

Divi 5 provides you with a structured method to outline, organize, and reuse sizing and spacing choices throughout all your web site. The use of Design Variables and Presets, you’ll create a scalable design gadget that’s simple to handle, modify, and reflect.
On this publish, we’ll display you the best way to suppose in methods, and we’ll stroll you via construction a complete sizing and spacing gadget.
Divi 5 is able for use on any new web site you create, but it surely’s prompt that you just cling off on migrating present websites (for now).
Why Use A Sizing And Spacing Machine?
Maximum Divi customers need consistency in layouts, margins, and typography. However few take some time to outline those requirements early on. Or should you do, you’ve most probably performed it by the use of a closely styled Kid Theme. Now, you’ll:
Subscribe To Our Youtube Channel
- Outline a bunch variable as soon as (like 16px or clamp(16px, 4vw, 48px))
- Assign it to Module/Part Presets
- Or Possibility Team Presets (like spacing or sizing)
- Replace the variable later and notice adjustments mirrored site-wide
- Use much less CSS general for slimmer pages
With different web site developers, designers have a tendency to lean closely on CSS frameworks to use constant spacing and sizing whilst the usage of a gadget they may be able to take from challenge to challenge. With Divi 5, you’ll create your personal “Design Framework” that works inside the Divi UI the usage of Divi’s Design Variables while not having to the touch a unmarried line of code.
Part Dimension, Padding, And Margins
Every internet part has 3 elements affecting general spacing and dimension:
- Part Dimension: The core content material dimension of a component, outlined by way of width and peak.
- Padding: Area added inside of a component, expanding its clickable space and visible dimension.
- Margin: Area added out of doors a component, pushing it clear of different components.
Sensible Examples For Divi Components
Basically, that is how you’ll be expecting to make use of padding and margin in Divi:
- Sections in most cases have best and backside padding (no longer margin) to create vertical spacing inside a web page.
- Rows incessantly have the benefit of vertical padding, however in a different way let content material fill them.
- Columns basically center of attention at the margin implemented to create column gaps.
- Modules often use a backside margin to obviously separate stacked components, however the quantity of margin is determined by visible groupings.
Divi’s Default Spacing Values
Newcomers to internet design who use Divi most probably don’t even understand that Divi makes some spacing choices for you out of the field. Extra skilled designers incessantly modify those to check their objectives, however those defaults let most of the people get started their tasks briefly.
| Default Spacing (Desktop) | Default Spacing (Pill) | Default Spacing (Cell) | |
|---|---|---|---|
| Segment | Applies Best and Backside Padding of 64px | Applies Best and Backside Padding of four% | Applies Best and Backside Padding of 50px |
| Row & Internal Row | Applies Best and Backside Padding of 32px | Applies Best and Backside Padding of two% | Applies Best and Backside Padding of 30px |
| Row Width | Applies a relative Width of 80% (however to not Nested Rows) | ||
| Column Hole* | Applies a 5.5% Hole between Columns (the usage of Margin Proper on all aside from for the closing Column within the row) | ||
| Module | Varies, some have Backside Margin implemented (% or px price) | ||
| H1-H6 tags | Every heading tag has a Backside Padding of 10px this is implemented at the stylesheet stage with Divi. To modify this, customized CSS is had to override this. | ||
| *Flexbox and controls will paintings utterly in a different way, so keep tuned for that | |||
Those defaults may also be useful, however designers incessantly wish to set their very own spacing requirements. In the event you sought after to look what your web page would seem like with out the default padding arrange, you’ll do that:
- Move to any part and in finding the Spacing Possibility Team underneath the Design Tab.
- Open the Default Possibility Team and set the highest and backside padding to 0 (0).
- Save the Default Spacing OG Preset to use it site-wide to each part.
This may increasingly display you what your pages seem like with out Divi’s default settings. It gained’t glance as excellent, however you’ll begin to see what you want to do to create your personal design gadget (or you’ll use Divi’s defaults and make adjustments as you spot are compatible).
The use of An 8-Level Spacing Scale
The 8-point scale is a format scheme the place spacing values are constructed the usage of increments of 8. So, as an alternative of the usage of arbitrary values like 13px or 27px, you stick with values like 8, 16, 24, 32, 40, 48, and so forth.
The program is helping:
- Stay vertical and horizontal rhythm the usage of a constant rubric of sizes
- Be certain spacing stacks cleanly throughout breakpoints
- Accelerate decision-making (fewer alternatives = quicker design)
You’ll be able to use the dimensions in px or rem, relying to your desire or form of scale. For instance, 16px turns into 1rem when the bottom font dimension is 16px.
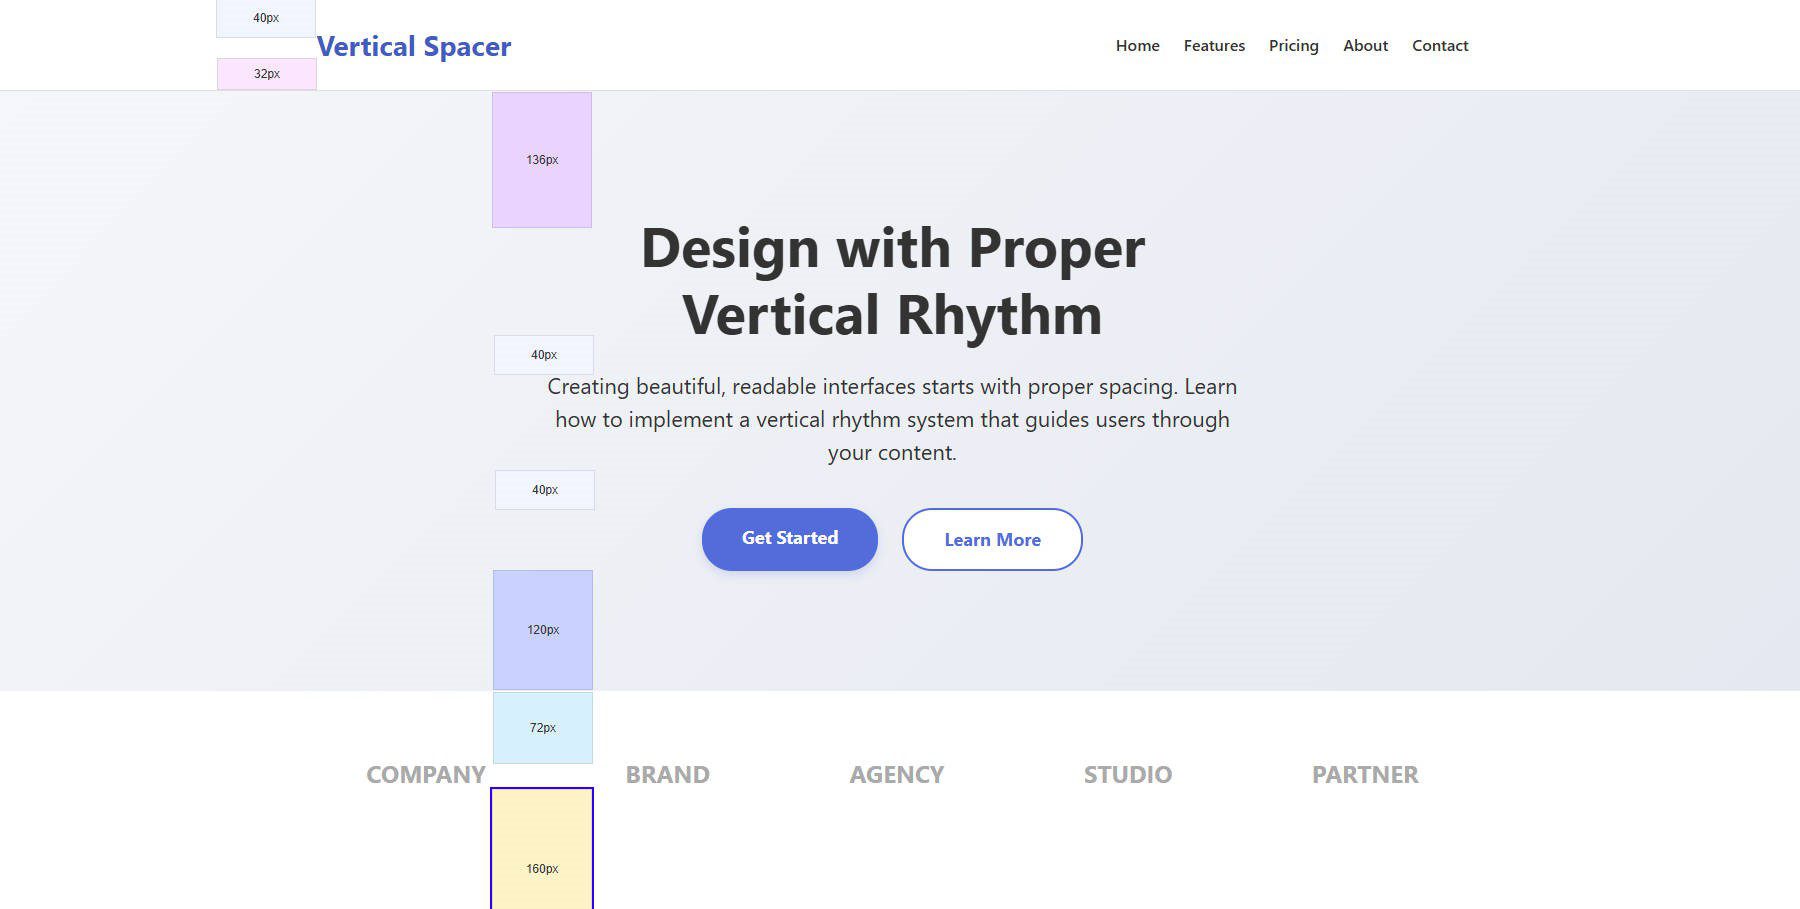
Mockup of a web page that teams your consideration to make a choice spaces and pushes guests down the web page with vertical spacing
Vertical spacing tells the reader the place to center of attention. Pieces clustered at the side of tighter spacing are naturally observed as linked to one another. Issues separated by way of extra space point out a brand new concept.
How To Create A Sizing & Spacing Machine
A gadget in your sizes and areas is composed of 2 issues: atmosphere variables or tokens that will likely be used all the way through a design and persistently the usage of the ones variables all the way through the web site design. This is how you’ll do this with Divi.
Step 1: Create Quantity Variables In The Design Variable Supervisor
Divi 5 introduces a visible interface for outlining reusable numeric values. Every quantity variable contains:
- An simply recallable identify (e.g., gap-sm, text-h1) that isn’t too lengthy
- A numeric price or serve as calc() or clamp()
- A CSS unit (px, rem, %, vw, and many others.)
On account of the Variable Supervisor, you don’t wish to write CSS Variables in a separate stylesheet. You put all of those within the Design Variable Supervisor after which choose them from the enter fields within the Visible Builder.
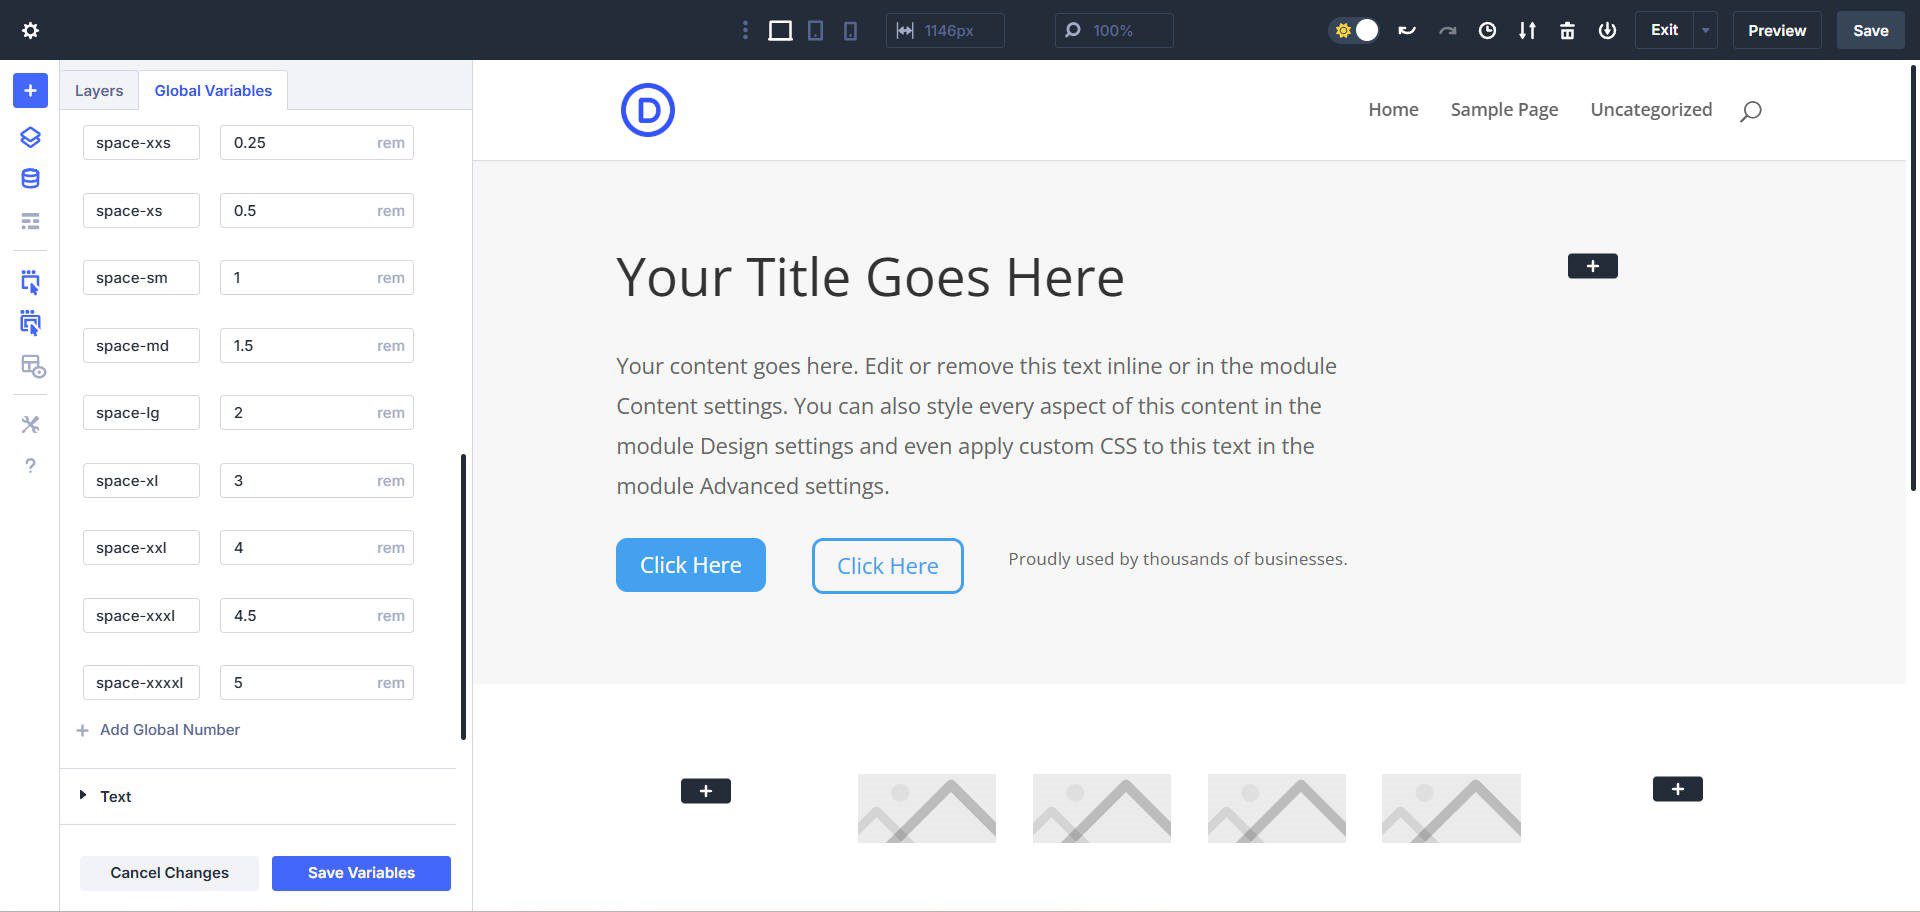
Underneath is an entire beginning set of quantity variables to check an 8-point design gadget. You wouldn’t have to make use of this, but it surely provides you with an concept of what’s conceivable.
| Identify | px | rem |
|---|---|---|
| space-xxs | 4px | 0.25rem |
| space-xs | 8px | 0.5rem |
| space-sm | 16px | 1rem |
| space-md | 24px | 1.5rem |
| space-lg | 32px | 2rem |
| space-xl | 48px | 3rem |
| space-xxl | 64px | 4rem |
| space-xxxl | 72px | 4.5rem |
| space-xxxxl | 80px | 5rem |
And right here’s what it seems like to have this crammed out within the Variable Supervisor.
Be aware that those spacing values will likely be useful in Divi 5’s upcoming Flexbox characteristic
Step 2: Making plans Your 8-Level Spacing Machine
Your pages will most often include repeating patterns of components. Search for commonplace teams or clusters corresponding to:
- Heading, Paragraph, Button
- Small Heading, Huge Heading, Paragraph
- Icon, Paragraph
- Playing cards containing a couple of components
Along with your preliminary wireframes (or placeholder designs), you’ll have the ability to create possible patterns. You’ll additionally create issues that don’t are compatible into patterns that you just’ll must come to a decision the best way to care for. However this is all a part of designing.
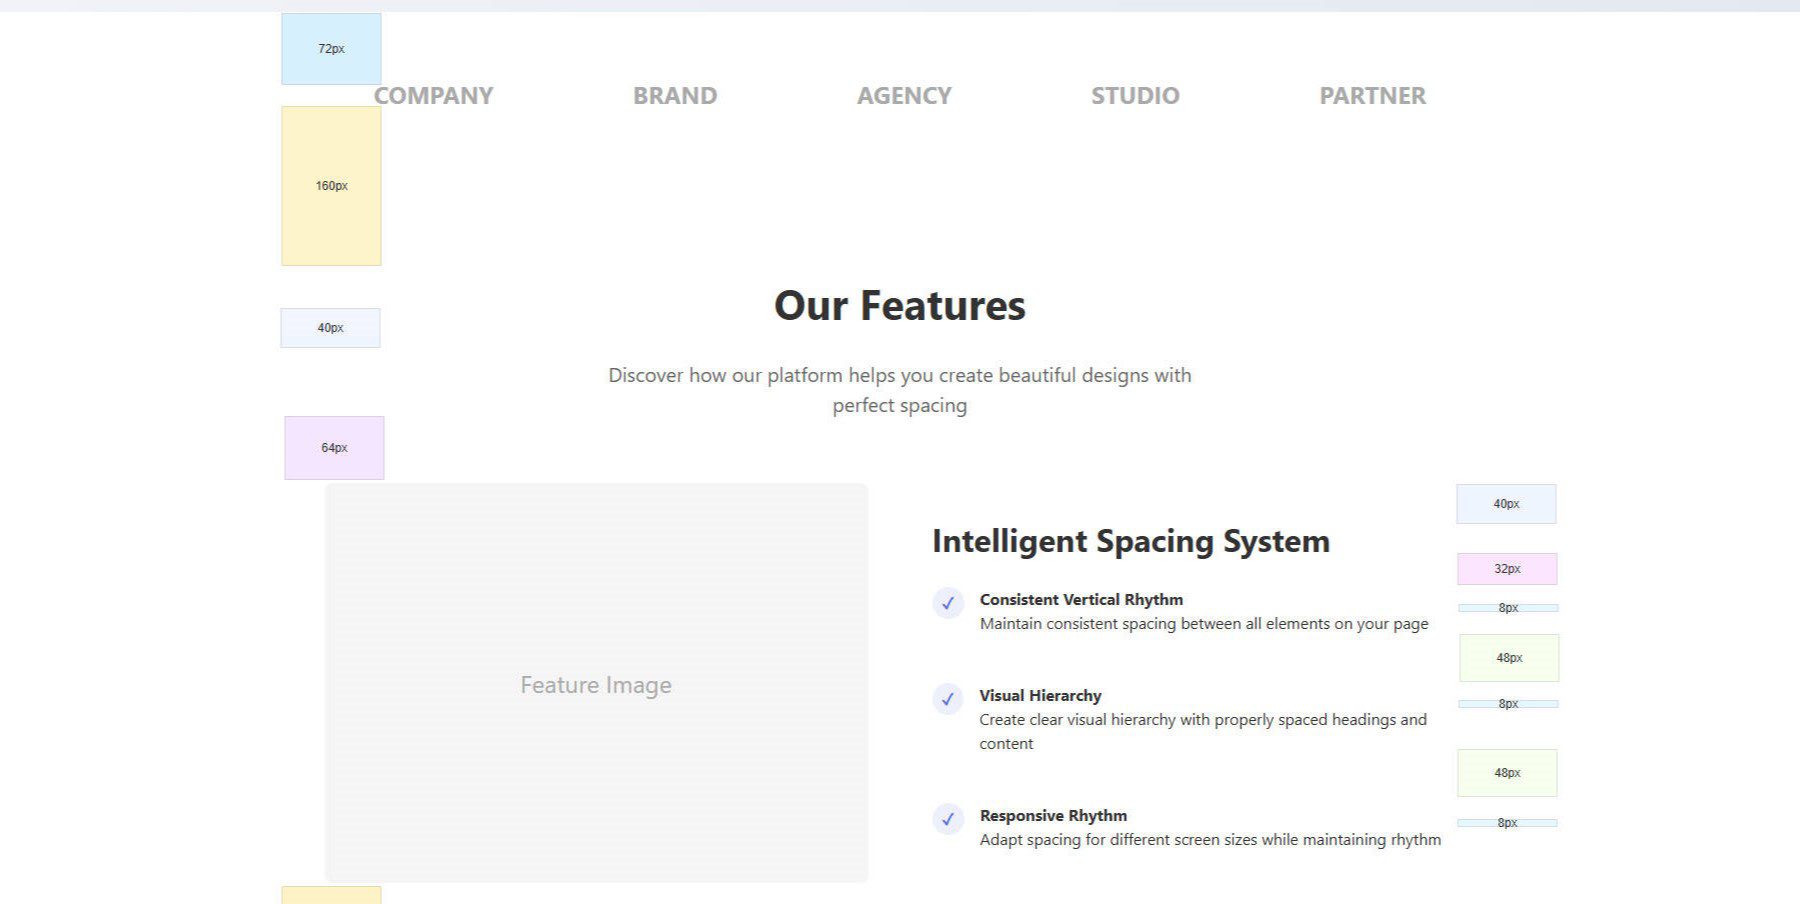
You’ll be able to do that in Figma or by way of at once making a wireframe web page with placeholder components in Divi. Simply get the whole thing you’ll laid out on a web page. You’ll be able to use a Chrome Extension known as Measure Everything that can assist you visualize the spacing (to start with with Divi’s default spacing) as you get started adjusting the ones.

To make use of the extension, turn on it from the Chrome Extension toolbar. Then click on a component at the web page you have an interest in, focusing the instrument on that part. From there, transfer your mouse to measure more than a few facets between the these days decided on part and different components as you hover over them.
Step 3: Assign Quantity Variables To Possibility Team Presets
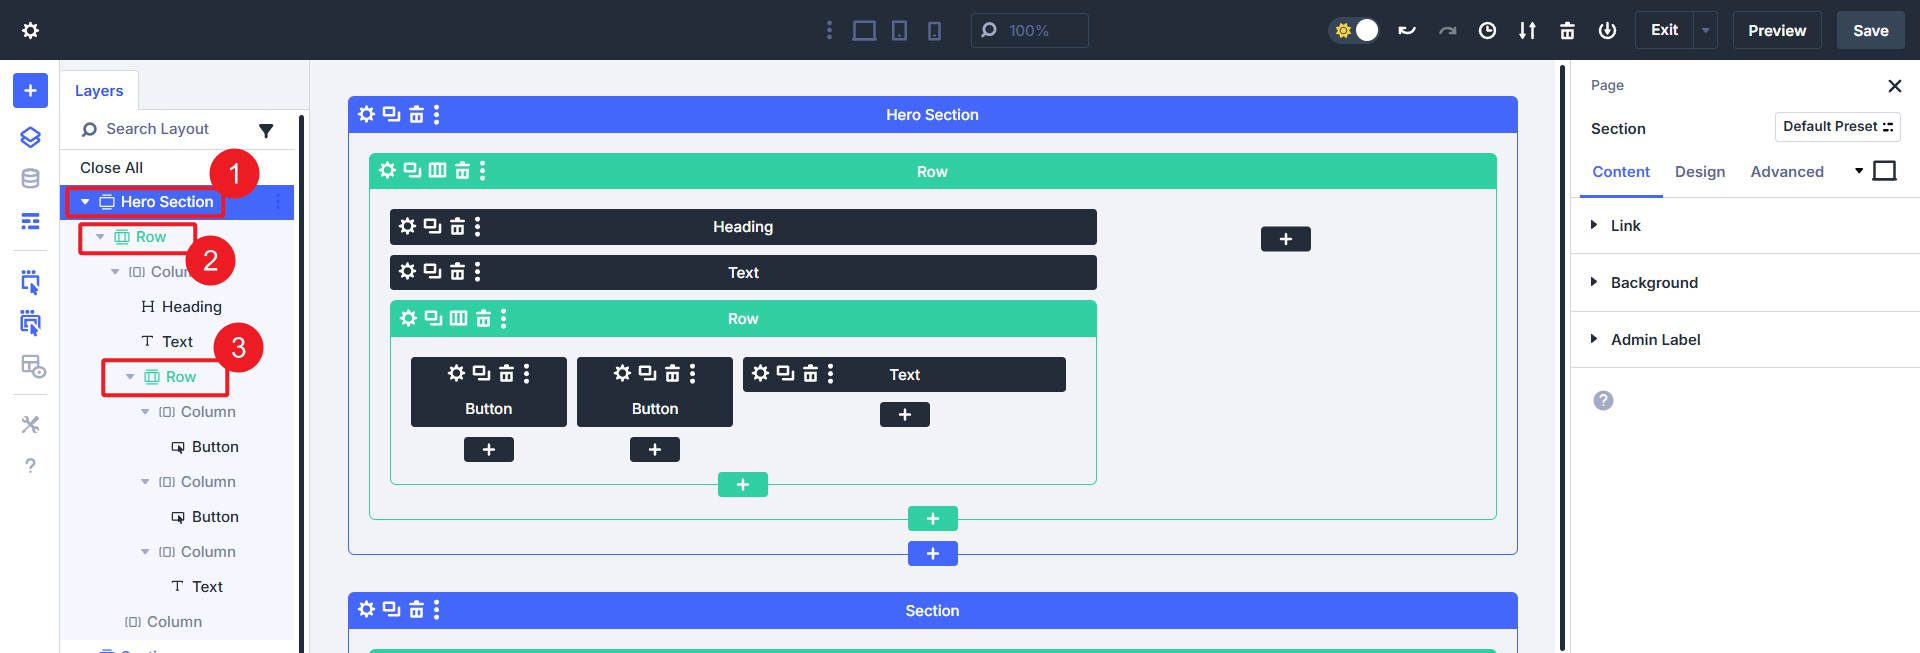
With a wireframe of a web page arrange and a Design Variable in position, you’ll get started making spacing and sizing-related adjustments for your web page. You’ll be able to get started with teams of content material first. Let’s center of attention at the heading, paragraph, and button within the hero segment.
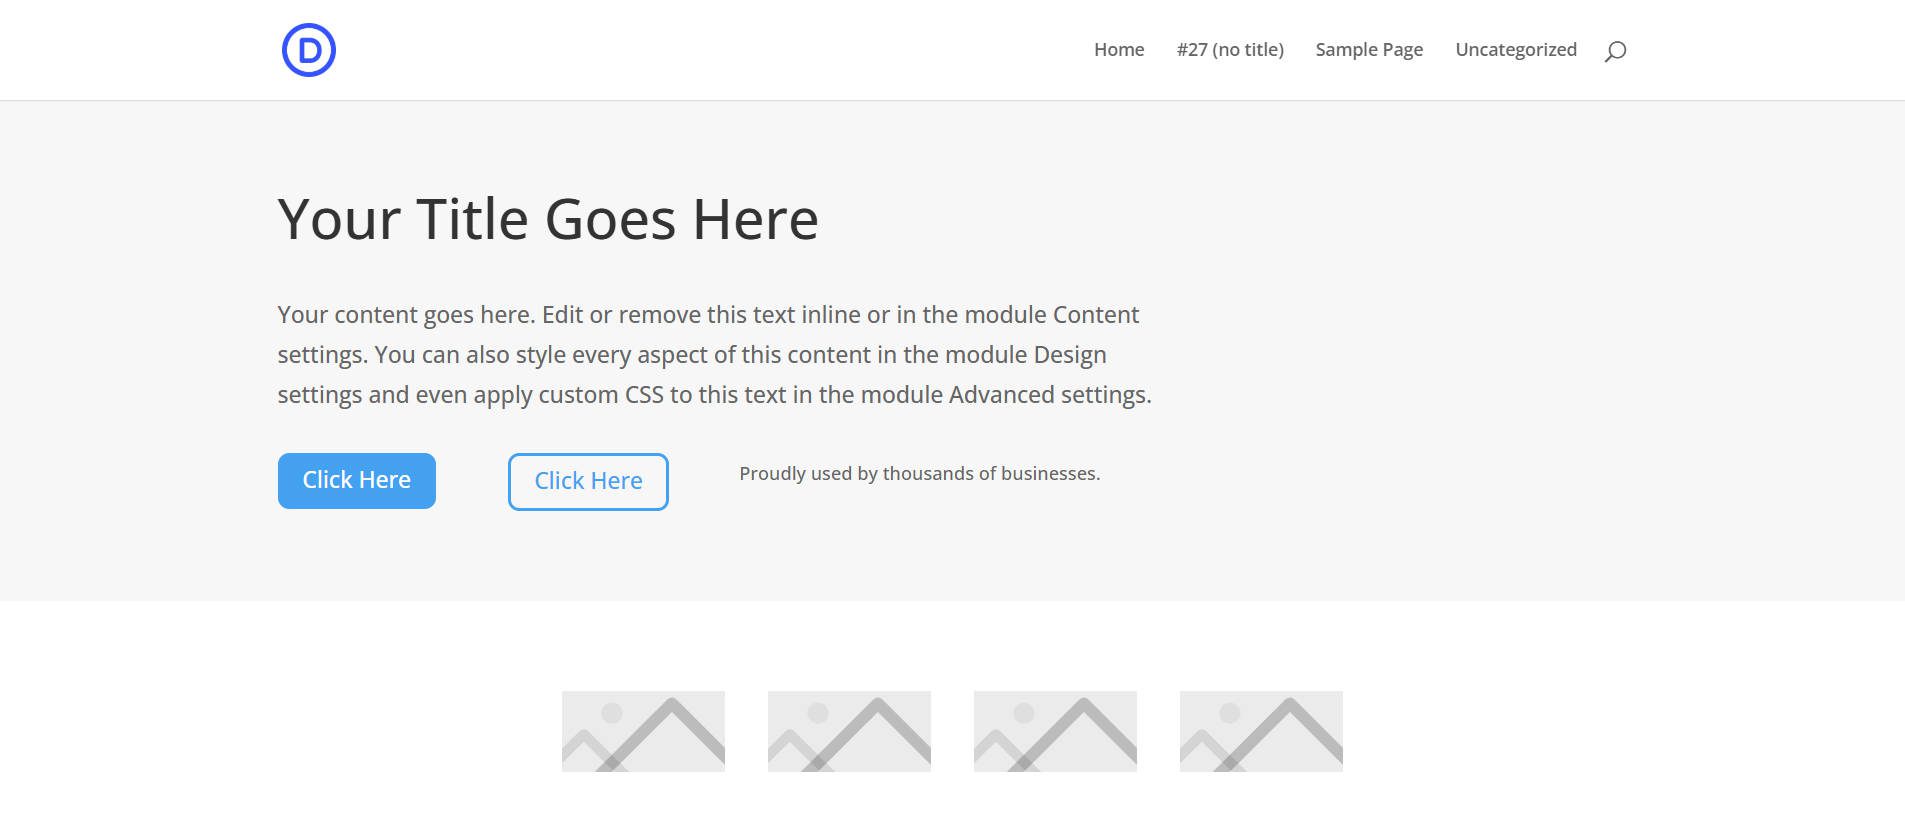
Wireframe with placeholder content material and font/font sizing in position
Be aware that at this level, you’ll wish to have a primary draft of your Typography arrange already. This contains fonts, font sizing, and line peak/letter spacing. With out this, you’re very prone to rebalance your whole sizing while you identify your typographic gadget.
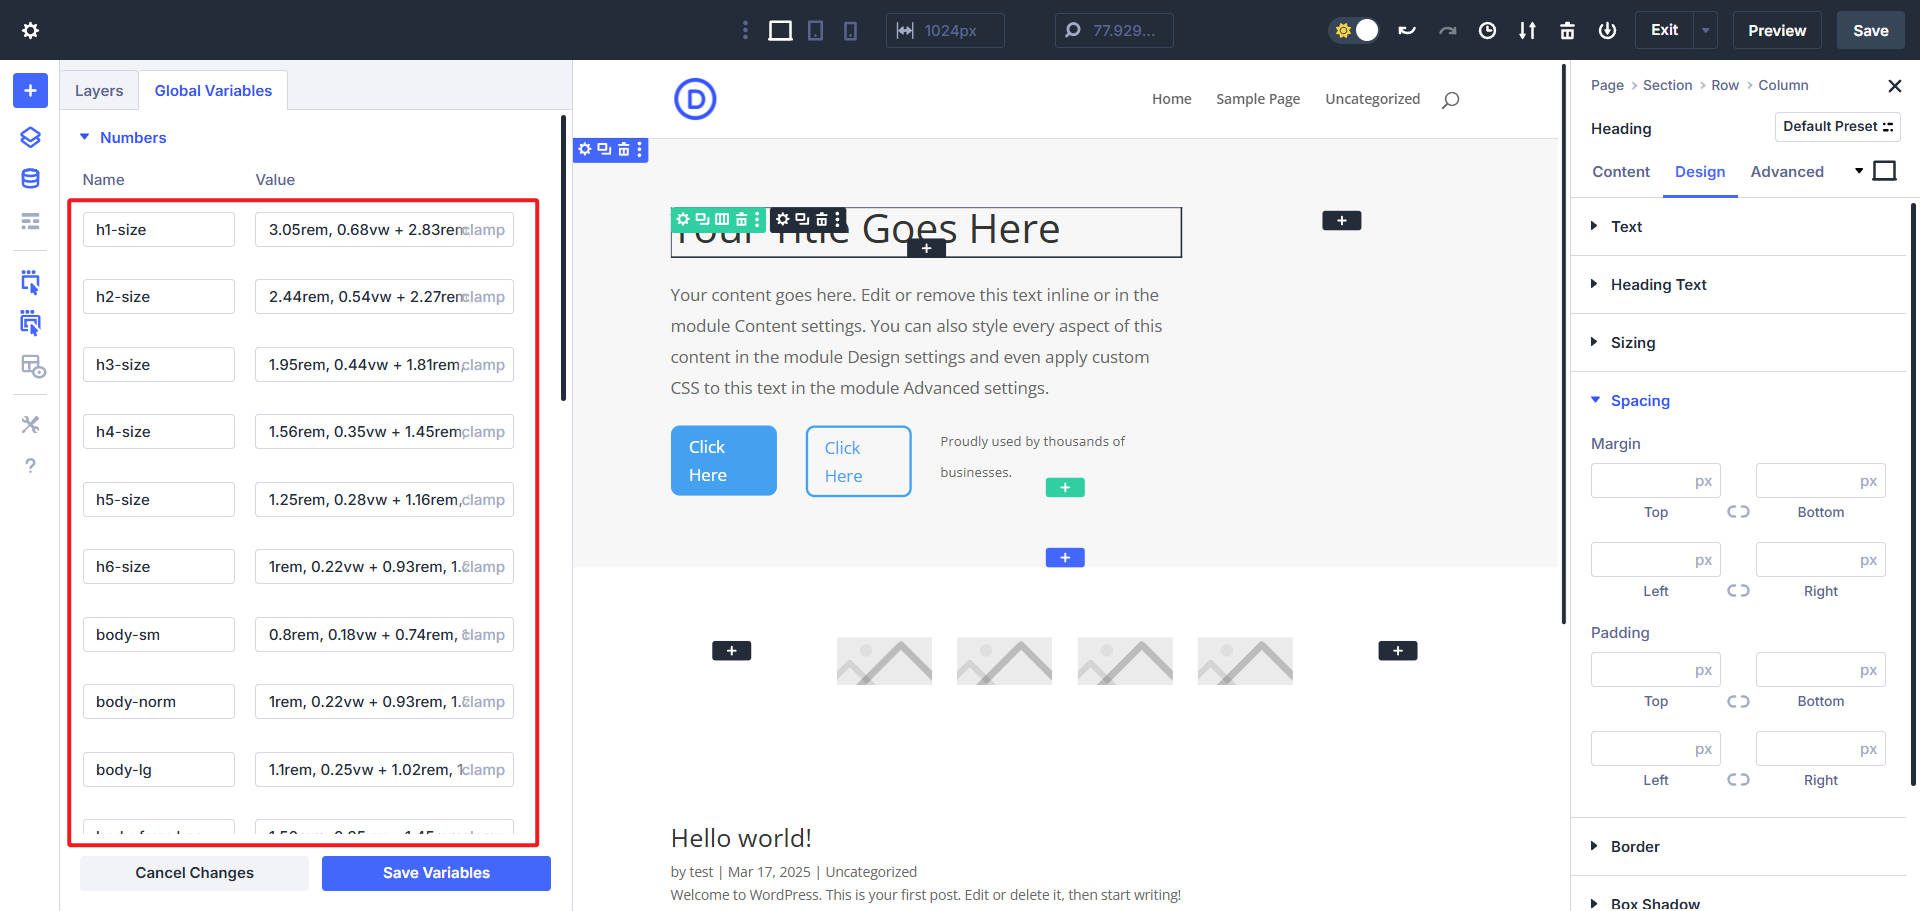
Instance of typography sizing choices arrange as quantity variables
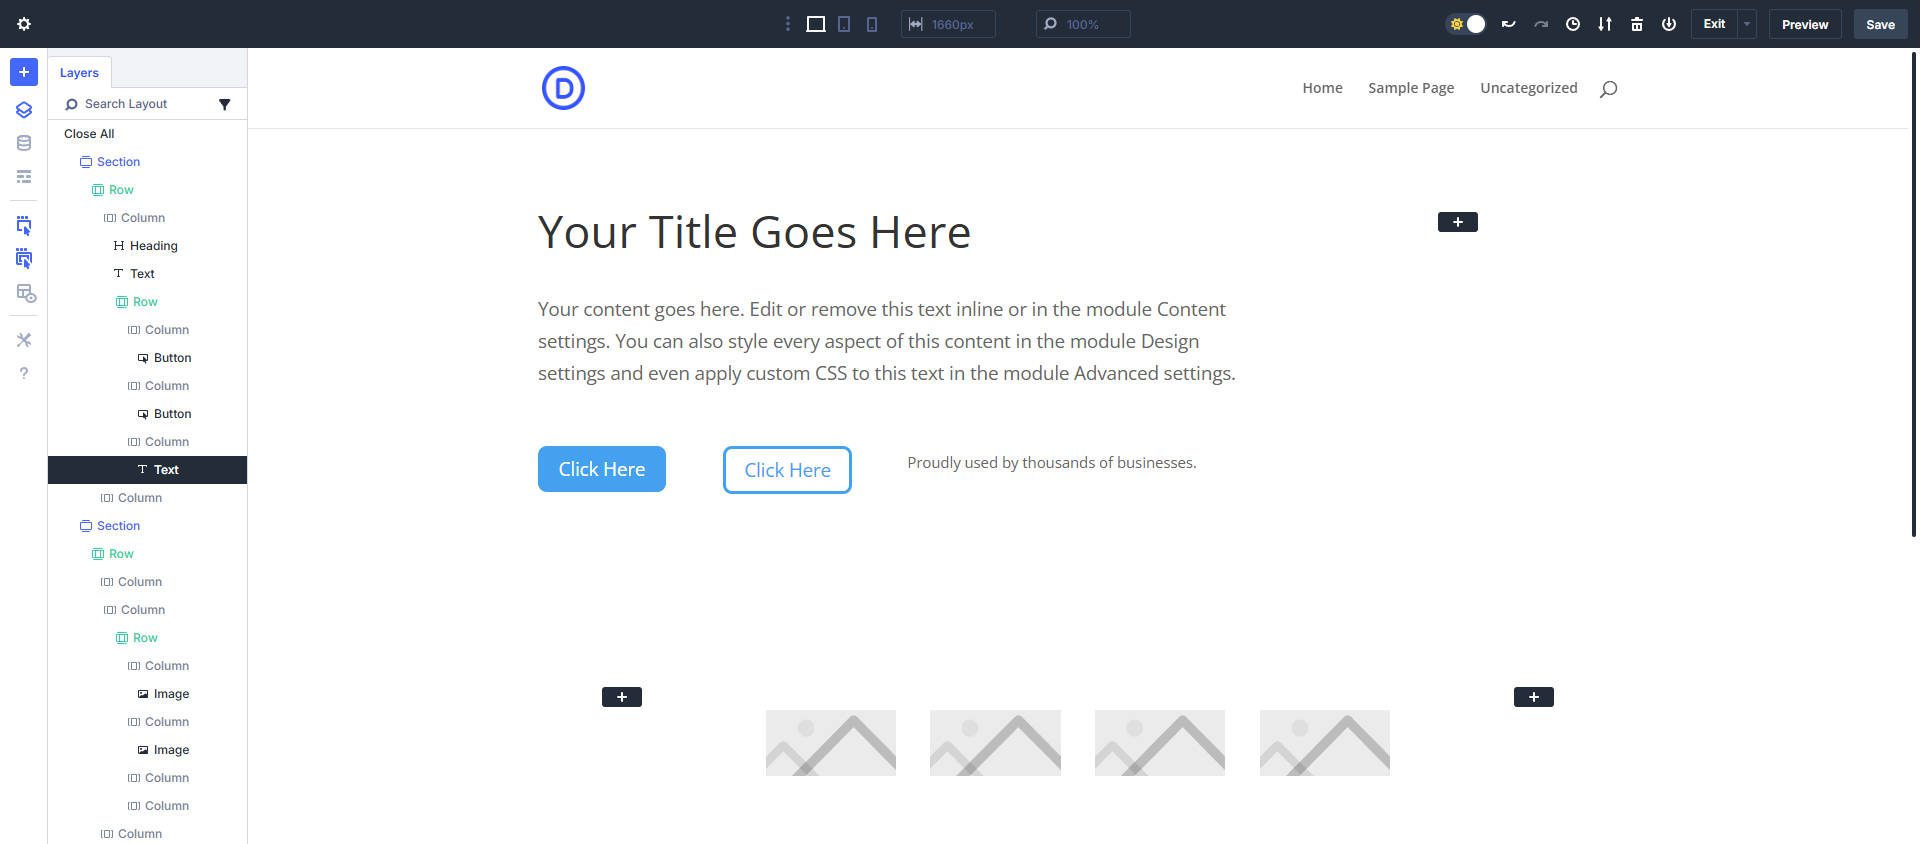
Now, we wish to assess what default spacing is being implemented within the design. To try this, you’ll take a look at the chart previous up within the publish and examine it with what we’ve got occurring inside the hero segment. Clearly, there’s a segment (#1) and two rows (#2 and #3). For at this time, we’ll set the Default Row Best/Backside Padding to 0.
Subsequent, we’ve got two choices for segment spacing: we will be able to set the padding to 0 and determine it out later, or we will be able to set some initial best and backside padding within the Default Part Preset for Sections to seem one thing like this:
- Desktop: Best & Backside Padding set to space-xxxl
- Pill: Best & Backside Padding set to space-xxl
- Cell: Best & Backside Padding set to space-xl
However what you do is totally as much as you and the spacing Design Variables you find yourself putting in (or the usage of the defaults if you desire to undertake them as your personal). What we’ve got at this time (with Default Row padding set to 0 and customized Segment padding):
With the discharge of Flexbox, you’ll have extra choices to dimension your Hero and different Sections extra concretely by way of making use of one thing like:
- Segment: Flex
- Segment Best/Backside Padding: 0px
- Row Best/Backside Padding: 0px
- Segment Peak: min(450px, 90vh)
- Row > Align Pieces: Heart
Step 4: Module Spacing
The following factor to do is figure at the spacing between the modules inside Sections/Rows. The secret is to select a constant manner of making use of spacing to Modules.
You have got choices, you’ll break up the spacing up in a couple of techniques:
- Follow spacing to Margin-Best
- Follow spacing to Margin-Backside
- Follow spacing flippantly between Margin-Best and Margin-Backside
It’s essential to needless to say many Modules have a Margin-Backside implemented by way of default, so I like to recommend you pass with that conference and get started there when atmosphere your spacing paradigm. For starters, you’ll set best/backside Margins to 0 to look how the spacing between modules seems to be with out a defaults implemented to them.
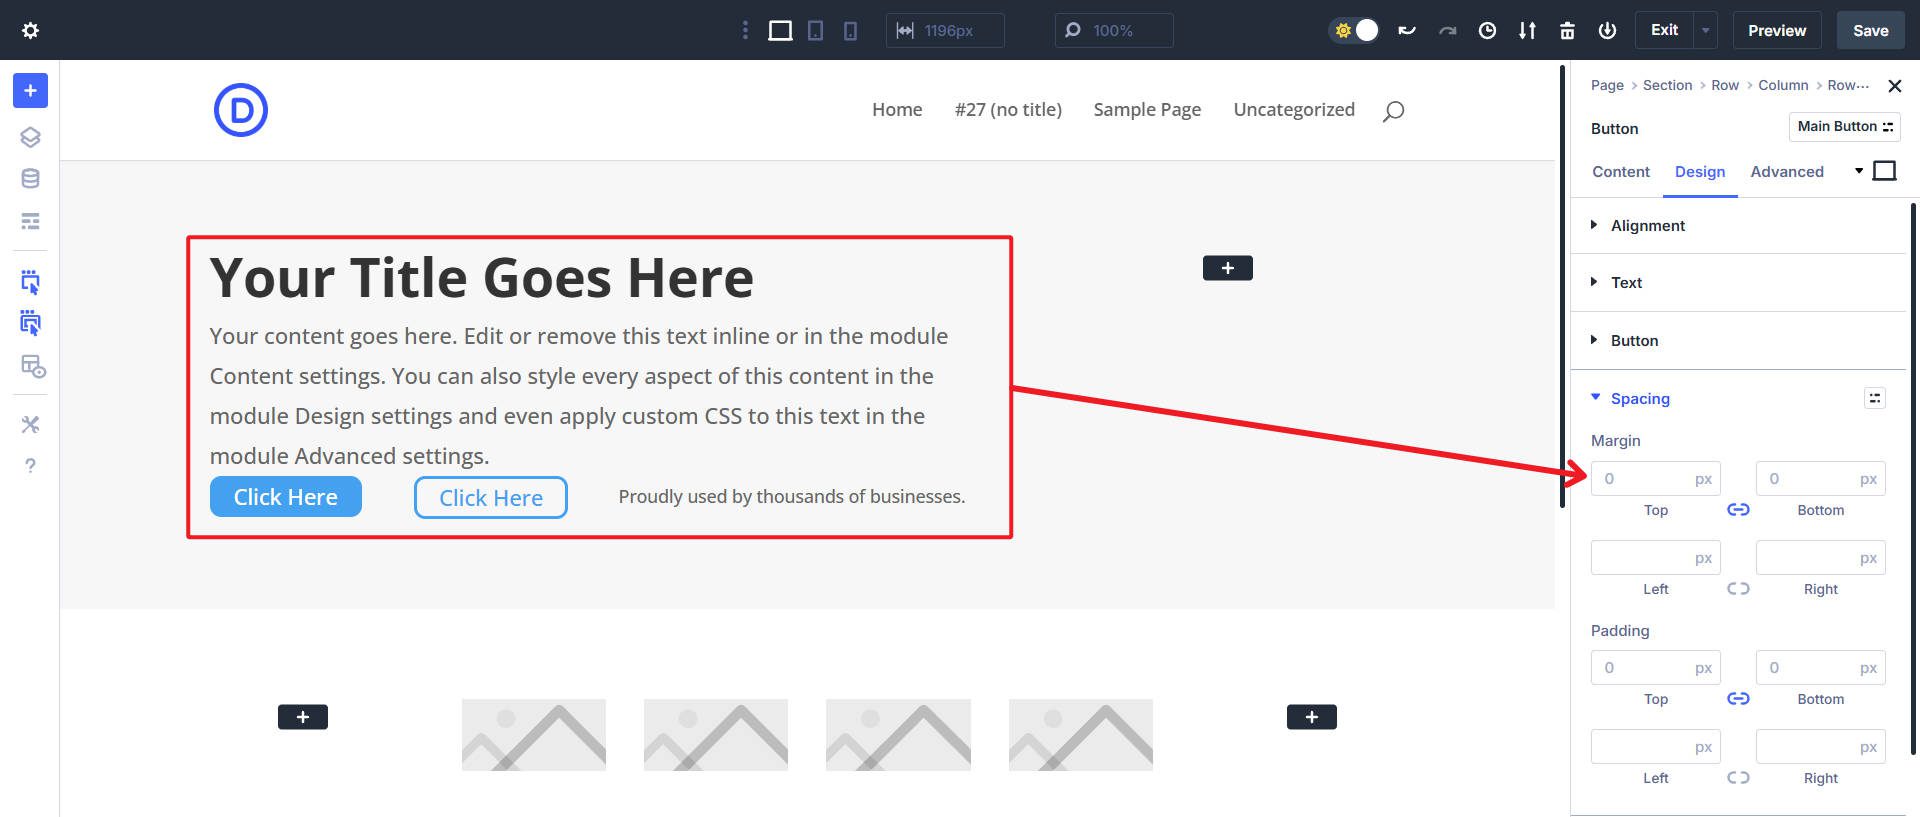
Inside of this segment, we implemented 0px to the Margin best and backside to look these kind of Modules with out default spacing
Now, we will be able to get started assigning spacing Design Variables to the Margin-Backside of those Modules to create a spacing gadget. We’ll get started with the heading and the frame textual content.
As you get started seeing patterns together with your Module spacing, chances are you’ll wish to upload those spacing alternatives to the Default Part Presets. And as you want to create spacing regulations for components that deviate, you’ll create Customized Part Presets. New components will use the Default Preset from there, however you’ll briefly choose a customized Part Preset for more than a few eventualities.
How Will You Use Divi 5 For Sizing And Spacing?
Making a spacing and sizing gadget you’re proud of comes right down to practising the basics and leaning into the equipment to hand. Divi 5 is on its method to developing the de facto design gadget for WordPress web sites. It hits the candy spot of getting numerous flexibility, however it’s simple to wrap your head round.
In the event you’ve by no means thought to be developing design methods, Divi means that you can take into accounts it from a Design Variable and Preset stage, no longer handiest on a person module or part stage. This is helping you persistently practice base design choices to components faster than ever.
Will you be checking out the 8-point gadget, or do you might have different issues deliberate? Additionally, is that this your first time serious about Divi’s Default spacing? It makes designing with Divi automated, however for pro designers, chances are you’ll wish to trade a few of the ones defaults to succeed in your pixel-perfect imaginative and prescient.
Divi 5 is ready to be used on any new web site you create.
The publish Creating A Sizing And Spacing System With Divi 5 Design Variables seemed first on Elegant Themes Blog.

0 Comments