

The site footer is a well-liked location to put an e mail optin shape. Since Divi has an e mail optin module, this is a straightforward job with the Divi Theme builder. On this article, we’ll see find out how to upload an e mail optin to the Divi footer. We’ll additionally see a couple of settings inside the Divi e mail optin module that creates other structure choices.
Preview
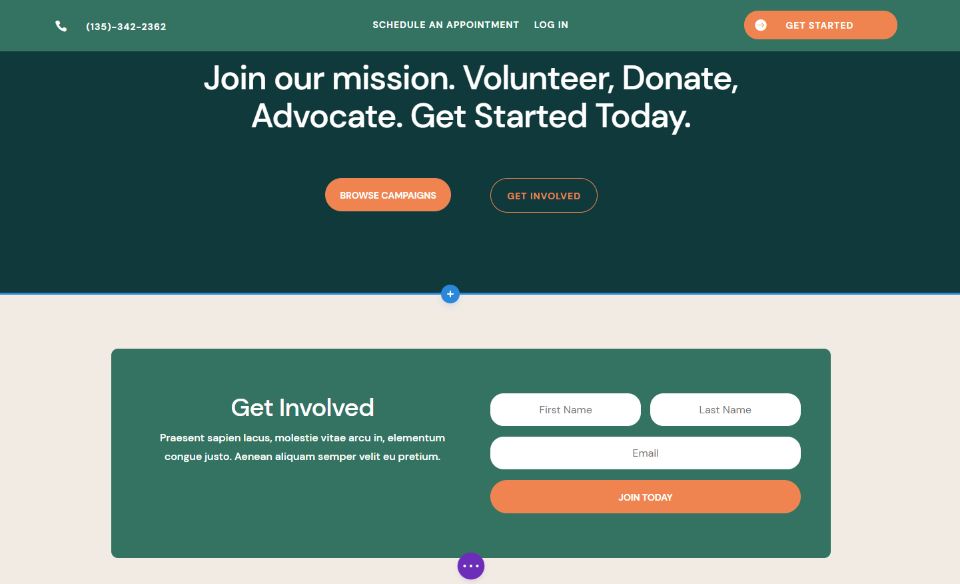
Right here’s the footer we’ll construct.
Electronic mail Optin Desktop
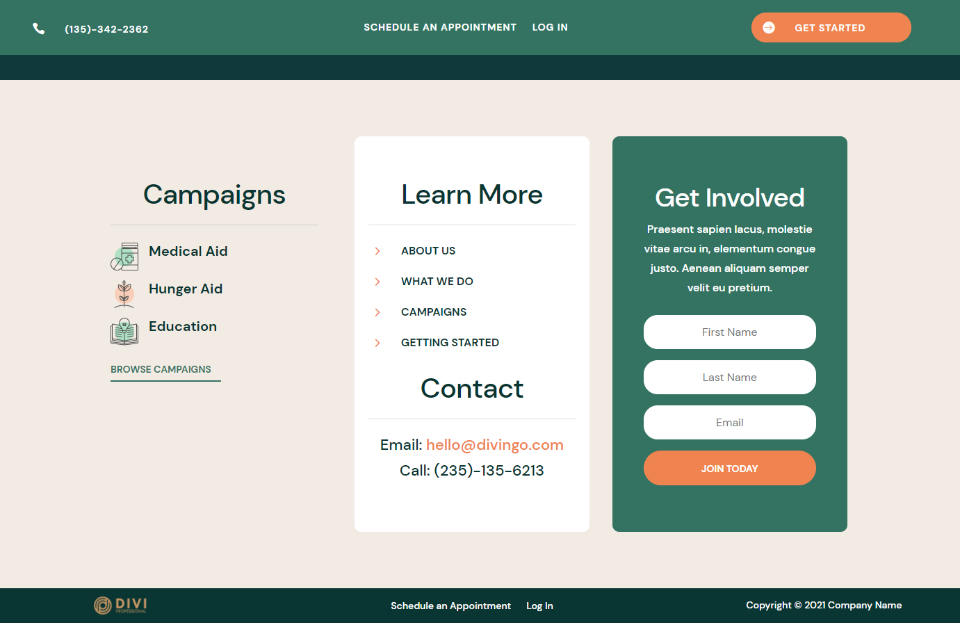
Right here’s how our e mail optin shape will glance on a desktop. I’m changing an current component on this structure with the e-mail choice.
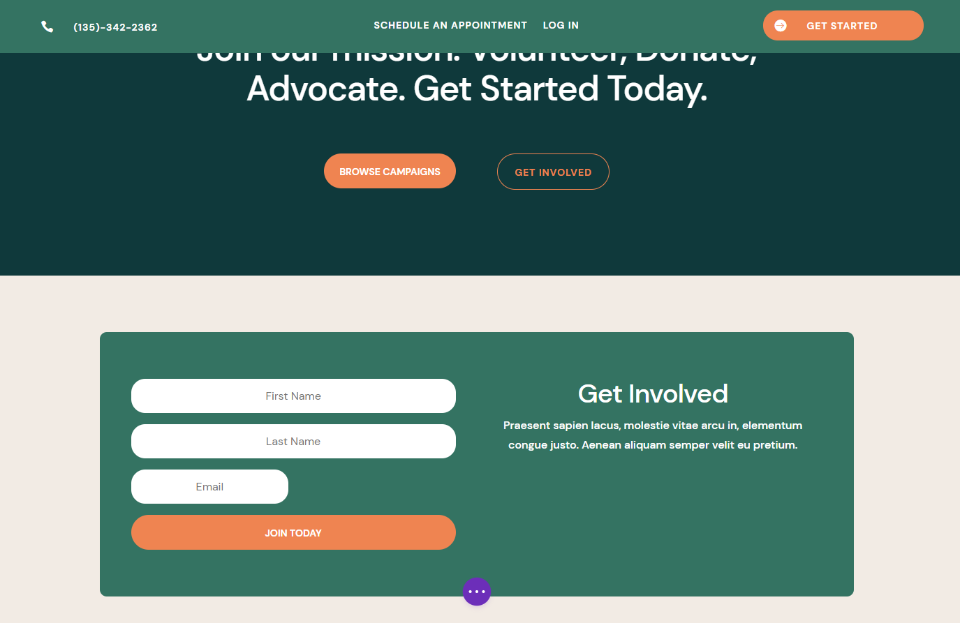
Electronic mail Optin Telephone
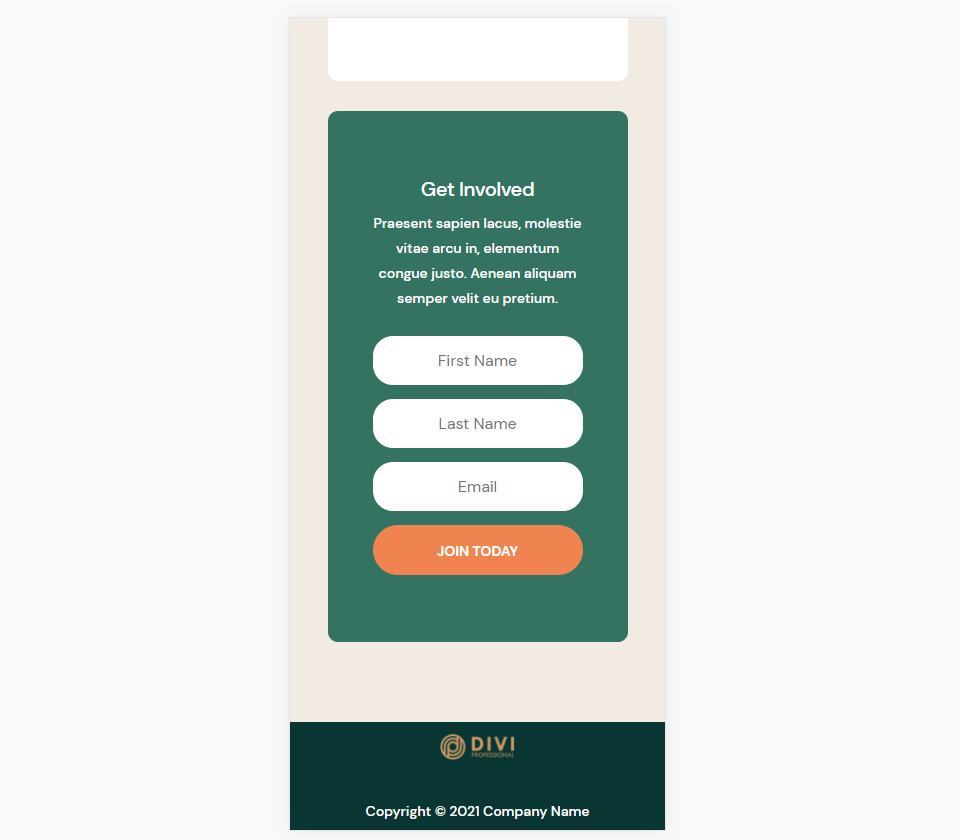
Right here’s how our e mail optin shape seems to be on a smartphone.
Divi Theme Builder Template
So as to add an e mail optin to the Divi footer, we’ll want a template to construct our footer. You’ll construct one from scratch or use one of the most loose templates that Chic Subject matters supplies. To search out them, seek the Chic Subject matters weblog for “loose footer”.
I’m the usage of the footer template from the FREE Header and Footer Template for Divi’s NGO Layout Pack. Obtain your footer and unzip the record. You’ll want to add the JSON record to the Divi Theme Builder.
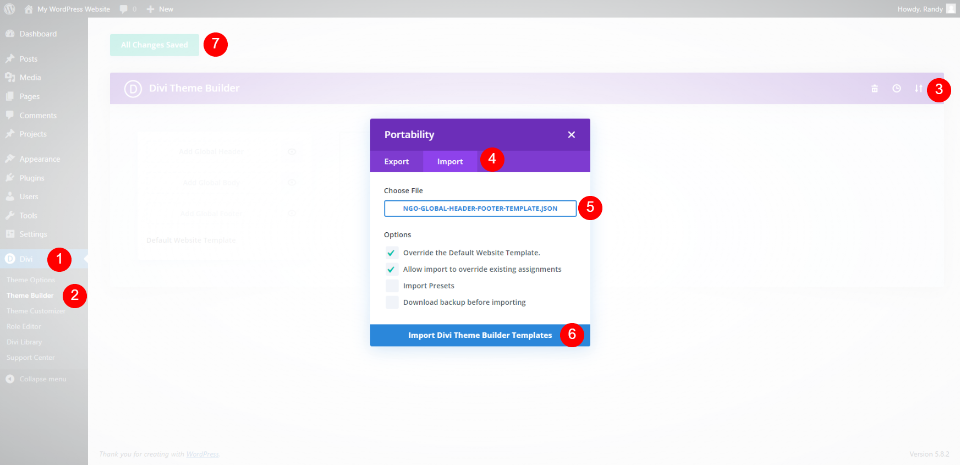
To add your Divi footer, move to Divi > Divi Theme Builder within the WordPress dashboard. Make a selection Portability. Within the modal that opens, select the Import tab. Click on to make a choice the record and navigate to the JSON record to your laptop. Make a selection the record and click on Import Divi Theme Builder Templates.
Stay up for the record to add. You’ll delete the header template in the event you don’t wish to use it. Click on to avoid wasting the adjustments within the higher left of the builder.
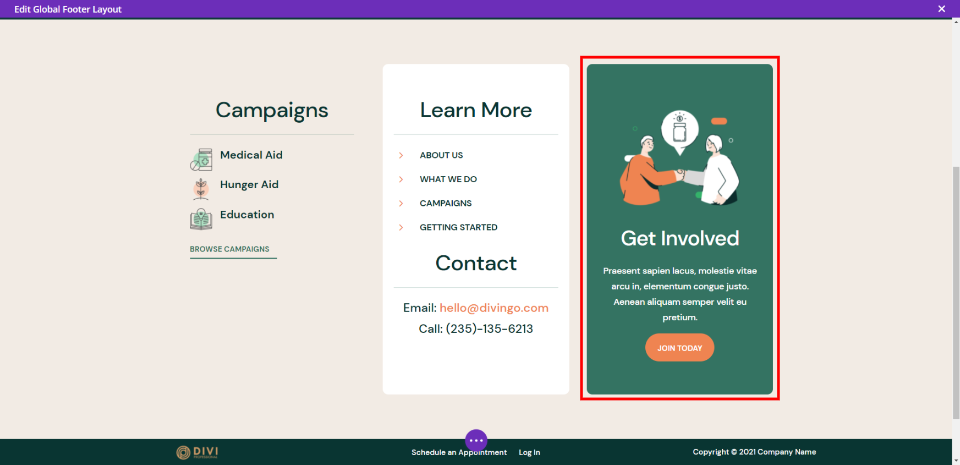
For this educational, I’ll substitute the boxed space at the proper with an e mail optin. I’ll use the similar styling, so it’s going to mix with the site.
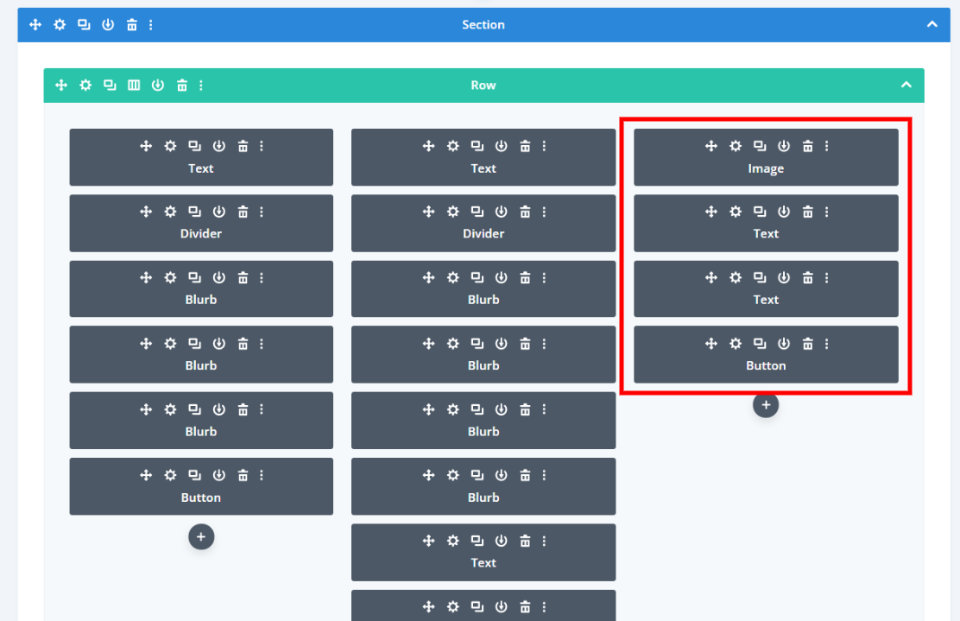
This component is made up of a picture module, two textual content modules, and a button module. I’ll substitute them with a unmarried module. You’ll delete them now or go away them till you’re completed if you wish to use them as design queues. You’ll paintings at the entrance finish or again finish.
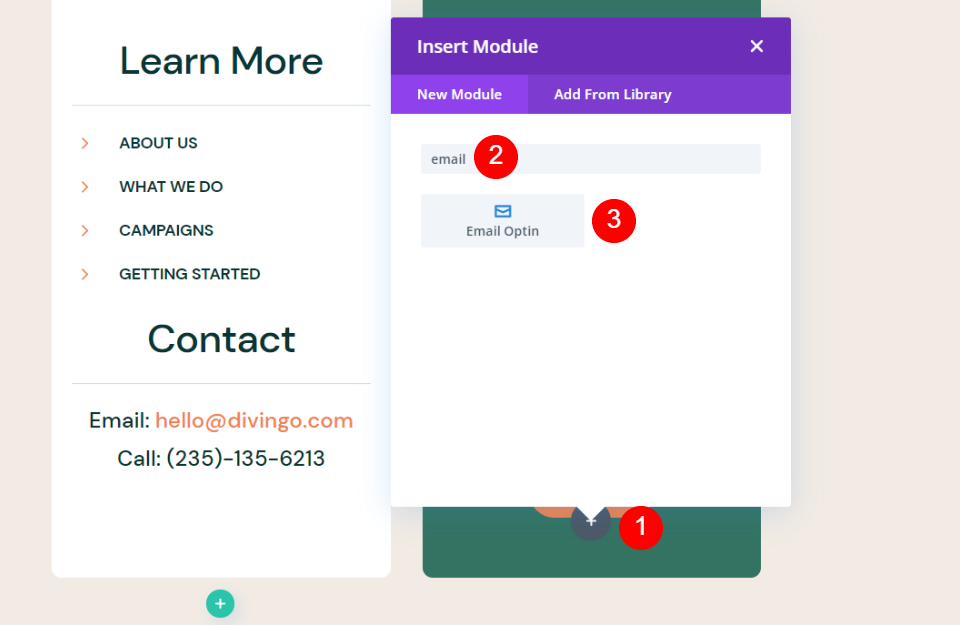
Subsequent, we’ll upload an e mail optin to the Divi footer. Hover below the ultimate module within the row and click on the darkish grey plus icon. Seek for e mail and choose the Electronic mail Optin module.
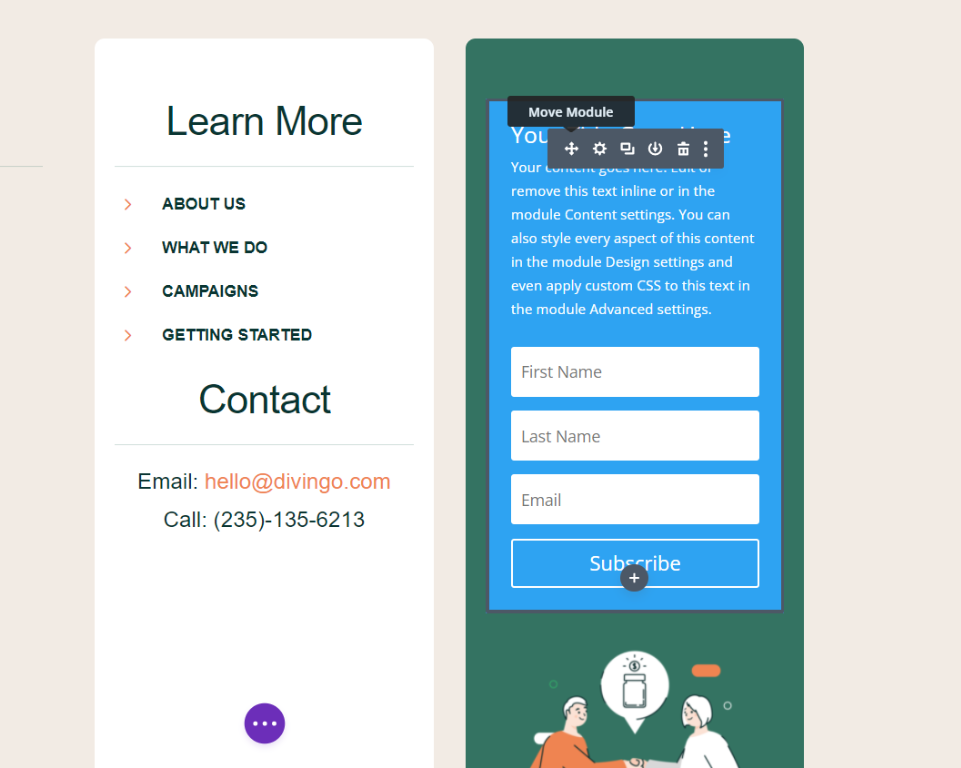
Shut the settings for the module and transfer the module to the highest of the column the usage of the Transfer instrument. This shall we us see how it’s going to glance in its actual location and nonetheless use the unique module till we’re completed styling.
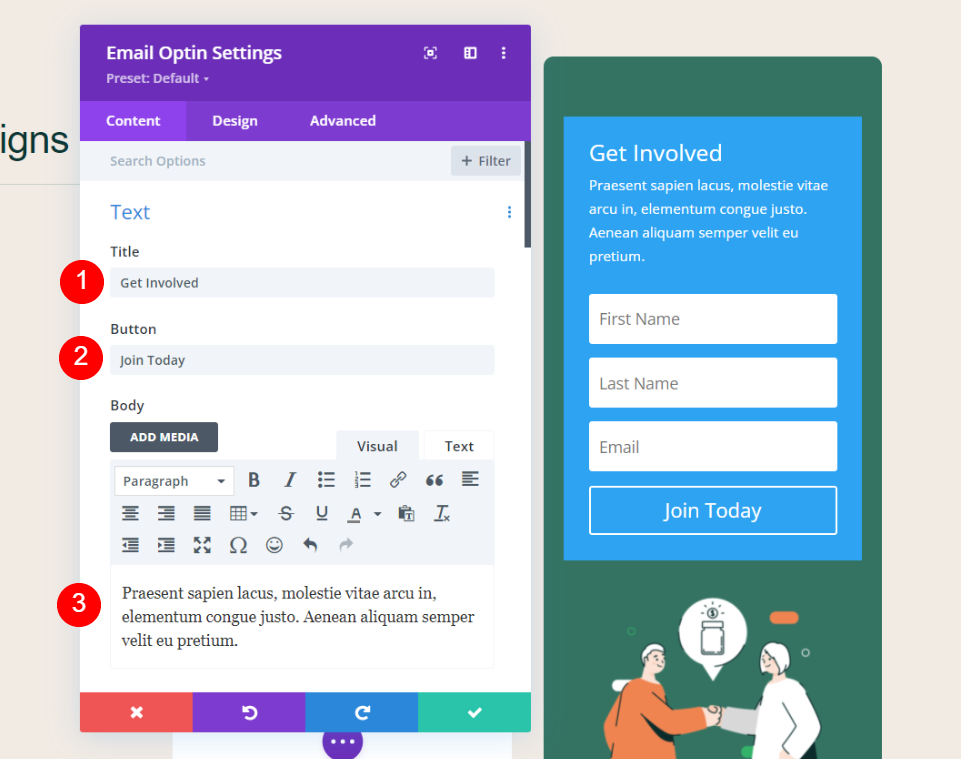
Open the module’s settings and upload the Name, Button textual content, and Frame textual content. I’m the usage of the textual content from the unique modules.
- Name: Get Concerned
- Button: Sign up for Lately
- Frame: your corporate’s message

Scroll all the way down to Electronic mail Account. Make a selection your e mail carrier supplier from the dropdown record. Click on Upload to connect with your carrier supplier. You’ll want your account identify and API key. Subsequent, choose the e mail record you need to make use of.
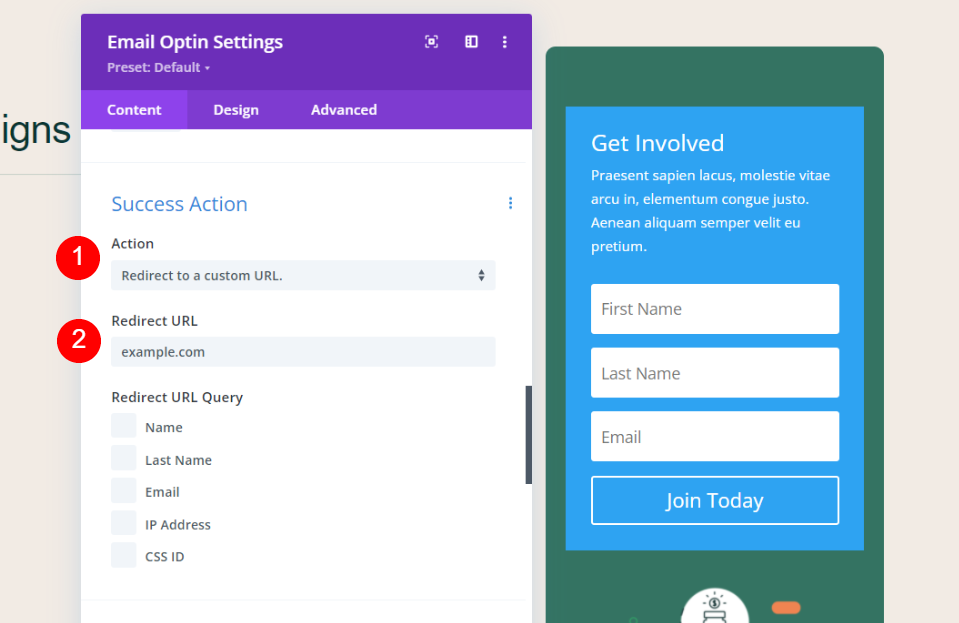
Scroll all the way down to Good fortune Motion. Make a choice the motion from the record. Make a selection between appearing a message or redirecting to a URL. I’ve decided on to redirect to a URL. You’ll additionally choose which information of the e-mail shape to incorporate as question arguments if you need.
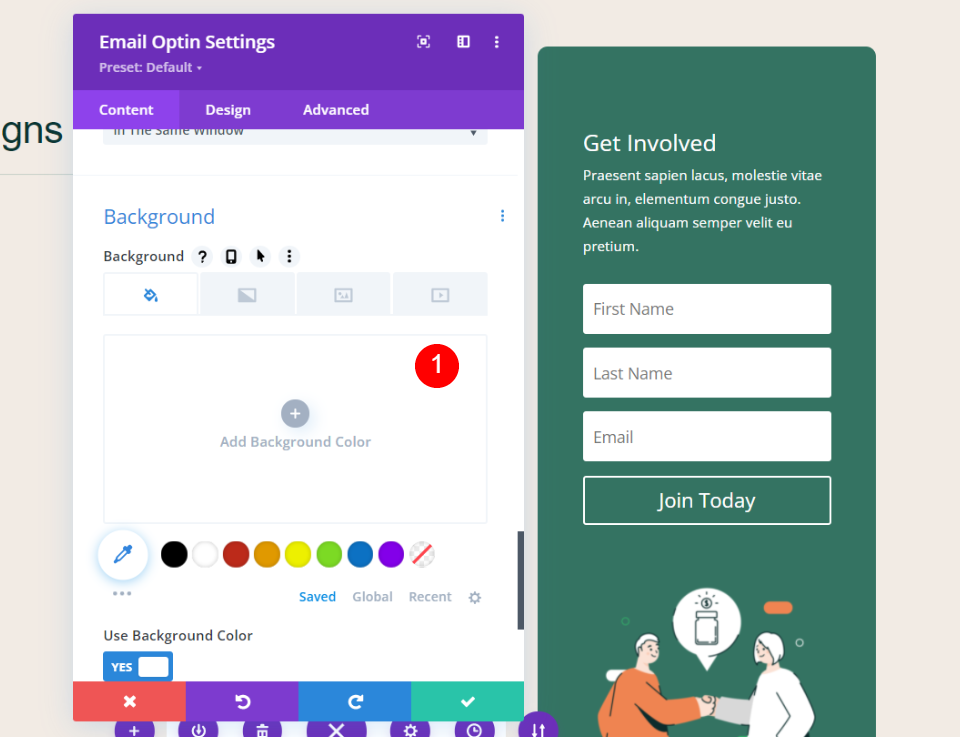
Scroll to Background and delete it. Realize the golf green background continues to be at the back of the e-mail module. This background is within the Column settings for the Row. We’ll go away this as it’s, however the Row Column Settings is the place you’ll alternate it if you need.
Taste the Divi Electronic mail Optin

To taste the e-mail optin module, I’m taking design queues from the NGO Layout Pack itself. This structure has a number of textual content modules with white backgrounds and rounded corners. We’ll mirror the ones design parts to the e-mail optin shape’s fields.
Box Choices
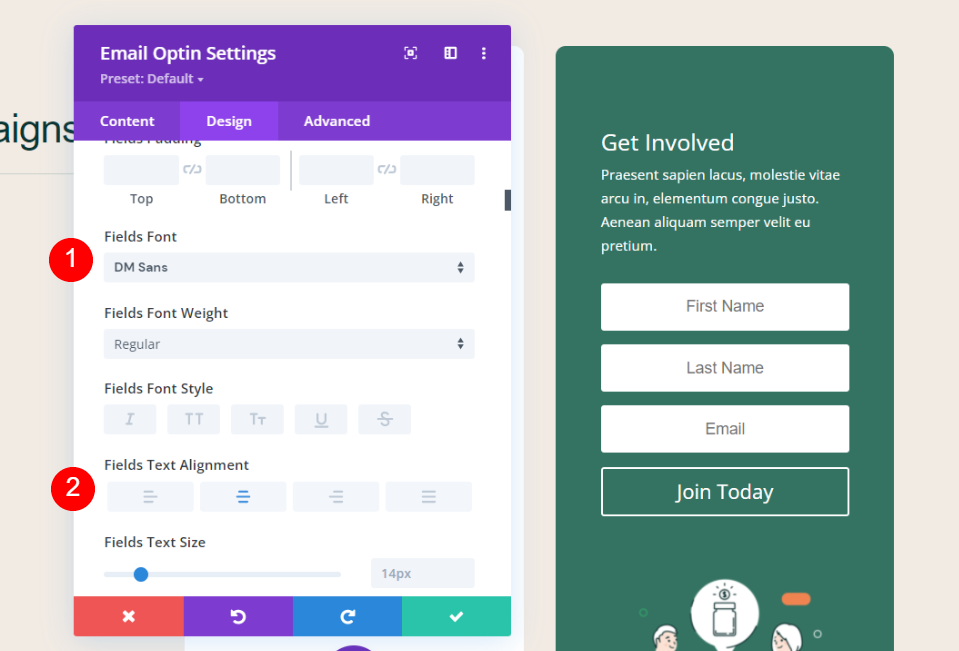
Below Fields, set the Fields Font to DM Sans. Set the alignment to Middle.
- Fields Font: DM Sans
- Fields Textual content Alignment: Middle
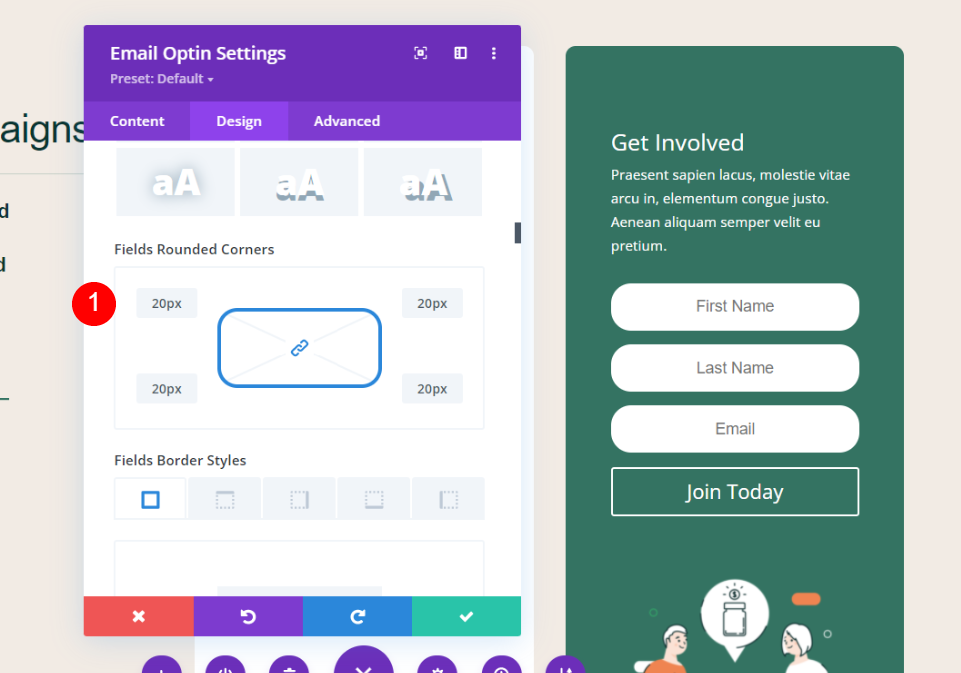
Scroll to the Fields border settings. Set the Fields Rounded Corners to 20px.
- Fields Rounded Corners: 20px
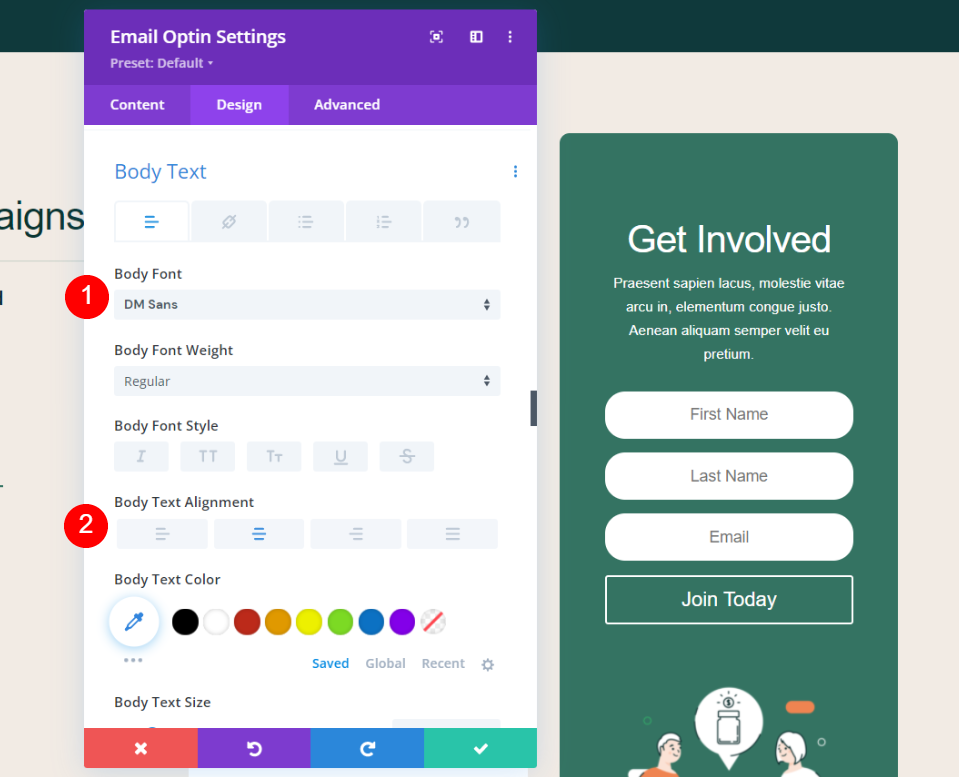
Name Textual content

Scroll to Name Textual content. Make a selection DM Sans for the Name Font and set it to Middle Alignment.
- Header: DM Sans
- Alignment: Middle

Set the Desktop Name Textual content Dimension to 38px and the Telephone measurement to 20px. Modify the Letter Spacing to -0.02em and the Line Peak to one.15em.
- Desktop Textual content Dimension: 38px
- Telephone Textual content Dimension: 20px
- Letter Spacing: -0.02em
- Line Peak: 1.15em
Frame Textual content
Scroll to Frame Textual content. Make a selection DM Sans for the Frame Font and set it to Middle Alignment.
- Header: DM Sans
- Alignment: Middle
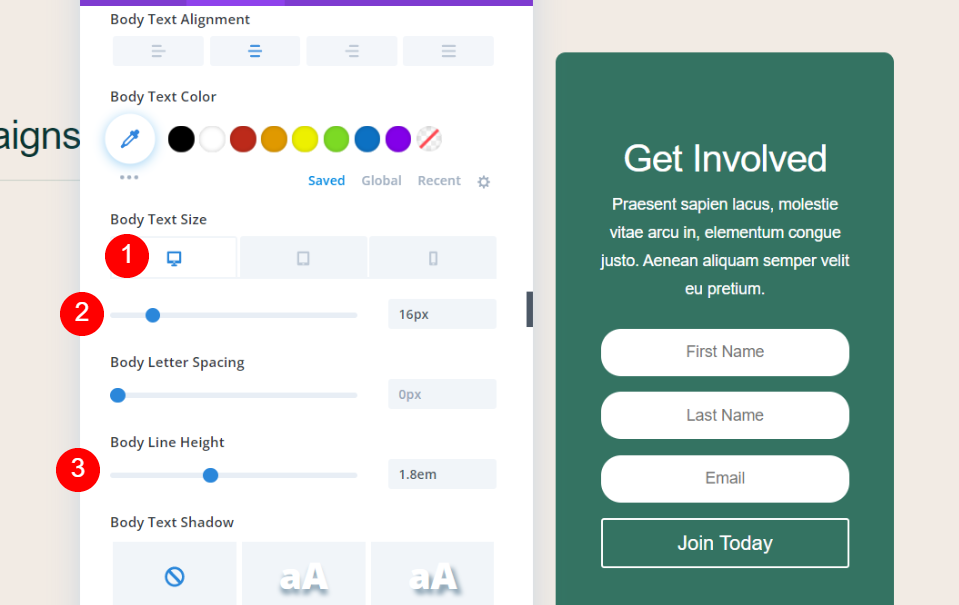
Set the Desktop Name Textual content Dimension to 16px and the Telephone measurement to 14px. Modify Line Peak to one.8em.
- Desktop Textual content Dimension: 16px
- Telephone Textual content Dimension: 14px
- Line Peak: 1.8em
Button Choices
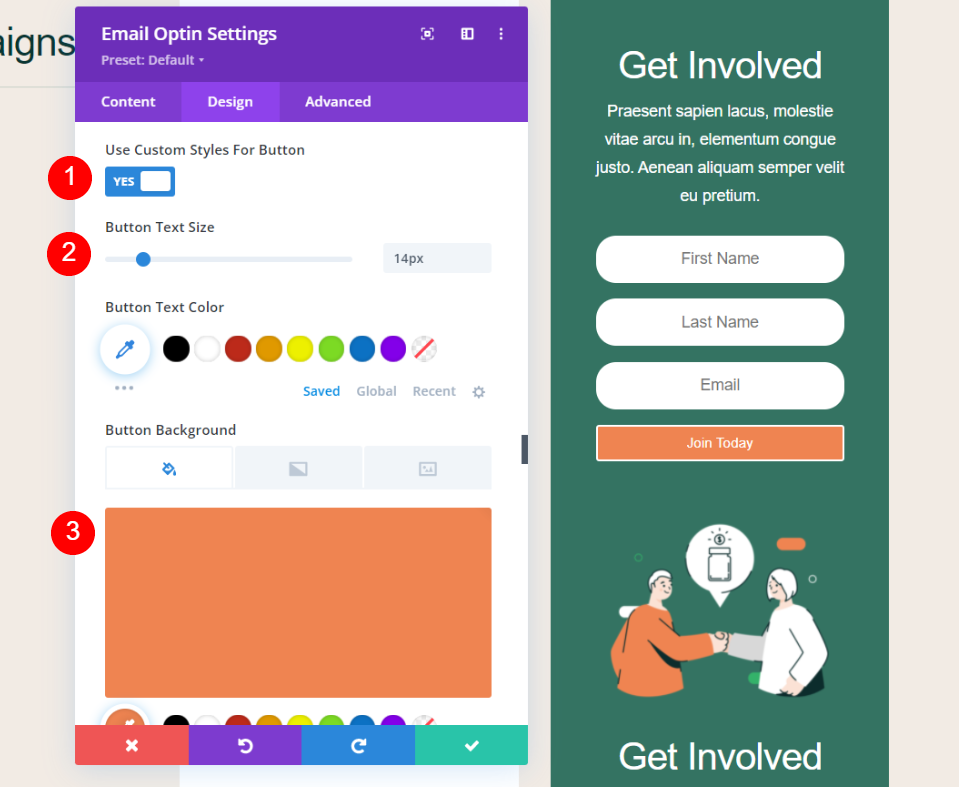
Scroll all the way down to the Button Settings and choose to make use of the customized types. Set the Button Textual content Dimension to 14px and alter the Background colour to #ef8451.
- Use Customized Kinds for Button: Sure
- Button Textual content Dimension: 14px
- Button Background: #ef8451
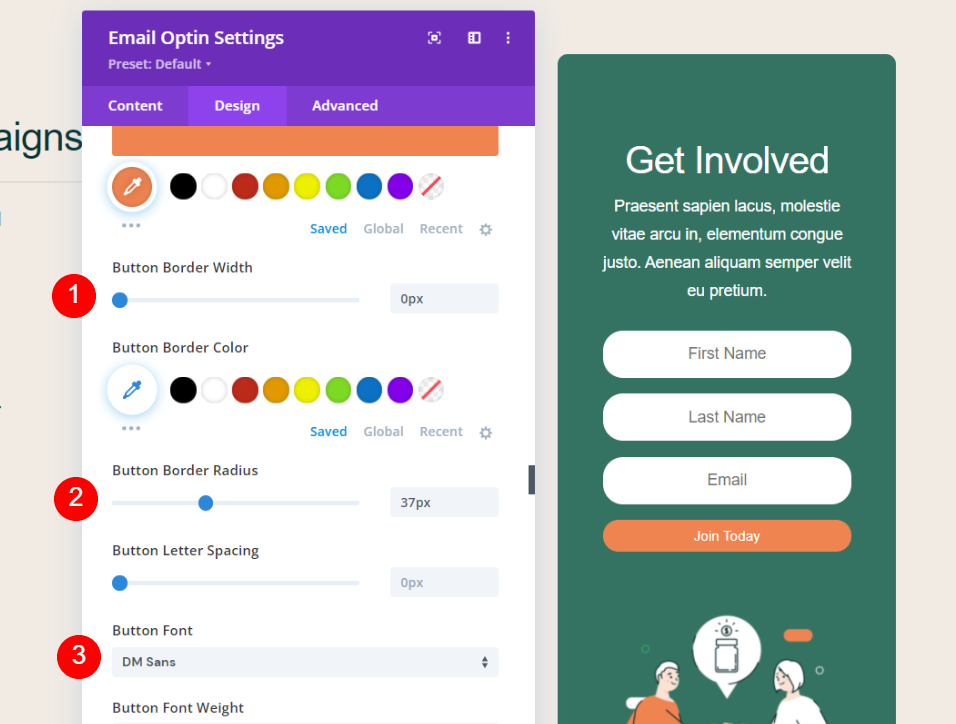
Set the Width to 0px, the Radius to 37px, and choose DM Sans for the Font.
- Button Border Width: 0px
- Button Border Radius: 37px
- Button Font: DM Sans
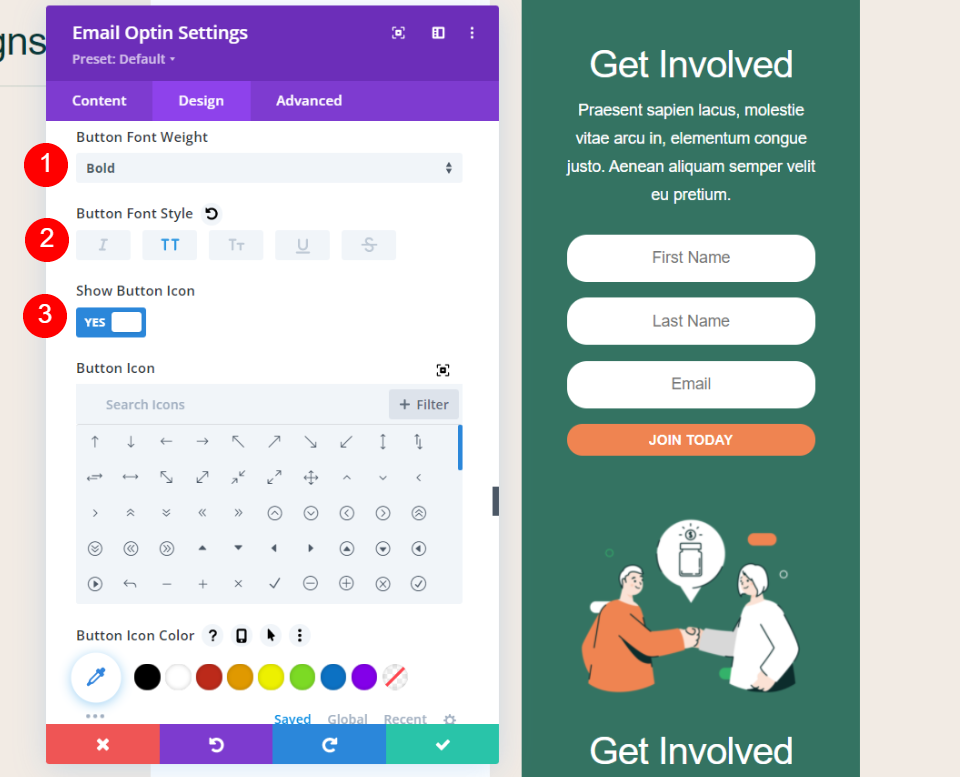
Set the Font Weight to Daring and select All Caps for the Font Taste. Allow the Button Icon, choose an icon, and set it to turn most effective on hover.
- Button Font Weight: Daring
- Button Font Taste: All Caps
- Display Button Icon: Sure
- Button Icon: >
- Best Display Icon on Hover for Button: Sure
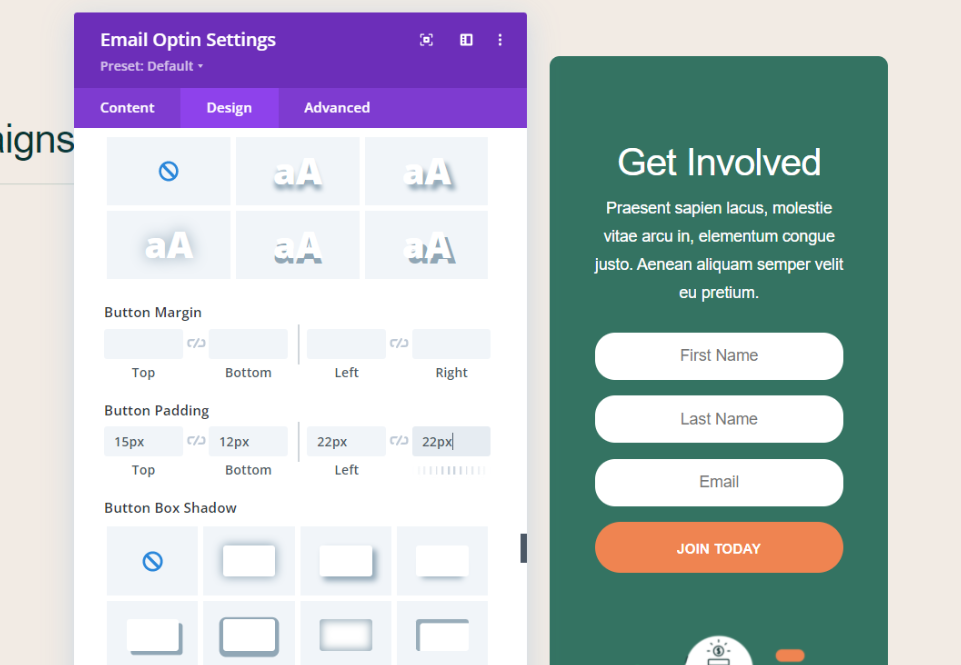
Upload Padding to all 4 aspects of the button.
- Button Padding: Most sensible 15px, Backside 12px, Left 22px, Proper 22px
Row Column Settings
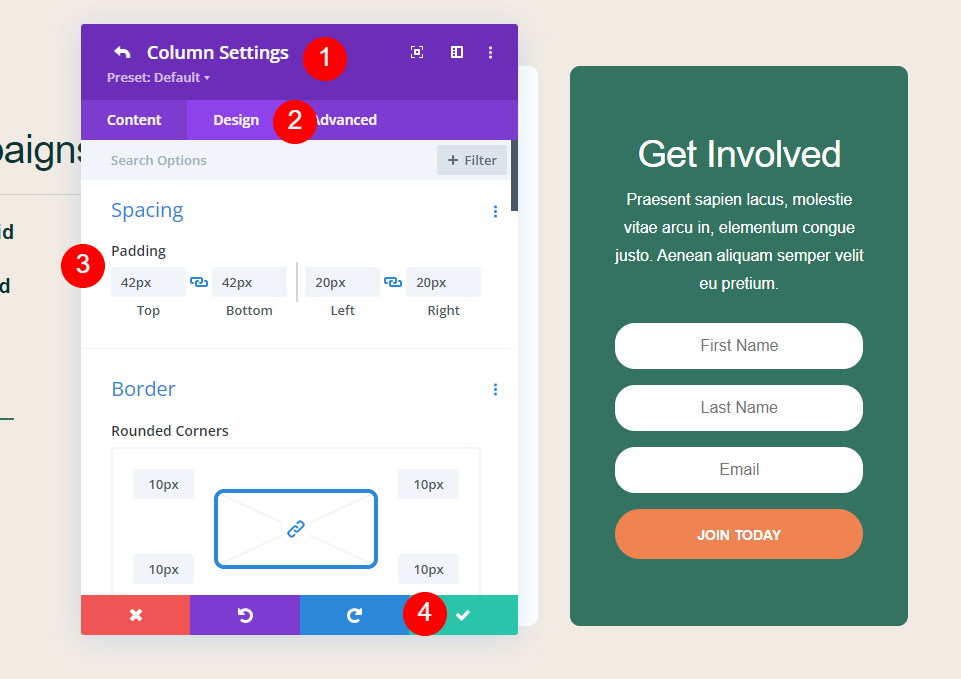
In the end, delete the unique parts you’re now not the usage of. Open the column settings on this Row. Navigate to the Design tab and set the Padding to 42px for the highest and backside. Save your paintings.
- Padding: 42px Most sensible and Backside
Exchange Shape Structure and Box Choices
The Divi Electronic mail Optin module provides you with a number of choices for the shape’s design and contours. The Structure choices come with a couple of structure alternatives. Make a choice from:
- Frame on Left, Shape on Proper
- Frame on Proper, Shape on Left
- Frame on Most sensible, Shape on Backside
- Frame on Backside, Shape on Most sensible
You’ll additionally set the width of the fields. They’re complete width through default. Disabling Fullwidth provides you with some fascinating structure choices. You’ll make the most of a couple of combos.
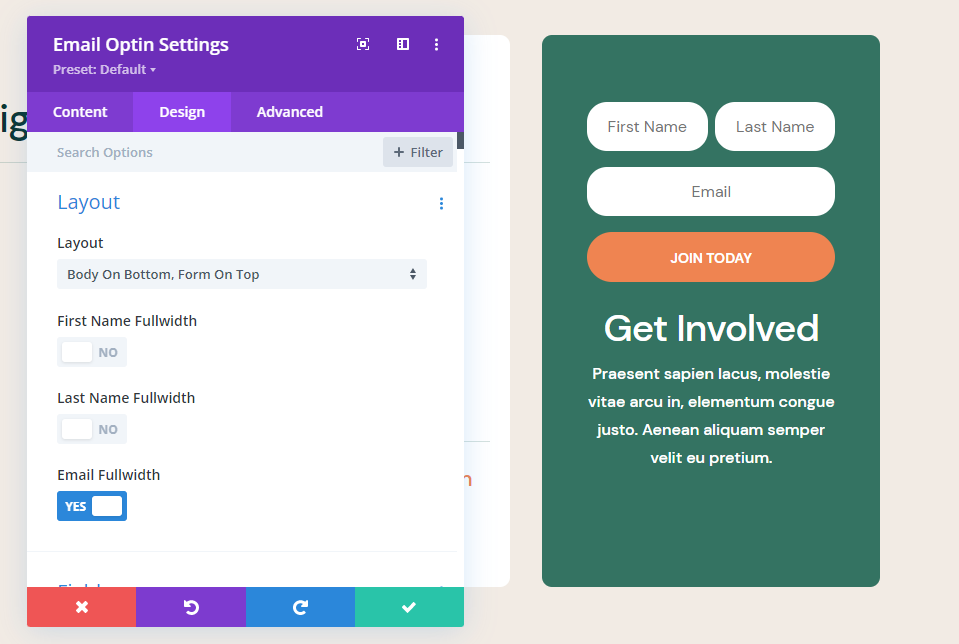
Within the instance above, I’ve decided on Frame on Backside, Shape on Most sensible. I’ve additionally disabled Fullwidth for the First Identify and Final Identify fields. This puts the shape above the textual content and the primary and ultimate names at the similar line.
I’ve positioned this kind in a single-column row. The structure displays the boy at the left and the shape at the proper. I’ve additionally disabled the full-width choices for the primary and ultimate identify fields.
This one puts the shape at the left and the frame at the proper. I’ve disabled the full-width choice for the e-mail box. The remainder are at their default settings.
Effects
Listed below are our effects.
Electronic mail Optin Desktop
Right here’s how our e mail optin shape seems to be on a desktop.
Electronic mail Optin Telephone
Right here’s our e mail optin shape on a smartphone.
That’s our have a look at find out how to upload an e mail optin to the Divi footer. The e-mail optin module makes this straightforward. Because it’s a Divi module, it may be styled to paintings with any Divi structure. The optin module comprises a number of structure choices so you’ll tailor the shape to suit your site’s design wishes.
We wish to listen from you. Do you upload an e mail optin to the Divi footer? Tell us about it within the feedback.
The submit How to Include an Email Optin in Your Divi Footer gave the impression first on Elegant Themes Blog.
Contents
- 1 Preview
- 2 Divi Theme Builder Template
- 3 Upload Electronic mail Optin to Divi Footer with a Divi Module
- 4 Taste the Divi Electronic mail Optin
- 5 Exchange Shape Structure and Box Choices
- 6 Effects
- 7 Finishing Ideas on The way to Upload an Electronic mail Optin to the Divi Footer
- 8 Divi Product Highlight: Furniture Shop Divi WooCommerce Theme
- 9 WordPress vs Bootstrap (2023) — What You Want To Know
- 10 Easy methods to Simply Combine Shopify with WordPress (Step via Step)

0 Comments