
Are you wondering what so that you could upload to the footer of your WordPress web site?
The footer is the sector at the bottom of your internet web page. Even though it’s easy to fail to remember, the footer can make stronger the shopper revel in to your web site in lots of vital tactics.
In this checklist, we can proportion the perfect problems that you simply should add to the footer of your WordPress internet web page.
The footer is the sector that appears beneath the content material subject material part of your internet web page. It is a not unusual internet web page design serve as used by tens of thousands and thousands of web websites.
‘Footer’ can also discuss with the footer code space. Third-party services and products like Google Analytics, Facebook Pixel, and a lot of others would possibly ask you to upload code snippets on your internet web page’s footer.
This type of footer code doesn’t appear to visitors nevertheless it definitely permits you to add choices, services and products, and other content material subject material on your WordPress internet web page.
With such a large amount of alternatives, learners would possibly battle to come to a decision what so that you could upload to the footer space. In consequence, many internet web page house owners fail to notice choices to make stronger their web pages and provide a better buyer revel in.
That being discussed, let’s take a look at one of the most problems so that you could upload to the footer of your WordPress web site, and the easiest way to make it further useful.
Listed below are all of the problems we’ll add, so be at liberty to jump in an instant to the items that passion you.
- Including Hyperlinks to The Footer of Your WordPress Web site
- Including Code in WordPress Footer
- Including Privateness Coverage Hyperlink in WordPress Footer
- Including Copyright Date in WordPress Footer
- Take away Powered by way of Hyperlinks from Footer in WordPress
- Find out how to Upload Instagram Feed in WordPress Footer
- Upload a Sticky Footer Bar in WordPress
- Upload Social Buttons in WordPress Footer
- Upload a Telephone Quantity in WordPress Footer
- Upload a Touch Shape in WordPress Footer
Many web websites add links to the footer space. That is serving to visitors to seek out your web site’s most necessary content material subject material such since the about internet web page, products internet web page, checkout, contact form, and additional.
All in style WordPress issues come with a footer widget space where you’ll add different content material subject material and portions.
To be able to upload links to the footer space, cross to the Glance » Menus internet web page and click on on on the ‘create a brand spanking new menu’ link.
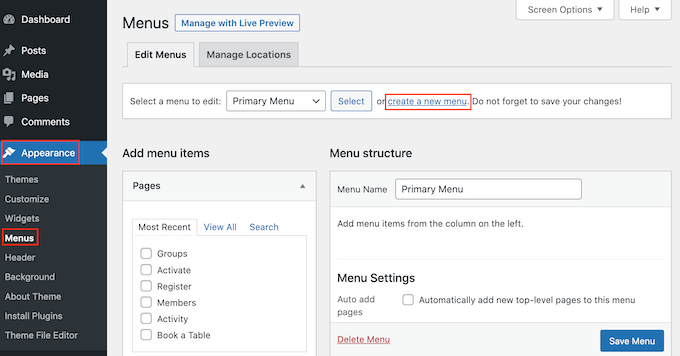
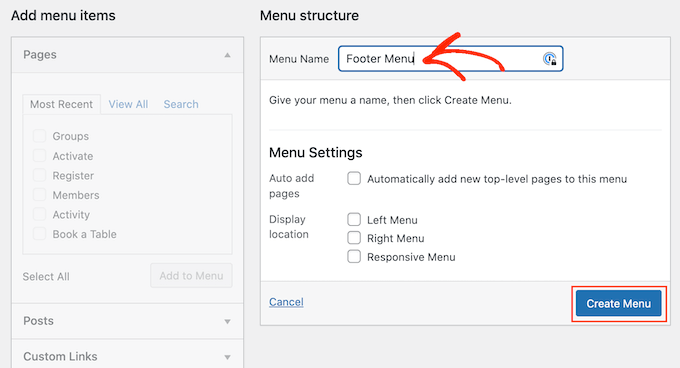
After that, type in a name for the menu. This is merely in your reference so that you’ll use the rest you need.
With that completed, click on on on the ‘Create Menu’ button.
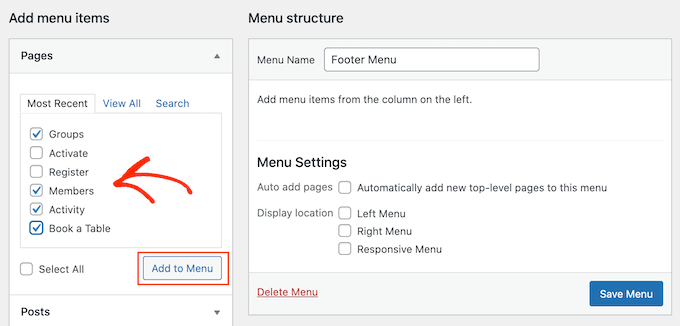
Now, take a look at the sphere next to each products that you need so that you could upload to the menu.
Then, click on on on ‘Add to Menu.’
When you’re proud of how the menu is waiting up, click on on on the ‘Save Menu’ button to store your changes. For added have the same opinion, see our knowledge on the best way to create navigation menus in WordPress.
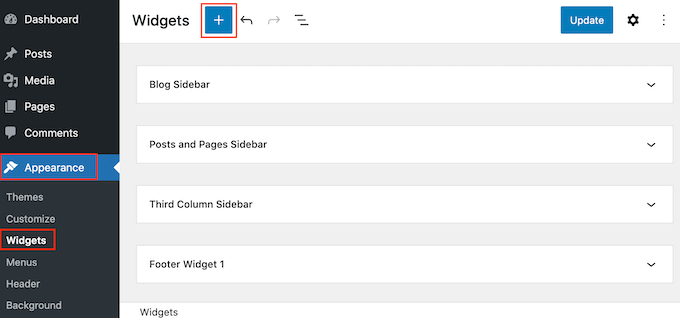
Now you’ve created a menu, let’s add it to the footer space of your internet web page by the use of going to Glance » Widgets. Proper right here, click on on on the blue ‘+’ button.
Inside the ‘Search’ field, type in ‘Navigation Menu.’
When the correct block turns out, drag and drop it onto the ‘Footer’ or an similar space.
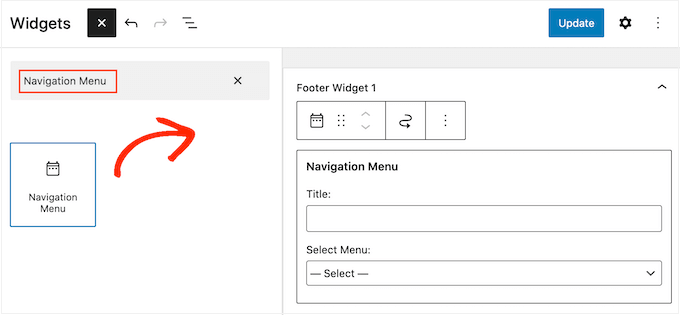
After that, open the Select Menu’ dropdown and make a choice the footer menu you created earlier.
You may also want to type in a reputation, which is able to appear above the links in your internet web page’s footer.
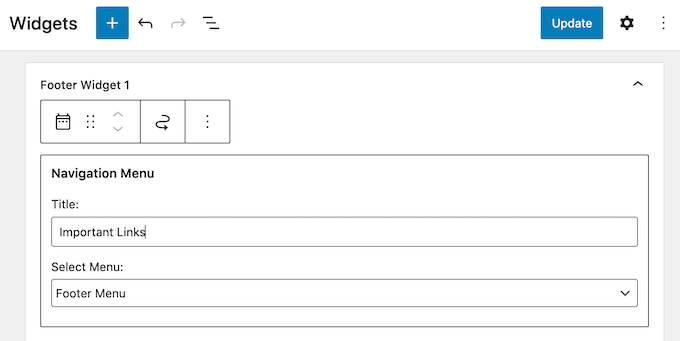
With that completed, click on on on the ‘Exchange’ button.
Now, if you consult with your internet web page you’ll see all of the links inside the footer space.

You’ll be capable to moreover add links to the footer using a drag-and-drop web page builder plugin like SeedProd. You’ll be capable to even create different footers for explicit individual WordPress pages.
For step-by-step instructions, check out our knowledge on the best way to edit the footer in WordPress.
Together with a Menu to Your Footer with the Whole-Internet website Editor
In the event you occur to’re using a block-based theme related to ThemeIsle Hestia Professional or Twenty Twenty-3, then the process of together with a menu to the footer is moderately different.
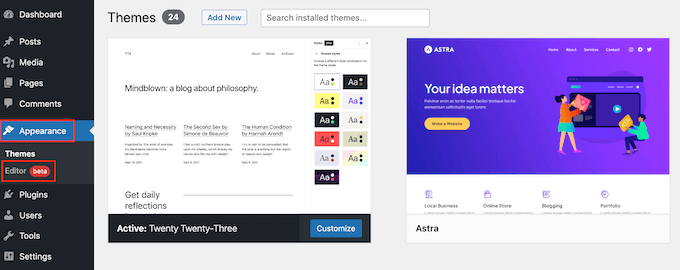
Simply create a navigation menu following the identical process described above. Then, cross to Problems » Editor inside the WordPress dashboard to open the full-site editor.
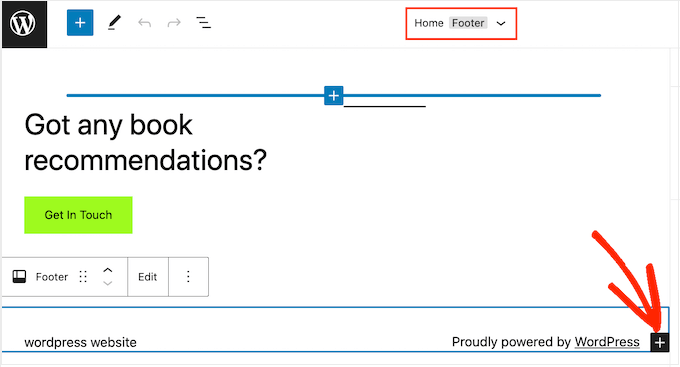
Proper right here, click on on on the downwards-pointing arrow inside the toolbar and make a choice the ‘Footer’ template.
Inside the footer space, cross ahead and click on on on the ‘+’ button so that you could upload a brand spanking new block.
Inside the ‘Search’ bar, type in ‘Navigation.’
When the correct block turns out, click on on so that you could upload it to the footer space.

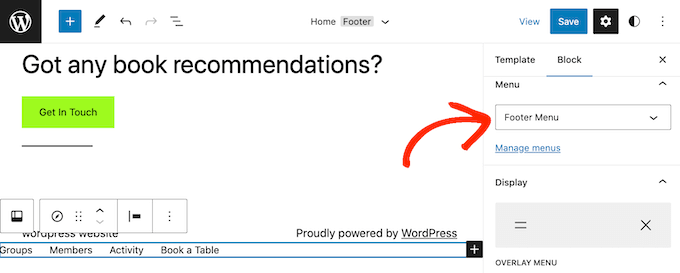
The total-site editor will show one in all your navigation menus by the use of default.
If you want to show a distinct menu instead, then open the ‘Select menu’ dropdown inside the right-hand panel and make a choice the menu you need to use.
When you’re proud of how the menu seems to be like, click on on on ‘Save’ to make your changes reside.
Every now and then it’s imaginable you’ll want to add snippets on your WordPress weblog or internet web page’s footer.
You should edit your theme information immediately and paste the new code inside the footer.php template. On the other hand, this isn’t really useful since the custom designed code will disappear if you alternate the WordPress theme, or exchange that theme.
Editing your theme information immediately can also be bad. Even a simple typo or mistake would possibly explanation why lots of commonplace WordPress mistakes.
One of the simplest ways so that you could upload code inside the WordPress footer is by the use of using a code snippets plugin. WPCode is the most productive code snippets plugin for WordPress. It makes it easy to insert code into your WordPress web site’s headers and footers with no need to edit your theme information.
First, you wish to have to place in and switch at the WPCode plugin. For added details, see our step-by-step knowledge on the best way to set up a WordPress plugin.
Upon activation, cross to Code Snippets » Header & Footer. From correct right here you’ll paste your code snippet into the ‘Footer’ box.

Don’t forget to click on on on the ‘Save Changes’ button to store your changes. For added detailed instructions, please see our article on the best way to upload header and footer code in WordPress.
To conform to GDPR and other privacy-related rules in a lot of world places, you wish to have to upload a privateness coverage web page in WordPress and then link to it from all of the other pages.
Given that footer turns out all over your whole internet web page, it’s the perfect place so that you could upload this URL.
First, you wish to have to discuss with Settings » Privacy inside the admin space. You’ll understand that WordPress has already created a Privacy Protection internet web page draft for you.

To use the default Privacy Protection internet web page, simply click on on on ‘Use This Internet web page.’ If you want to use a distinct internet web page instead, then open the dropdown menu and make a choice a brand spanking new internet web page from the file.
You’ll be capable to moreover create a brand spanking new privacy protection internet web page from this visual display unit. Simply click on on on the ‘Create’ button and WordPress will generate a brand spanking new put up with some basic privacy protection text.

Without reference to the way in which you create the privacy protection internet web page, you’ll edit it very similar to another internet web page in WordPress. For example, you’ll add further information about your prerequisites, and words and must haves.
When you’re proud of the guidelines you’ve entered, click on on on the ‘Submit’ button to make the privacy protection reside.
With that completed, you’ll want to add a link on your internet web page’s footer. To be able to upload a navigation menu to the footer space, simply observe the identical process described above.
You may also want to add a copyright date inside the WordPress footer space to let visitors know that your content material subject material is copyrighted. A technique to check out that is by the use of simply together with the text on your theme settings.
Many top WordPress problems can help you add text inside the footer space, so it’s worth checking whether or not or no longer your theme has this environment.
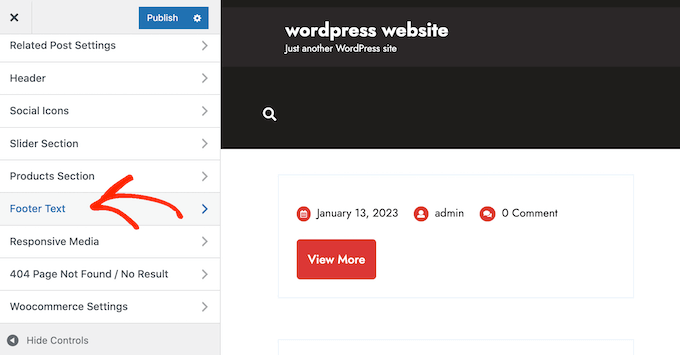
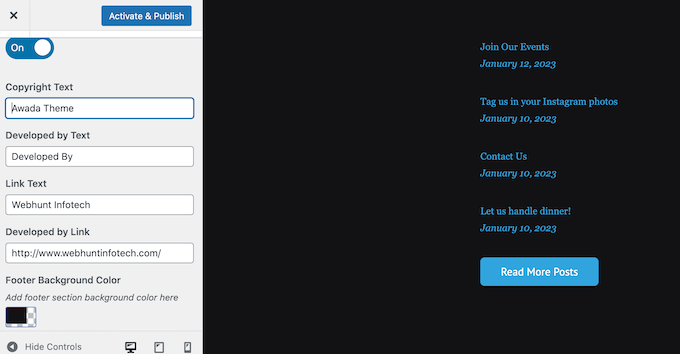
Simply cross to the Glance » Customize internet web page and seek for any footer settings inside the left-hand menu. The ones are normally labeled ‘Footer Possible choices,’ ‘Footer Settings’ or an similar.
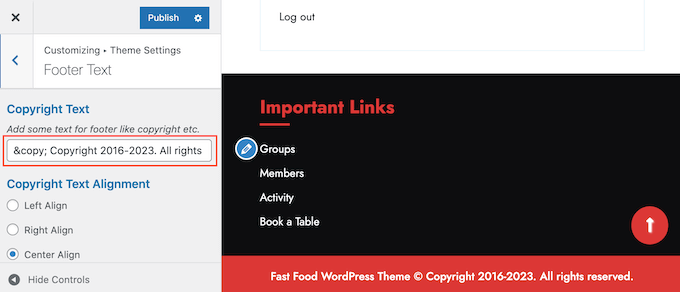
To be able to upload the copyright symbol, simply paste the following into the ‘Footer Credit score,’ ‘Copyright Text’ or an similar section.
© Copyright 2016-2023. All rights reserved.
The WordPress Theme Customizer will exchange automatically so that you’ll see how the copyright text will look to your internet web page.
Depending to your theme, you may additionally be capable of alternate the font measurement and text alignment using the theme settings.
In the event you occur to’re proud of how the copyright understand seems to be like, then click on on on the ‘Submit’ button to make your changes reside.
Skilled Tip: With this manner, you’ll however want to exchange the copyright understand yearly. To be able to upload the new 365 days automatically, see our knowledge on the easiest way to add a dynamic copyright date within the WordPress footer.
Together with a Copyright Date to Your Footer with the Whole-Internet website Editor
In the event you occur to’re using a block-enabled theme, then it’s easy so that you could upload a copyright date to the footer. Simply cross to Problems » Editor to open the full-site editor.
Then, scroll to the footer section and click on on on the ‘+’ so that you could upload a brand spanking new block. You’ll be capable to now get began typing in ‘Shortcode’ and make a choice the correct block when apparently.
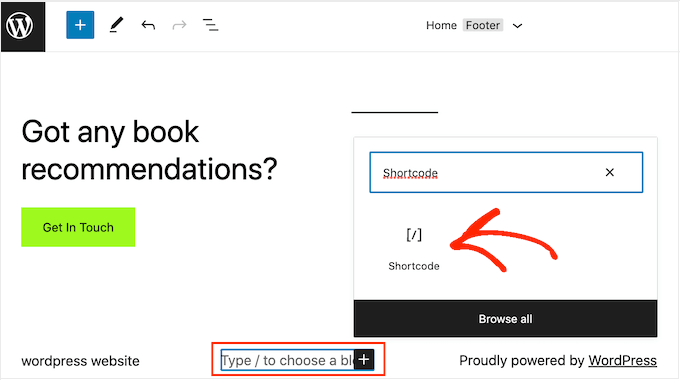
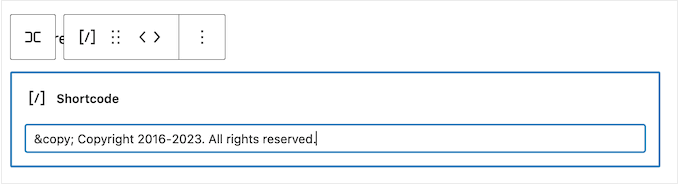
Inside the shortcode block, add the following:
© Copyright 2016-2023. All rights reserved.
After that, simply click on on on the ‘Save’ button to make the copyright understand reside.
Some unfastened WordPress issues add links to the footer space. Most often this can be a ‘Powered by the use of WordPress’ disclaimer that links to the dependable WordPress internet web page, alternatively some theme developers moreover include links to their own web websites.
The ones outgoing links encourage visitors to leave your internet web page and will have a destructive affect to your WordPress search engine optimization. With that throughout ideas, it’s a good idea to remove them from the footer space by the use of going to Glance » Customize.
Some problems make it tricky to remove the ones links so you’ll have to spend time looking all over the opposite settings.
To start out, we propose searching for any settings labeled ‘Footer Possible choices,’ ‘Footer & Copyright Possible choices,’ or an similar.
Proper right here, you’ll have to be capable of delete the links or even alternate them with your personal URLs.
Some problems hard-code the links inside the theme information and don’t give you the selection to remove them using the WordPress Customizer.
If this is the case, you’ll remove the ones links by the use of bettering the footer.php document. For step-by-step instructions, please see our knowledge on how to take away the powered by way of WordPress footer hyperlinks.
Eliminating Powered By means of Links with the Whole-Internet website Editor
To remove the ‘Powered By means of’ links in a block-enabled theme, simply open the full-site editor by the use of following the identical process described above.
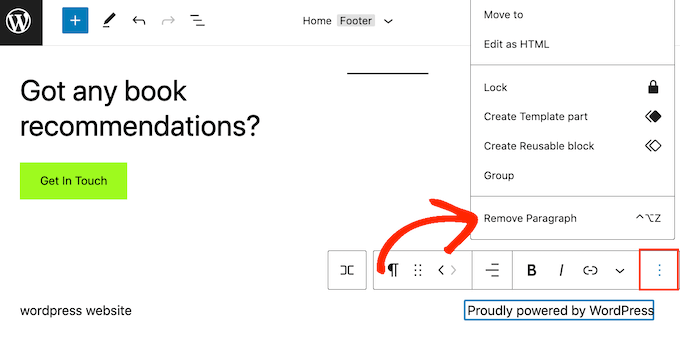
Inside the editor, to seek out the ‘Proudly powered by the use of WordPress’ or an similar text. You’ll be capable to alternate this with your personal text by the use of typing into the ‘Paragraph’ block.

If you want to remove the text completely, then simply click on on to select the ‘Paragraph’ block. After that, click on on on the three-dotted ‘alternatives’ button.
In spite of everything, click on on on ‘Remove Paragraph’ to delete the block.
You’ll be capable to then cross ahead and click on on on ‘Save.’ Now, if you consult with your internet web page you’ll see that this newsletter has been removed.
Do you steadily put up surprising pictures and films to Instagram?
People received’t see your Instagram content material subject material if they just consult with your internet web page. With that throughout ideas, it’s imaginable you’ll want to show recent Instagram pictures in your internet web page’s footer.
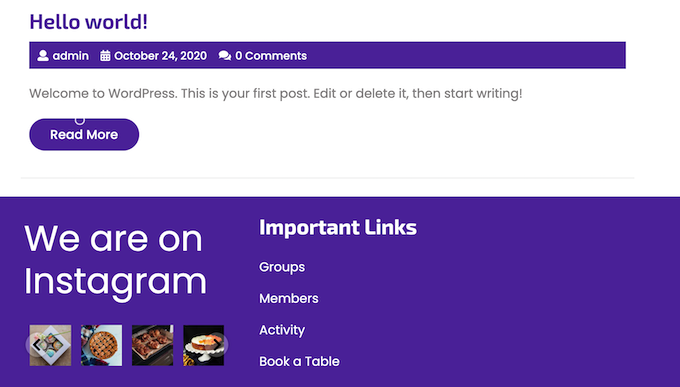
It is a easy method to put it up for sale your social media internet web page and encourage further other people to use you on Instagram.
Probably the most perfect tactics so that you could upload {a photograph} feed inside the WordPress footer is by the use of using Ruin Balloon Instagram Feed. It’s the perfect Instagram plugin for WordPress and allows you to merely add {a photograph} feed on your internet web page.
After together with the social media feed on your footer, Smash Balloon will fetch new Instagram pictures automatically. In this approach, your footer will all the time show your latest Instagram pictures to the people who consult with your internet web page.
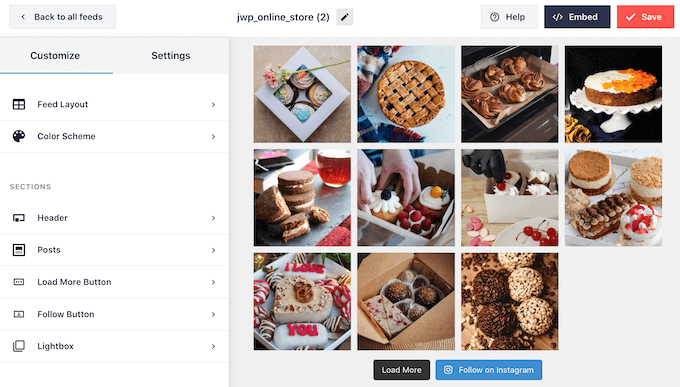
In the event you occur to run a internet primarily based store, then you definately’ll even get further product sales by the use of including Instagram shoppable photographs to the WordPress footer.
Smash Balloon has all of the tools you wish to have to fine-tune how the Instagram feed seems to be like in your footer. For example, you’ll choose between different layouts, add a ‘Observe’ button, optimize your feed for mobile devices, and additional with the user-friendly Smash Balloon editor.
For step-by-step instructions, please see our knowledge on the easiest way to the best way to simply embed Instagram in WordPress.
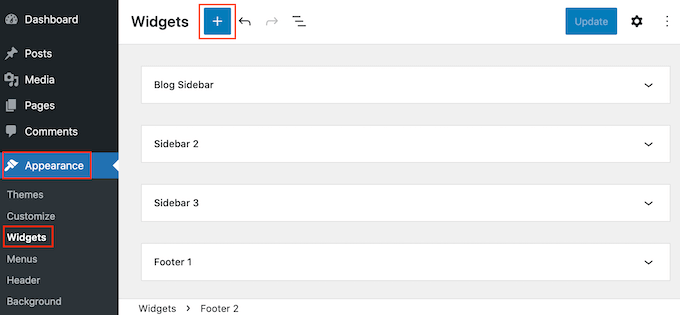
When you’re proud of how the feed seems to be like, it’s time so that you could upload it on your internet web page’s footer. Simply cross to Glance » Widgets and click on on on the blue ‘+’ button.
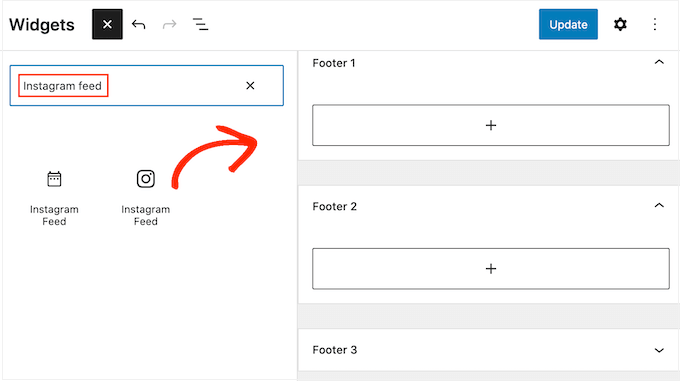
Inside the search field, type in ‘Instagram Feed’ to go looking out the correct block. Merely take into accout that WordPress has a built-in Instagram Feed button, so take note to make use of the block that has the dependable Instagram logo.
You’ll be capable to now drag and drop the block onto your web site’s footer.
With that completed, simply click on on on ‘Exchange.’ After that, you’ll consult with your internet web page to look your Instagram feed inside the footer.
Together with an Instagram Feed with the Whole-Internet website Editor
It’s easy so that you could upload the Smash Balloon Instagram feed to a block-enabled WordPress theme.
Simply open the full-site editor following the exact same process described above, and then click on on on the ‘+’ button inside the footer template.
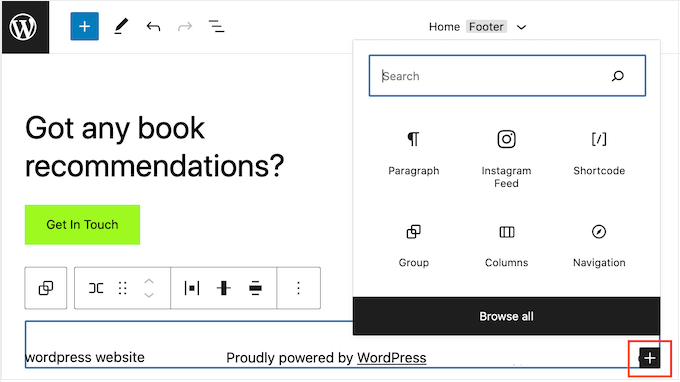
With that completed, type in ‘Instagram Feed’ and make a choice the correct block when it sounds as if this is the case as so as to add it to the footer.
The total-site editor will automatically show the Instagram feed you created.
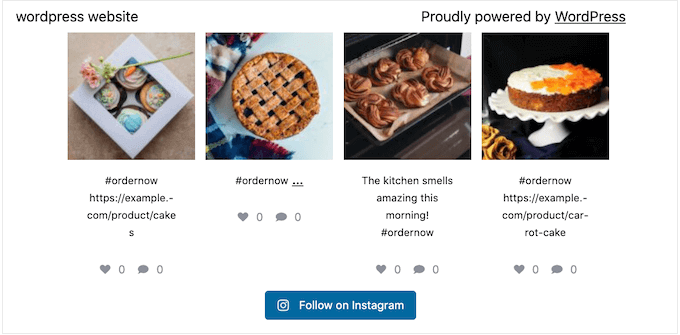
With that completed, simply click on on on ‘Save’ to make the Instagram feed reside.
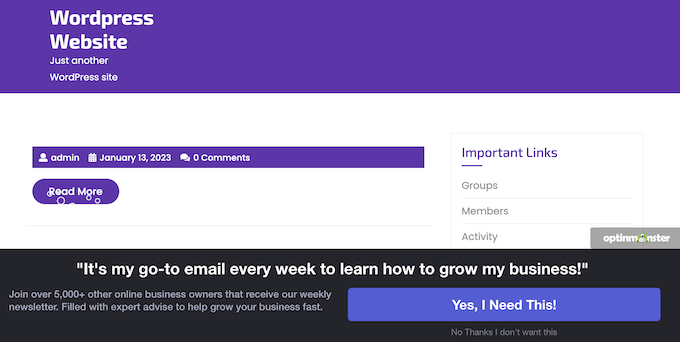
Wish to show explicit supplies or notifications inside the footer space?
You’ll be capable to create a footer bar that continues to be stuck to the bottom of the visual display unit since the buyer scrolls.
To create this kind of sticky footer bar, you’ll need OptinMonster. It’s the most productive conversion optimization tool in the market and allows you to turn internet web page visitors with a over the top leap fee into shoppers and customers.
OptinMonster moreover comes with tricky display regulations so that you’ll show personalised customized messages in your internet web page’s footer.
First, you’ll want to join an OptinMonster account.
After that, arrange and switch at the OptinMonster plugin to your WordPress internet web page. Upon activation, make a choice Connect Your Provide Account.
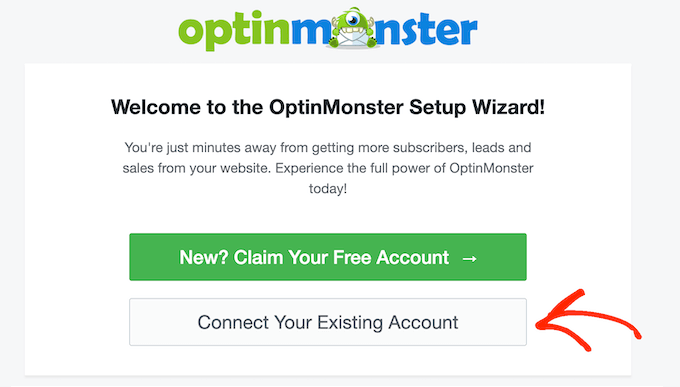
You’ll be capable to now type inside the e-mail deal with and password in your OptinMonster account.
Once connected, cross to the OptinMonster » Campaigns internet web page and click on on on the ‘Create your first advertising marketing campaign’ or ‘Add New’ button.

On the next visual display unit, make a choice ‘Floating Bar’ as your advertising marketing campaign type and then make a choice a template.
To preview an OptinMonster template, simply hover your mouse over it and then click on on on the ‘Preview’ button.
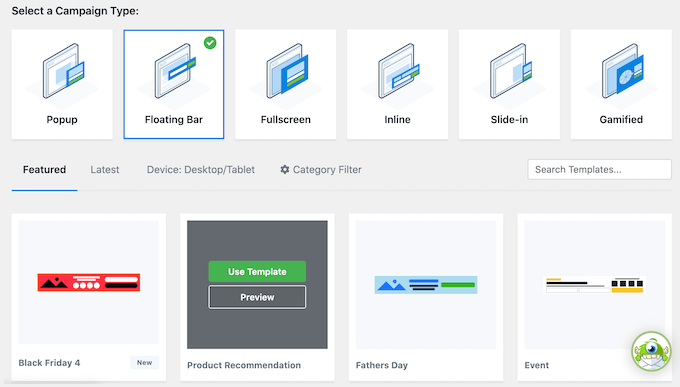
When you find a template you favor, click on on on its ‘Use Template’ button.
You’ll be capable to then type in a name for the promoting marketing campaign. This is merely in your reference so that you’ll use any identify you need.
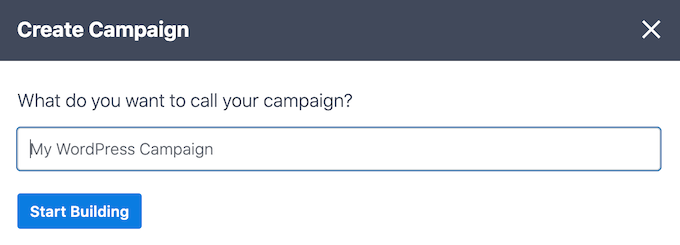
With that completed, click on on on Get began Development.
This may increasingly an increasing number of take you to OptinMonster’s drag-and-drop advertising marketing campaign builder where you’ll design the footer bar. Simply click on on on any section you need to edit, or drag and drop new blocks from the left-hand column.
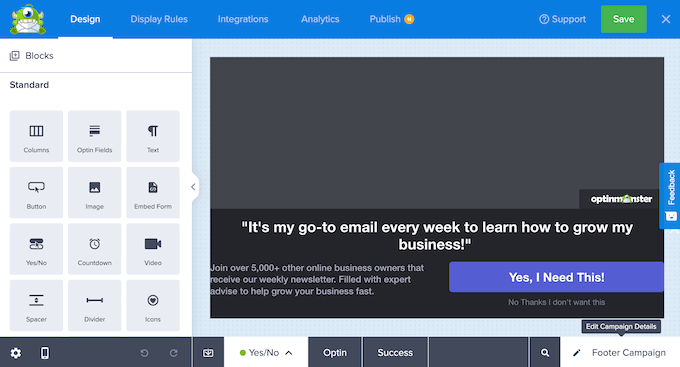
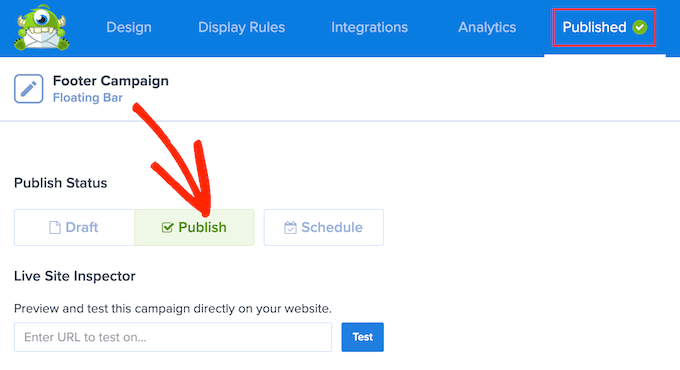
When you’re proud of how the promoting marketing campaign seems to be like, simply click on on on the ‘Submit’ button.
Then, make a choice ‘Submit’ to make the promoting marketing campaign reside.
You’ll be capable to now make a choice the ‘Save’ button to store your changes and then click on on on the ‘X’ inside the upper-right corner to close the OptinMonster advertising marketing campaign builder.
Once more inside the WordPress dashboard, open the ‘Status’ dropdown and make a choice ‘Printed.’
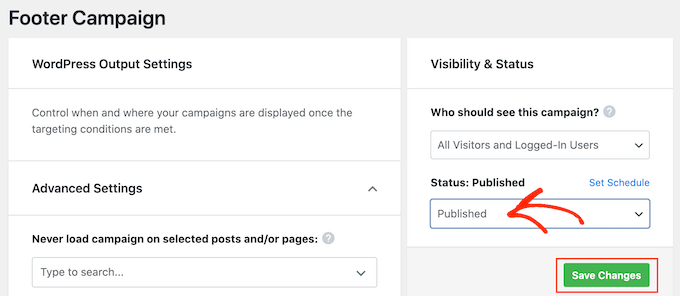
In spite of everything, click on on on ‘Save.
Now, consult with your WordPress web page to look the floating footer bar in movement.
You’ll be capable to use OptinMonster to create all kinds of high-converting campaigns along with slide-in footer popups, countdown timers, and targeted footer notifications that can can help you recuperate deserted cart gross sales.
Each different good way to use the footer space in your WordPress theme is by the use of appearing social media icons. It is a easy method to put it up for sale your different profiles and get further lovers on Twitter, Facebook, and other in taste platforms.
One of the simplest ways so that you could upload the ones buttons is by the use of using the Social Icons Widget plugin. This plugin is helping all of the primary social networks and comes with a few icon varieties that you simply’ll choose between.
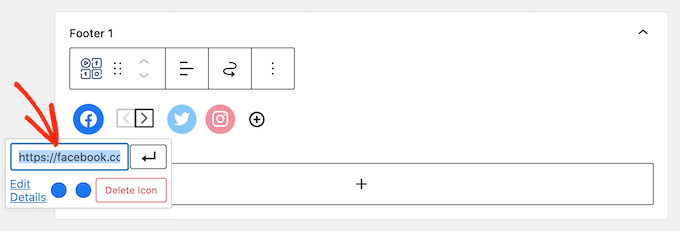
After activating Social Icons Widget, cross to the Glance » Widgets internet web page. You’ll be capable to then click on on on the ‘+’ button and search for ‘Social Icons Block.’
When the correct block turns out, drag and drop it onto the footer space.
By means of default, the Social Icons Block already has a few social media icons built-in.
To link any of the ones icons on your non-public social profiles, simply give it a click on on. Inside the little bar that appears, type inside the URL of the internet web page you need to put it up for sale.
Wish to use a distinct icon for this social media platform?
Then simply click on on on the ‘Edit Details’ link. This opens a window where you’ll make a choice a brand spanking new image for the social icon.
Simply repeat this process for each built-in social media icon.
If you want to remove this sort of default icons, then click on on on the ‘Delete icon.’
There are a lot of social media platforms and other web websites which you’ll want to add to the footer space.
To try this, click on on on the ‘+’ button.
You’ll be capable to now make a choice a social media icon and add a link by the use of following the identical process described above.
When you’re proud of how the social media icons are prepare, click on on on ‘Exchange.’ Now, simply consult with your internet web page and scroll to the footer space to look the social buttons in movement.
Bonus: Wish to add further social choices on your internet web page? Take a look at our an expert pick of the perfect social media plugins for WordPress to expand your target audience.
Together with Social Buttons with the Whole-Internet website Editor
Are you using a block-enabled theme? Then you definitely’ll add social icons to the footer by the use of going to Problems » Editor.
Inside the footer, click on on on the ‘+’ button and then type in ‘Social Icons block.’
When the correct block turns out, click on on so that you could upload it to the footer.
This gives a block with the default social icons.

You’ll be capable to now customize the ones icons and add new social buttons, by the use of following the identical process described above.
When you’re proud of how the buttons look, simply click on on on the ‘Save’ button. Now if you consult with your internet web page you’ll see the social icons inside the block-enabled footer.
In the event you occur to offer purchaser strengthen over the phone, then together with your phone amount inside the WordPress footer space can have the same opinion shoppers contact you.
For this, you’ll desire a trade phone amount. We propose using Nextiva, which is the perfect industry telephone carrier for small corporations.
Nextiva permits you to make affordable calls and use complicated choices like identify forwarding, infinite free house calling, voicemail to electronic mail and text, and additional. You’ll be capable to moreover use the identical amount on a few devices and handsets, and prepare calls from any device that has an internet connection.
Upon getting a trade phone amount, you’ll want to add it on your internet web page. Probably the most perfect tactics is by the use of using the WP Name Button plugin, which supplies a click-to-call button on your WordPress web site.
After activating the plugin, cross to Settings » WP Title Button inside the WordPress dashboard.
Proper right here, click on on on the ‘Title Now Button Status’ switch so it presentations ‘Vigorous.’
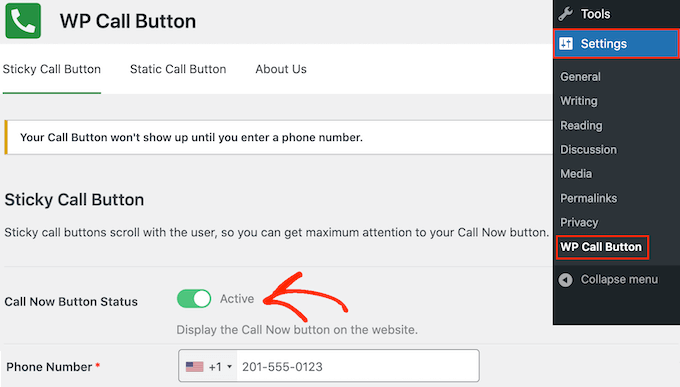
Next, type your business phone amount into the ‘Phone Amount’ field.
By means of default, the button presentations ‘Title Us’ text alternatively you’ll alternate this with your personal custom designed messaging by the use of typing into the ‘Title Button Text’ field.

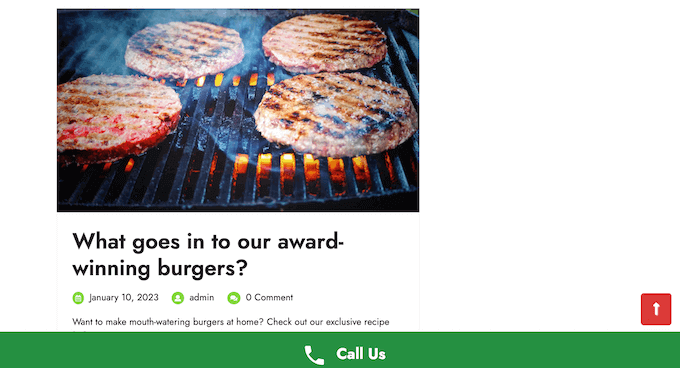
After that, scroll to the Title Button Position section and make a choice where you need to show the button to your internet web page. For example, you’ll show the button inside the bottom-right corner, or create a banner that covers all of the footer space.
When you’re proud of how the button is waiting up, click on on on ‘Save Changes.’ After that, simply head over on your internet web page to look the call-to-click button in movement.
Don’t want to use a click-to-call button? Then see our knowledge on the easiest way to upload clickable telephone numbers in WordPress for another alternatives.
Your internet web page’s footer doesn’t should be a dead-end. In the event you occur to’ve added a navigation menu following the process described above, then you definately definately’re off to an excellent get began. On the other hand, you’ll moreover encourage customers to hook up with you by the use of together with a marginally form to the footer space.
That’s the position WPForms is to be had in.
WPForms is the perfect WordPress touch shape plugin and comes with a ready-made Simple Contact Form template that lets you create a marginally form with just a few clicks.
After activating the plugin, cross to WPForms » Add New and type in a name for the contact form. This is merely in your reference so that you’ll use the rest you need.
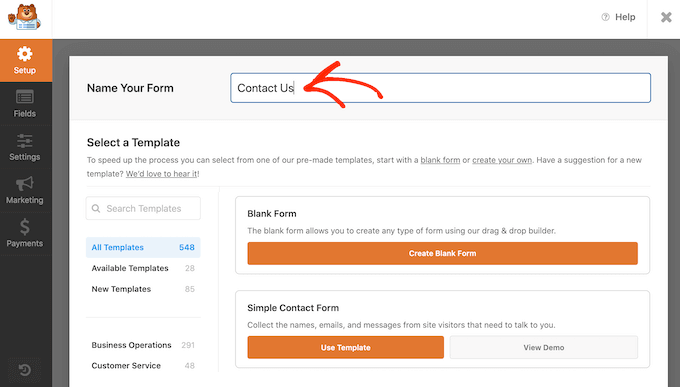
Simply to seek out the ‘Simple Contact Form’ template and click on on on its ‘Use Template’ button.
WPForms will now open the template in its form builder. The template already has all of the fields you’ll generally need, alternatively you’ll add further fields by the use of dragging them from the left-hand menu and dropping them onto your form.
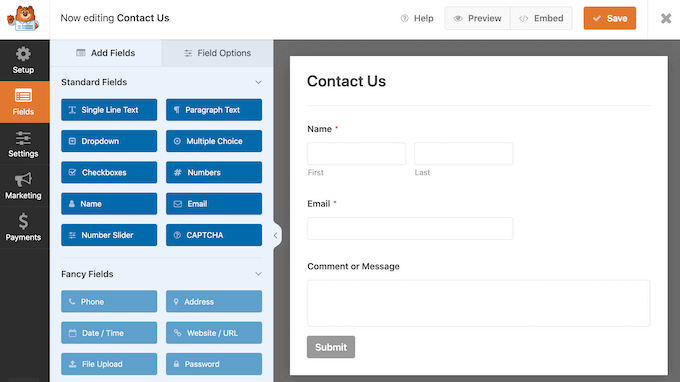
You’ll be capable to moreover click on on on any field to edit it, and rearrange them inside the form using drag and drop.
To delete a field, simply hover your mouse over it and then click on on on the small trash can icon when apparently.
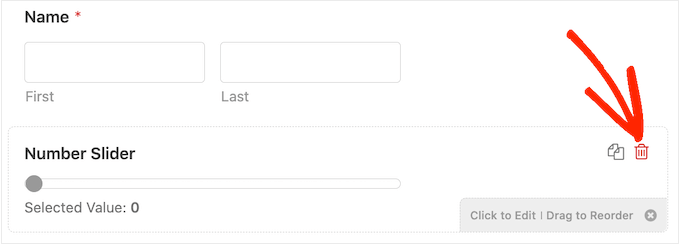
When you’re ready, click on on on the ‘Save’ button to store your changes.
To be able to upload the contact form on your footer, head over to the Glance » Widgets internet web page inside the WordPress dashboard.
Proper right here, click on on on the ‘+’ button and search for ‘WPForms.’ When the correct block presentations up, drag and drop it onto your theme’s footer space.
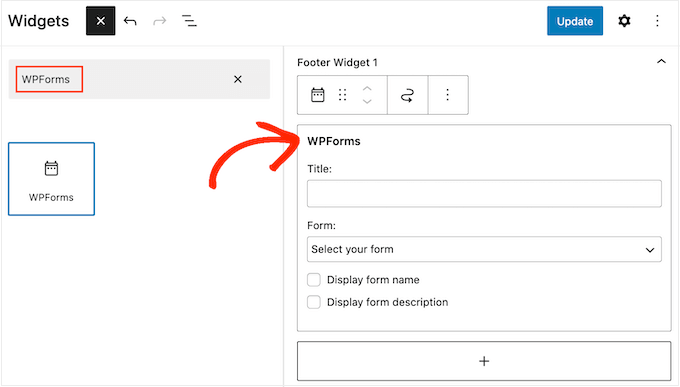
After that, open the ‘Form’ dropdown and make a choice your contact form.
You’ll be capable to moreover add an no longer necessary identify, which is able to appear above the contact form.
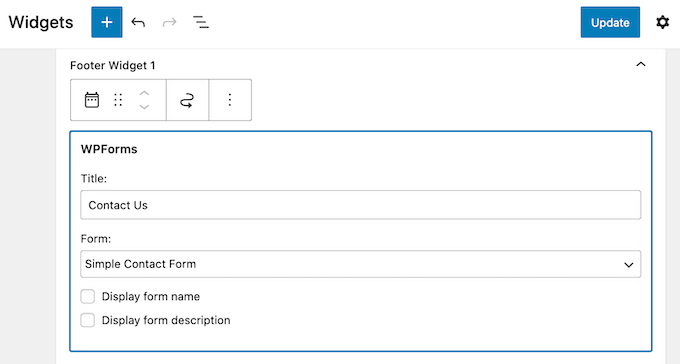
In the event you’ve completed that, click on on on the ‘Exchange’ button.
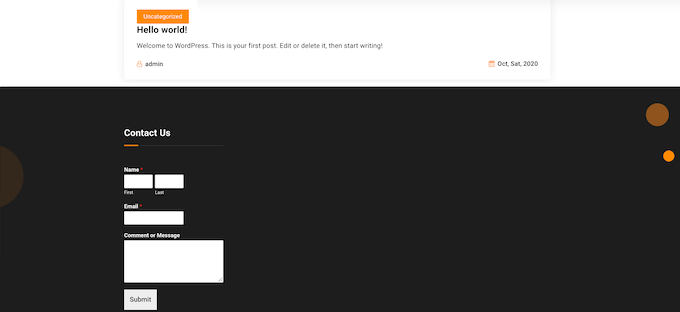
Now, if you consult with your internet web page you’ll see the new contact form inside the footer.
Together with a Contact Form with the Whole-Internet website Editor
Wish to add a marginally form to the footer of a block-enabled theme?
Then you’ll want to head over to Problems » Editor. Proper right here, scroll to the bottom of the visual display unit and click on on on the ‘+’ inside the footer space.
With that completed, type in ‘WPForms’ to go looking out the correct block.
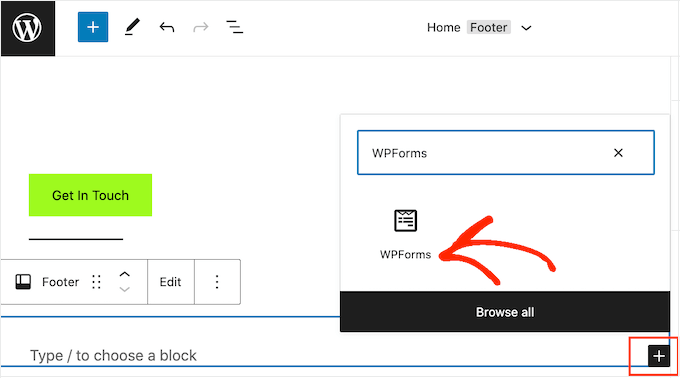
Give this block a click on on so that you could upload it to the footer space.
Inside the WPForms block, open the ‘Select a Form’ dropdown and make a choice the contact form we merely created.
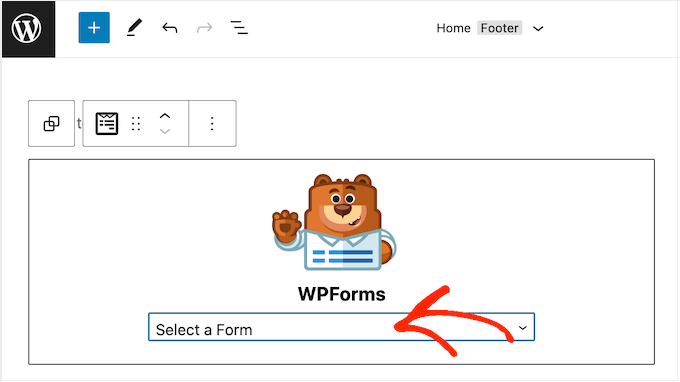
When you’re ready to make the contact form reside, simply click on on on the ‘Save’ button.
We hope this article helped making a decision which problems so that you could upload on your WordPress footer to make it further useful. Next, you’ll see our knowledge on the easiest way to make stronger your WordPress web page velocity and function, and our an expert pick of the perfect WordPress plugins to use to your web site.
In the event you occur to liked this article, then please subscribe to our YouTube Channel for WordPress video tutorials. You’ll be capable to moreover to seek out us on Twitter and Fb.
The put up Tick list: 10 Issues To Upload To The Footer on Your WordPress Web site first seemed on WPBeginner.
Contents
- 0.0.1 What’s the Footer in WordPress?
- 0.0.2 1. Together with Links to The Footer of Your WordPress Internet website
- 0.0.3 2. Together with Code in WordPress Footer
- 0.0.4 3. Together with Privacy Protection Link in WordPress Footer
- 0.0.5 4. Together with Copyright Date in WordPress Footer
- 0.0.6 5. Remove Powered by the use of Links from Footer in WordPress
- 0.0.7 6. Learn how to Add Instagram Feed in WordPress Footer
- 0.0.8 7. Add a Sticky Footer Bar in WordPress
- 0.0.9 8. Add Social Buttons in WordPress Footer
- 0.0.10 9. Add a Phone Amount in WordPress Footer
- 0.0.11 10. Add a Contact Form in WordPress Footer
- 0.1 Related posts:
- 1 The right way to Take away the Powered by way of WordPress Footer Hyperlinks
- 2 What Is Google Lighthouse? How Can It Toughen Your Website online’s UX?
- 3 The way to Use Matter Clusters in Your Video Advertising Technique

0 Comments