
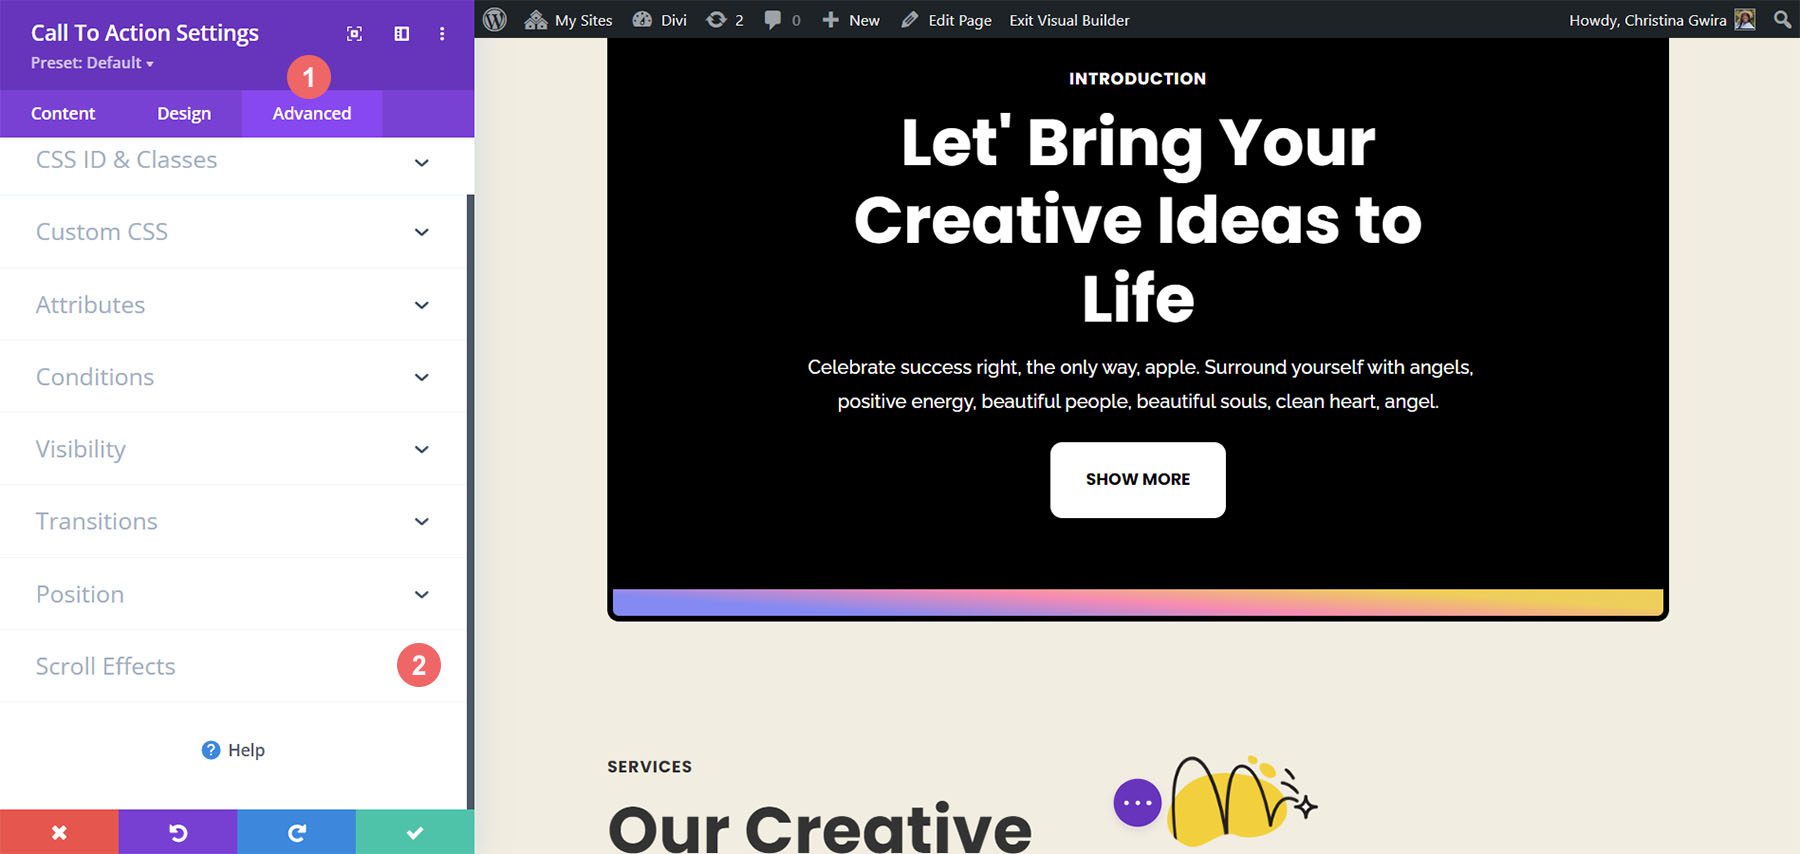
Our signature theme, Divi, comes stuffed with relatively a large number of styling possible choices for its library of local modules. In conjunction with having deep keep an eye on over how portions in your website will look, you moreover provide the possibility of together with motion in your pages. Divi comprises a variety of animation effects you’ll be capable of add in your next web design problem. In this post, we’ll take a look at discover ways to use the following animation settings in Divi all over the native Name to Motion Module:
- Hover
- Scroll Effects
- Animation and
- Sticky
For this instructional, we’ll recreate a work all over the Divi Advertising Company Format Pack. We can be running with the Touchdown Web page Format.
Putting in place the Landing Internet web page Structure
We first wish to create a brand spanking new internet web page in WordPress to place within the internet web page structure. We do this thru hovering over the Pages menu products from the left-hand menu. Then, we click on on Add New.
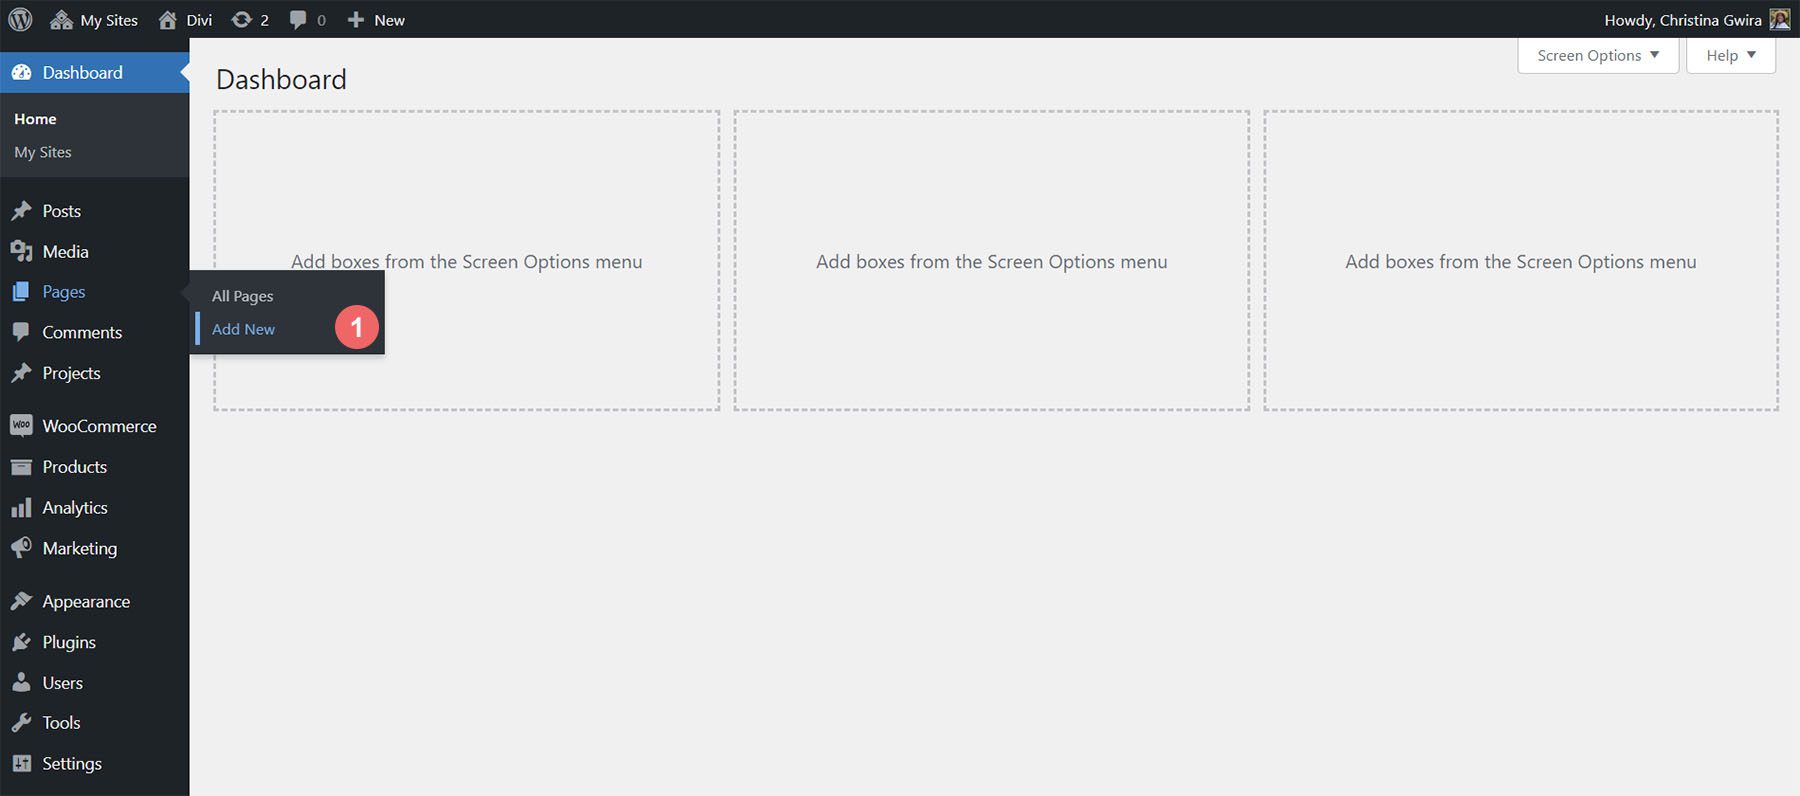
Once all over the default WordPress editor Gutenberg, set a determine for your new internet web page. Next, click on on on the purple Use Divi Builder button.
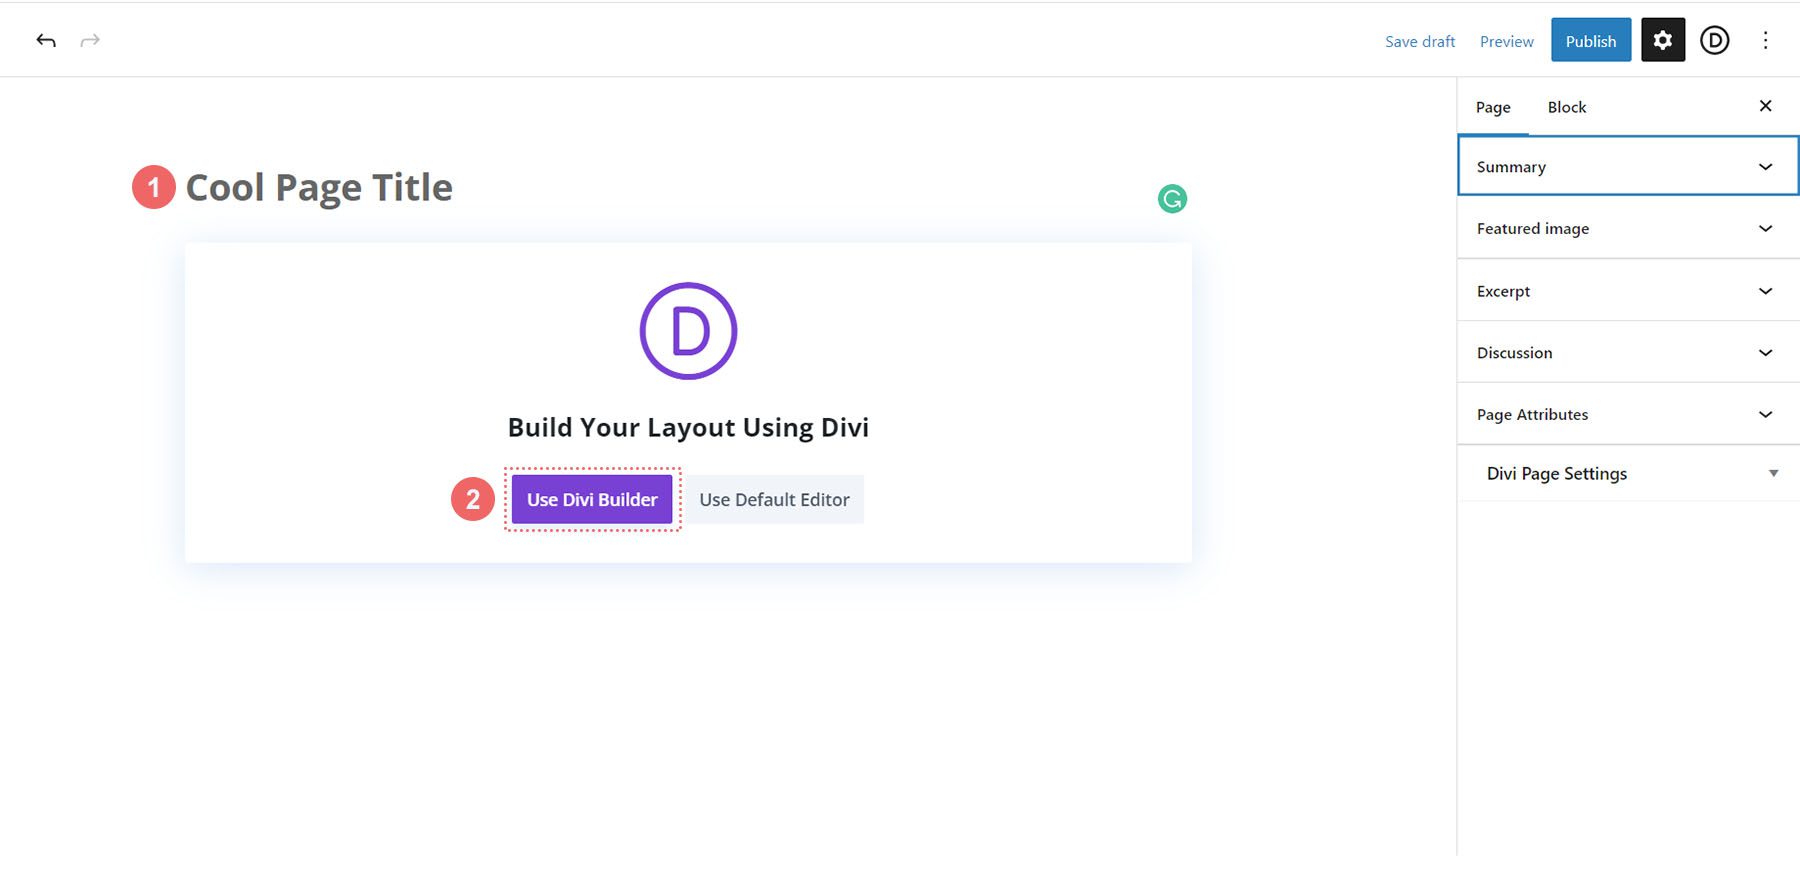
You’re going to then be introduced with 3 possible choices. We can click on on on the purple middle button, Browse Layouts.
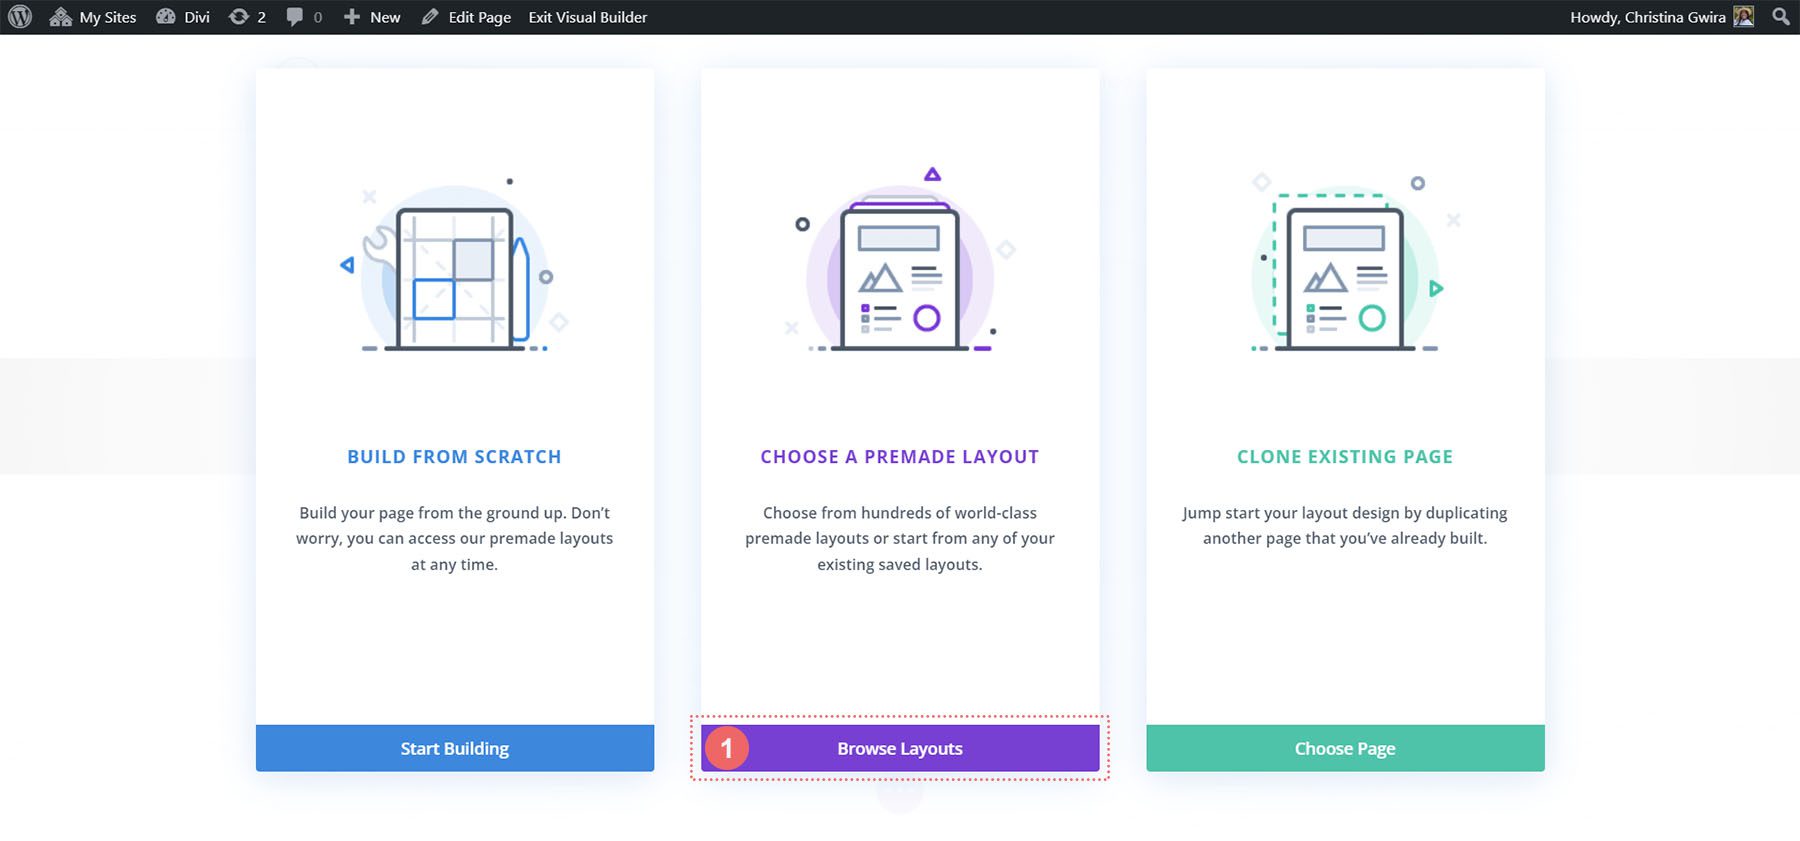
This may increasingly most probably open up Divi’s large structure library, which comes stuffed with pre-designed pages for you to choose between. We’ll be deciding at the Advertising Company Format Pack.
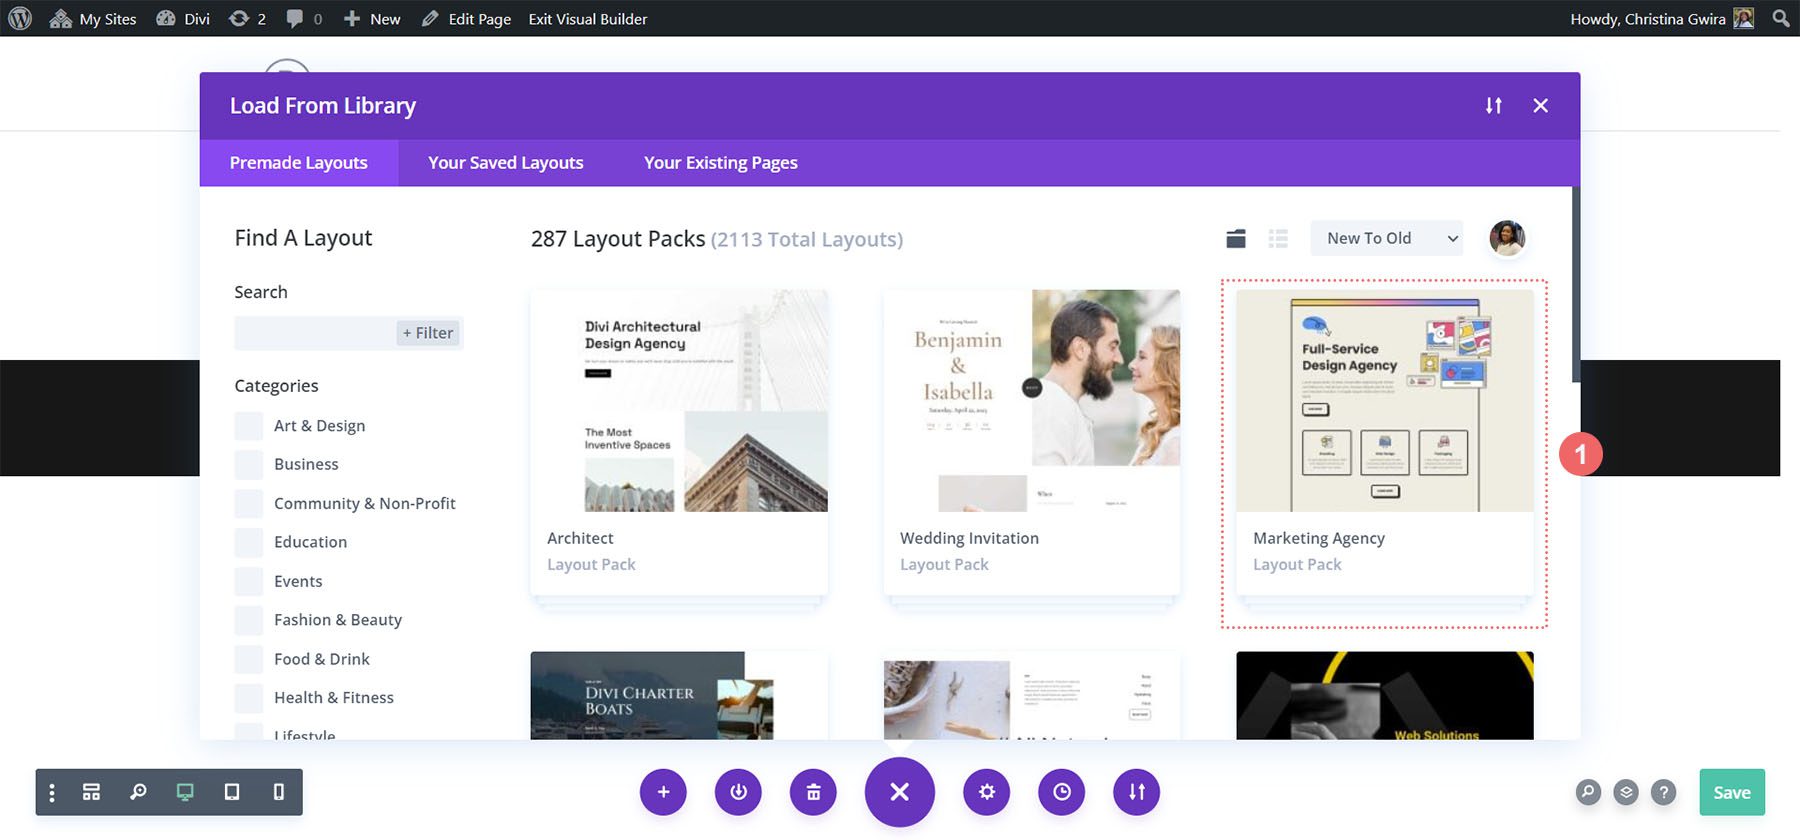
From all over the structure pack, we’ll be using the Landing Internet web page Structure. Click on on on the structure, then, click on on on the blue Use this Structure button to load the structure into your newly created internet web page.
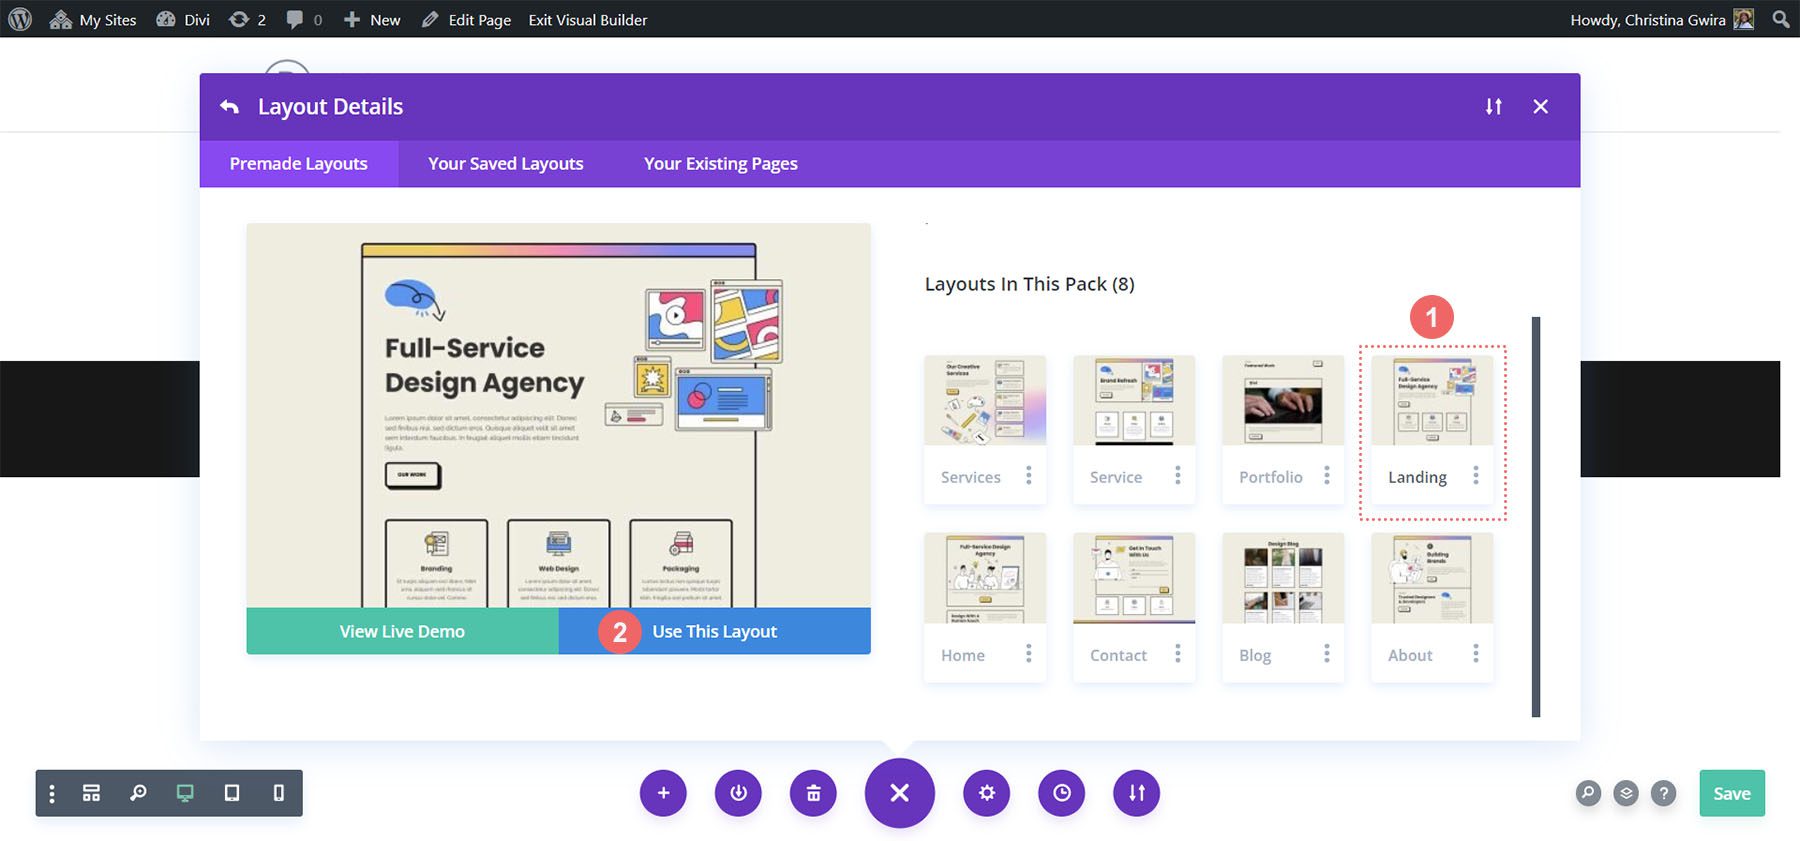
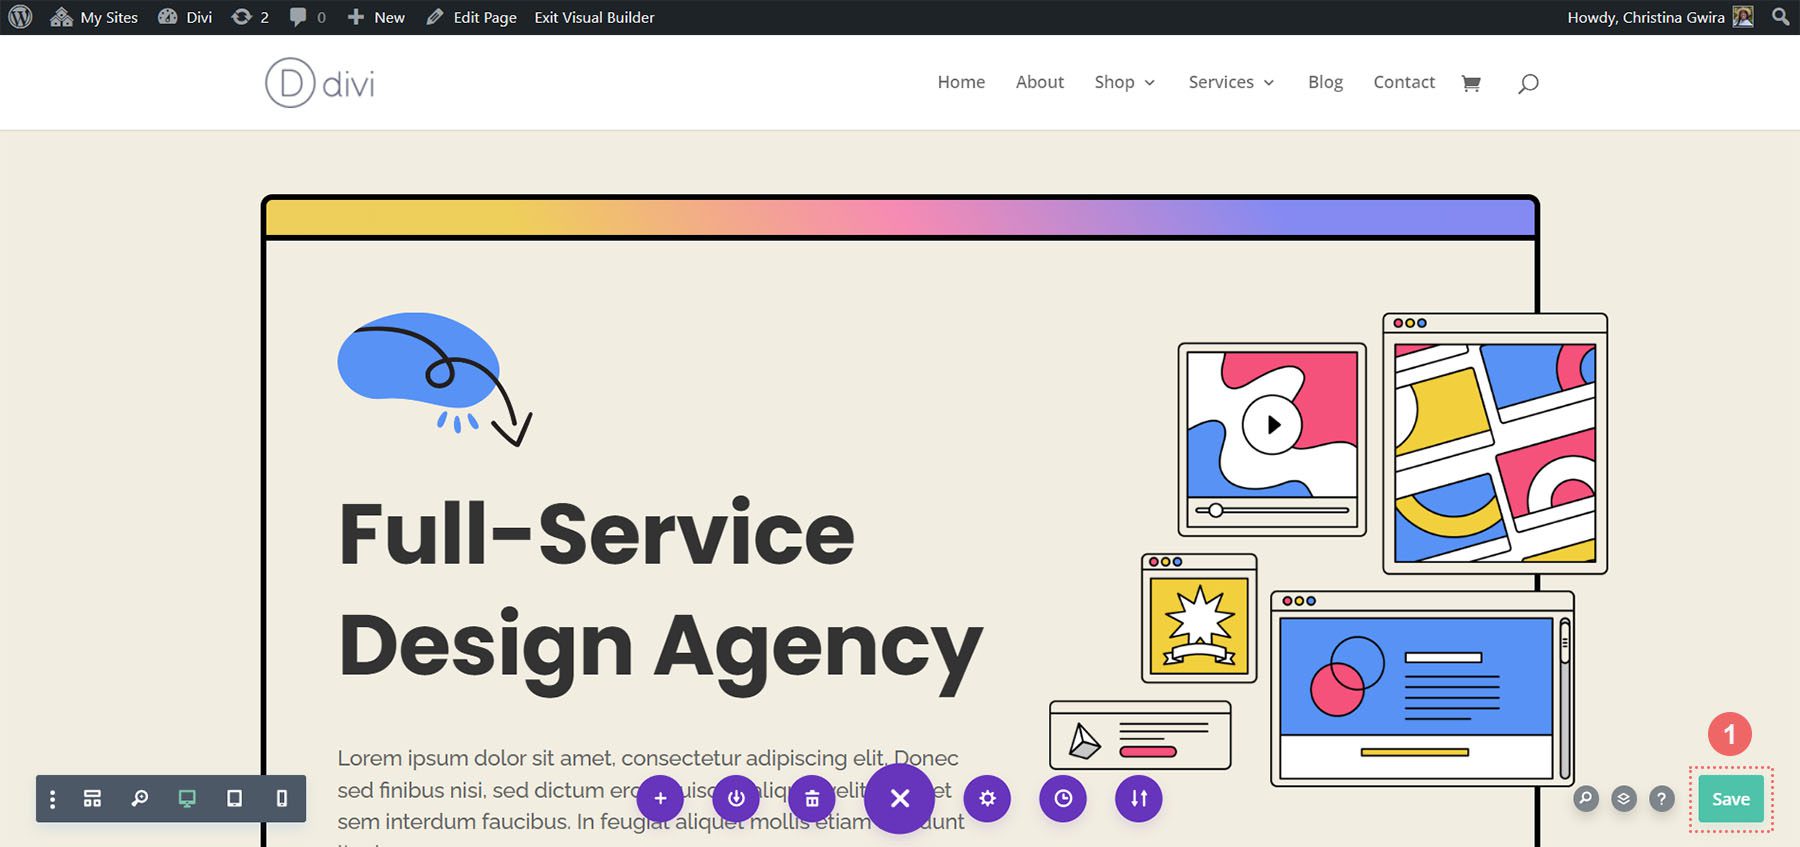
As quickly because the structure has loaded, click on at the golfing inexperienced Save button at the bottom right kind of the visual display unit.
Now, the actual artwork begins! Let’s create our first title to movement!
Together with Our Identify to Movement Module
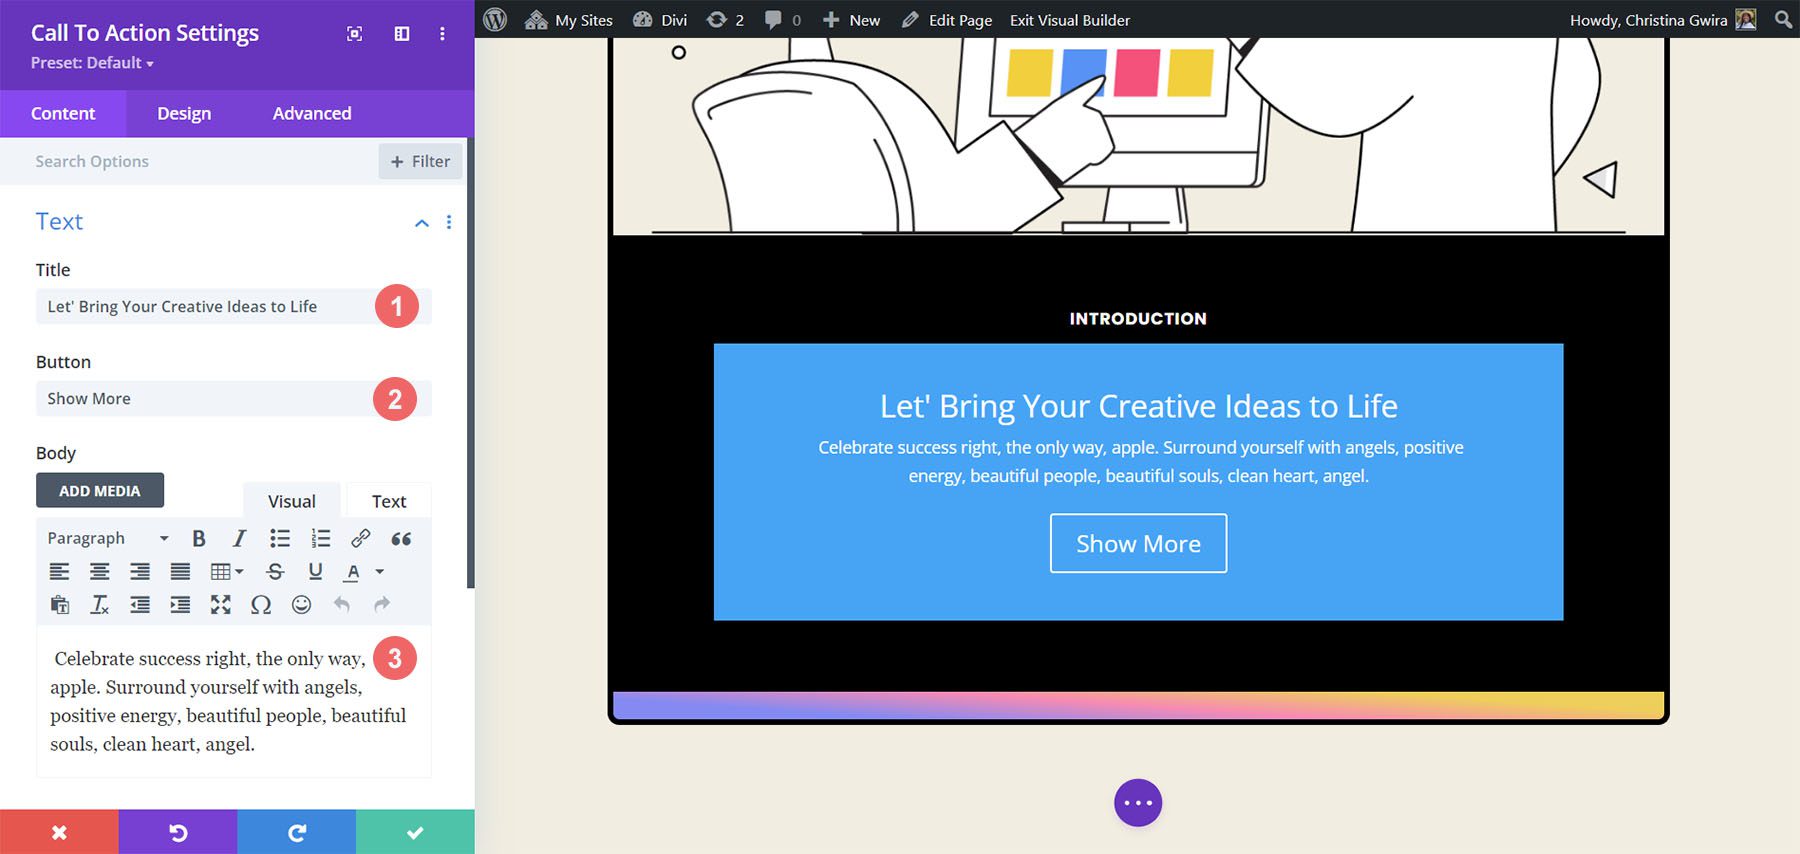
In all places this instructional, we will use a Identify to Movement module to change the Textual content and Button Modules used in this section.
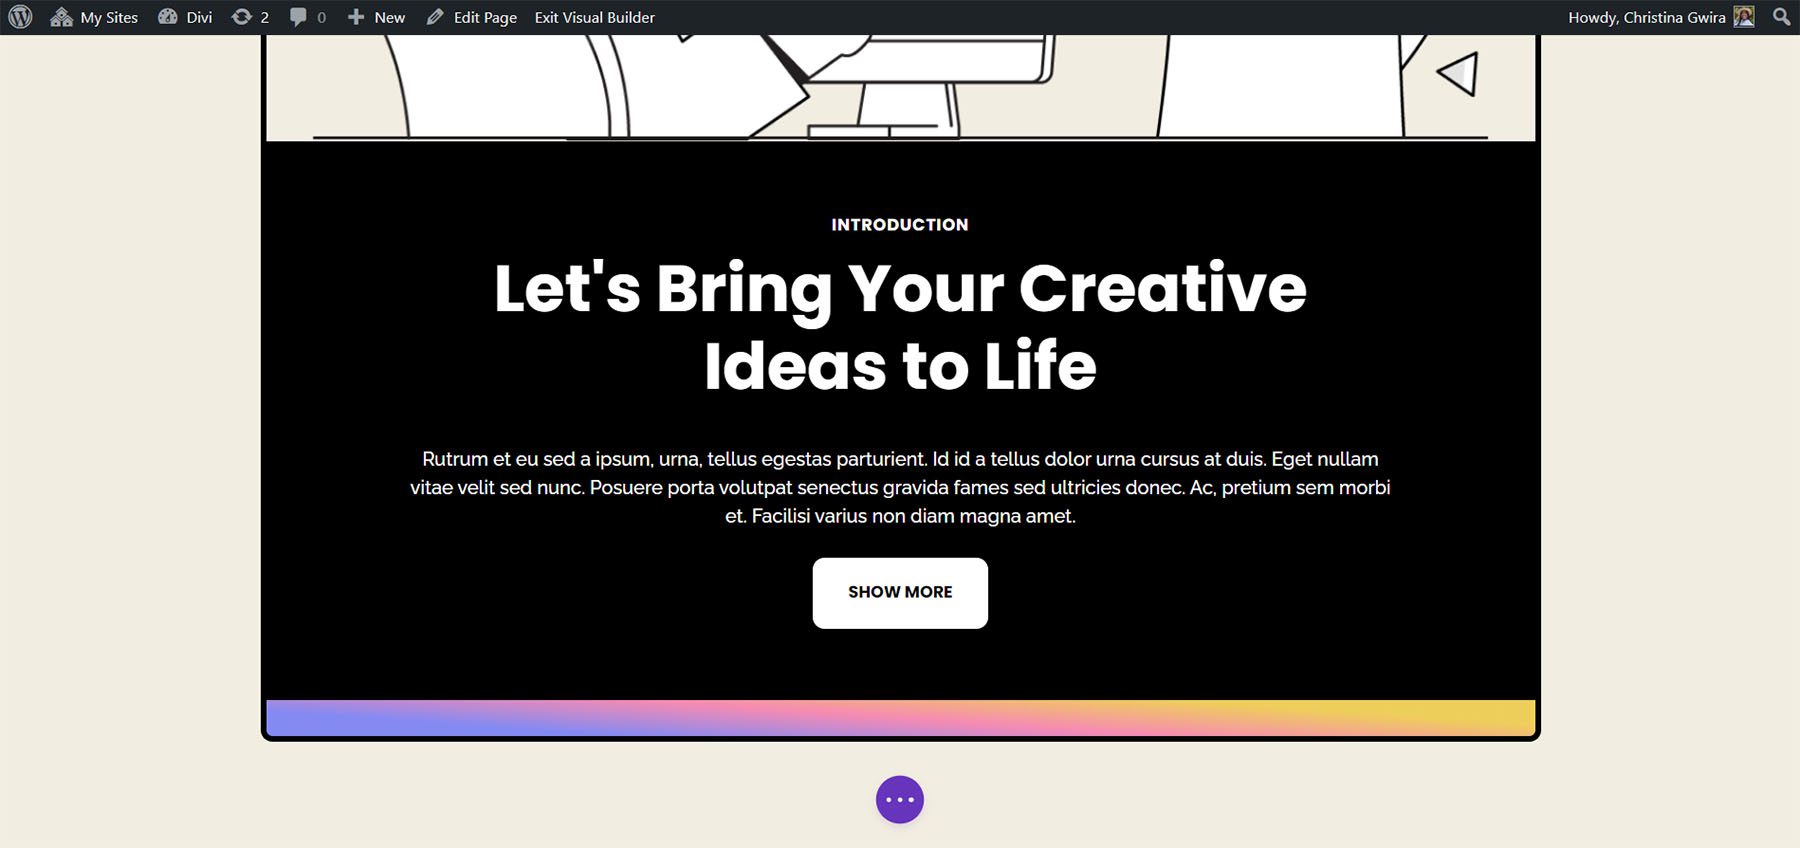
To start out out, let’s first delete the ones modules. Hover over each module, and click on at the trash can icon when the gray pop-out menu turns out. We need to move away the Text Module that says Creation, alternatively we will use one Identify to Movement to change the modules that we’ve got deleted.
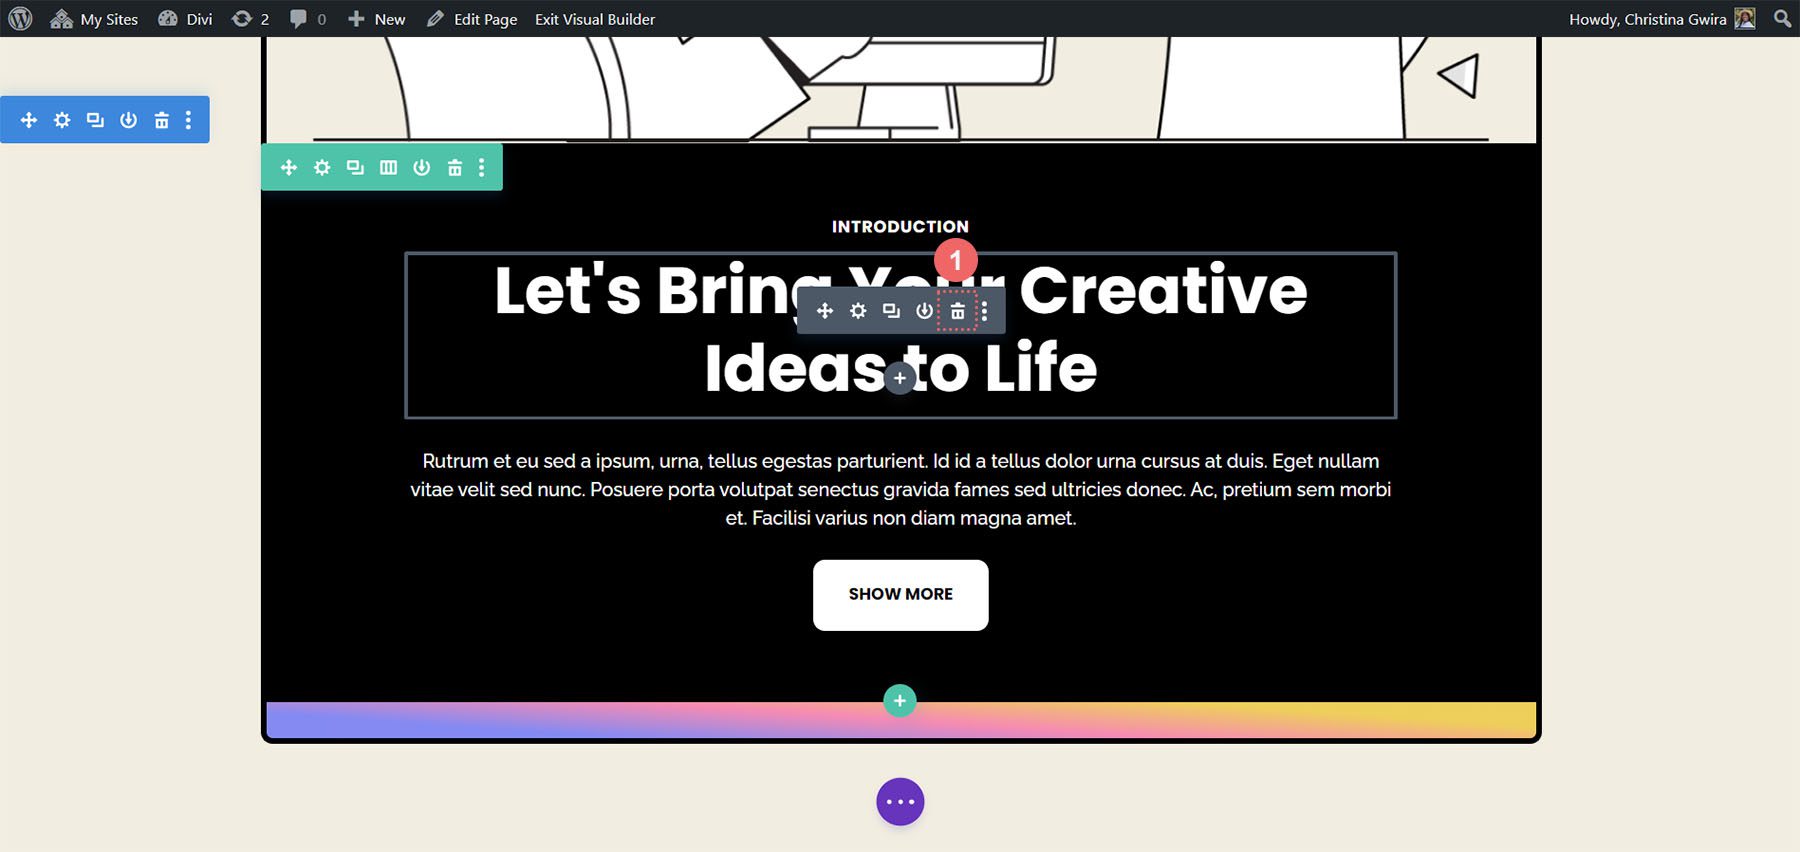
Next, we need to add a Identify to Movement Module to the row. We do this thru hovering over the Text Module and clicking the gray plus icon.
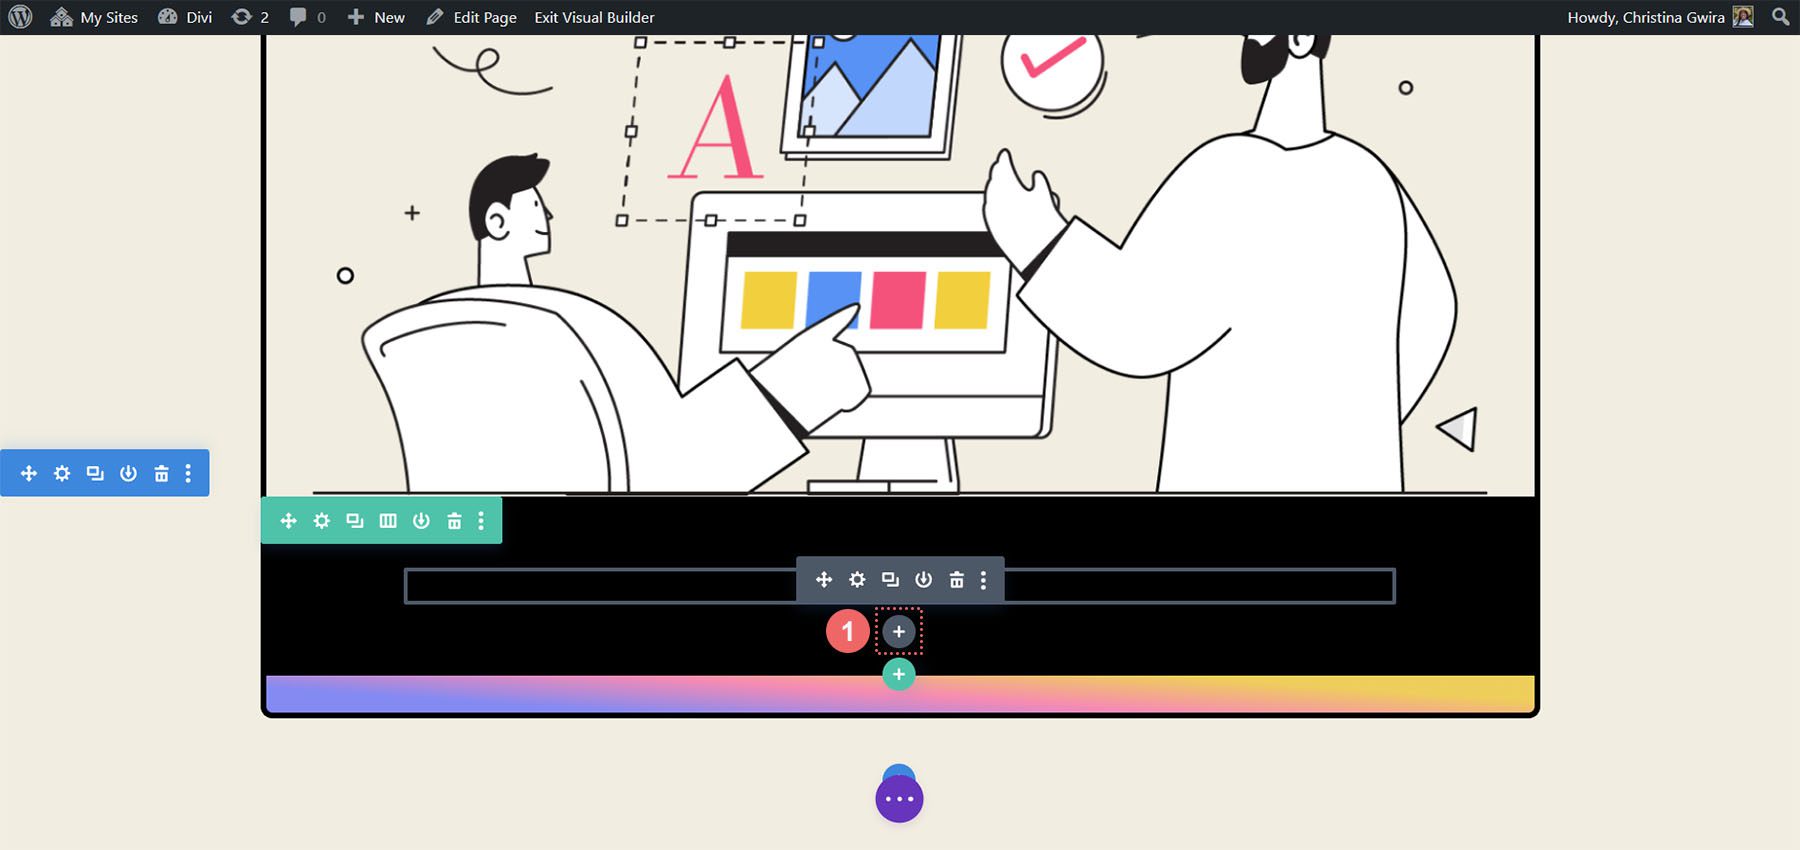
This may increasingly most probably then open the modules pop-up. From there, we click on on on the Identify to Movement Module icon.
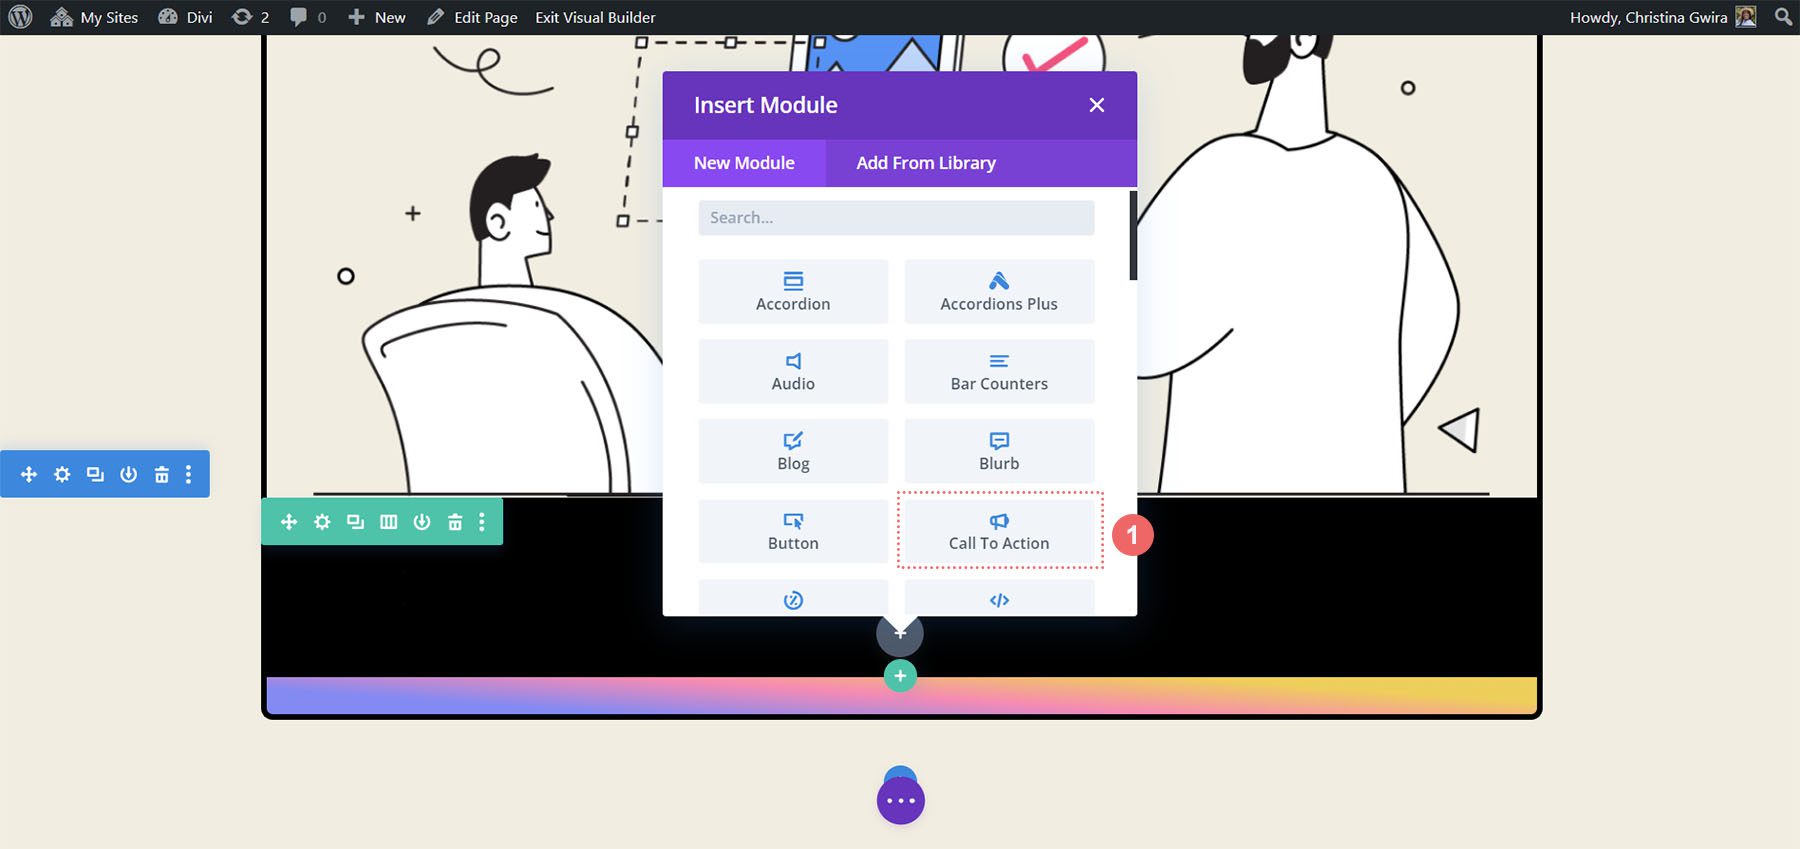
With the module added, we will start to style it for use inside our structure.
Styling Our Identify to Movement Module
We can use the equivalent copy from the original modules for our newly added Identify to Movement Module. We will be able to enter this content material subject matter into the module’s Determine, Button, and Body fields.
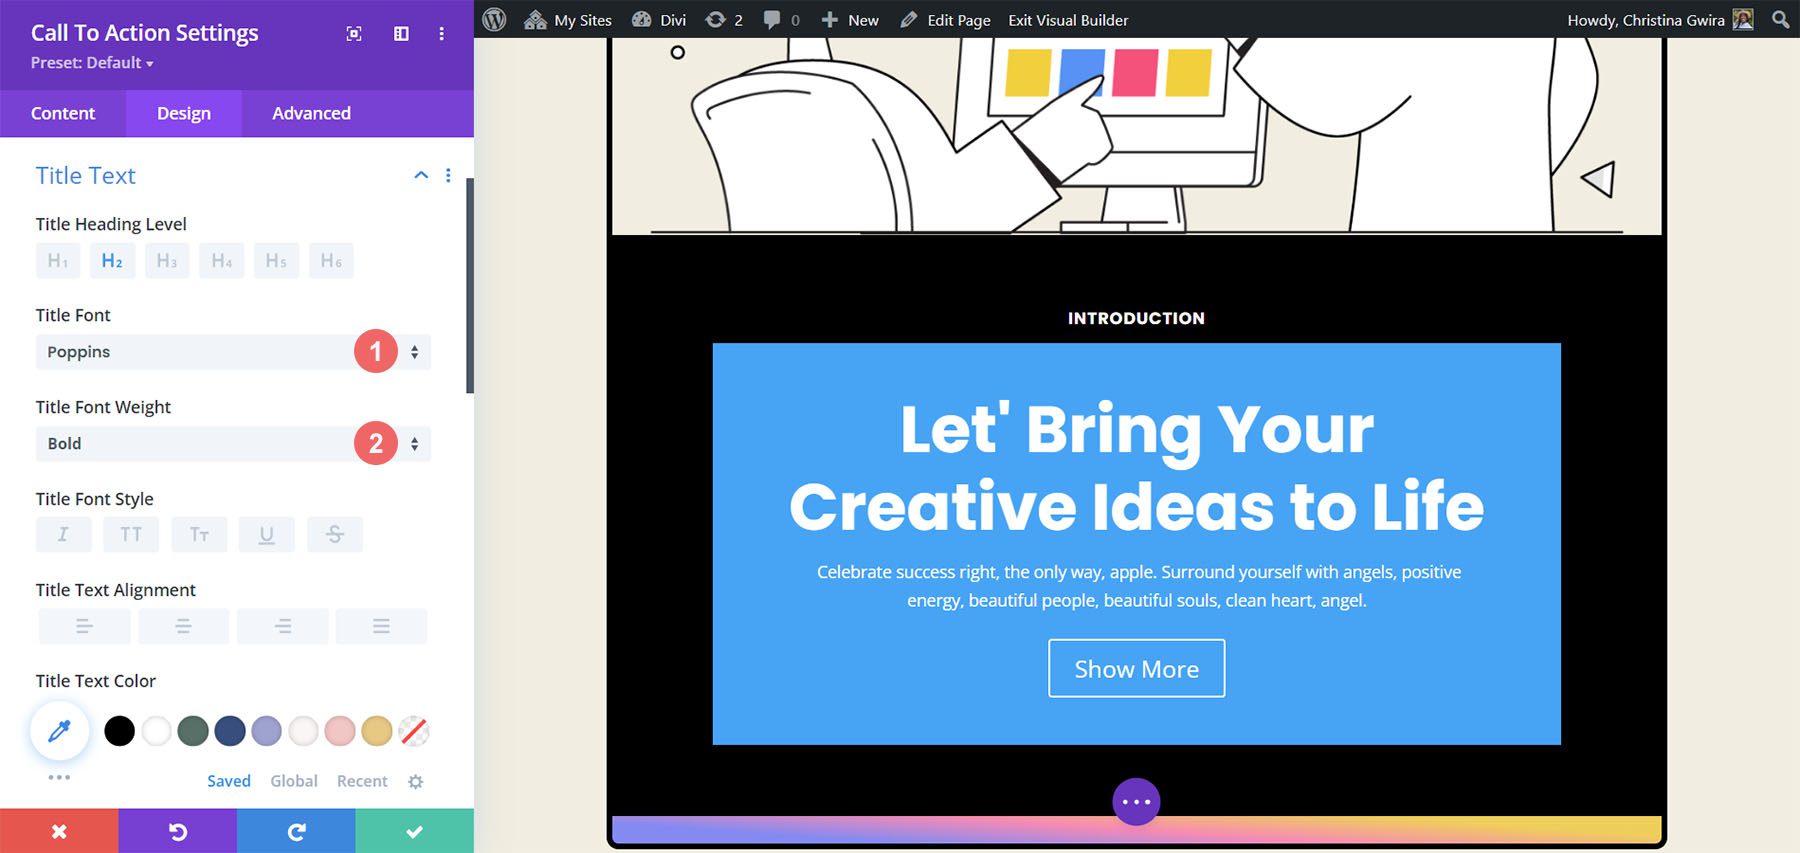
Styling the Identify to Movement Text
Now, let’s begin to style our module. We start thru clicking on the Design tab of the Identify to Movement Module. First, we need to set the alignment and color of our text. We need to have our text aligned to the Heart and color set to Delicate.
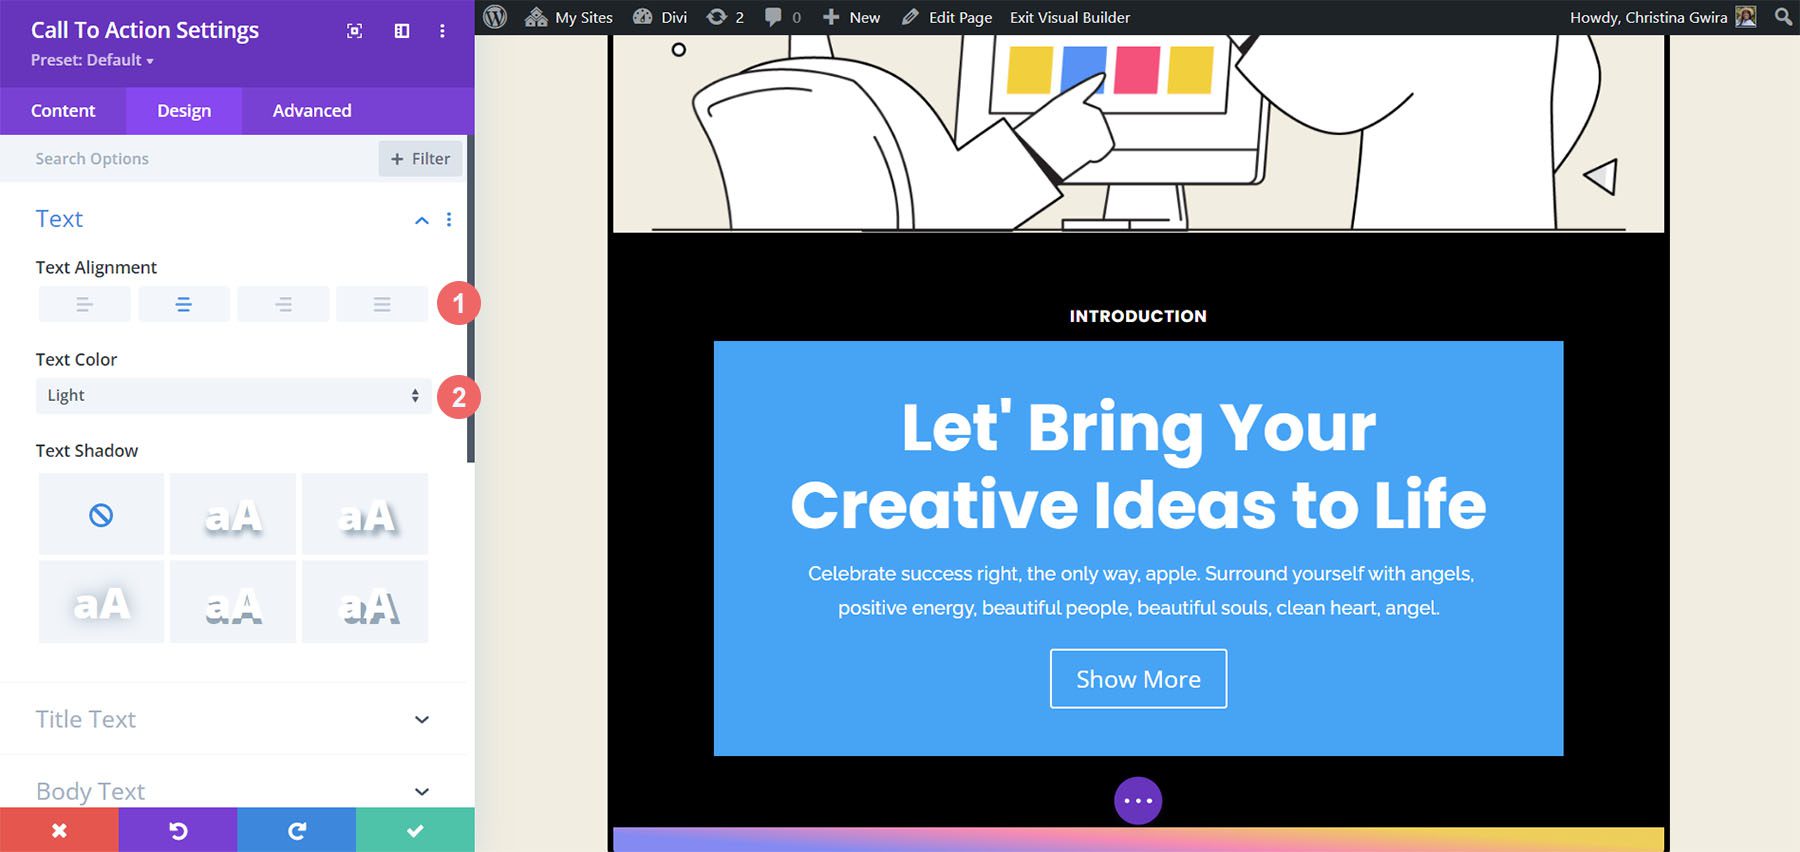
Secondly, we need to get began styling our Determine Text. Underneath, to find the settings that we’ll be using.
Determine Text Settings:
- Determine Font: Poppins
- Determine Font Weight: Bold
- Determine Text Measurement: 55px
- Determine Line Top: 1.2em
Perceive the way in which apparently similar to the text that was prior to now used. We’ll take our style steerage from our Divi Promoting Corporate Structure Pack.
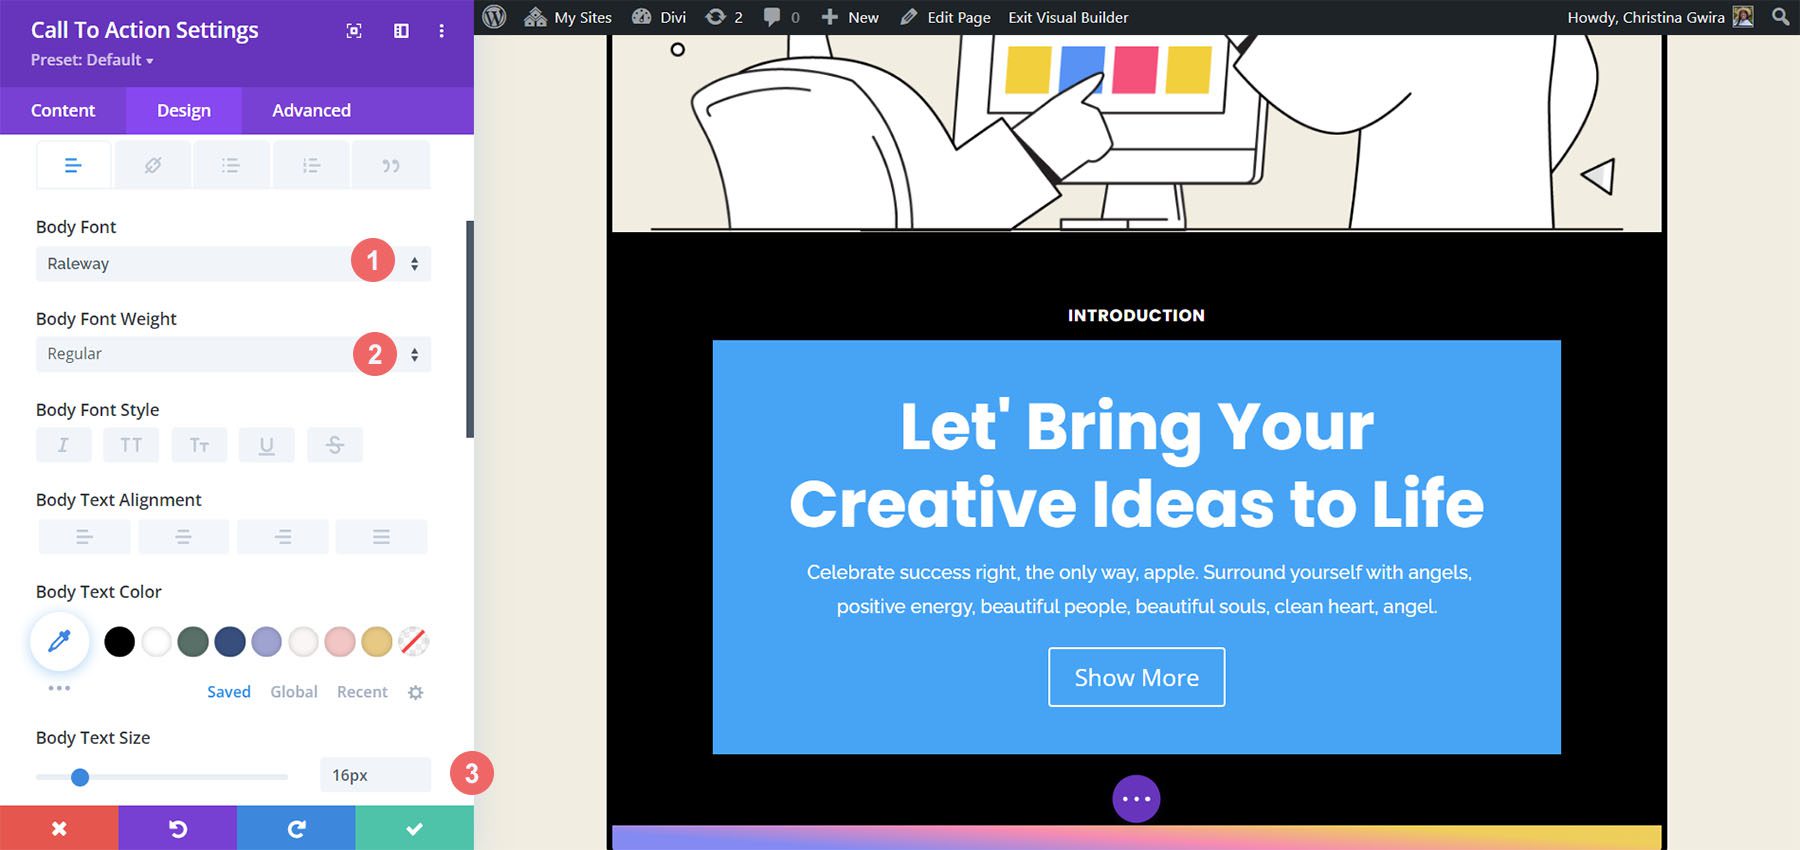
Thirdly, we need to style our Body Text. Let’s use the settings underneath to get the Body Text of our module.
Body Text Settings:
- Body Font: Raleway
- Body Font Weight: Commonplace
- Body Text Measurement: 16px
- Body Line Top: 1.8em
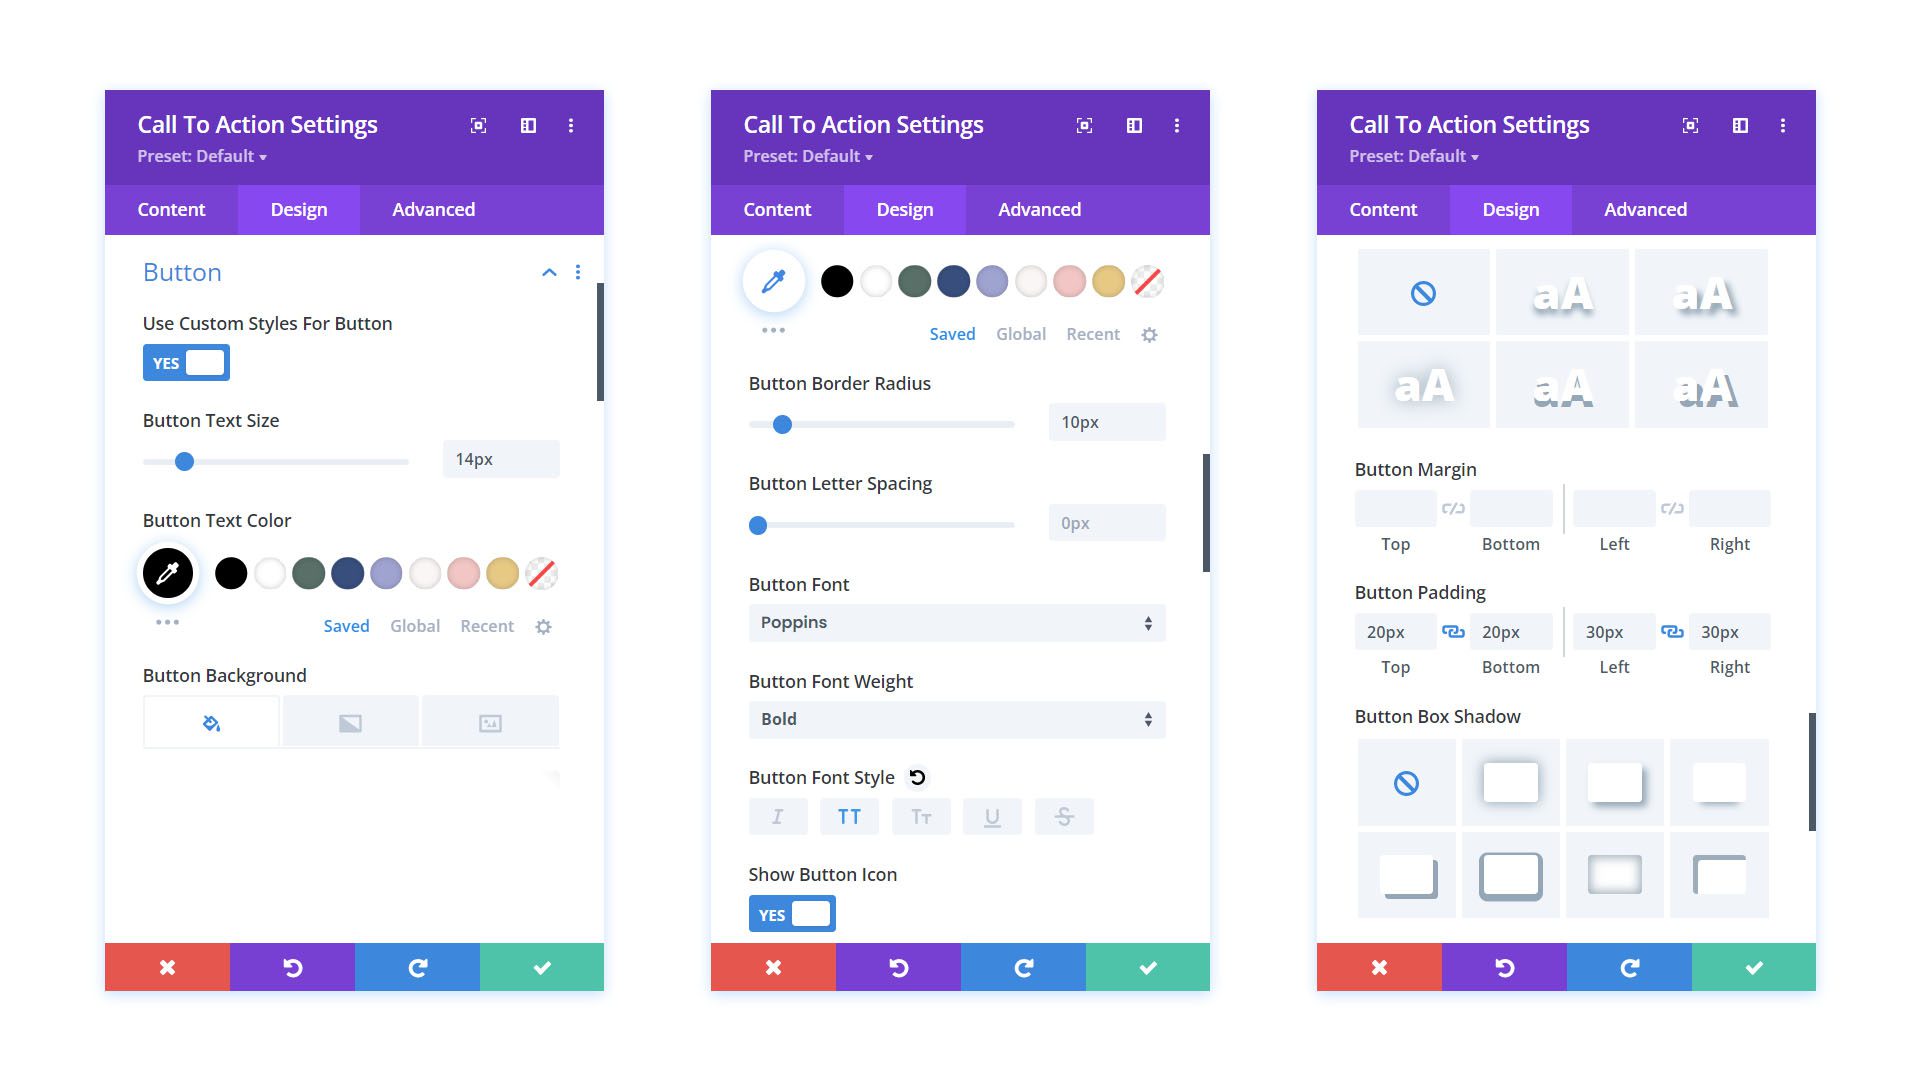
Button Types inside Our Module
Finally, we’ll use the following settings to style the button of the Identify to Movement Module.
Button Settings:
- Use Custom designed Types for Button: Certain
- Button Text Measurement: 14px
- Button Text Color: #000000
- Button Background: #ffffff
- Button Border Width: 0px
- Button Border Radius: 10px
- Button Font: Poppins
- Button Font Weight: Bold
- Button Padding:
- Best and Bottom Padding: 20px
- Left and Right kind Padding: 30px
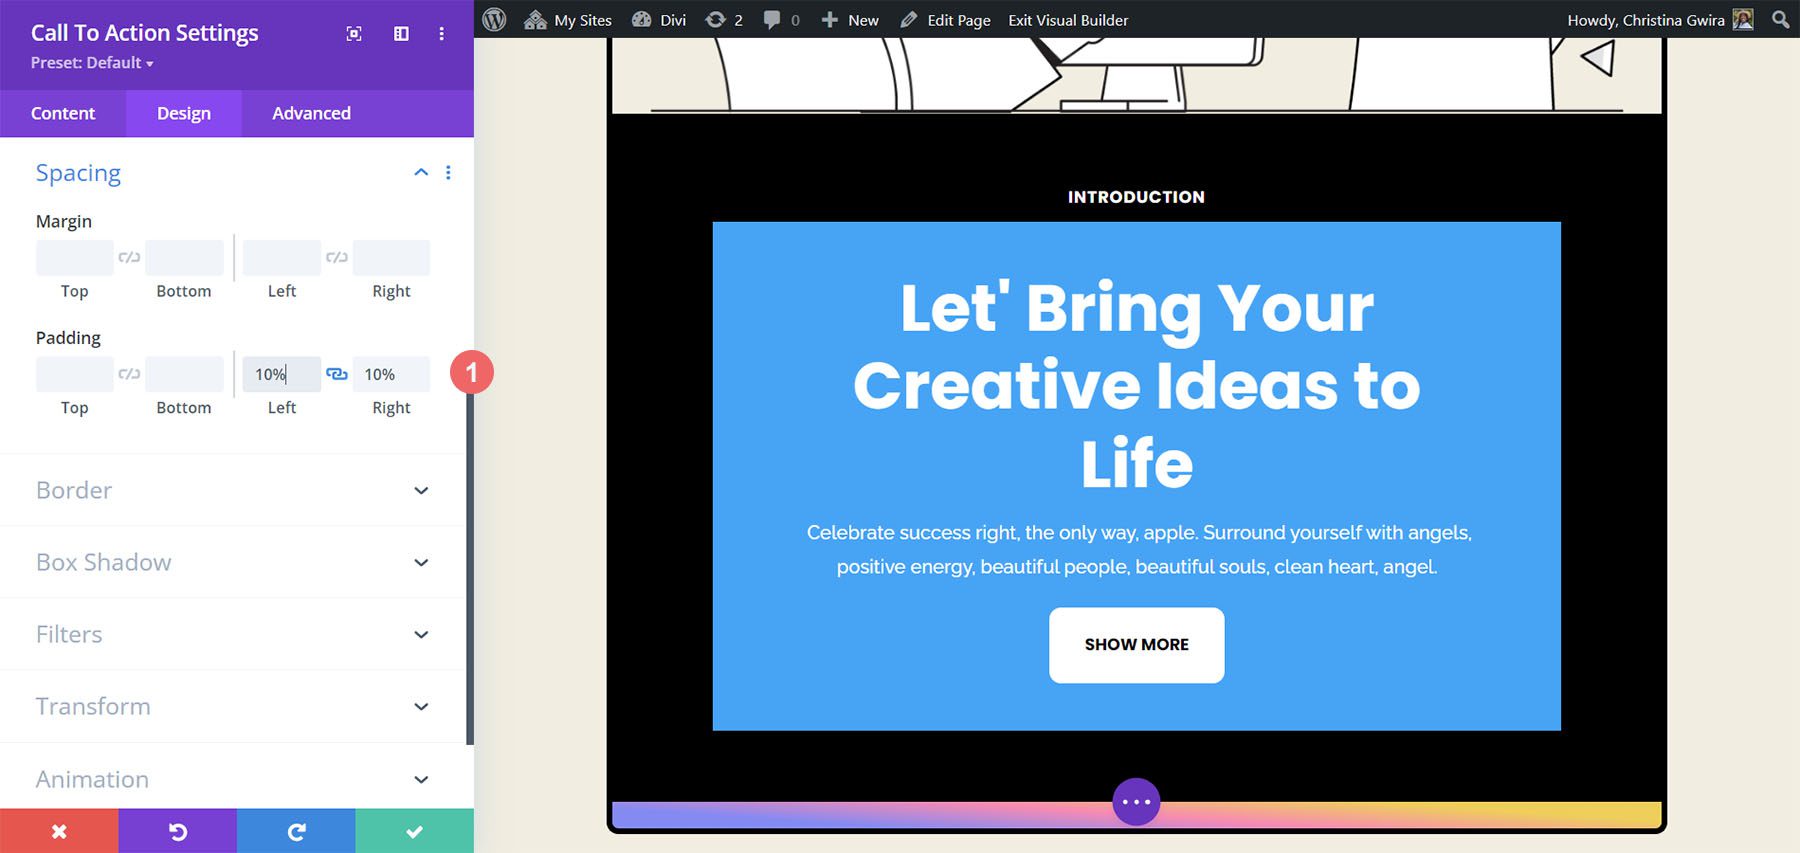
Together with Padding to Our Module
Previous to we move away the Design tab, let’s add some padding to the contents of our Identify to Movement Module. To take a look at this, let’s scroll proper all the way down to the Spacing tab. Then, enter 10% for each and every the Left and Right kind Padding.
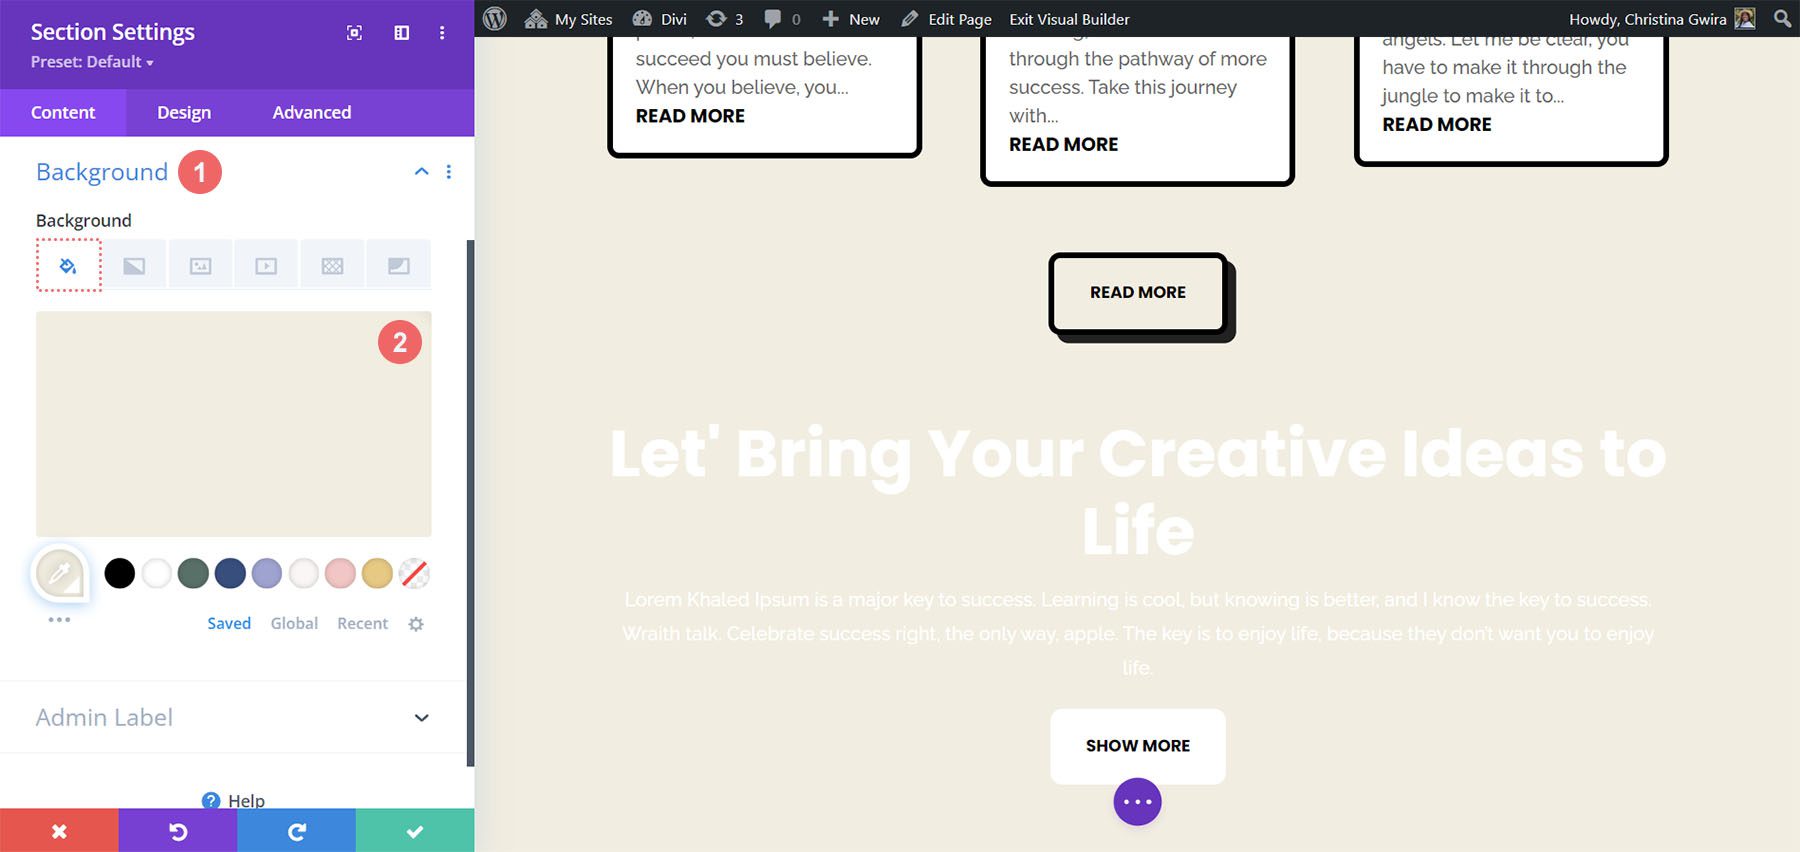
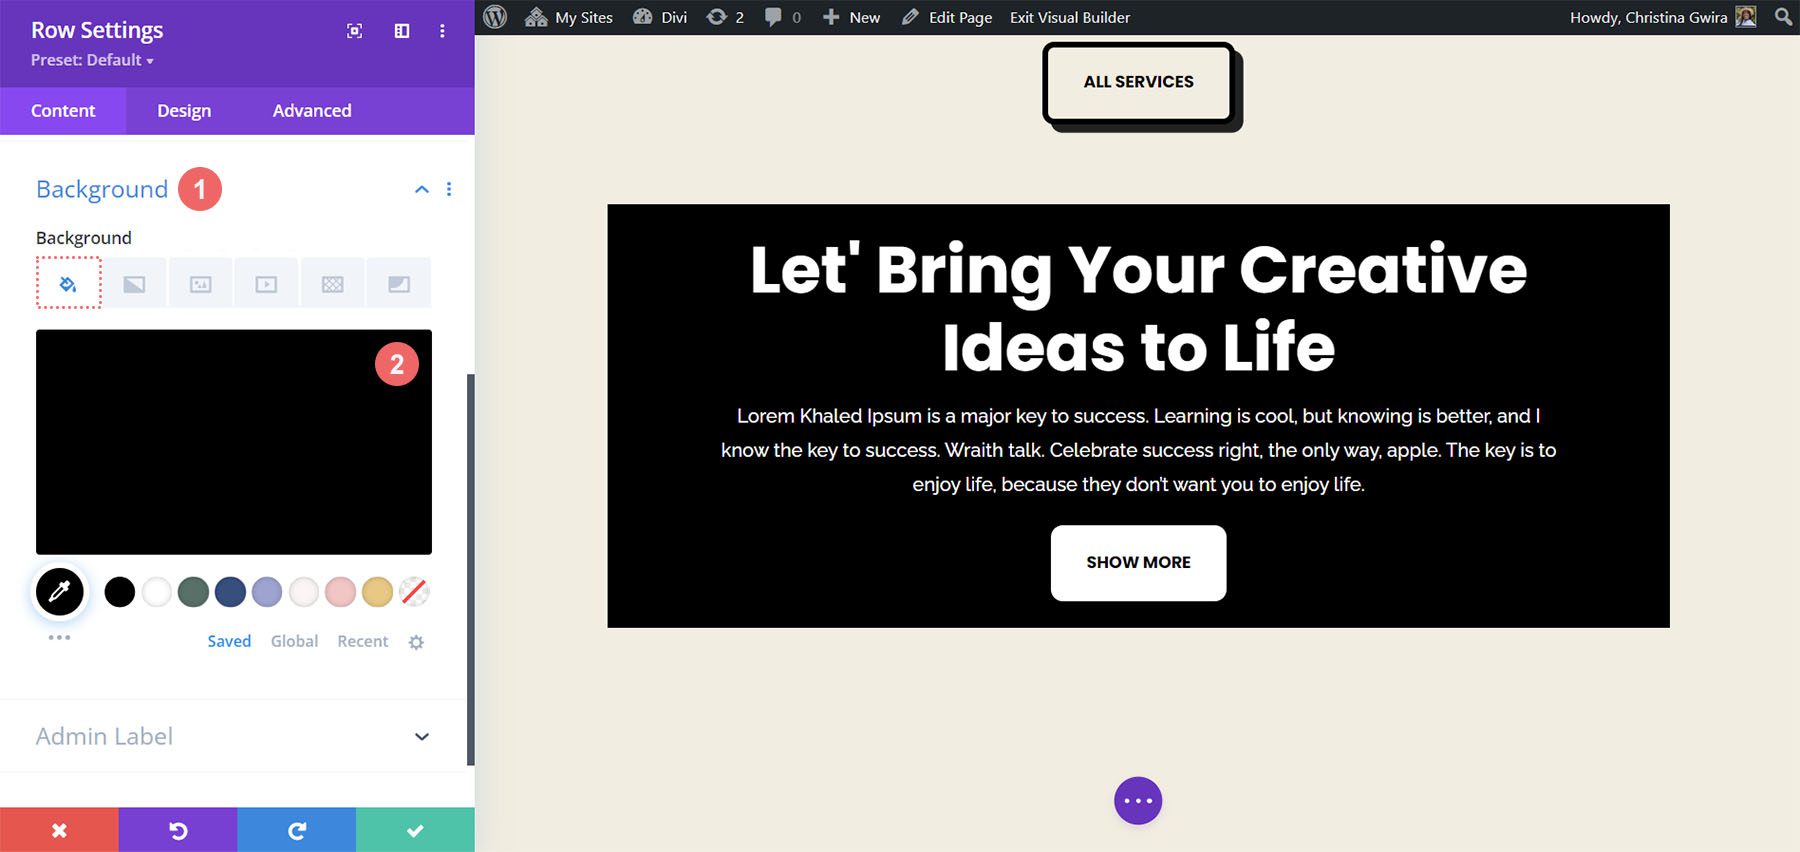
Changing Our Background Color
To finish styling our module, we will move out the Design tab and in any case end throughout the Content material subject matter tab. We click on on on the Content material subject matter tab, then scroll proper all the way down to the Background tab. Then, we uncheck the Use Background Color toggle to remove the default background color of the module.
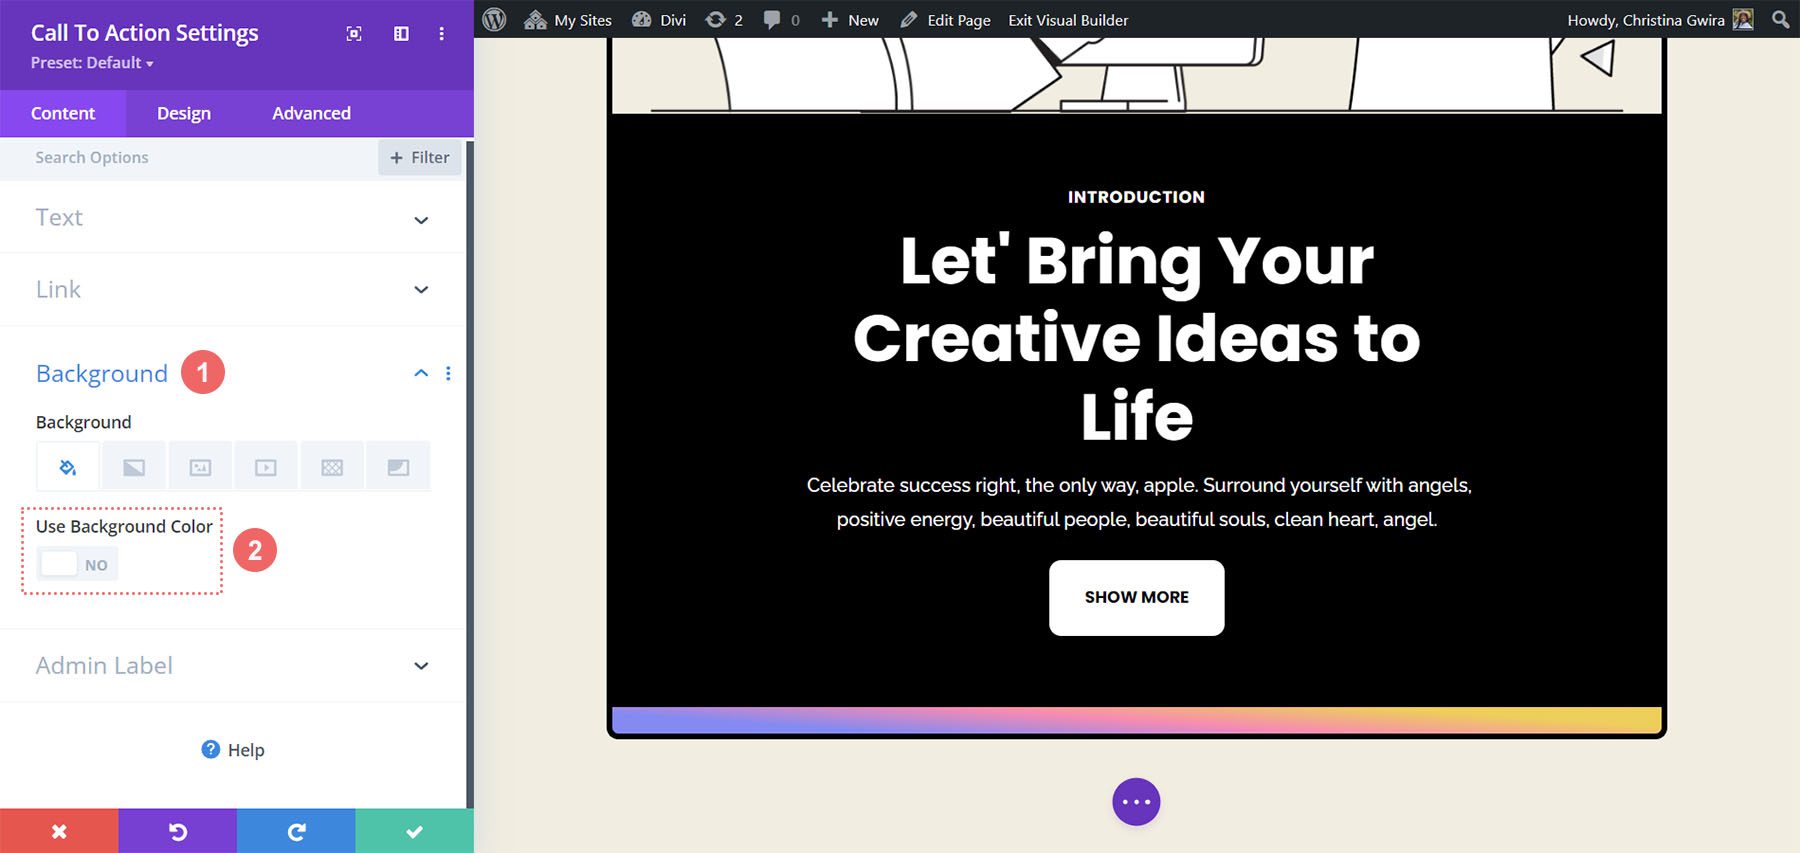
Once that is finished, we then click on on on the green check mark to avoid wasting quite a lot of our artwork and close our Identify to Movement Module.
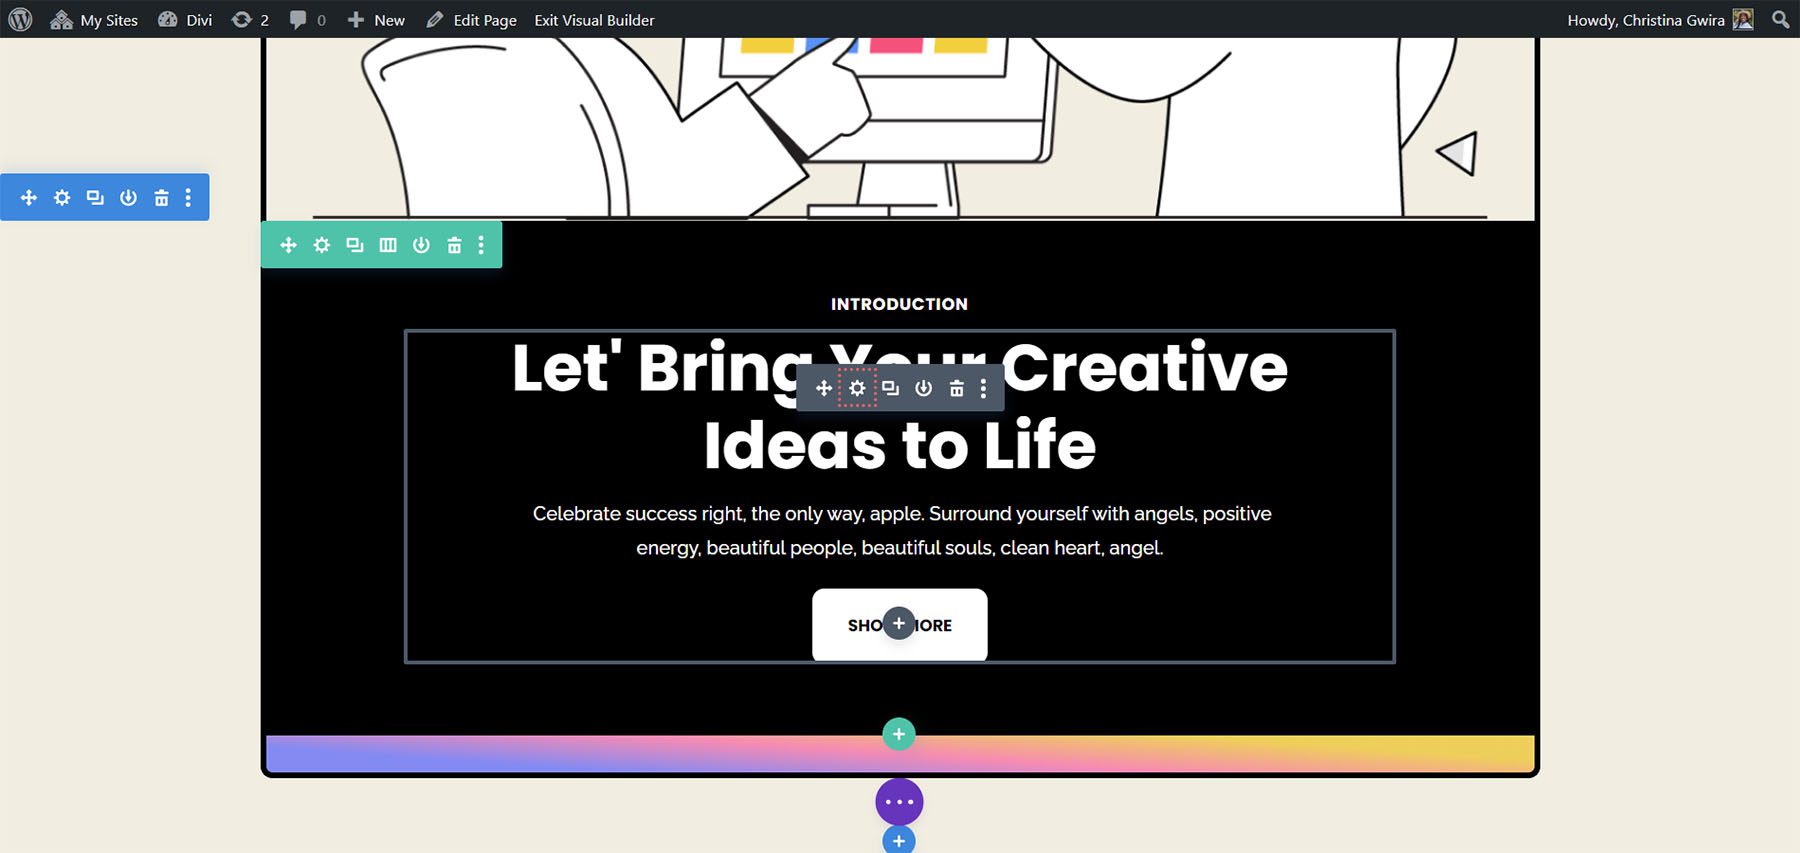
Animating Our Module with Hover Effects
We can begin to animate our first Identify to Movement Module with a cultured Hover animation. You’ll be capable of see the overall comprised of our artwork underneath.
Activating Hover Settings
To start out out, we enter into the Module Settings for our newly styled Identify to Movement Module.
Then, we click on on on the Design tab. Finally, we scroll proper all the way down to the Turn into tab. That’s the position we’ll be activating the hover have an effect on for this module. Once we’re throughout the Turn into section, we hover over Turn into to turn a flyout menu. From the menu, we click on on on the Pointer icon. This icon way we will set variety settings all over the Turn into possible choices that may well be activated upon hovering.
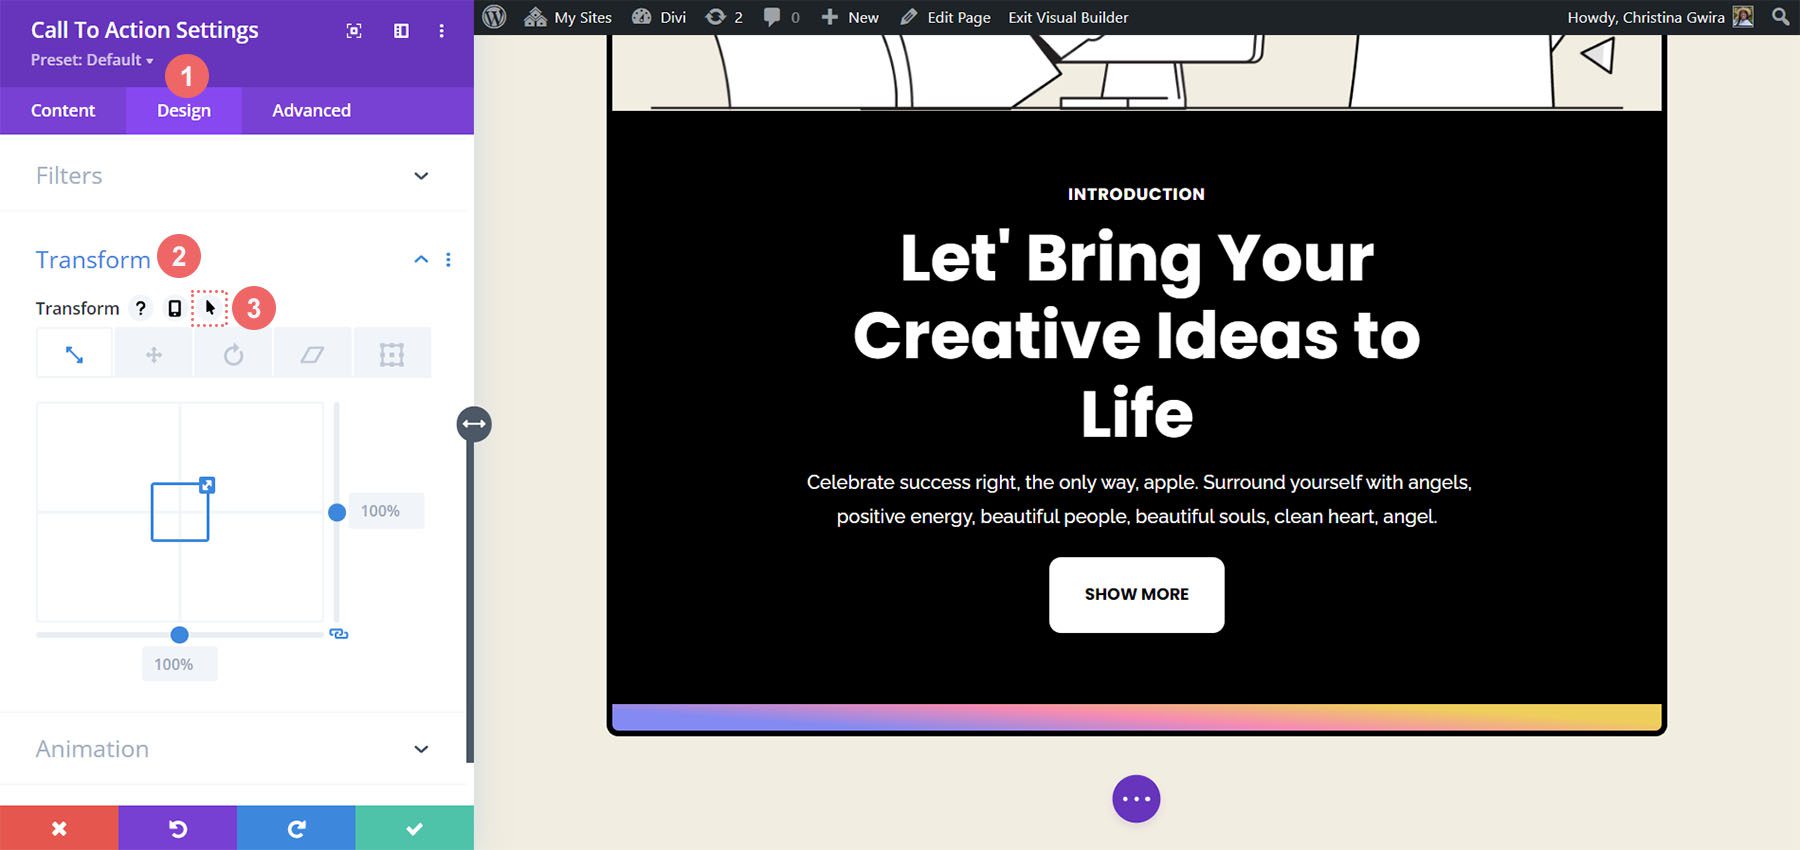
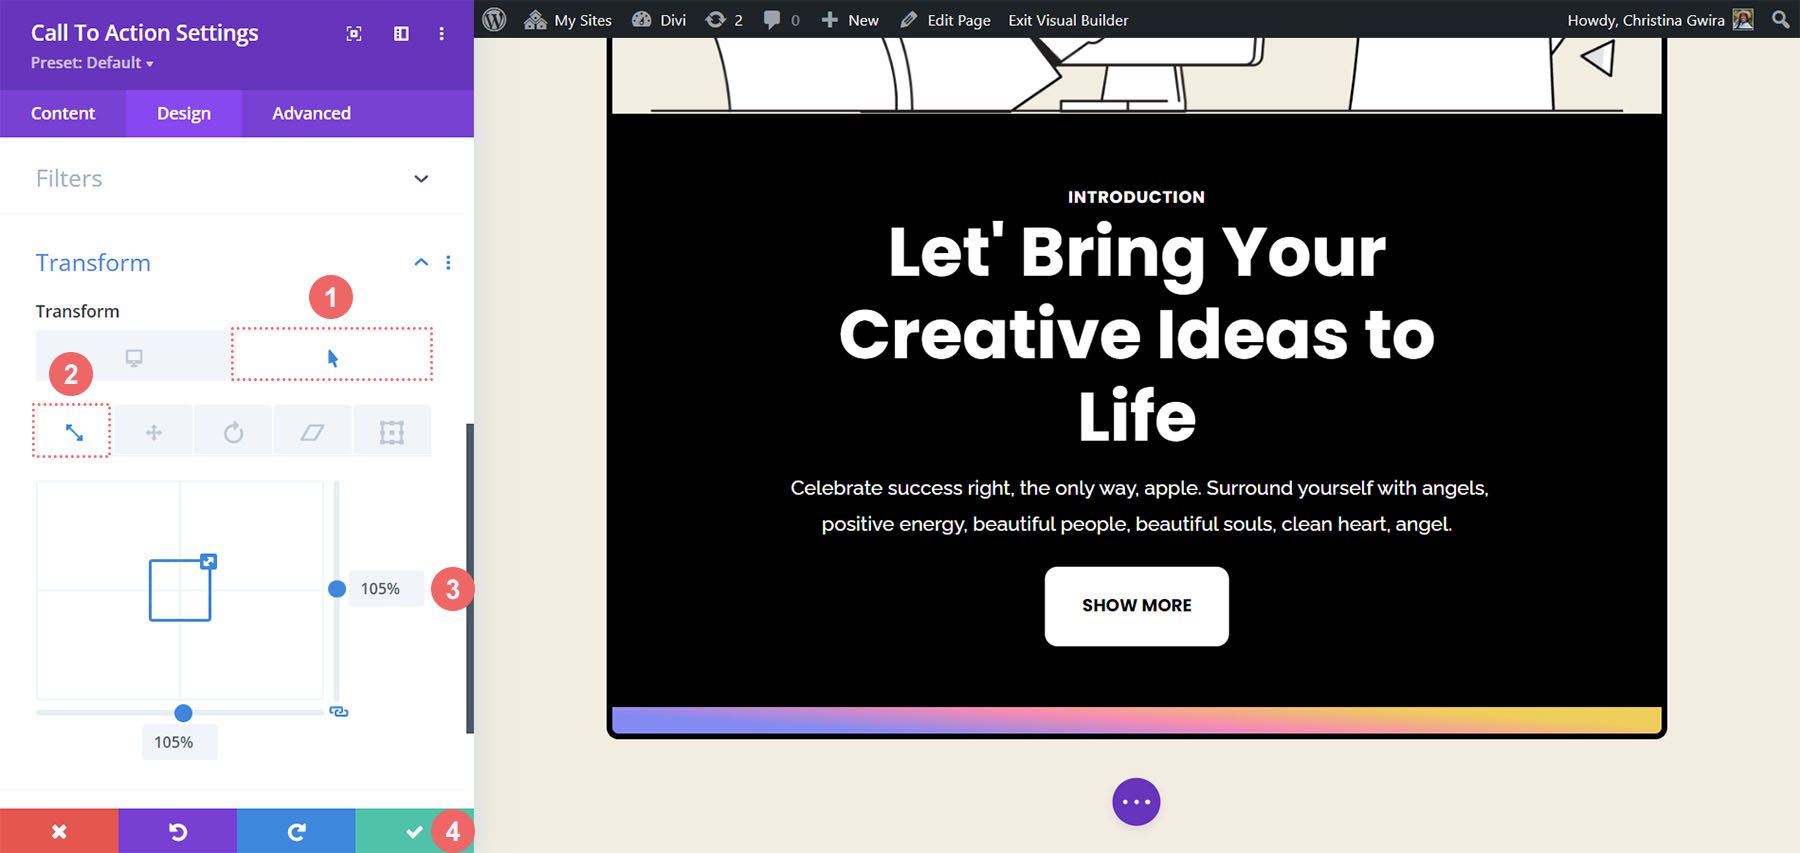
Probably the most important excellent stuff about Divi is that many items and possible choices in Divi too may have the equivalent hover have an effect on activated. In our case, we would like the size of the module to increase thru 5% after we hover over it.
In the beginning, we will click on on on the hover tab. This may increasingly most probably show us the decisions that we will use to turn out to be our module. Secondly, we will click on on on the Scale icon. We need to build up the entire size of our module. Next, we enter the amount that we would like our module to increase thru. We’d love it to be greater than it not too long ago is thru 5 %, so we enter 105% into the size risk. To avoid wasting quite a lot of our changes, we then click on on on our green check mark button.
Using Scroll Effects with the Identify to Movement Module
Let’s take a look at how we will use Scroll Effects as a way to upload a cultured animation to our Identify to Movement Module. Proper right here’s what we’ll be reaching by way of Divi’s native Scroll Effects:
We’ll be starting from our freshly styled Identify to Movement Module. Against this to our Turn into settings, we’ll activate our Scroll Effects throughout the Difficult tab of our module. So, we click on on on the Difficult tab, then we scroll proper all the way down to the Scroll Effects tab.
Once throughout the Scroll Effects tab, there are a selection of settings that we’d like to concentrate on to create this subtle have an effect on. First, we will keep the Sticky Position as Do Now not Stick for this module. Next, we will be using the Fading In and Out Scroll Have an effect on. We click on on on its icon to activate it. Thirdly, we need to permit the ambience thru activating the Permit Fading In and Out toggle.
A large part of this animation style is the figures used for the start, mid, and completing opacity. The ones settings are activated when the module comes into the relatively a large number of sections of the visual display unit viewport. For our example, we will be using the following settings:
Fading In and Out Settings:
- Starting Opacity: 10%
- Mid Opacity: 99%
- Completing Opacity: 20%
For the Motion Have an effect on Purpose, we would like the Fading In and Out to begin when the Middle of the Section is inside focal point.
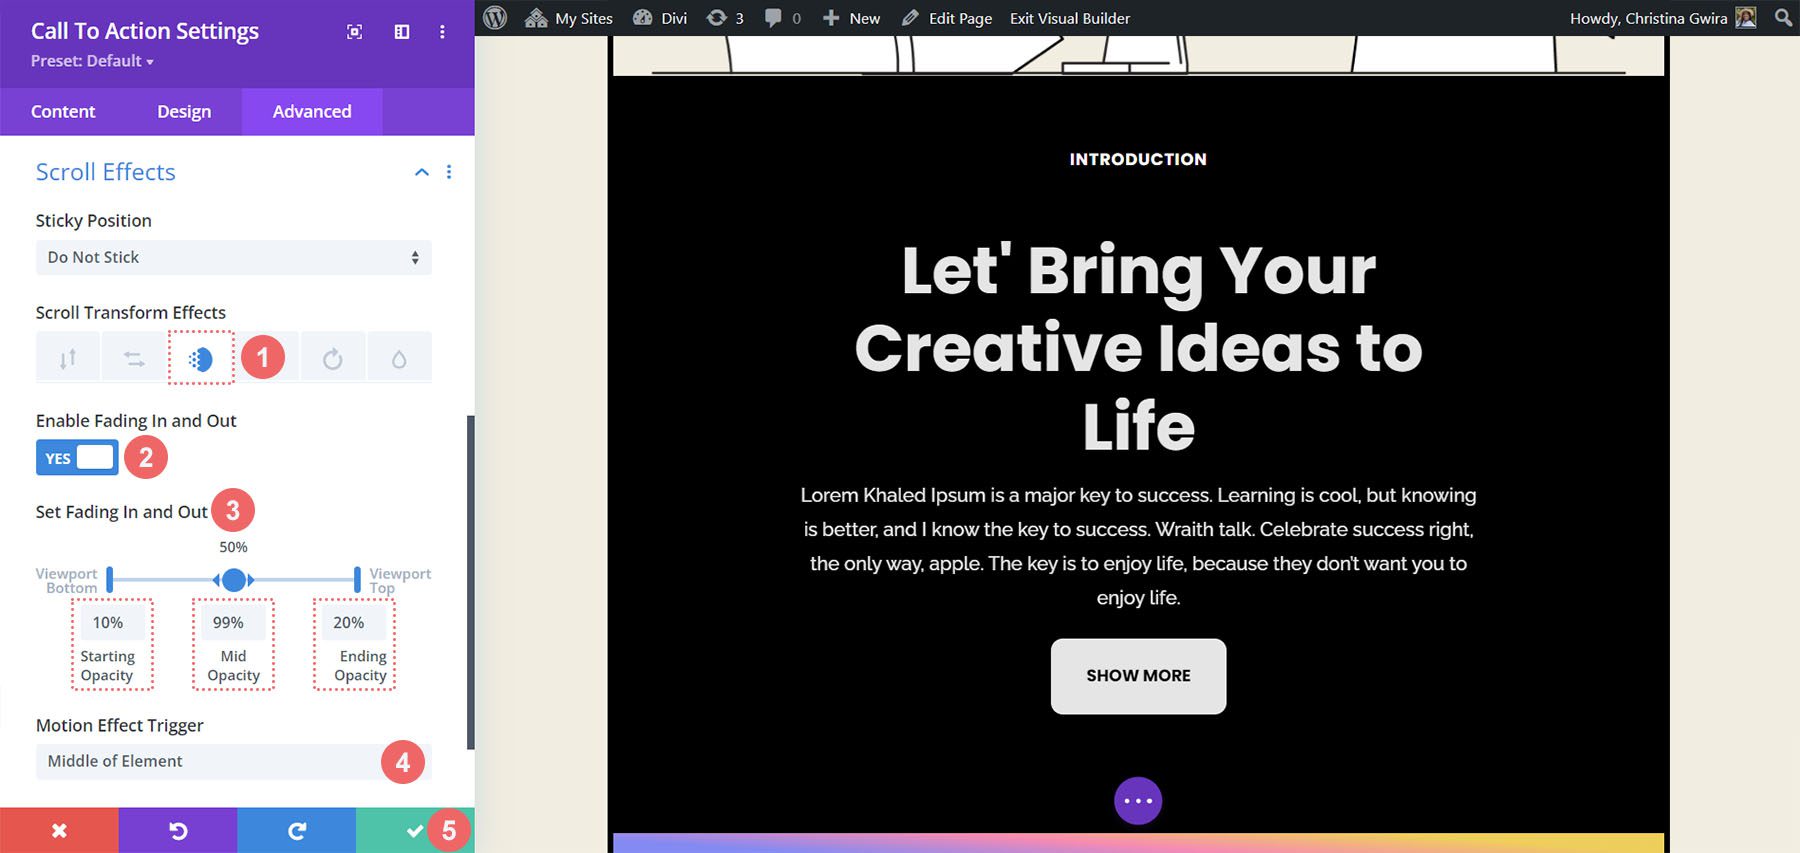
By the use of using the ones settings, we will create a clean scroll have an effect on inside our Identify to Movement Module. Next, let’s see how we will animate the entrance of a few different Identify to Movement Module with the Animation tab.
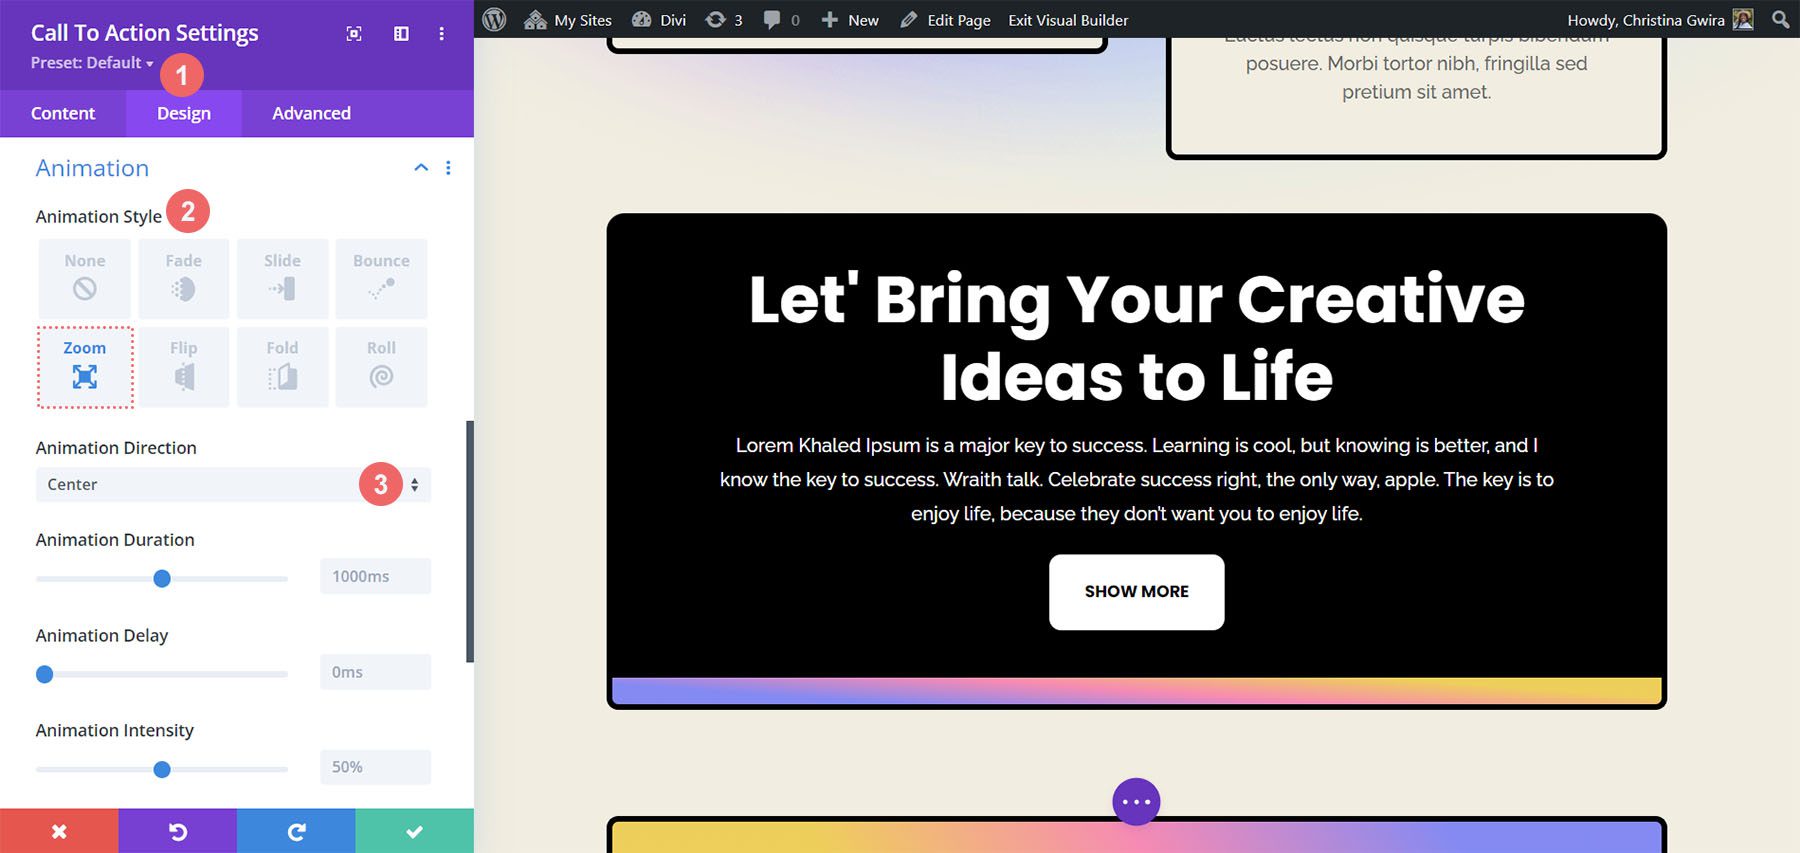
Entrance Animations and Divi
An entrance animation takes place as a module enters your visual display unit viewport. While Scroll Effects means that you can incessantly interact with the module each time you scroll by way of its viewport, an entrance animation is activated once. An entrance animation will also be looped, alternatively, whether or not or no longer you scroll thru it, hover over it, and so on., it gained’t become re-animated. Proper right here’s the way in which you create your entrance animation. We need to use a Zoom animation as quickly because the module comes into view:
Inside of our Identify to Movement Module settings window, we click on on on the Design tab and scroll proper all the way down to Animation. Inside of, we’ve were given a variety of animation possible choices that we will use once this module moves into focal point. Click on on on the Zoom Animation Style. For the Animation Path, we need to move away it as Heart – the default – and move away the entire other default settings.
Using Sticky Effects with the Identify to Movement Module
Our final example will show us discover ways to use Divi’s native Sticky Effects. For this, we’ll wish to create a brand spanking new row and section.
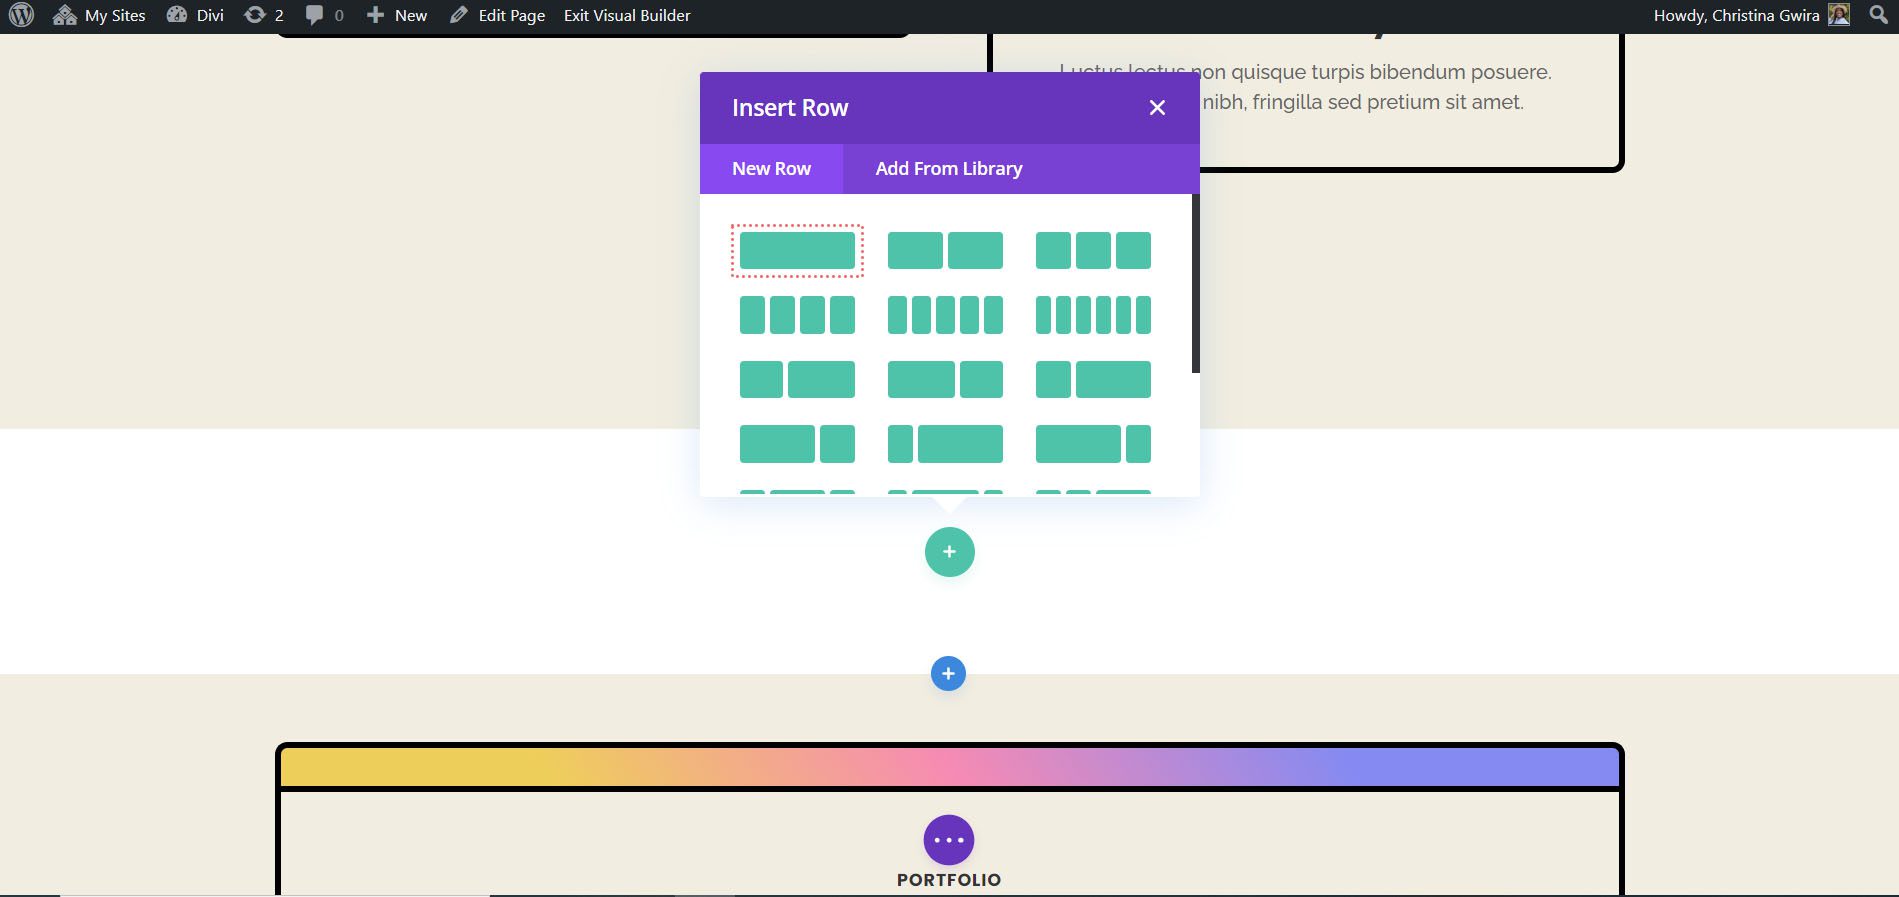
Click on on on the blue plus icon as a way to upload a brand spanking new section.
Then, choose the one-column row structure.
We’ll be using our premade Identify to Movement Module so we will close the Add New Module window. For the section, we will get began thru coming into the settings and environment a background color. To take a look at this, click on at the apparatus icon to reach the section settings.

Next, scroll proper all the way down to the Background tab and set the background color to #f1ede1.
With the background in place, we now wish to add spacing settings to ensure that our sticky Identify to Movement Module works as displayed. So, we click on on on the Design tab and then scroll to the Spacing section. This section is essential to ensure that we’ve were given enough space to see our Sticky animation take have an effect on.
We use the following settings to amend the spacing of our section:
Segment Spacing Settings:
- Margin Best: 0px
- Padding Best: 0px
- Padding Bottom: 300px
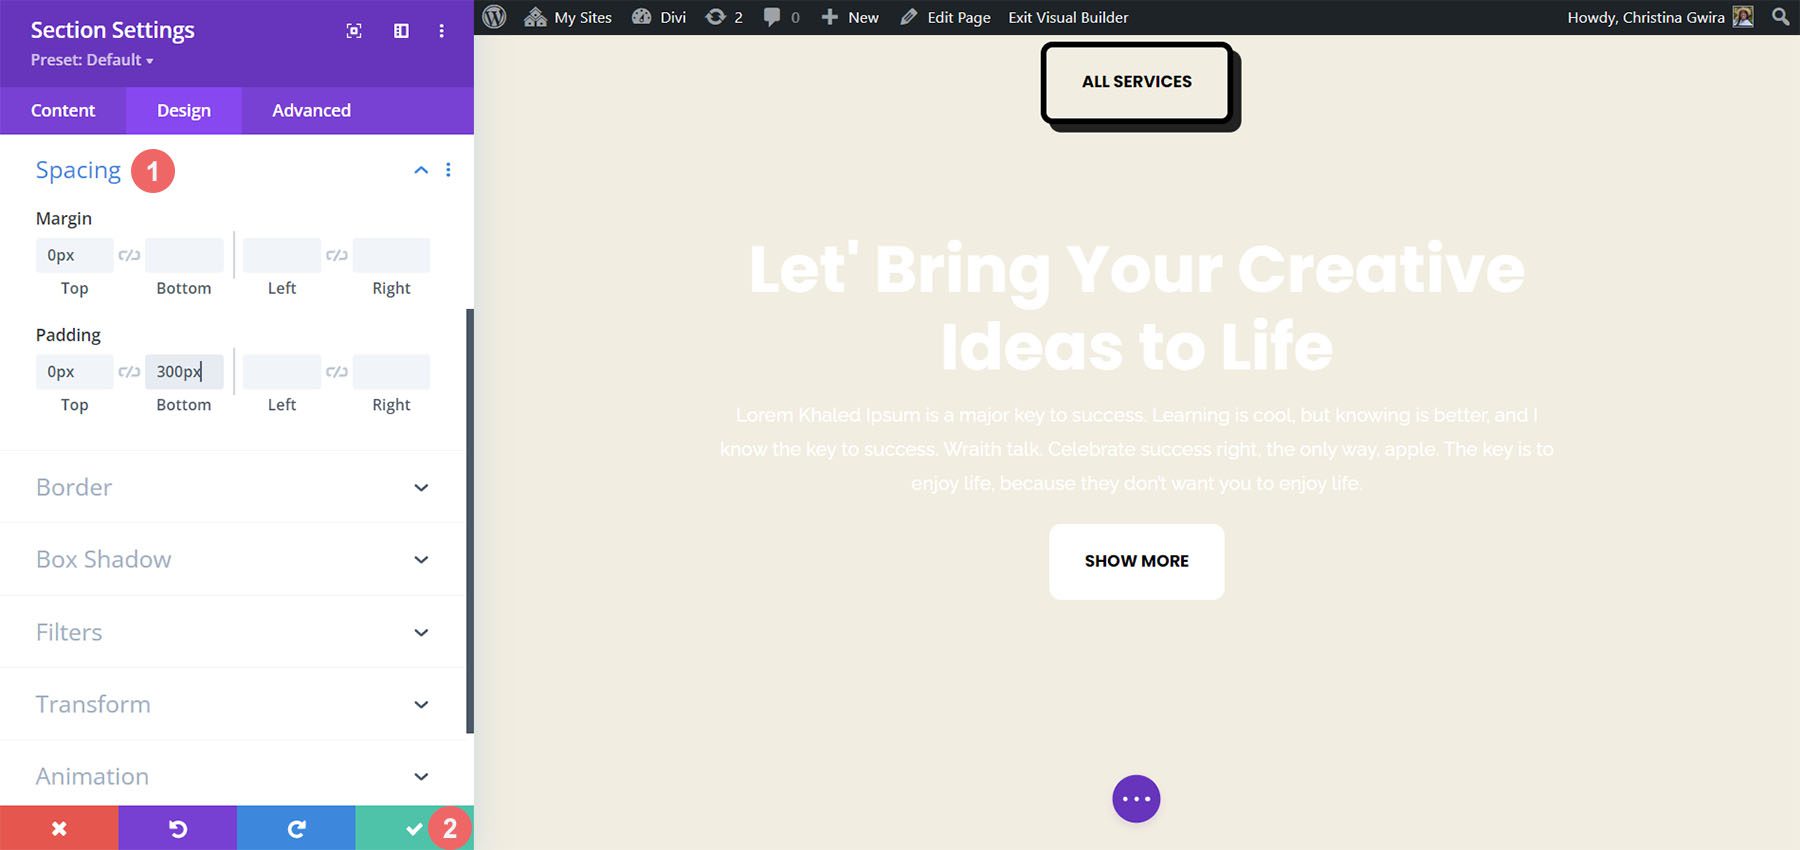
Once we’ve were given entered the ones settings, we will save our artwork thru clicking the fairway checkmark. Now, we’ll flip at the Sticky have an effect on all over the row of our section. First, we enter the row settings thru clicking the apparatus icon.
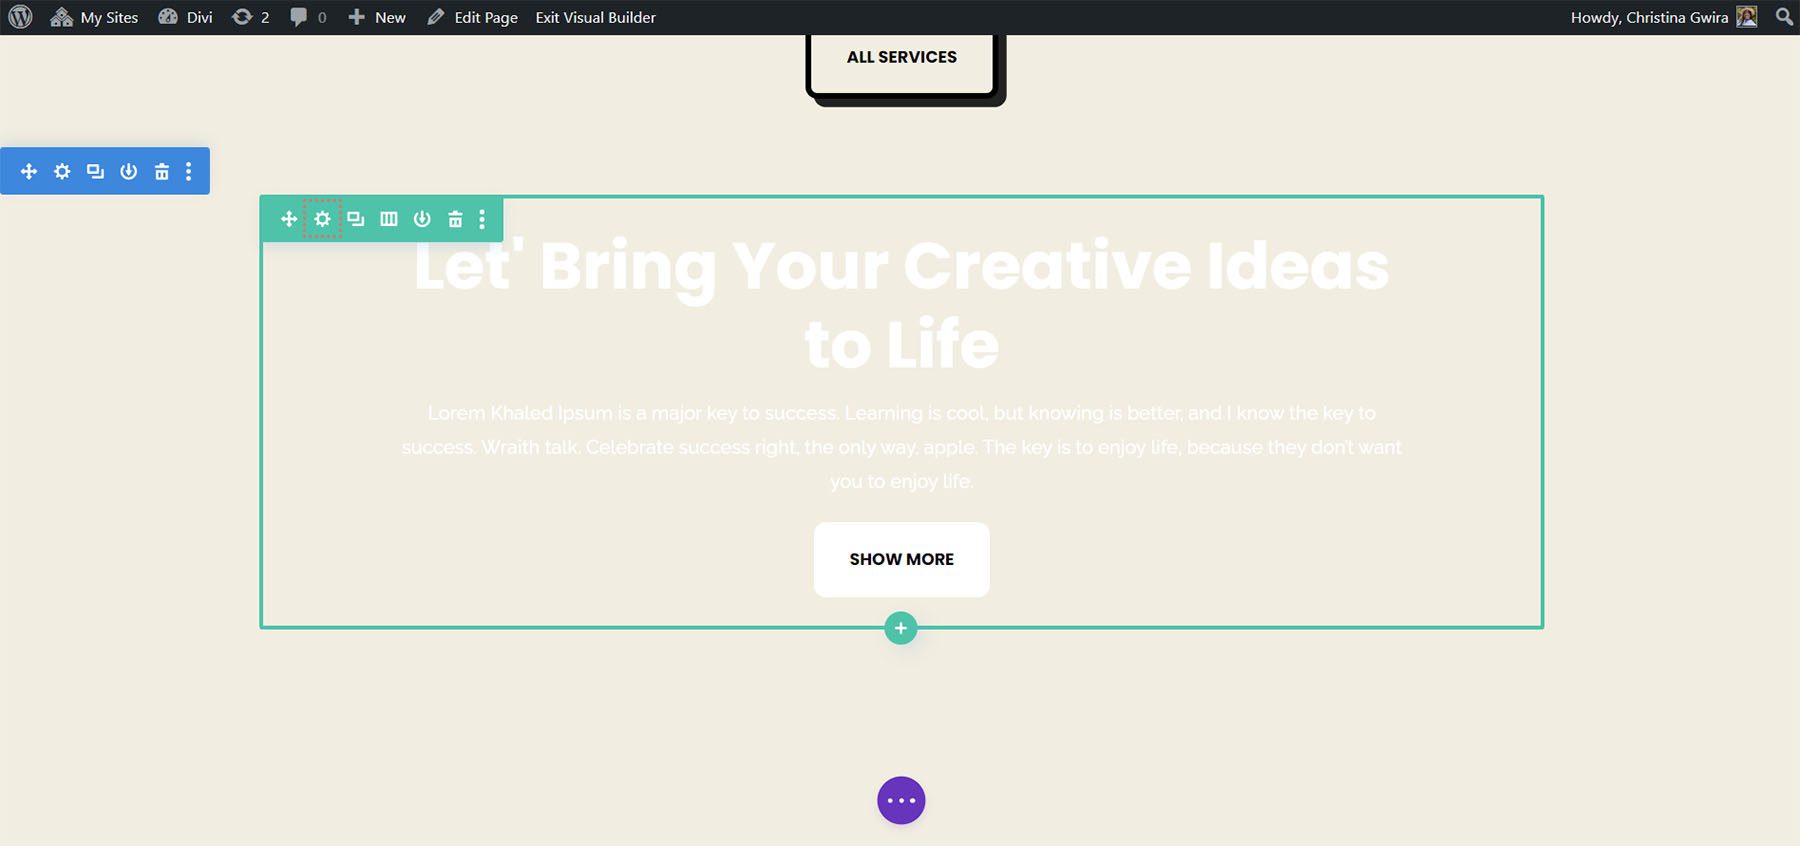
Previous to we navigate to the Difficult tab, let’s set the background color for the row. In a similar way to how we did with the section, we scroll proper all the way down to the Background tab and set the Background Color to #000000.
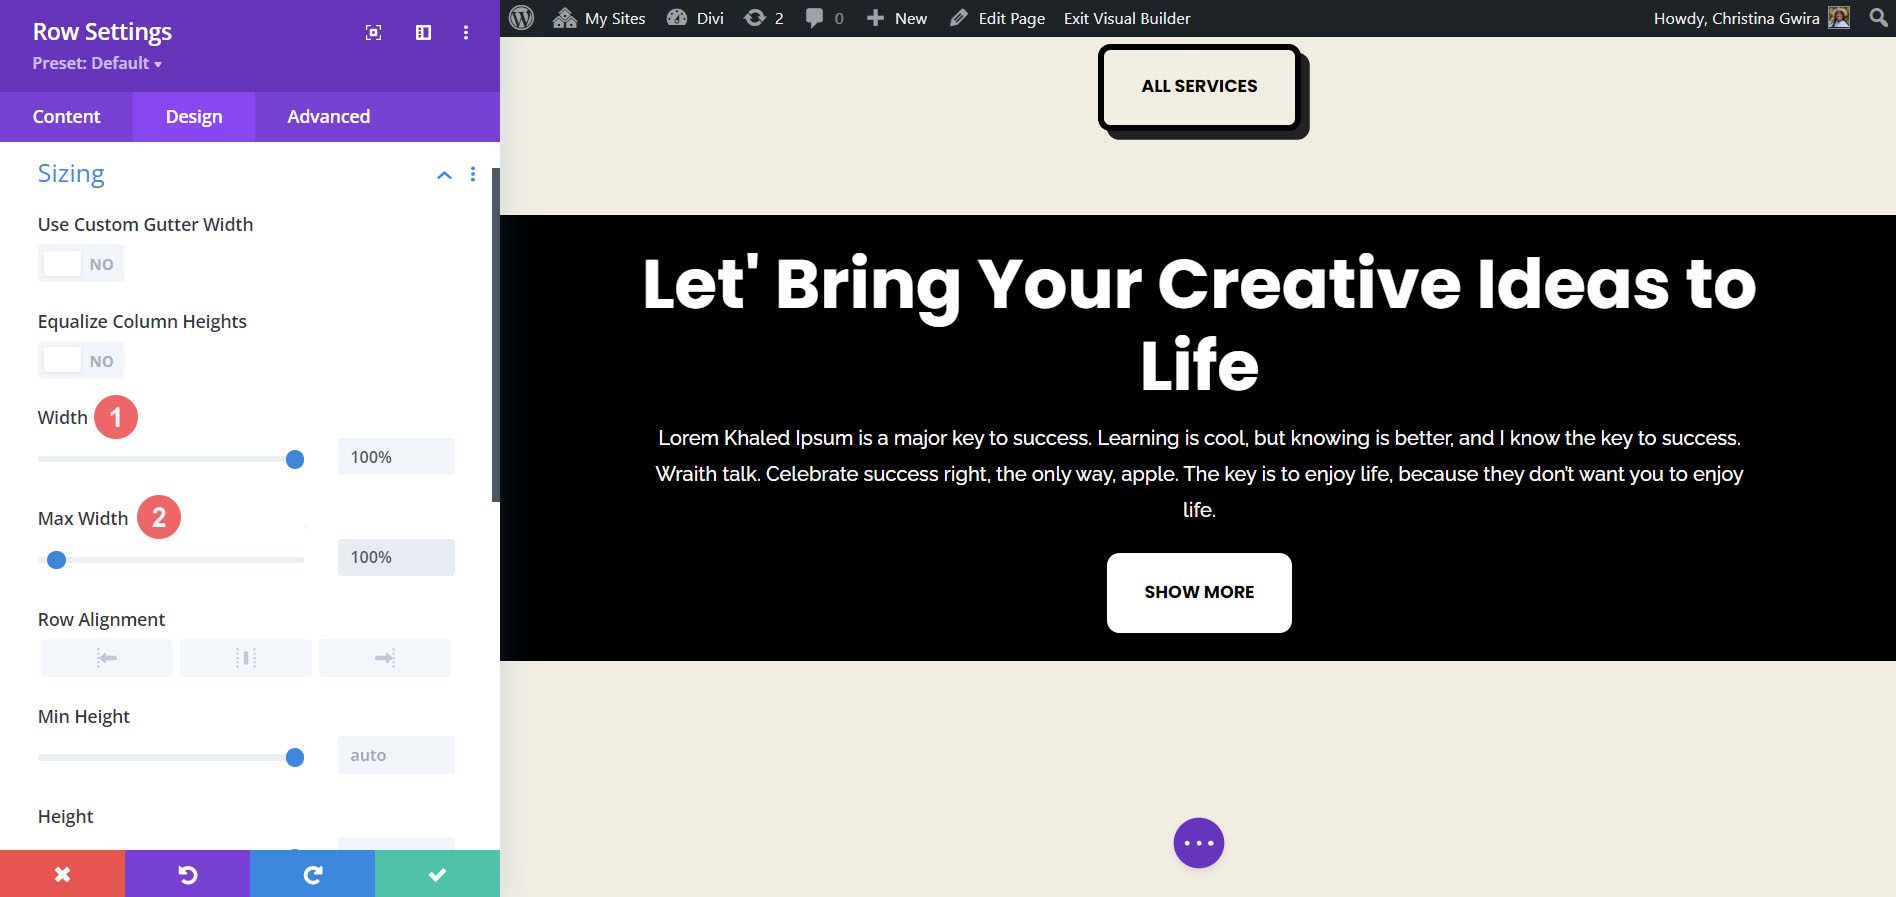
With this, our row just about turns out just like the Identify to Movement Module that we created at first of this instructional. Then again, we will use padding and margins to make this row lengthen from edge to edge. This may increasingly most probably make the Sticky have an effect on visually fascinating and less intrusive when used for target audience of your website.
We now switch to the Design tab and click on on on the Sizing tab. Next, we set the Width and Max Width to 100%.
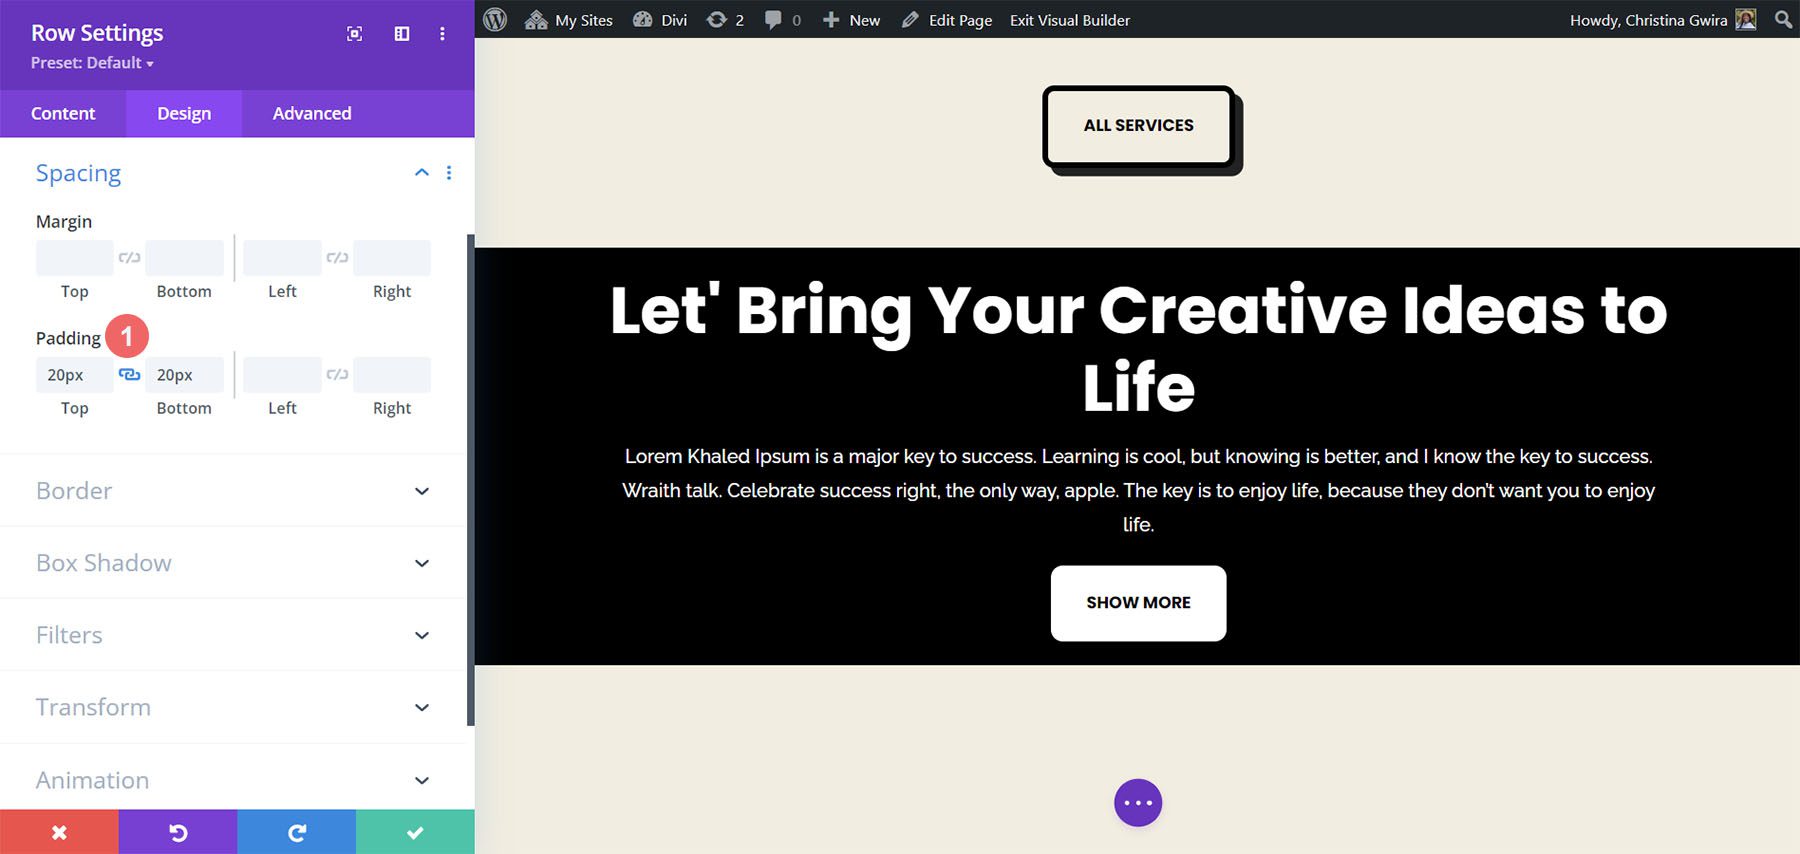
Shifting along, we now scroll proper all the way down to the Spacing tab and add similar absolute best and bottom padding values of 20px. That is serving to to create a sleeker look with our title to movement.
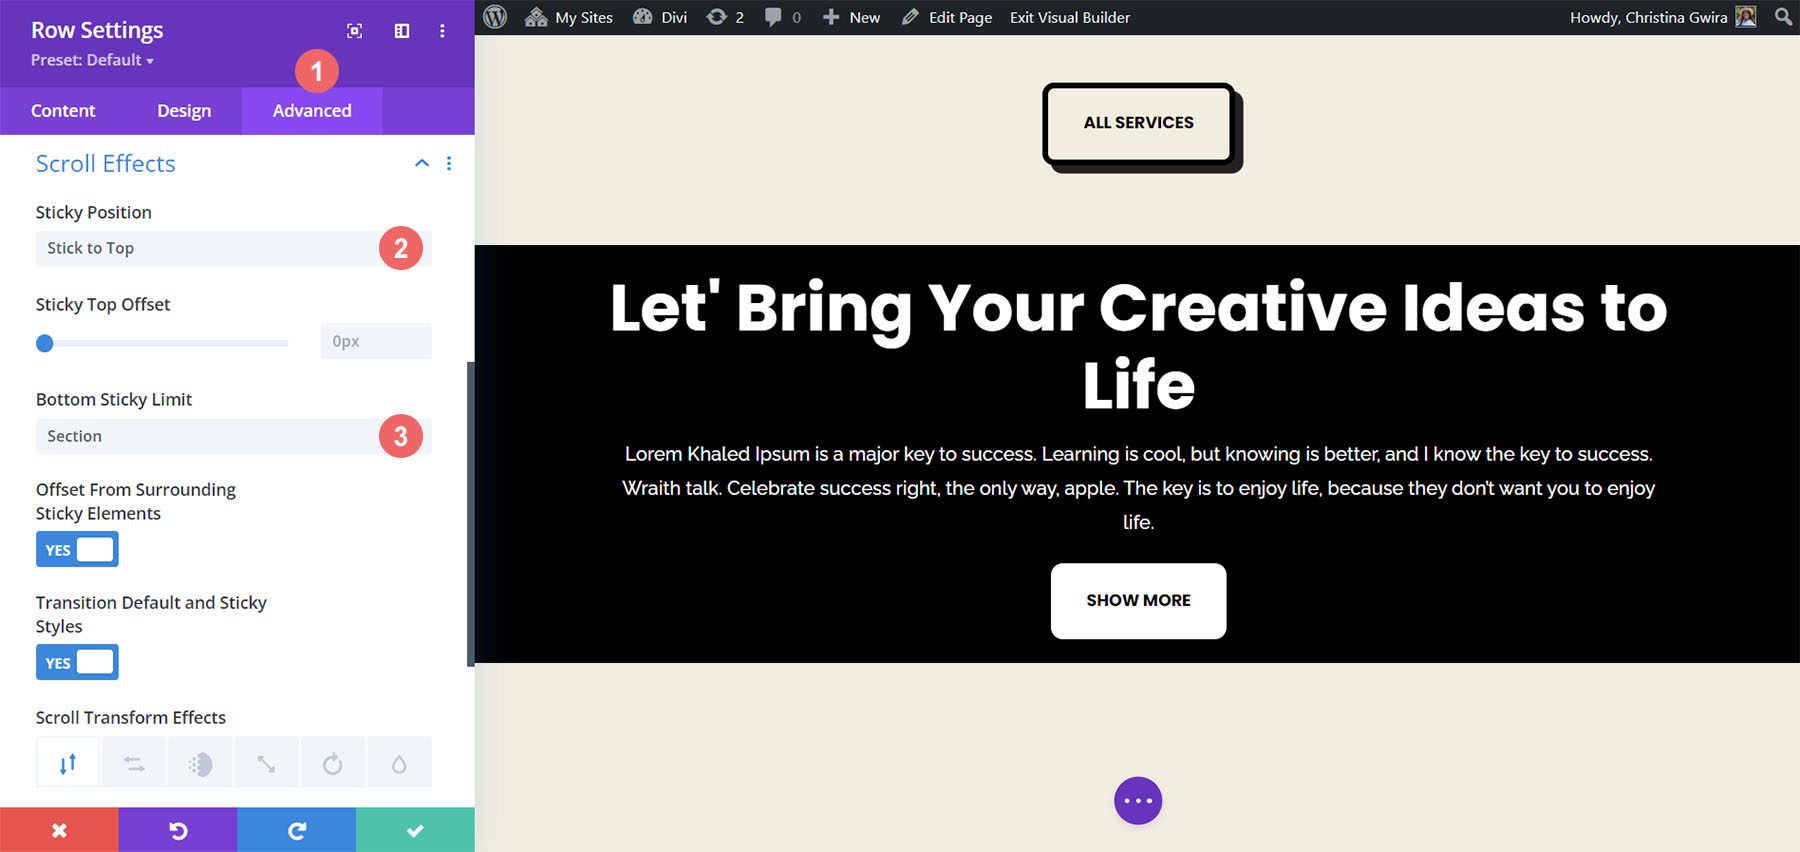
Now that we’ve got the aesthetics lined, we will now switch at once to creating use of our Scroll Have an effect on. We switch to the Difficult tab, then we click on on on the Scroll Effects tab. Now, we flip at the Sticky Position thru selecting Stick with Best. We would really like our title to movement to stick flush to the absolute best of our visual display unit, so we move away the Sticky Best Offset to 0px. The only other environment we’ll change will be the Bottom Sticky Prohibit, which we will now set to Segment.
To Sum it Up
As you’ll be capable of see, thru default, Divi has many choices and ways as a way to upload animation and movement in your internet web page. Whether or not or no longer you want as a way to upload movement to introduce your internet web page or create passion in your content material subject matter, Divi gives you the tools to do so. We lined 4 alternative ways to animate the Identify to Movement Module, alternatively you’ll be capable of use the ones an identical settings across the library of modules inside Divi. You’ll be capable of moreover apply the ones settings to sections, columns, and rows to create vibrant and unique internet web page designs in your consumers.
How are you using animation in Divi? Did any of the ones techniques passion you? Let us know throughout the comments section, and let’s get a conversation going!
The post How you can Animate Your Divi Name to Motion Module gave the impression first on Sublime Issues Weblog.
Contents
- 1 Putting in place the Landing Internet web page Structure
- 2 Together with Our Identify to Movement Module
- 3 Animating Our Module with Hover Effects
- 4 Using Scroll Effects with the Identify to Movement Module
- 5 Entrance Animations and Divi
- 6 Using Sticky Effects with the Identify to Movement Module
- 7 To Sum it Up
- 8 I Grew to become My WordPress Website online right into a Cellular App — Right here’s What I Discove...
- 9 Divi Product Highlight: The Ultimate Divi Module UI Kit
- 10 Get a Free Hostel Layout Pack for Divi

0 Comments