
Do you want to easily settle for Test expenses on your WordPress website?
By the use of accepting Test expenses, you allow shoppers to split their purchases into smaller expenses over the years. This may increasingly help make stronger the patron experience on your internet web site as this is a further to hand and flexible gain method than credit cards.
In this article, we will be able to show you the easiest way to easily accept Test expenses in WordPress, step by step.
Why Accept Test Expenses in WordPress?
Test is a purchase order now pay later (BNPL) service that allows customers to buy your products/services in installments over the years.
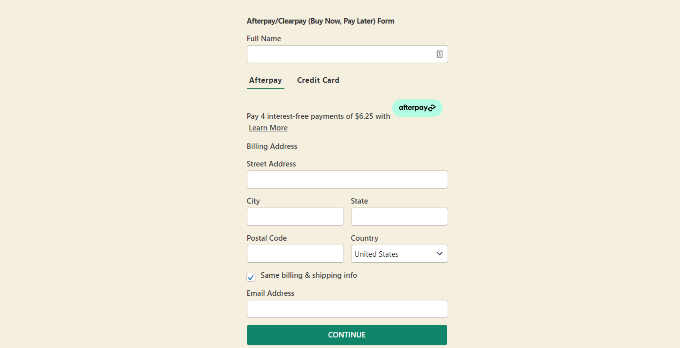
The platform offers two tactics for the customers to make a purchase order order. A shopper will pay for their gain in 4 identical, interest-free expenses over 8 weeks, or they can pay in monthly installments over 36 months.
By the use of accepting Test expenses on your WordPress website online, you’ll be capable to make it more uncomplicated for customers to buy your more expensive products and services and merchandise.
This may increasingly boost the patron experience and building up your affordable order value. Analysis have confirmed that visitors who use Test spend more money on affordable than those who use other cost strategies.
Plus, with Test expenses, you’ll however download the total value for the product up front. Then, Test instantly works with the customers to collect the remaining balance.
Having discussed that, let’s see the easiest way to easily accept Test expenses in WordPress. We will duvet 2 methods, and also you’ll be capable to use the quick links underneath to jump to the one you want to use:
Approach 1: Accept Test Expenses in WordPress The use of WP Simple Pay (In point of fact useful)
The program is really useful if you want to add an Test value form on your website.
This is a great selection while you don’t appear to be the use of WooCommerce. Plus, it signifies that you’ll be able to accept donations and membership fees, value for content material subject material get entry to, or process expenses for various corporations.
One of the best ways to easily settle for the ones Test expenses is with the WP Easy Pay plugin.
It’s the very best WordPress Stripe plugin to be had available on the market that lets you merely accept online expenses without a want to organize a purchasing groceries cart. It comes with a value form builder, easy setup, secure value processing, bizarre expenses, and the ability to easily settle for Test expenses.
First, you wish to have to place in and switch at the WP Easy Pay plugin. For detailed instructions, see our step-by-step knowledge on the best way to set up a WordPress plugin.
Bear in mind: WP Simple Pay moreover has a unfastened plan. However, you’ll need the Professional paid plan to free up the Test expenses feature.
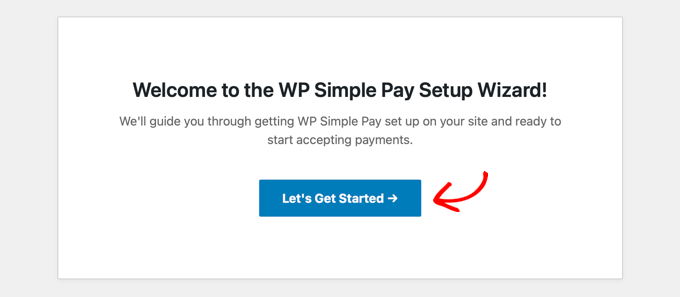
Upon activation, a setup wizard will be presented on the show. Proper right here, it’s necessary to click on at the ‘Let’s Get Started’ button.
This may increasingly from time to time take you to the next step, where it’s necessary to provide the license key for the plugin.
You’ll to search out this information in your account on the WP Simple Pay website. Once that’s performed, click on at the ‘Activate and Continue’ button.

Now, you’ll be asked to connect your Stripe account with WP Simple Pay. Stripe is a wonderful fashionable cost gateway that permits you to merely accept online expenses.
Transfer ahead and click on at the ‘Connect with Stripe’ button to continue.
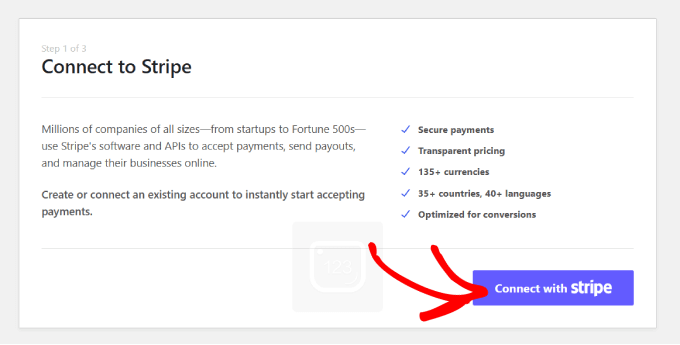
Once you have performed that, log in on your Stripe account to connect it to WP Simple Pay. In the event you don’t have an account however, then you definately’ll be capable to create one via visiting the Stripe website.
For additonal details on this, you may want to see our tutorial on the best way to settle for Stripe bills in WordPress.
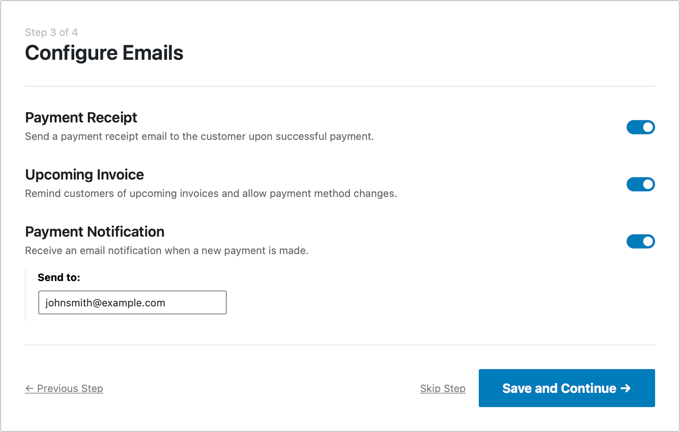
Upon successfully connecting Stripe and the plugin, the setup wizard will then ask you to configure your emails.
Proper right here, you’ll be capable to permit alternatives to procure e mail notifications for value receipts, upcoming invoices, and price notifications and enter the email take care of to send them to.
Bear in mind: Whilst you’ve were given problems with receiving e mail notifications on your end, then you’ll have thought to be making an attempt to take a look at our knowledge on the best way to correctly configure e-mail settings in WordPress.
Once you’re satisfied, click on at the ‘Save and Continue’ button.
You’ll now cross out the setup wizard because it’s time to create a value form in your website.
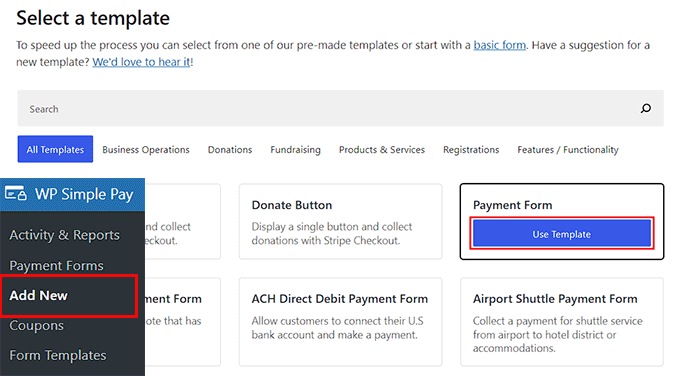
To take a look at this, discuss with the WP Simple Pay » Add New internet web page from the WordPress admin sidebar.
This may increasingly from time to time open the ‘Choose a template’ show, where you’ll be capable to make a choice any of the premade templates presented in the course of the plugin via clicking the ‘Use Template’ button beneath it.
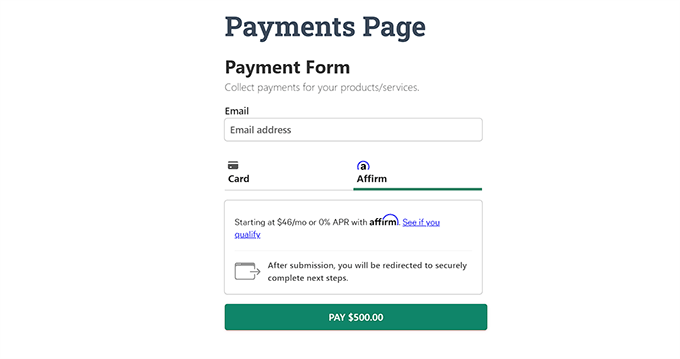
For the sake of this tutorial, we will be able to be the use of the ‘Rate Form’ template.
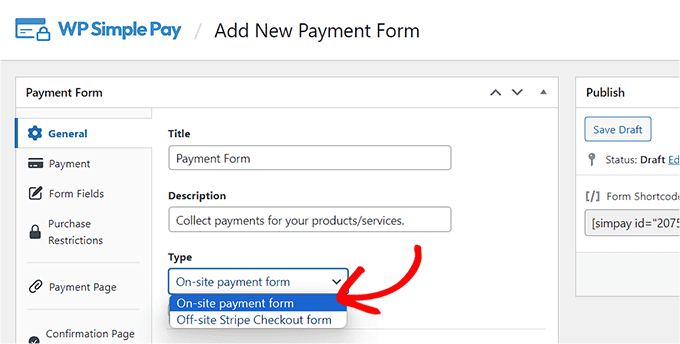
This may increasingly from time to time direct you to the ‘Add New Rate Form’ internet web page, where you’ll be capable to get began via together with a establish and description in your form.
After that, you’ll be capable to make a choice your form type as ‘On-site value form’.
Once you have performed that, switch to the ‘Rate’ tab from the left column. Proper right here, you’ll be capable to make a choice your hottest tax collection fees from the dropdown menu beneath the ‘Tax Collection’ selection.
After that, you’ll be capable to add the default worth of the service or product that you simply’re rising the price form for.

Next, scroll proper right down to the ‘Rate Methods’ section and make a choice the ‘All’ selection from the dropdown menu.
In the event you don’t make a selection this selection, the Test value method might not be displayed on your show.
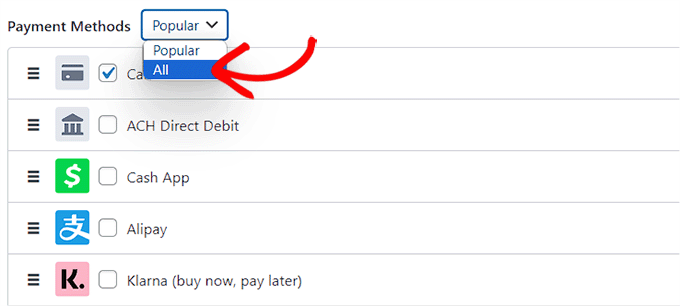
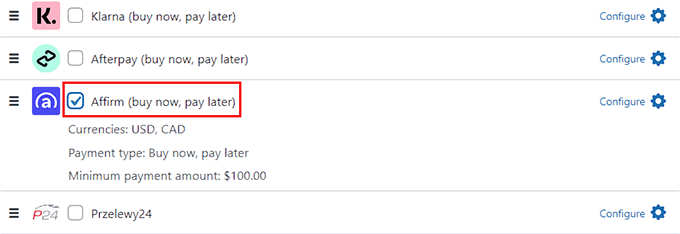
Once all the value methods presented via WP Simple Pay are displayed as a list, merely scroll proper right down to the ‘Test’ selection and check the sphere next to it.
You need to have now successfully added the Test value gateway on your WordPress form.
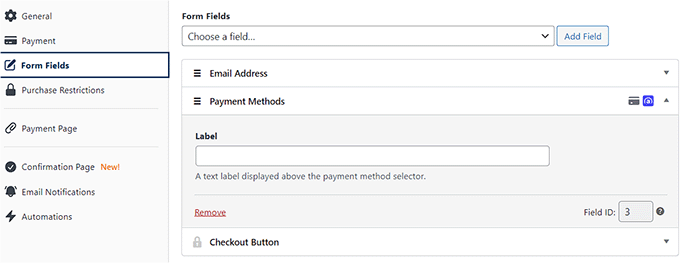
You’ll now switch to the ‘Form Fields’ tab from the column on the left.
Proper right here, you’ll be capable to add a type field from the dropdown menu and then configure its settings via expanding the tab. You’ll moreover business the order of present fields via simply dragging and losing them.
For example, you’ll be capable to add and customize an e-mail deal with field on your form. That suggests, customers will need to provide their emails once they make purchases the use of your form.
Together with the Test Rate Form to Your Web page
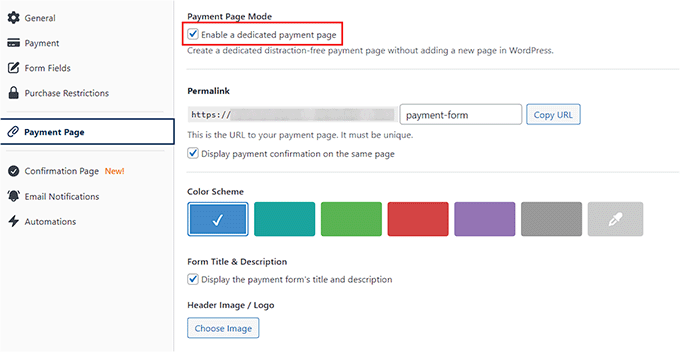
Next, switch to the ‘Rate Internet web page’ tab and check the ‘Allow a faithful value internet web page’ box. WP Simple Pay will then will mean you can create a custom designed internet web page in your Test value form without making a brand spanking new internet web page on your WordPress weblog or website.
On checking this box, new settings will appear on the internet web page where you’ll be capable to add a permalink, color scheme, image, and footer text in your form.
Once you’re performed, click on at the ‘Publish’ button to store your settings.
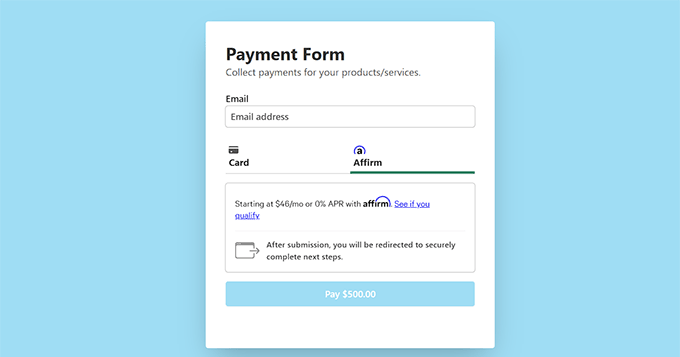
You’ll then discuss with your WordPress website to view the price form internet web page.
However, if you want to add the price form to an present internet web page, then you definately’ll be capable to moreover do that via clicking the ‘Publish’ button after together with form fields.
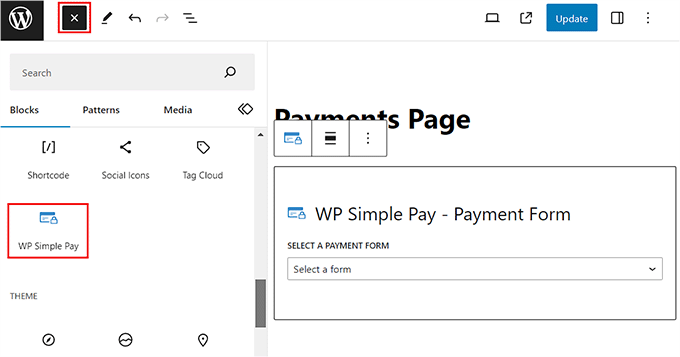
Next, open the internet web page/put up of your liking from the WordPress dashboard. Then, click on at the ‘Add Block’ (+) button inside the most productive left corner of the show to open the block menu.
From proper right here, to search out and add the WP Simple Pay block to the internet web page, and then make a choice the price form that you just made from the dropdown menu within the block.
After all, click on at the ‘Publish’ or ‘Change’ button to store your settings.
Now, simply discuss with your WordPress internet web site to view the Test value form in movement.
Approach 2: Accept WooCommerce Test Expenses The use of Test Expenses Plugin (Free)
We suggest this method if you have a WooCommerce store and are looking for a loose solution.
Verify Bills is a brilliant WooCommerce plugin for putting in installment expenses. It signifies that you’ll be able to merely add Test as a value gateway on the checkout internet web page for each product.
First, you wish to have to place in and switch at the Test Expenses plugin. For detailed instructions, see our step-by-step knowledge on the best way to set up a WordPress plugin.
Bear in mind: This plugin won’t art work if the WooCommerce plugin isn’t activated on your website. For additonal details, you’ll be capable to see our complete WooCommerce instructional. You will moreover need to create an Verify account.
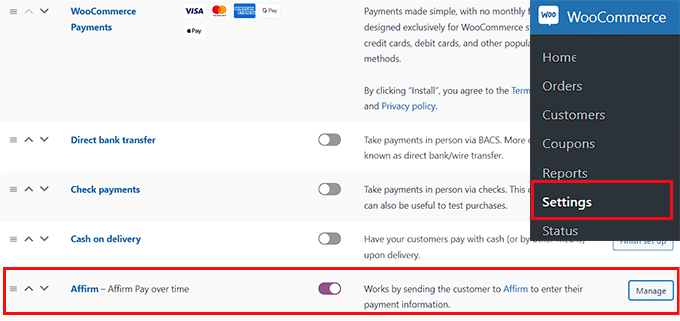
Upon activation, you wish to have to discuss with the WooCommerce » Settings internet web page from the WordPress admin sidebar and switch to the ‘Expenses’ tab.
Proper right here, you’ll see a list of all the value gateways presented via WooCommerce. You should scroll proper right down to the ‘Test’ selection and click on on on the ‘Organize’ button.
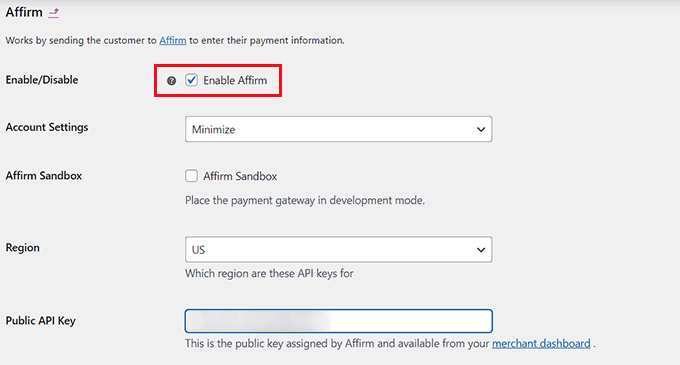
This may increasingly from time to time direct you to a brand spanking new show where you must check the ‘Allow/Disable’ box to activate Test as a value gateway in your on-line retailer.
Next, you’ll be capable to configure some customization alternatives for the price gateway, similar to the Test color, promotional messaging, and further.
You will moreover need to enter your public and private API keys for Test. You’ll get this information from your provider supplier dashboard on the Test website.
Once you’re performed, don’t fail to remember to click on at the ‘Save Changes’ button to store your settings.
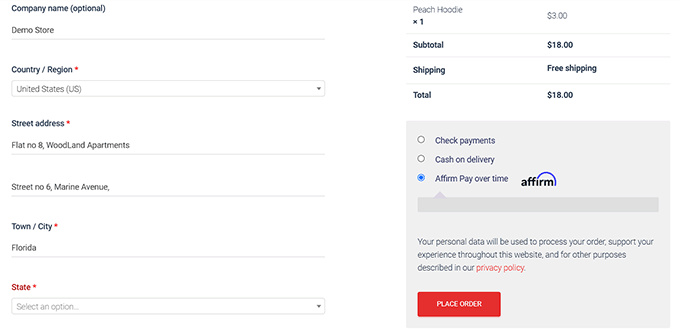
You’ll now discuss with your WooCommerce store and take into consideration the checkout web page to seem Test as a value selection.
Bonus Alternatives for Surroundings Up Installment Expenses in WordPress
In the event you advertise any products or services on your WordPress internet web site, then putting in place installment bills mean you can boost conversions.
This is because the acquisition now, pay later model offers further flexibility on your customers and in an instant makes your entire products and services and merchandise look further affordable.
One of the vital essential main reasons for a most sensible cart abandonment fee is that consumers can’t find the money for the cost of their purchases. However, while you allow them to pay in installments, then you definately’ll be capable to reduce cart abandonment on your internet web site.
Except Test, there are also other value gateways like AfterPay and Klarna that you simply’ll be capable to use to easily add a purchase order now pay later method on your WordPress internet web site.
For detailed instructions, you’ll be capable to see our tutorial on the best way to upload purchase now, pay later cost plans in WordPress.
We hope this newsletter helped you learn how to merely add Test expenses in WordPress. You may additionally want to see our tutorial on the best way to upload Venmo in WordPress and WooCommerce and our professional picks for the very best WordPress PayPal plugins.
In the event you liked this newsletter, then please subscribe to our YouTube Channel for WordPress video tutorials. You’ll moreover to search out us on Twitter and Fb.
The put up Easy methods to Settle for Verify Bills in WordPress (2 Simple Strategies) first seemed on WPBeginner.
Contents
- 0.0.1 Why Accept Test Expenses in WordPress?
- 0.0.2 Approach 1: Accept Test Expenses in WordPress The use of WP Simple Pay (In point of fact useful)
- 0.0.3 Approach 2: Accept WooCommerce Test Expenses The use of Test Expenses Plugin (Free)
- 0.0.4 Bonus Alternatives for Surroundings Up Installment Expenses in WordPress
- 0.1 Related posts:
- 1 Does Call for-Pushed Pricing Paintings? Type Emblem Telfar Is Giving It A Take a look at
- 2 8 Perfect Gamification Plugins for WordPress
- 3 Google Hyperlink Absolute best Practices Information: What It Approach for Your search engine market...

0 Comments