

Showing a timeline to your site allows you to show off your emblem’s milestones or challenge historical past, offering visible passion on your guests. Divi 5‘s Group Carousel module provides a recent method to show this content material in a scrollable, enticing structure, absolute best for storytelling to your site.
On this put up, you’ll uncover find out how to use the Crew Carousel module to construct a timeline carousel in a couple of easy steps. We’ll quilt what the module is, its options and advantages, and supply a step by step information on developing your personal timeline.
Let’s dive in.
What Is The Crew Carousel Module?
The Group Carousel module is a flexible instrument for developing customized carousels and sliders without delay within the Visible Builder. It permits you to construct dynamic, scrollable shows for more than a few content material sorts, making it very best for timelines, portfolios, product showcases, and extra. At its core, the module acts as a container that holds more than one slides, every functioning as a Crew the place you’ll be able to upload and prepare content material manually or generate it dynamically the use of Divi 5’s Loop Builder.
Every slide within the Crew Carousel is an absolutely editable crew, that means you’ll be able to nest any Divi module to construct customized layouts. You’ll configure the Carousel to show a unmarried slide at a time for a centered slider or more than one slides for a broader view, relying to your wishes. Navigation is treated via customizable dots and arrows, with choices to keep an eye on the collection of slides that scroll, making sure a clean person enjoy.
Key Options
- It Serves As A Clean Canvas: Every slide helps Nested Rows and Flexbox, supplying you with entire keep an eye on over the design, from easy textual content and symbol mixtures to complicated multi-column preparations.
- Dynamic Content material With The Loop Builder: The module integrates with the Loop Builder to drag content material from posts, phrases, customers, or customized fields, enabling computerized updates as new content material is added.
- Slides Are Totally Customizable: The Crew Carousel is absolutely customizable, identical to some other Divi module. You’ll upload background photographs and gradients, taste borders, observe transforms, filters, shadows, and animations to create cohesive and polished designs.
- Show Controls: Alter slides in step with view, scroll quantity in step with click on, animation velocity, and navigation controls, permitting you to fine-tune the Carousel’s conduct and responsiveness.
Advantages Of The Crew Carousel Module
The Crew Carousel module in Divi 5 provides a spread of benefits that make it a useful tool for developing enticing, environment friendly, and dynamic carousels.
It’s Extremely Versatile
Not like conventional sliders with fastened layouts, the Crew Carousel’s clean canvas method means that you can design slides with entire freedom. You’ll create the rest from easy slides to complicated layouts, all with no need third-party plugins. This protects time and helps to keep your website streamlined by means of decreasing plugin dependency.
Create Dynamic, Scalable Content material
With Loop Builder integration, the module can robotically retrieve content material from posts, phrases, customers, or customized fields, reminiscent of Complicated Customized Fields (ACF) repeater fields. For timelines, which means new occasions will also be added as posts or knowledge entries, and the carousel updates robotically with out requiring handbook edits. It’s very best for rising websites, reminiscent of blogs, portfolios, or e-commerce shops, the place content material evolves continuously.
Efficiency And Ease Of Use
Constructed on Divi 5’s light-weight structure, the Crew Carousel is optimized for quick loading, making sure your website stays responsive even with dynamic or media-heavy slides. Its intuitive interface makes setup and customization easy, even for customers with little to no enjoy with Divi.
Limitless Ingenious Attainable
The module helps Divi’s tough styling choices, like animations, transforms, Integrations, and filters, permitting you so as to add delicate results that fortify the timeline’s visible attraction. Integration with equipment like WooCommerce or Lottie animations opens up much more ingenious chances, serving to interact guests and stay them to your website longer.
How To Construct A Timeline Carousel With Divi 5
Now that you’ve a elementary idea of what the Crew Carousel module is and what you’ll be able to do with it, we will be able to birth development our structure. By means of the tip, you’ll have an absolutely responsive timeline carousel you’ll be able to use to your site.
Step 1: Set Up The Container
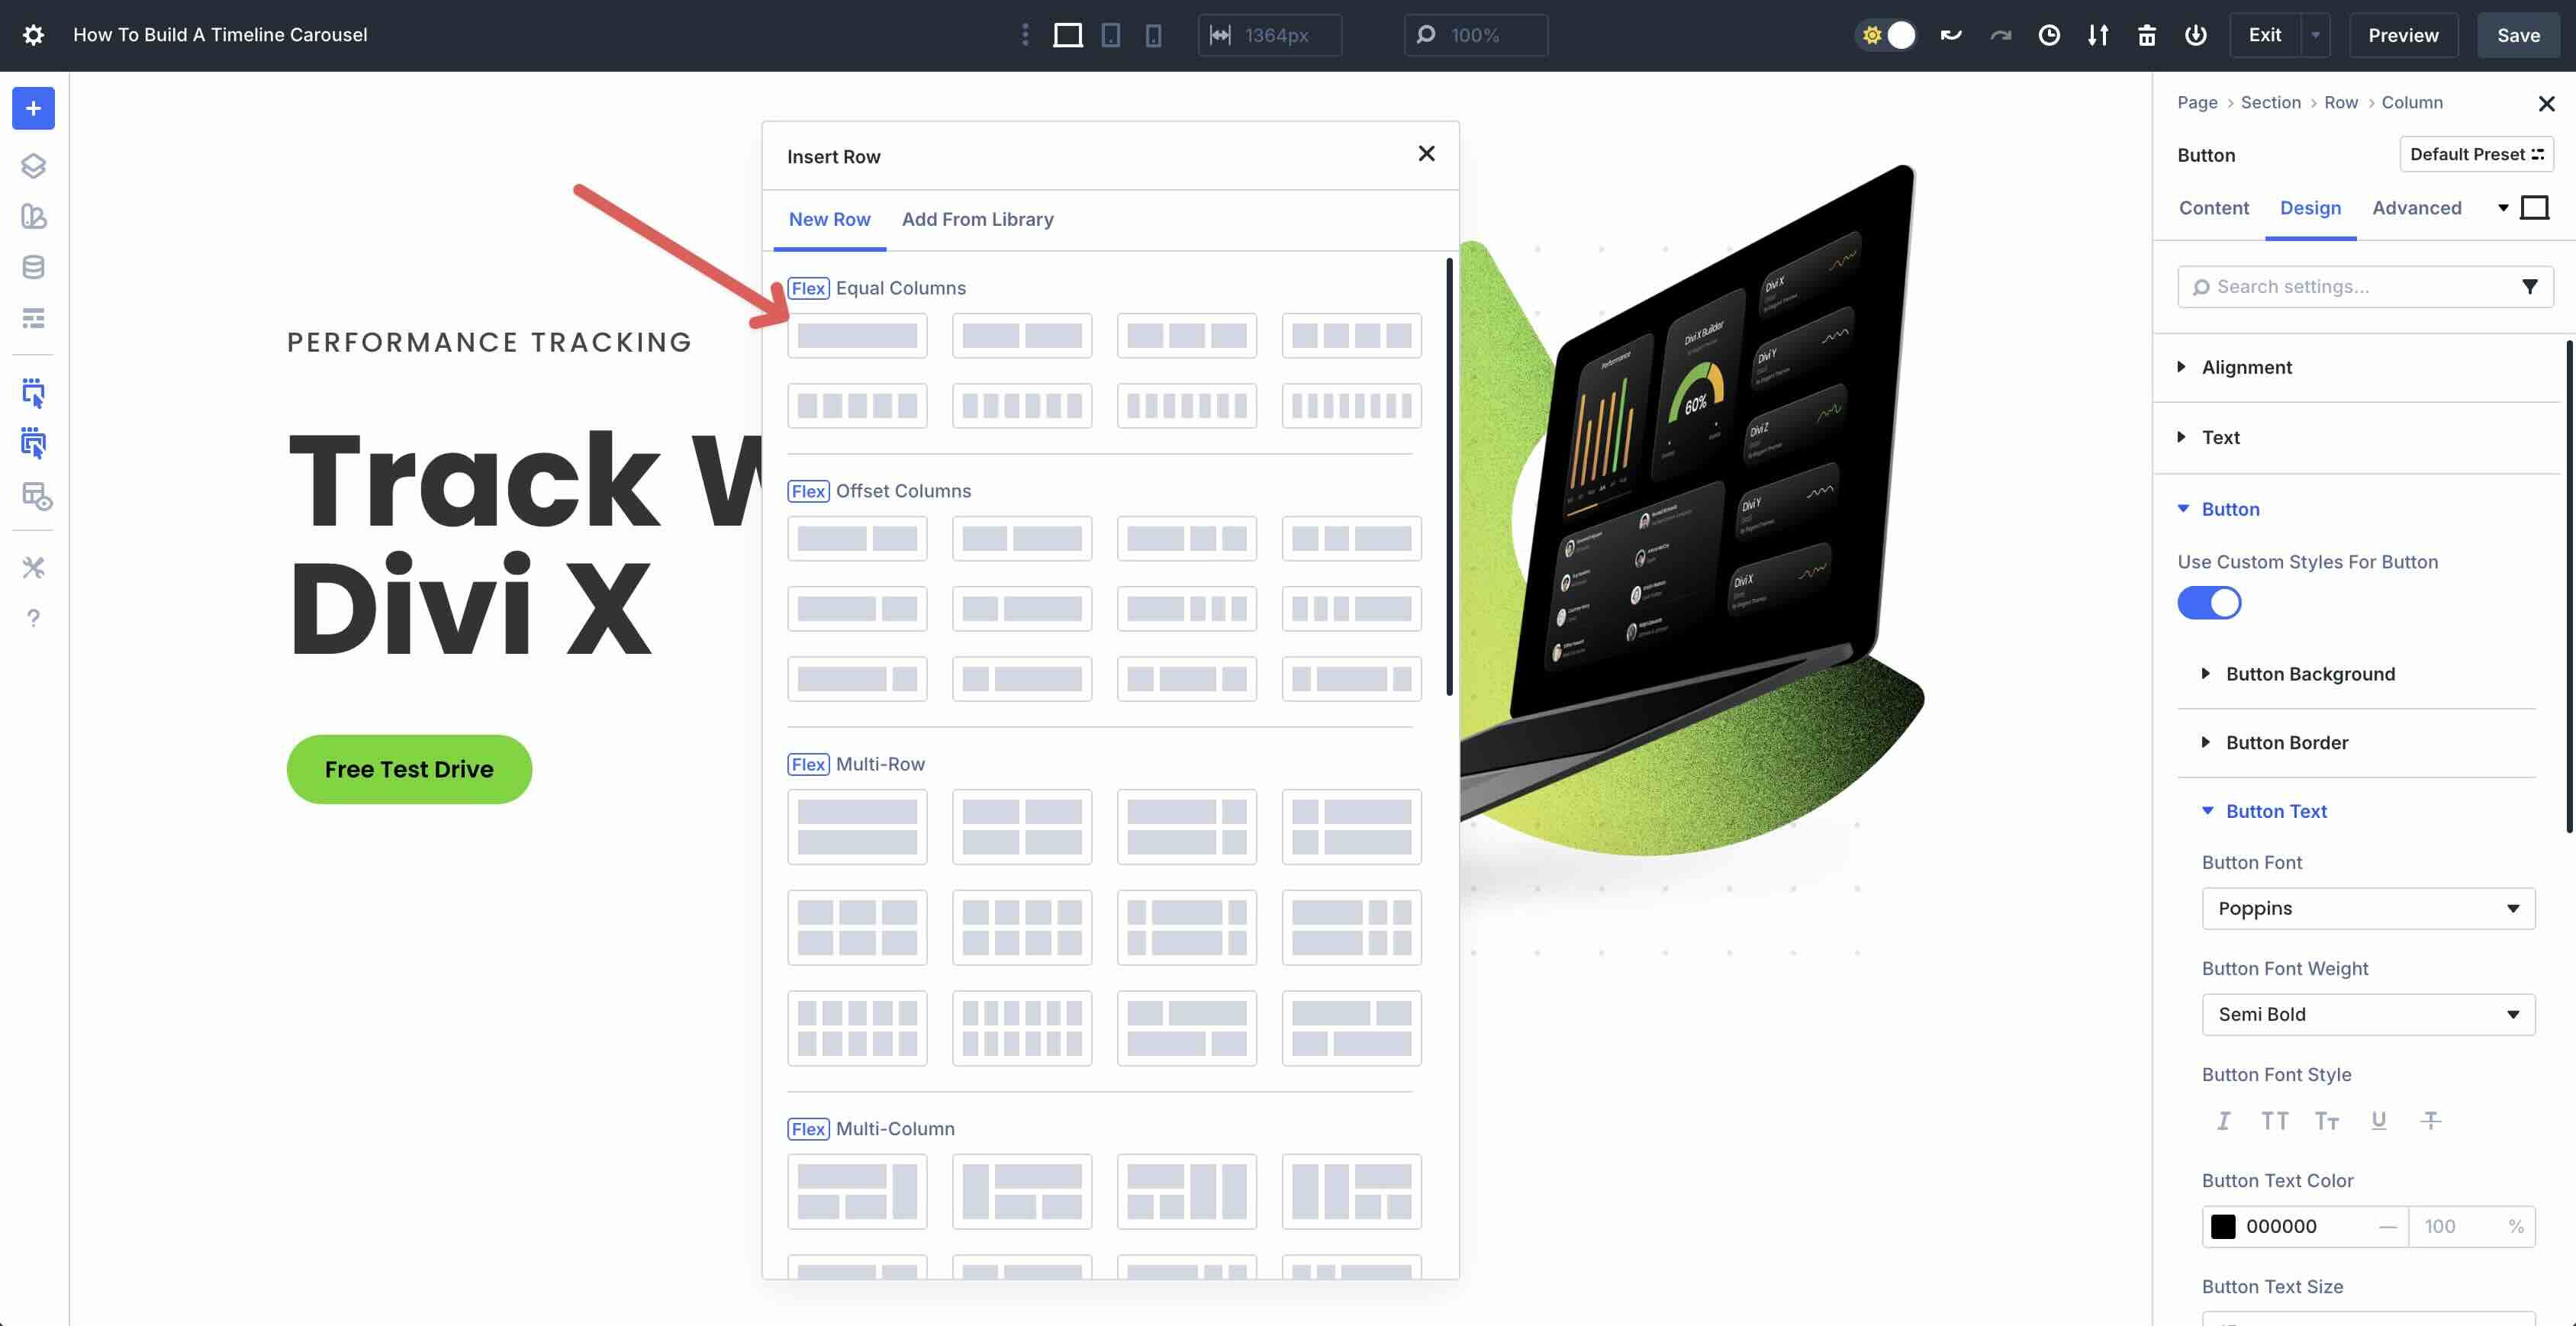
Step one is to configure the mother or father container for the Crew Carousel. Create a brand new web page or open an present one. Create a brand new segment and upload a single-column Flex row to the web page.
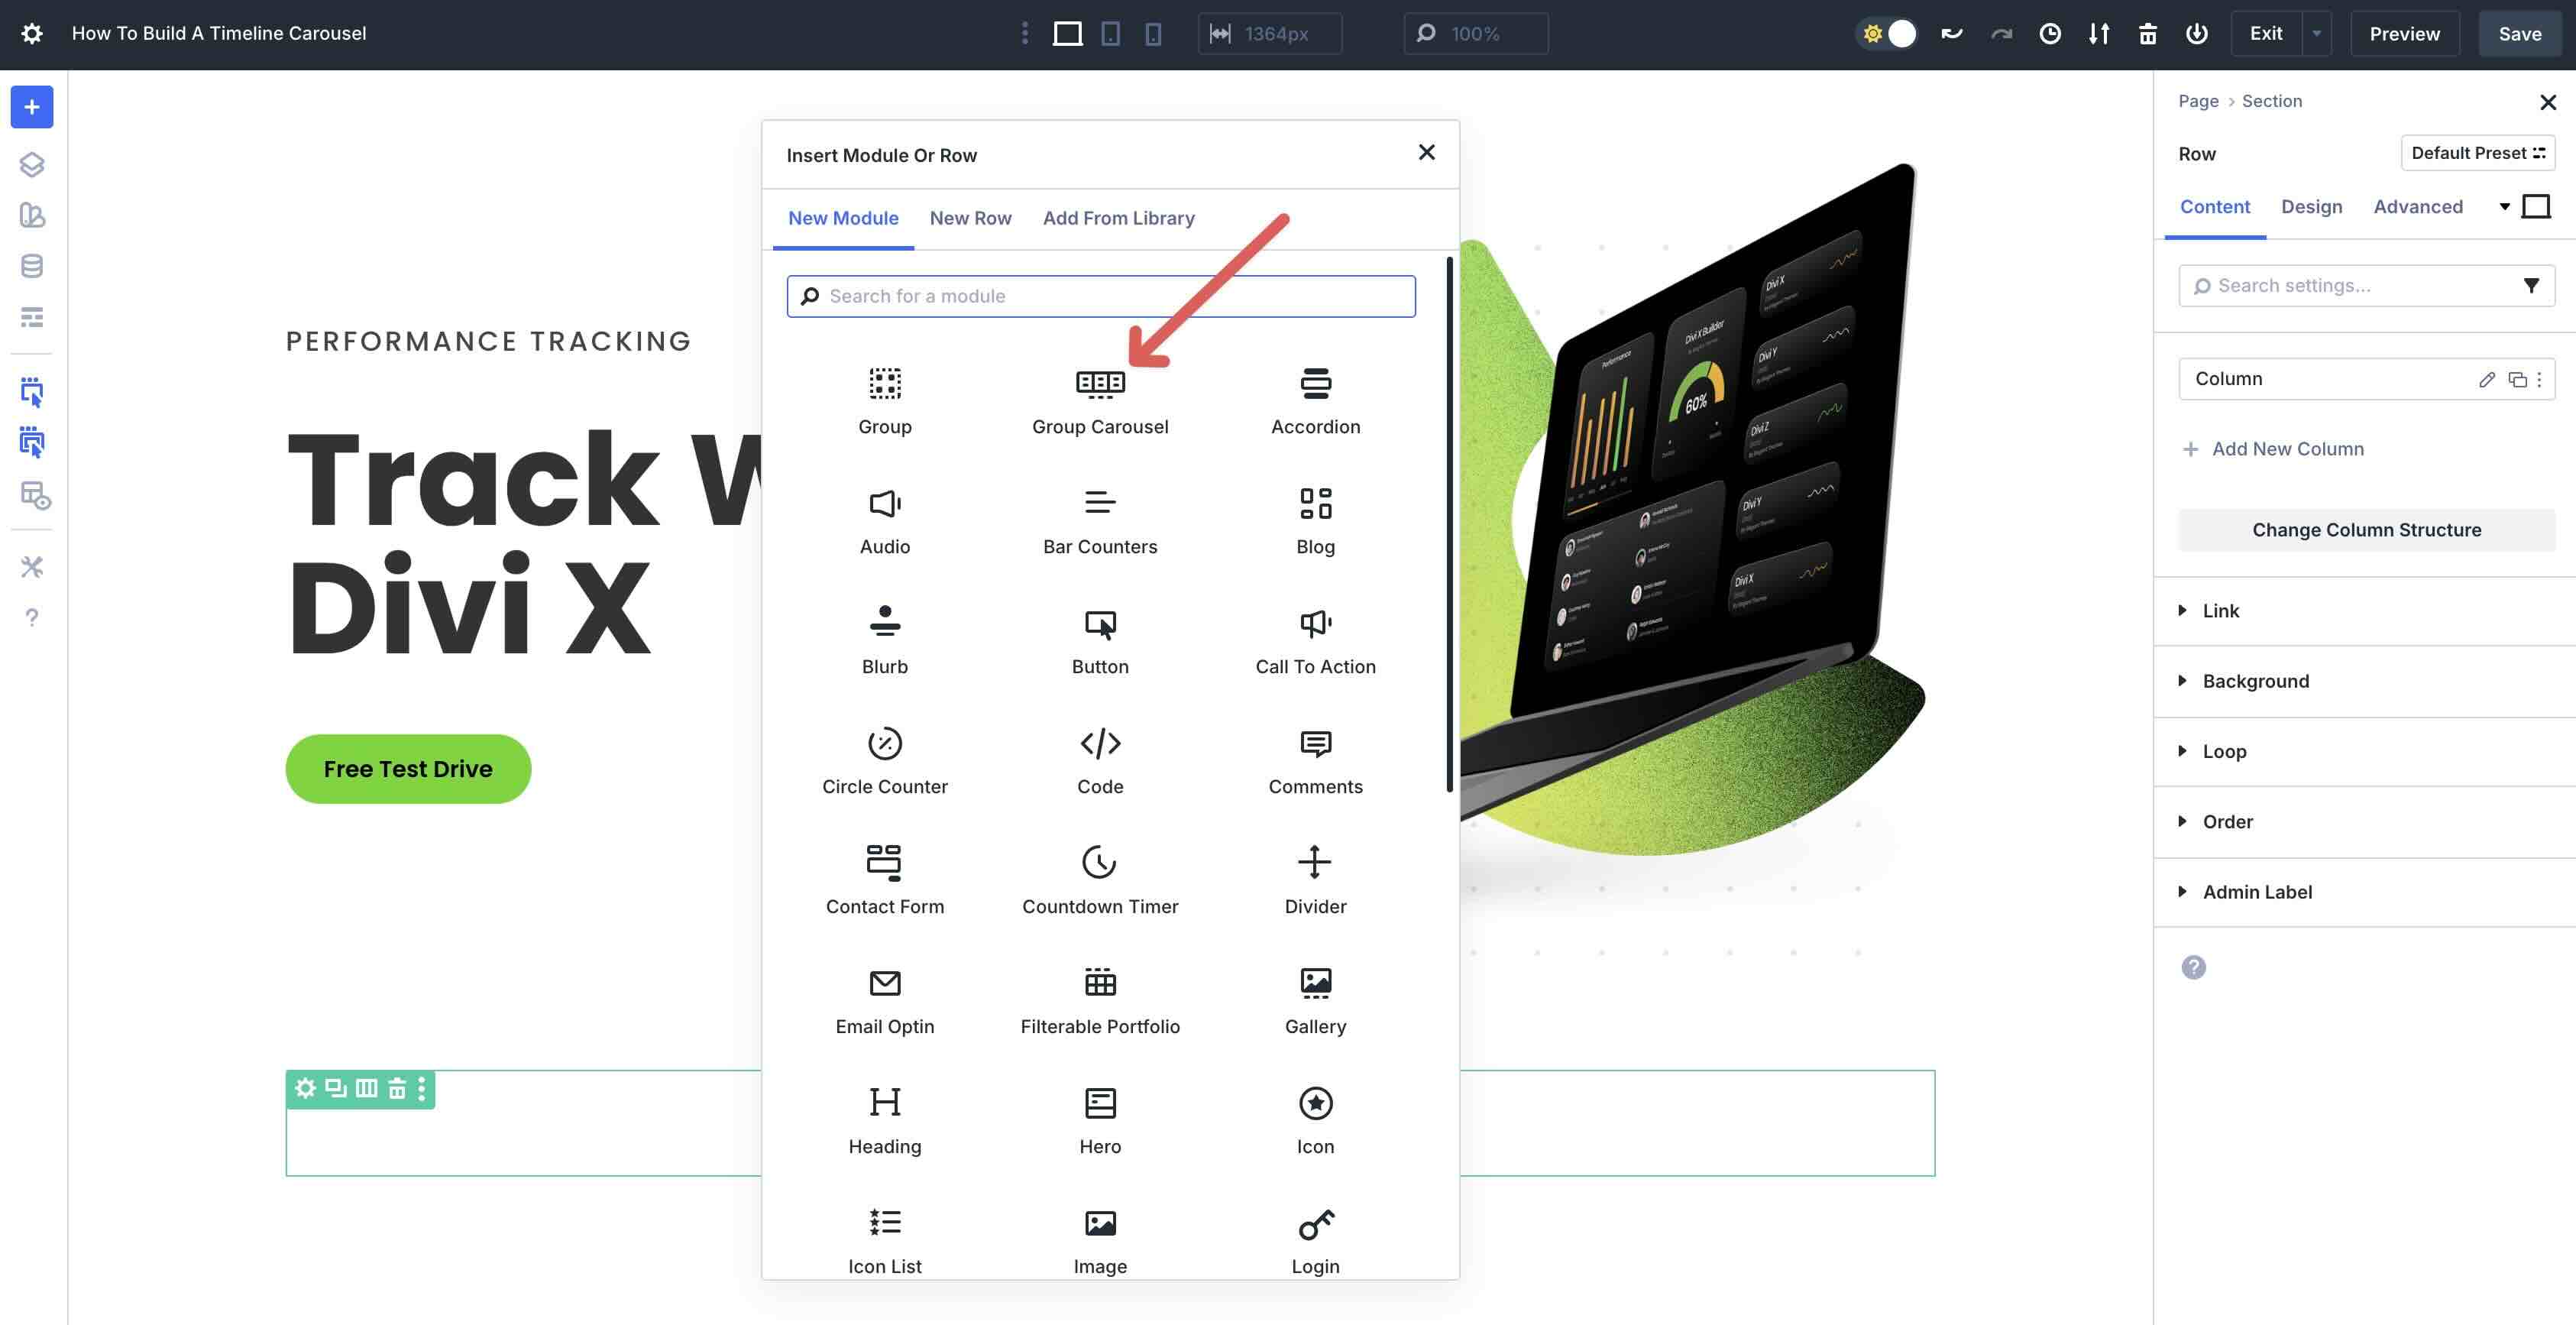
Subsequent, we’ll upload the Crew Carousel module to the row.
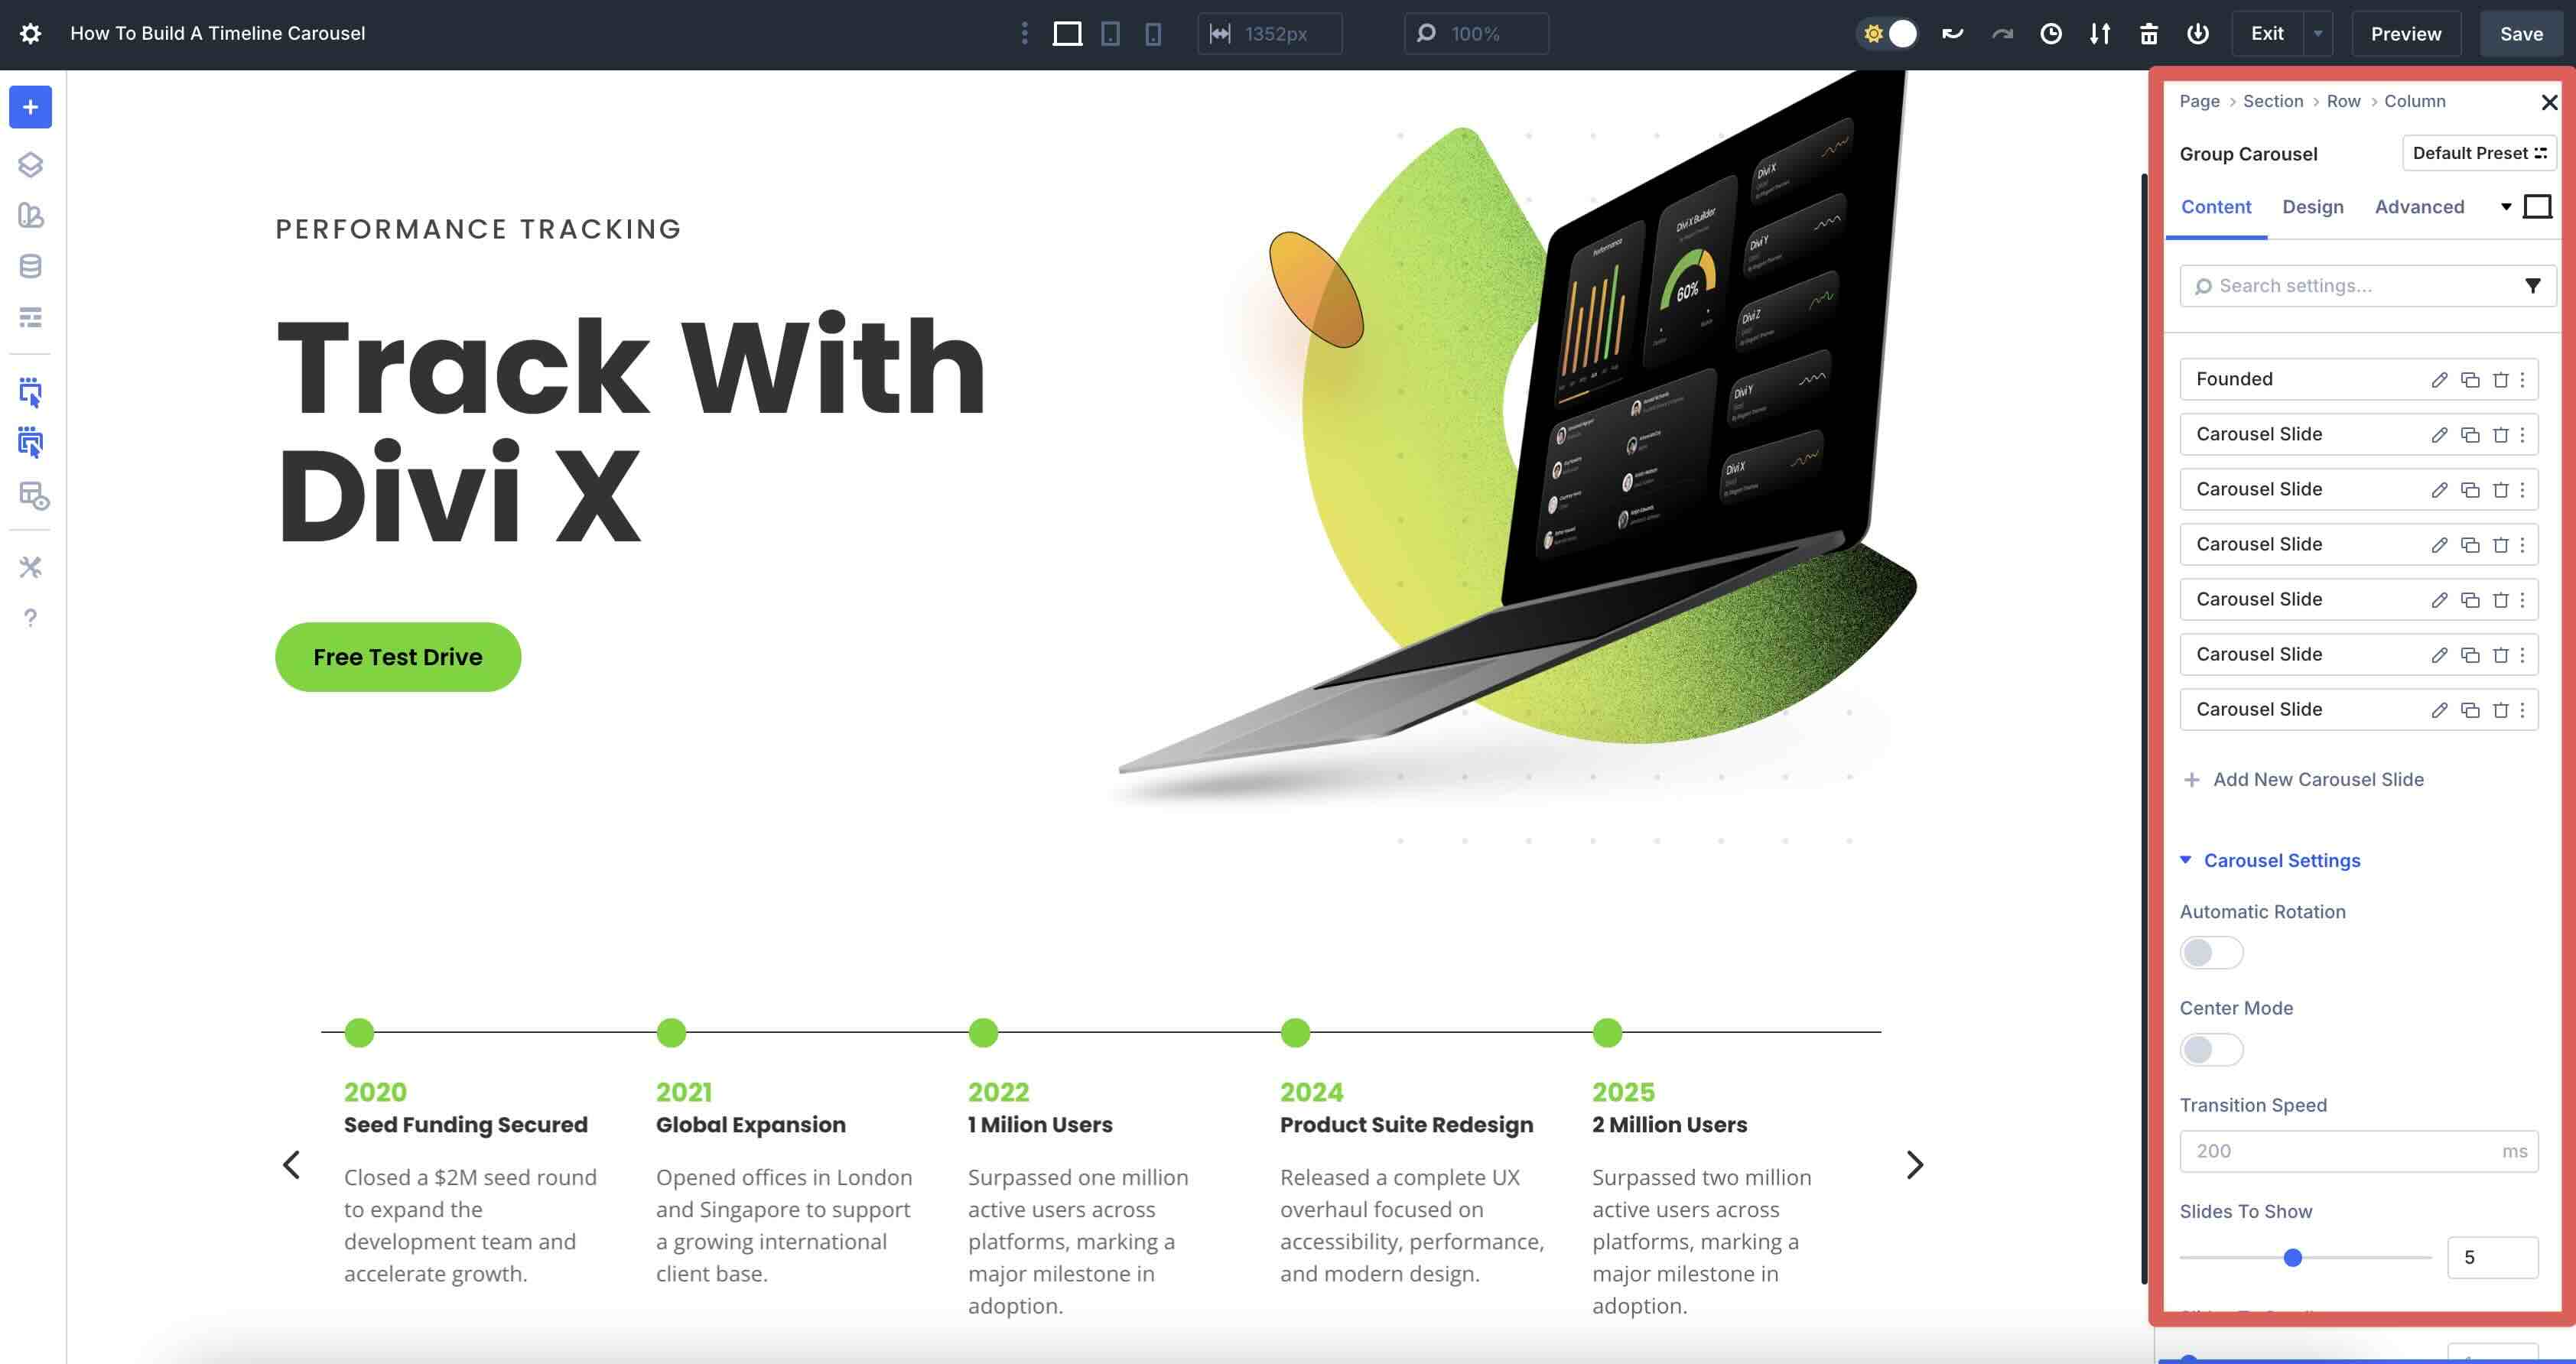
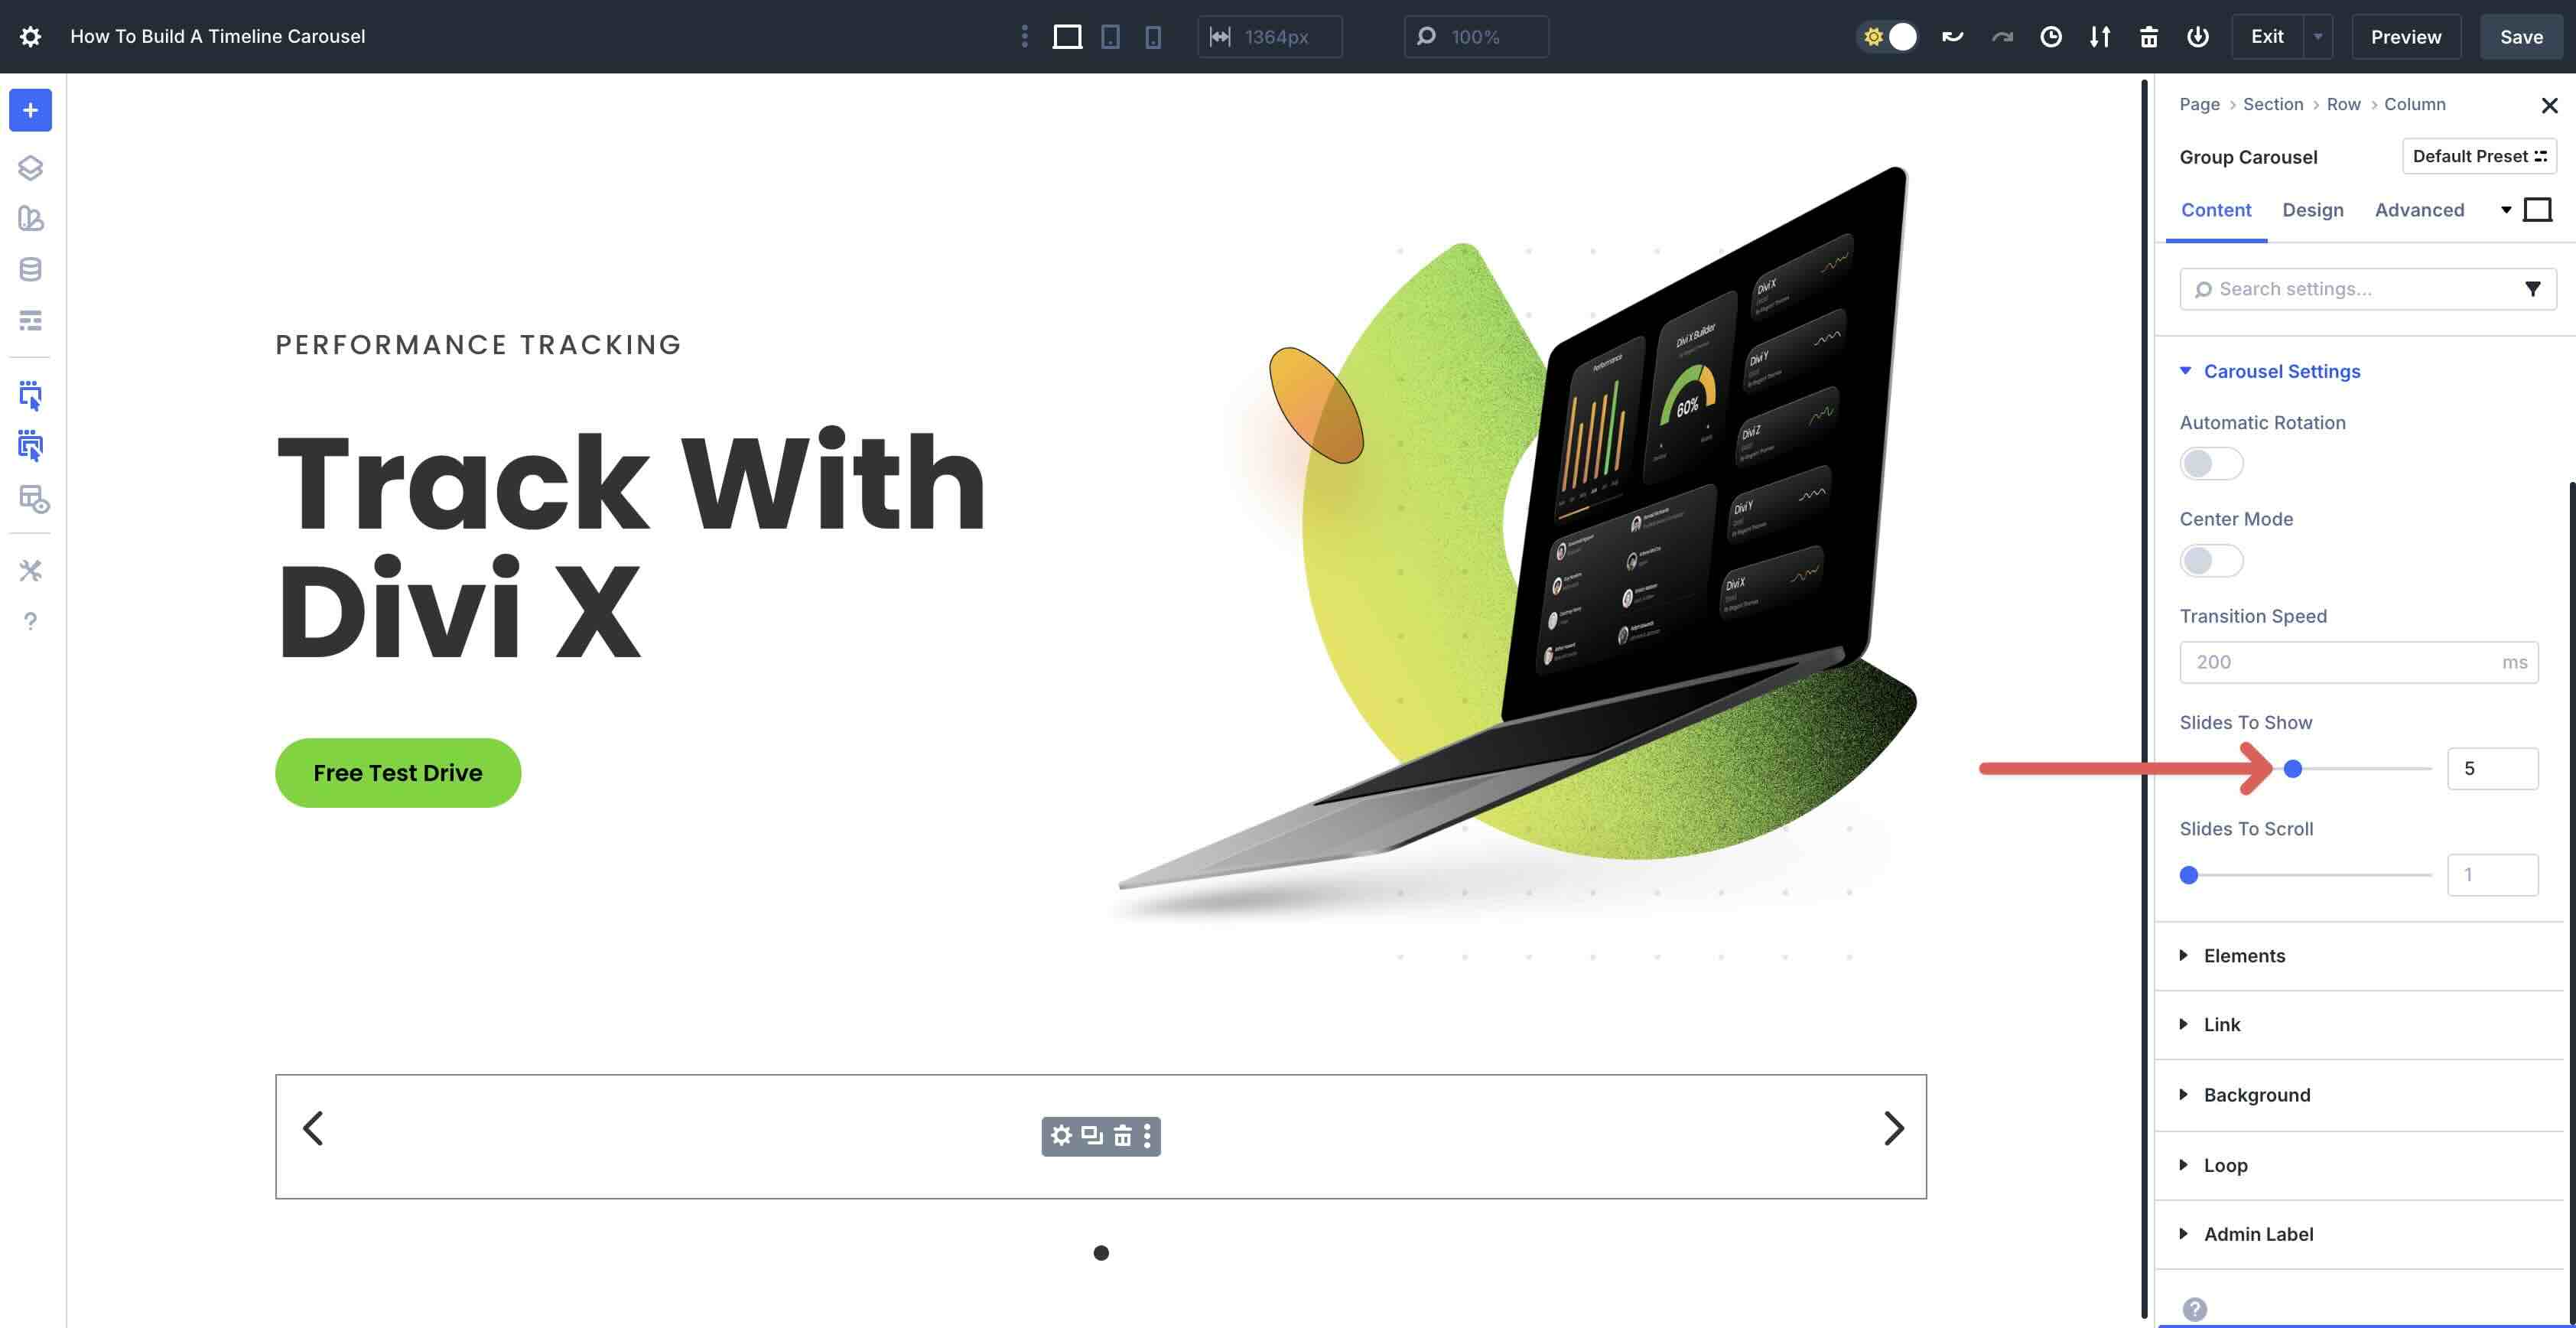
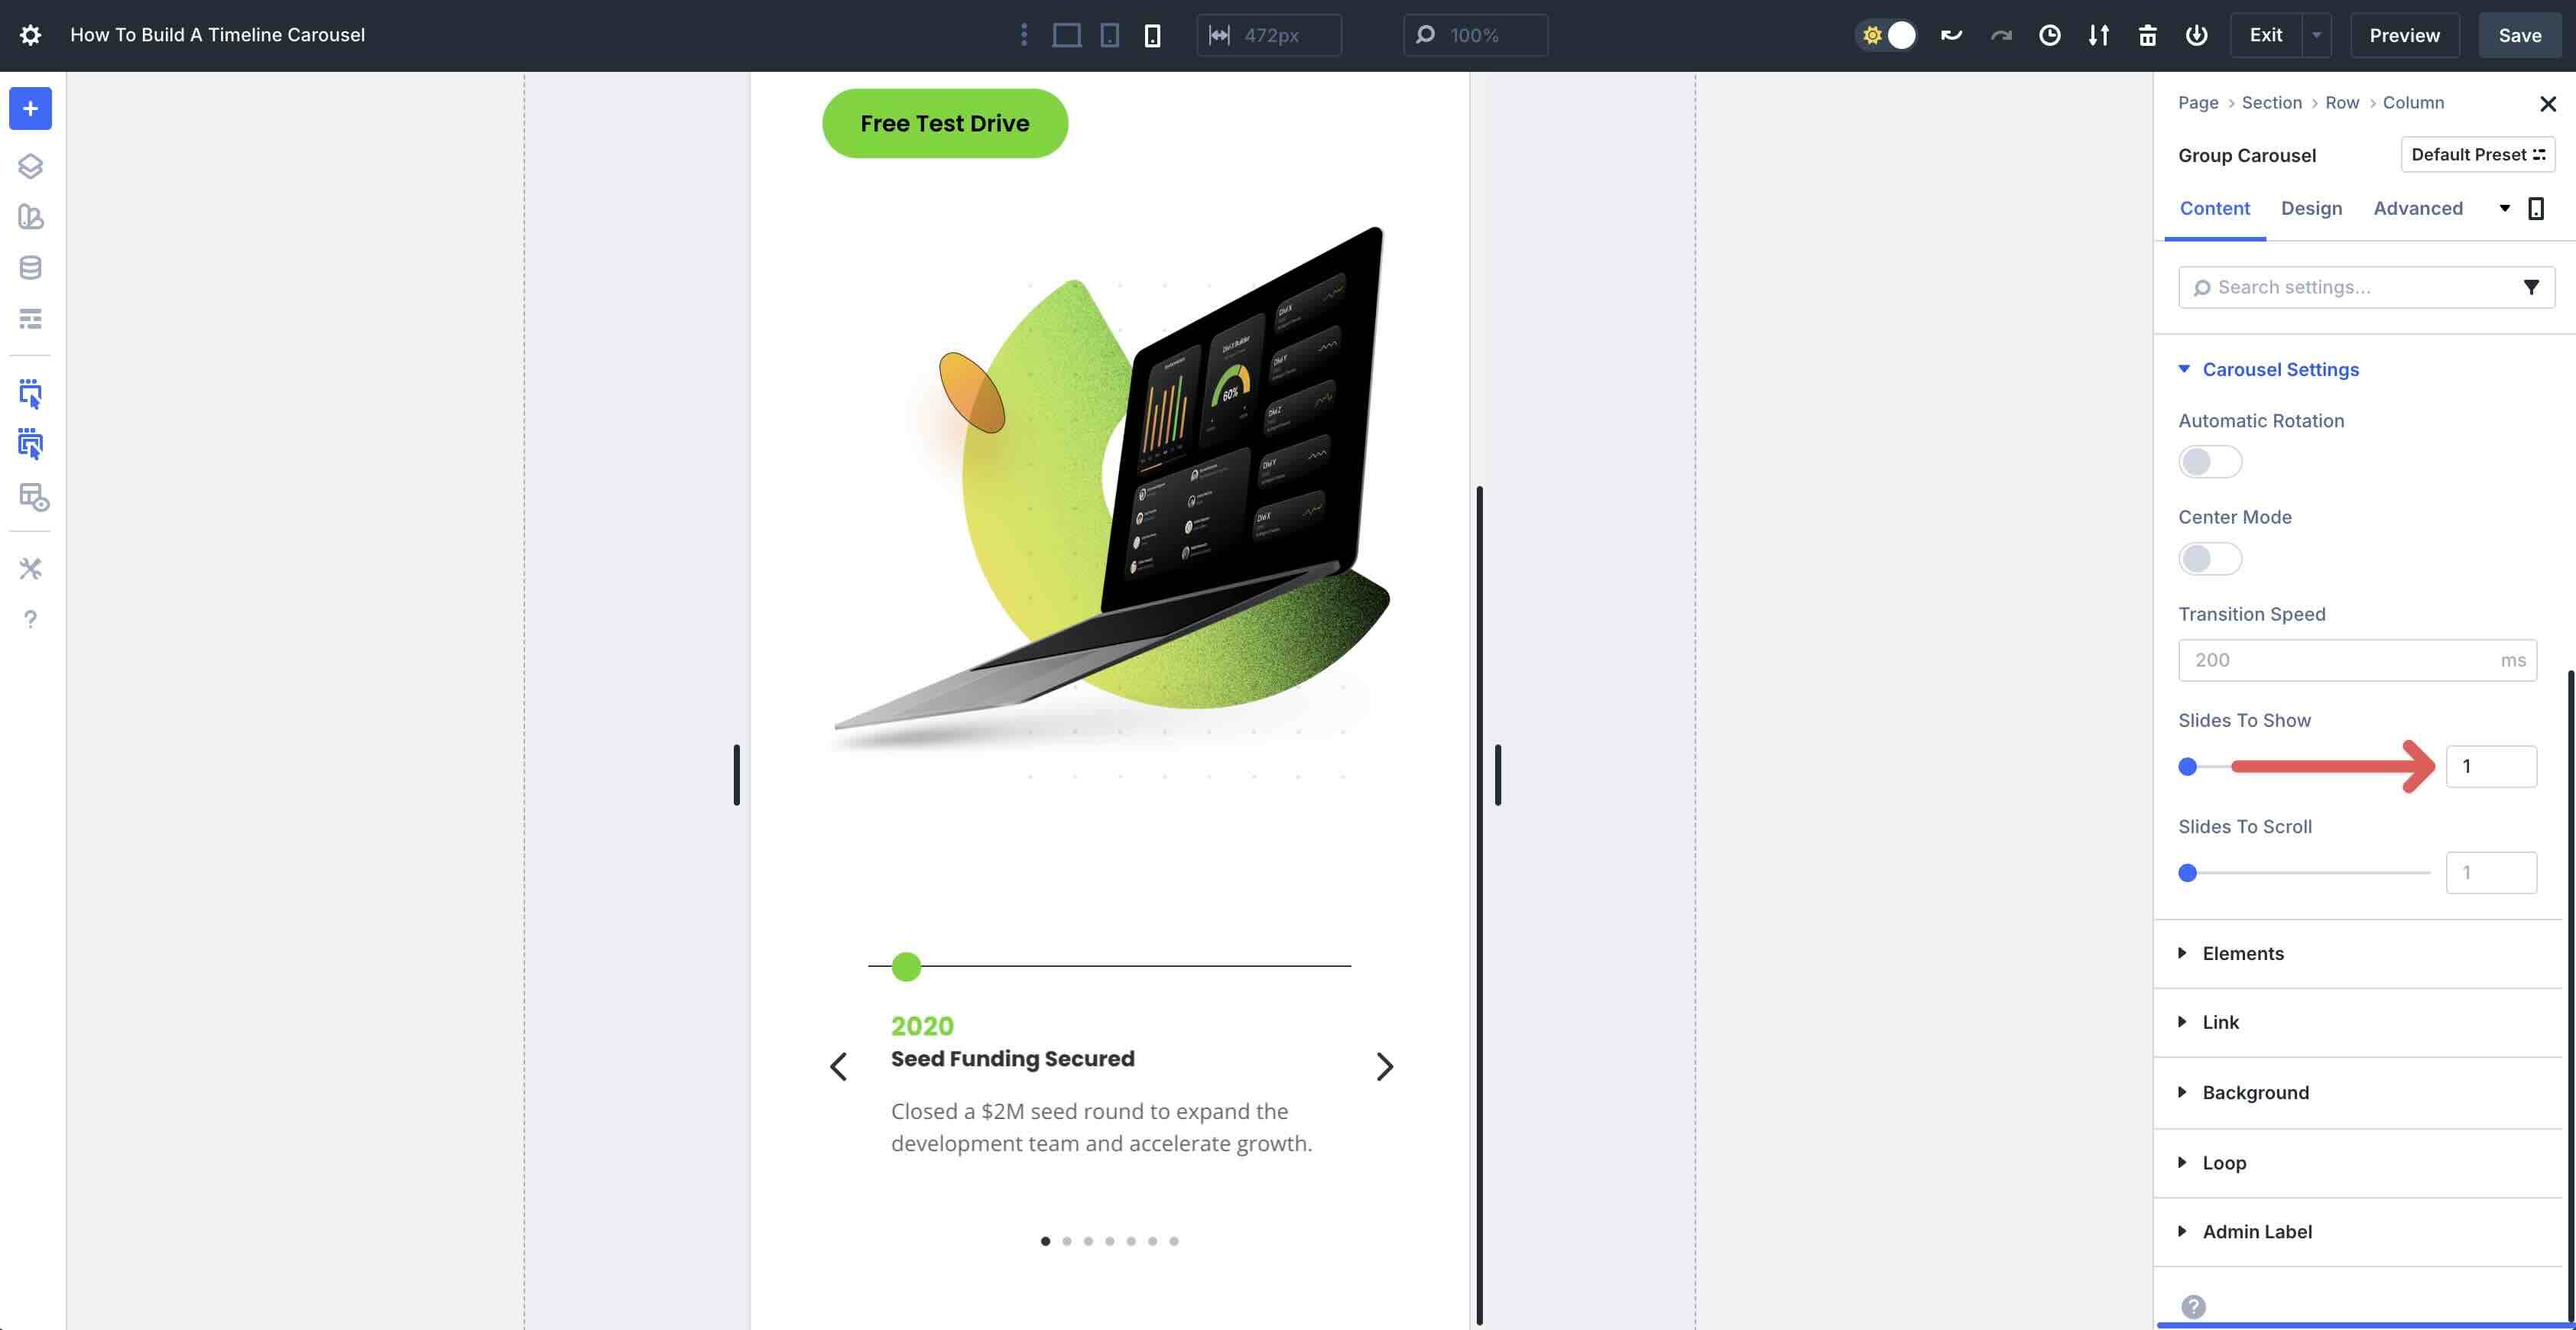
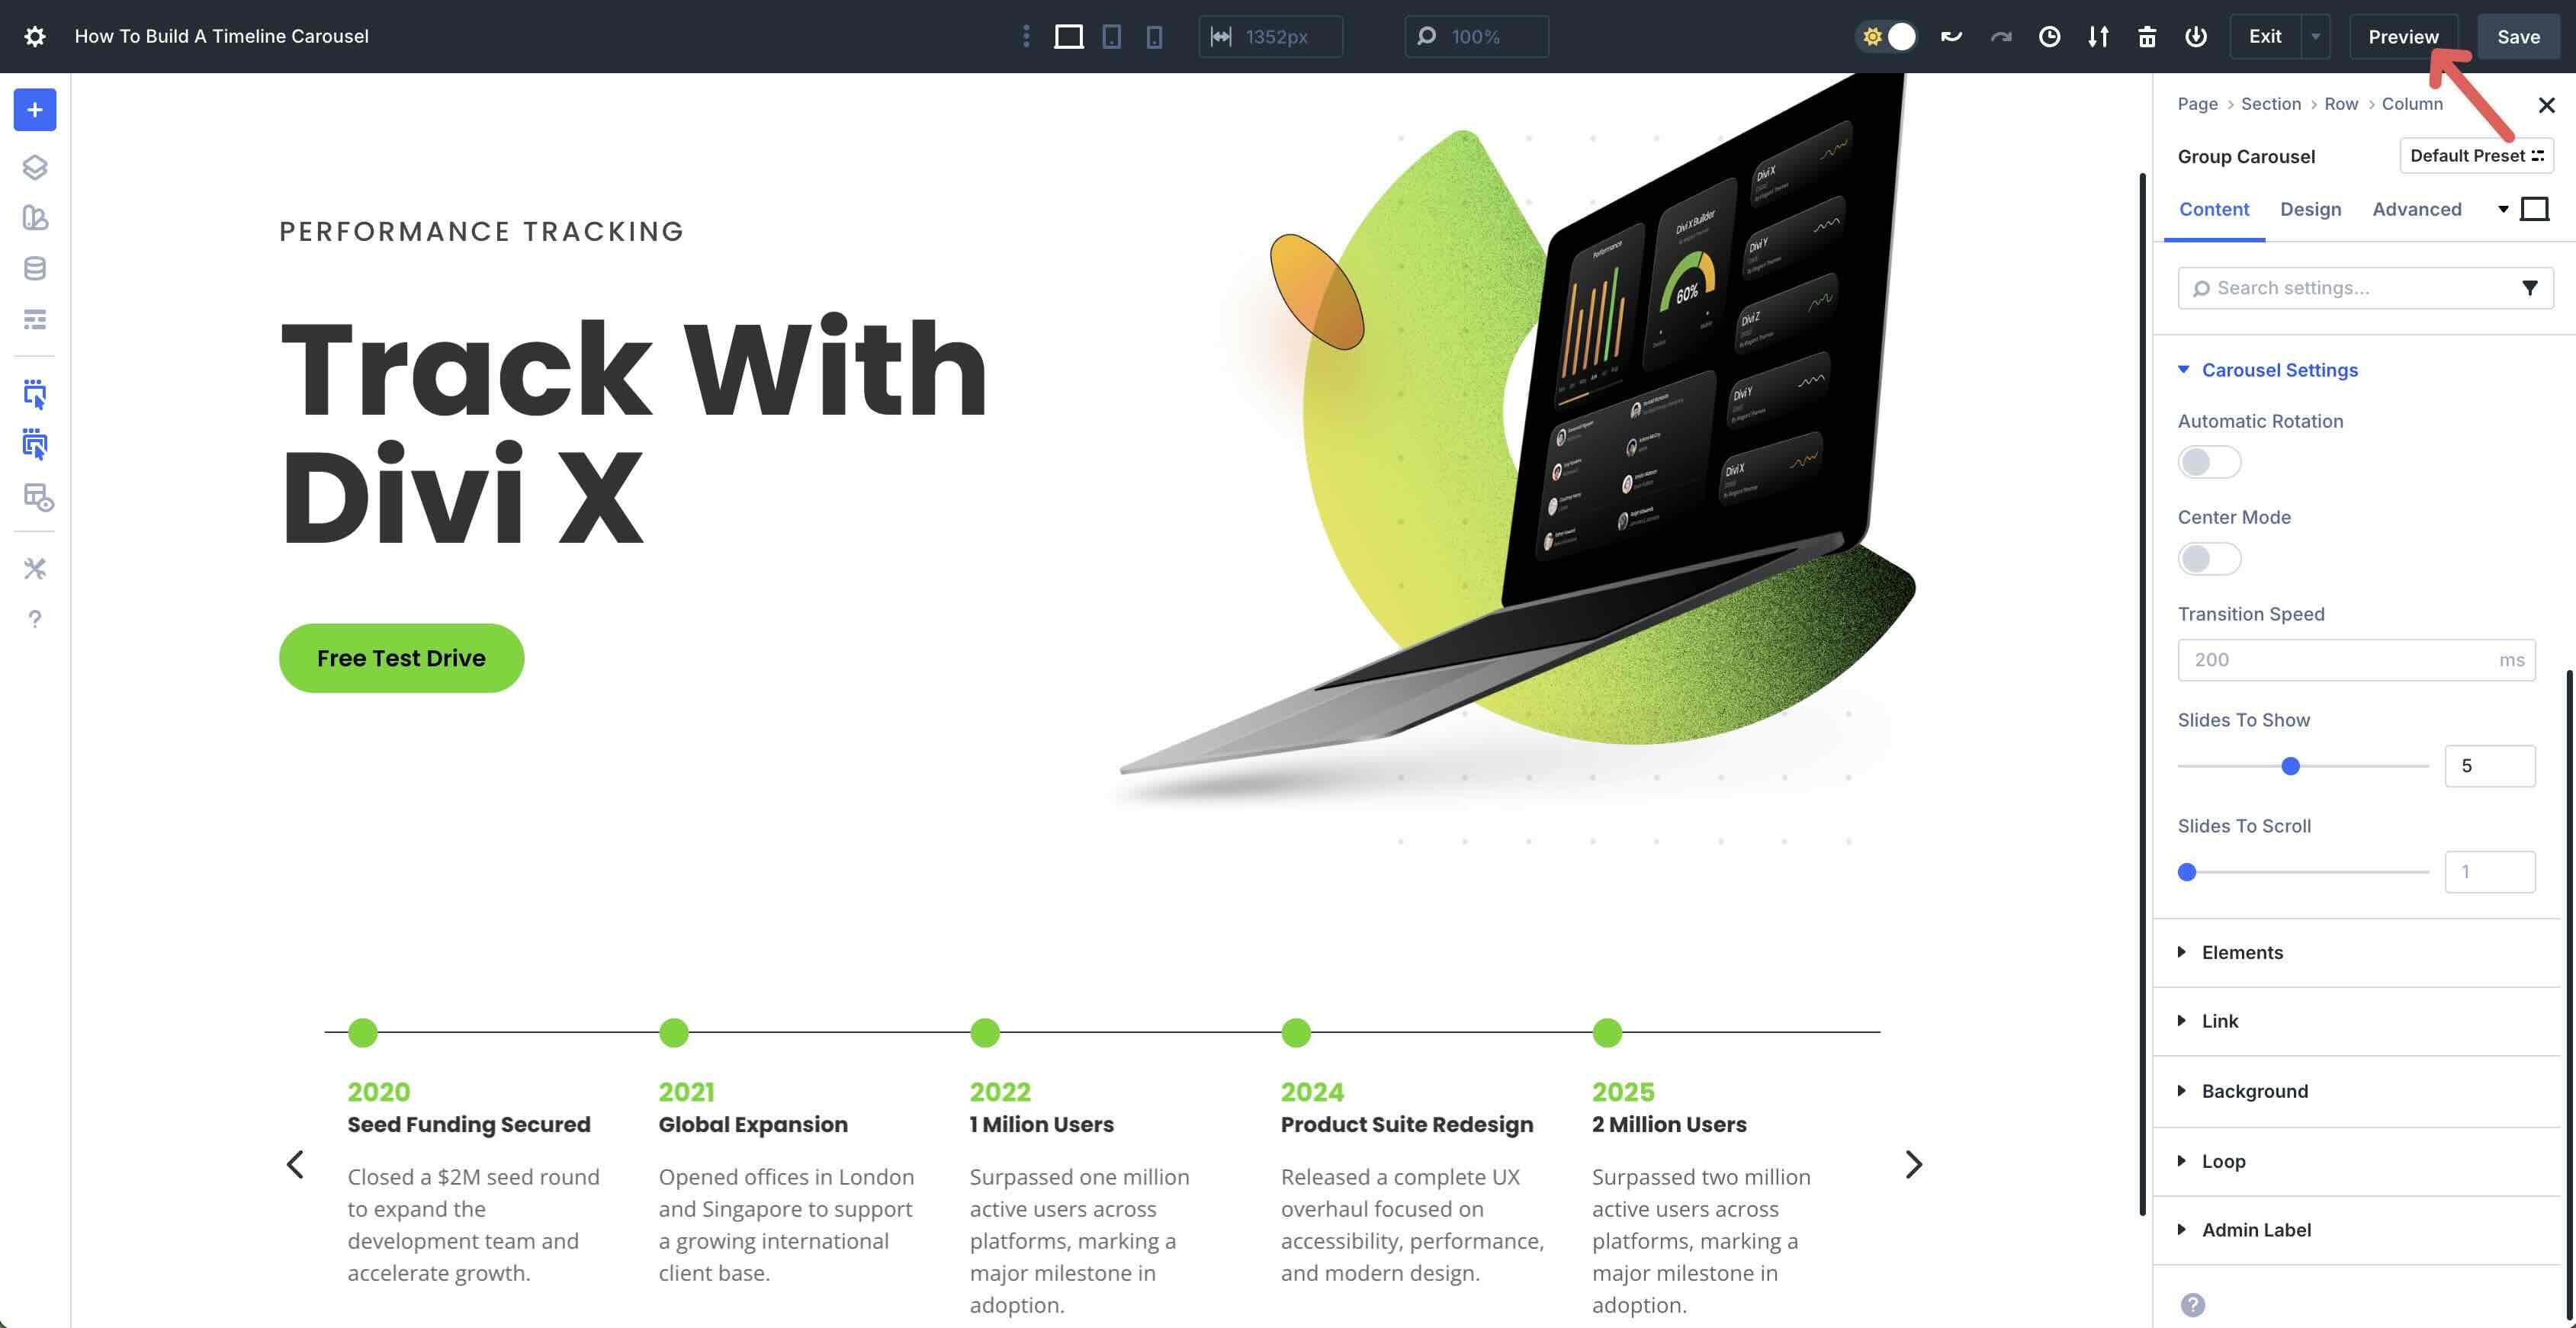
Within the Content material tab, extend the Carousel Settings menu. Depart all settings at their defaults, however set the Slides To Display to 5.
Transfer to the Design tab and extend the Arrows menu. Set the Arrow Measurement to 40px and the Arrow Place to Outdoor.
![]()
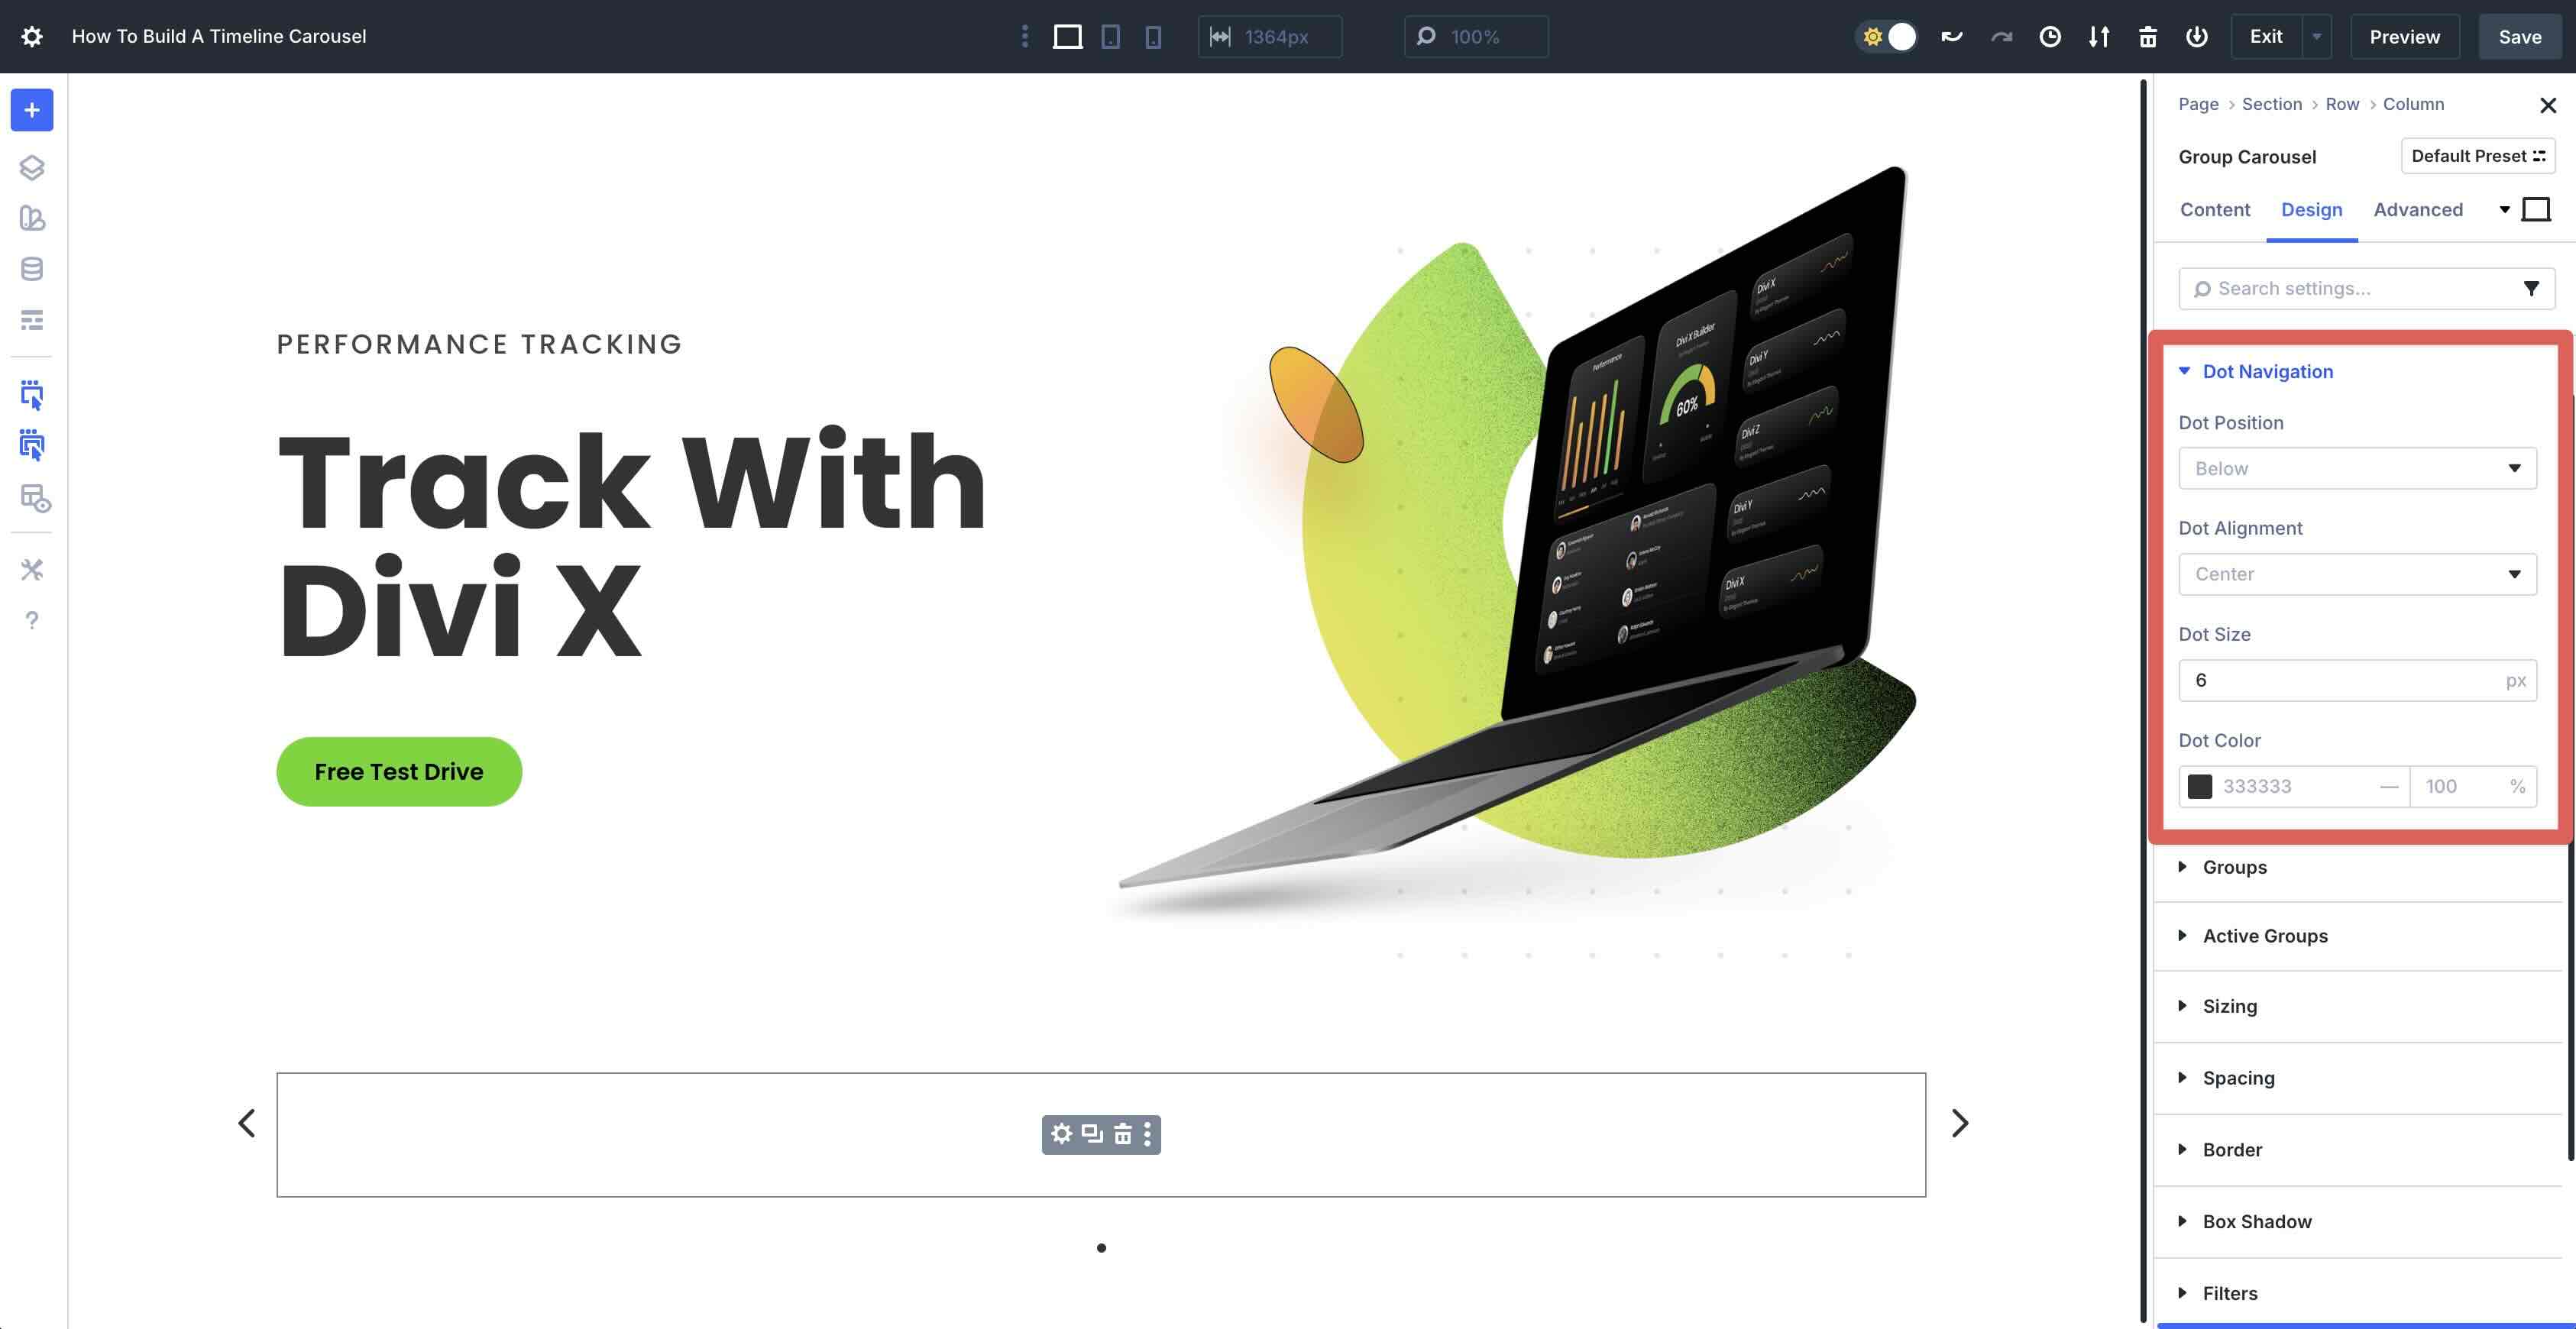
Subsequent, extend the Dot Navigation menu. Set the Dot Measurement to 6px.
Enlarge the Teams > Spacing menu and upload 15px Margin to the Left and Proper.

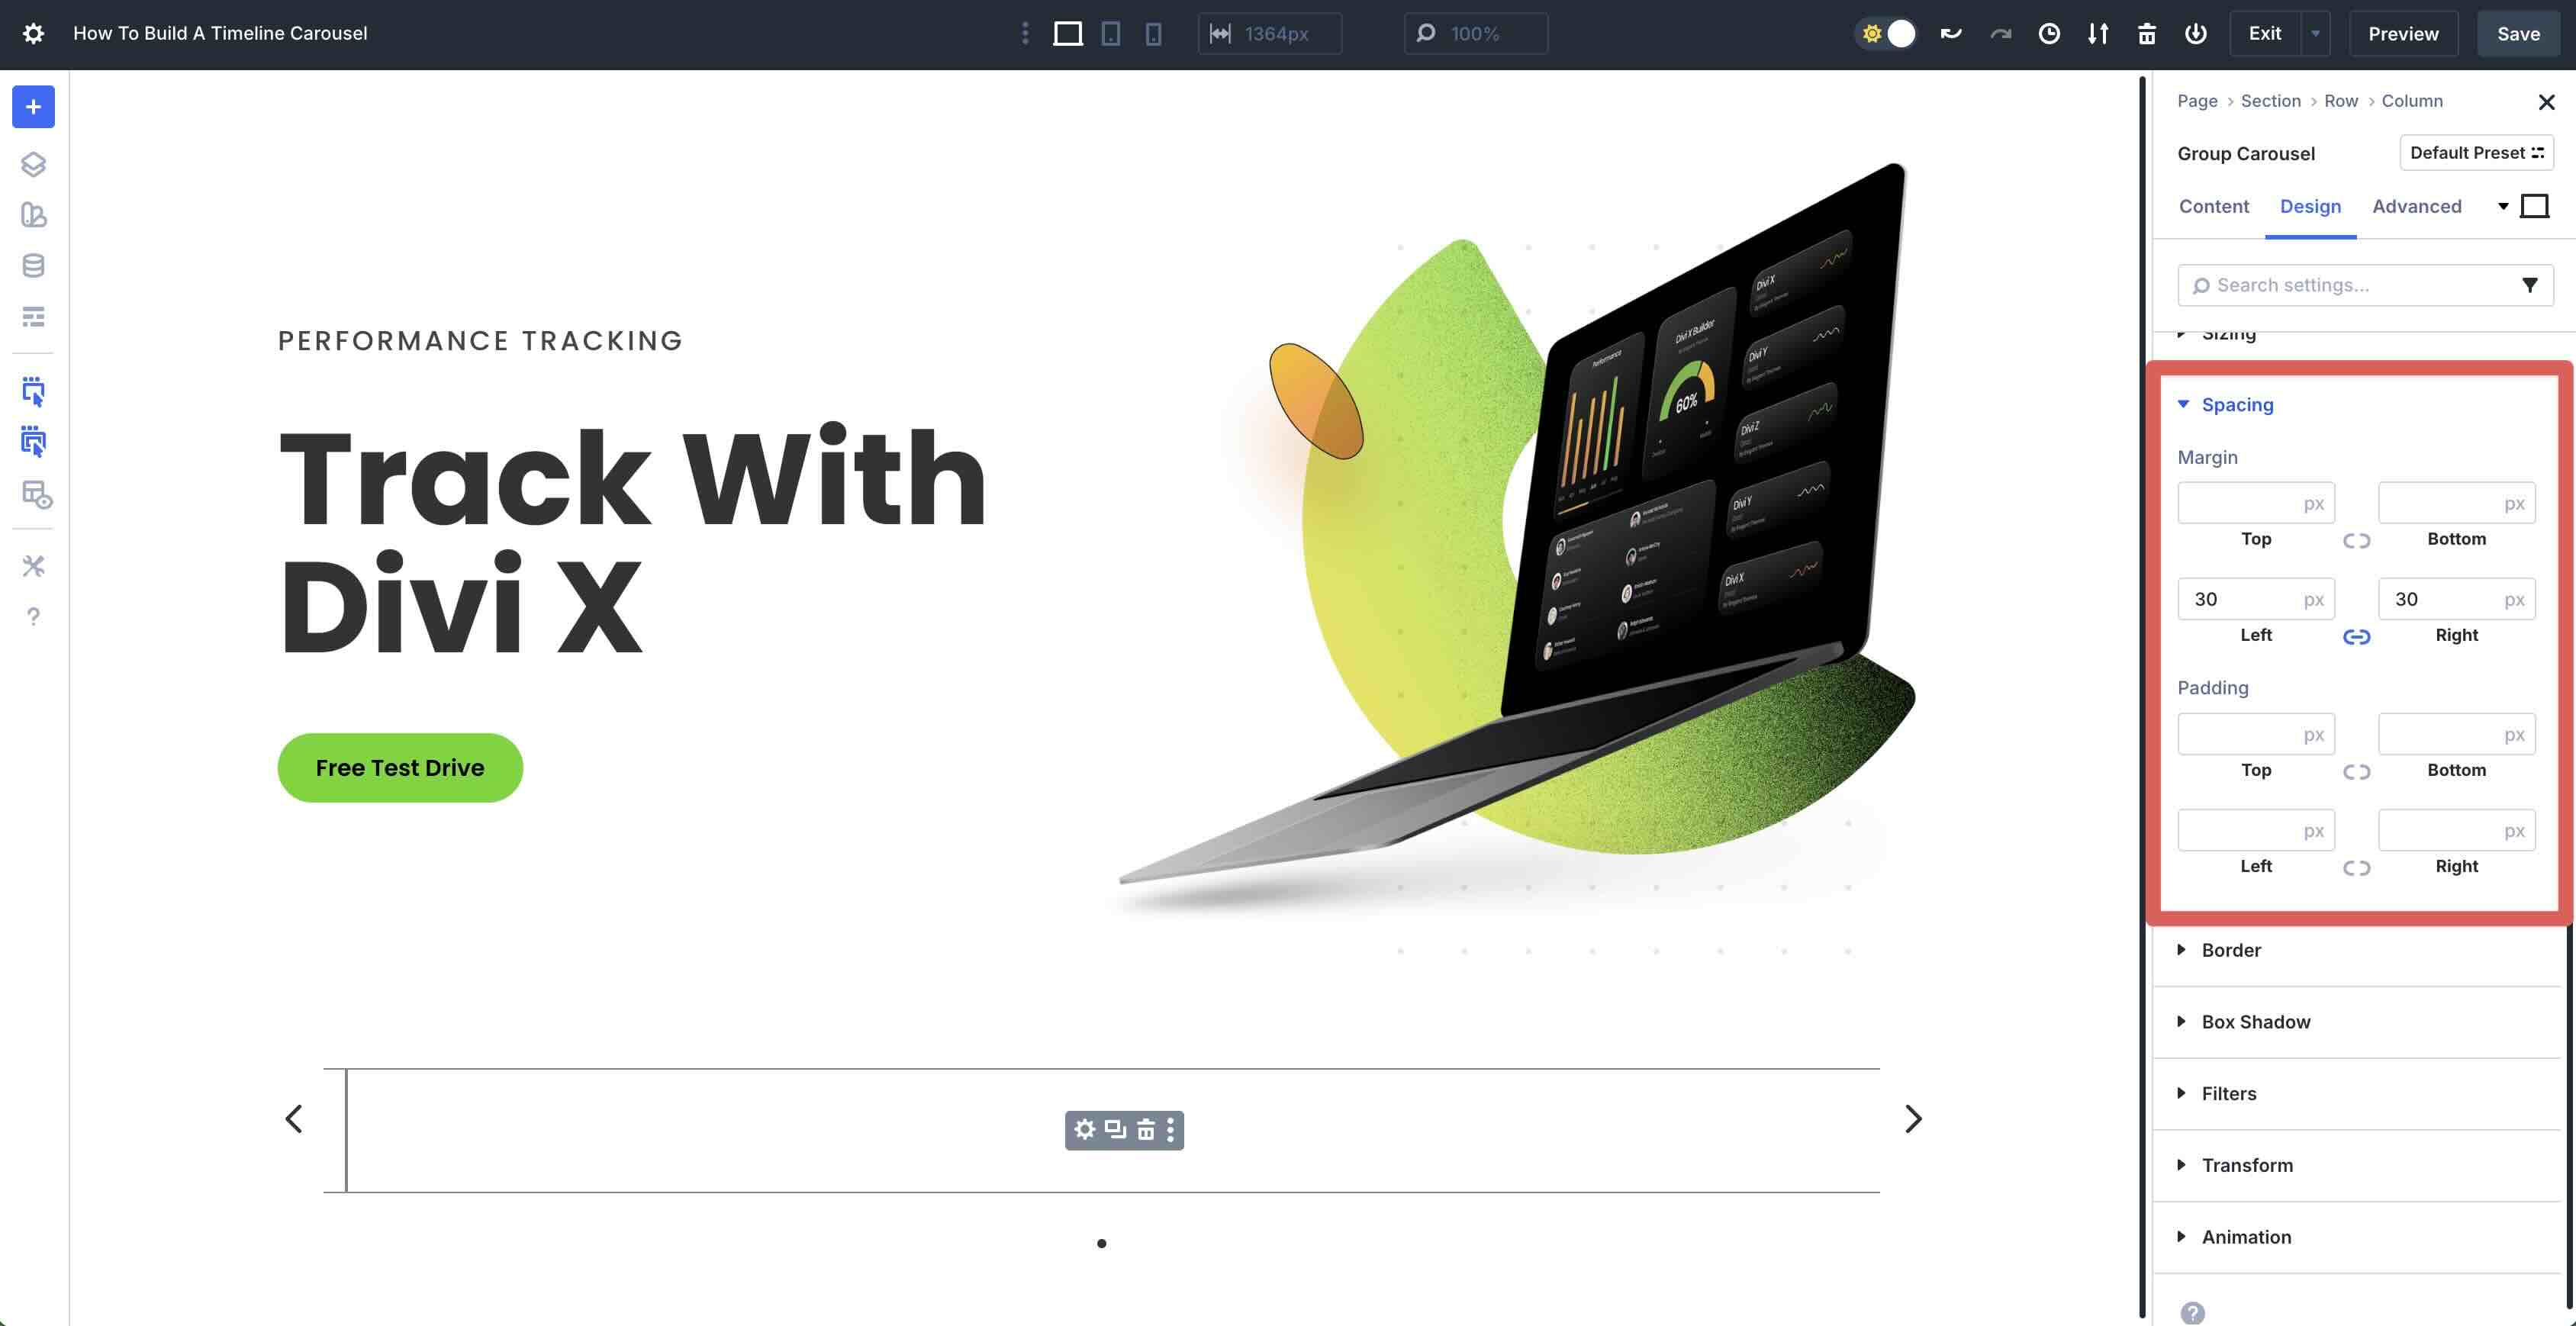
Scroll down and extend the Spacing menu. Upload 30px Margin to the Left and Proper.
Enlarge the Border menu. Below Border Types, click on the Border Most sensible tab. Input 1px Most sensible Border Width.

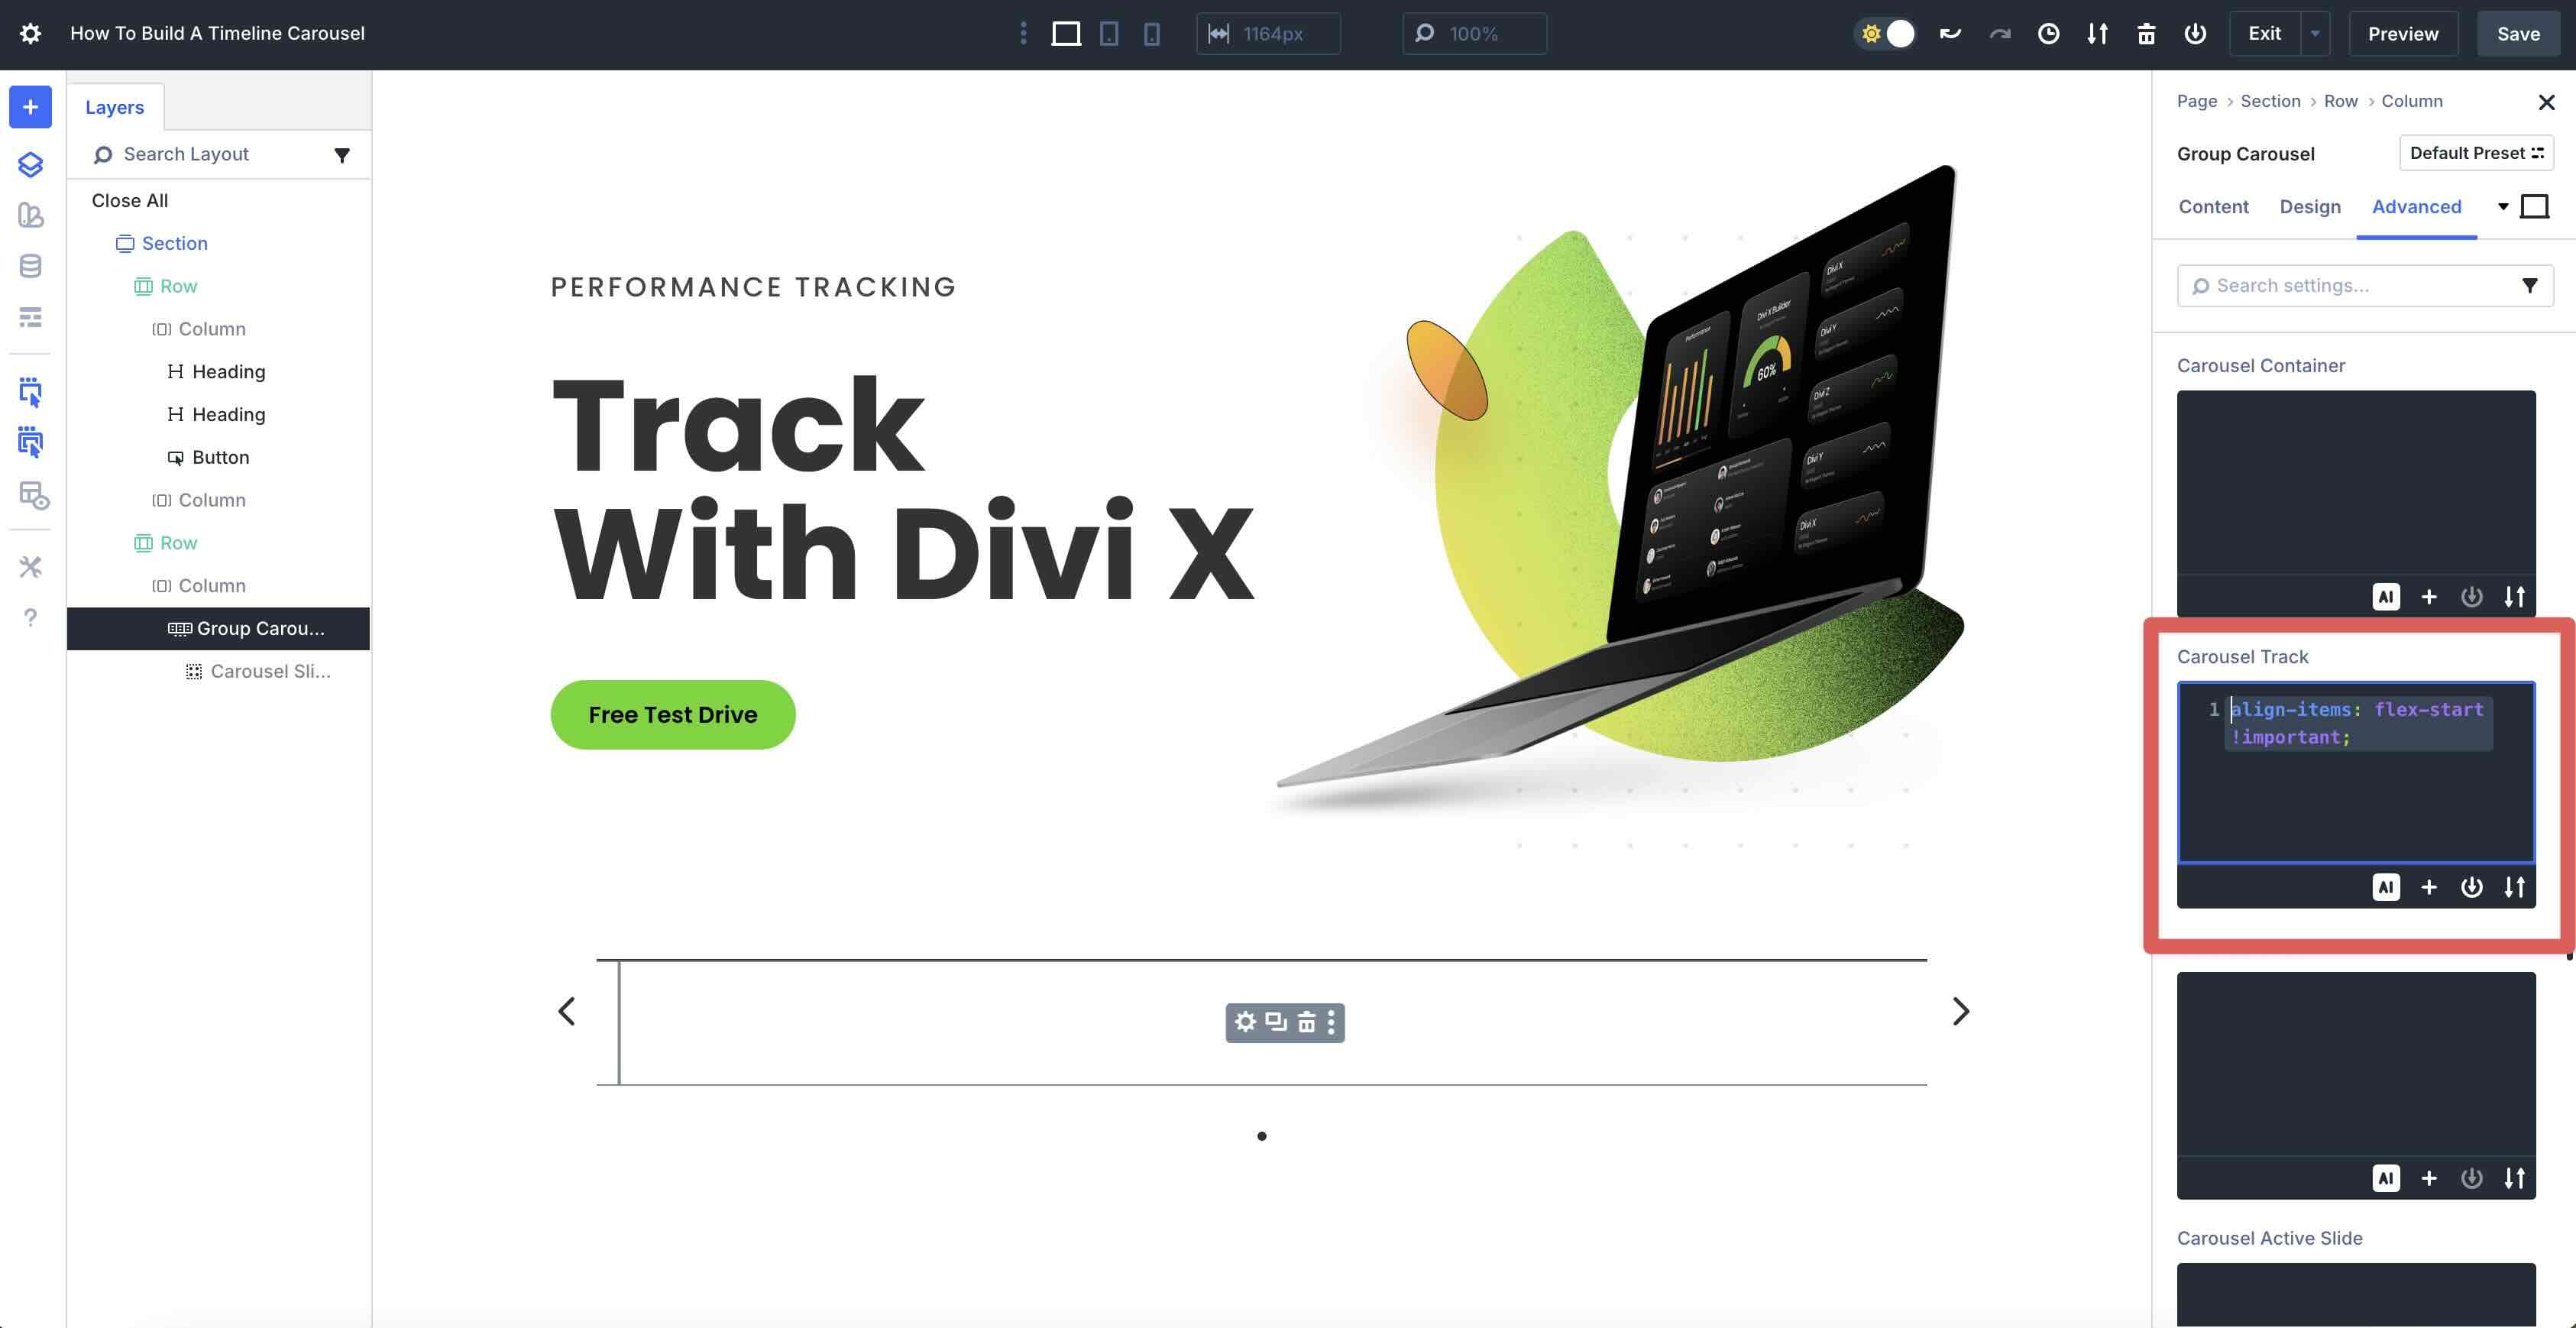
Subsequent, navigate to the Complicated tab. Enlarge the CSS dropdown menu, tab over to Module Components, and position the next code within the Carousel Monitor box:
align-items: flex-start !vital;
Step 2: Upload The First Crew
With our Crew Carousel settings in position, we will be able to birth designing the primary Crew. Click on to edit the one Crew within the Crew Carousel module.
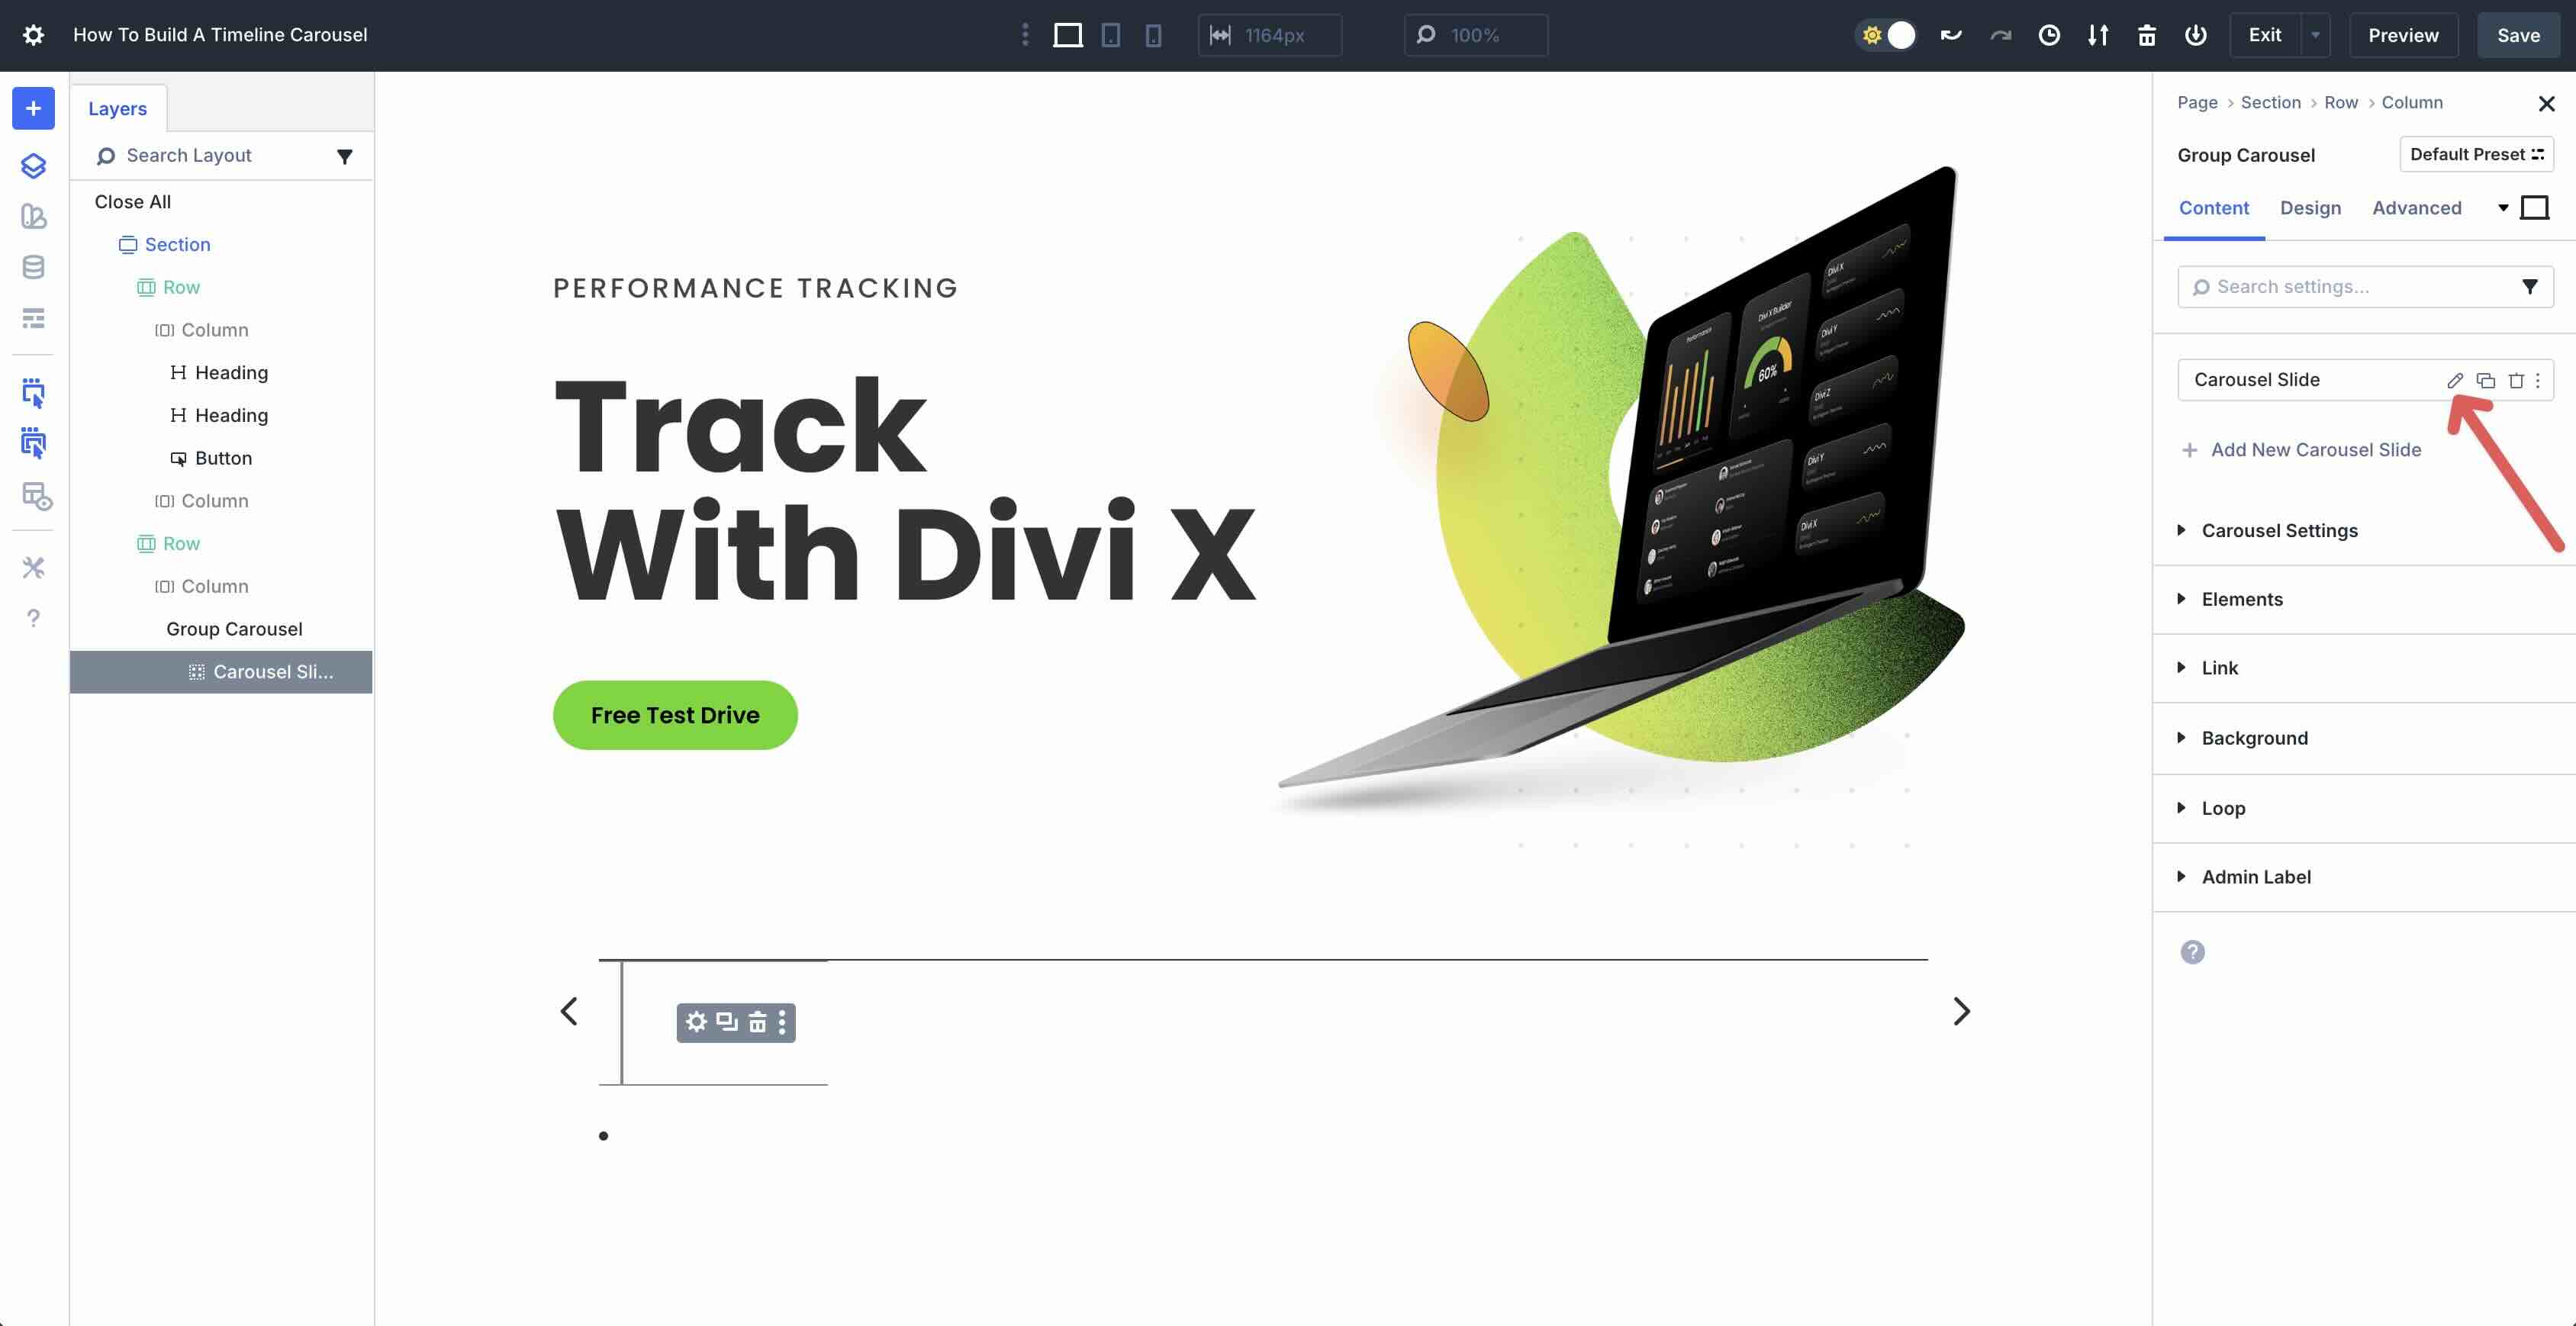
Enlarge the Admin Label box and assign a reputation to it. This is helping determine teams within the Layers View.
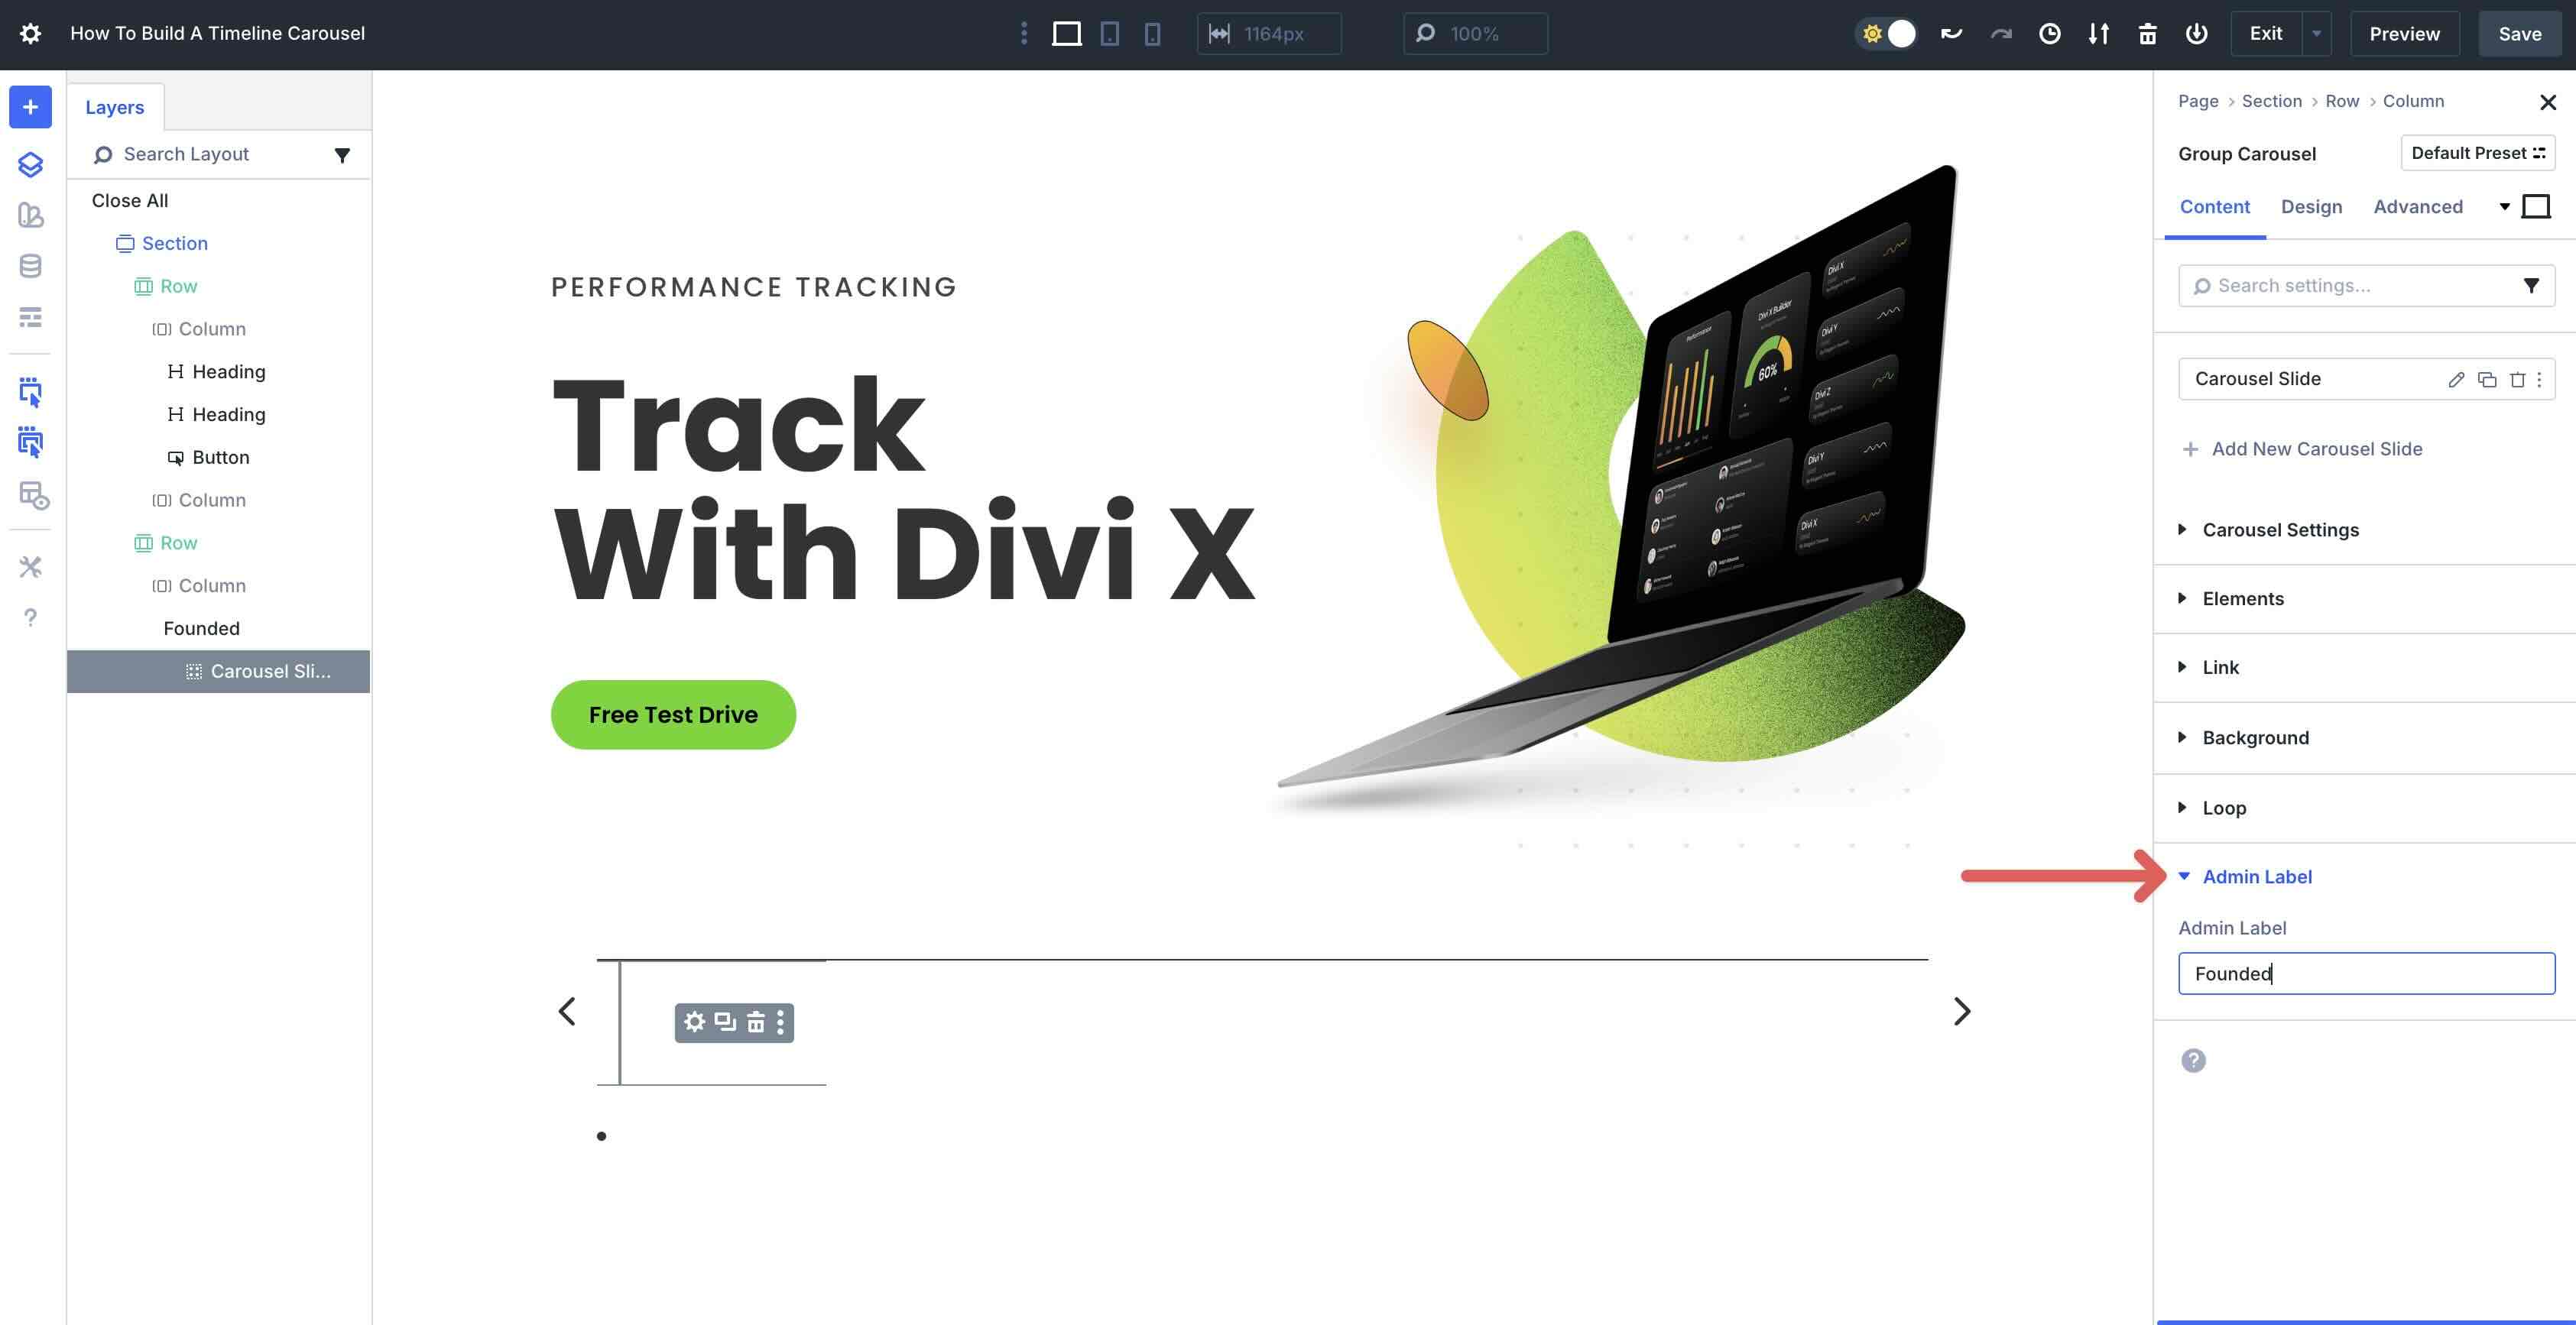
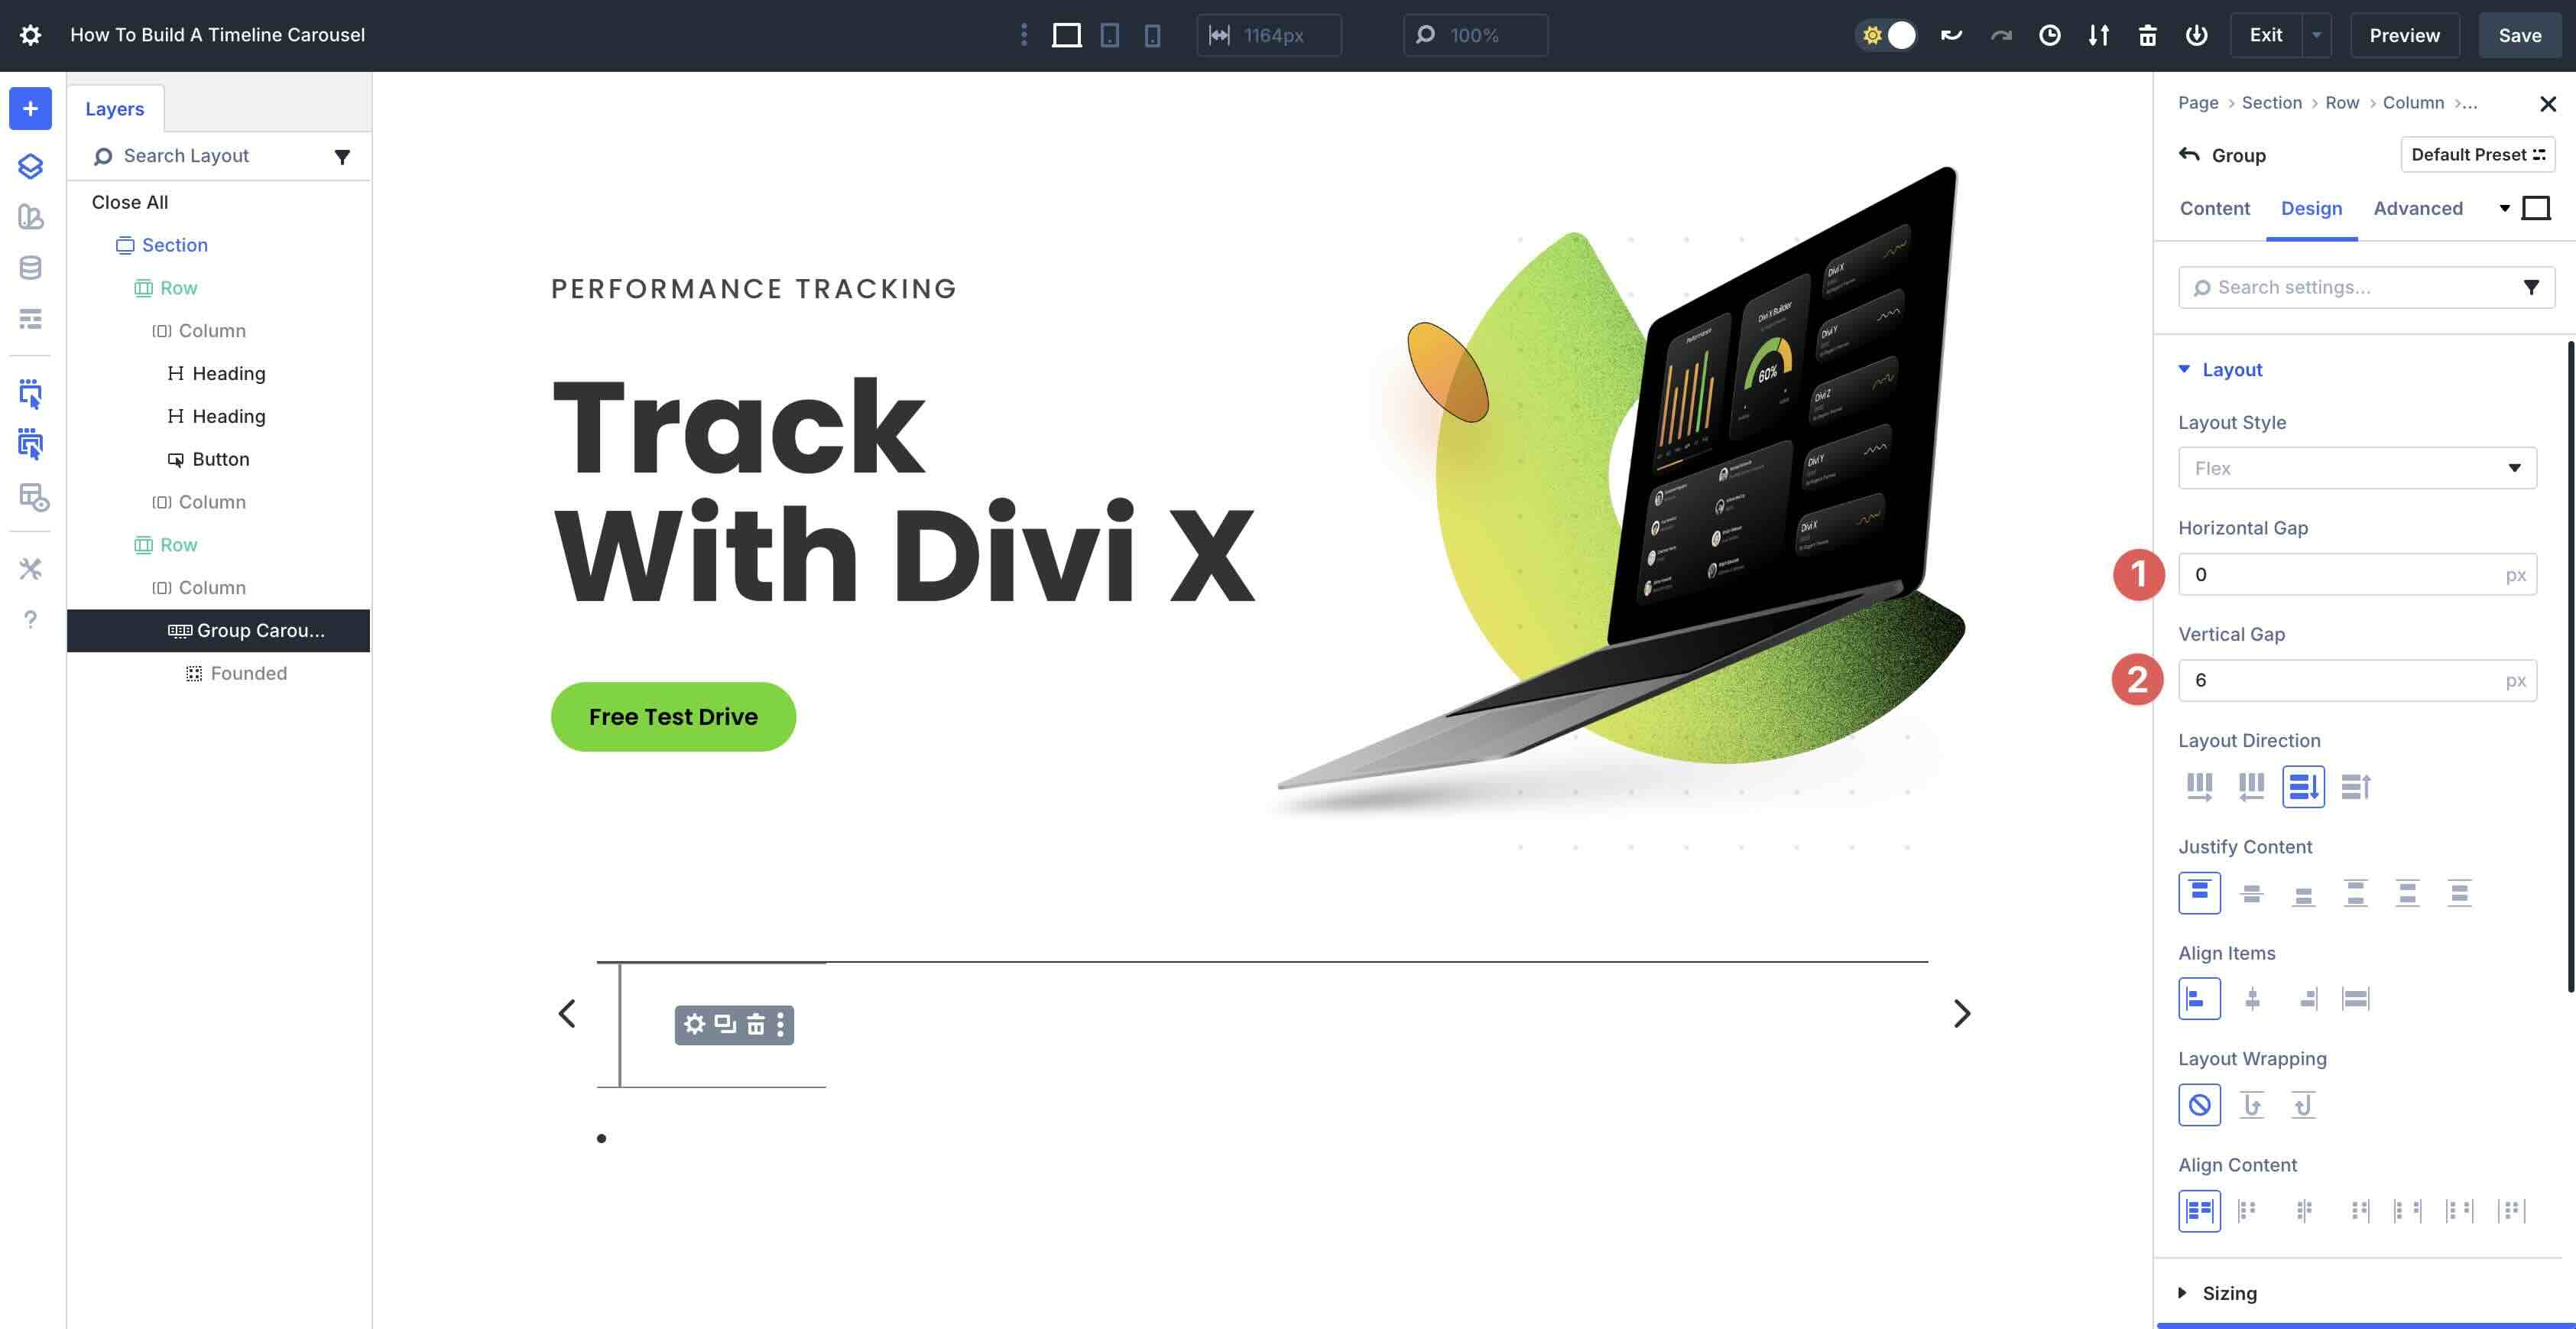
Tab over to the Design settings. Enlarge the Structure menu and upload 0px within the Horizontal Hole box. Within the Vertical Hole box, input 6px.
Upload An Icon Module
Click on so as to add the Icon module to the primary Crew. Enlarge the Icon menu and make a choice an icon.
![]()
Navigate to the Design tab and extend the Icon menu. Assign #62d60a because the Icon Colour, and 20px because the Icon Measurement.
![]()
Enlarge the Alignment menu. Set the Icon Alignment to Left.
![]()
Subsequent, we want to set Transforms for the Icon. Enlarge the Transforms menu and tab over to Grow to be Translate. Disable the hyperlink and set the Y axis to -50%.
Subsequent, click on the Grow to be Foundation tab. Set the Foundation to Left Middle.
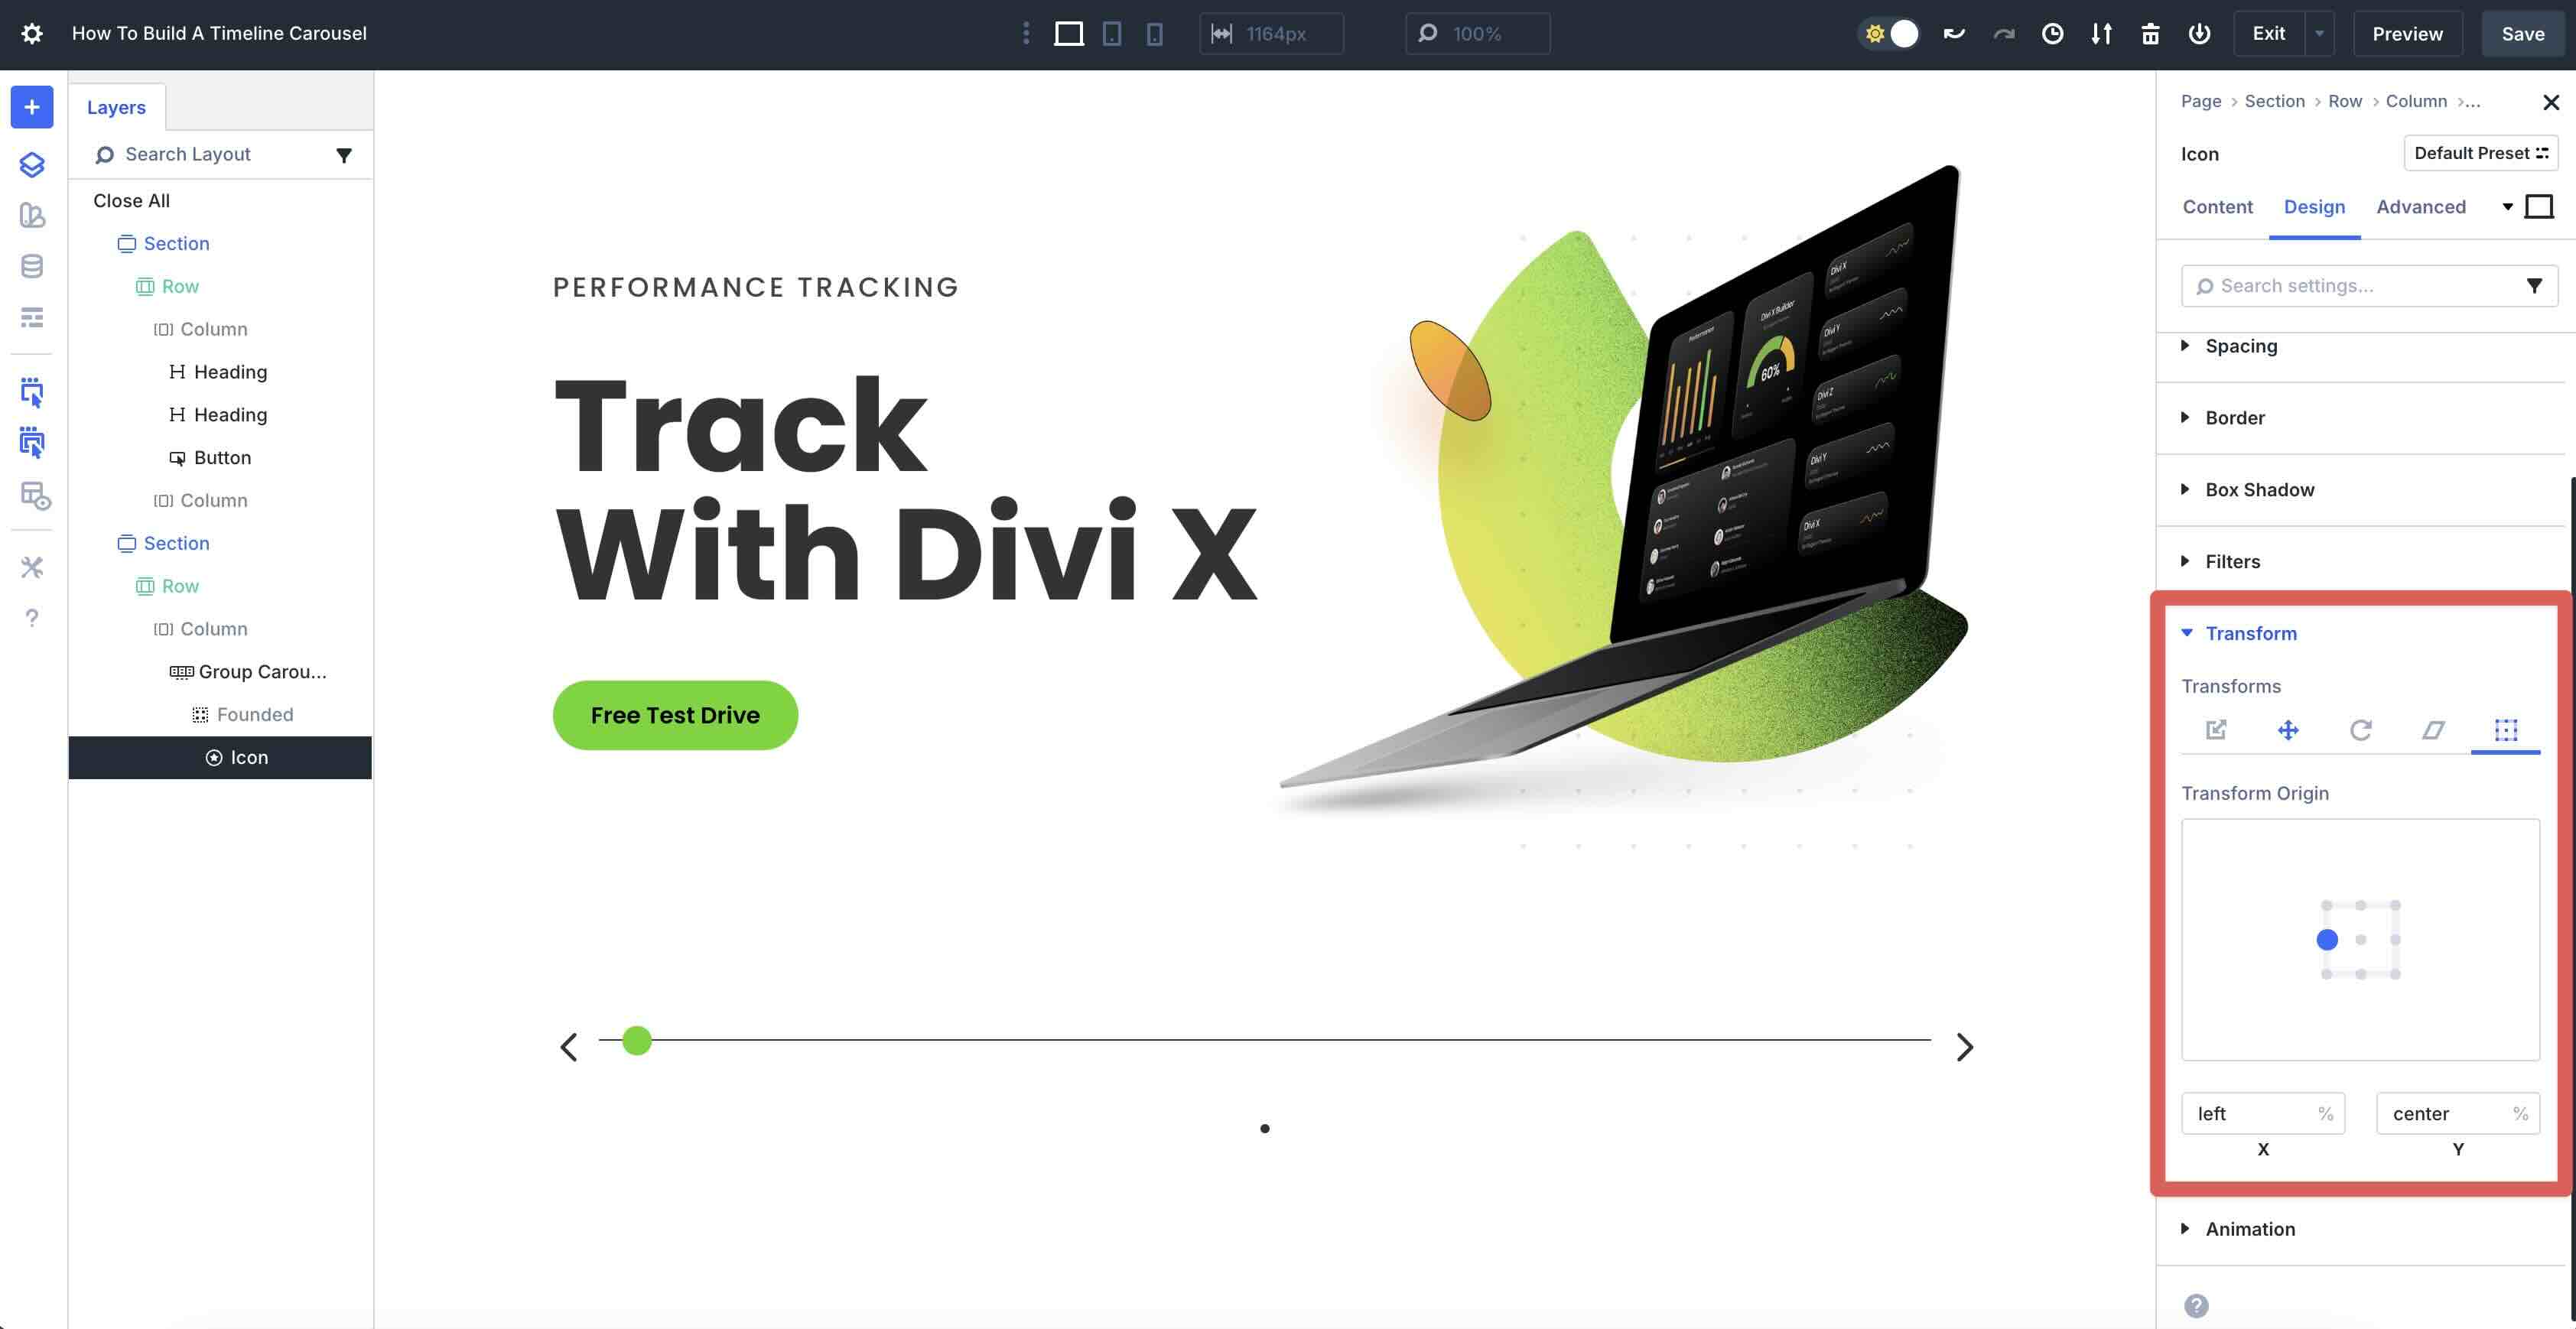
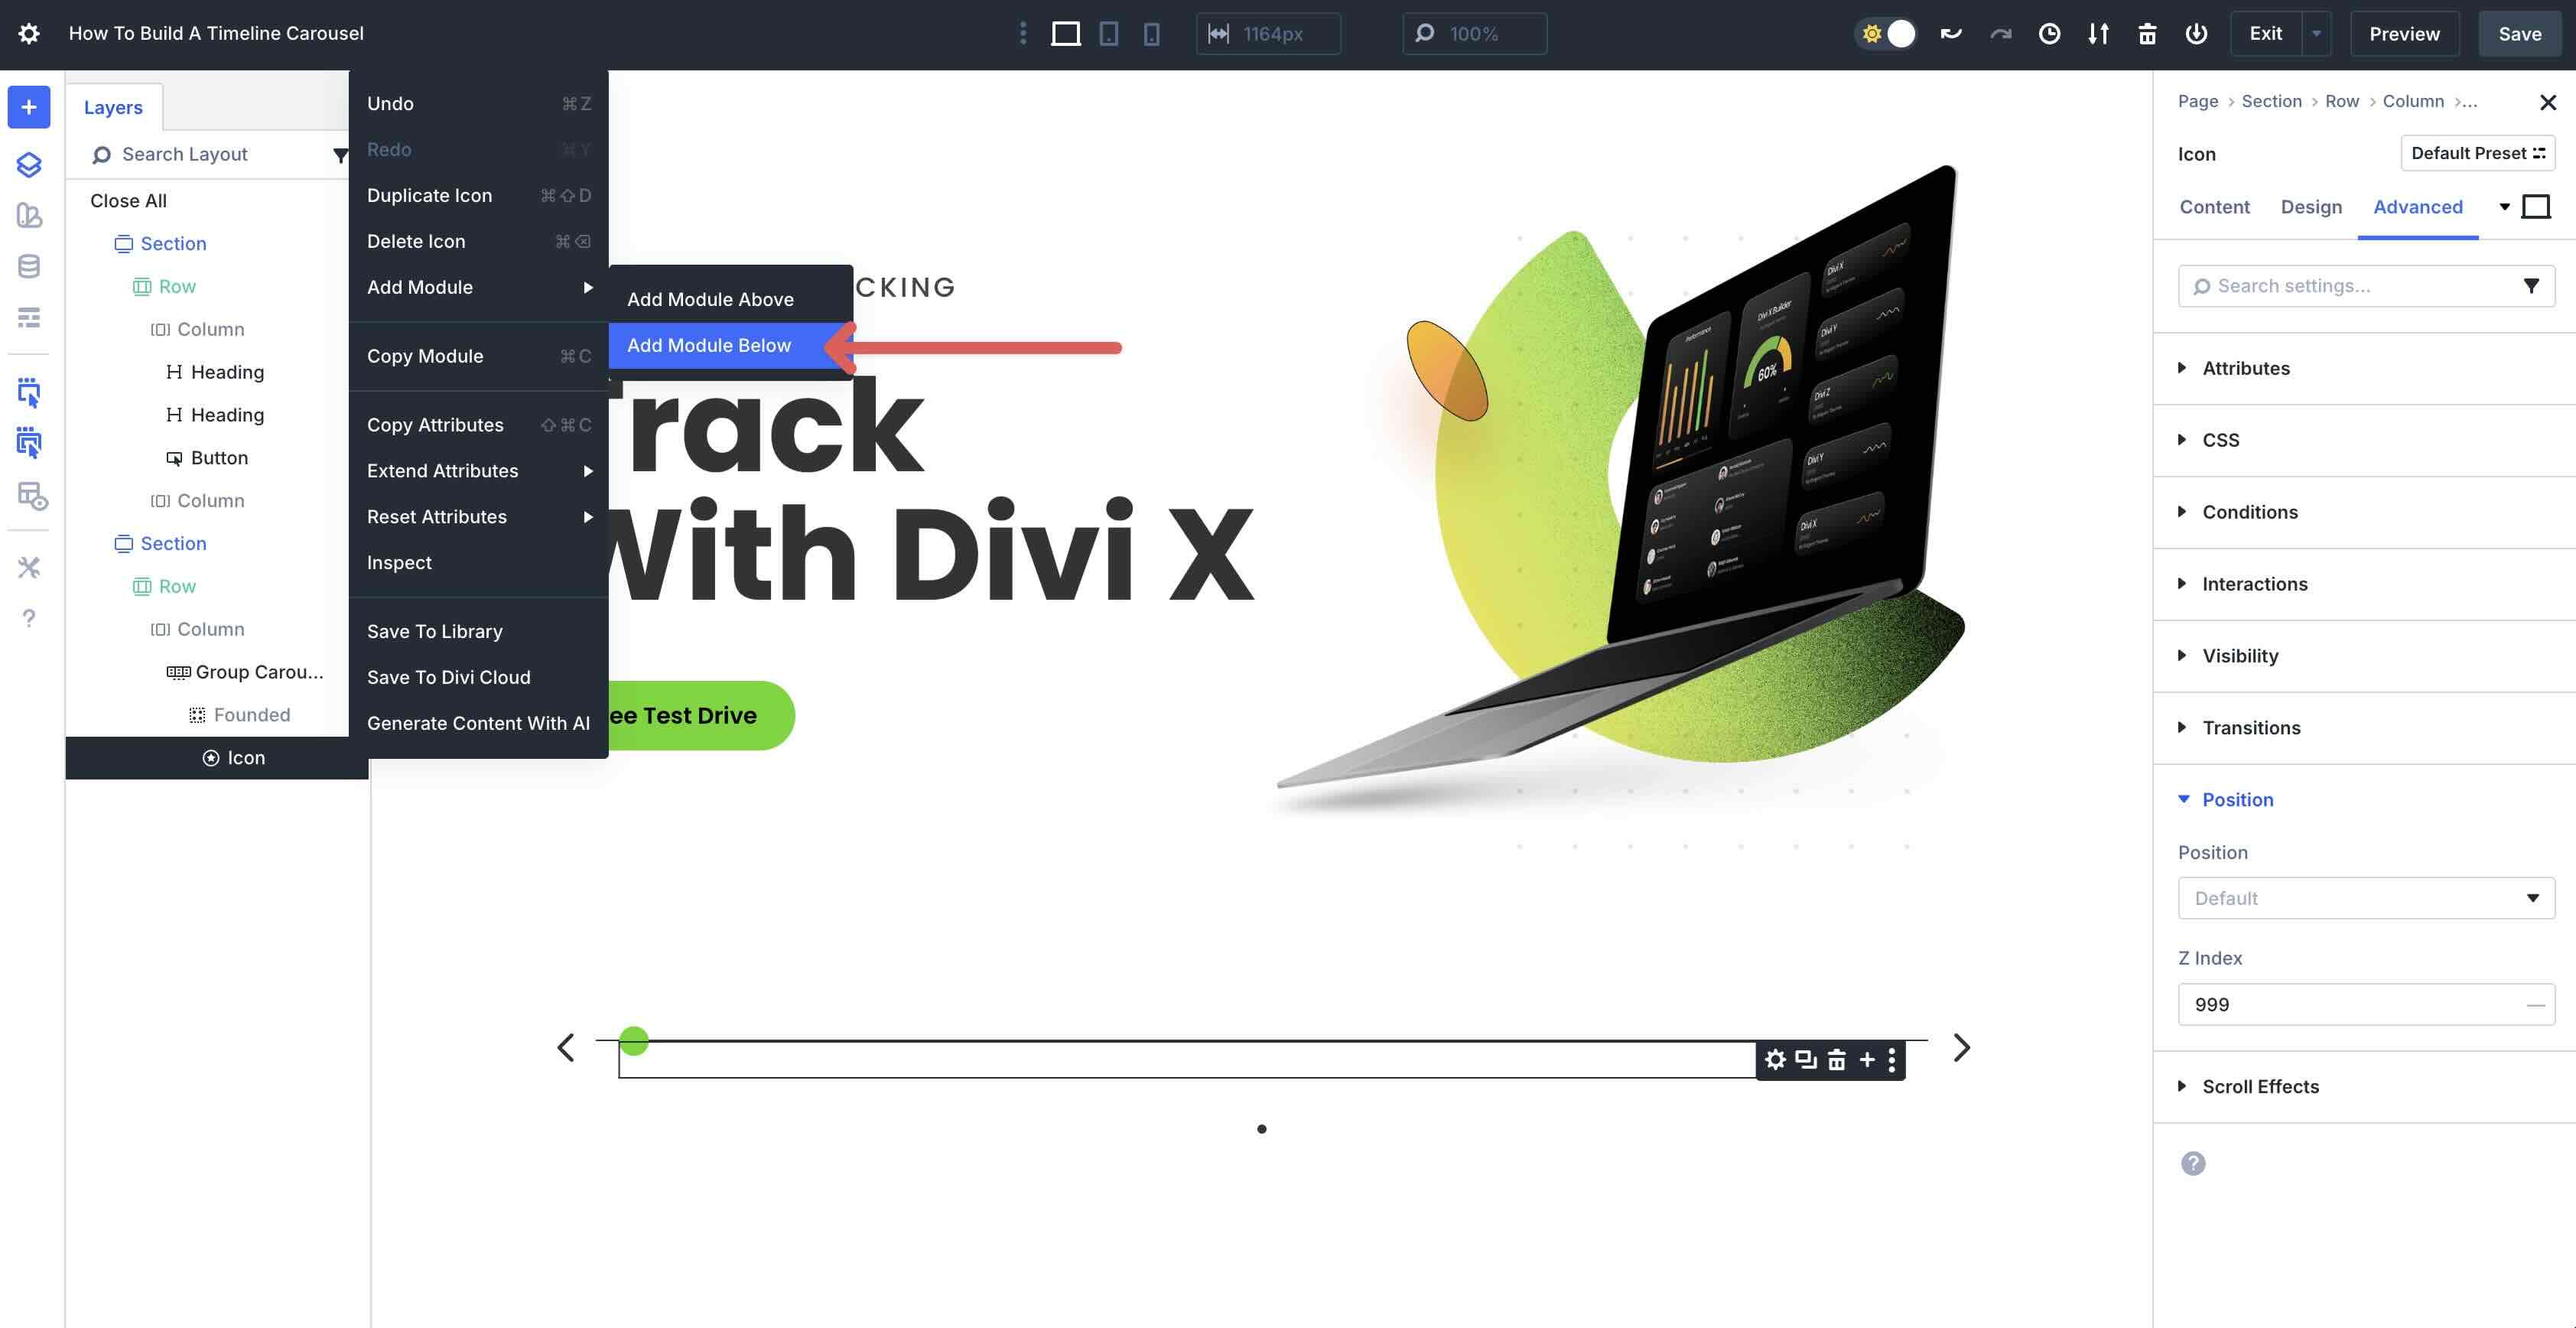
In spite of everything, click on the Complicated tab, scroll down and extend the Place menu, and input 999 within the Z Index box. This may position the Icon above the border of the Crew Carousel.
![]()
Upload A Heading Module
Subsequent, we want to upload a Heading module to the primary Crew. Open the Layers View so as to add a brand new module underneath the Icon module.
Within the Content material tab, give the Heading a name.
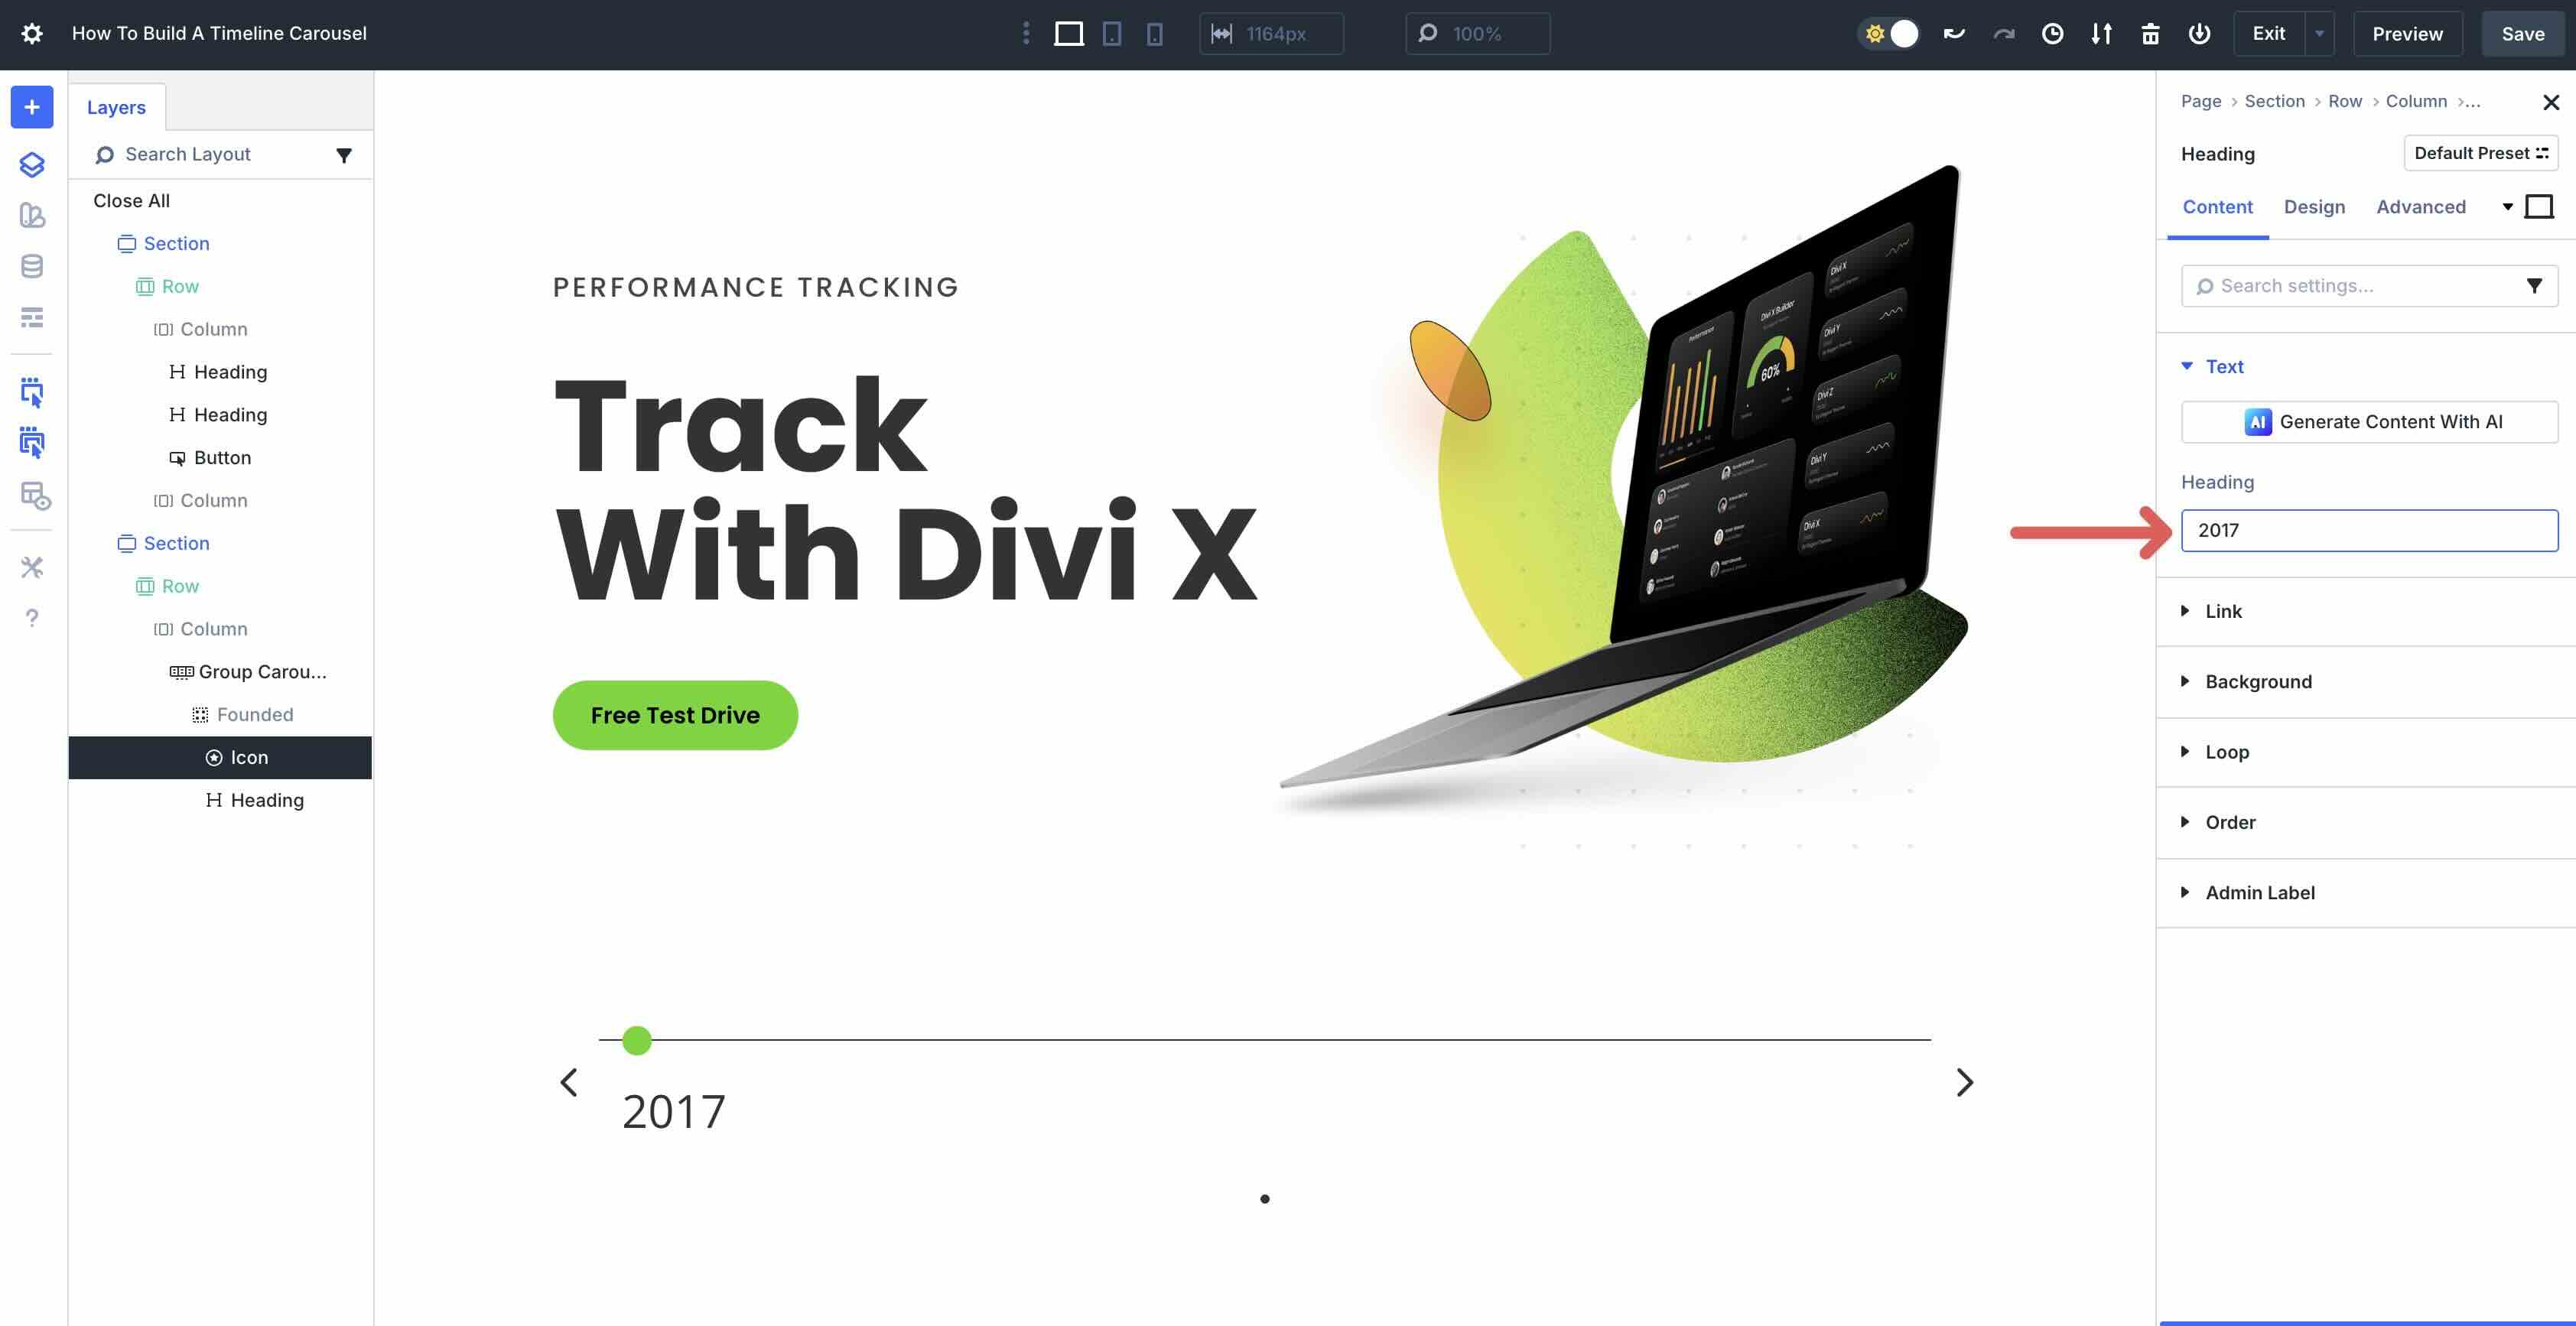
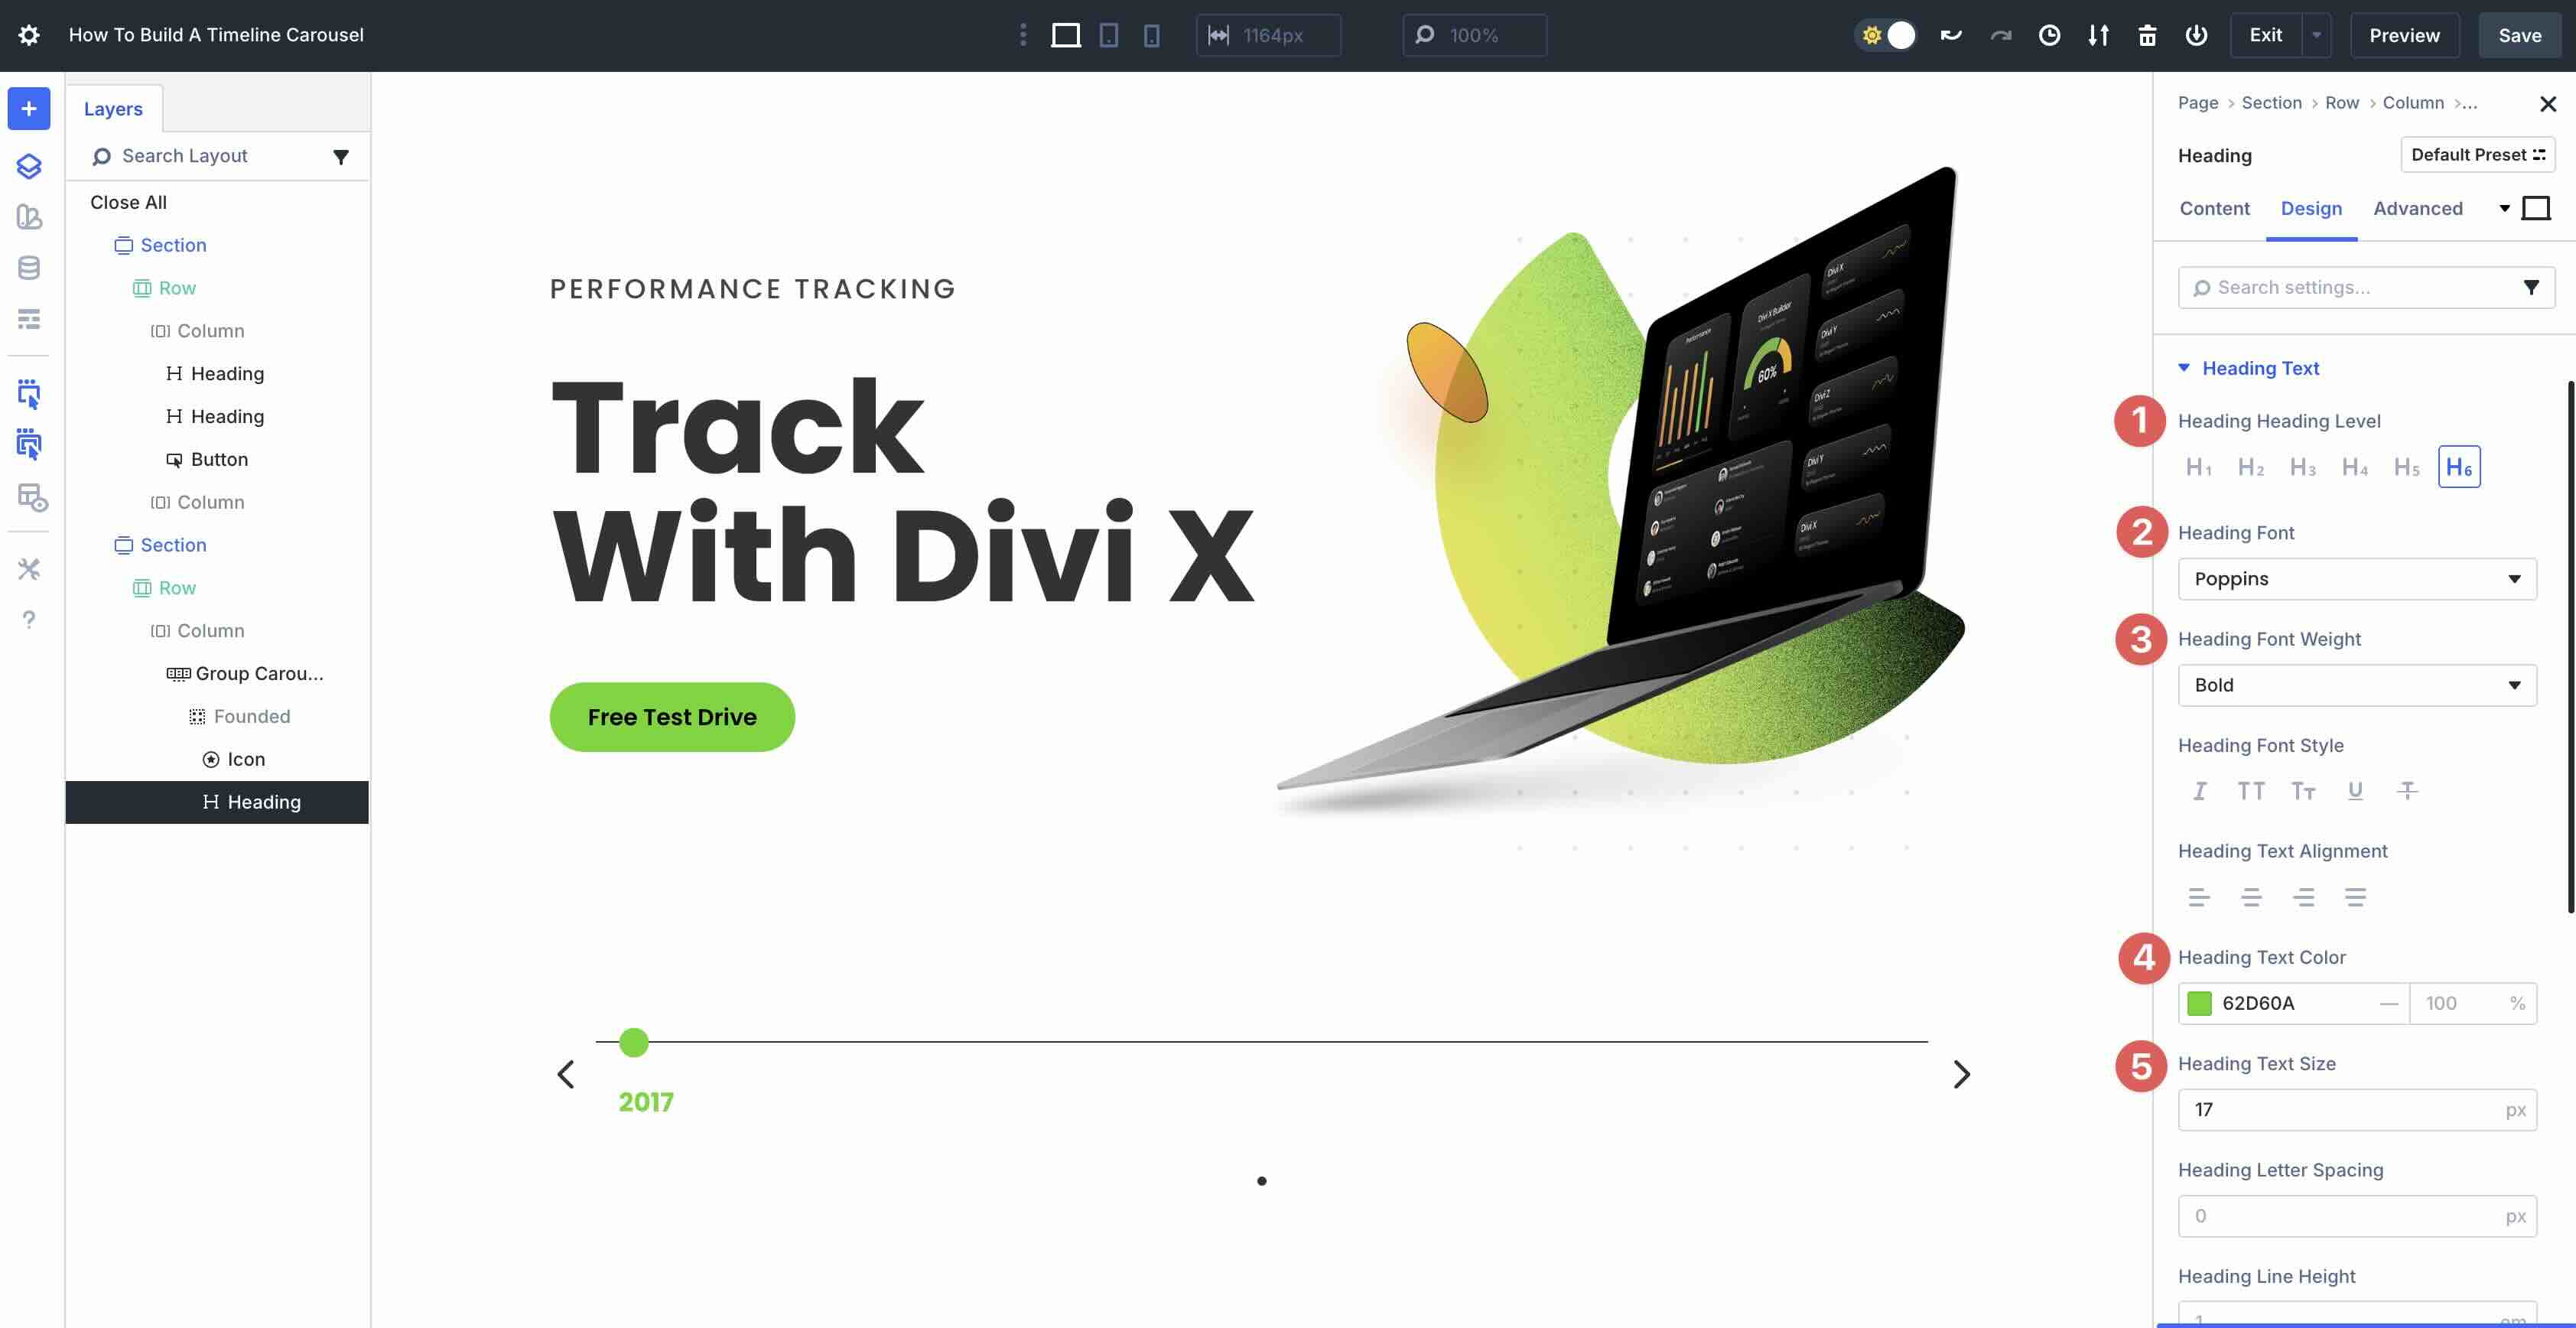
Transfer to the Design tab and extend the Heading Textual content menu. Make a selection H6 because the Heading Heading Degree, Poppins because the Heading Font, and Daring for the Heading Font Weight. Assign #62d60a because the Heading Textual content Colour and set the Heading Textual content Measurement to 17px.
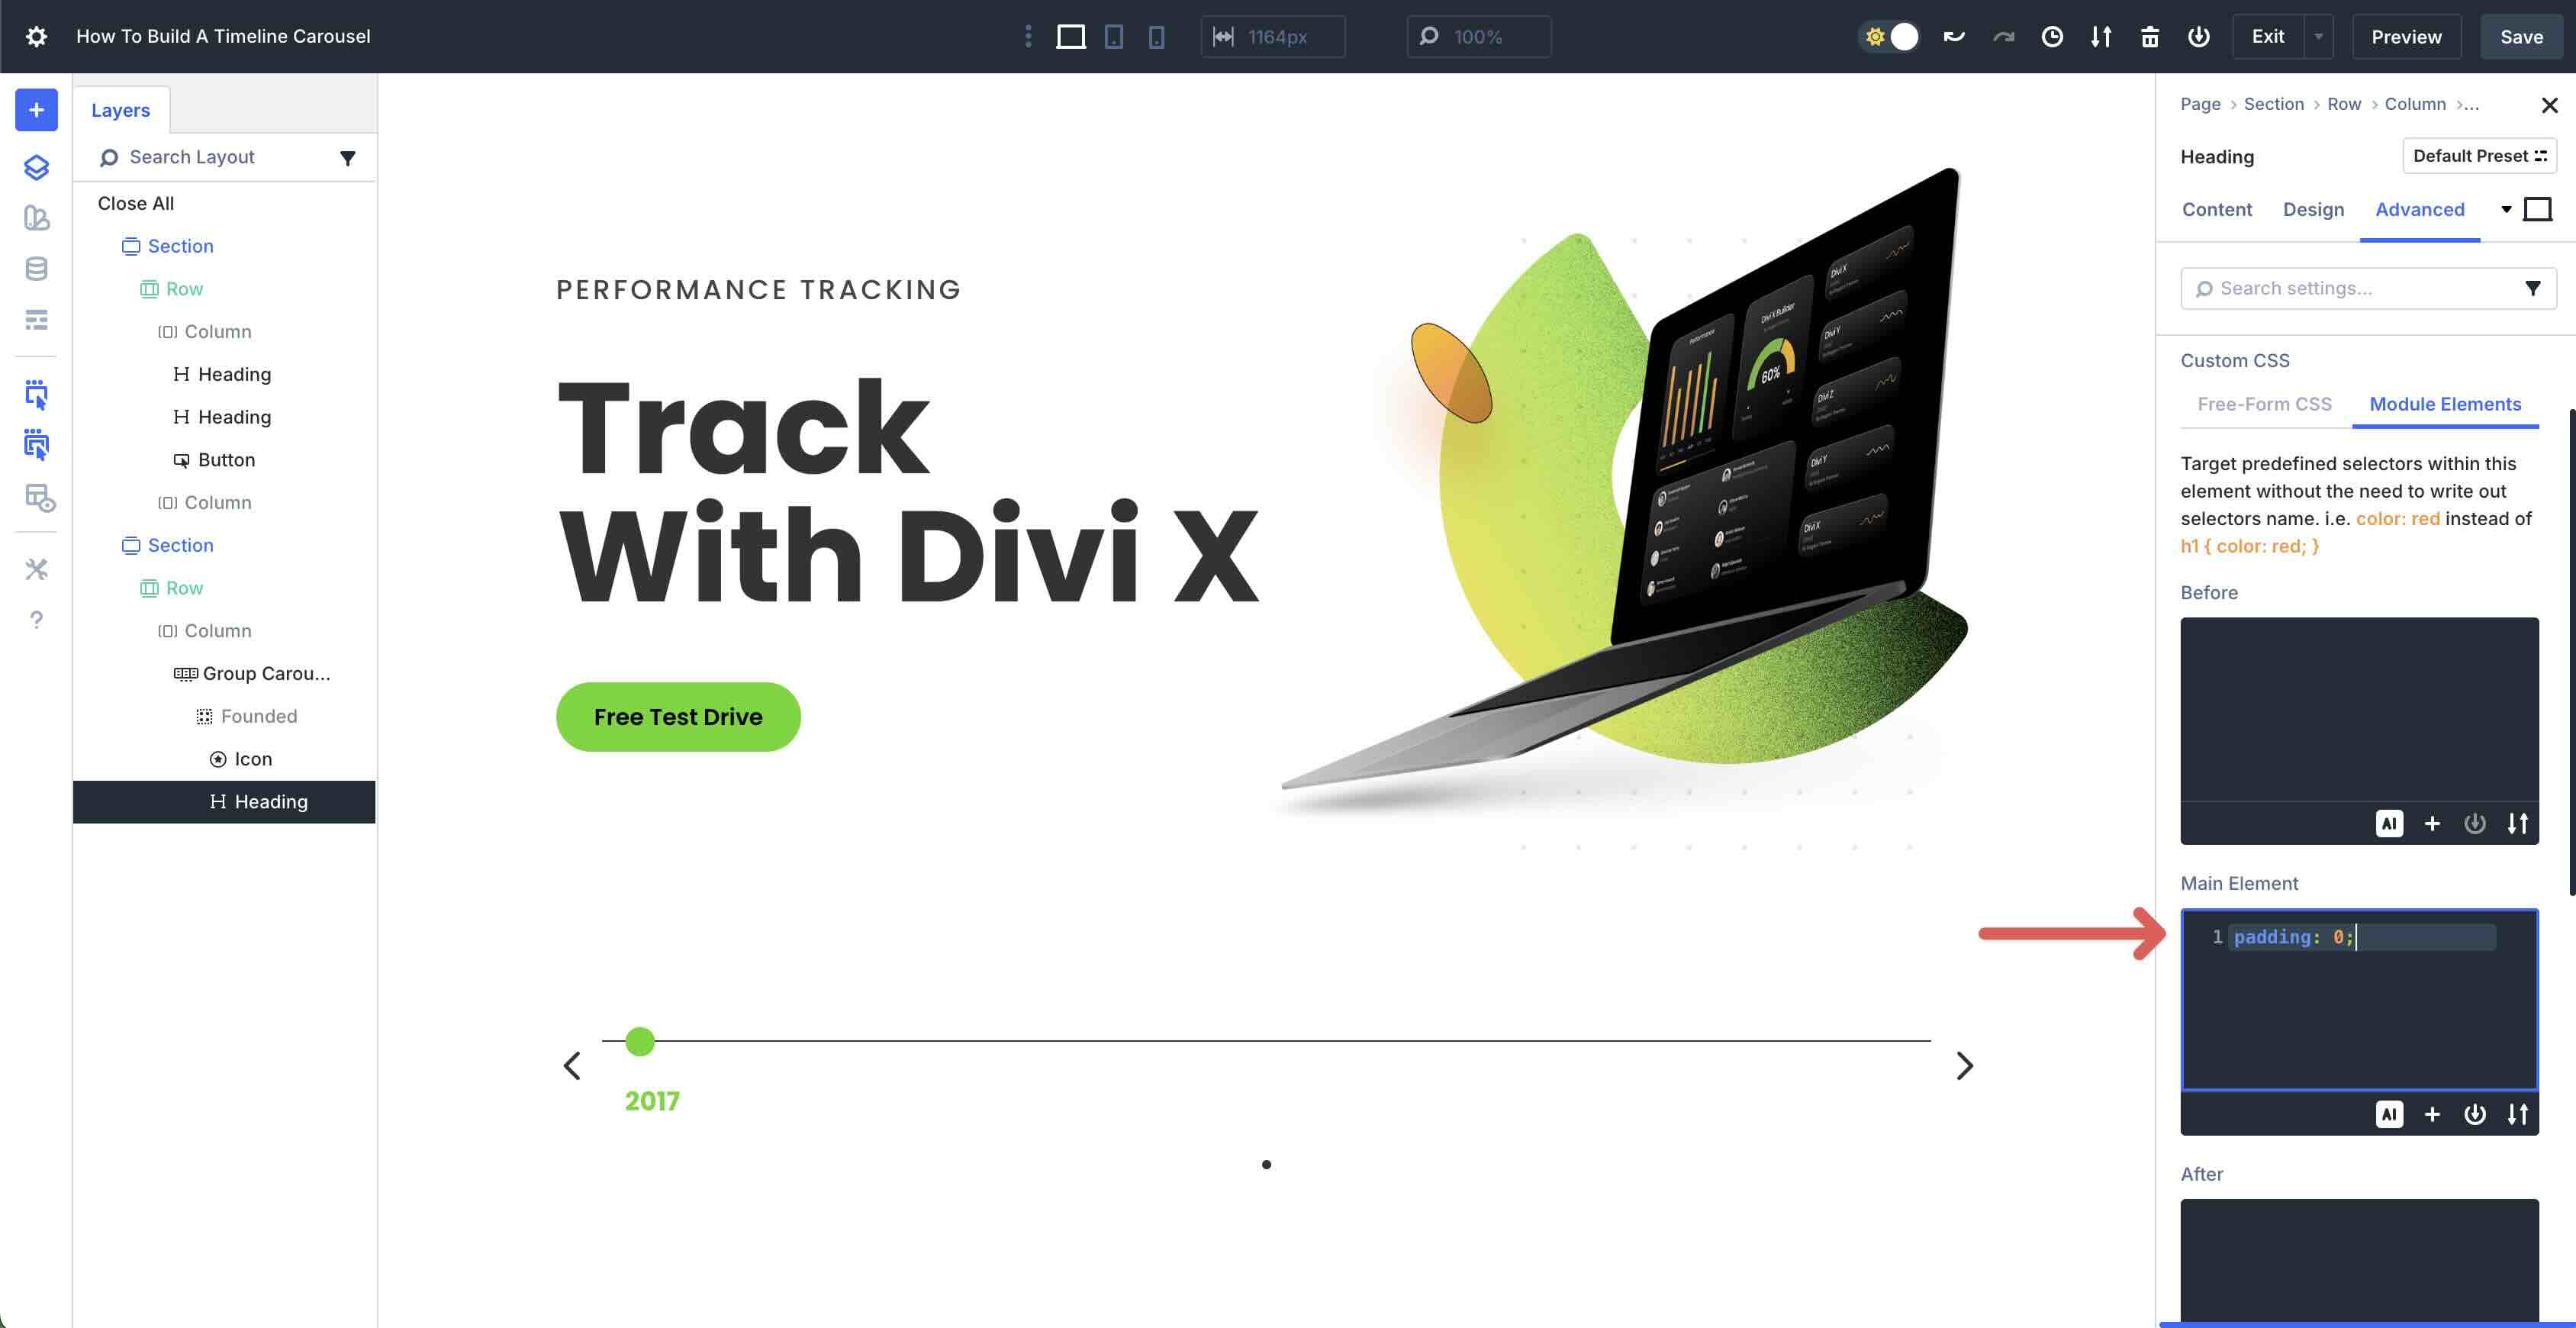
Click on the Complicated tab > Module Components. Input padding: 0; within the Major Component box.
Upload A 2d Heading Module
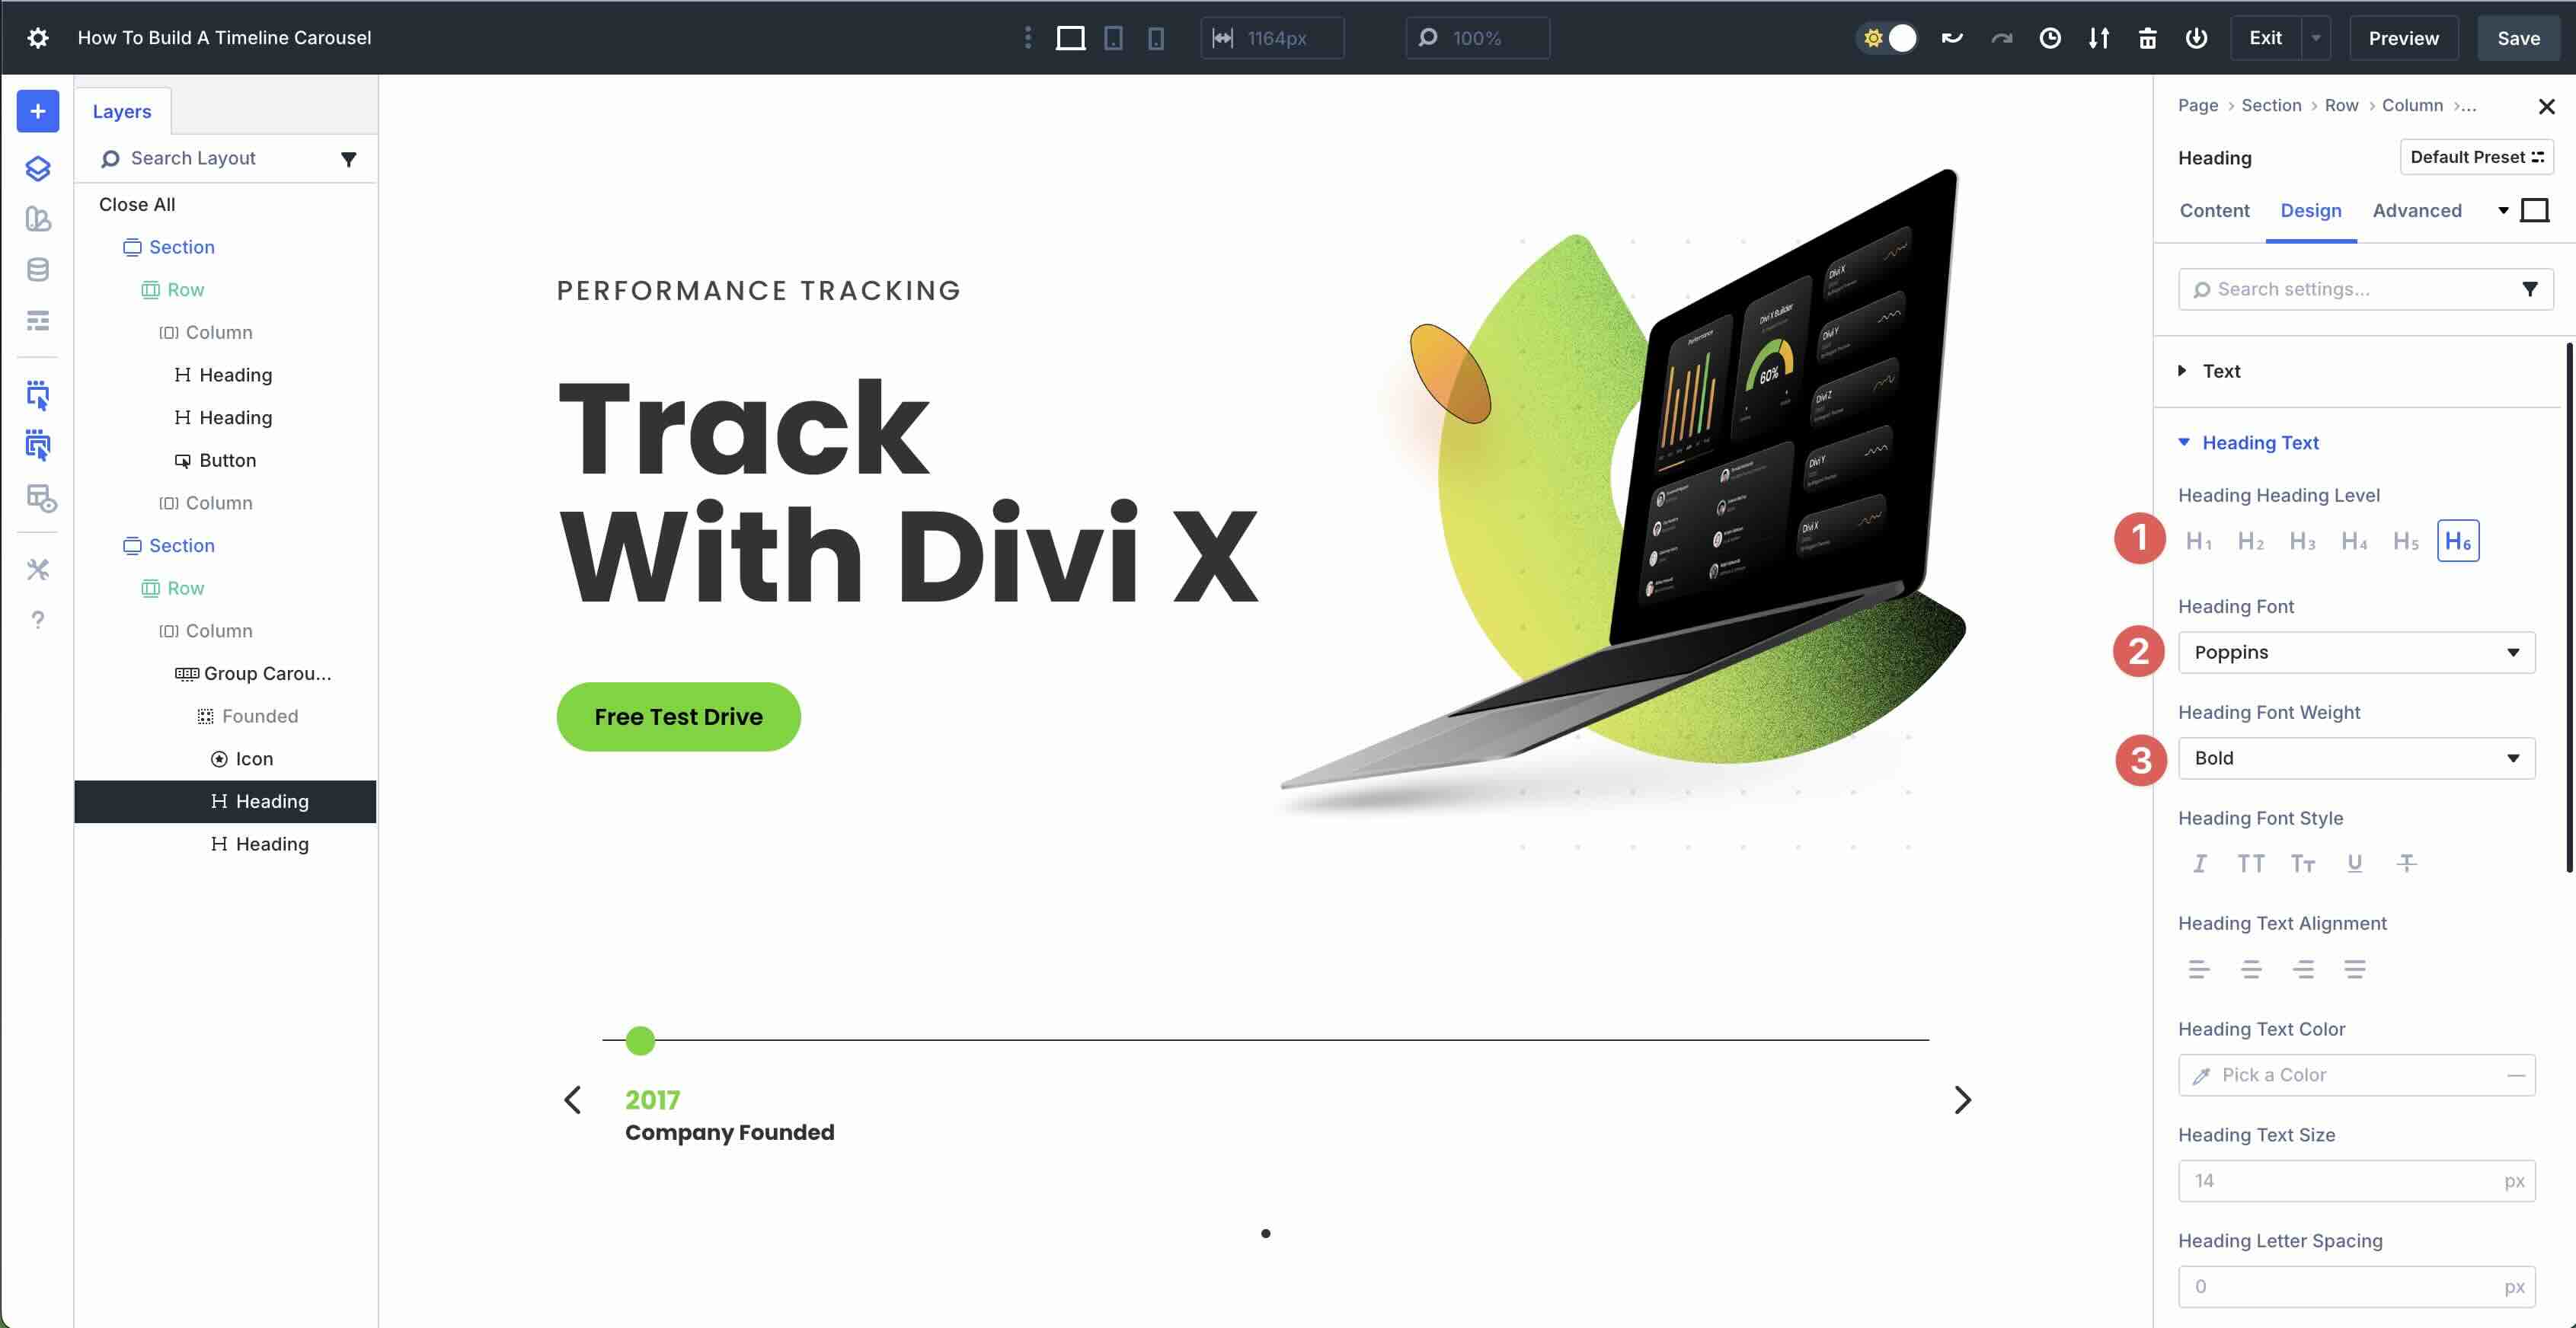
Click on so as to add a 2d Heading module to the Crew. Click on the Design tab, and set the Heading Heading Degree to H6. Make a selection Poppins Daring because the Heading Font and Font Weight. Depart all different settings at their defaults.
Upload A Textual content Module
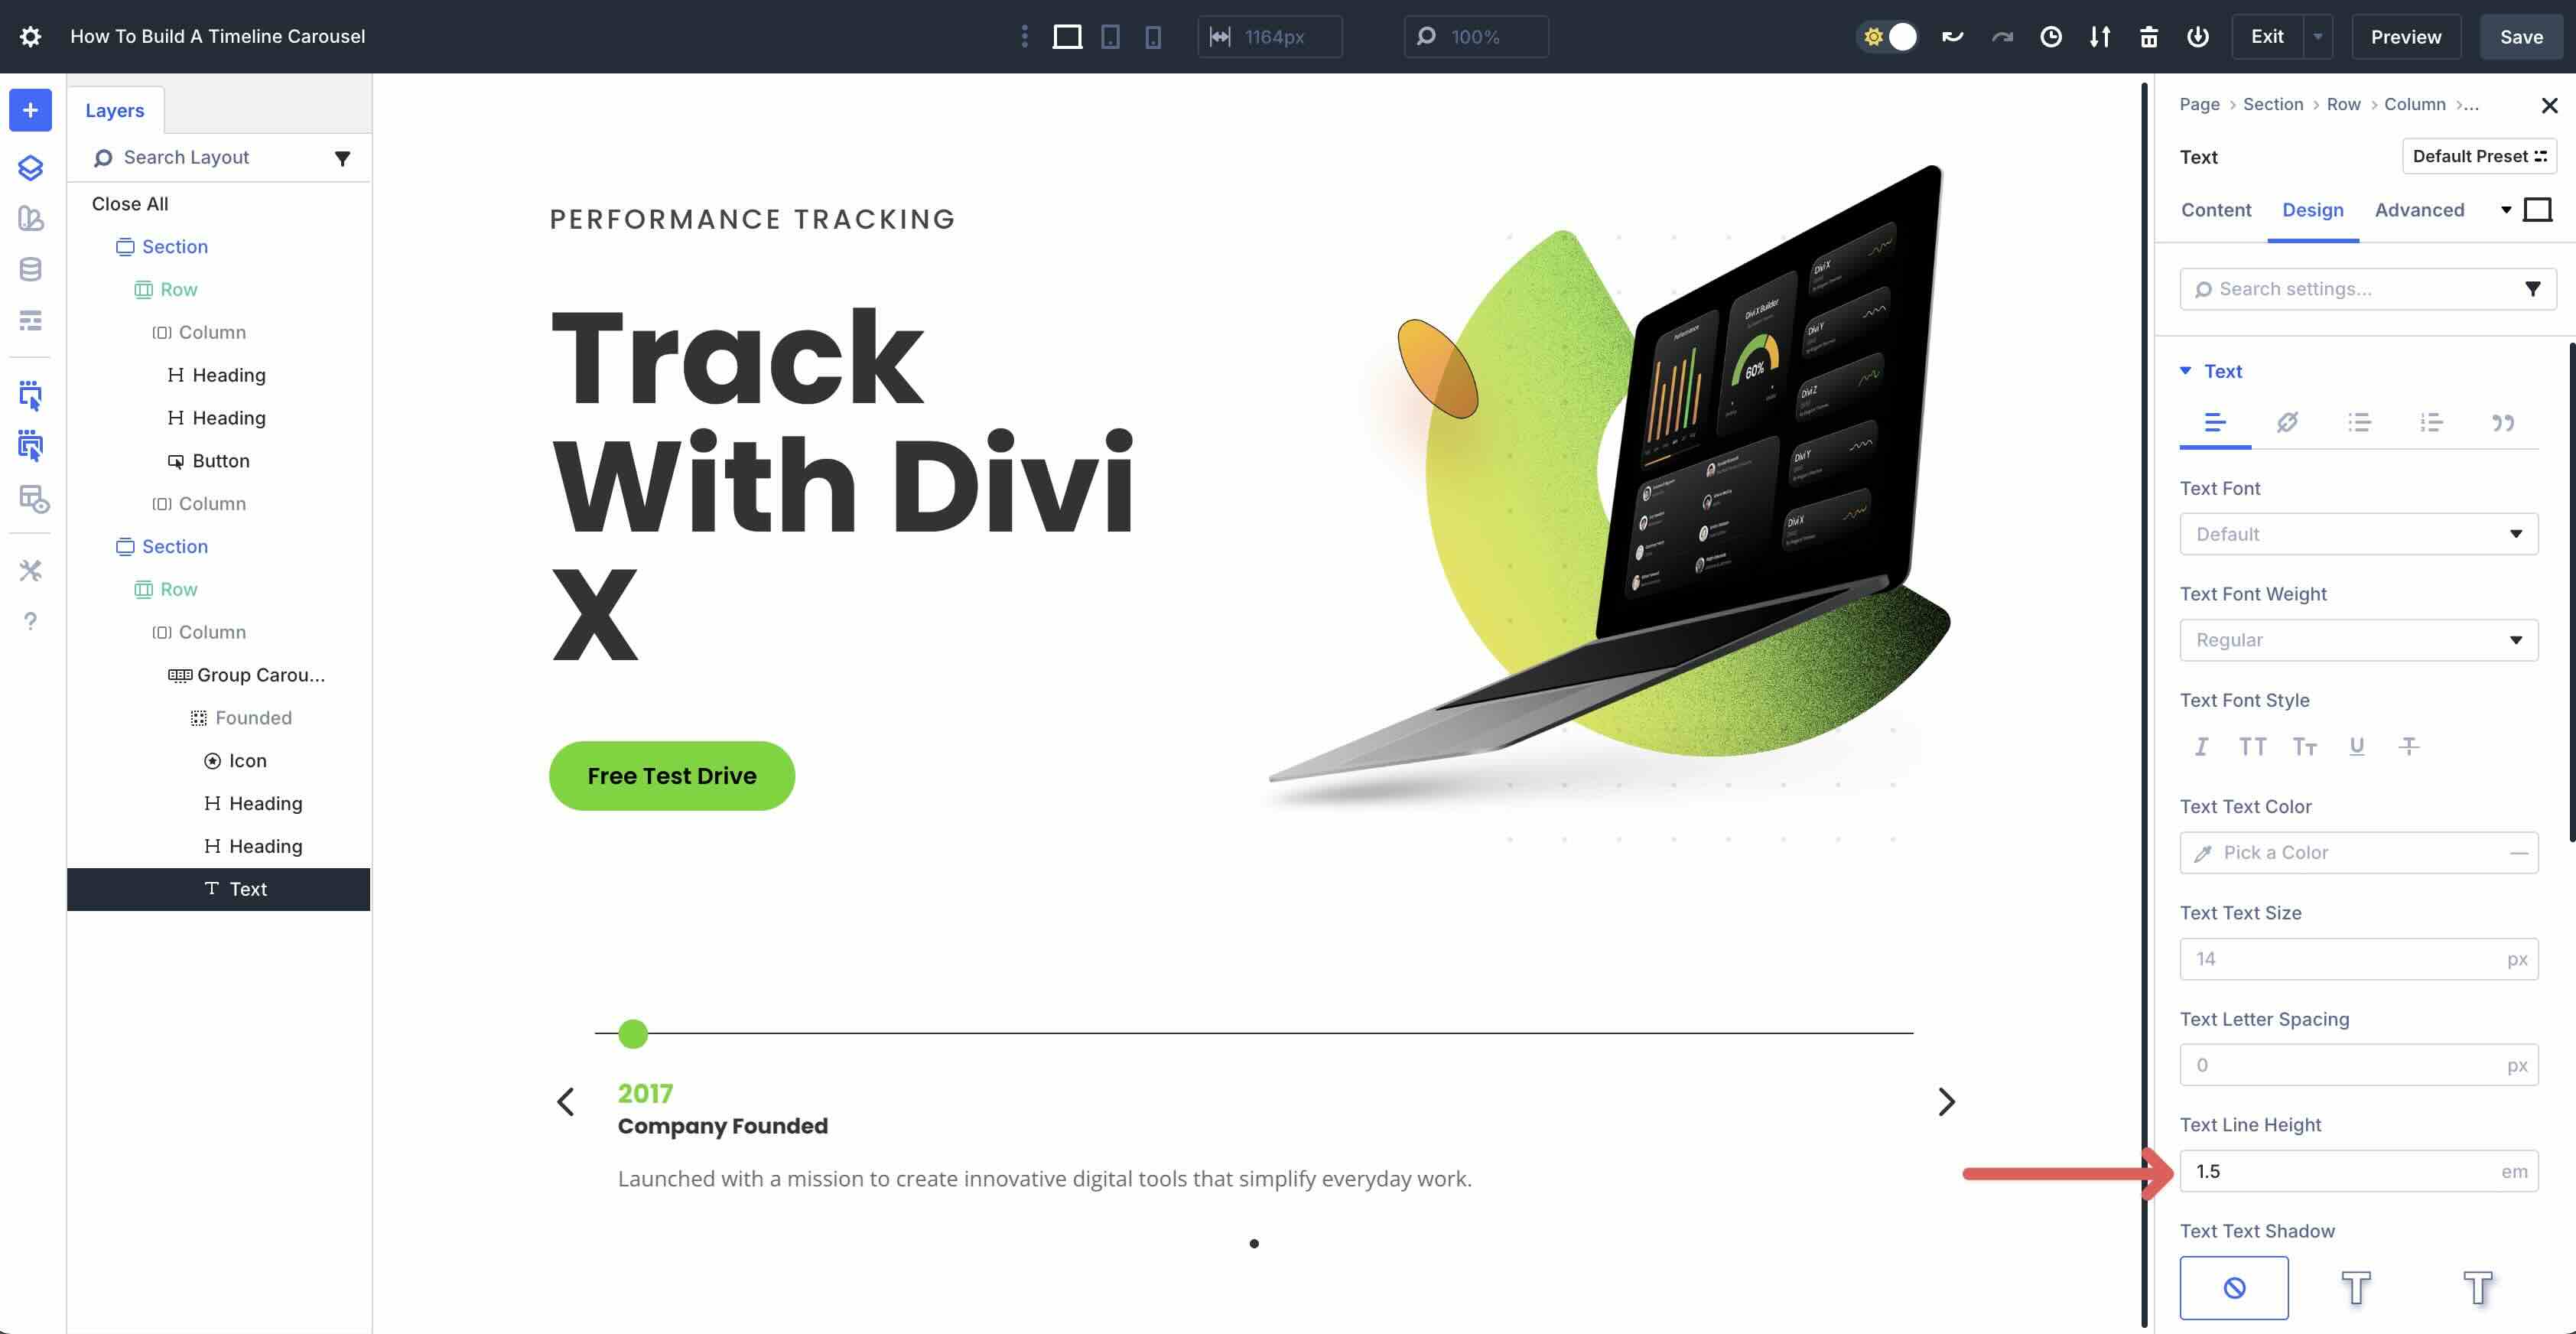
The final step is so as to add a Textual content module beneath the Heading module within the first Crew. Upload textual content into the Frame box within the Content material tab, after which navigate to the Design tab. The one surroundings we want to alternate this is the Textual content Line Peak within the Textual content menu. Set it to 1.5em.
Step 3: Upload Further Teams
With the primary Crew styled, we will be able to transfer directly to including further Teams to the Crew Carousel module. Navigate to the primary Content material tab for the Crew Carousel. Click on the Replica icon for our first Crew to replicate it.
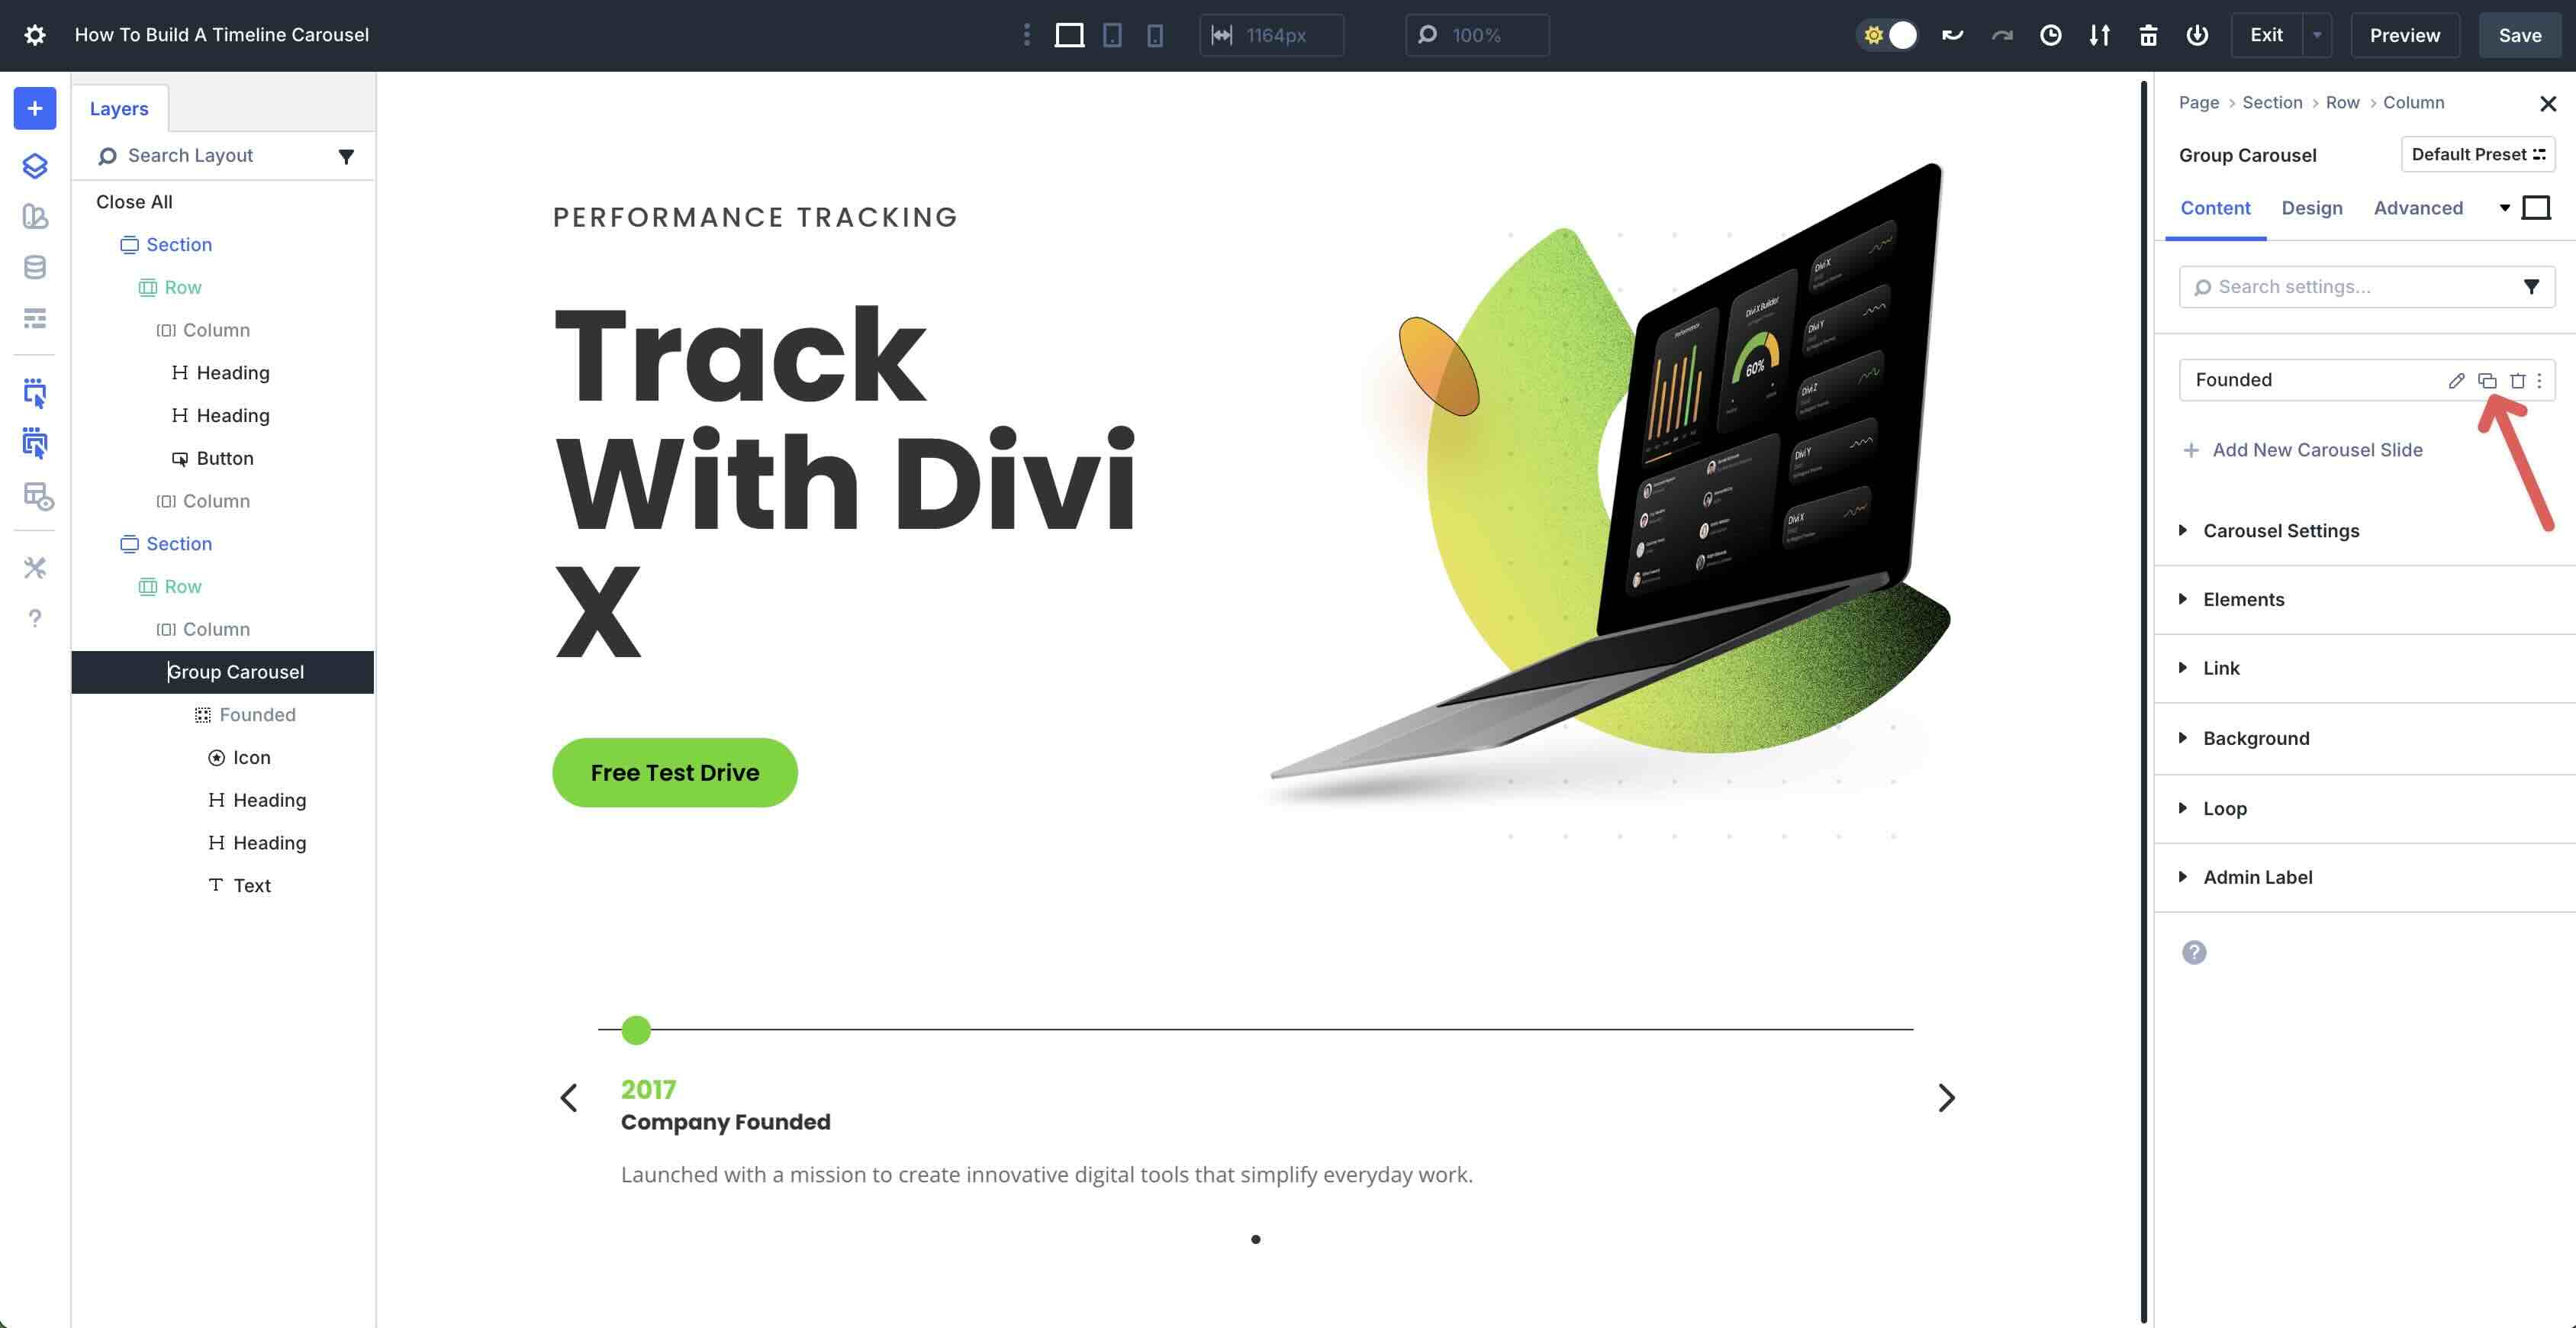
This motion will position the second one Crew into the Carousel, horizontally. Repeat this step 5 instances to populate the Carousel.
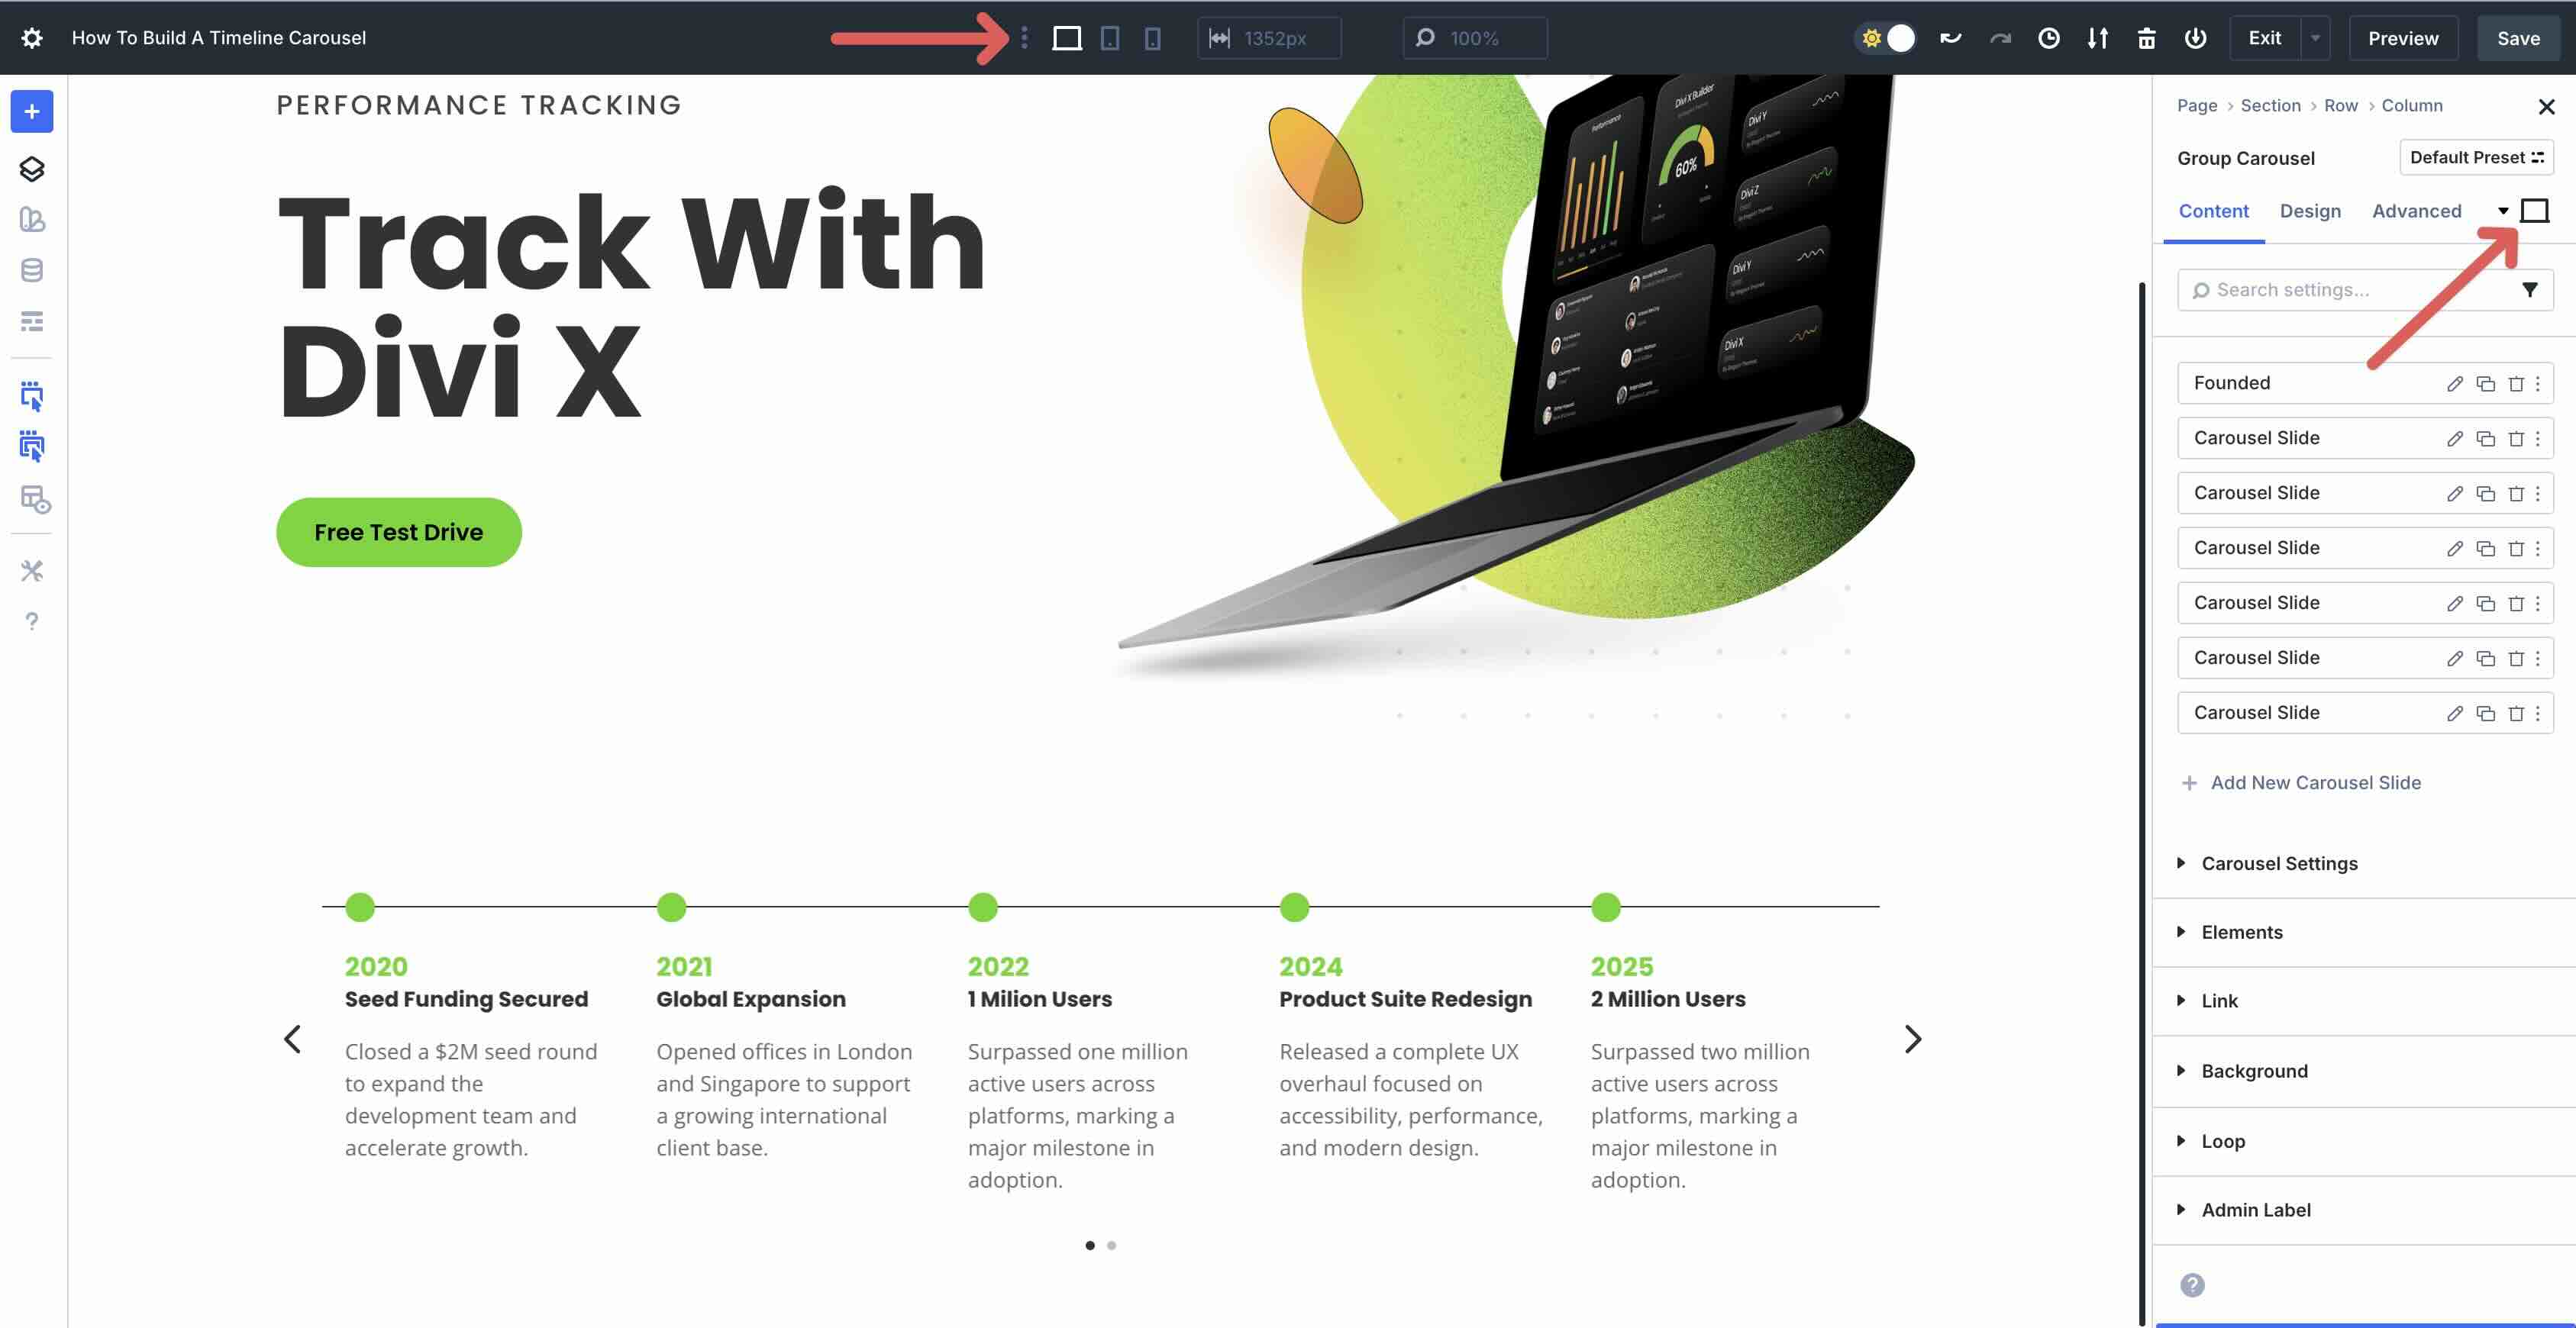
From there, merely regulate the content material of the slides as wanted.
Step 4: Take a look at For Responsiveness
As soon as all content material is in position, you’ll be able to modify the Carousel’s settings the use of Divi 5’s Customizable Responsive Breakpoints or Responsive Editor.
One surroundings that are meant to be adjusted is the collection of slides on cell gadgets. Click on into the Crew Carousel‘s major Content material tab. Enlarge the Carousel Settings and modify the Slides To Display. Within the Pill View, modify the Slides To Display to 3.
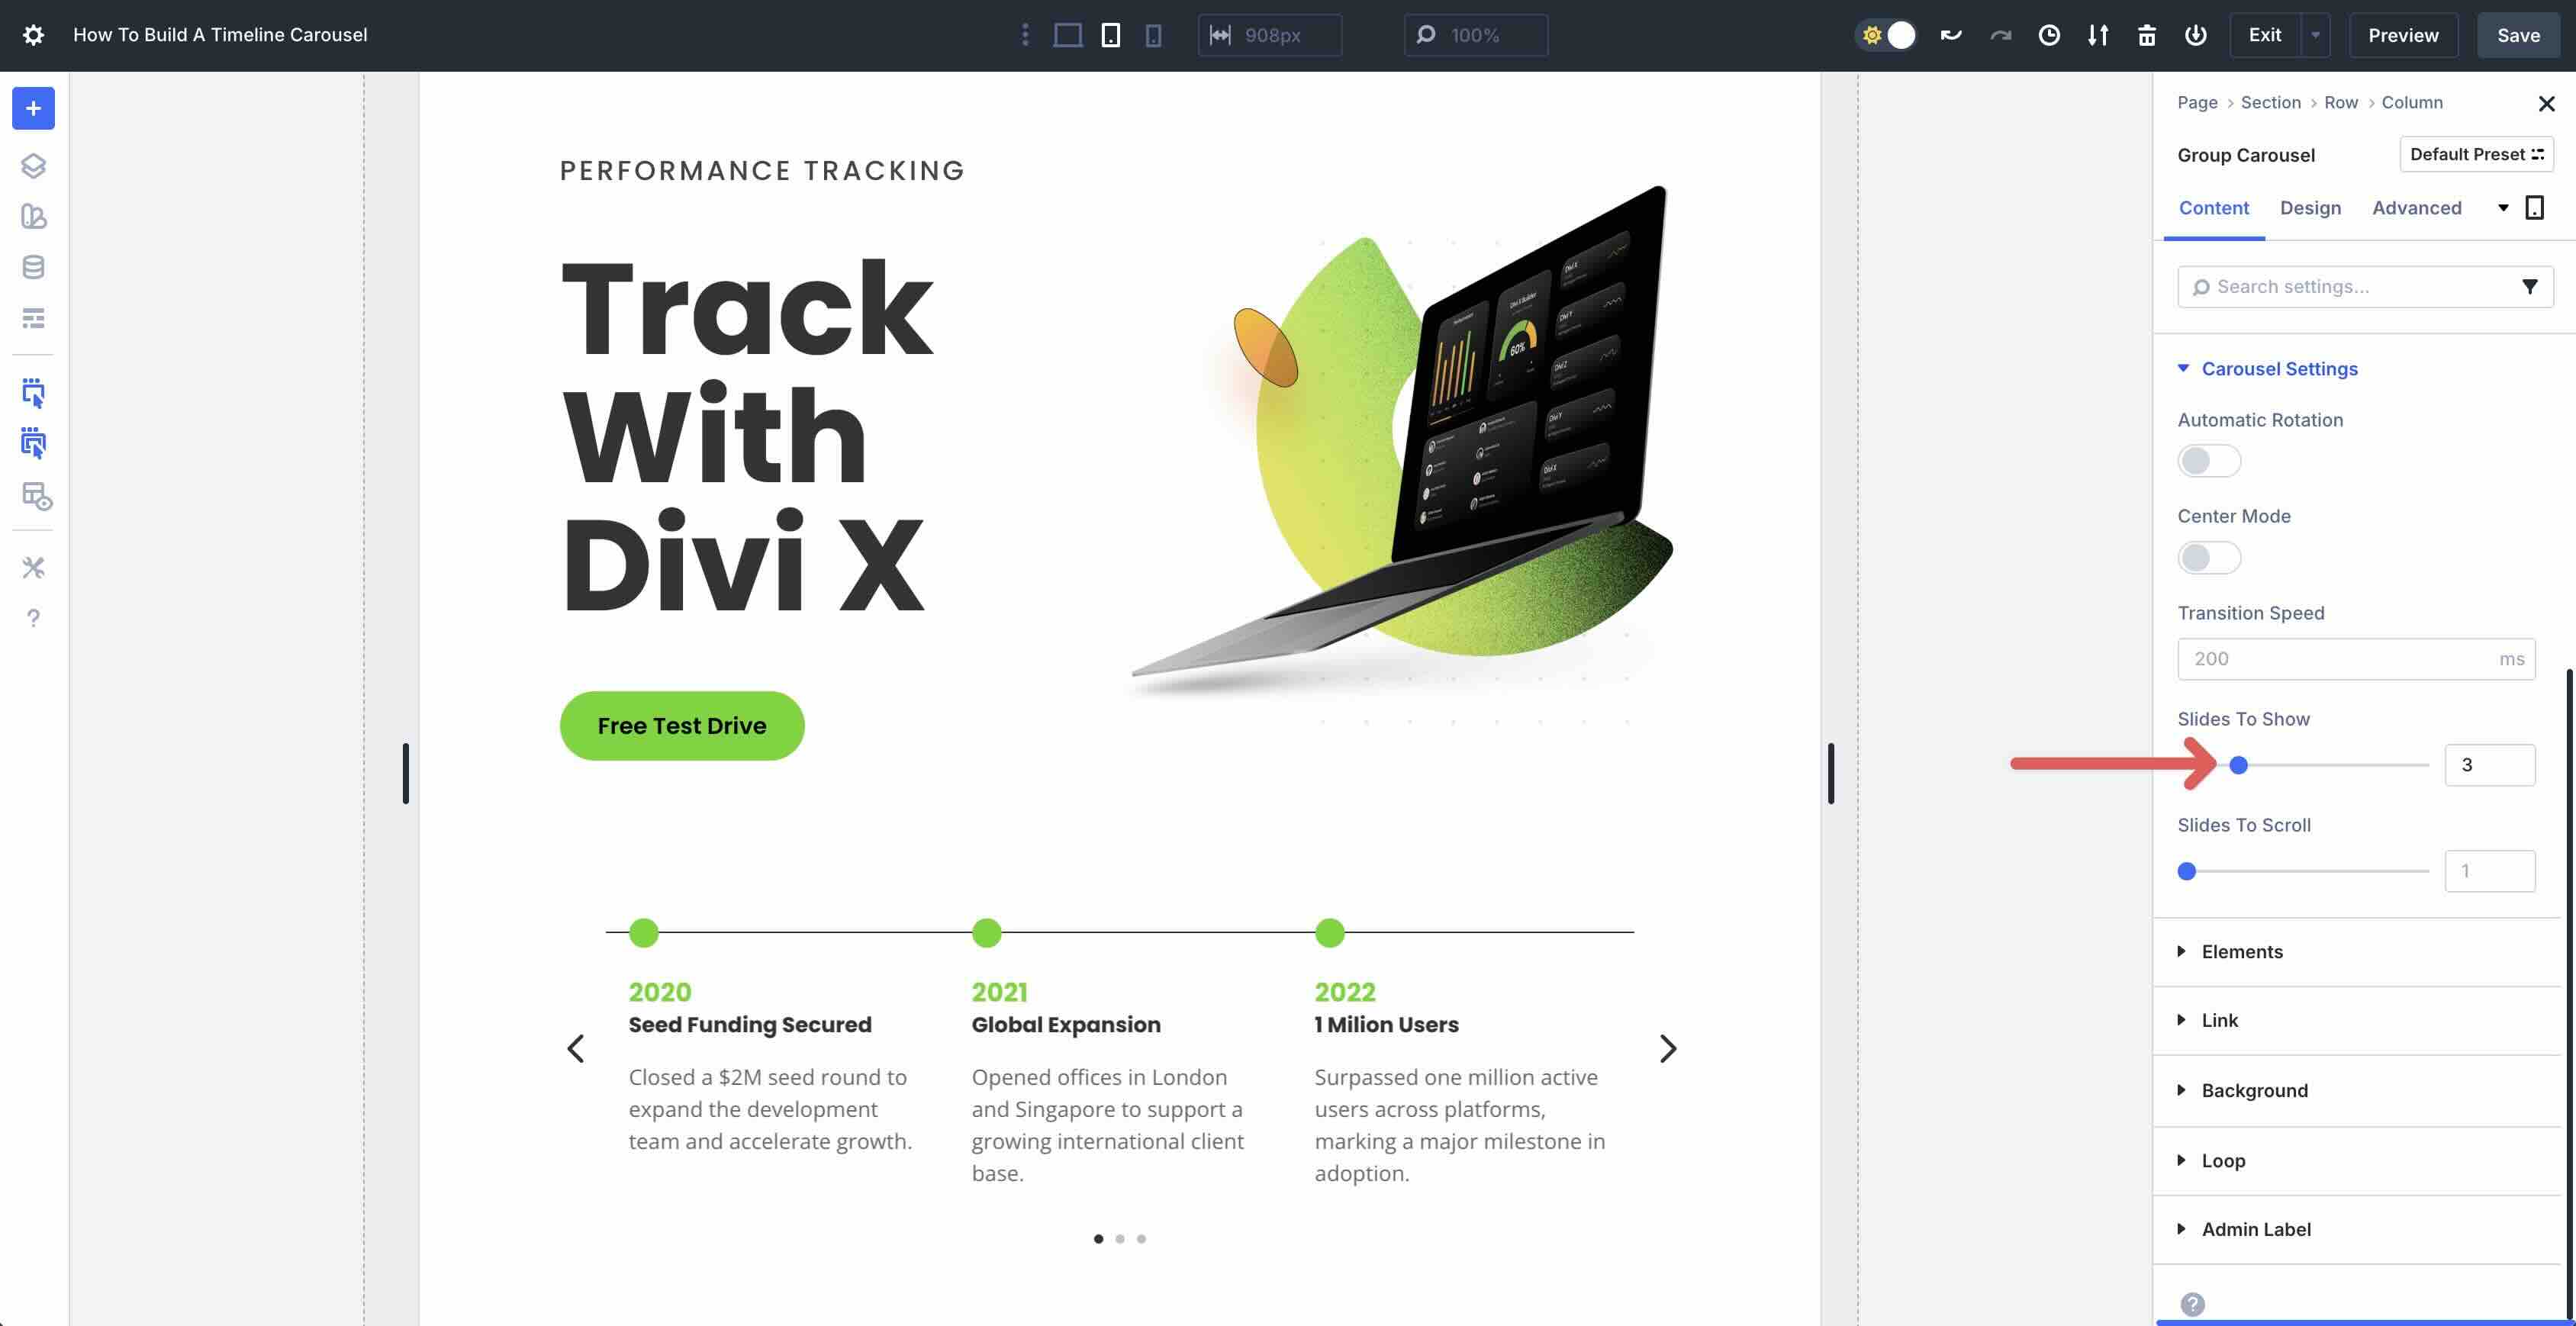
Within the Telephone View, set the Slides To Display to 1.
Use the responsive settings to make any essential changes.
Step 5: Preview And Save The Web page
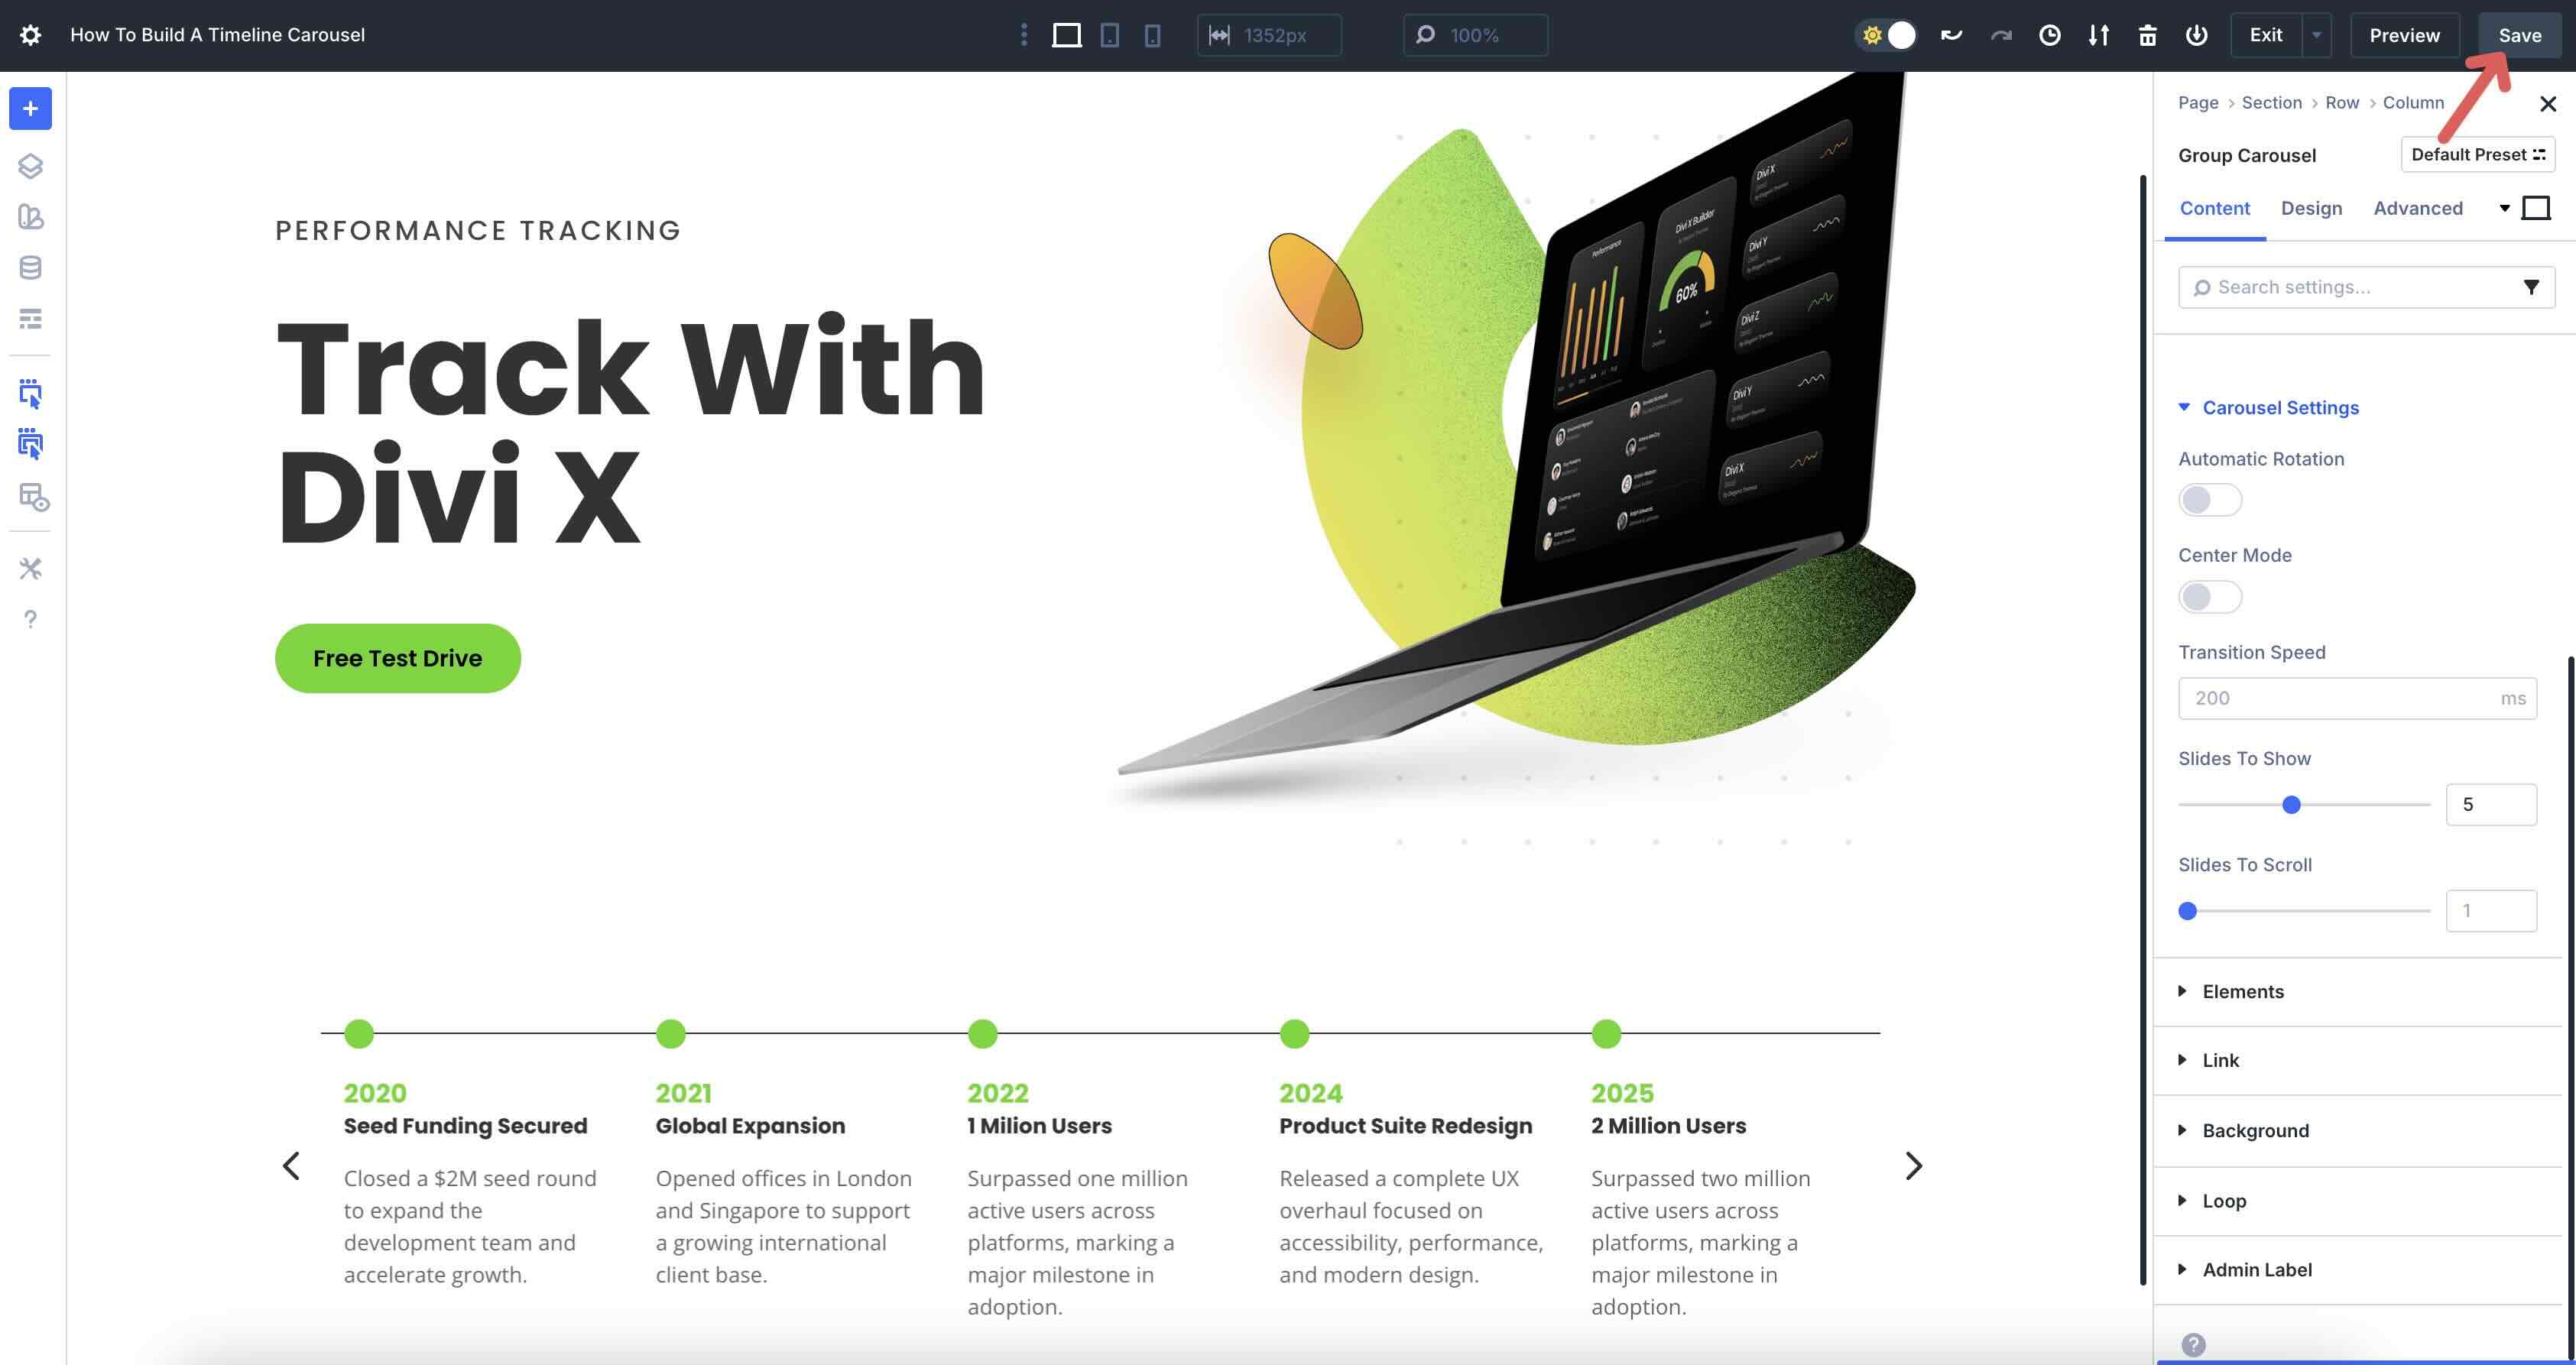
The overall step is to preview your structure to make sure that the whole thing purposes as anticipated. To preview the web page, click on the Preview button on the height proper of the Visible Builder.
Whenever you’ve showed the whole thing seems just right, go back to the Visible Builder to avoid wasting the web page.
That’s it! You’ve effectively created a timeline carousel that you’ll be able to use to your site. When you’d love to obtain the record to preview the settings earlier than development your personal Carousel, fill out the shape under.
@media simplest display screen and ( max-width: 767px ) {.et_bloom .et_bloom_optin_1 .carrot_edge.et_bloom_form_right .et_bloom_form_content:earlier than { border-top-color: #ffffff !vital; border-left-color: clear !vital; }.et_bloom .et_bloom_optin_1 .carrot_edge.et_bloom_form_left .et_bloom_form_content:after { border-bottom-color: #ffffff !vital; border-left-color: clear !vital; }
}.et_bloom .et_bloom_optin_1 .et_bloom_form_content button { background-color: #f92c8b !vital; } .et_bloom .et_bloom_optin_1 .et_bloom_form_content .et_bloom_fields i { shade: #f92c8b !vital; } .et_bloom .et_bloom_optin_1 .et_bloom_form_content .et_bloom_custom_field_radio i:earlier than { background: #f92c8b !vital; } .et_bloom .et_bloom_optin_1 .et_bloom_border_solid { border-color: #f7f9fb !vital } .et_bloom .et_bloom_optin_1 .et_bloom_form_content button { background-color: #f92c8b !vital; } .et_bloom .et_bloom_optin_1 .et_bloom_form_container h2, .et_bloom .et_bloom_optin_1 .et_bloom_form_container h2 span, .et_bloom .et_bloom_optin_1 .et_bloom_form_container h2 robust { font-family: “Open Sans”, Helvetica, Arial, Lucida, sans-serif; }.et_bloom .et_bloom_optin_1 .et_bloom_form_container p, .et_bloom .et_bloom_optin_1 .et_bloom_form_container p span, .et_bloom .et_bloom_optin_1 .et_bloom_form_container p robust, .et_bloom .et_bloom_optin_1 .et_bloom_form_container shape enter, .et_bloom .et_bloom_optin_1 .et_bloom_form_container shape button span { font-family: “Open Sans”, Helvetica, Arial, Lucida, sans-serif; } p.et_bloom_popup_input { padding-bottom: 0 !vital;}

Obtain For Unfastened
Sign up for the Divi E-newsletter and we will be able to e mail you a duplicate of without equal Divi Touchdown Web page Structure Pack, plus lots of different superb and loose Divi assets, guidelines and tips. Observe alongside and you are going to be a Divi grasp very quickly. In case you are already subscribed merely sort on your e mail cope with under and click on obtain to get entry to the structure pack.
You’ve gotten effectively subscribed. Please test your e mail cope with to substantiate your subscription and get get entry to to loose weekly Divi structure packs!
Construct A Timeline Carousel Simply With Divi 5
The Crew Carousel module in Divi 5 makes it easy to create a timeline carousel that brings your emblem’s milestones or challenge historical past to lifestyles. Its intuitive design, dynamic content material functions, and versatile styling help you construct a visually enticing, responsive timeline with out depending on complicated coding or third-party plugins.
Now that you just’ve walked in the course of the steps to construct your personal timeline carousel, it’s time to position it into motion. Download the latest Divi 5 Beta to discover the Crew Carousel module and birth experimenting with its options. We’d love to listen to the way you’re the use of this selection to fortify your website. Drop a remark under or percentage your ideas on our social media channels.
The put up How To Build A Timeline Carousel With Divi 5 seemed first on Elegant Themes Blog.
Contents
- 1 What Is The Crew Carousel Module?
- 2 How To Construct A Timeline Carousel With Divi 5
- 3 Obtain For Unfastened
- 4 You’ve gotten effectively subscribed. Please test your e mail cope with to substantiate your subscription and get get entry to to loose weekly Divi structure packs!
- 5 Construct A Timeline Carousel Simply With Divi 5
- 6 How To Create a Weblog in Laravel
- 7 Get a FREE Museum Format Pack for Divi
- 8 Tales That Transfer, Messages That Stick: The Secret to Persuasive Advertising

0 Comments