

With the Loop Builder characteristic in Divi 5, you’ll be able to simply create a responsive grid the usage of the unfastened model of Complicated Customized Fields (ACF). On this publish, we’ll show the way to configure ACF, arrange CSS Grid, and use the Loop Builder to construct a workforce portfolio grid in smartly beneath an hour.
In case you haven’t already, head over to the Sublime Issues Participants’ House and download the latest Divi 5 Beta so you’ll be able to observe along side the academic.
Let’s dive in.
What Is Loop Builder?
Divi 5’s Loop Builder is a characteristic that lets you create dynamic, repeatable layouts immediately within the Visible Builder or Theme Builder. This eliminates the restrictions of Divi’s same old Weblog and Portfolio Modules. In contrast to conventional modules, the Loop Builder supplies complete regulate over queries and designs for just about any content material kind.
You’ll loop thru posts, phrases, customers, or customized publish varieties — like tasks, or in relation to this educational, workforce contributors — pulling in dynamic knowledge easily. Taste only one card within the Loop, and each further merchandise routinely inherits that design, saving hours of handbook tweaking. Incorporate Flexbox and CSS Grid for complicated layouts, equivalent to masonry grids and carousels (the usage of the Group Carousel module), to reach completely symmetrical preparations. It really works seamlessly whether or not you’re construction on a web page within the Visible Builder or globally within the Theme Builder, making it superb for scalable, maintainable websites.
How To Construct A Staff Listing The use of Loop Builder
For this educational, we’ll be making a customized publish kind for Staff Participants the usage of the unfastened model of ACF. Underneath, we stroll in the course of the steps to arrange ACF, together with making a customized publish kind, box workforce, and customized fields to tie into the Loop. Via the tip of this publish, you’ll understand how to construct an absolutely responsive workforce member show off that you’ll be able to use on any Divi website online.
Step 1: Configure ACF
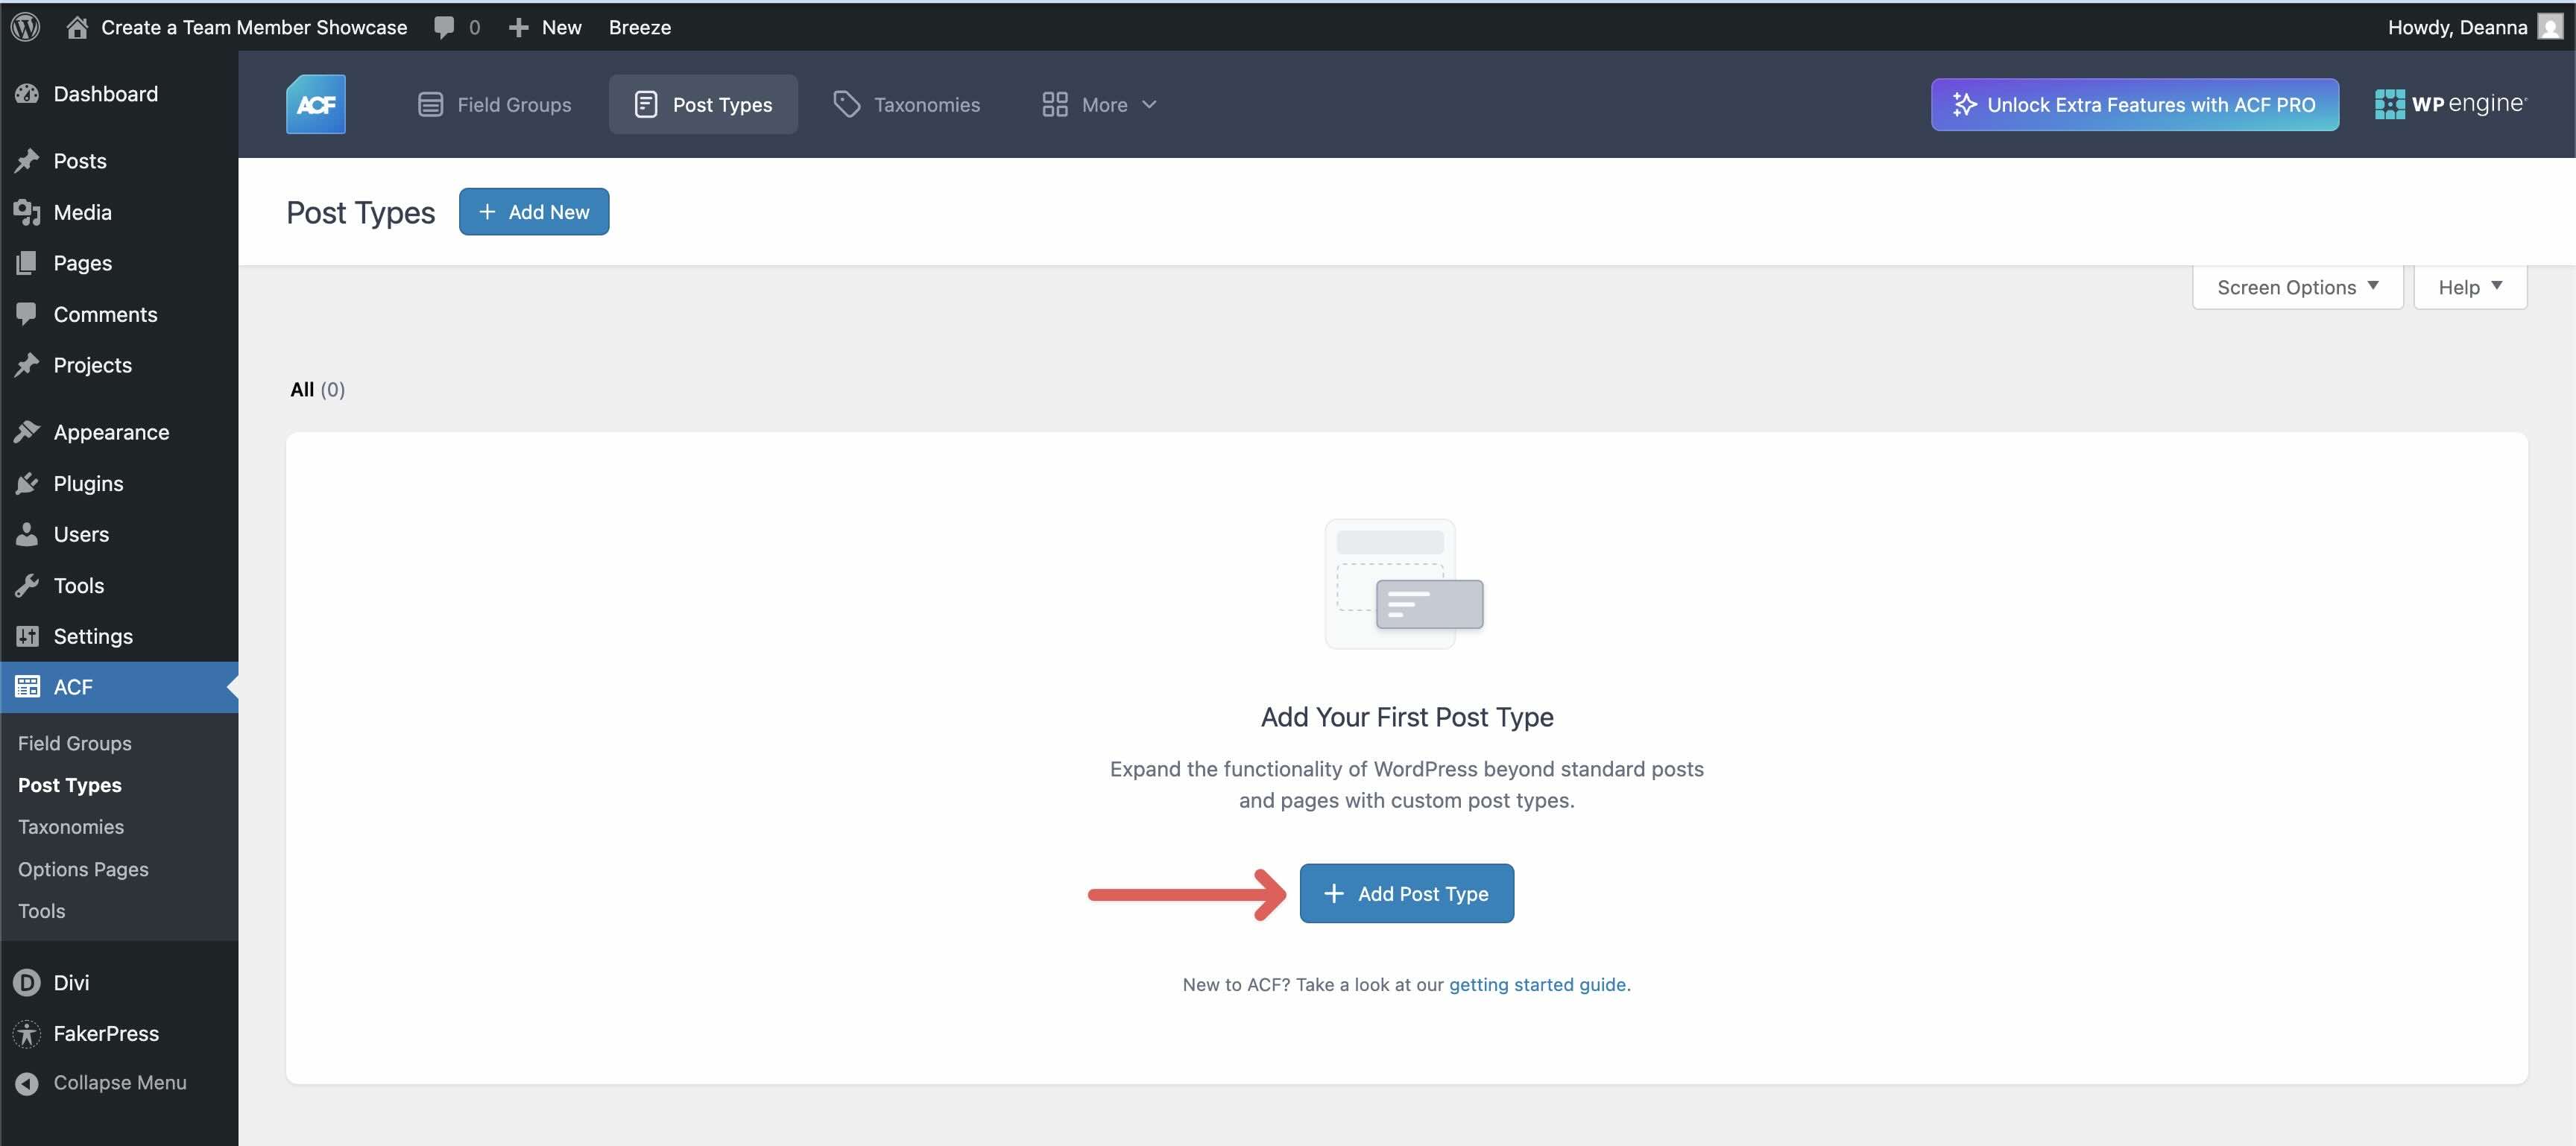
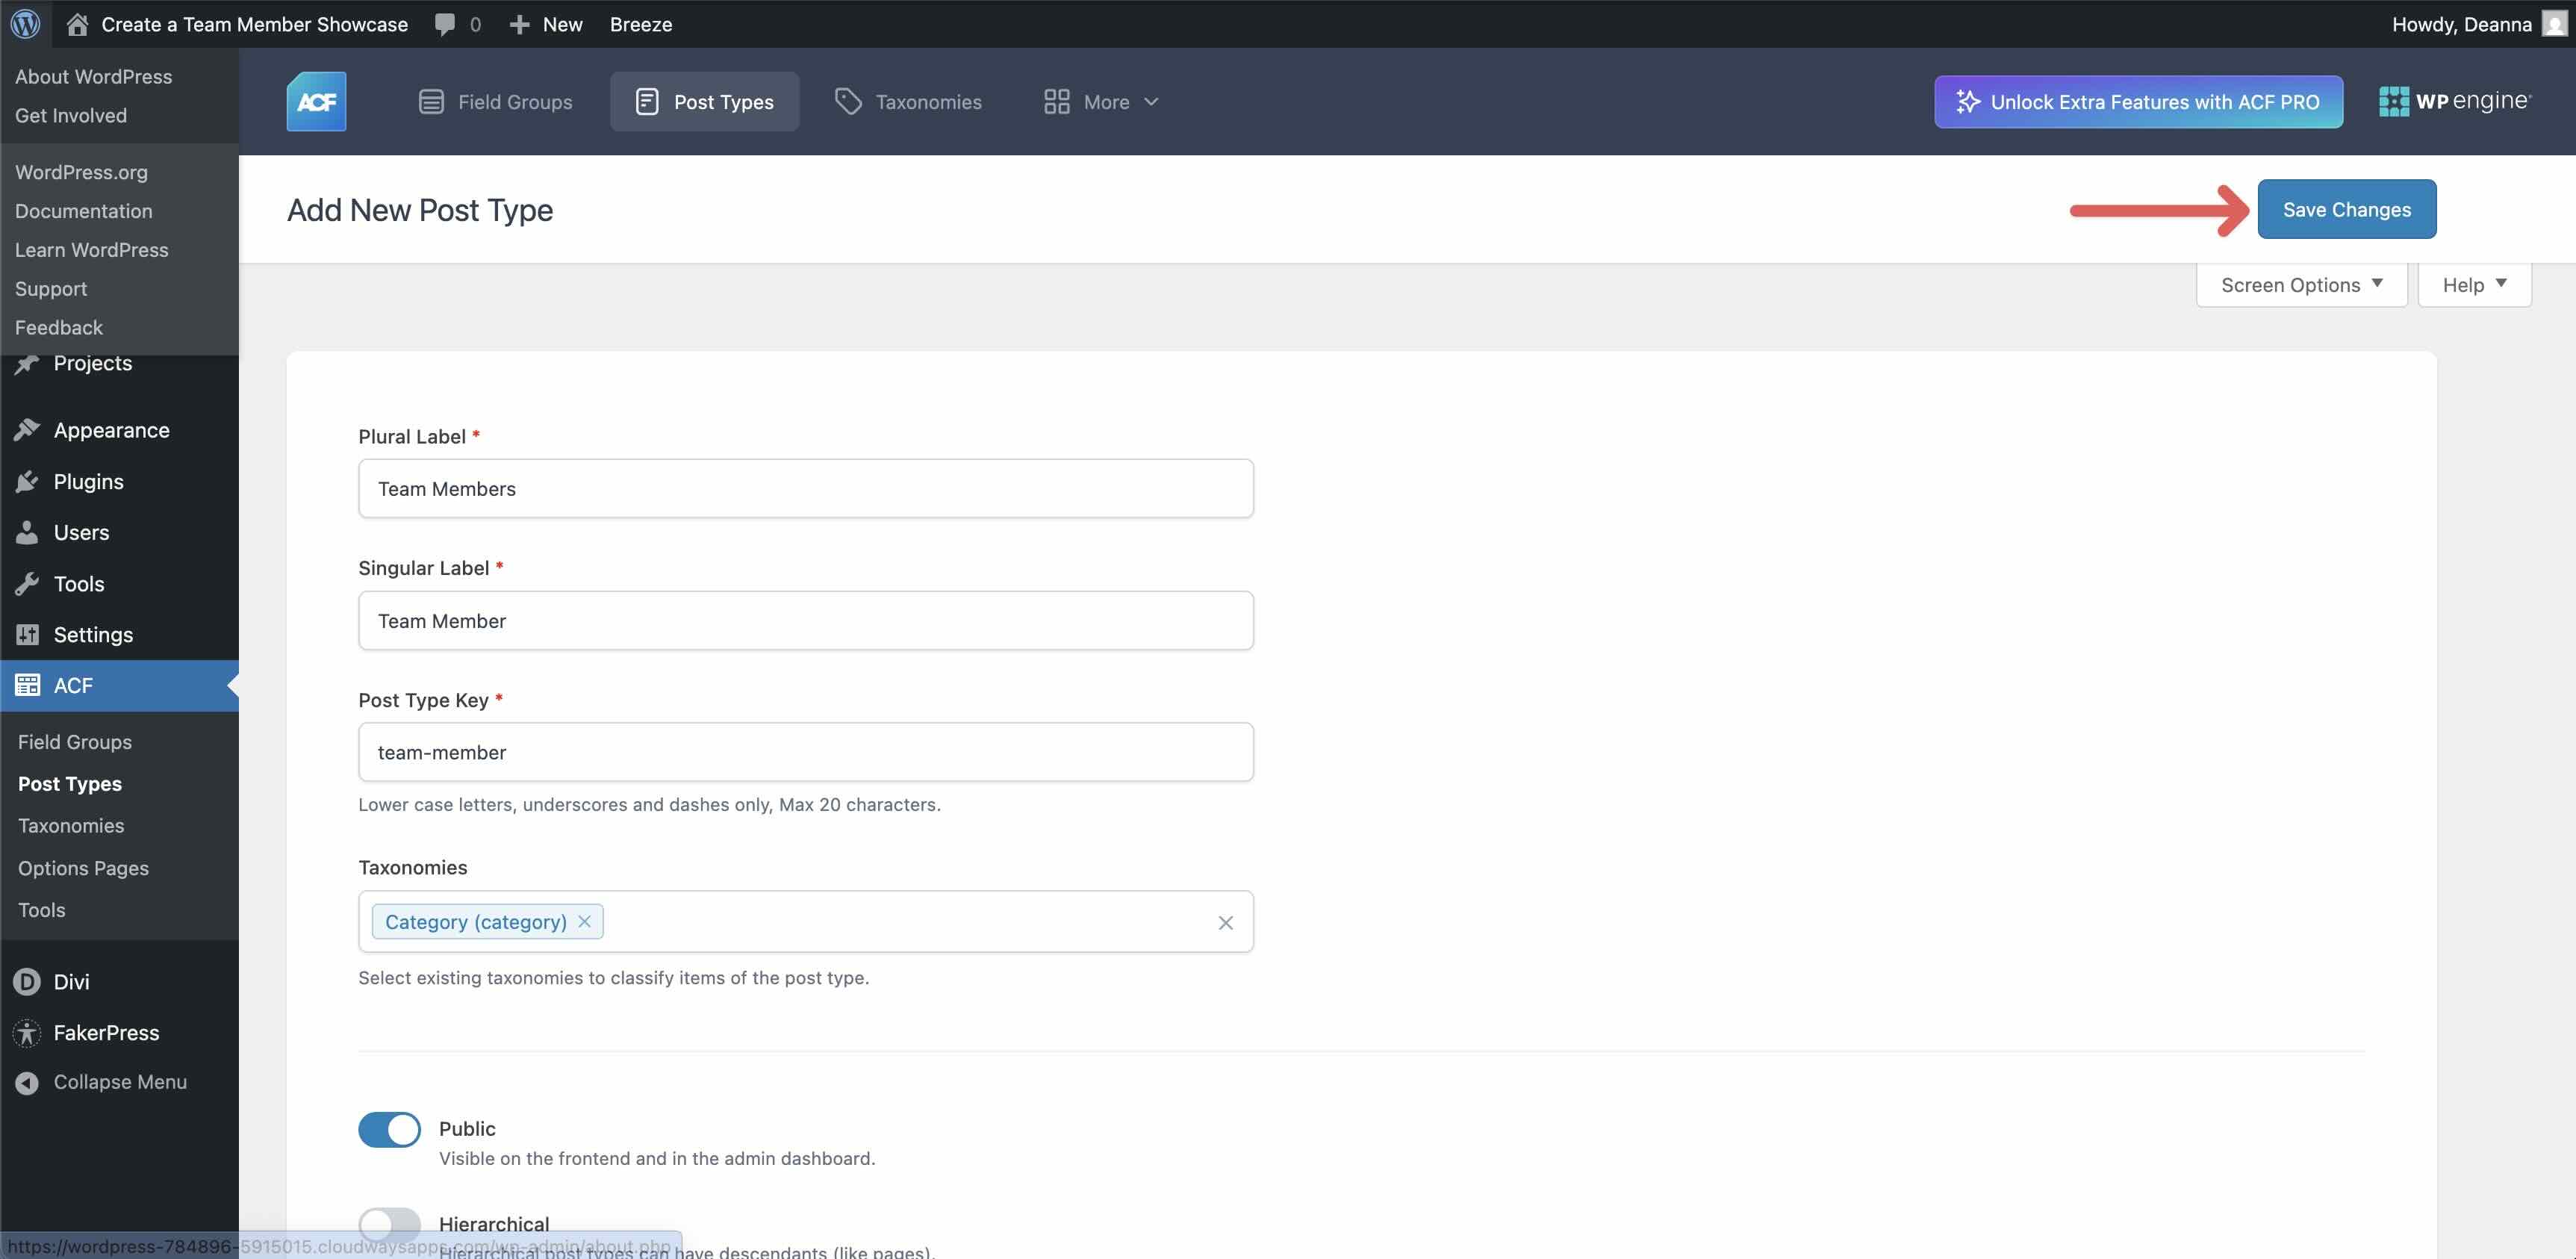
Get began by means of putting in the unfastened model of Complicated Customized Fields (ACF) for your Divi website online. Turn on the plugin and navigate to ACF > Submit Sorts.
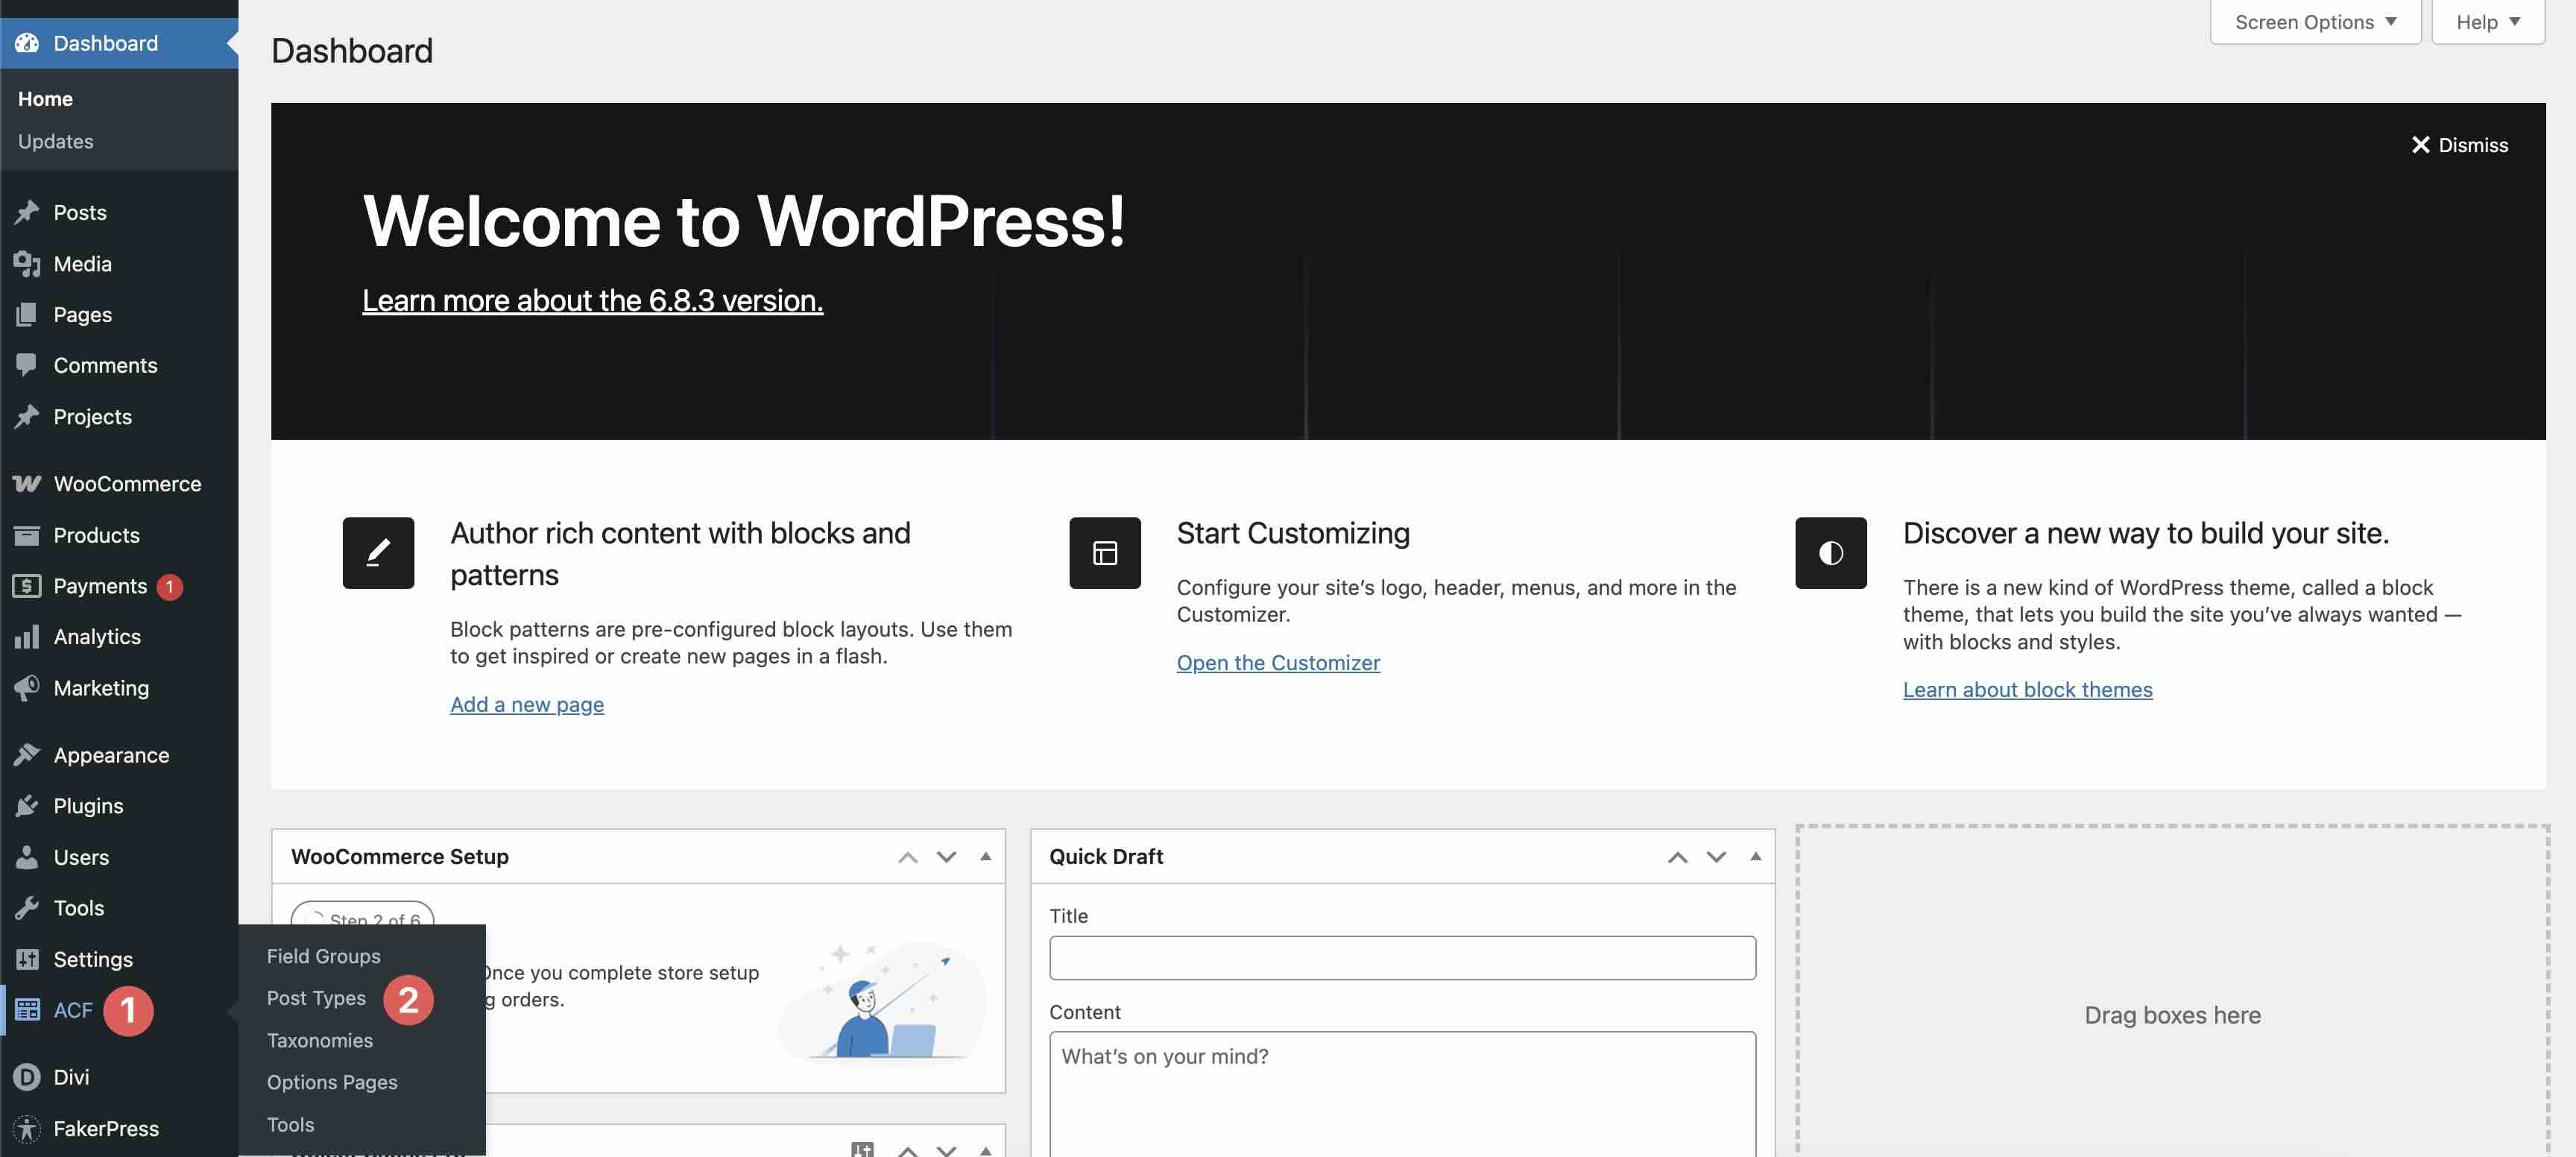
Click on the + Upload Submit Kind button to create a brand new publish kind.
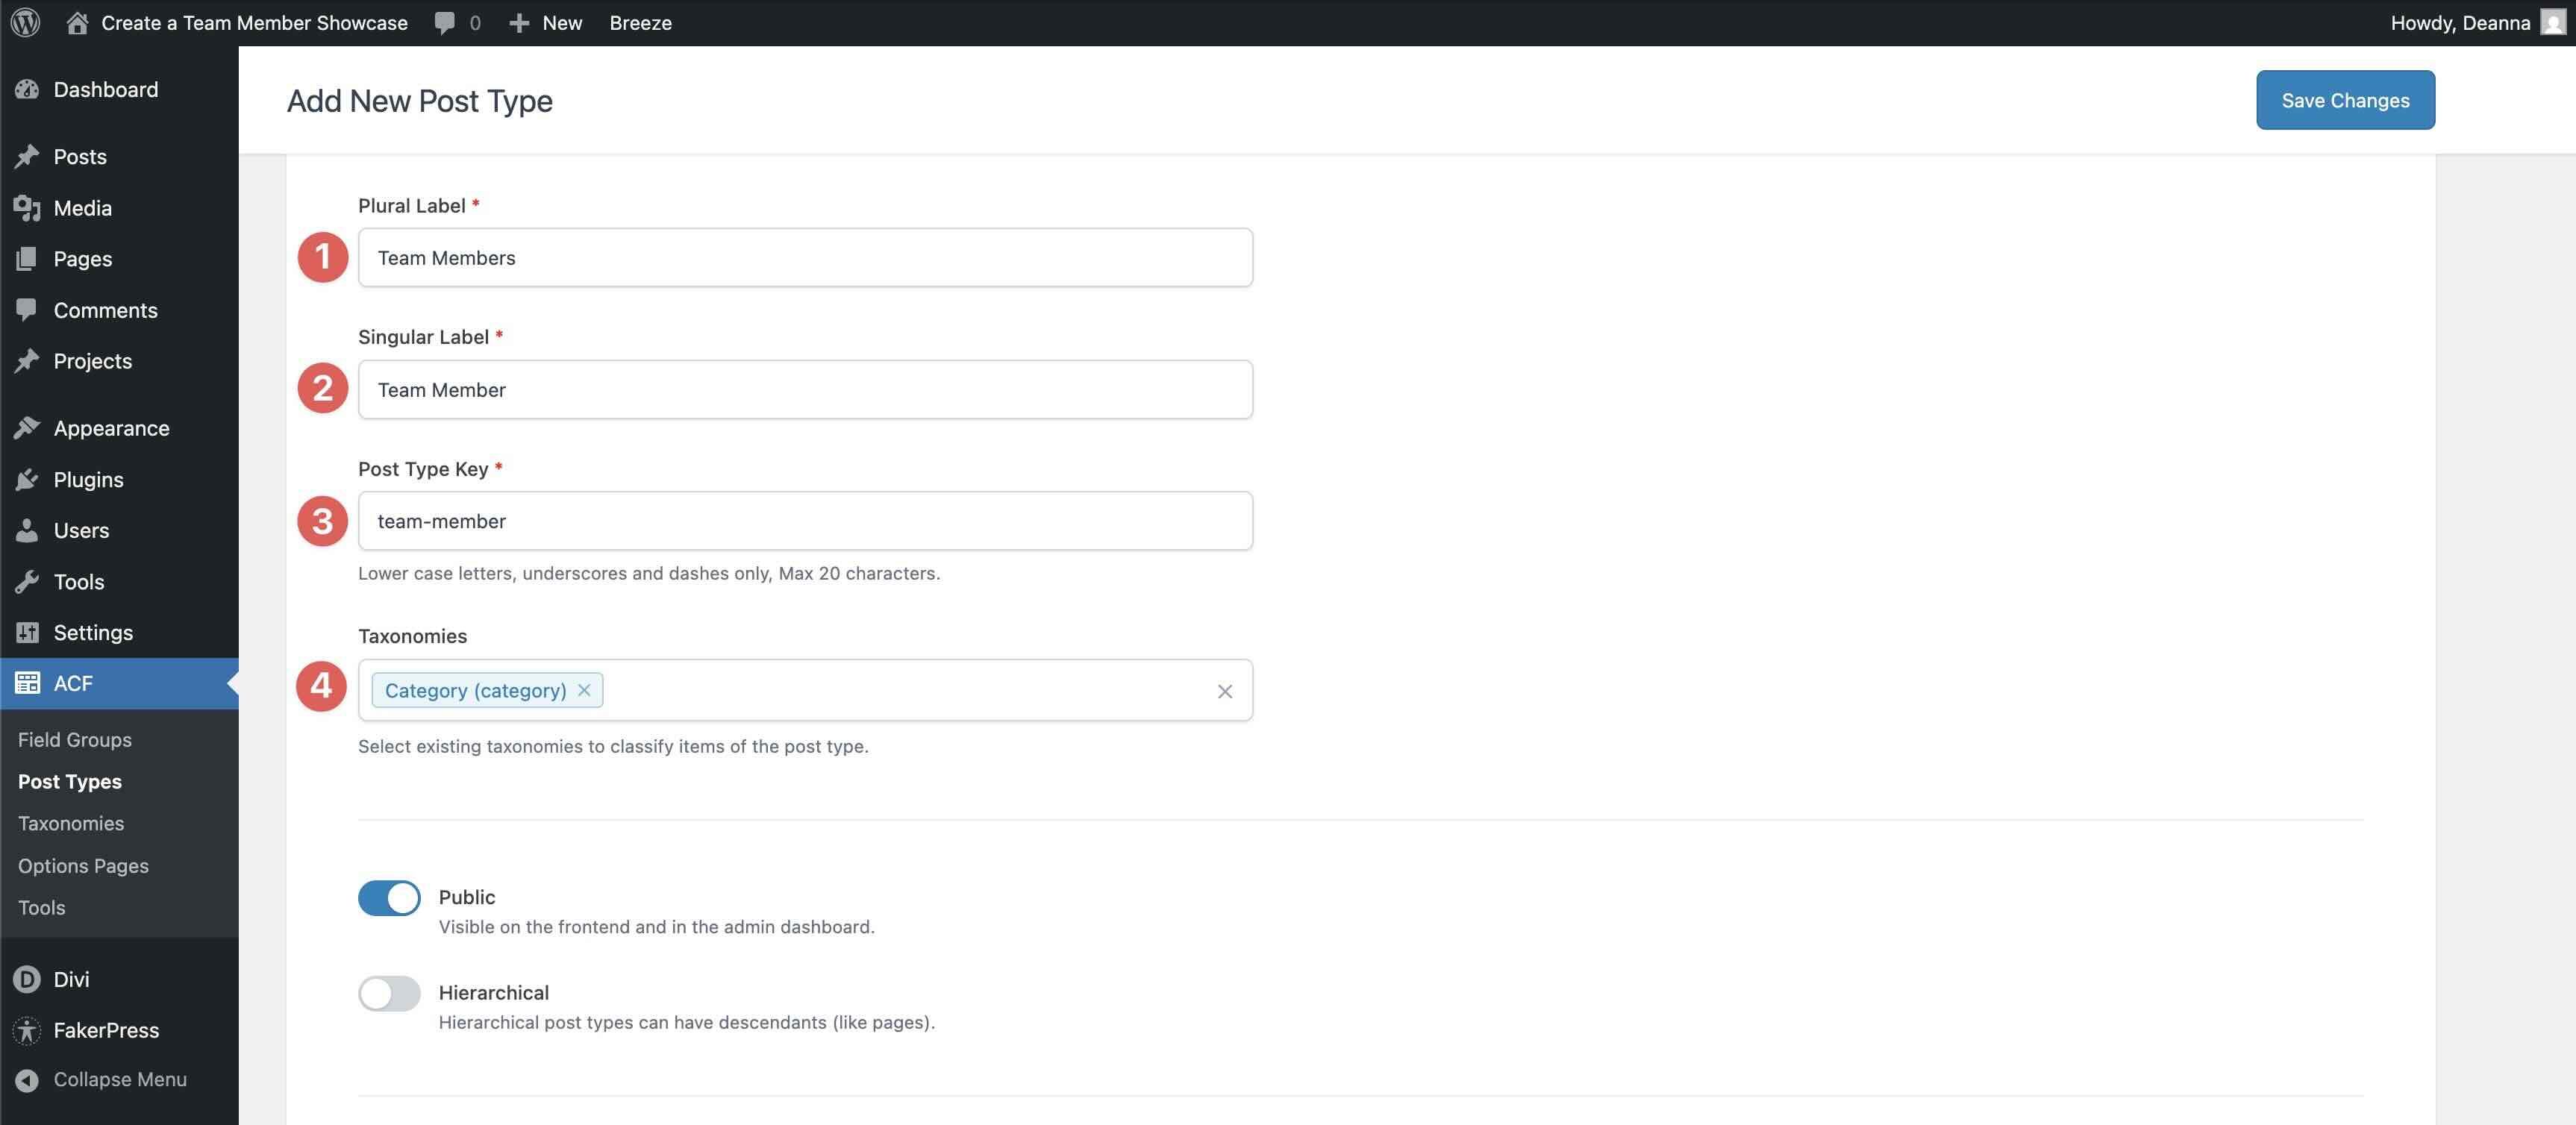
Fill within the very important labels:
- Plural Label: Groups
- Singular Label: Staff Member
- Submit Kind Key: team_member
- Taxonomies: Class
Make certain that Public is toggled on.
Toggle on Complicated Configuration. Within the Common tab, make sure that Featured Symbol, Name, Editor, Excerpt, and Customized Fields are enabled.
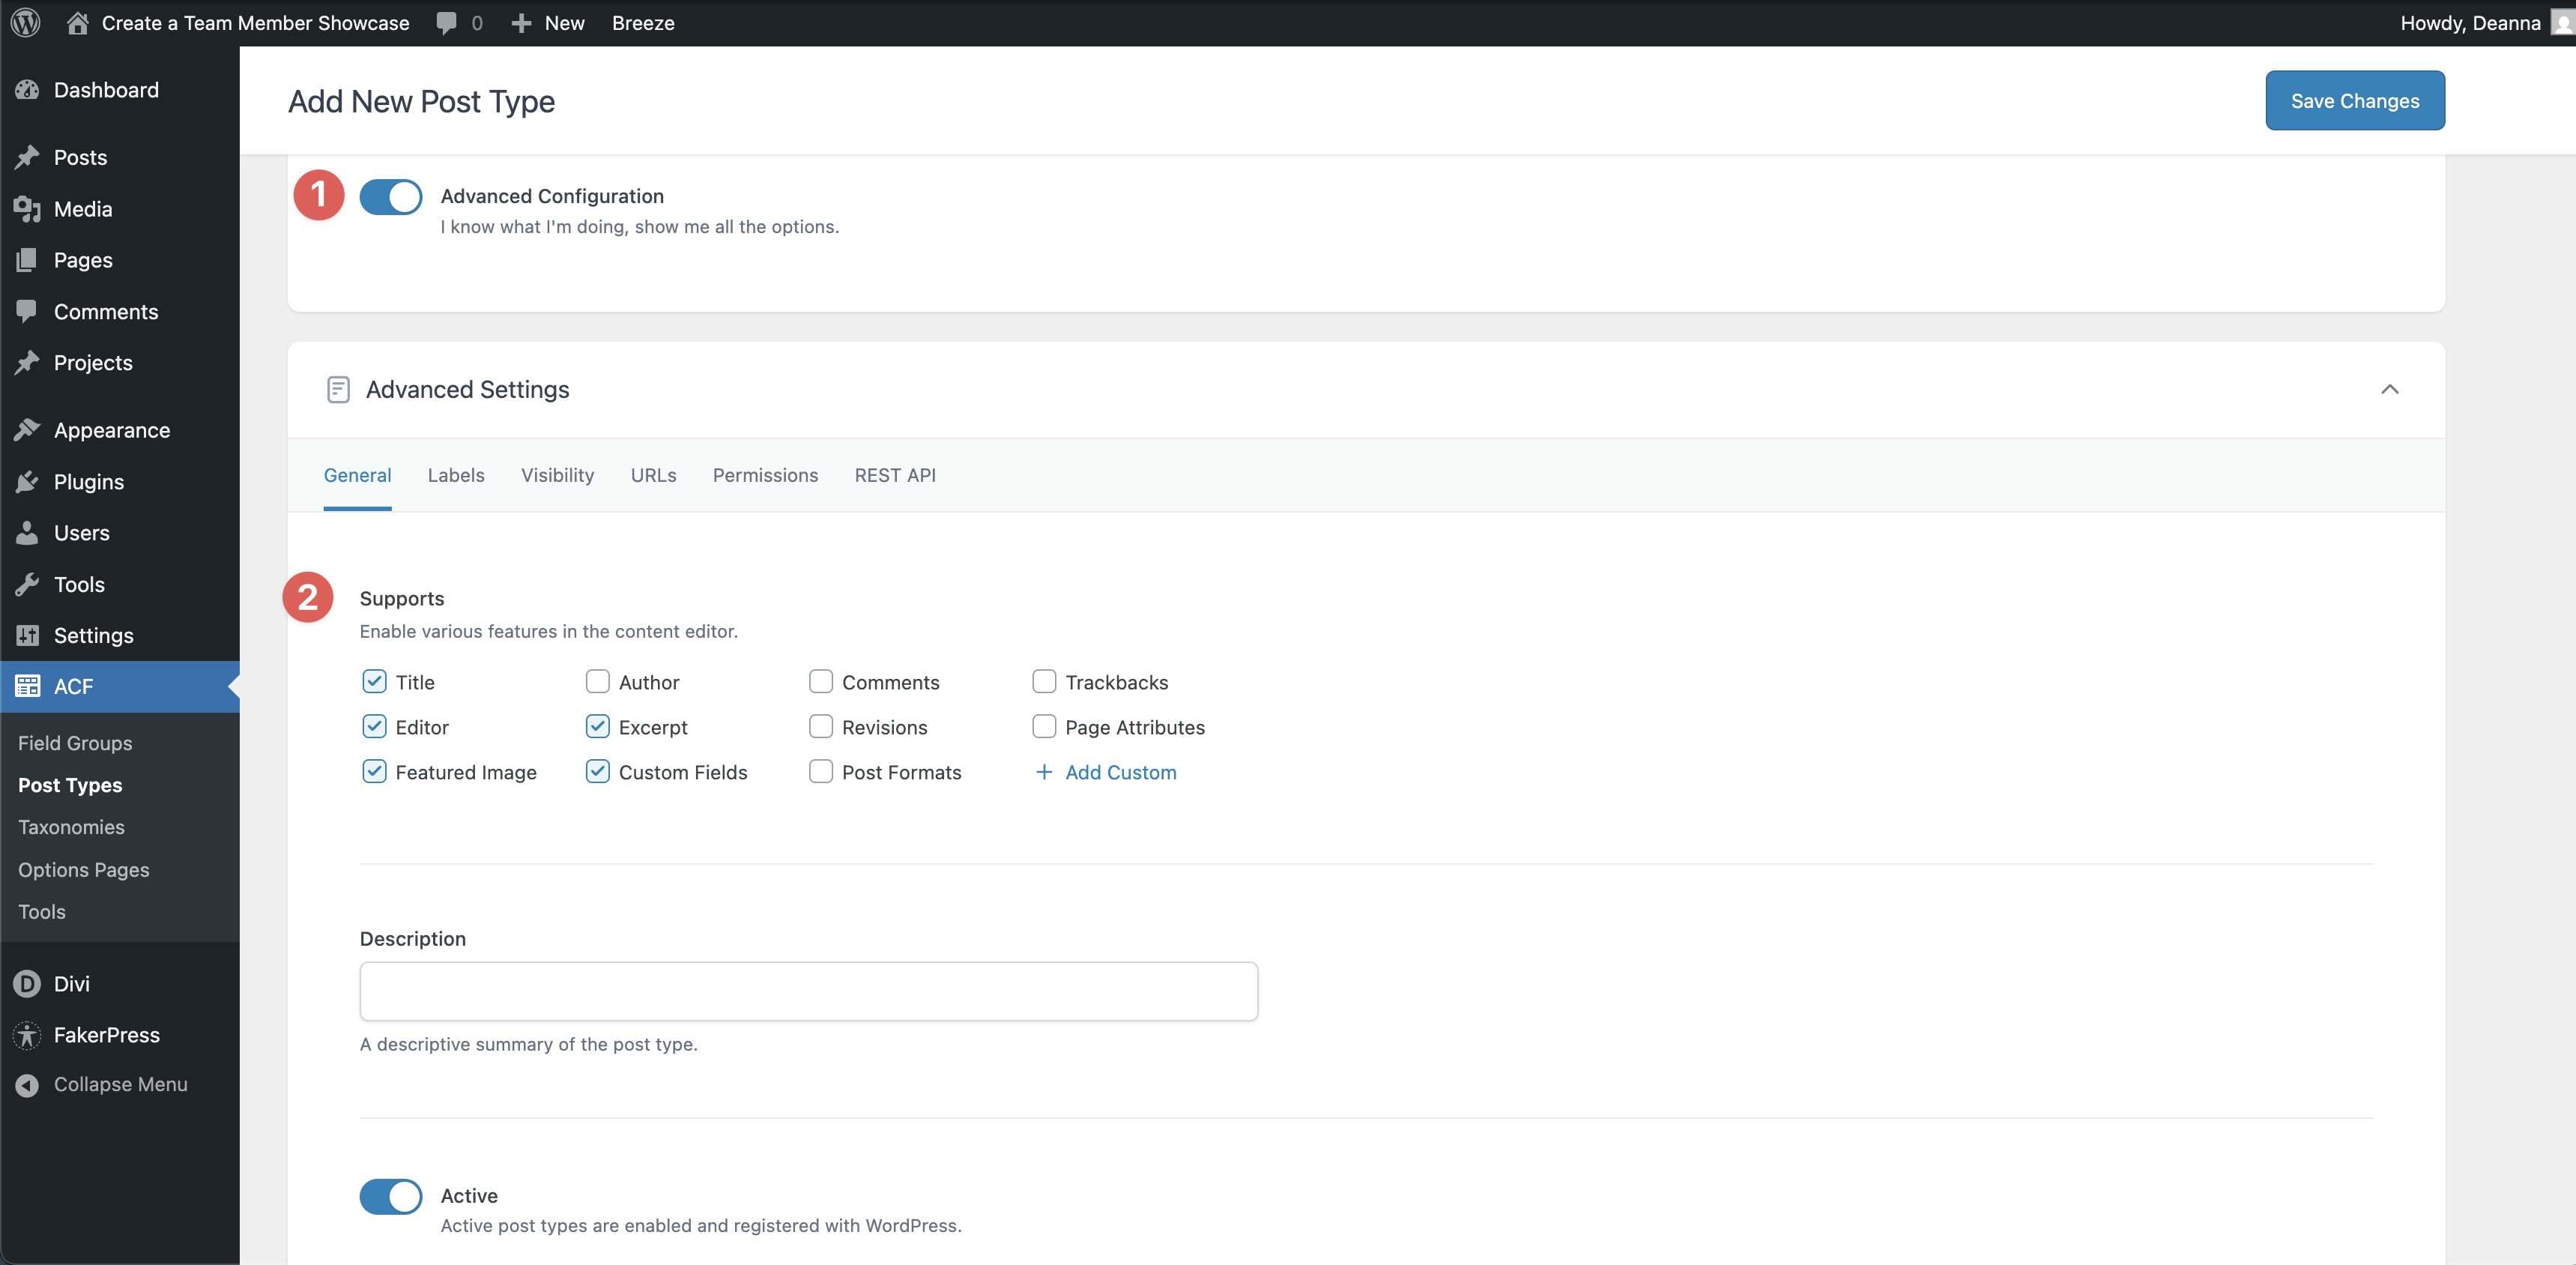
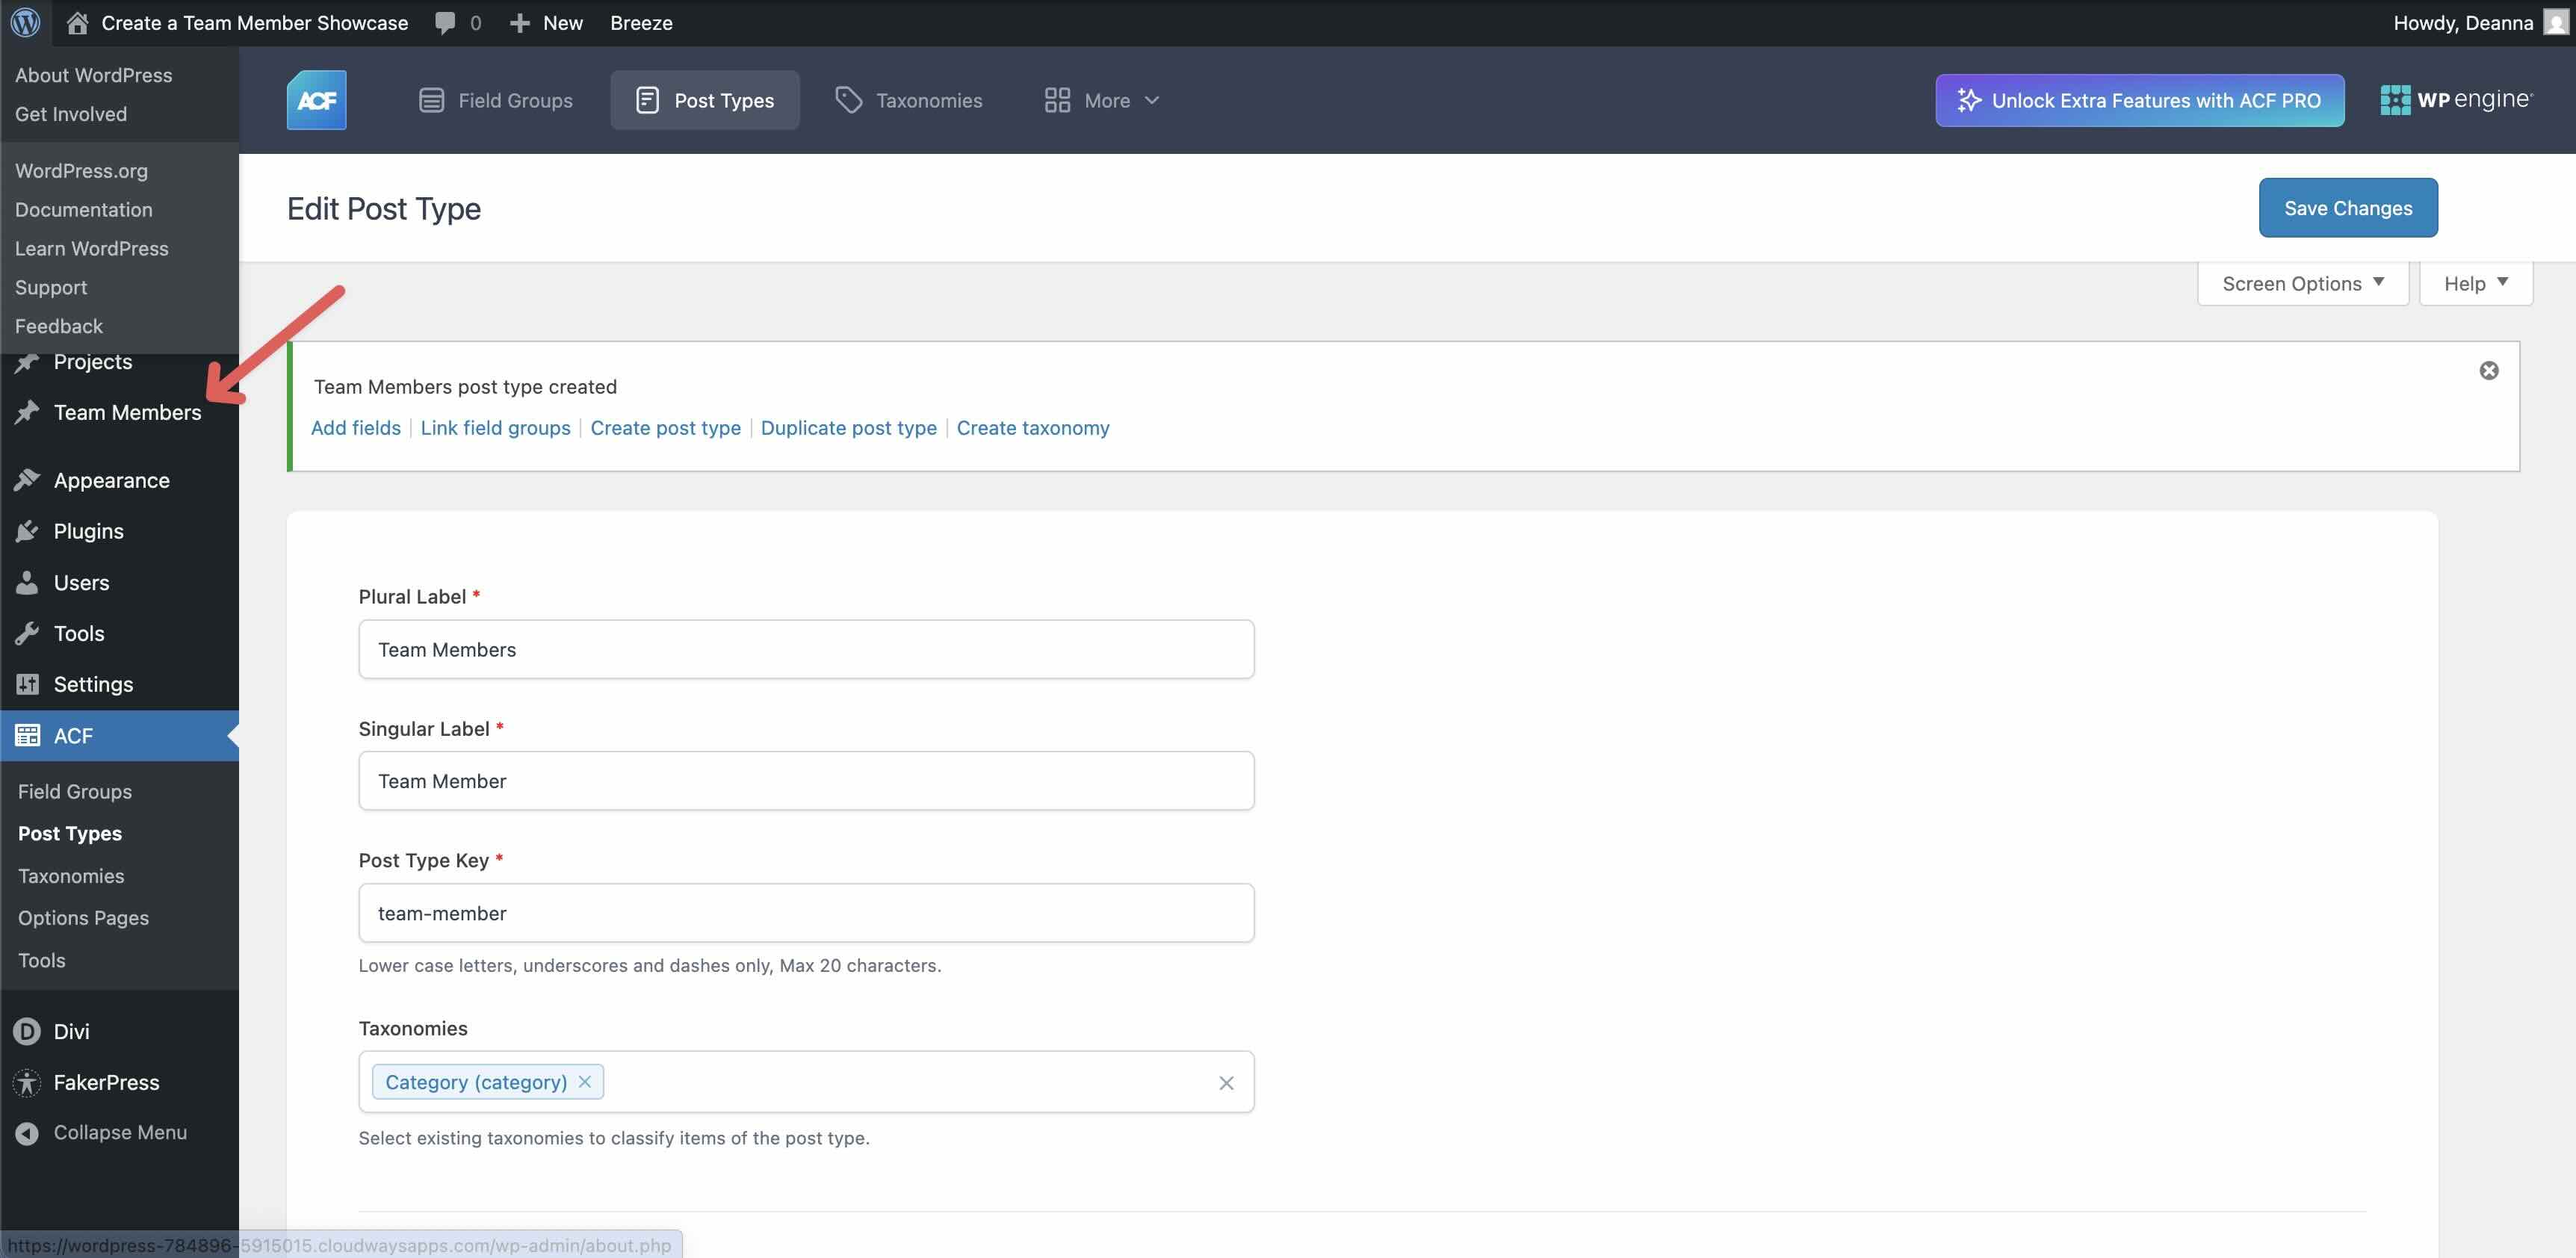
The overall step is to click on the Save Adjustments.
Take a look at the left-hand toolbar to verify the Staff Participants publish kind seems after saving.
Create The Box Team
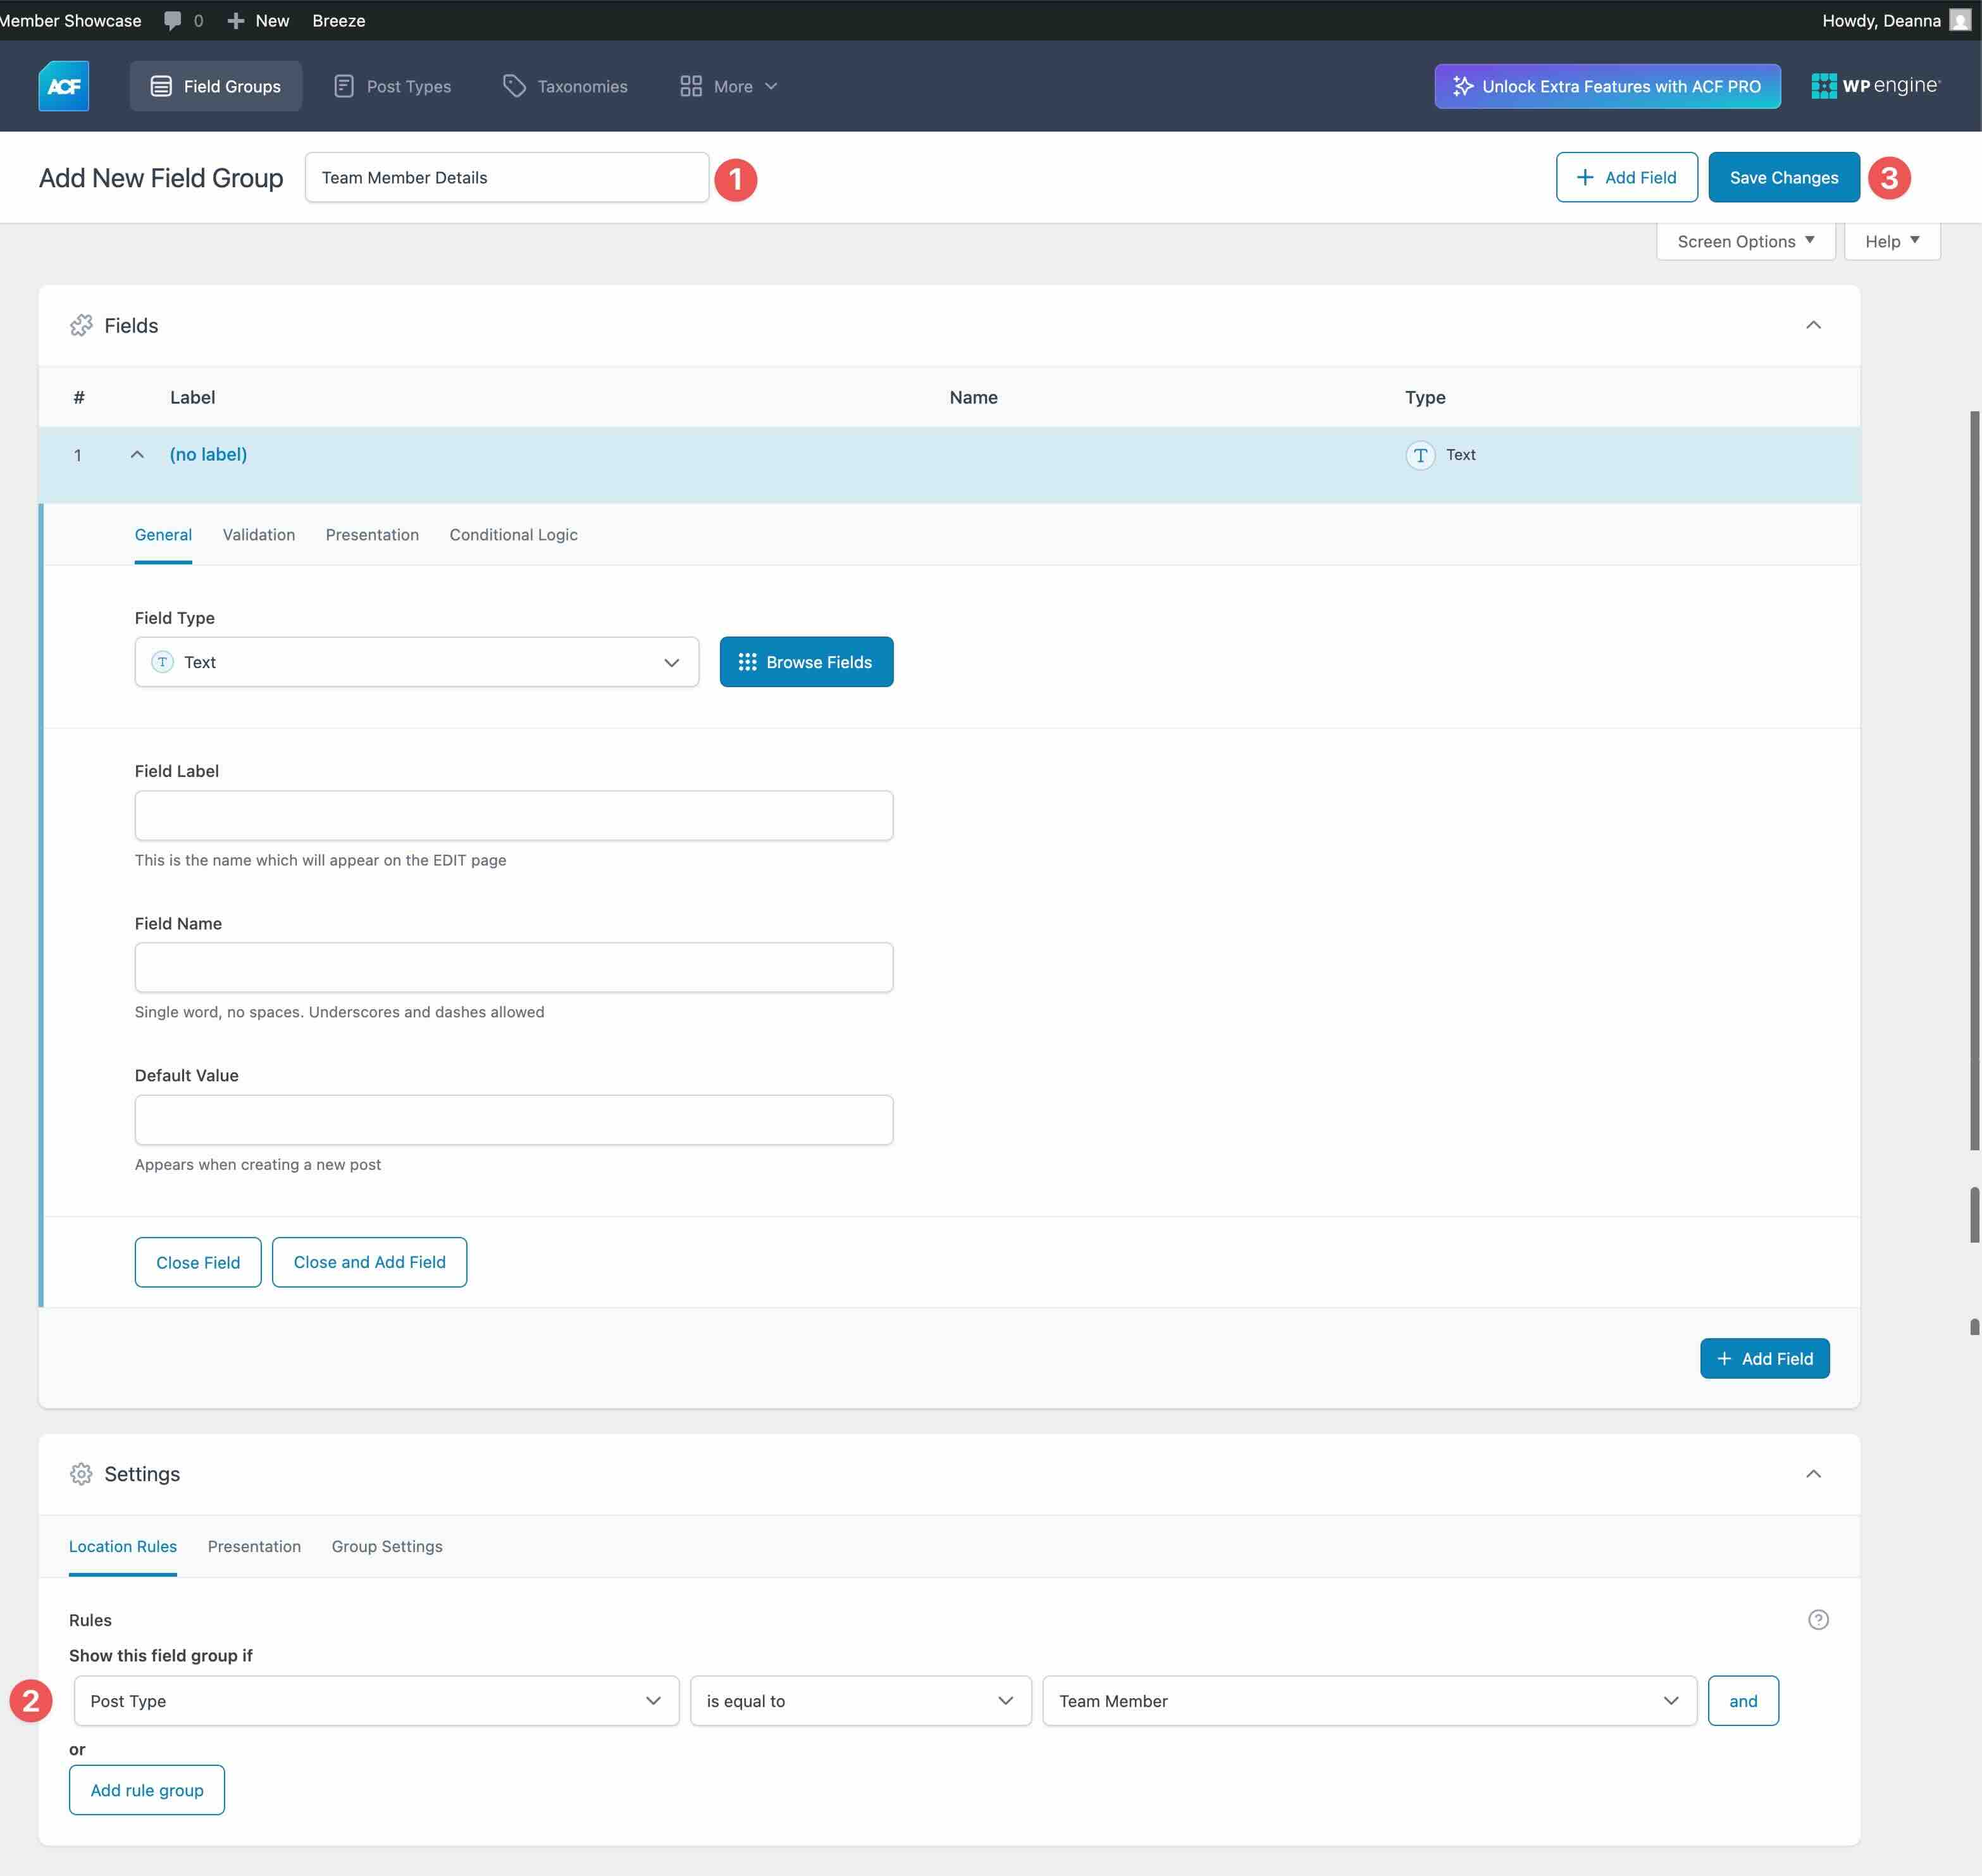
Navigate to ACF > Box Teams and click on the + Upload Box Team button to create a brand new workforce.
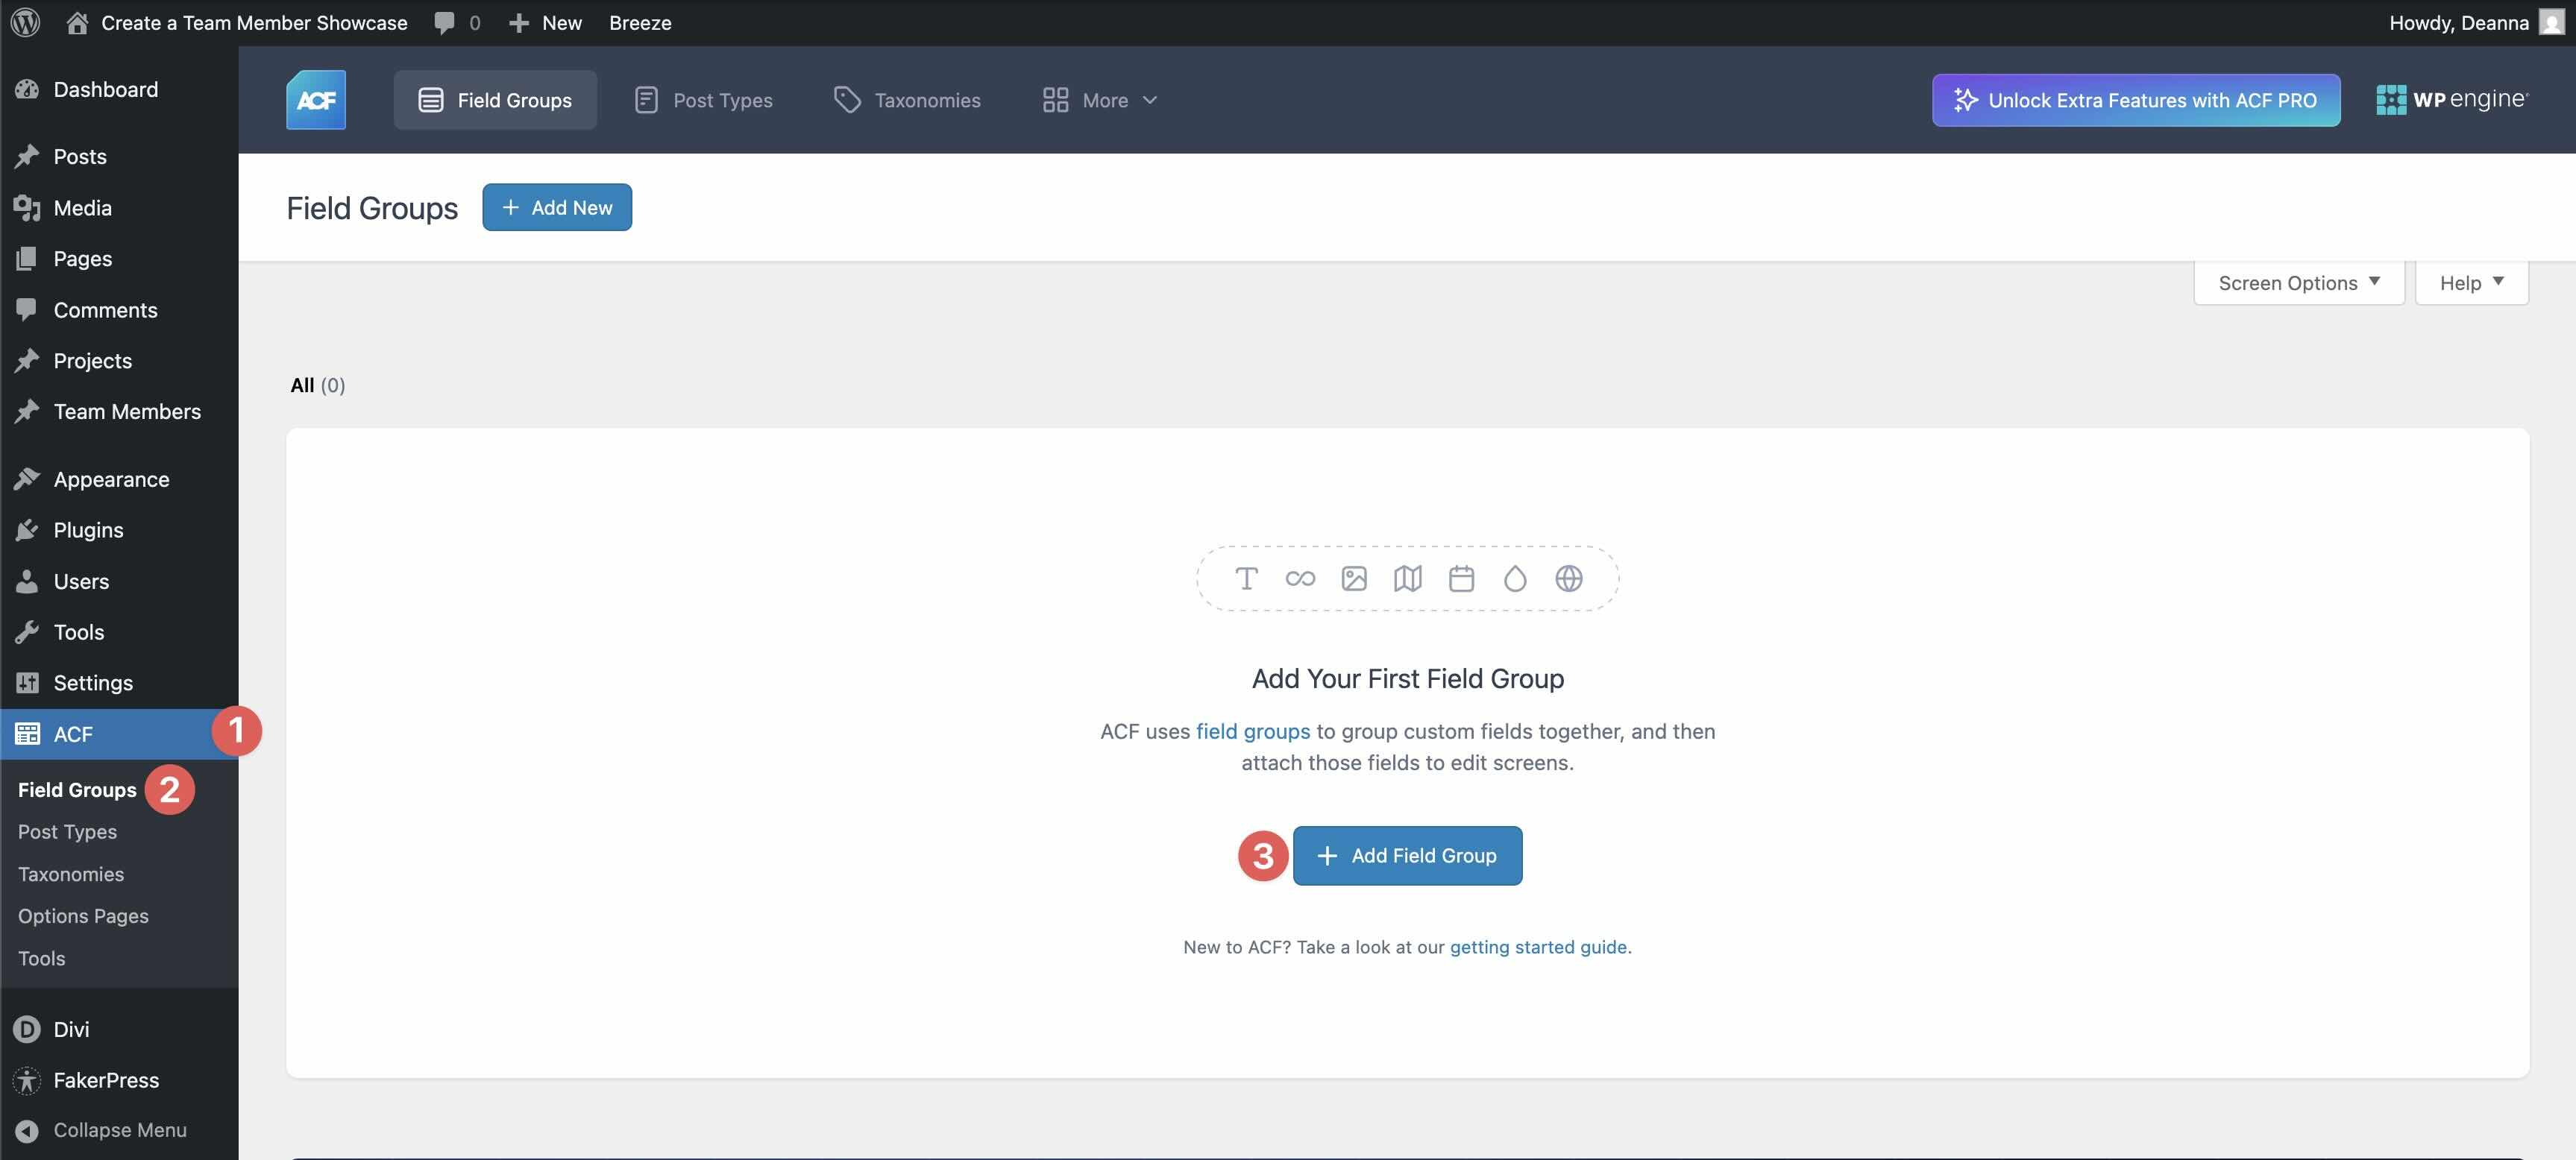
Assign the name Staff Member Main points to the sphere workforce. Scroll all the way down to Settings, and create a brand new Rule: Submit Kind > is the same as > Staff Member. Click on the Save Adjustments button to save lots of the gang.
Create The Customized Fields
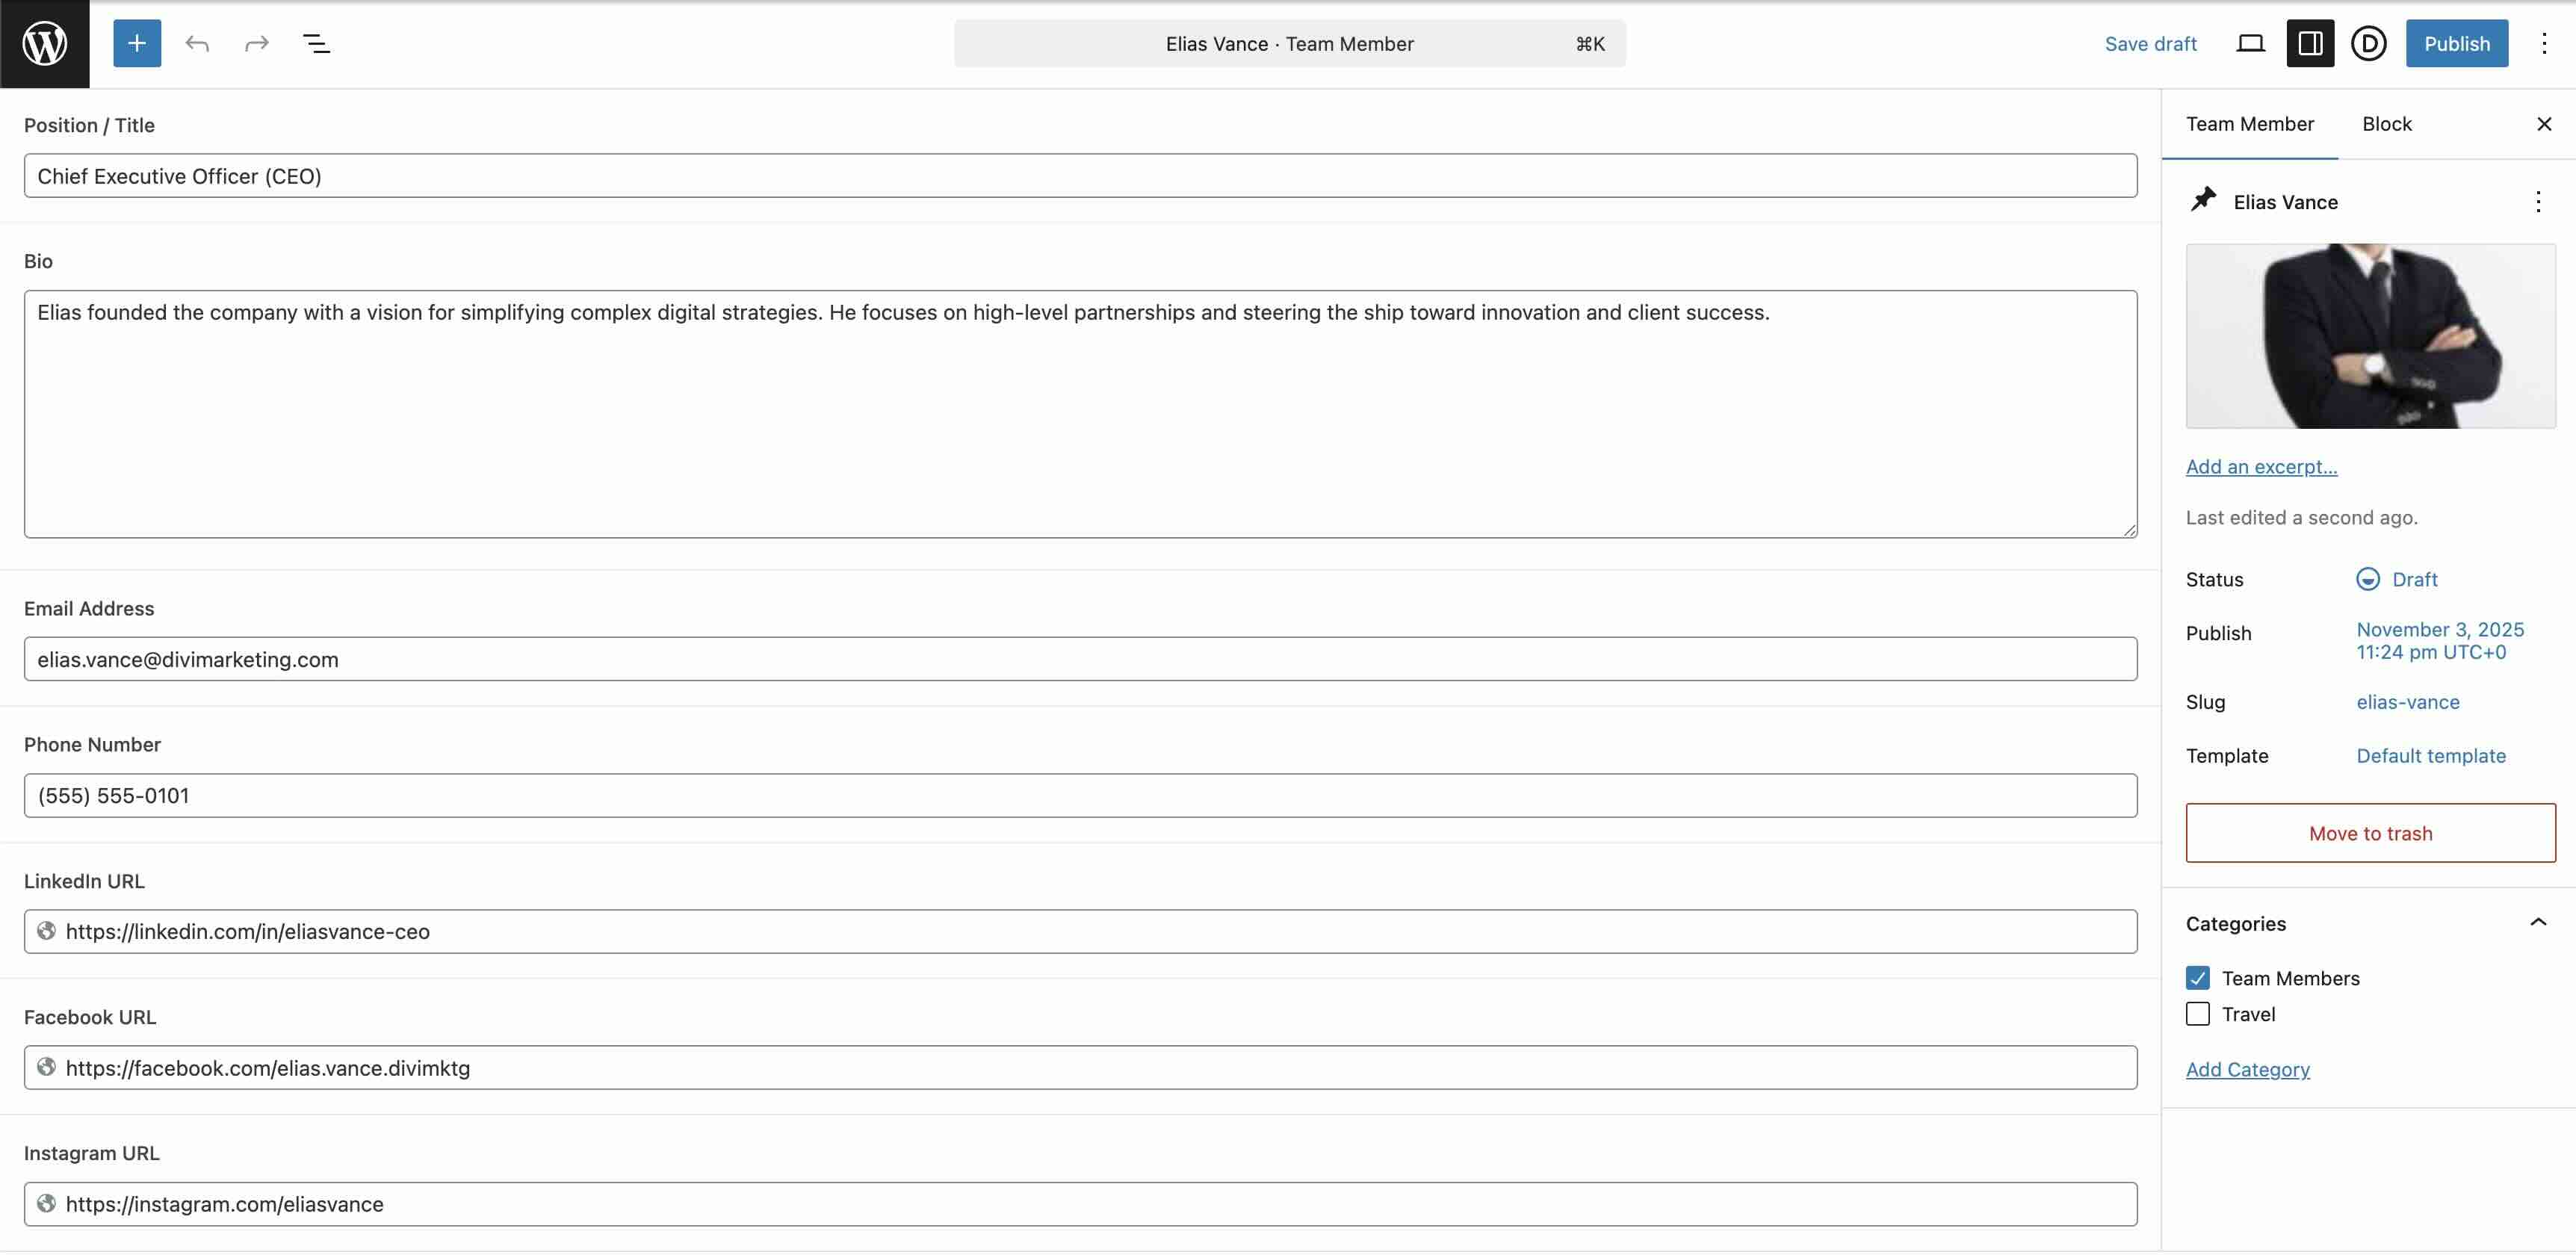
Now that the publish kind and box workforce are created, we wish to create our customized fields. Via default, ACF creates the primary one for you. Hover over the sphere identify to expose the settings. Click on Edit.
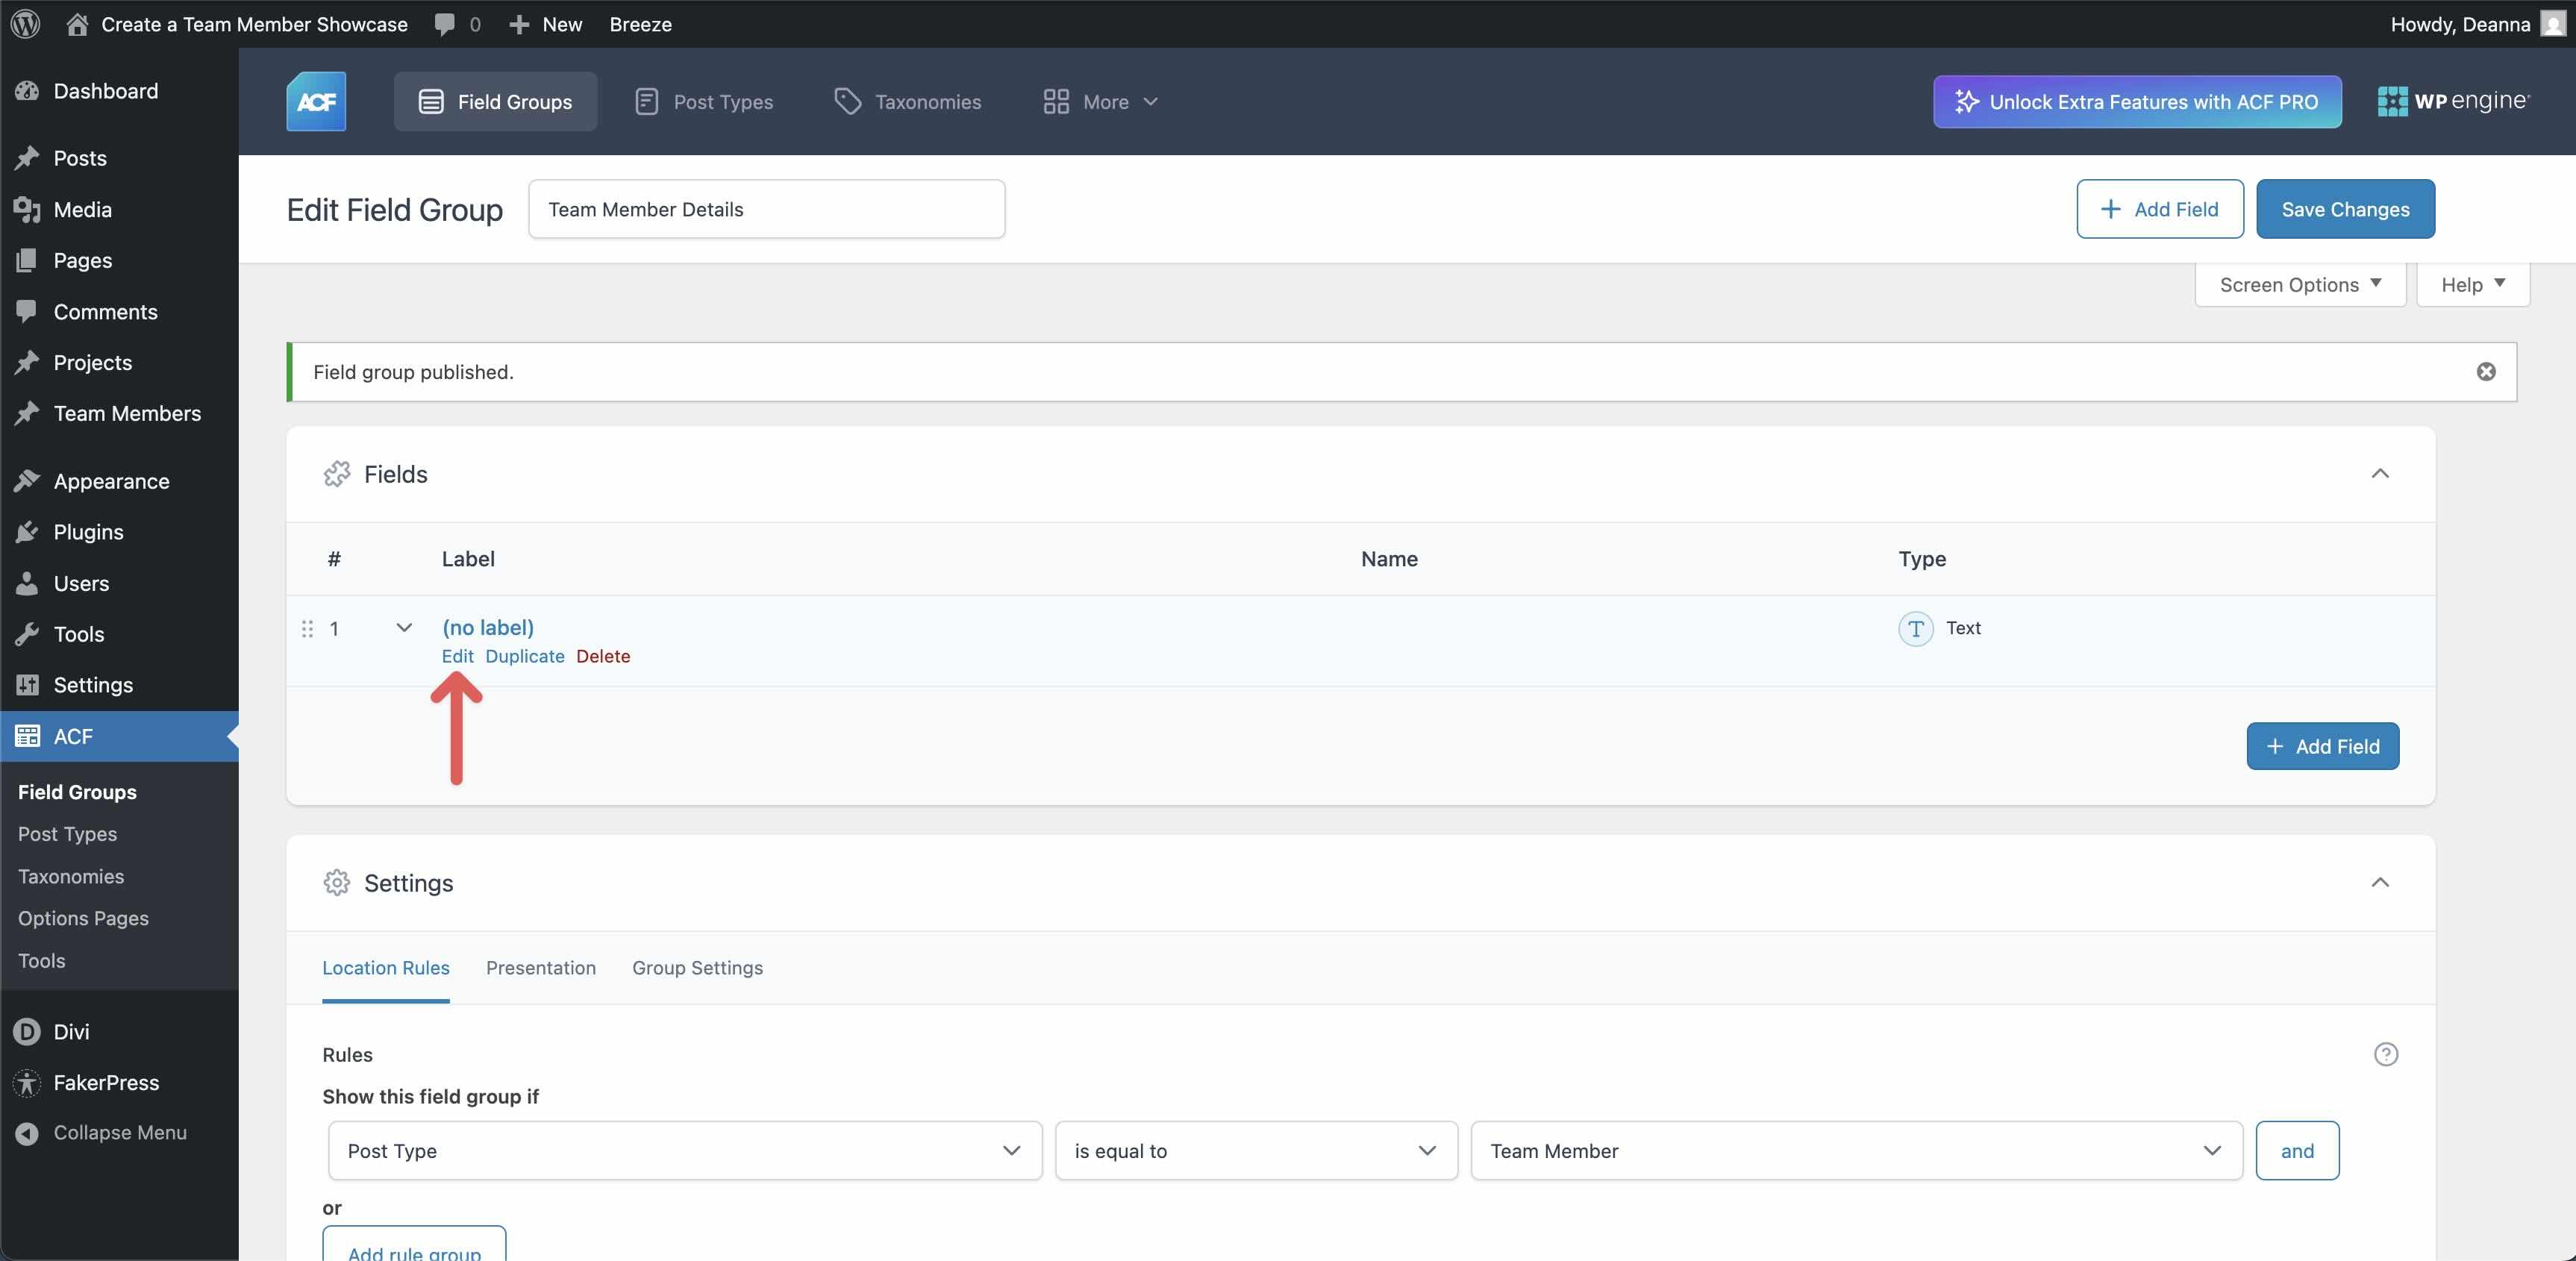
Make a selection Textual content because the Box Kind, Place/Name because the Box Label, position_title because the Box Identify, and Place – Name because the Default Price. Subsequent, click on Shut and Upload Box.
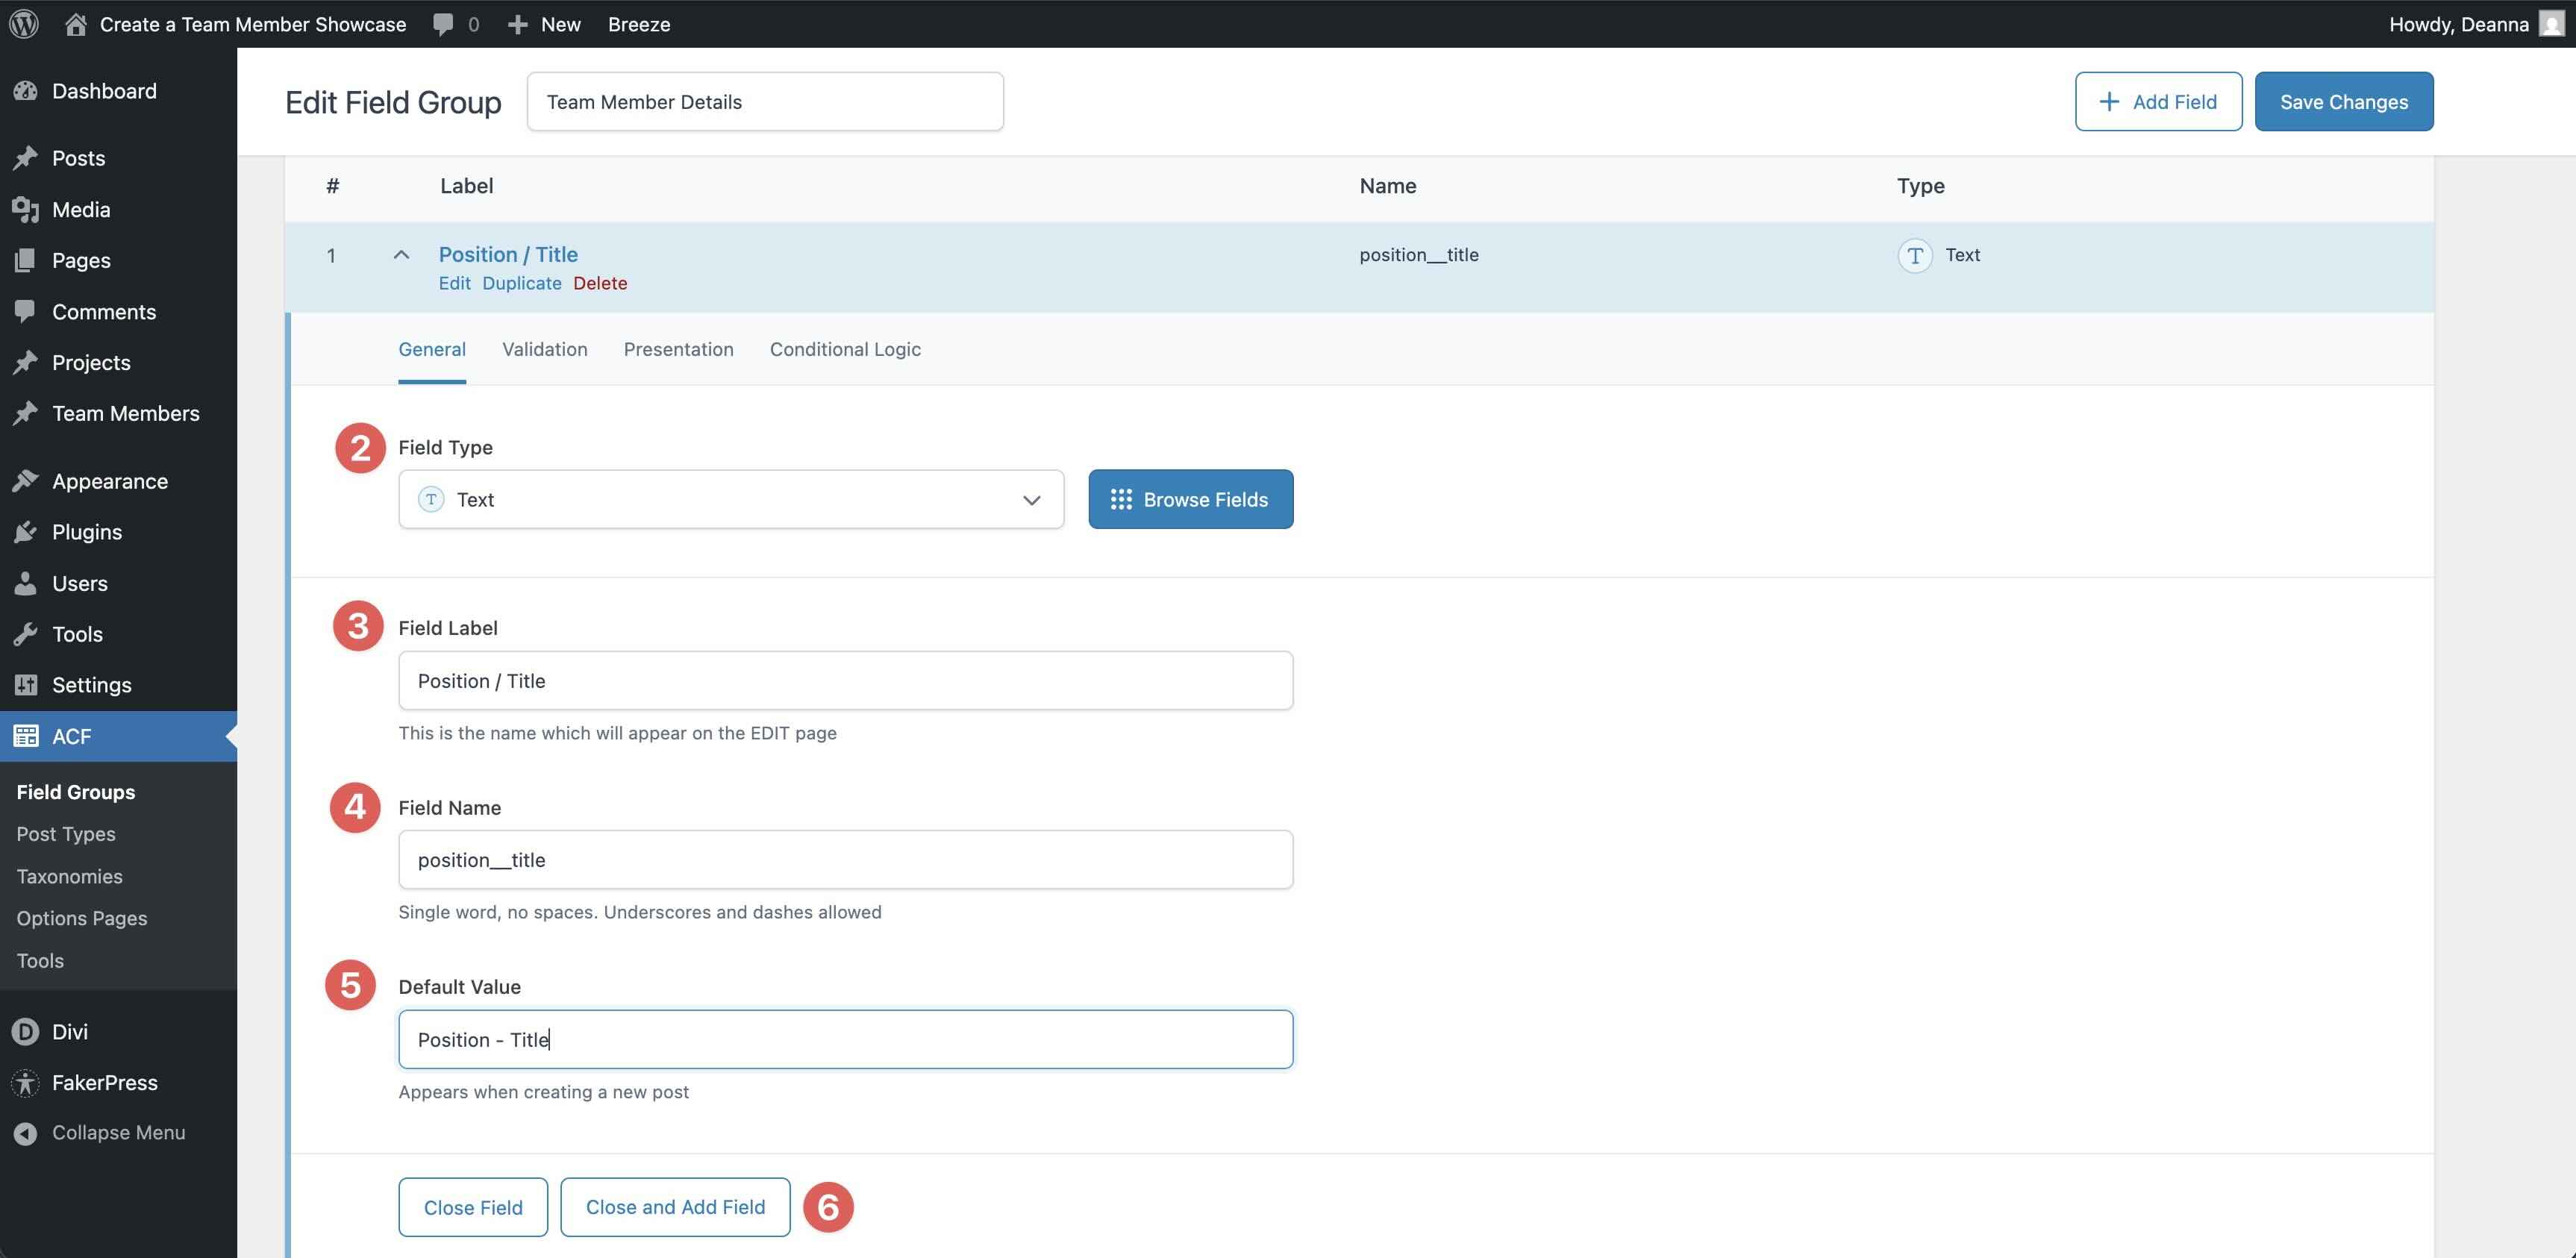
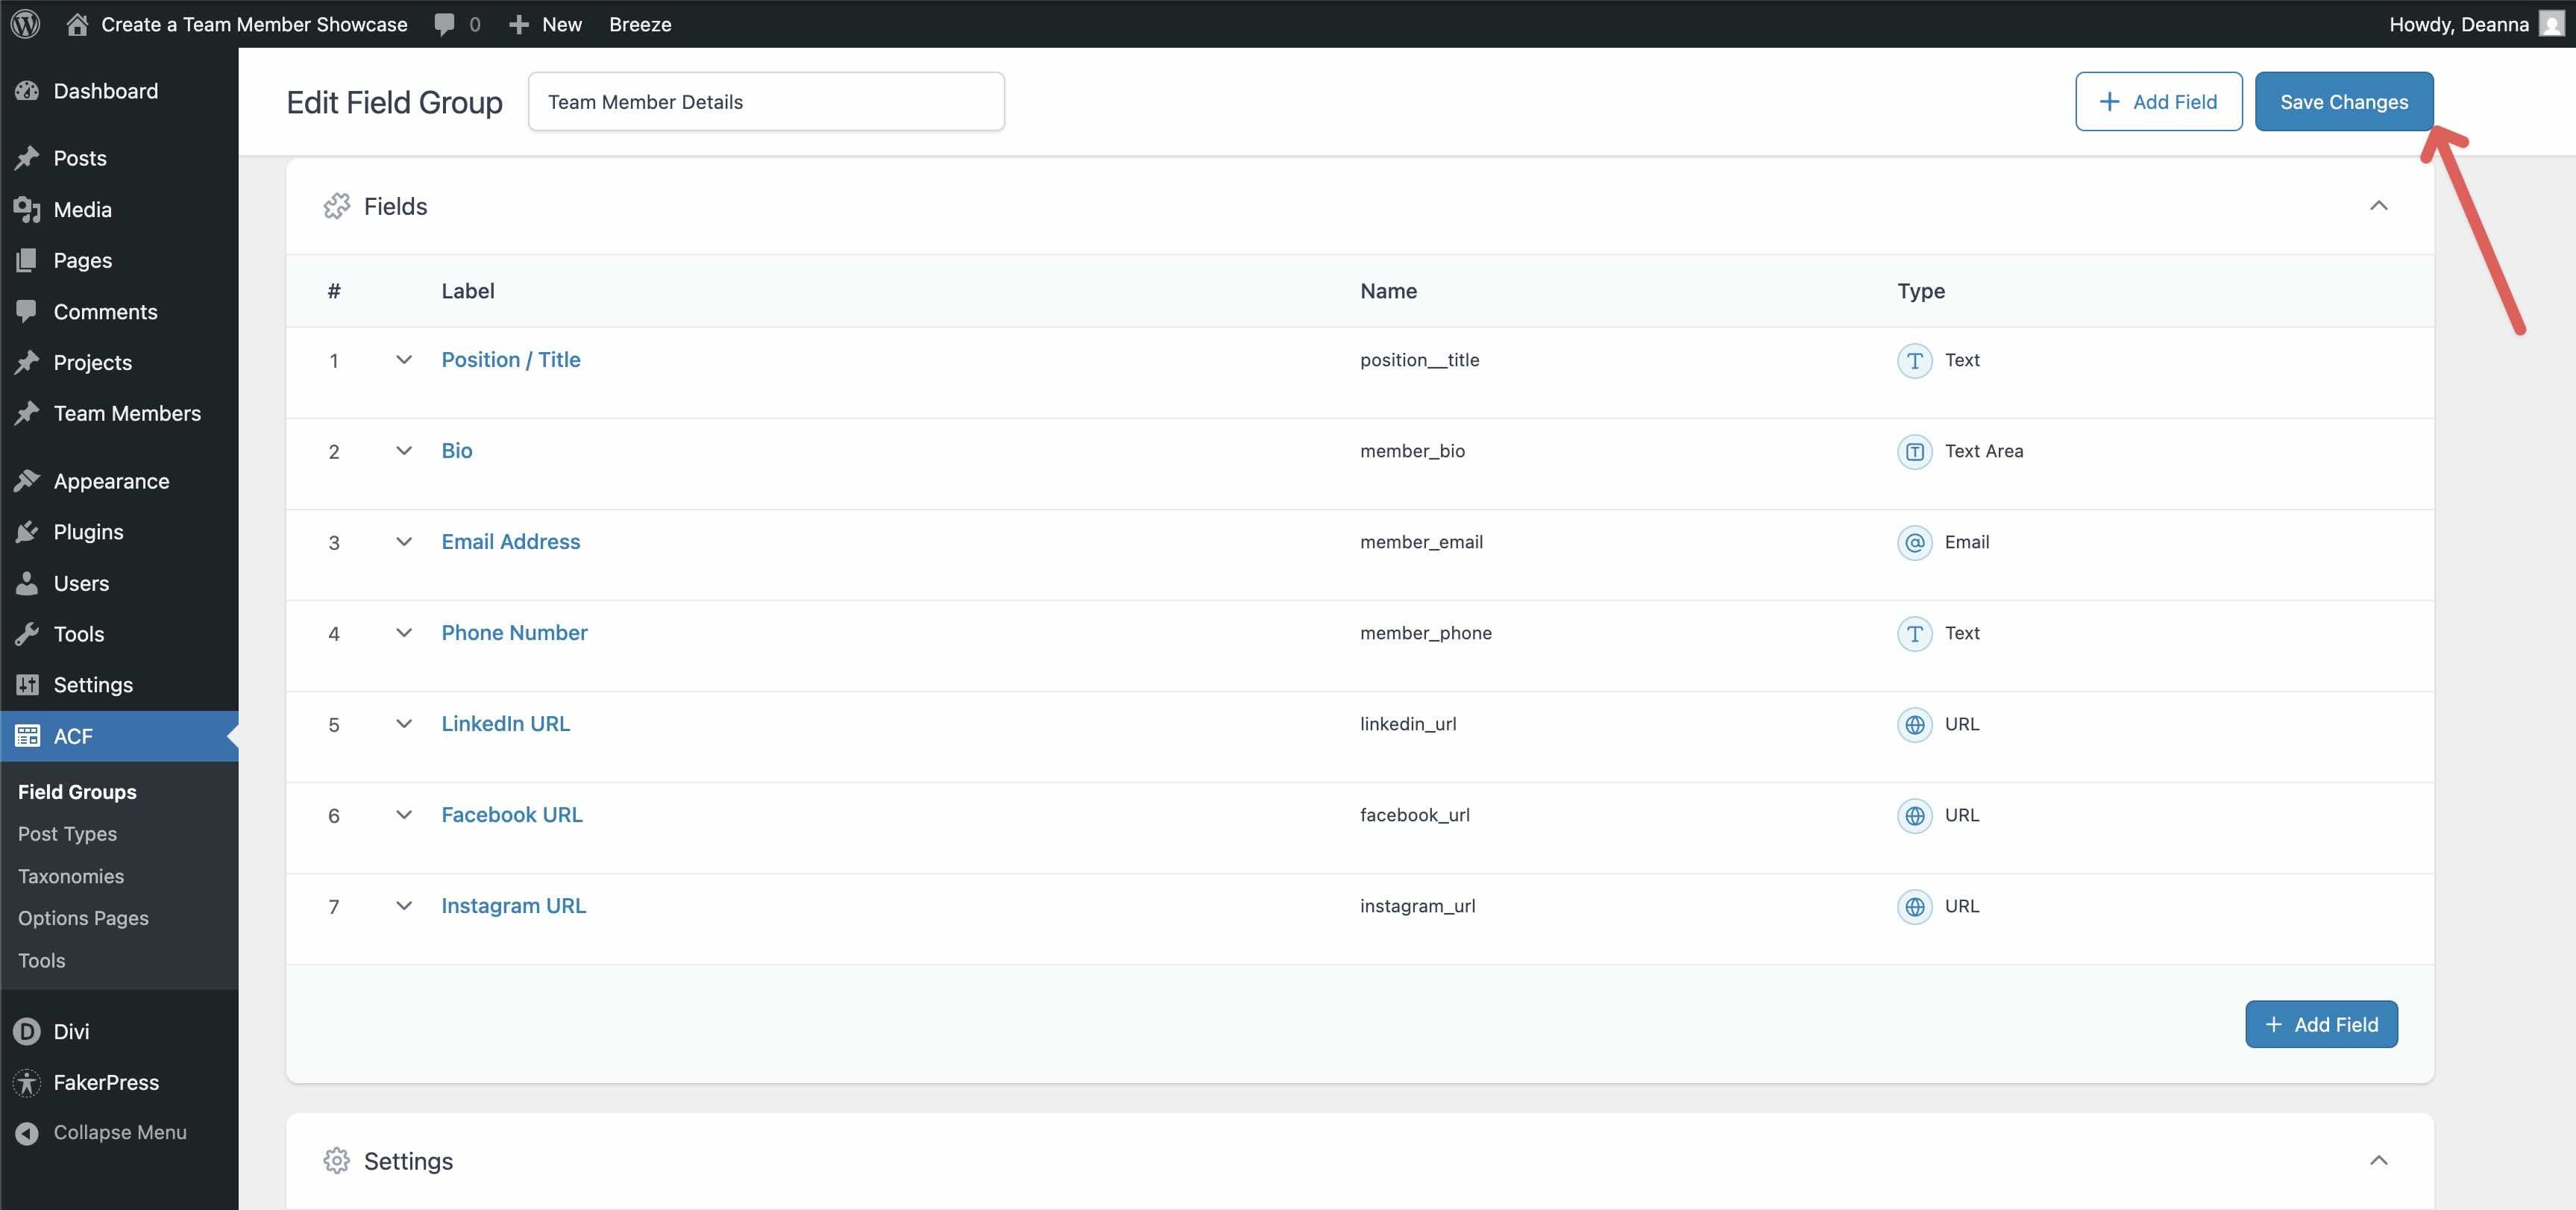
Repeat the stairs so as to add the remainder fields. Fairly than write out the entire fields and their data right here, we’ve created a desk that will help you:
| Box Label | Box Identify | Box Kind |
|---|---|---|
| Place / Name | position_title | Textual content |
| Bio | member_bio | Textual content House |
| E mail Cope with | member_email | E mail |
| Telephone Quantity | member_phone | Textual content |
| LinkedIn URL | linkedin_url | URL |
| Fb URL | facebook_url | URL |
| Instagram URL | instagram_url | URL |
As soon as all fields are created, click on Save Adjustments on the best proper of the display screen.
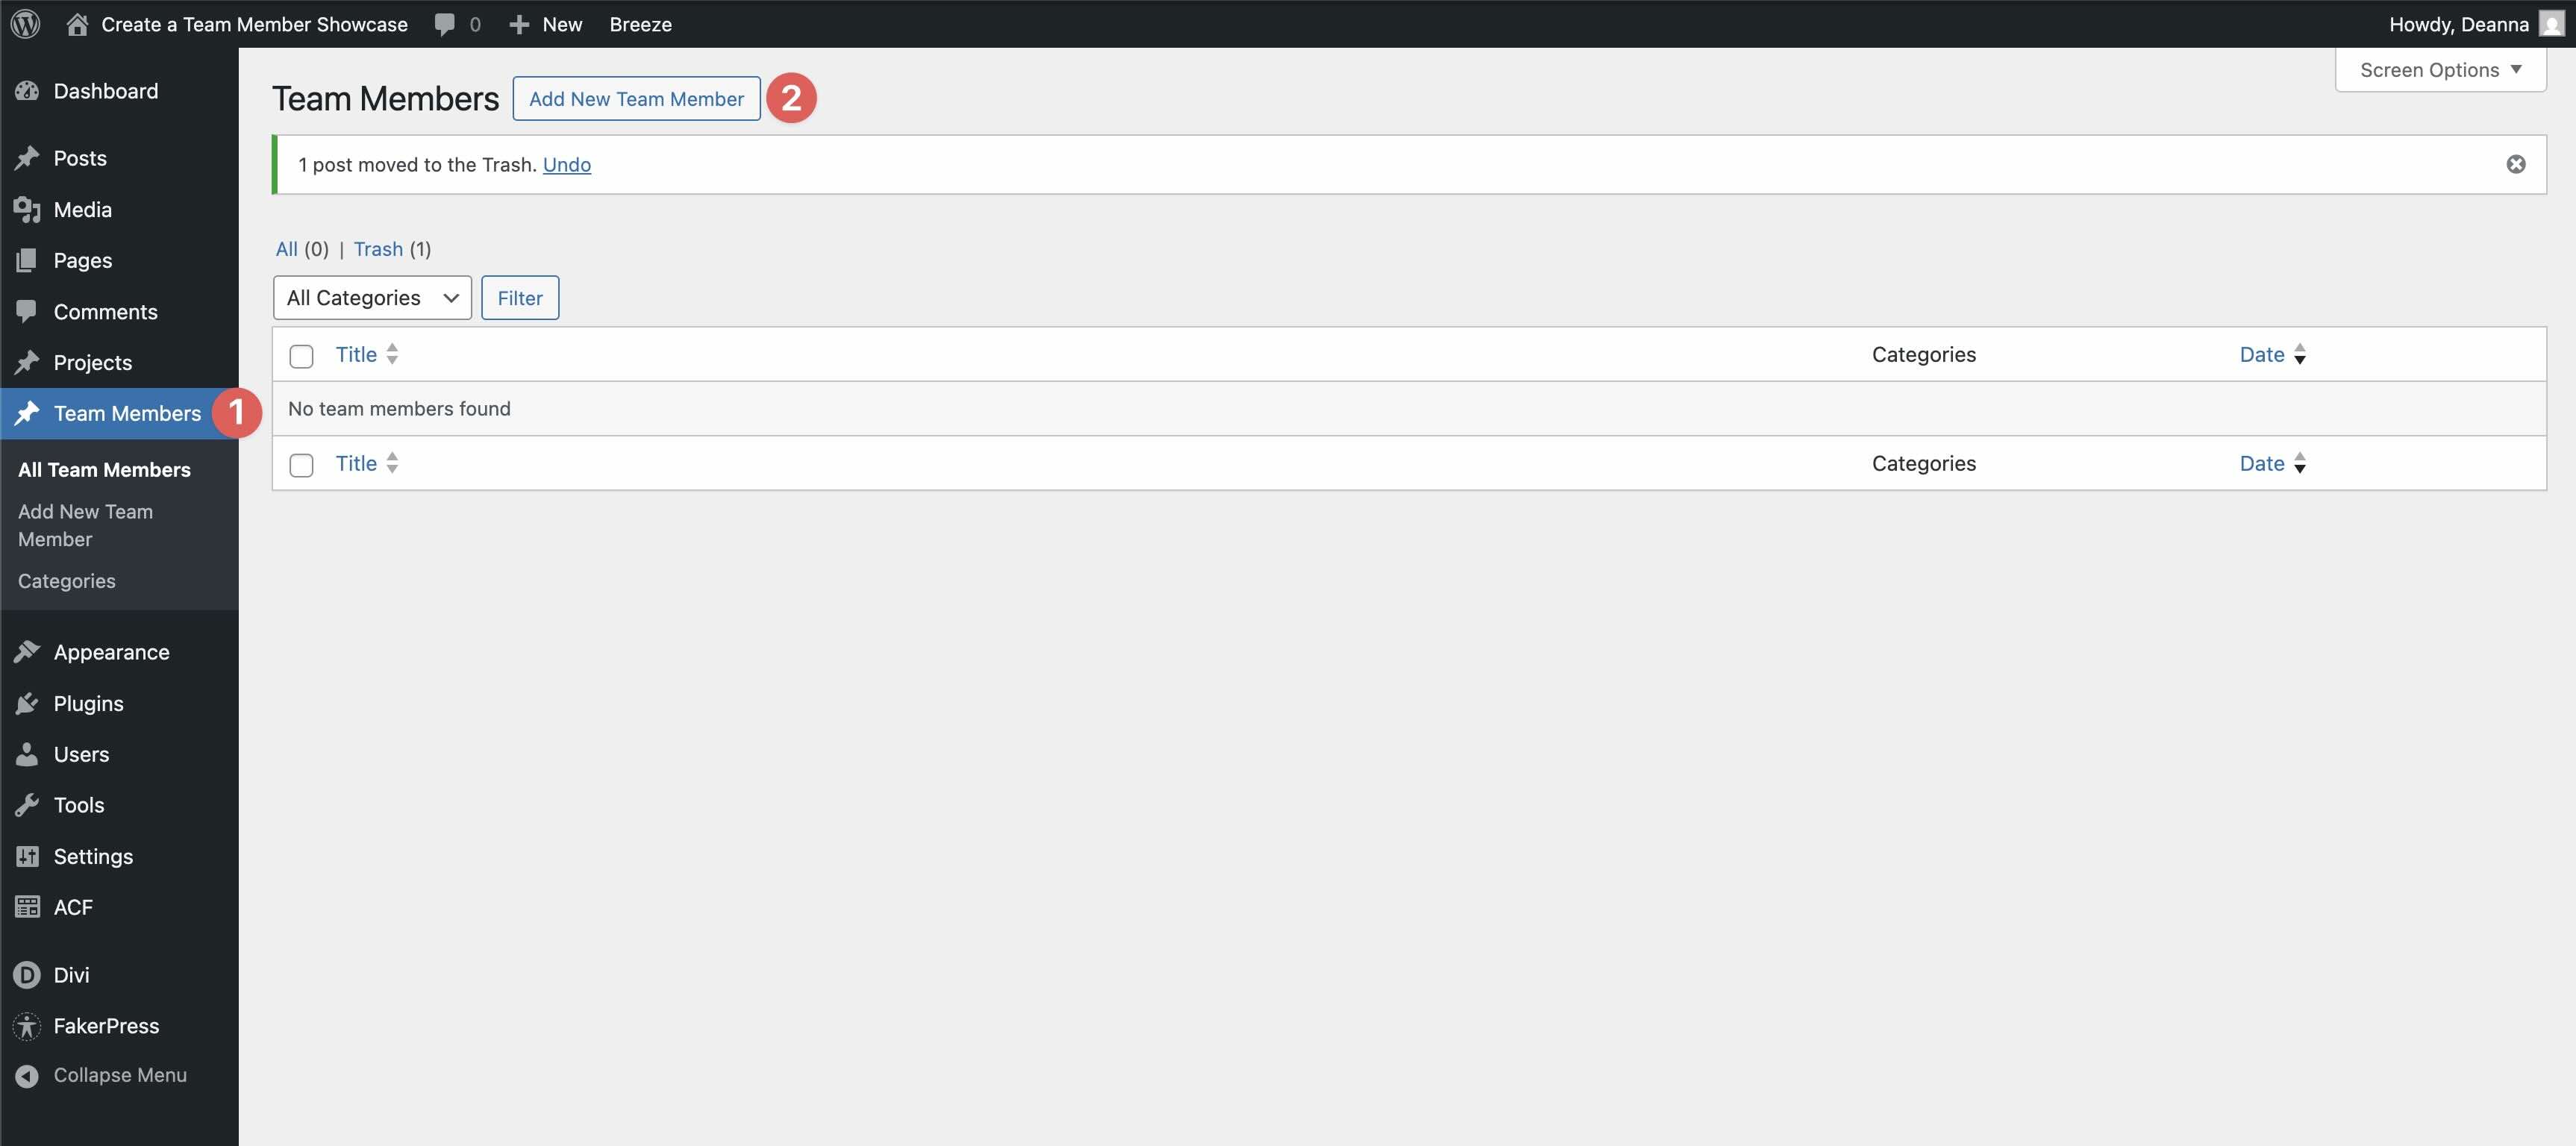
Create The First Staff Member
Navigate to Staff Participants > Upload New Staff Member.
When the Staff Member publish is printed, upload a Name and a Featured Symbol.
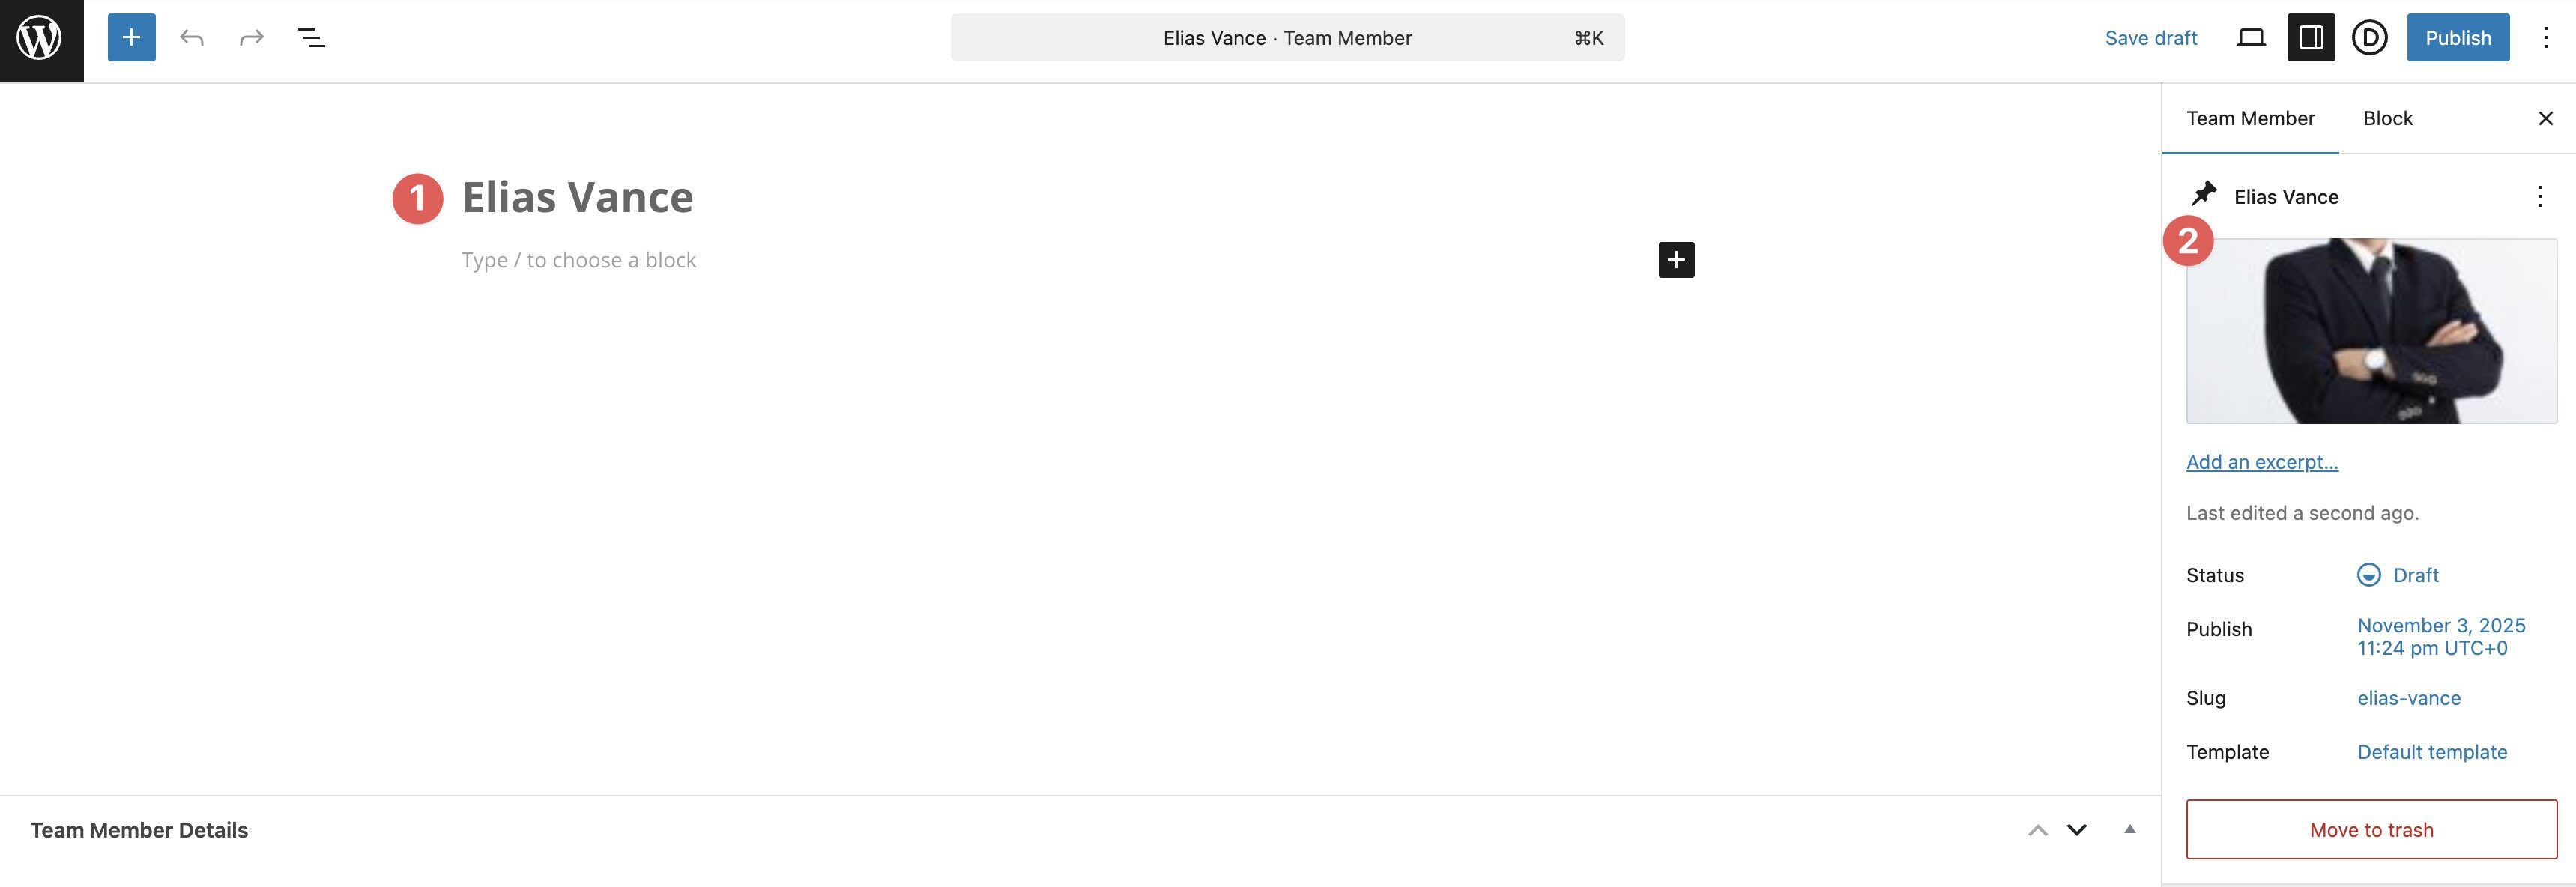
Fill within the customized fields along with your data.
Repeat those steps to create all your Staff Member posts.
Step 2: Create The Loop
Get started by means of growing a brand new web page in Divi or opening an present one. For this publish, we’ll use the Internet Design starter web site and upload a workforce member show off to the About web page.
Get started by means of including a single-column Flex Row to the web page.

Open the Row settings, make bigger the Components menu, and click on the Edit icon for the Column.

Extend the Loop menu, and allow Loop Part.
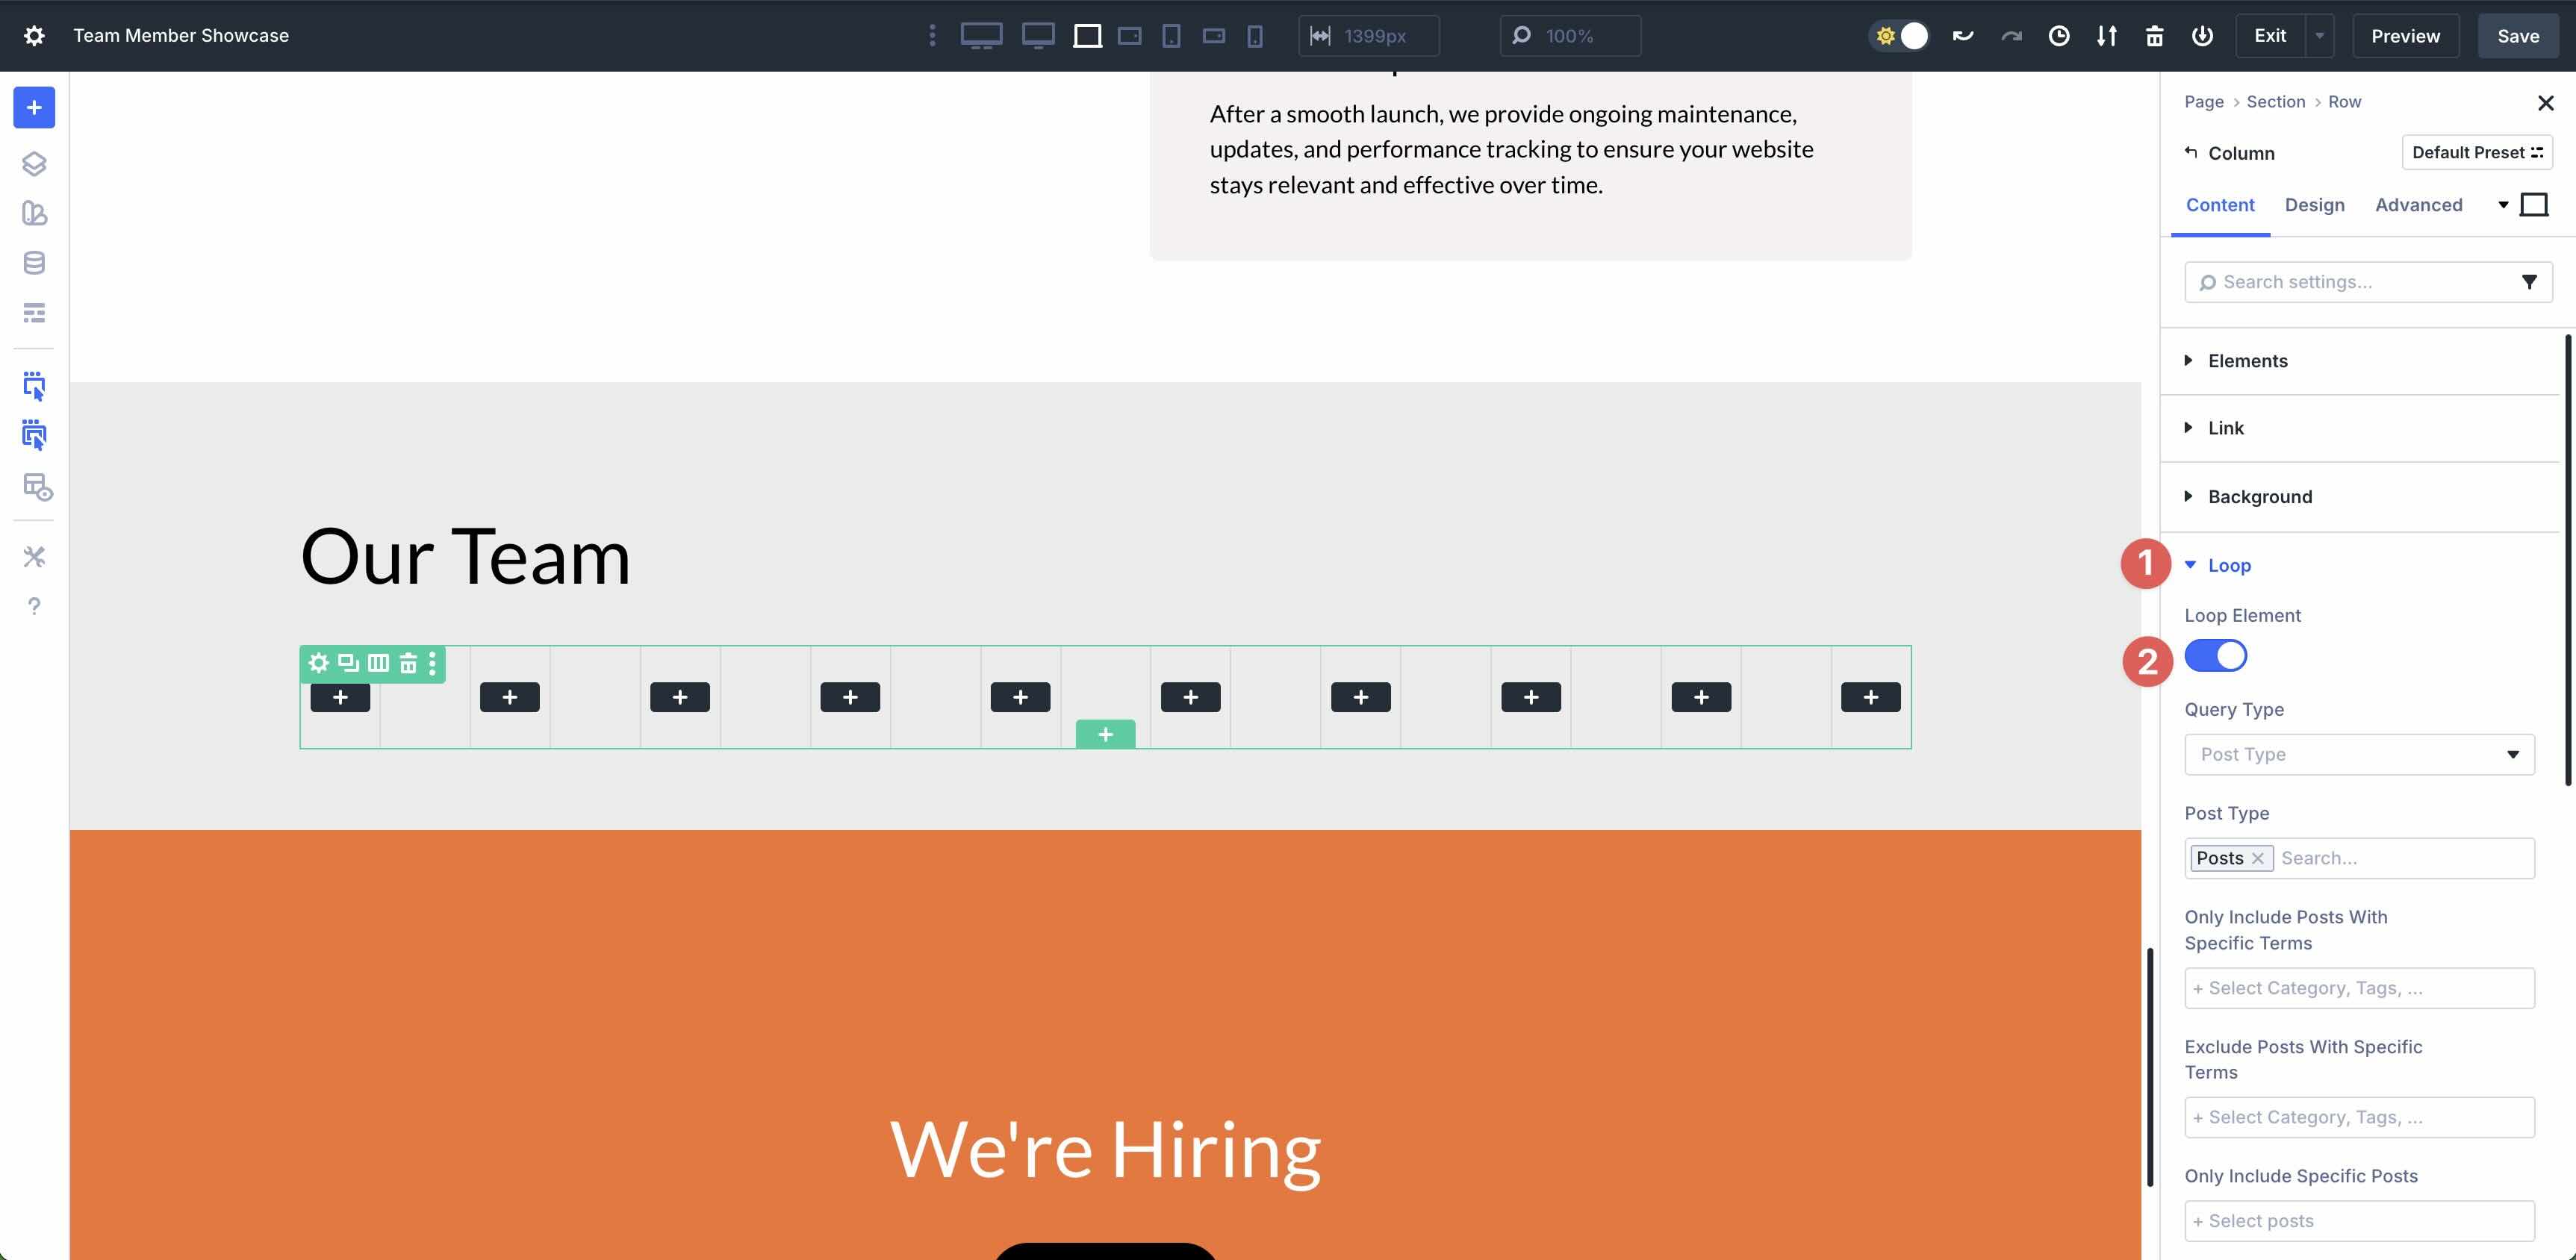
Stay Submit Kind decided on within the Question Kind box. Within the Submit Kind box, make a choice the Staff Participants customized publish kind.
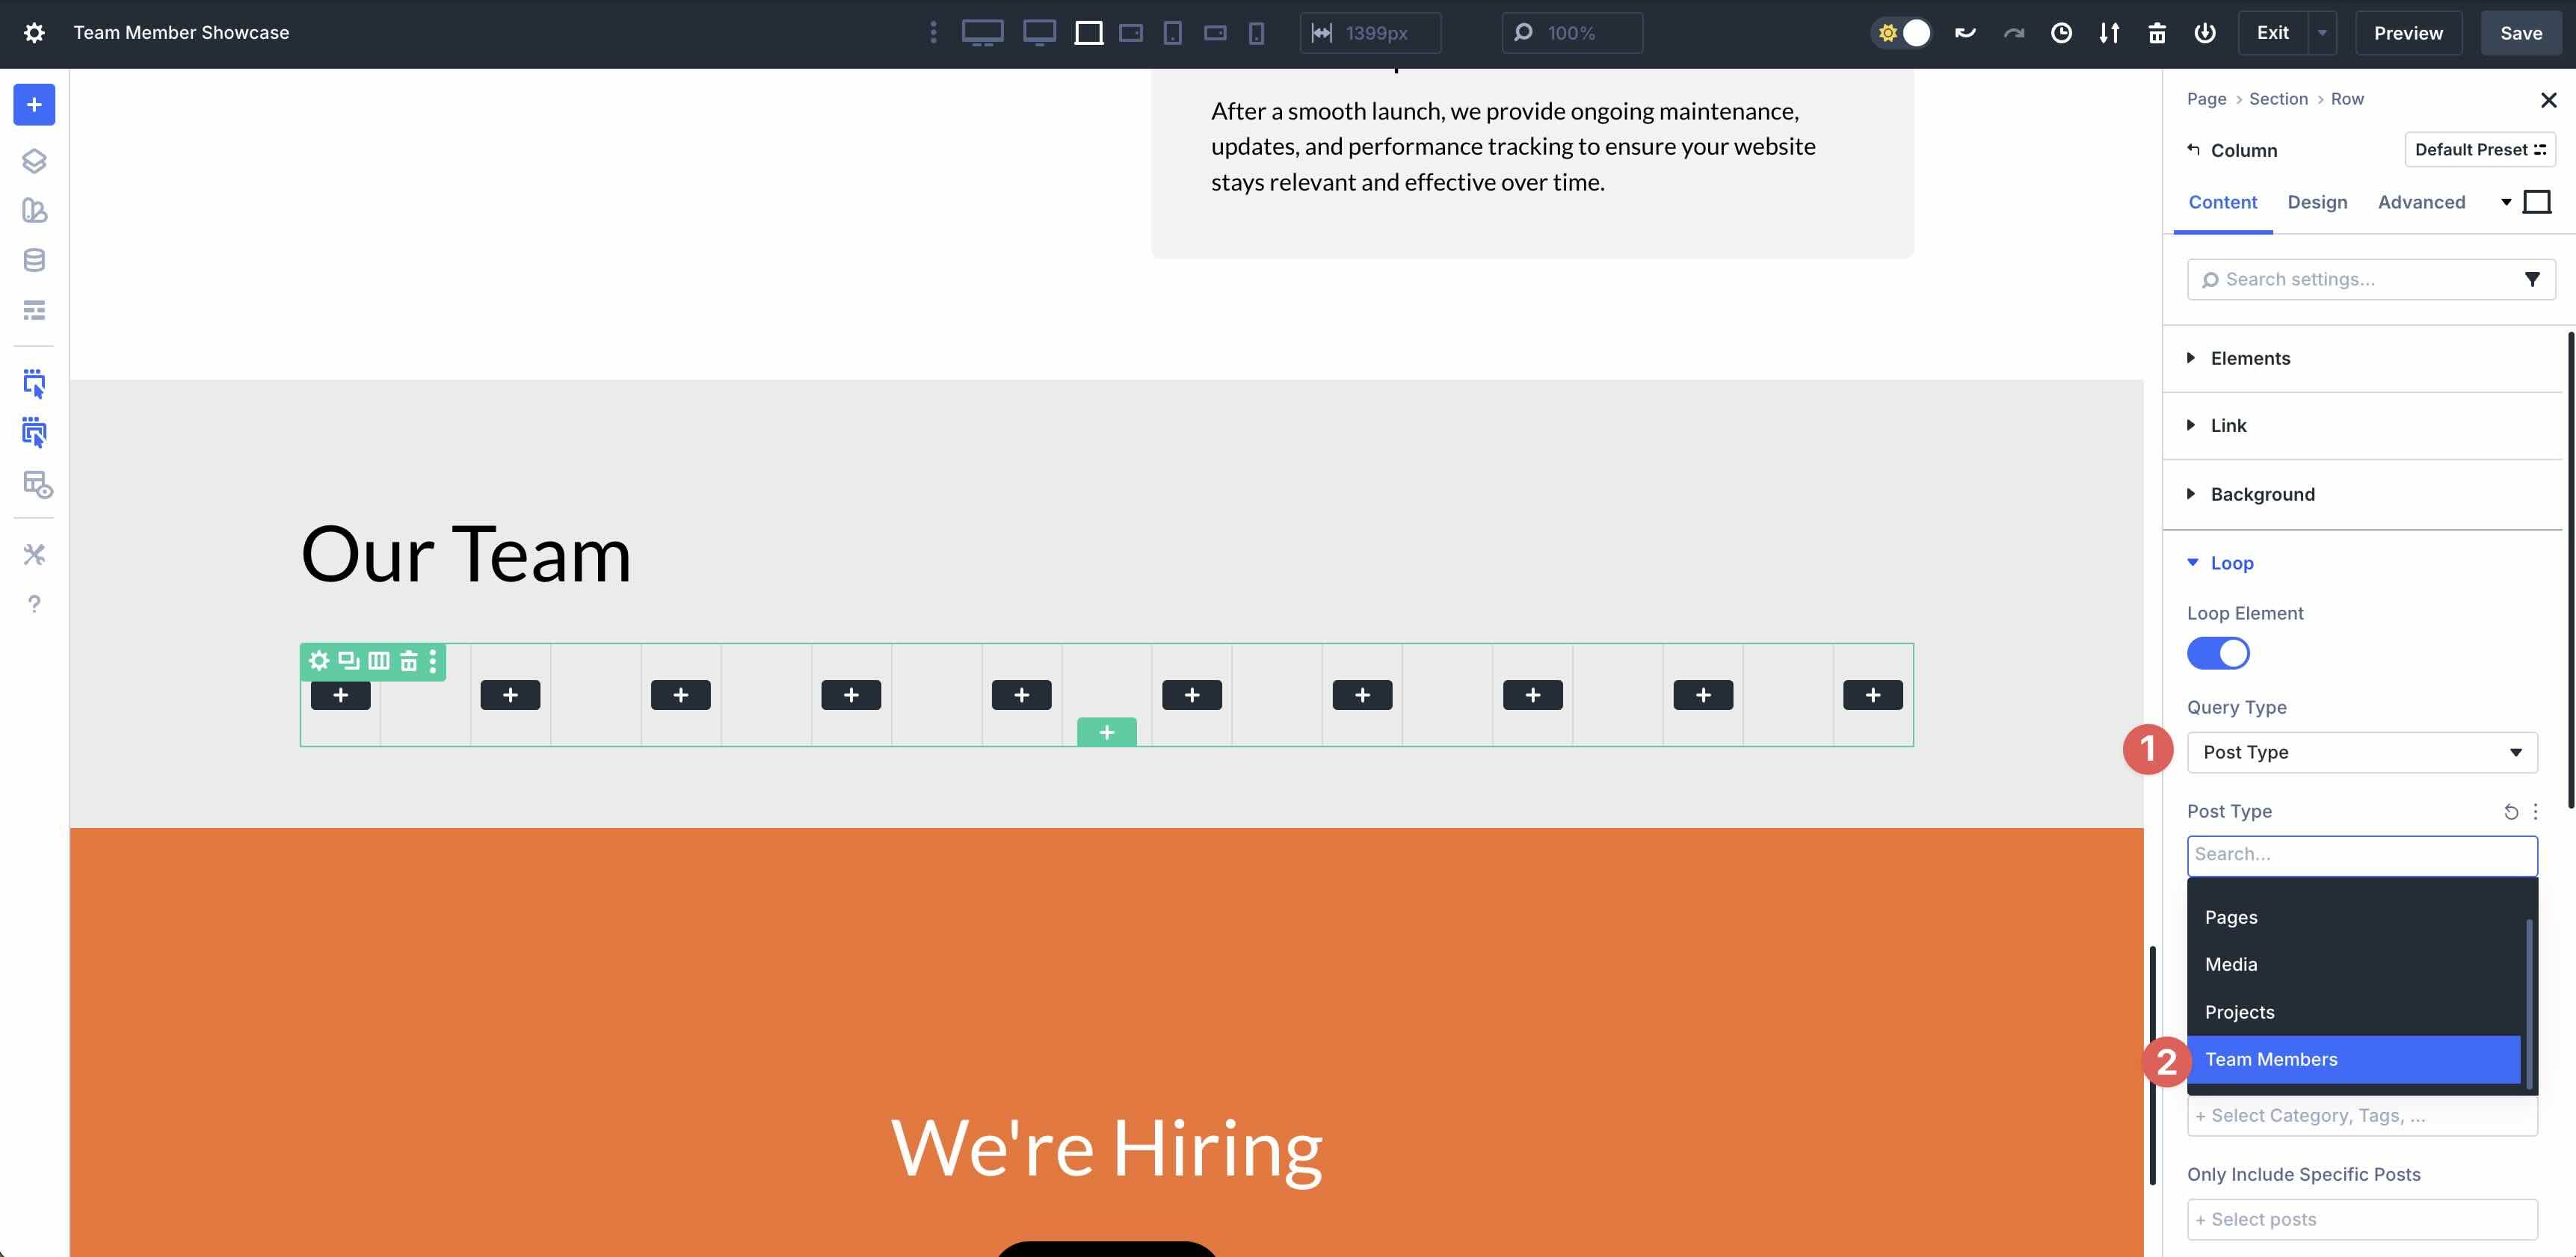
Within the Simplest Come with Posts With Particular Phrases box, make a choice Staff Participants.
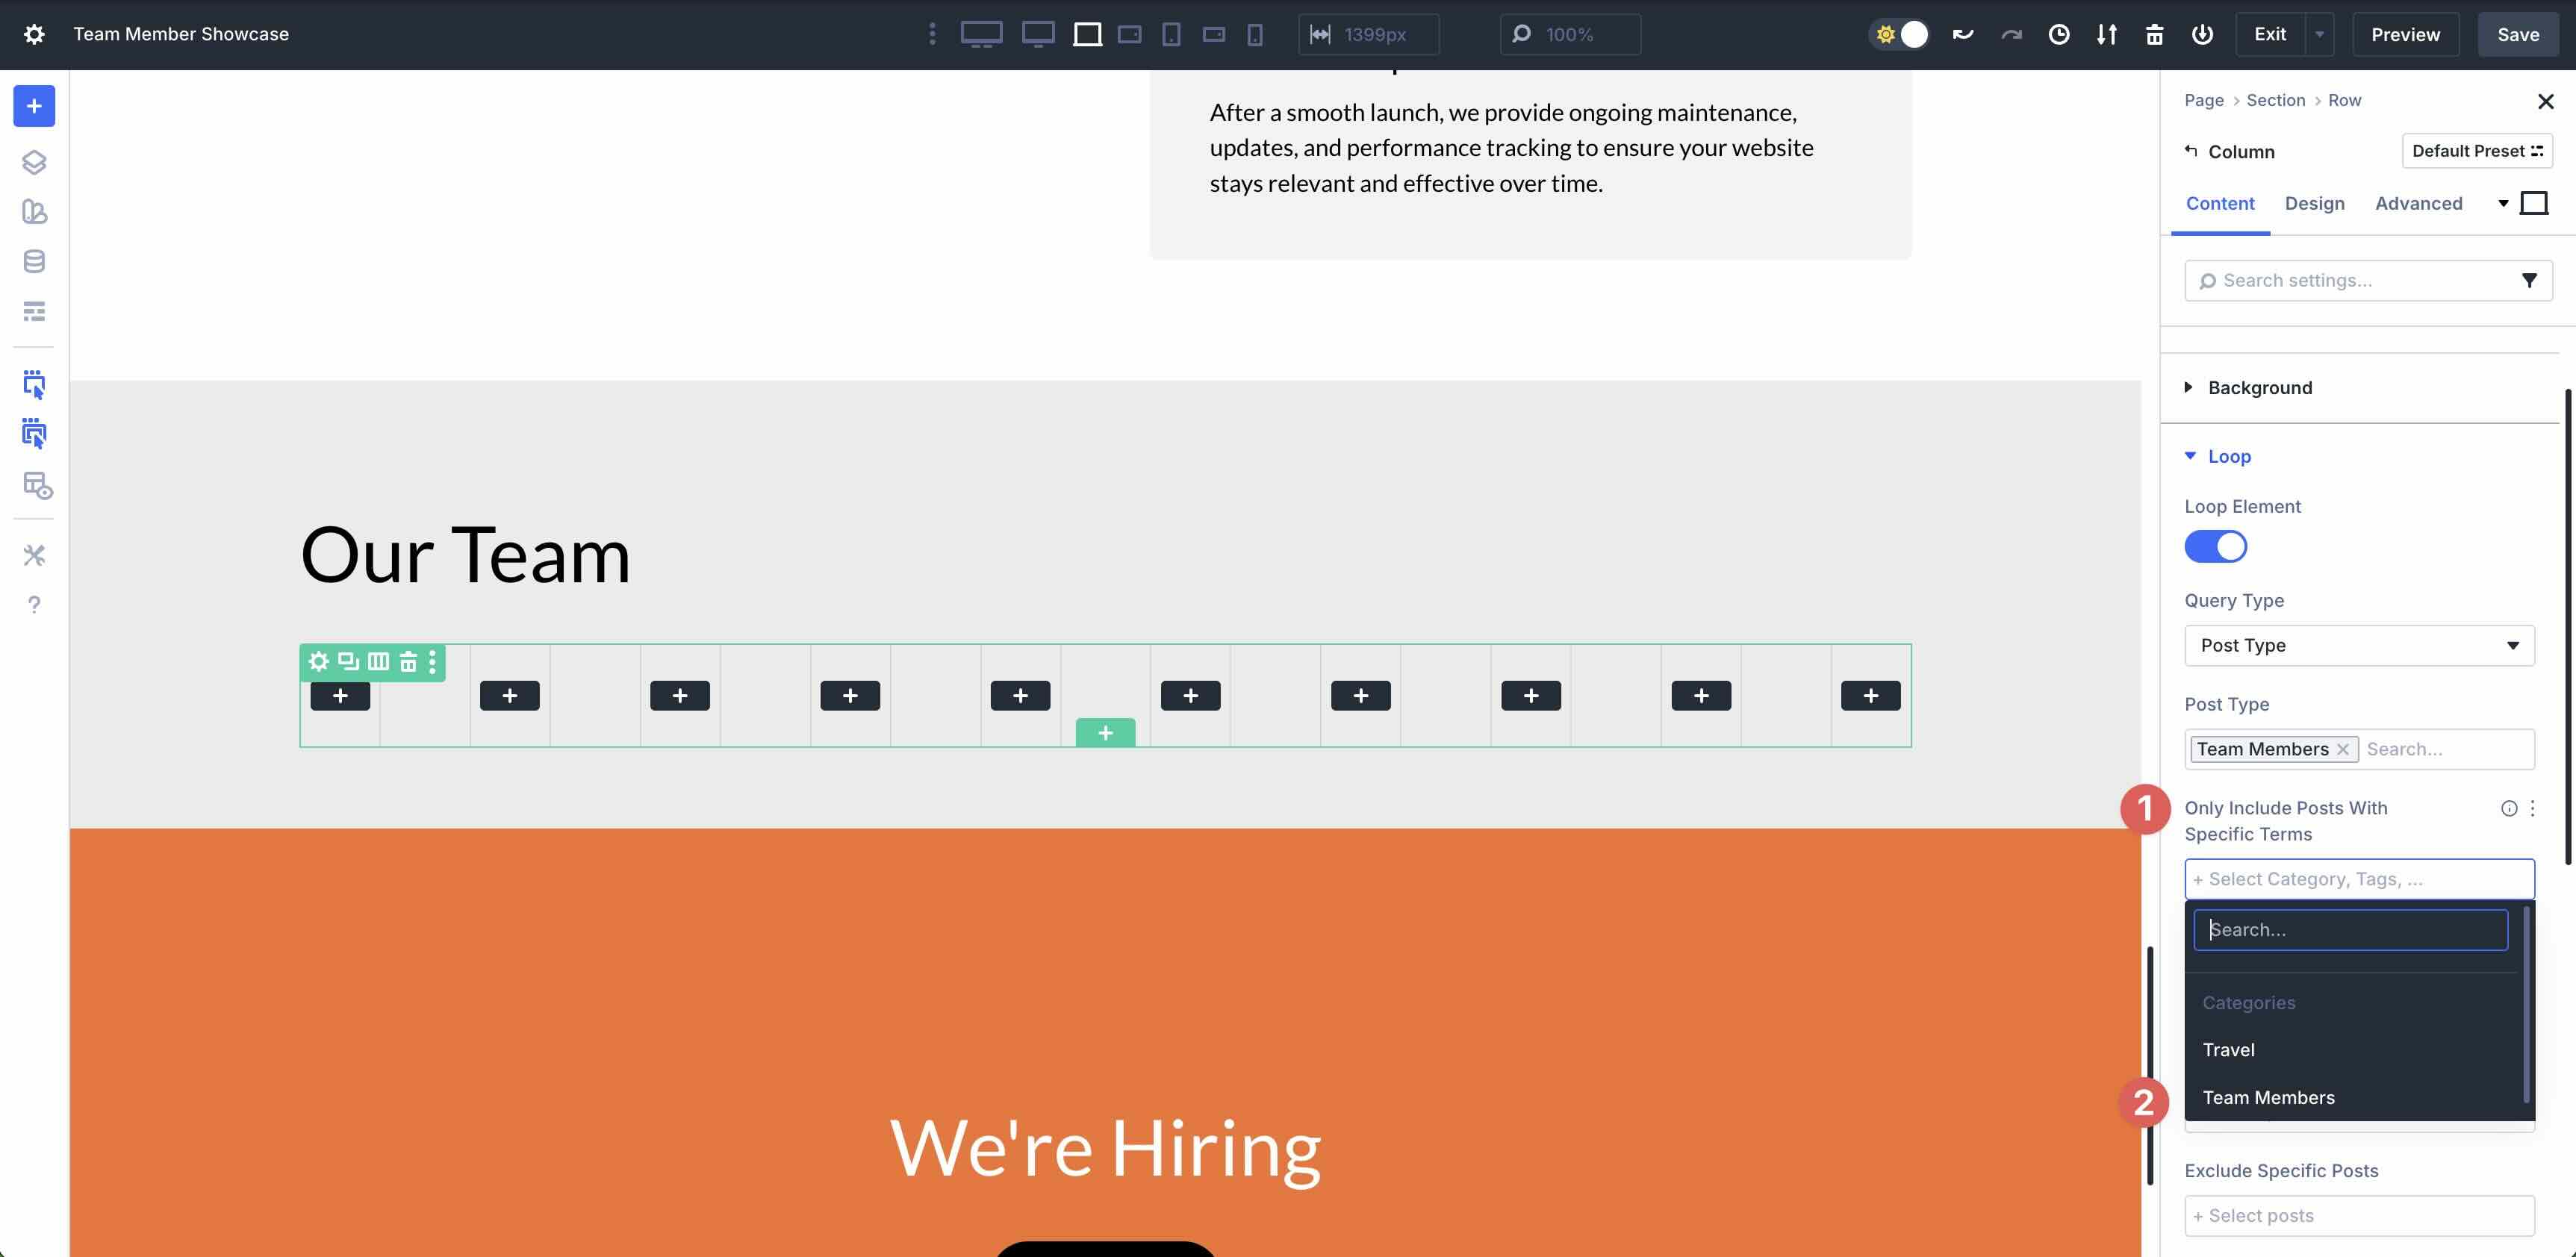
For the Posts In step with Web page box, input 12. This may occasionally show all 12 posts at the Loop.

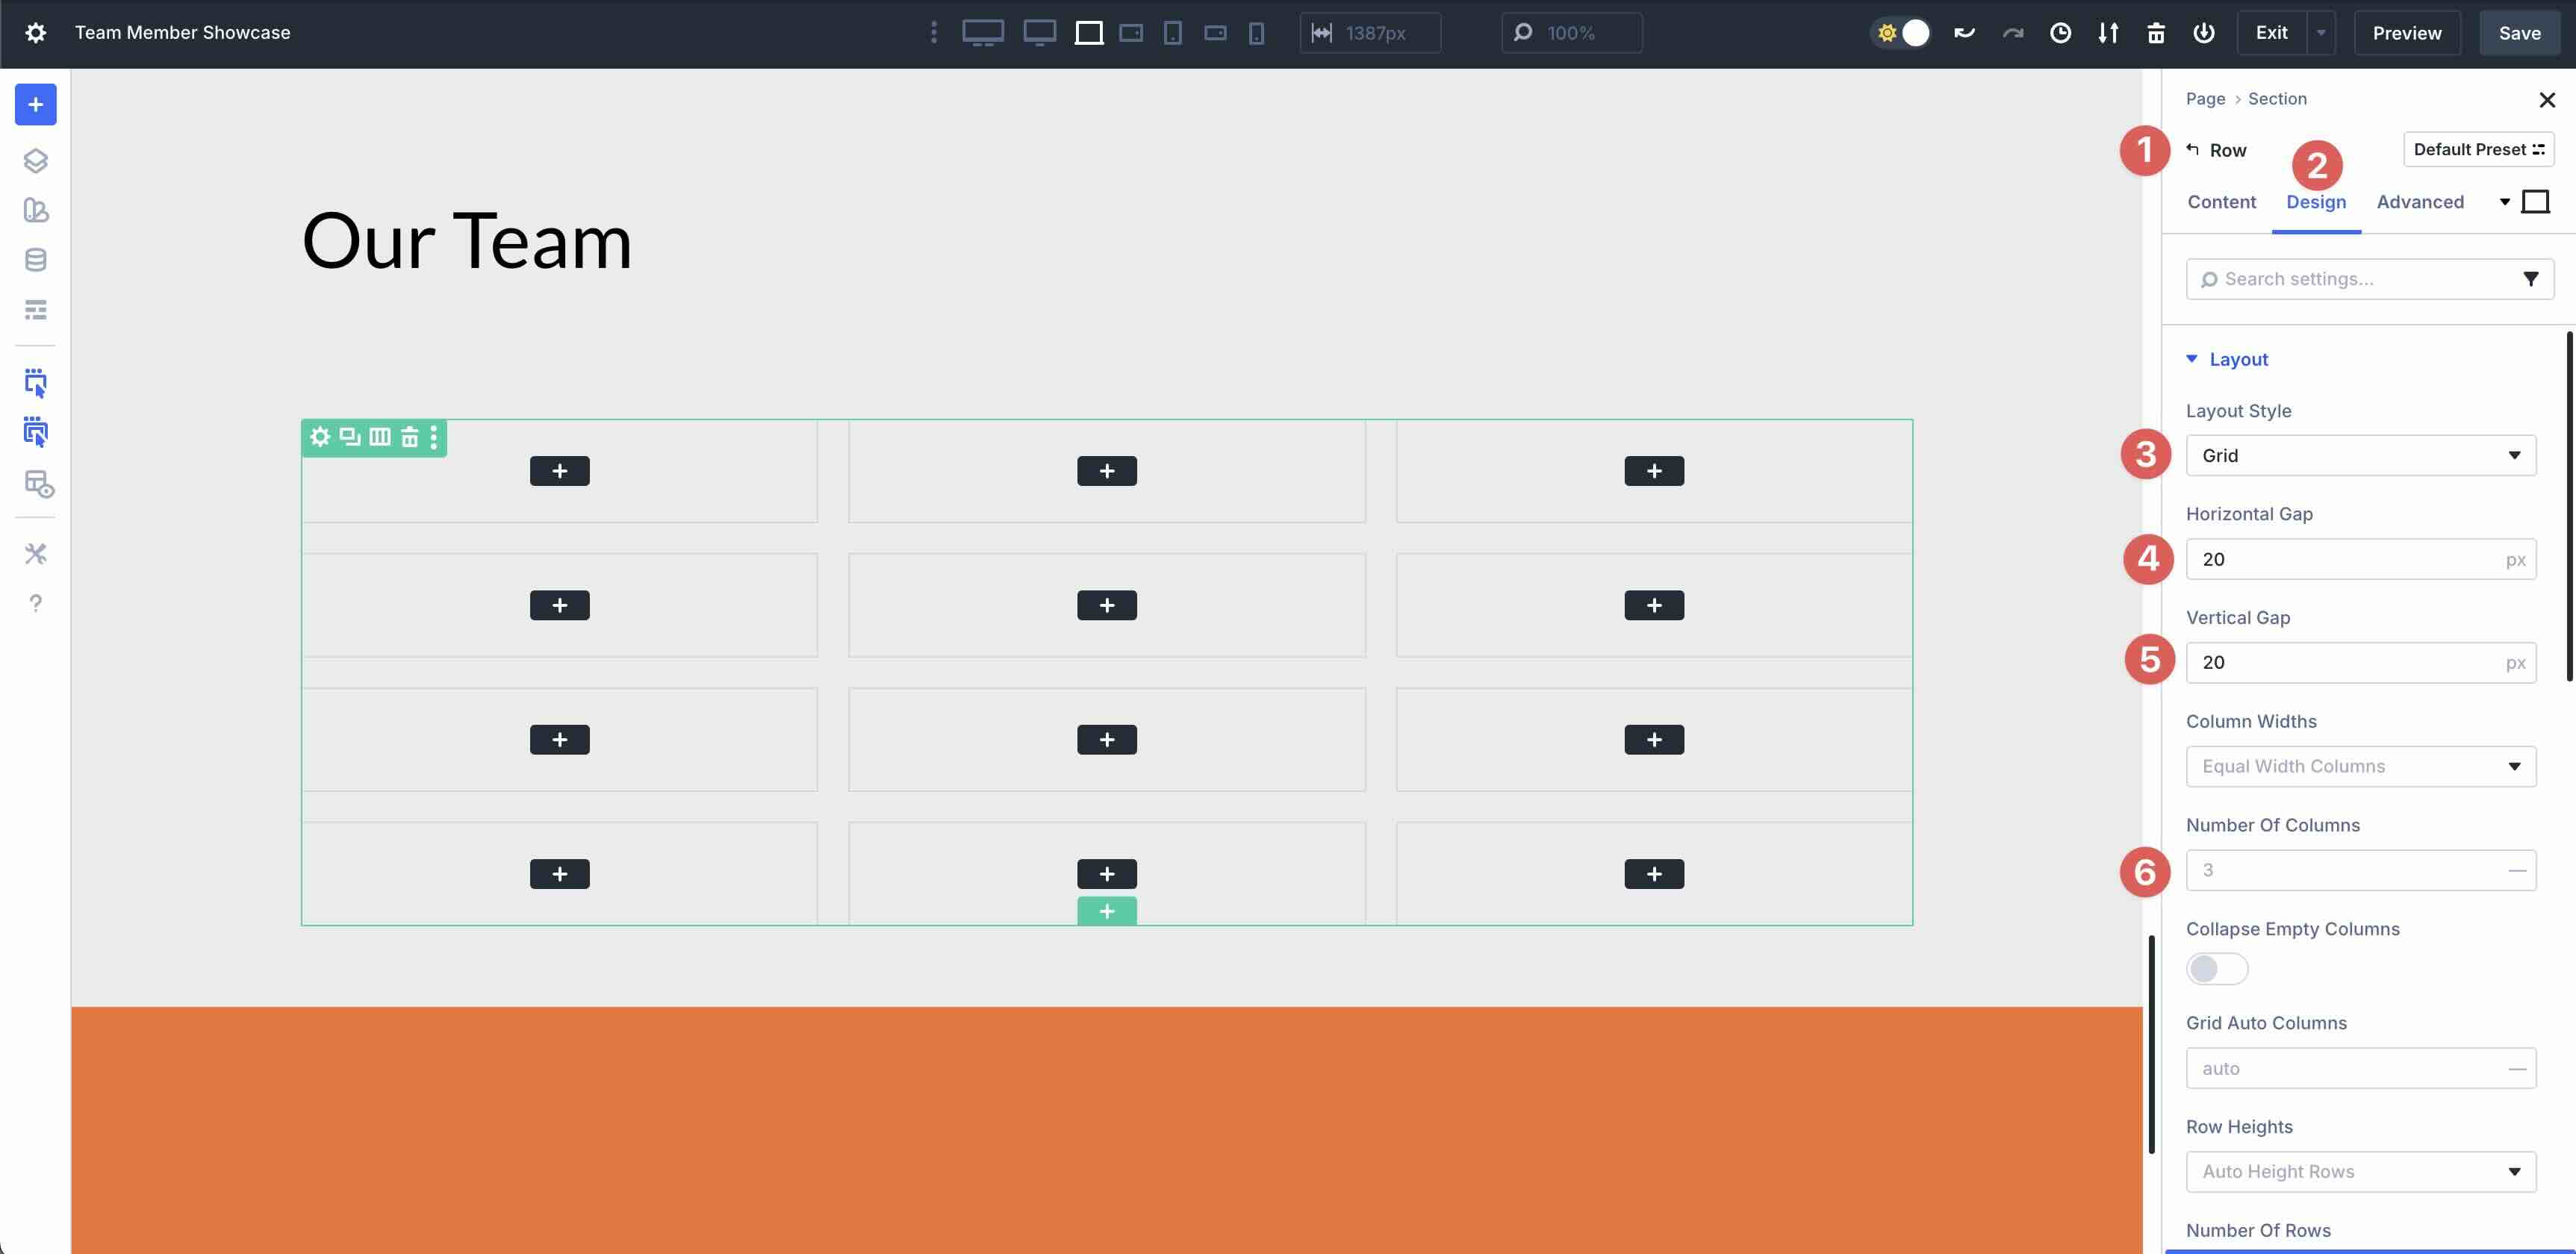
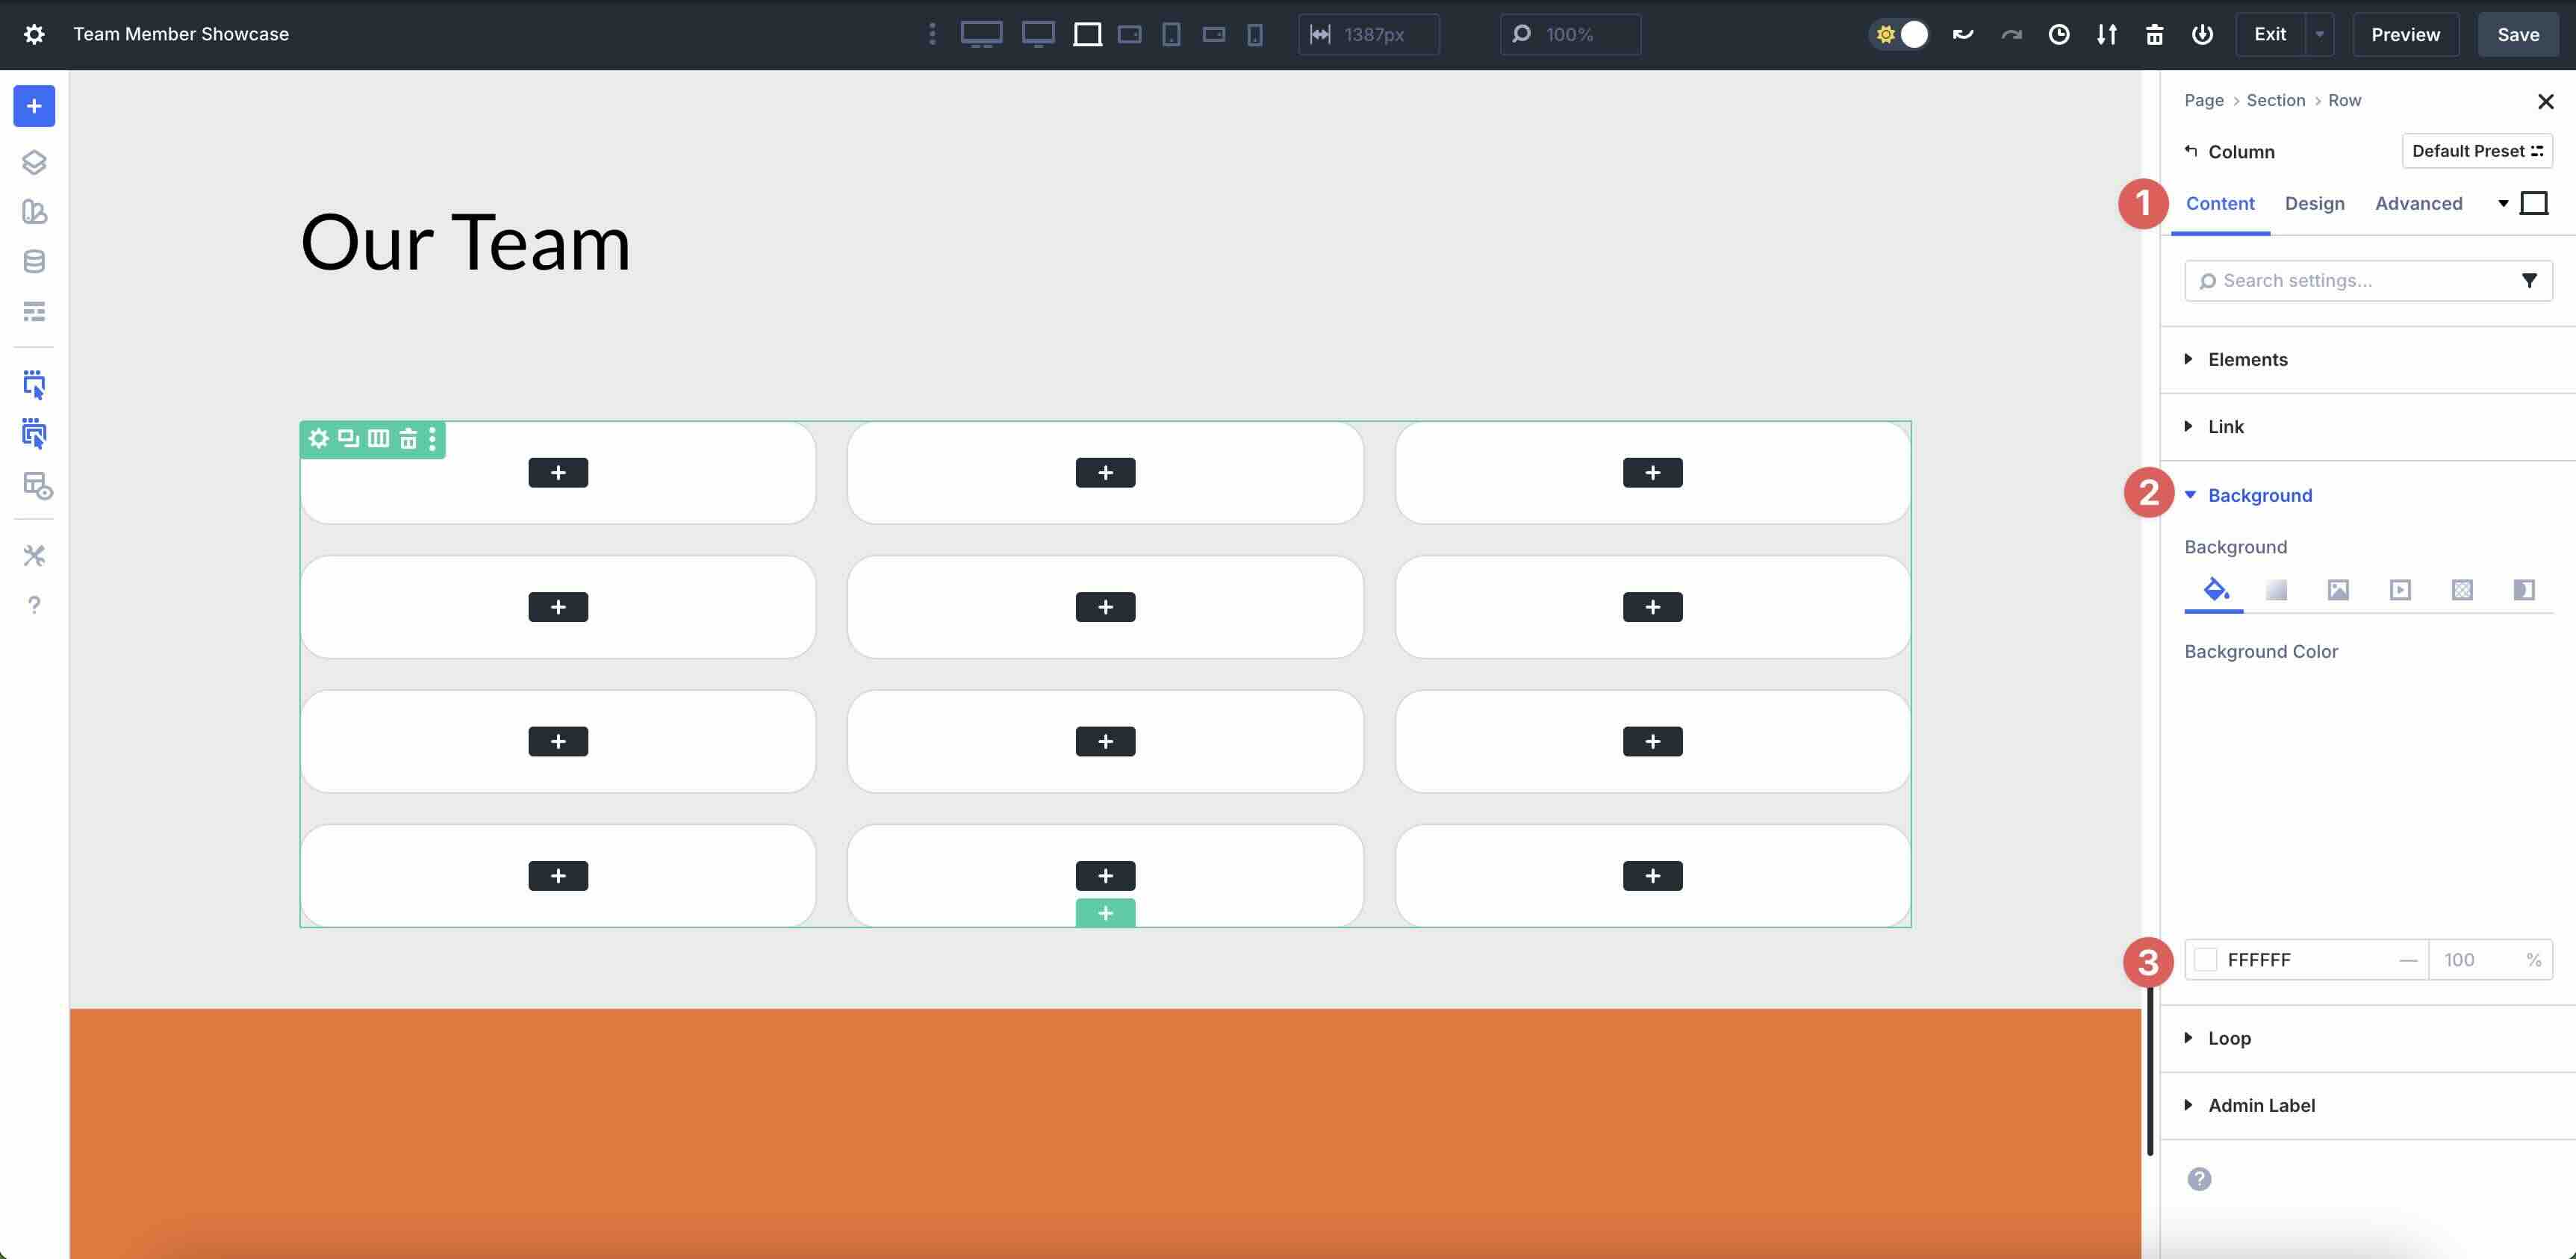
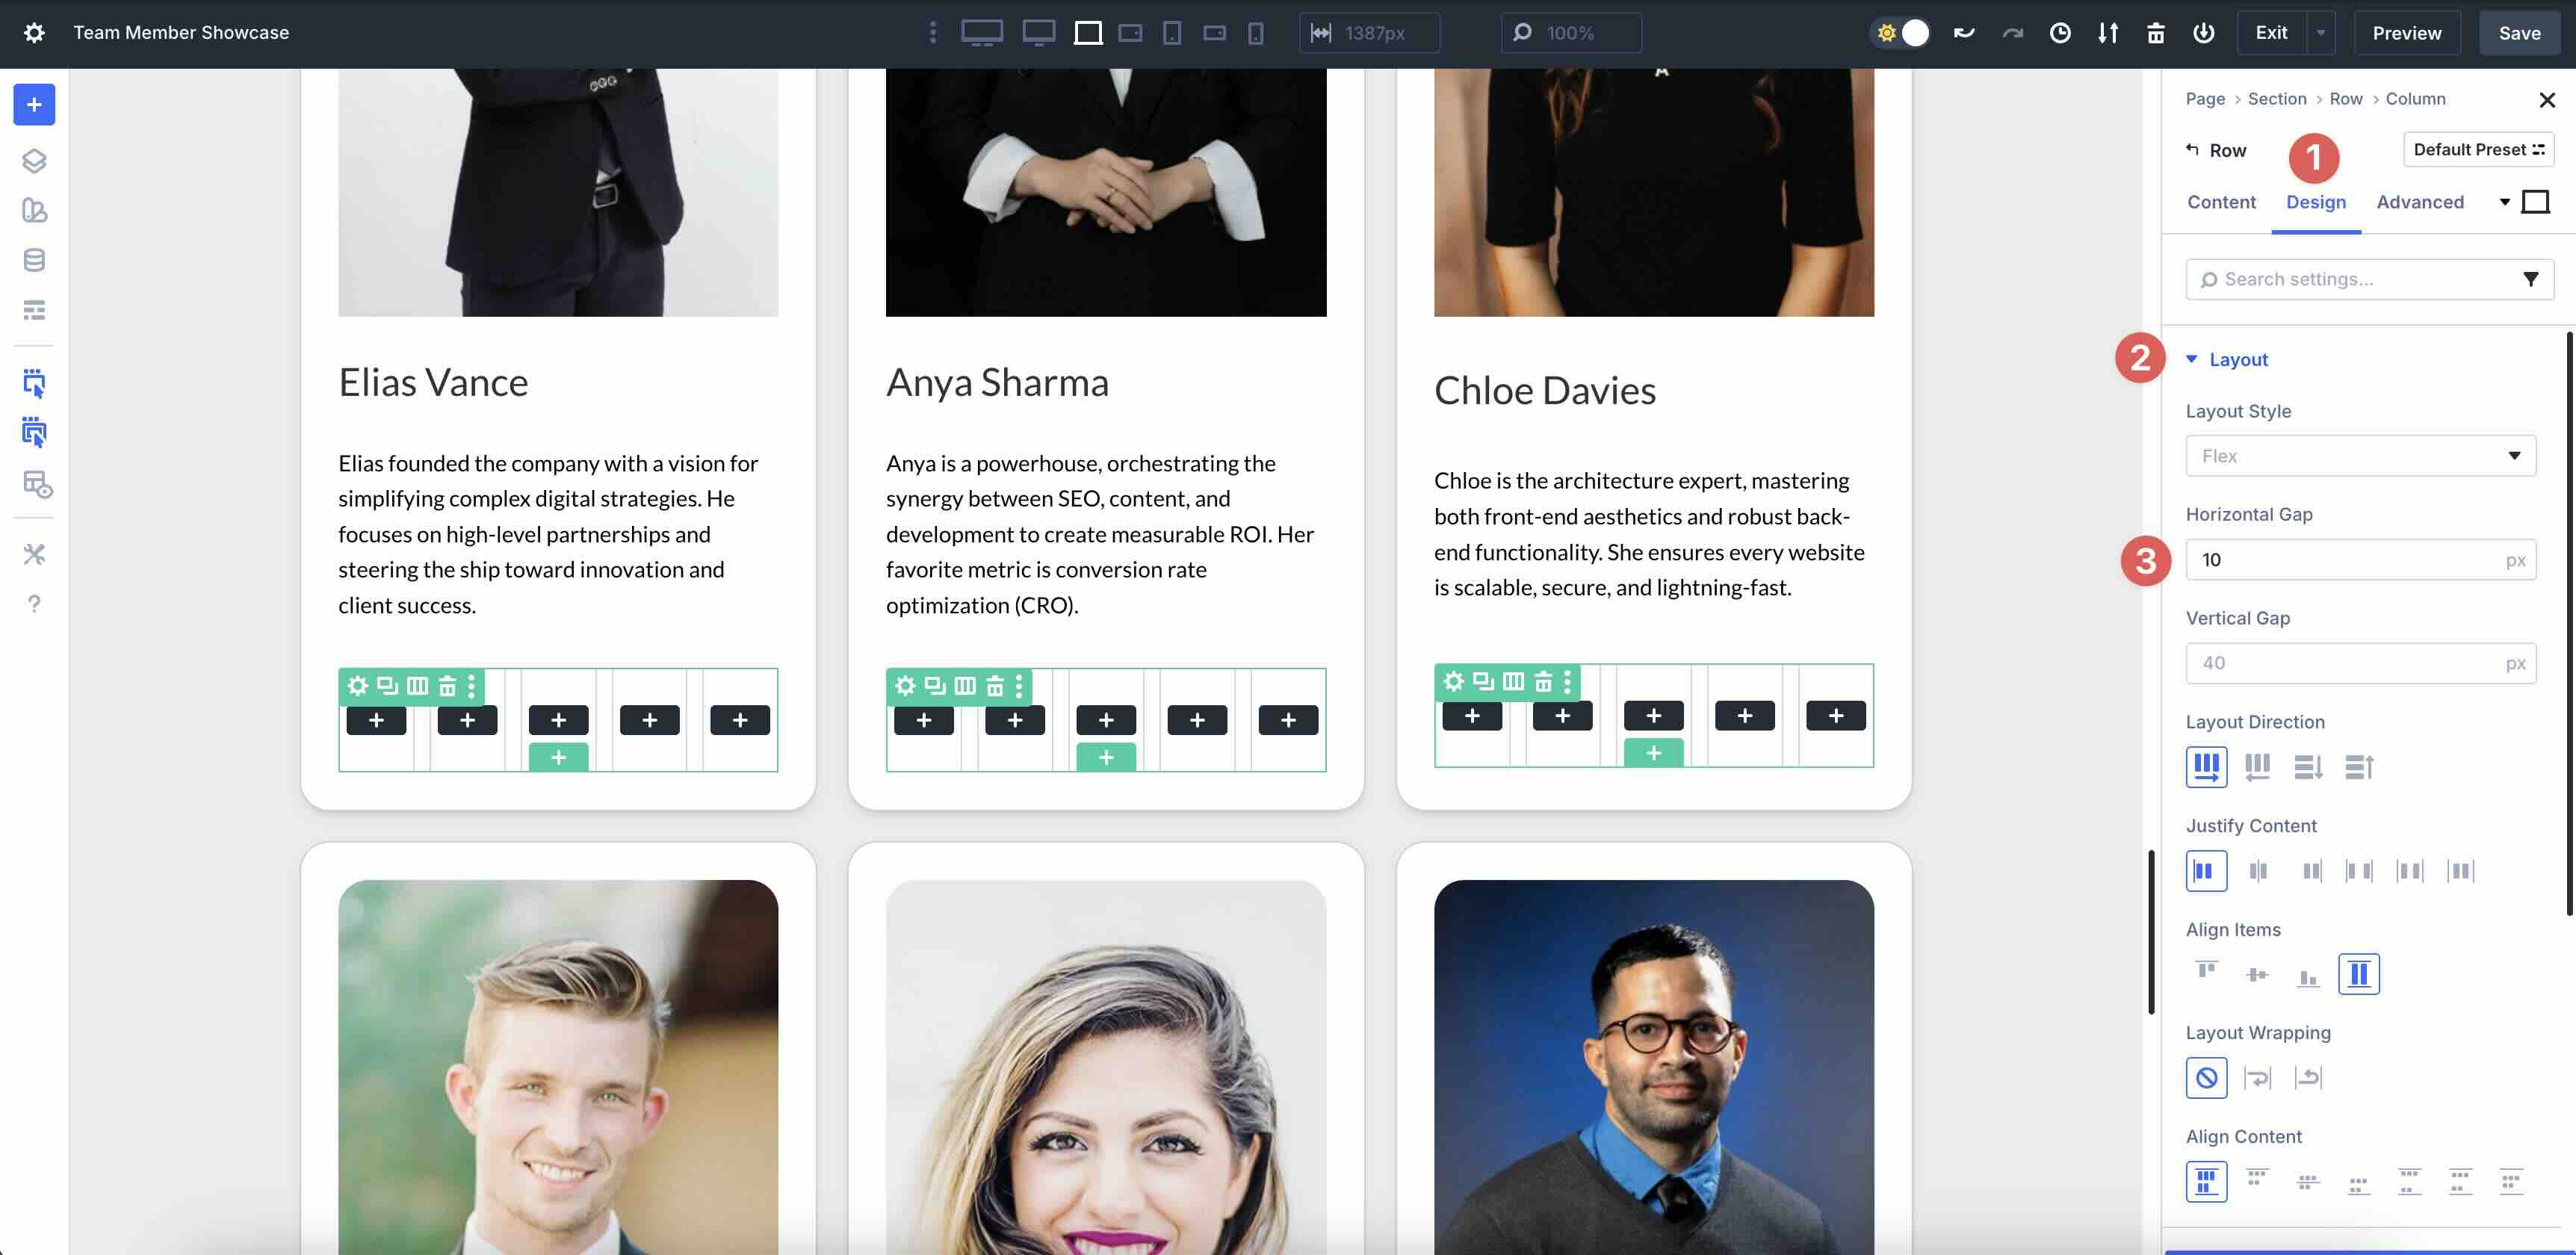
Transfer to the Design tab within the Row settings. Switch the Structure Taste to Grid and assign a 20px Vertical and Horizontal Hole to the Row. Set the Selection of Columns to 3.
Step 3: Taste Column
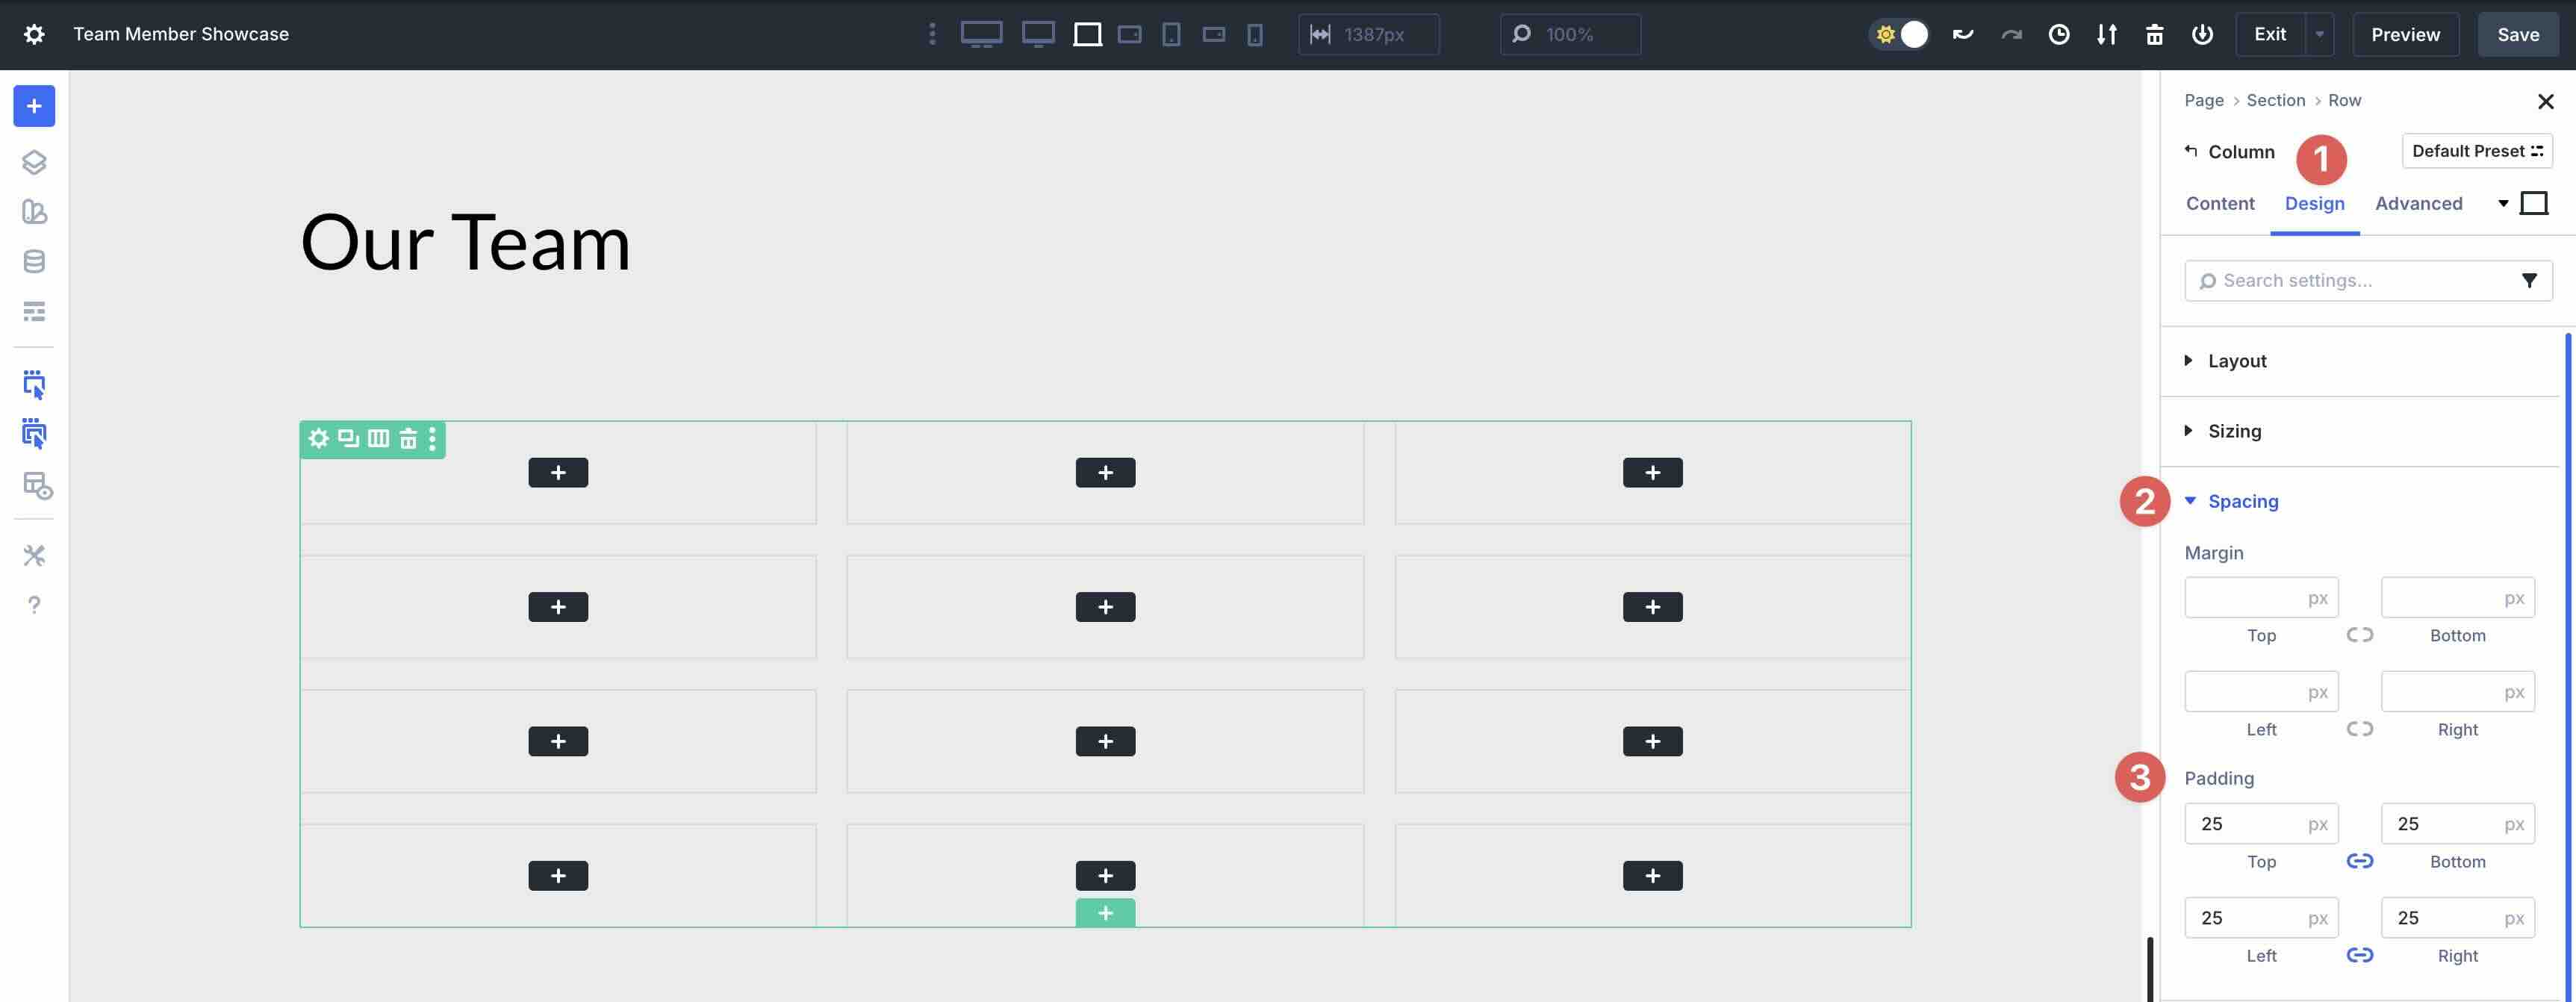
With our Loop in position, we will taste the Column that can space the content material. Click on into the only Column of the Row. Navigate to the Design tab. Extend the Spacing menu and upload 25px Padding to each side.
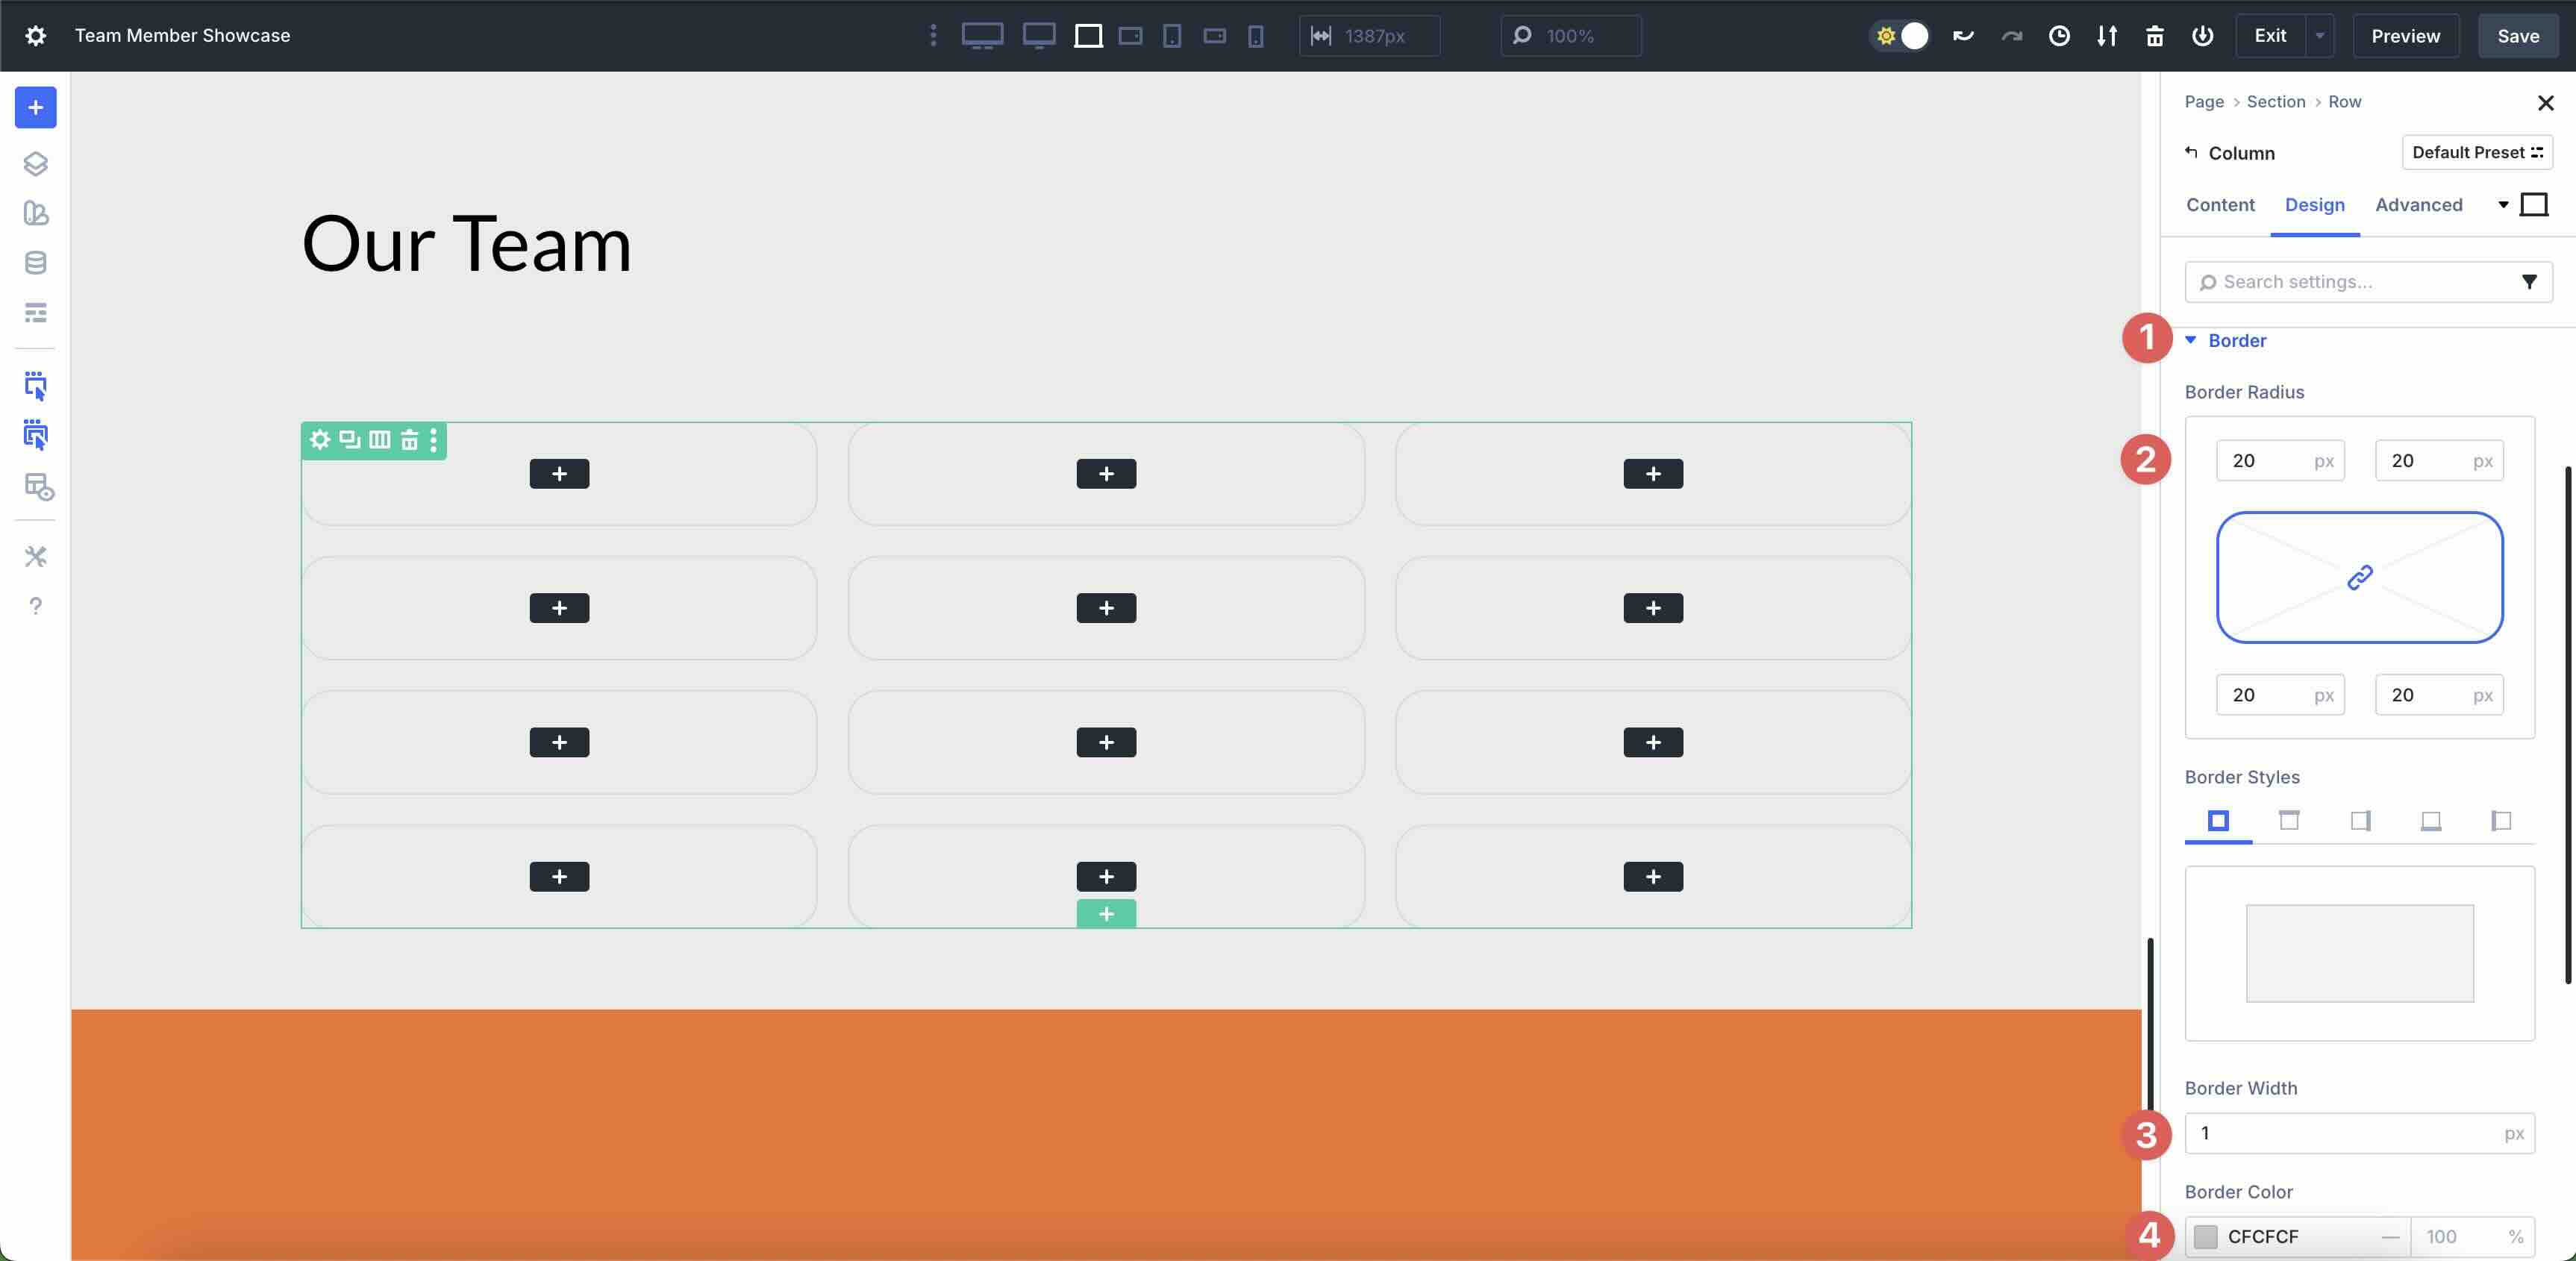
Subsequent, make bigger the Border menu. Upload 20px Border Radius to the Column. Underneath the Border Types settings, input 1px Border Width and assign #cfcfcf because the Border Colour.
Whilst within the column settings, navigate again to the Content material tab. Extend the Background menu and assign #ffffff because the Background Colour.
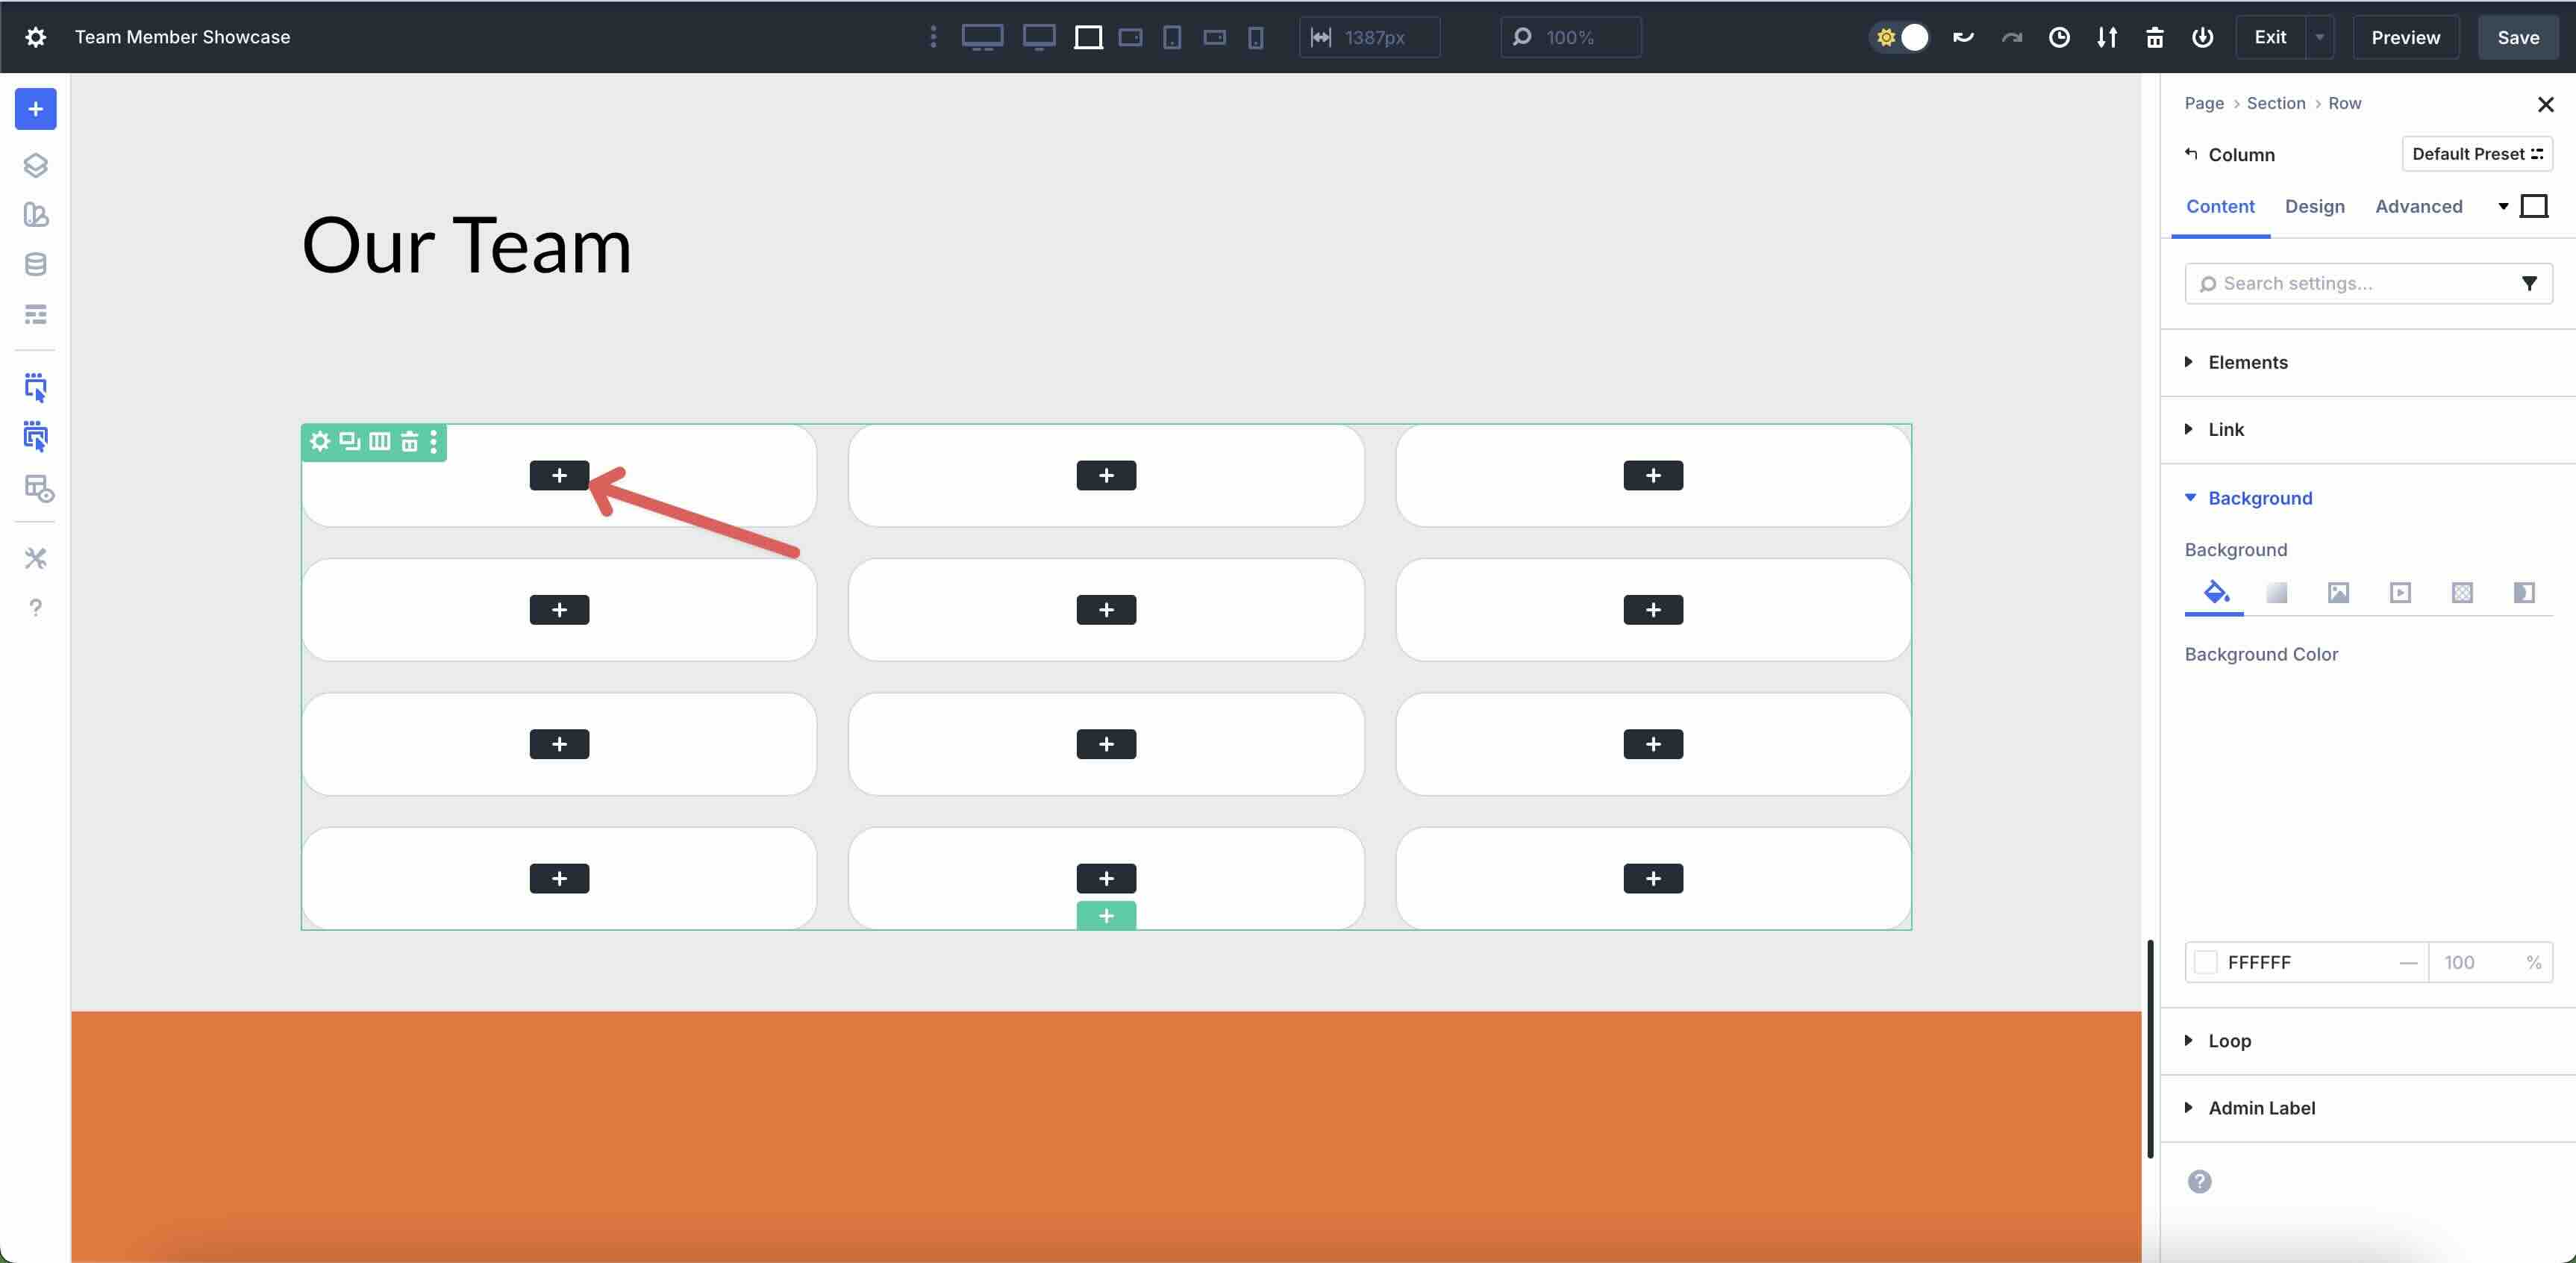
Step 4: Upload Content material To Column
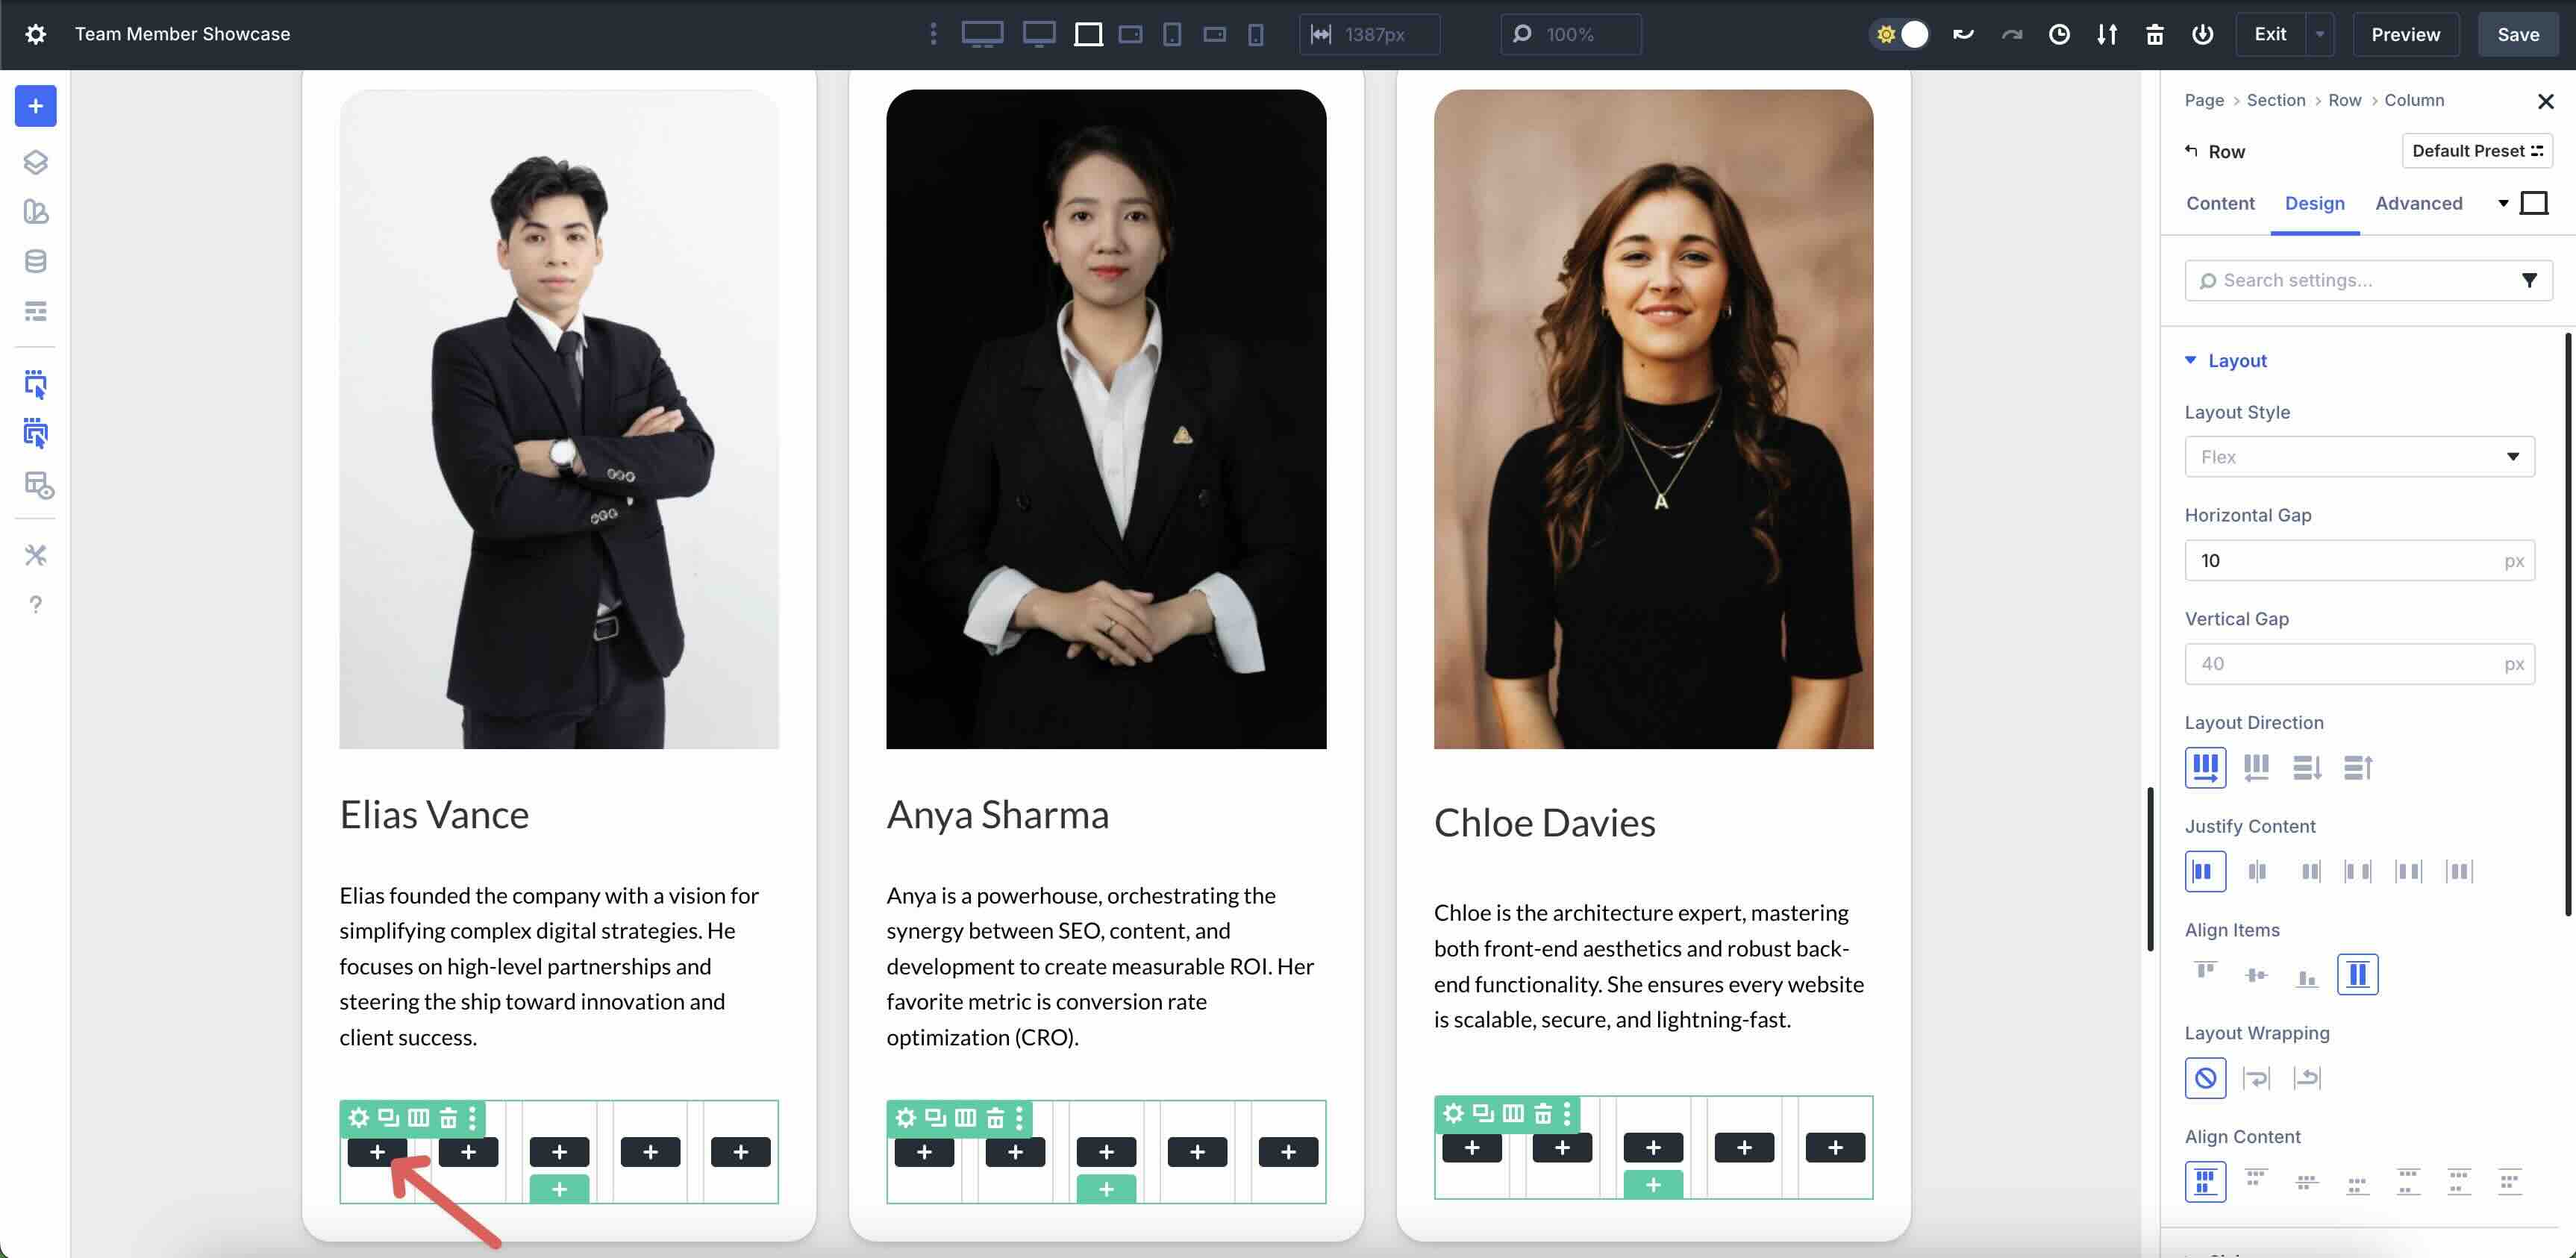
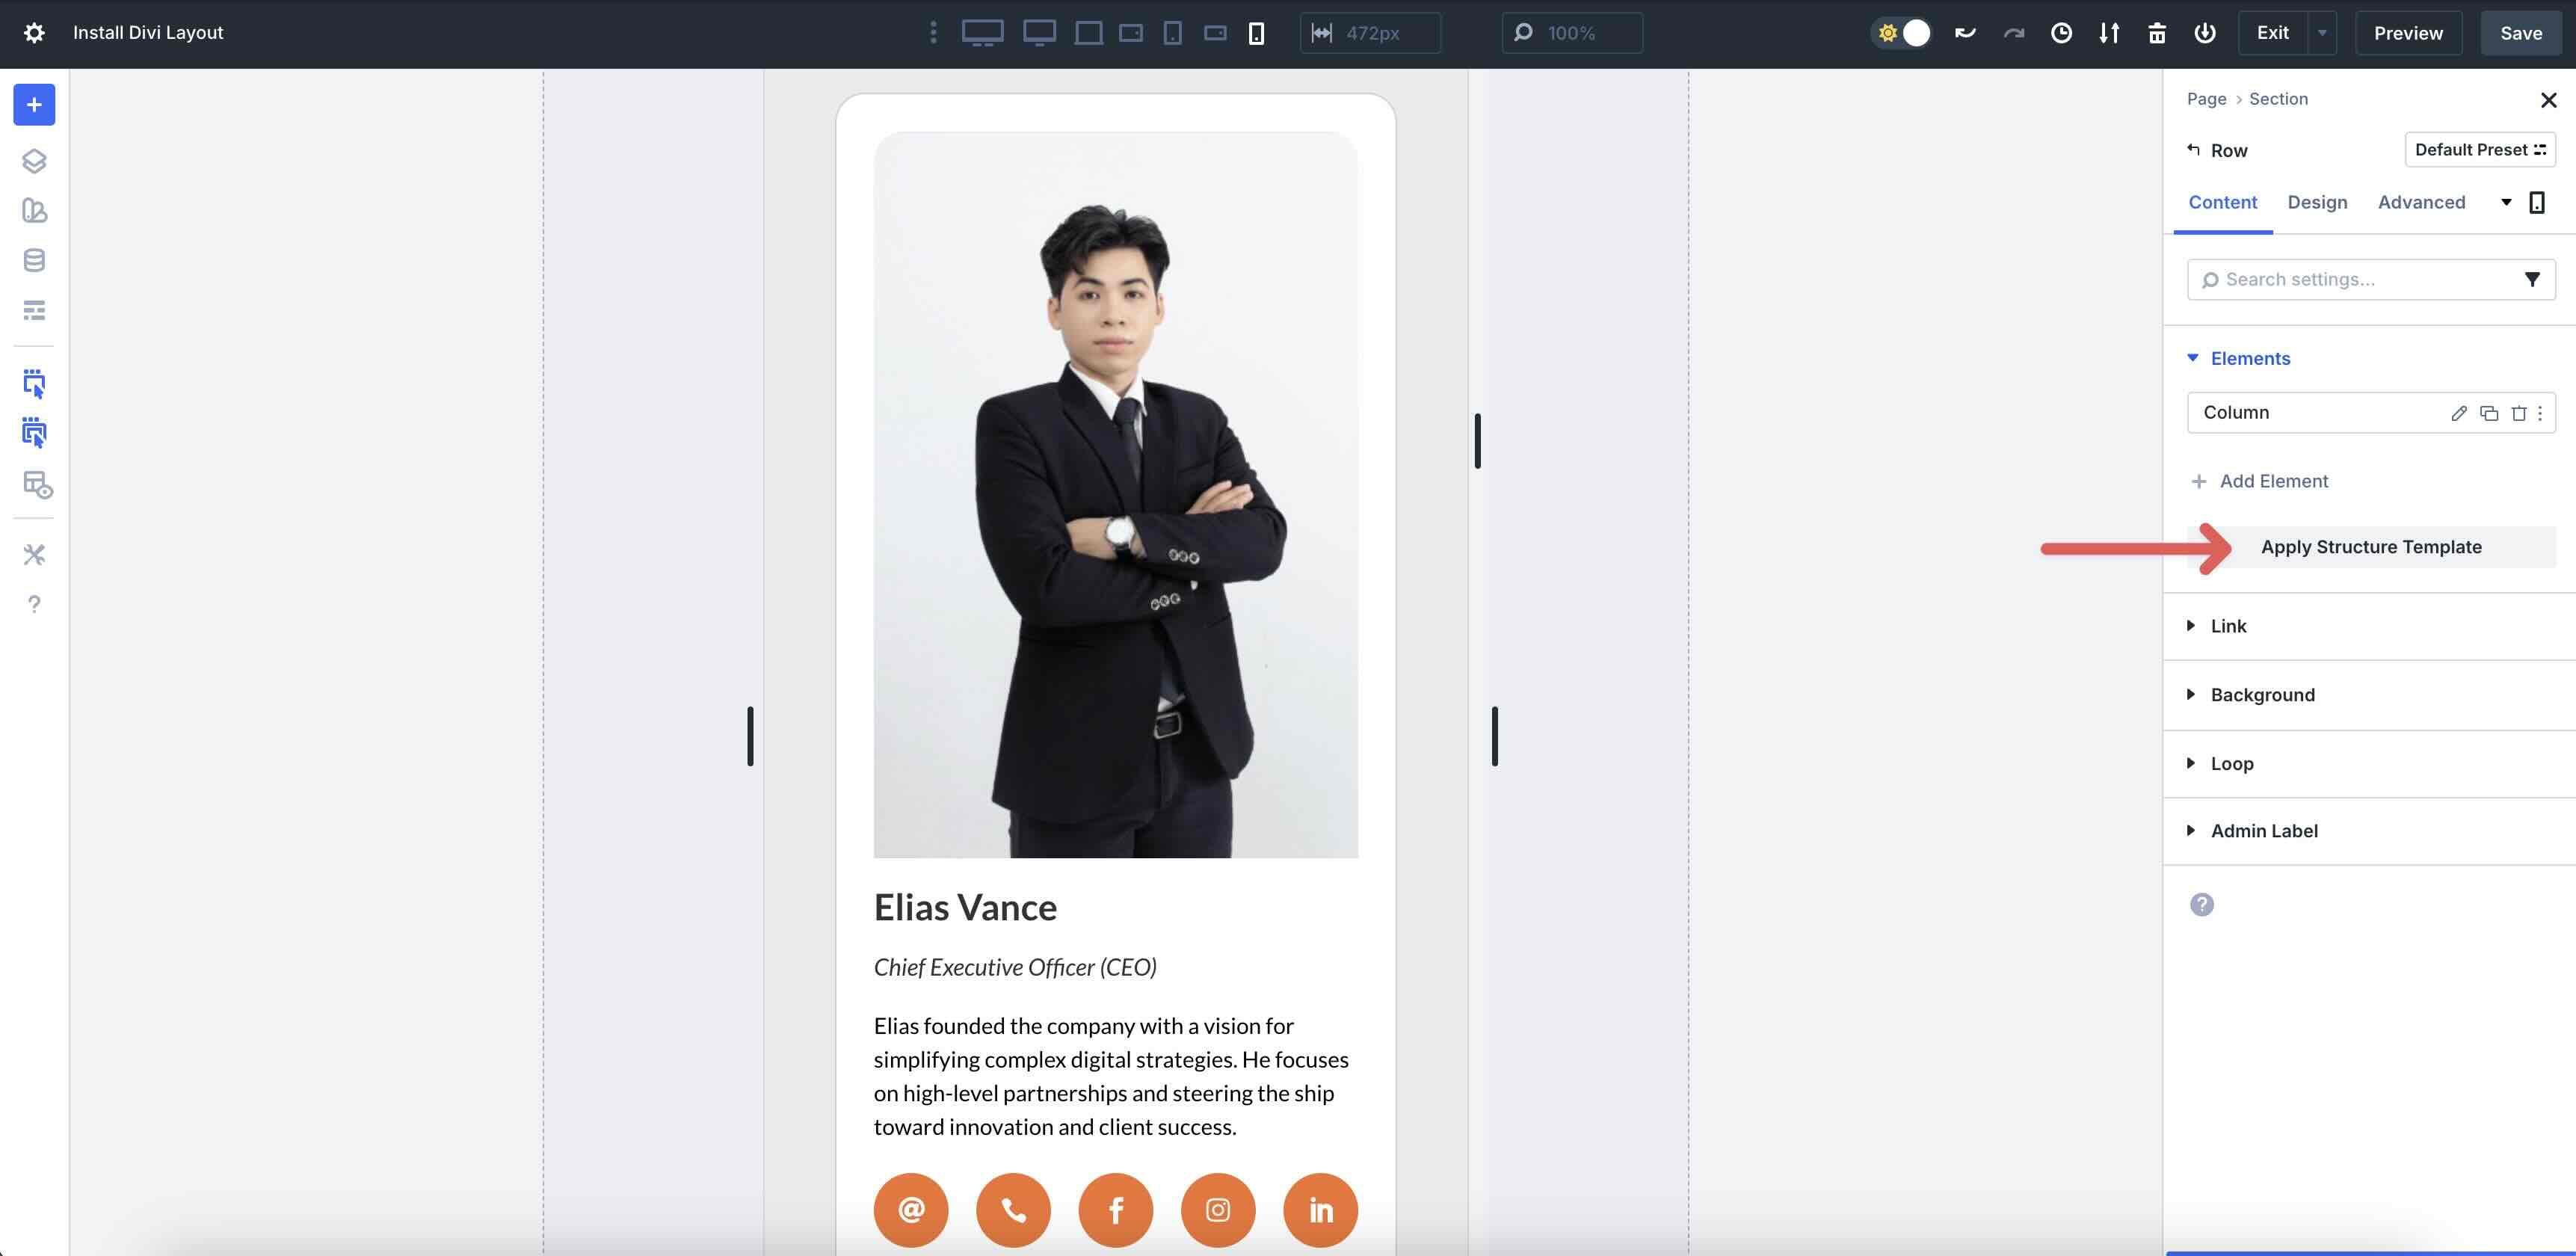
Now, we will get started including content material to the Column. Click on into the primary Column of the Loop so as to add an Symbol module.
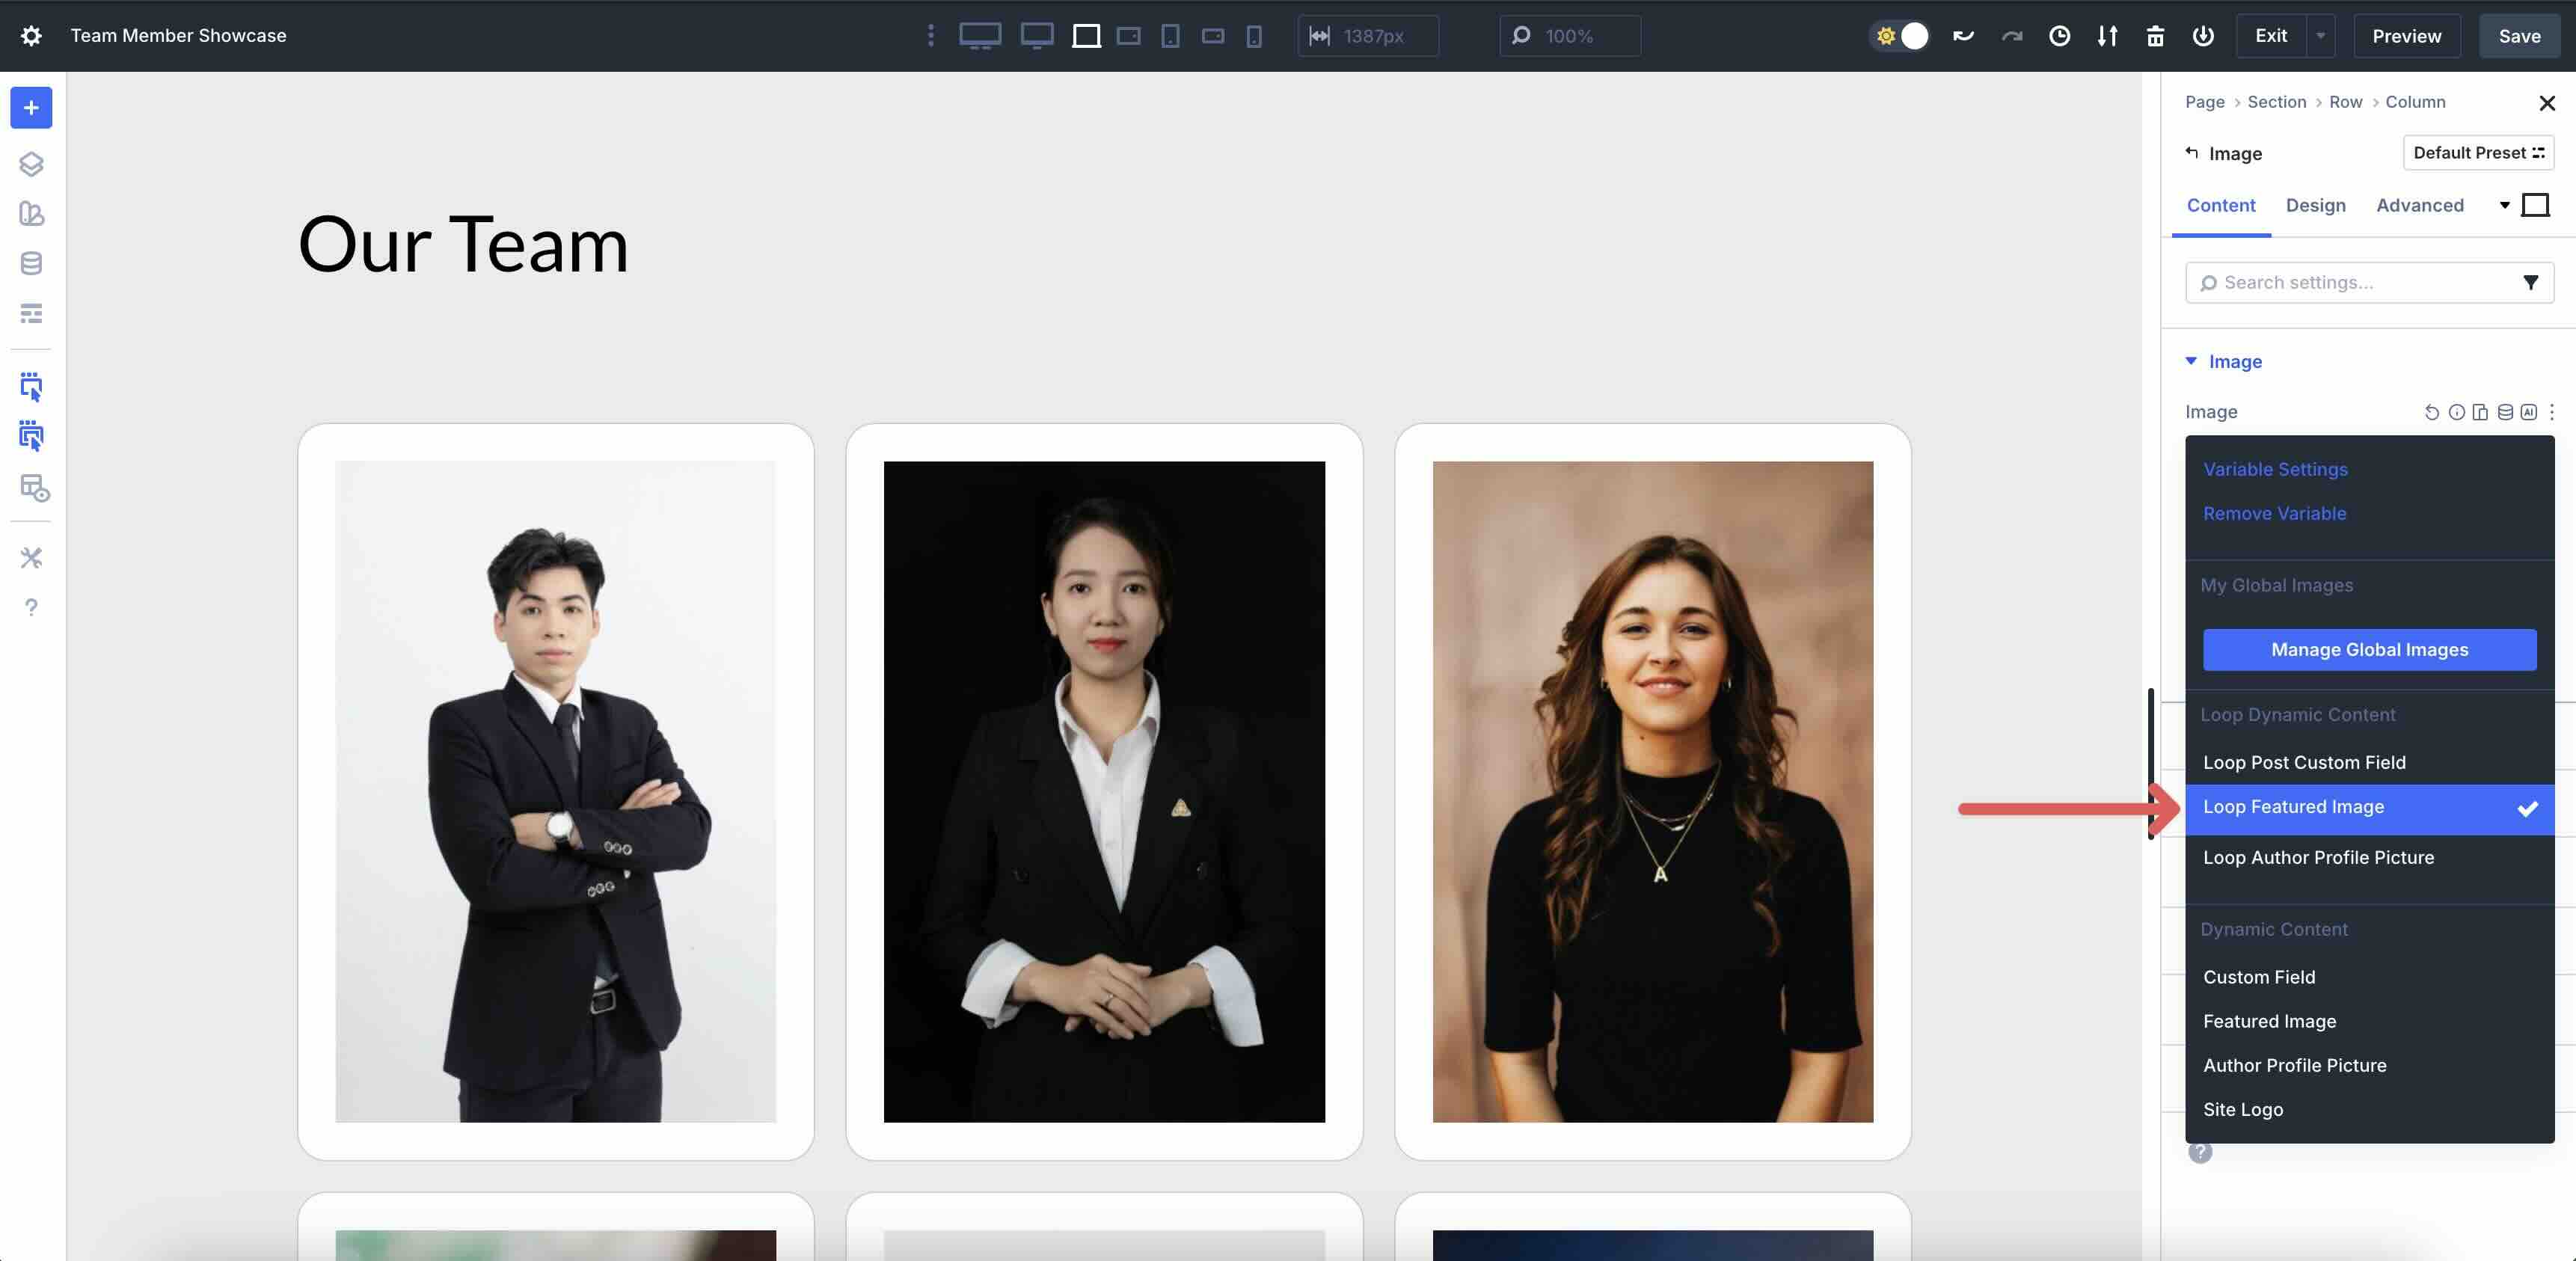
Hover above the picture box to expose the Dynamic Content material icon.
![]()
Make a selection Loop Featured Symbol because the dynamic tag. Taste the picture as desired.
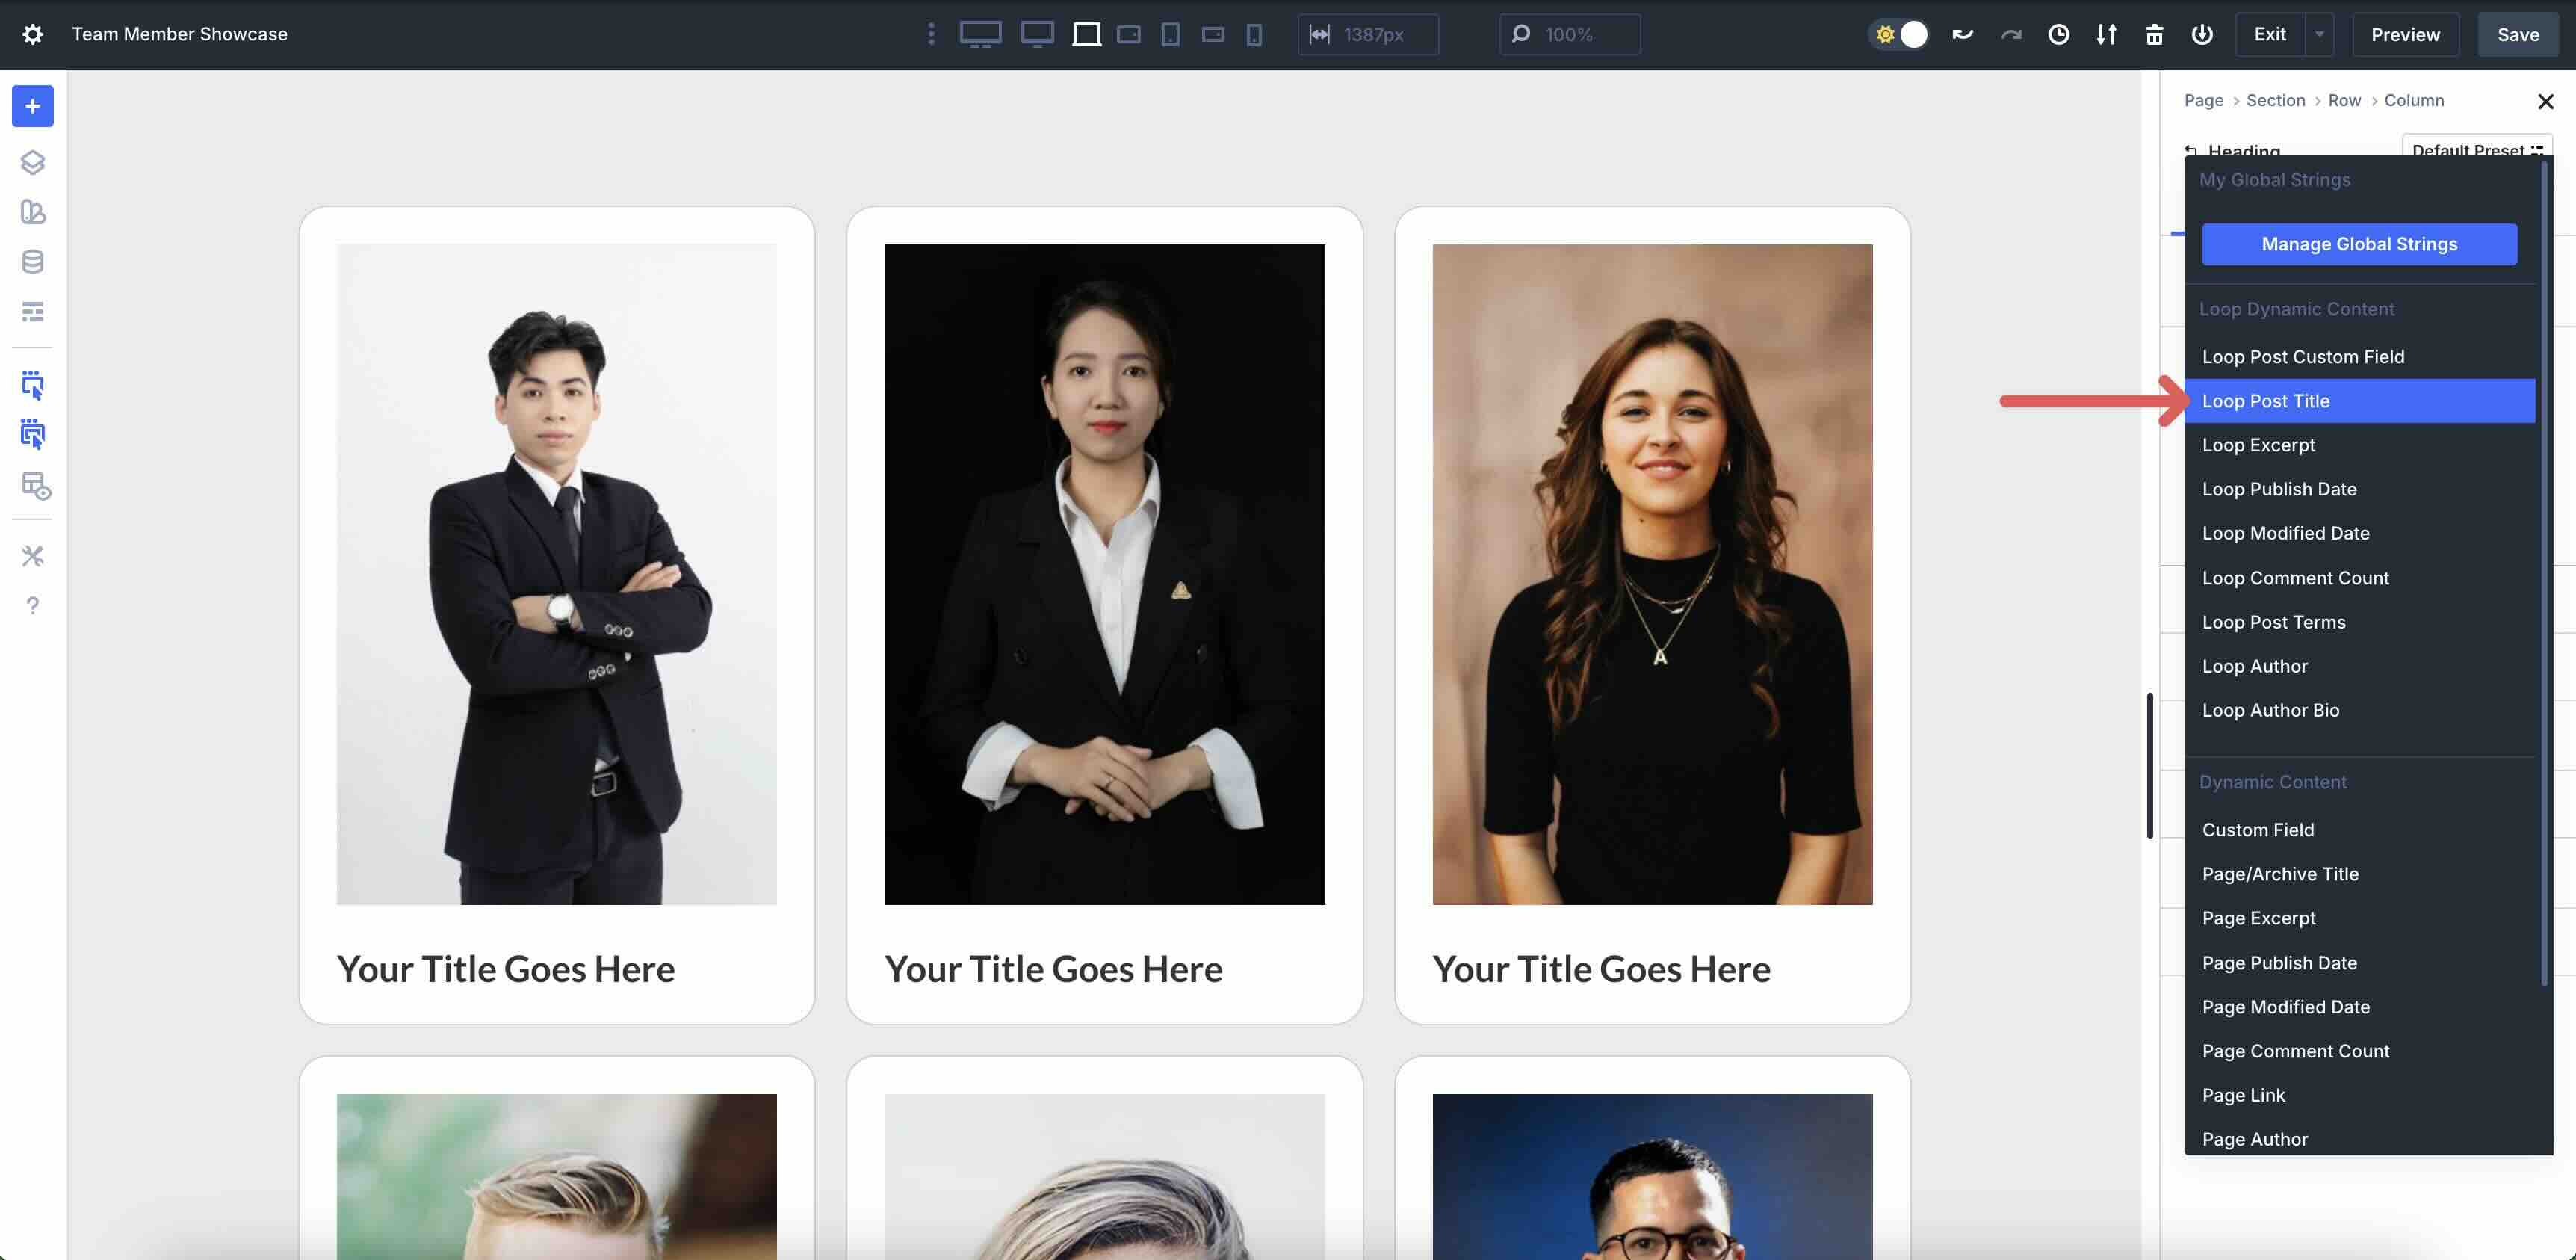
Upload Heading Modules
Click on the black + icon so as to add a Heading module.

Click on the Dynamic Content material icon for the Heading module and make a choice Loop Submit Name.
Upload every other Heading module to the Column. This time, make a choice the Loop Submit Customized Box choice.
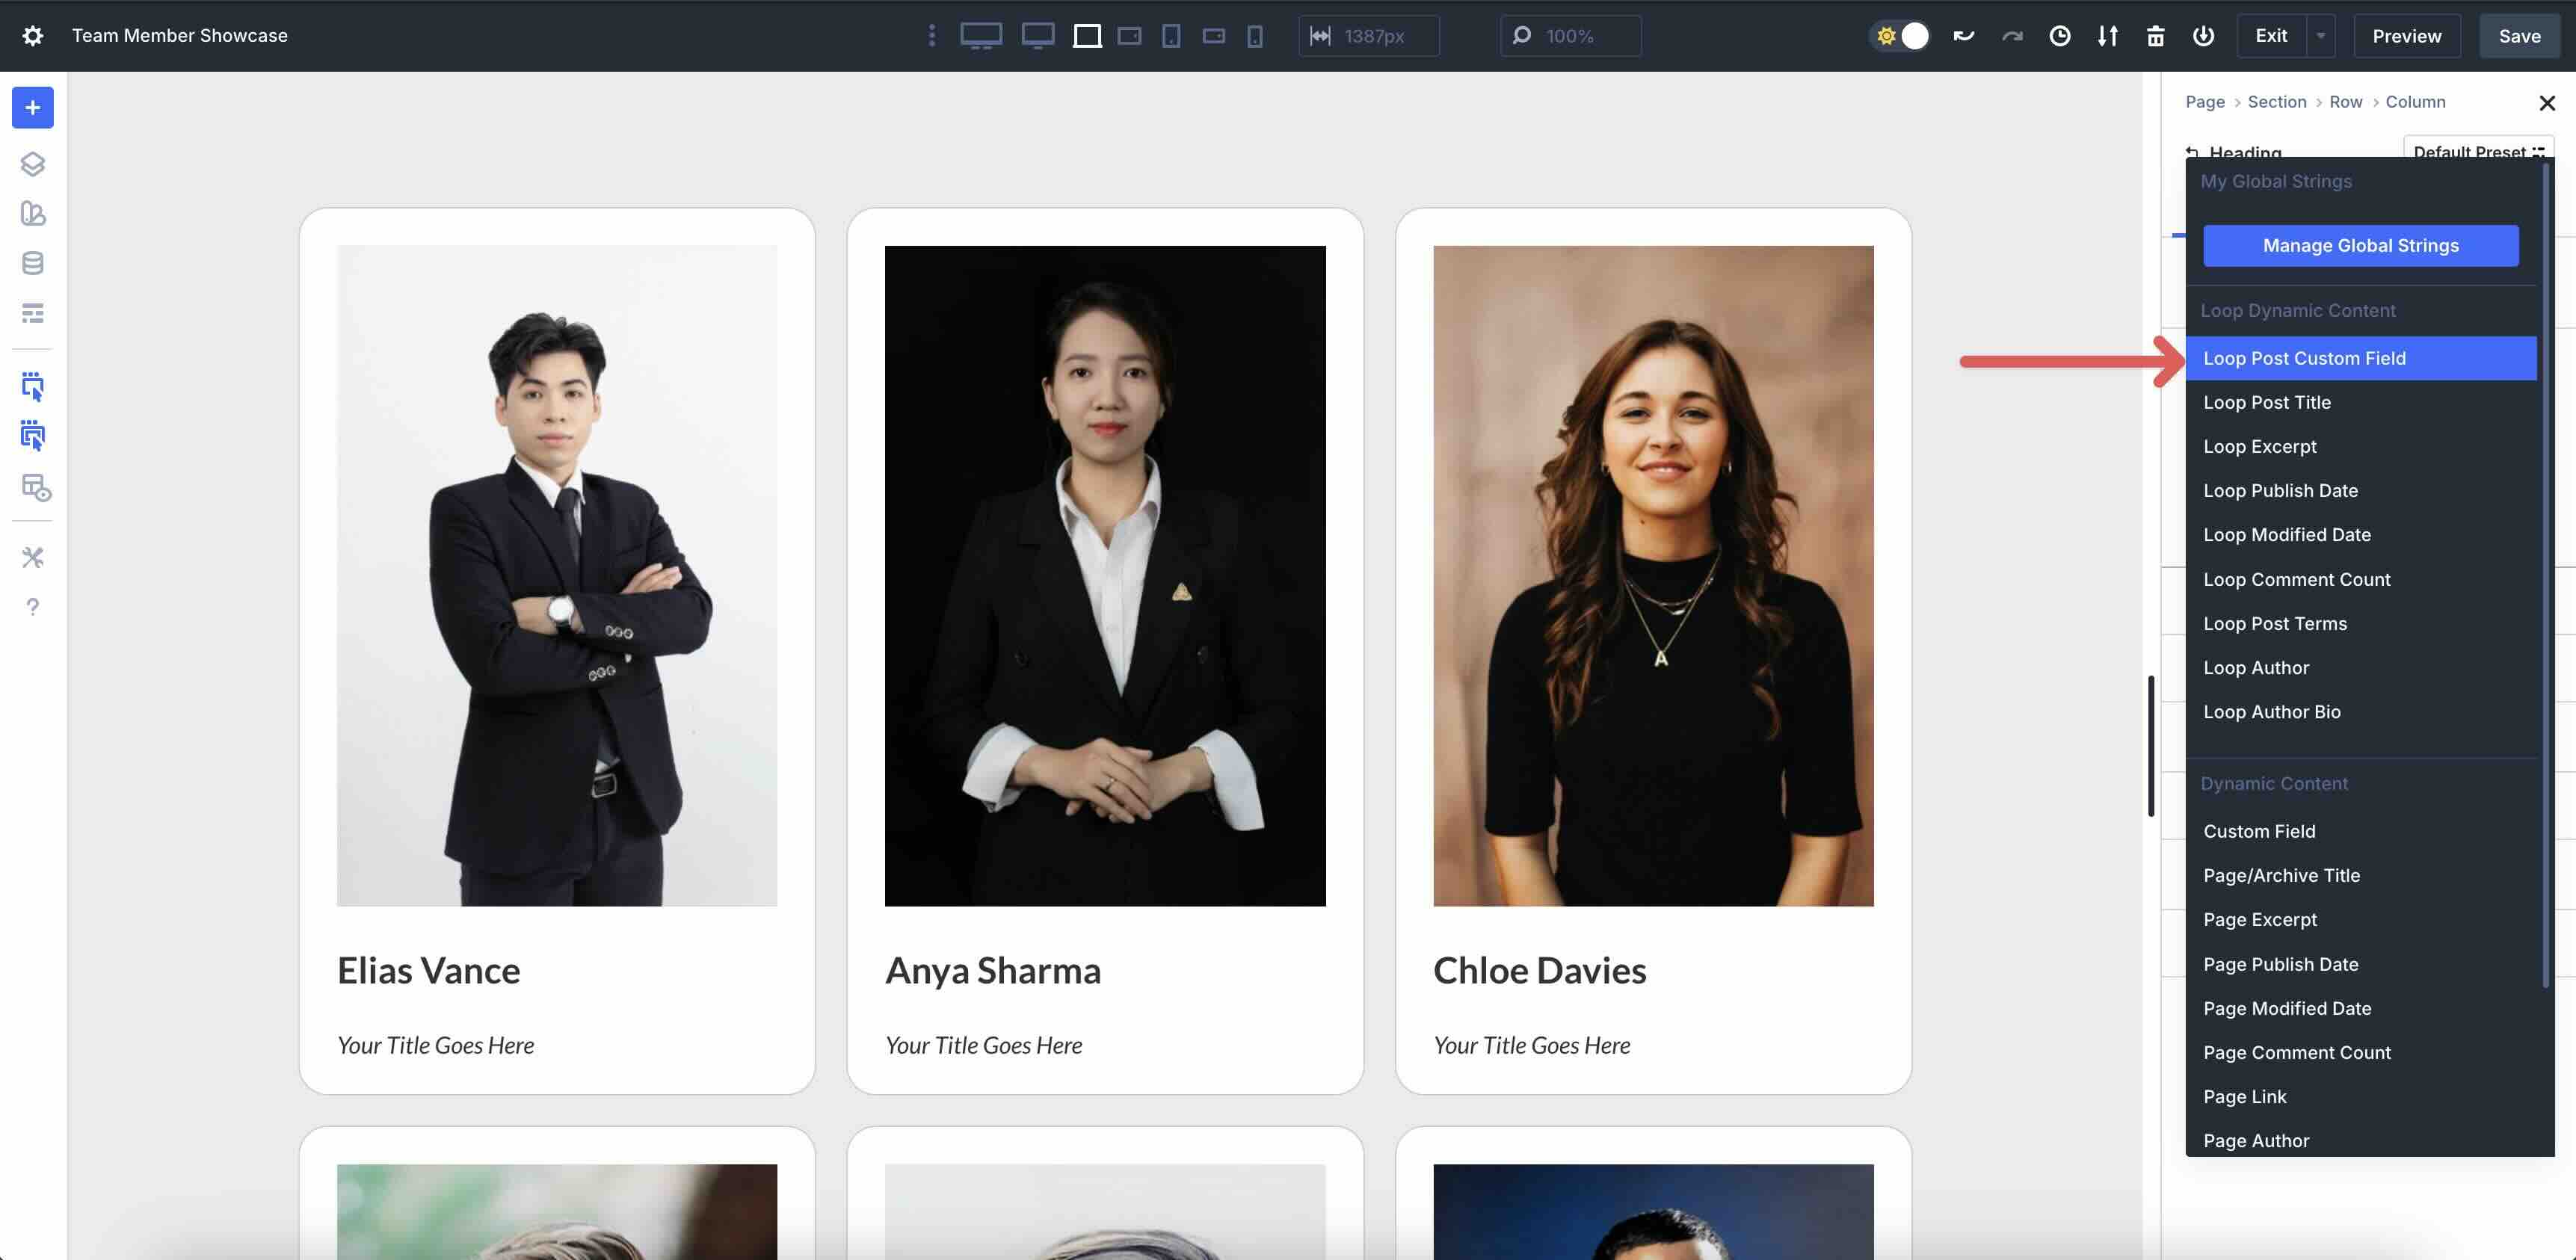
Extend the dropdown menu subsequent to Make a selection Customized Box.
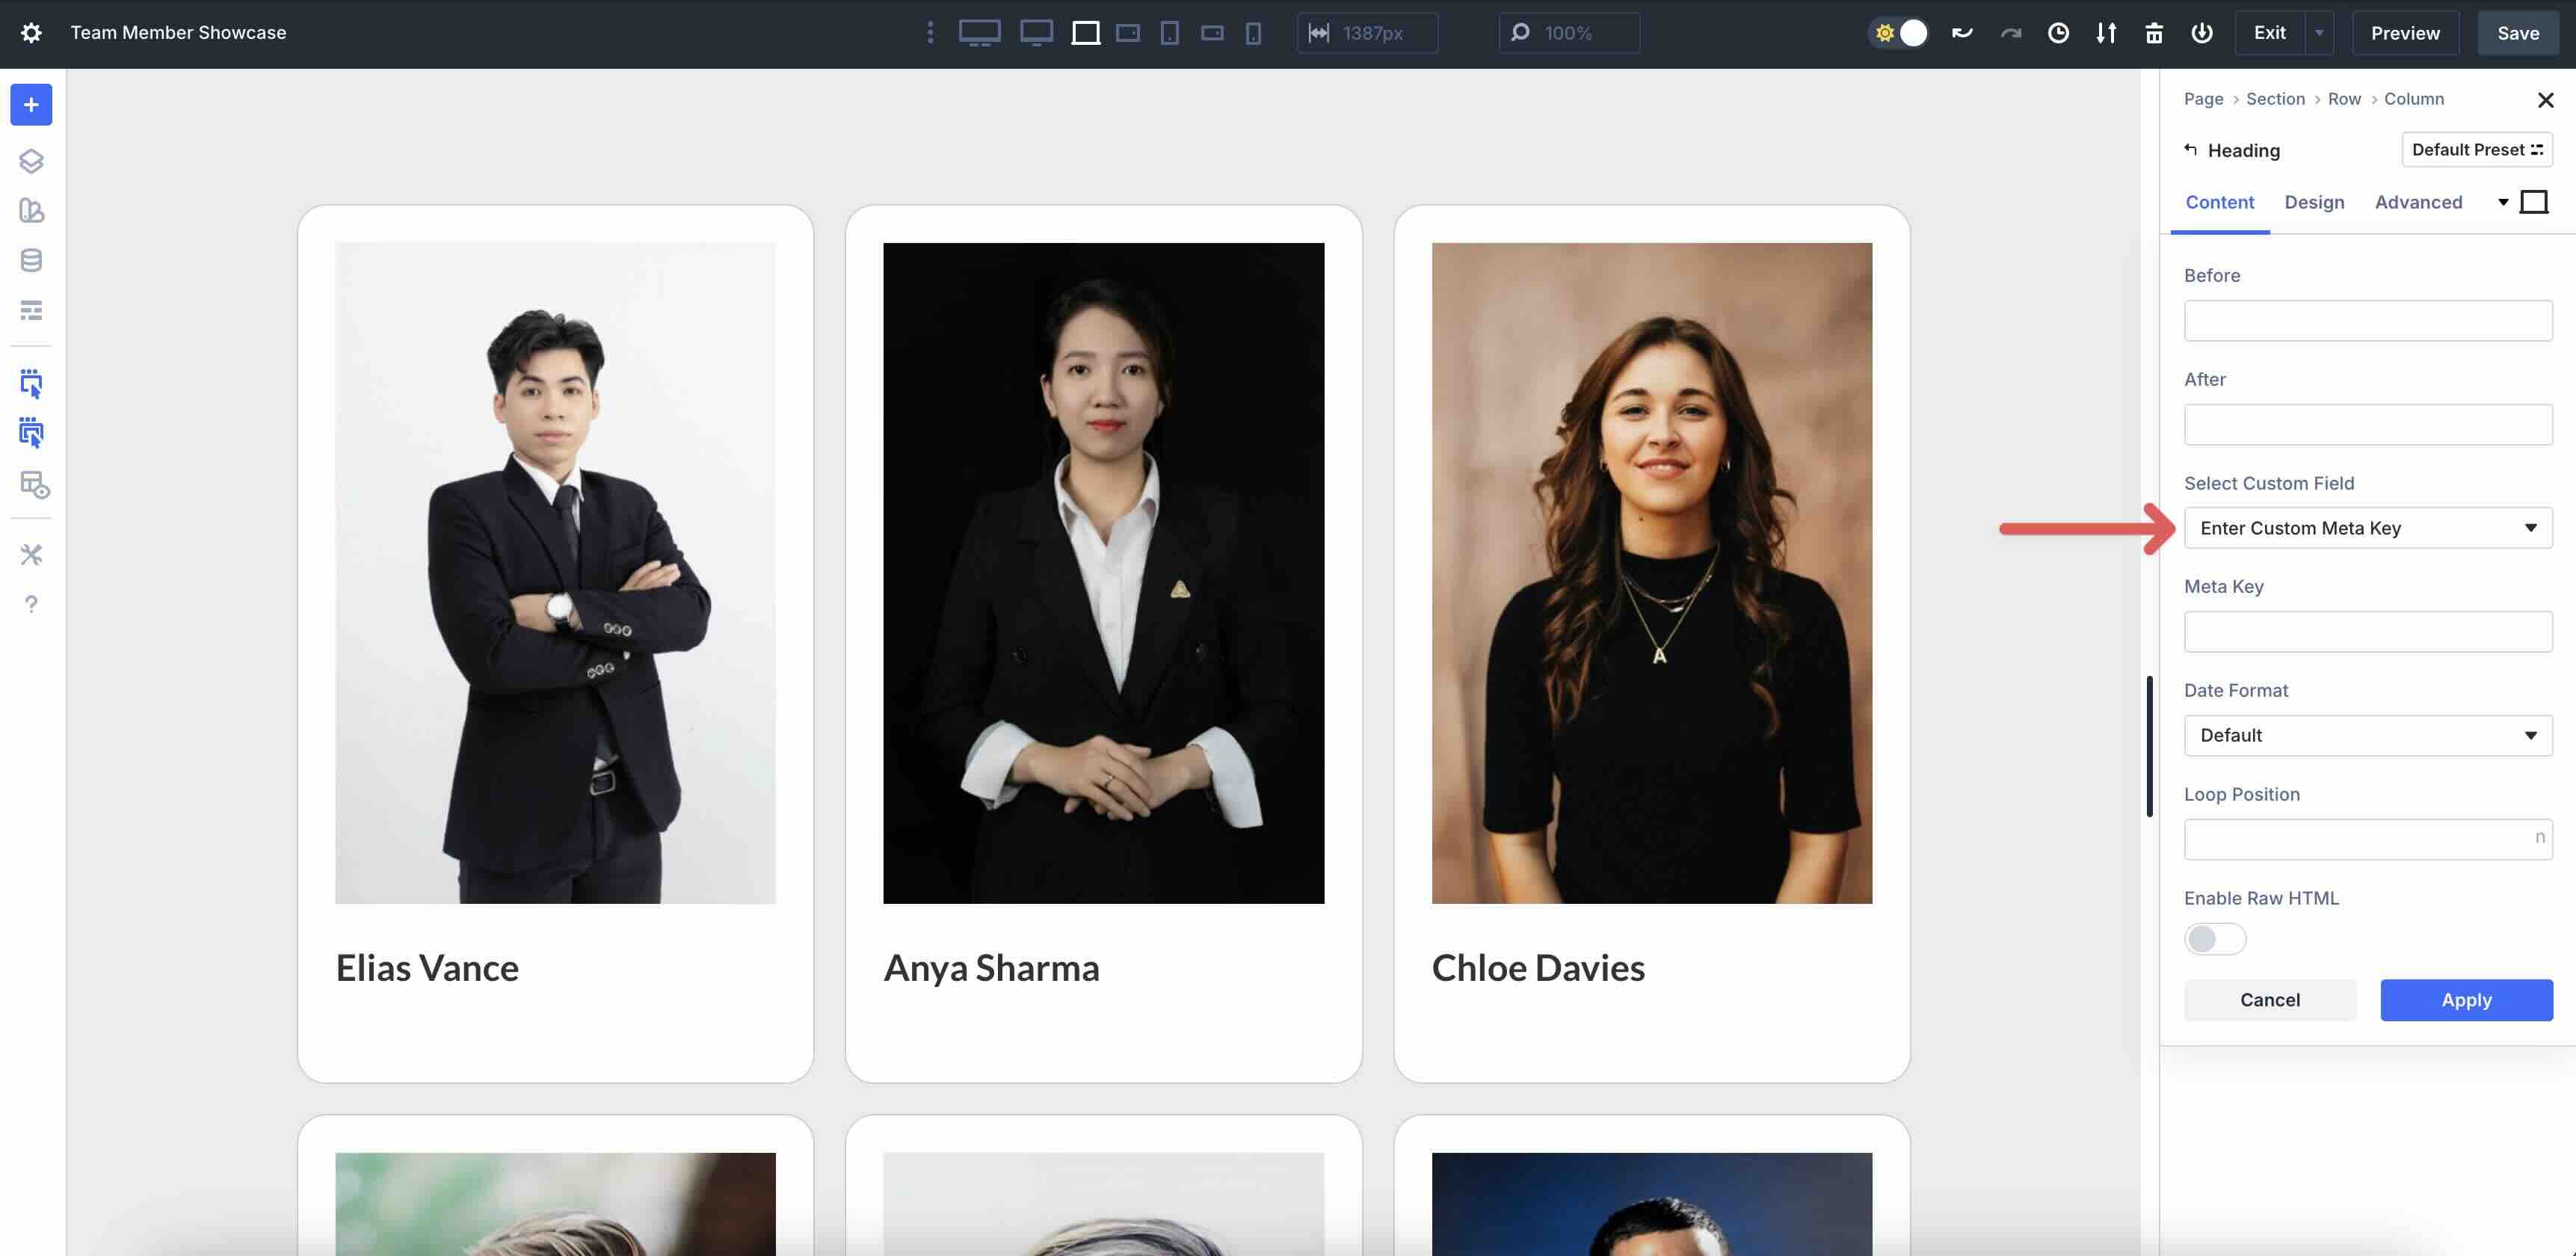
Make a selection Place/Name because the customized box.
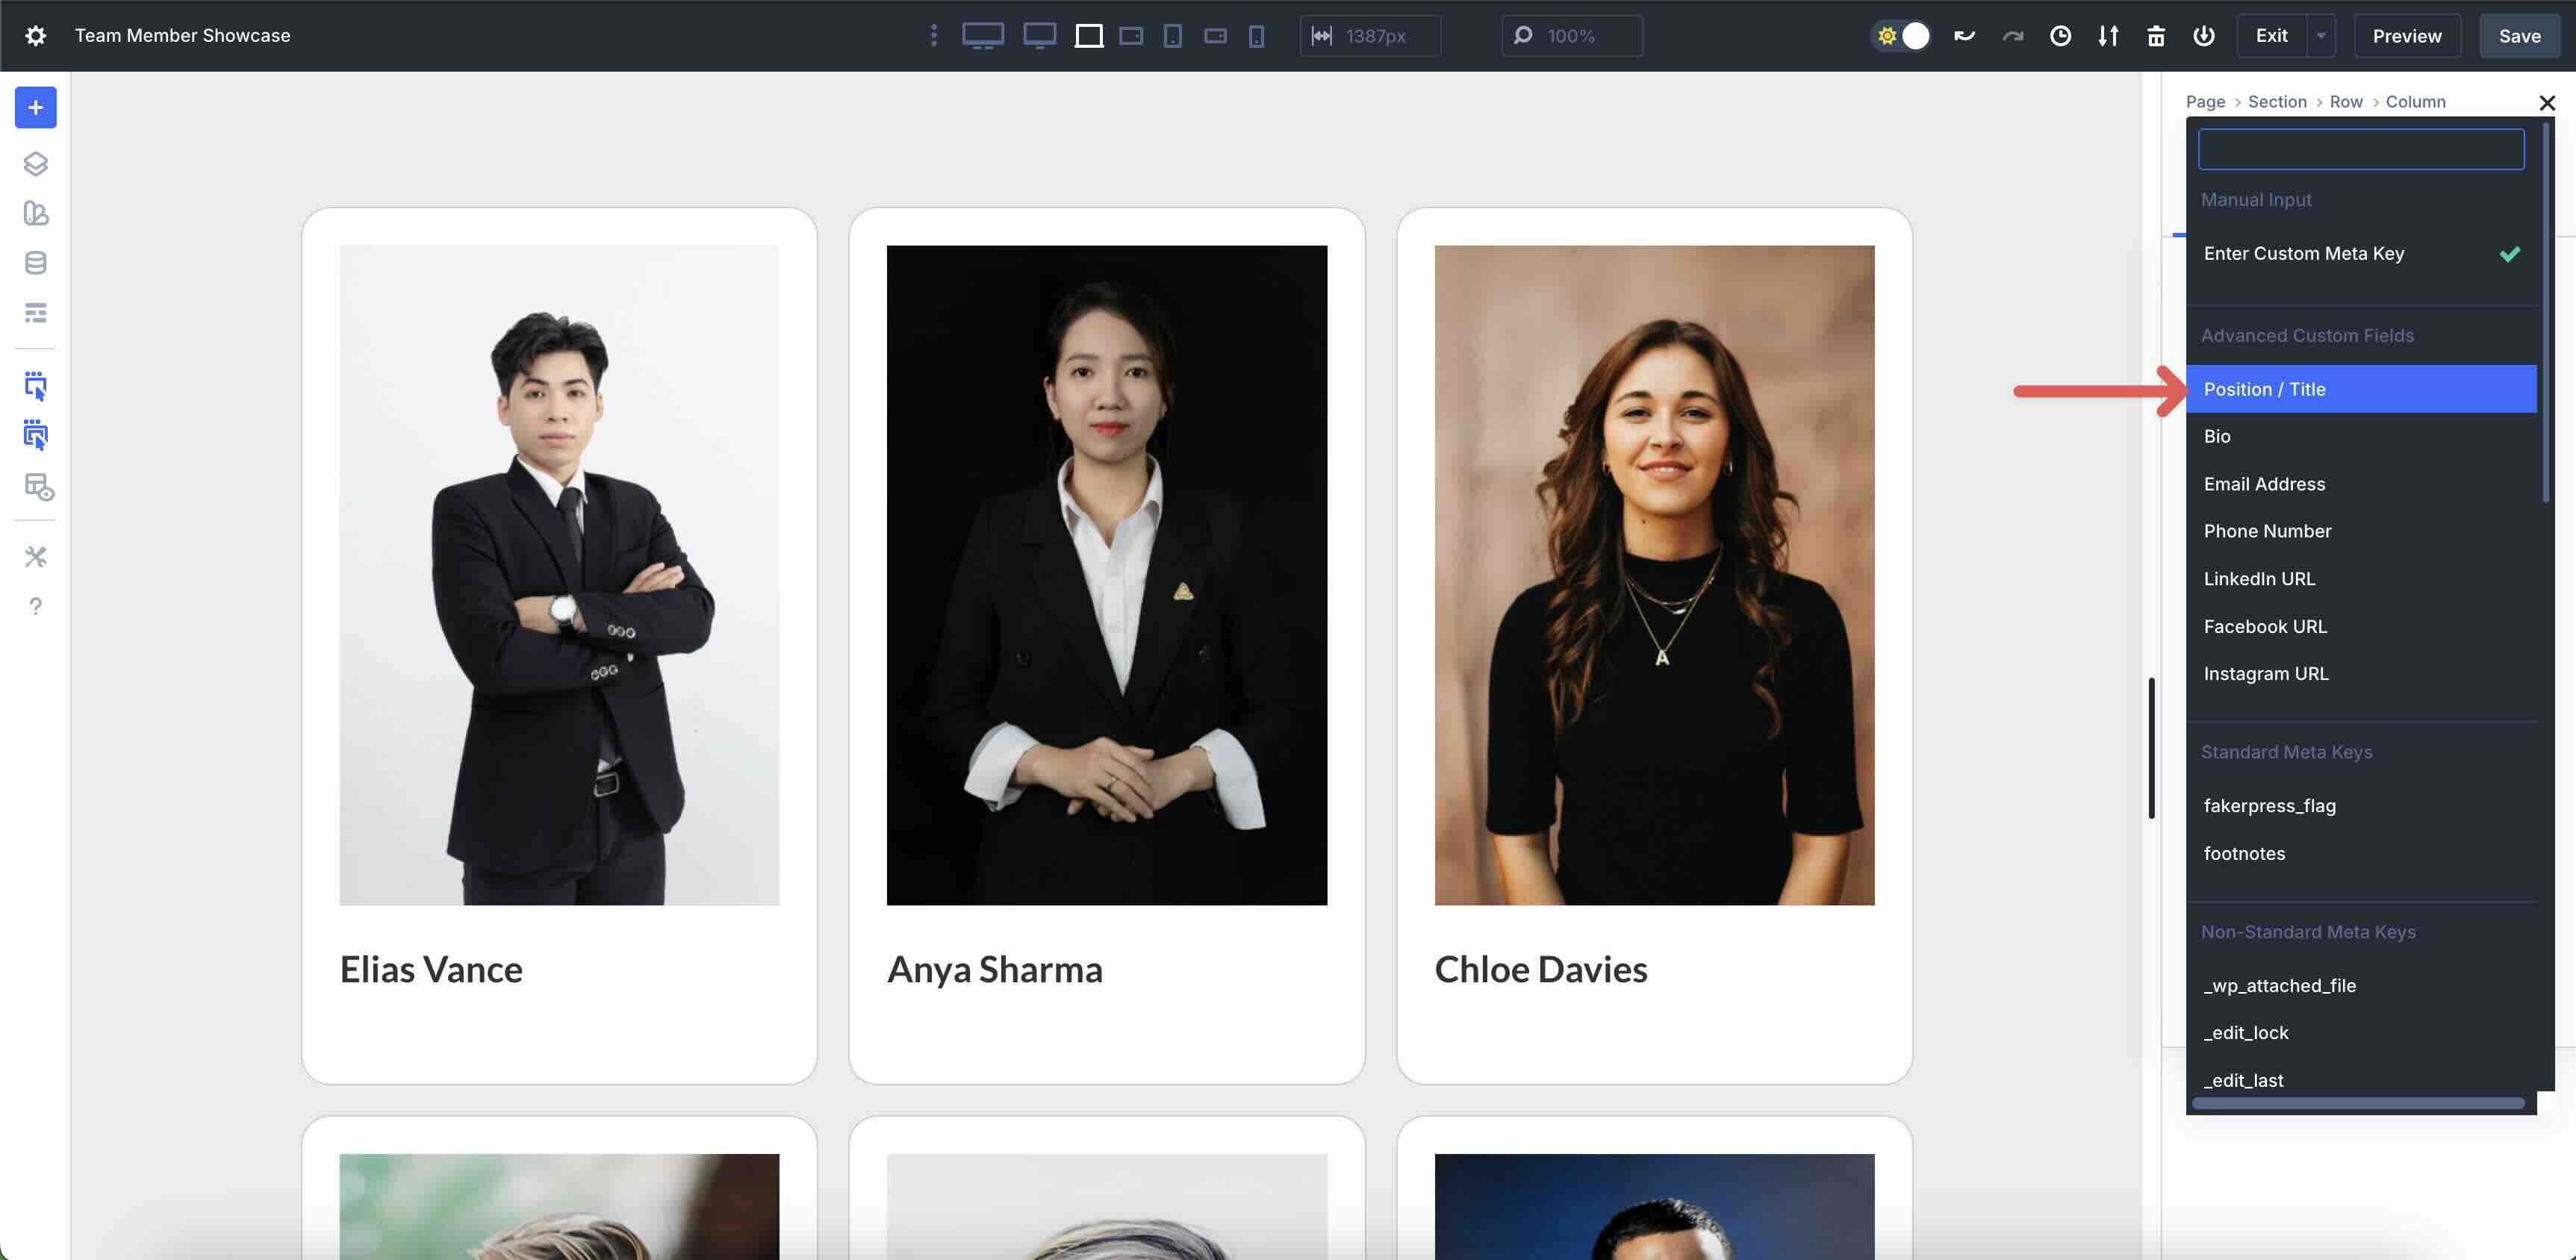
Click on the Practice button to assign the customized box to the module. Taste the module as desired.

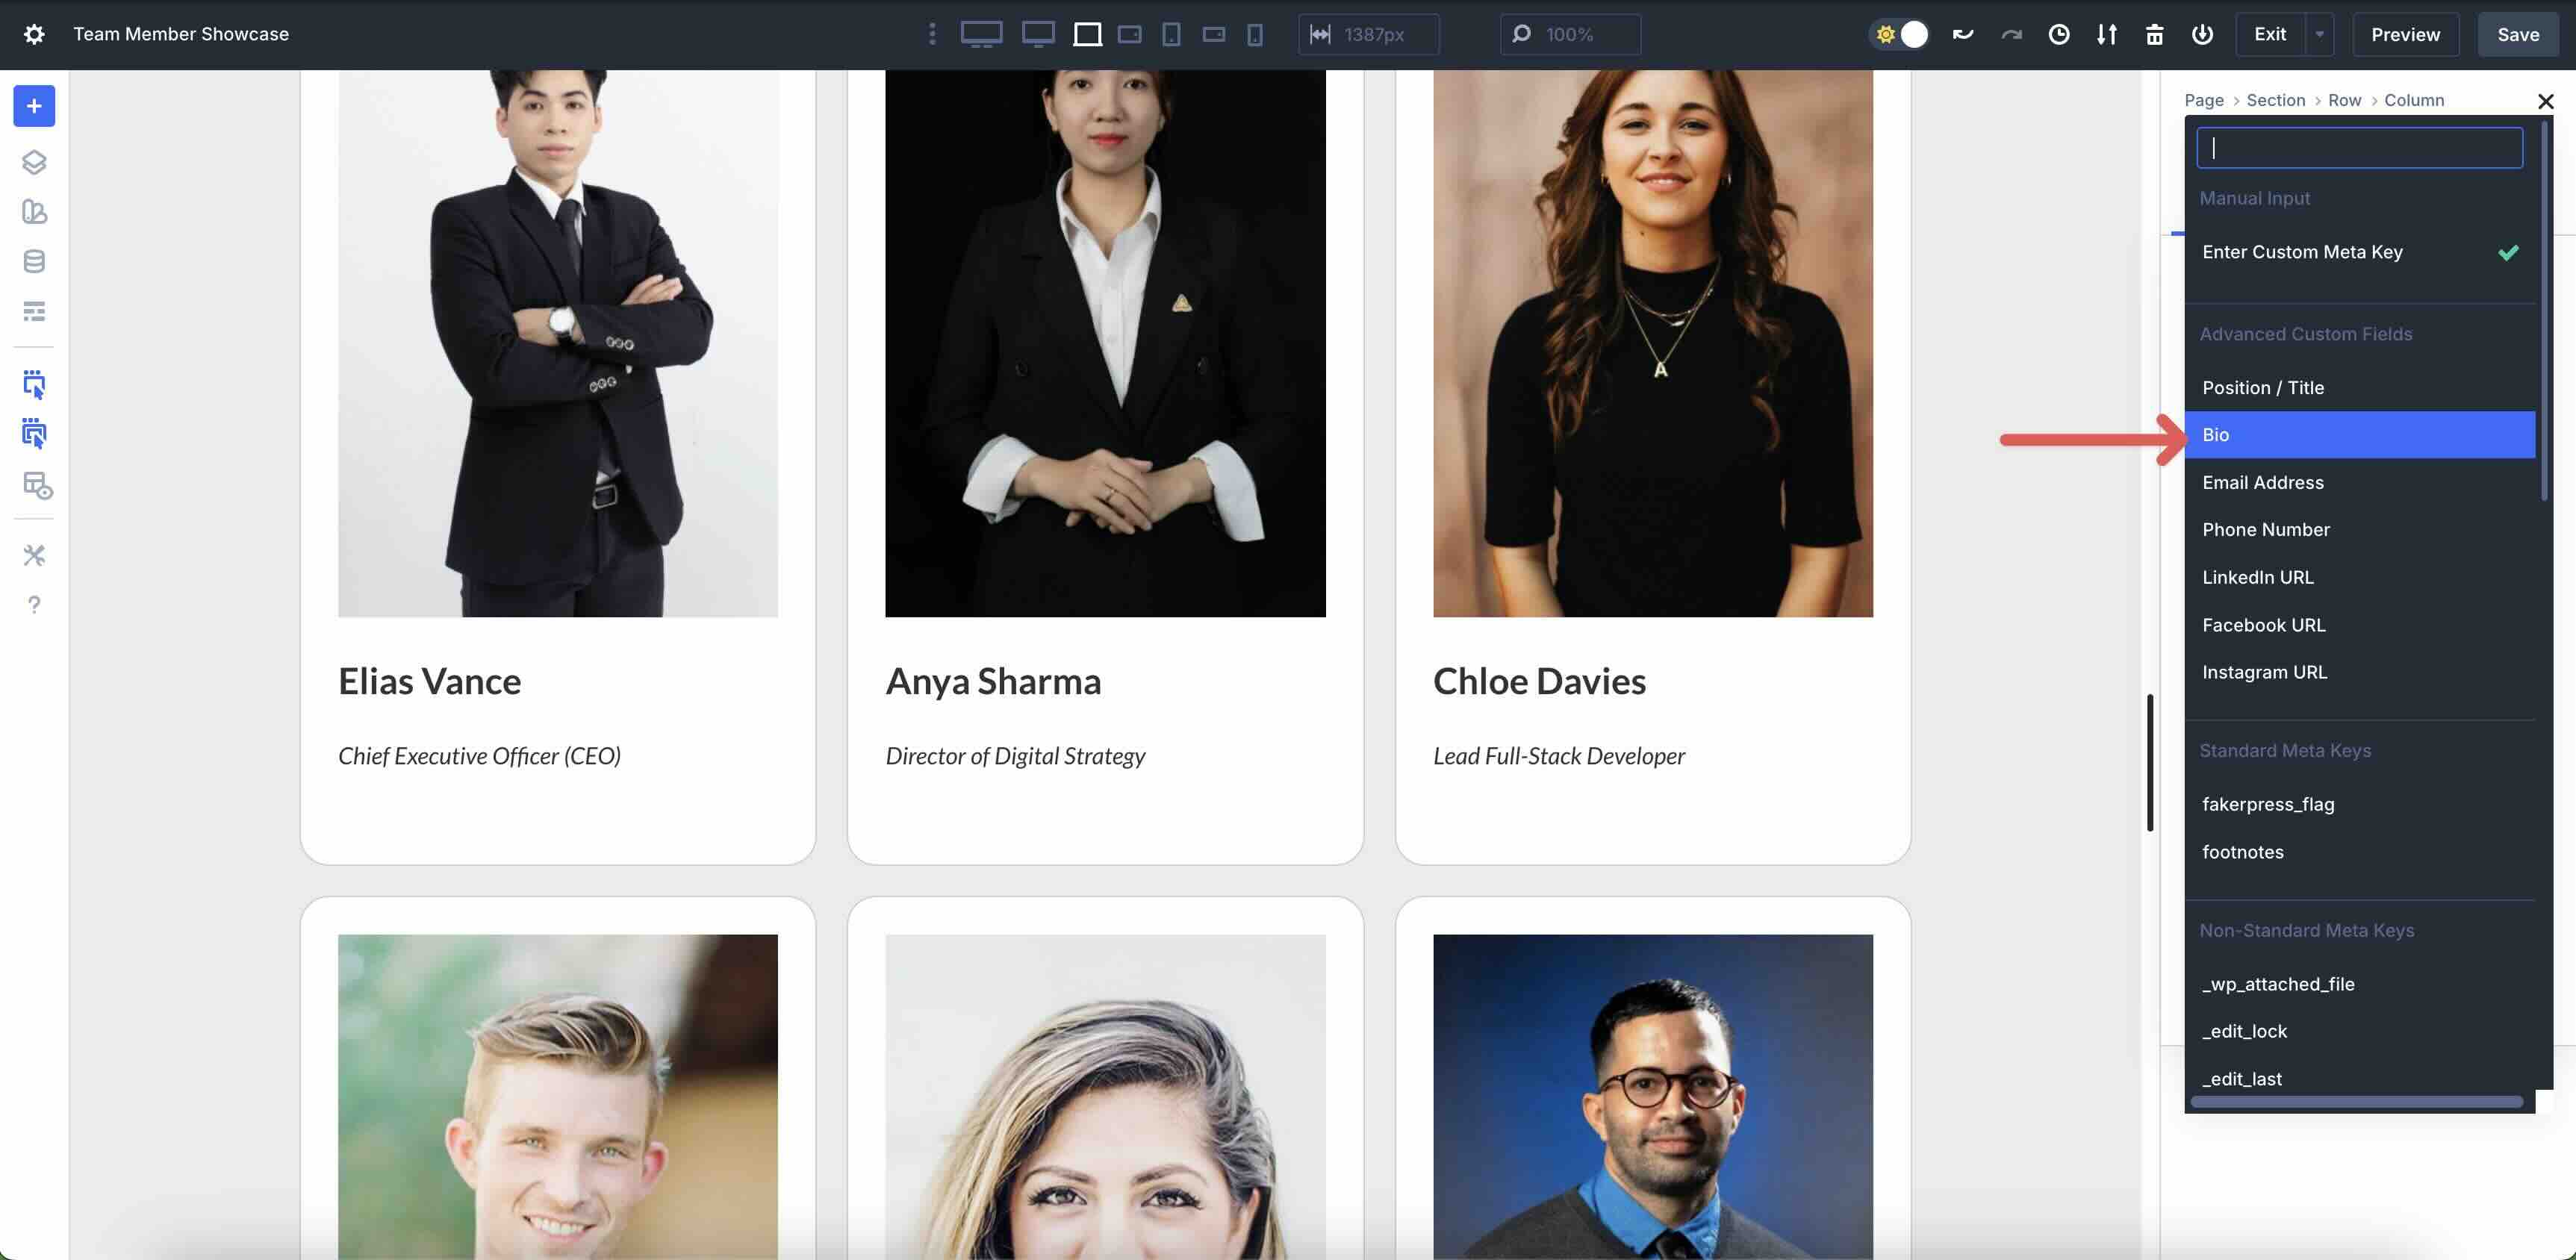
Upload A Textual content Module
Upload a Textual content module to the Column. Select Loop Submit Customized Box within the Dynamic Content material settings and make a choice Bio because the Customized Meta Key.
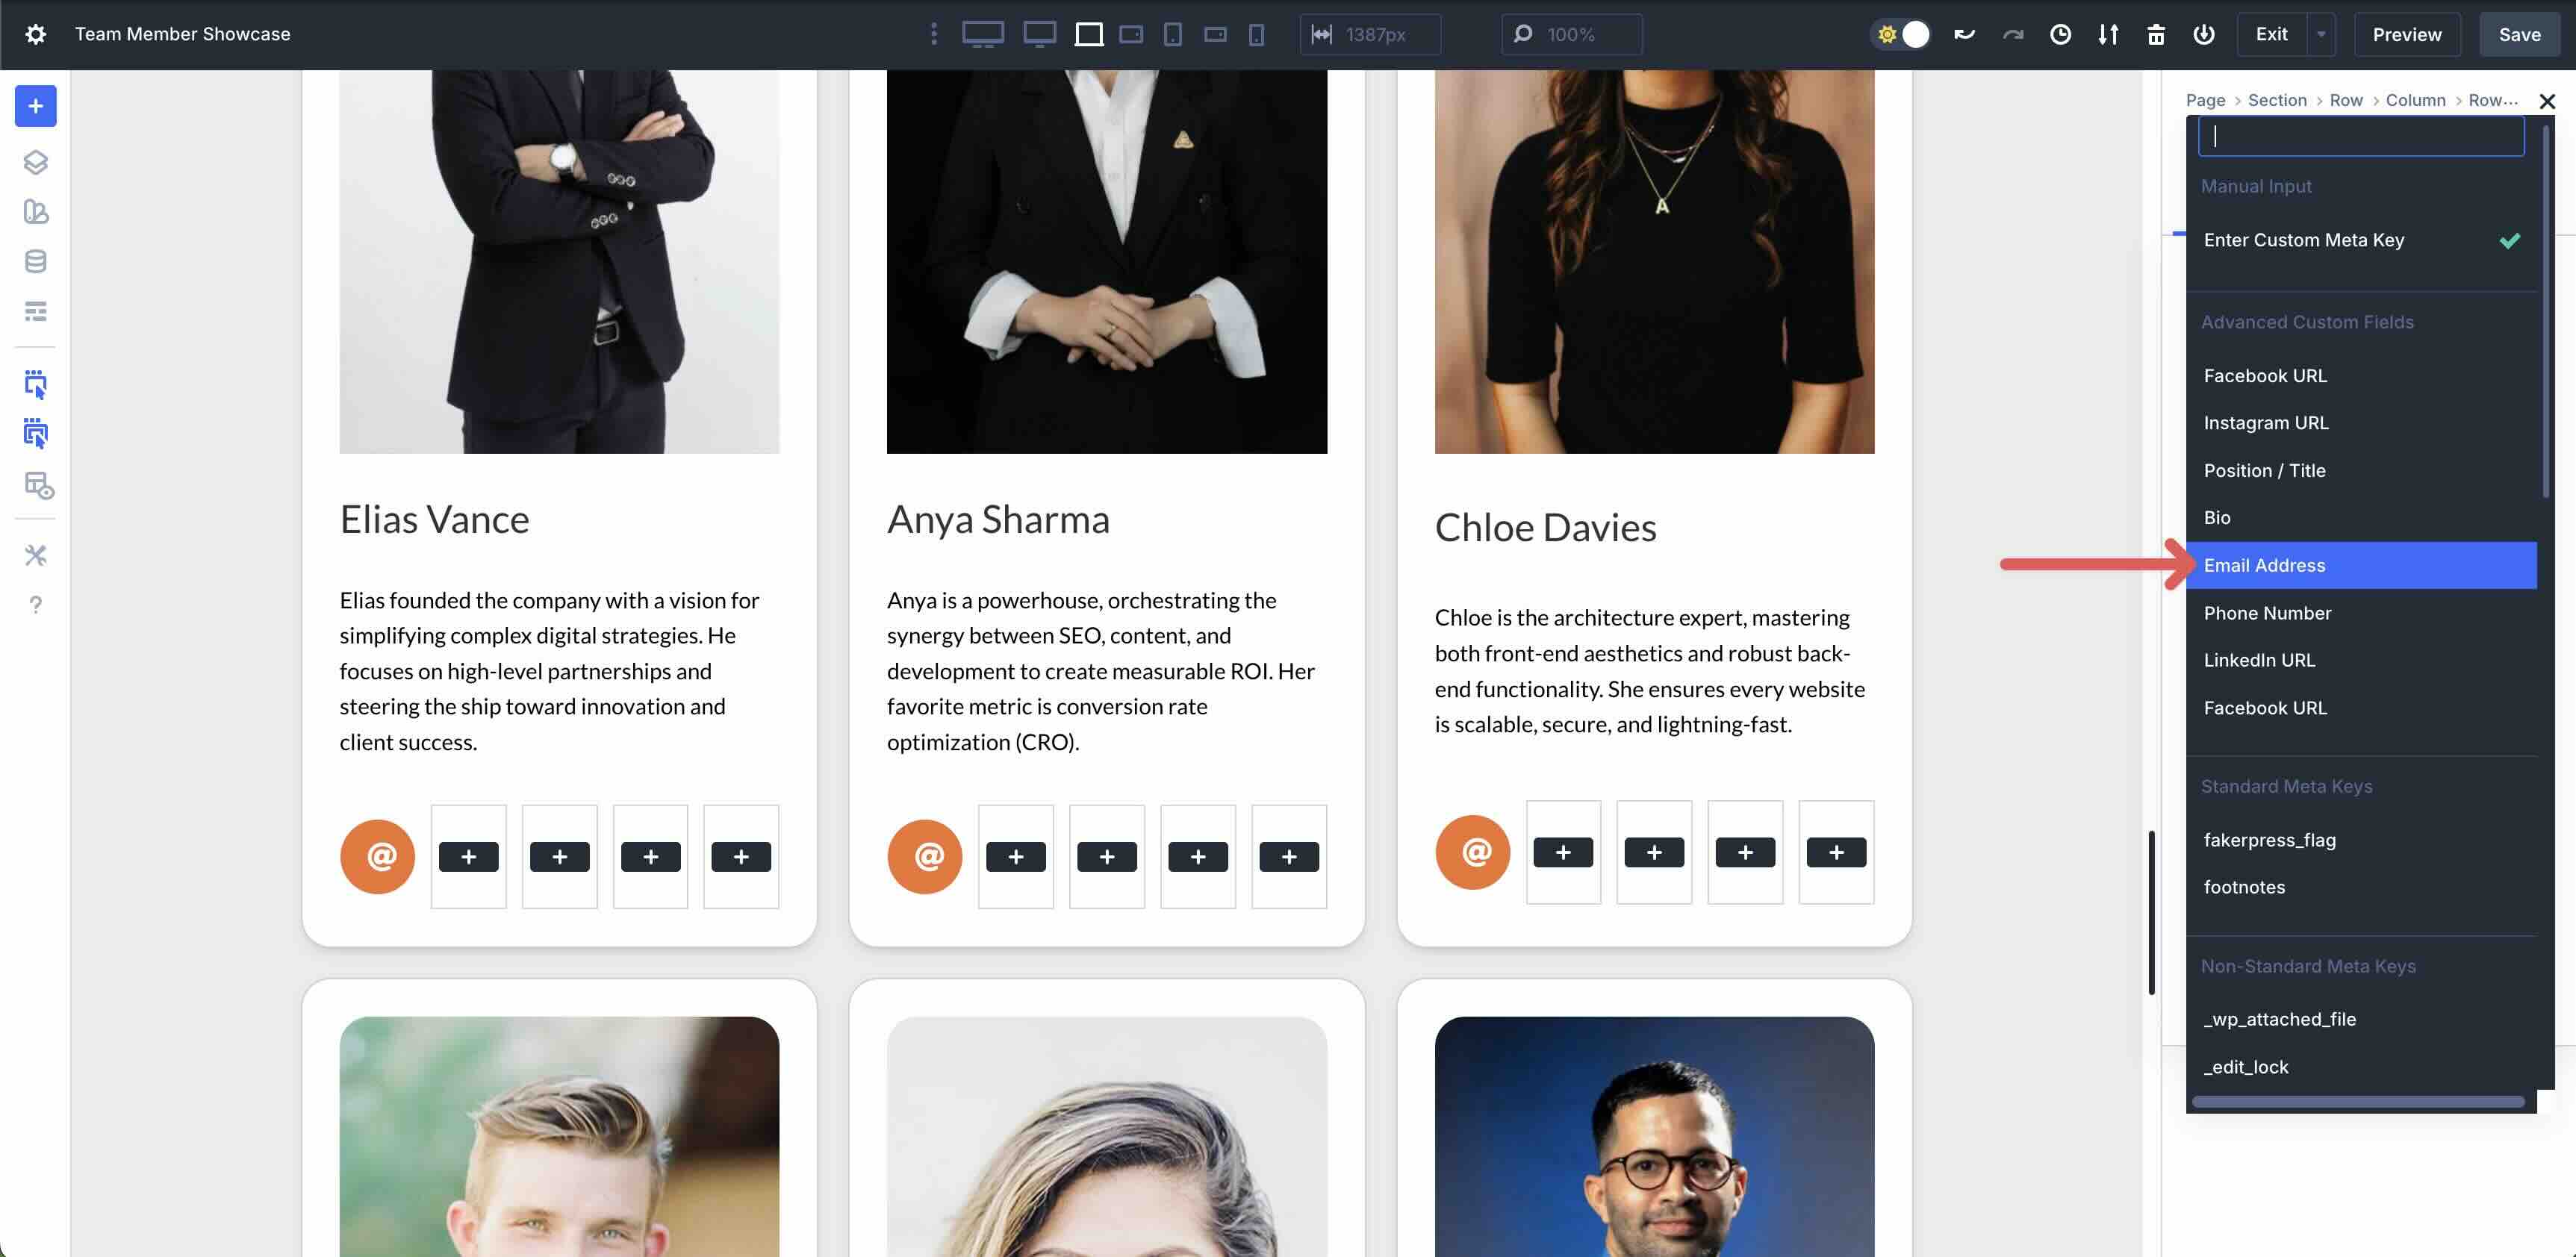
Upload A Nested Row
Subsequent, we’ll upload a Nested Row to the primary Column. Click on the black + icon, tab over to New Row, and make a choice a 5-Column Row.

Within the Nested Row’s Design tab, alter the Horizontal Hole to 10px.
Within the Row’s Structure settings, set Align Pieces to Heart.

Upload Icon Modules
Click on into the primary Column of the Nested Row and upload an Icon module.
Make a selection an E mail icon, taste the module, and make a choice the E mail Cope with customized box. Click on the Practice button to save lots of the content material.
Subsequent, proper click on at the Icon module to duplicate it.
![]()
Click on into the 2d Column of the Nested Row, proper click on, and make a choice Paste Module > Paste Module Inside of.
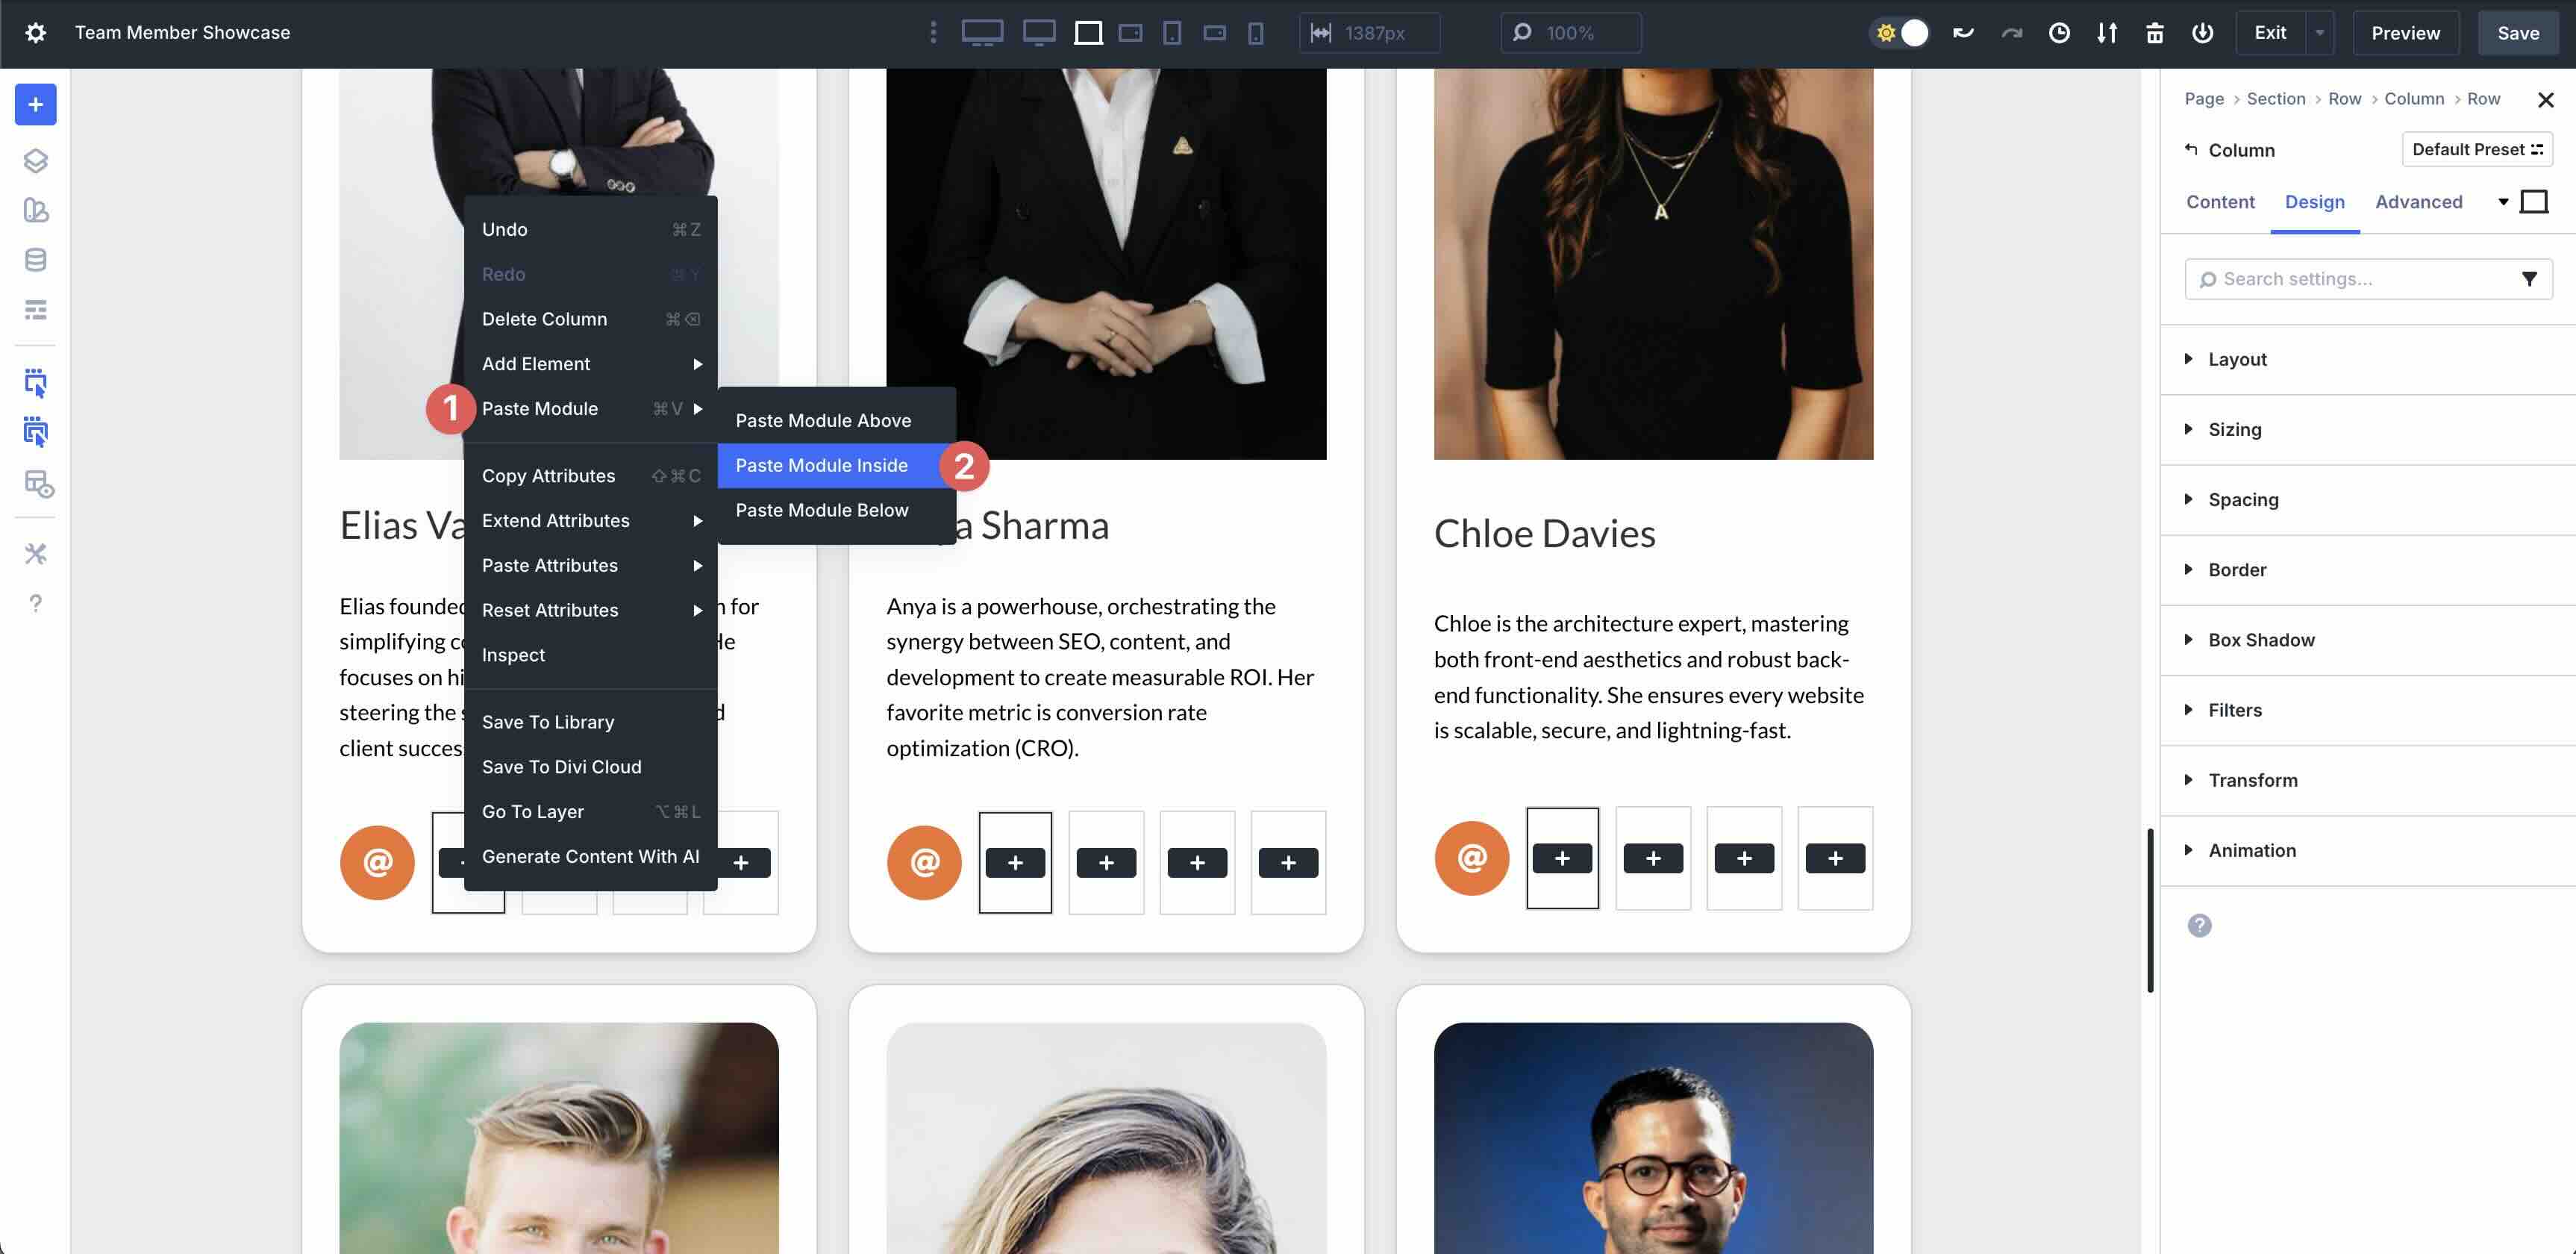
Repeat for the remainder columns.
The final step is to interchange the icon in every of the Icon modules and assign the proper Dynamic Content material tag.
![]()
Regulate Vertical Spacing
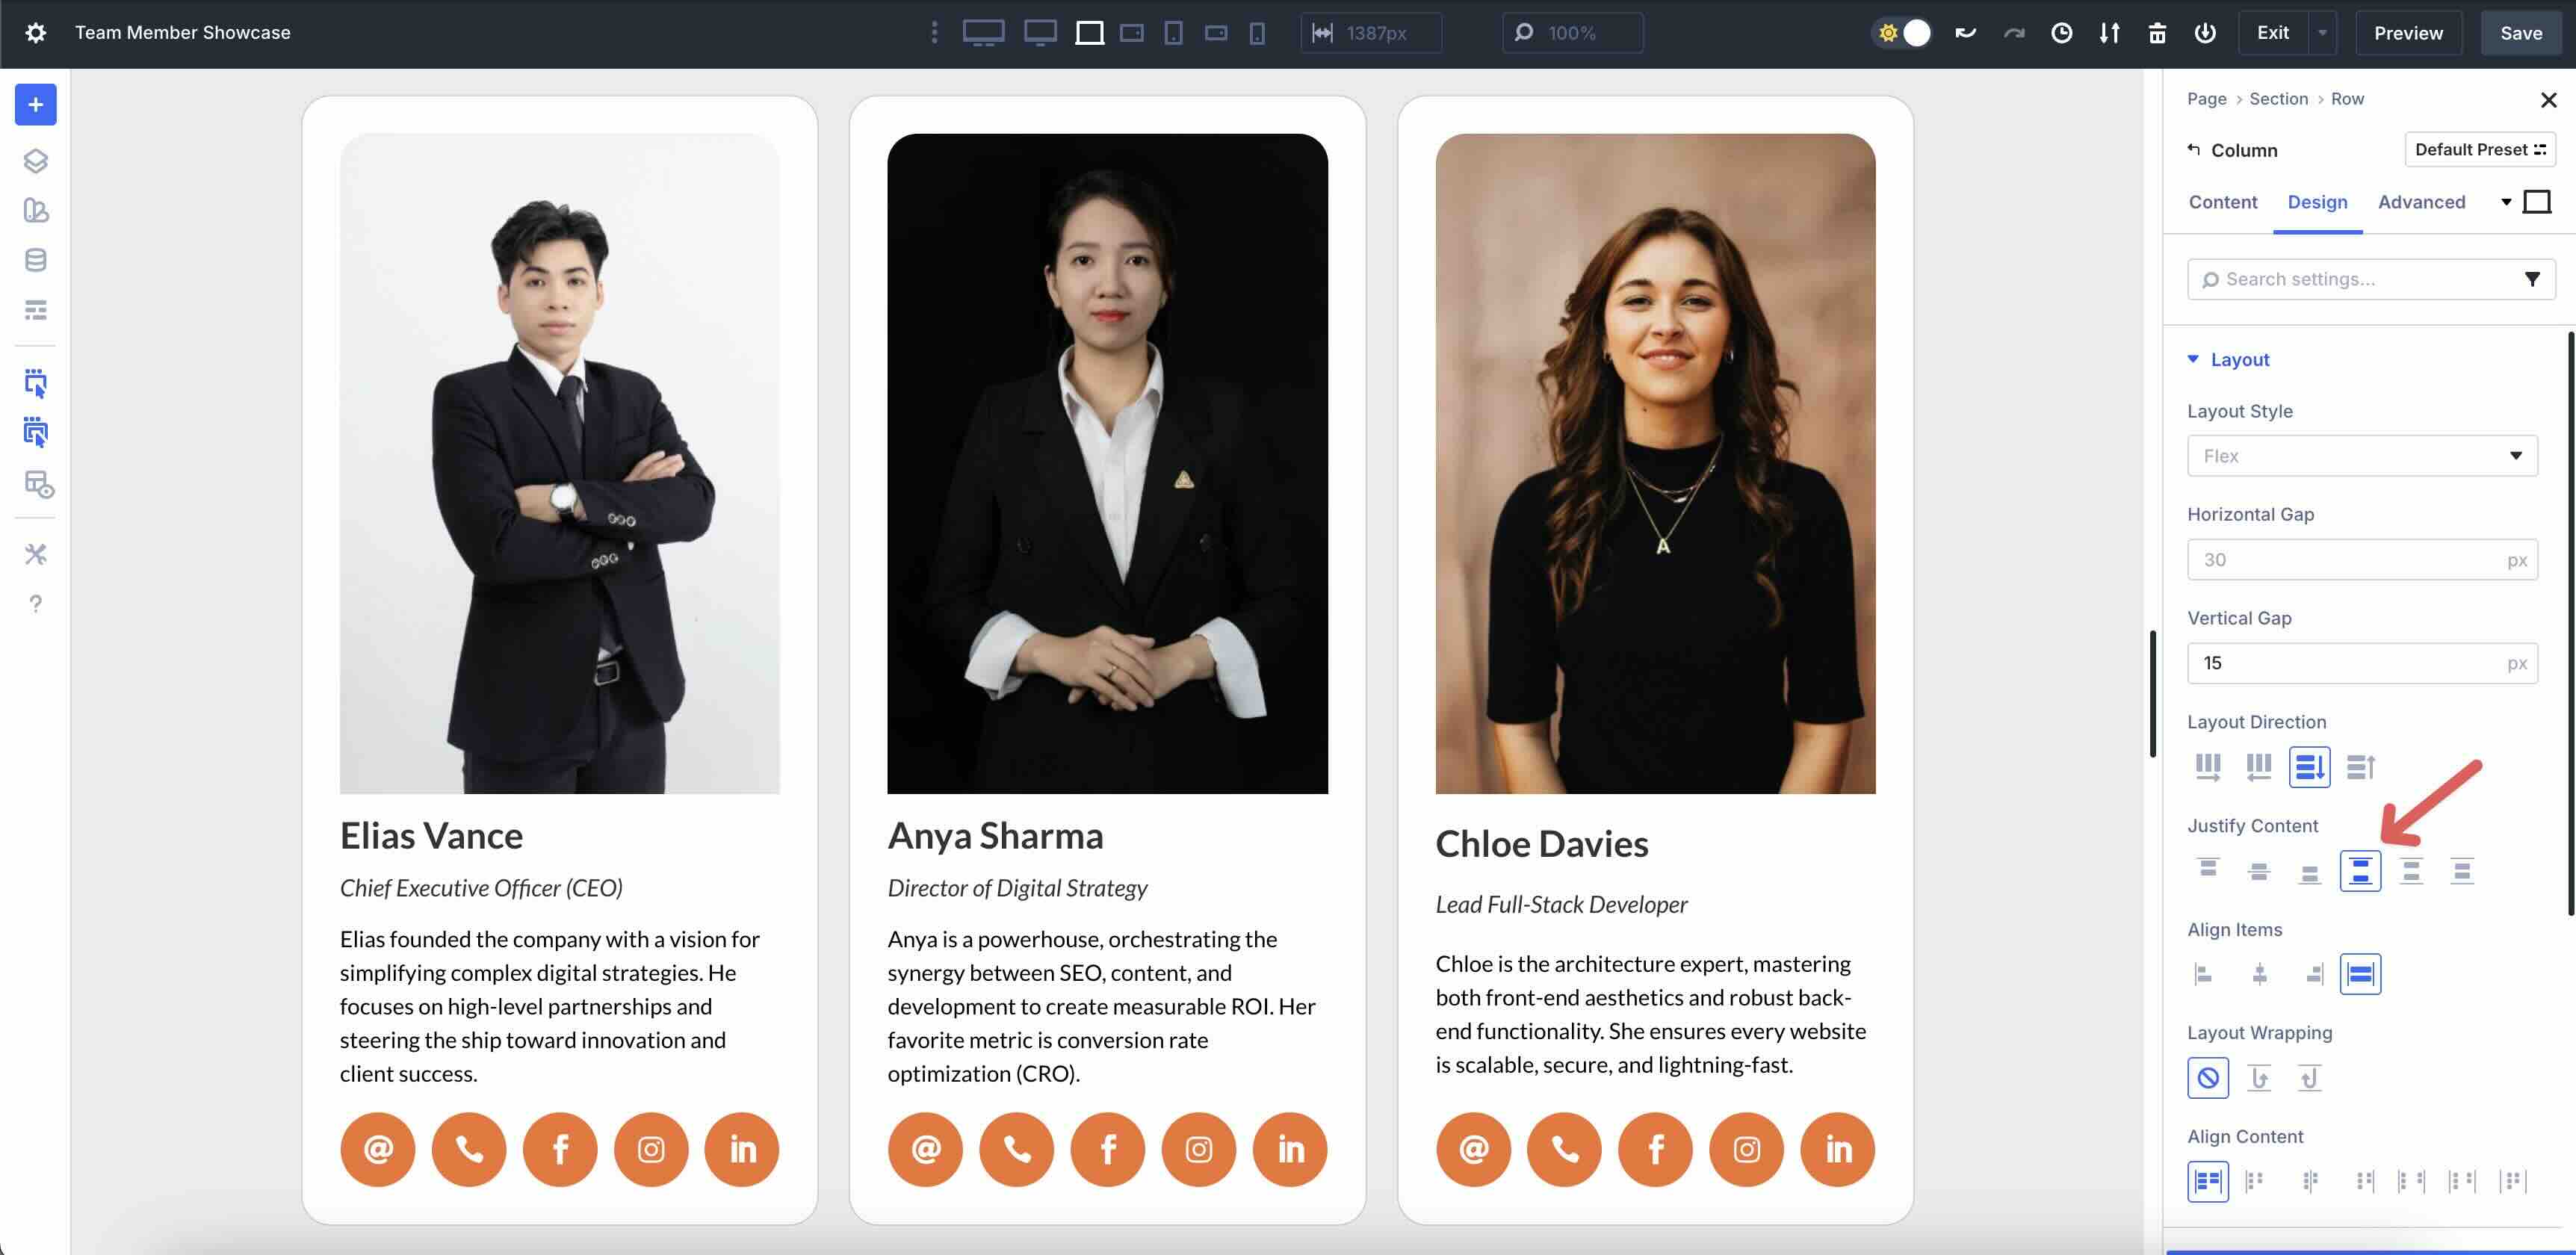
In case you’d like to regulate the vertical spacing for the Loop, alternate the Column’s Vertical Hole in Design > Structure > Vertical Hole.
To make sure that all your playing cards line up completely, alter the ‘Justify Content material’ box to ‘House Between’.
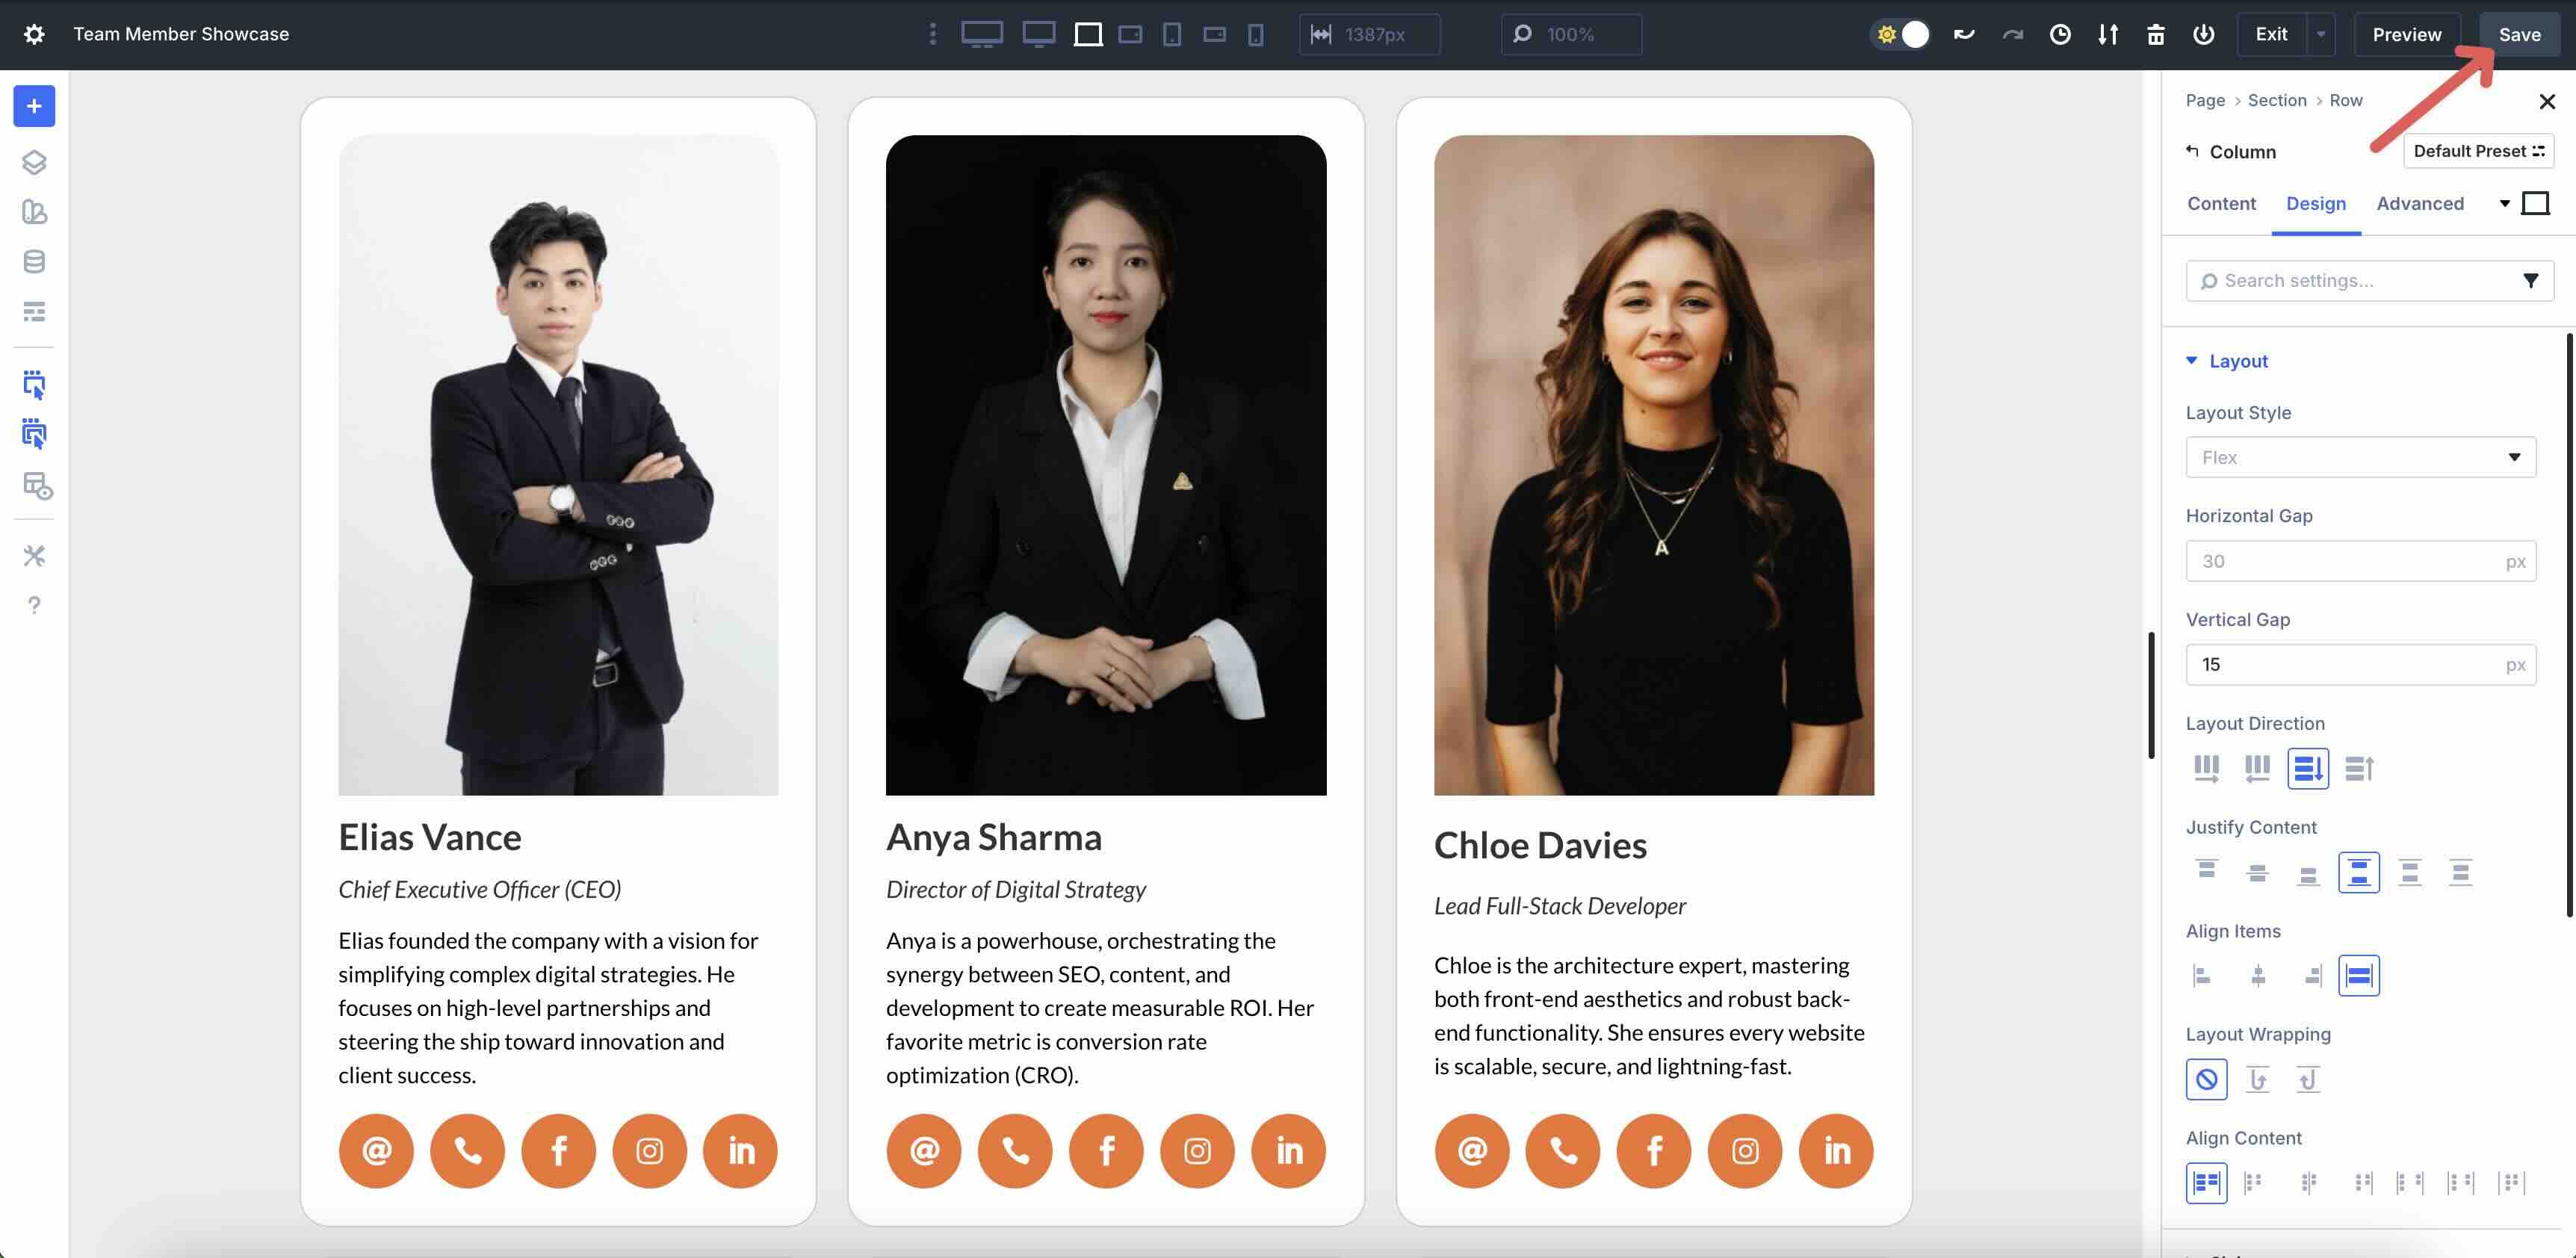
Ahead of continuing to the next move, save the format by means of clicking the Save button on the best proper of the Visible Builder.
Step 5: Regulate The Structure For Small Monitors
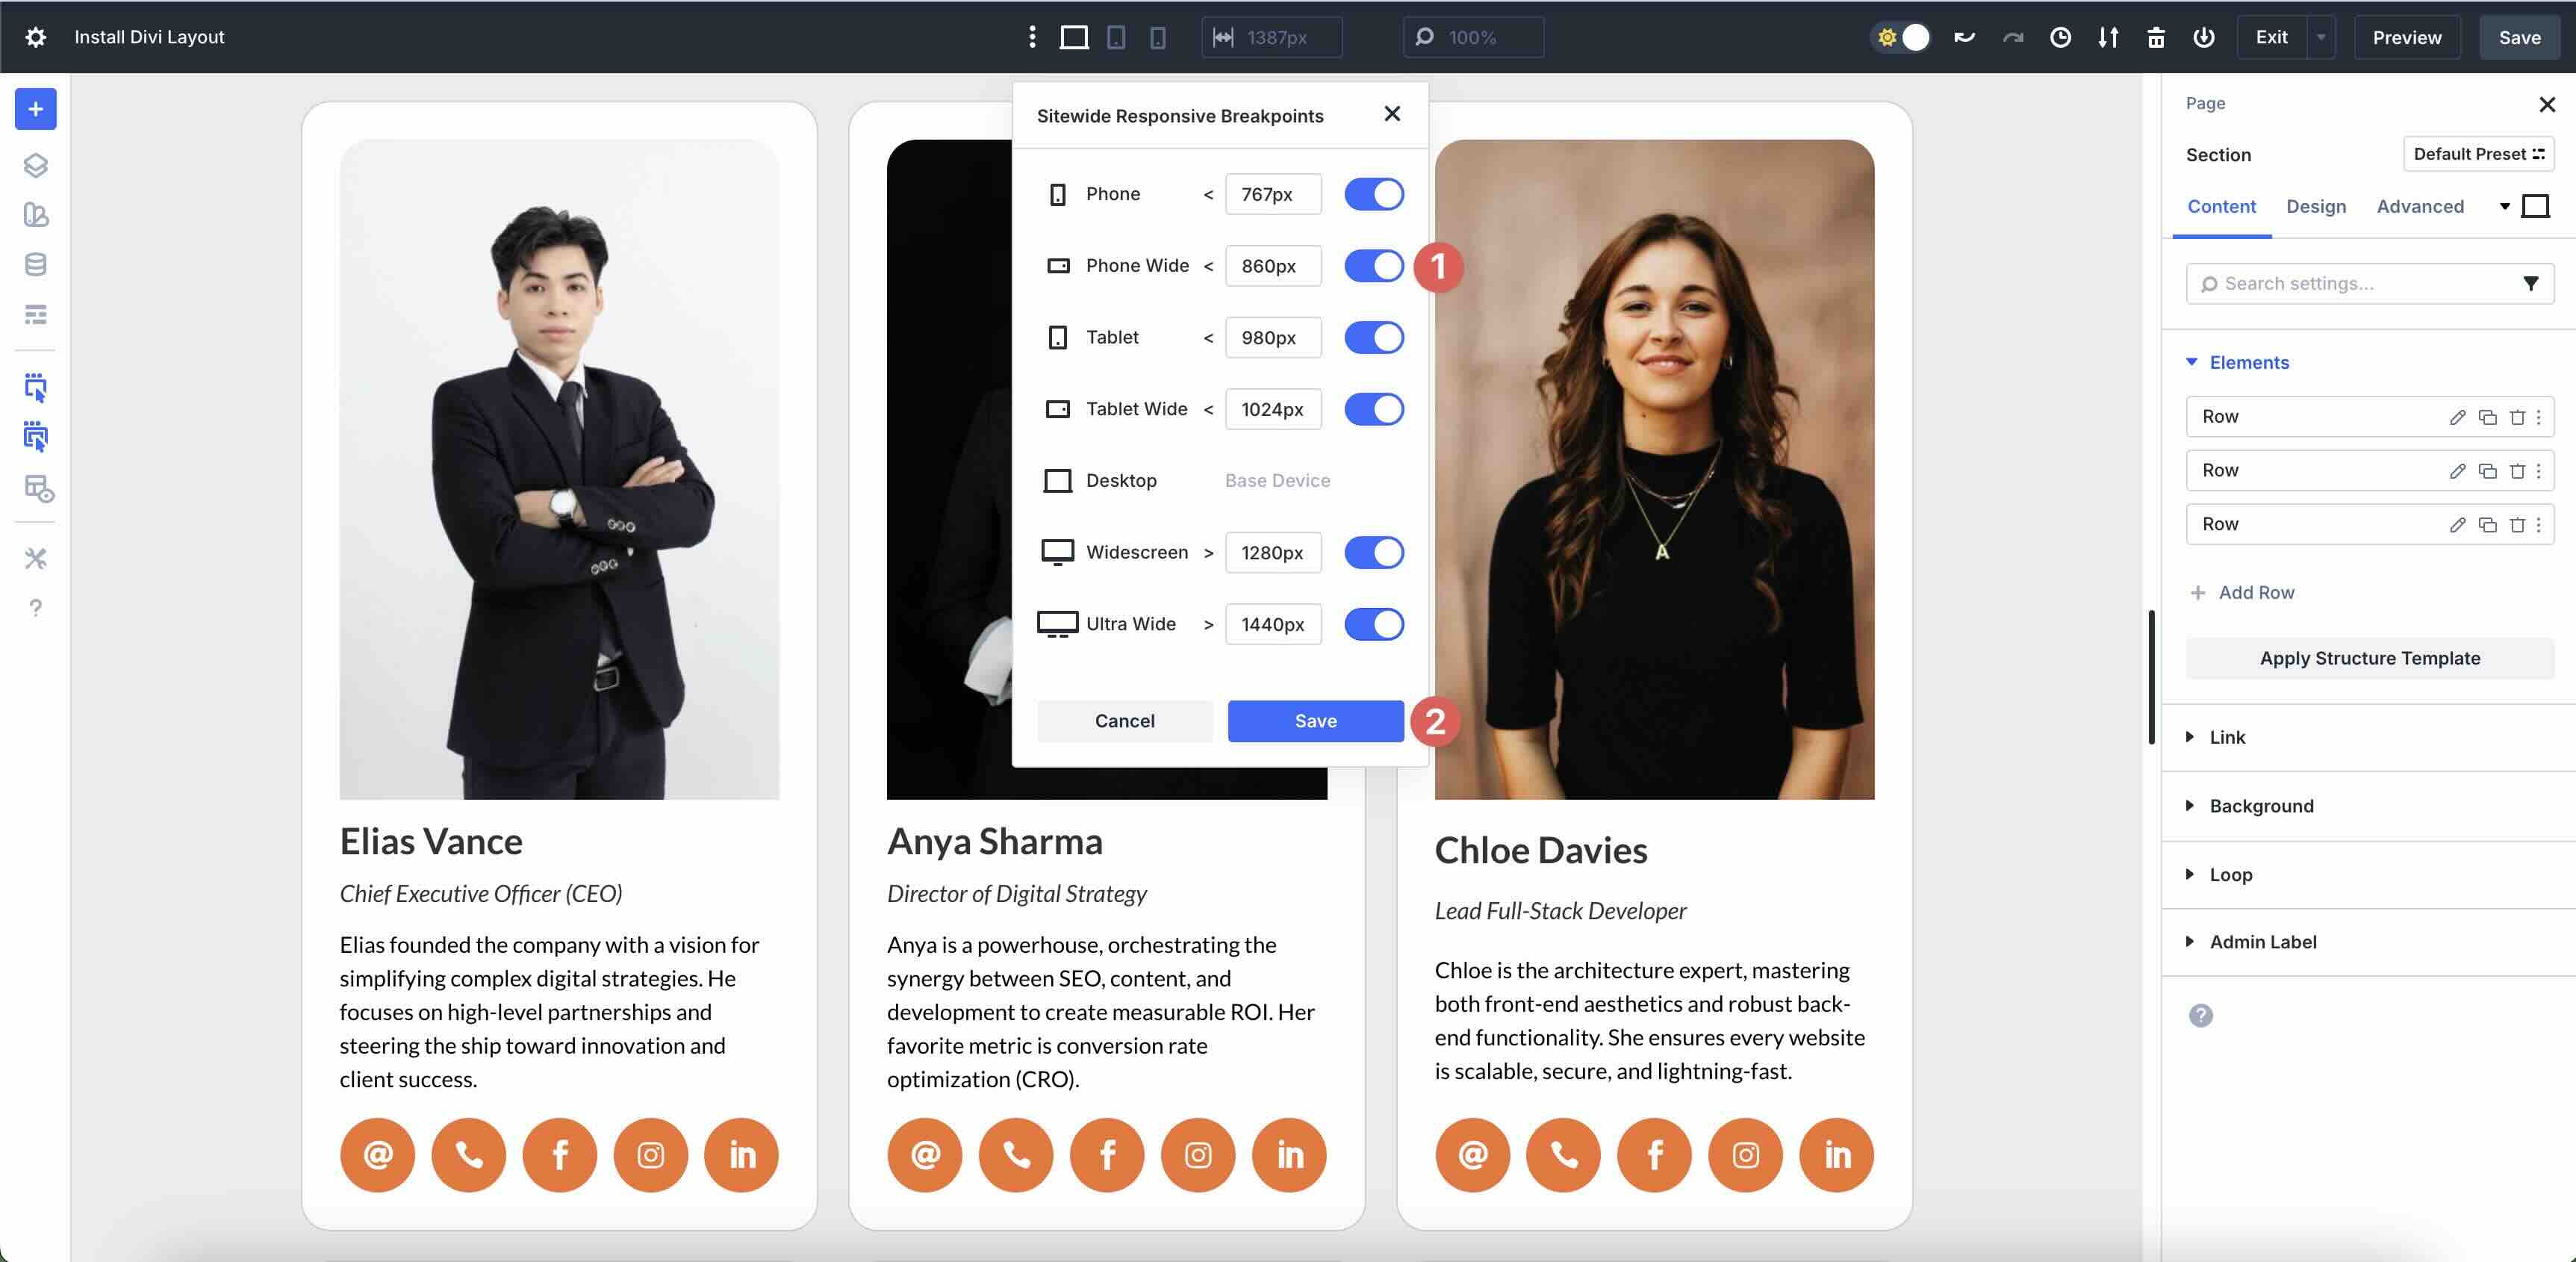
The final step within the procedure is to make responsive changes to the format. The use of Divi 5’s Customizable Responsive Breakpoints, you’ll be able to fine-tune the design on as much as 7 breakpoints, making sure that the design appears to be like polished on each instrument.
Via default, 3 breakpoints are enabled. On the other hand, you’ll be able to simply allow all 7 by means of clicking the three-dot ellipsis menu within the best bar within the Visible Builder.

Permit your required breakpoints by means of toggling them on. As soon as entire, click on the Save button to proceed.
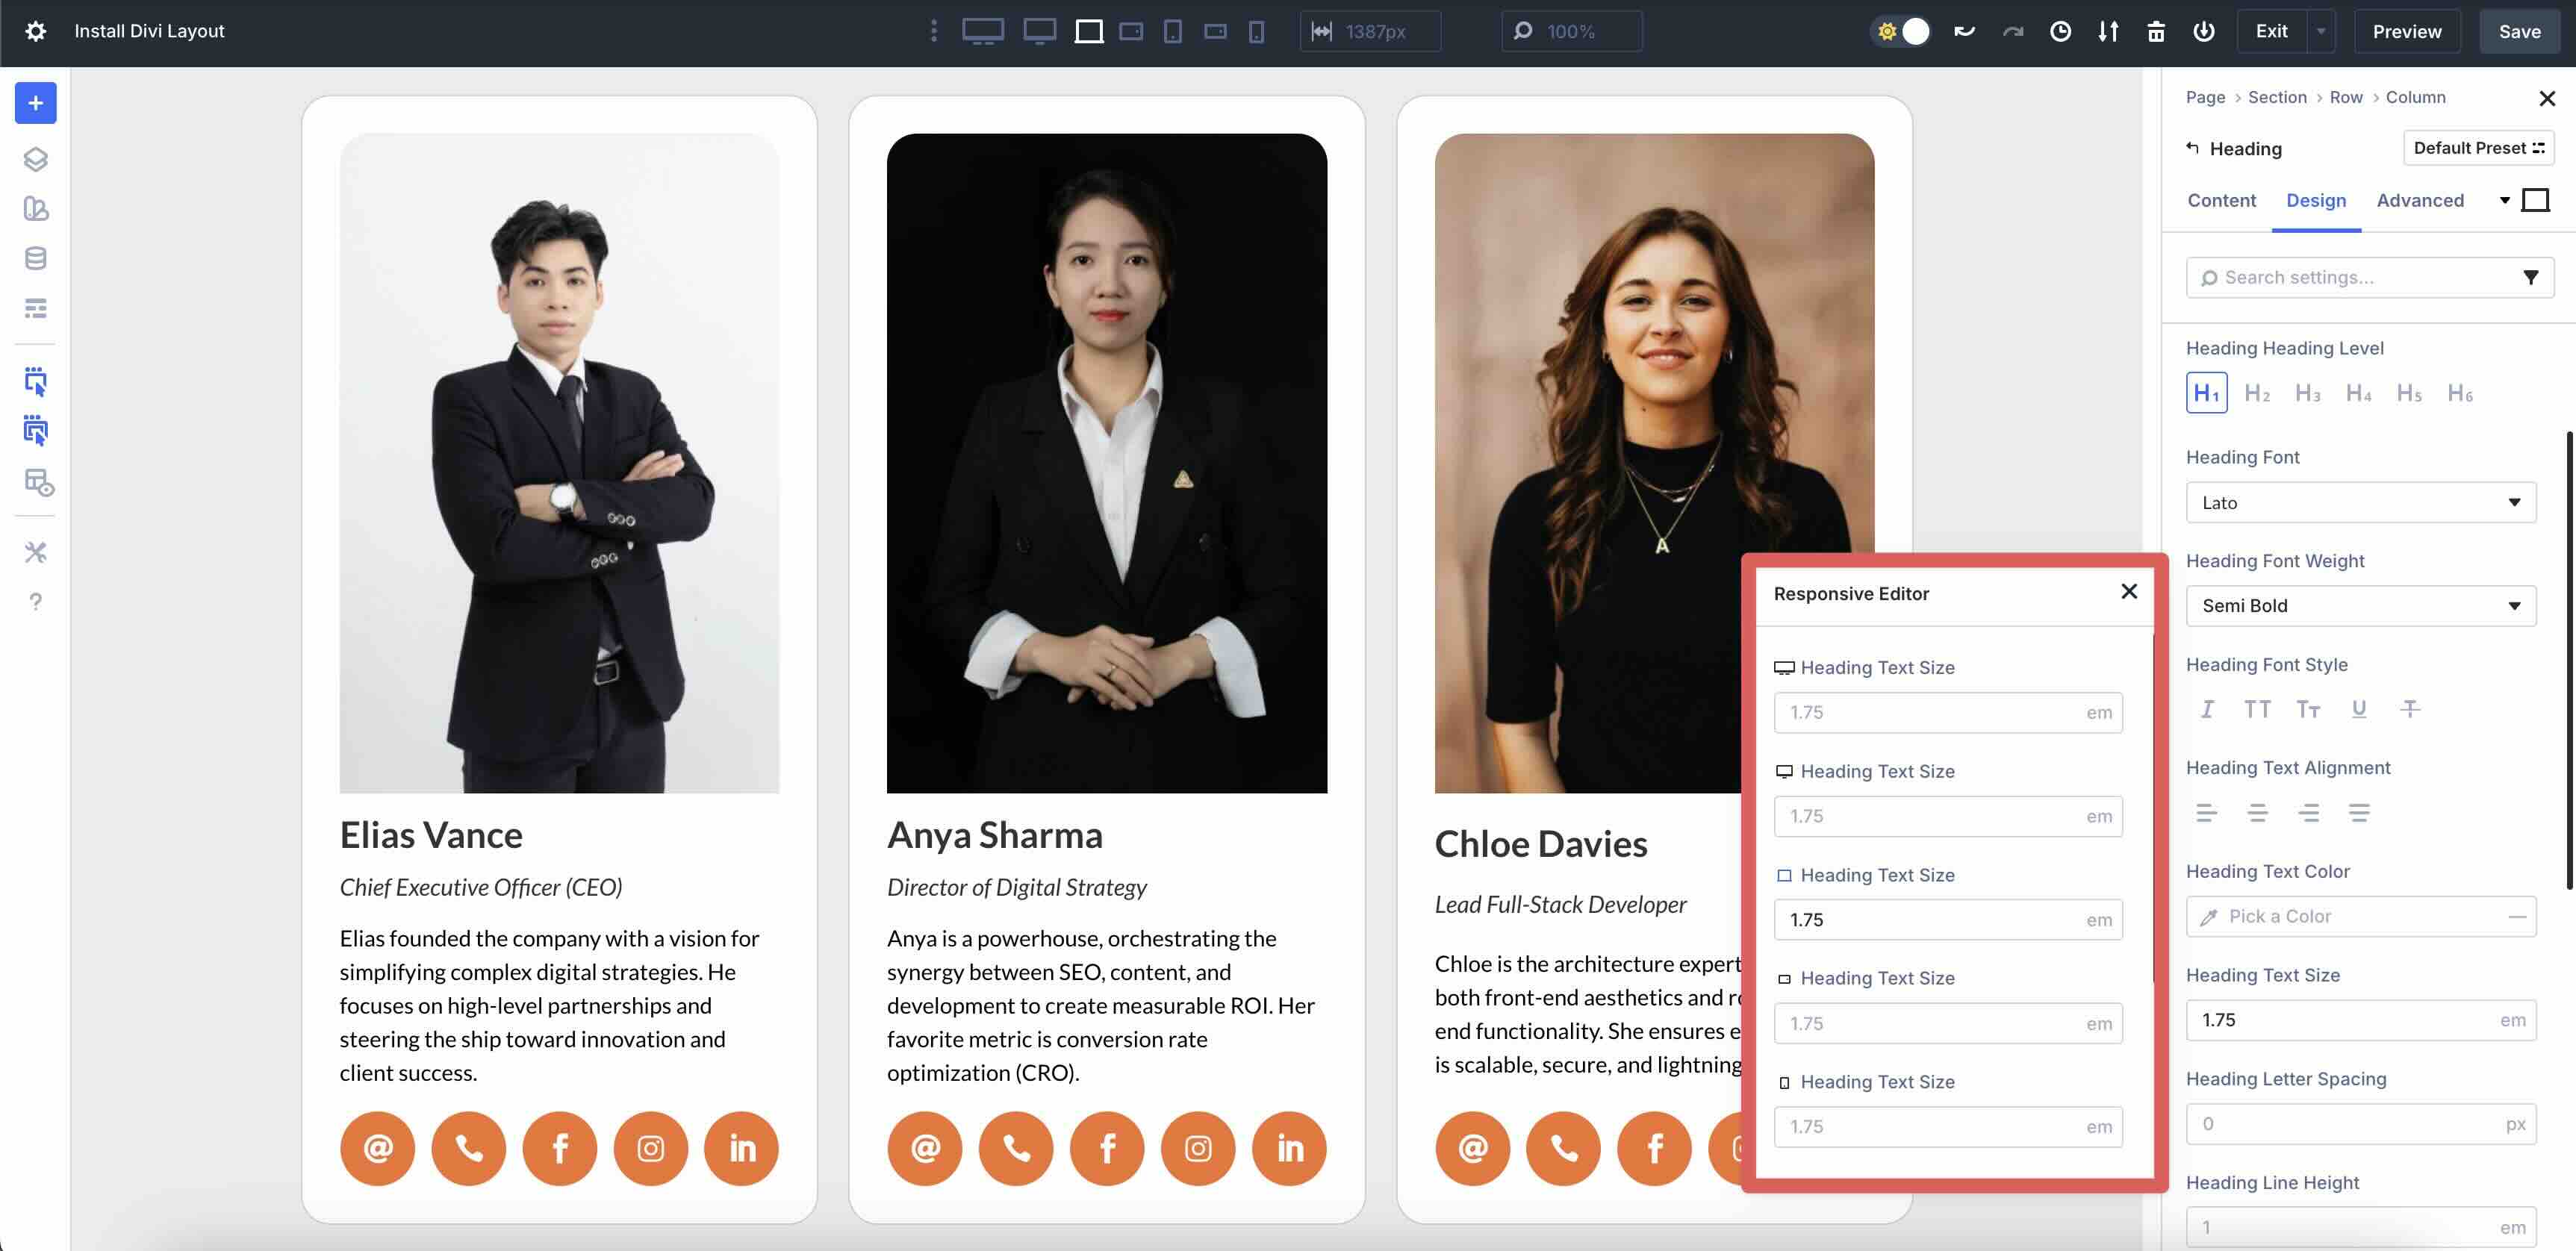
You’ll additionally use Divi 5’s Responsive Editor on the Phase, Row, Column, or Module stage to regulate responsive values as you construct your format. Click on the Responsive icon within the design settings of any module to turn on it.
![]()
The Responsive Editor modal will seem, permitting you to make changes to each breakpoint at the fly.
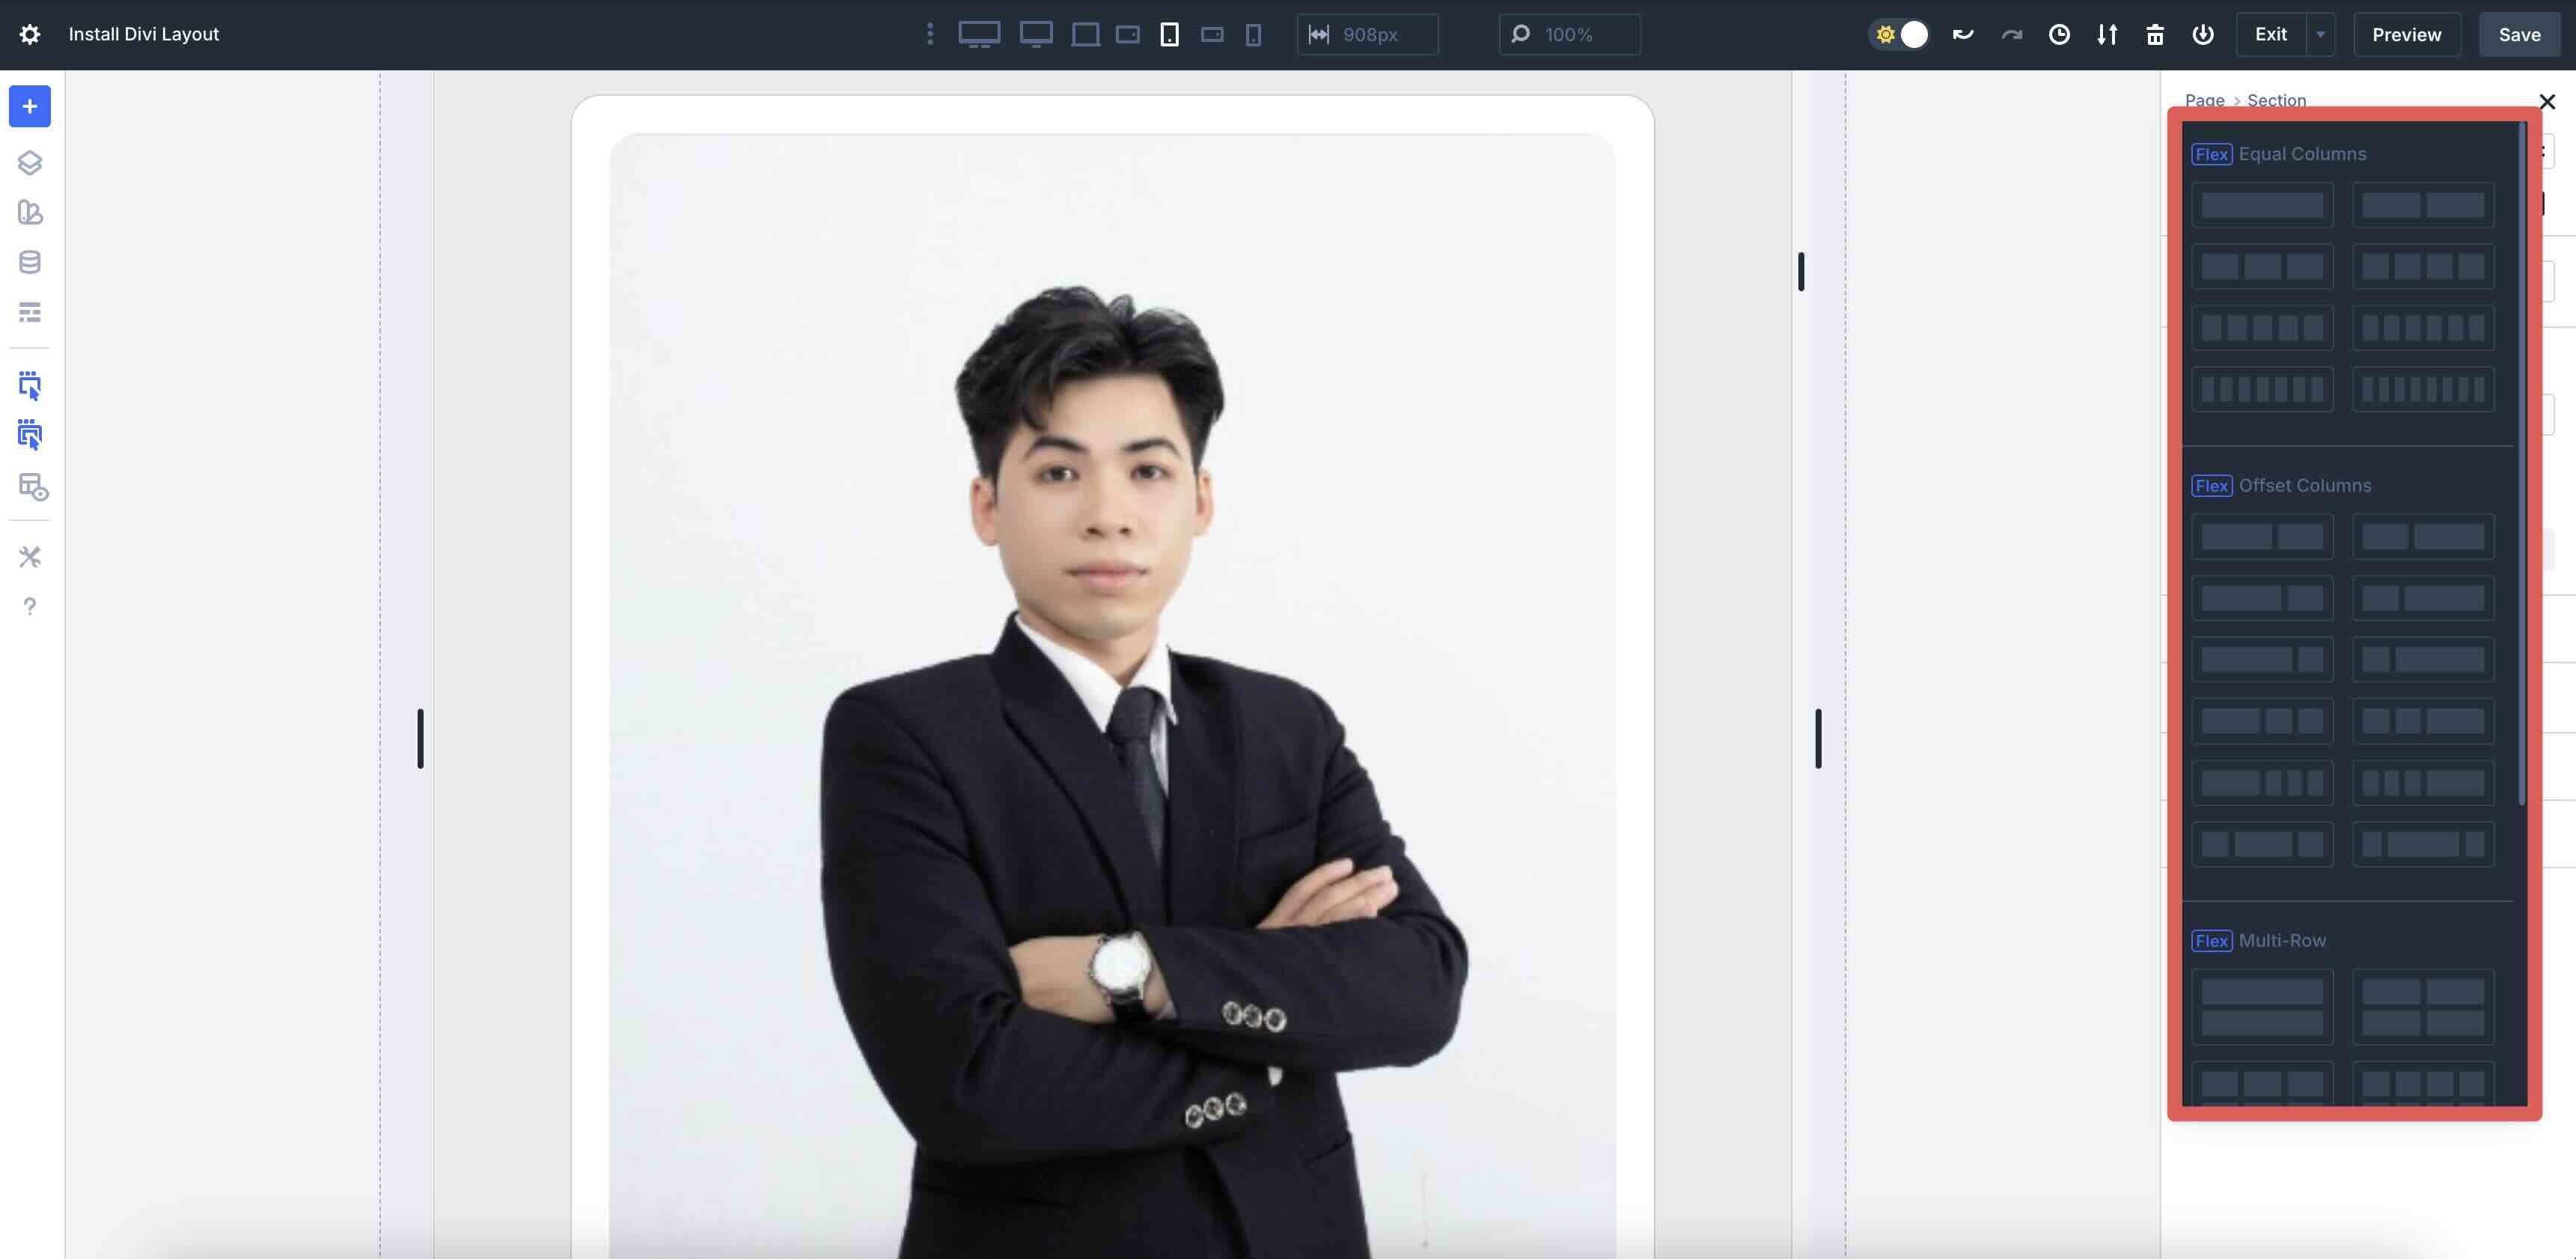
As you progress thru every breakpoint, you’ll be able to alter the selection of columns by means of clicking the Practice Construction Template button positioned within the Content material tab.
When the modal seems, you’ll be able to alternate the Column construction and observe a predefined template with the press of a button.
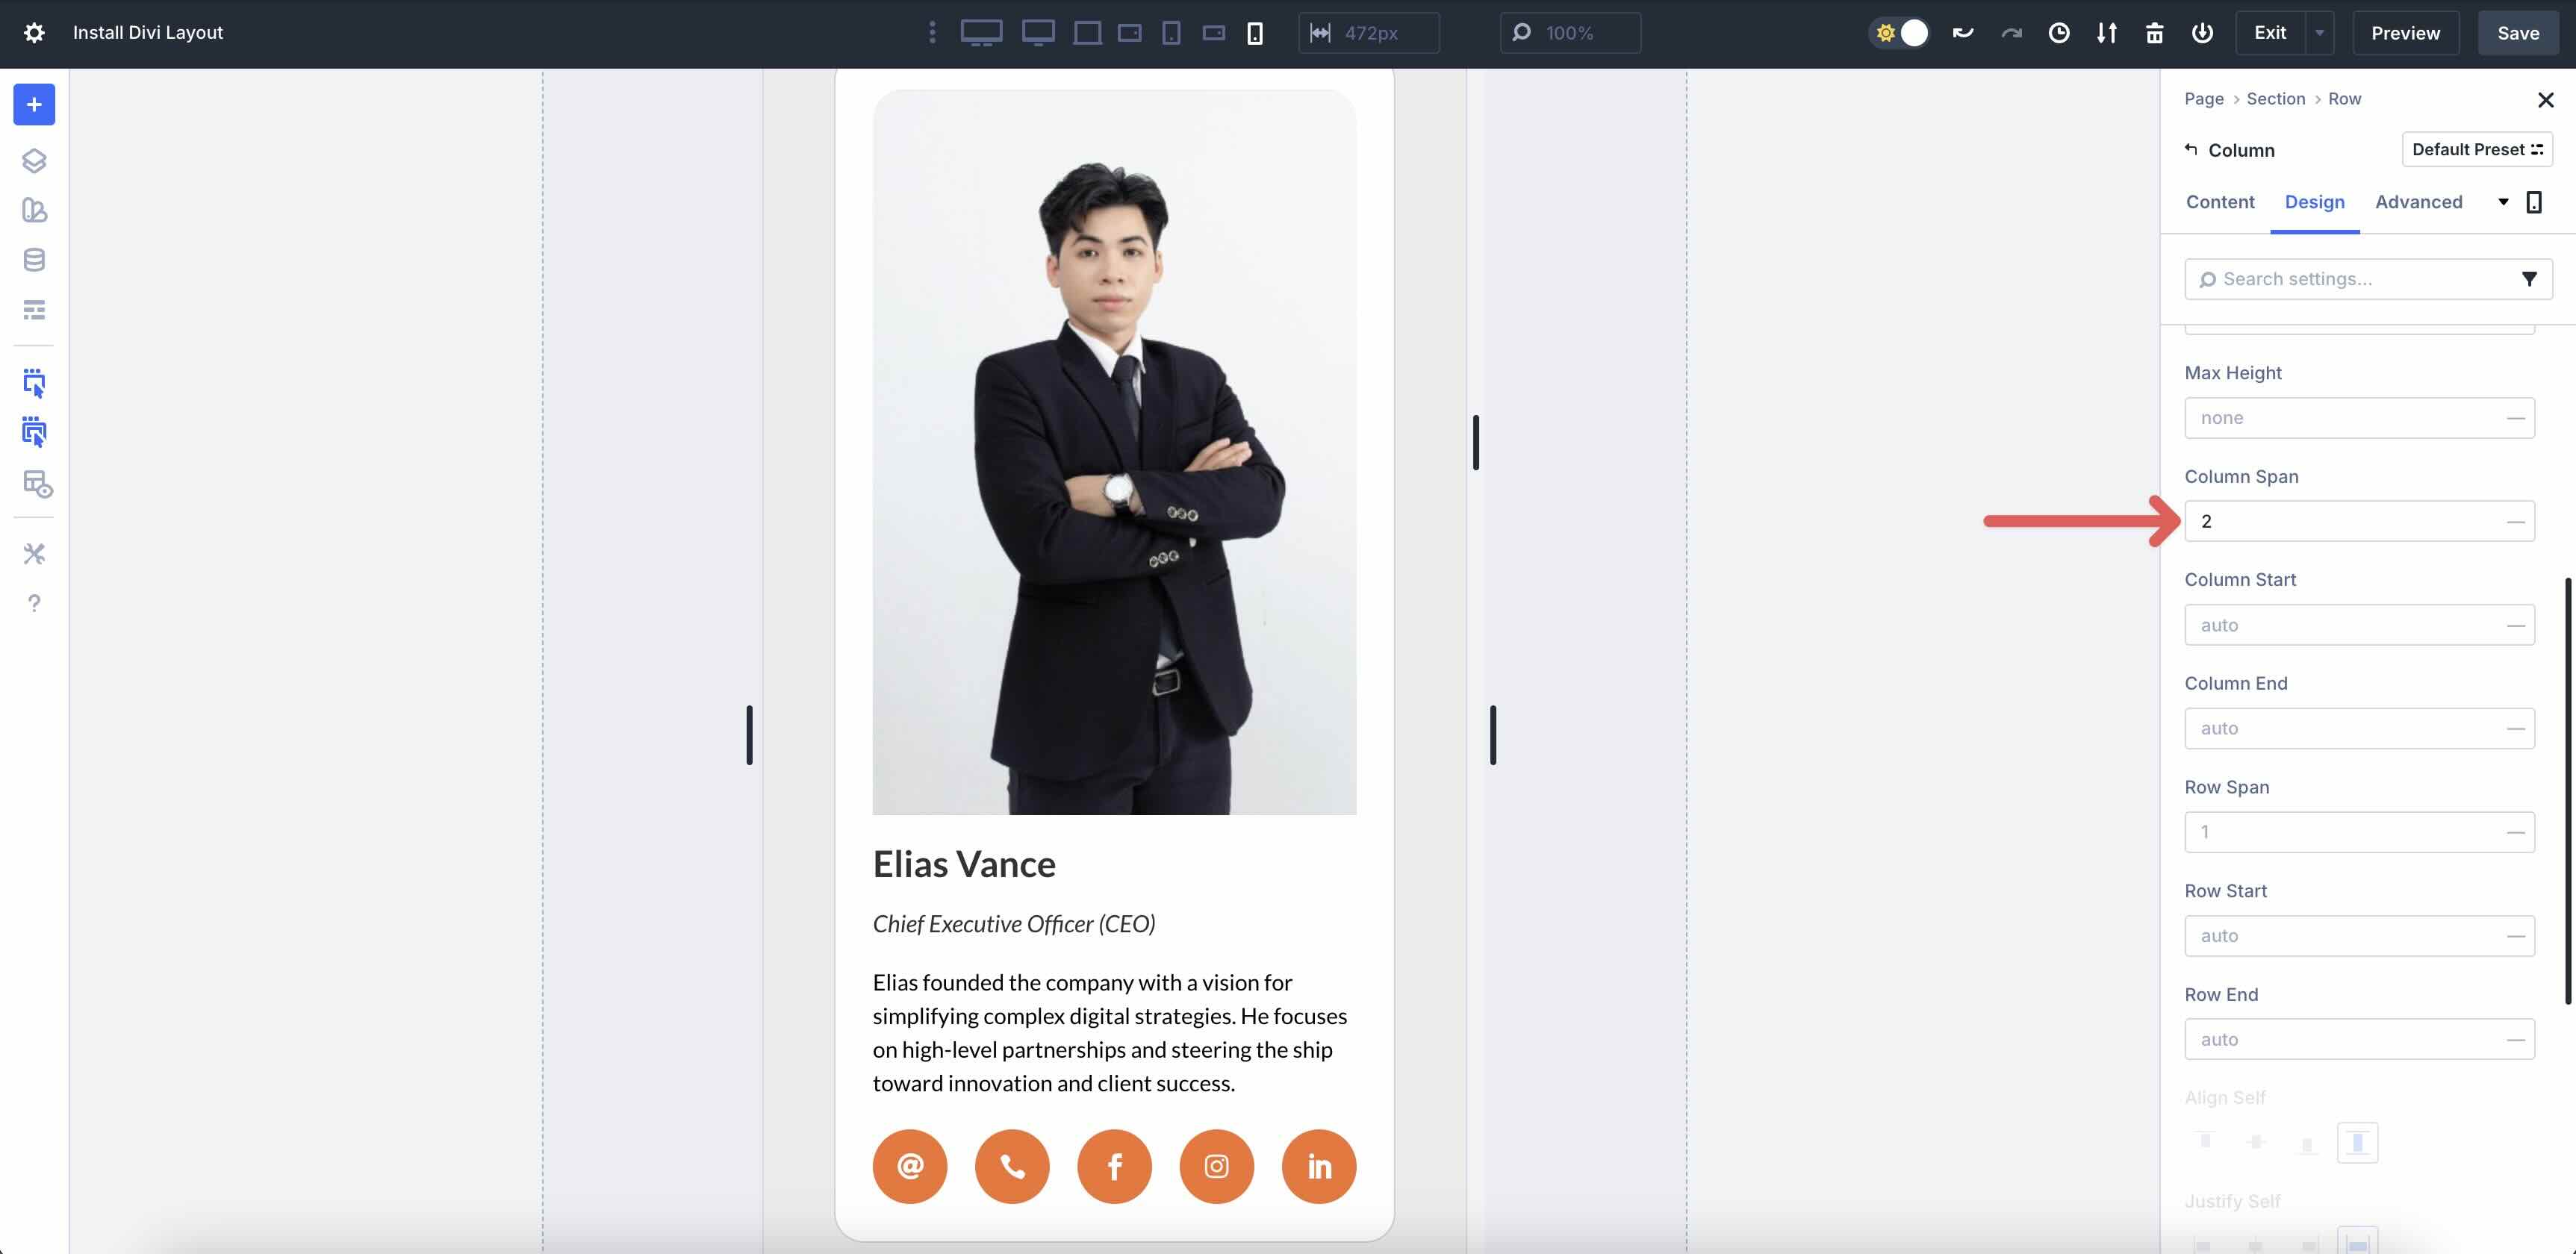
Finally, alter the selection of Columns for every breakpoint by means of navigating to the Loop Column’s Design tab. Extend the Sizing menu and alter the Column Span for every instrument.
As you’ll be able to see, the usage of the Loop Builder with ACF is simple, rapid, and lets in for unending ingenious chances.
Use The Divi 5 Loop Builder As of late!
With Loop Builder, a unmarried setup unlocks an unlimited selection of chances. Switch out publish varieties, tweak queries, or reuse layouts throughout your web site for workforce showcases, portfolios, testimonials, and past. You’ve now constructed a certified, responsive workforce listing that’s simple to replace as your workforce grows.
In a position to dive in? Download the latest Divi 5 Beta nowadays and get started experimenting with Loop Builder to create dynamic content material that wows.
The publish How To Build A Team Directory Using Divi 5’s Loop Builder seemed first on Elegant Themes Blog.
Contents
- 1 What Is Loop Builder?
- 2 How To Construct A Staff Listing The use of Loop Builder
- 3 Use The Divi 5 Loop Builder As of late!
- 4 In Primary Replace, Complex Customized Fields 6.1 Shall we Customers Check in Customized Submit Sort...
- 5 Get a Unfastened Realty Format Pack For Divi
- 6 How to Include a Fullwidth Featured Image in Your Divi Blog Post Template

0 Comments