
Skipping the process of assigning semantic wrappers can actually really feel tempting. It often approach building the internet web page first, then going once more to configure tags for each part, and repeating that artwork on each and every new phase or internet web page.
Divi 5 removes this friction by means of the usage of presets. You’ll be capable of define semantic tags once at the default level, and each and every part you add shortly will mechanically observe the right kind HTML development.
In this publish, you’re going to learn which preset settings to configure so your builds are semantically sound from the start, even faster than you get started creating pages. Have a look!
What Are Semantic Tags?
Each part on a webpage is wrapped in a tag. Some tags describe the type of content material subject material they contain. The ones are semantic tags. The word semantic approach “on the subject of which means that,” so semantic tags add which means that on your markup.
Tags like header, nav, number one, phase, article, aside, and footer fall into this magnificence. A header tag tells browsers this content material subject material functions as a header. A nav tag indicates navigation. A piece of writing tag marks content material subject material that stands alone, like a blog publish. Each tag describes what’s within it, not merely that something exists there.
Other tags serve as independent wrappers that don’t describe the content material subject material type. The ones generic bins grasp parts together for styling or layout, then again put throughout now not the rest to browsers in regards to the internet web page’s function or function.
And Why They Subject
Visual display unit readers rely on semantic tags to help visitors switch by means of your internet web page conveniently. When you label your sections accurately, people can skip in an instant to what they would like. They don’t will have to plow through each and every part in order. Your markup becomes helpful, not merely visual.
Serps like google be informed the equivalent code. Their bots scan for semantic signs to resolve how your content material subject material connects and which parts lift one of the weight. Clean tagging supplies them a clear map of your internet web page. They may be able to’t see your layout or styling anyway, so the markup itself does the heavy lifting.
Divi 5’s Presets: A Difficult, Connected Design Machine
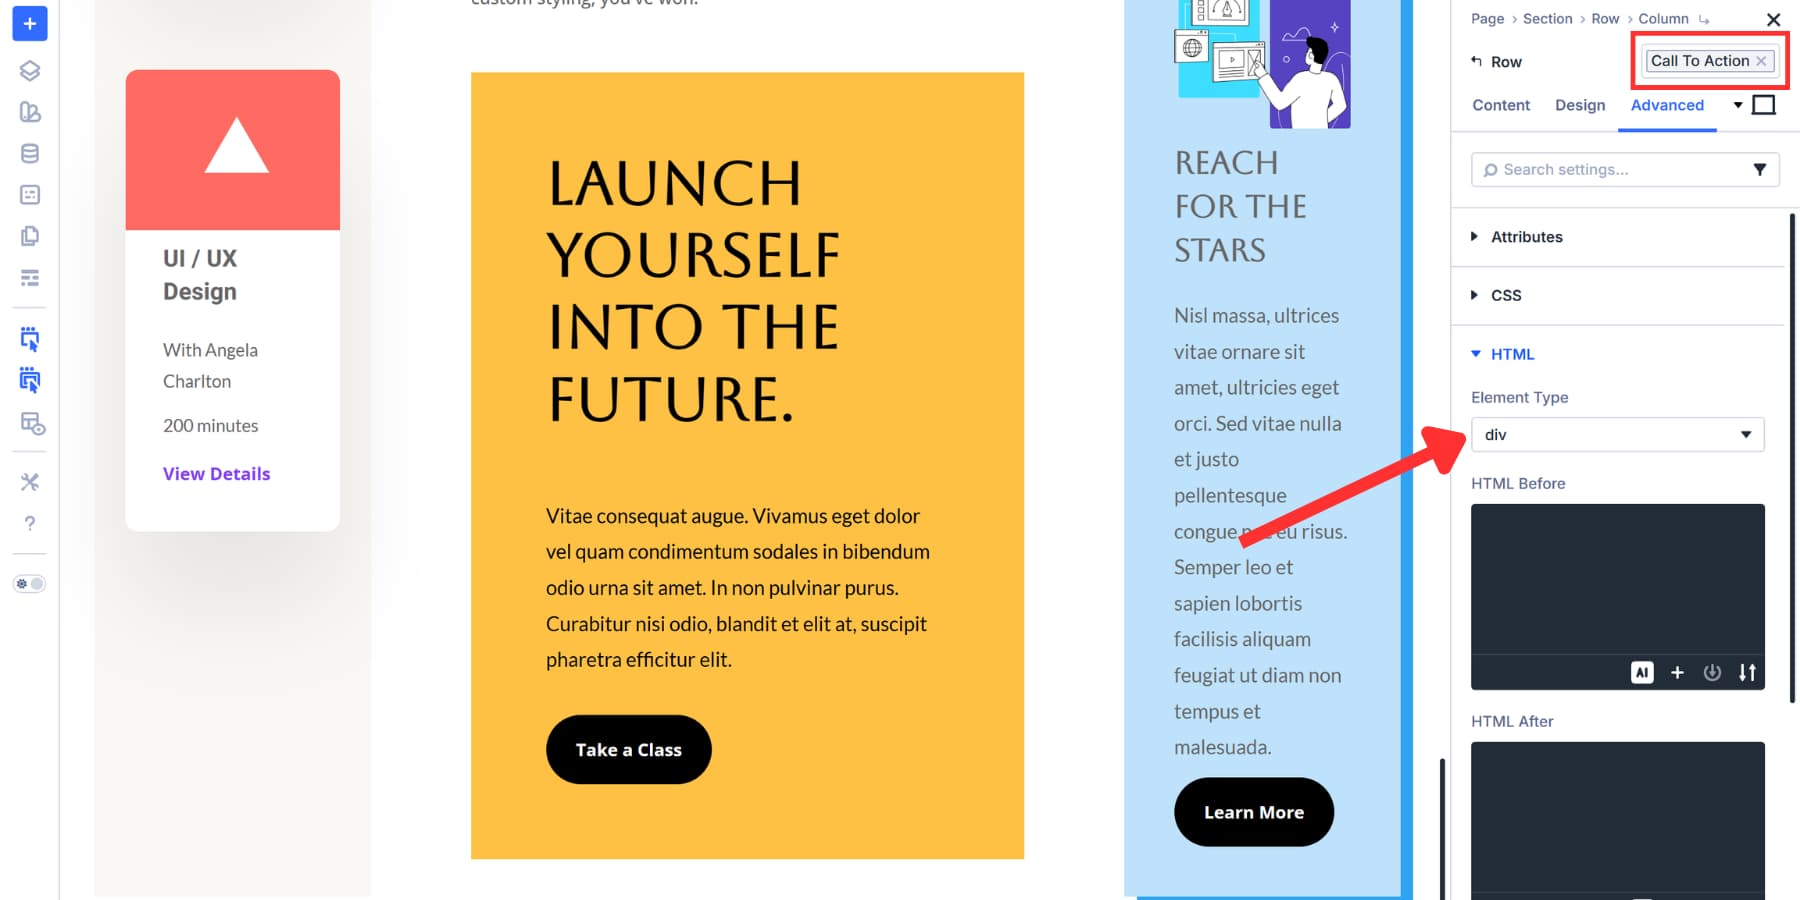
Divi 5 supplies an HTML possibility staff to the Sophisticated tab of each and every part’s settings, along with sections, rows, columns, and modules. Open any part’s settings, and also you’ll choose an Section Kind from semantic tags like header, nav, number one, article, aside, footer, and additional.
This environment replaces the default wrapper tag with the tag you choose, anywhere sought after. You’ll be capable of moreover bake those possible choices into presets, so each and every new part you create already has the right kind Section Kind attached. The preset tool in Divi 5 has a selected development, and figuring out where semantic tags fit into that development determines how neatly your workflow scales.
Proper right here’s how Divi 5’s preset tool works:
Chance Group Presets And Section Presets
Possibility Crew Presets form the backbone of Divi 5’s design tool. Each one controls a single chance group of workers. You get presets for borders, shadows, text, animations, and interactions.
Save a border radius as one preset. That radius can pull from a Design Variable. Save a shadow setup as each different preset. Now observe each and every to totally different spots in your internet web page. A border preset you made for a column works the equivalent manner in a blurb or title to movement.
Now not the rest ties the ones presets to one part type. They switch freely anywhere the equivalent chance group of workers exists. You’ll be capable of nest them, too.
Part Presets transfer deeper. They snatch each and every style component of particular person parts, comparable to buttons or sections. They simply artwork within matching modules. Save an Section Preset for a button, and in addition you store it all. Colors, spacing, fonts, shadows, borders. The whole lot gets bundled together. Practice that preset to any button and your design stays consistent.
Section Presets can stack as neatly.
How They Art work Together
This two-tier development provides you with flexibility. Chance Group Presets will help you control particular person chance groups with precision. Section Presets come up with speed when you need entire designs able to transport. Section Presets can also reference Chance Group Presets.
This creates a connected tool. Consistency gets built in mechanically.
Use a text chance group of workers preset in a blurb part. That exact same preset can style text for your accordions, tabs, and other parts. When you need to make changes, you exchange once. No need to hunt down and edit each part preset one by one.
The Preset Manager
The Preset Supervisor provides you with one workspace for your entire preset library. Click on at the icon inside the sidebar to look each and every preset you’ve created, organized in a searchable, filterable document with each and every Chance Group Presets and Section Presets.
Add new presets correct from this panel, plus edit, copy, delete, reorder, or set defaults without having a look by means of particular person parts on different pages.
This control saves time as your library grows. When you edit a preset proper right here, a are living preview turns out next on your settings so that you realize exactly how changes look without touching your exact internet web page content material subject material.
You’ll be capable of set the preview towards different background colors from your internet web page’s variables, catching difference issues faster than they transfer are living.
Why Collect Optimal Semantic Tags In Presets
Presets already grasp your visual sorts: colors, spacing, typography. Together with semantic tags keeps your markup possible choices alongside your design possible choices in one place.
This becomes similar as internet sites broaden. A 3-page portfolio would perhaps stay manageable, then again a 50-page business internet web page with a few personnel people can fall apart quickly. Anyone would perhaps wrap content material subject material in article tags, while each different would perhaps skip them absolutely. Semantic possible choices get began being spotty, and pages in the end finally end up inconsistent. Fixing it approach manually checking each and every single instance.
Storing semantic tags in default presets solves this at the provide. When you alter something, you exchange the preset. The business flows to each and every part where the preset applies, and in addition you get a single reference degree for your entire markup development.
Configuring Semantic Tags In Presets
Let’s get began by means of creating column presets, since columns are probably the most essential used parts. Click on at the Preset Manager icon for your sidebar. This opens a panel with two tabs: Parts and Groups.
![]()
Previous than You Make A Variety…
You’ll be capable of save a column’s semantic tag in two places: within a Column Section Preset or as an HTML Chance Group Preset. Each and every approaches artwork. The variation is in how reusable they’re.
Section Presets are tied to a single part type. A Column Section Preset can include the HTML chance group of workers settings, along with Section Kind. That is to hand when one preset equals one entire column development. But if you need the equivalent styled column to be used with different semantic wrappers (for example, every now and then number one, every now and then aside), you end up duplicating the equivalent column styling during a few Column Section Presets merely to switch the Section Kind.
Chance Group Presets are reusable anywhere that the equivalent chance group of workers exists. So will have to you create an HTML Chance Group Preset that most simple devices Section Kind, you’ll keep your column styling in one Column Section Preset, then layer the semantic wrapper variety on best by means of selecting a unique HTML Chance Group Preset when sought after. That keeps the styling and the semantic wrapper impartial, which is most often more uncomplicated to care for at scale.
Development Now not abnormal HTML Chance Group Presets For Columns
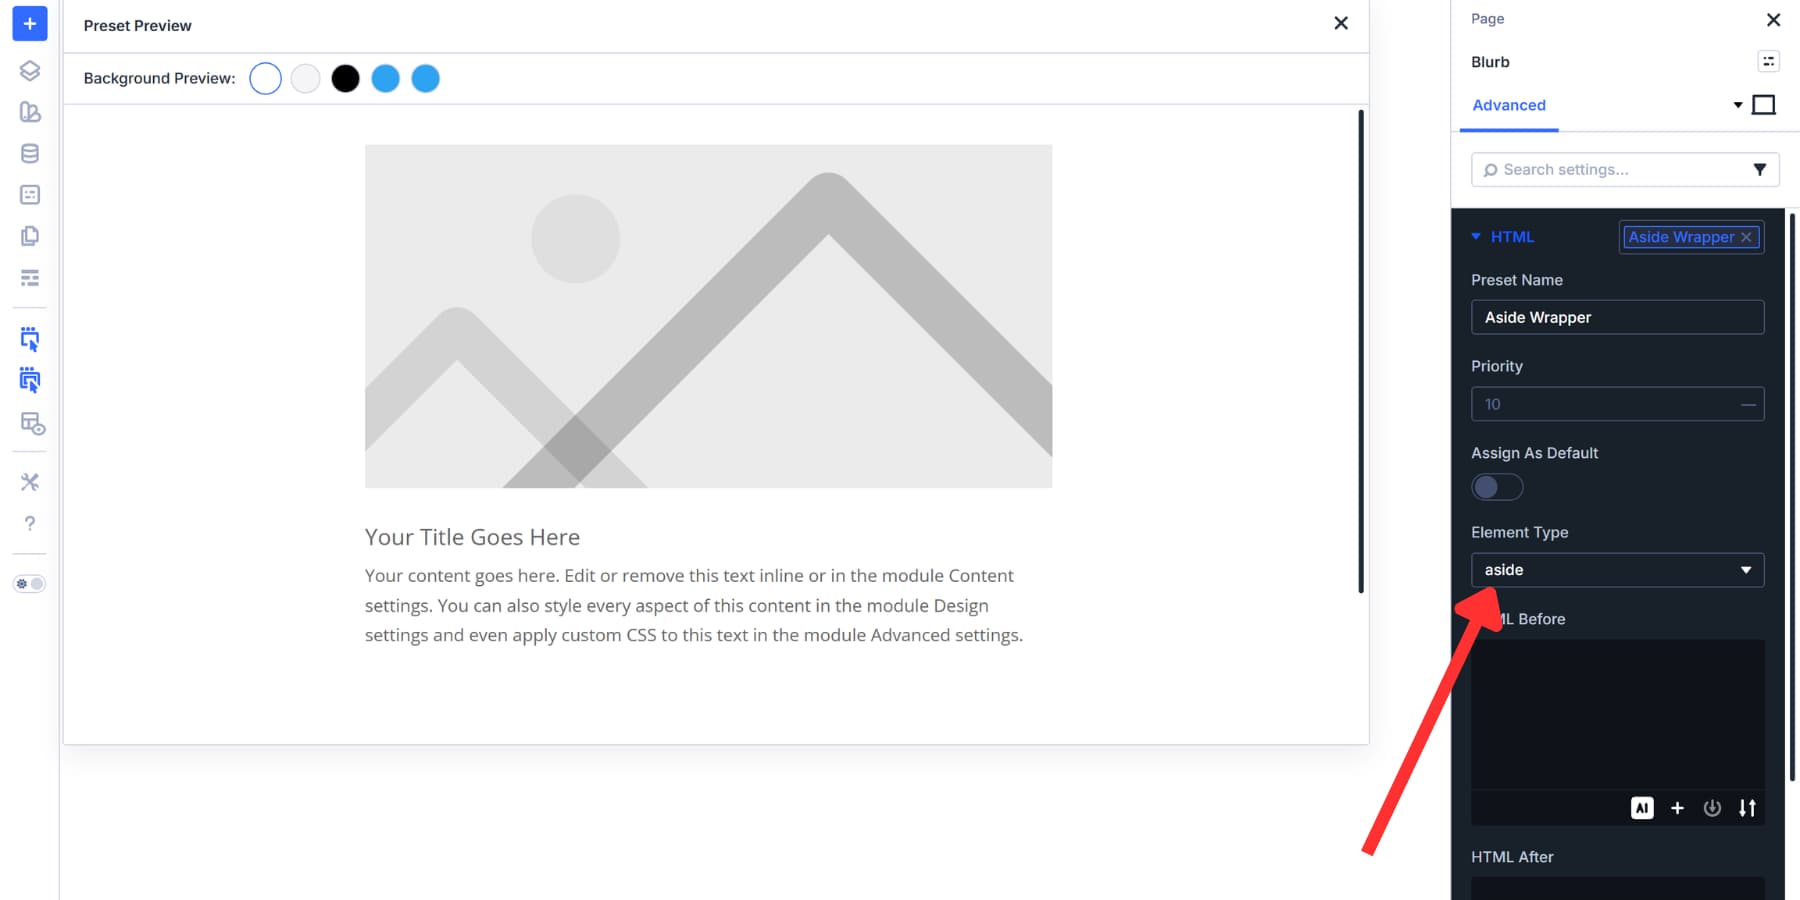
Go to the Groups tab. Search for “HTML” or scroll to hunt out the HTML chance group of workers. Choose it and click on on Add New Preset. The settings panel opens.
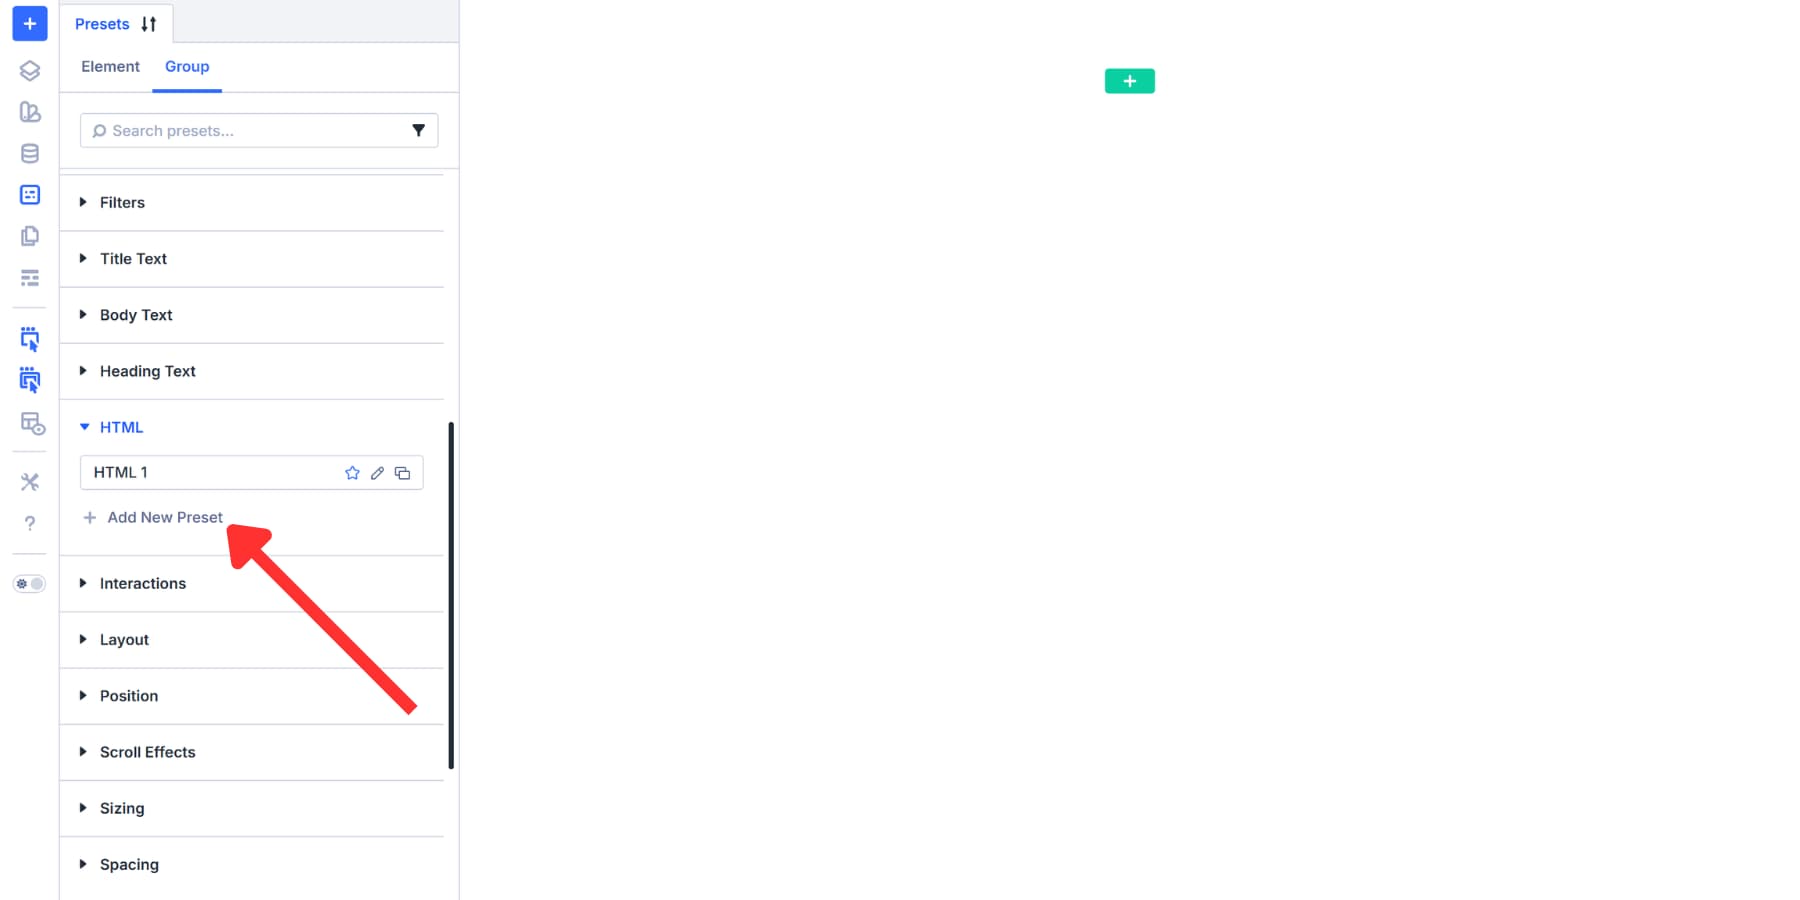
Set the Section Kind dropdown to aside. Name this preset “Aside Wrapper” and save. This tag should be used for supplementary content material subject material like author bios, equivalent posts, or promotional widgets that relate to, then again stand break away, the main story.
Imagine together with presets for various not unusual wrappers as neatly:
- Main Wrapper: Set Section Kind to number one. This identifies the principle content material subject material column. Use once consistent with internet web page for the core content material subject material that visitors were given right here to look.
- Nav Wrapper: Choose nav for columns containing menus, magnificence lists, or internet web page navigation links.
- Section Wrapper: Choose phase for columns grouping equivalent content material subject material underneath a theme. Product choices or supplier listings fit proper right here.
- Article Wrapper: Choose article for standalone content material subject material like blog posts, knowledge stories, or product descriptions.
Now, you’ve got presets able for the 5 most not unusual column tags.
We didn’t assign any of the ones as a default because of each column on a internet web page serves a unique function. Atmosphere one tag as default approach each and every column you drop onto the internet web page inherits the equivalent wrapper, and most of them could be mistaken. Fallacious semantic tags deceive computer screen readers and search engines like google and yahoo like google the equivalent manner missing tags do. Practice the ones presets as sought after.
Go back to the Section tab, find “column”, and create Section Presets for your columns. Add colors, spacing, borders, shadows, and additional. The most productive workflow right here’s to create Chance Group Presets for your sorts and reference them, while moreover the usage of Design Variables to stick values consistent during modules.
Configure Default Presets
Columns offer flexibility, so Chance Group Presets artwork neatly there. There are instances where assigning a default Section Preset makes further sense. Let’s take a look.
Development A Preset For Sections
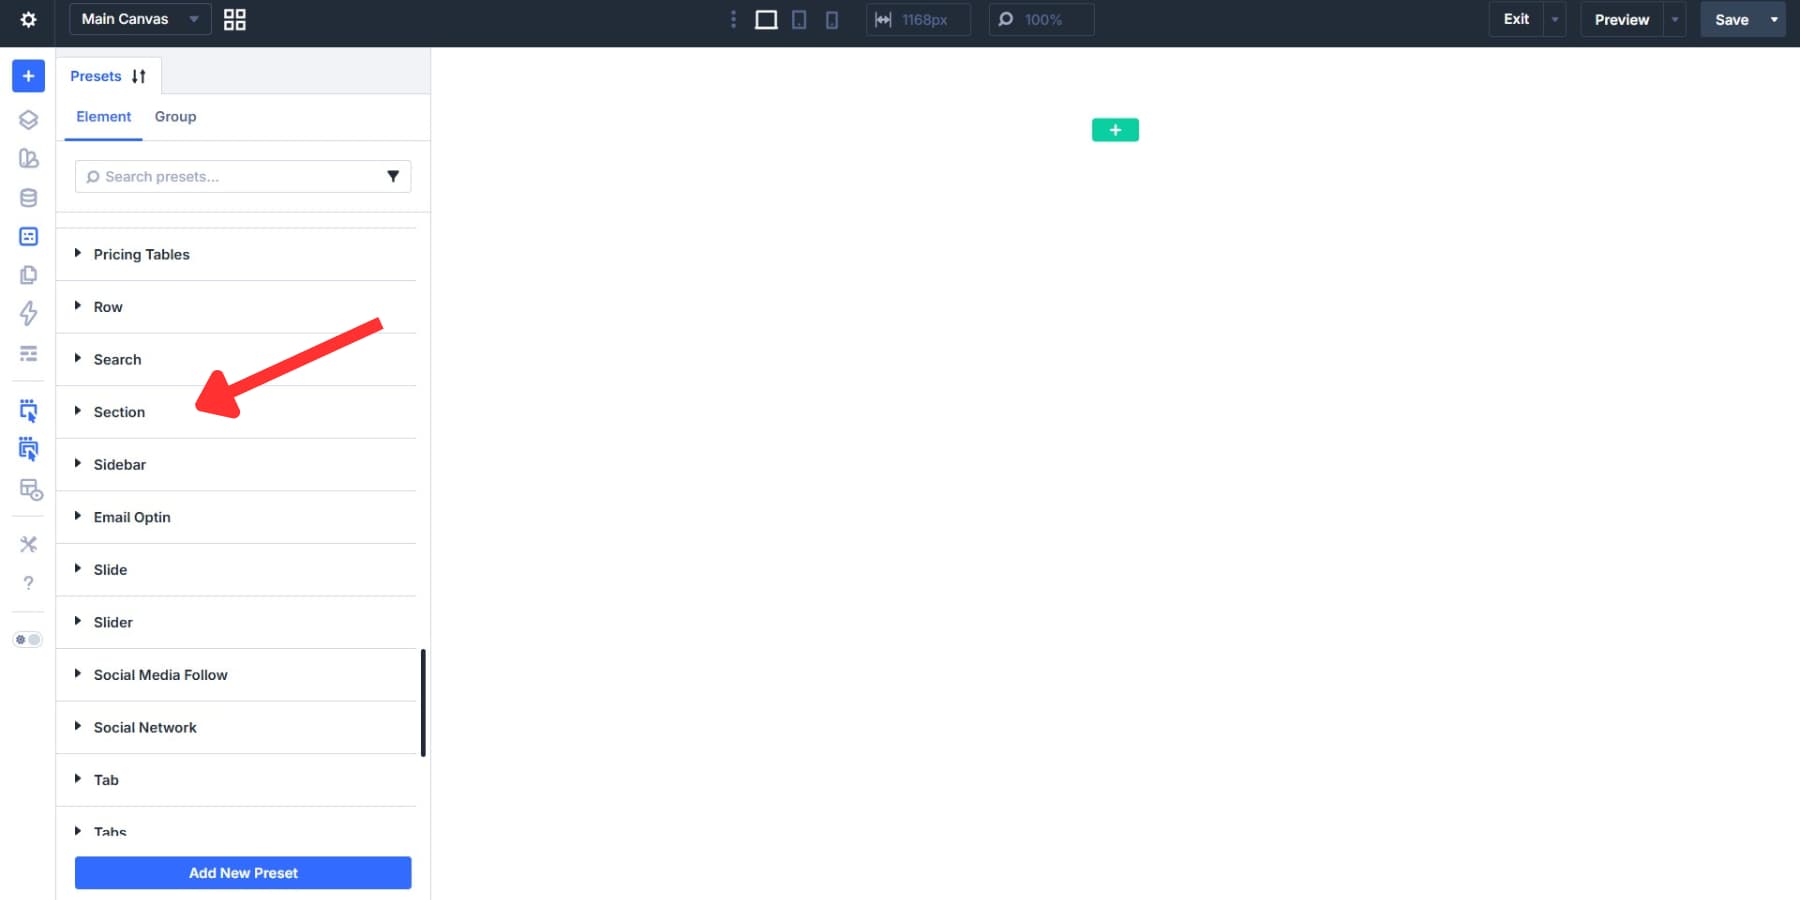
Get began with sections. Open the Preset Manager and find Section underneath Parts.
Click on on Add New Preset. Style it as sought after, then transfer to the HTML chance group of workers and set Section Kind to phase.
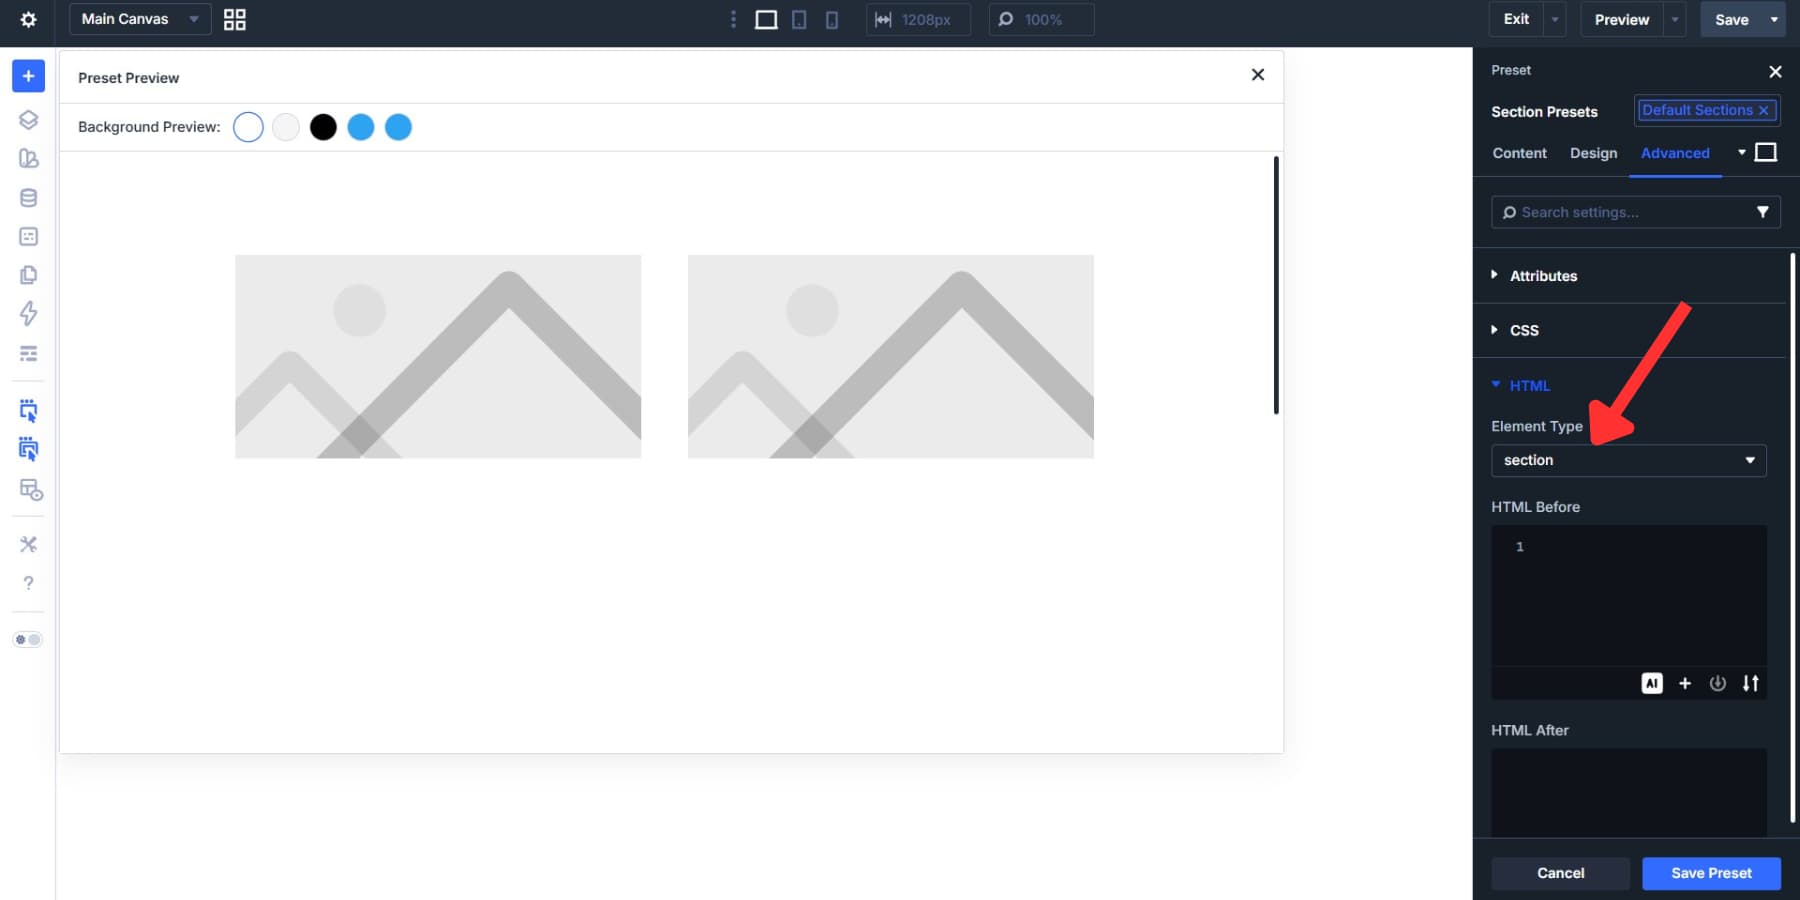
Toggle “Assign As Default” on and save.
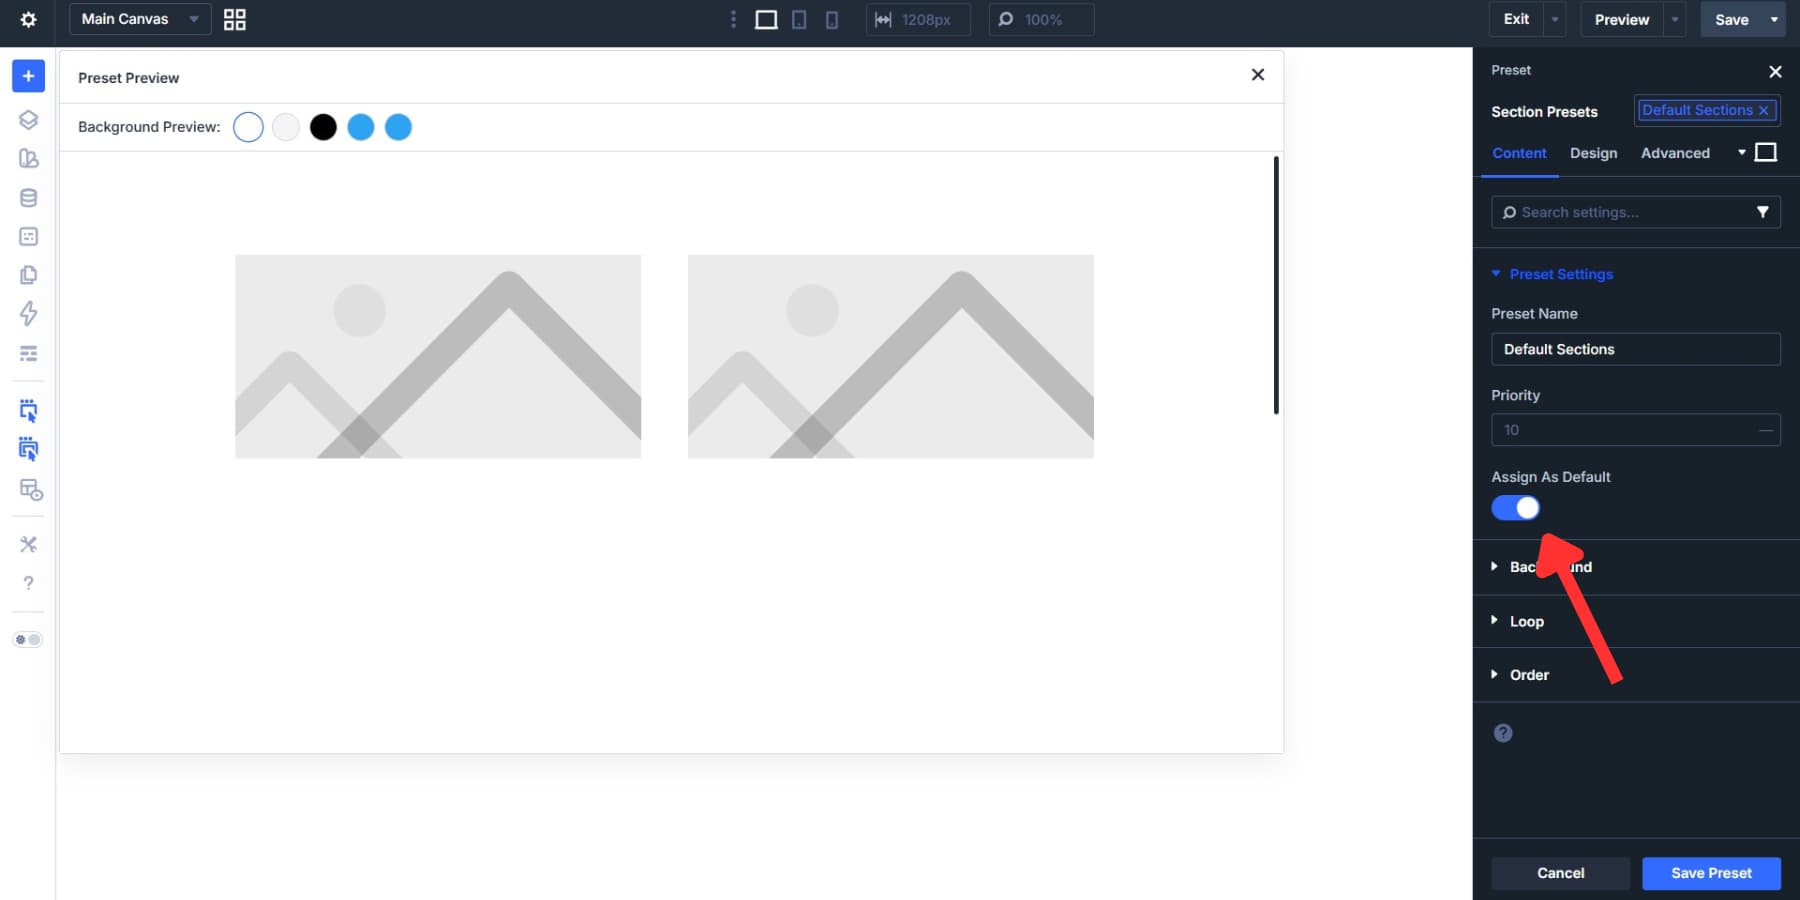
Now add a contemporary phase to any internet web page. Open its Sophisticated settings, and the HTML chance group of workers already reads phase. The tag is there faster than you place a single row or module within it. That toggle makes a preset vigorous moderately than holding it for your library.
If a decided on phase needs a unique tag, merely choose probably the most essential HTML Chance Group Presets you created earlier from the HTML chance group of workers. That modify most simple affects the environment you changed. The whole lot else stays intact without breaking the tool.
This implies maintains development while nevertheless allowing customization. Assemble with presets as your foundation, then alter specific parts when your design requires something different.
Together with HTML Tags For Icon Lists
Let’s walk by means of each different example the usage of an Icon List and Icon List Items:
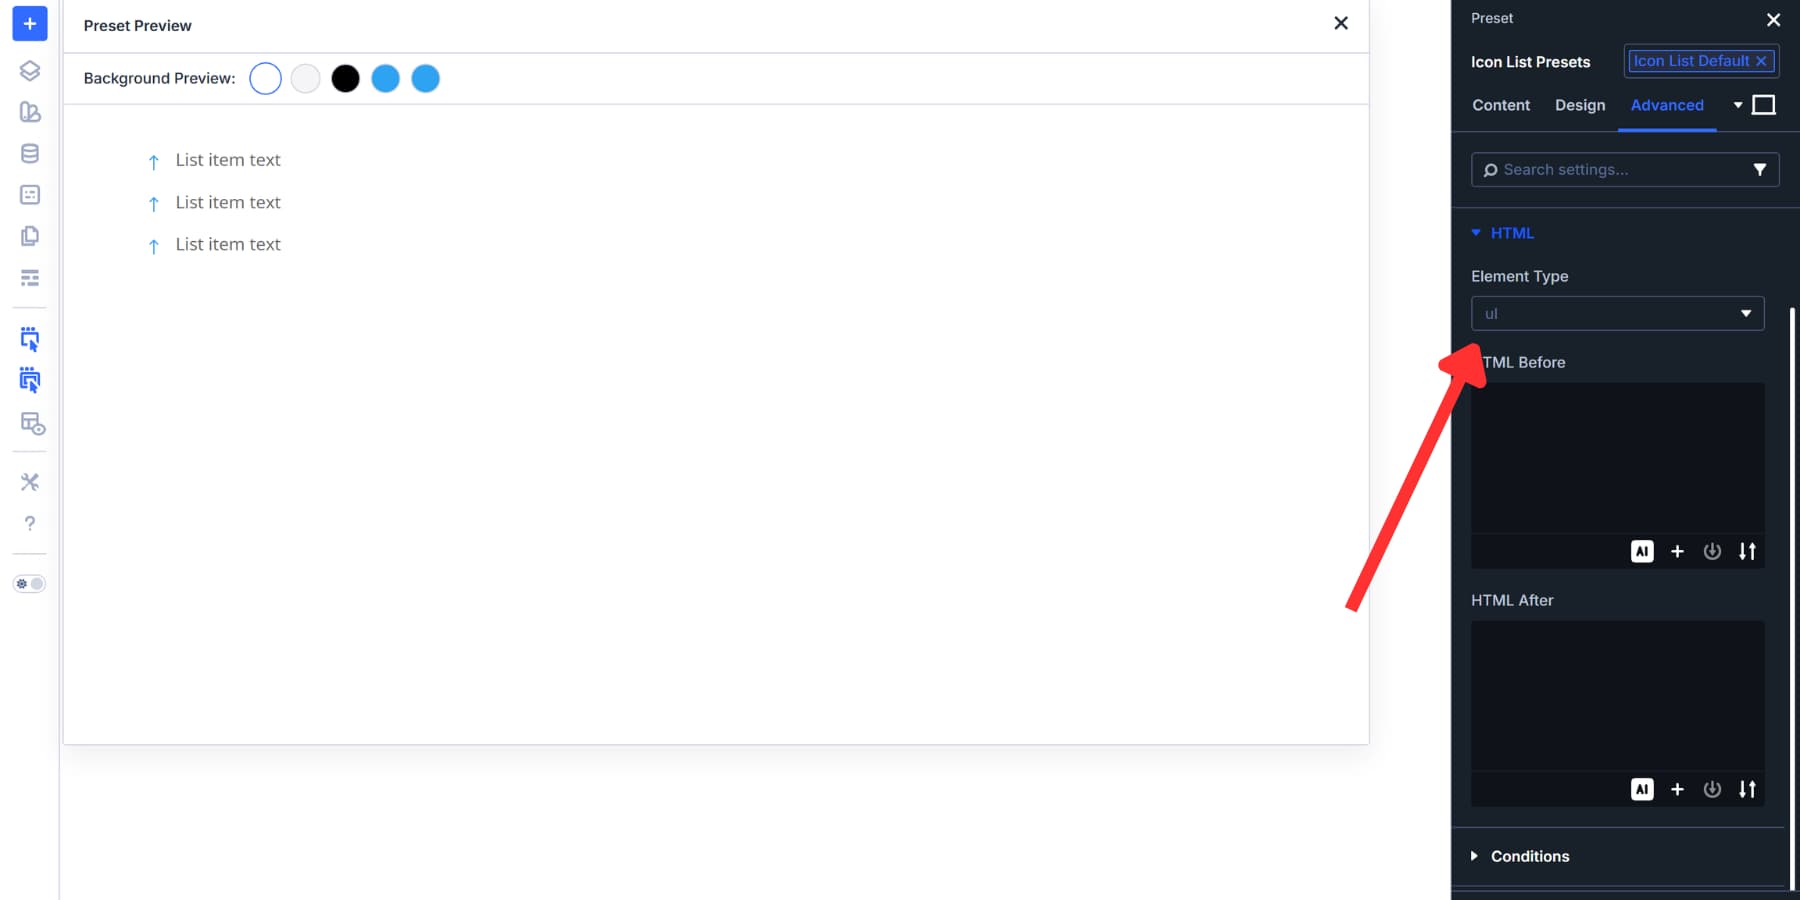
Now, find Icon List underneath Parts inside the Preset Manager. Click on on Add New Preset. This creates an Section Preset that captures the whole thing about your icon document in a single place.
Style your document first. Set colors, spacing, and typography. Choose your icon style and measurement. Now add the HTML wrapper. Set Section Kind to ul for an unordered document. This makes your document semantically correct by means of default.
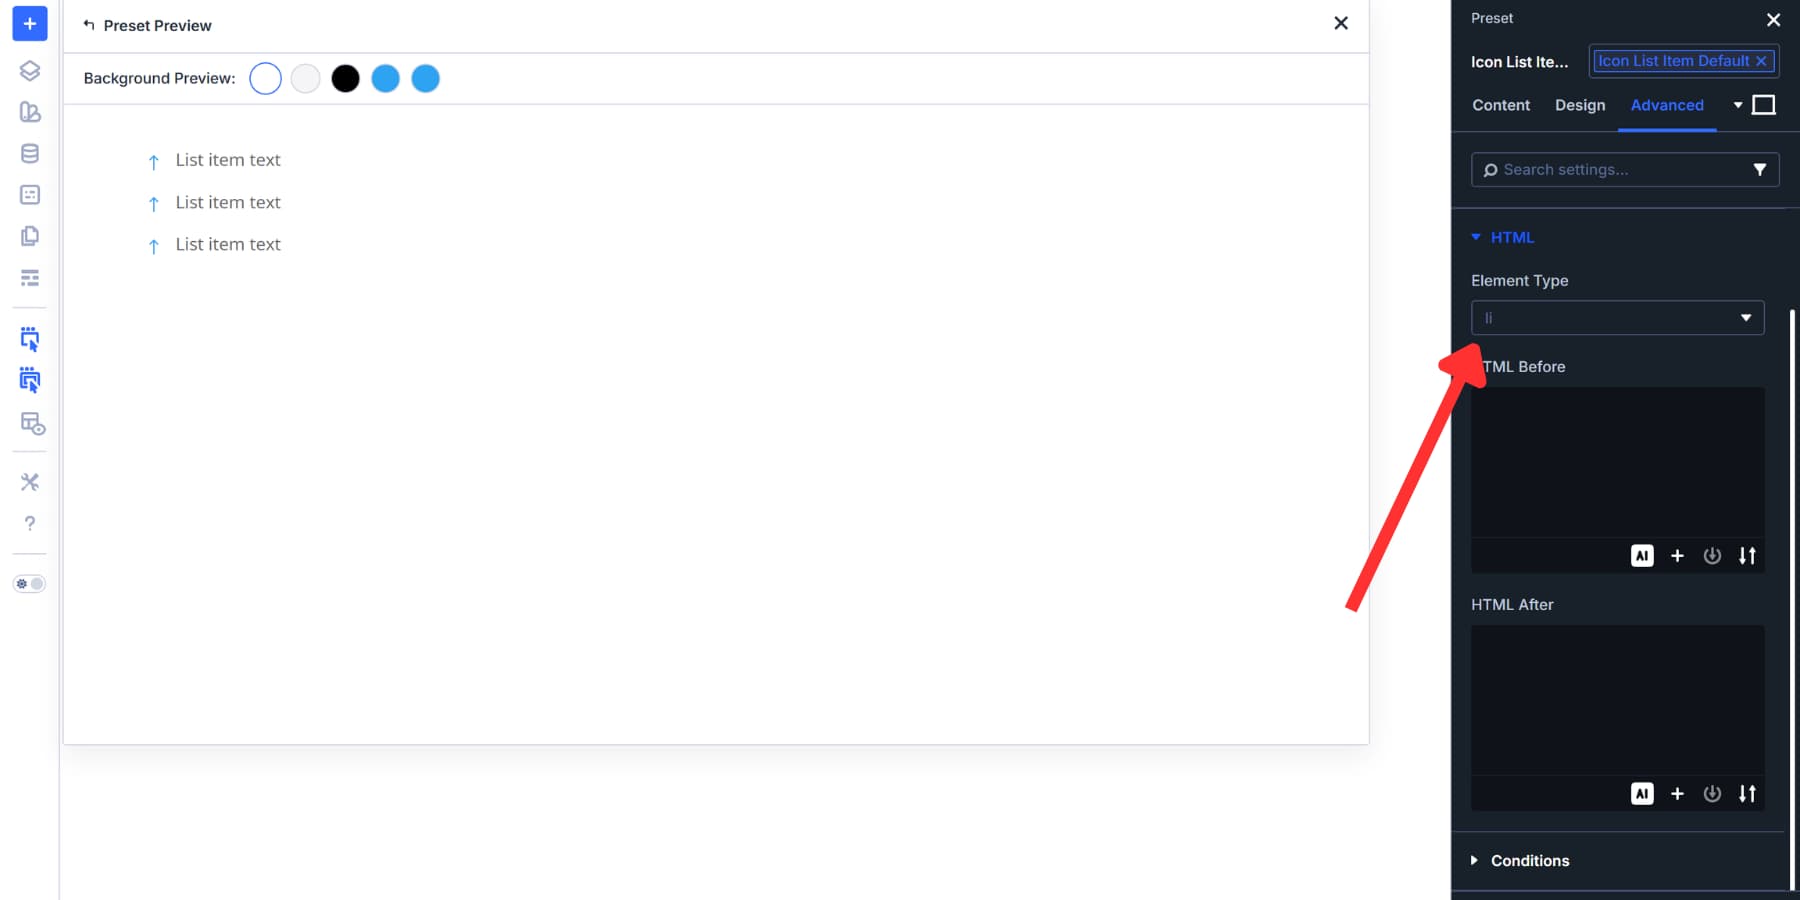
Then, find the Icon List Products inside the Parts document. Click on on Add New Preset. This sorts your individual document items. Set colors, spacing, and typography for the text. Choose your icon style and measurement.
Set Section Kind to li since each products becomes a list products.
Previous than saving each preset, toggle “Assign As Default” on. Do this for the Icon List preset and yet again for the Icon List Products preset.
Now, add a brand new Icon List module on your internet web page. Open its settings. The Section Kind already reads ul. Open any document products, and the Section Kind already reads li. Each and every tags are there faster than you configure the remainder. No dropdown opened. No chance group of workers touched.
Together with Accessibility Attributes
When you’re there, underneath Attributes, click on on Add Function. Set Objective Section to Image or Icon, Function Name to aria-hidden, and Function Value to true.
![]()
Icons in Icon Lists are most often decorative. They add visual pastime then again don’t put throughout which means that that computer screen readers need to announce. Hiding them keeps the experience cleaner for people the usage of assistive era.
In this case, we baked the wrappers (and attributes) directly into the Section Presets because of you’re going to hardly need the remainder previous the wrapper and accessibility setup after they’re configured.
The ones tags are absolute best defaults for the Icon List and Icon List Products, then again we built-in the steps anyway as an invaluable example of when to use Section Presets versus Chance Group Presets.
Likewise, parts like Image and Button already use appropriate tags by means of default, and respectively, so their Section Presets should point of interest purely on visual styling instead. No Chance Group Preset is wanted for those parts each, since proper tags are performed from the start.
Practice The ones Presets All the way through Your Internet web page
Applying your presets works by means of two simple paths, depending at the position you stored what:
For HTML wrapper Chance Group Presets: transfer to Sophisticated > hover over the HTML chance group of workers > preset icon, and choose your Chance Group Preset.
To make use of an Section Preset, click on at the preset selector at the best correct of the settings panel and make a choice your Section Preset from the dropdown.
As we mentioned earlier, the ones presets aren’t fixed constraints. The whole lot remains adjustable. Practice an Section Preset, then exchange out particular person chance groups within it for quite a lot of effects. Or add custom designed values directly to specific settings. Each manner, most simple the environment you touch changes. The whole lot else stays intact.
Growing Presets From Present Parts
Possibly you built your internet web page faster than semantic tags. The pages artwork high-quality, then again the whole thing nevertheless uses generic div wrappers. You’ll be capable of add proper markup to those provide parts and turn them into presets at the same time as.
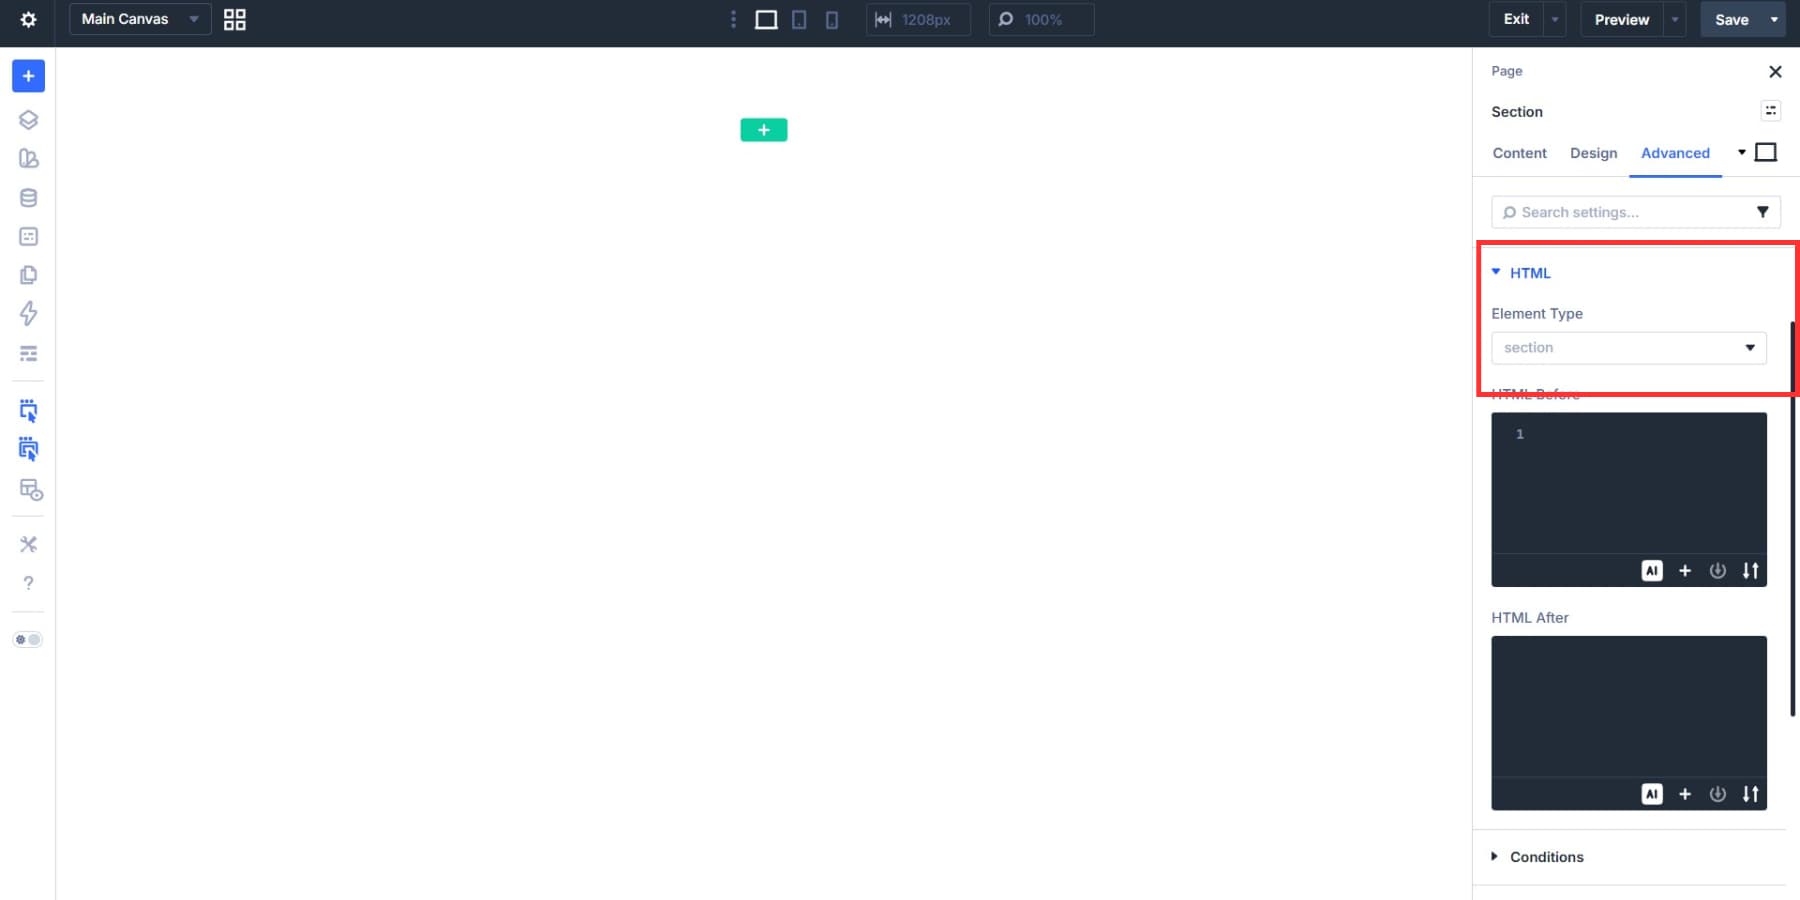
Open any phase, row, column, or module in your internet web page. Go to Sophisticated settings and find the HTML chance group of workers. Set the Section Kind to the best semantic tag for what that part does.
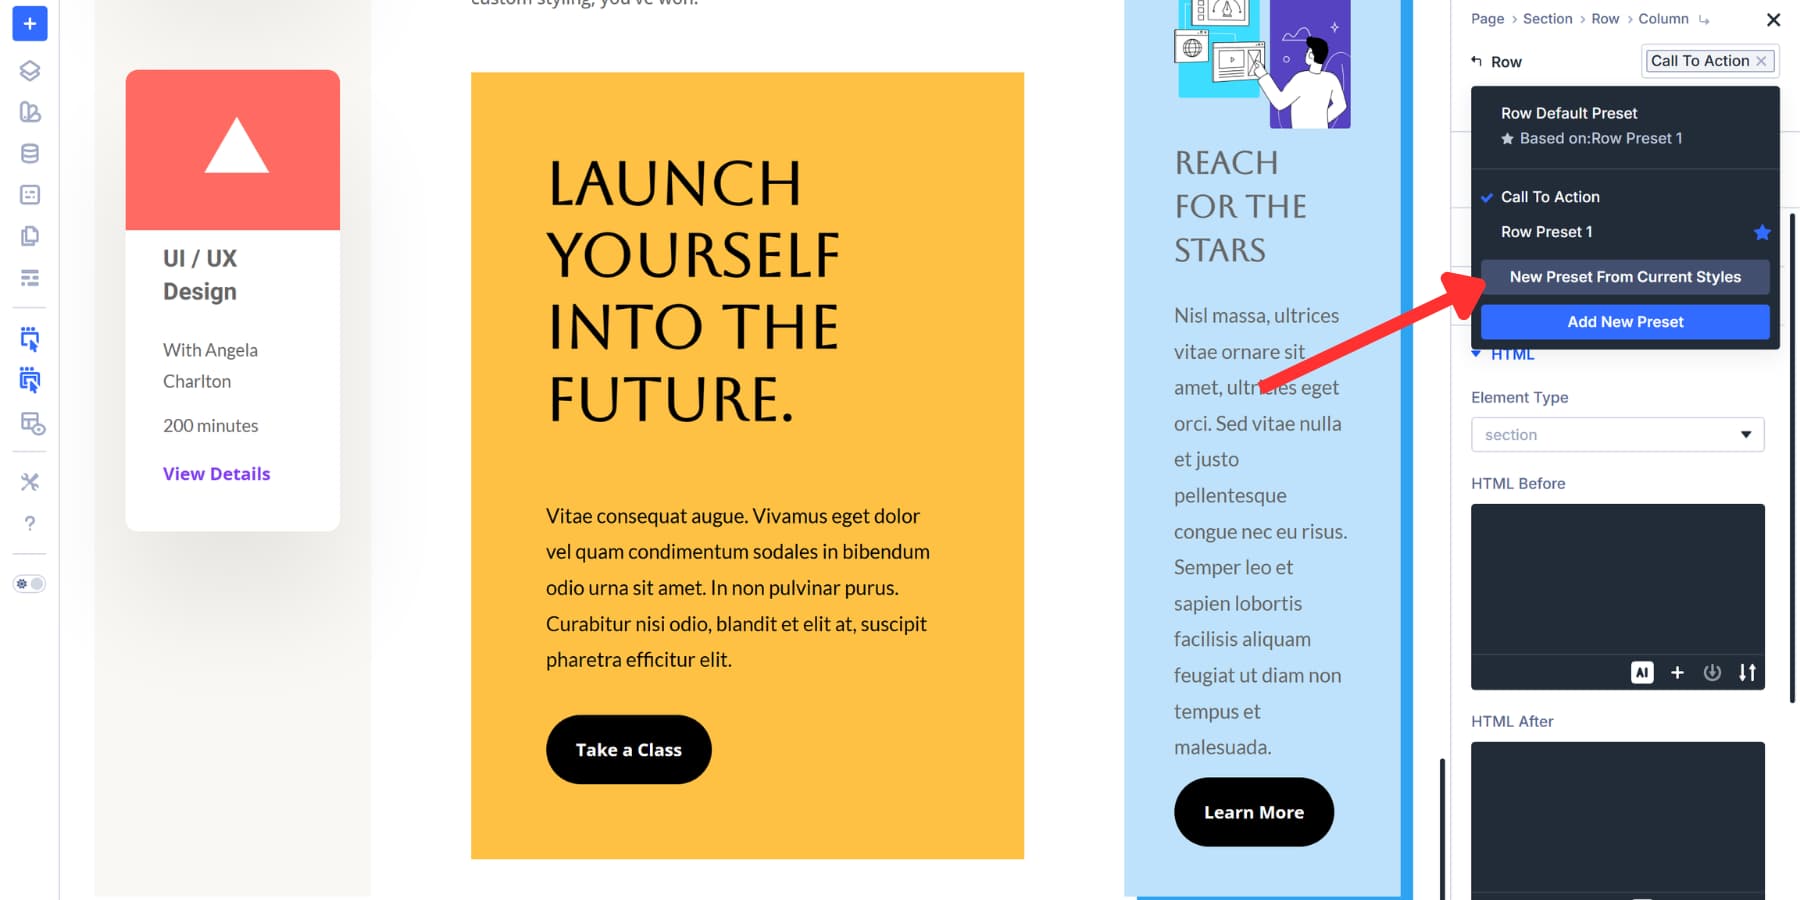
Once configured, hover over the HTML chance group of workers and click on at the preset icon that appears. Choose Create a brand spanking new preset from your provide settings. Name it clearly, like “Article Wrapper” or “Nav Column.”
The equivalent works for Section Presets.
Lengthen HTML Wrappers To A few Parts
Possibly you put Section Kind to aside on one column, then came upon a few others during your internet web page need the equivalent semantic tag. Lengthen Attributes can observe that wrapper variety in a single movement, moderately than opening each part one by one.
Right kind-click the HTML chance group of workers and choose Lengthen Attributes.
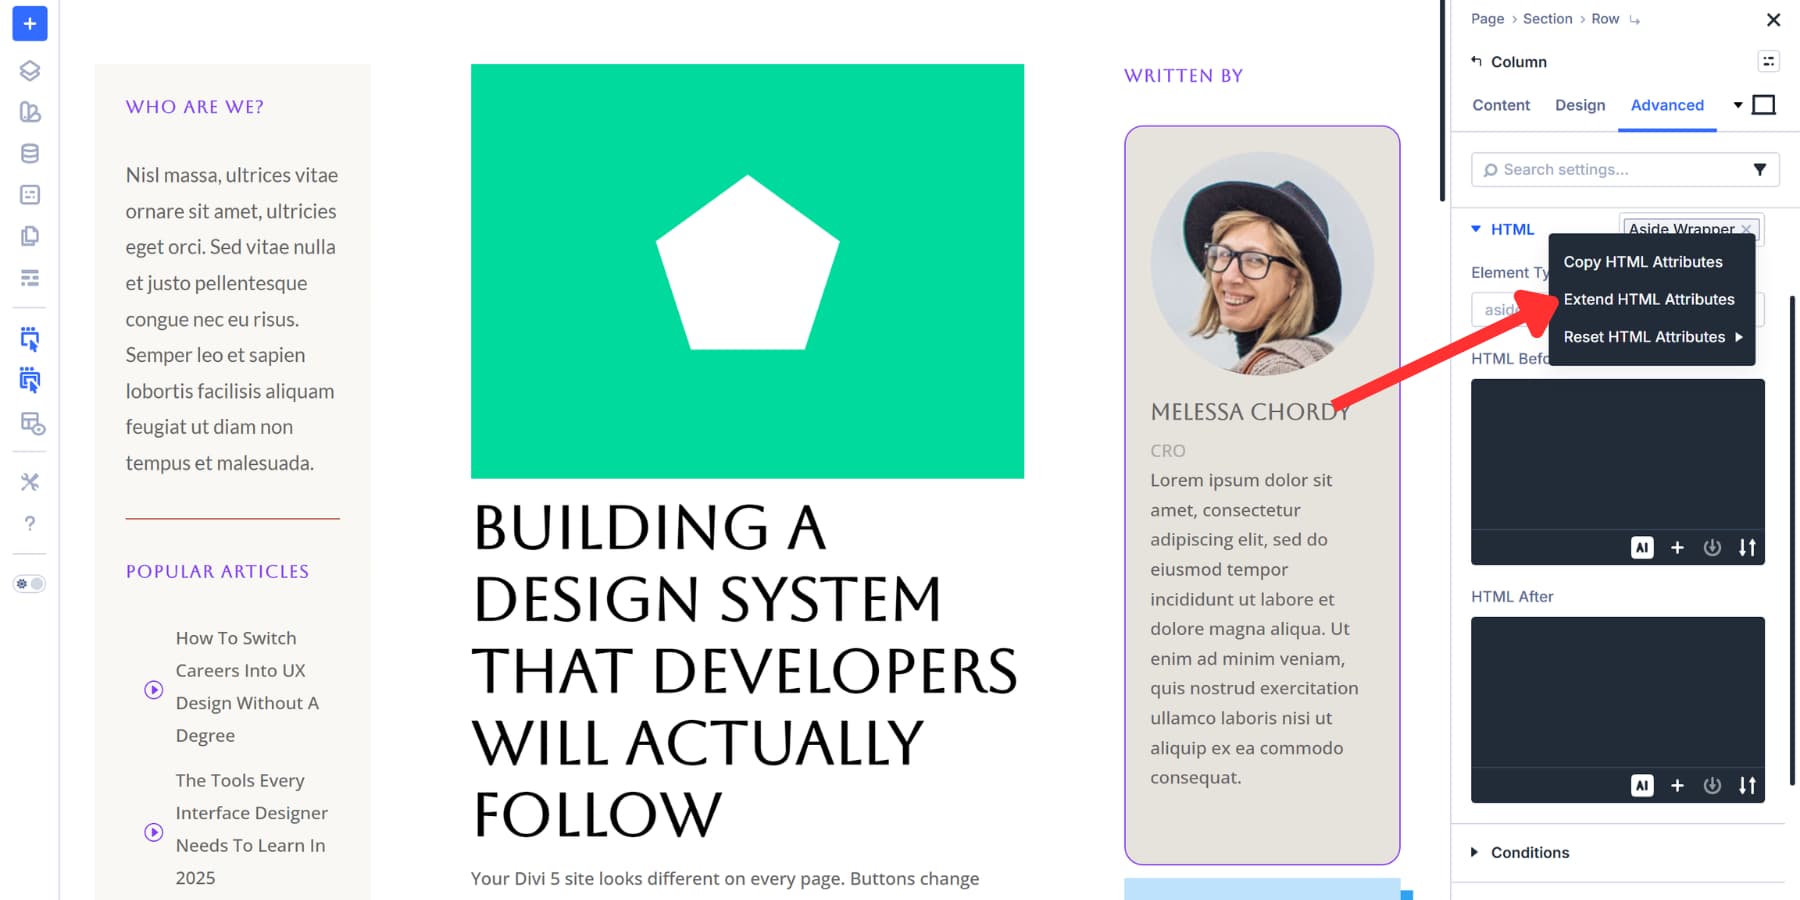
Set your scope to Whole Internet web page, choose which part sorts to concentrate on, and click on on Lengthen Attributes. This extends the Section Kind environment without touching any styling.
Each matching part inherits that semantic wrapper in an instant. Use this when retrofitting internet sites or when you realize partway by means of a assemble that a few parts need consistent markup. But if your presets already maintain wrapper allocation accurately, you gained’t need this step the least bit.
Take a look at Semantic Parts In Divi 5 This present day!
Your internet web page’s semantic foundation gets set faster than you place the main module. Default presets maintain the markup artwork mechanically, so each and every new part follows proper development without further steps.
You gained’t need to retrofit the remainder later or manually check dozens of pages. And when you do need to, Divi 5 provides equipment like Lengthen Attributes to help you observe consistent markup quickly.
Download Divi 5 and let presets do the heavy lifting when you assemble pages that artwork neatly for everyone who visits.
The publish Configuring Optimum Semantic Tags In Divi 5’s Default Presets appeared first on Chic Issues Weblog.
Contents
- 1 What Are Semantic Tags?
- 2 Divi 5’s Presets: A Difficult, Connected Design Machine
- 3 Why Collect Optimal Semantic Tags In Presets
- 4 Configuring Semantic Tags In Presets
- 5 Take a look at Semantic Parts In Divi 5 This present day!
- 6 Inexperienced WordPress Website hosting Suppliers For Eco-conscious Internet sites / Website hosting...
- 7 WordPress Internet hosting: Unlocking The Energy Of WordPress Internet hosting In Arkansas:…
- 8 8 WordPress Plugins That Use AI to Toughen Potency

0 Comments