
As tool building evolves, databases stand for the reason that core of utmost methods, storing and managing wisdom an important to digital corporations. As this information grows and becomes additional complicated, ensuring your database’s efficiency is vital to satisfy your app’s needs.
That’s where the idea of database maintenance comes into play. Database maintenance involves tasks paying homage to cleaning, backups, and optimizing indices to boost potency.
This article supplies valuable insights into maintenance triggers and pieces smart setup instructions. It explains the process of enforcing quite a lot of database maintenance tasks paying homage to backing up wisdom, rebuilding indices, archiving, and data cleanup using PostgreSQL, integrated with an API motive in a Node.js tool.
Working out Triggers
Previous than construction maintenance operations to your database, it is very important understand the quite a lot of ways they may be able to be caused. Each motive serves distinct purposes in facilitating maintenance tasks. The three primary triggers regularly used are:
- Information, API-based: This motive means that you can run one-off operations using an API title. It is useful in scenarios like restoring a database backup or rebuilding indices when potency suddenly drops.
- Time table (like CRON): This motive means that you can automate scheduled maintenance movements all over classes of low shopper guests. It’s ideally suited for running resource-intensive operations like archiving and cleanup. You’ll have the ability to use methods like node-schedule to organize schedules in Node.js that motive the operations routinely when sought after.
- Database Notifications: This motive means that you can perform maintenance operations according to database changes. As an example, when a client posts a marginally upon a platform, saved wisdom can immediately motive exams for ordinary characters, offensive language, or emojis. Implementing this capacity in Node.js is achievable using methods paying homage to pg-listen.
Will have to haves
To follow at the side of this data, you’ll have the following equipment on your local pc:
- Git: To keep an eye on type control to your app’s provide code
- Node.js: To build your backend app
- psql: To engage along with your some distance off PostgreSQL database using your terminal
- PGAdmin (Optional): To engage along with your some distance off PostgreSQL database using a Graphical Client Interface (GUI).
Rising and Site internet hosting a Node.js App
Let’s organize a Node.js problem, commit it to GitHub, and organize an auto-deploy pipeline to Kinsta. You need to moreover provision a PostgreSQL database on Kinsta to test your maintenance routines on it.
Get began by the use of creating a brand spanking new list on your local system using the following command:
mkdir node-db-maintenanceThen, turn into the newly created folder and run the following command to create a brand spanking new problem:
cd node-db-maintenance
yarn init -y # or npm init -y
This initializes a Node.js problem for you with the default configuration. You’ll have the ability to now arrange the necessary dependencies by the use of running the following command:
yarn add specific pg nodemon dotenvProper right here’s a quick description of each package deal deal:
specific: allows you to organize an Specific-based REST API.pg: allows you to engage with a PostgreSQL database through your Node.js tool.nodemon: we could to your dev assemble to be up-to-the-minute as you develop your tool, freeing you from the constant need to stop and start your app each and every time you’re making a change.dotenv: allows you to load environment variables from a .env report into yourprocess.envobject.
Next, add the following scripts on your package deal deal.json report so that you’ll start your dev server merely and run your server on production as successfully:
{
    // ...
    "scripts": {
      "start-dev": "nodemon index.js",
      "start": "NODE_ENV=production node index.js"
  },
  // …
}
You’ll have the ability to now create an index.js report which comprises your app’s provide code. Paste the following code into the report:
const specific = require("specific")
const dotenv = require('dotenv');

if (process.env.NODE_ENV !== 'production') dotenv.config();
const app = specific()
const port = process.env.PORT || 3000

app.get("/properly being", (req, res) => res.json({status: "UP"}))

app.listen(port, () => {
    console.log(`Server running at port: ${port}`);
});
This code above initializes an Categorical server and configures environment variables using the dotenv package deal deal if now not in production mode. It moreover devices up a /properly being path that returns a JSON object {status: "UP"}. In any case, it starts the app using the app.listen() function to listen to on the specified port, defaulting to 3000 if no port is provided by the use of the environment variable.
Now that you simply’ve were given a fundamental app in a position initialize a brand spanking new git repository along with your preferred git provider (BitBucket, GitHub, or GitLab) and push your code. Kinsta is helping deploying methods from numerous those git providers. For this article, let’s use GitHub.
When your repository is in a position, follow the ones steps to deploy your tool to Kinsta:
- Log in to or create an account to view your MyKinsta dashboard.
- Authorize Kinsta along with your Git provider.
- On the left sidebar, click on on Programs and then click on on Add tool.
- Choose the repository and the dept you wish to have to deploy from.
- Choose probably the most an important available wisdom middle puts from the document of 35 alternatives. Kinsta routinely detects the assemble settings to your methods through Nixpacks.
- Choose your tool belongings, paying homage to RAM, and disk space.
- Click on on Create tool.
As quickly because the deployment is entire, copy the deployed app’s link and navigate to /properly being. You’ll have to see the following JSON on your browser:
{status: "UP"}Because of this the application has been organize as it should be.
Surroundings Up a PostgreSQL Instance on Kinsta
Kinsta provides a very easy interface to provision database instances. Get began by the use of creating a brand spanking new Kinsta account will have to you don’t have one already. Then, follow the steps beneath:
- Log in for your MyKinsta dashboard.
- On the left sidebar, click on on Databases and then click on on Add database.
- Choose PostgreSQL for the reason that Database sort and make a choice your preferred type. Choose a name to your database and keep an eye on the username and password if you need.
- Choose an information middle location from the document of 35 alternatives.
- Choose your database measurement.
- Click on on Create database.
As quickly because the database is created, you will have to without a doubt retrieve the database host, port, username, and password.
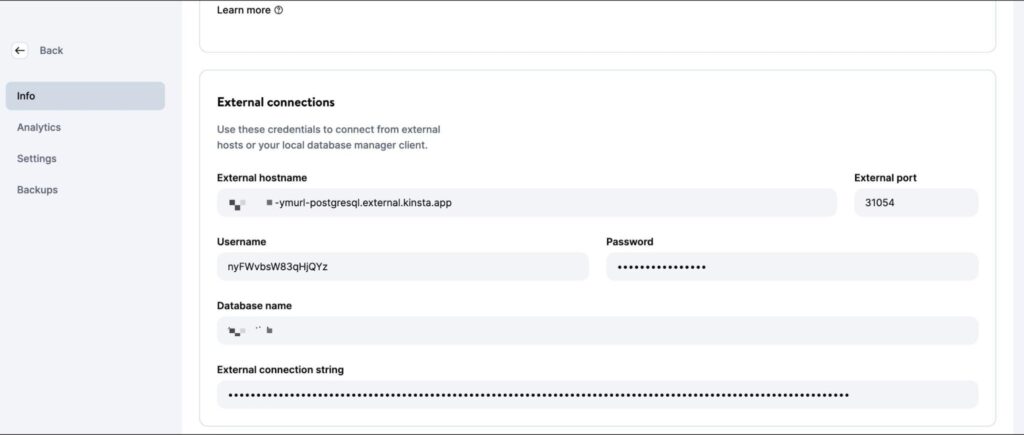
You’ll have the ability to then plug the ones values on your psql CLI (or PGAdmin GUI) to keep watch over the database. To test your code in the neighborhood, create a .env report on your problem’s root list and store the following secrets and techniques and strategies in it:
DB_USER_NAME=your database shopper name
DB_HOST=your database host
DB_DATABASE_NAME=your database’s name
DB_PORT=your database port
PGPASS=your database password
When deploying to Kinsta, you need in an effort to upload the ones values as setting variables for your tool deployment.
To arrange for database operations, download and execute this SQL script to create tables (shoppers, posts, comments) and insert development wisdom. Use the command beneath, converting placeholders along with your specifics, in an effort to upload the tips for your newly created PostgreSQL database:
psql -h -p -U -d -a -f Make certain that to go into the right kind report name and path within the command above. The execution of this command turns on you to enter your database password for authorization.
Once this command completes running, you’re ready to start out writing operations to your database maintenance. Feel free to push your code for your Git repository when completed with each operation to appear it in movement on the Kinsta platform.
Writing Upkeep Routines
This phase explains multiple regularly used operations for maintaining PostgreSQL databases.
1. Rising Backups
Eternally backing up databases is a not unusual and crucial operation. It involves creating a replica of all the database contents, which is stored in a secure location. The ones backups are an important for restoring wisdom in case of accidental loss or errors affecting wisdom integrity.
While platforms like Kinsta be offering automatic backups as part of their products and services and merchandise, it is very important know the way to organize a custom designed backup routine if sought after.
PostgreSQL supplies the device pg_dump for creating database backups. Alternatively, this will have to be run from the command line without delay, and there’s no npm package deal deal for it. So, you need to use the @getvim/execute package deal deal to run the pg_dump command on your Node app’s local environment.
Arrange the package deal deal by the use of running the following command:
yarn add @getvim/executeNext, import the package deal deal on your index.js report by the use of together with this line of code at the top:
const {execute} = require('@getvim/execute');The backups are generated as knowledge on the local filesystem of your Node app. So, it’s very best to create a faithful list for them by the use of the name backup inside the problem’s root list.
Now, you’ll use the following trail to generate and procure backups of your database when sought after:
app.get('/backup', async (req, res) => {

    // Create a name for the backup report
    const fileName = "database-backup-" + new Date().valueOf() + ".tar";

    // Execute the pg_dump command to generate the backup report
    execute("PGPASSWORD=" + process.env.PGPASS  + " pg_dump -U " + process.env.DB_USER_NAME
    + " -d " + process.env.DB_DATABASE_NAME
    + " -h " + process.env.DB_HOST
    + " -p " + process.env.DB_PORT
    + " -f backup/" + fileName + " -F t"

).then(async () => {
        console.log("Backup created");
        res.redirect("/backup/" + fileName)
    }).catch(err => {
        console.log(err);
        res.json({message: "Something went improper"})
    })

})
Moreover, you need in an effort to upload the following line first of all of your index.js report after the Specific app is initialized:
app.use('/backup', specific.static('backup'))This allows the backup folder to be served statically using the specific.static middleware function, allowing the shopper to procure the generated backup knowledge from the Node app.
2. Restoring From a Backup
Postgres we could in restoring from backups using the pg_restore command line device. Alternatively, you will have to use it by the use of the execute package deal deal similar to the best way you used the pg_dump command. Proper right here’s the path code:
app.get('/restore', async (req, res) => {

    const dir = 'backup'

    // Kind the backup knowledge consistent with after they've been created
    const knowledge = fs.readdirSync(dir)
        .clear out((report) => fs.lstatSync(path.join(dir, report)).isFile())
        .map((report) => ({ report, mtime: fs.lstatSync(path.join(dir, report)).mtime }))
        .sort((a, b) => b.mtime.getTime() - a.mtime.getTime());

    if (!knowledge.length){
        res.json({message: "No backups available to restore from"})
    }

    const fileName = knowledge[0].report

    // Restore the database from the chosen backup report
    execute("PGPASSWORD=" + process.env.PGPASS  + " pg_restore -cC "
    + "-U " + process.env.DB_USER_NAME
    + " -h " + process.env.DB_HOST
    + " -p " + process.env.DB_PORT
    + " -d postgres backup/" + fileName
)

        .then(async ()=> {
            console.log("Restored");
            res.json({message: "Backup restored"})
        }).catch(err=> {
        console.log(err);
        res.json({message: "Something went improper"})
    })
})
The code snippet above first appears to be for info stored inside the local backup list. Then, sorts them by the use of the date they’ve been created to look out the most recent backup report. In any case, uses the execute package deal deal to restore the chosen backup report.
Be sure you add the following imports for your index.js report so that the necessary modules for getting access to the local filesystem are imported, enabling the function to run as it should be:
const fs = require('fs')
const path = require('path')
3. Rebuilding an Index
The indices of Postgres tables every now and then get corrupted, and the potency of the database gets degraded. This can be as a result of instrument bugs or errors. Every now and then, indices can also turn out to be bloated as a result of too many empty or with reference to empty pages.
In such instances, you need to rebuild the index to you should definitely are getting the most efficient potency from your Postgres instance.
Postgres supplies the REINDEX command for this function. You’ll have the ability to use the node-postgres package deal deal to run this command (and to run any other operations later as successfully), so arrange it by the use of running the following command first:
yarn add pgNext, add the following strains to the best of the index.js report beneath the imports to initialize the database connection as it should be:
const {Client} = require('pg')
const client = new Client({
    shopper: process.env.DB_USER_NAME,
    host: process.env.DB_HOST,
    database: process.env.DB_DATABASE_NAME,
    password: process.env.PGPASS,
    port: process.env.DB_PORT
})


client.connect(err => {
    if (err) throw err;
    console.log("Connected!")
})
The implementation for this operation is rather easy:
app.get("/reindex", async (req, res) => {

    // Run the REINDEX command as sought after
    stay up for client.query("REINDEX TABLE Consumers;")

    res.json({message: "Reindexed table successfully"})
})
The command confirmed above reindexes all of your Consumers table. You’ll have the ability to customize the command consistent with your will have to rebuild a particular index or to even reindex all of your database.
4. Knowledge Archiving and Purging
For databases that increase large over time (and historic wisdom isn’t accessed), it will make sense to organize routines that offload the former wisdom into an information lake where it can be stored and processed additional conveniently.
Parquet knowledge are a not unusual standard for wisdom storage and turn in numerous wisdom lakes. Using the ParquetJS library, you’ll create parquet knowledge from your Postgres wisdom and use products and services and merchandise like AWS Athena to without delay be informed them with no need to load them once more into the database at some point.
Arrange the ParquetJS library by the use of running the following command:
yarn add parquetjsWhen creating archives, you need to query numerous knowledge from your tables. Storing such a large amount of wisdom on your app’s memory can be resource-intensive, pricey, and susceptible to errors.
Because of this reality, it’s smart to use cursors to load chunks of data from the database and process them. Arrange the cursors module of the node-postgres package deal deal by the use of running the following command:
yarn add pg-cursorNext, you’ll want to import each and every libraries into your index.js report:
const Cursor = require('pg-cursor')
const parquet = require('parquetjs')
Now, you’ll use the code snippet beneath to create parquet knowledge from your database:
app.get('/archive', async (req, res) => {

    // Query all comments through a cursor, finding out absolute best 10 at a time
    // You are able to exchange the query proper right here to satisfy your must haves, paying homage to archiving knowledge older than at least a month, or absolute best archiving knowledge from inactive shoppers, and plenty of others.
    const queryString = "SELECT * FROM COMMENTS;"

    const cursor = client.query(new Cursor(queryString))

    // Define the schema for the parquet report
    let schema = new parquet.ParquetSchema({
        comment_id: { sort: 'INT64' },
        post_id: { sort: 'INT64' },
        user_id: { sort: 'INT64' },
        comment_text: { sort: 'UTF8' },
        timestamp: { sort: 'TIMESTAMP_MILLIS' }
    });


    // Open a parquet report writer
    let writer = stay up for parquet.ParquetWriter.openFile(schema, 'archive/archive.parquet');

    let rows = stay up for cursor.be informed(10)

    while (rows.length > 0) {

        for (let i = 0; i < rows.length; i++) {
            // Write each row from table to the parquet report
            stay up for writer.appendRow(rows[i])
        }

        rows = stay up for cursor.be informed(10)
    }

    stay up for writer.close()

    // As quickly because the parquet report is generated, you'll be able to consider deleting the tips from the table at this stage to liberate some space

    // Redirect shopper to the report path so they may be able to download the report
    res.redirect("/archive/archive.parquet")
})
Next, add the following code to the beginning of your index.js report after the Specific app is initialized:
app.use('/archive', specific.static('archive'))This allows the archive folder to be served statically, allowing you to procure the generated parquet knowledge from the server.
Don’t put out of your mind to create an archive list inside the problem list to store the archive knowledge.
You are able to further customize this code snippet to routinely upload the parquet knowledge to an AWS S3 bucket and use CRON jobs to motive the operation on a routine routinely.
5. Knowledge Cleanup
A not unusual function for running database maintenance operations is to wash up wisdom that grows earlier or irrelevant with time. This phase discusses two not unusual instances when wisdom cleanups are completed as part of maintenance.
In fact, you’ll be able to organize your personal wisdom cleanup routine as required by the use of your tool’s wisdom models. The examples given beneath are only for reference.
Deleting Information By means of Age (Final Modified or Final Accessed)
Cleaning up knowledge consistent with report age is rather easy compared to other operations on this document. You are able to write a delete query that deletes knowledge which will also be older than a collection date.
Proper right here’s an example of deleting comments made forward of Oct 9, 2023:
app.get("/clean-by-age", async (req, res) => {

    // Filter out and delete all comments which were made on or forward of 9th October, 2023
    const finish outcome = stay up for client.query("DELETE FROM COMMENTS WHERE timestamp  0) {
        res.json({message: "Cleaned up " + finish outcome.rowCount + " rows successfully!"})
    } else {
        res.json({message: "Now not the rest to wash up!"})
    }
})
You are able to test it out by the use of sending a GET request to the /clean-by-age path.
Deleting Information Consistent with Custom designed Prerequisites
You are able to moreover organize cleanups consistent with the other conditions, paying homage to taking out knowledge that aren’t associated with other vigorous knowledge inside the system (creating an orphan situation).
As an example, you’ll be able to organize a cleanup operation that looks for comments associated with deleted posts and deletes them as they most definitely not at all ground inside the tool over again:
app.get('/conditional',  async (req, res) => {

    // Filter out and delete all comments that are not associated with any vigorous posts
    const finish outcome = stay up for client.query("DELETE FROM COMMENTS WHERE post_id NOT IN (SELECT post_id from Posts);")

    if (finish outcome.rowCount > 0) {
        res.json({message: "Cleaned up " + finish outcome.rowCount + " rows successfully!"})
    } else {
        res.json({message: "Now not the rest to wash up!"})
    }
})
You are able to come up with your personal conditions specific for your use case.
6. Knowledge Manipulation
Database maintenance operations are also used to carry out wisdom manipulation and transformation, paying homage to censoring obscene language or converting text combinations to emoji.
By contrast to most other operations, the ones operations are very best run when database updates occur (fairly than running them on all rows at a collection time of week or month).
This phase lists two such operations, on the other hand the implementation for any other custom designed manipulation operation remains rather similar to the ones.
Convert Text to Emoji
You are able to consider converting text combinations paying homage to “:)” and “xD” to specific emojis to provide a better shopper enjoy and deal with consistency of information as successfully. Proper right here’s a code snippet that can assist you do that:
app.get("/emoji", async (req, res) => {
    // Define an inventory of emojis that need to be reworked
    const emojiMap = {
        xD: '😁',
        ':)': '😊',
        ':-)': '😄',
        ':jack_o_lantern:': '🎃',
        ':ghost:': '👻',
        ':santa:': '🎅',
        ':christmas_tree:': '🎄',
        ':provide:': '🎁',
        ':bell:': '🔔',
        ':no_bell:': '🔕',
        ':tanabata_tree:': '🎋',
        ':tada:': '🎉',
        ':confetti_ball:': '🎊',
        ':balloon:': '🎈'
    }

    // Assemble the SQL query together with conditional exams for all emojis from the map
    let queryString = "SELECT * FROM COMMENTS WHERE"

    queryString += " COMMENT_TEXT LIKE '%" + Object.keys(emojiMap)[0] + "%' "

    if (Object.keys(emojiMap).length > 1) {
        for (let i = 1; i < Object.keys(emojiMap).length; i++) {
            queryString += " OR COMMENT_TEXT LIKE '%" + Object.keys(emojiMap)[i] + "%' "
        }
    }

    queryString += ";"

    const finish outcome = stay up for client.query(queryString)

    if (finish outcome.rowCount === 0) {
        res.json({message: "No rows to wash up!"})
    } else {
        for (let i = 0; i < finish outcome.rows.length; i++) {

            const currentRow = finish outcome.rows[i]
            let emoji

            // Identify each row that comprises an emoji at the side of which emoji it comprises
            for (let j = 0; j < Object.keys(emojiMap).length; j++) {
                if (currentRow.comment_text.contains(Object.keys(emojiMap)[j])) {
                    emoji = Object.keys(emojiMap)[j]
                    damage
                }
            }

            // Change the emoji inside the text and change the row forward of transferring at once to the next row
            const updateQuery = "UPDATE COMMENTS SET COMMENT_TEXT = '" + currentRow.comment_text.alternate(emoji, emojiMap[emoji]) + "' WHERE COMMENT_ID = " + currentRow.comment_id + ";"

            stay up for client.query(updateQuery)
        }

        res.json({message: "All emojis cleaned up successfully!"})
    }

})
This code snippet first calls so that you can define an inventory of emojis and their textual representations. Then, it queries the database to seek for those textual combinations and replaces them with emojis.
Censor Obscene Language
A gorgeous not unusual operation used in apps that allow user-generated content material subject material is to censor any indecent language. The process proper right here is similar—determine the instances of obscene language and alternate them with asterisk characters. You are able to make use of the bad-words package deal deal to easily check out for and censor profanity.
Arrange the package deal deal by the use of running the following command:
yarn add bad-wordsThen, initialize the package deal deal on your index.js report:
const Filter out = require('bad-words');
clear out = new Filter out();
Now, use the following code snippet to censor obscene content material subject material on your comments table:
app.get('/obscene', async (req, res) => {

    // Query all comments using a cursor, finding out absolute best 10 at a time
    const queryString = "SELECT * FROM COMMENTS;"

    const cursor = client.query(new Cursor(queryString))

    let rows = stay up for cursor.be informed(10)

    const affectedRows = []

    while (rows.length > 0) {

        for (let i = 0; i < rows.length; i++) {
            // Check each observation for profane content material subject material
            if (clear out.isProfane(rows[i].comment_text)) {
                affectedRows.push(rows[i])
            }
        }

        rows = stay up for cursor.be informed(10)
    }

    cursor.close()

    // Substitute each observation that has profane content material subject material with a censored type of the text
    for (let i = 0; i < affectedRows.length; i++) {
        const row = affectedRows[i]
        const updateQuery = "UPDATE COMMENTS SET COMMENT_TEXT = '" + clear out.transparent(row.comment_text) + "' WHERE COMMENT_ID = " + row.comment_id + ";"
        stay up for client.query(updateQuery)
    }

    res.json({message: "Cleanup entire"})

})
You are able to to find all of your code for this educational in this GitHub repo.
Working out PostgreSQL’s Vacuuming and Its Goal
Aside from for putting in place custom designed maintenance routines paying homage to those discussed above, you’ll be able to moreover make use of probably the most an important native maintenance functionalities that PostgreSQL supplies to ensure the continued properly being and serve as of your database: the Vacuum procedure.
The Vacuum process helps to optimize database potency and reclaim disk space. PostgreSQL runs vacuum operations on a agenda using its auto-vacuum daemon, on the other hand you’ll be able to moreover motive it manually if sought after. Listed here are a few ways all through which not unusual vacuuming helps:
- Getting higher Blocked Disk Area: One in all Vacuum’s primary targets is to get well blocked disk space within the database. As wisdom is incessantly inserted, up-to-the-minute, and deleted, PostgreSQL can turn out to be cluttered with “needless” or outdated rows that still occupy space on the disk. Vacuum identifies and removes the ones needless rows, making the space available for brand spanking new wisdom. Without Vacuum, disk space would continuously turn out to be exhausted, almost definitely leading to potency degradation and even system crashes.
- Updating Query Planner Metrics: Vacuuming moreover helps PostgreSQL deal with up-to-date statistics and metrics used by its query planner. The query planner relies on right kind wisdom distribution and statistical information to generate atmosphere pleasant execution plans. By means of continuously running Vacuum, PostgreSQL promises that the ones metrics are provide, enabling it to make upper picks about simple the right way to retrieve wisdom and optimize queries.
- Updating Visibility Map: The Visibility Map is every other an important aspect of PostgreSQL’s Vacuum process. It’s serving to determine which wisdom blocks in a table are completely visible to all transactions, allowing Vacuum to concentrate on absolute best the necessary wisdom blocks for cleaning. This enhances the efficiency of the Vacuum process by the use of minimizing needless I/O operations, which may well be pricey and time-consuming.
- Preventing Transaction ID Wraparound Disasters: Vacuum moreover plays a pivotal place in combating transaction ID wraparound screw ups. PostgreSQL uses a 32-bit transaction ID counter, which can lead to a wraparound when it reaches its maximum worth. Vacuum marks earlier transactions as “frozen,” combating the ID counter from wrapping spherical and causing wisdom corruption. Neglecting this aspect would possibly simply lead to catastrophic database screw ups.
As mentioned earlier, PostgreSQL supplies two alternatives for executing Vacuum: Autovacuum and Guide Vacuum.
Autovacuum is the really helpful variety for plenty of scenarios as it routinely manages the Vacuum process consistent with predefined settings and database task. Information Vacuum, on the other hand, provides additional control on the other hand requires a deeper understanding of database maintenance.
The decision between the two is made up our minds via elements paying homage to database measurement, workload, and available belongings. Small to medium-sized databases can steadily rely on Autovacuum, while higher or additional complicated databases would possibly require manual intervention.
Summary
Database maintenance is not only a subject of routine house duties; it’s the foundation of a healthy and performant tool. By means of continuously optimizing, cleaning, and organizing your wisdom, you ensure that your PostgreSQL database continues to send top potency, remains free from corruption, and operates effectively, concurrently your tool scales.
In this whole knowledge, we explored the necessary importance of putting in place well-structured database maintenance plans for PostgreSQL when operating with Node.js and Specific.
Did we cross over any routine database maintenance operations that you have got carried out to your database? Or are you aware a better technique to enforce any of those discussed above? Feel free to let us know inside the comments!
The put up Atmosphere Up Database Repairs Plans for PostgreSQL on Node.js appeared first on Kinsta®.
Contents
- 1 Working out Triggers
- 2 Will have to haves
- 3 Writing Upkeep Routines
- 4 Working out PostgreSQL’s Vacuuming and Its Goal
- 5 Summary
- 6 Audio AI: How AI Is Converting Podcasts, Audiobooks & Extra
- 7 Divi Meetup Community Update: Q3 2022
- 8 How To Add CSS Classes And ID Attributes In Divi 5

0 Comments