

Structure Packs supply a quick head get started, however they hardly ever align along with your logo out of the field. Swapping colours, fonts, and photographs throughout dozens of modules manner you’re an hour deep into paintings you concept would take ten mins.
Divi 5’s Inspector streamlines all the procedure. Proper-click any phase, see the whole thing within it, and edit colours, fonts, and media from one panel. This instructional walks via rebranding a structure pack touchdown web page the usage of simplest the Inspector panel.
What Is Divi 5’s Inspector?
The Inspector is a toolbar in Divi 5 (you’ll be able to additionally in finding it the usage of the Inspector icon within the left sidebar) that shows the whole thing taking place within a container.
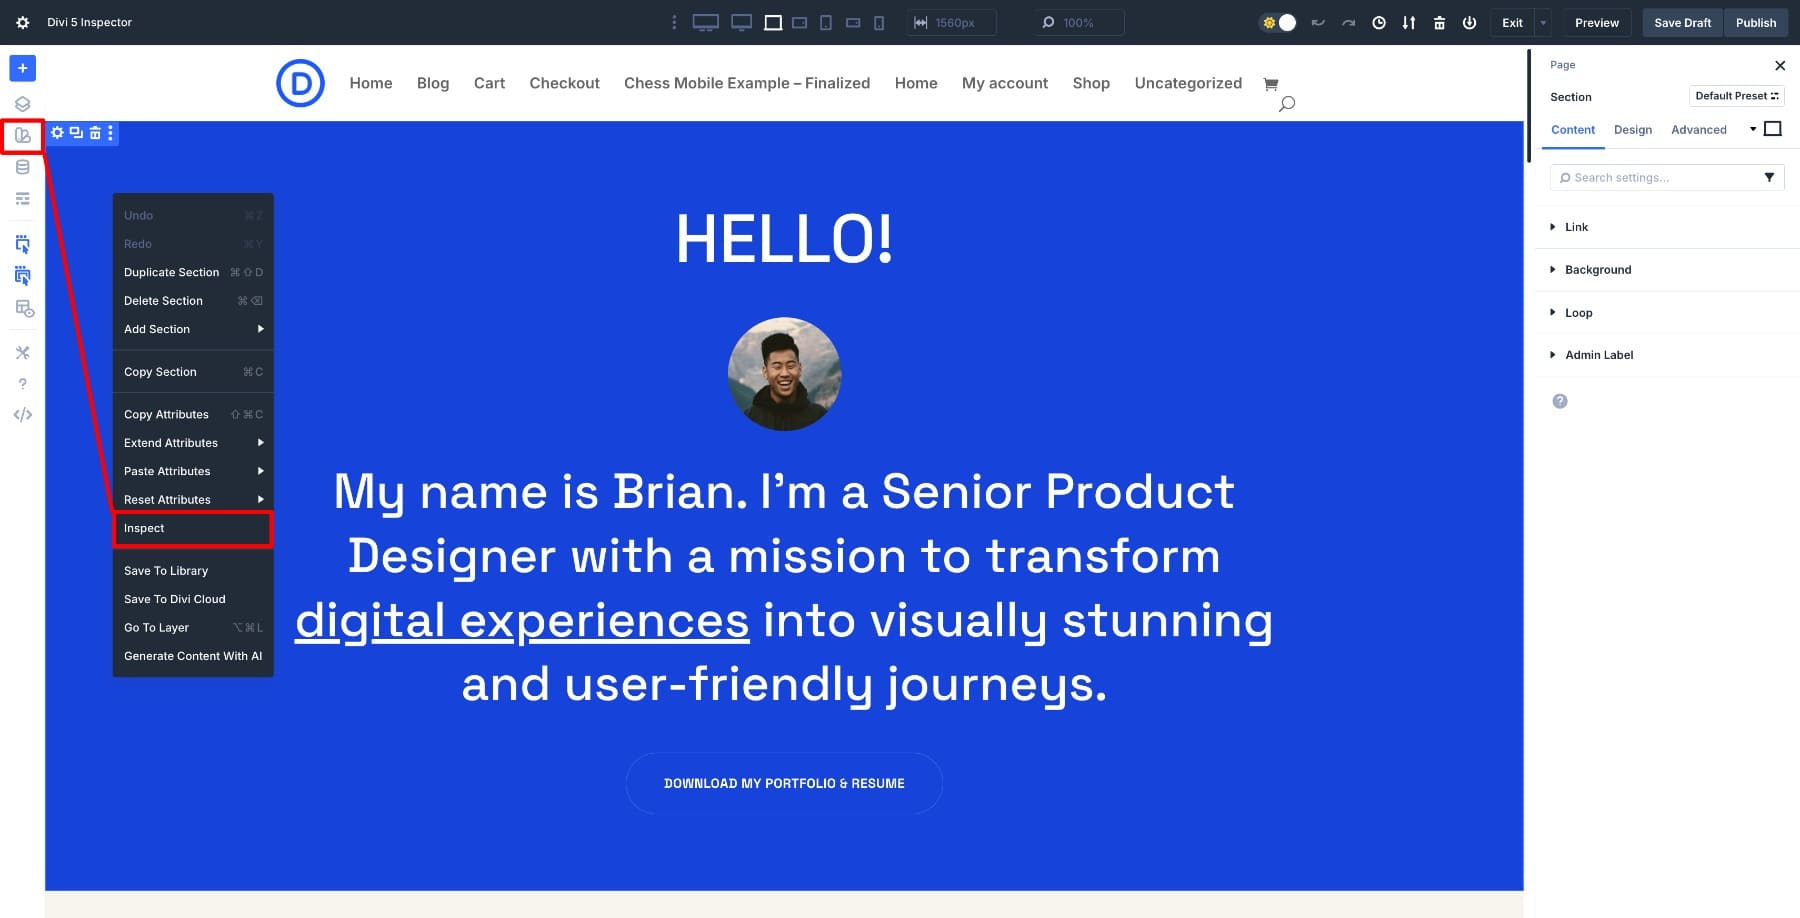
Proper-click any phase, and a panel opens with a whole breakdown of the design and content material within that component and all its youngsters.
Colours are indexed, and fonts seem with their households, weights, and sizes. You’ll additionally see photographs and media as thumbnails that you’ll be able to click on to exchange. Spacing values, reminiscent of padding and margin, are grouped below quantity values. Even the presets implemented to modules display up right here. You spot the whole thing in a single view as a substitute of searching via particular person modules.
The actual merit is bulk enhancing. Whilst you trade a colour within the Inspector, each and every example of that colour throughout the inspected scope updates directly. The similar applies to fonts, photographs, and spacing. You are making one centered trade, and it cascades via the whole thing in view.
You’ll be able to shut the Inspector, right-click a distinct phase, and investigate cross-check that one subsequent. You’ll be able to additionally navigate the web page and investigate cross-check new parts as you progress. Every time you investigate cross-check one thing new, the panel updates to turn precisely what types are utilized in that house, so you’ll be able to edit what you spot with out guessing.
Understand the environment choices within the Inspector panel converting as we transfer between parts? That is the way you audit a structure and connect it from one position.
Learn Everything About Divi 5’s Inspector
How The Inspector Is helping Customise Layouts Quicker
The Inspector works nice when mixed with Divi 5’s different options. Check out a piece to peer what’s getting used, then edit the ones types the usage of Design Variables or Possibility Staff Presets. This fashion, your adjustments aren’t simply remoted to 1 phase; they transform a part of a reusable machine.
For instance, whilst you change a colour within the Inspector and put it aside as a Design Variable, that colour turns into to be had throughout all of your website online. Practice an Option Group Preset to standardize button types, and the Inspector will display you precisely the place the ones presets are getting used, permitting you to regulate them in bulk. The primary web page you customise establishes your logo machine. Each web page after that is going sooner since you’re running with variables and presets you’ve already outlined, now not ranging from scratch each and every time.
How To Customise Structure Kinds
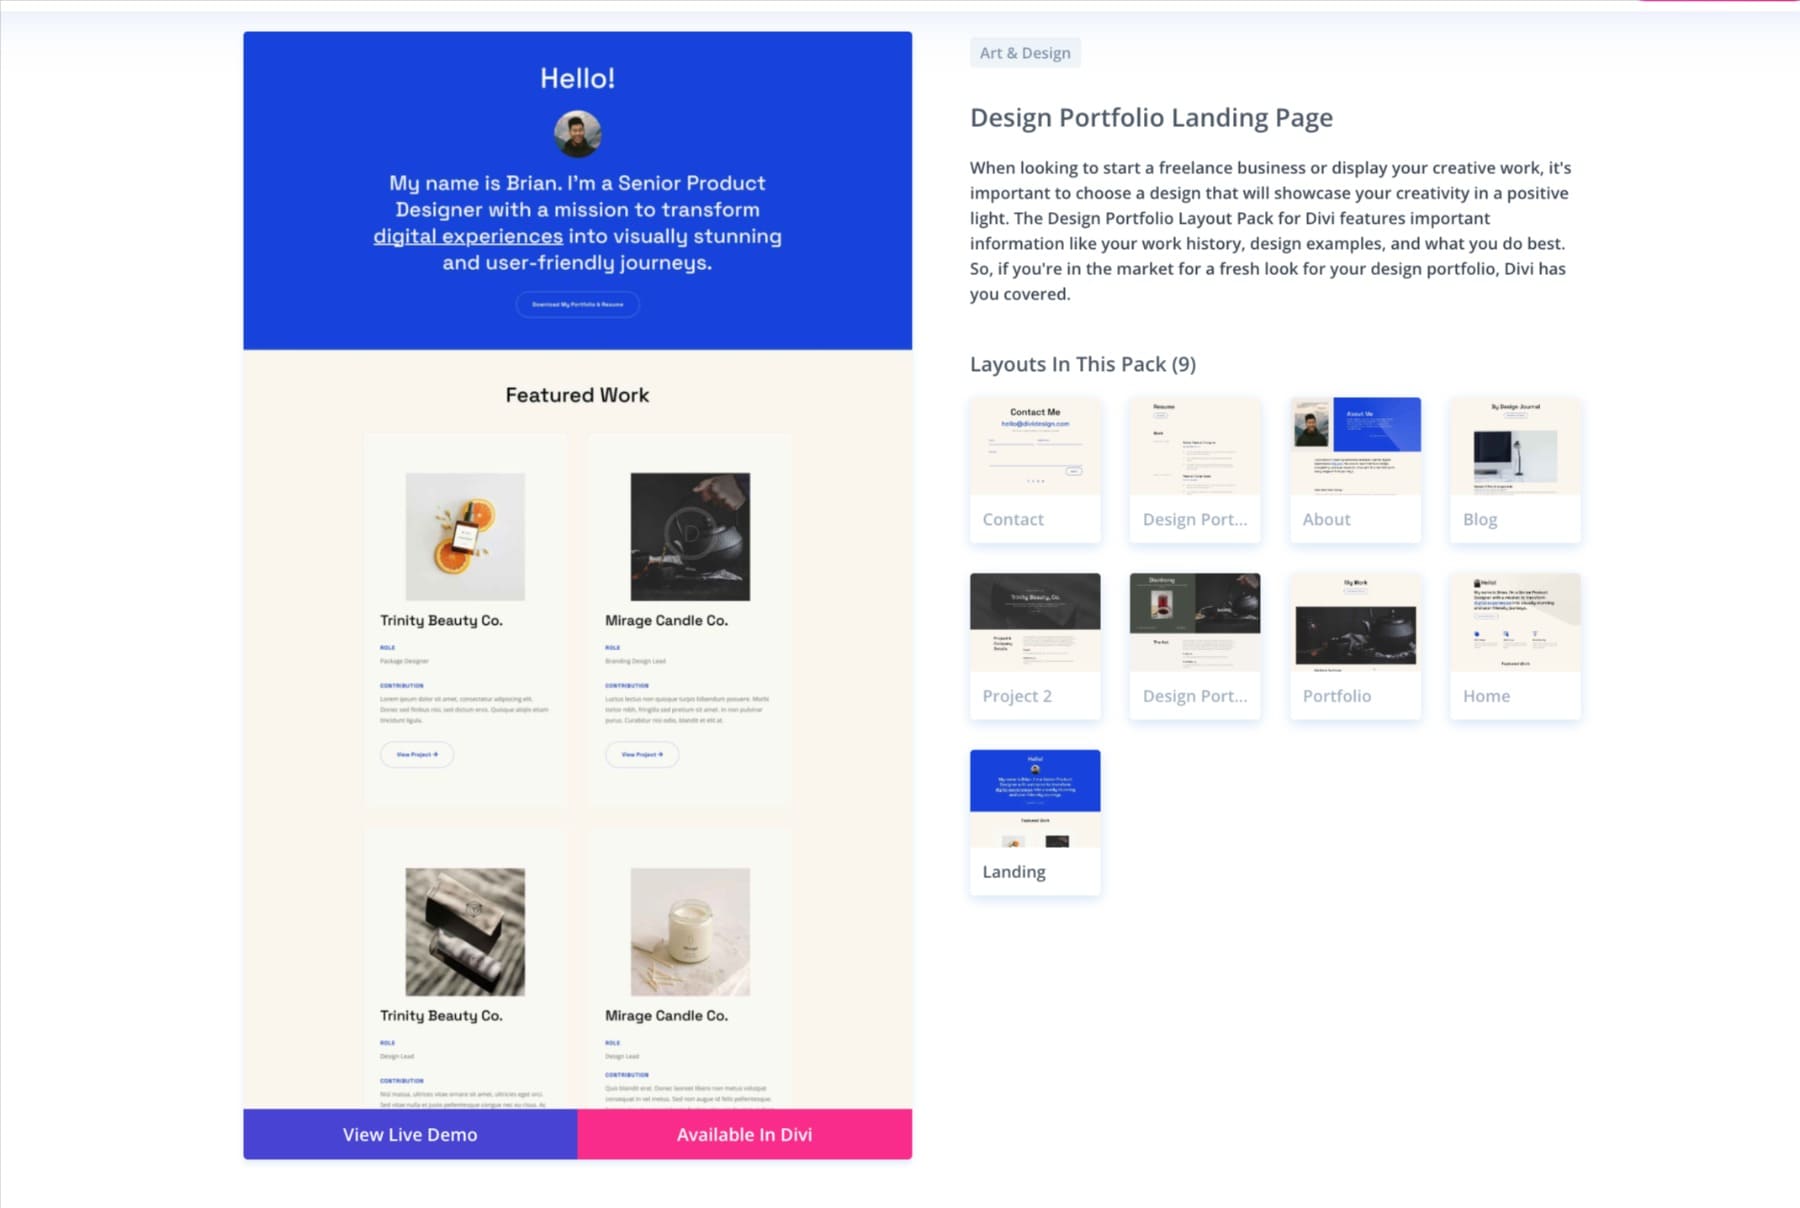
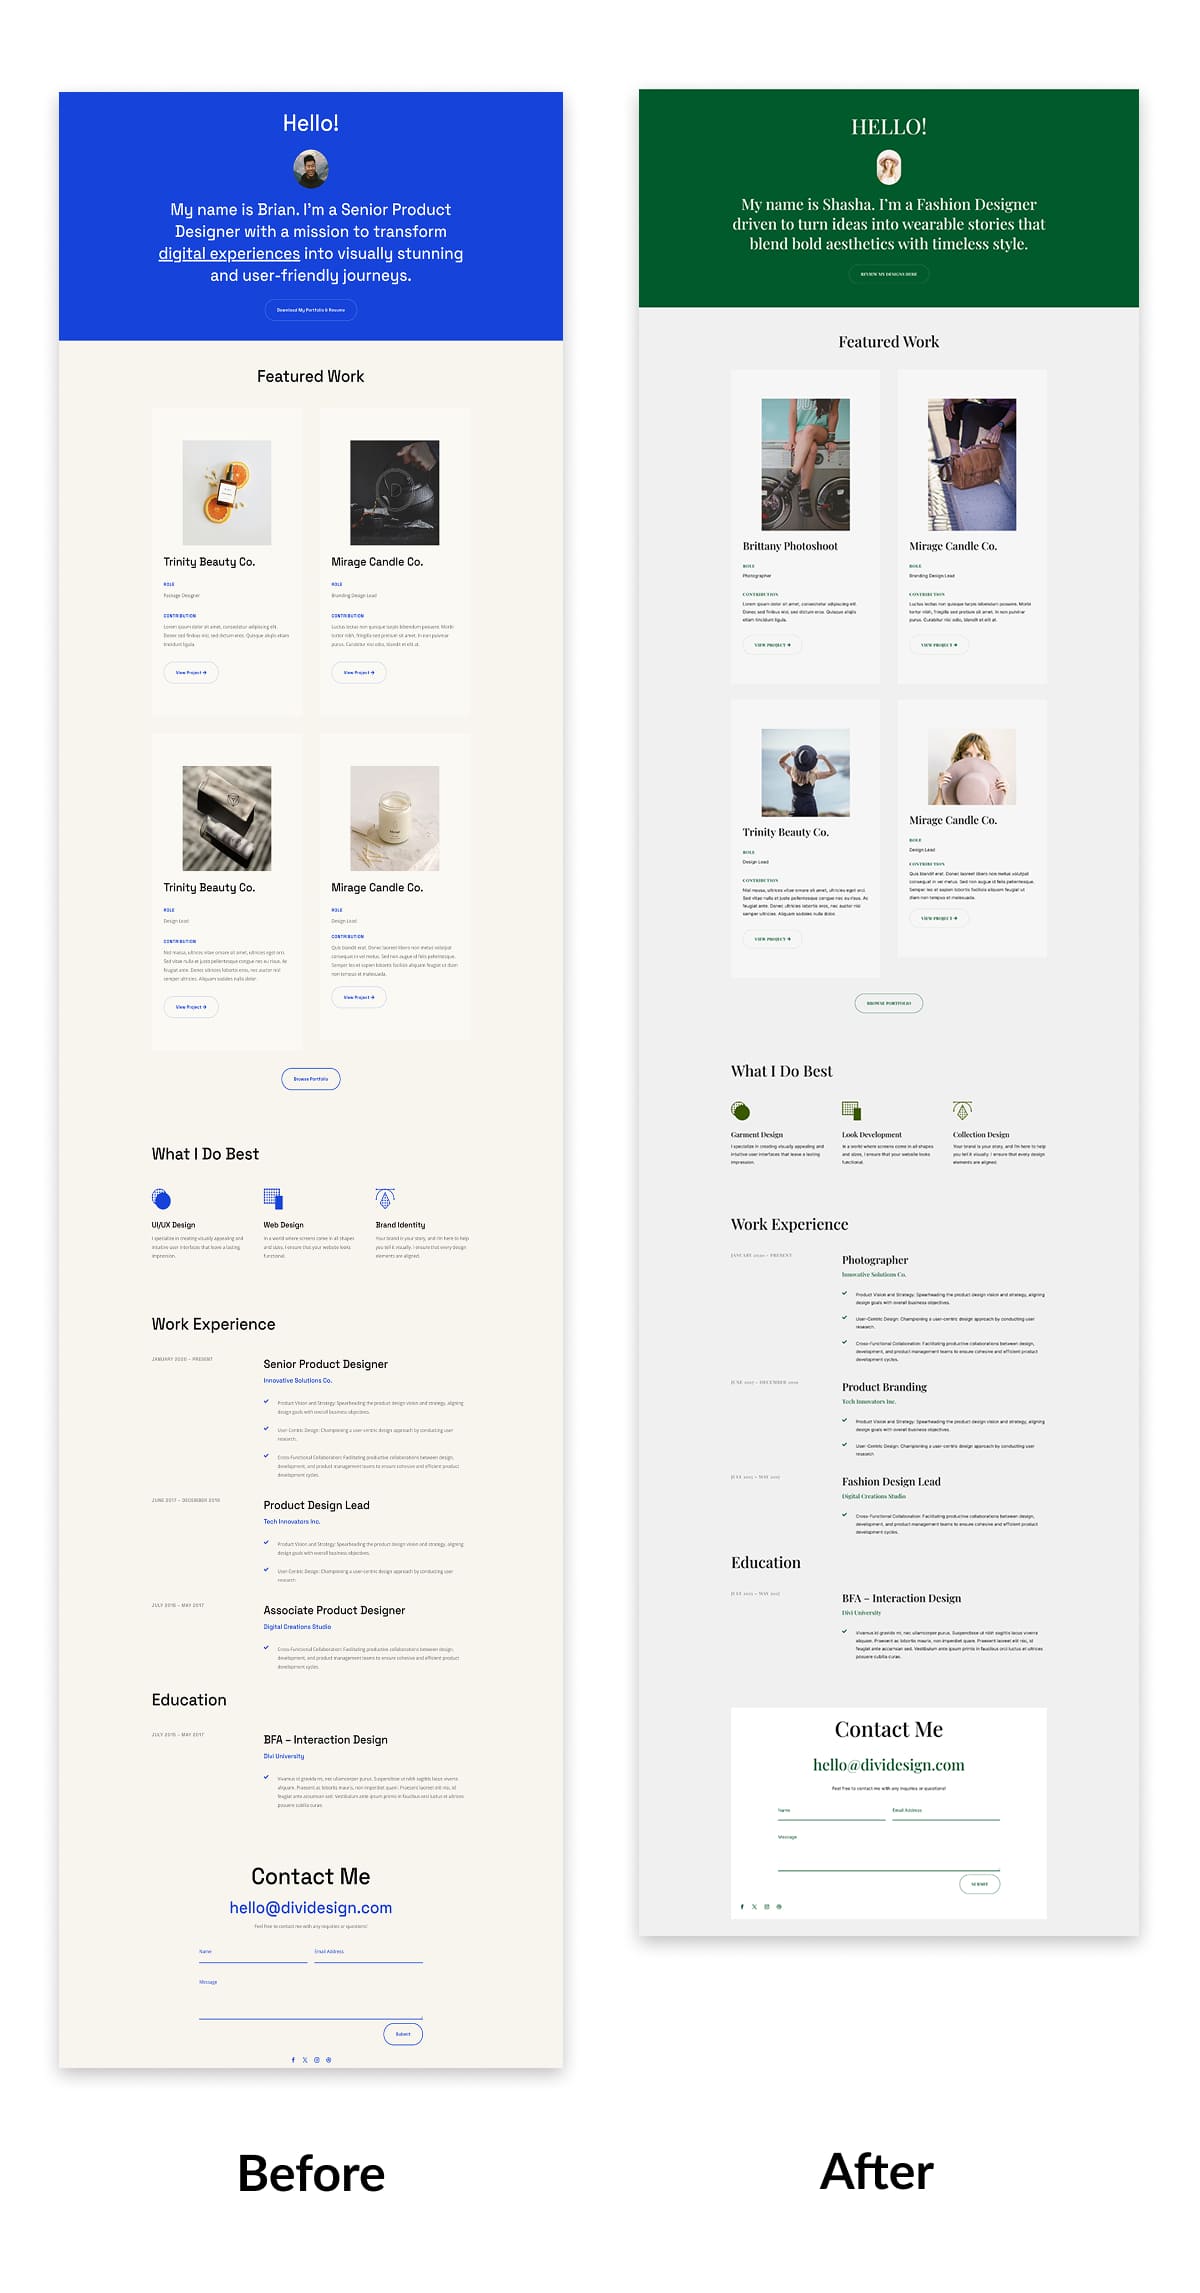
Now that you understand how the Inspector works, let’s use it to rebrand a structure pack touchdown web page. For this situation, we’ll paintings with the Design Portfolio structure pack web page that makes use of default colours, fonts, and photographs instantly out of the field.
The touchdown web page includes a hero phase, a number of frame sections with key options, and a footer. The entirety is styled with the pack’s authentic design. We’ll investigate cross-check phase via phase, change the types for our logo, and practice the adjustments cascade via the entire kid modules while not having to open them in my view. Right here’s the step by step procedure.
1. Audit The Web page First
Earlier than enhancing, spend a minute scanning the structure to make sure it’s correct. The function is to know what the unique design is constructed on: its colour palette, fonts, and repeated visible patterns. With out the Inspector, this will require manually checking each and every module to regulate settings. With it, you get a whole stock in seconds.
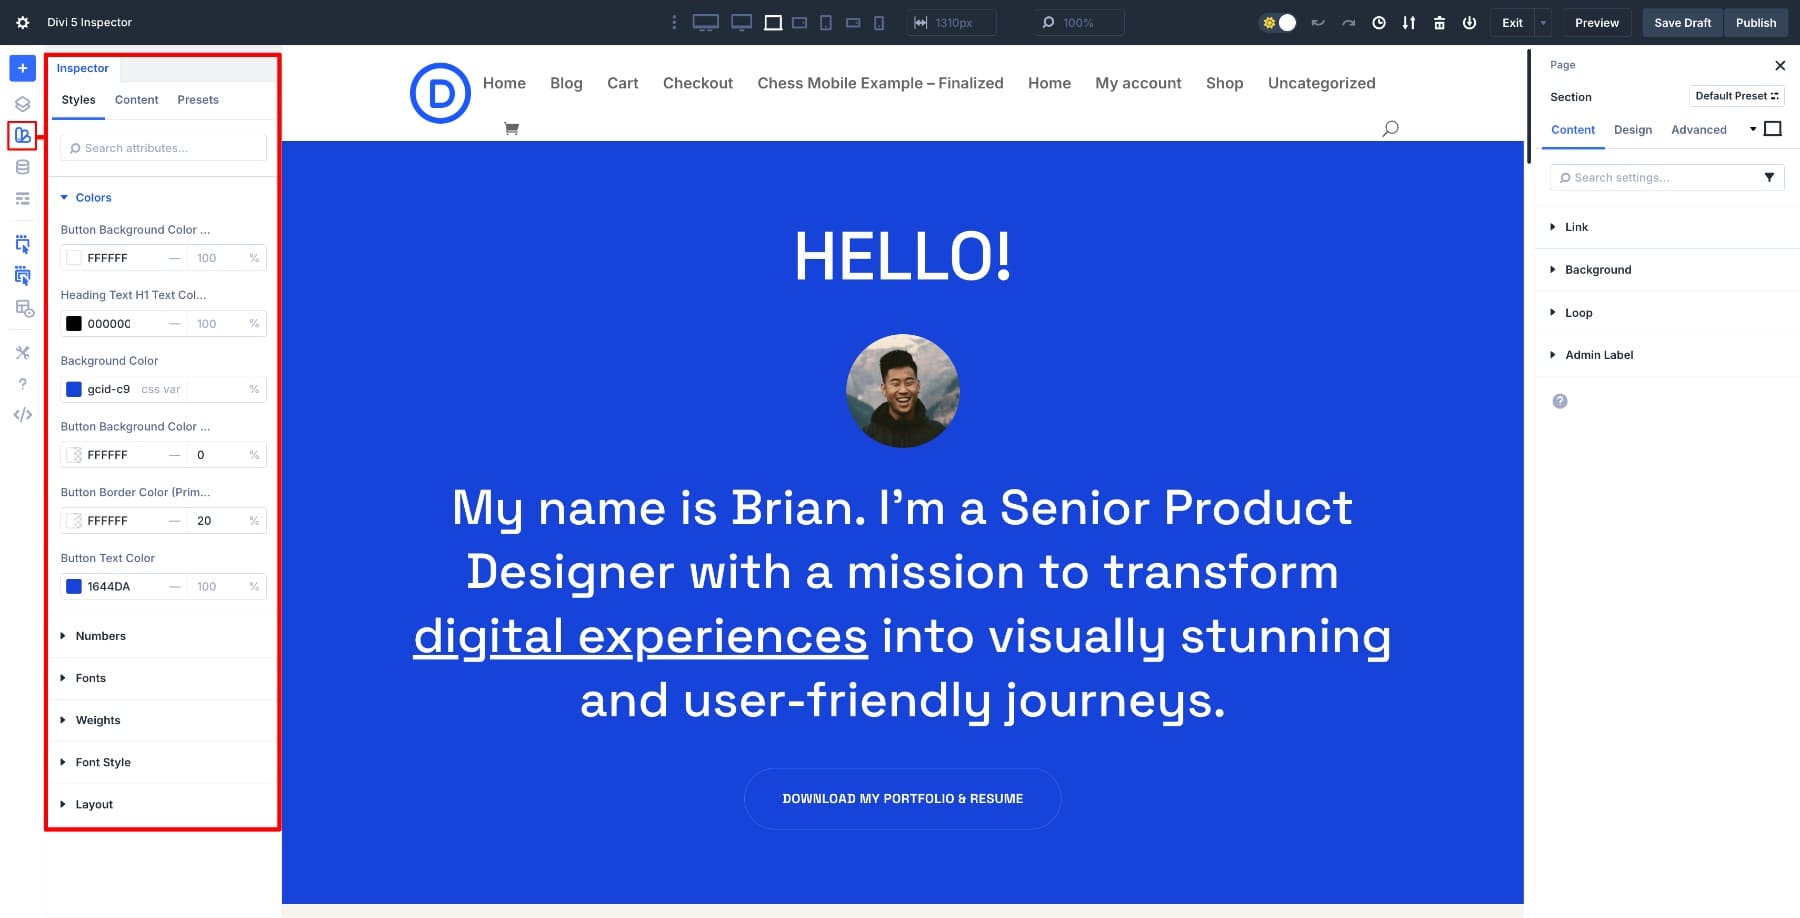
Get started with the hero phase and open the Inspector. On the best of the panel, you’ll see tabs (Kinds, Content material, & Presets) additional divided into Colours, Fonts, Weights, Content material, Numbers, and extra. Every tab will provide you with a distinct viewpoint on what’s if truth be told being utilized in that phase and its kid modules.
To audit temporarily, you wish to have to change between tabs. Right here’s how:
Colours
This tab lists each and every colour actively used within the inspected scope, displayed as swatches with their corresponding hex codes. You’ll see the primary accessory colour on buttons, the background colour at the back of textual content blocks, and any overlay tints on photographs.
If the similar hex seems more than one occasions throughout other modules, it’s simplest proven as soon as. That’s helpful as a result of you’ll be able to trade it as soon as and replace each and every example concurrently. Soaring over a colour presentations the entire cases the place it’s used.
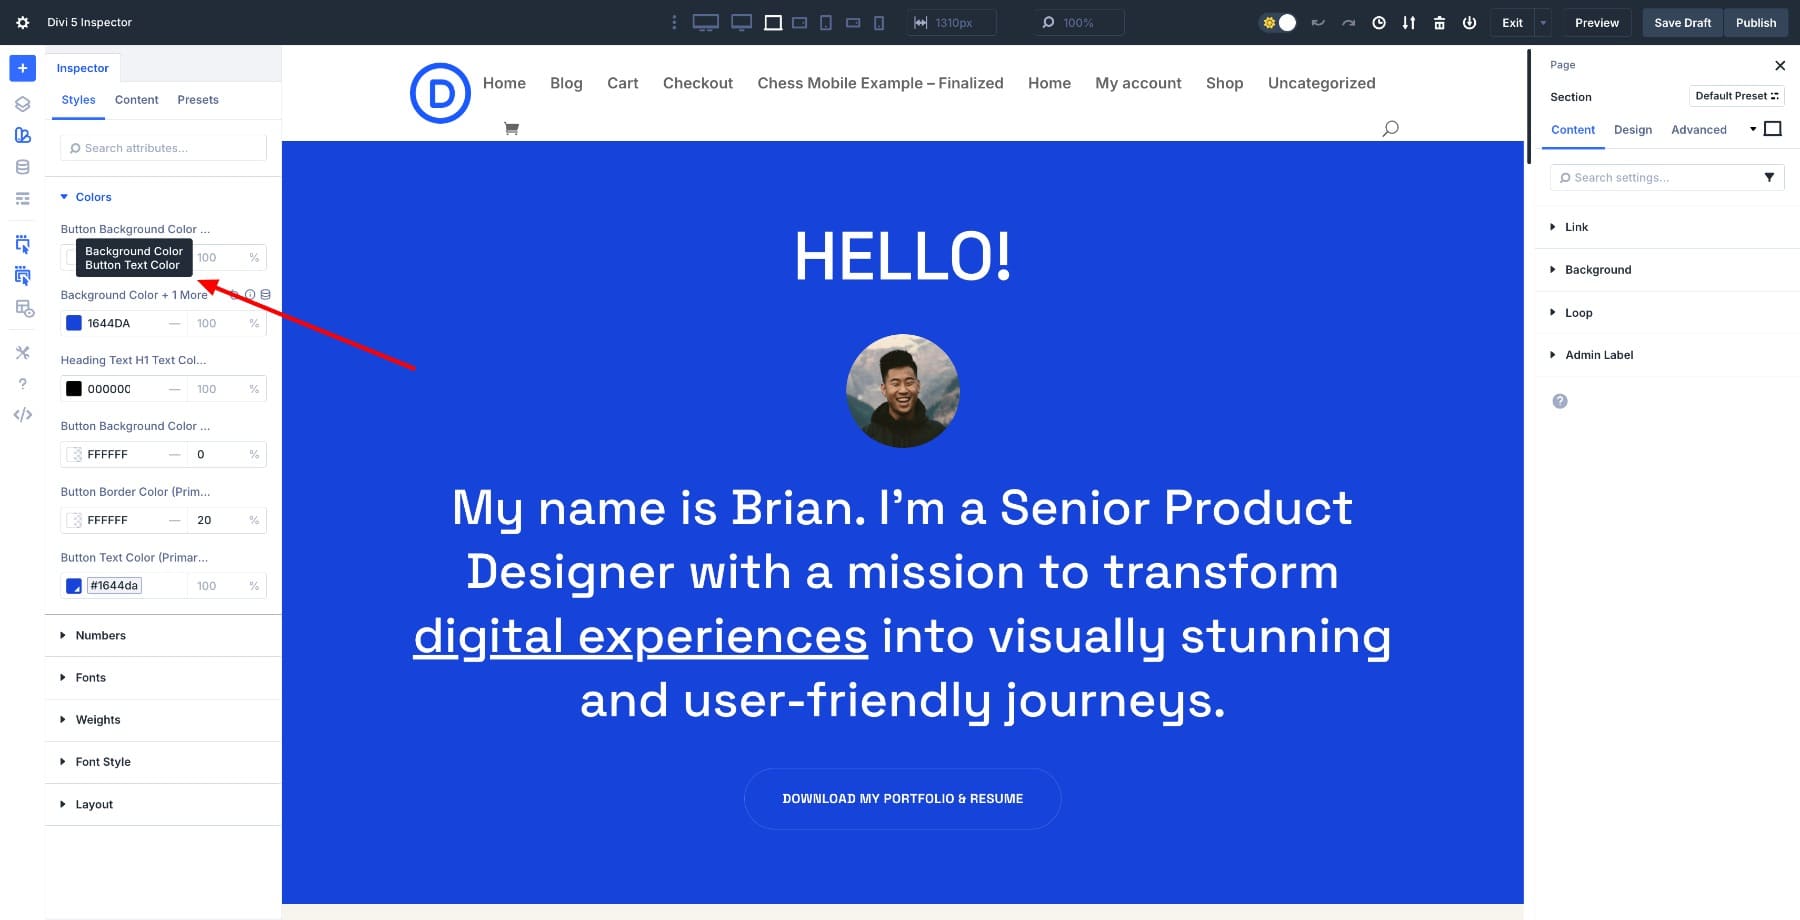
Search for the principle accessory colour. On this case, it’s #1644DA.
Fonts
This tab presentations the entire fonts used within the inspected house. Right here, we will see that Area Grotesk is utilized in all headings.
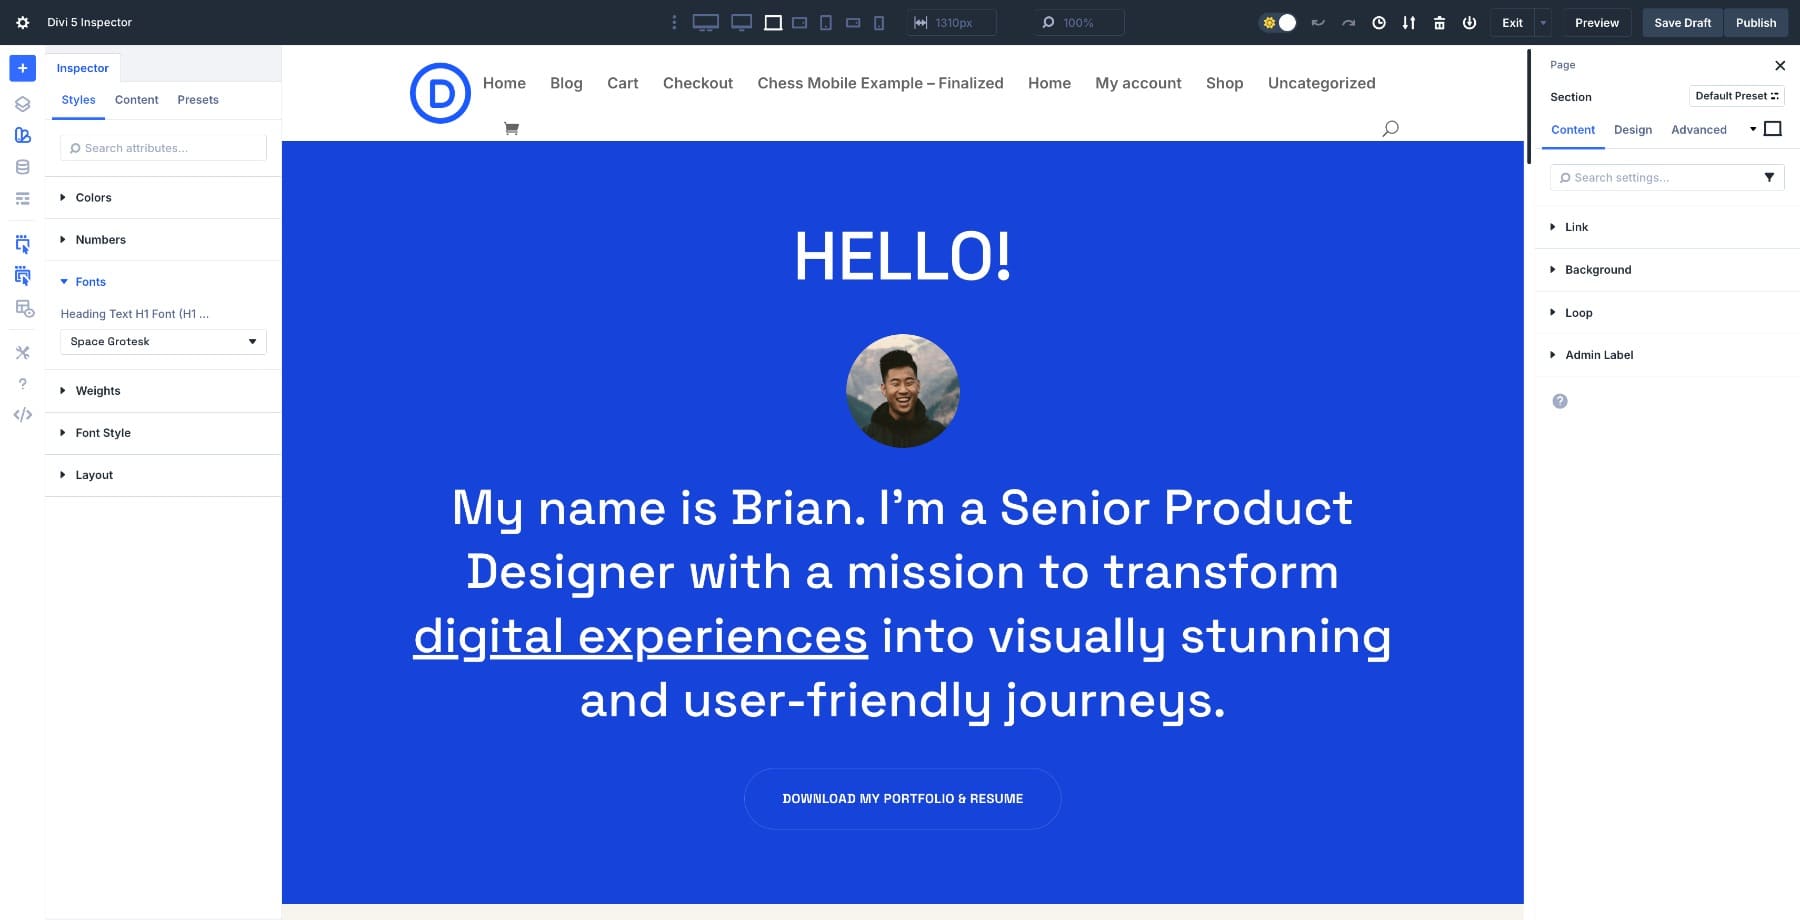
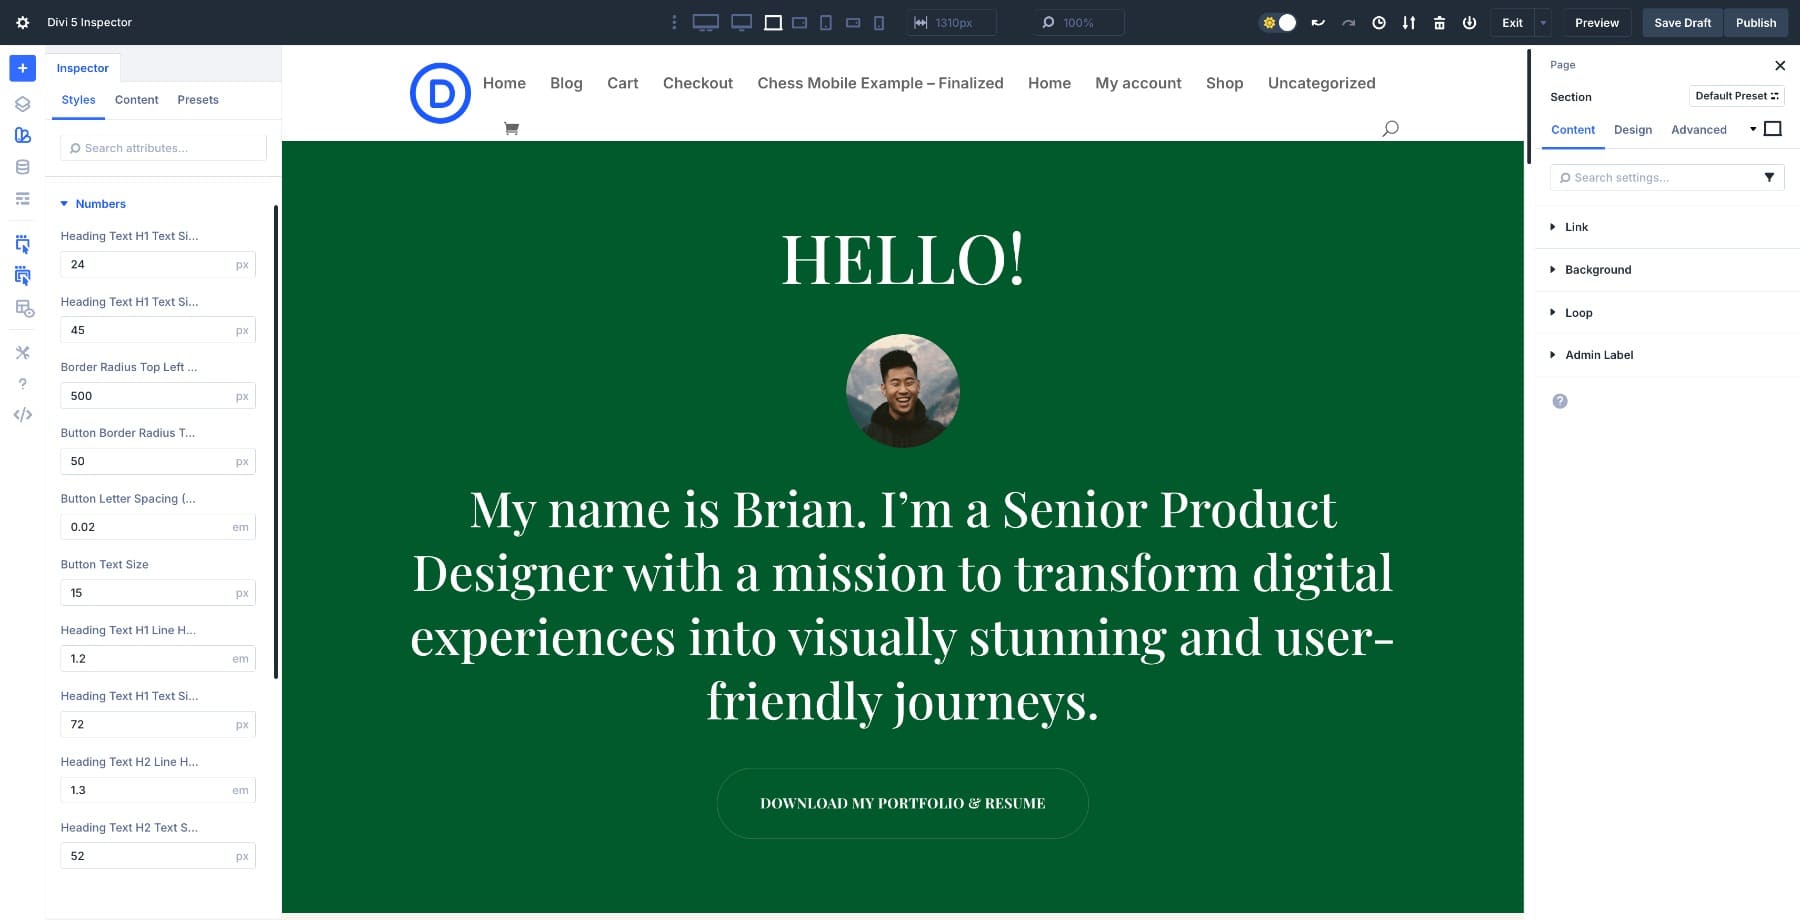
In a similar fashion, transfer to Numbers, Weights, and Font Taste to audit the present font types. For instance, the entire headings use medium weights, however buttons use daring weights. Then transfer to the Content material tab, the place you’ll in finding Media, Textual content, and Attributes columns with lately used parts.
This audit will provide you with a transparent image of what you’re running with. You’ll know which colours to exchange, which fonts to change, and which photographs want updating. It additionally presentations you the scope of your edits. You’re in a position to start out enhancing whenever you’ve reviewed what’s indexed.
2. Rebrand The Hero Phase
Now that you just’ve audited the hero phase, it’s time to customise it. We’ll change the accessory colour, substitute the hero symbol, replace the heading font, and edit placeholder content material, all from the Inspector panel.
Exchange The Accessory Colour
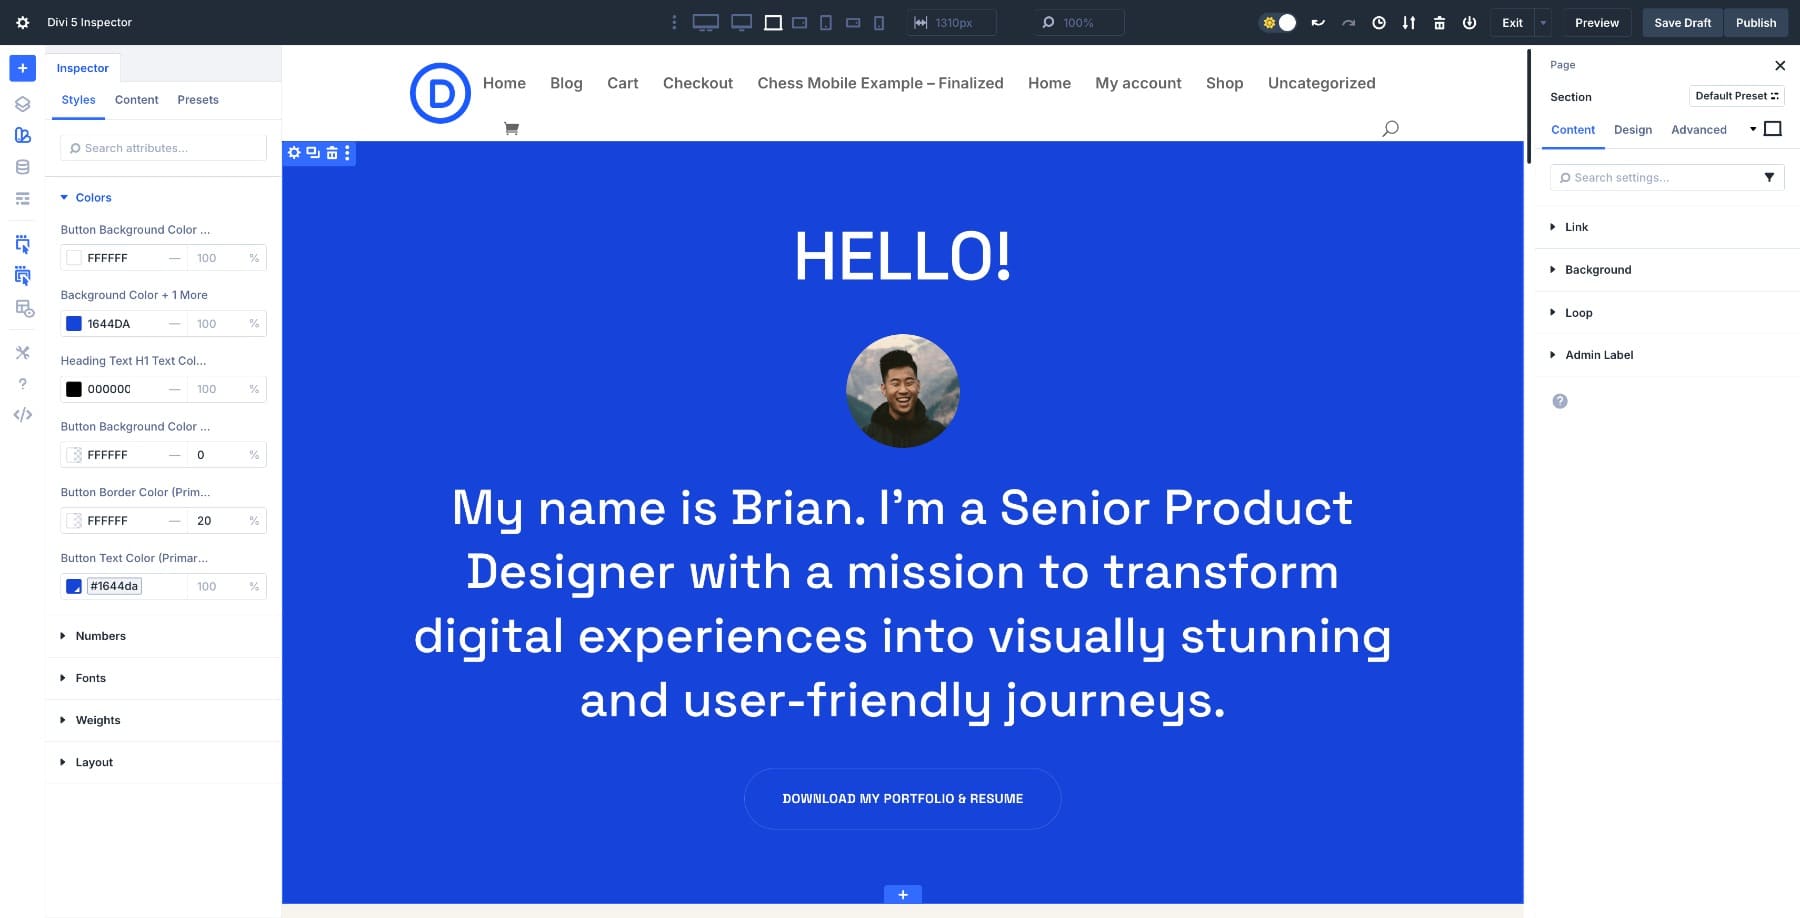
Within the Colours tab, the dominant accessory colour is #1644DA, which is used constantly throughout buttons, icons, and headings. Click on the colour swatch. A colour picker opens. Input your logo’s hex code or make a choice a brand new colour visually.
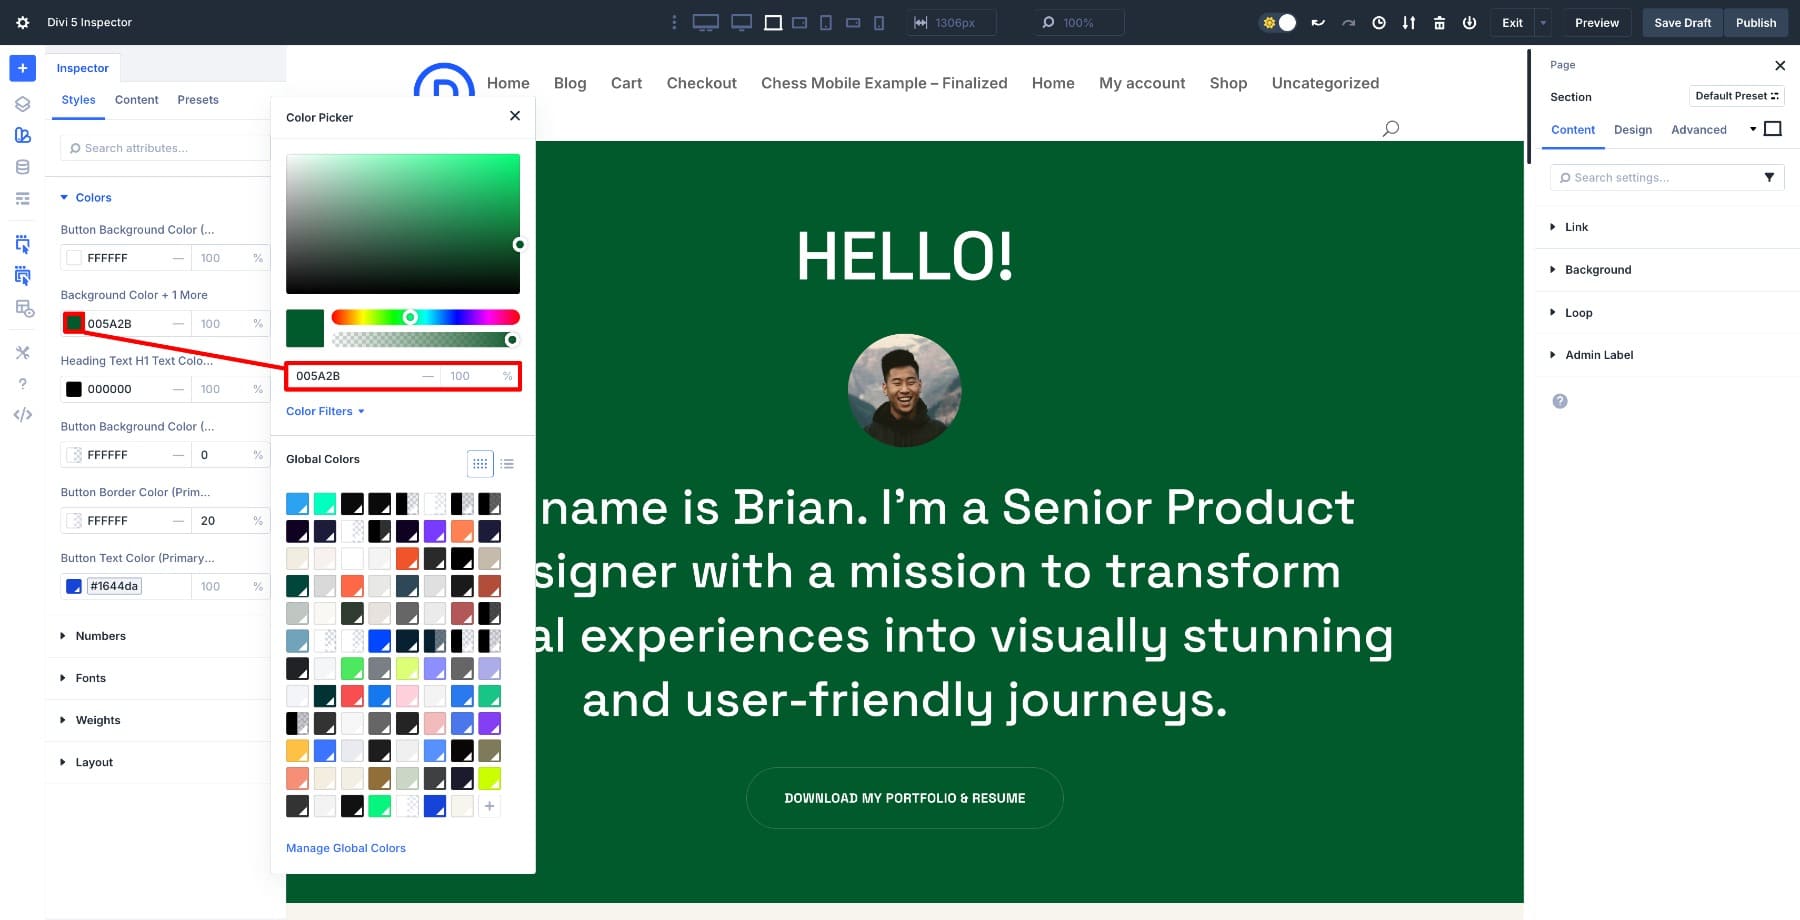
Once you follow the trade, each and every example of that colour within the hero phase updates straight away.
Adjust Font Kinds
Within the Kinds tab, click on into Fonts. In finding the heading font. Click on the font identify, and a dropdown seems with all to be had fonts. Make a choice your logo’s heading font.
Understand how we modified the font as soon as and up to date all its cases (in H1, H2, and the button)? Subsequent, we greater the button textual content dimension within the Numbers column and changed the font weight within the Weights column.
Exchange Content material
Transfer to the Content material tab, then click on within the Media column. The hero symbol will seem as a thumbnail. Click on it, and the media library will open. You’ll be able to add your branded symbol or make a selection one out of your library.
Beneath the Textual content column, you’ll see the entire textual content content material for headings, subheadings, and buttons used within the hero phase. You’ll be able to kind or paste your new content material without delay from right here.
Your hero phase is now branded. Apply the similar workflow within the subsequent sections.
3. Transfer Phase Through Phase
As soon as the hero is completed, shut the Inspector and transfer down the web page. Proper-click the following phase and investigate cross-check it. You’ll see a brand new set of colours, fonts, and media particular to that phase. Paintings from best to backside so your edits keep arranged and intentional.
Every phase would possibly use somewhat other types, however the Inspector presentations you precisely what’s there prior to you exchange anything else. This assists in keeping your workflow blank and forestalls you from lacking rogue types buried in nested modules.
As you progress throughout the web page, you’ll begin to realize patterns. Some sections would possibly already mirror adjustments you made previous as a result of types cascaded down from mum or dad parts. For instance, once I up to date the hero phase’s heading colour, the footer additionally mirrored the ones new colours.
Different sections would possibly introduce a brand new accessory colour or font variation that wasn’t within the hero. Whilst you spot one thing sudden, take a look at if it’s intentional (like a callout field supposed to face out) or simply an inconsistency from the unique structure pack. The Inspector makes those variations visual prior to you by accident overwrite one thing that are meant to keep distinctive.
The primary two or 3 sections take essentially the most time since you’re nonetheless finding out what the structure makes use of. After that, the paintings hurries up. You’ll acknowledge which types repeat, which of them are outliers, and the place you’ll be able to make bulk adjustments with a bit of luck.
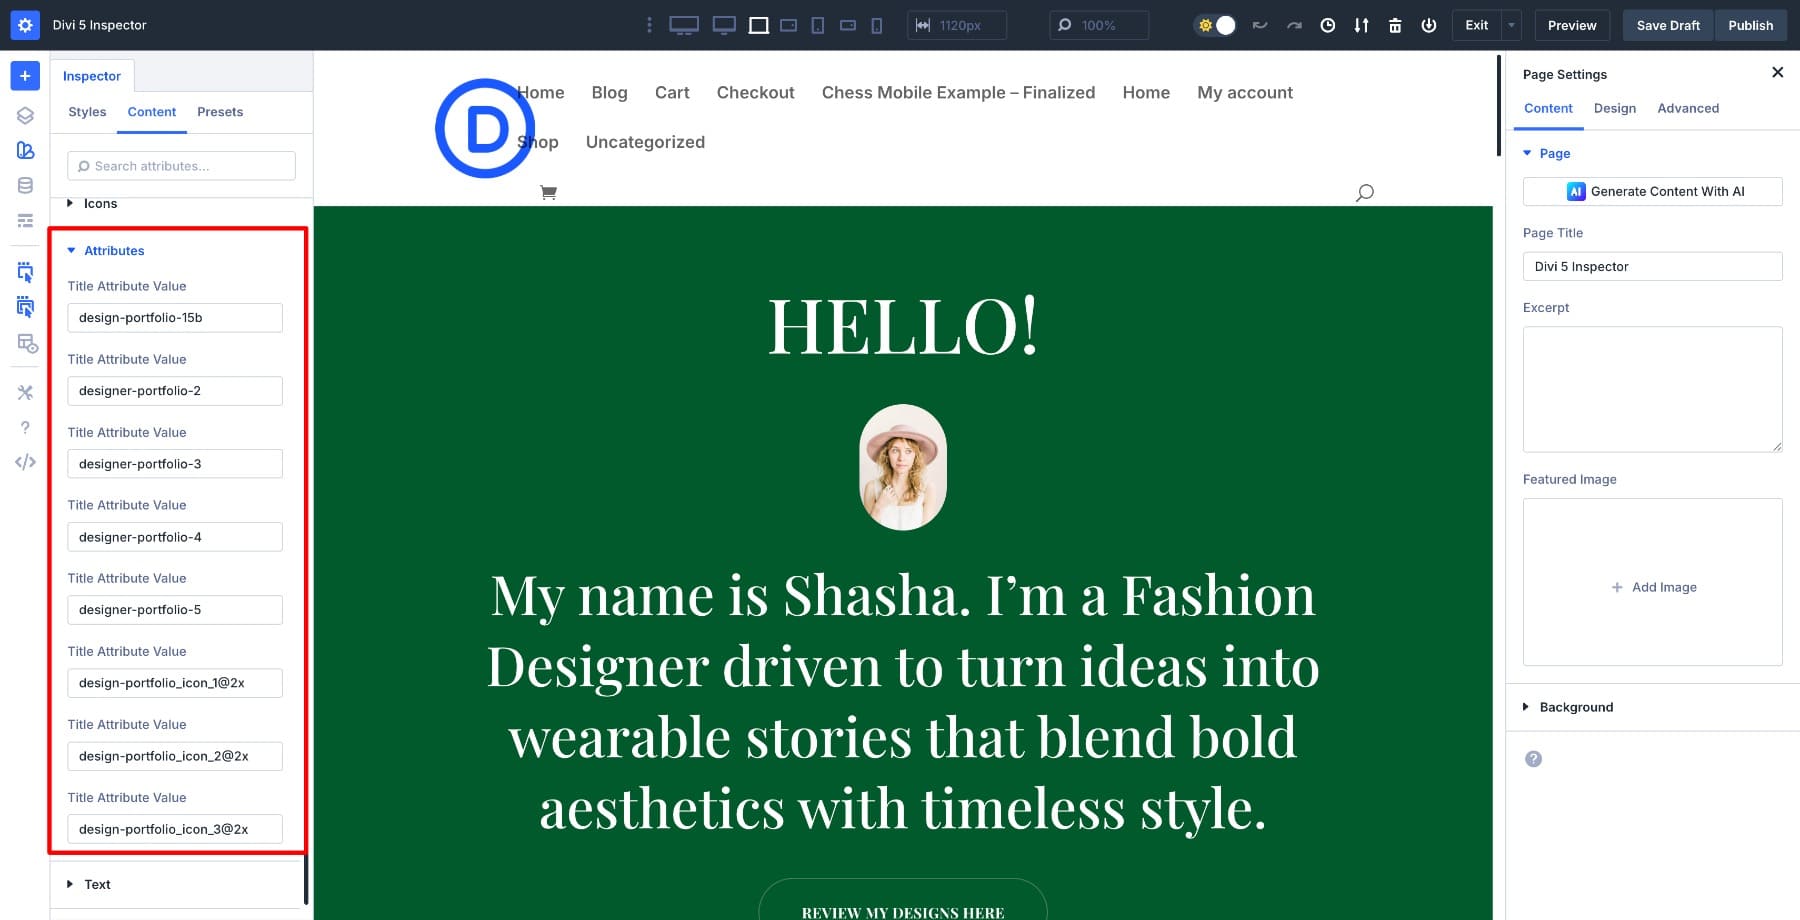
4. Exchange Inventory Media And Content material
As you progress throughout the web page, you’ll stumble upon placeholder photographs and generic replica. The Content material tab within the Inspector permits you to change between them with out opening particular person modules. Click on any symbol thumbnail within the Media column to exchange it with one from the Media Library.
Click on any textual content block within the Textual content column to edit headlines, CTAs, or frame replica inline. That is particularly helpful in sections with repeating content material patterns, reminiscent of characteristic grids or testimonial blocks, the place you’d in a different way must open the similar module kind many times.
Moreover, make the most of the Attributes column to improve the usability of your pages.
By the point you achieve the footer, maximum of your logo types are already in position, and lots of the colours and fonts you modified previous can have carried over. Check out the footer to check what’s left. Search for any lingering placeholder textual content in copyright traces, menu hyperlinks, default social media icons, or trademarks that also want to be swapped.
Make the ones ultimate changes, then step again and overview the entire web page. Scan for any inconsistencies you could have neglected prior to you wrap up the rebrand.
Professional Tip: Save Your Design Variables
Whilst you trade colours and fonts within the Inspector, save them as Design Variables as a substitute of the usage of static values. This creates a design framework that makes replicating types to different pages virtually immediate. Values stored as world variables transform a part of a reusable machine that looks throughout all of your website online.
Move to the Variable Supervisor icon and make a choice Colours. Scroll right down to Upload International Colour and save your colour as a variable.
You’ll be able to save fonts, numbers, hyperlinks, textual content, and different variables for world get admission to the similar means. As soon as stored, those variables shape a framework you’ll be able to follow to any web page for your structure pack.
Now, open any other web page from the similar structure pack (such because the About web page). Check out the hero phase, click on a colour, and make a selection your stored variable from the dropdown as a substitute of coming into a brand new hex code.
The colour updates straight away fit your logo. Repeat this for fonts and different types. You’re now not re-customizing from scratch. You’re making use of a design machine you already constructed at the first web page. This assists in keeping your structure pack constant and cuts your workflow time in part.
Check out Divi 5’s Inspector Lately
The Inspector in Divi 5 adjustments the way you customise structure packs. Audit a piece to peer what’s getting used, make your edits from one panel, and watch the ones adjustments ripple via each and every module within it. The primary web page takes a while since you’re organising your logo machine.
As soon as the ones types are stored as Design Variables, the remainder pages take a fragment of the time. Check out the Inspector workflow in your subsequent structure pack and watch how temporarily it comes in combination.
The publish Customizing Layouts Packs With Divi 5’s Inspector (So Easy) seemed first on Elegant Themes Blog.
Contents
- 1 What Is Divi 5’s Inspector?
- 2 How To Customise Structure Kinds
- 3 Professional Tip: Save Your Design Variables
- 4 Check out Divi 5’s Inspector Lately
- 5 Rising Our New House for WordPress Innovation in Eire
- 6 How (And Why) to Get started The use of Google Analytics 4
- 7 The best way to Allow / Turn on WordPress Plugins from the Database

0 Comments