
Pop-up optin bureaucracy are similtaneously probably the most an important useful and most annoying parts of web design. Without them, you’ll on occasion increase a list of devoted shoppers, then again first-time visitors are extraordinarily probably not to even keep in mind of them. That’s why we want to walk you all over the tactic of the usage of Divi’s scenario alternatives to reason an optin form after the individual visits sure pages. No longer most simple are they a lot more more likely to develop into on account of they have appeared spherical your internet web page quite, however as well as because you’re now not frustrating them with a pop up that doesn’t pertain to them. Let’s dig in and spot how we will be able to make stronger your internet web page!
Simple the right way to Reason an Optin Form the usage of Scenario Alternatives
For this particular article, we’re going to make use of the Divi scenario alternatives to turn an optin form for a discount code after the individual visits two explicit pages for your internet web page. It’s going to most simple appear after those must haves are met, that implies the bargain is most simple available to particularly centered shoppers.
For this educational, we’re going to be the usage of the Divi Theme Builder with the intention to upload the optin form module to the pages’ Body construction, then again whilst you’ve were given a selected internet web page or put up you want to have an optin show after sure Page or Post visits, you’ll follow the exact same process for the location alternatives.
You’ll to find the Divi Theme Builder on your WordPress admin dashboard underneath Divi – Theme Builder inside the left-hand sidebar.
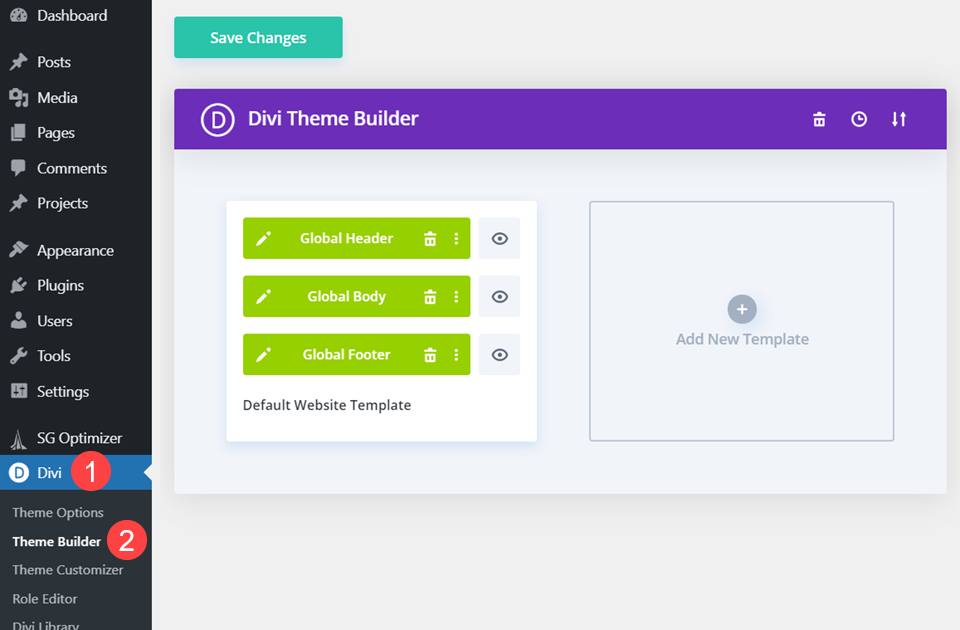
Create a New Template
Inside the Divi Theme Builder, you want to click on at the Add New Template button.
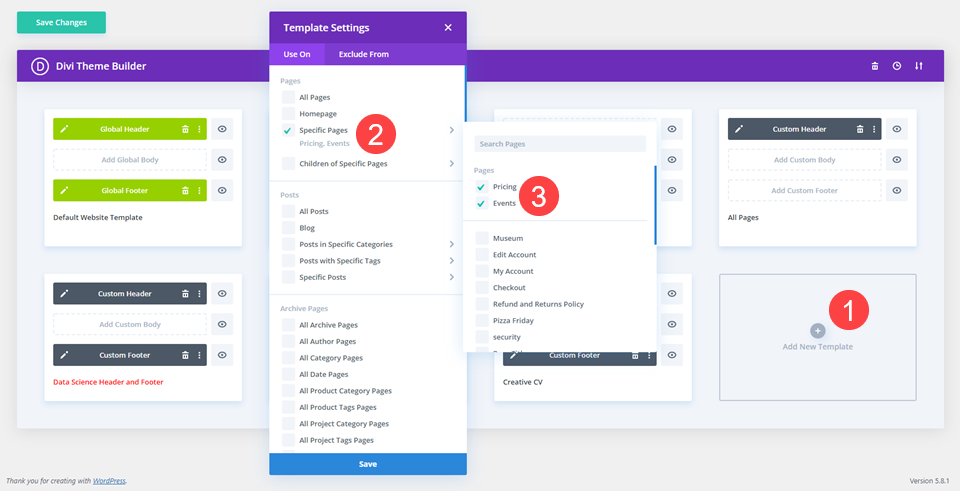
Then, make a choice the precise pages you want the optin form to appear. Since we’re going to offer a discount code the usage of the optin form module, we’re going to have the construction appear most simple on the Events and Pricing pages.
Copy Email Optin Module
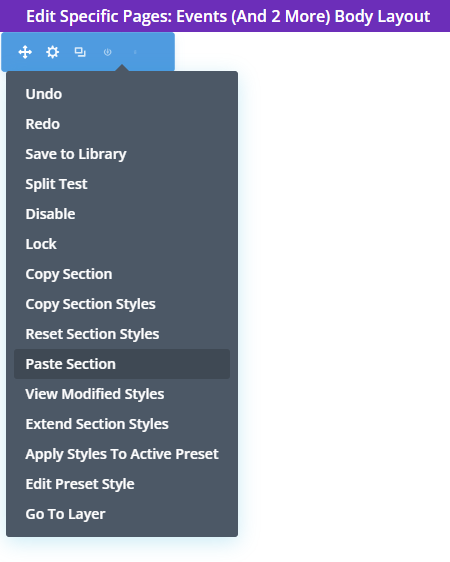
Since we’re the usage of premade construction packs for this, go into the construction internet web page with the email optin form already designed and implemented. Right kind click on at the containing phase and make a choice copy phase from the context menu.
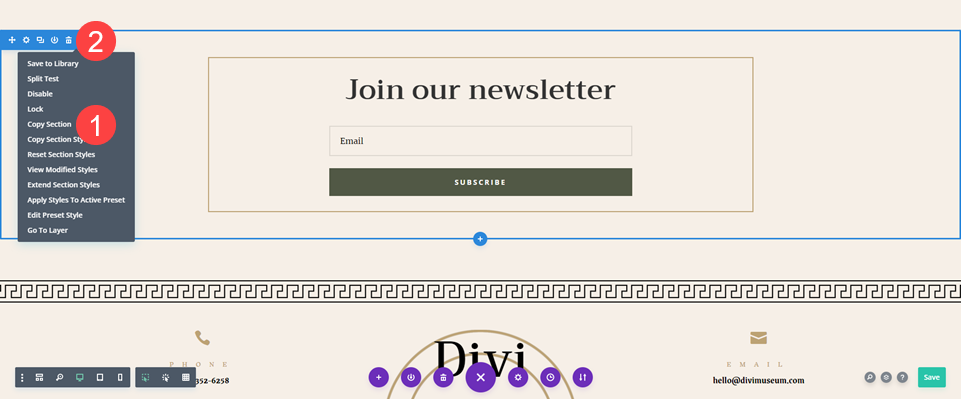
After that, delete the phase from the internet web page on account of you’ll have it inside the Theme Builder as an alternative.
Add a Custom designed Body Construction
Next navigate once more to the Theme Builder to create the entire construction. You’re going to click on at the Add Custom designed Body in that template and make a choice Assemble Custom designed Body.
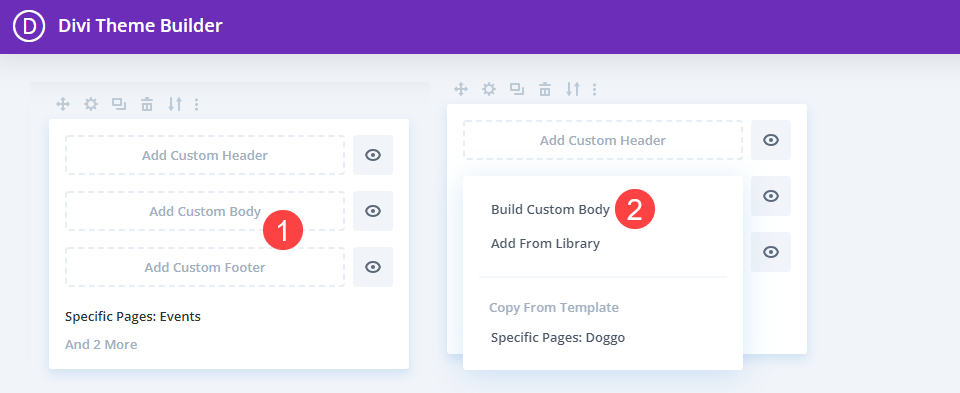
Inside of that, make a choice Get began From Scratch and also you’ll have a blank template to art work with.
Paste the Email Optin Segment
Inside the editor, right kind click on on and make a choice Paste Segment from the context menu.
The definitely styled and designed email optin must drop right kind in.
Add Copy to Offer the Conditional Bargain
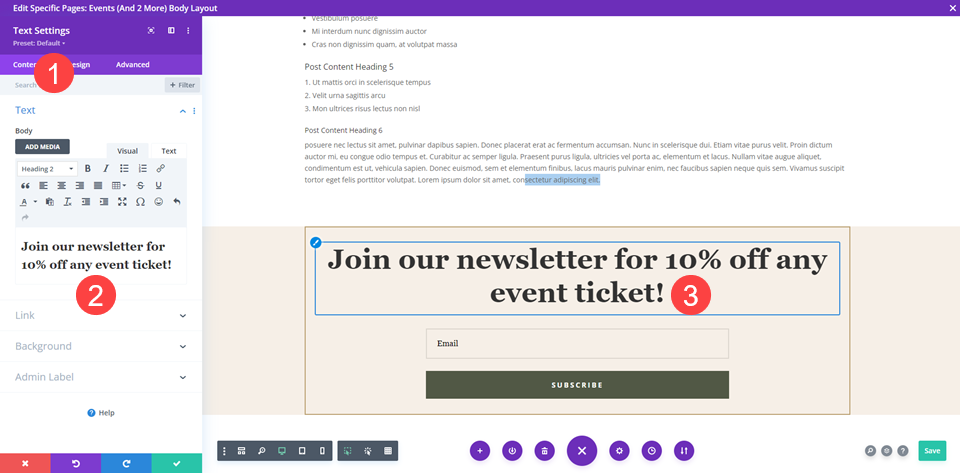
Next, you want to mention the bargain you’re offering. For this module, we’re going to switch the heading in a Text module, then again chances are you’ll wish to moreover go into the Settings for the Optin Form and change the determine text.
After that, it’s time to get to showing the internet web page content material subject material.
Add Dynamic Internet web page Content material subject material
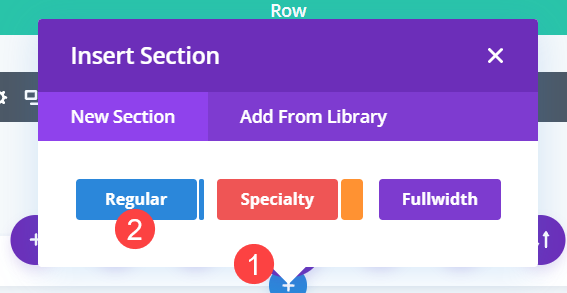
Next, if there’s now not already a blank phase, click on on add a brand spanking new phase by means of clicking the blue + icon and selecting Not unusual Segment.
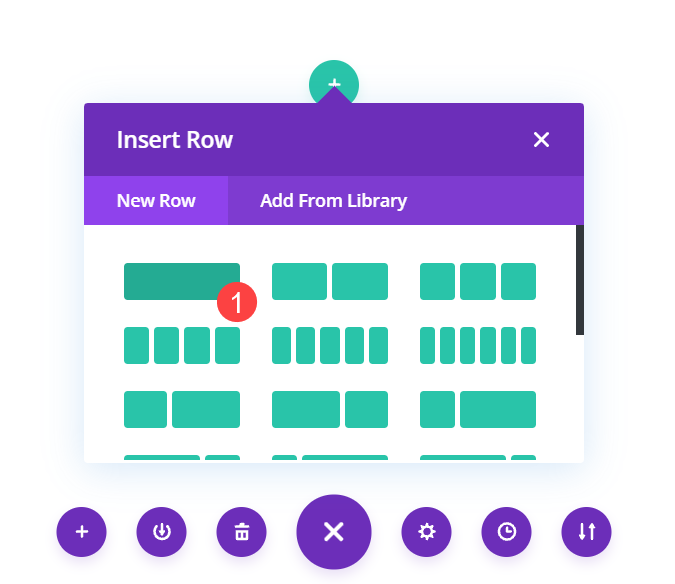
If in case you have the phase in place, add a single column row.
Make a selection the Put up Content material subject material module from the Insert Module dropdown. It is a dynamic module that displays regardless of design you’ve got already made. In this case, the premade Museum Events and Pricing layouts will display on the front end.
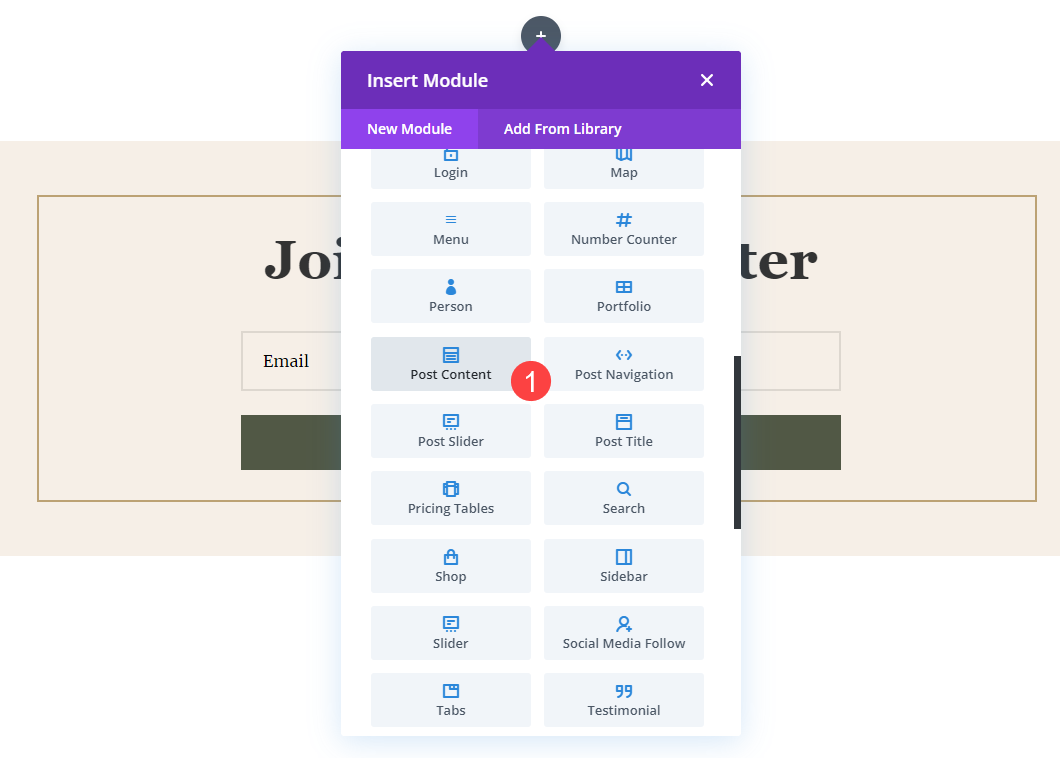
In this case, the premade Museum Events and Pricing layouts will display on the front end.
Edit the Put up Content material subject material’s Width
Next, go into the row settings for the Put up Content material subject material module’s containing row. Navigate to Spacing inside the Design tab and set every Width and Max Width to 100%.

Remove Padding from Rows and Sections
On account of we’re together with dynamic content material subject material to already designed pages, we want to keep it as seamless as possible. So go into the Design Settings tab for the entire particular person sections and rows and also you must unquestionably set Highest and Bottom Padding to 0 px underneath the Spacing heading. Don’t go away it blank, as there’s default spacing set in Divi for them.

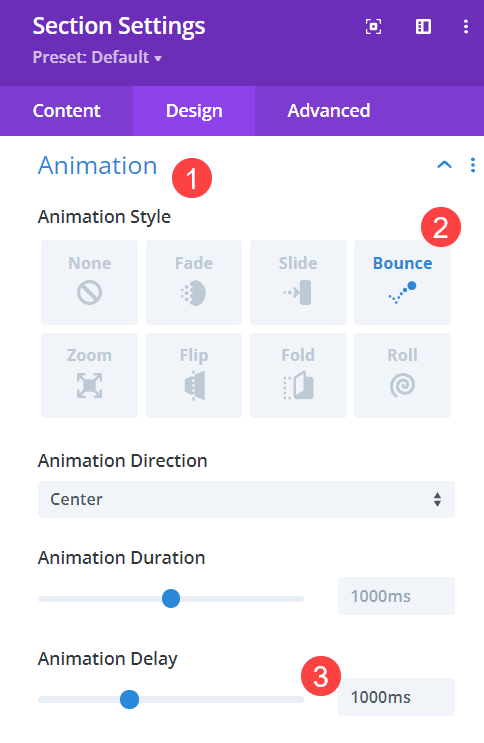
Add an Animation
Next, go into the phase settings for the one containing the email optin form. Under the Design tab of the phase, we’re going to add an Animation. On account of this phase will show only for visitors who meet sure requirements, we want to draw their attention to it. We want to be sure they don’t think it’s merely each and every different part of the internet web page. We will do so by means of animating the entire phase to appear after a set period.
We will decided on Leap for the Animation Style and 1000ms (1 second) for the Animation Lengthen. Now, this phase will most simple appear 1 second after the buyer has arrived. You’ll set the extend to regardless of works best for you, with each and every 1000ms being 1 second.
Not obligatory: Set Fastened Position
If you want the individual to seem the optin instantly, quite than having to scroll to the bottom of the internet web page, you’ll affix it to the bottom of the show. Move into the Complicated tab for the phase and to find the Position settings. Make a selection Fastened from the dropdown, and then click on at the bottom middle sq. to place the phase. Next, trade the Z Index to 999 so that it’s always higher than other content material subject material on the internet web page.

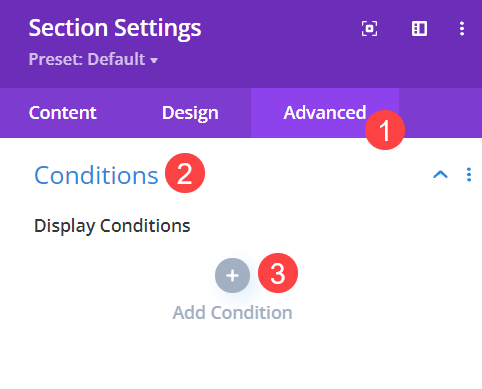
Add Conditional Not unusual sense to the Segment
Whilst you’re nevertheless inside the settings for the containing phase, go to Complicated tab and to find the Must haves alternatives. This is the way you’ll set what pages a buyer must see for your internet web page previous to they get this optin form. Click on at the grey + icon that says Add Scenario to start out.
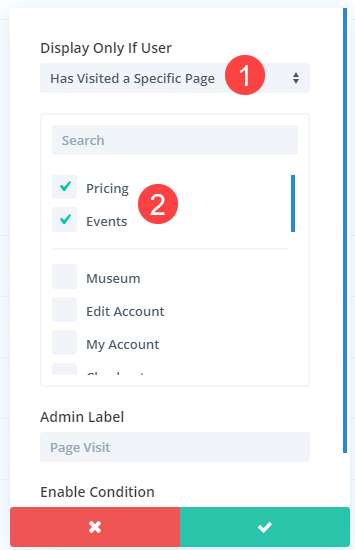
Next, make a selection Internet web page Visit underneath the Interaction subheading.

Then, you merely need to select the correct pages the buyer must see in an effort to reason the optin form with the bargain. Make a selection the Pricing and Events pages from the file proper right here. On account of both probably the most pages are made up our minds on and they’re every assigned to the Theme Builder template, the individual will see the optin on each internet web page regardless of the order in which they’re visited. Then again every must be visited in an effort to reason the optin form to appear.
You’ll moreover do this with Put up Visit, too, which may be underneath the Interaction subheading. It truly works the exact same method, then again with blog posts as an alternative of Pages.
Wrapping Up with the Conditional Optin Form
Once all of that is saved, your conditional optin form is live. Now each and every time someone visits particular pages or posts for your internet web page, you’ll give them specific, centered content material subject material. Having the ability to customize your content material subject material the usage of the ones alternatives opens up your internet web page to having an improbable particular person revel in. Which is among the greatest the usage of components to conversions. And now you’ll display the optin form to develop into them as part of that experience.
How would you use the location alternatives to turn an optin form?
Article featured image by means of TMvectorart / shutterstock.com
The put up How to Trigger an Optin Form After Specific Page Visits gave the impression first on Elegant Themes Blog.
Contents
- 1 Simple the right way to Reason an Optin Form the usage of Scenario Alternatives
- 1.1 Create a New Template
- 1.2 Copy Email Optin Module
- 1.3 Add a Custom designed Body Construction
- 1.4 Paste the Email Optin Segment
- 1.5 Add Copy to Offer the Conditional Bargain
- 1.6 Add Dynamic Internet web page Content material subject material
- 1.7 Edit the Put up Content material subject material’s Width
- 1.8 Remove Padding from Rows and Sections
- 1.9 Add an Animation
- 1.10 Not obligatory: Set Fastened Position
- 1.11 Add Conditional Not unusual sense to the Segment
- 2 Wrapping Up with the Conditional Optin Form
- 3 Take a look at Damaged Hyperlinks The use of Google Sheets
- 4 How to Effectively Rebrand Your Website Step-by-Step in 2025
- 5 Divi Meetup Group Replace: June 2022

0 Comments