
Do you wish to have to create your own customized fast URL on your blog?
Customized fast URLs are regularly branded fast URLs which could be easy to remember and share. We use wpbeg.in for our private branded custom designed fast URLs.
In this article, we’ll show you tips about the best way to merely create your own customized fast URLs on your blog.
Why Use a Branded Customized Fast URL in WordPress?
You may have noticed how in taste web websites like The New York Events, Twitter, Facebook, and TechCrunch use branded fast URLs on social media.
The New York events uses nyti.ms, TechCrunch uses tcrn.ch, and WPBeginner uses wpbeg.in space name for shorter customized URLs.

The ones branded domain names are known as space hacks.
They’re created by the use of combining the brand name and a web site TLD to cleverly spell a logo name.
Since most web websites use .com as their primary space, it is a excellent solution to create a temporary url on your WordPress internet web site. See our recommendations on choosing the most efficient area on your blog.
Using your own customized fast URL improves logo popularity among your shoppers. It moreover means that you can create shorter URLs for simple sharing on social platforms.
Most importantly, you’ll merely observe those URLs to look what choice of clicks you got whilst you shared a URL.
Having discussed that, let’s see tips about the best way to create your own branded customized fast URLs in WordPress.
Bear in mind: Should you’re merely looking to create memorable fast URLs using your number one space, then we propose using the Beautiful Hyperlinks plugin. That’s what very best podcasters and YouTubers use to mention fast links in their films.
Step 1: Acquire a Fast URL or Fast House Identify
Most other folks shouldn’t have a temporary URL as our primary space name. This means it is important to enroll a brand spanking new space name it is a lot shorter than your provide space.
For instance, when choosing a branded shorter space for WPBeginner.com we registered WPBeg.in. This made our fast URL 6 characters shorter than our primary space.
There are many free space name generators that permit you to robotically generate space name concepts. See our record of 14 best possible unfastened area title turbines.
Domainr is the one that specializes in helping you in finding fast domains using space hacks.
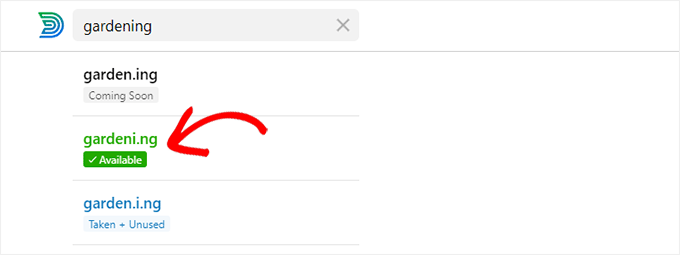
Take a look at different combinations and uncover ingenious techniques to spell your logo name.
Upon getting found out a web site name that meets your needs and is available, you’ll enroll it on any of the absolute best space registrars.
We propose using Area.com. They’re the most productive space registrar available on the market and also you’ll get a 25% bargain using our Area.com coupon code.

Other area registrars that we propose include Community Answers and GoDaddy.
The cost of space name registration is decided wherein TLD you select. Country-specific TLDs worth just a little bit more than every other new TLDs.
Upon getting registered your space name, it’s conceivable so that you can to keep watch over it from your space registrar’s keep watch over panel.
Step 2: Setup Your Custom designed House in Bitly
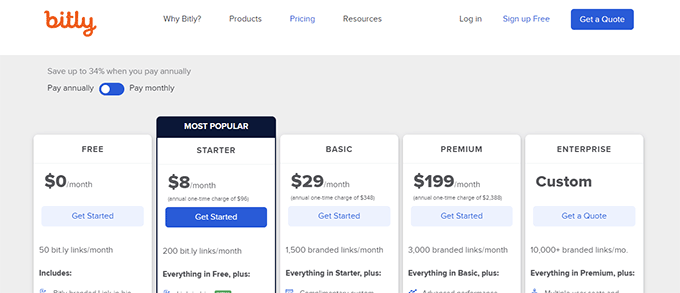
Bitly is a popular URL shortner provider that allows you to organize and follow links. We use it to shorten our WordPress URLs and organize them.
First, it is important to create a Bitly account. You’ll need at least Basic plan to use your own custom designed space name for link shortening.
After completing the sign up, you’ll be successful to your Bitly account dashboard.
From proper right here, you want to click on on on Account settings » Custom designed domains menu and then click on on on the Add a web site button.
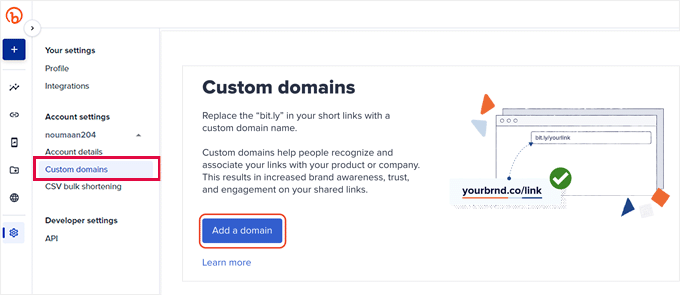
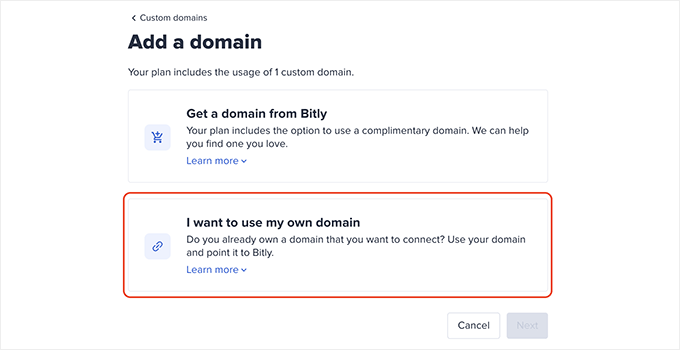
On the next show, you’ll see alternatives to buy a brand spanking new space name or use your own space name.
Transfer ahead, and click on on on the ‘I wish to use my own space name’ method to continue.
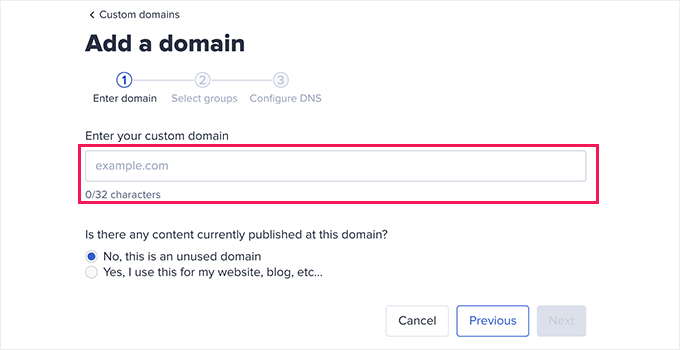
Next, enter the realm name you in recent years purchased.
Below that, make a choice ‘No, this is an unused space name’ selection and click on on Next.
Now you’ll see the selection to choose a number.
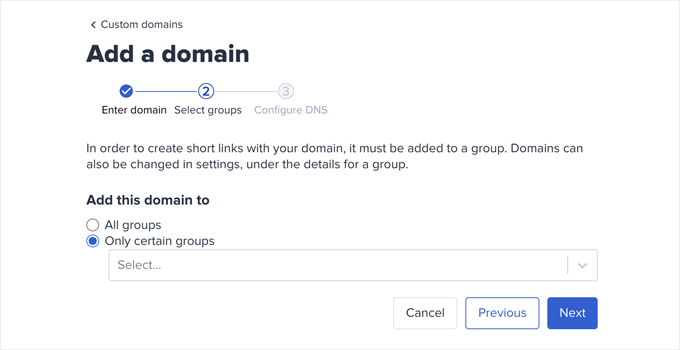
Bitly means that you can organize your links, domains, and shoppers into groups. This allows you to limit certain domains to specific shoppers.
Select All groups to make your custom designed space available for all groups.
Next, you’ll be asked to be able to upload DNS knowledge to your branded space name previous to continuing.
You’ll be capable to move away this window open and proceed to your next step.
Step 3: Set DNS A Document to Degree to Bit.ly
So that you can create your own branded custom designed fast URLs, you want to signify your space to Bitly servers.
To do that, it is important to add DNS knowledge to your custom designed space name. DNS knowledge are kind of instructions that point space name to proper servers.
You’ll be capable to to find the DNS information that you want to be able to upload on Bitly internet web page.
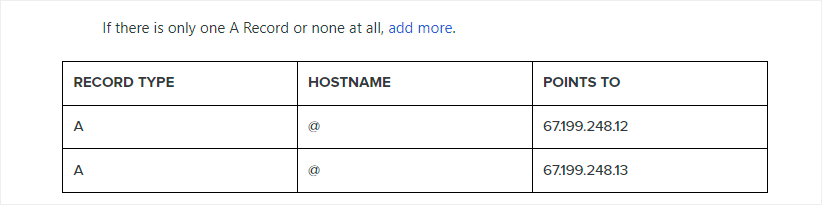
There are two varieties of DNS knowledge that you simply’ll add.
For root domain names (e.g. wpbeg.in), you’ll want to enter A knowledge.
Alternatively, If your custom designed space is a subdomain (e.g. on.wsj.com), you then definately’ll want to enter the CNAME knowledge.
So that you can upload the tips, simply talk over with the realm keep watch over house on your space registrar’s internet web page and seek for DNS knowledge.
Should you took our advice and registered your space with House.com, you then’ll to search out the DNS & Nameservers settings underneath the left column.
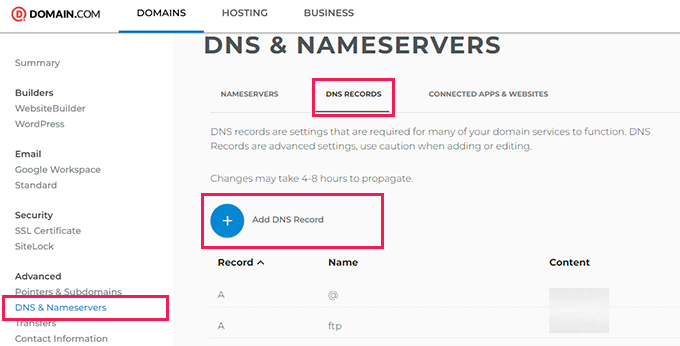
Switch to the DNS Knowledge tab and then click on on on the Add DNS Document button.
This will now and again put across up a popup where you want to enter the following wisdom
- Hostname underneath the Identify field
- Select A since the Type
- Reproduction and paste the Bitly IP take care of
- Select 1 hour underneath the TTL
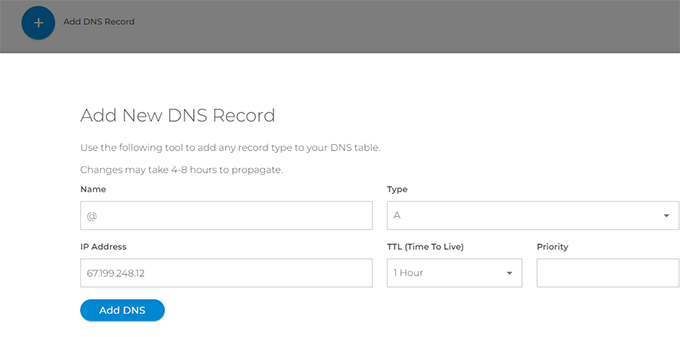
Click on on on the Add DNS button to save some your settings.
If you’re using a subdomain for instance on.wsj.com, then you want to set a CNAME file and stage it to cname.bitly.com
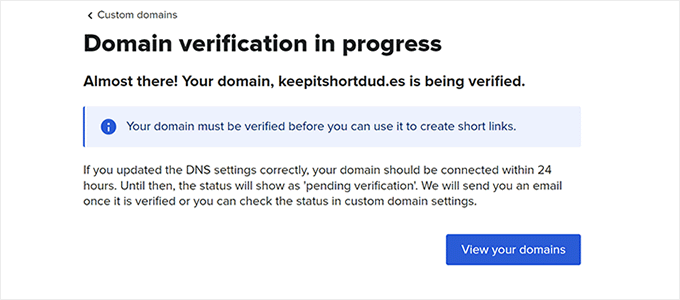
After together with DNS knowledge you’ll switch once more to Bitly internet web page and click on on on the Add House button.
Now, you’ll see a notification that your space settings are being verified.
Bitly will take a look at your space for DNS knowledge and if the whole thing seems to be like just right sufficient you’ll recieve an e-mail notification.
Step 4: Prepare Fast URL on Your WordPress Internet web site
The best segment about using Bitly is that you simply’ll merely organize, share, and follow your fast URLs straight away from your WordPress internet web site.
First, issue you want to do is about up and switch at the Bitly’s WordPress Plugin. For additonal details, see our step by step knowledge on tips on how to set up a WordPress plugin.
Upon activation, you want to talk over with Settings » Writing internet web page and scroll proper all the way down to the ‘WP Bitly Shortlinks’ phase.
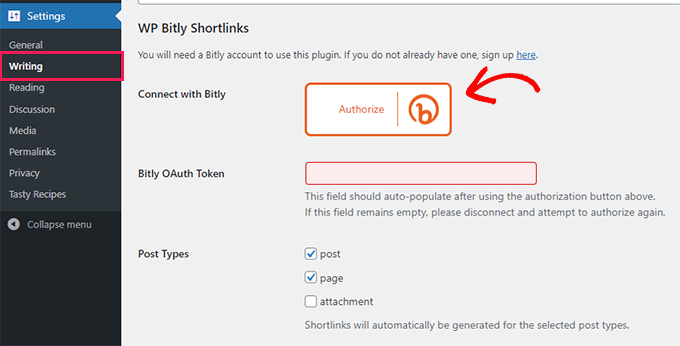
Simply click on on on the Authorize button and then Allow Bitly to connect your WordPress internet web site.
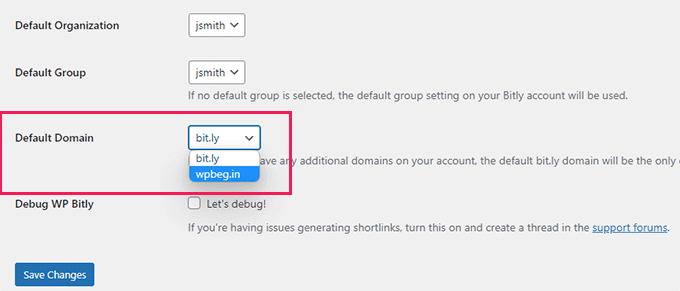
Once hooked up, you’ll make a choice which post types you wish to have to generate shortlinks for. Below that, you’ll make a choice the default space that you just added earlier.
Don’t put out of your mind to click on on on the Save changes button to store your settings,
The plugin will now get began generating your custom designed branded fast URLs. You’ll be capable to see them by the use of visiting your Bitly dashboard.
WP-Bitly plugin may also show you BitLy stats for each post. You’ll be capable to see those stats by the use of improving a post and seek for WP Bitly metabox.
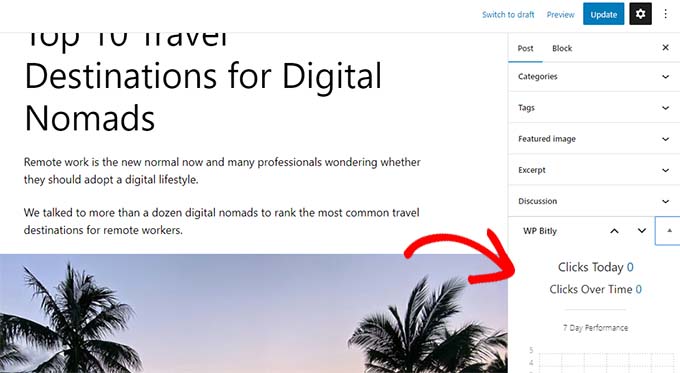
This will now and again permit you to follow how time and again your fast URL for this post has been clicked and from which web websites.
We hope this newsletter helped you learn to create your own customized fast URLs in WordPress. You may also wish to see our entire WordPress conversion monitoring information or see our select of the best possible social media plugins for WordPress.
Should you liked this newsletter, then please subscribe to our YouTube Channel for WordPress video tutorials. You’ll be capable to moreover to search out us on Twitter and Fb.
The post Find out how to Create Your Personal Custom designed Quick URL for Your Weblog first appeared on WPBeginner.

0 Comments