
Fullscreen headers take the entire visual display unit, regardless of the visual display unit size of the client. This is great for grabbing the attention of consumers. It’s moreover great for guiding them to your title to movement. Fortunately, it’s easy to make a fullscreen header with Divi’s Fullwidth Header Module. In this post, we’ll show you one of the best ways to build a fullwidth header, turn it fullscreen, and style it. You’ll have the ability to use this approach to assemble any fullscreen hero segment to your pages!
Let’s get started.
Previewing the Fullscreen Header
Let’s see a preview of what we’ll assemble in this tutorial.
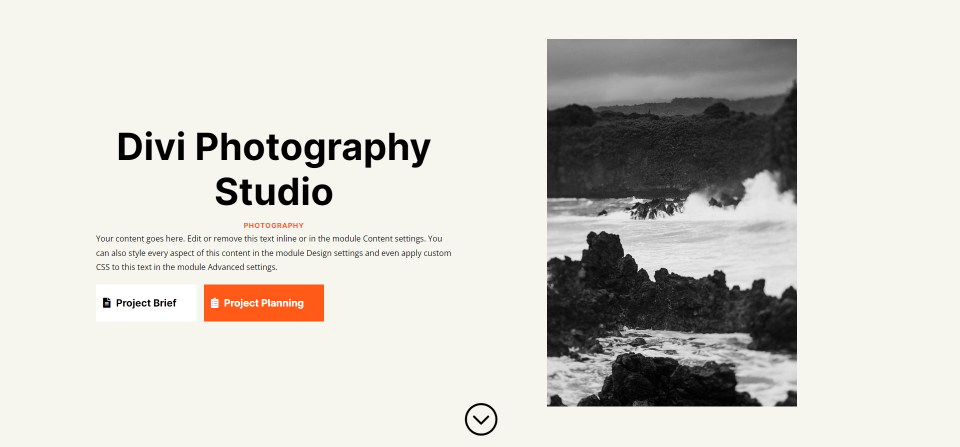
Desktop
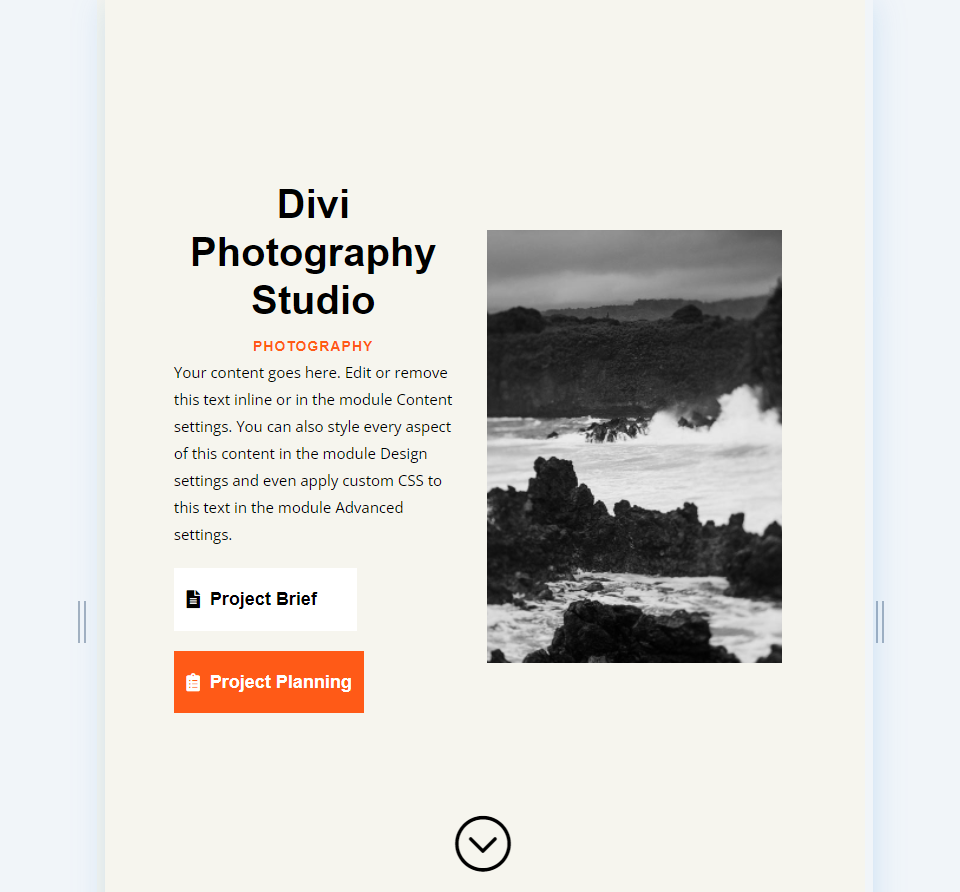
Tablet
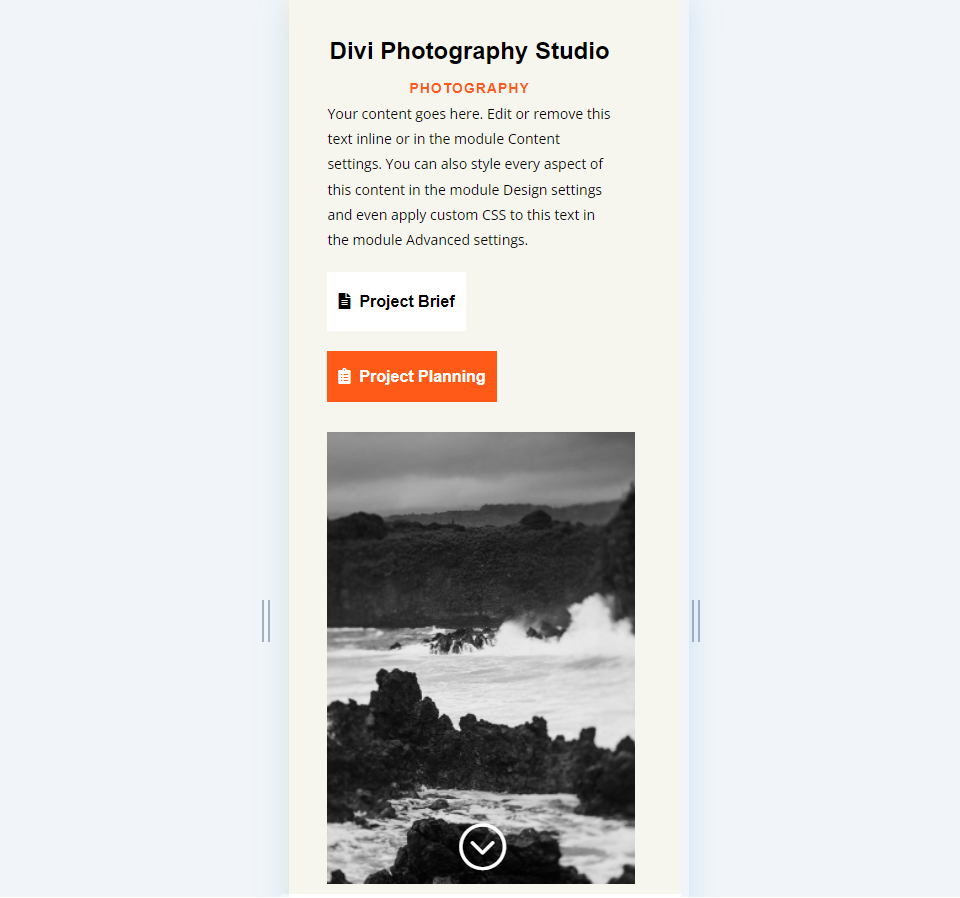
Phone
Why Make a Fullscreen Header with Divi’s Fullwidth Header Module?
Forward of we discuss one of the best ways to make a fullscreen header, let’s talk about why Divi consumers would possibly want one.
A fullscreen header items specific portions in a contained segment. This segment items the ones portions in a clean structure that pulls attention and performs a variety of tasks.
To start with, this can be used to turn a choice to movement that can lead your visitors into your product sales funnel. It’s a great place to mention a decided on product or service.
Secondly, it will neatly give you the client with an interesting design that keeps them on the internet web page. Internet websites most efficient have a few seconds to take hold of the attention of tourists.
There are a few things to remember when creating a fullscreen header:
- Apply common design practices for colors and fonts. Be sure they’re legible and fit with the topic of your internet web page.
- Keep the design simple and clean. Don’t use too many pictures, links, or buttons. Point of interest on a few problems. A lot much less is further.
- Ensure that the fullscreen header is responsive. A fullscreen header must look great and artwork as it should be on all visual display unit sizes.
Learn the way to Make Your Divi Fullwidth Header a Fullscreen Header
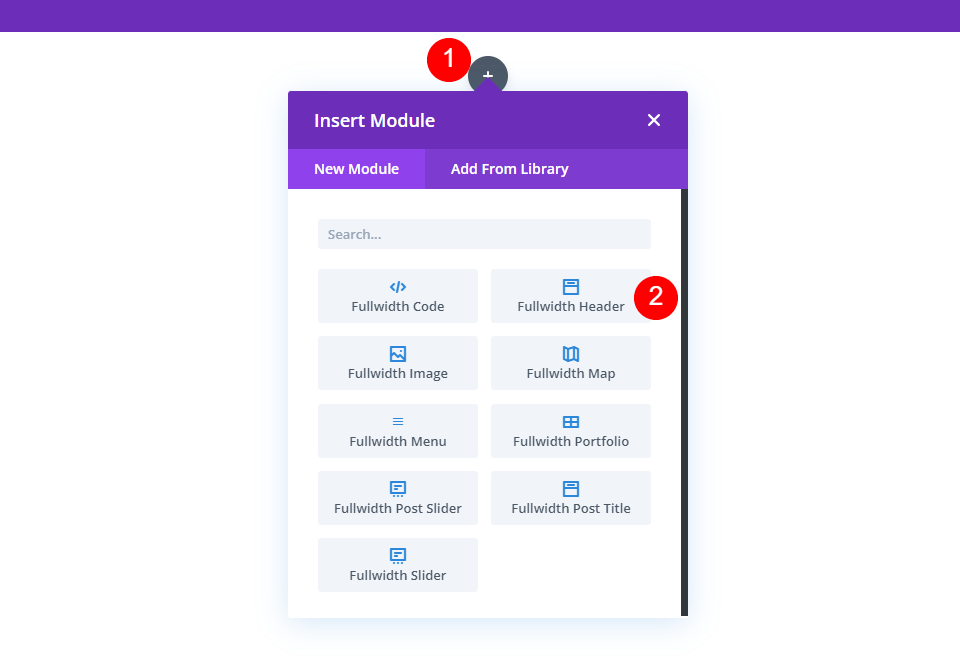
Get began by means of together with a fullwidth segment to the internet web page you’re operating on. Then, add a Fullwidth Header Module to the fullwidth segment.
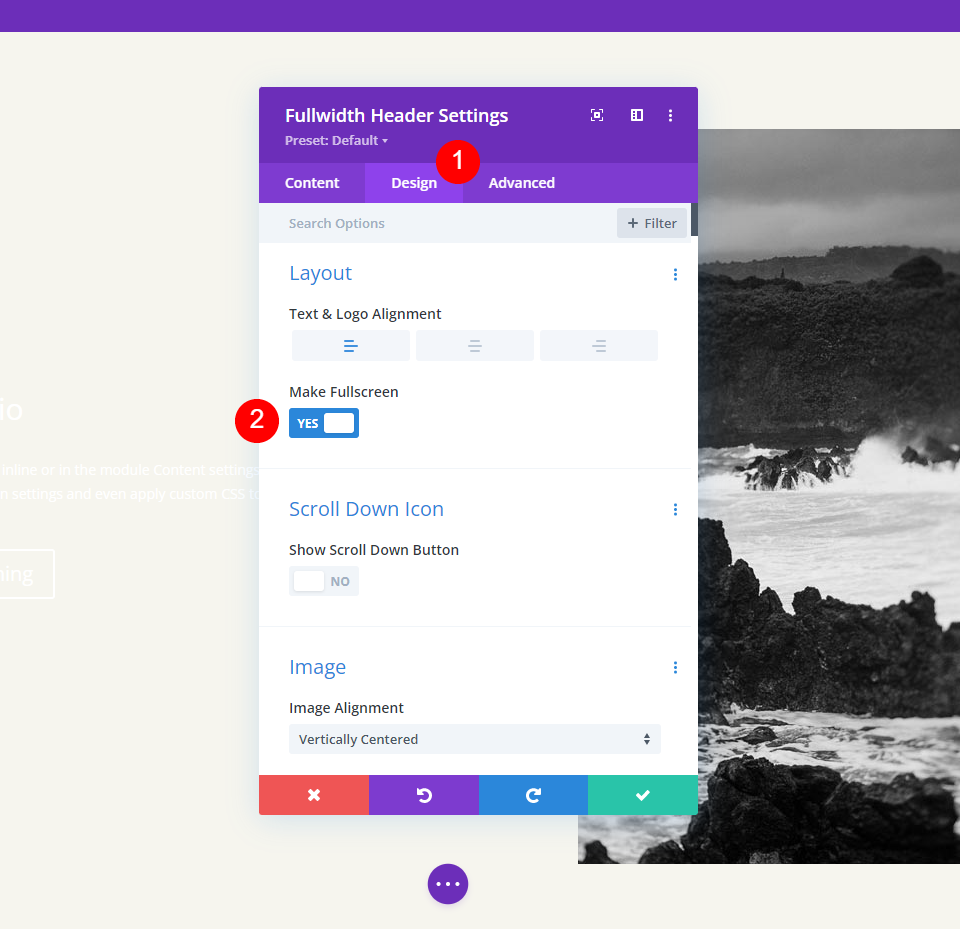
The module’s settings will open. Make a choice the Design tab. Allow the selection known as Make Fullscreen.
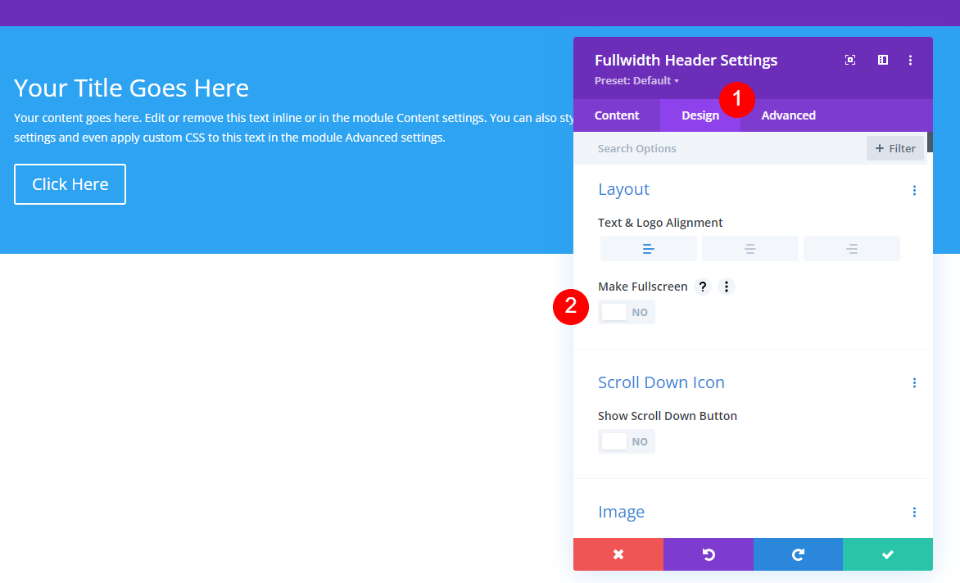
We’ve a fullscreen header. It’s that straightforward.
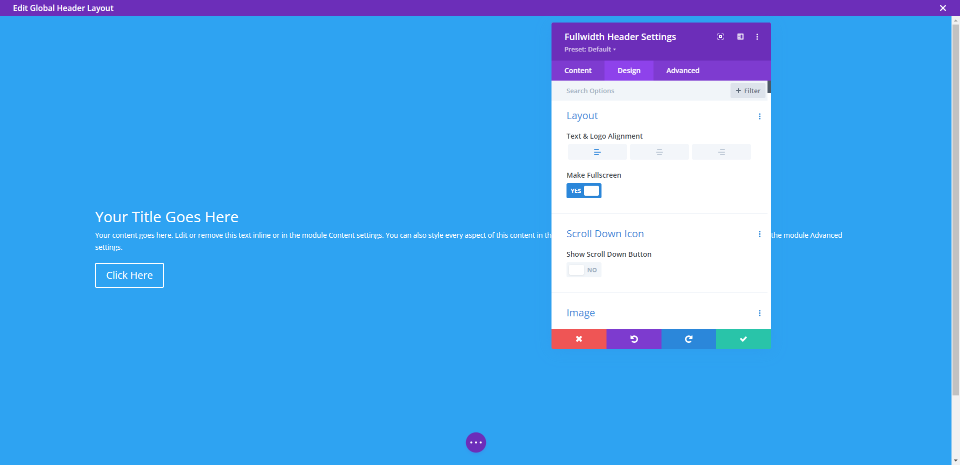
Allow the Fullscreen Header Scroll Down Icon
We will moreover add a button that indicates for the shopper to scroll down. Alternatively, we do will have to permit it. This button is at all times in view inside the fullscreen selection. The fullscreen header selection at all times fits the client’s visual display unit top.
Inside the module’s settings, we’ll see a bit of known as Scroll Down Icon beneath the Layout possible choices. Click on at the button to permit Show Scroll Down Button.
![]()
Divi Fullwidth Header Fullscreen Header Example
Now that we’ve discussed why we’d want to make a Fullwidth Header fullscreen and see one of the best ways to perform the obligation, let’s take a look at an example. I’ll create a full-width header using the hero segment of a Divi structure.
For this case, I’m using the hero segment from the homepage inside the unfastened Images Studio Format Pack that’s available within Divi. I’ll customize this hero segment using the fonts and colors from the structure to create a unique full-width header.
Fullscreen Header Module Settings
Listed below are the steps for each segment of settings inside the Fullscreen Header Module.
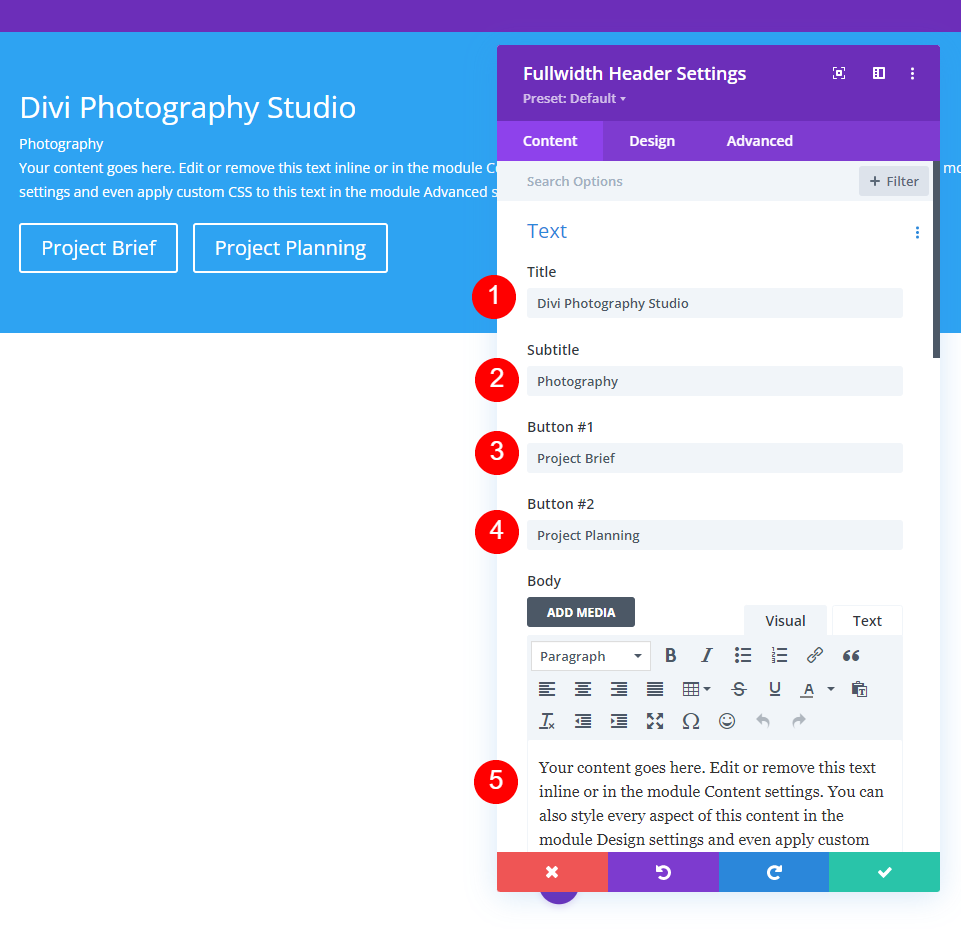
Text
First, add the text that it will be visible inside the fullwidth header. This incorporates the title, sub-title, content material subject material (I’ll use Divi’s built-in dummy text for this), and the button text.
- Determine: Divi Photographs Studio
- Subtitle: Photographs
- Button 1: Endeavor Brief
- Button 2: Endeavor Planning
- Body: content material subject material
Pictures
Next, add the image. This displays at the right kind side of the fullwidth header, transferring the text to the left.
- Header Image: your variety

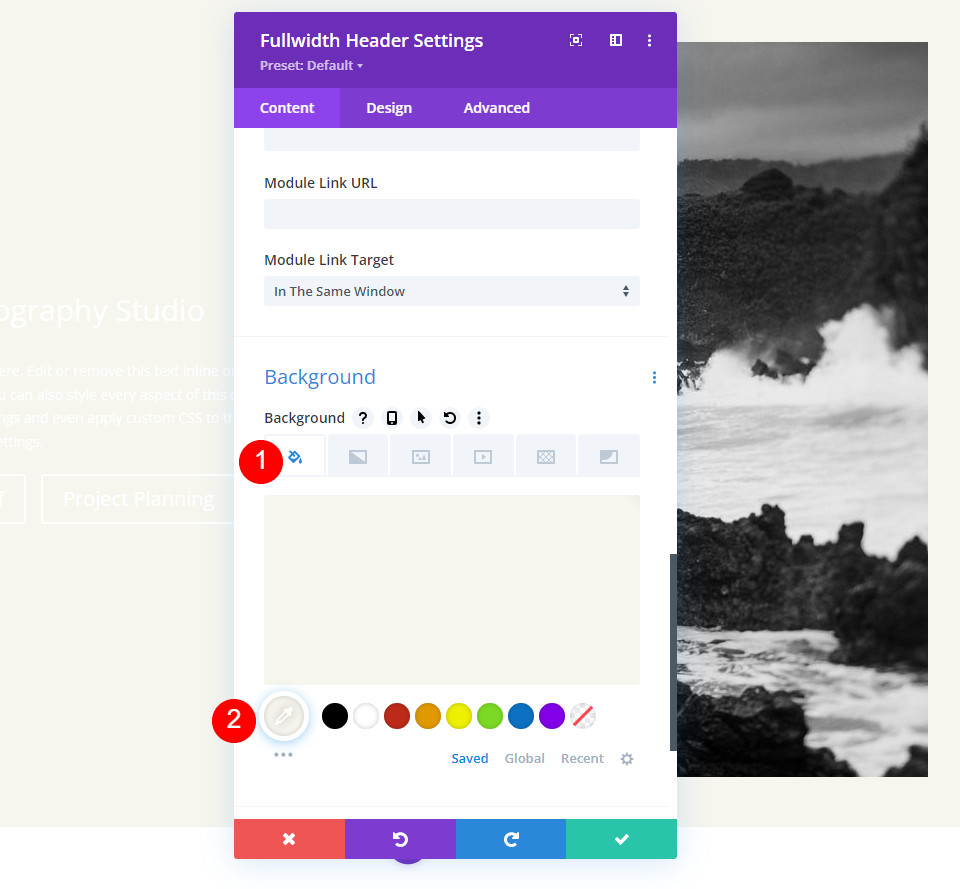
Background
Scroll proper all the way down to Background and set the Color to #f6f5ee.
- Color: #f6f5ee
Layout
Next, cross to the Design tab. Allow Make Fullscreen.
- Make Fullscreen: Positive
Scroll Down Icon
Next, permit the Scroll Down Icon. Business the Color to black for desktops and capsules and white for phones. With the image I’ve determined on, the icon will appear on the image at the bottom for phones and this allows it to be visible with the colors of the image. Business the Icon Size to 70px for desktops, 60px for capsules, and 50px for phones.
- Show Scroll Down Button: Positive
- Icon Color: #000000 Desktop and Tablet, #ffffff Phone
- Size: 70px Desktop, 60px Tablet, 50px Phone
![]()
Determine Text
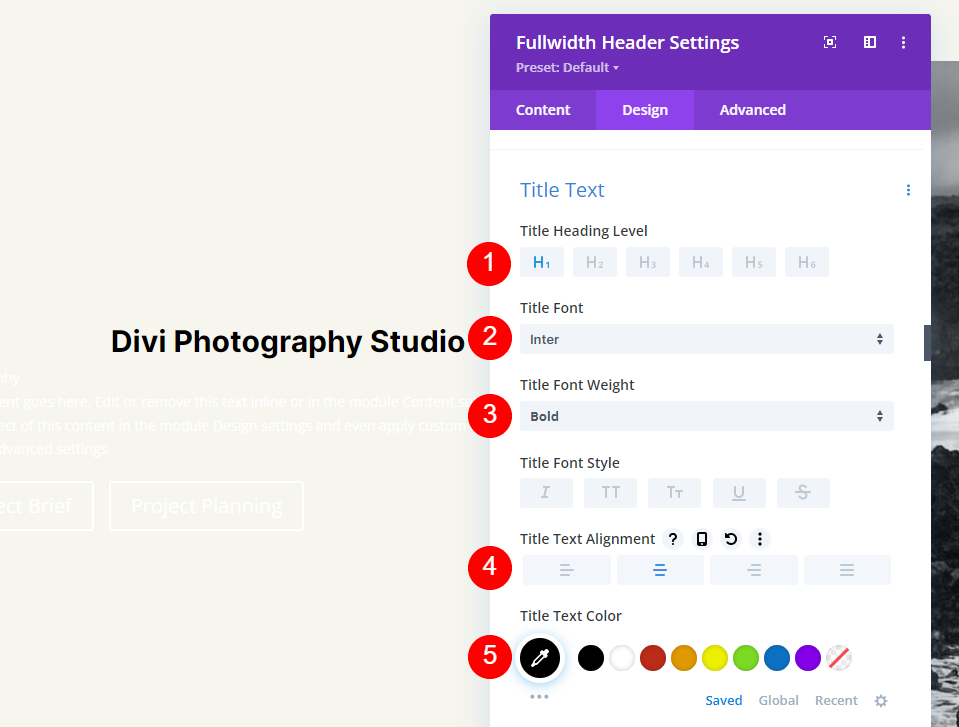
Next, we’ll keep watch over the Determine Text. Set the text to H1 and choose Inter for the Font. Set the Weight to bold, the Alignment to center, and the Color to black.
- Heading: H1
- Font: Inter
- Weight: Bold
- Alignment: Center
- Color: #000000
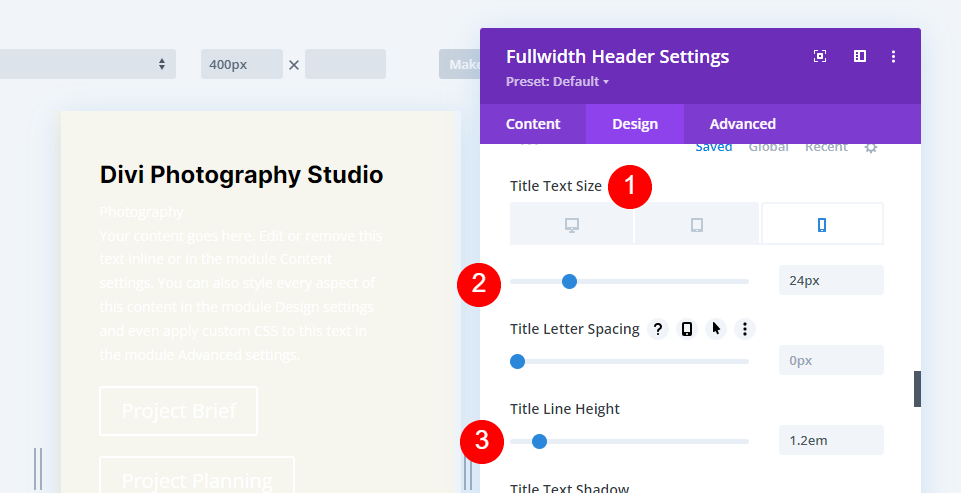
We’ll use 3 sizes for the Font Size: 75px for desktops, 40ps for capsules, and 24px for phones. Business the Line Most sensible to no less than one.2em.
- Size: 75px Desktop, 40px Tablet, 24px Phone
- Line Most sensible: 1.2em
Body Text
Next, scroll proper all the way down to Body Text. Choose Open Sans for the Font. Set the Alignment to the Left and the Color to black.
- Font: Open Sans
- Alignment: Left
- Color: #000000

Set the Font Size to 16px for desktops, 15px for capsules, and 14px for phones. Business the Line Most sensible to no less than one.8em.
- Size: 16px Desktop, 15px Tablet, 14px Phone
- Line Most sensible: 1.8em

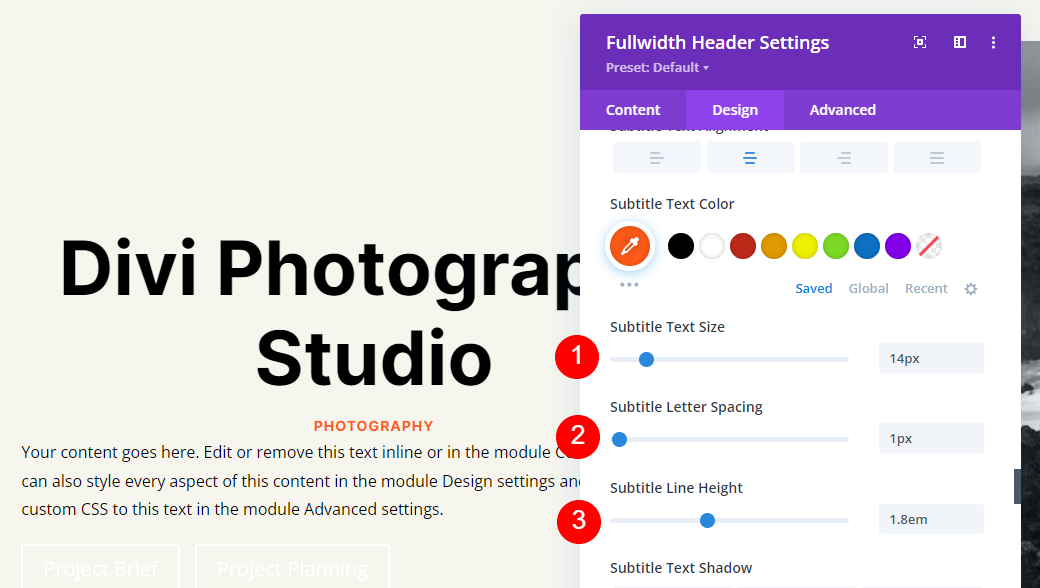
Subtitle Text
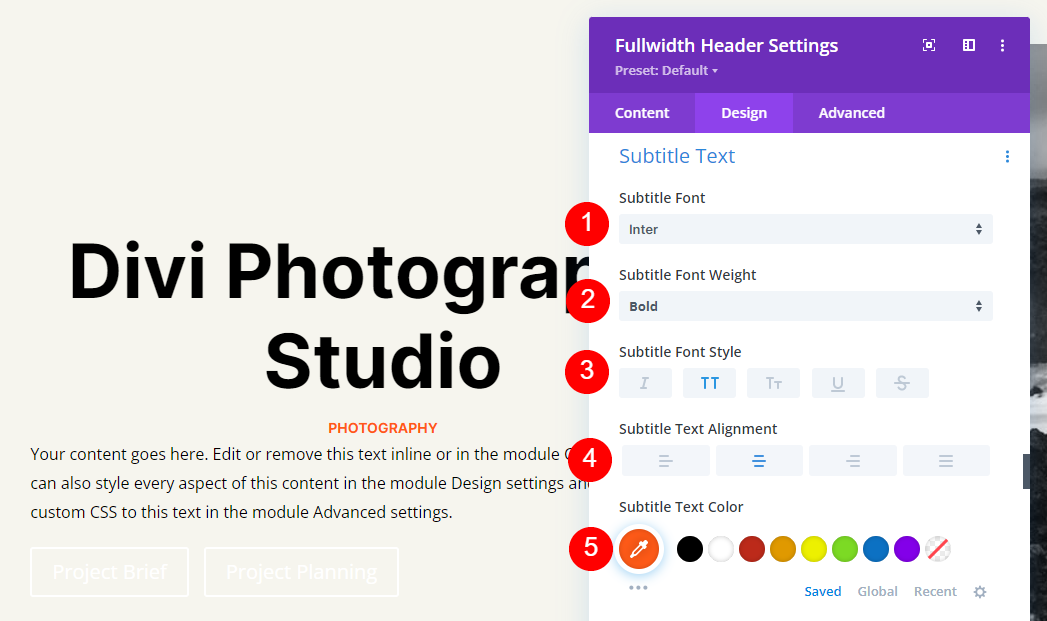
Next, scroll proper all the way down to Subtitle Text. Business the Font to Inter. Set the Weight to bold, the Style to TT, the Alignment to center, and the Color to #ff5a17.
- Font: Inter
- Weight: Bold
- Style: TT
- Alignment: Center
- Color: #ff5a17
Business the Size to 14px for all 3 visual display unit sizes. Business the Letter Spacing to 1px and the Line Most sensible to no less than one.4em.
- Size: 14px
- Letter Spacing 1px
- Line Most sensible: 1.8em
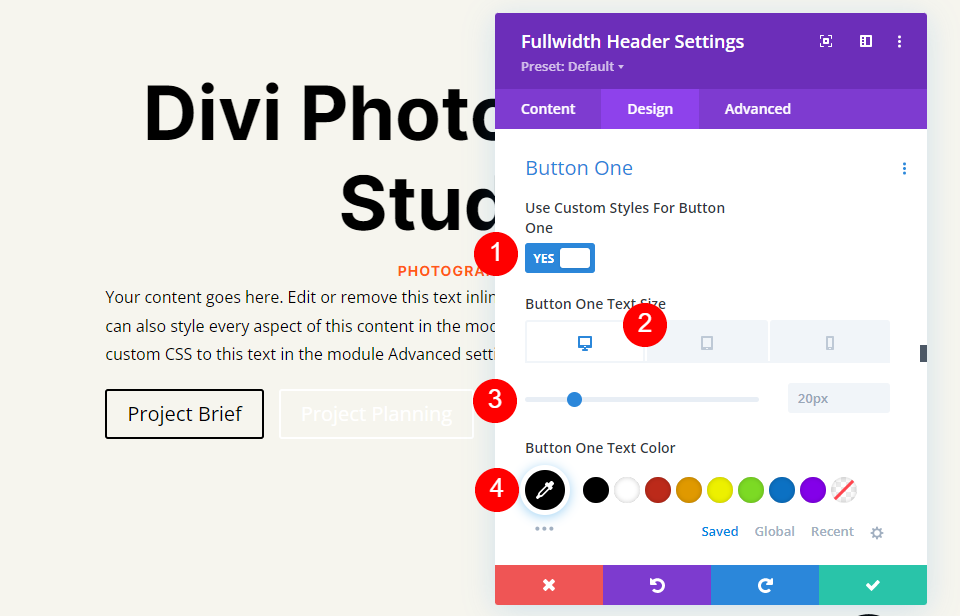
Button One
Next, scroll proper all the way down to Button One and select Use Custom designed Sorts for Button. Business the Text Color to black.
- Use Custom designed Sorts For Button: Positive
- Size: 20px Desktop, 18px Tablet, 16px Phone
- Text Color: #000000
Business the Background Color to white and set the Border Width and Radius to 0px.
- Background Color: #ffffff
- Button One Border Width: 0px
- Button One Border Radius: 0px

Business the Font to Inter and the Weight to Bold.
- Font: Inter
- Weight: Bold
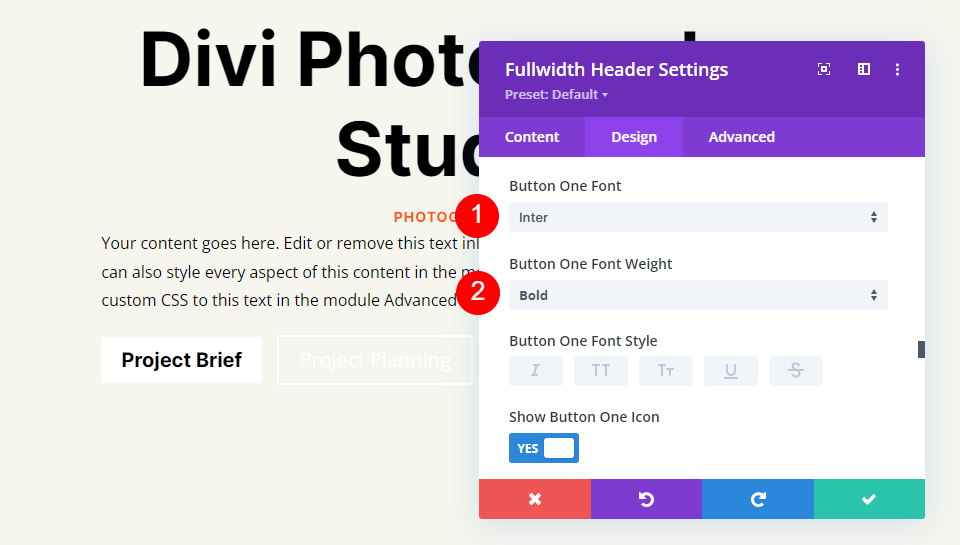
Next, select your hottest icon, business the Color to black, set the Button Placement on the left, and disable Simplest Show Icon On Hover For Button One.
- Icon: your variety
- Icon Color: #000000
- Button One Icon Placement: Left
- Simplest Show Icon On Hover For Button One: No
![]()
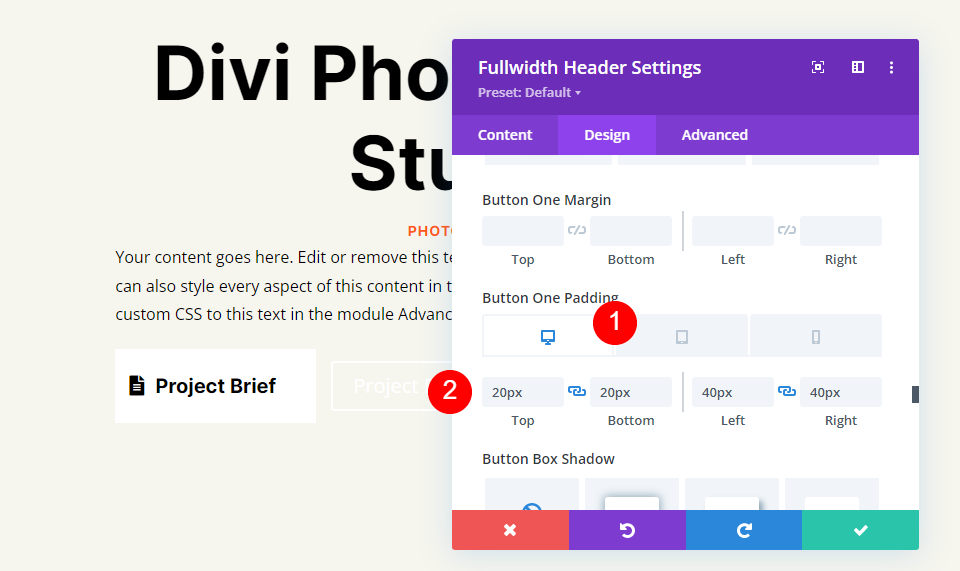
In the end, scroll proper all the way down to Button One’s Padding possible choices. We’ll use different Padding for each visual display unit size. For desktops, use 20px for Absolute best and Bottom, and 40px for Left and Correct. For capsules, business the Absolute best and Bottom Padding to 16px. On phones, business the Absolute best and Bottom Padding to 12px. Move away the Left and Correct Padding the identical for all 3.
- Desktop Padding: 20px Absolute best and Bottom, 40px Left and Correct
- Tablet Padding: 16px Absolute best and Bottom, 40px Left and Correct
- Phone Padding: 12px Absolute best and Bottom, 40px Left and Correct
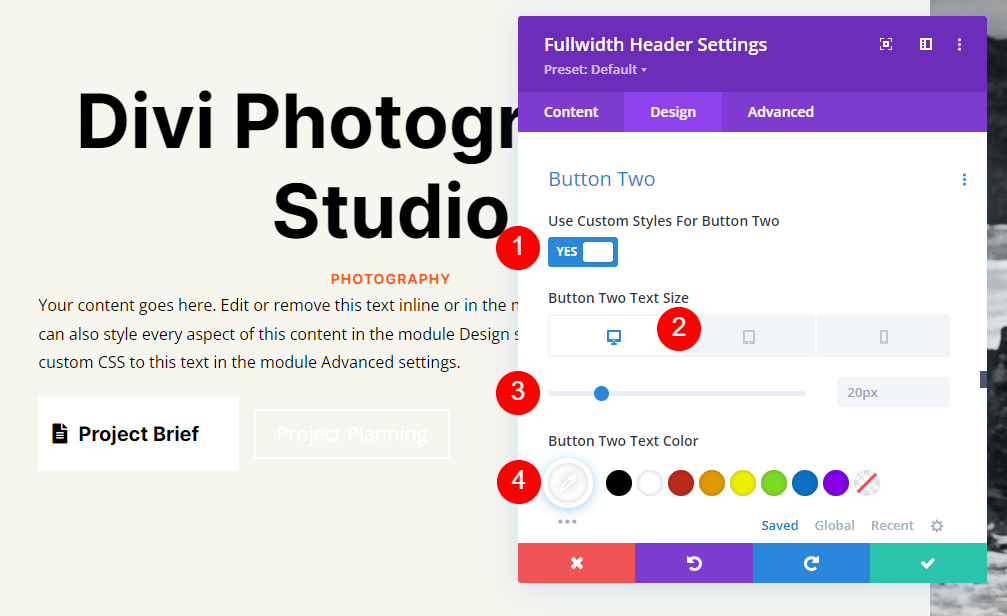
Button Two
After all, scroll proper all the way down to Button Two. Make a choice Use Custom designed Sorts for Button. Set the Font size to 20px for desktops, 19ps for capsules, and 16px for phones. Business the Text Color to white.
- Use Custom designed Sorts For Button: Positive
- Size: 20px Desktop, 18px Tablet, 16px Phone
- Text Color: #ffffff
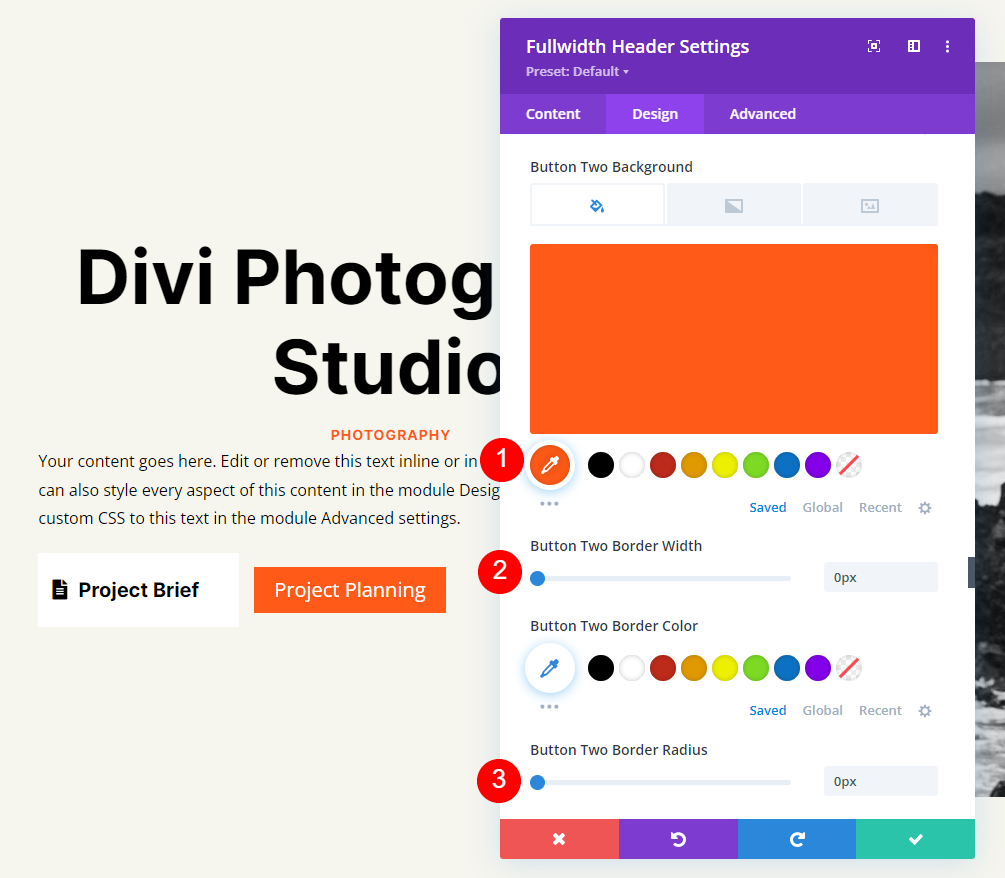
Business the Background Color to #ff5a17. Set the Border Width and Radius to 0px.
- Background Color: #ff5a17
- Button Two Border Width: 0px
- Button Two Border Radius: 0px
Next, business the Font to Inter and the Weight to Bold.
- Font: Inter
- Weight: Bold
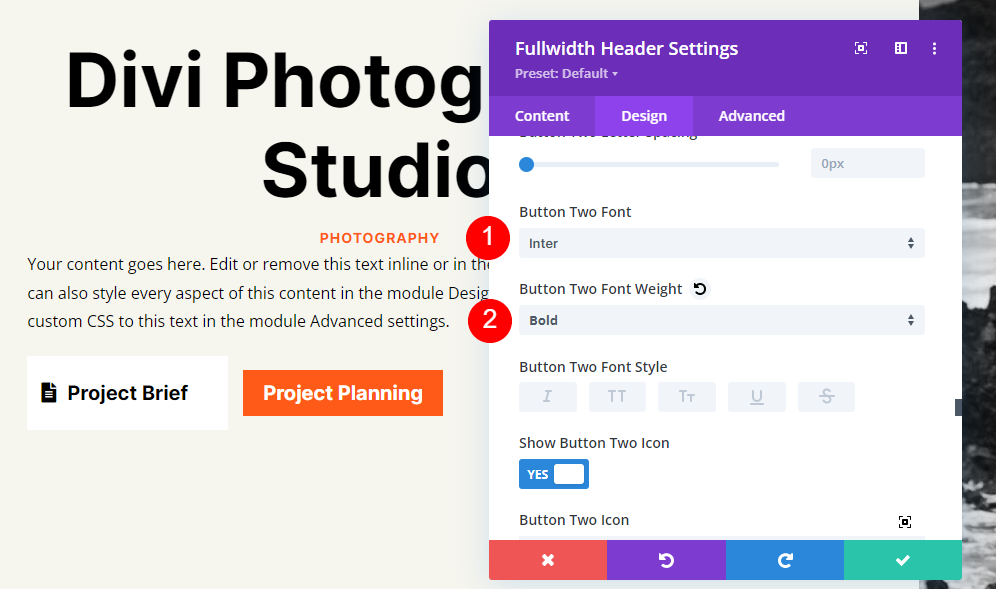
Choose your hottest icon. Business the Color to black, set the Button Placement on the left, and disable Simplest Show Icon On Hover For Button Two.
- Icon: your variety
- Icon Color: #000000
- Button Two Icon Placement: Left
- Simplest Show Icon On Hover For Button Two: No
![]()
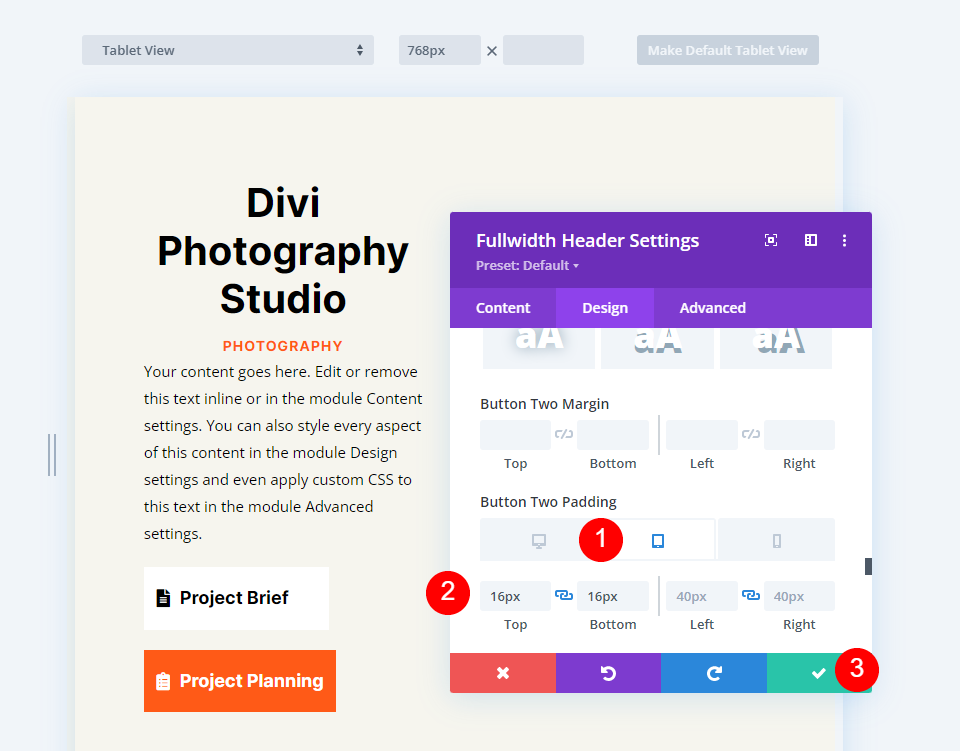
After all, scroll proper all the way down to Button Two’s Padding possible choices. For desktops, use 20px for Absolute best and Bottom, and 40px for Left and Correct. On capsules, business the Absolute best and Bottom Padding to 16px. For phones, business the Absolute best and Bottom Padding to 12px. Close the module and save your artwork.
- Desktop Padding: 20px Absolute best and Bottom, 40px Left and Correct
- Tablet Padding: 16px Absolute best and Bottom, 40px Left and Correct
- Phone Padding: 12px Absolute best and Bottom, 40px Left and Correct
Fullscreen Header Results
Proper right here’s how our fullwidth header appears to be on desktops, capsules, and phones.
Desktop
Tablet
Phone
Completing Concepts on Creating a Fullscreen Header with Divi’s Fullwidth Header Module
That’s our take a look at one of the best ways to make a fullscreen header together with your Divi Fullwidth Header Module. The process is discreet, and it sort of feels to be great on any device. Together with the Scroll Down button is a wonderful visual that indicates to consumers they can scroll. Designing a fullscreen header is similar to designing a hero segment. Following a few simple tips will let you create very good fullscreen headers with Divi’s Fullscreen Header Module.
We want to listen from you. Have you ever ever made your Divi Fullwidth Header fullscreen? Let us know about it inside the comments.
The post Find out how to Make Your Divi Fullwidth Header Module Fullscreen appeared first on Chic Topics Weblog.
Contents
- 1 Previewing the Fullscreen Header
- 2 Why Make a Fullscreen Header with Divi’s Fullwidth Header Module?
- 3 Learn the way to Make Your Divi Fullwidth Header a Fullscreen Header
- 4 Allow the Fullscreen Header Scroll Down Icon
- 5 Divi Fullwidth Header Fullscreen Header Example
- 6 Fullscreen Header Results
- 7 Completing Concepts on Creating a Fullscreen Header with Divi’s Fullwidth Header Module
- 8 React UI Parts Libraries: Our Most sensible Alternatives for 2022
- 9 WordPress – WordPress In New York: Retaining Your Website online Secure…
- 10 Divi 5 Update: Public Alpha Version 4

0 Comments