
For those who’re the use of Visible Studio Code (VS Code), you’ve maximum indisputably used its built-in terminal to run directions and scripts without ever leaving the editor.
The terminal plays a big place in most developers’ day by day workflow, so even small annoyances like a rather visible cursor or dropping your own home while scrolling can slow you down and damage your focal point.
In this article, we’ll cross over a few simple settings you’ll be capable of tweak to your VS Code terminal to boost your productivity and make your coding enjoy additional enjoyable.
First, let’s see where to hunt out the terminal settings.
In this article
- Consumer Settings
- Terminal IntelliSense
- Sticky Scroll
- Customise Cursor
- Default Location
- Customise Tab Name
- Break up CWD
- Customise Font Circle of relatives
- Wrapping Up
Shopper Settings
You’ll get right to use the terminal settings by way of going to Report > Preferences > Settings (or by way of pressing Ctrl + ,), then searching for “terminal” or navigate from “Choices > Terminal” on the left pane menu.
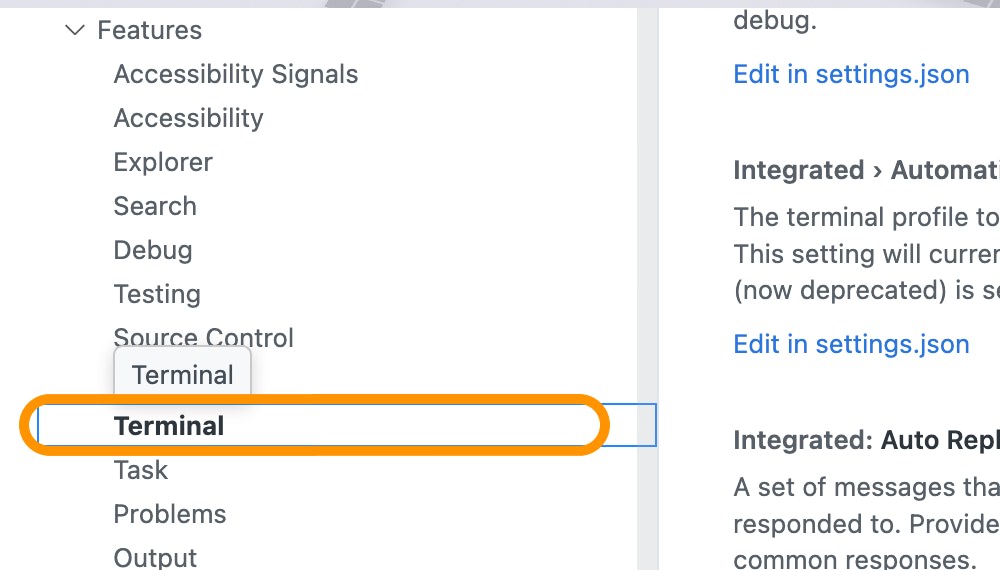
In this case, however, we’ll be together with the settings without delay to the settings.json as I imagine it’s more straightforward than having to search for each surroundings personally.
To save some settings on the settings.json record, you’ll be capable of liberate Command Palette (Ctrl + Shift + P (or Cmd + Shift + P on Mac), then sort and make a choice Preferences: Open Settings (JSON).

This may occasionally open the settings.json record where you’ll be capable of add or regulate your terminal settings.
Now, we will get began customizing the terminal.
Terminal IntelliSense
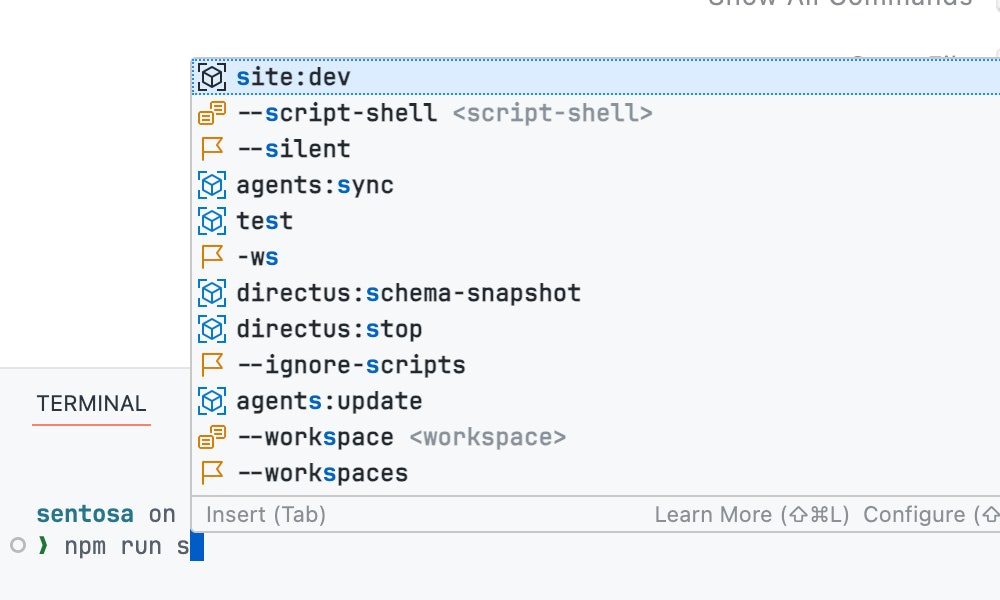
VS Code’s Terminal IntelliSense makes operating throughout the terminal faster and smoother by way of suggesting knowledge, folders, directions, and even arguments as you sort.
To use it, you’ll first need to make sure that shell integration is enabled by way of surroundings:
{
    "terminal.integrated.shellIntegration.enabled": true
}
Once that’s turned into on, you’ll be capable of activate IntelliSense concepts with:
{
    "terminal.integrated.counsel.enabled": true
}
VS Code then provides good concepts in line with your shell along side Bash, Zsh, or PowerShell. As you get began typing a command, it’ll automatically show you comparable concepts. It exams your machine to indicate available directions.
For example, it is helping native or built-in command in Unix related to ls, clear, and even an alias.

It moreover is helping directions from additional programs or methods related to git.
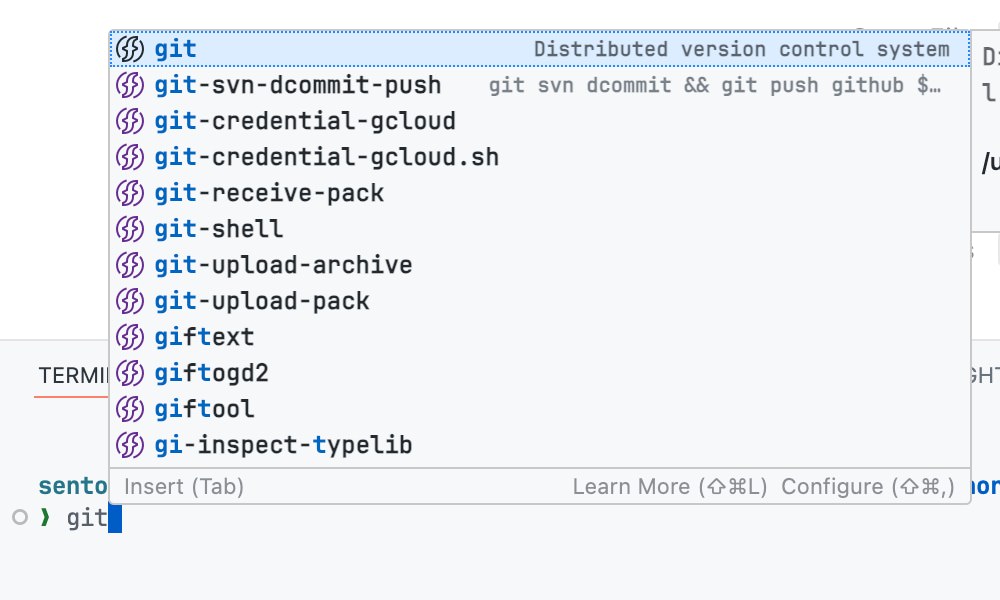
It even exams your provide workspace for directions or scripts set throughout the challenge workspace related to throughout the package deal.json or composer.json record.
Sticky Scroll
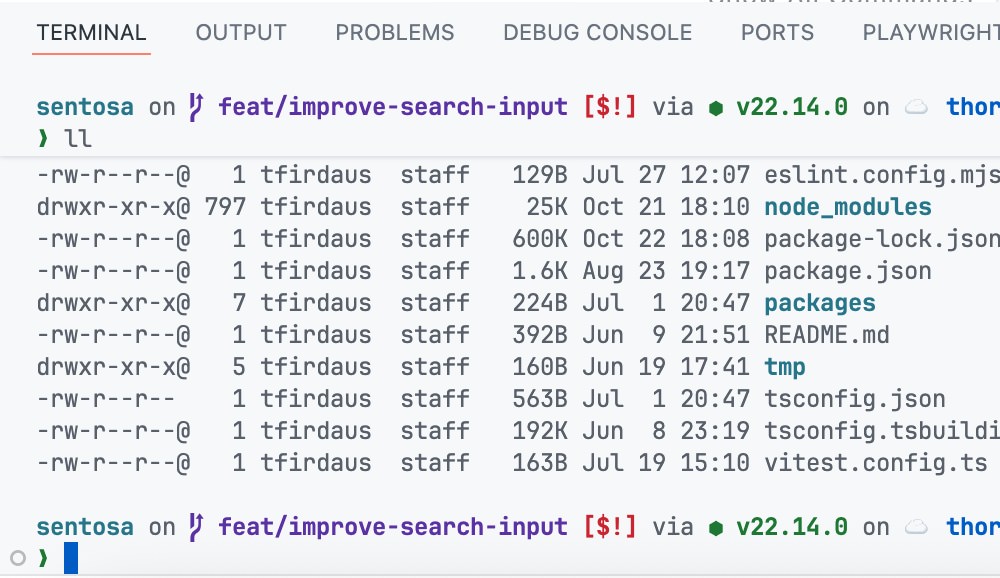
The Sticky Scroll is a brand spanking new function in VS Code. When enabled, it assists in keeping the absolute best line of the terminal visible as you scroll down showing the command you’re in recent times operating on. This is in particular useful when operating with long outputs or logs, as a result of it’s serving to you keep track of your home without dropping context.
To allow Sticky Scroll, add the following surroundings on your VS Code settings:
{
    "terminal.integrated.stickyScroll.enabled": true
}
With this surroundings enabled, the absolute best line of your terminal will keep visible as you scroll during the output, making it more straightforward to follow together with your directions and their results. Underneath for instance, we’ve merely run ll to tick list items throughout the provide list.
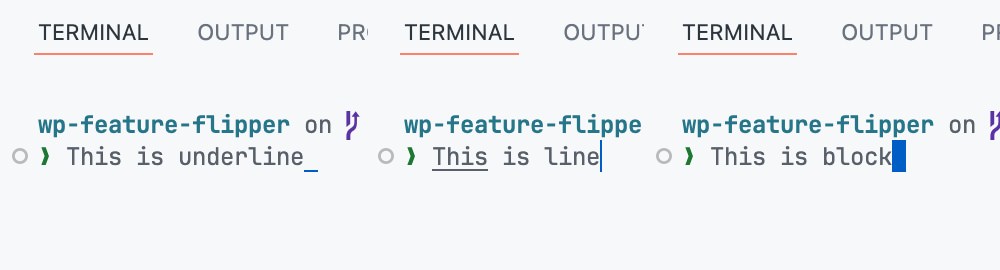
Customize Cursor
Changing how the terminal cursor turns out may make a big difference in usability. A additional visible cursor helps you quickly in finding where you’re typing, reducing errors and making improvements to efficiency.
To customize the cursor style, you’ll be capable of use the following surroundings:
{
    "terminal.integrated.cursorStyle": "block"
}
Possible choices include block, line, or underline.
You’ll moreover set the types when the terminal is focused or unfocused the use of:
{
    "terminal.integrated.cursorStyleInactive": "line"
}
Along with change whether or not or now not the cursor should blink. This is by way of default disabled, on the other hand enabling it will smartly make the cursor additional noticeable:
{
    "terminal.integrated.cursorBlinking": true
}
Default Location
Thru default, the Terminal in VS Code might be located at the bottom of the window. On the other hand, you’ll be capable of change its default location to open as an editor tab with the following surroundings:
{
    "terminal.integrated.defaultLocation": "editor"
}
This can be in particular useful if in case you have a big monitor or need to have your terminal alongside your code.
Customize Tab Identify
When operating on trendy tasks, you regularly need to run multiple terminals at once. Most likely one on your frontend, and one for the backend. Keeping track of them can get messy speedy. Thankfully, VS Code allows you to rename terminal tabs in order that you all the time know what’s what.
To rename a terminal tab, simply right-click on the terminal tab and make a choice Rename. Then, sort to your desired determine and hit Enter. For example, you’ll be capable of label them “Frontend” or “Backend” to turn you methods to decide.
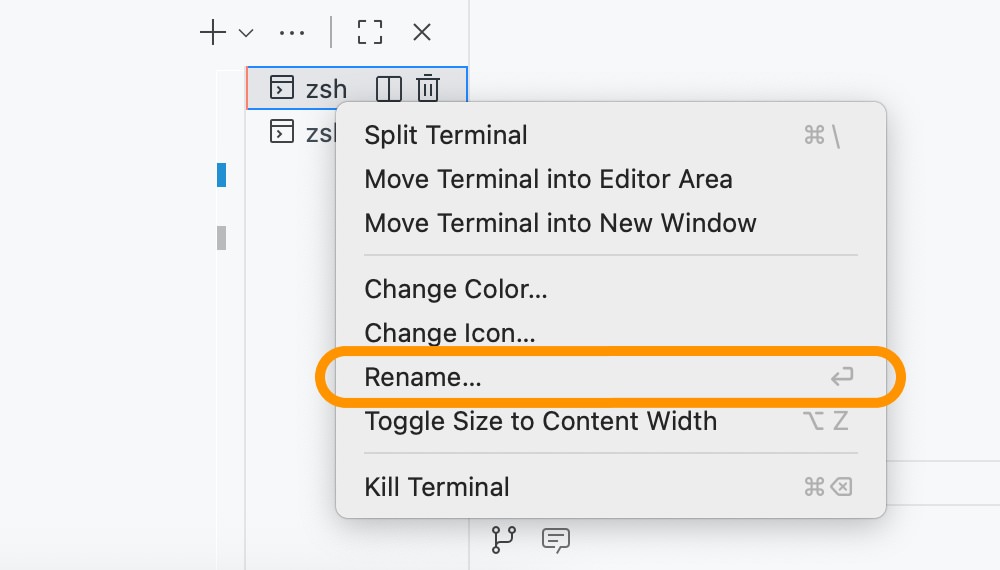
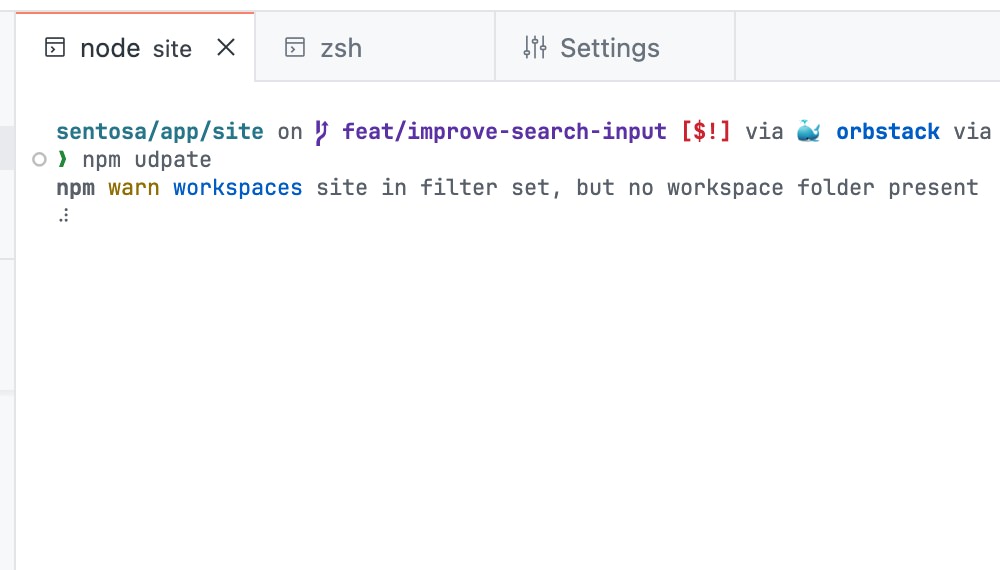
Merely keep in mind that this transformation is short and might be out of place while you close the terminal. If you want to set a additional permanent naming convention, you’ll be capable of customize the terminal tab identify the use of variables.
My favorite trick that is to combine each and every to have the terminal show the operating process together with the prevailing operating list.
You’ll do this by way of together with the following surroundings:
{
    "terminal.integrated.tabs.identify": "${process}",
    "terminal.integrated.tabs.description": "${cwdFolder}",
}
Get a divorce CWD
When you lower up a terminal in VS Code, where the new terminal opens, the prevailing operating list (CWD) can vary depending on your operating machine.
On House home windows, it regularly jumps once more to the list where the main terminal started, while on macOS and Linux, it most often opens within the identical folder since the parent pane. This small difference can merely reason why confusion, in particular while you’re switching between ways.
You’ll make this behavior consistent by way of updating the terminal.integrated.splitCwd surroundings, as follows:
{
    "terminal.integrated.splitCwd": "workspaceRoot"
}
Surroundings it to "workspaceRoot" promises that each new lower up terminal all the time opens to your challenge’s root folder. It’s a small change that makes your workflow predictable.
Customize Font Family
A clean and readable terminal makes a big difference while you spend hours coding. You’ll change the font used throughout the integrated terminal. Thru default, VS Code uses the identical font since the editor, on the other hand you’ll be capable of specify a distinct font by way of together with the following surroundings:
{
    "terminal.integrated.fontFamily": "Fira Code"
}
Simply change Fira Code with the determine of your hottest font. Be sure that the font is installed on your machine for it to art work appropriately.
If the font is helping ligatures, you’ll be capable of allow them throughout the terminal by way of together with:
{
    "terminal.integrated.fontLigatures": true
}
I’ve a couple of favorite fonts you’ll be in a position to check out while you’re on the lookout for ideas.
Wrapping Up
The VS Code terminal is a powerful device that can significantly beef up your development workflow. Thru customizing its settings to fit your preferences, you’ll be capable of create a additional surroundings pleasant and enjoyable coding surroundings.
Expectantly, the following advice help you get necessarily essentially the most out of your VS Code terminal.
The submit Hidden VS Code Terminal Options Each Developer Must Know appeared first on Hongkiat.
Supply: https://www.hongkiat.com/blog/optimize-visual-studio-code-terminal/
Contents
- 1 In this article
- 2 Shopper Settings
- 3 Terminal IntelliSense
- 4 Sticky Scroll
- 5 Customize Cursor
- 6 Default Location
- 7 Customize Tab Identify
- 8 Get a divorce CWD
- 9 Customize Font Family
- 10 Wrapping Up
- 11 Complete Put up vs Abstract (Excerpt) in WordPress Archive Pages?
- 12 Maximize Your Have an effect on: 205 Motion Verbs to Use on Your Resume
- 13 How full-service companies develop with the appropriate website hosting spouse

0 Comments