
For those who’re amassing fit registrations, expenses, or path sign-ups in WordPress, it’s sensible to supply folks something they are able to download right away. Which may be a ticket, a receipt, or a certificate they are able to save or print right away after submitting your type.
The problem is that WordPress bureaucracy don’t generate PDFs by means of default. Many internet website house owners in any case finally end up exporting entries, pasting knowledge into bureaucracy, and fixing layouts by means of hand.
That further art work supplies up speedy, will build up the chance of mistakes, and becomes frustrating once submissions get began coming in often.
In this knowledge, I’ll show you my tested means for robotically turning WordPress type entries into PDFs using WPForms. I’ll walk you at some stage in the setup step by step, so each specific particular person receives a clean, professional PDF immediately after submitting your type. 📄
TL;DR: To turn WordPress type entries into PDFs, arrange WPForms Professional and its PDF Addon, then connect a PDF template for your type so a brand spanking new PDF is created robotically after each submission. You’ll be capable to moreover attach that PDF for your type notifications, in order that you (and the person who crammed out the form) get a replica right away.
Why Routinely Generate PDFs From Form Entries? (Benefits + Use Instances)
Manually converting type entries to PDFs takes longer than it should. It’s a should to export the access, put it proper right into a document, read about that the whole thing seems right kind, reserve it as a PDF, and then send it out. Doing this over and over slows you down, and it’s easy to make small mistakes along one of the best ways.
Routinely producing PDFs fixes that. Every type submission can immediately grow to be a ready-to-send PDF without you in need of to touch anything.
That means a lot much less busywork, fewer errors, and bureaucracy that all the time look clean and loyal. It moreover makes it more uncomplicated to stick knowledge, because the entirety is already saved in a clear structure.
Listed here are a few now not atypical techniques you’ll use computerized PDF generation from type entries:
| Web site type | Example PDFs |
|---|---|
| Consulting/products and services and merchandise | Quotes, proposals |
| Fit internet websites | Tickets, registration confirmations |
| Online stores | Invoices, receipts |
| On-line classes | Certificates, enrollments |
| Prison, HR, and admin | Consent bureaucracy, waivers, authorization letters |
| Precise belongings | Belongings details, book-a-viewing confirmations |
Common, robotically generating PDFs helps you spend a lot much less time on admin art work and time beyond regulation working your website or trade. All while giving visitors a quicker and smoother experience.
With that all through ideas, proper right here’s the whole thing I’ll proportion in this knowledge:
- Step 1: Set up and Turn on WPForms Professional
- Step 2: Create Your Shape or Make a choice an Current One
- Step 3: Set Up Shape Notifications and Confirmations (Not obligatory)
- Step 4: Configure the PDF Settings
- Step 5: Customise and Taste Your PDF
- Step 6: Modify Complicated PDF Settings
- Step 7: Check Your PDF Technology
- Step 8: Embed Your Shape in WordPress
- FAQs About PDFs and Bureaucracy in WordPress
- Further Assets for The use of Bureaucracy in WordPress
Step 1: Arrange and Activate WPForms Skilled
The first thing you need to do is ready up WPForms Professional to your WordPress internet website. I’ve been using WPForms for years, and it’s hands down the absolute best WordPress kind plugin I’ve tried out.
It comes with an impressive PDF addon that robotically generates PDFs from your type submissions. Plus, WPForms lets you create all kinds of bureaucracy, in conjunction with contact, price, survey, and publication registration bureaucracy.
We use WPForms at WPBeginner for our contact type, internet website migration request type, and our annual readers’ survey. See our detailed WPForms evaluate for added insights into the plugin.
To get started, head over to the WPForms website, click on at the ‘Get WPForms Now’ button, and full the registration process.
💡 Phrase: The PDF generation serve as most simple works with WPForms Professional or higher plans. The WPForms Lite type doesn’t include this capacity, in order that you’ll need to give a boost to in case you’re in recent years using the free type.
Whilst you whole your achieve, you’ll have your own WPForms account dashboard, where you’ll download your plugin zip checklist and license key. You’ll need the ones in a 2nd, so chances are high that you’ll wish to keep this tab open or save them somewhere safe – like a password supervisor.
Now, it’s time to place within the WPForms plugin to your WordPress internet website.
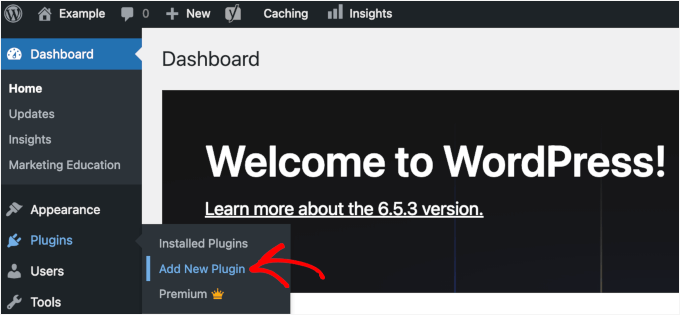
From your WordPress admin dashboard, go to Plugins » Add New Plugin.
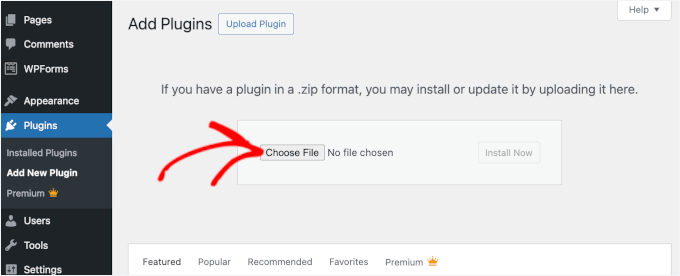
Click on at the ‘Upload Plugin’ button at the top of the internet web page.
Make a choice the WPForms plugin checklist you merely downloaded (a .zip checklist) and arrange it.
After arrange finishes, click on at the ‘Activate Plugin’ button. WPForms will now appear to your admin dashboard.
You’ll be capable to then go to WPForms » Settings to show for your license key. Transfer ahead and paste the essential factor into the sphere and click on on ‘Take a look at Key.’
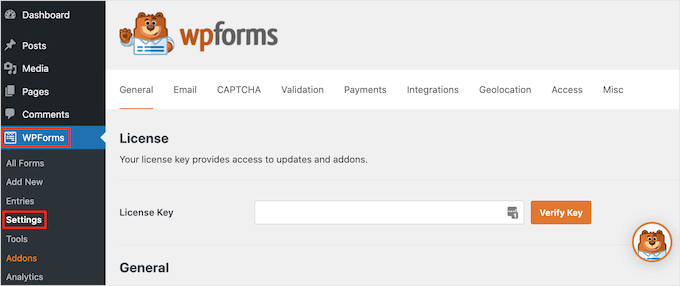
This activation step is important because it unlocks the entire Skilled choices, in conjunction with the PDF Addon we’ll be using. Once your key’s verified, you’re ready to begin out rising WordPress paperwork that generate PDFs robotically.
If you want to have have the same opinion, check out our knowledge on how one can set up a WordPress plugin.
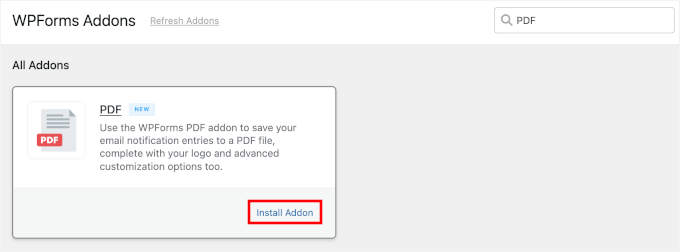
After that, you’ll navigate to WPForms » Addons to place within the PDF Addon.
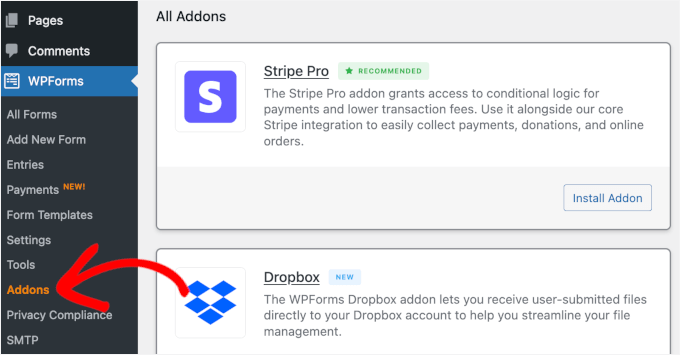
During the Addons panel, you’ll use the quest bar to in brief to find the PDF Addon.
Inside the search result, simply click on at the ‘Arrange Addon’ button to allow it.
Step 2: Create Your Form or Choose an Present One
Now that WPForms and PDF Addon are installed and activated, it’s time to create the form you’ll use for PDF generation.
In this instructional, I’m going to create a simple phrases of provider type and prepare an automated PDF for demonstration.
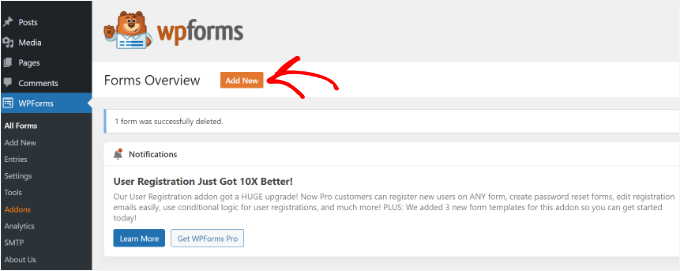
From your WordPress dashboard, go to WPForms » Add New.
💡 Phrase: You’ll be capable to each assemble a brand spanking new type from scratch or use indisputably certainly one of your present bureaucracy. If you want to edit a type, you’ll go to the ‘All Paperwork’ tab in WPFForms and click on at the ‘Edit’ button for the form you need so that you can upload automatic PDF generation.
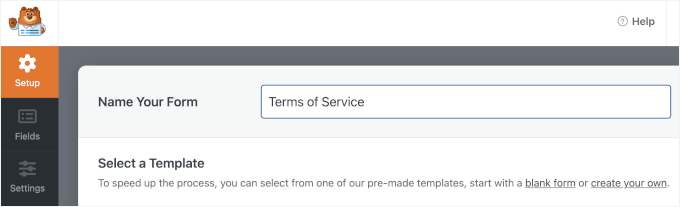
This opens the Setup internet web page, where you’ll name your type.
This is for your reference most simple, then again I love to suggest using a clear name for more uncomplicated staff.
Next, select how you can assemble your type.
You’ll be capable to get began from scratch, use the AI type builder, or choose a template.
For demonstration, I’ll show you how you can do it using a pre-made type template.
Inside the search bar, you’ll type in keywords, comparable to “Contact Form,” “Receipt,” “Agreement,” or anything that fits your needs, to in brief to find the easiest template.
Whilst you to find the form template you like, hover over it and click on at the ‘Use Template’ button. For demonstration, I’m going to make a choice the Words of Provider Form template.

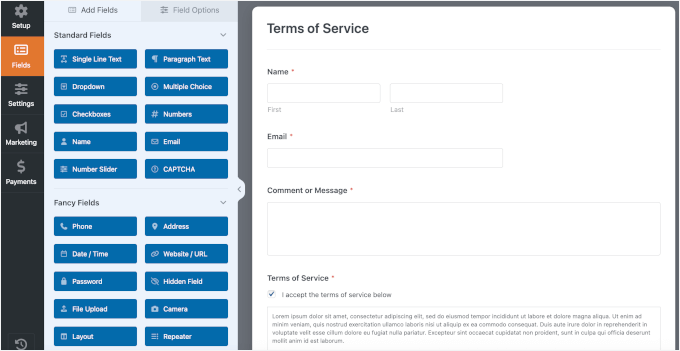
WPForms will then open the kind builder interface.
The Words of Provider type template comes preloaded with fields corresponding so far, receipt amount, order details, payer name, and price knowledge.
You’ll be capable to take a 2nd to check out the form builder interface. On the left side, you’ll see the entire available type fields you’ll add. The best panel presentations the real fields to your type.
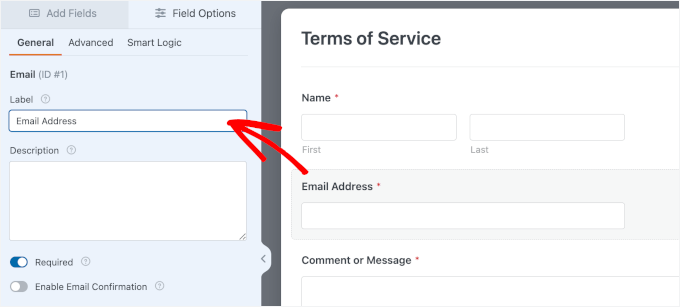
To customize this sort, click on on on any field in the appropriate panel to edit it.
For example, if you want to exchange the Email correspondence label to Electronic mail Cope with, merely click on on that field and type the new label throughout the settings panel at the correct. You’ll be capable to moreover make fields required or now not necessary, add a temporary description, and change their order by means of dragging them up or down.
If you want to have so that you can upload further fields, like a dropdown for extra possible choices or a record add field for supporting bureaucracy, simply drag them from the left panel into your type.
Since we want this to be a signed legal document, take into accout to tug the Signature field into your type as well.
From proper right here, you’ll continue tweaking this sort template to fit your needs.
One thing that you need to do remember that is to edit the trend text for your Words of Provider checkbox. Simply click on on on the field and rewrite the text in ‘Description.’
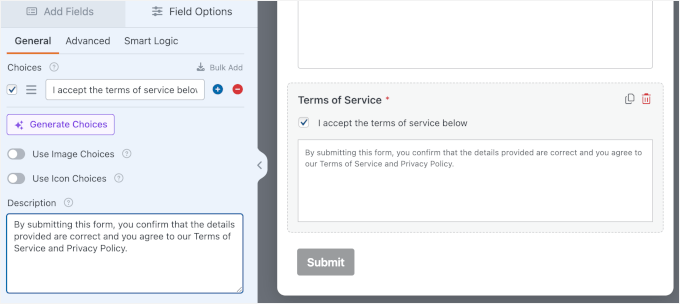
Once your type seems exactly how you need it, you’re ready to configure your type settings.
Step 3: Set Up Form Notifications and Confirmations (No longer necessary)
Previous than we prepare the automated PDF generation, it’s a good idea to in brief read about the Notifications and Confirmations settings. Do phrase that this step isn’t necessary, however it promises that every you and your shoppers download the appropriate follow-up after type submission.
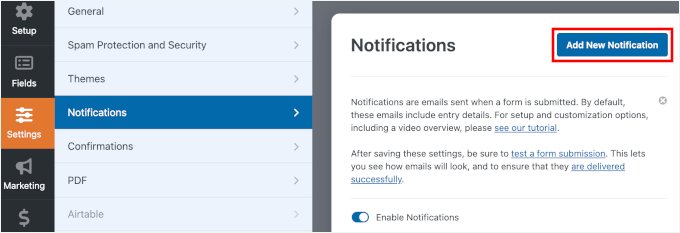
By the use of default, type notifications are sent to the web site admin. For those who moreover wish to send a replica of the PDF to the individual, you’ll add some other notification for that.
To try this, open Settings » Notifications, and click on on ‘Add New Notification.’
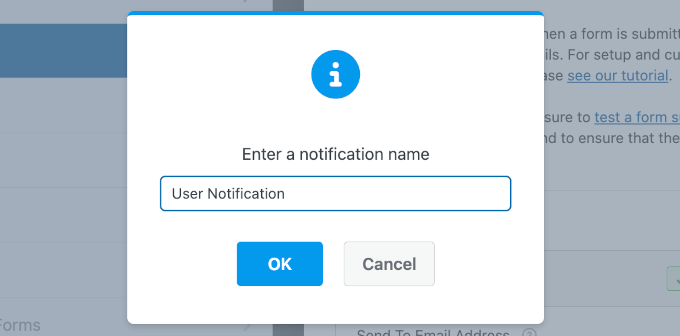
Inside the popup, give your notification a name.
For example, “Send PDF to Client” or “Client Notification,” and click on on ‘OK.’
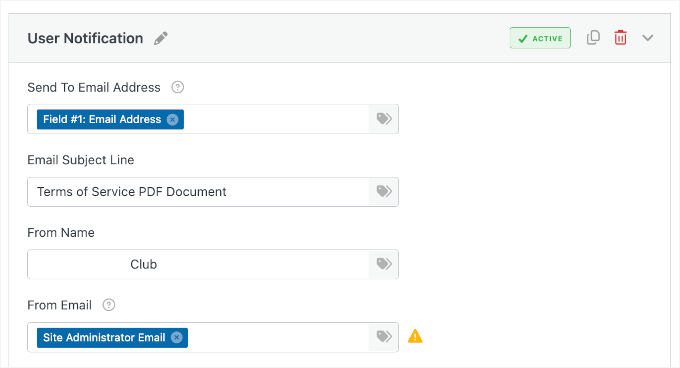
Inside the Send To Email correspondence Deal with field, you’ll wish to use a Smart Tag so the email is distributed to the person who submitted the form. Click on at the Smart Tag icon at the end of the sphere and select the Email correspondence field from your type.
If your type should notify more than one other folks, you’ll go ahead and add multiple electronic mail addresses, separated by means of commas.
Next, you’ll fill throughout the Email correspondence Subject, From Establish, and From Email correspondence fields. You’ll be capable to use Smart Tags proper right here, too, if you want to robotically personalize the message or include type details.
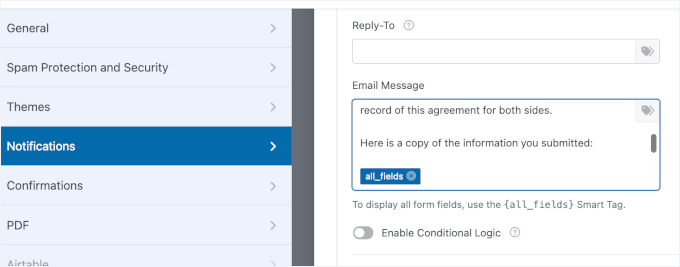
After that, you’ll scroll all of the means right down to the ‘Email correspondence Message’ field.
By the use of default, WPForms has included the {all_fields} good tag, then again you’ll add further content material subject material to make sure your notification e mail seems excellent.
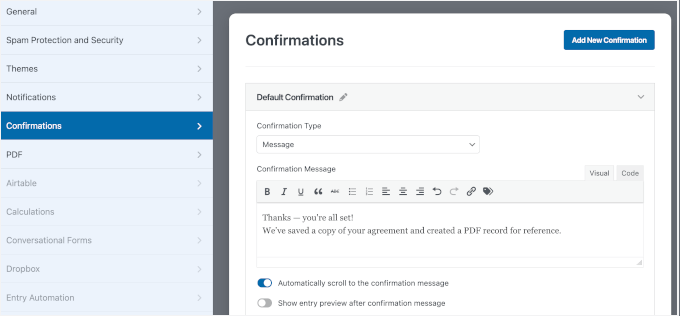
When you’re proper right here, click on on over to the Settings » Confirmations tab as well.
WPForms provides 3 varieties of confirmations: a message, a redirect, or sending shoppers to a decided on URL.
In this instructional, I’m using the ‘Message’ confirmation because of I wish to keep shoppers on the similar internet web page after they put up the form. Once that’s set, you’re completed with this step.
As an alternative of a confirmation message, you’ll redirect shoppers to some other web internet web page or a fully different internet website.
For more information, you’ll see our knowledge on how one can redirect customers after kind submission.
Step 4: Configure the PDF Settings
In conjunction with your type built, it’s time to organize the PDF generation. In this step, you’ll configure WPForms to robotically create a professional PDF every time anyone submits your type.
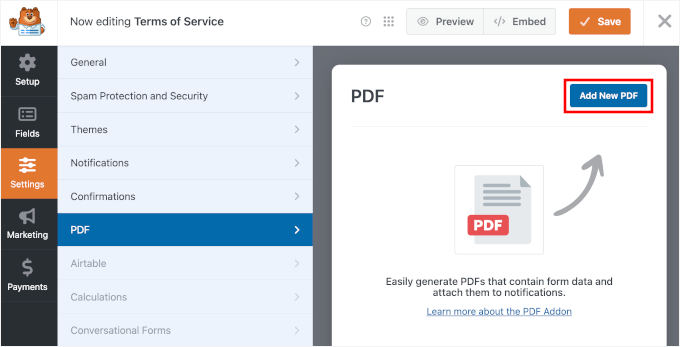
To start, take a look on the left sidebar underneath ‘Settings’ throughout the type builder and switch to the ‘PDF’ tab. Then, click on at the ‘Add New PDF’ button.
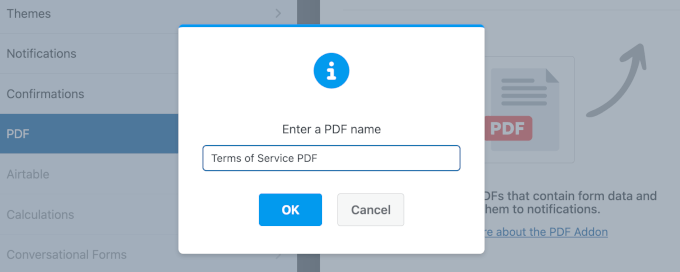
A popup window will appear asking you to name your PDF.
Transfer ahead and add a descriptive name this is sensible for your knowledge. You’ll be capable to all the time exchange this later if sought after, so don’t pressure a substantial amount of about getting it easiest at the present time.
Click on on ‘OK’ to continue.
In conjunction with your PDF configuration enabled, WPForms will show you several important settings.
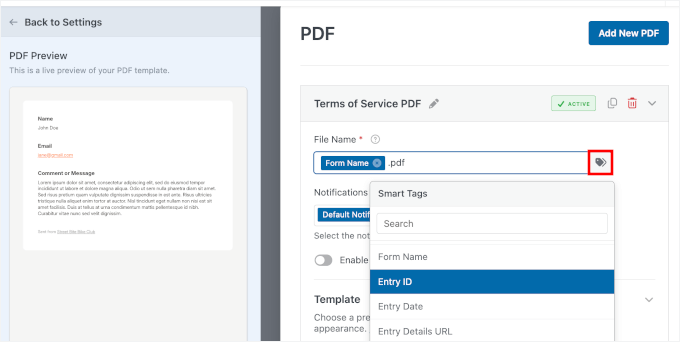
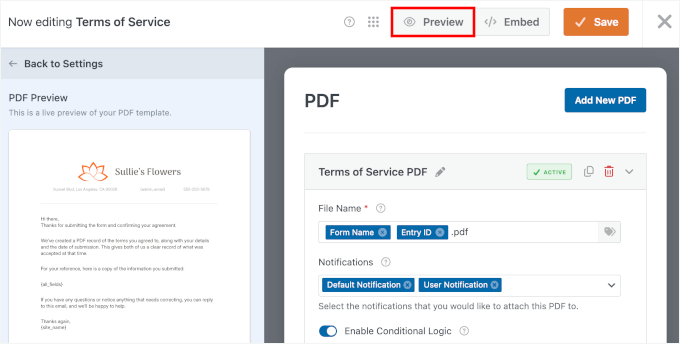
The first thing you’ll see is the ‘File Establish’ field. By the use of default, WPForms uses the “Get right of entry to for {form-name}” structure since the PDF filename, then again you’ll customize this.
I in my view like to include good tags proper right here to make each PDF unique. For example, it’s crucial to make use of something like {form_name}-{entry_id}, which would possibly create knowledge named “Words-of-Provider-123.pdf.”
Using the Get right of entry to ID is terribly in point of fact useful for record-keeping. It promises every checklist has a singular name, making it much more simple to organize your folders and to find specific agreements later without opening every single checklist.
To use a wise tag, you’ll click on at the ‘Smart Tags’ icon to the appropriate of the sphere and choose from the available possible choices throughout the dropdown.
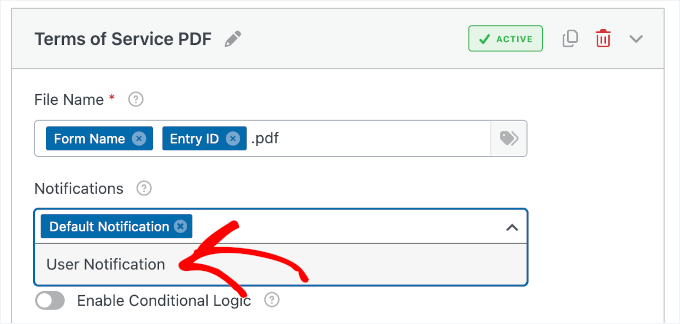
Right kind beneath that, you’ll see the Email correspondence Notifications dropdown. That’s the position you make a decision which electronic mail notifications should include the PDF as an attachment.
If you want to send the PDF on your self, select ‘Default Notification.’ If you want to have shoppers to procure a replica, select ‘Client Notification.’ You’ll be capable to even select every possible choices if you want to have everyone to get a replica.
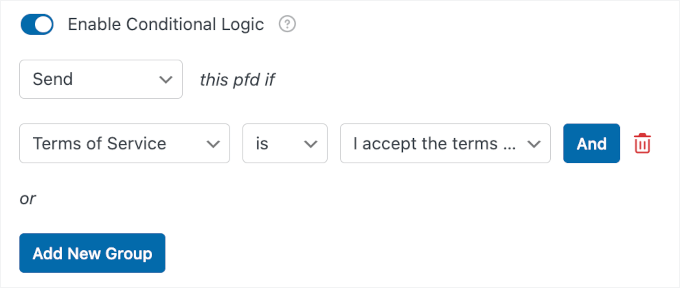
Right kind beneath that, you’ll see a conditional common sense risk. This powerful serve as lets you keep watch over when PDFs are generated.
For example, perhaps you most simple wish to create a PDF if anyone tests the “I comply with words” checkbox.
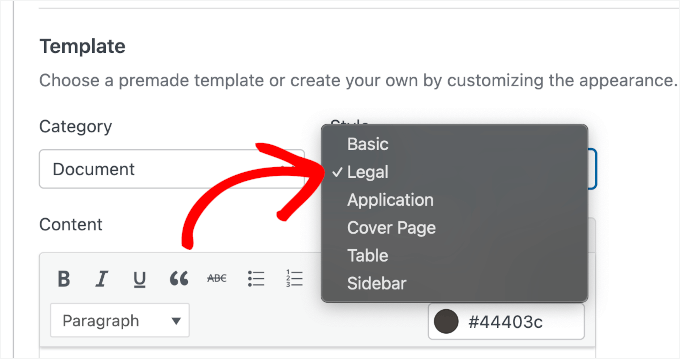
Next, you’ll select your PDF template. WPForms provides dozens of professionally designed templates organized into categories.
You’ll see possible choices for Notifications, Bureaucracy, Financial bureaucracy, and Certificates. Since we’re operating with a legal document, click on at the ‘Bureaucracy’ magnificence.
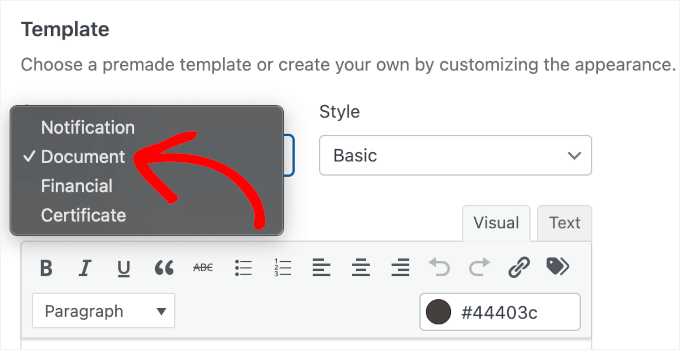
🧑💻 Skilled Tip: Make a choice the category that most nearly fits your use case. For example, use ‘Financial Paperwork’ for invoices or price knowledge, and ‘Certificates’ for things like on-line direction completion or attendance certificates.
You’ll be capable to then browse at some stage in the available templates by means of clicking on each one. You’ll see a live preview appear on the left side of your show showing exactly how your PDF will look.
For my type, I’m deciding at the ‘Prison’ style.
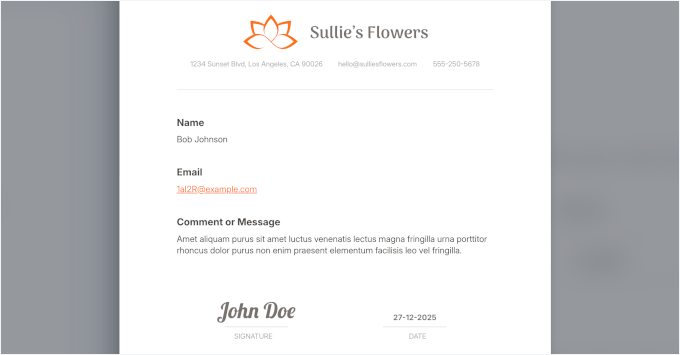
Whilst you’ve decided on a template and magnificence, it’s robotically applied for your PDF. You’ll perceive the preview updates immediately to show your type fields populated throughout the template structure.
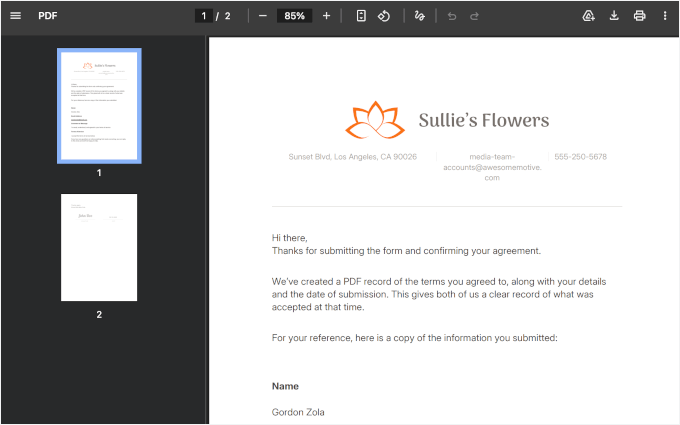
It has a clean, professional look with a right kind structure that’s easiest for contracts. The template features a header phase for your logo, clearly organized content material subject material sections, and a footer with internet web page numbers.
At this degree, your elementary PDF settings are configured. In the next move, we’ll customize the content material subject material and design to make sure it sounds as if exactly what you need throughout the final PDF.
Step 5: Customize and Style Your PDF
Now that you just’ve made up our minds on a template, it’s time to customize the PDF. That’s the position you’ll change placeholder text, alter your type fields, and add any further content material subject material you need to include throughout the final document.
Then, I’ll show you how you can make your PDF further on-brand with a custom designed design.
Step 5.1: Personalize the PDF Content material subject material
On the left side of the show, you’ll see a live PDF preview. The Prison template accommodates editable placeholders like “Business Deal with,” “Signature Type,” and “Date.” You’ll be capable to click on on immediately on any of this text throughout the preview to edit it.
Let’s get began with the Content material subject material phase.
The template already accommodates the entire type fields, then again you’ll add a temporary rationalization to provide context.
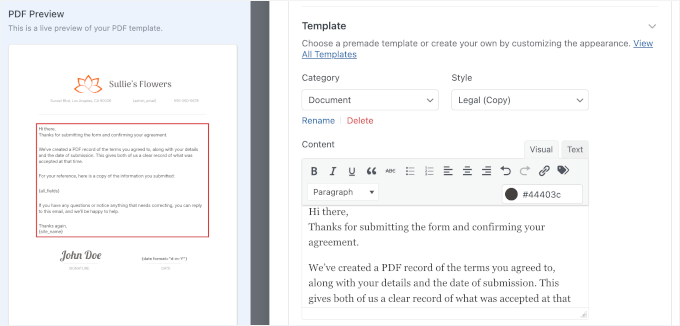
The editor works like a simple word processor. You’ll be capable to structure text, add bullet problems, insert headings, and include links to make the whole thing clear and easy to be told.
Moreover, you’ll paste to your actual legal text, corresponding on your entire phrases of provider or contract language.
Plus, you’ll use Smart Tags to pull the information dynamically from your type submissions. Using Smart Tags means every PDF it is going to be custom designed with the correct knowledge without you doing anything manually.
🧑💻 Skilled Tip: It’s essential to wish to add any disclaimers or additional information your shoppers might need. For legal bureaucracy, it’s crucial to return with contact knowledge, environment friendly dates, and instructions for next steps.
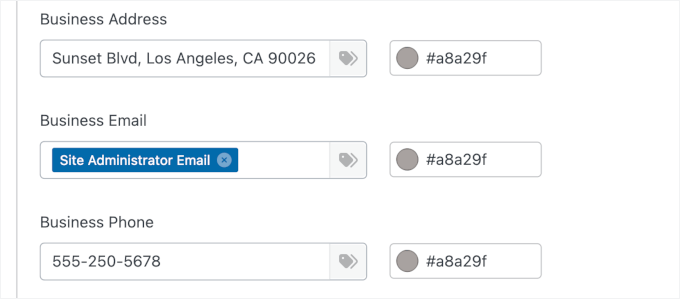
Next, you’ll art work on the placeholders with your online business contact details, corresponding on your deal with, electronic mail, and telephone quantity. You’ll be capable to moreover use Smart Tags proper right here.
Now, scroll down to hunt out the signature settings.
Proper right here, you’ll configure how the signature turns out. Since we added a Signature field to the form in Step 2, WPForms will robotically pull the form particular person’s eSignature into this area. You’ll be capable to alter the size and the heading to ensure it sounds as if respected.
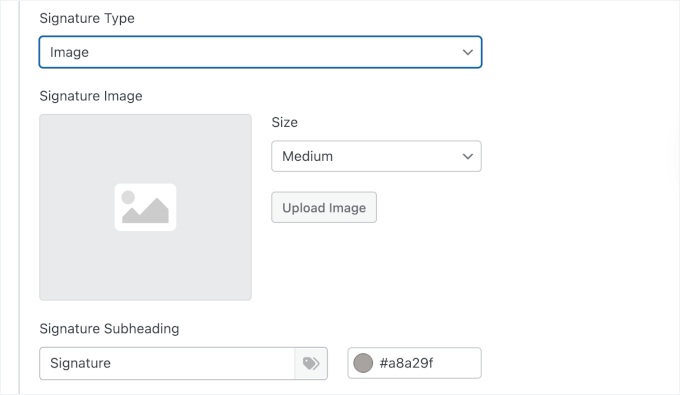
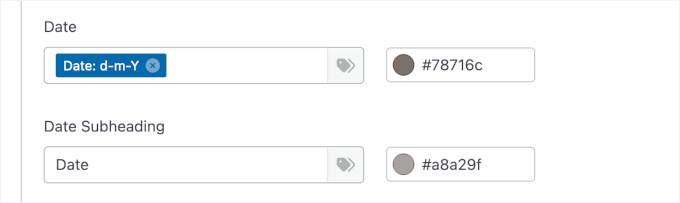
Next, there are the Date fields.
Transfer ahead and select your date structure, along with write the subheading.
From proper right here, take a little time to test each phase.
Make sure all your type fields are included and that they’re arranged in a logical order. You need the entire PDF to be easy to be told and understand.
Step 5.2: Customize the PDF Design
In conjunction with your content material subject material in place, it’s time to make your PDF look on-brand. In this step, you’ll customize colors, upload your emblem, and alter the entire design to match your online business id.
Let’s scroll all of the means right down to ‘Glance’ throughout the PDF settings panel to make a choice a pre-designed theme. Every theme has its non-public color scheme and styling. On the other hand, you’ll edit the theme colors.
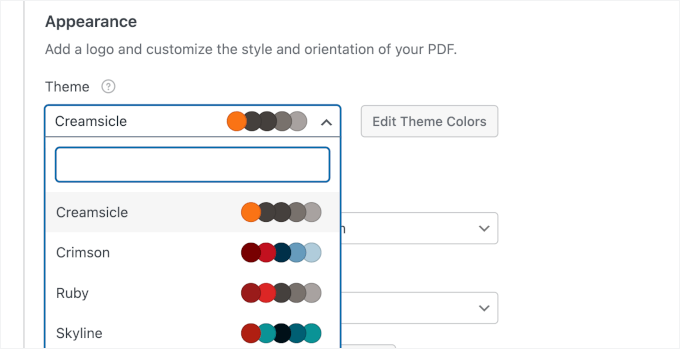
I like to scroll by means of a few possible choices to hunt out the one who best suits my type. The preview on the left updates immediately, so that you’ll see how the ones topic issues impact your PDF design.
Whilst you’ve picked a theme, it’s time so that you can upload your customized emblem.
For those who don’t see the ‘Upload’ button, click on at the ‘Remove Image’ button to remove the existing logo placeholder.
After that, you’ll select your logo checklist from your pc. WPForms accepts commonplace symbol codecs like PNG and JPG. Your logo will then appear throughout the PDF preview.
You’ll be capable to then alter the brand size – small, medium, or massive. You’ll be capable to moreover position your logo on the left or center. I maximum ceaselessly center mine for legal bureaucracy because it creates a further formal, balanced glance.
All these small design touches add up to create a document that looks professionally designed. Your colors suit your type, your logo is prominently displayed, and the entire structure seems clean and organized.
Step 6: Alter Difficult PDF Settings
Previous than we check out your PDF, there are a few technical settings you should configure. The ones sophisticated possible choices get a hold of keep watch over over the document structure, protection, and who can get right of entry to your PDFs.
Click on directly to make larger the ‘Difficult’ tab by means of the highest of the PDF settings panel.
The main surroundings you’ll see is Paper Measurement. Available sizes include Letter (8.5&Top; x 11&Top;), A4, Prison, and further. The default is Letter, which goes great for lots of trade bureaucracy in the US.
For those who’re operating with international shoppers or have formatting must haves, you’ll select A4 or some other size from the dropdown.
Right kind next to that, you’ll to find the ‘Orientation’ surroundings. You’ll be ready to make a choice from Portrait (vertical) and Landscape (horizontal) layouts.

Portrait is the structure for lots of bureaucracy, and that’s what I’m using proper right here. Landscape orientation works upper when you’ve got huge tables or charts that need further horizontal space.
Now let’s talk about protection. You’ll be capable to click on directly to turn on ‘Get admission to Restrictions.’
This is indisputably certainly one of my favorite choices because it lets you keep watch over exactly who can view and procure your PDFs. By the use of default, PDFs are accessible to any buyer, then again you’ll lock them down using plenty of possible choices.
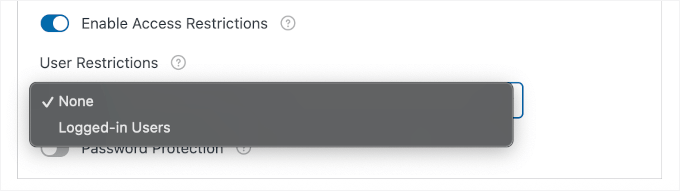
If you choose the “Logged-in Consumers” risk, most simple logged-in WordPress customers will be able to get right of entry to the PDF. This is useful in case you’re rising bureaucracy for people of your website or body of workers to your staff.
For additonal protection, WPForms moreover lets you password-protect your PDFs.
You’ll be capable to use this selection by means of enabling the ‘Password Protection risk.’ Then simply enter a password that consumers need to open the document, and re-enter it to verify.
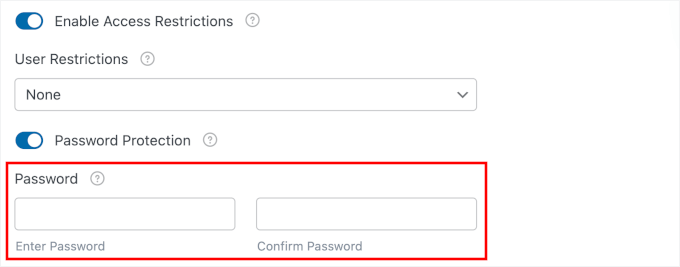
This is easiest for subtle legal agreements or financial bureaucracy.
🧑💻 Skilled Tip: One thing to remember with password protection – you’ll need to keep in touch the password for your shoppers one way or the other. I maximum ceaselessly include it in a follow-up electronic mail to stick problems secure.
Whilst you’ve configured the whole thing to match your must haves, it’s time to test your PDF generator type.
Step 7: Take a look at Your PDF Era
Previous than you post your kind and get began amassing precise submissions, you need to make sure the whole thing works correctly. Trying out your PDF generation is a essential step that I not at all skip, and likewise you shouldn’t each.
The good news is that WPForms makes testing easy with its built-in preview serve as. Take a look on the easiest right kind corner of the form builder and click on at the ‘Preview’ button.
This opens your type in a brand spanking new tab exactly as your shoppers will see it. Now you’ll fill it out similar to a real submission and spot if the PDF generates correctly.
Transfer ahead and fill in the entire type fields with check out knowledge. For the Prison Bureaucracy type, I skipped the decision field and wrote a typo throughout the electronic mail field to check validation.
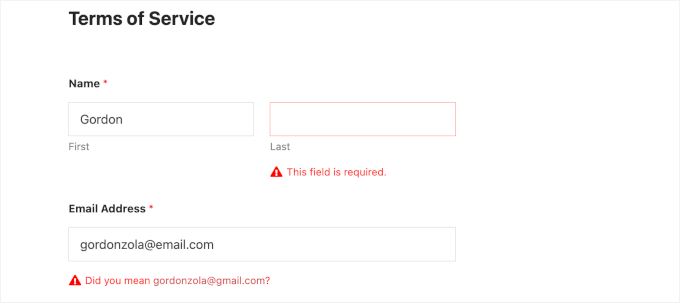
Now, let’s take into accout to inspect the ‘I comply with words’ checkbox and click on at the ‘Submit’ button at the bottom of the form.
After submitting, you’ll see a confirmation message for your type.

Now let’s read about if the PDF was once as soon as created appropriately.
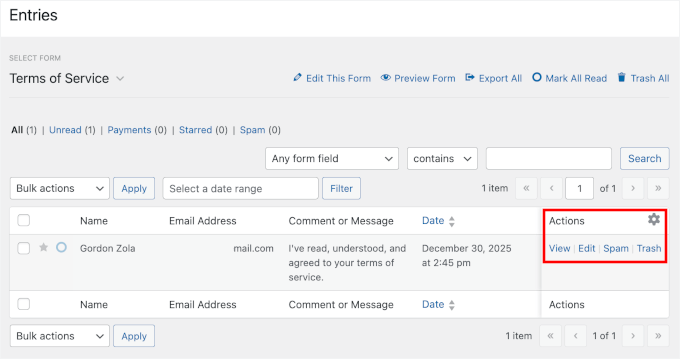
Go back for your WordPress dashboard and navigate to WPForms » Entries.
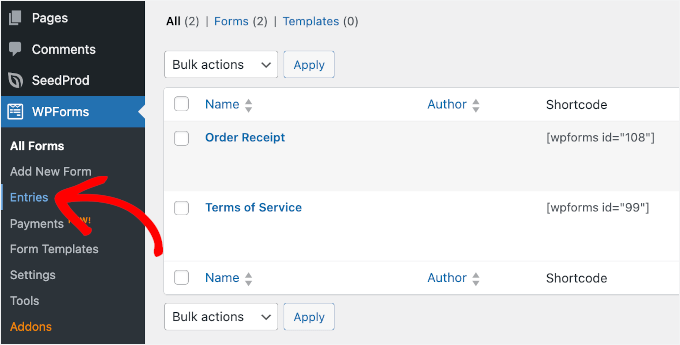
You should see your check out submission listed on the next show.
Click on on on the ‘View’ button throughout the ‘Actions’ column to look the entire details.
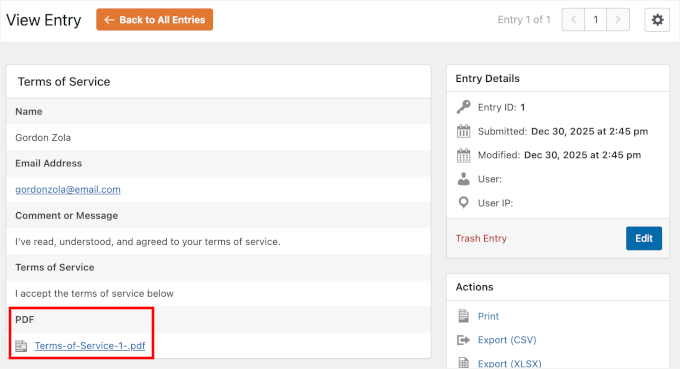
On the get entry to details internet web page, seek for the PDF phase – it should display your configured PDF link.
You’ll be capable to simply click on on on that link to open your generated PDF.
The PDF will open in a brand spanking new browser tab or download for your pc, depending to your browser settings.
Take a excellent take a look at it and read about the whole thing carefully:
- Make sure all your type knowledge turns out correctly throughout the PDF. Your check out name, e mail cope with, and company details should be exactly the position you situated them throughout the template.
- Check out that the practical tags pulled in the appropriate knowledge. Scroll by means of the entire document and take a look at that now not anything else is bring to a standstill or formatting seems abnormal.
- Consider of your logo – does it appear on the correct size and in the appropriate position? Are your type colors showing up correctly?
- Is the textual content readable and appropriately formatted with the headings, bullet problems, and styling you added?
This step problems because it affects how professional your document seems.
Now, let’s check out provide in case you configured notifications to include the PDF.
You are going to have received an electronic mail with the PDF attached. Open that electronic mail and take a look at that the PDF attachment is there and opens correctly.
For those who don’t see the email immediately, you will have to certainly read about your direct mail or junk folder, as emails with attachments can every so often reason direct mail filters.
💡Phrase: For those who’re not receiving check out emails, your website will have e mail supply problems. I love to suggest using WP Mail SMTP to fix it. This plugin promises your type notifications and PDF attachments if truth be told reach their holiday spot.
Step 8: Embed Your Form in WordPress
Now, it’s time to put up your type and add it for your WordPress website so folks can if truth be told use it.
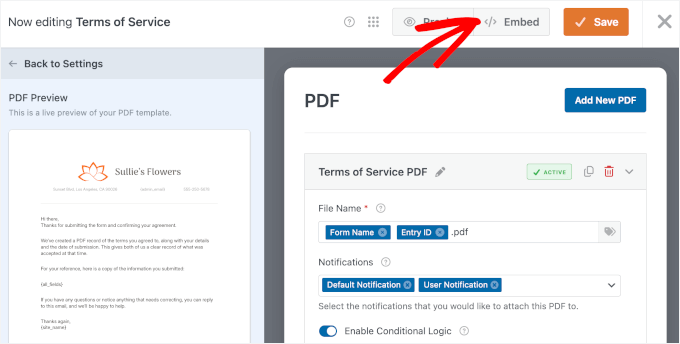
Inside the type builder, click on at the ‘Save’ button first to ensure all your changes are saved. This is important because you don’t wish to lose any of the customizations you merely made.
Once your type is saved, click on at the ‘Embed’ button right kind next to it.
WPForms will show you a popup with a few possible choices for together with your type for your put up or web page.
The perfect means is to embed it on a brand spanking new internet web page, so feel free to click on at the ‘Create New Internet web page’ risk throughout the popup window.
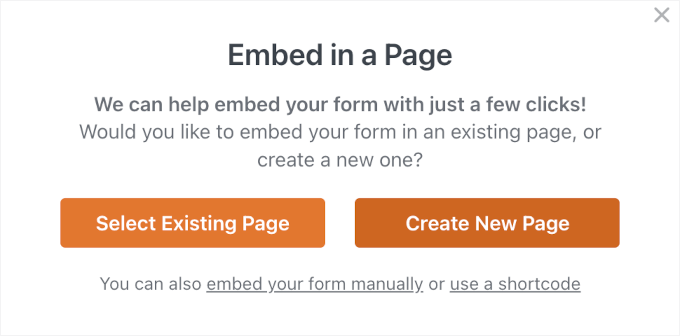
Inside the next popup, go ahead and speak to your new internet web page.
For my type, I’m calling it “Prison Agreement Form” – you’ll name yours regardless of is sensible for your website.
Once you have into the internet web page name, click on at the ‘Let’s Transfer!’ button.

WPForms robotically creates a brand spanking new WordPress internet web page and embeds your type on it.
The internet web page opens throughout the WordPress block editor so that you’ll see exactly the way in which it sounds as if. Your type is already there, ready to go.
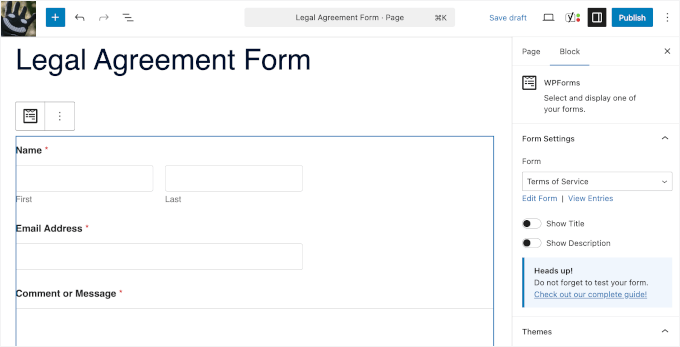
You’ll be capable to add additional content material subject material around the type if you want to have.
Most likely you need to include instructions above the form explaining how you can fill it out. Or possibly you need so that you can upload some introductory text about what the legal document covers. Merely click on on above or beneath the form block and get began typing.
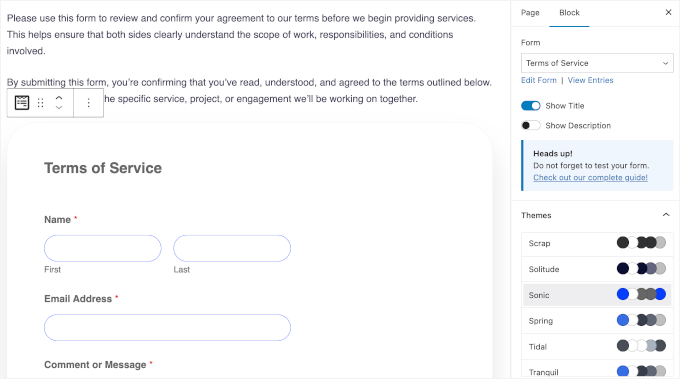
You’ll be capable to moreover select a theme throughout the ‘Form Settings’ at the correct to style your type.
If you wish to add the form to an present internet web page as a substitute, that’s easy too. Navigate to any internet web page to your internet website and open it throughout the editor.
You’ll be capable to moreover use the shortcode means in case you’re further pleased with that. Every WPForms type has a singular shortcode that you simply’ll replica and paste anywhere.
For more information, see our knowledge on how one can embed WordPress paperwork.
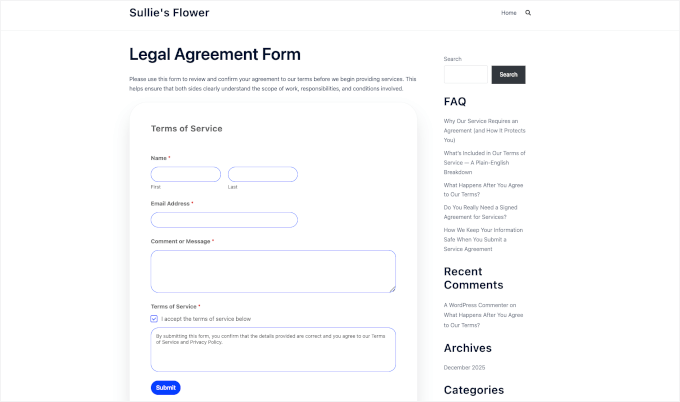
Previous than you put up the internet web page, click on at the ‘Preview’ button to look how the whole thing seems on the front end of your website. Make sure the form presentations correctly and fits well along side your internet web page structure.
Check out that it’s mobile-friendly too – click on at the cell preview icon to look the way in which it sounds as if on phones and tablets. WPForms robotically optimizes bureaucracy for cell units, however it’s all the time excellent to double-check.
If the whole thing seems easiest, go ahead and click on at the ‘Put up’ button. Your type is now live to tell the tale your WordPress website!
Any longer, each time anyone submits your type, WPForms will robotically generate a professional PDF. Then, it’s going to deal with it in step with the settings you configured.
You’ll be capable to all the time go back and make changes for your type or PDF settings later. Merely navigate to WPForms » All Paperwork, to find your type, and click on on ‘Edit.’ Any changes you’re making will stick with to all longer term submissions.
FAQs About PDFs and Paperwork in WordPress
Listed here are one of the most most now not atypical questions we get about generating PDFs from WordPress bureaucracy:
How do I export type entries in WordPress?
For those who’re using WPForms, go to WPForms » Entries to your WordPress dashboard and select the kind you wish to have to export. You’ll be capable to download all submissions as a CSV or Excel checklist. You’ll be capable to then open that checklist in Excel, Google Sheets, or any spreadsheet program.
Which WordPress type plugin can generate PDF knowledge?
WPForms is the best WordPress type plugin for generating PDF knowledge. Its PDF Addon accommodates 40+ professionally designed templates, design customization possible choices, and the facility to robotically electronic mail PDFs to shoppers and internet website admins.
How can I create a downloadable PDF in WordPress?
You’ll be capable to create a PDF to your pc, upload it for your WordPress Media Library, and embed it into your internet website so visitors can download it. You’ll be capable to even advertise your PDF downloads by means of surroundings them up as virtual merchandise using Simple Virtual Downloads.
How do I embed a PDF in WordPress?
The easiest way is to use WordPress’s built-in File block. Add the block for your internet web page, upload your PDF, and WordPress will display it inline with a download risk. If you want to have further choices like zoom, internet web page navigation, or a better finding out experience, use a PDF viewer plugin.
Additional Belongings for Using Paperwork in WordPress
I hope this newsletter has helped you learn how to robotically generate PDFs from type entries in WordPress.
Next, it’s your decision to check out our other WordPress guides on:
- The way to restrict the choice of WordPress kind entries
- The way to attach any WordPress paperwork to Google Sheets
- Pointers for growing extra interactive paperwork
- The way to block touch kind unsolicited mail in WordPress
- Final information to the usage of WordPress paperwork
For those who favored this newsletter, then please subscribe to our YouTube Channel for WordPress video tutorials. You’ll be capable to moreover to find us on Twitter and Fb.
The submit How I Mechanically Flip WordPress Shape Entries Into PDFs (No Handbook Paintings) first seemed on WPBeginner.
Contents
- 0.0.1 Why Routinely Generate PDFs From Form Entries? (Benefits + Use Instances)
- 0.0.2 Step 1: Arrange and Activate WPForms Skilled
- 0.0.3 Step 2: Create Your Form or Choose an Present One
- 0.0.4 Step 3: Set Up Form Notifications and Confirmations (No longer necessary)
- 0.0.5 Step 4: Configure the PDF Settings
- 0.0.6 Step 5: Customize and Style Your PDF
- 0.0.7 Step 6: Alter Difficult PDF Settings
- 0.0.8 Step 7: Take a look at Your PDF Era
- 0.0.9 Step 8: Embed Your Form in WordPress
- 0.0.10 FAQs About PDFs and Paperwork in WordPress
- 0.0.11 Additional Belongings for Using Paperwork in WordPress
- 0.1 Related posts:
- 1 Shopify vs Amazon: Which eCommerce Platform to Choose?
- 2 8 Easiest WordPress Subject matters for 2026: Velocity, Flexibility, WooCommerce
- 3 The right way to Spotlight New Posts for Returning Guests in WordPress

0 Comments