
Fixed spacing values have turn into second nature in web design. Your internet website seems to be like great in your pc, but when anyone views it on a larger apply, the entire thing falls apart. You modify spacing for somewhat a large number of breakpoints, alternatively you may well be nevertheless guessing.
There’s a better manner: fluid spacing ramps. The ones scales proportionally all through each show size, keeping up your design balanced without information tweaking. In this knowledge, we’ll show you the easiest way to build this type of fluid spacing ramp in Divi 5. Proper right here’s what you need to grasp.
What Is A Fluid Spacing Ramp And What Does It Do?
A fluid spacing ramp is a systematic set of spacing values that scale proportionally all through show sizes. Most designers use fixed values: 16px padding on cellular, 24px on tablet, 32px on desktop.
The ones create visible jumps when the viewport hits each breakpoint. It moreover doesn’t account for tool sizes between the ones breakpoints, harking back to a smaller tablet or phones in landscape, which results in awkward gaps.
Fluid spacing ramps eliminate those jumps. They use the CSS clamp() function to stipulate 3 values: a minimum size, a most well liked (fluid) value, and a maximum size.
Clamp() promises that spacing remains fluid and proportional, regardless of whether or not or now not anyone views your internet website at 375px or 2560px. This prevents awkward gaps on ultrawide displays and cramped layouts on unusual tablet sizes.
This moreover eliminates answer inertia. As an alternative of defining spacing at a few breakpoints, you define it once with clamp(). The function handles the rest.
How Divi 5 Makes Fluid Spacing Ramps Possible
Divi 5 brings a whole overhaul to responsive design. We’ve expanded from 3 breakpoints to seven customizable ones, providing you with regulate over how web pages look on the entire thing from compact phones to ultrawide displays. However, a key part that allows fluid spacing ramps to art work is Complicated Gadgets.
This feature lets in all the range of latest CSS devices and functions to be used instantly all through the Visual Builder. Custom designed code stays throughout the drawer. Numeric input fields in Divi 5 now accept viewport devices like vw and vh, relative devices like rem and em, and functions like calc() and clamp().
Click on on proper right into a spacing or sizing field, and in addition you’ll see a dropdown with all available devices. Make a selection clamp(), enter your minimum, most well liked, and maximum values, and watch your spacing adapt in exact time. The Visual Builder shows you exactly the best way it seems that to be like as you assemble.
The workflow shifts completely. As an alternative of atmosphere fixed values at a few breakpoints, you define fluid spacing once. A padding value of clamp(20px, 3vw, 40px) scales robotically all through each show size. Combined with Design Variables, you’ll be capable of create a whole spacing tool that continues to be consistent and adapts without information adjustments.
Creating A Fluid Spacing Ramp In Divi 5
The Visual Builder, Design Variables, and Difficult Units all art work together to toughen fluid spacing. Alternatively having access to the ones choices doesn’t robotically create a spacing tool. So, let’s take a look at the way you’ll be capable of assemble a fluid spacing ramp in Divi 5.
Resolve Out Your Spacing Values
Get began by way of working out your minimum and maximum limitations. Your minimum values define the spacing at cellular widths, maximum frequently ranging from 320px to 480px. For cellular, margins would most likely range from 16px to 24px, while tighter padding sits spherical 8px to 16px. The ones keep layouts compact without feeling cramped.
Maximum values practice at desktop widths, maximum frequently 1200px and above. Desktop screens would possibly simply use margins of 80px to 120px, with padding scaling proportionally. Content material material-heavy blogs need generous desktop spacing between sections, so plan maximums spherical 64px to 80px. This gives text room to breathe.
Portfolio web pages art work in a different way. You wish to have further content material materials visible, so maximum values stay tighter at 32px to 48px. eCommerce web pages steadiness between the ones. Product grids require sufficient separation to in point of fact really feel distinct, alternatively now not the sort of lot that fewer items are visible above the fold.
Plan and apply down 5 to seven spacing tiers. Label them simply: area small, area medium, area really extensive. Small would most likely range from 8px to 24px. Medium scales 16px to 48px. Large runs 32px to 80px. Decide on the ones ranges previous than opening Divi.
Set Up Design Variables
Open the Visual Builder and to find the Variable Manager icon inside the most efficient toolbar. Click on on it to get right of entry to the website where all Design Variables are stored and regulated. That’s the position those spacing tiers you planned earlier turn into reusable values all through your internet website.
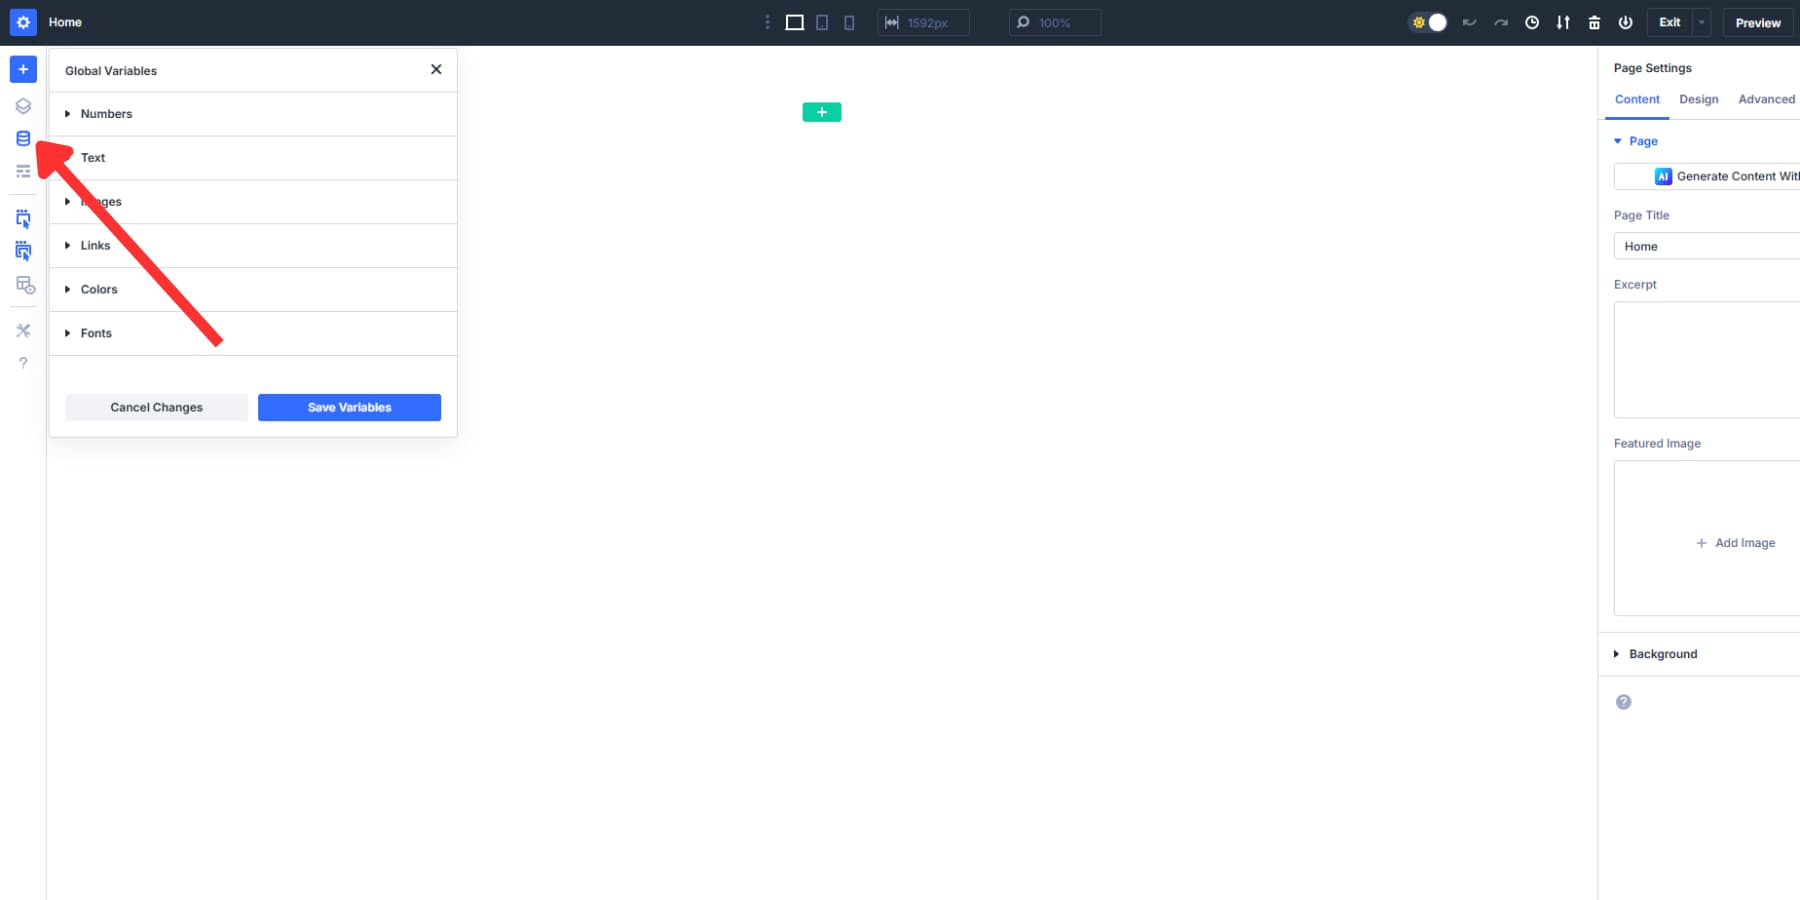
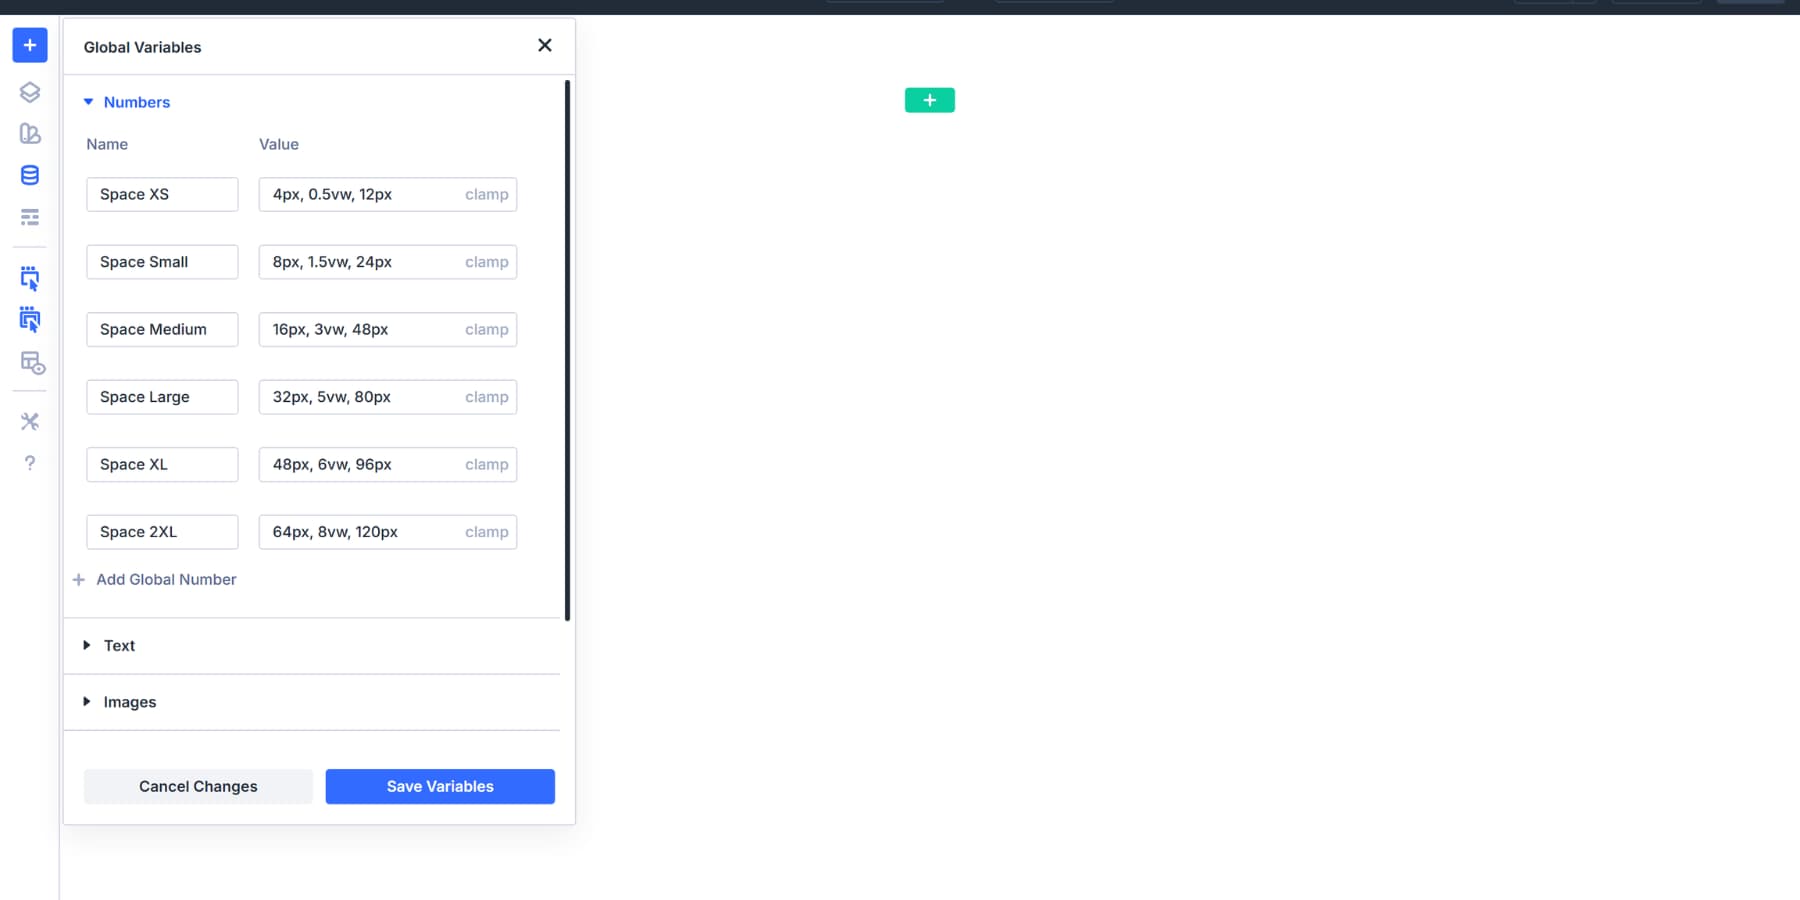
Inside the Numbers tab, click on on so that you could upload a brand spanking new variable. Now, take those ranges you mapped out and convert them into clamp method. Every tier becomes one variable. You’ll have to determine variables clearly. Anyone opening your internet website later must understand what the distance medium does without a want to make an educated bet:
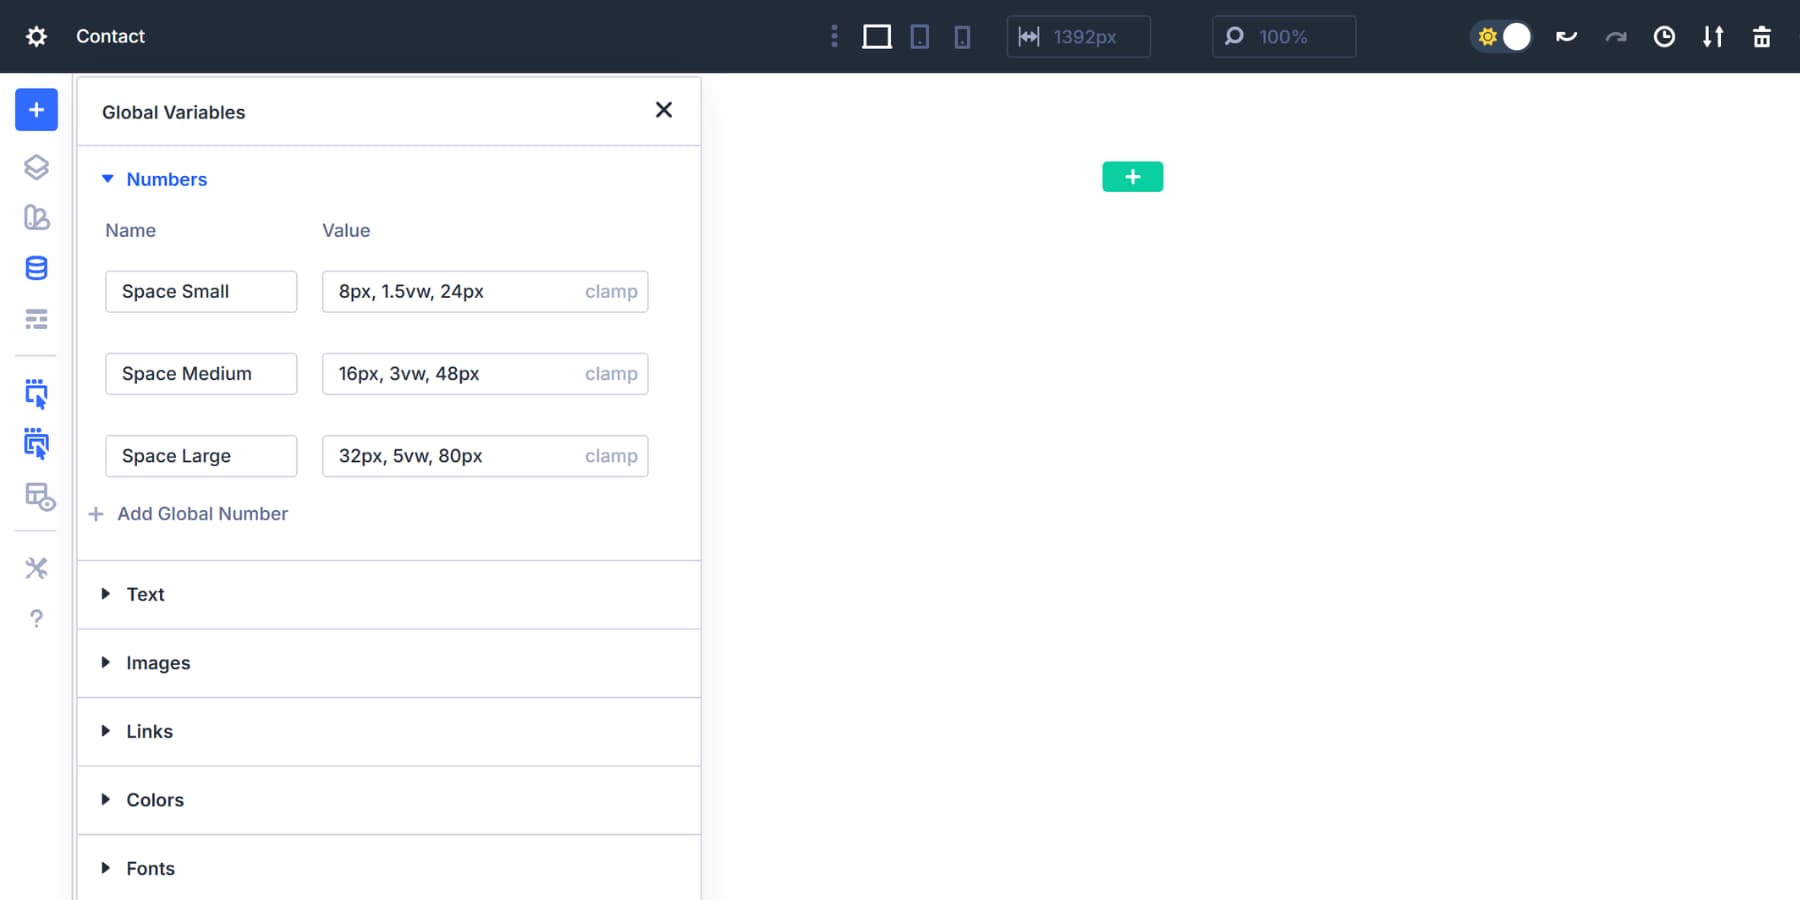
Space Small
Worth: clamp(8px, 1.5vw, 24px)
This scales from 8px at cellular to 24px at desktop. Use it for padding inside buttons, gaps between icons, or breathing room spherical small text parts. The 1.5vw scaling helps to keep enlargement refined and controlled.
Space Medium
Worth: clamp(16px, 3vw, 48px)
Starts at 16px, scales at 3% of viewport width, caps at 48px. Best possible conceivable for padding inside enjoying playing cards, spacing between paragraphs, or margins spherical pictures. The doubled scaling value from area small creates a clear visual hierarchy.
Space Large
Worth: clamp(32px, 5vw, 80px)
Handles greater gaps between content material materials blocks, section padding, or margins that separate distinct internet web page areas. The 5vw value helps to keep proportions correct even on ultrawide displays.
Space XS (optional)
Worth: clamp(4px, 0.5vw, 12px)
Micro spacing for tight situations. The distance between an icon and its label, padding in compact UI parts, or area spherical inline content material materials. The 0.5vw value prevents the ones details from emerging quite a lot of.
Space XL (optional)
Worth: clamp(48px, 6vw, 96px)
Generous breathing room for major internet web page sections or hero area padding. The 6vw scaling creates in point of fact in depth desktop spacing without crushing cellular layouts.
Space 2XL (optional)
Worth: clamp(64px, 8vw, 120px)
Maximum impact for homepage heroes or major landing internet web page divisions. Use sparingly. The 8vw value makes the ones sections dramatic on large presentations while staying affordable on phones.
Every clamp method follows the an identical development. The principle amount is your cellular baseline. The middle value with vw controls how fast spacing grows. The full amount is your desktop ceiling. The ones have compatibility the degrees you decided in your planning section.
The minimum and maximum values in each clamp method come instantly from your planning art work. When you decide the distance must range from 8px to 24px, those exact numbers turn into the principle and ultimate values throughout the method.
The middle vw value controls how simply you move between them. If you want to have the price to succeed in its maximum spherical a selected viewport width, base your most well liked value in your decided on min and max viewport widths. A clamp calculator will allow you to generate right kind values.
That is serving to you track when the spacing approaches its maximum on larger screens. Different internet website types use different scaling speeds according to what you planned: content-heavy blogs would most likely push maximums higher and use faster vw fees, while minimal portfolios keep them tighter for subtler enlargement.
Add Them To Sections And Modules
Whilst you’ve created spacing variables, they need to be performed in every single place your internet website. The Visual Builder makes this easy all through the dynamic content material materials tool, alternatively working out where to make use of which spacing values makes the adaptation between a cohesive design and a scattered one.
You’ll add the ones variables by means of the Insert Dynamic Content material materials button. This icon turns out next to each spacing field, revealing a dropdown of your saved variables when clicked.
![]()
This works for each side. Sections, rows, columns, and modules all use the an identical dynamic content material materials tool. You don’t need to memorize different interfaces or workflows for various part types.
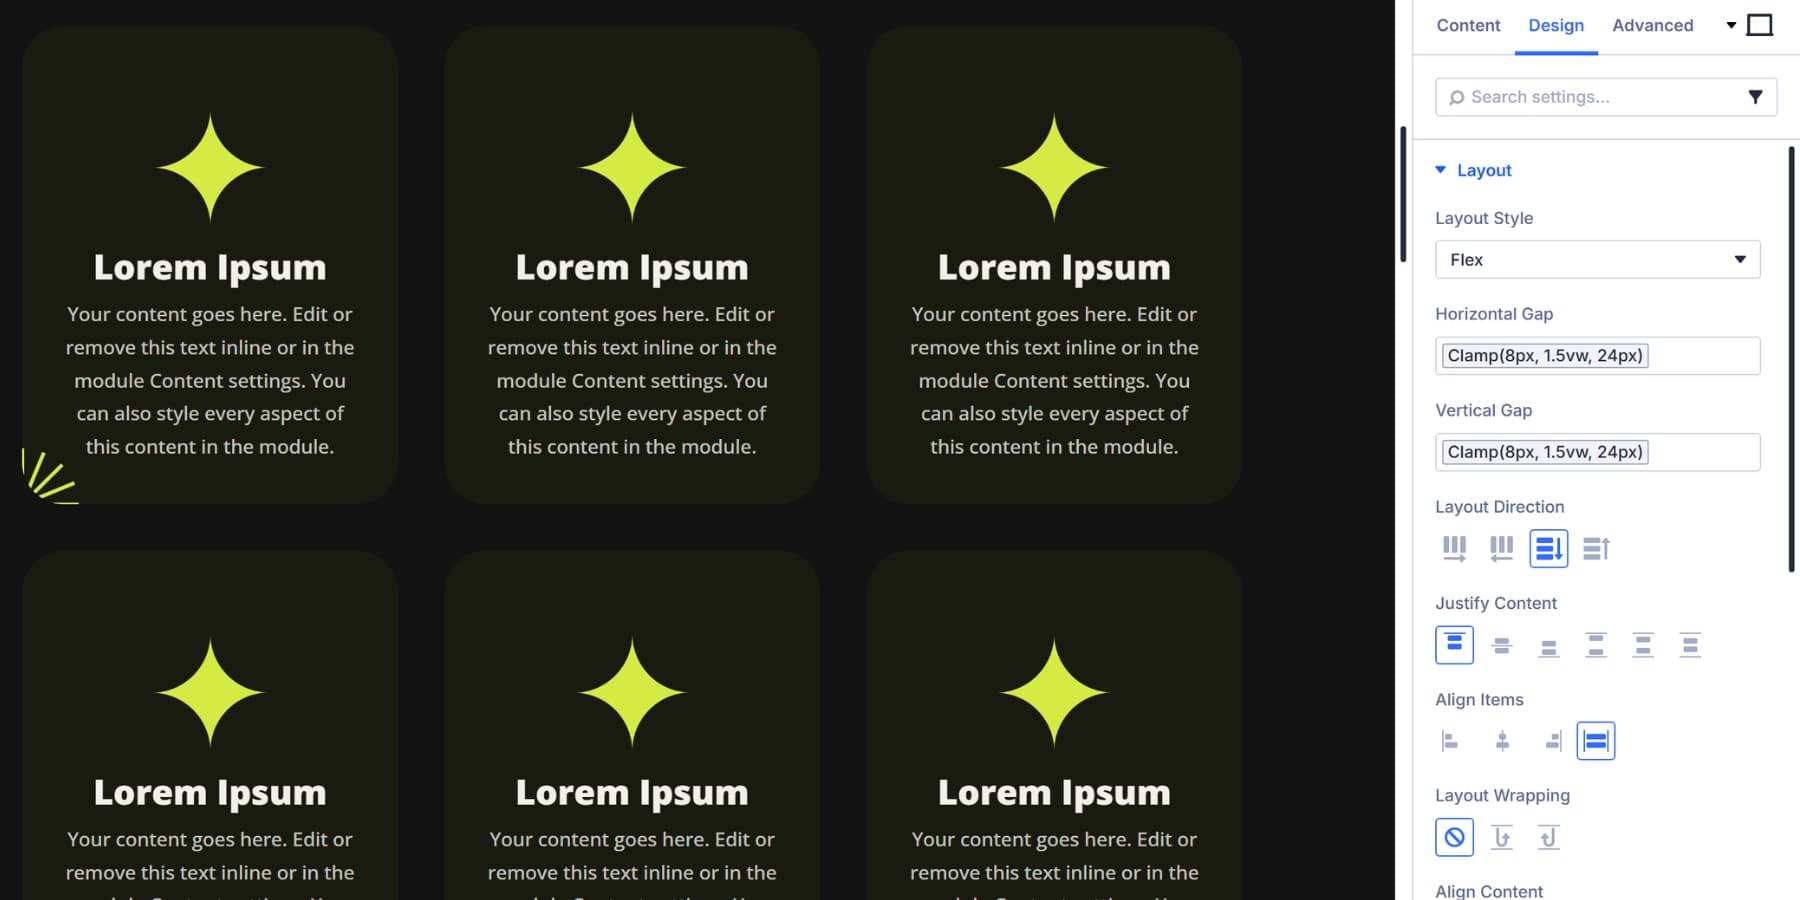
Apply Hollow Spacing To Flexbox Layouts
Set your section or row’s Construction Style to Flex to permit hollow controls. You’ll to find Horizontal Hollow and Vertical Hollow fields underneath the Construction settings.
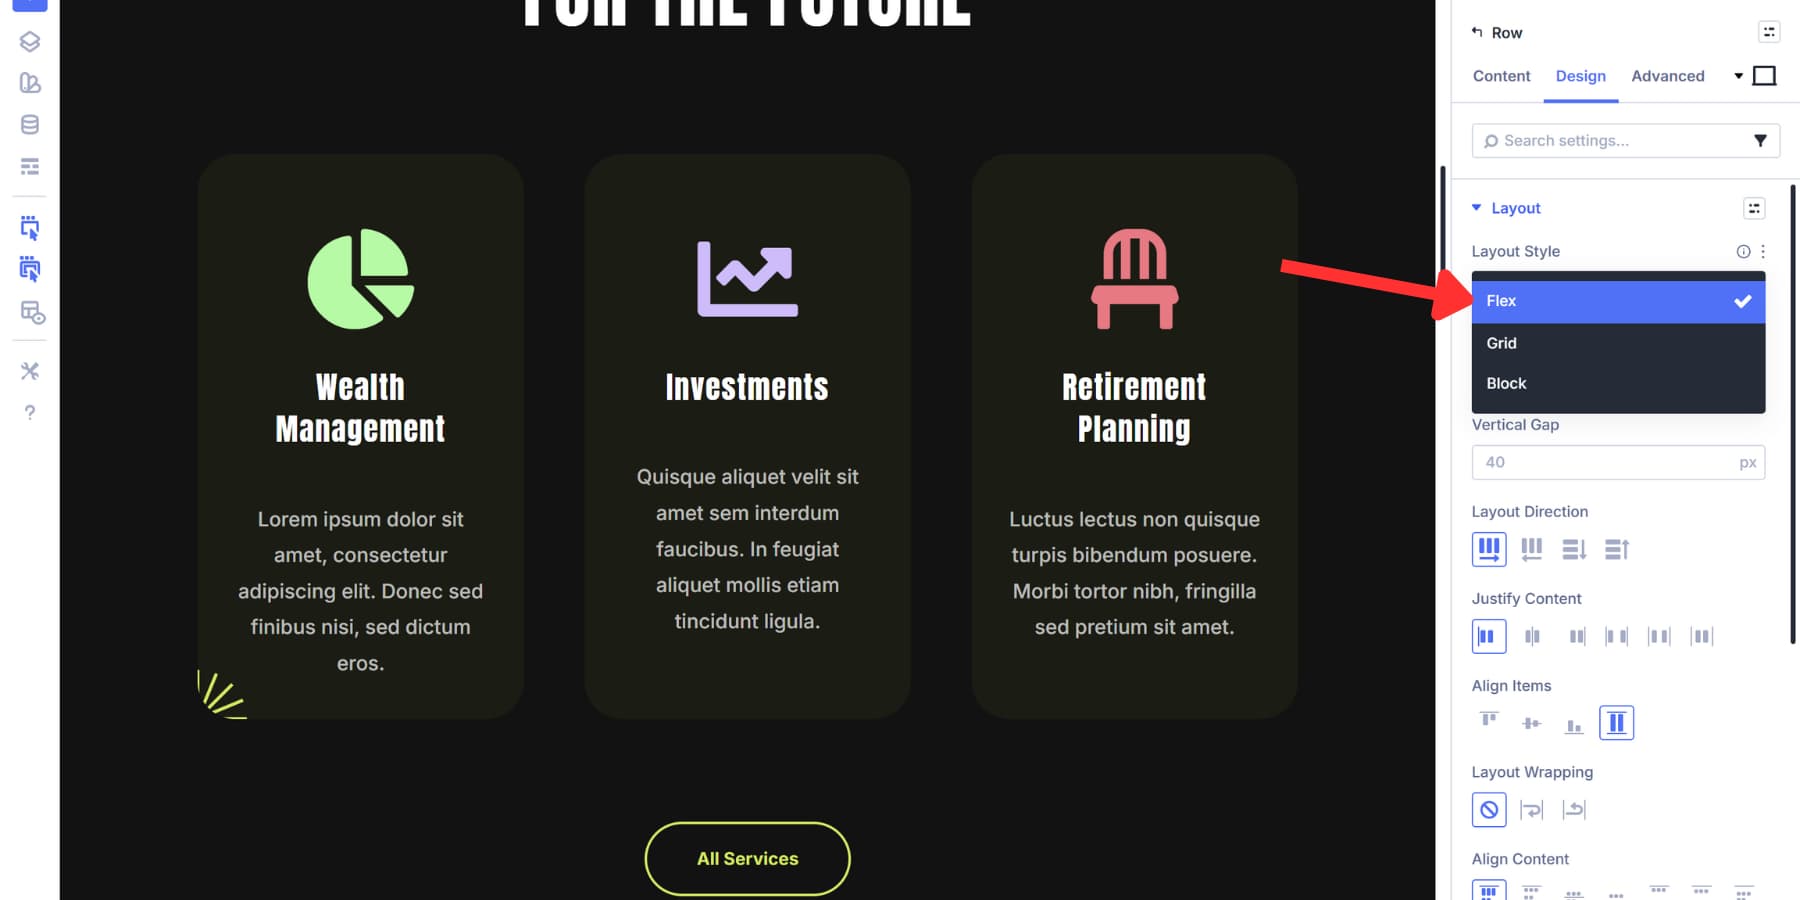
Horizontal hollow spaces parts side by way of side. Vertical hollow spaces stacked parts. Click on at the Insert Dynamic Content material materials icon and select your spacing variable. Space medium works for lots of column spacing.
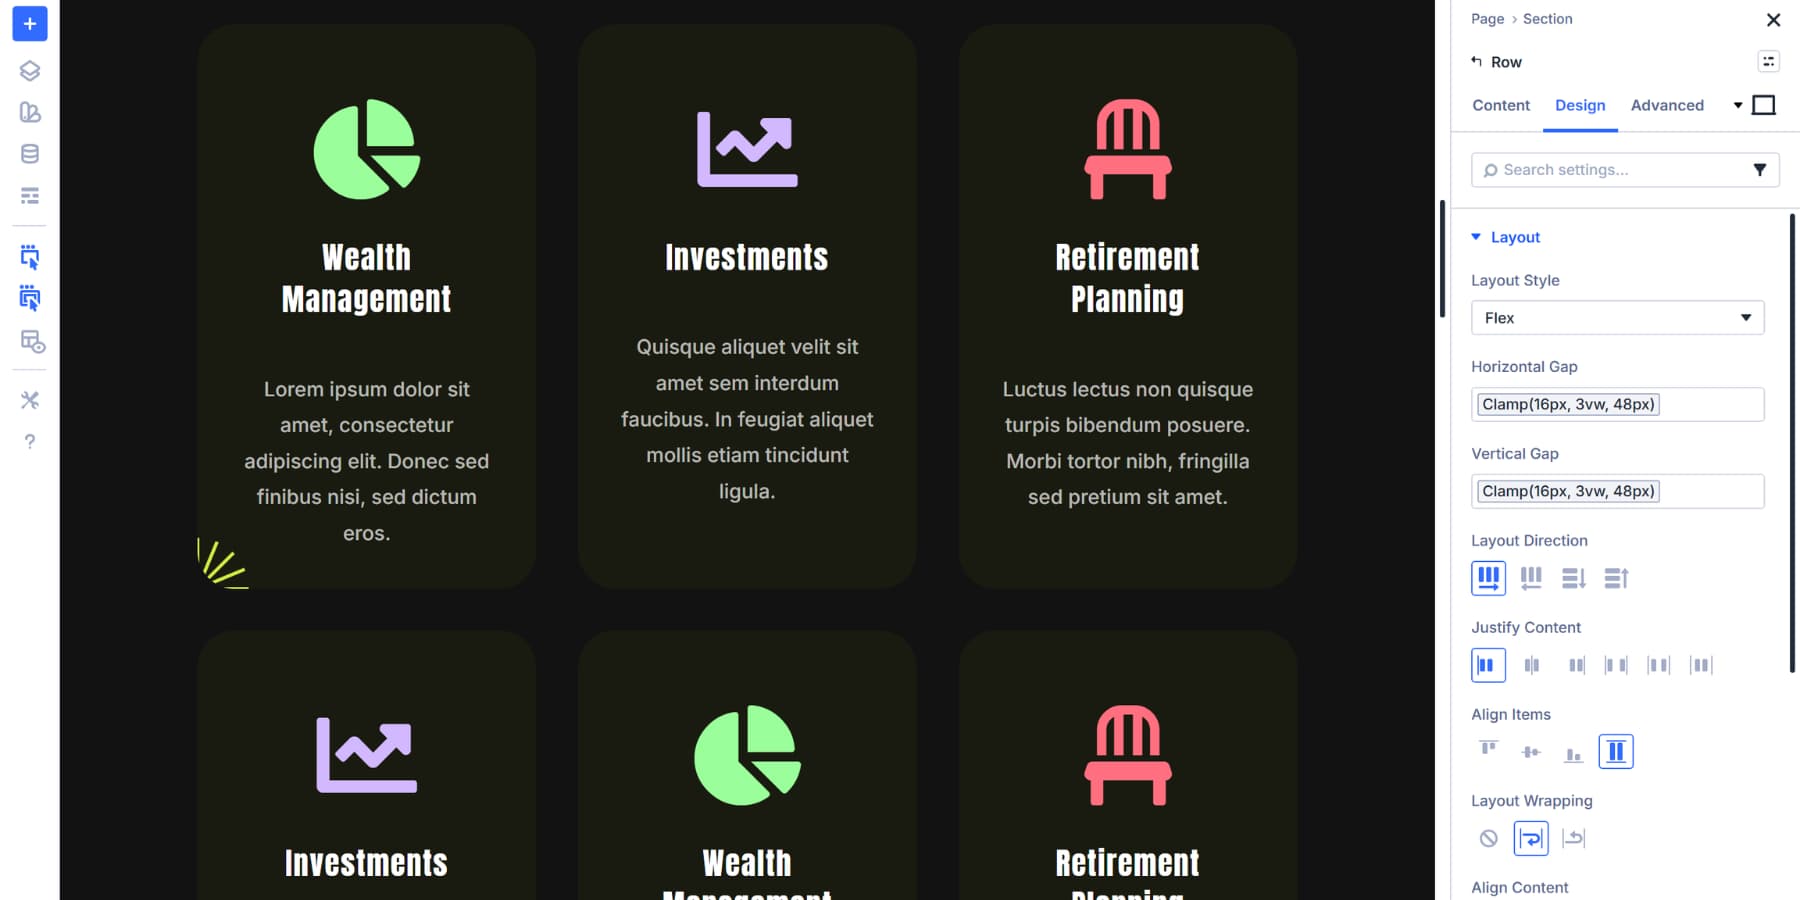
Space large creates further breathing room for text-heavy layouts. Sections with a few rows have the benefit of area large or XL on vertical hollow. This separates major content material materials areas cleanly. Rows containing columns maximum frequently use area medium to large on horizontal hollow, depending on content material materials density.
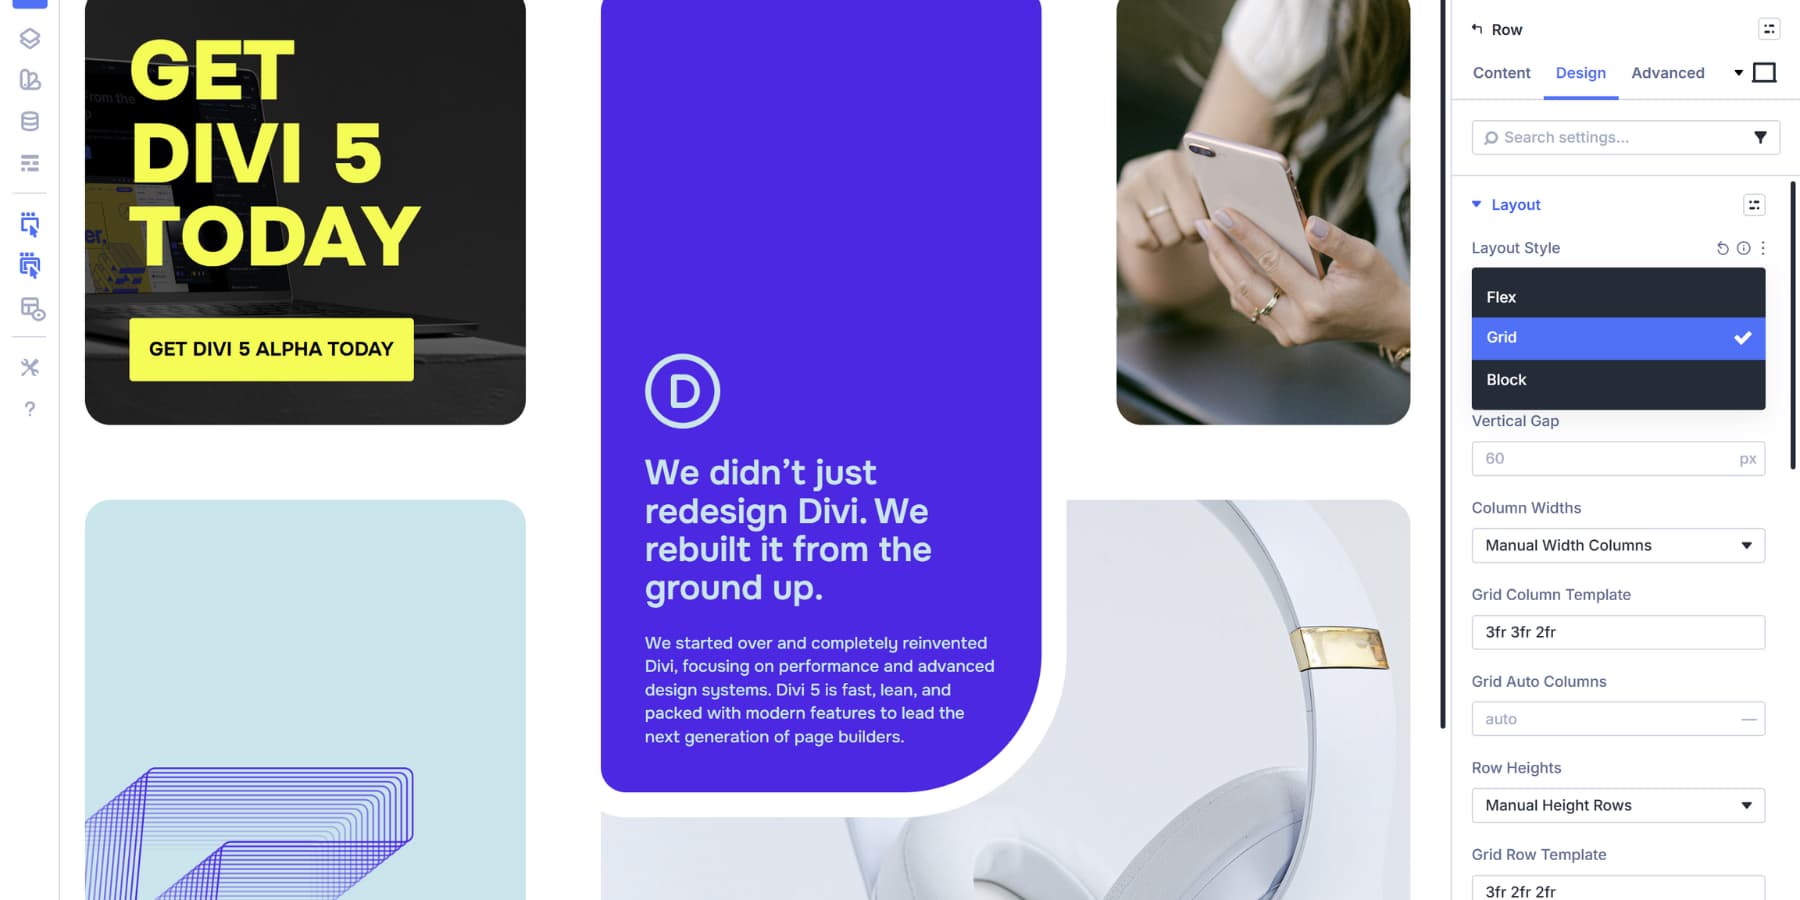
Apply Hollow Spacing To Grid Layouts
Grid layouts maintain spacing in a different way on account of they regulate rows and columns similtaneously. Set Construction Style to Grid to get right of entry to hollow controls.
Horizontal hollow creates consistent vertical lines of area between all columns. Portfolio grids would most likely use area small for tight, gallery style layouts. Serve as grids with enjoying playing cards continuously need area medium or large for readability.
Vertical hollow creates horizontal bands between rows. Blog grids maximum frequently art work with area medium. Product grids would most likely use area small to fit further items above the fold.
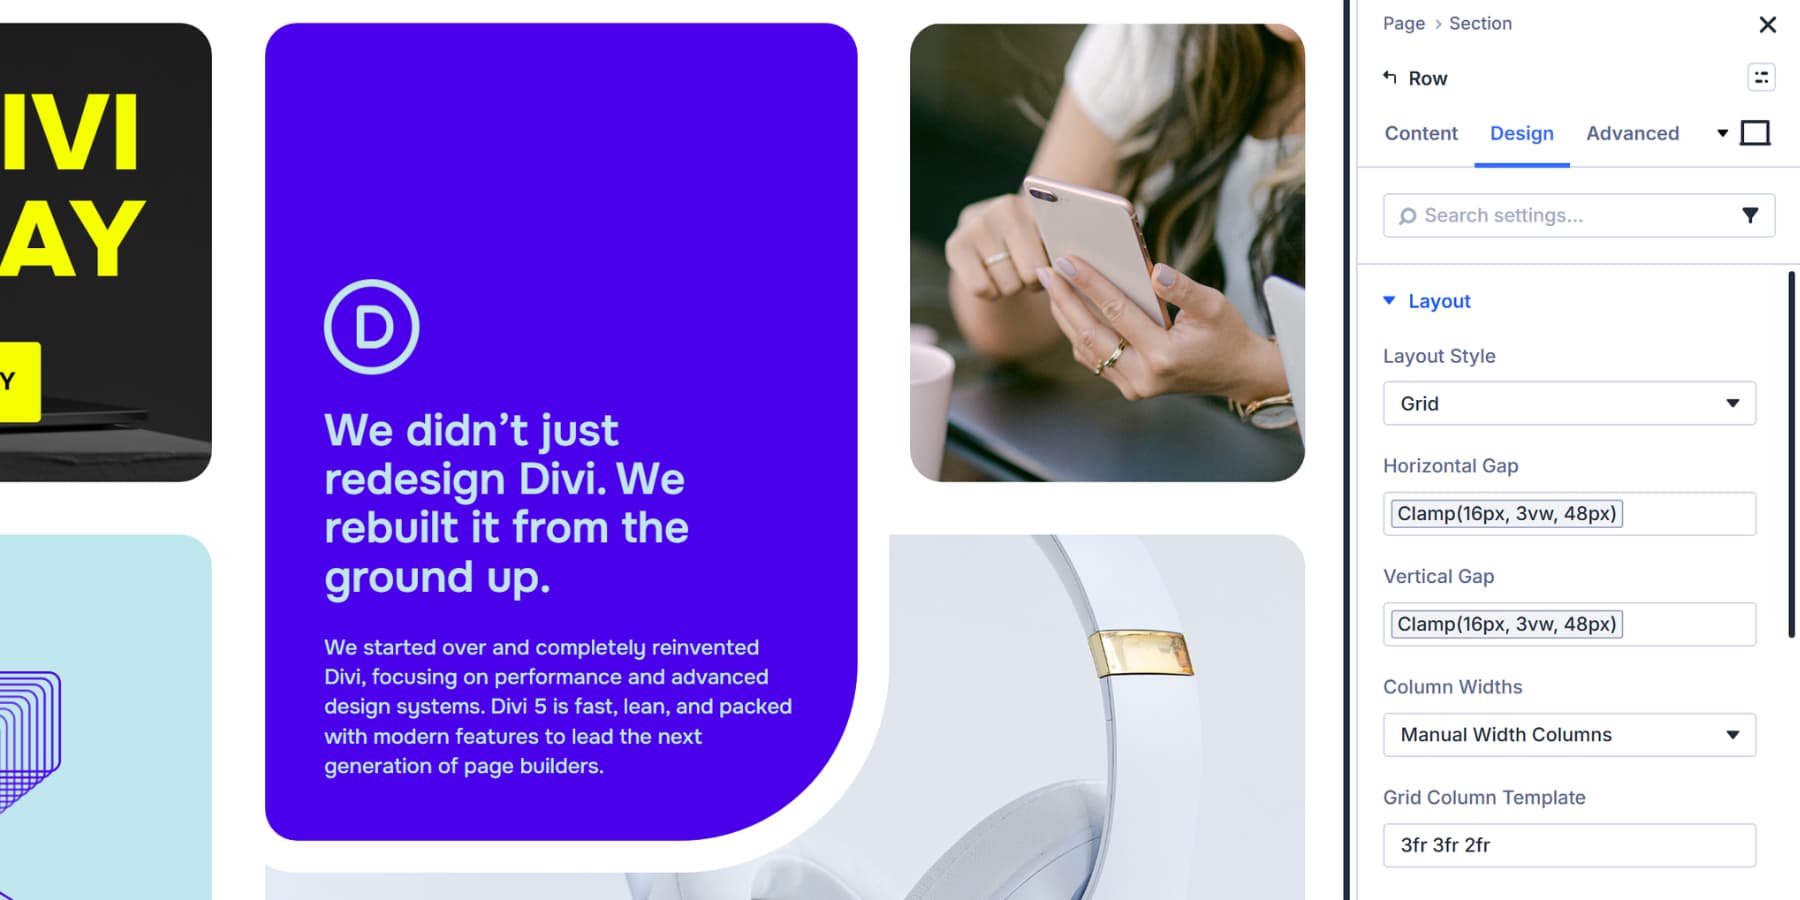
Grid hollow spacing eliminates the need to calculate margins or maintain edge cases. Set gaps once the use of your variables, and each grid products gets consistent spacing robotically.
Apply Spacing To Modules
Modules in Divi 5 can function as packing containers via Nested Modules. A blurb can clutch a heading, text, and button inside it. A tab can contain entire rows. Any module can turn into a flex or grid container.
Open a module’s settings, navigate to the Design tab, and set Construction Style to Flex or Grid. This permits hollow controls within that module. Blurbs set to Flex with a vertical hollow of area small helps to keep its icon, heading, and text as it should be spaced.
An accordion set to Grid with horizontal hollow of area medium presentations serve as enjoying playing cards side by way of side.
The ones nested hollow controls art work identically to section and row gaps. Click on at the Insert Dynamic Content material materials icon and select your spacing variable. Use area XS for tight relationships. Most nested content material materials works neatly with area small to medium. Dramatic separation needs area large.
Modules every so often need typical margin and padding for outer spacing. Text modules use area small on bottom margin when stacked. Buttons need area XS for internal padding.
However, when modules are situated inside flex or grid packing containers, let the space spacing maintain separation instead of together with particular person margins.
Preview And Superb-Monitor If Sought after
Once your spacing variables are performed, use the responsive preview to check how they scale all through show sizes. With Divi 5, you’ll be capable of permit seven breakpoints and even customize them as in line with your own tastes.
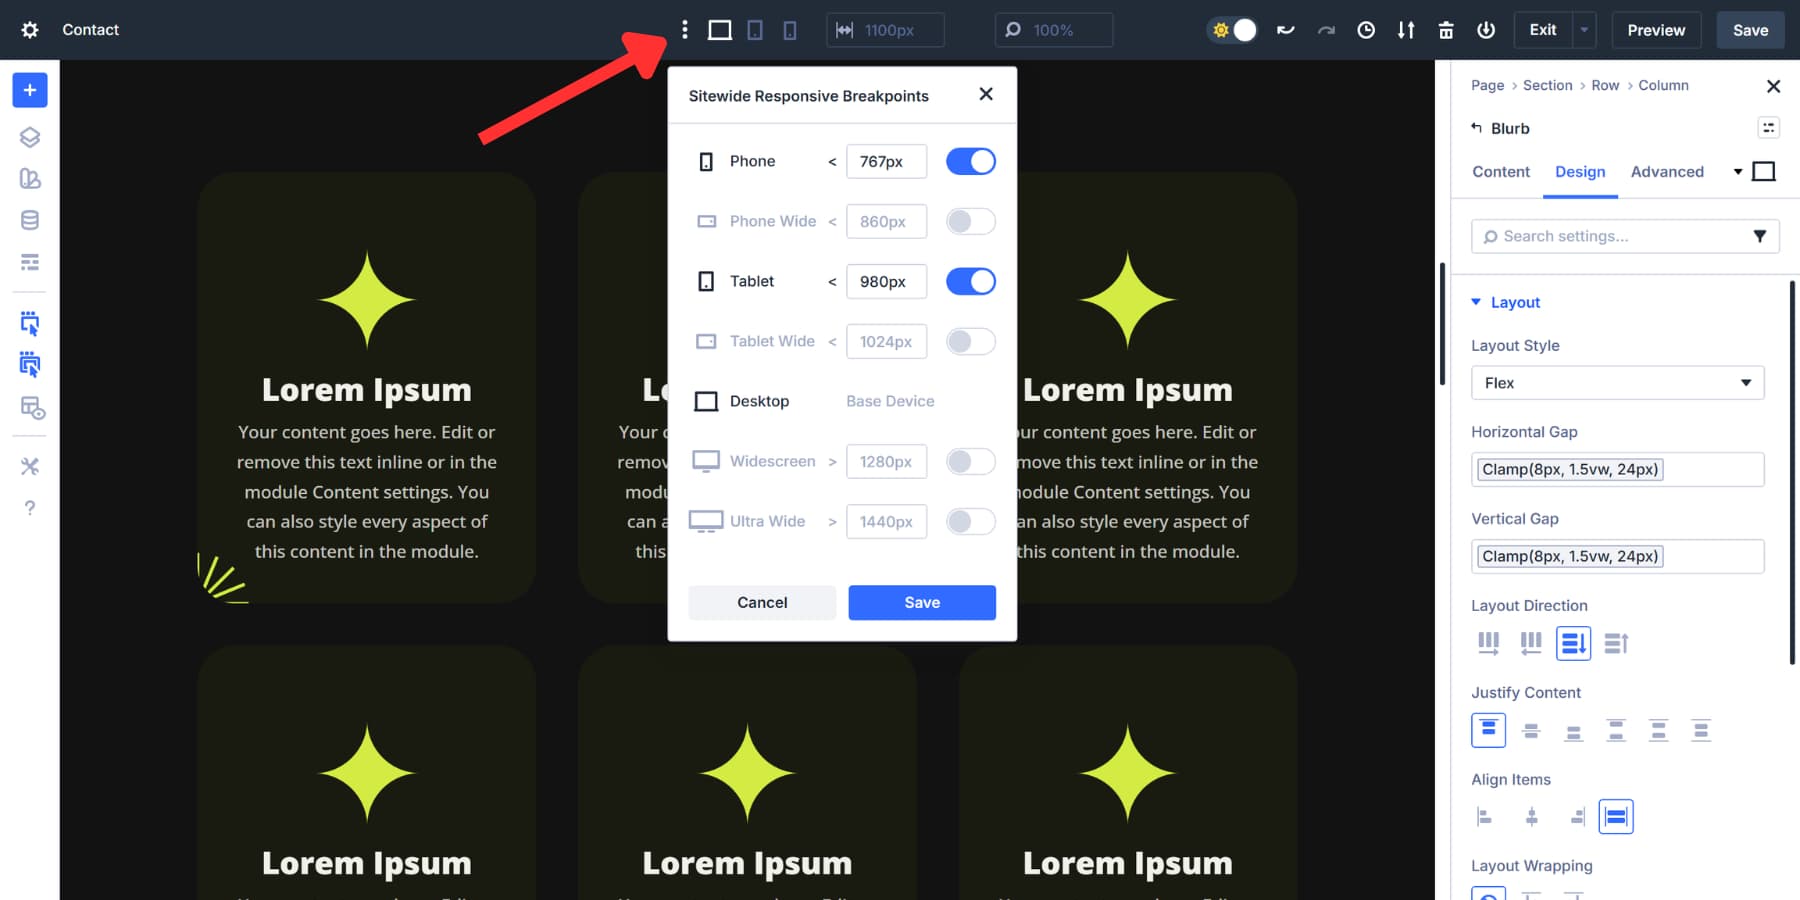
Click on on on the tool icons in your editor and toolbar to cycle via and spot how your spacing scales simply without any input at each breakpoint.
You’ll even drag the canvas edge to look how it scales simply between each breakpoint.
Watch how area small transitions from 8px on cellular to 24px on desktop. Check out that area medium maintains clear visual separation from area small the least bit widths. Seek for spots where spacing feels cramped or excessive.
If adjustments are sought after, open the Variable Manager and change the clamp method throughout the variable itself. Changing clamp(16px, 3vw, 48px) to clamp(16px, 2.5vw, 48px) slows the growth value all through each instance where that variable turns out. One edit updates all your internet website.
Lock It In With Presets
Your spacing variables are set. Component Presets bundle deal them into reusable modules and sections that you simply’ll be capable of deploy anywhere. Style a blurb module and click on at the preset icon inside the most efficient correct corner of the module settings panel. Make a selection New Preset From Provide Sorts.
Establish it Serve as Card and save.
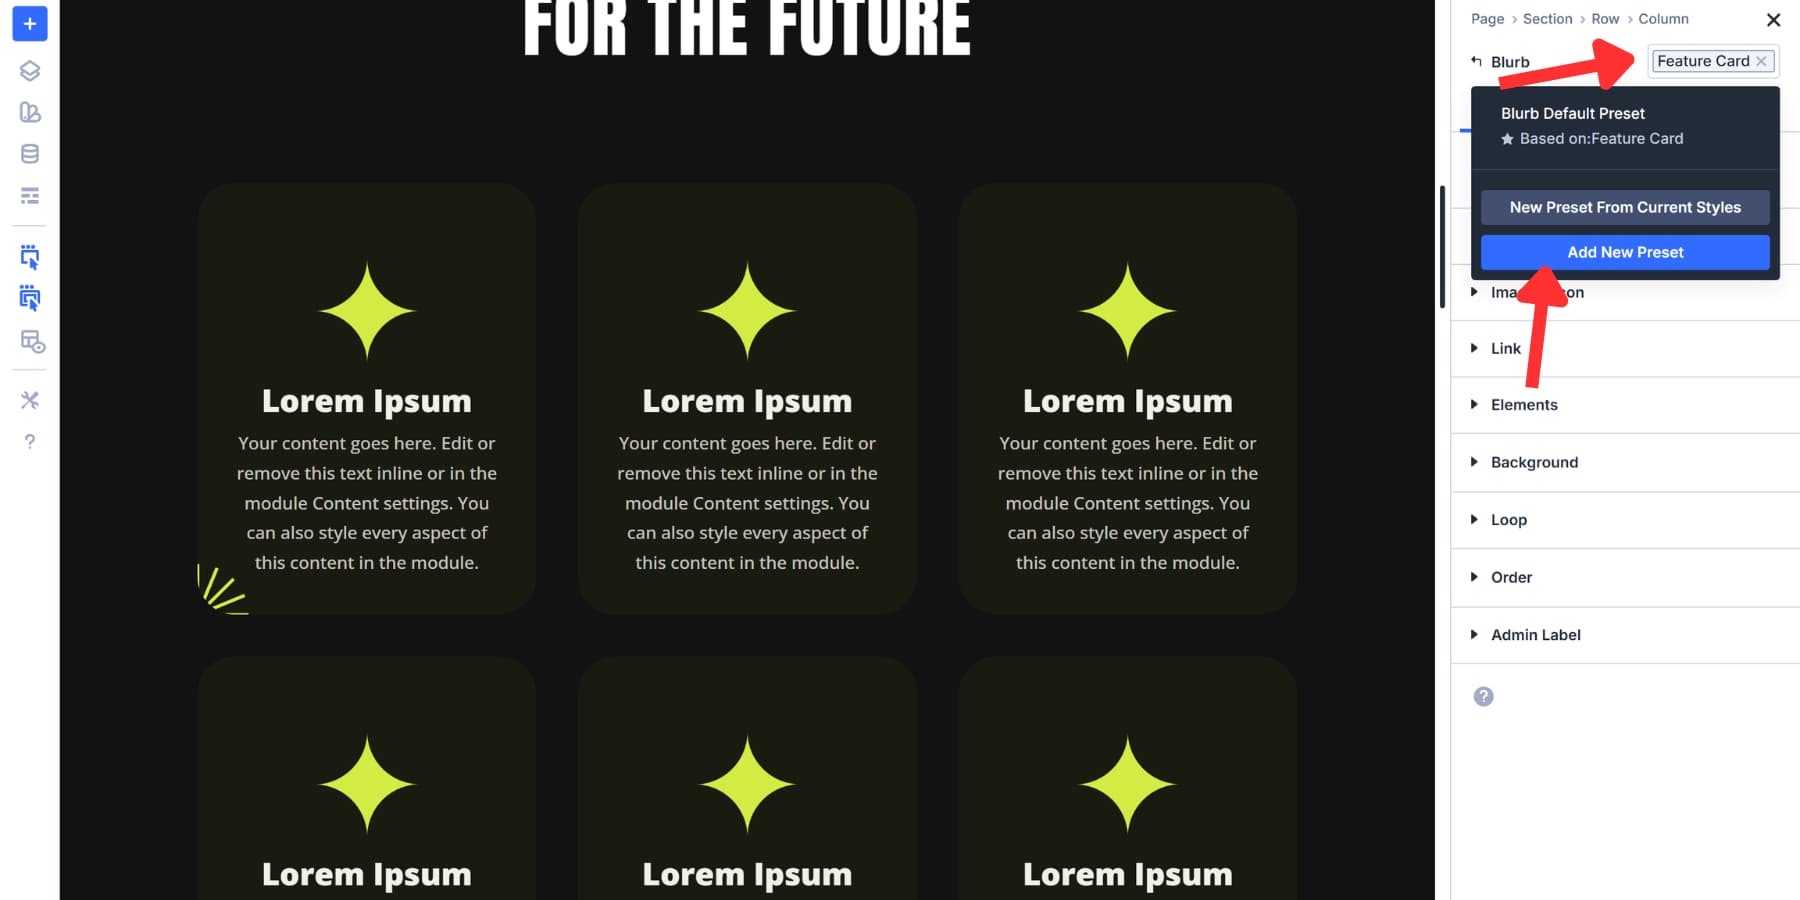
Open the preset dropdown on any new blurb. Make a selection Serve as Card. The spacing applies straight away. The variables are already attached to the preset.
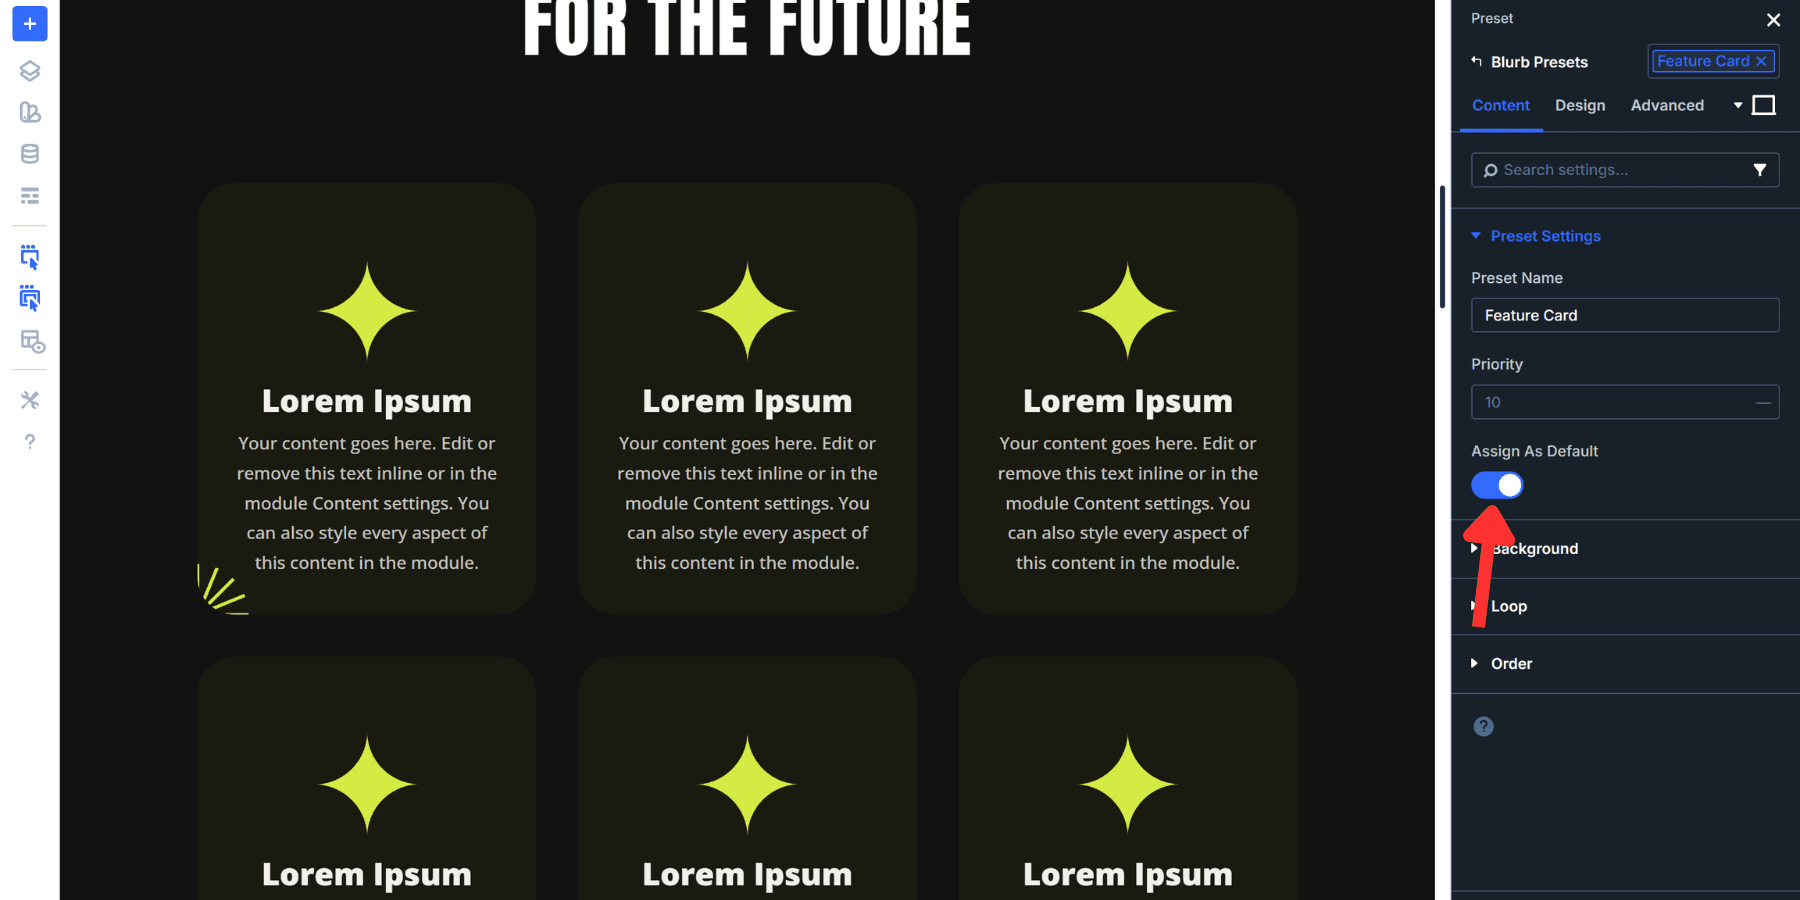
To make Serve as Card your default blurb style, open the preset dropdown and hover over the settings icon of the Serve as Card and make allowance Assign As Default. Save your changes. Each and every new blurb you add robotically adopts this spacing without further clicks.
You’ll moreover stack presets. Apply your Serve as Card Part Preset to a module, then add a Dark Background Selection Crew Preset on easiest of it. Each and every presets art work together on the equivalent part. One handles spacing, the other handles background colors.
Check out Fluid Spacing In Divi 5 In recent times!
Divi 5 puts fluid spacing correct throughout the Visual Builder. Click on on a field, select clamp(), enter your values, and watch your spacing adapt in exact time. You’re now not writing code. You’re designing with equipment that understand stylish CSS.
Internet sites look good at each show size when spacing scales accurately. That’s what this system offers you. Assemble it once throughout the Variable Manager, practice it via your construction, and then proceed with the actual design art work.
Use Divi 5 and see how so much faster responsive design becomes when your spacing is optimized.
The post How To Construct A Fluid Spacing Ramp With clamp() In Divi 5 gave the impression first on Chic Topics Weblog.
Contents
- 1 What Is A Fluid Spacing Ramp And What Does It Do?
- 2 How Divi 5 Makes Fluid Spacing Ramps Possible
- 3 Creating A Fluid Spacing Ramp In Divi 5
- 4 Check out Fluid Spacing In Divi 5 In recent times!
- 5 Electronic mail Advertising and marketing vs. search engine marketing: What You Want To Know for 202...
- 6 New Starter Site for Gyms (Quick Install)
- 7 DE{CODE} Moves a Chord, Achieves Report-Environment Attendance

0 Comments