

With the Loop Builder feature in Divi 5, you’ll be capable to merely create a responsive grid using the loose fashion of Advanced Custom designed Fields (ACF). In this submit, we’ll show off recommendations on the right way to configure ACF, prepare CSS Grid, and use the Loop Builder to build a staff portfolio grid in well underneath an hour.
Whilst you haven’t already, head over to the Sublime Problems Contributors’ House and obtain the most recent Divi 5 Beta so that you’ll be capable to observe along side the instructional.
Let’s dive in.
What Is Loop Builder?
Divi 5’s Loop Builder is a feature that allows you to create dynamic, repeatable layouts at once inside the Visual Builder or Theme Builder. This eliminates the constraints of Divi’s standard Blog and Portfolio Modules. Now not like typical modules, the Loop Builder provides entire control over queries and designs for just about any content material subject matter type.
You’ll be capable to loop via posts, words, consumers, or custom designed submit varieties — like projects, or when it comes to this tutorial, staff folks — pulling in dynamic wisdom with out issues. Style just one card inside the Loop, and every additional products automatically inherits that design, saving hours of guide tweaking. Incorporate Flexbox and CSS Grid for complicated layouts, an identical to masonry grids and carousels (using the Crew Carousel module), to reach totally symmetrical arrangements. It in reality works seamlessly whether or not or no longer you’re construction on a internet web page inside the Visual Builder or globally inside the Theme Builder, making it final for scalable, maintainable web sites.
How To Assemble A Personnel Checklist Using Loop Builder
For this tutorial, we’ll be creating a custom designed submit type for Personnel Contributors using the loose fashion of ACF. Underneath, we walk all through the stairs to organize ACF, in conjunction with creating a custom designed submit type, field personnel, and custom designed fields to tie into the Loop. By way of the highest of this submit, you’ll know the way to build an absolutely responsive staff member show off that you simply’ll be capable to use on any Divi internet web page.
Step 1: Configure ACF
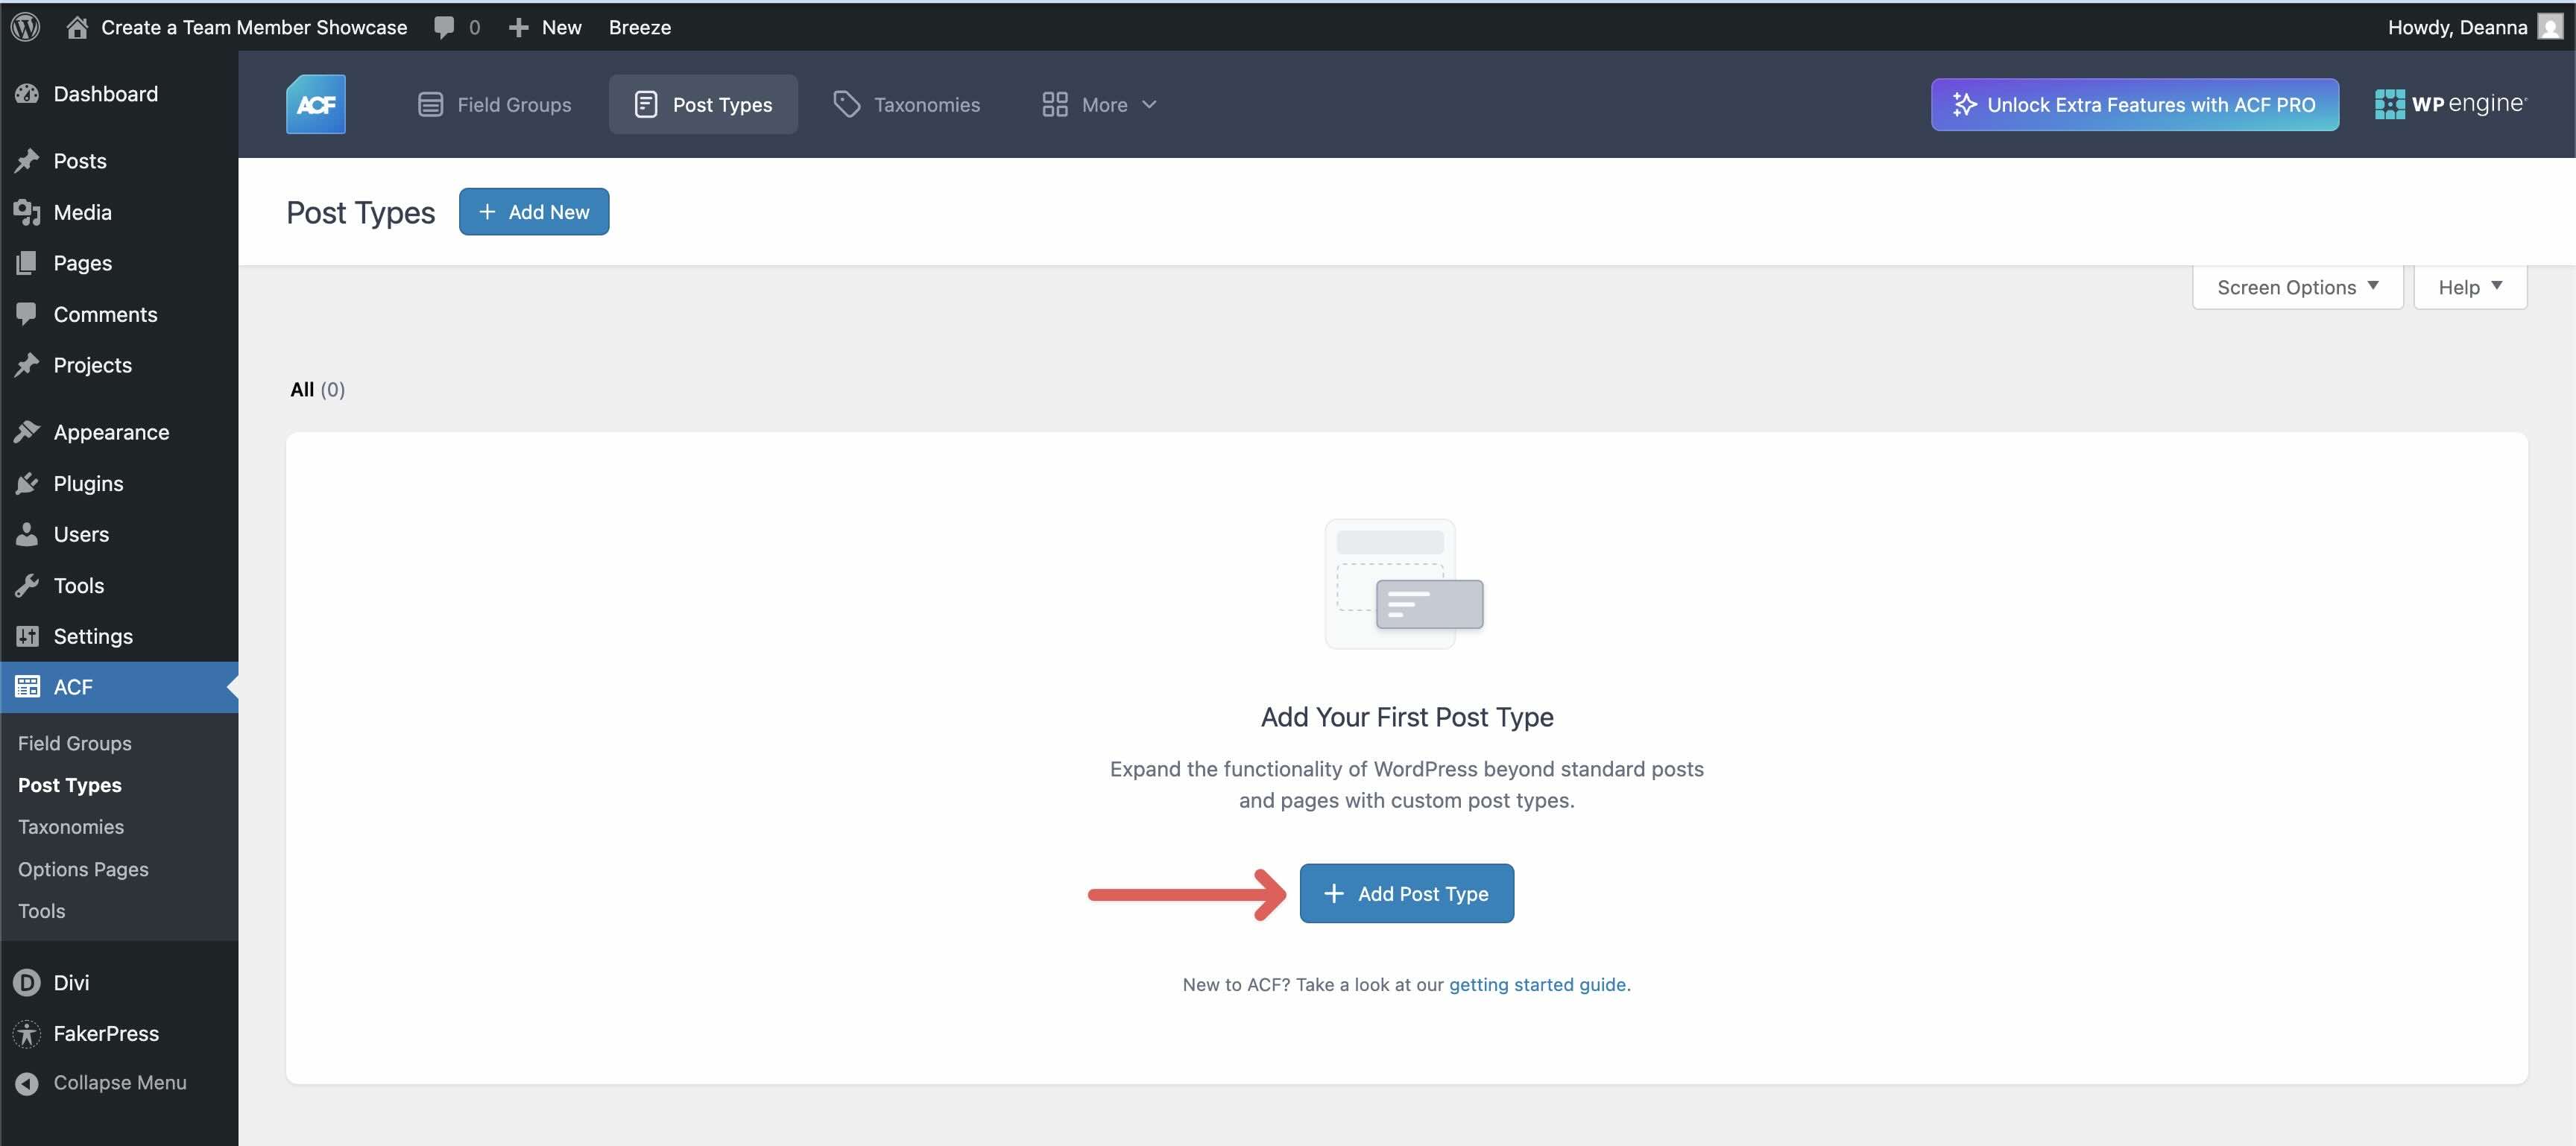
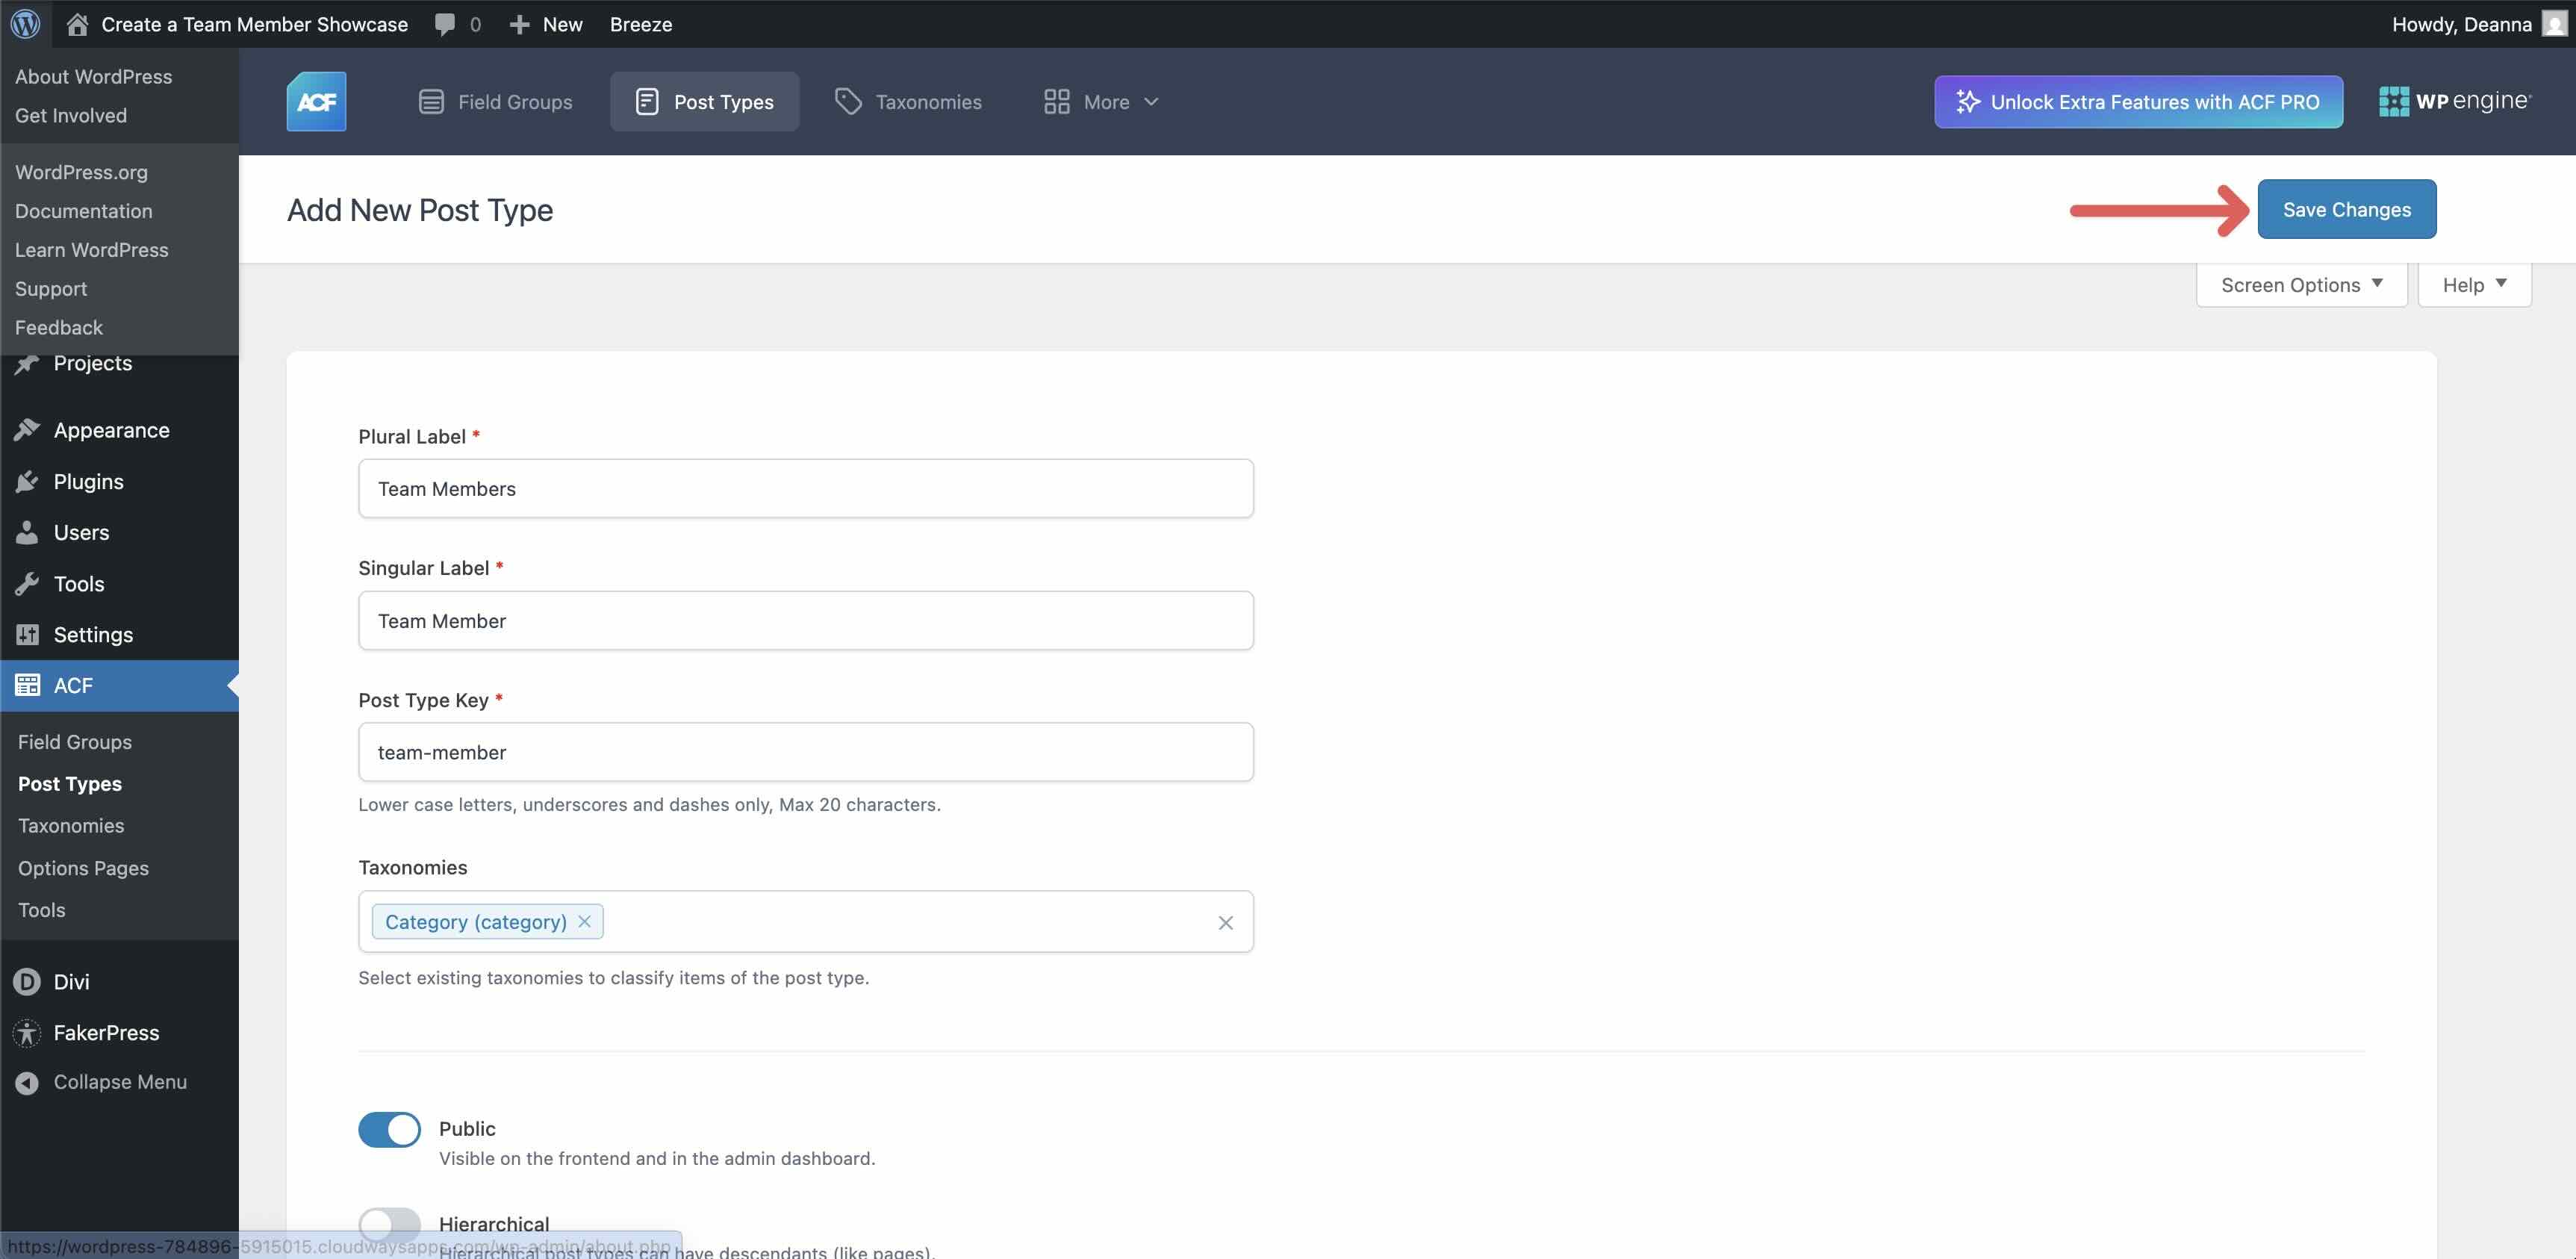
Get started by the use of putting in place the loose fashion of Advanced Custom designed Fields (ACF) in your Divi internet web page. Flip at the plugin and navigate to ACF > Publish Sorts.
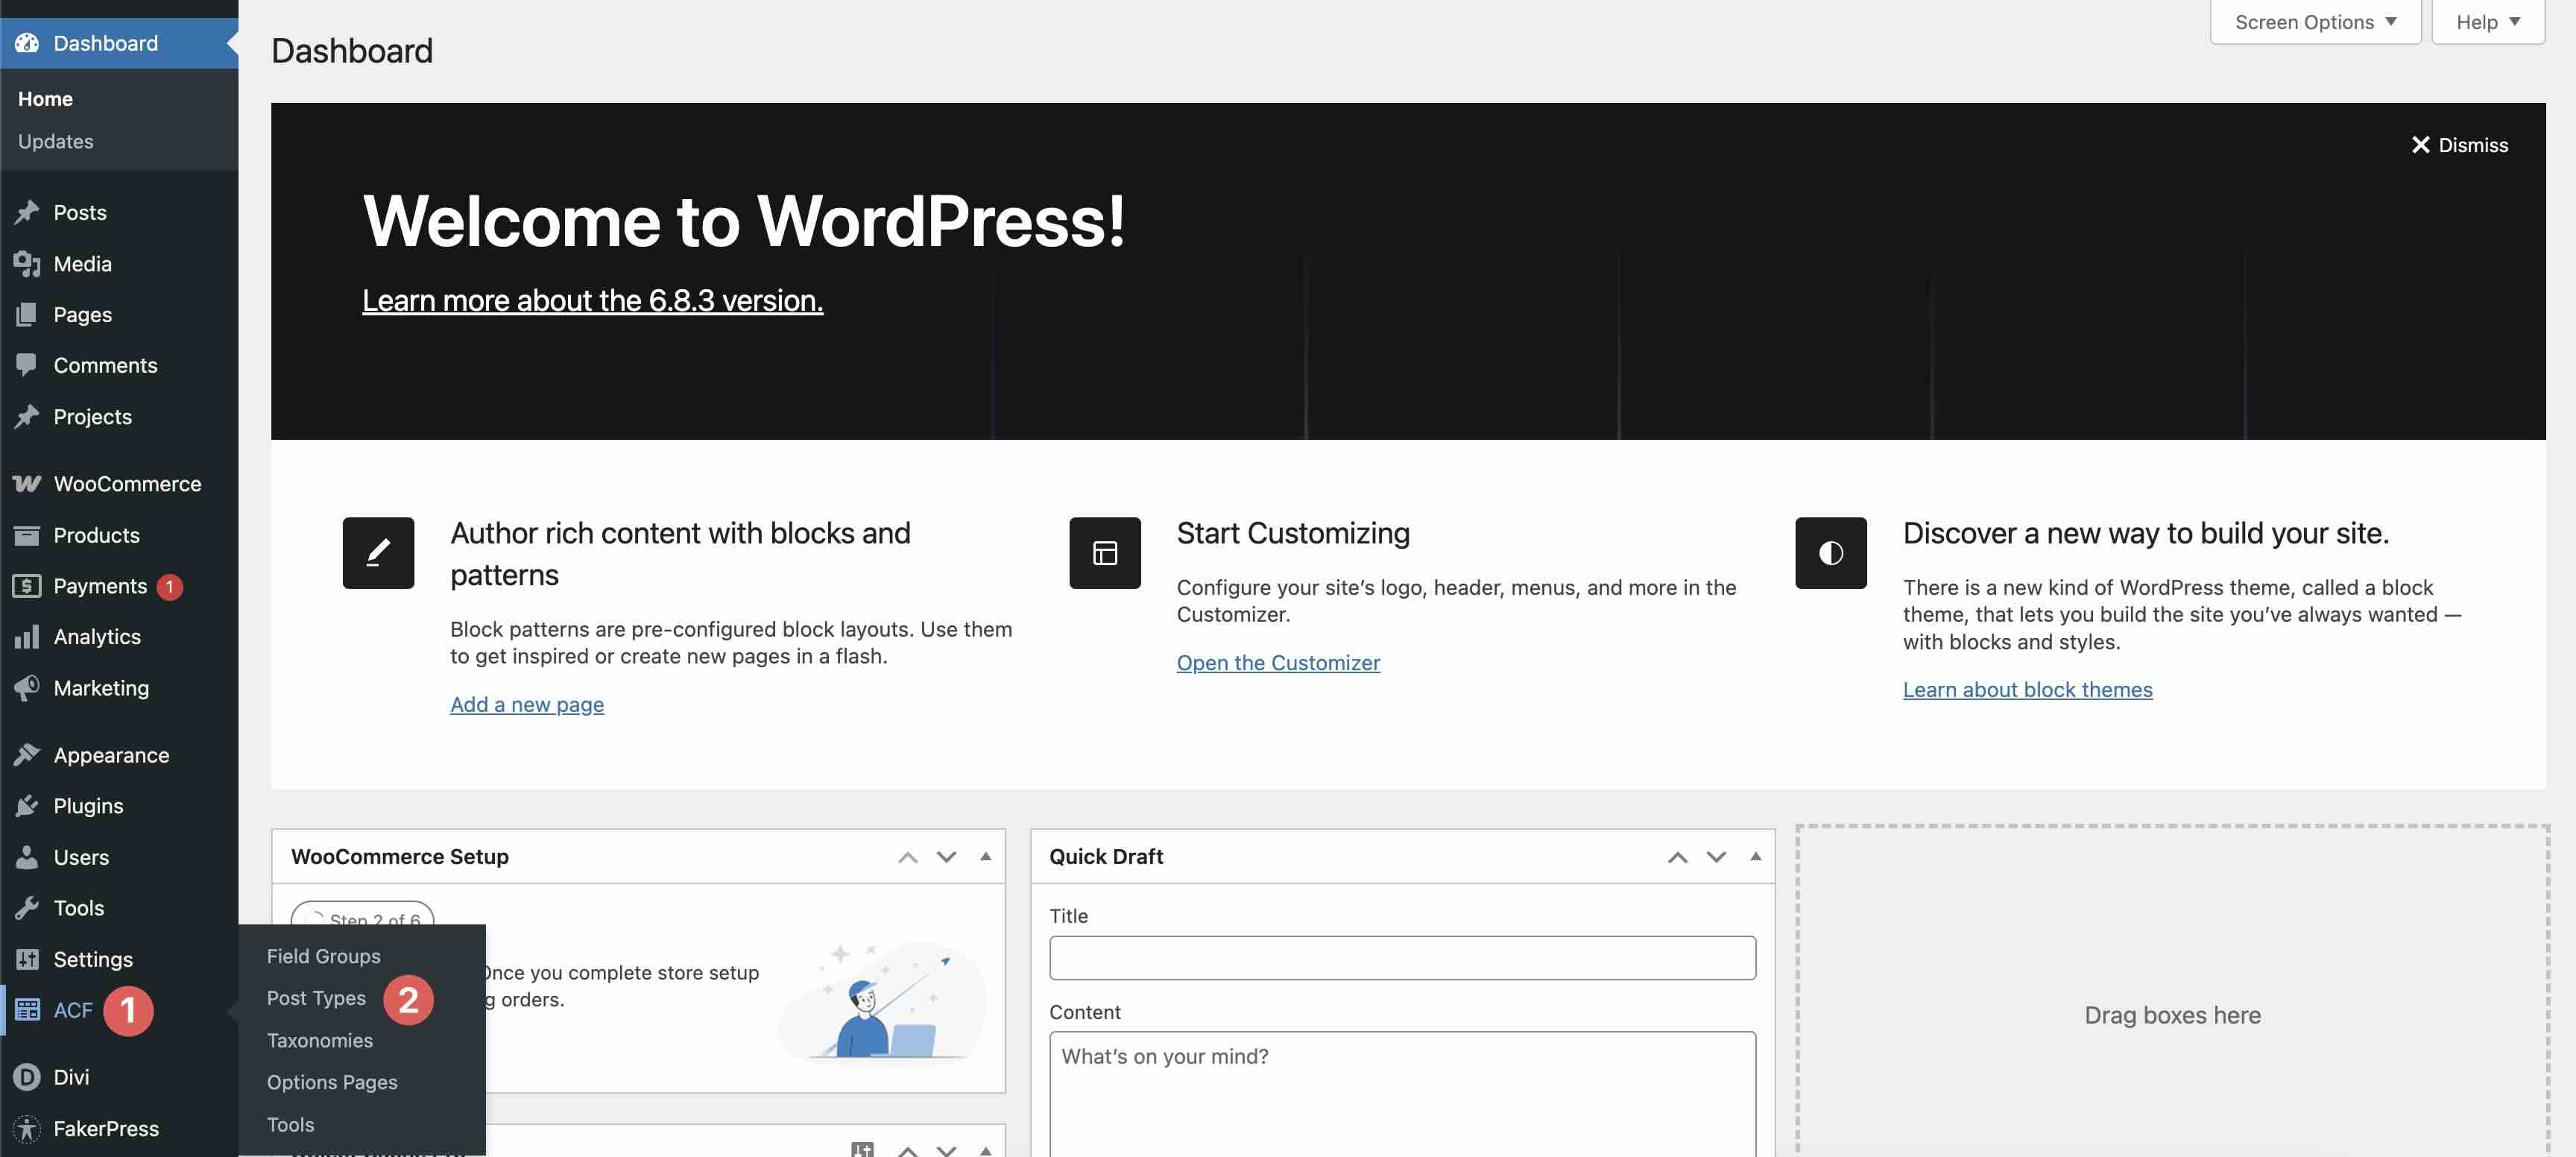
Click on at the + Add Publish Kind button to create a brand spanking new submit type.
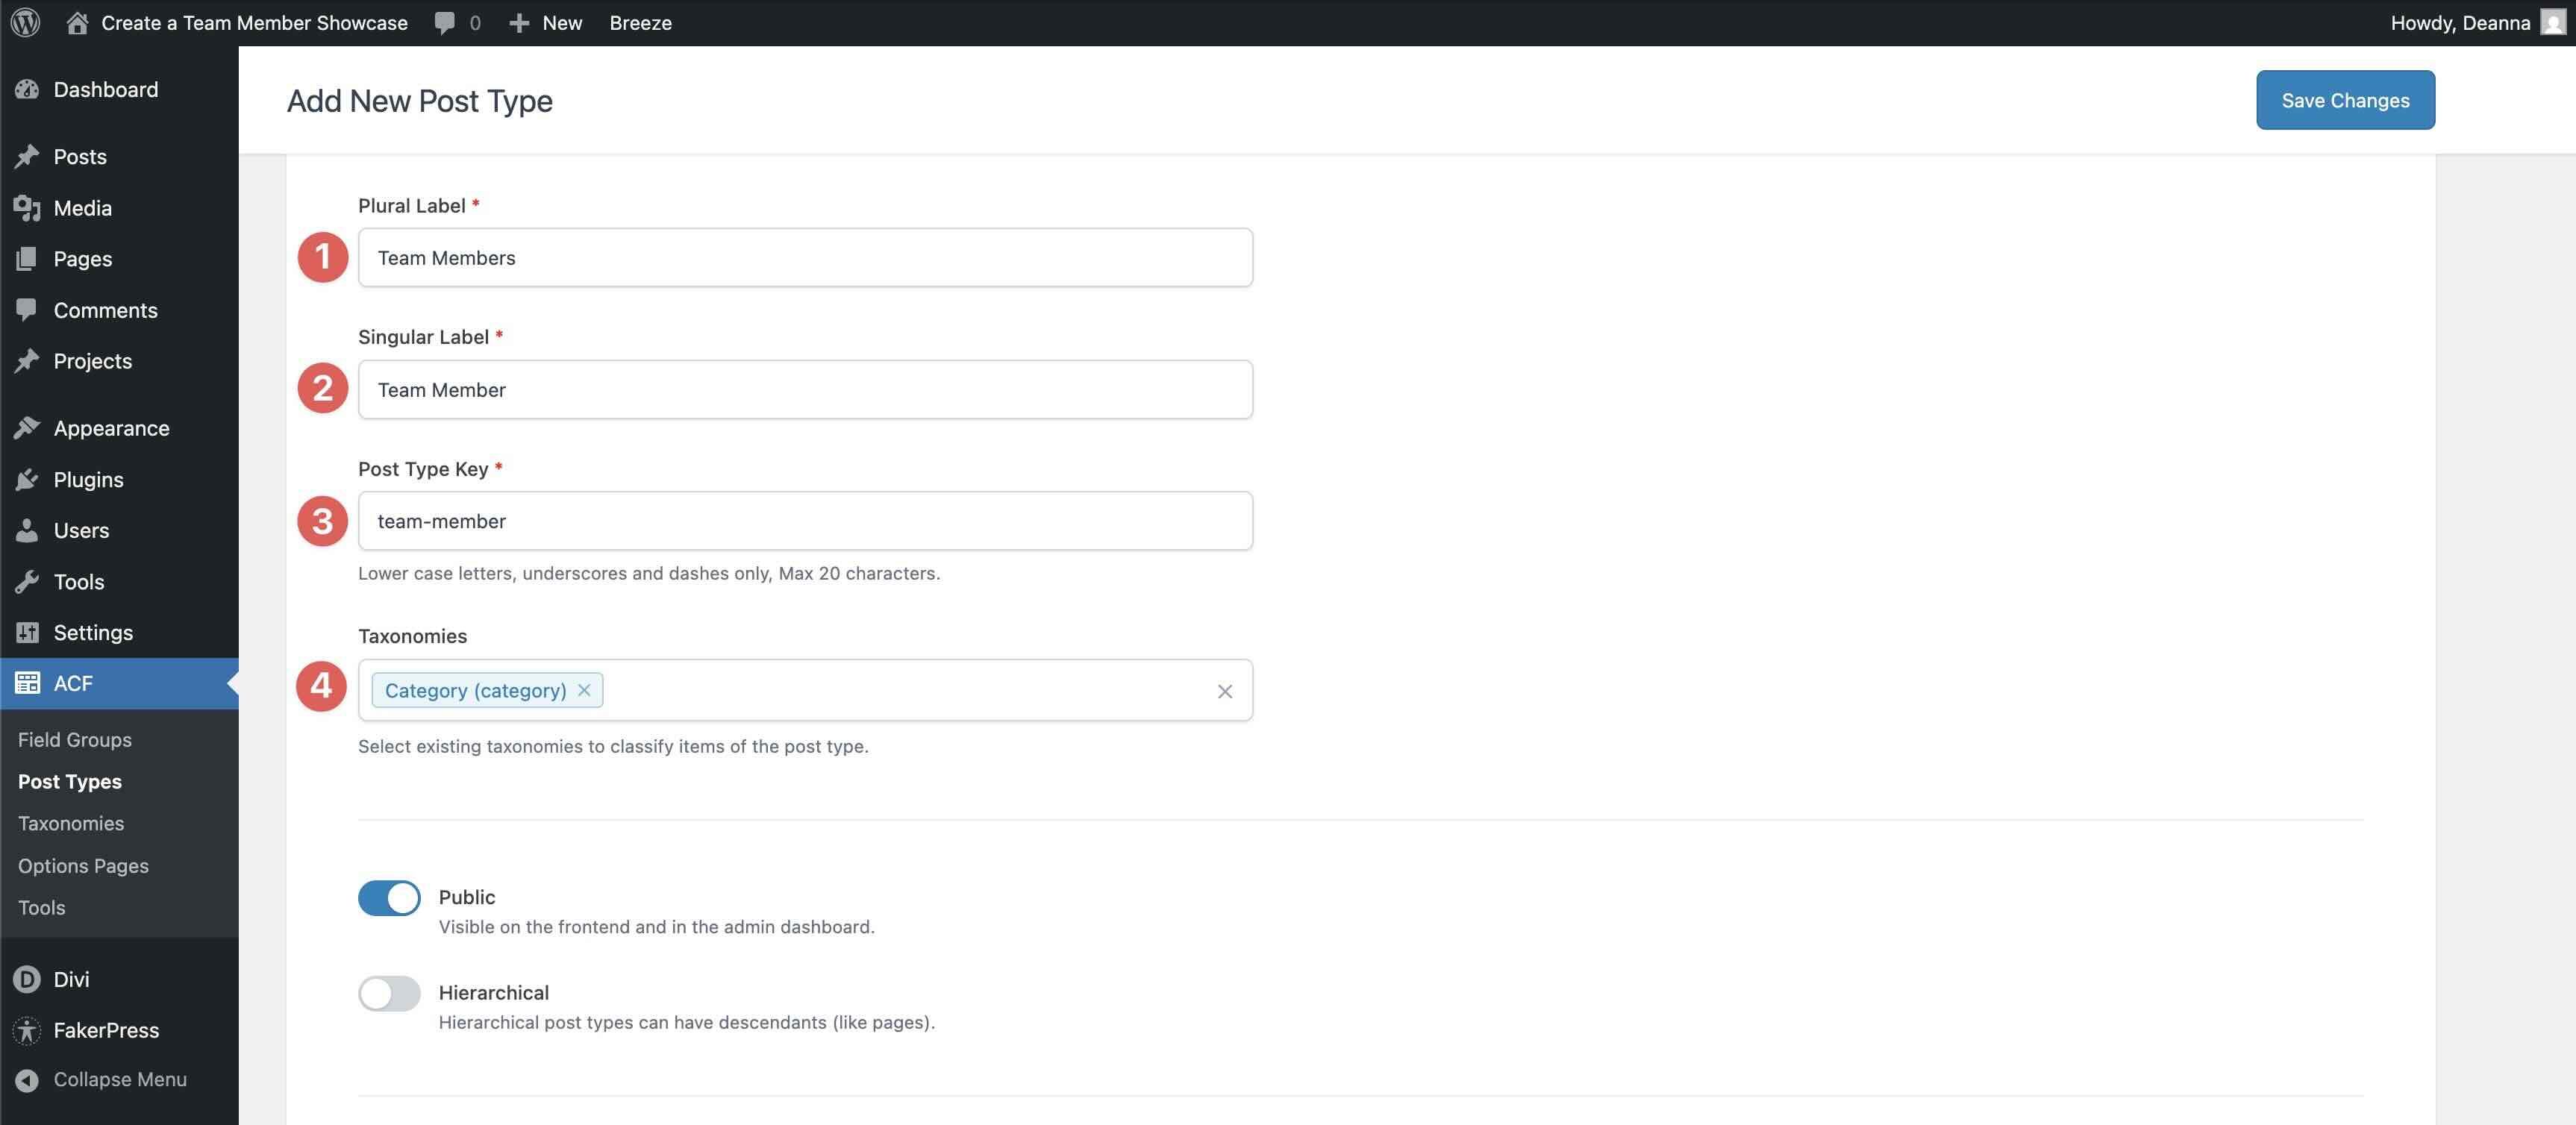
Fill inside the the most important labels:
- Plural Label: Teams
- Singular Label: Personnel Member
- Publish Kind Key: team_member
- Taxonomies: Magnificence
Be sure that Public is toggled on.
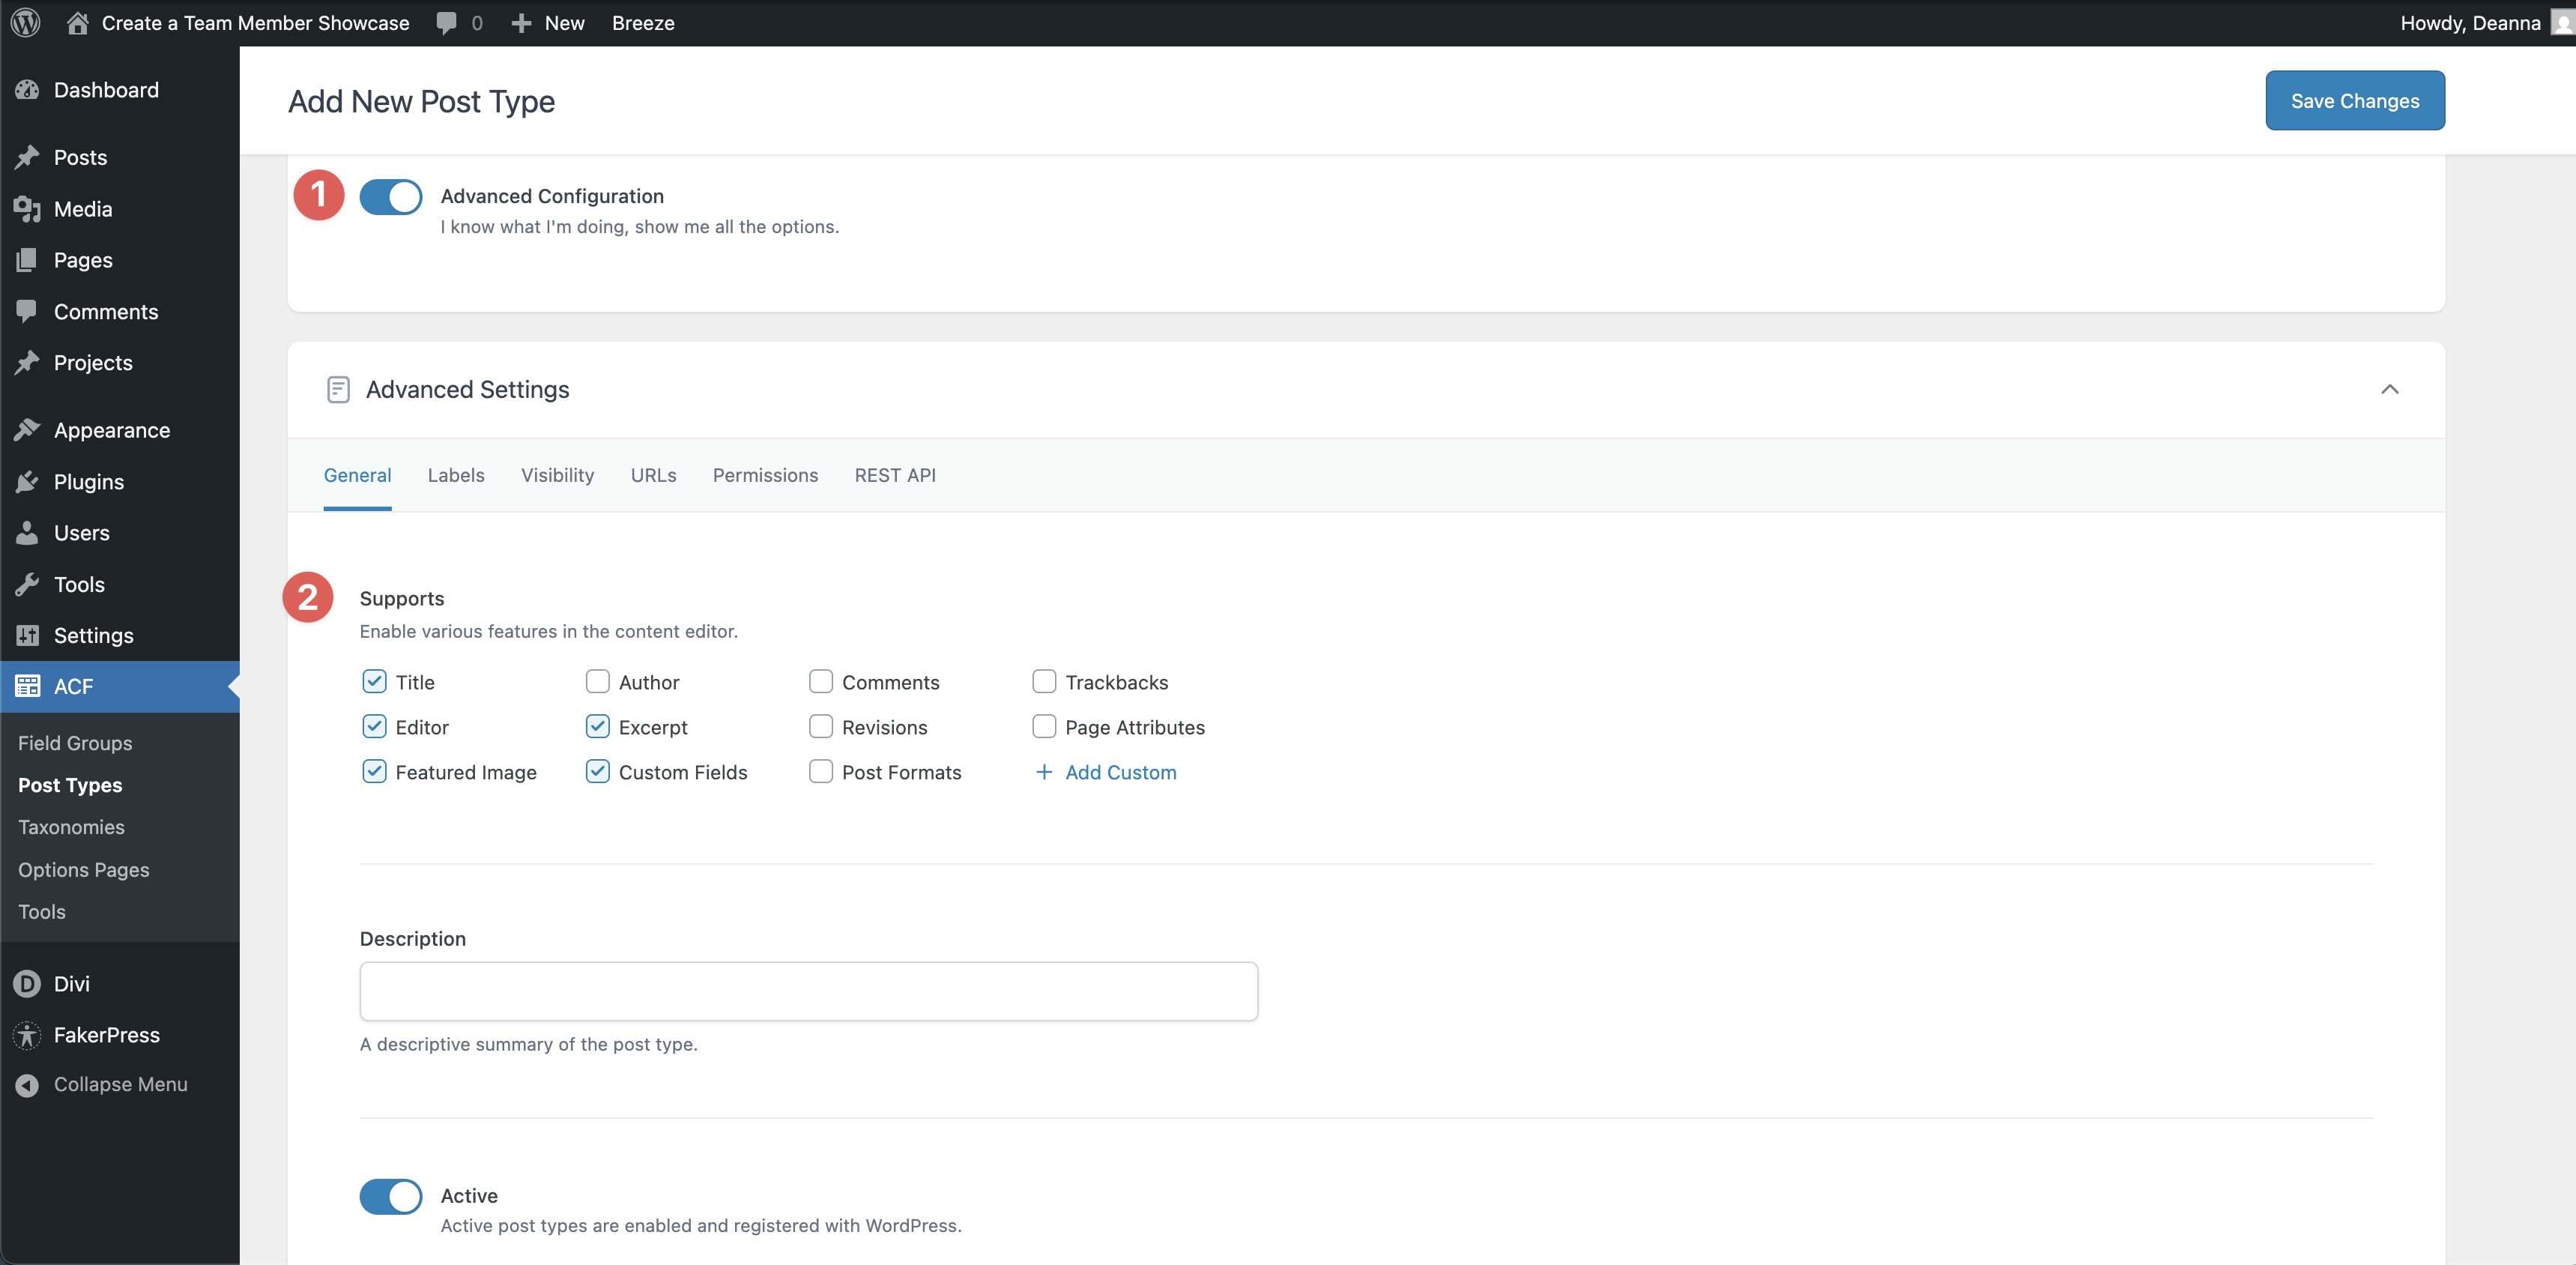
Toggle on Advanced Configuration. Inside the Commonplace tab, make sure that Featured Image, Establish, Editor, Excerpt, and Custom designed Fields are enabled.
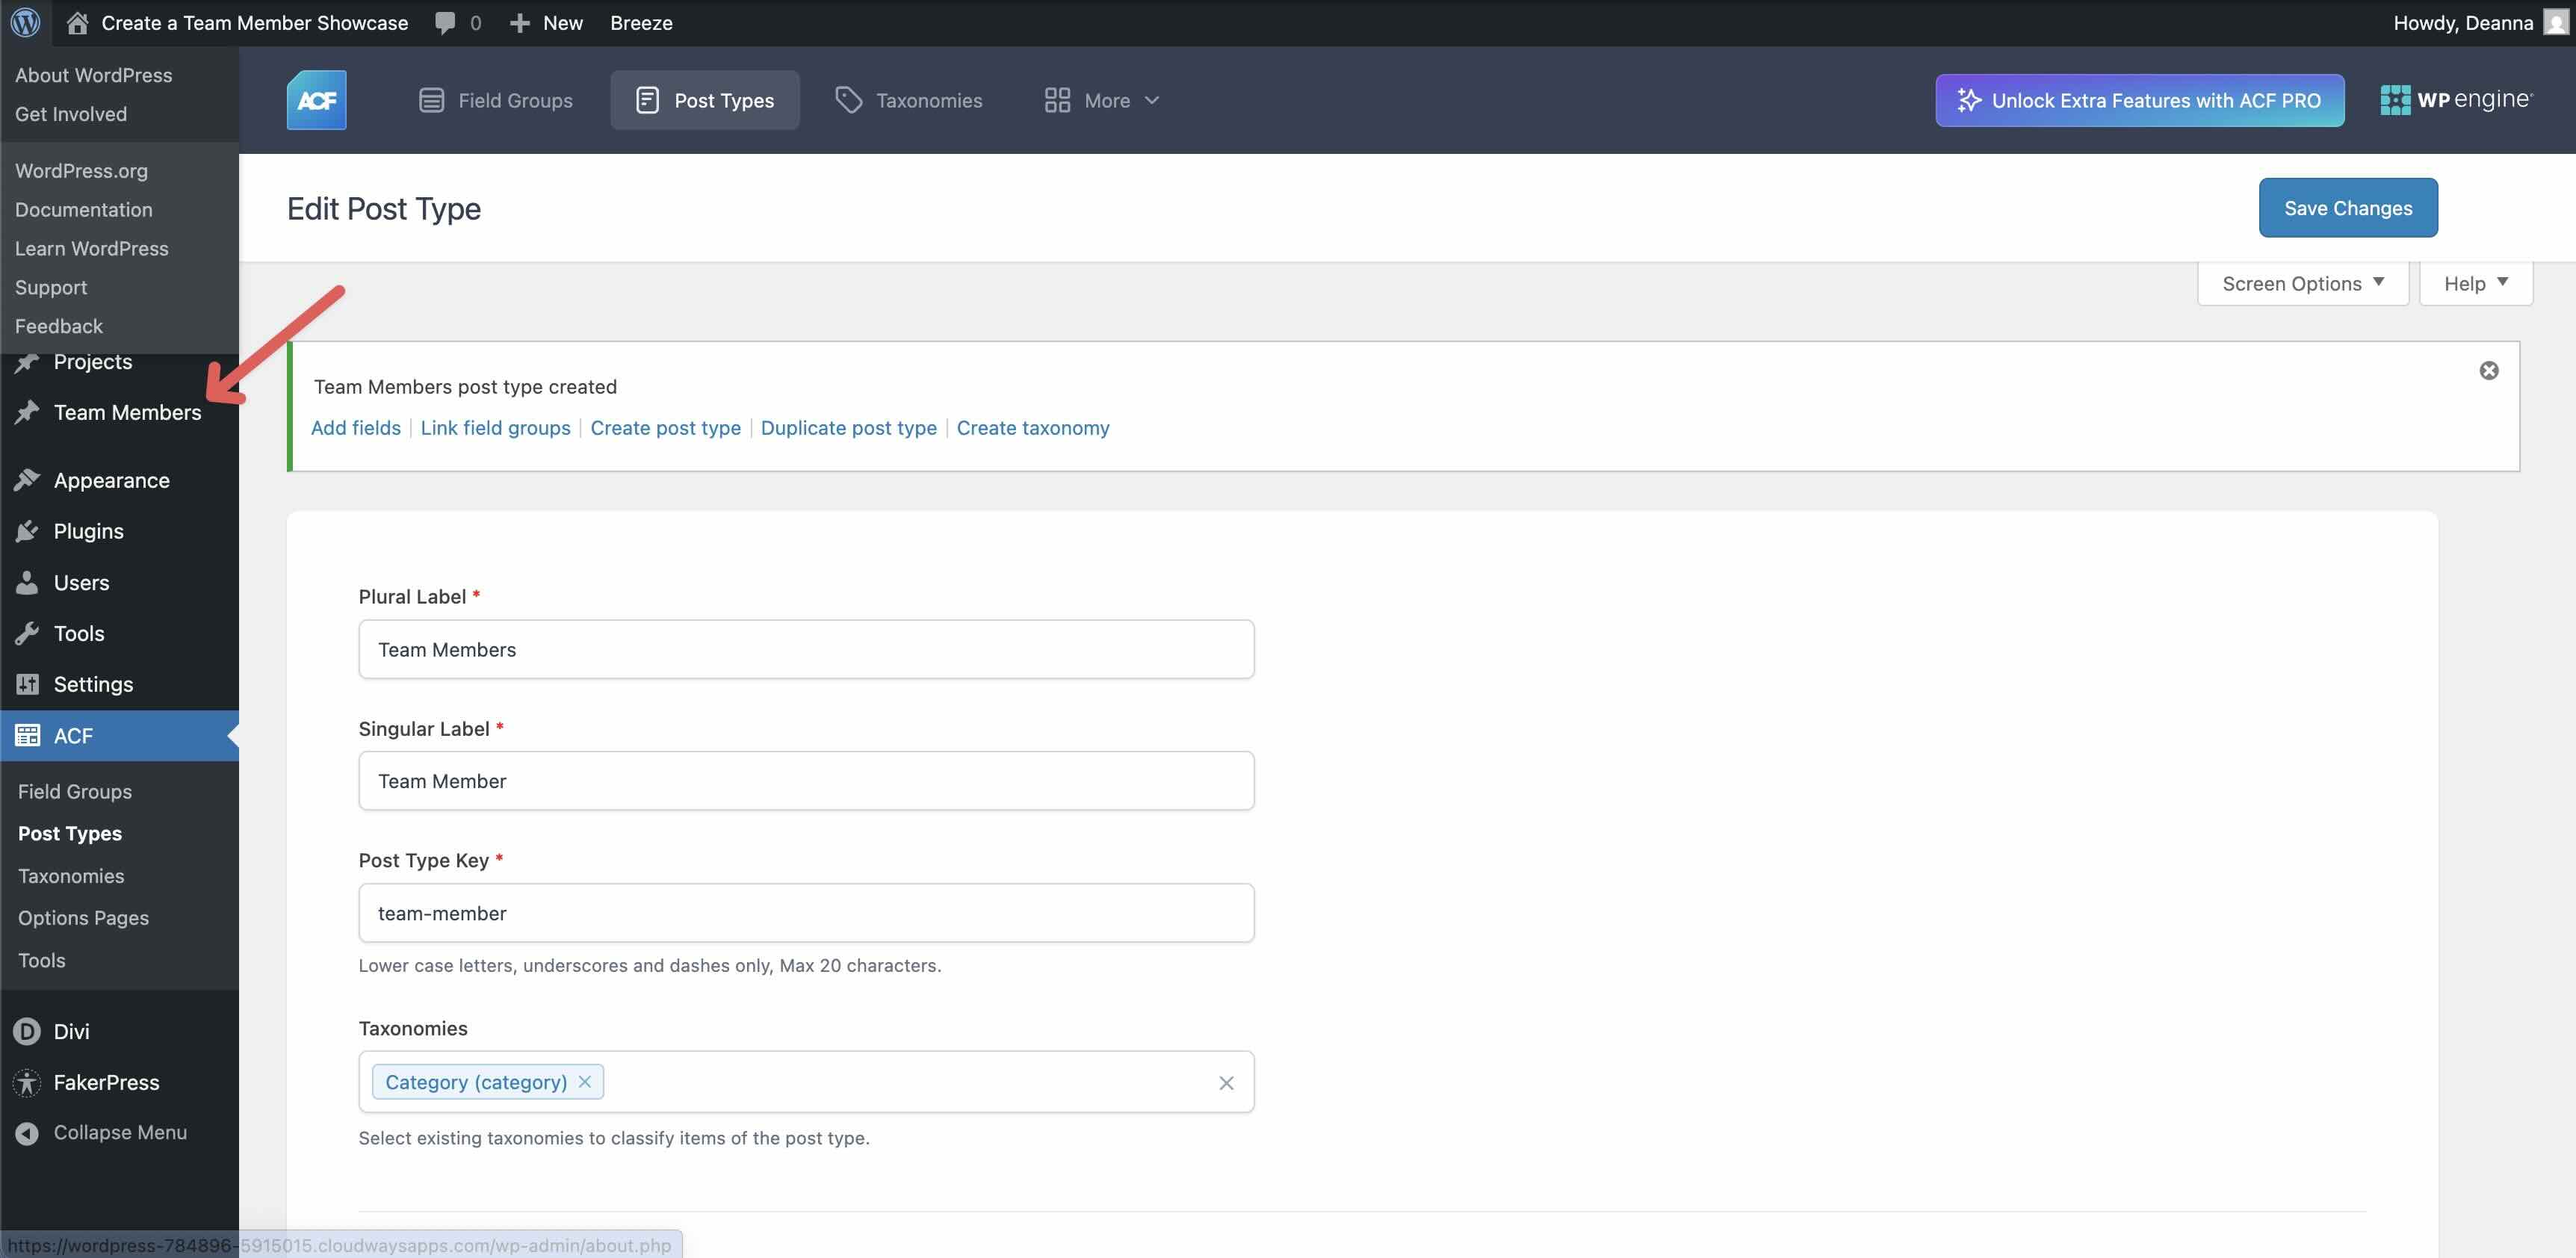
The total step is to click on at the Save Changes.
Take a look on the left-hand toolbar to ensure the Personnel Contributors submit type turns out after saving.
Create The Field Team
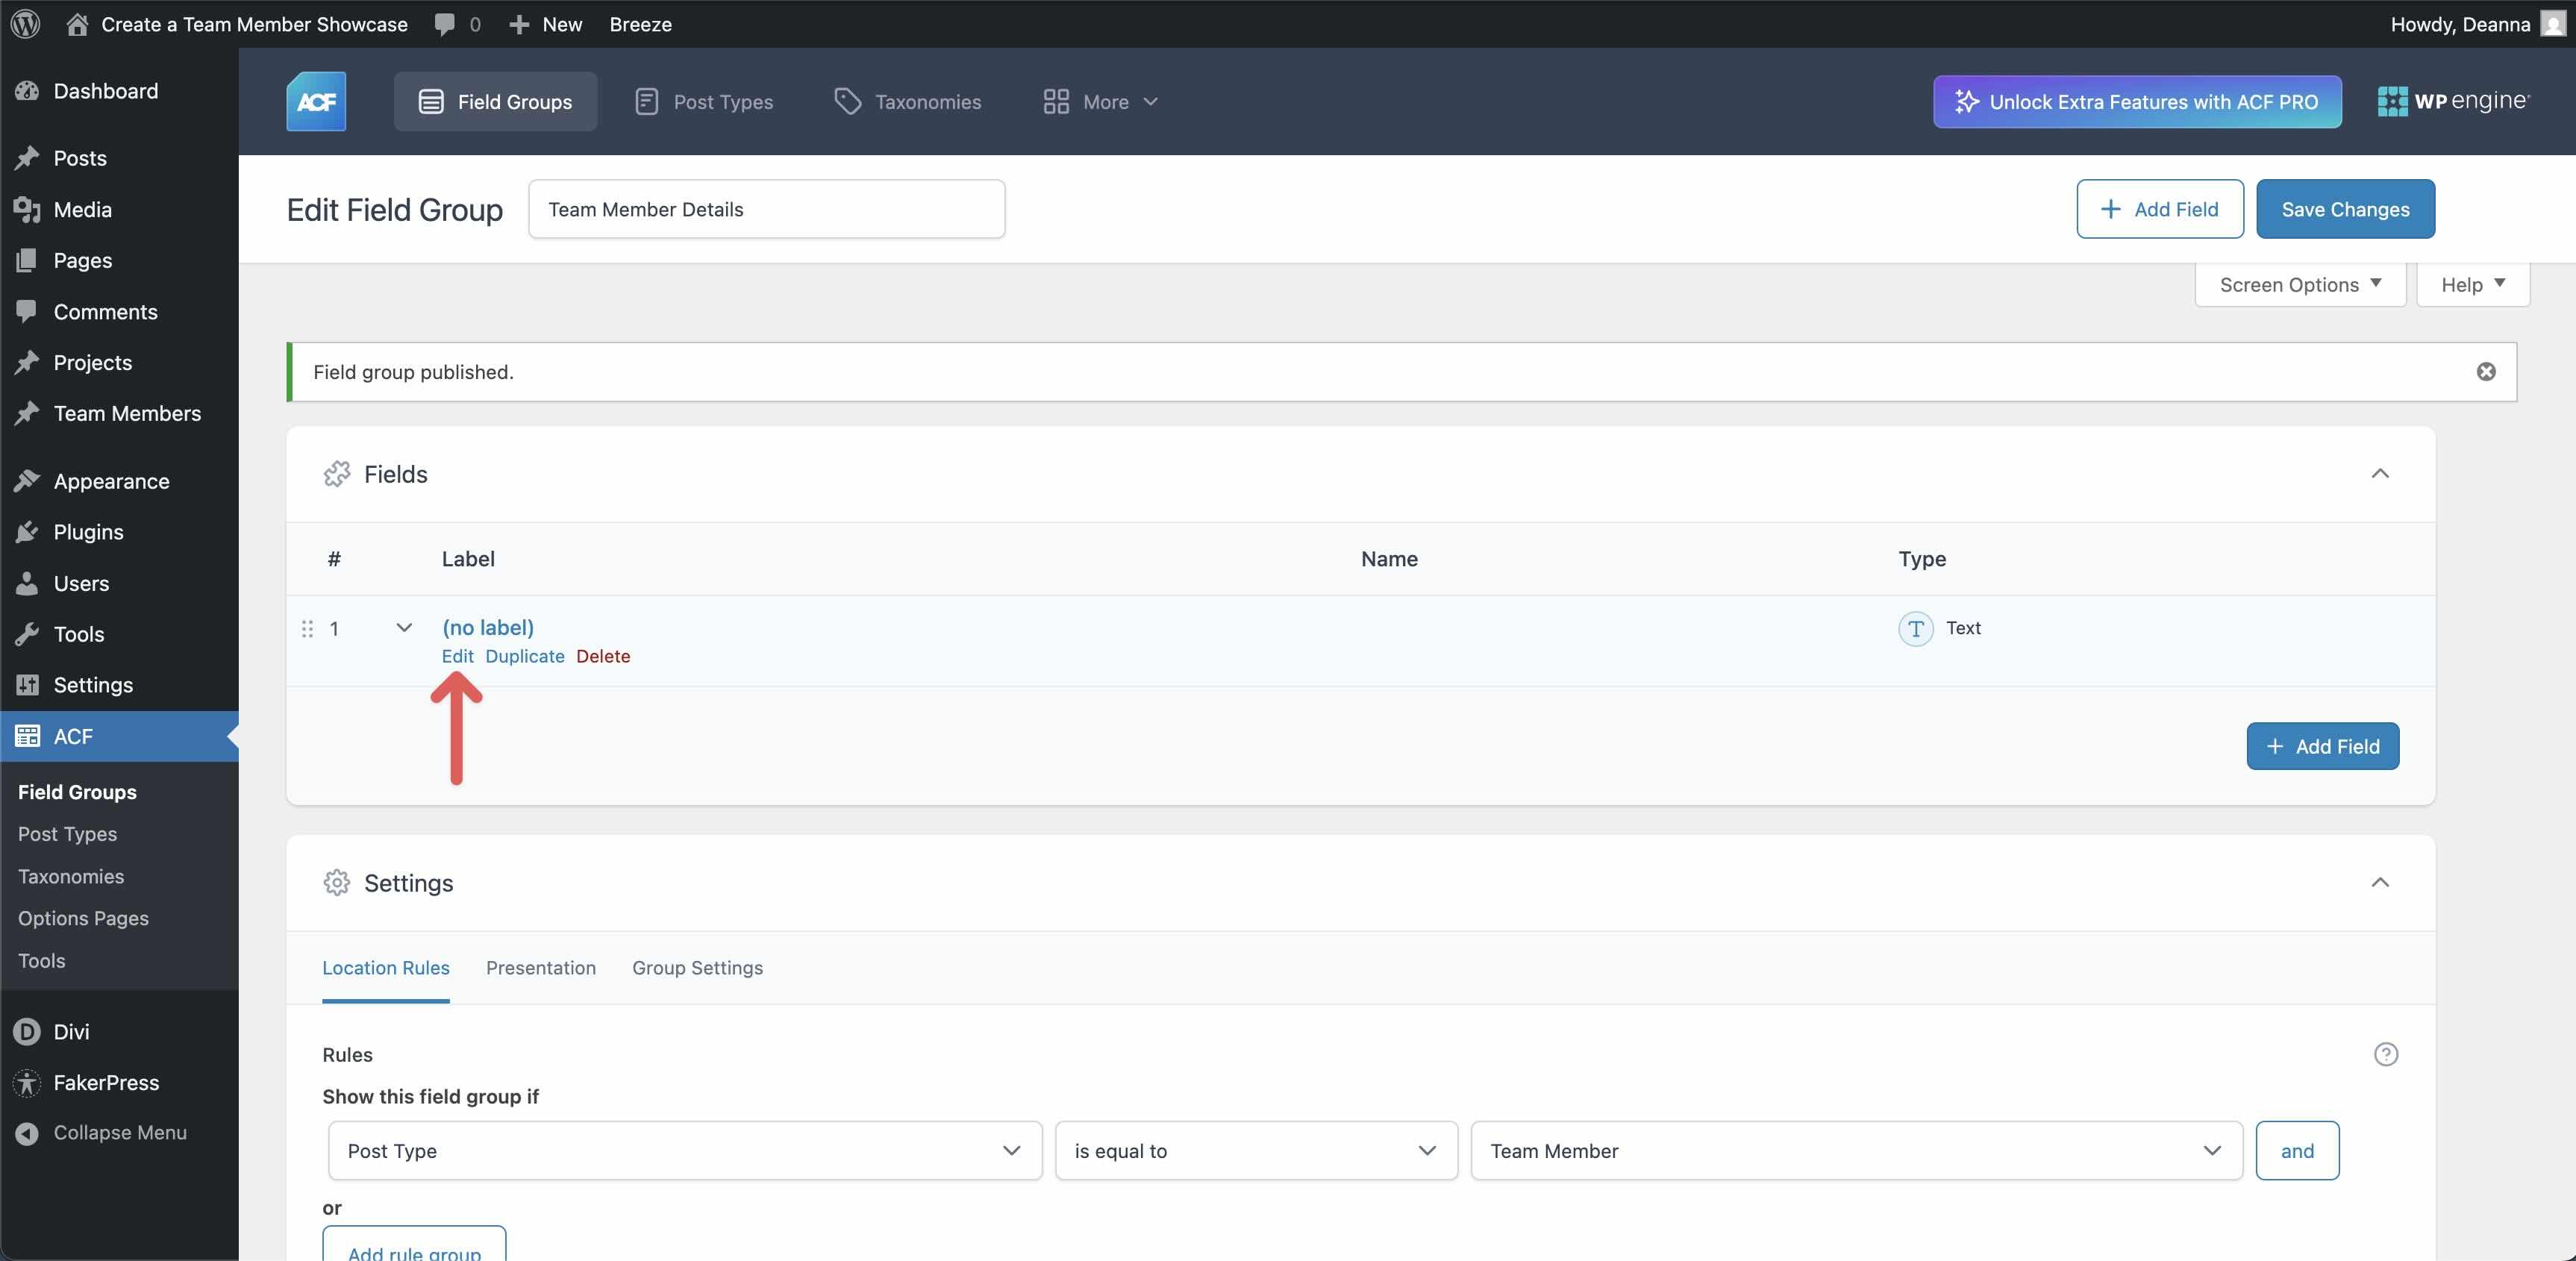
Navigate to ACF > Field Groups and click on at the + Add Field Team button to create a brand spanking new personnel.
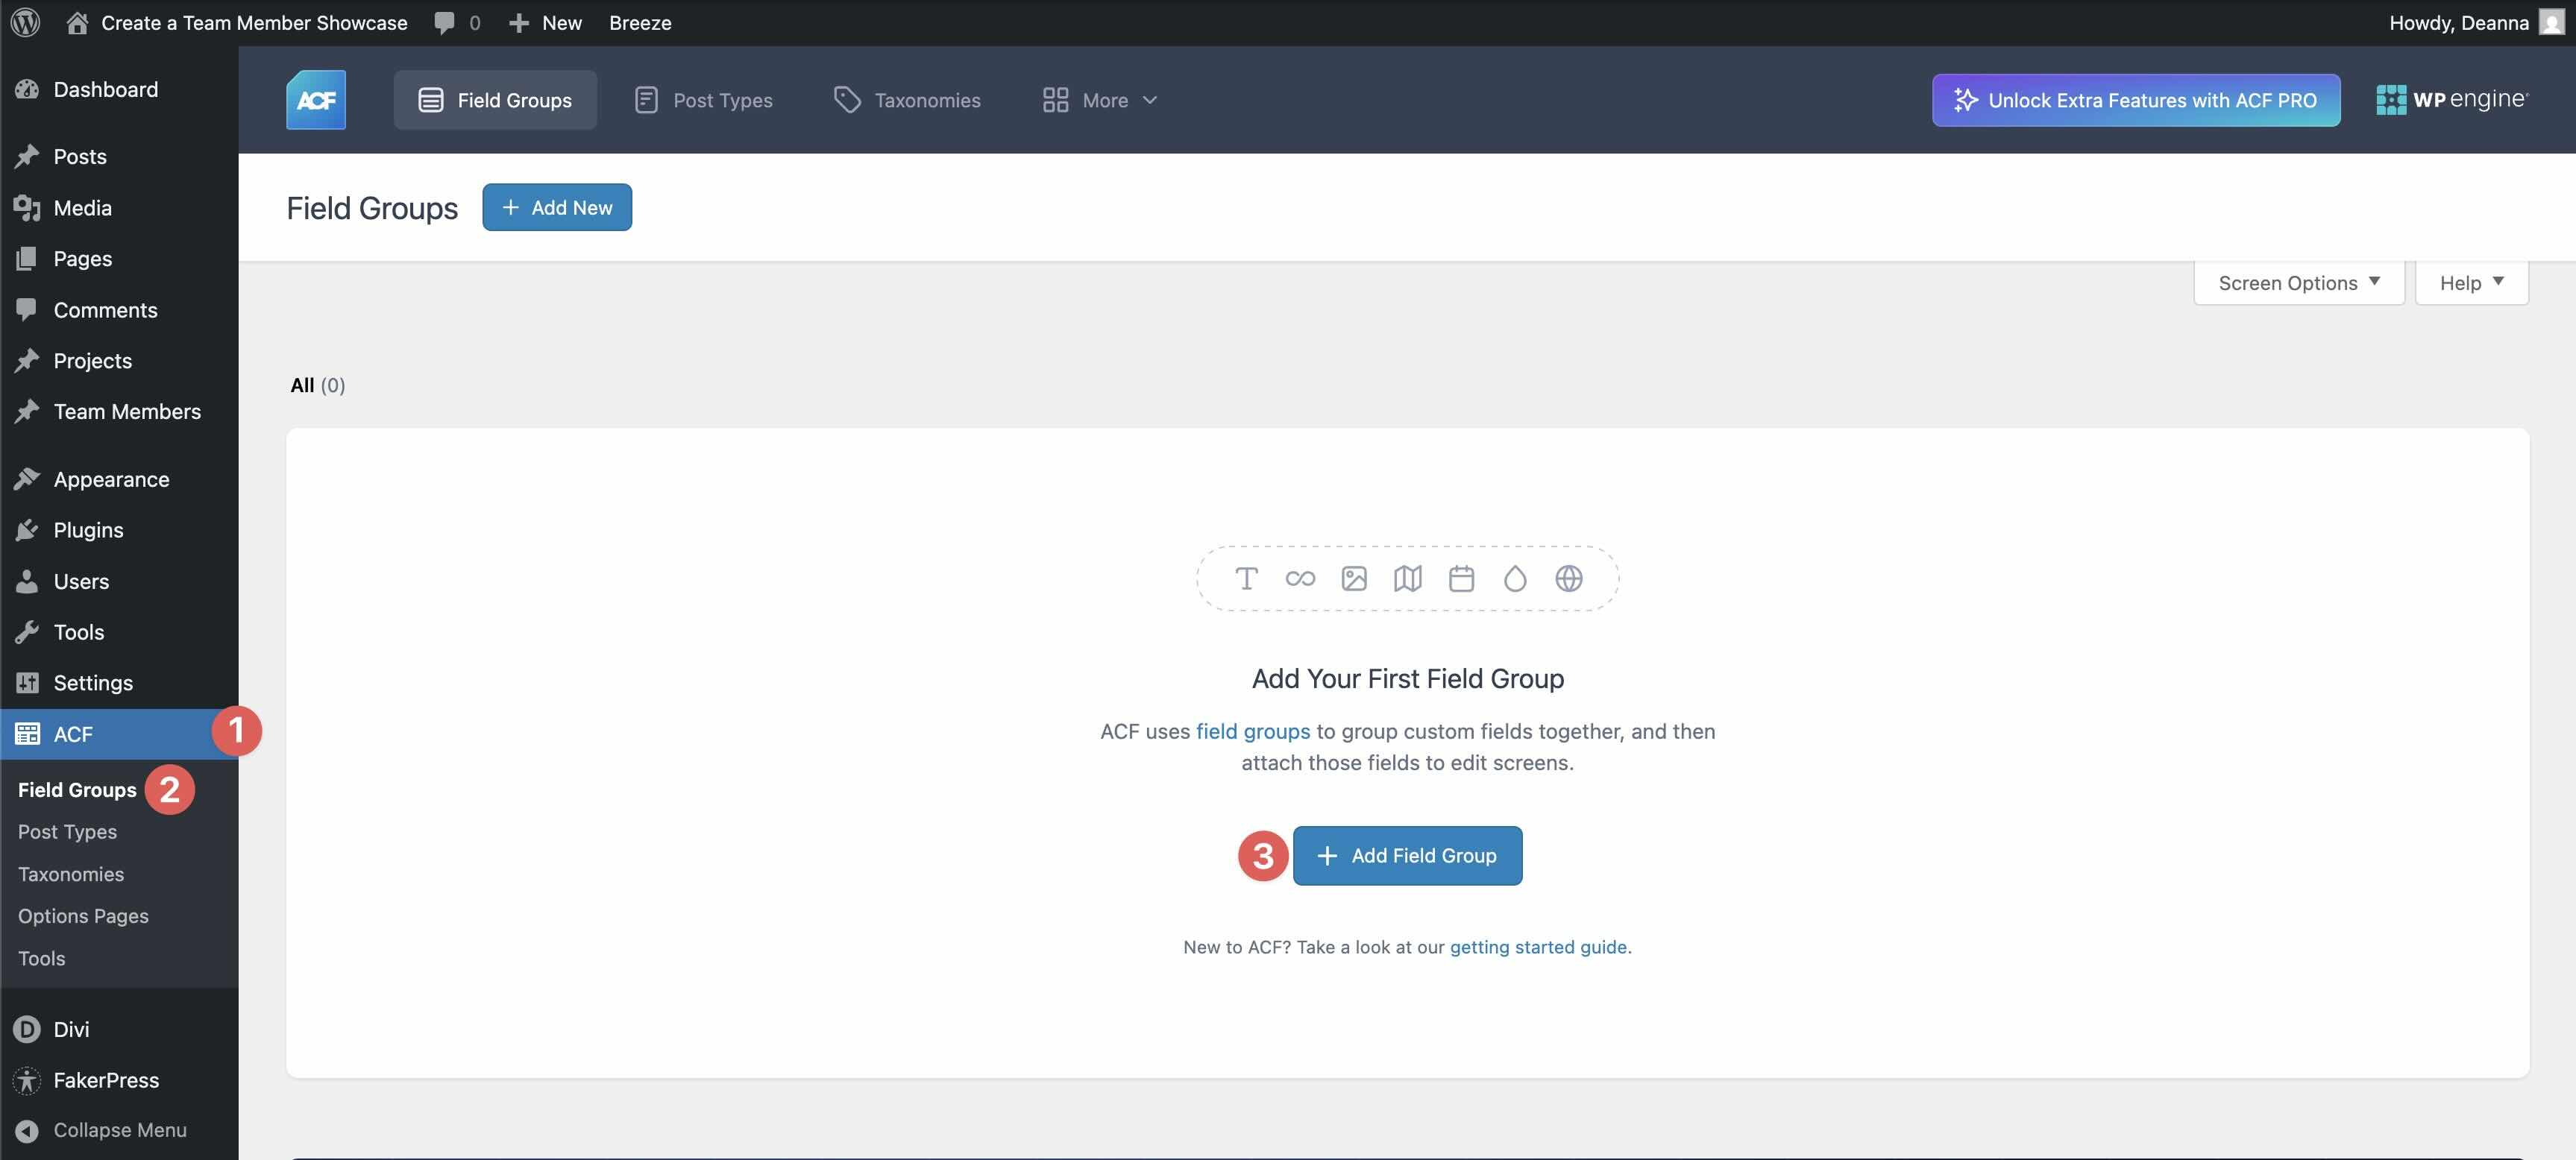
Assign the identify Personnel Member Details to the sector personnel. Scroll the entire method right down to Settings, and create a brand spanking new Rule: Publish Kind > is equal to > Personnel Member. Click on at the Save Changes button to save some the group.
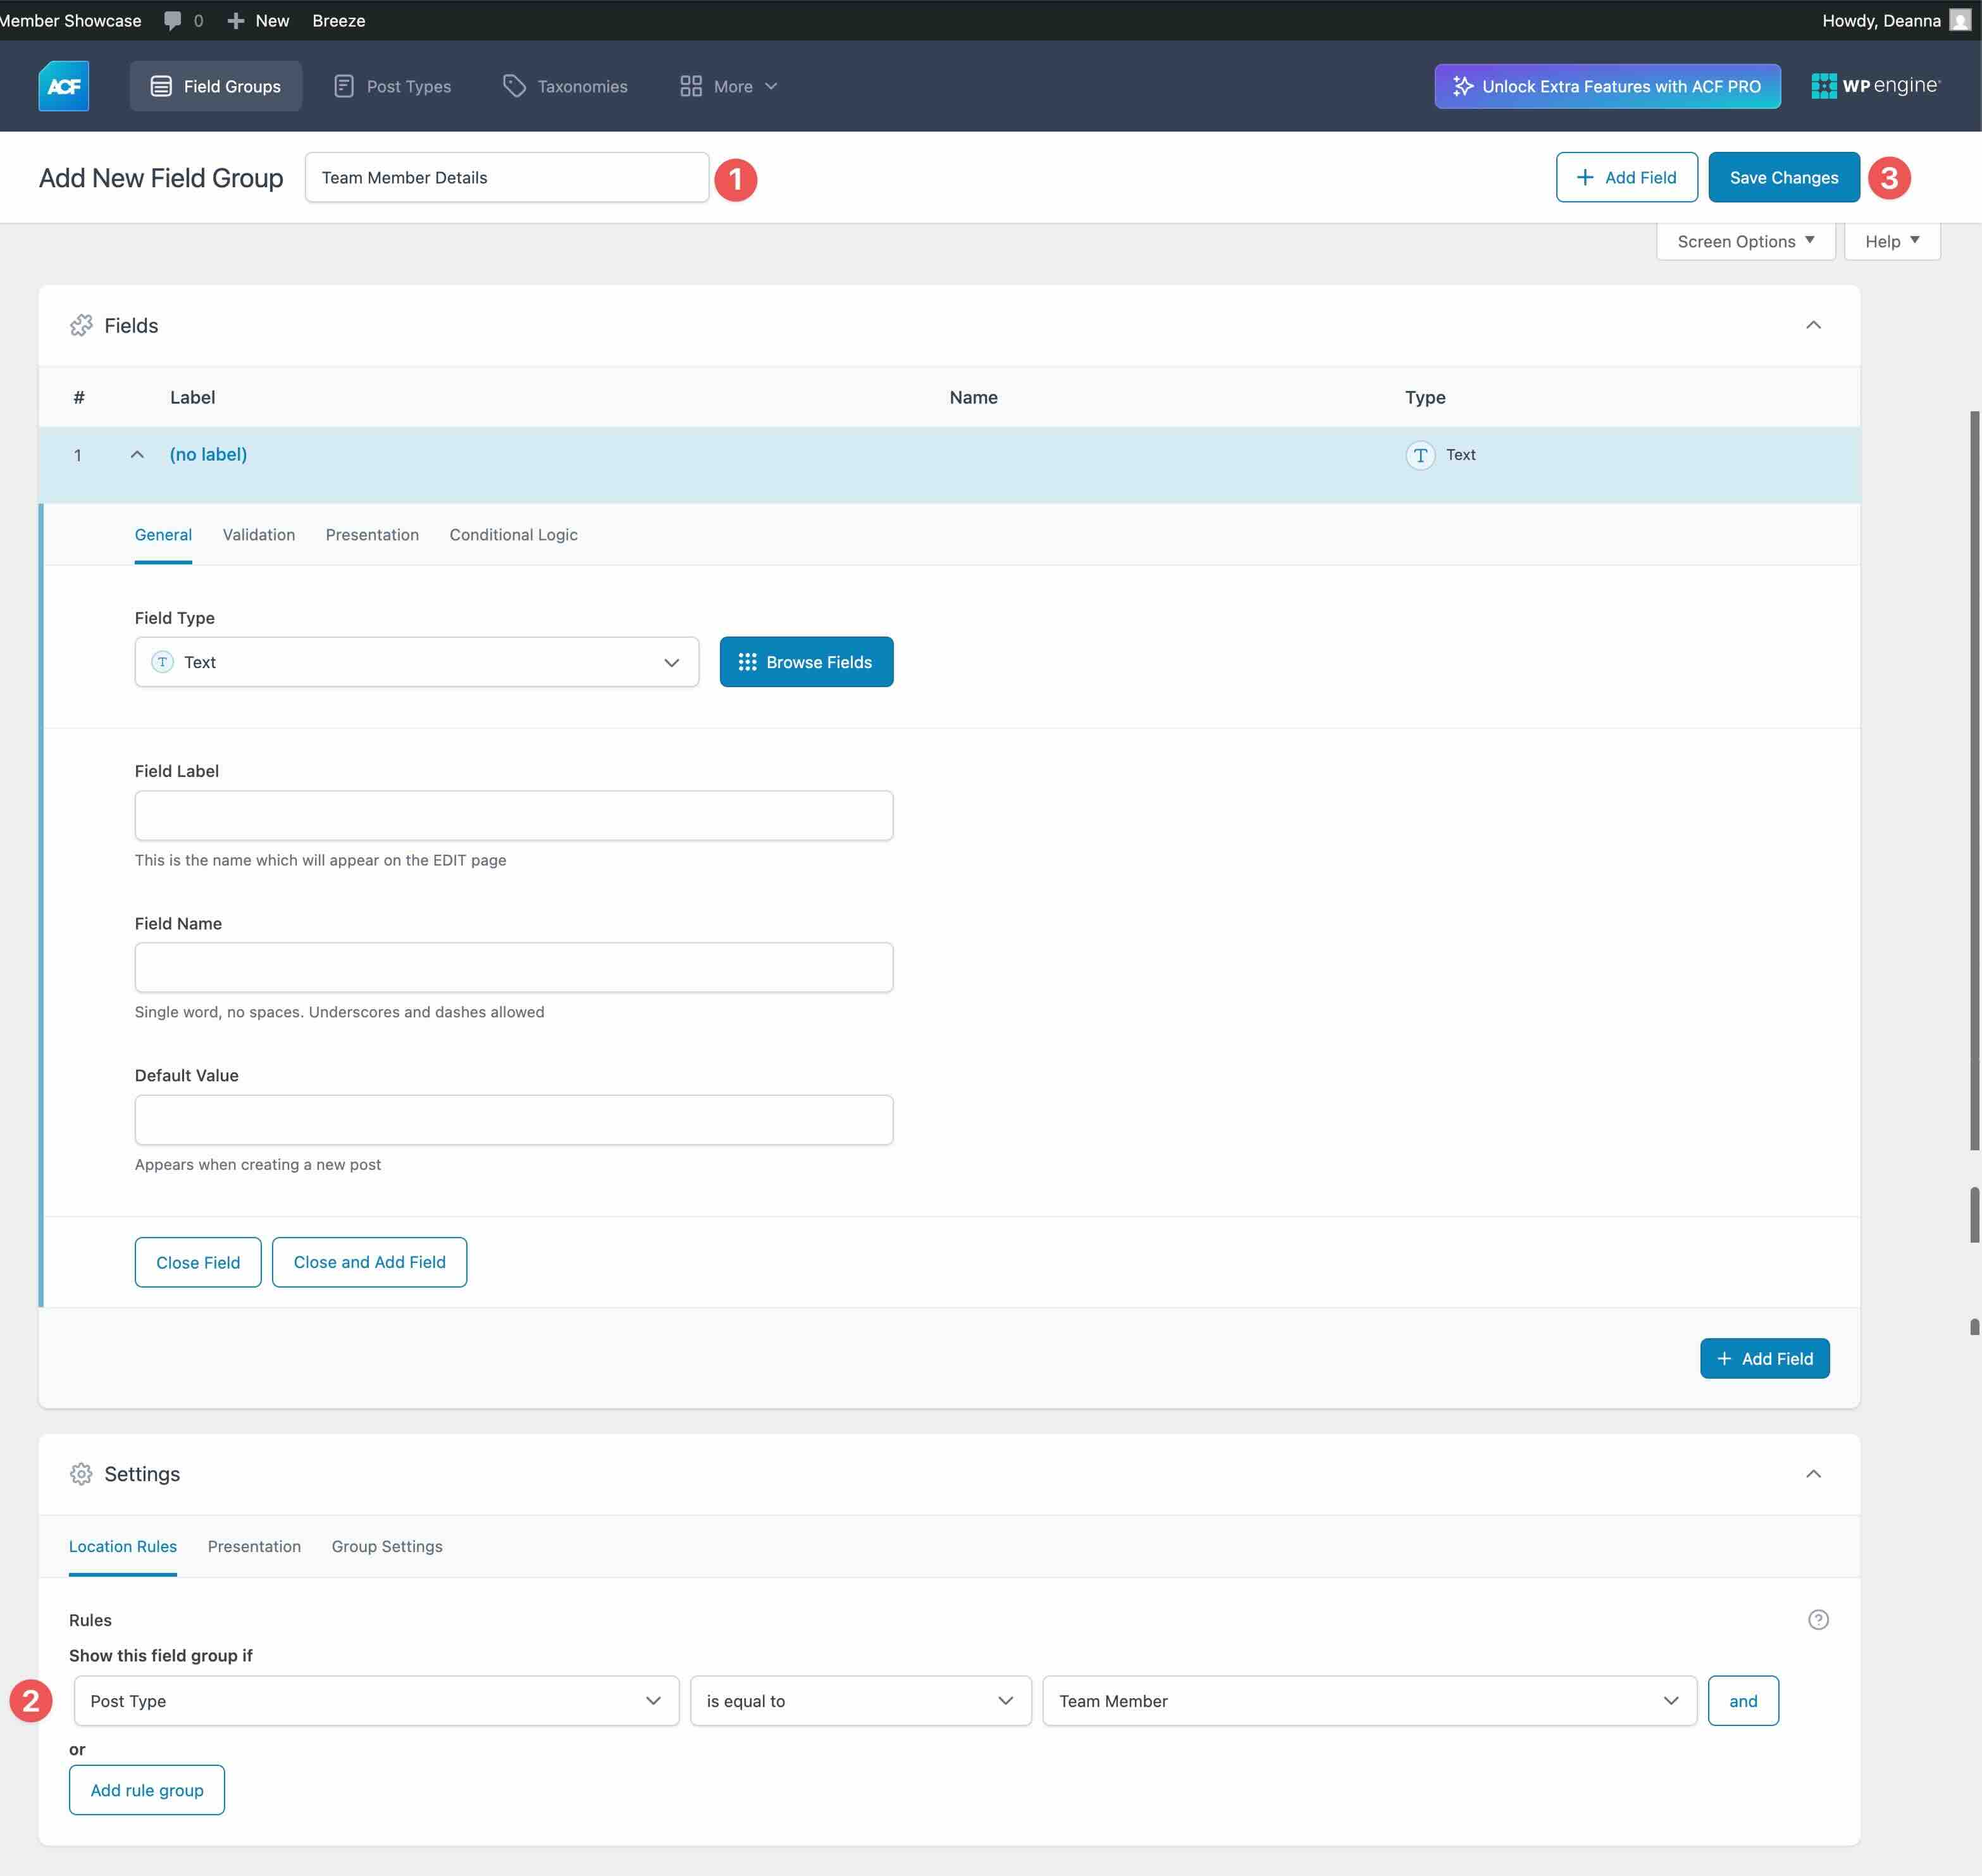
Create The Custom designed Fields
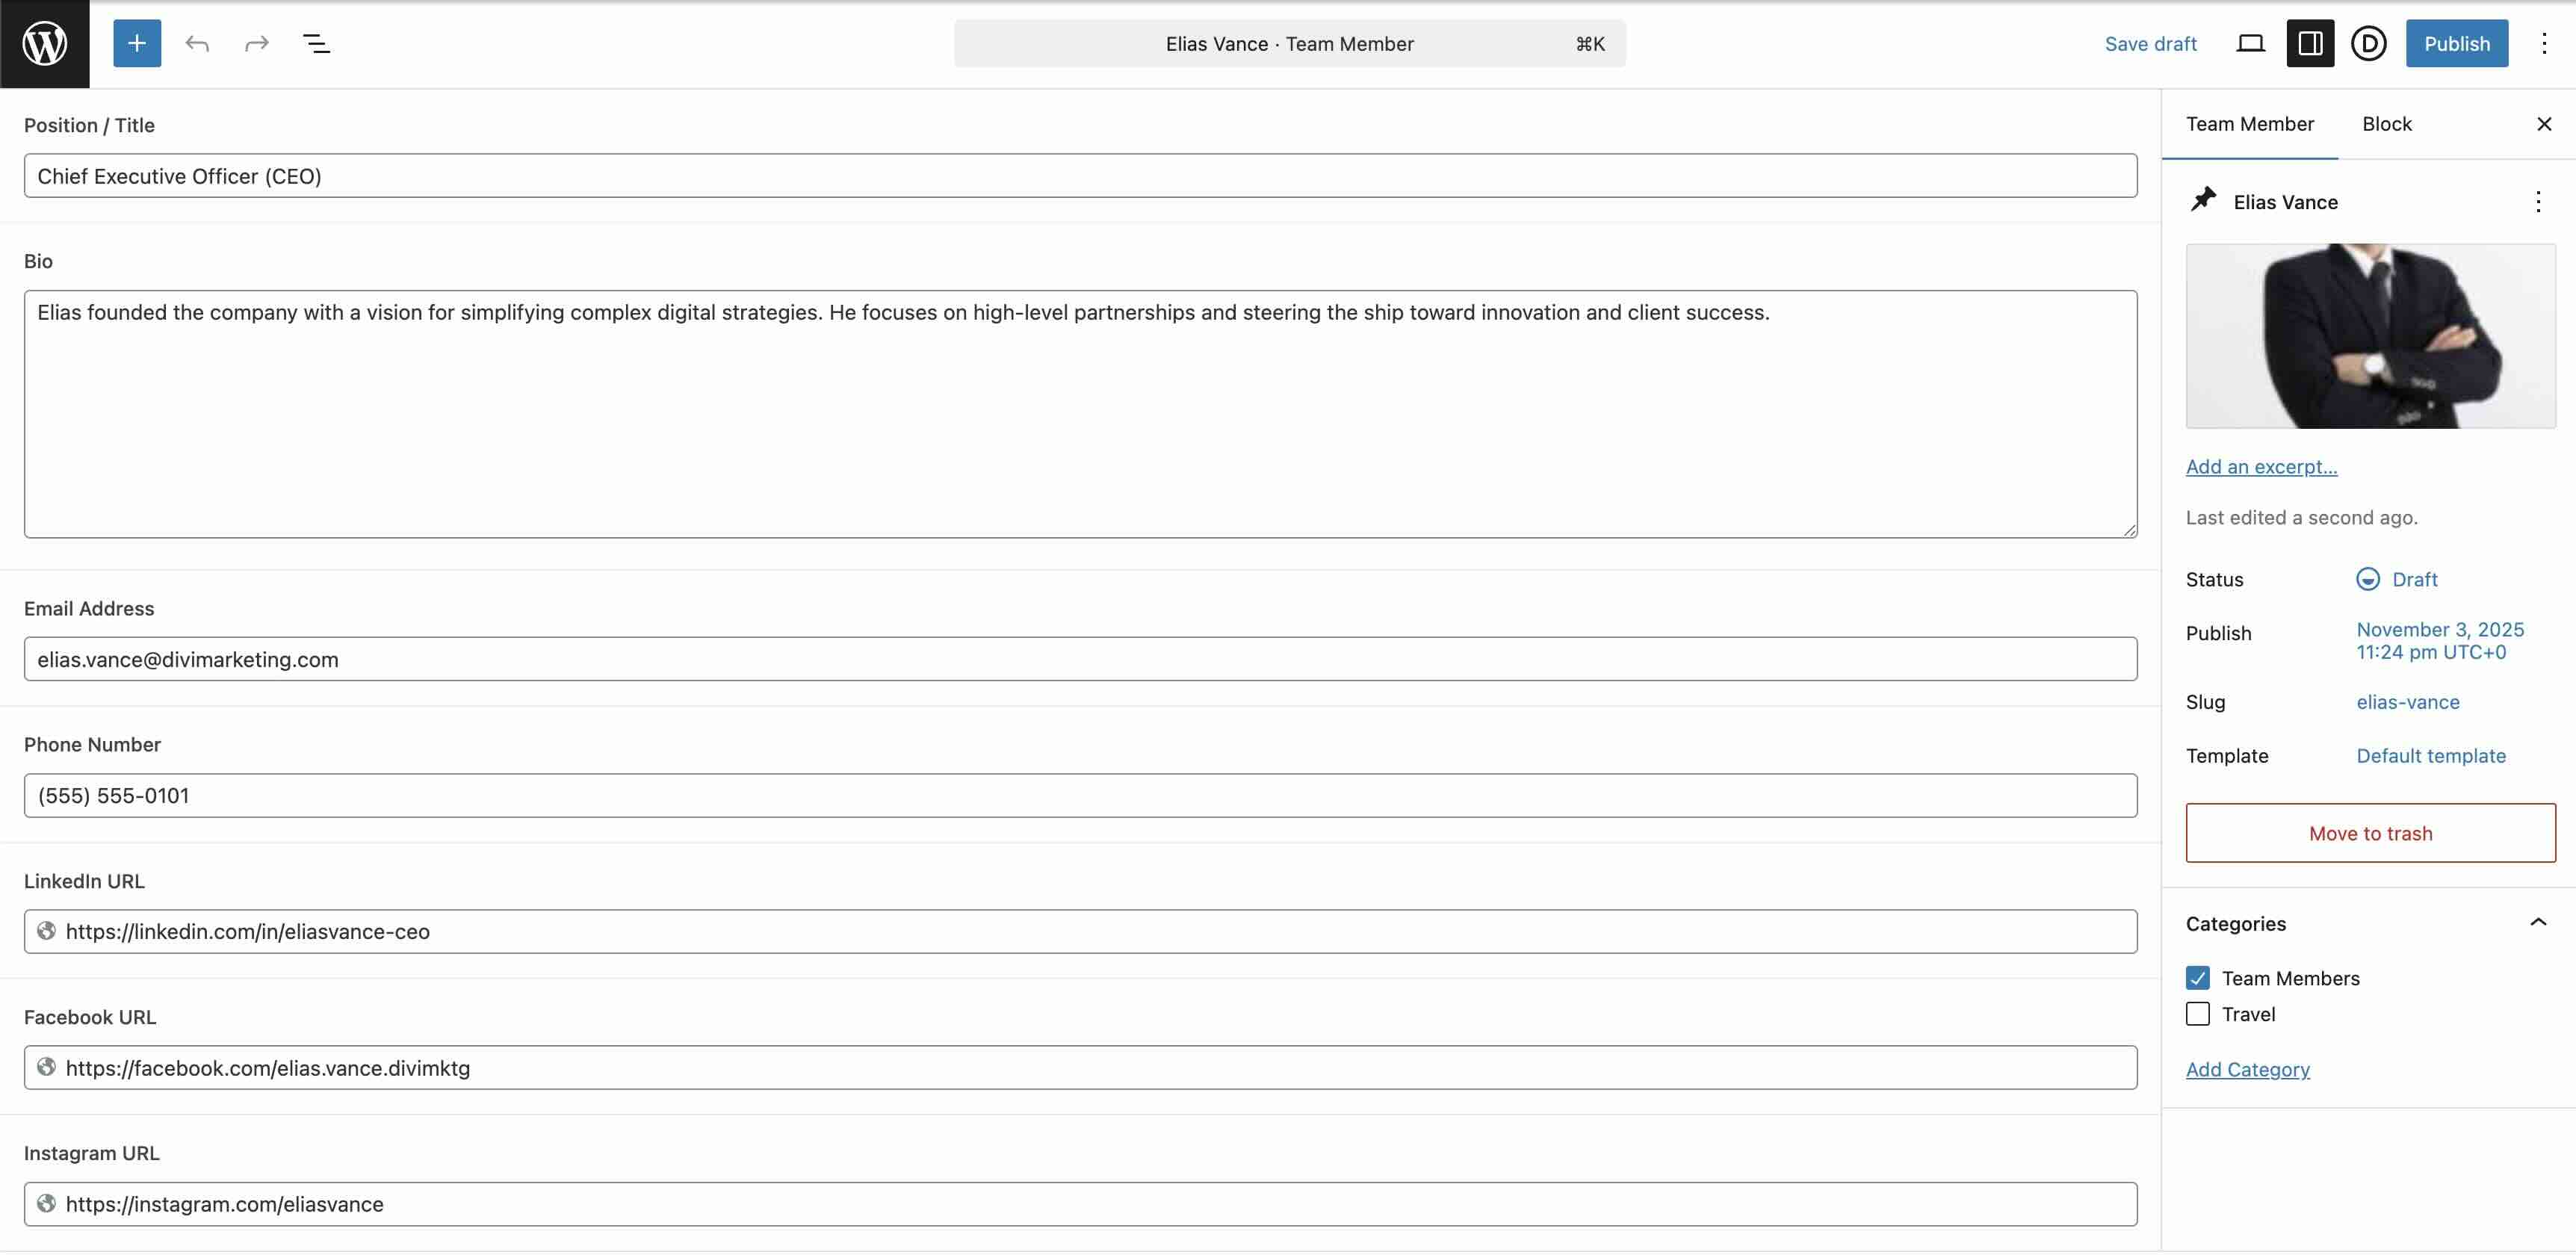
Now that the submit type and field personnel are created, we want to create our custom designed fields. By way of default, ACF creates the principle one for you. Hover over the sector name to reveal the settings. Click on on Edit.
Make a choice Text for the reason that Field Kind, Position/Establish for the reason that Field Label, position_title for the reason that Field Establish, and Position – Establish for the reason that Default Price. Next, click on on Close and Add Field.
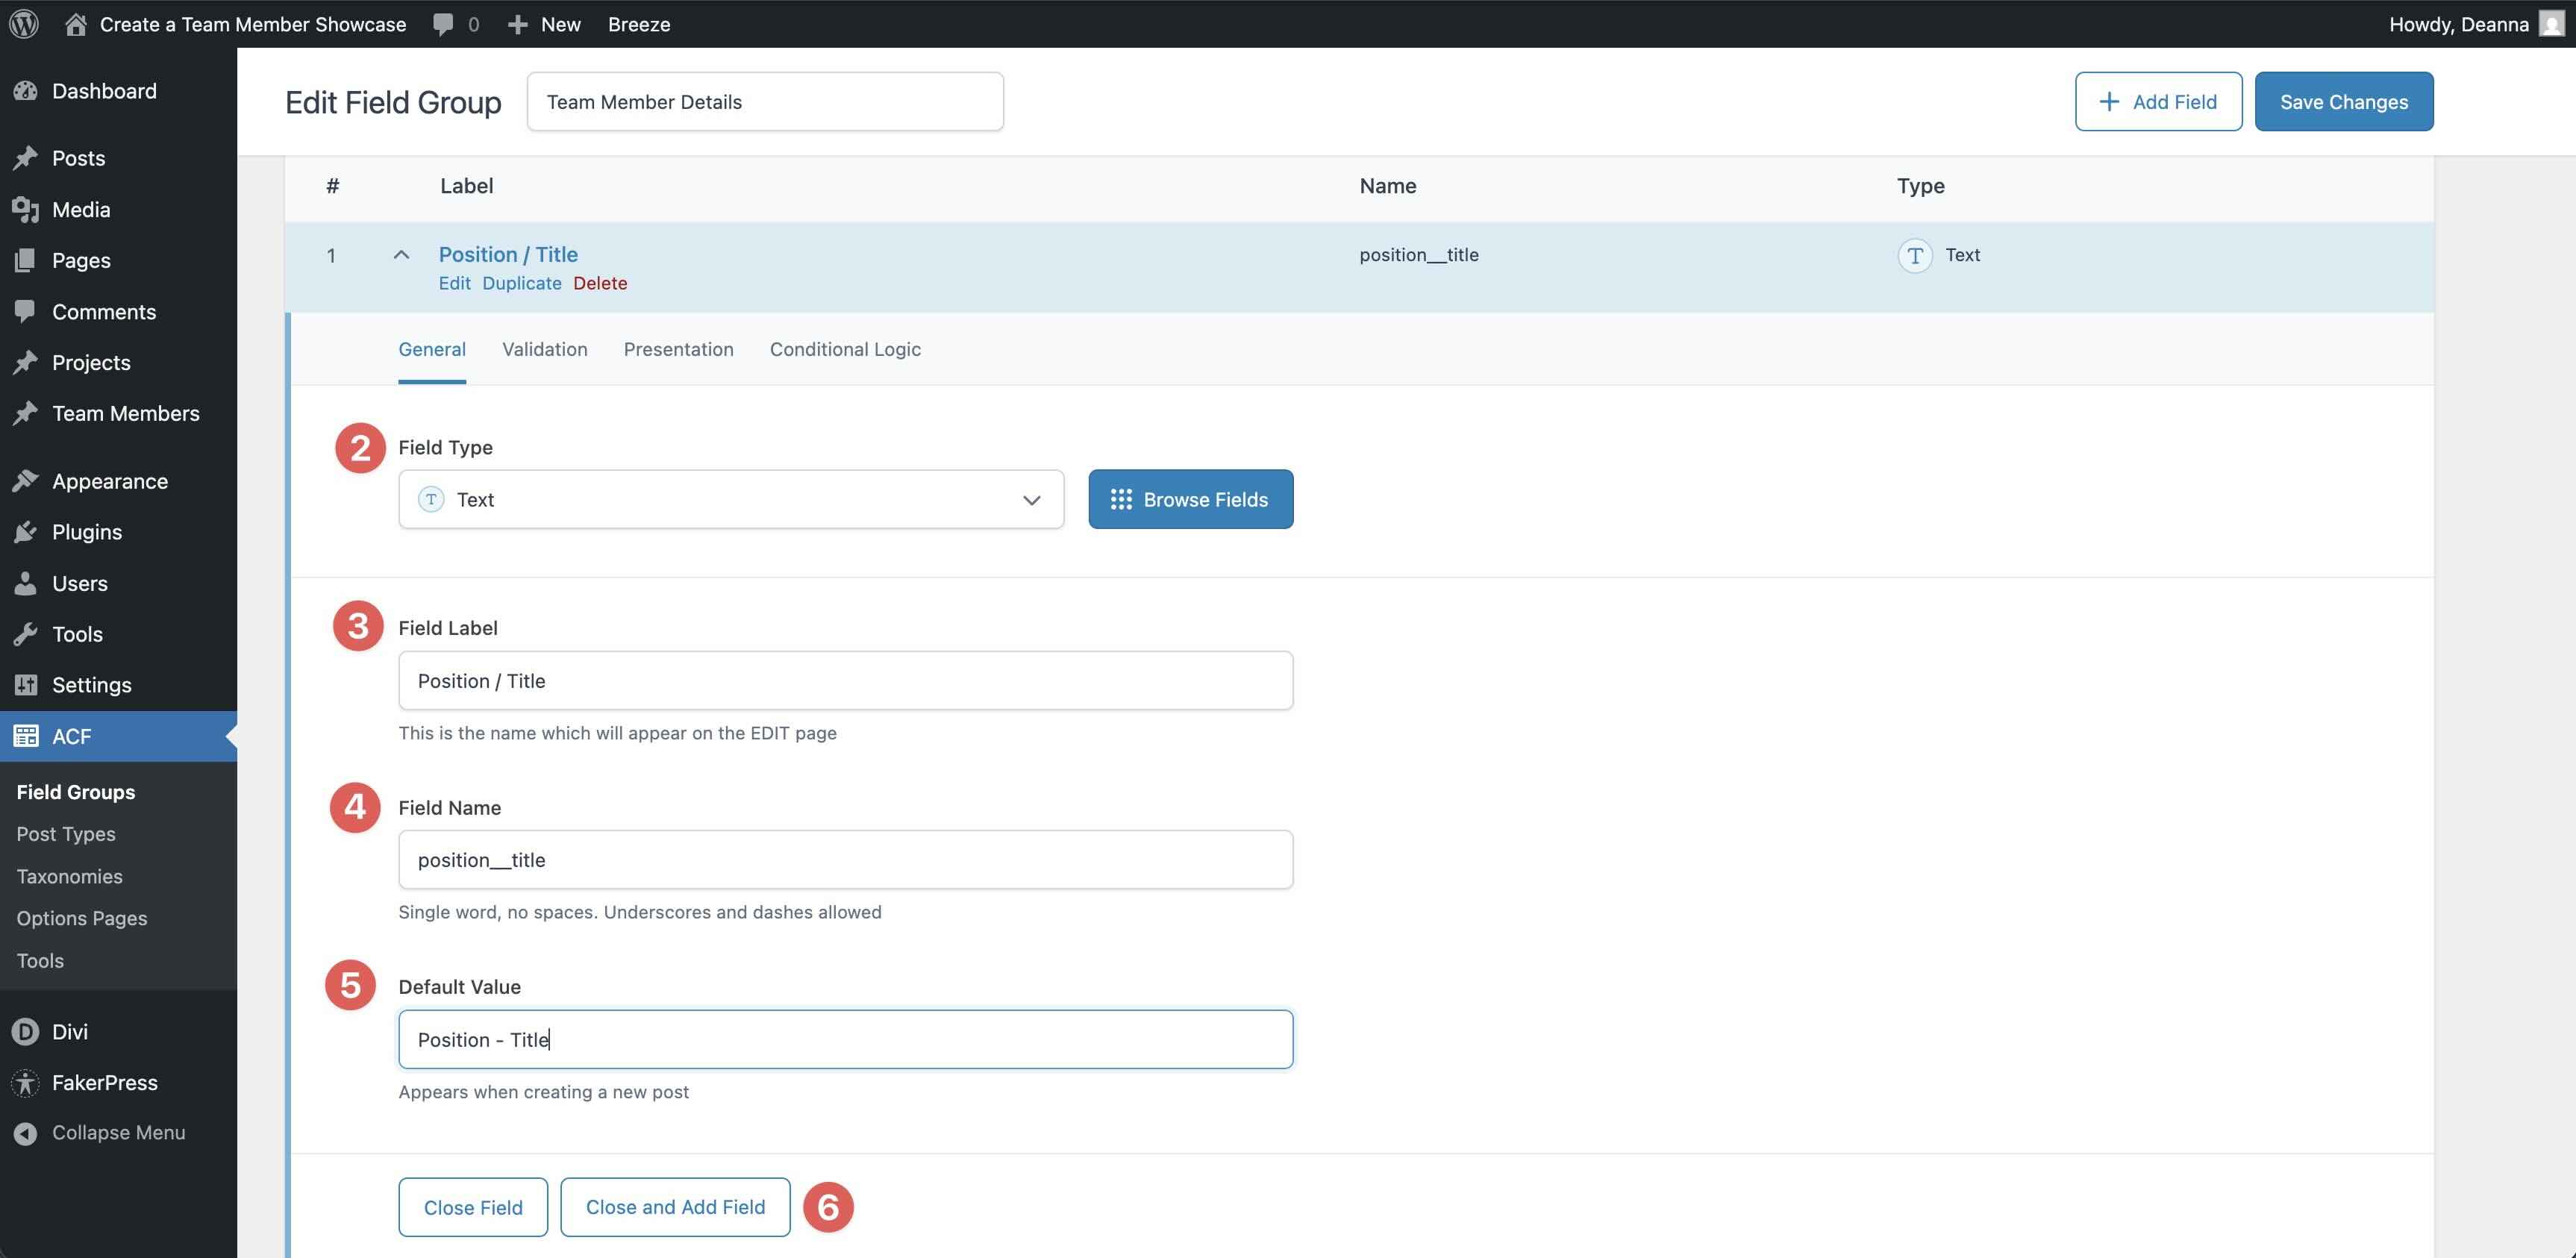
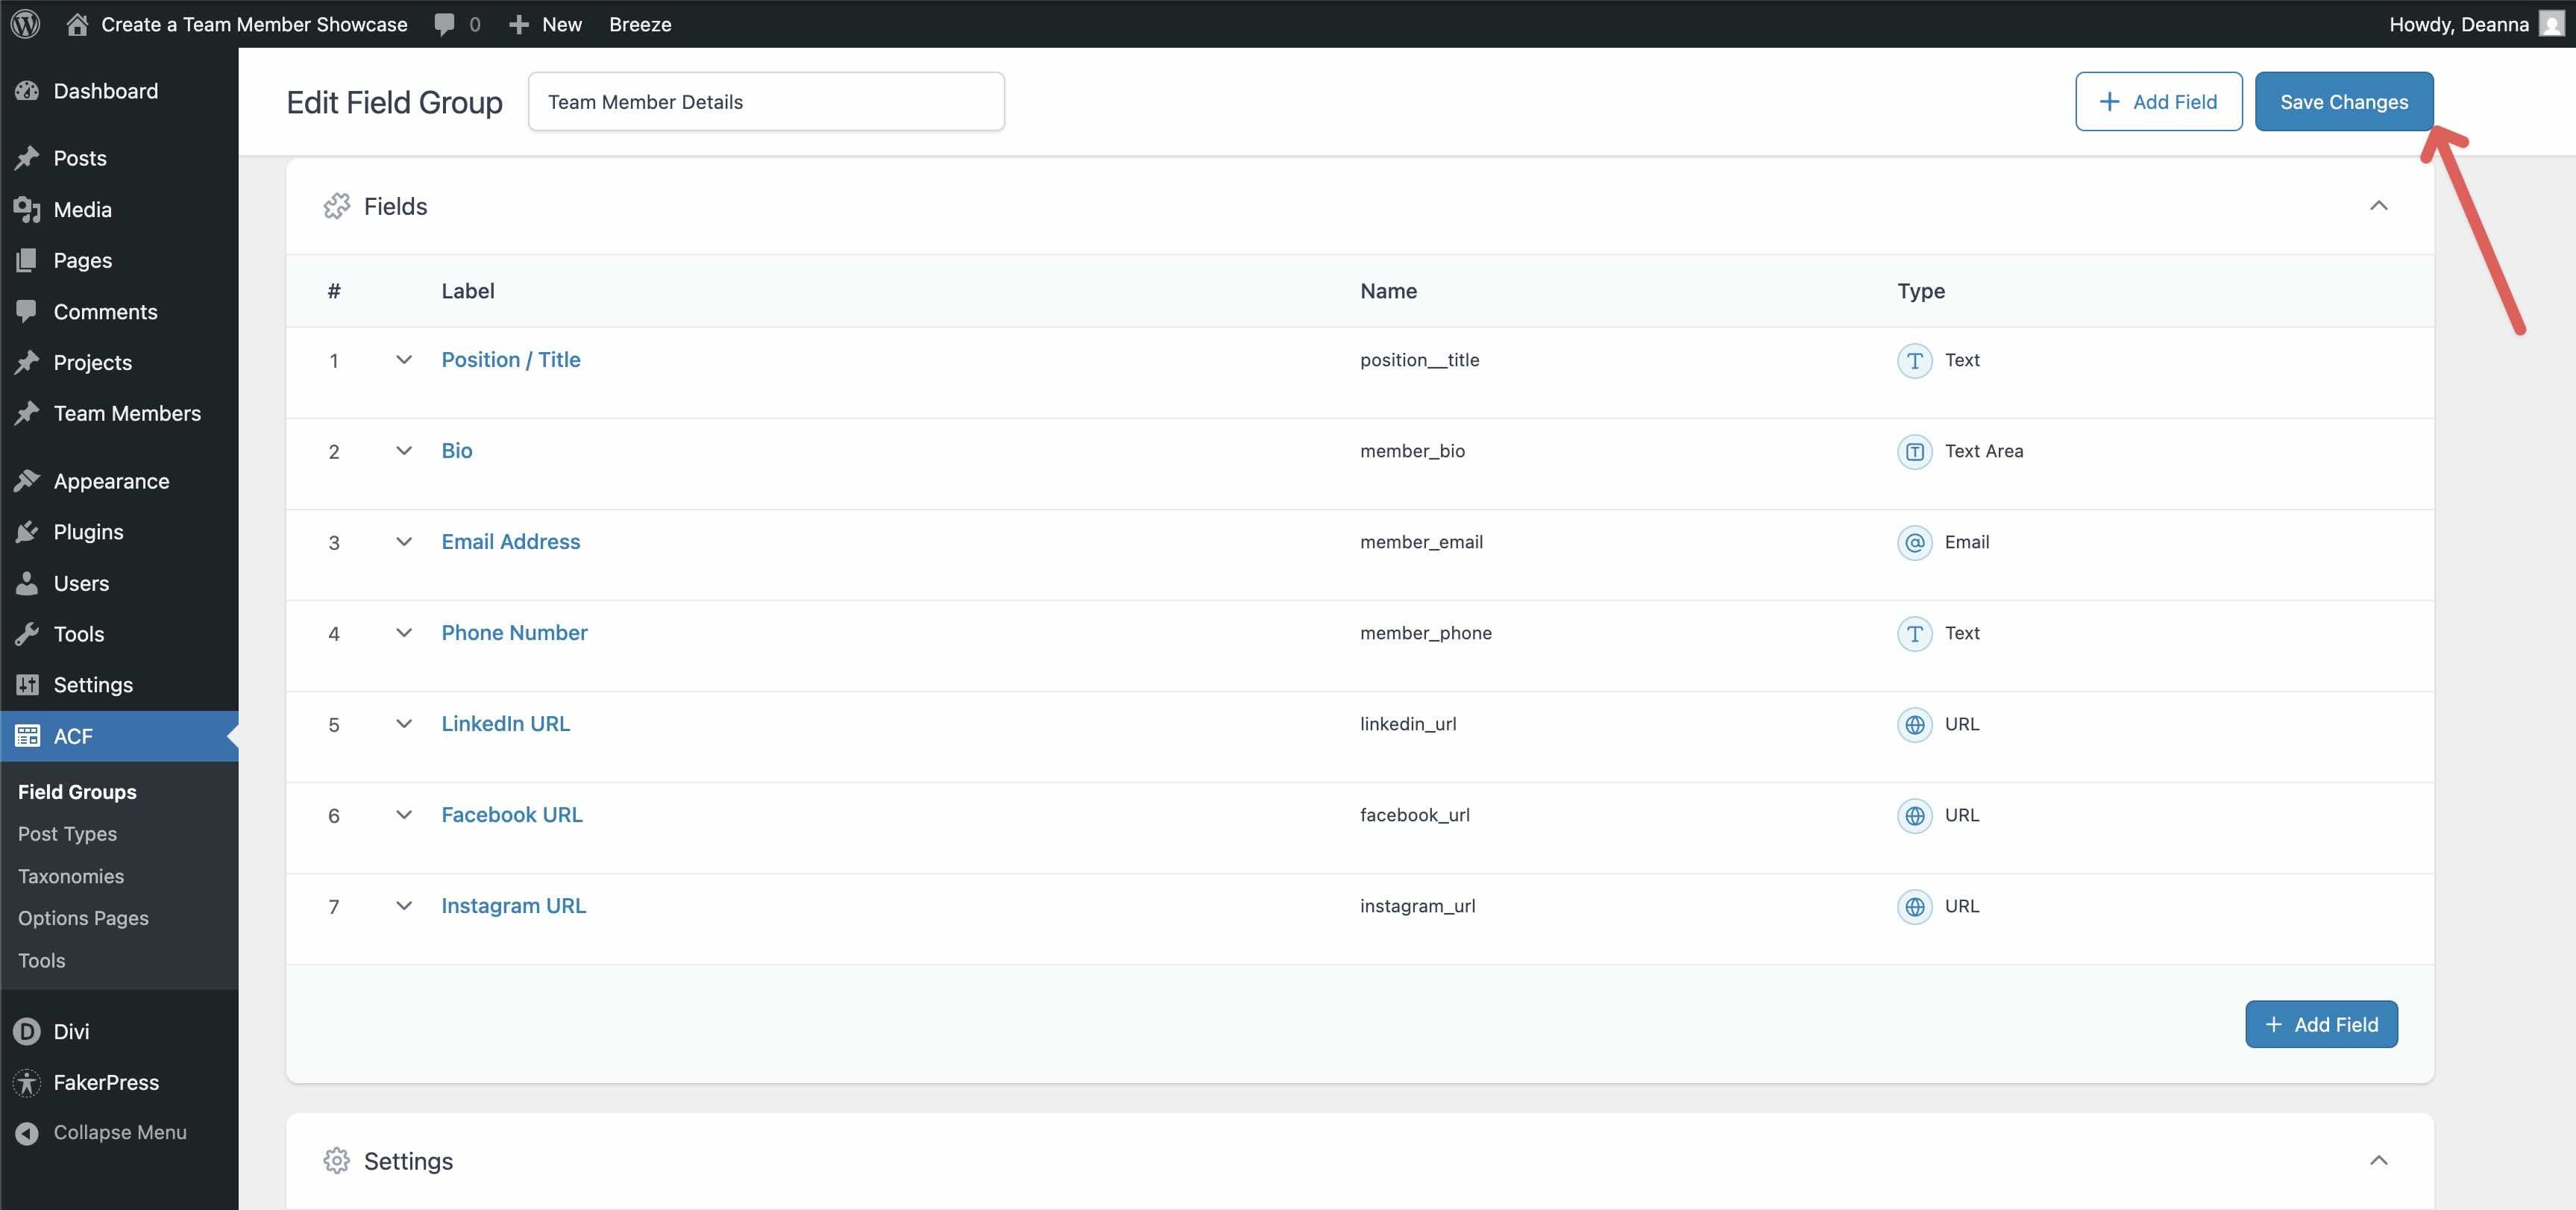
Repeat the steps so to upload the remaining fields. Fairly than write out the entire fields and their wisdom proper right here, we’ve created a table that will help you:
| Field Label | Field Establish | Field Kind |
|---|---|---|
| Position / Establish | position_title | Text |
| Bio | member_bio | Text House |
| Email Take care of | member_email | |
| Phone Amount | member_phone | Text |
| LinkedIn URL | linkedin_url | URL |
| Facebook URL | facebook_url | URL |
| Instagram URL | instagram_url | URL |
Once all fields are created, click on on Save Changes on the most efficient right kind of the show.
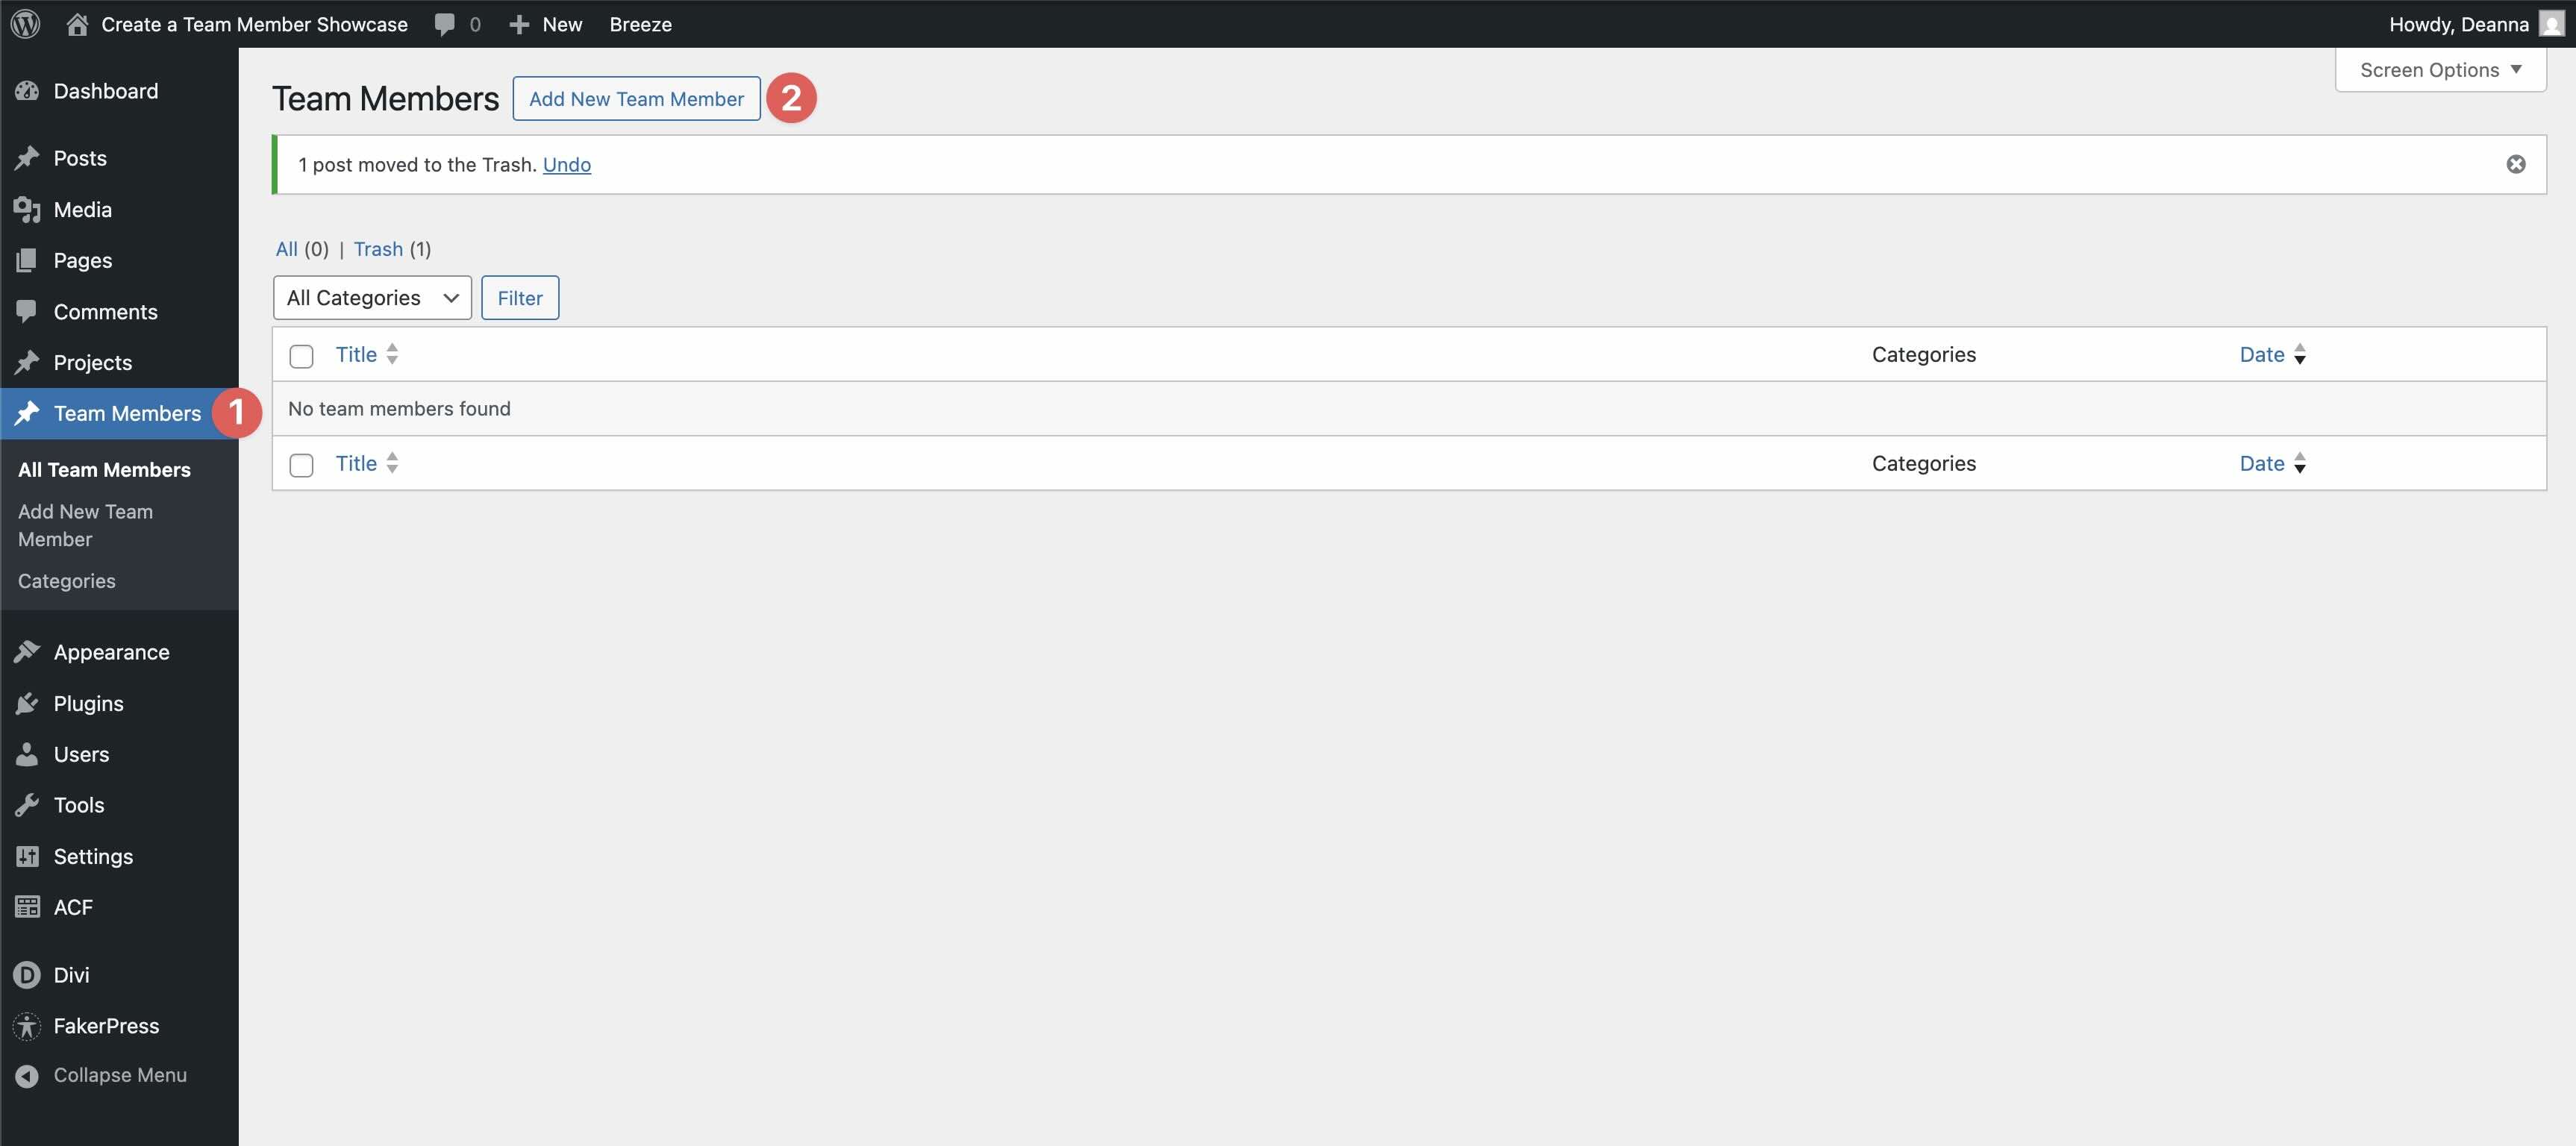
Create The First Personnel Member
Navigate to Personnel Contributors > Add New Personnel Member.
When the Personnel Member submit is outlined, add a Establish and a Featured Image.
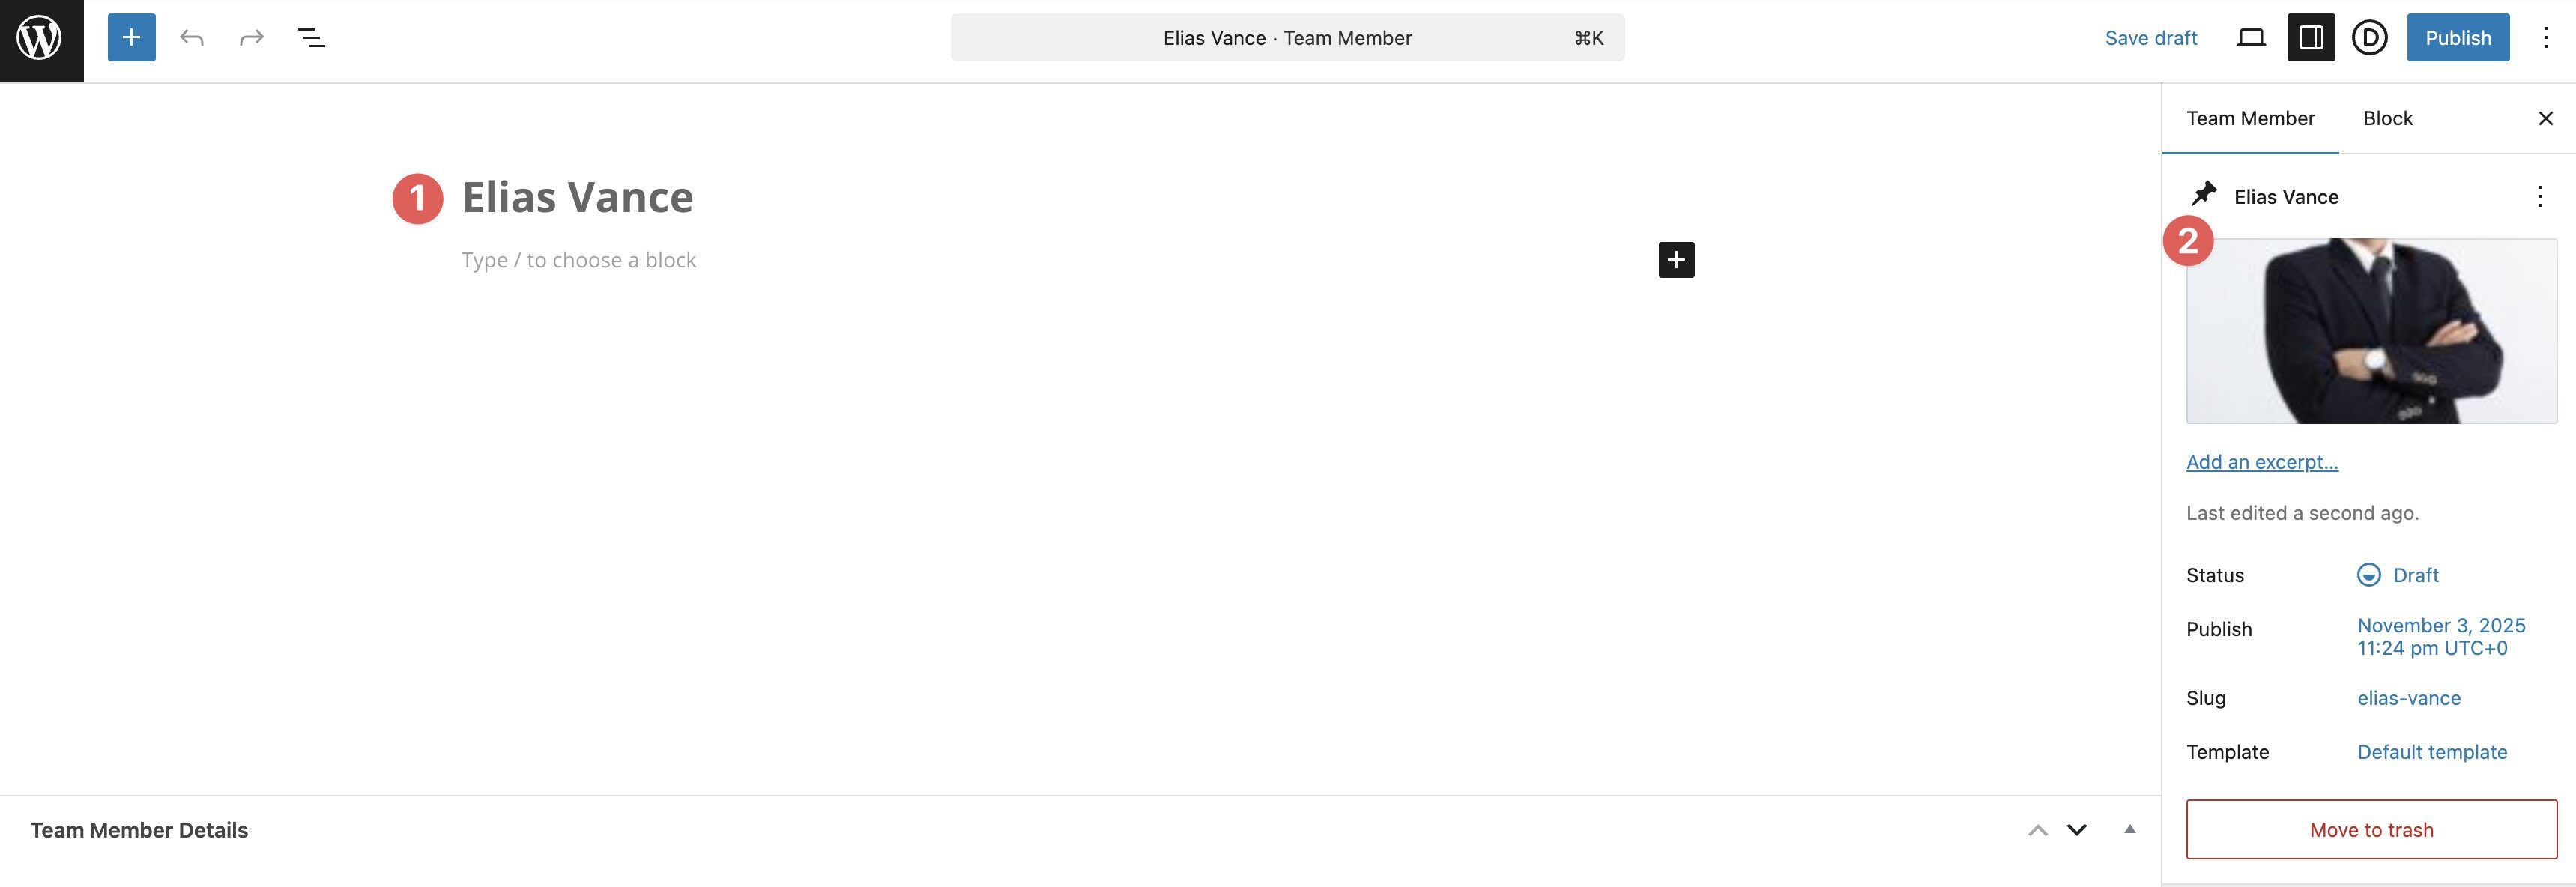
Fill inside the custom designed fields in conjunction with your wisdom.
Repeat the ones steps to create all of your Personnel Member posts.
Step 2: Create The Loop
Get began by the use of creating a brand spanking new internet web page in Divi or opening an provide one. For this submit, we’ll use the Web Design starter web page and add a staff member show off to the About internet web page.
Get began by the use of together with a single-column Flex Row to the internet web page.

Open the Row settings, lengthen the Portions menu, and click on at the Edit icon for the Column.

Amplify the Loop menu, and make allowance Loop Phase.
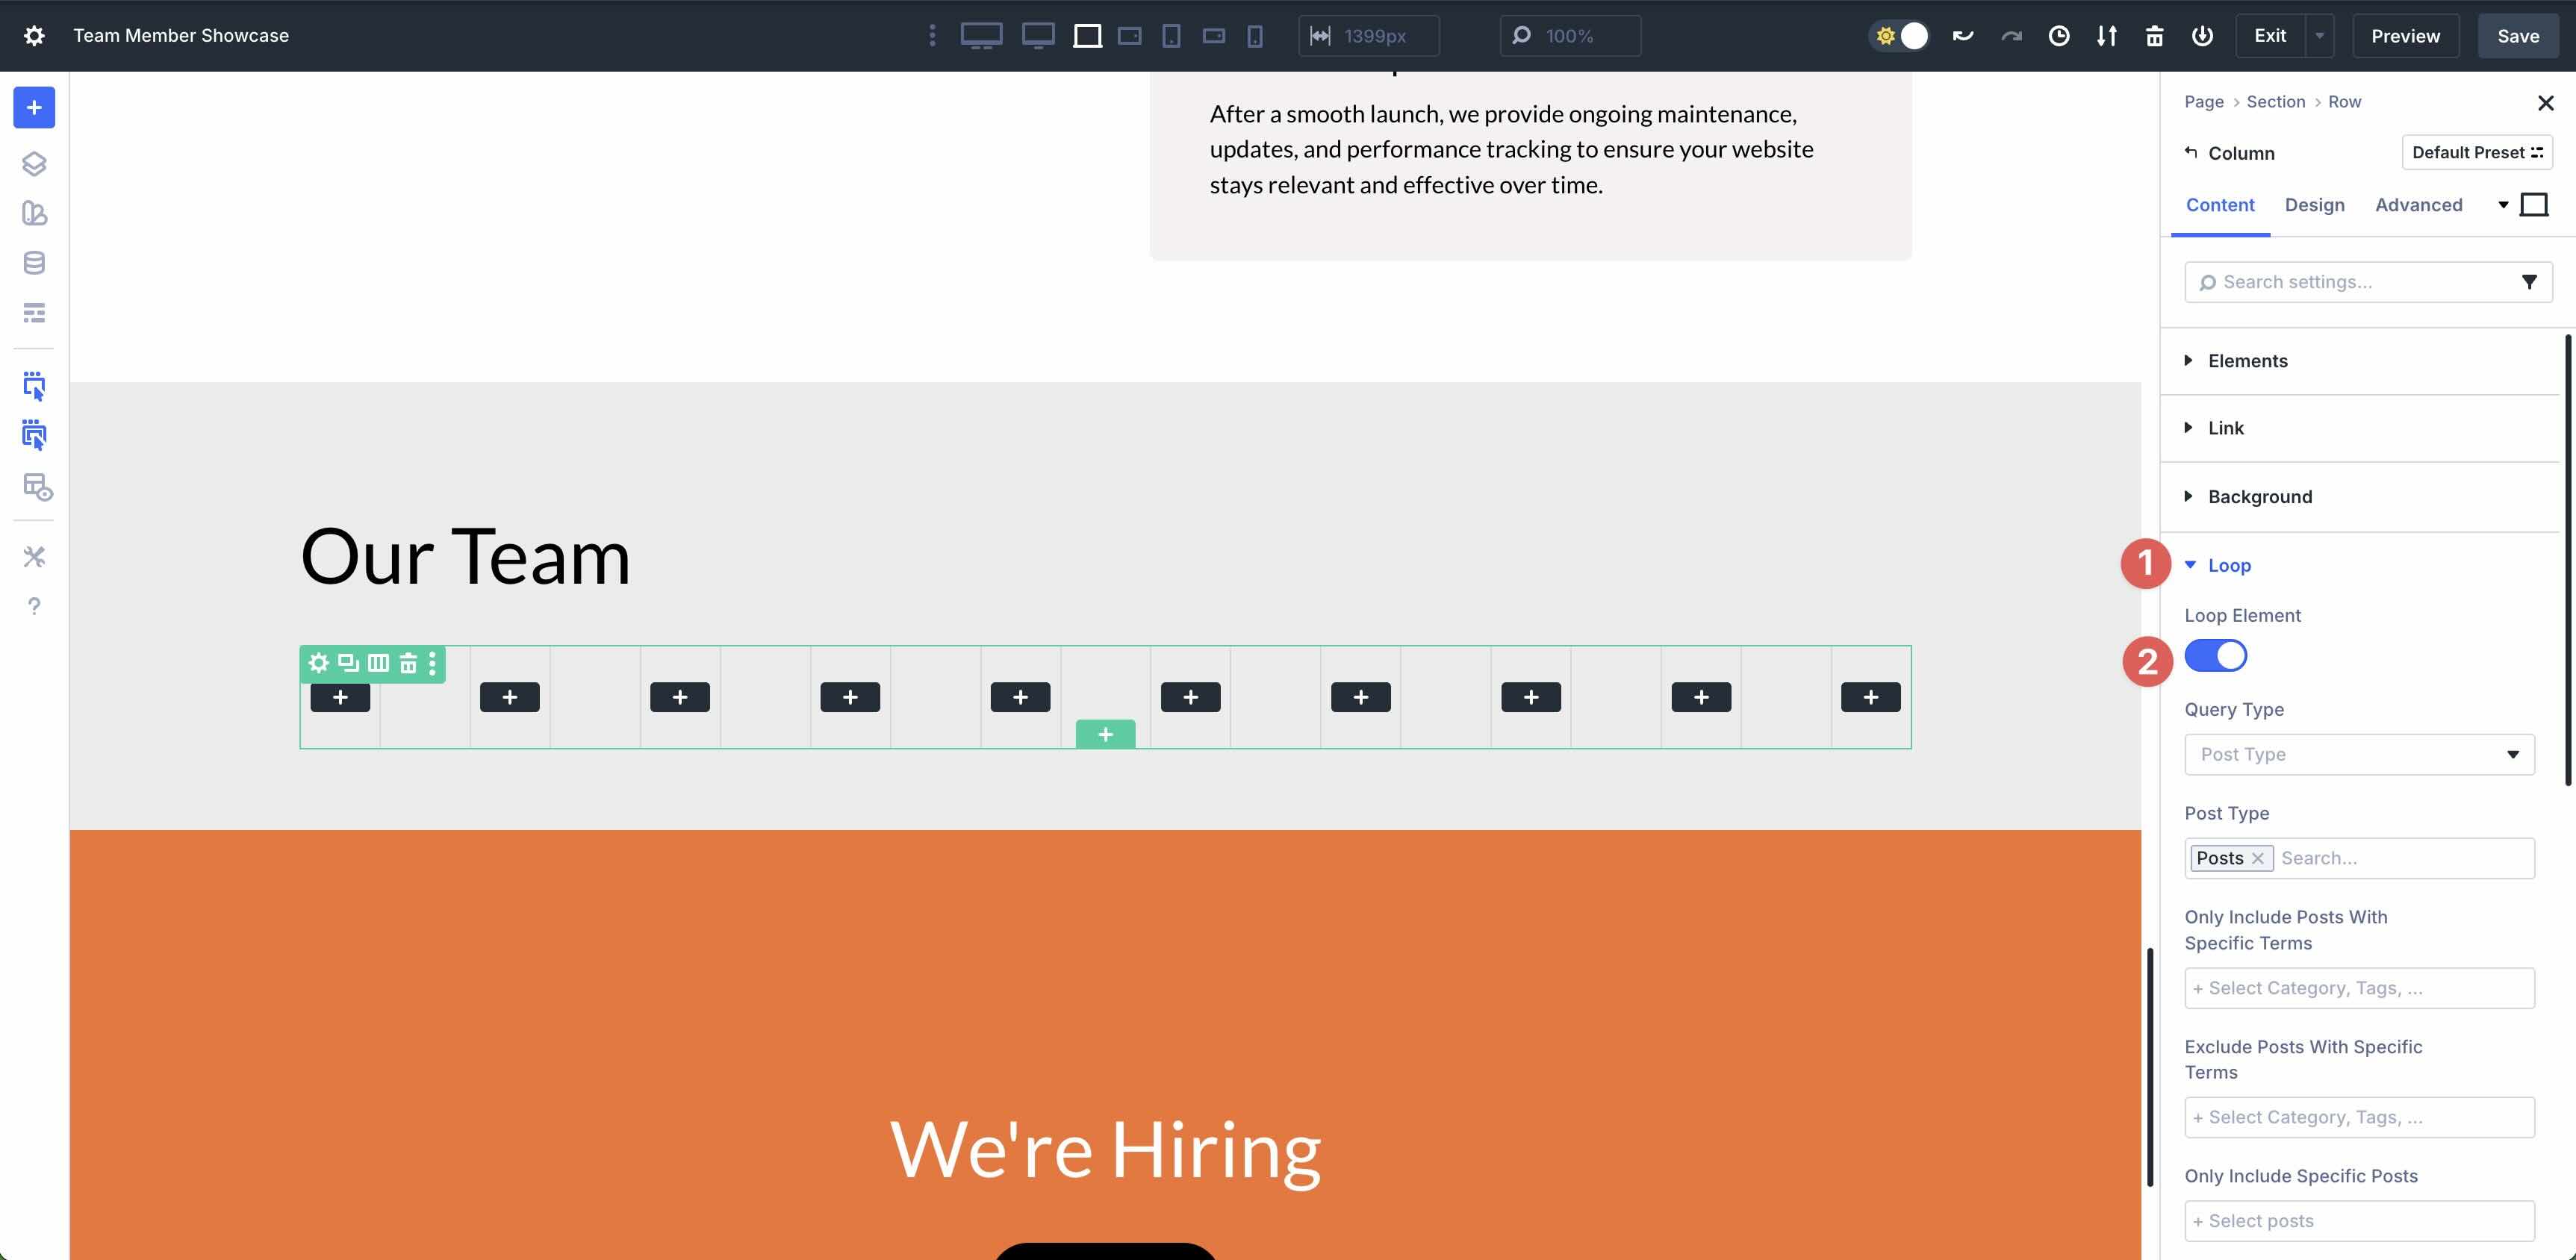
Keep Publish Kind determined on inside the Query Kind field. Inside the Publish Kind field, select the Personnel Contributors custom designed submit type.
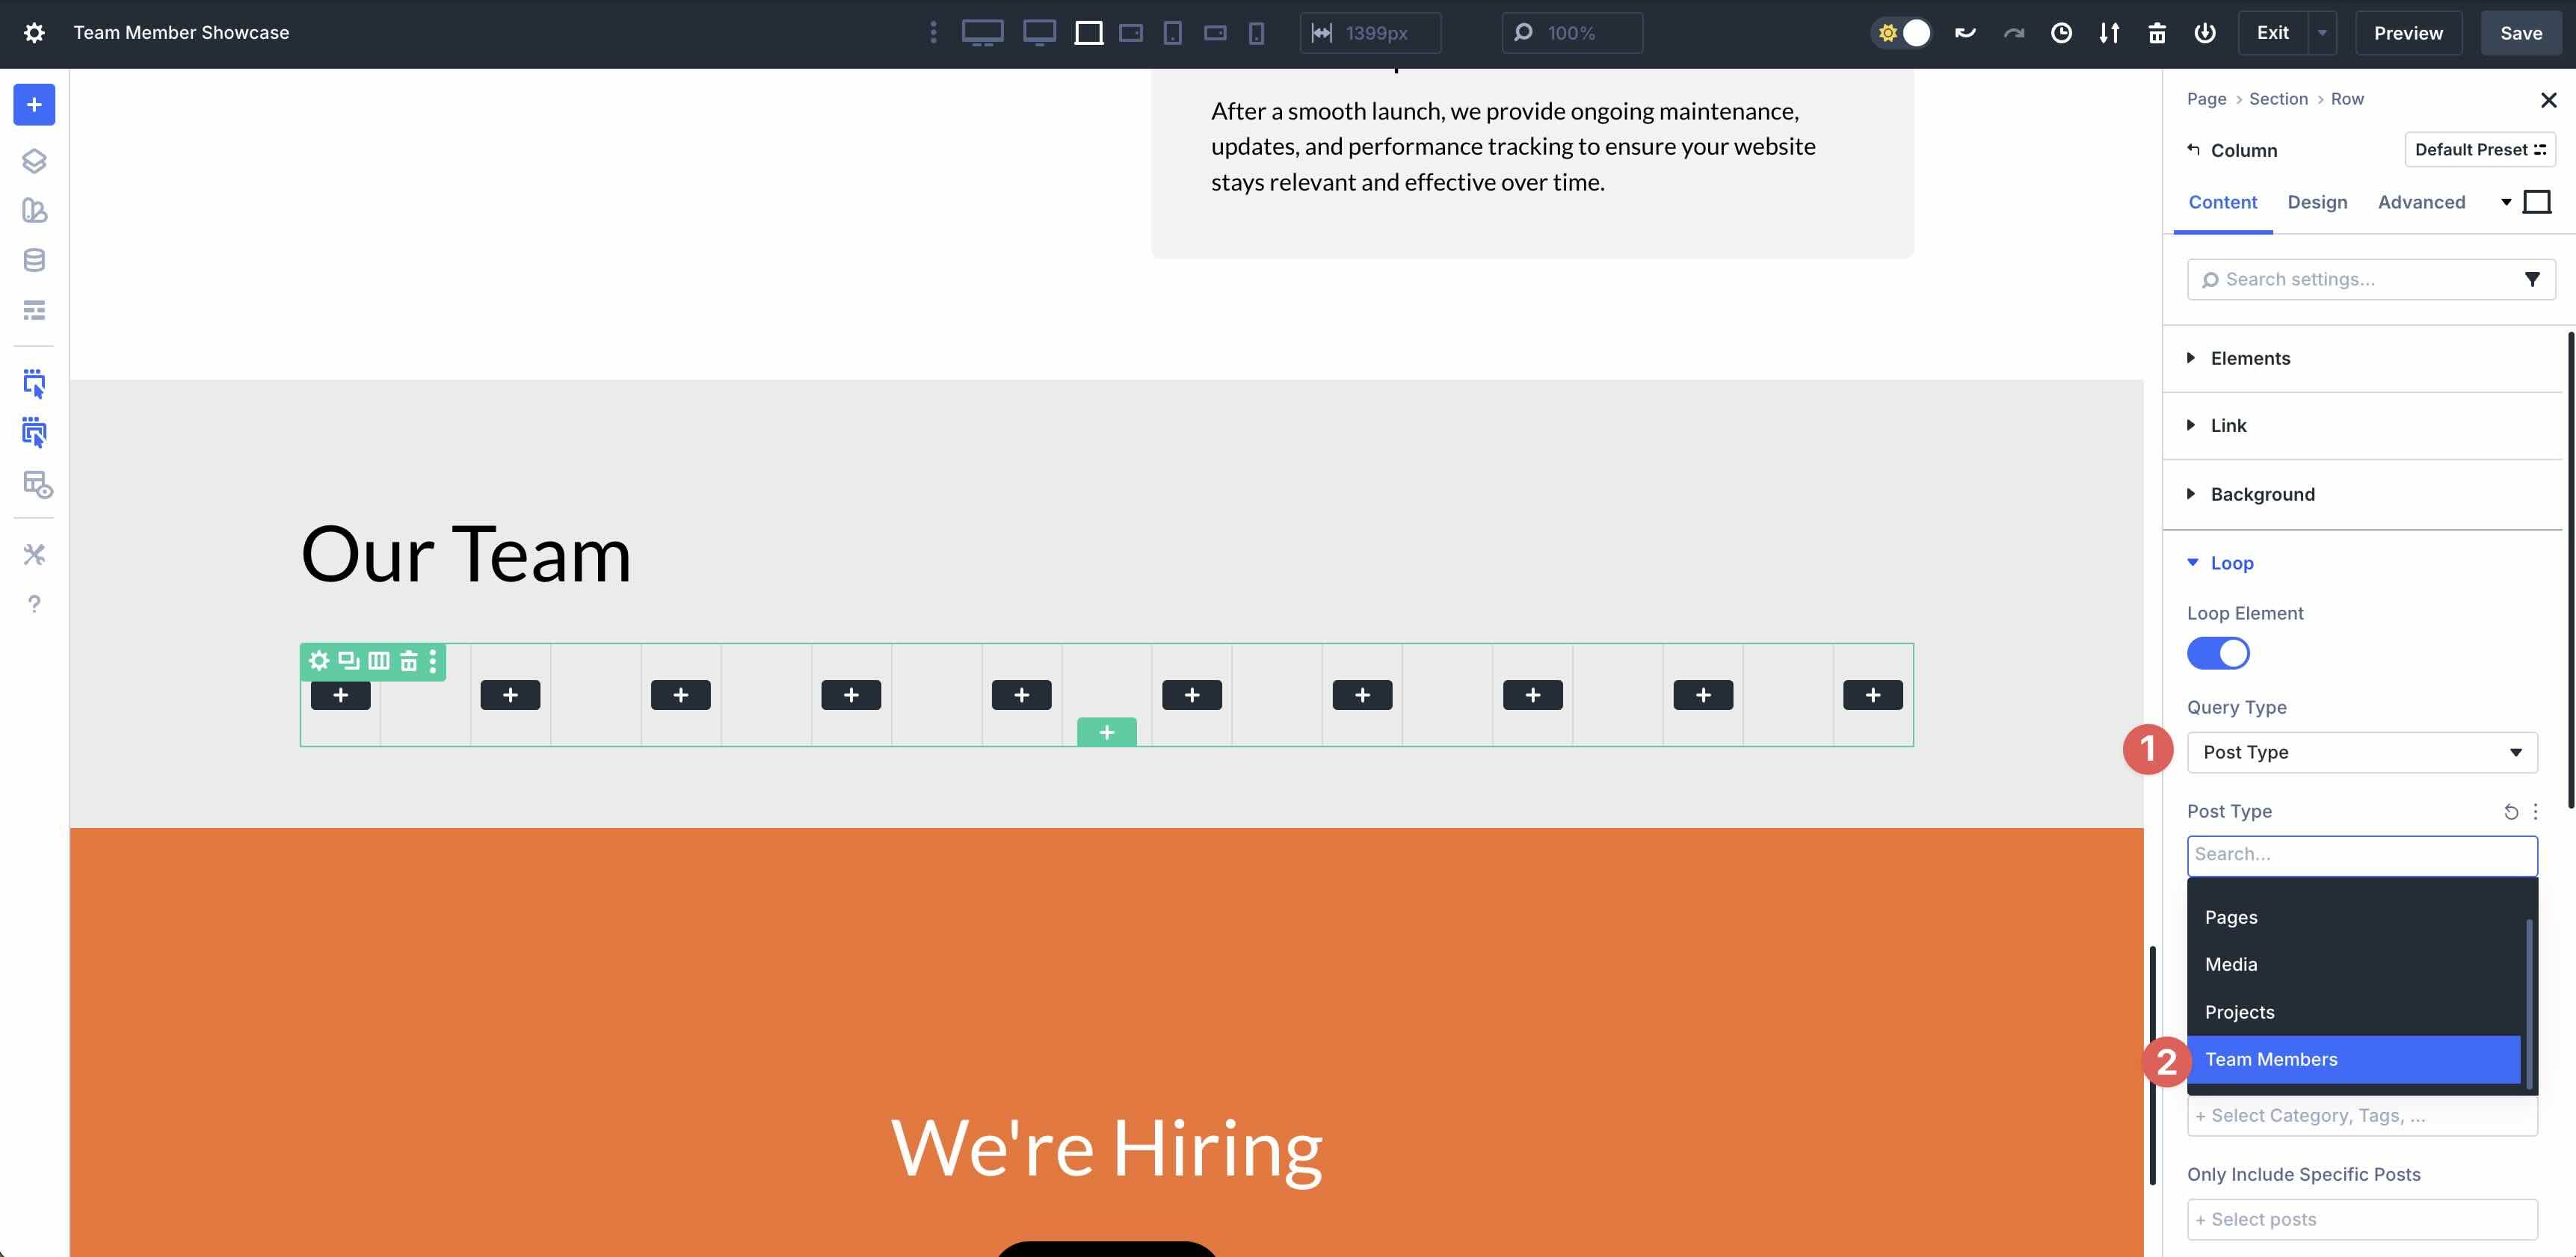
Inside the Most effective Include Posts With Specific Words field, select Personnel Contributors.
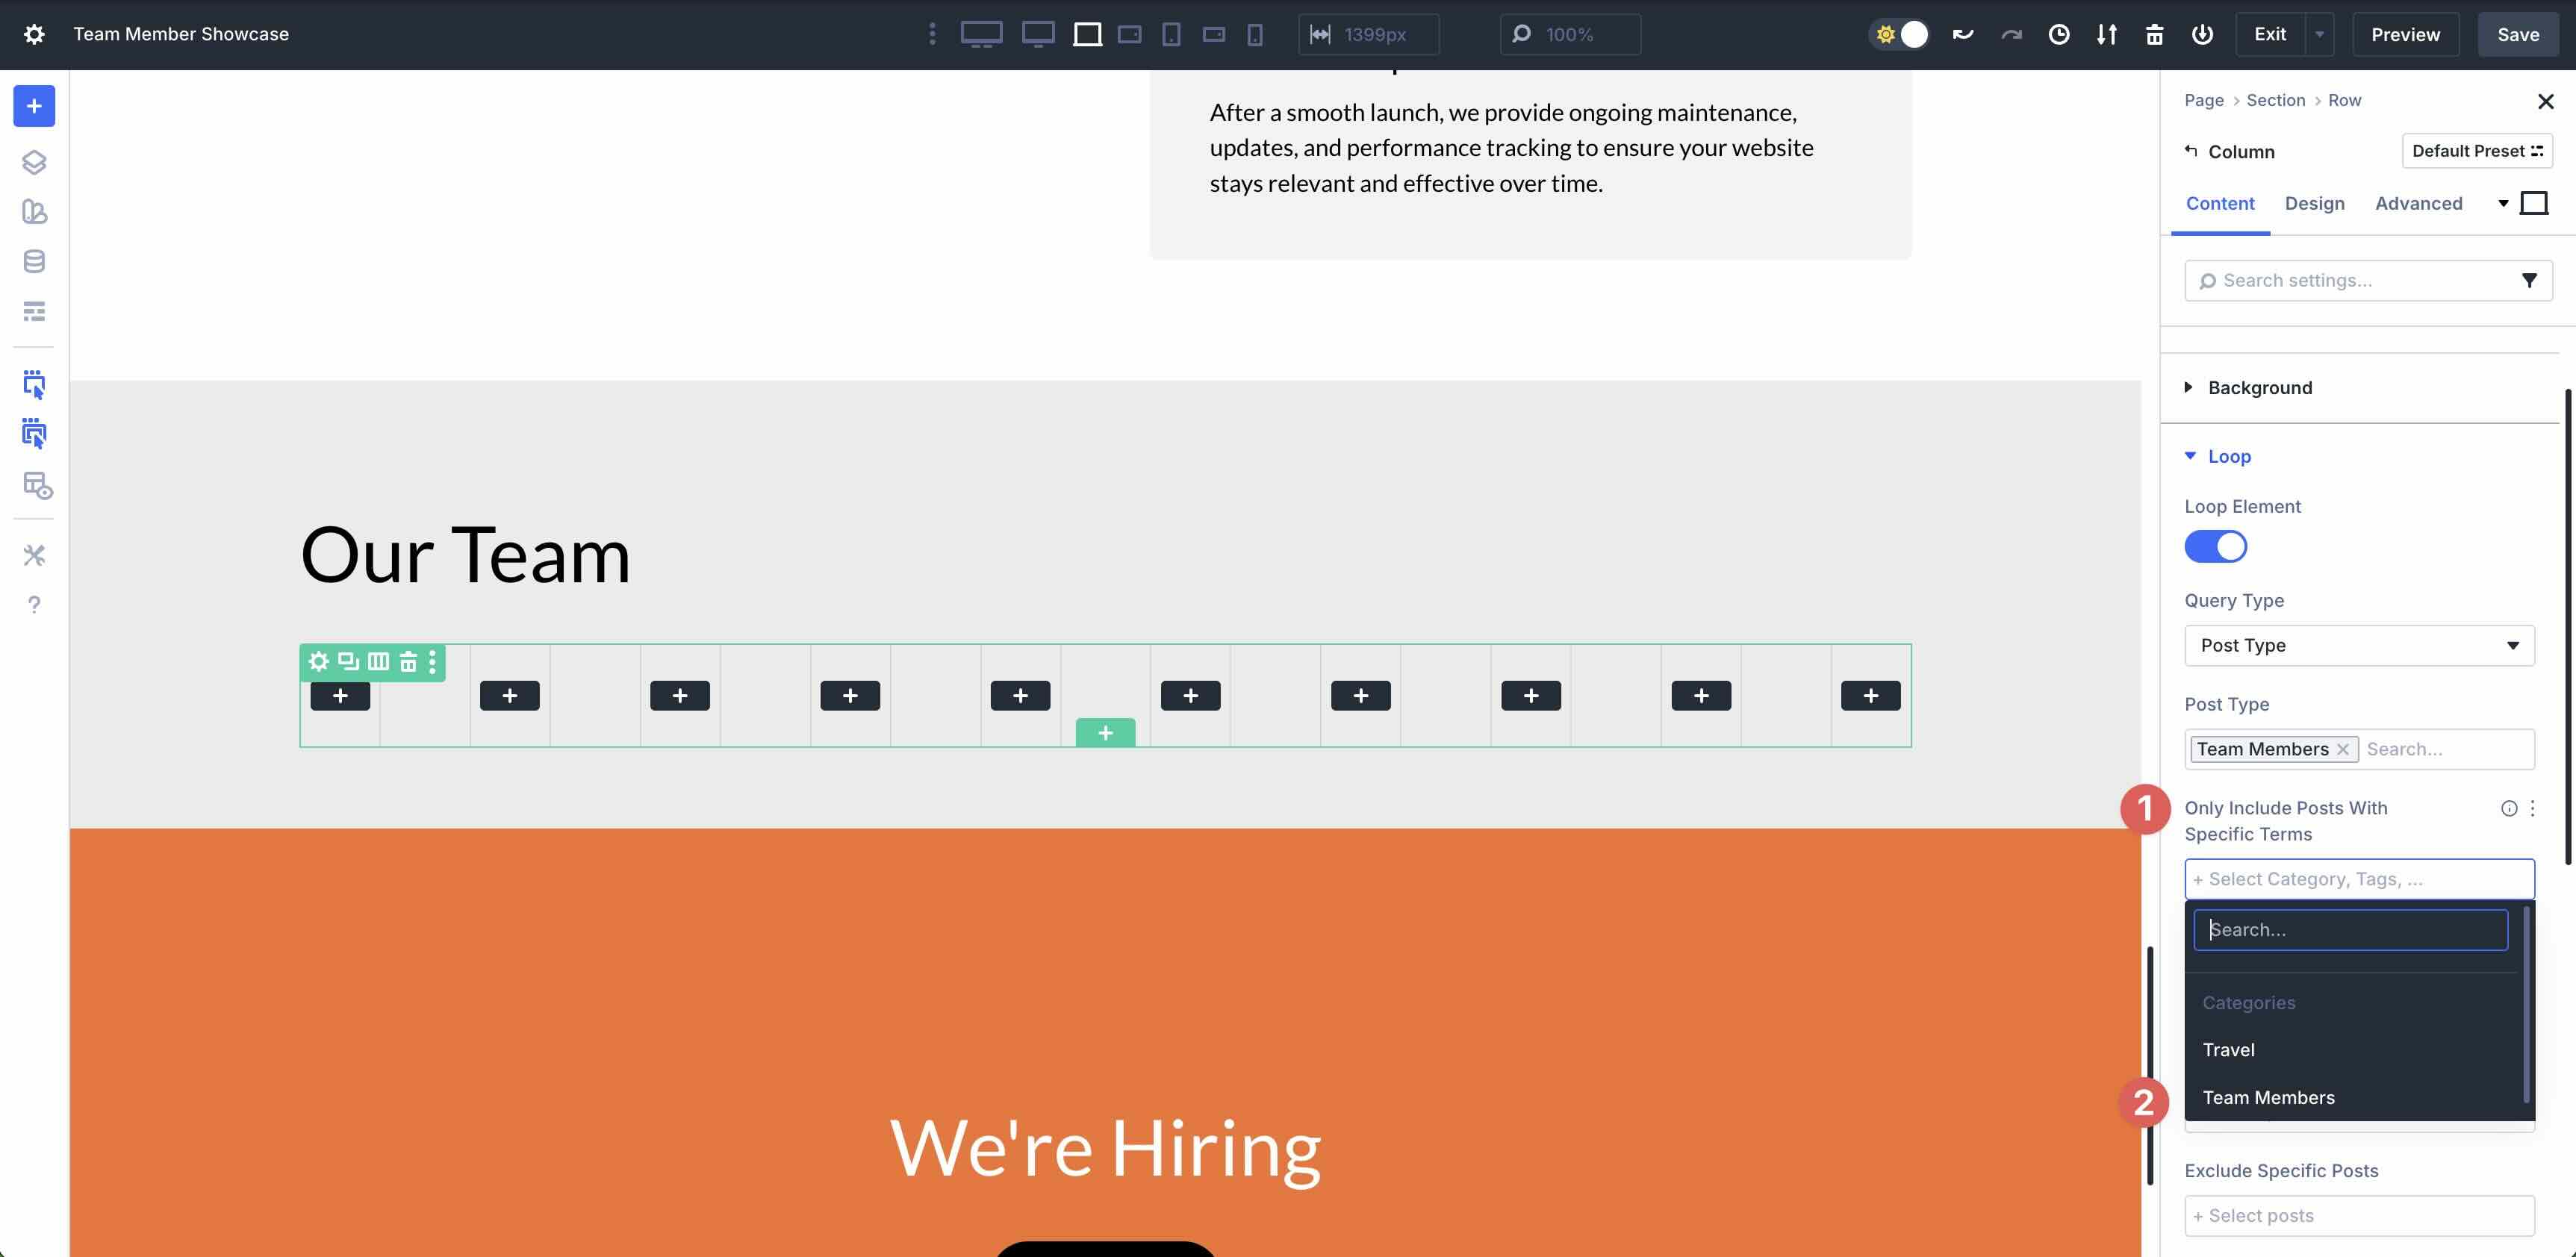
For the Posts Consistent with Internet web page field, enter 12. This will likely most probably display all 12 posts on the Loop.

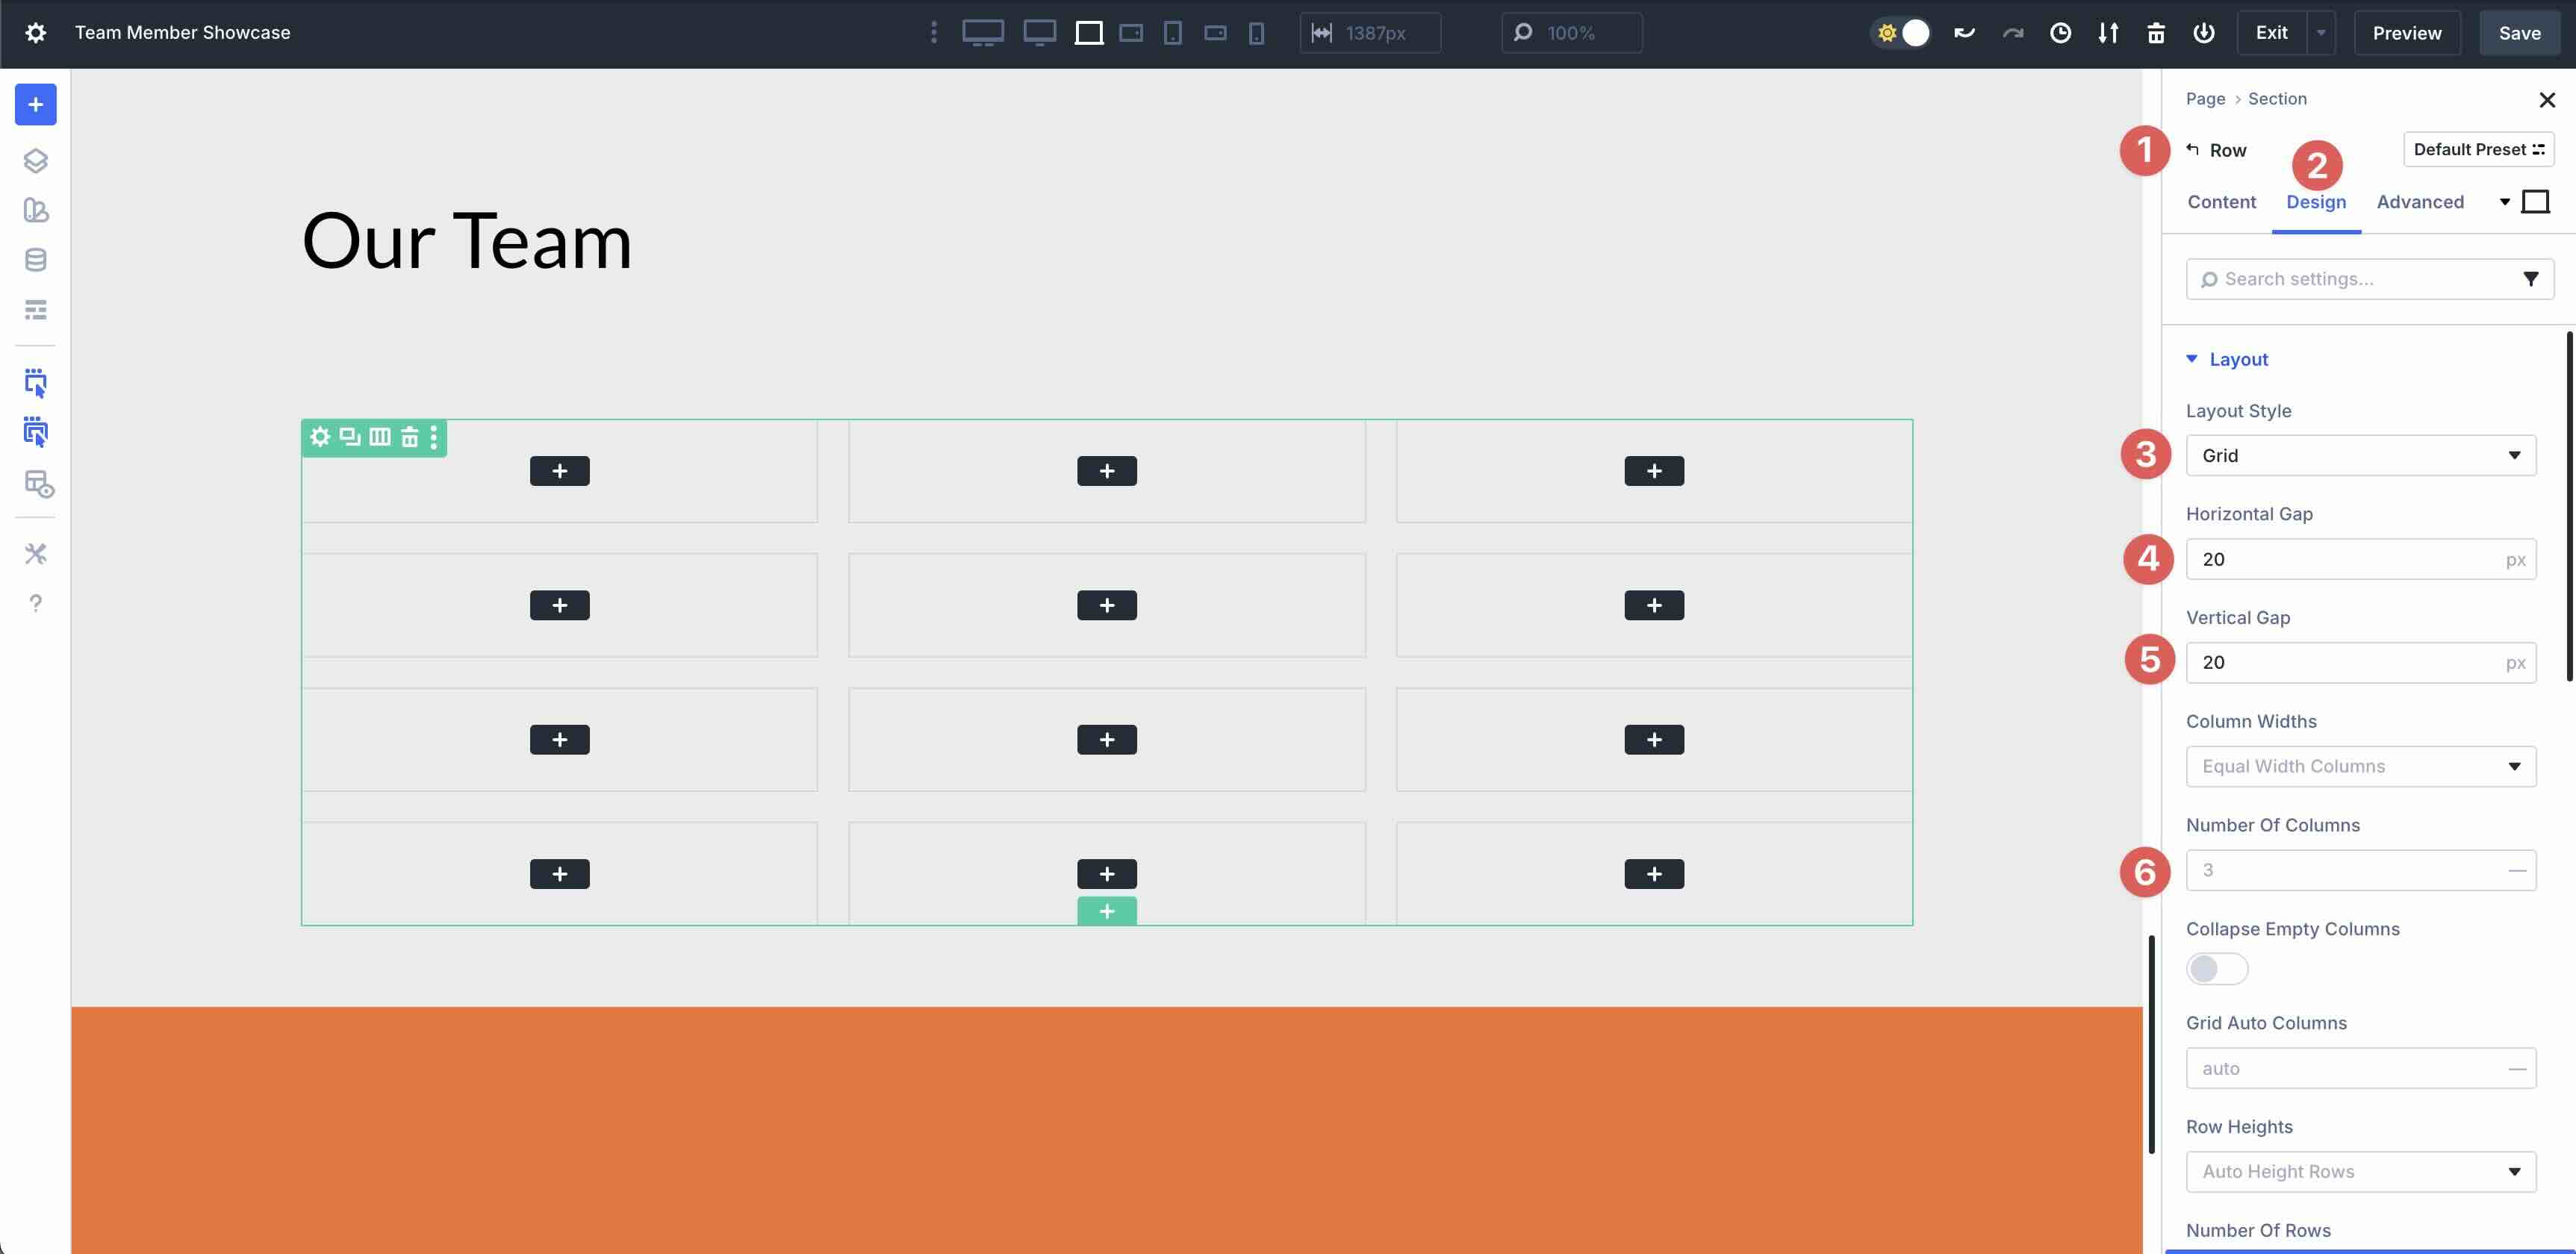
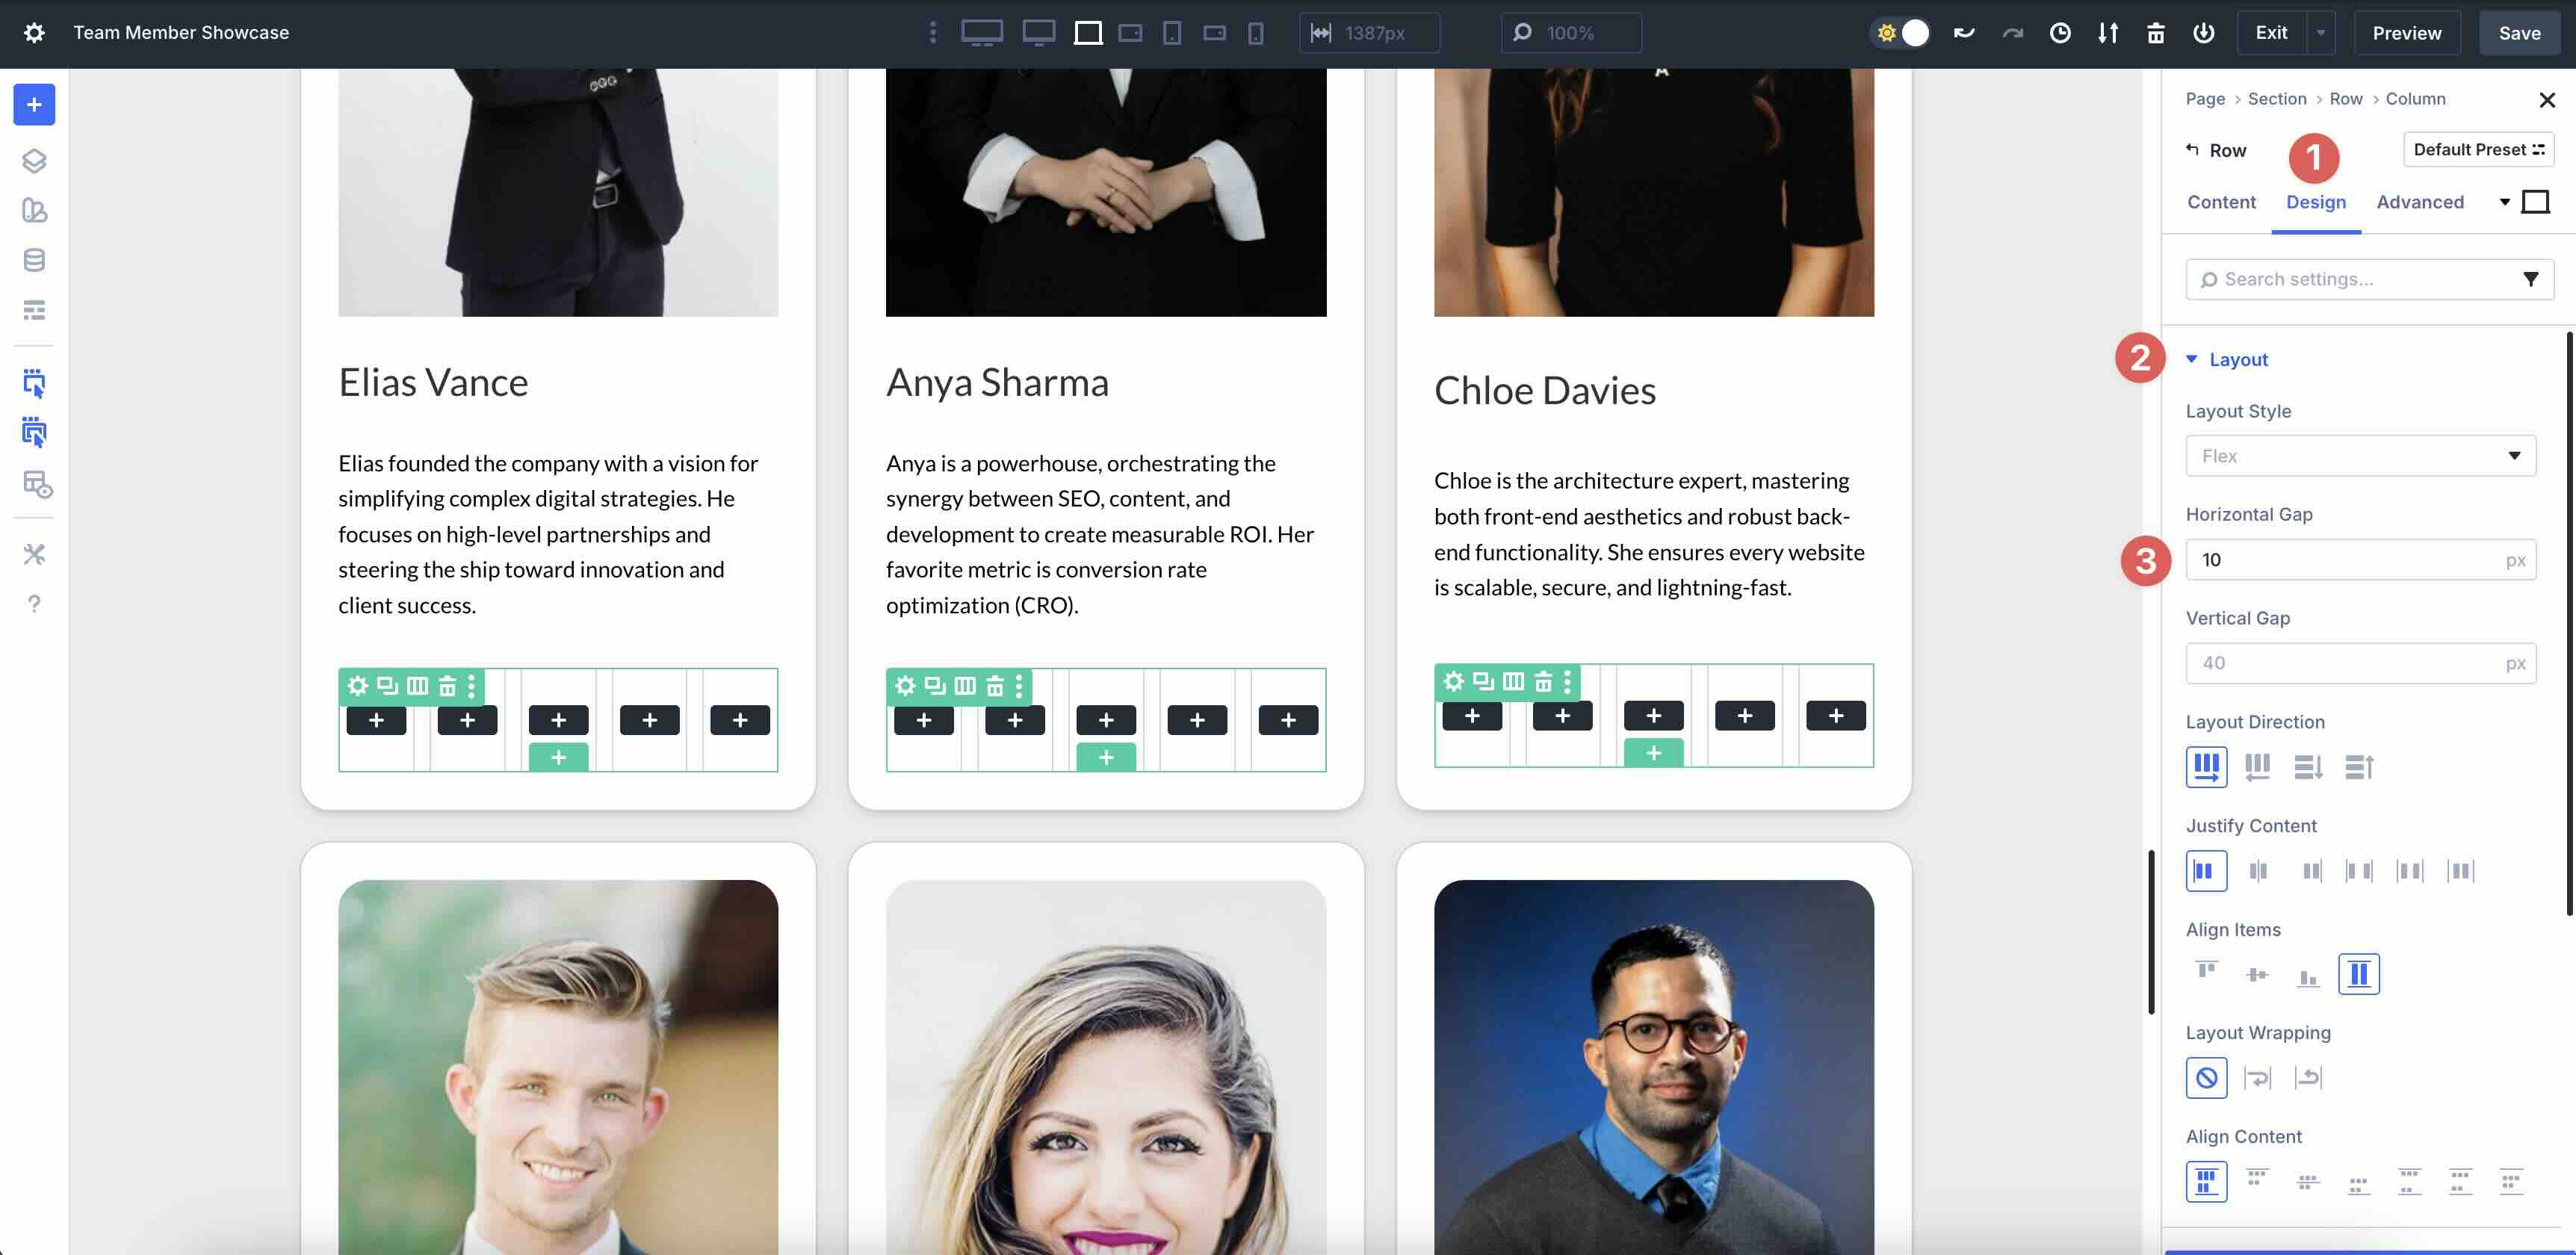
Switch to the Design tab inside the Row settings. Transfer the Structure Style to Grid and assign a 20px Vertical and Horizontal Hollow to the Row. Set the Number of Columns to 3.
Step 3: Style Column
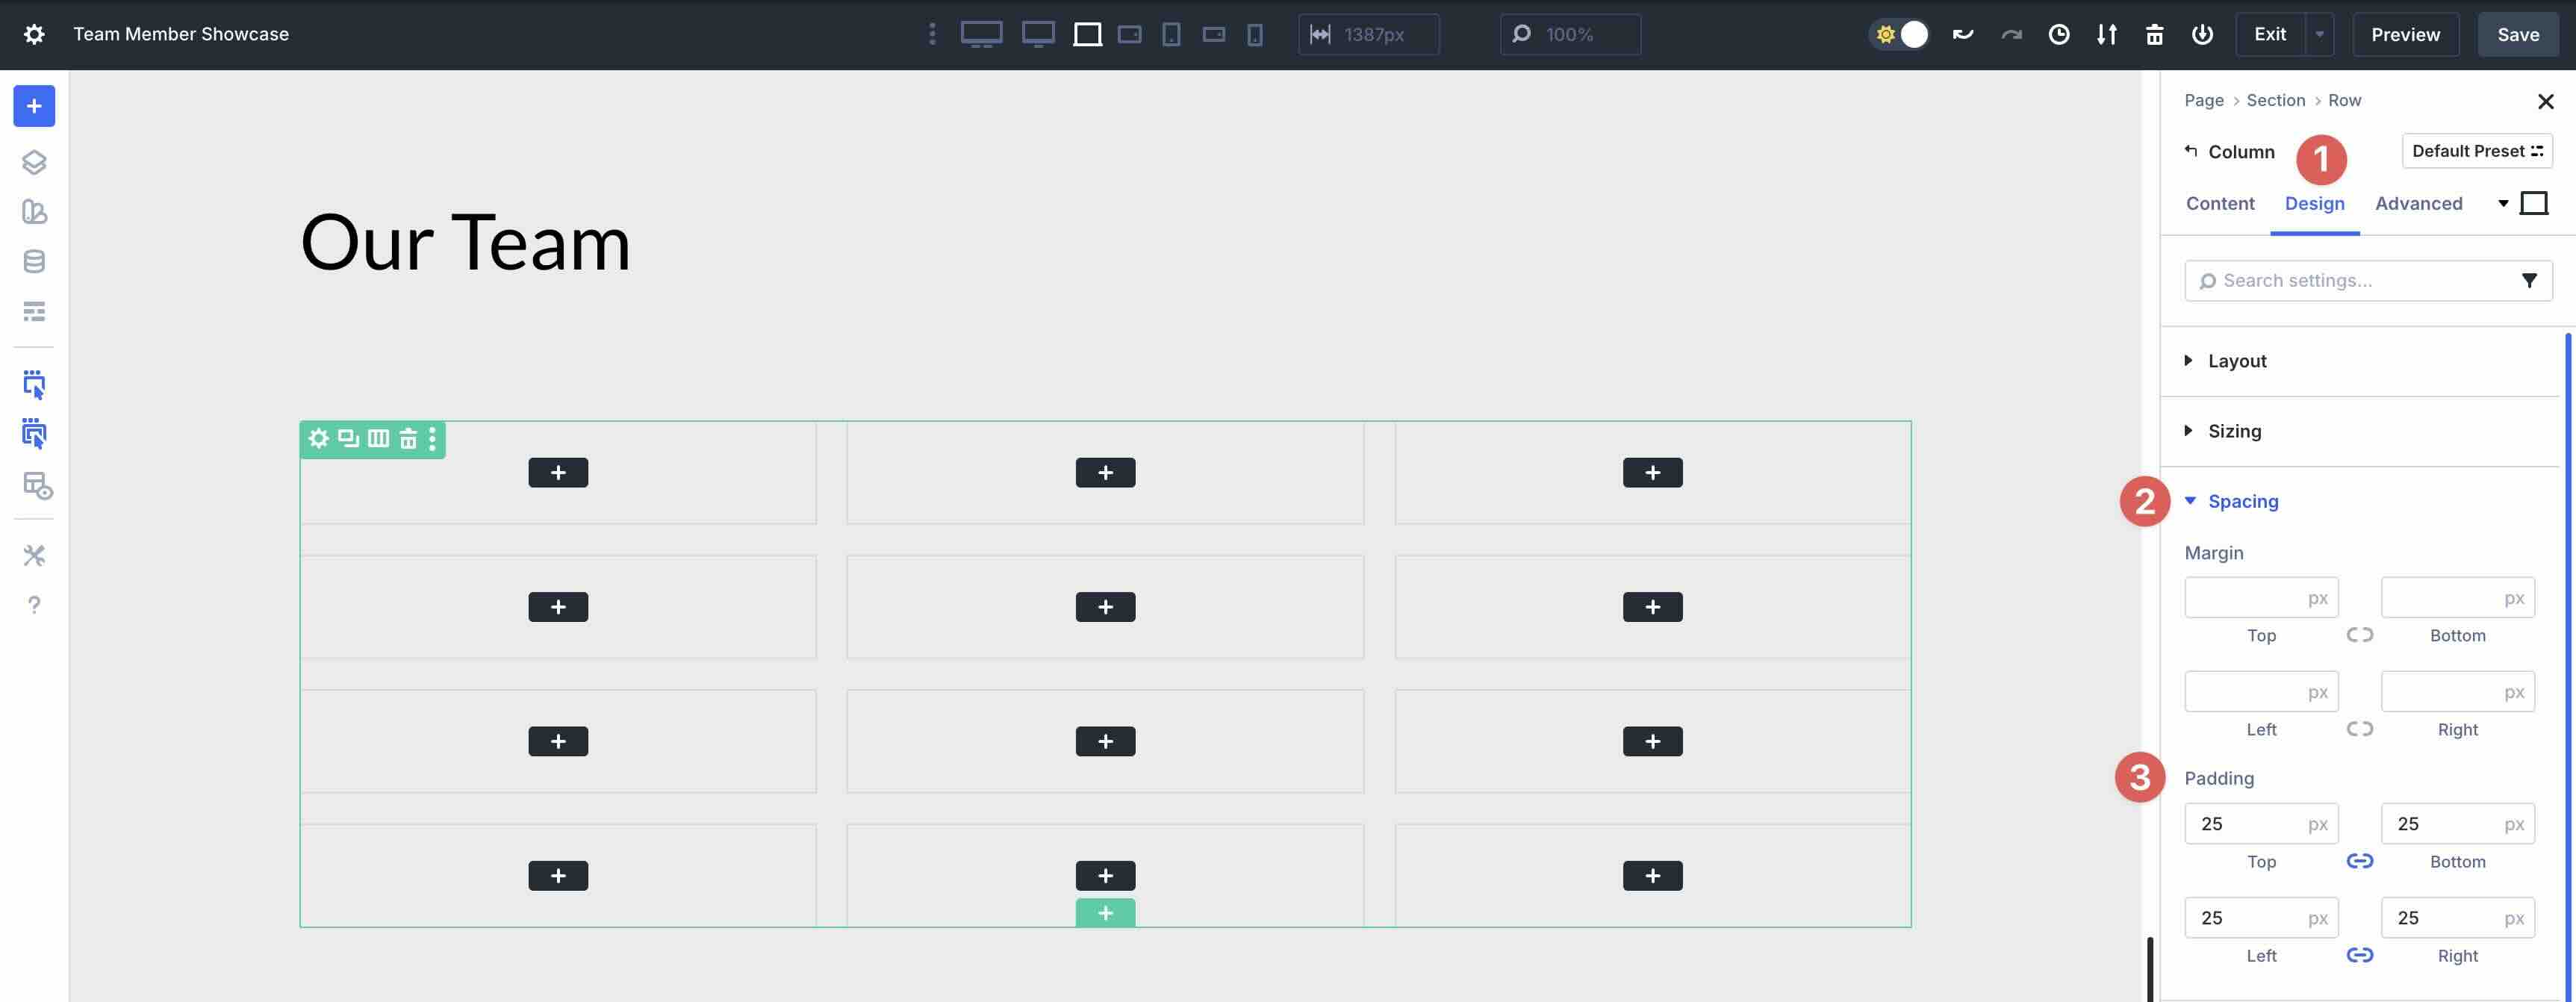
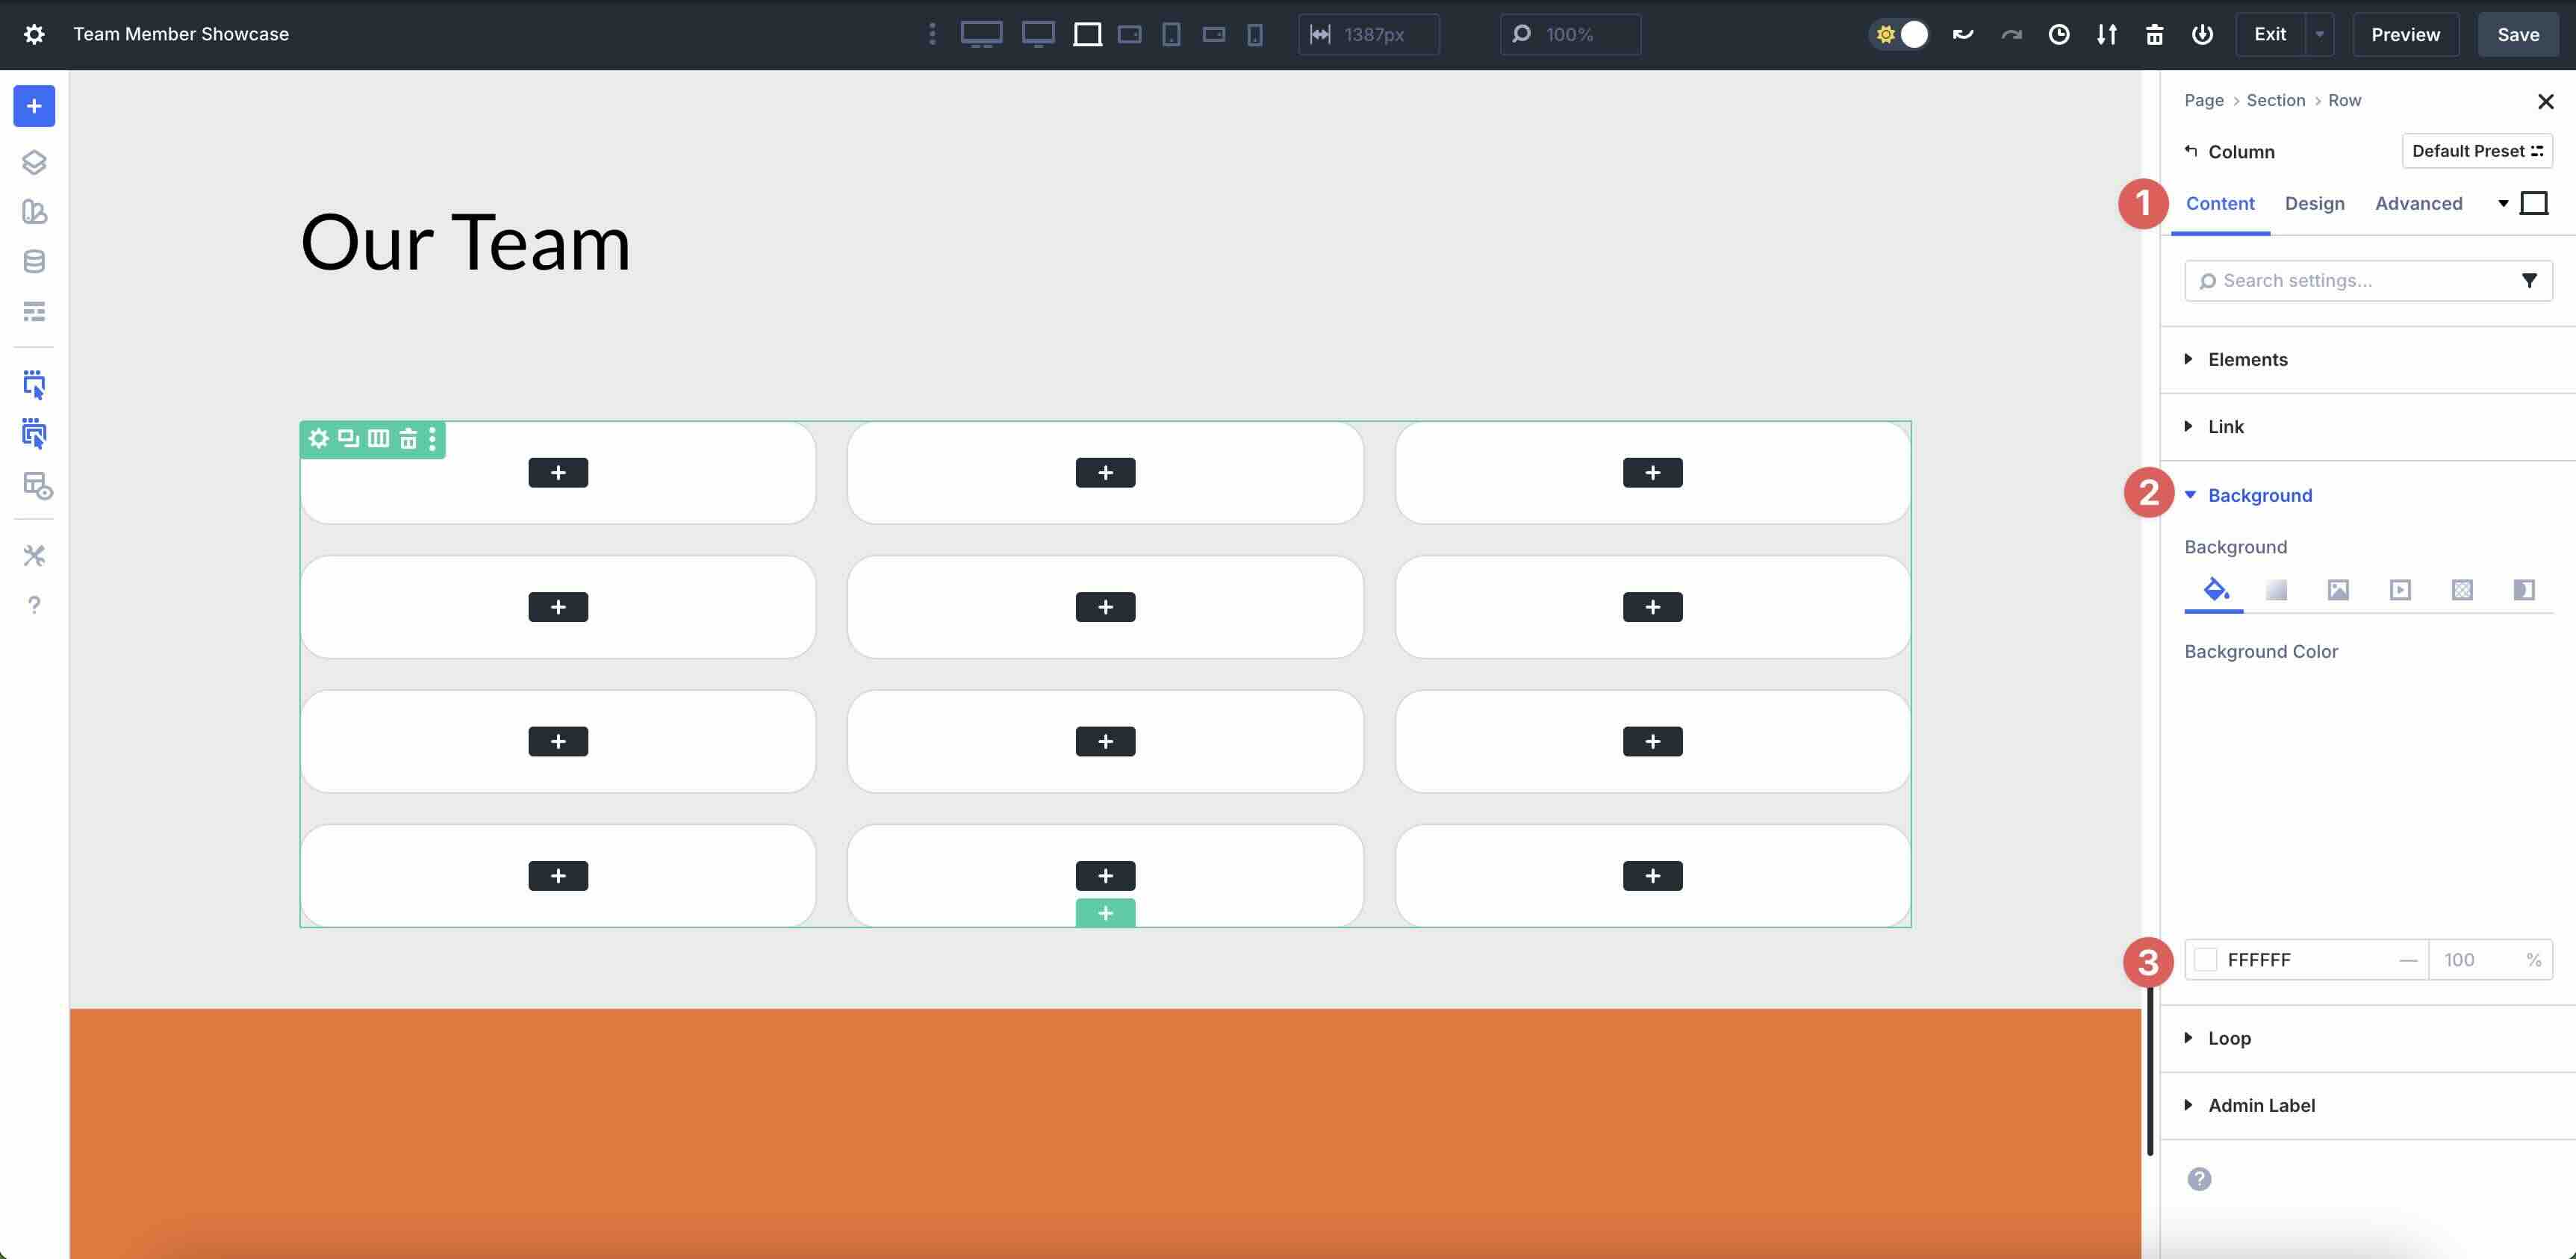
With our Loop in place, we will be able to style the Column that may house the content material subject matter. Click on on into the one Column of the Row. Navigate to the Design tab. Amplify the Spacing menu and add 25px Padding to both sides.
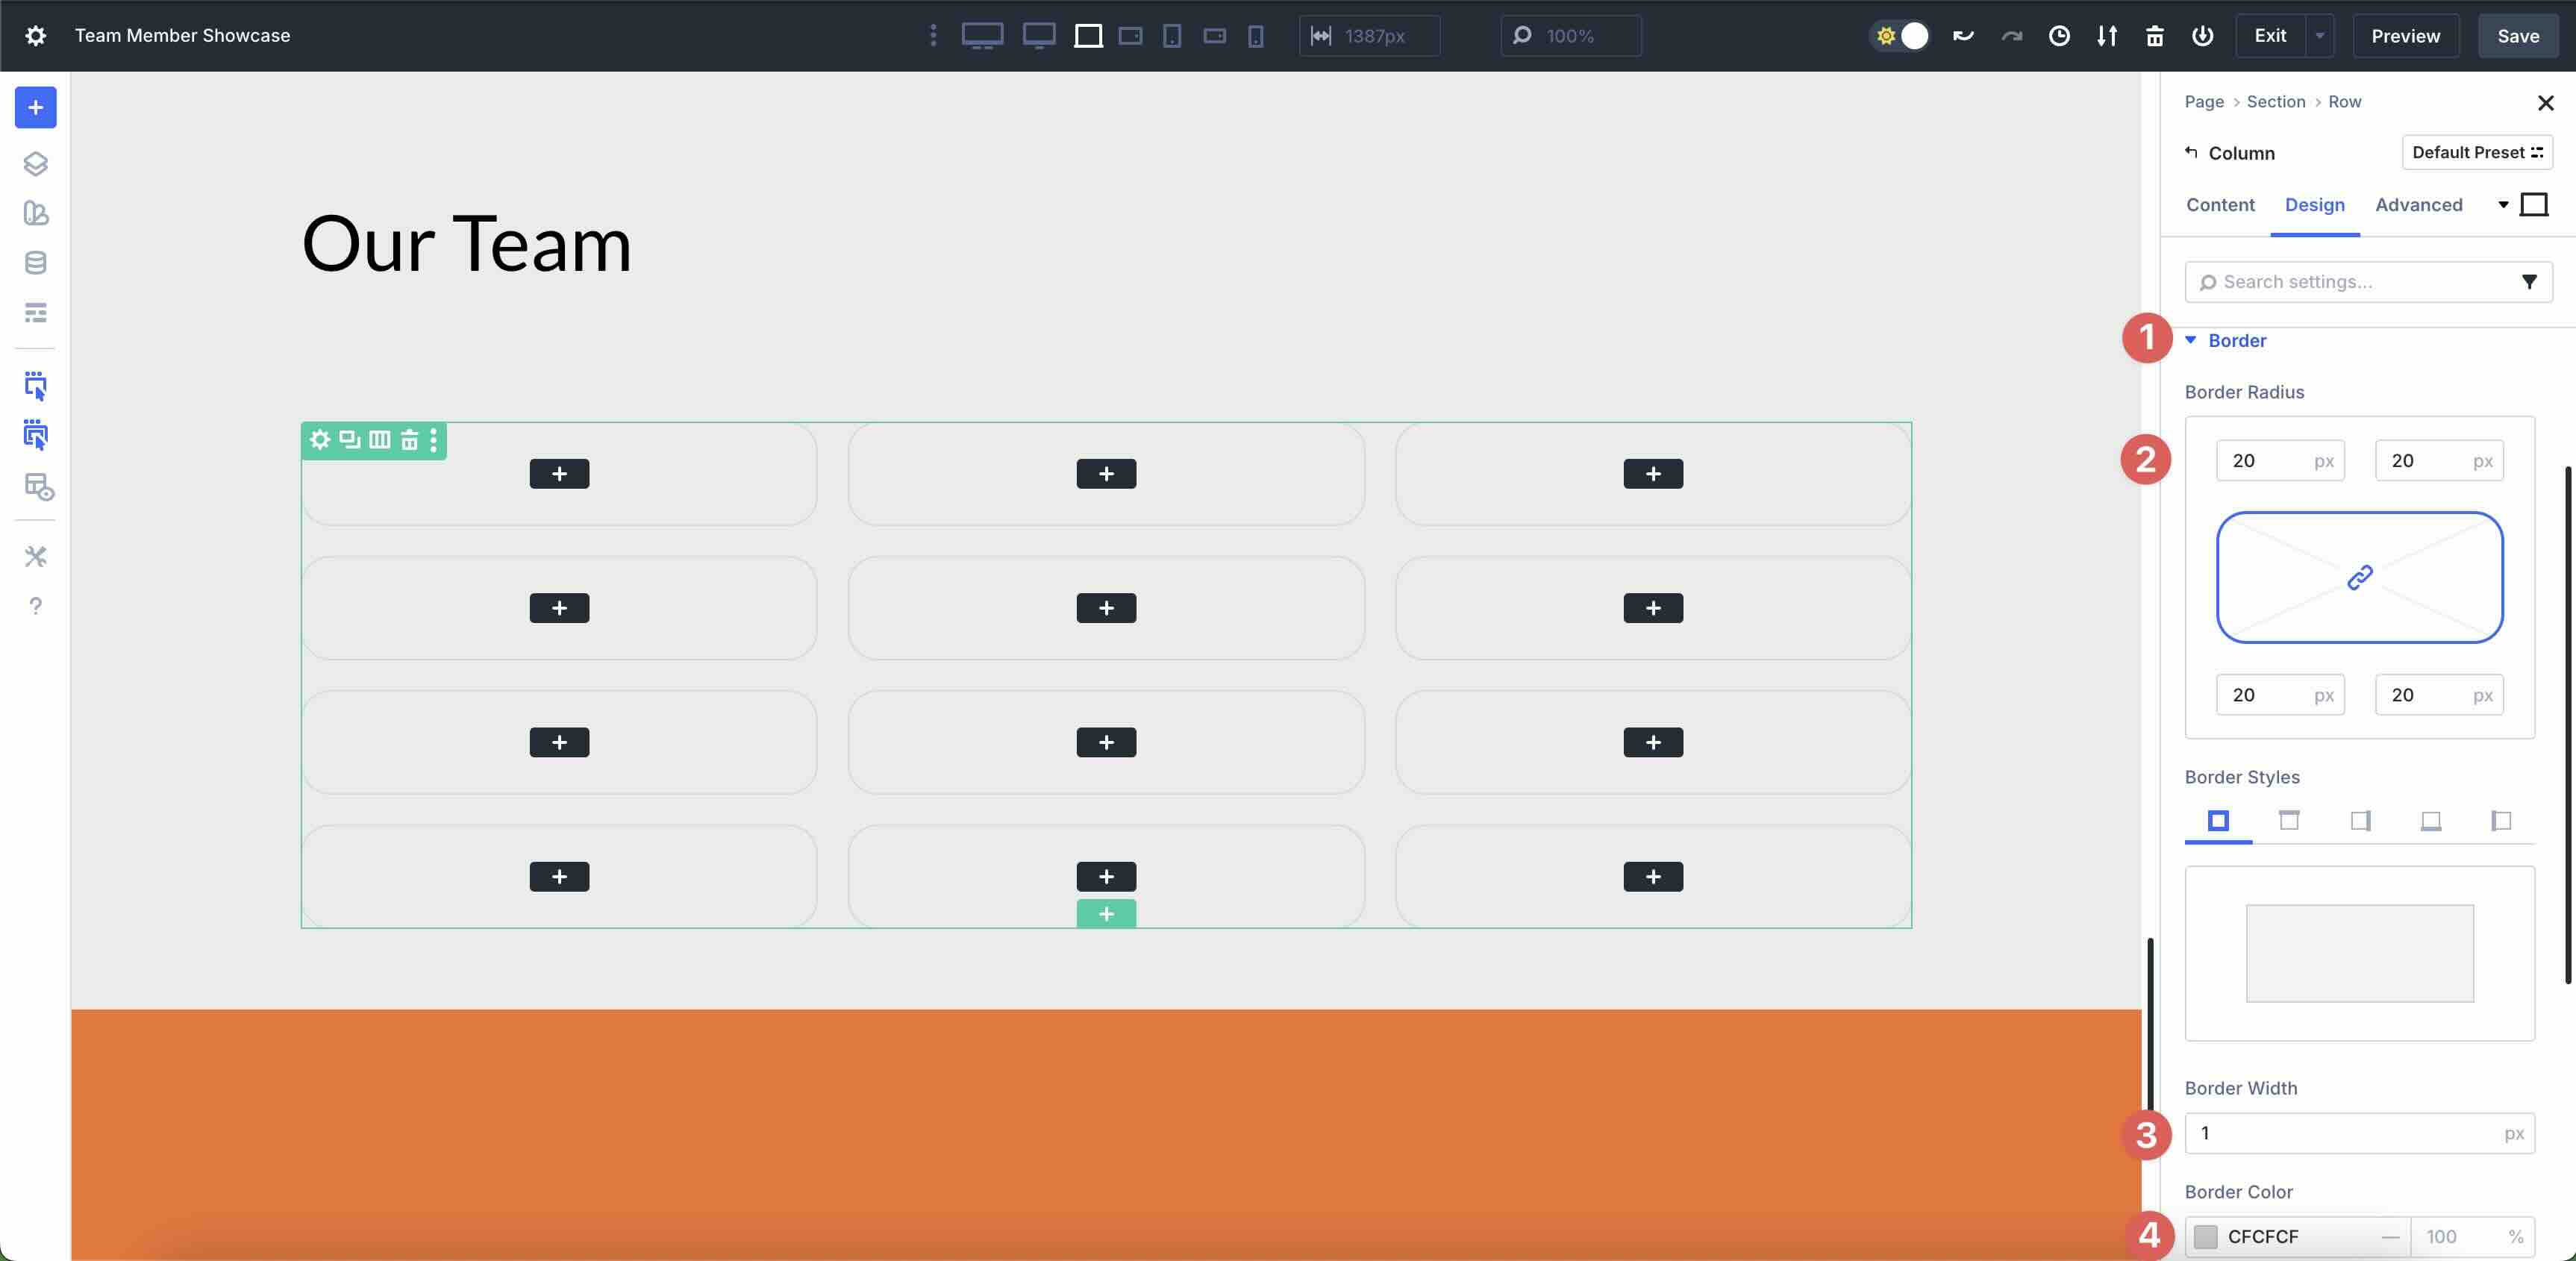
Next, lengthen the Border menu. Add 20px Border Radius to the Column. Underneath the Border Varieties settings, enter 1px Border Width and assign #cfcfcf for the reason that Border Color.
While inside the column settings, navigate once more to the Content material subject matter tab. Amplify the Background menu and assign #ffffff for the reason that Background Color.
Step 4: Add Content material subject matter To Column
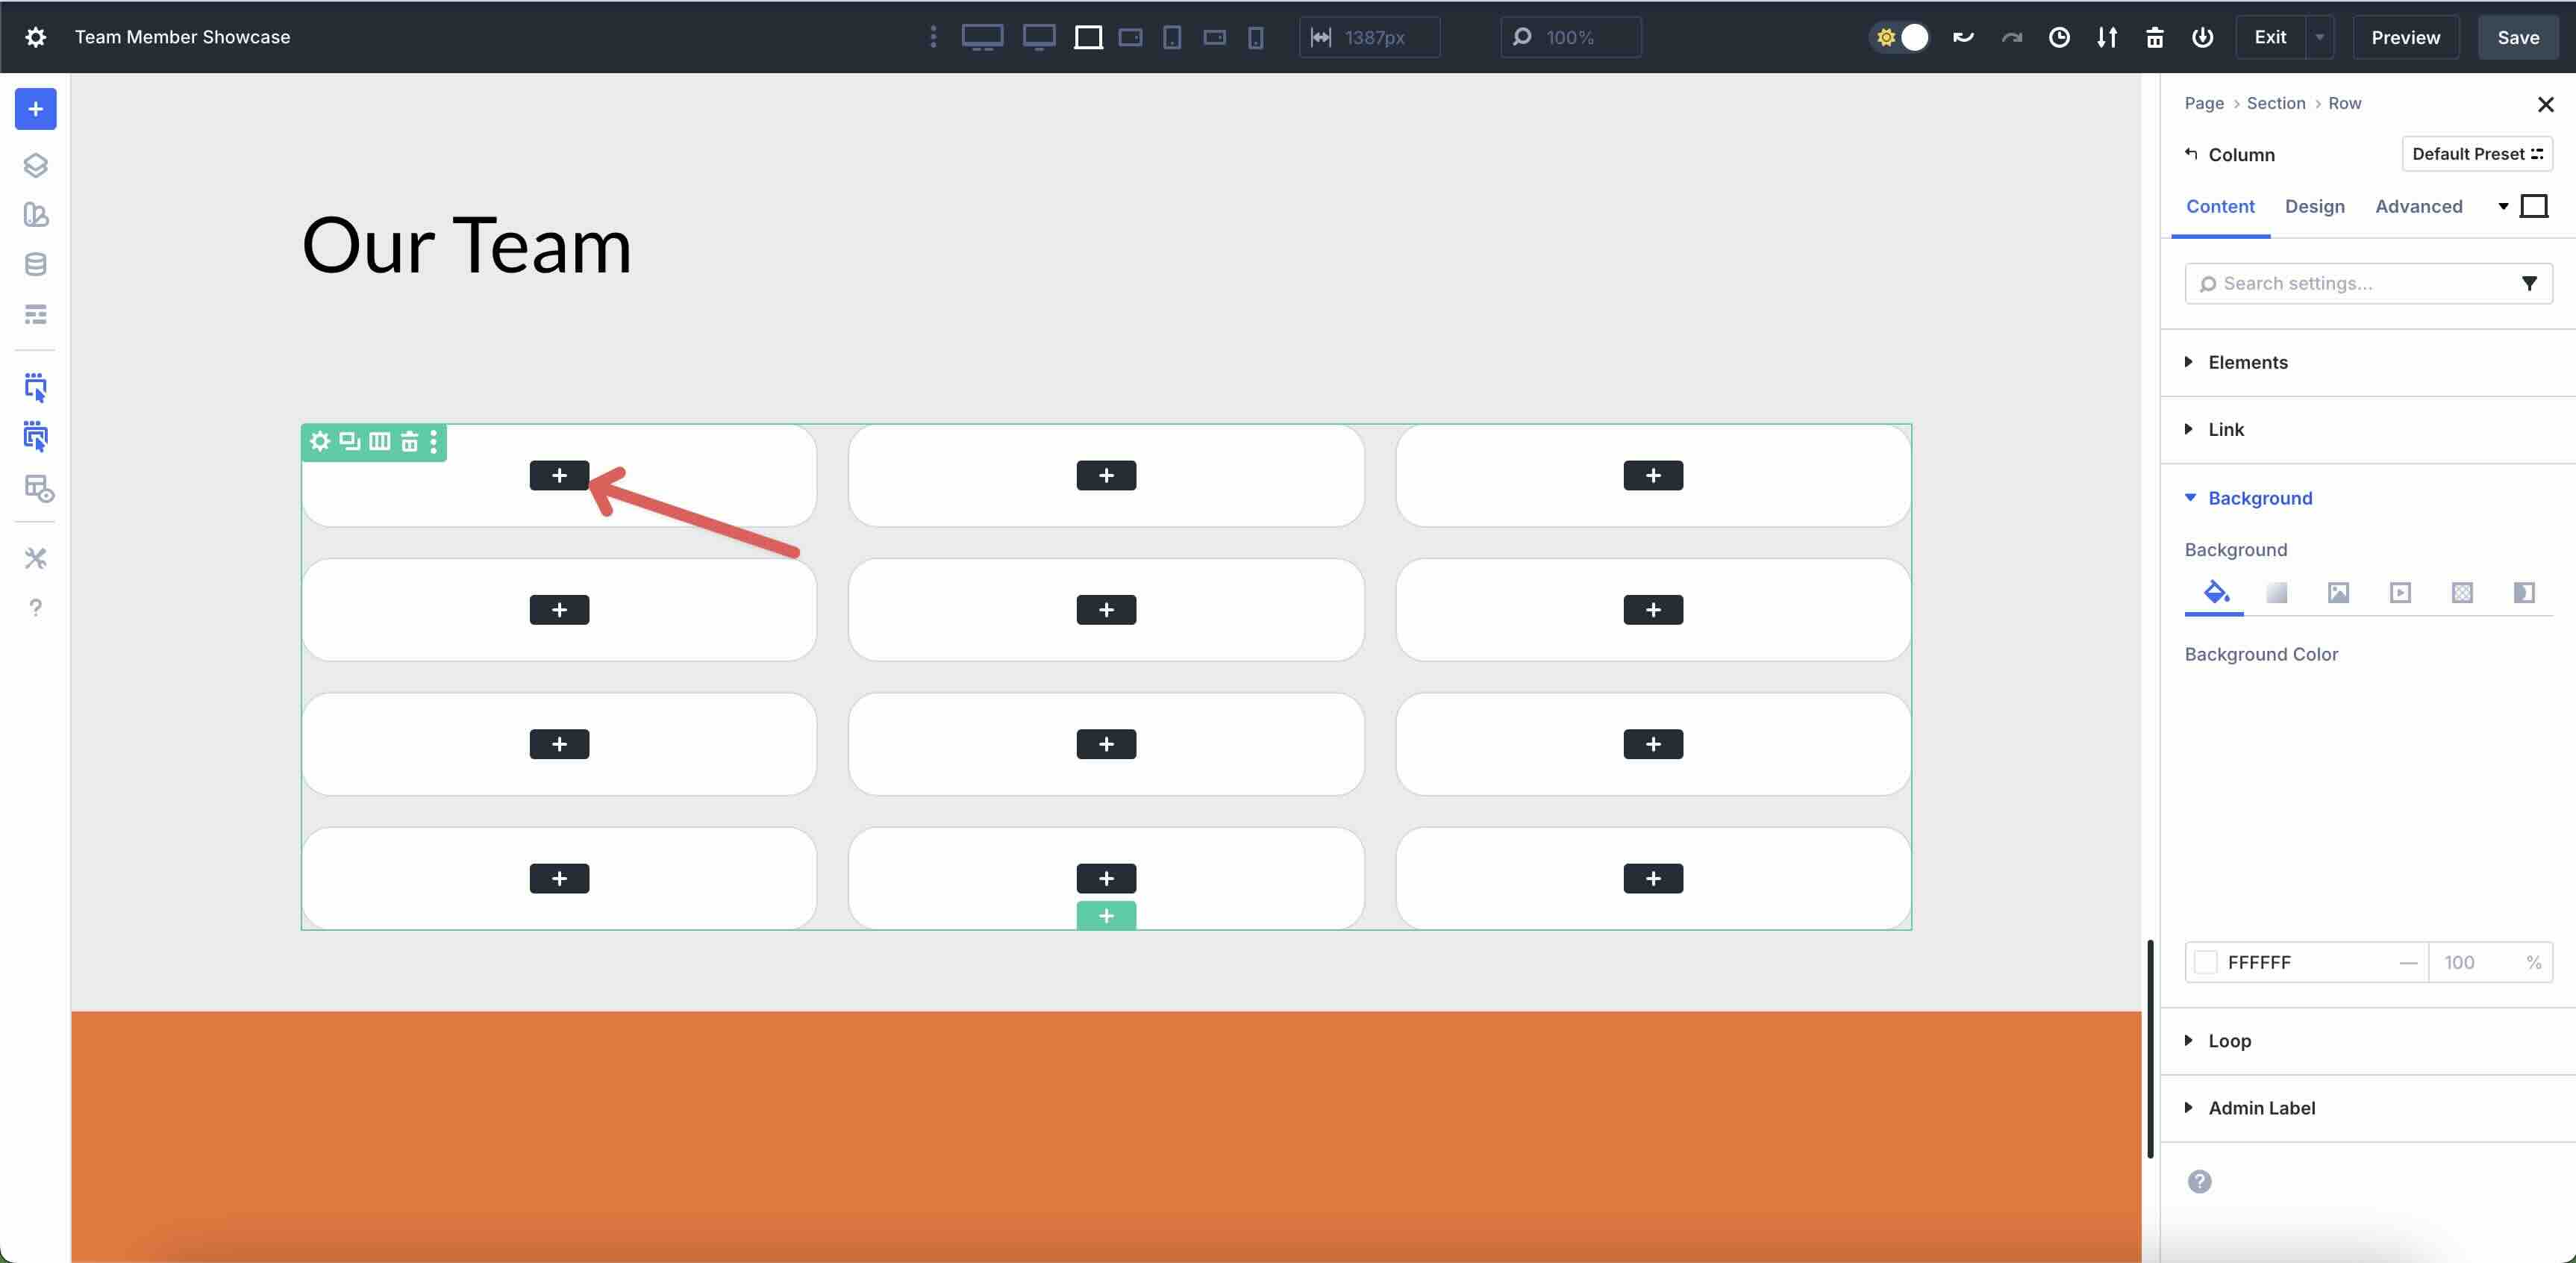
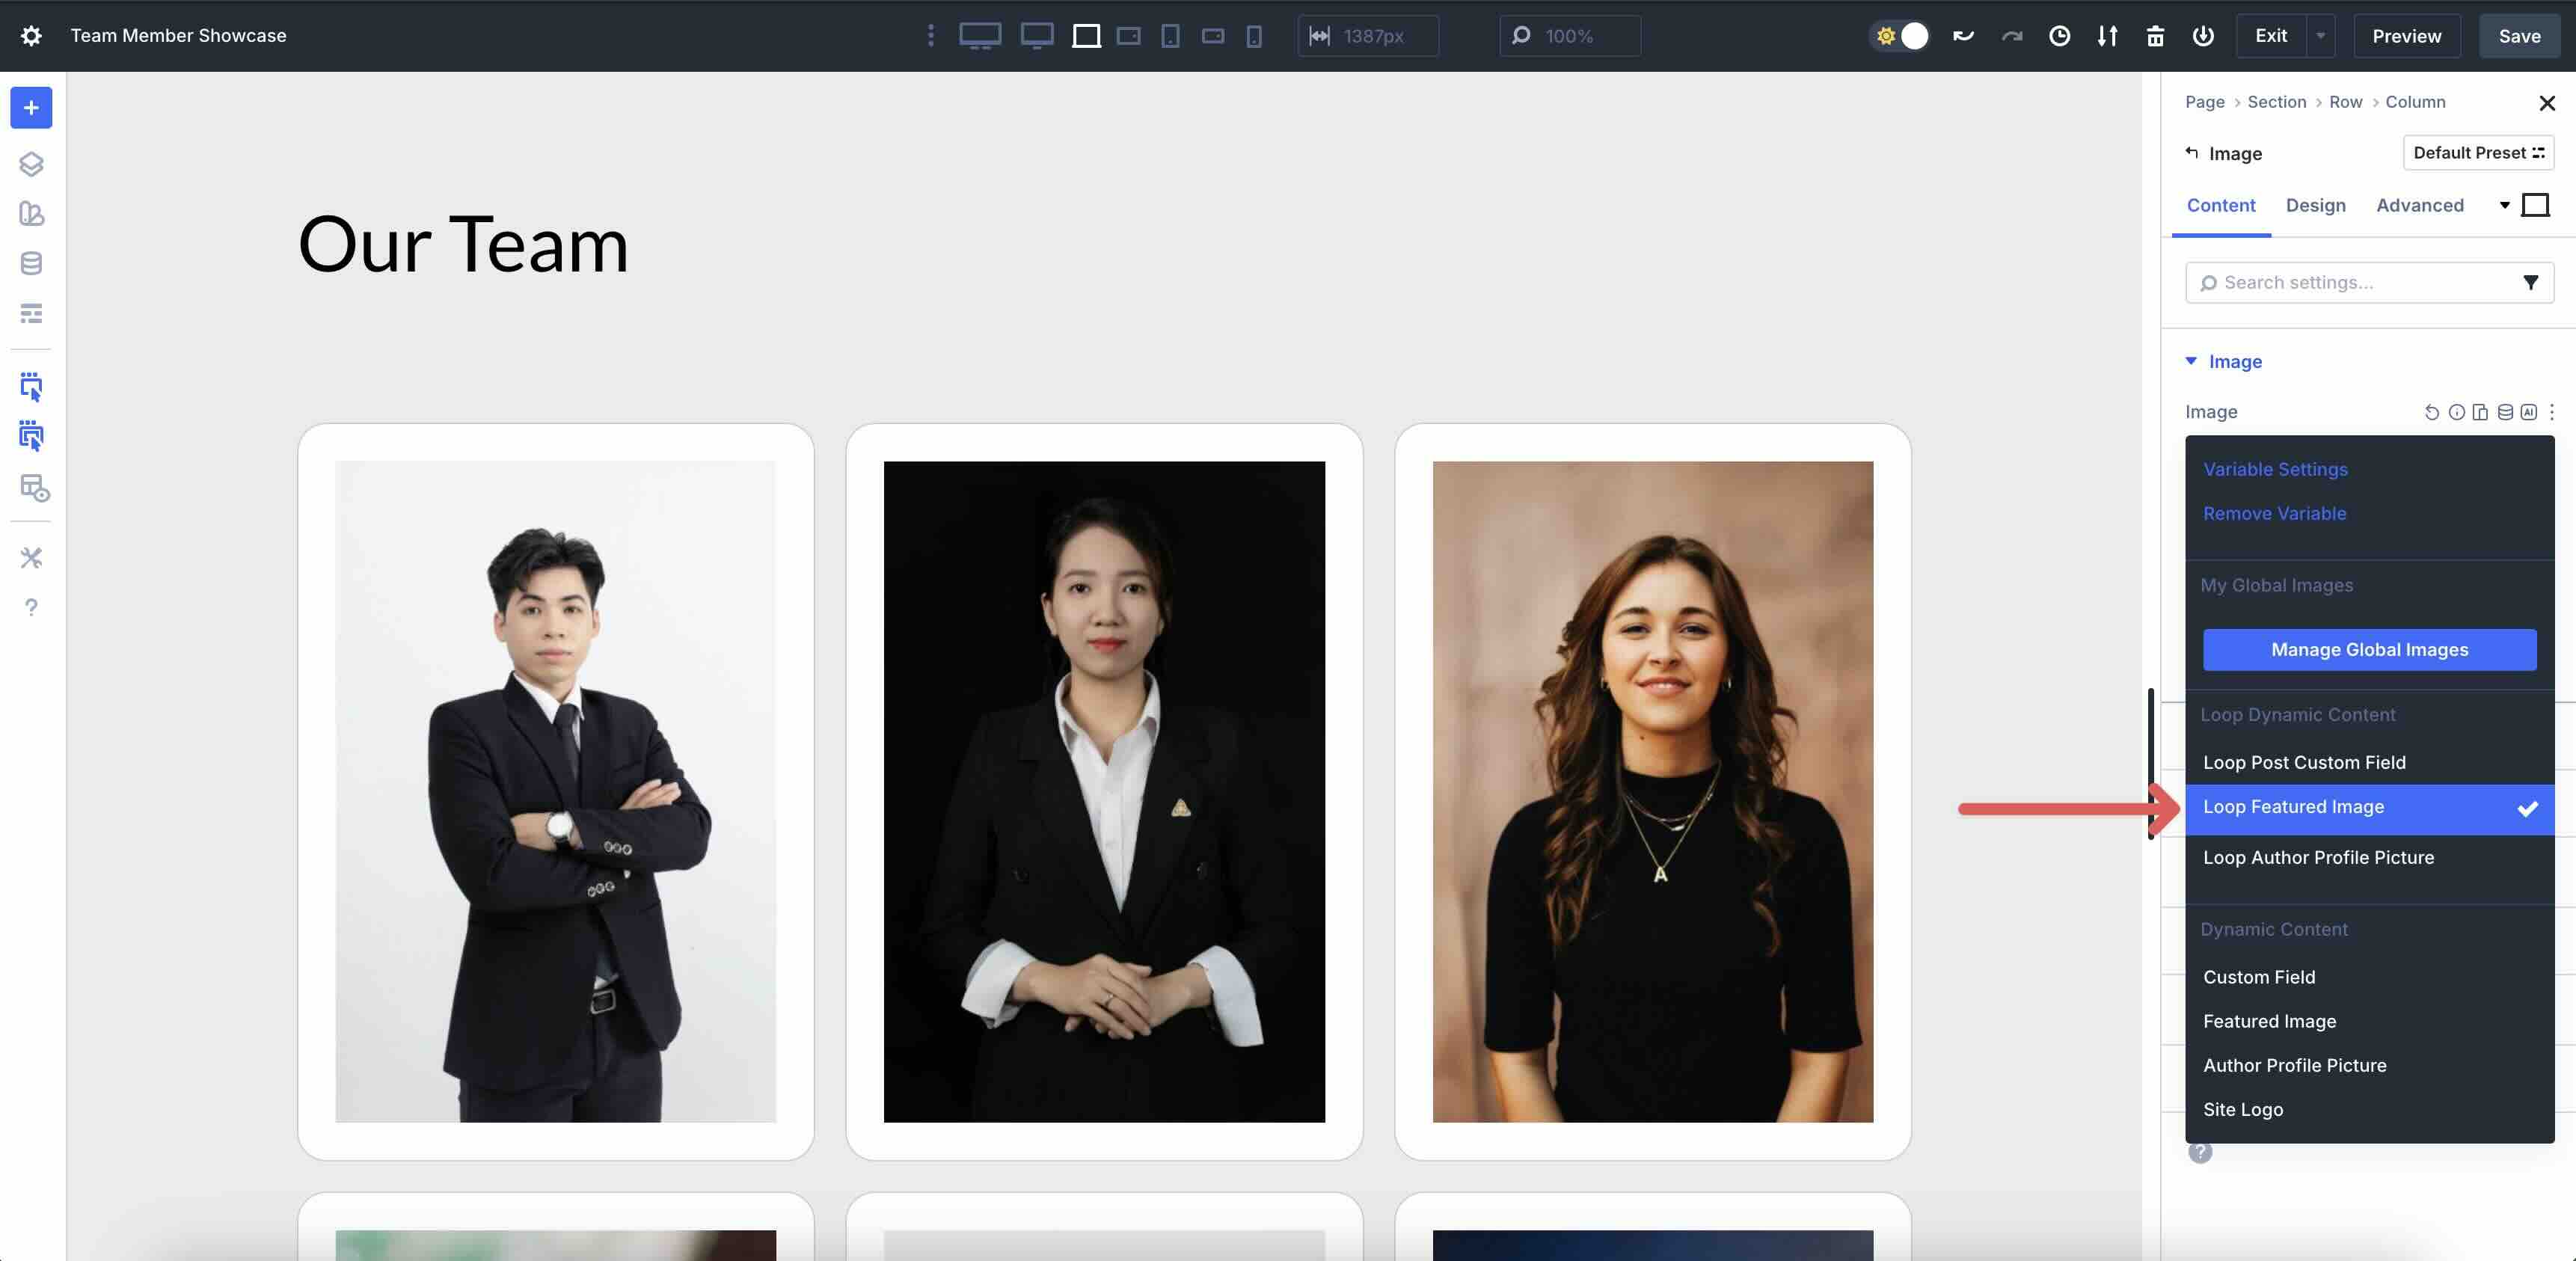
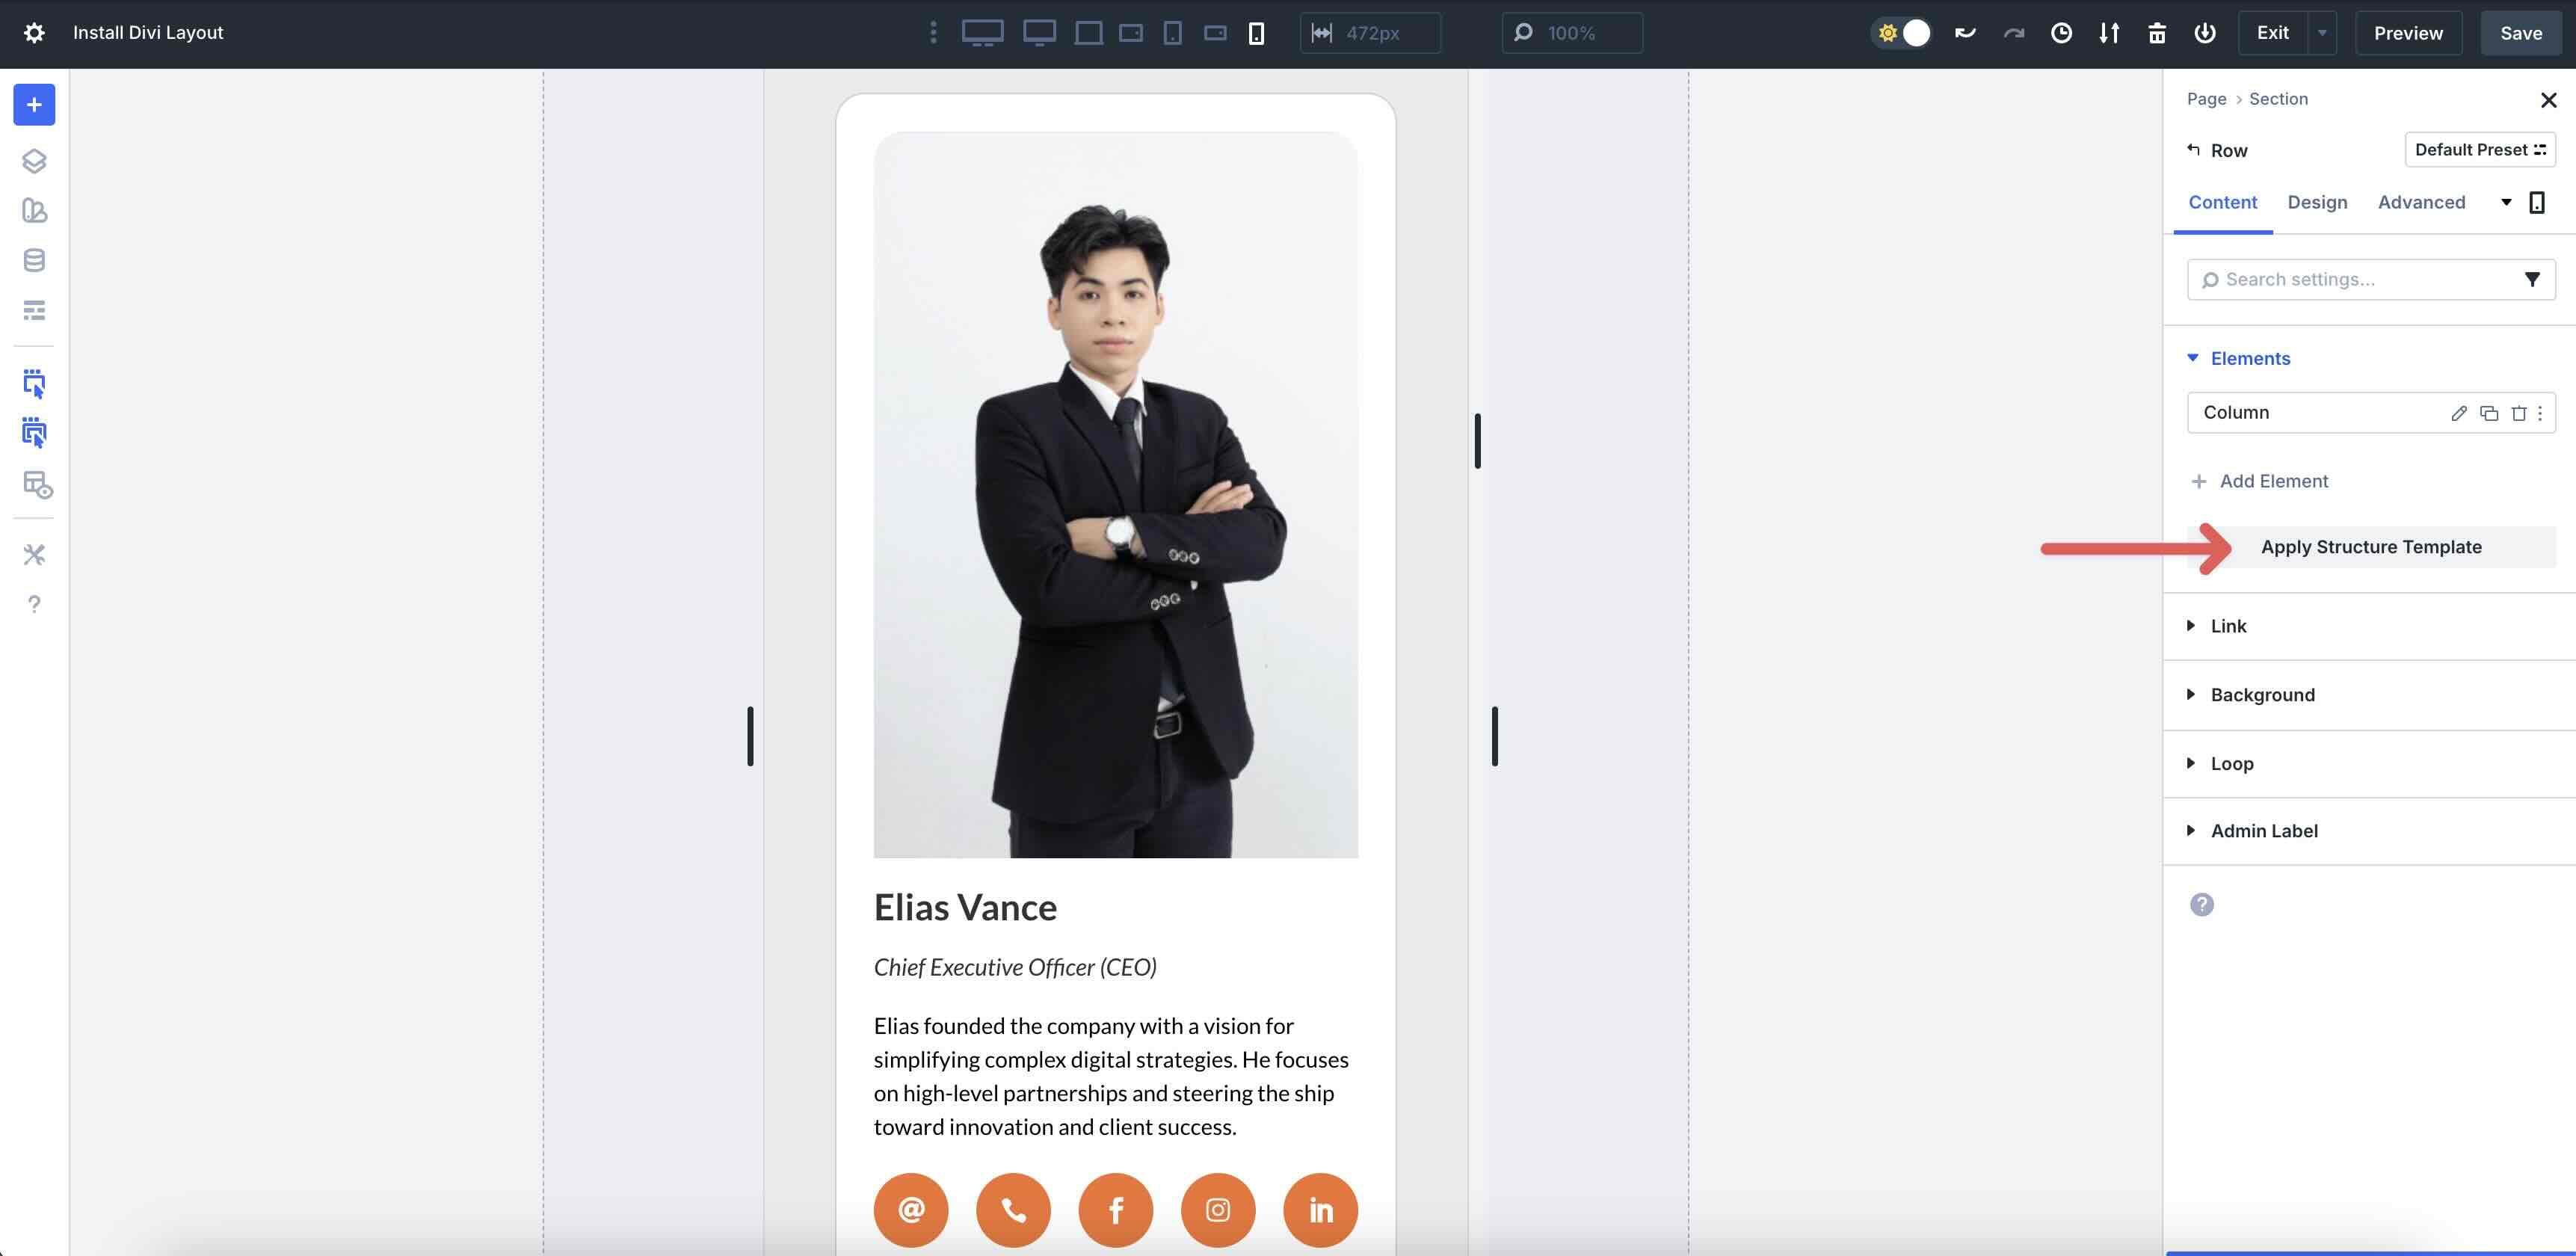
Now, we will be able to get began together with content material subject matter to the Column. Click on on into the principle Column of the Loop so to upload an Image module.
Hover above the image field to reveal the Dynamic Content material subject matter icon.
![]()
Make a choice Loop Featured Image for the reason that dynamic tag. Style the image as desired.
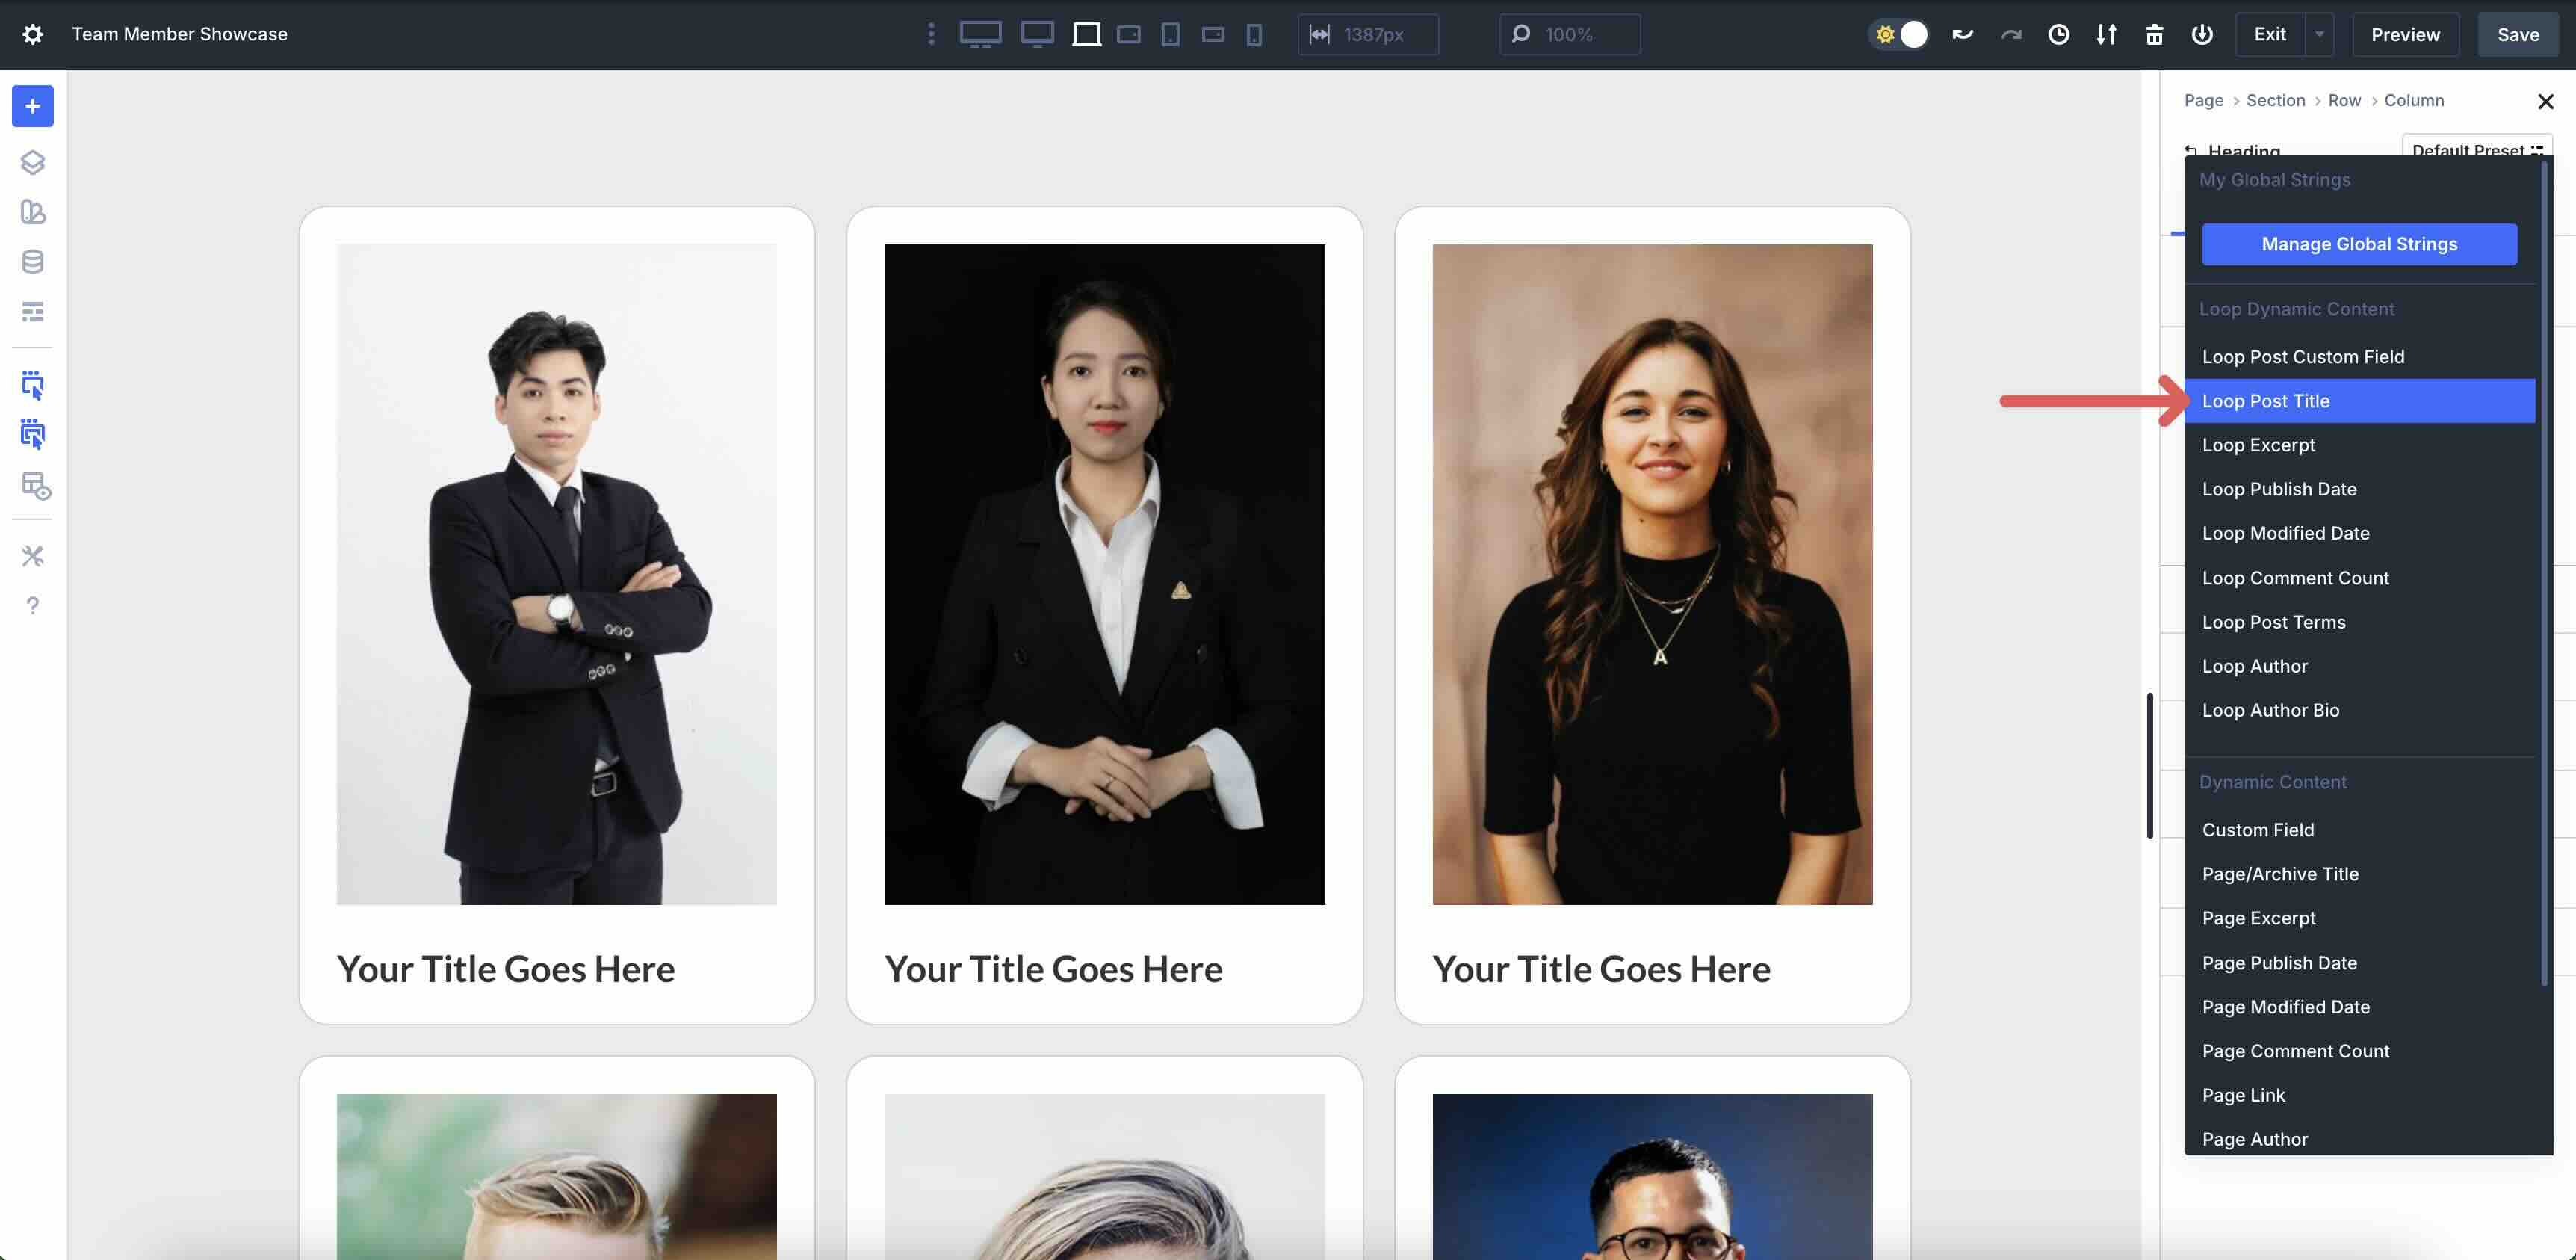
Add Heading Modules
Click on at the black + icon so to upload a Heading module.

Click on at the Dynamic Content material subject matter icon for the Heading module and select Loop Publish Establish.
Add each different Heading module to the Column. This time, select the Loop Publish Custom designed Field chance.
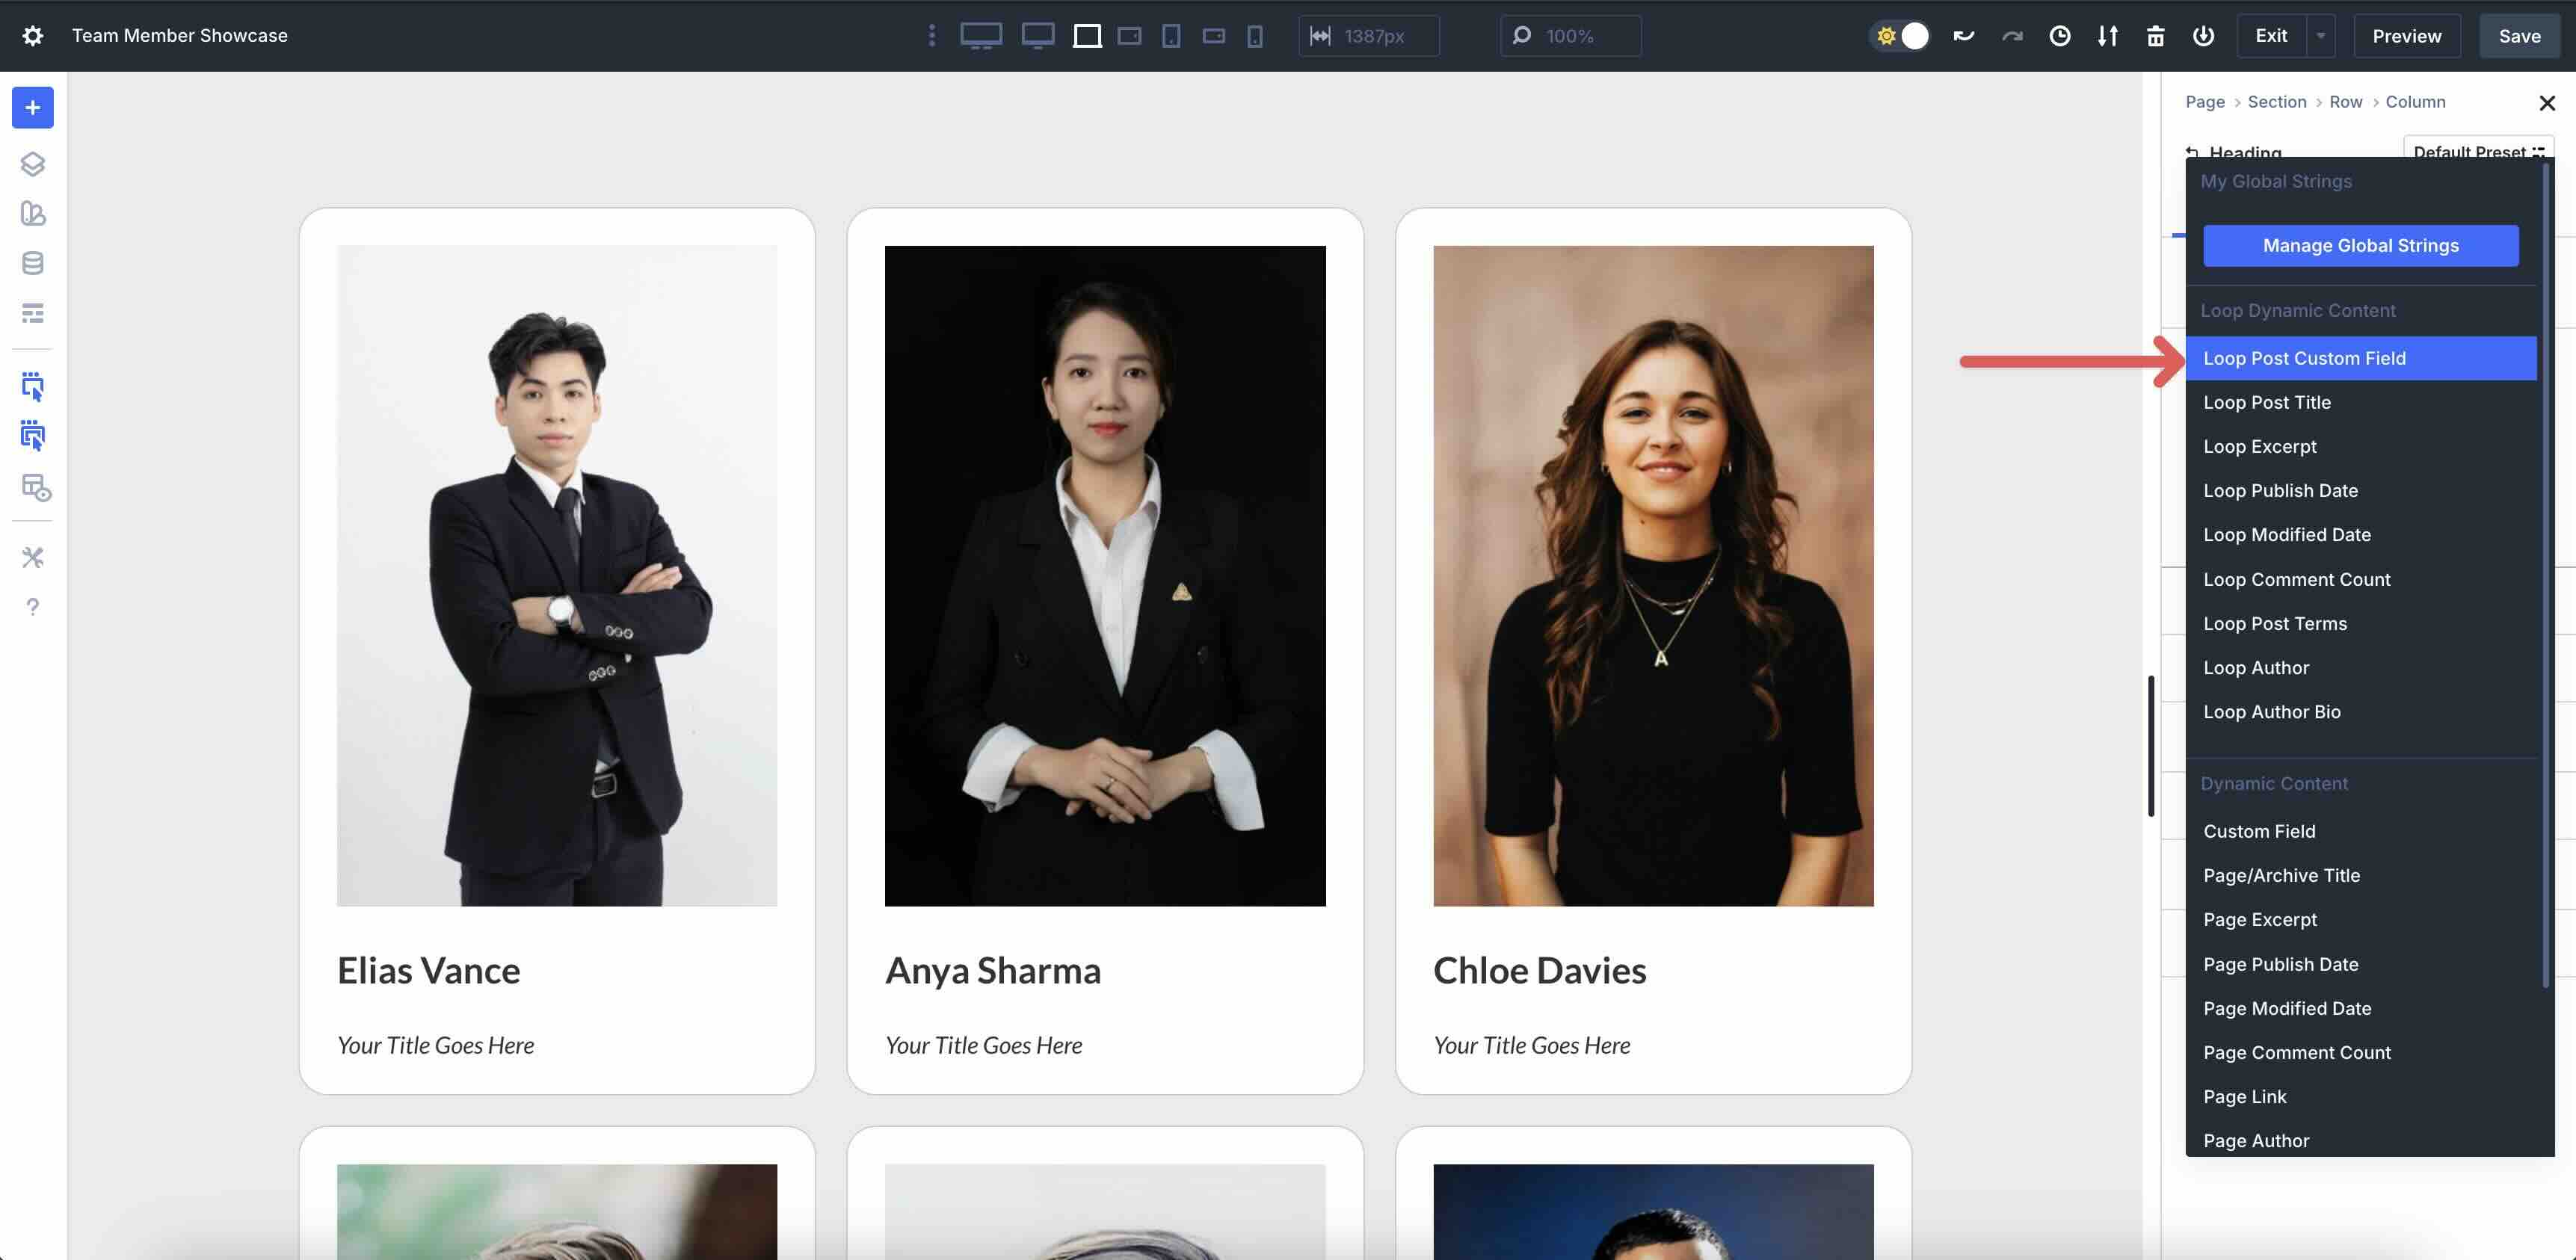
Amplify the dropdown menu next to Make a choice Custom designed Field.
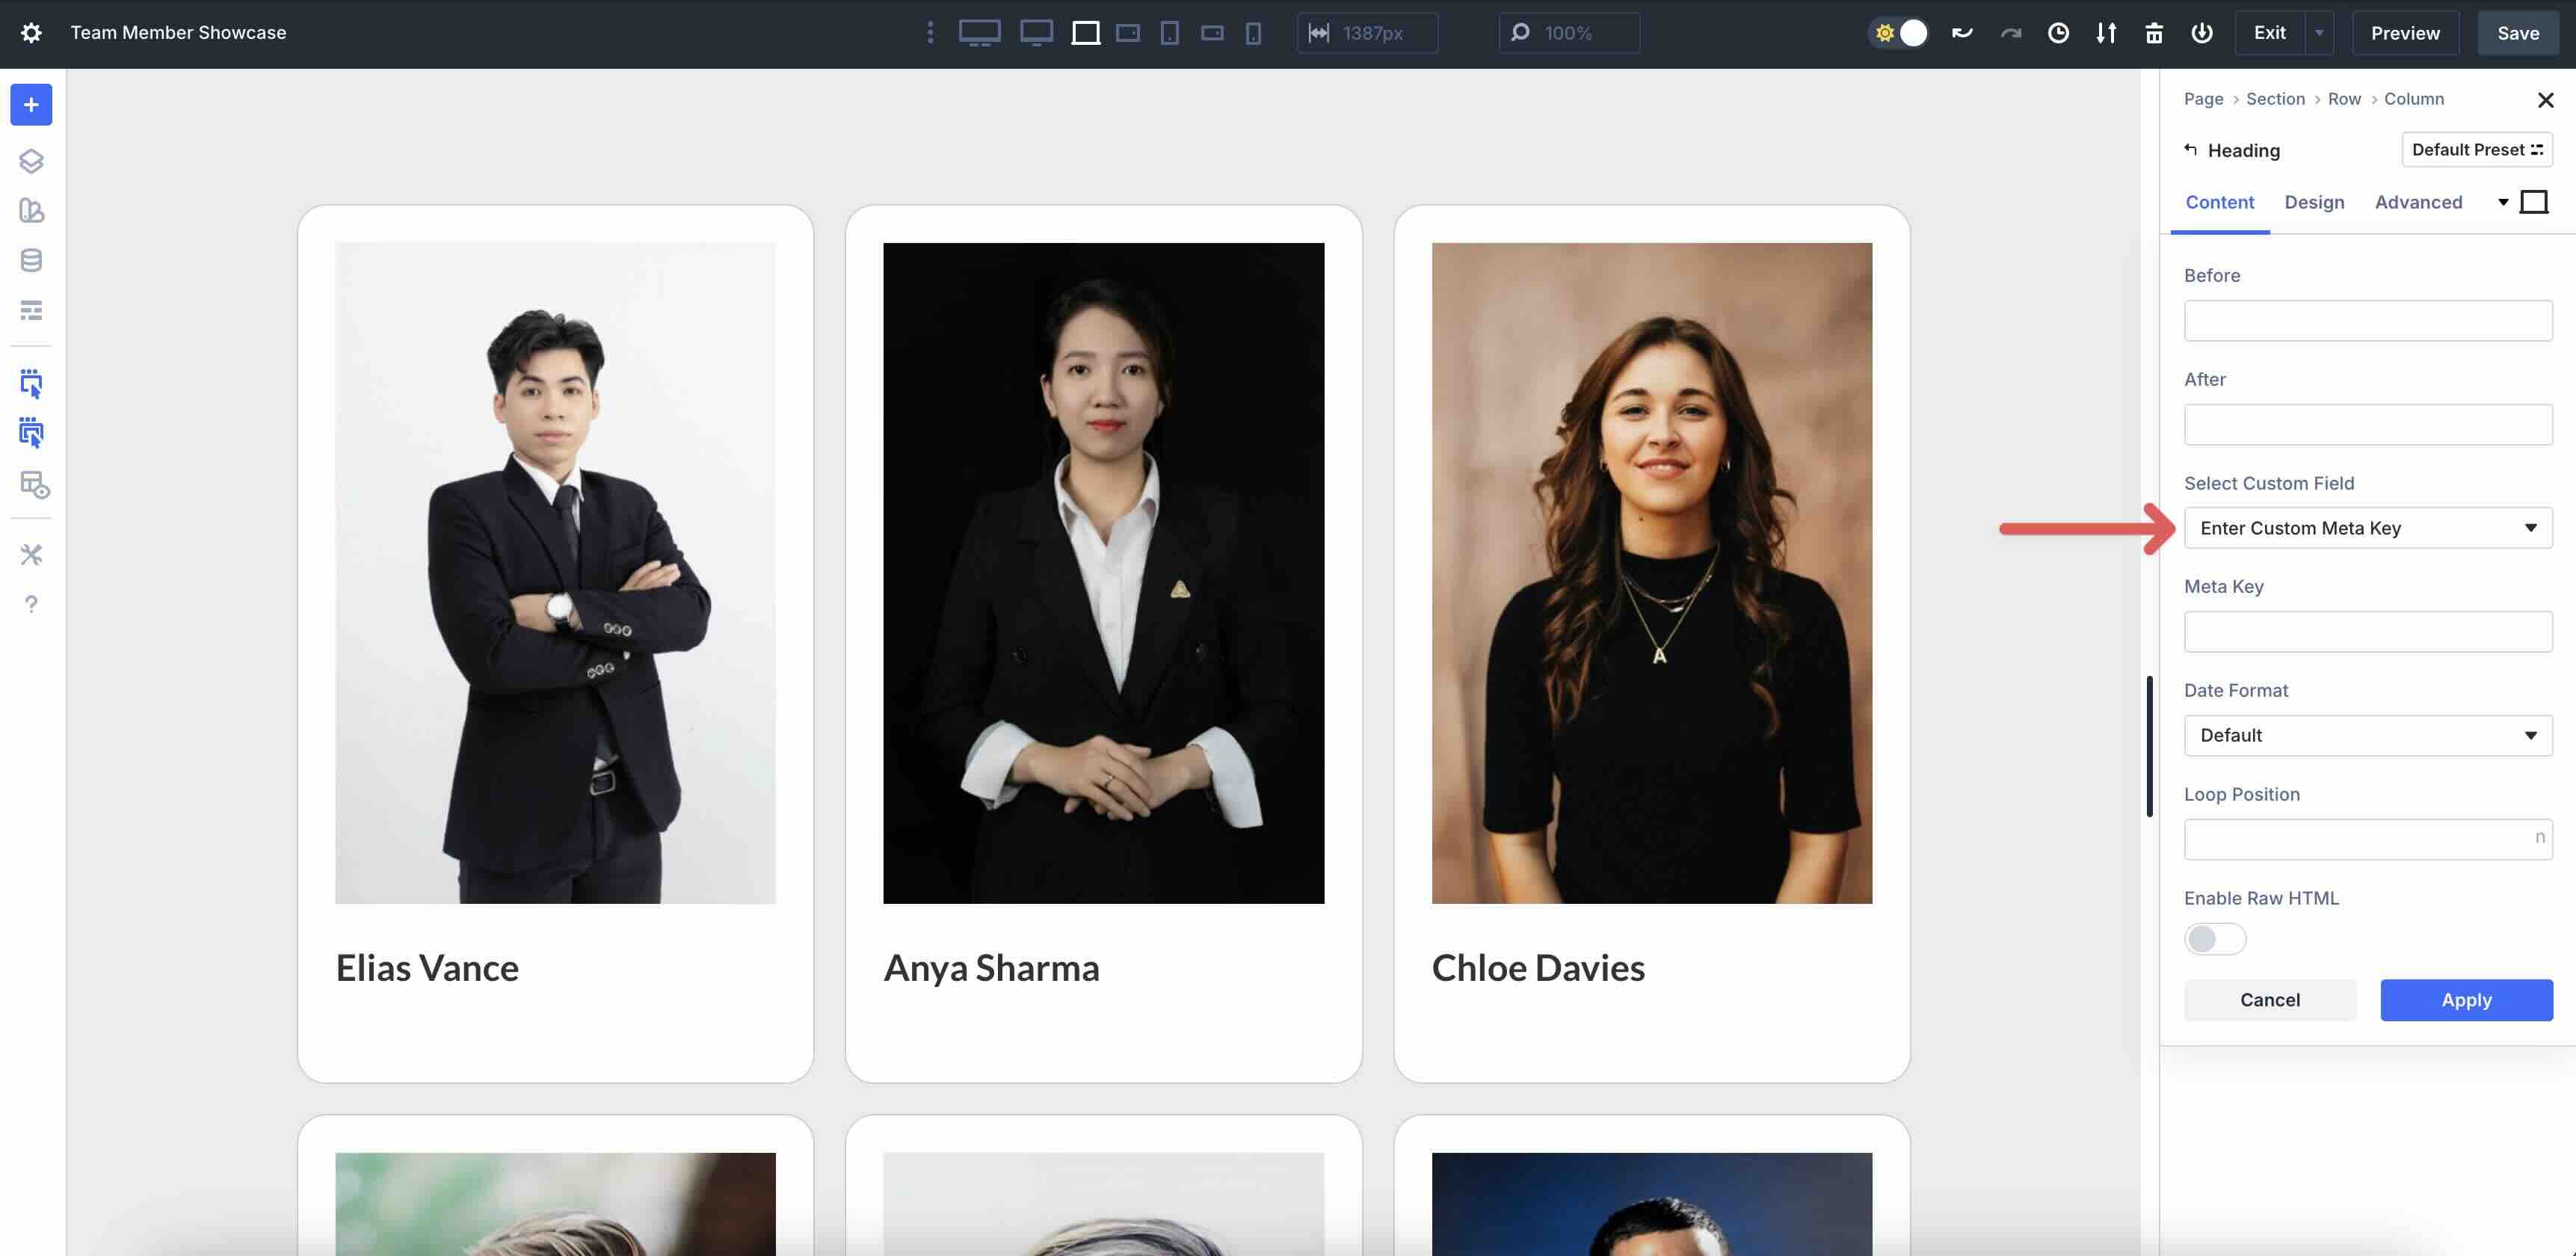
Make a choice Position/Establish for the reason that custom designed field.
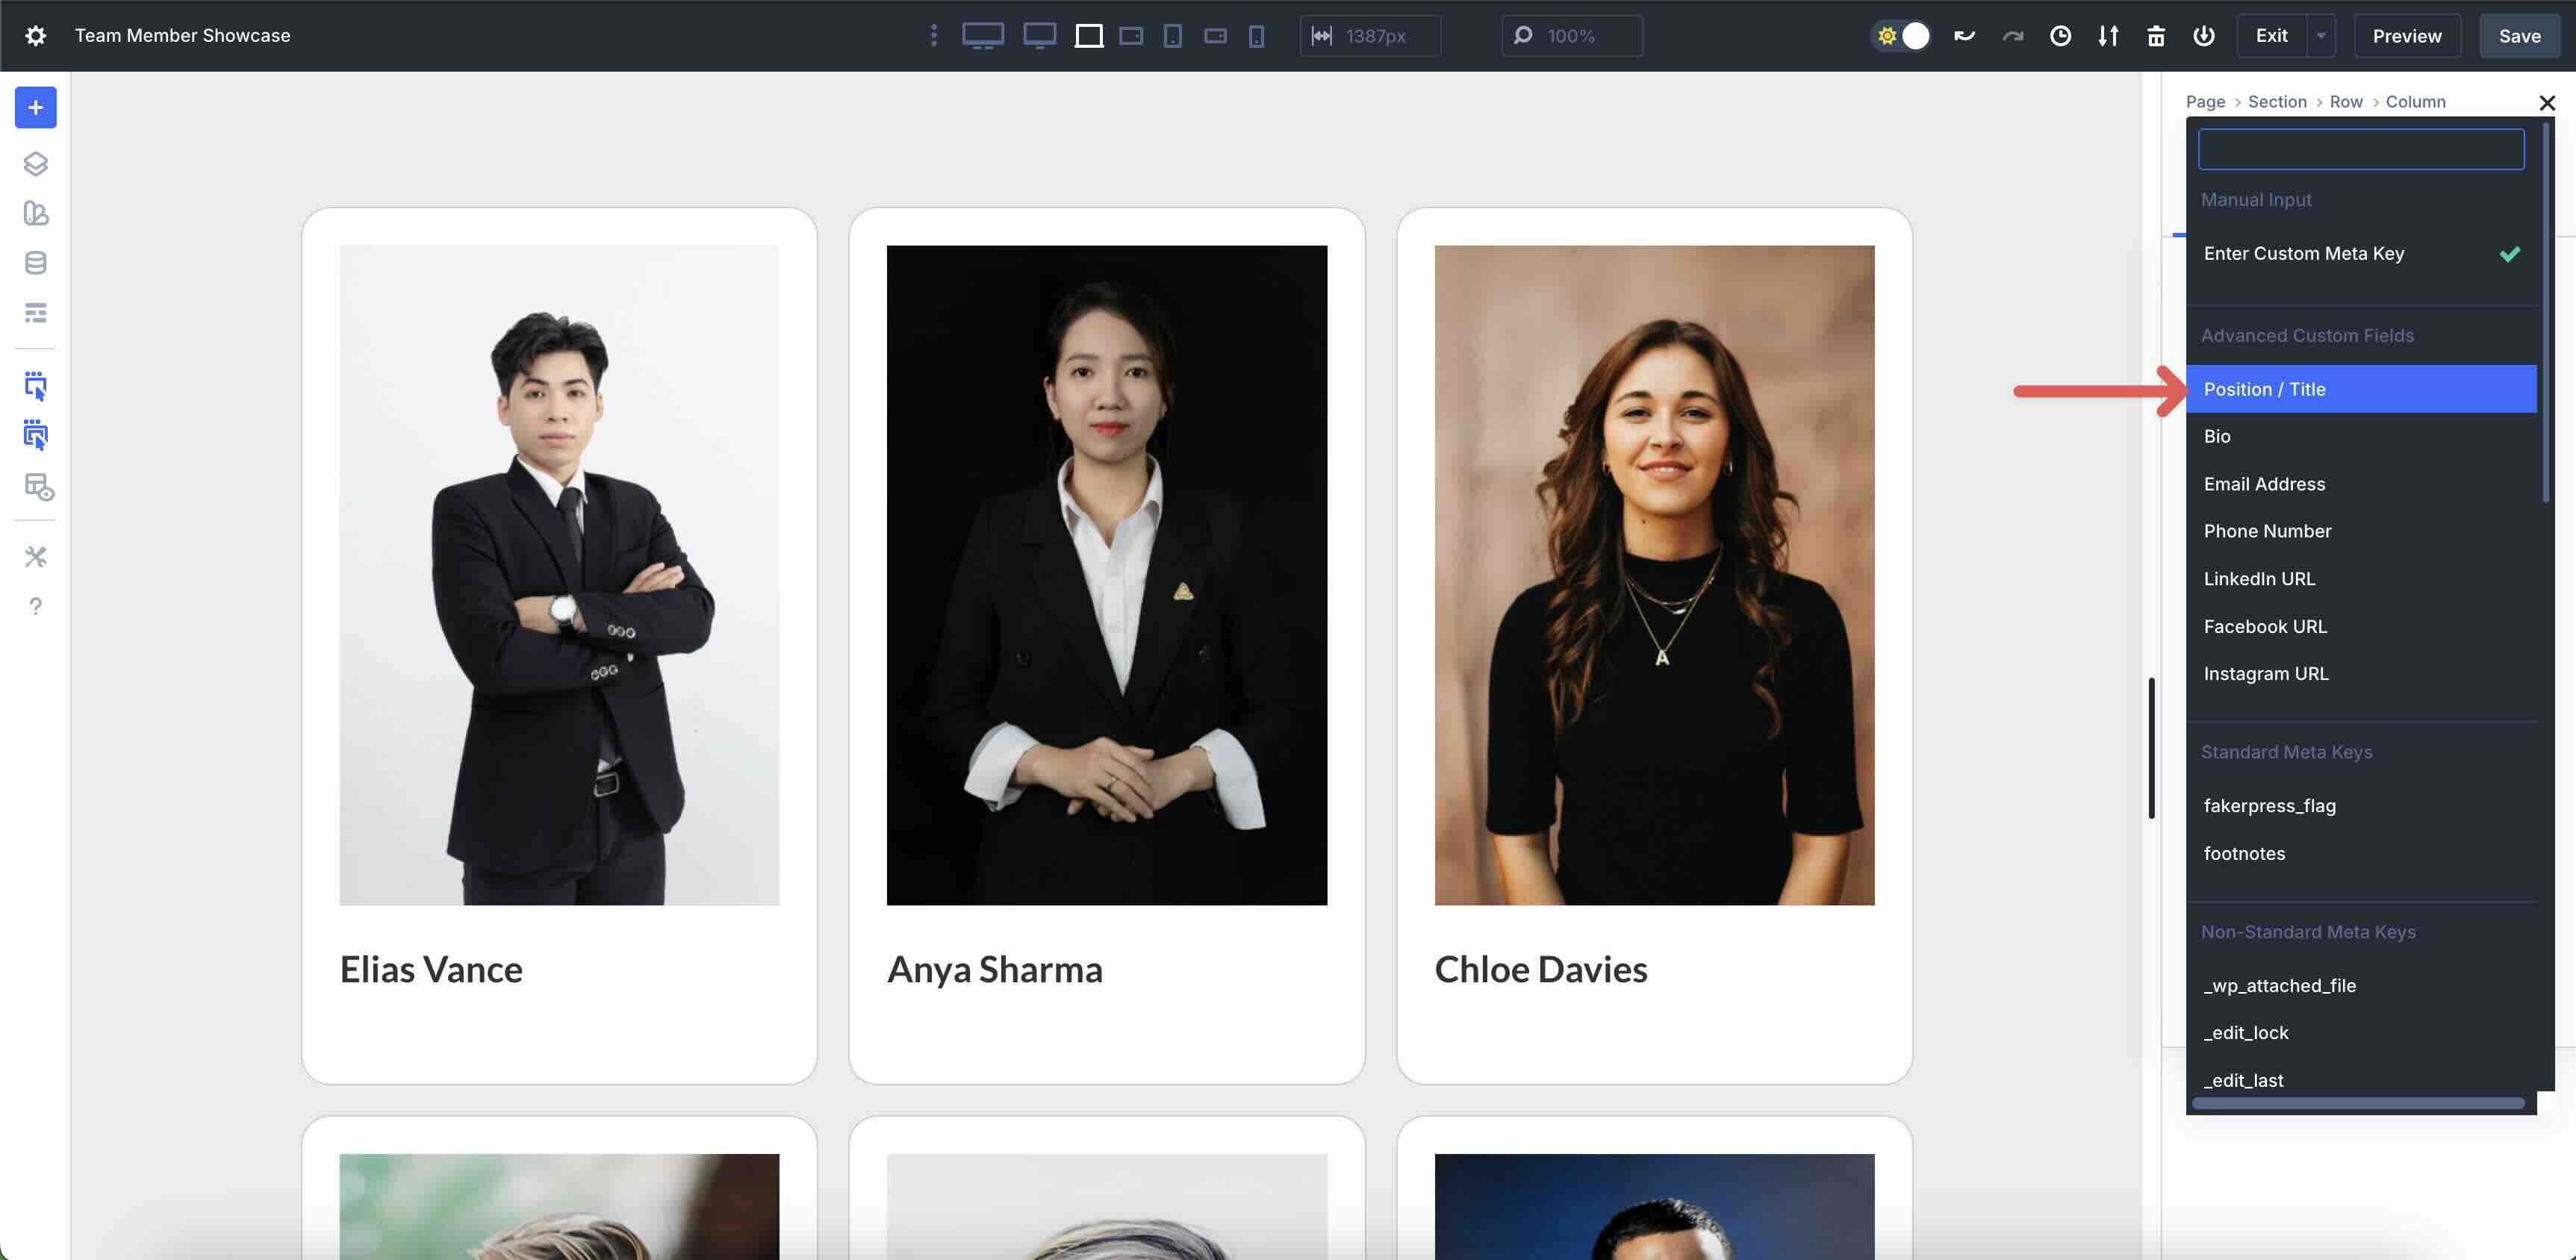
Click on at the Practice button to assign the custom designed field to the module. Style the module as desired.

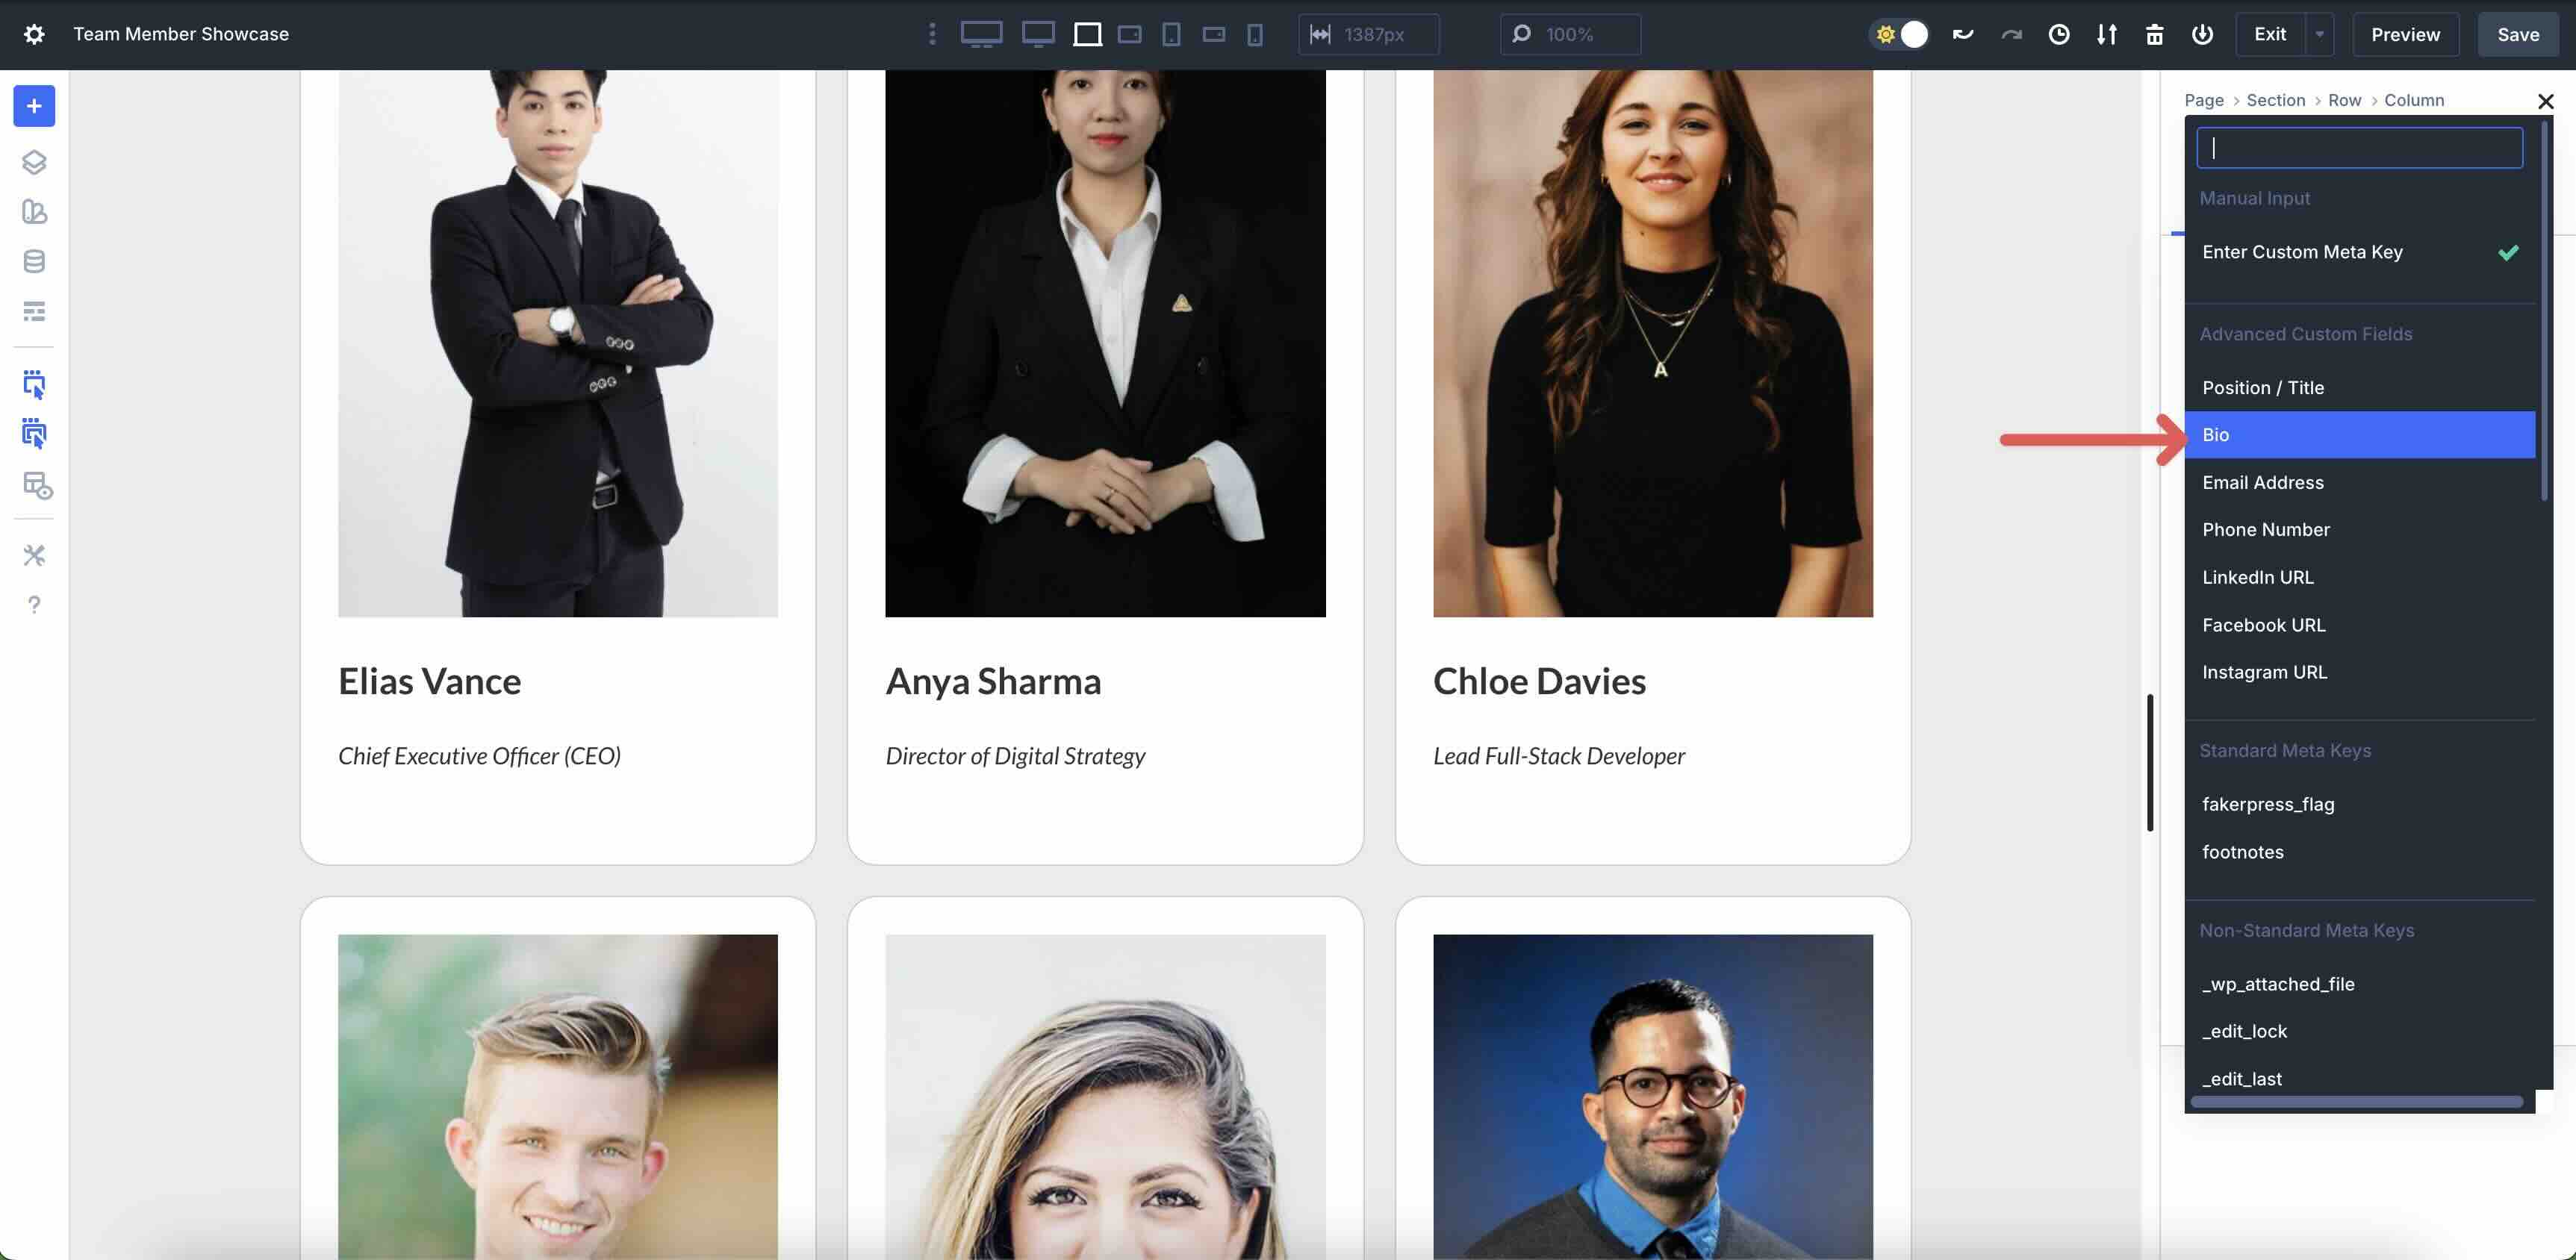
Add A Text Module
Add a Text module to the Column. Make a choice Loop Publish Custom designed Field inside the Dynamic Content material subject matter settings and select Bio for the reason that Custom designed Meta Key.
Add A Nested Row
Next, we’ll add a Nested Row to the principle Column. Click on at the black + icon, tab over to New Row, and select a 5-Column Row.

Inside the Nested Row’s Design tab, alter the Horizontal Hollow to 10px.
Inside the Row’s Structure settings, set Align Items to Center.

Add Icon Modules
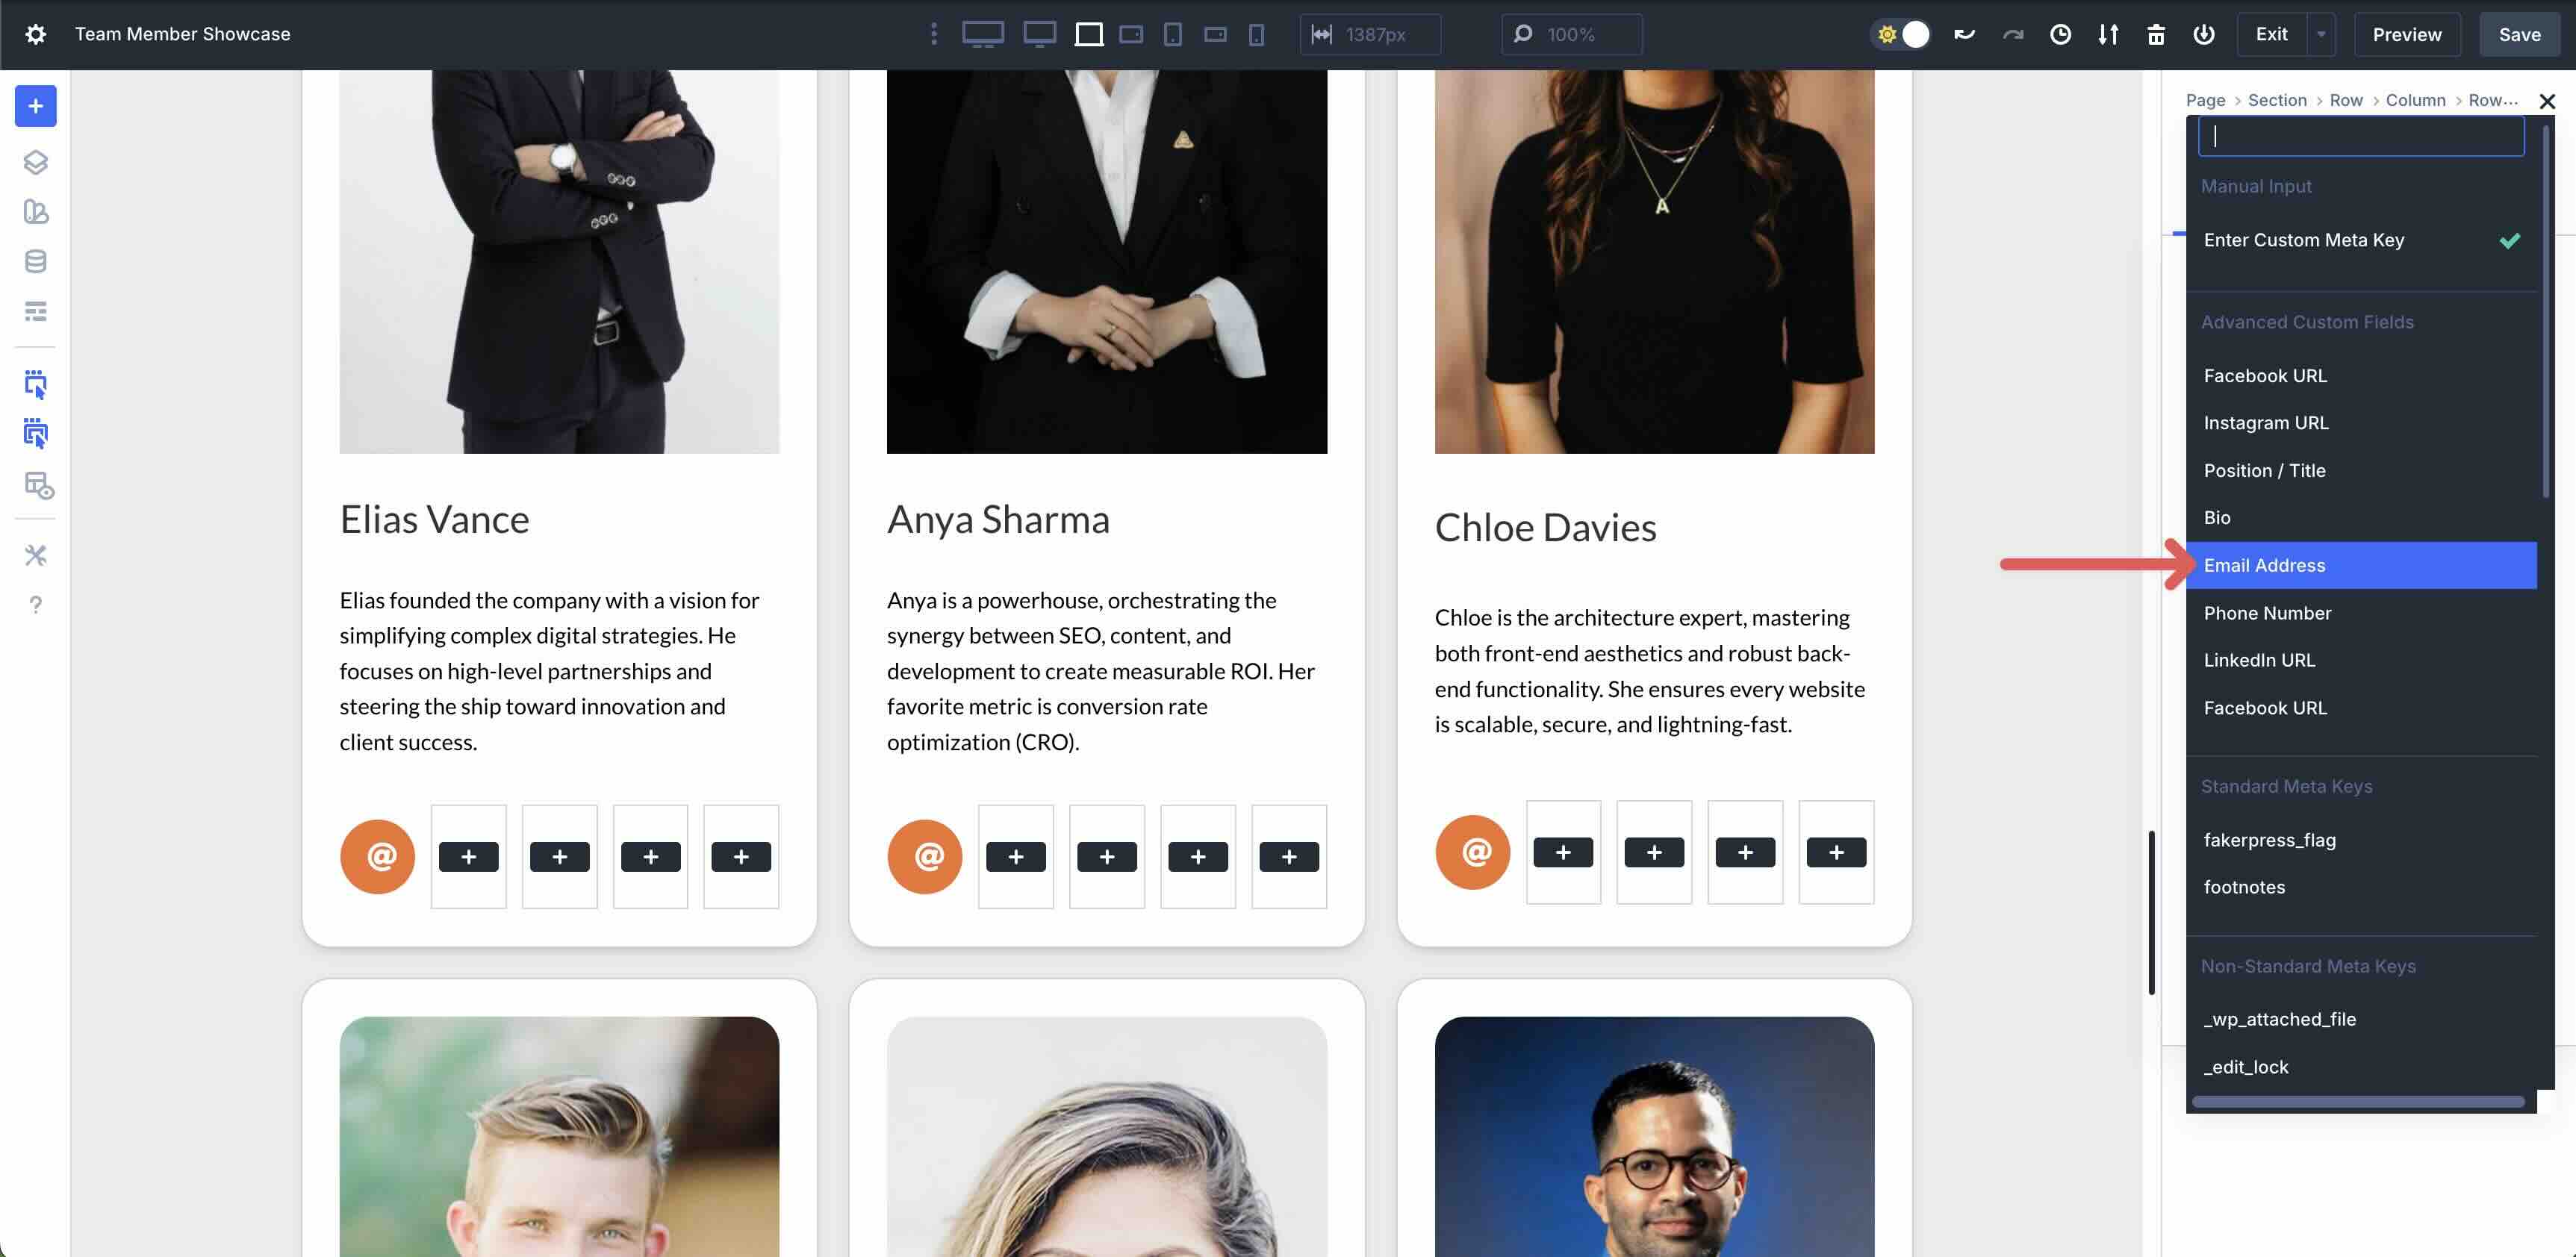
Click on on into the principle Column of the Nested Row and add an Icon module.
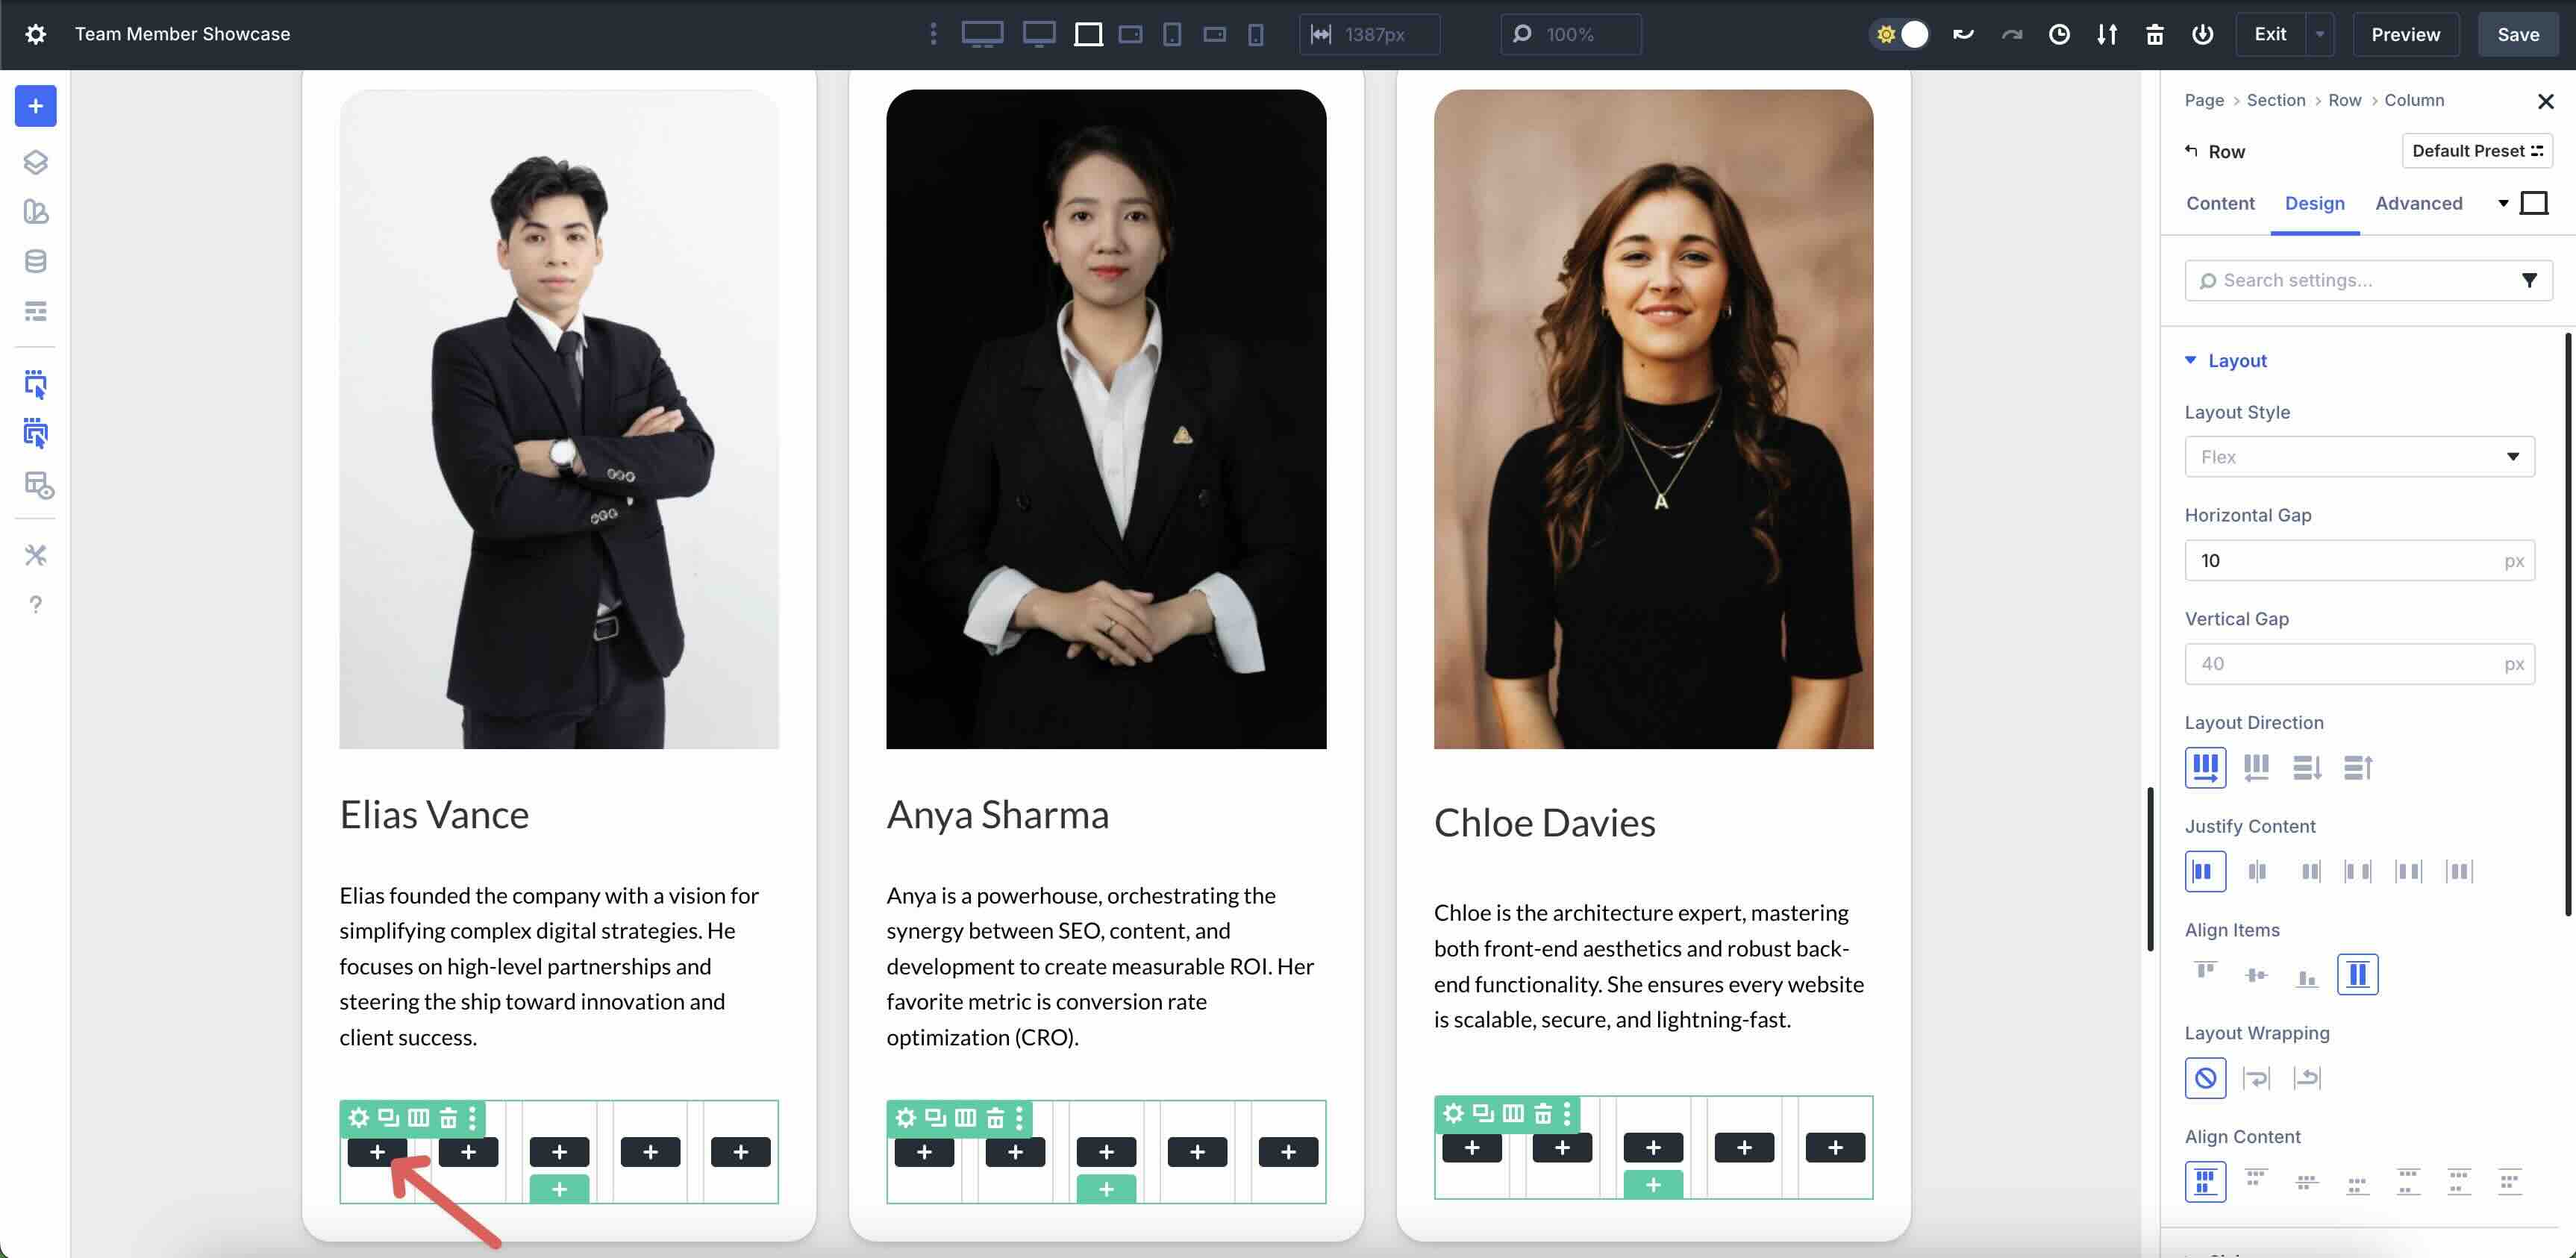
Make a choice an Email icon, style the module, and select the Email Take care of custom designed field. Click on at the Practice button to save some the content material subject matter.
Next, right kind click on on on the Icon module to copy it.
![]()
Click on on into the second one Column of the Nested Row, right kind click on on, and select Paste Module > Paste Module Inside.
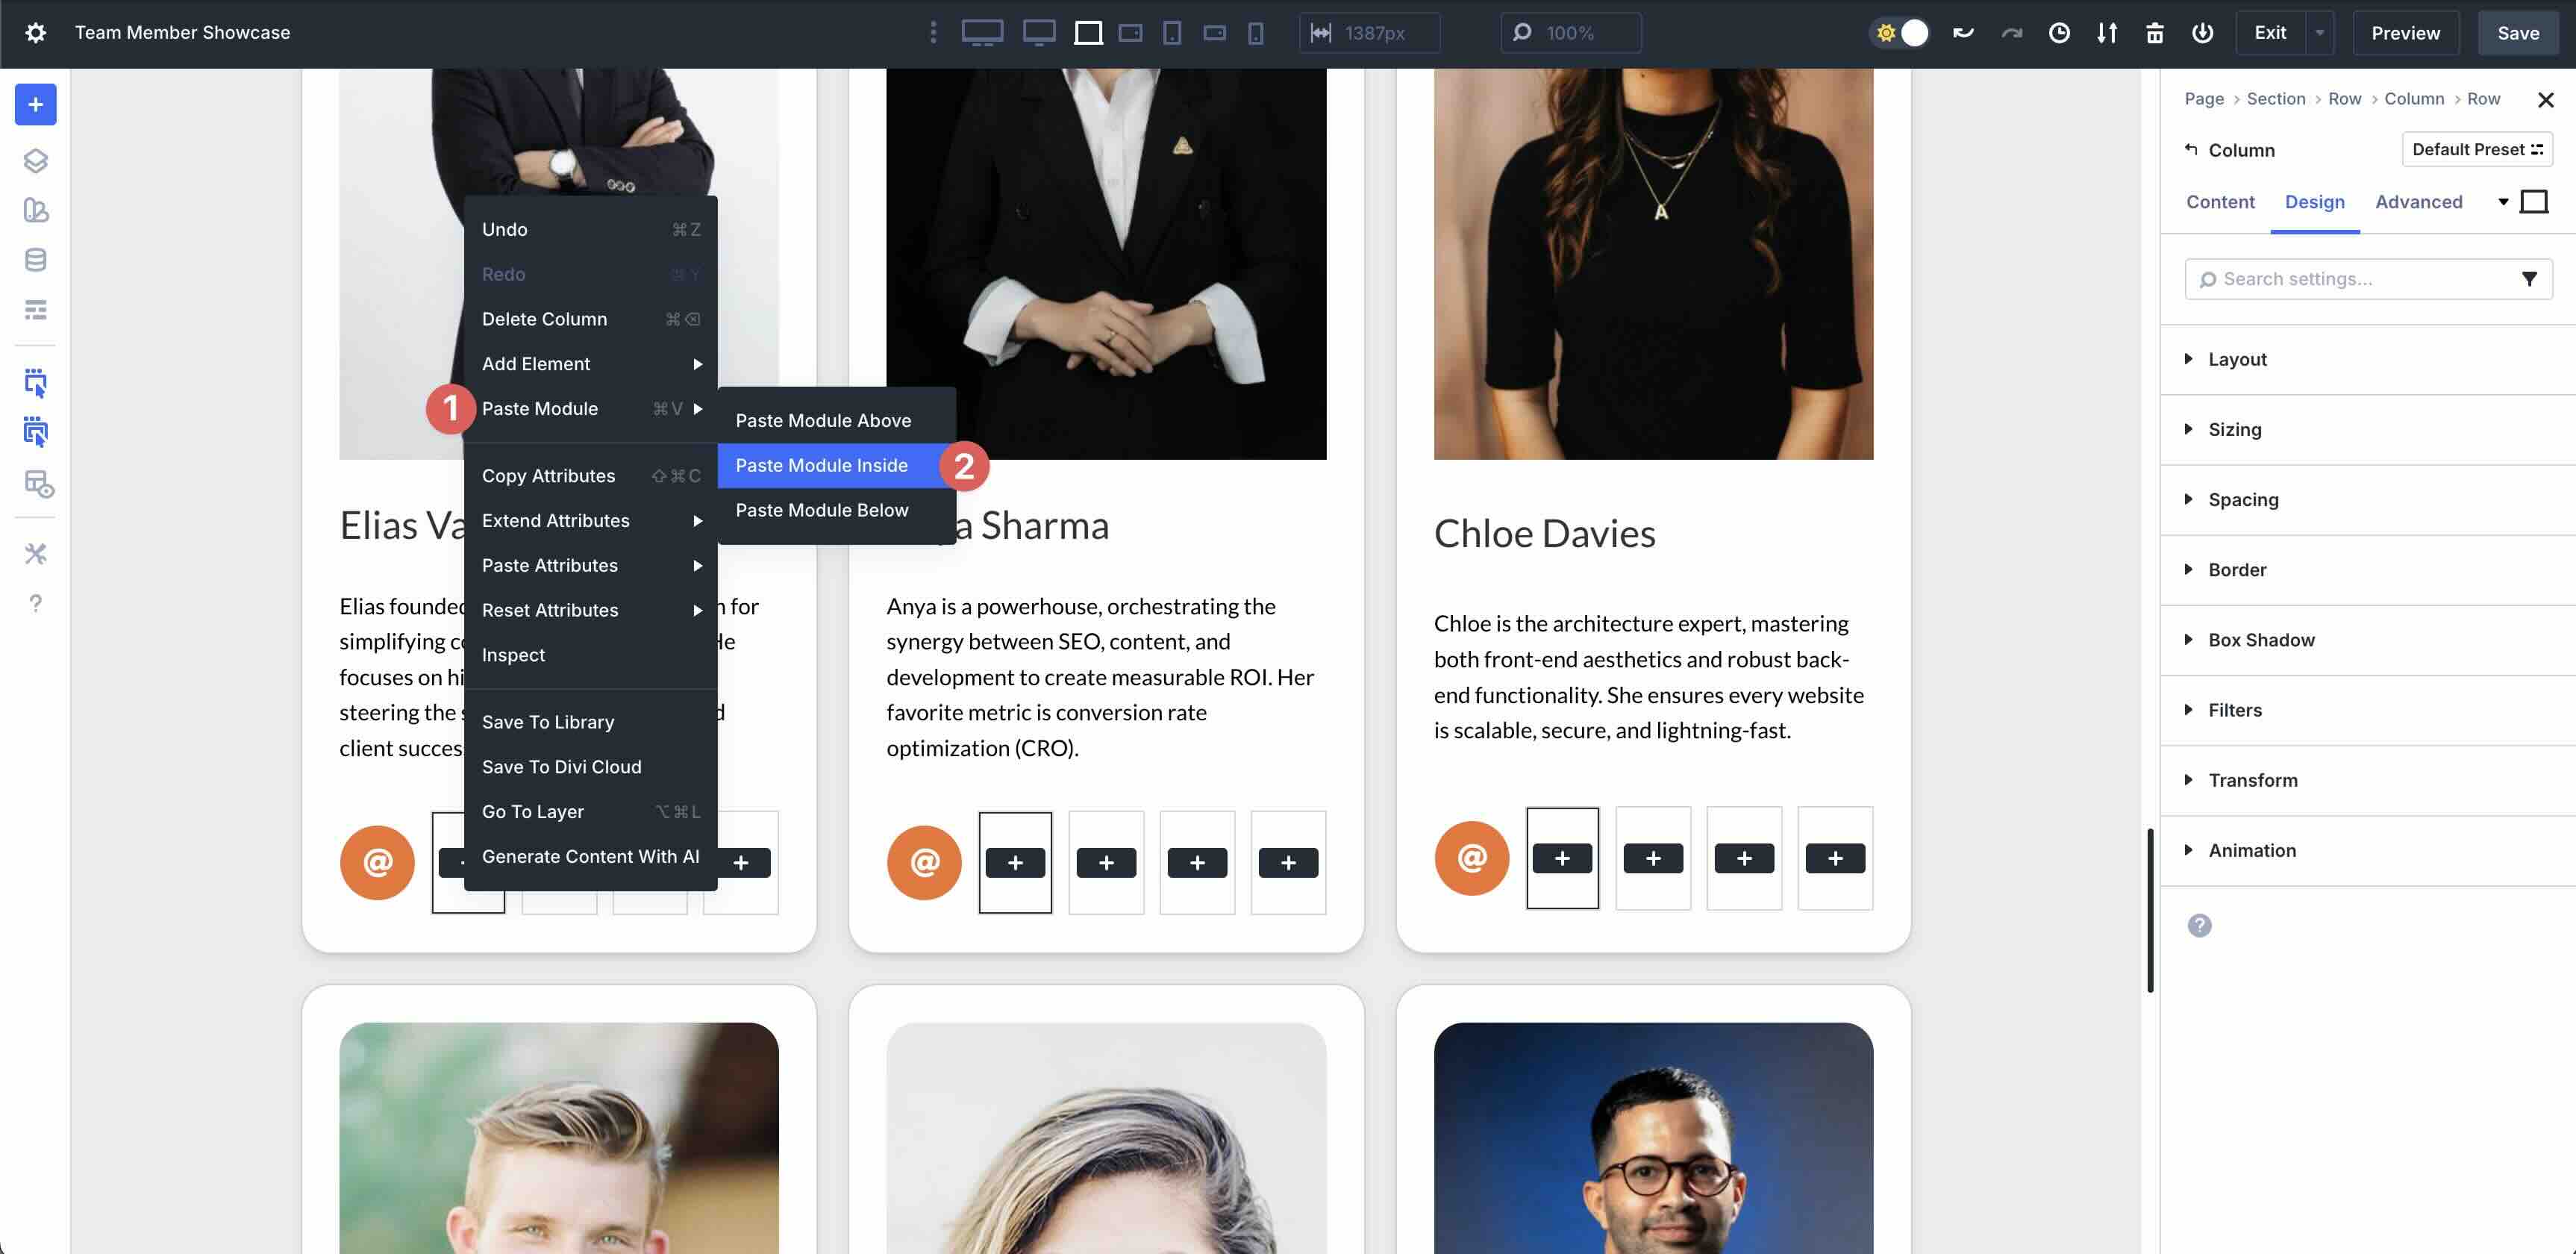
Repeat for the remaining columns.
The rest step is to switch the icon in each of the Icon modules and assign the appropriate Dynamic Content material subject matter tag.
![]()
Modify Vertical Spacing
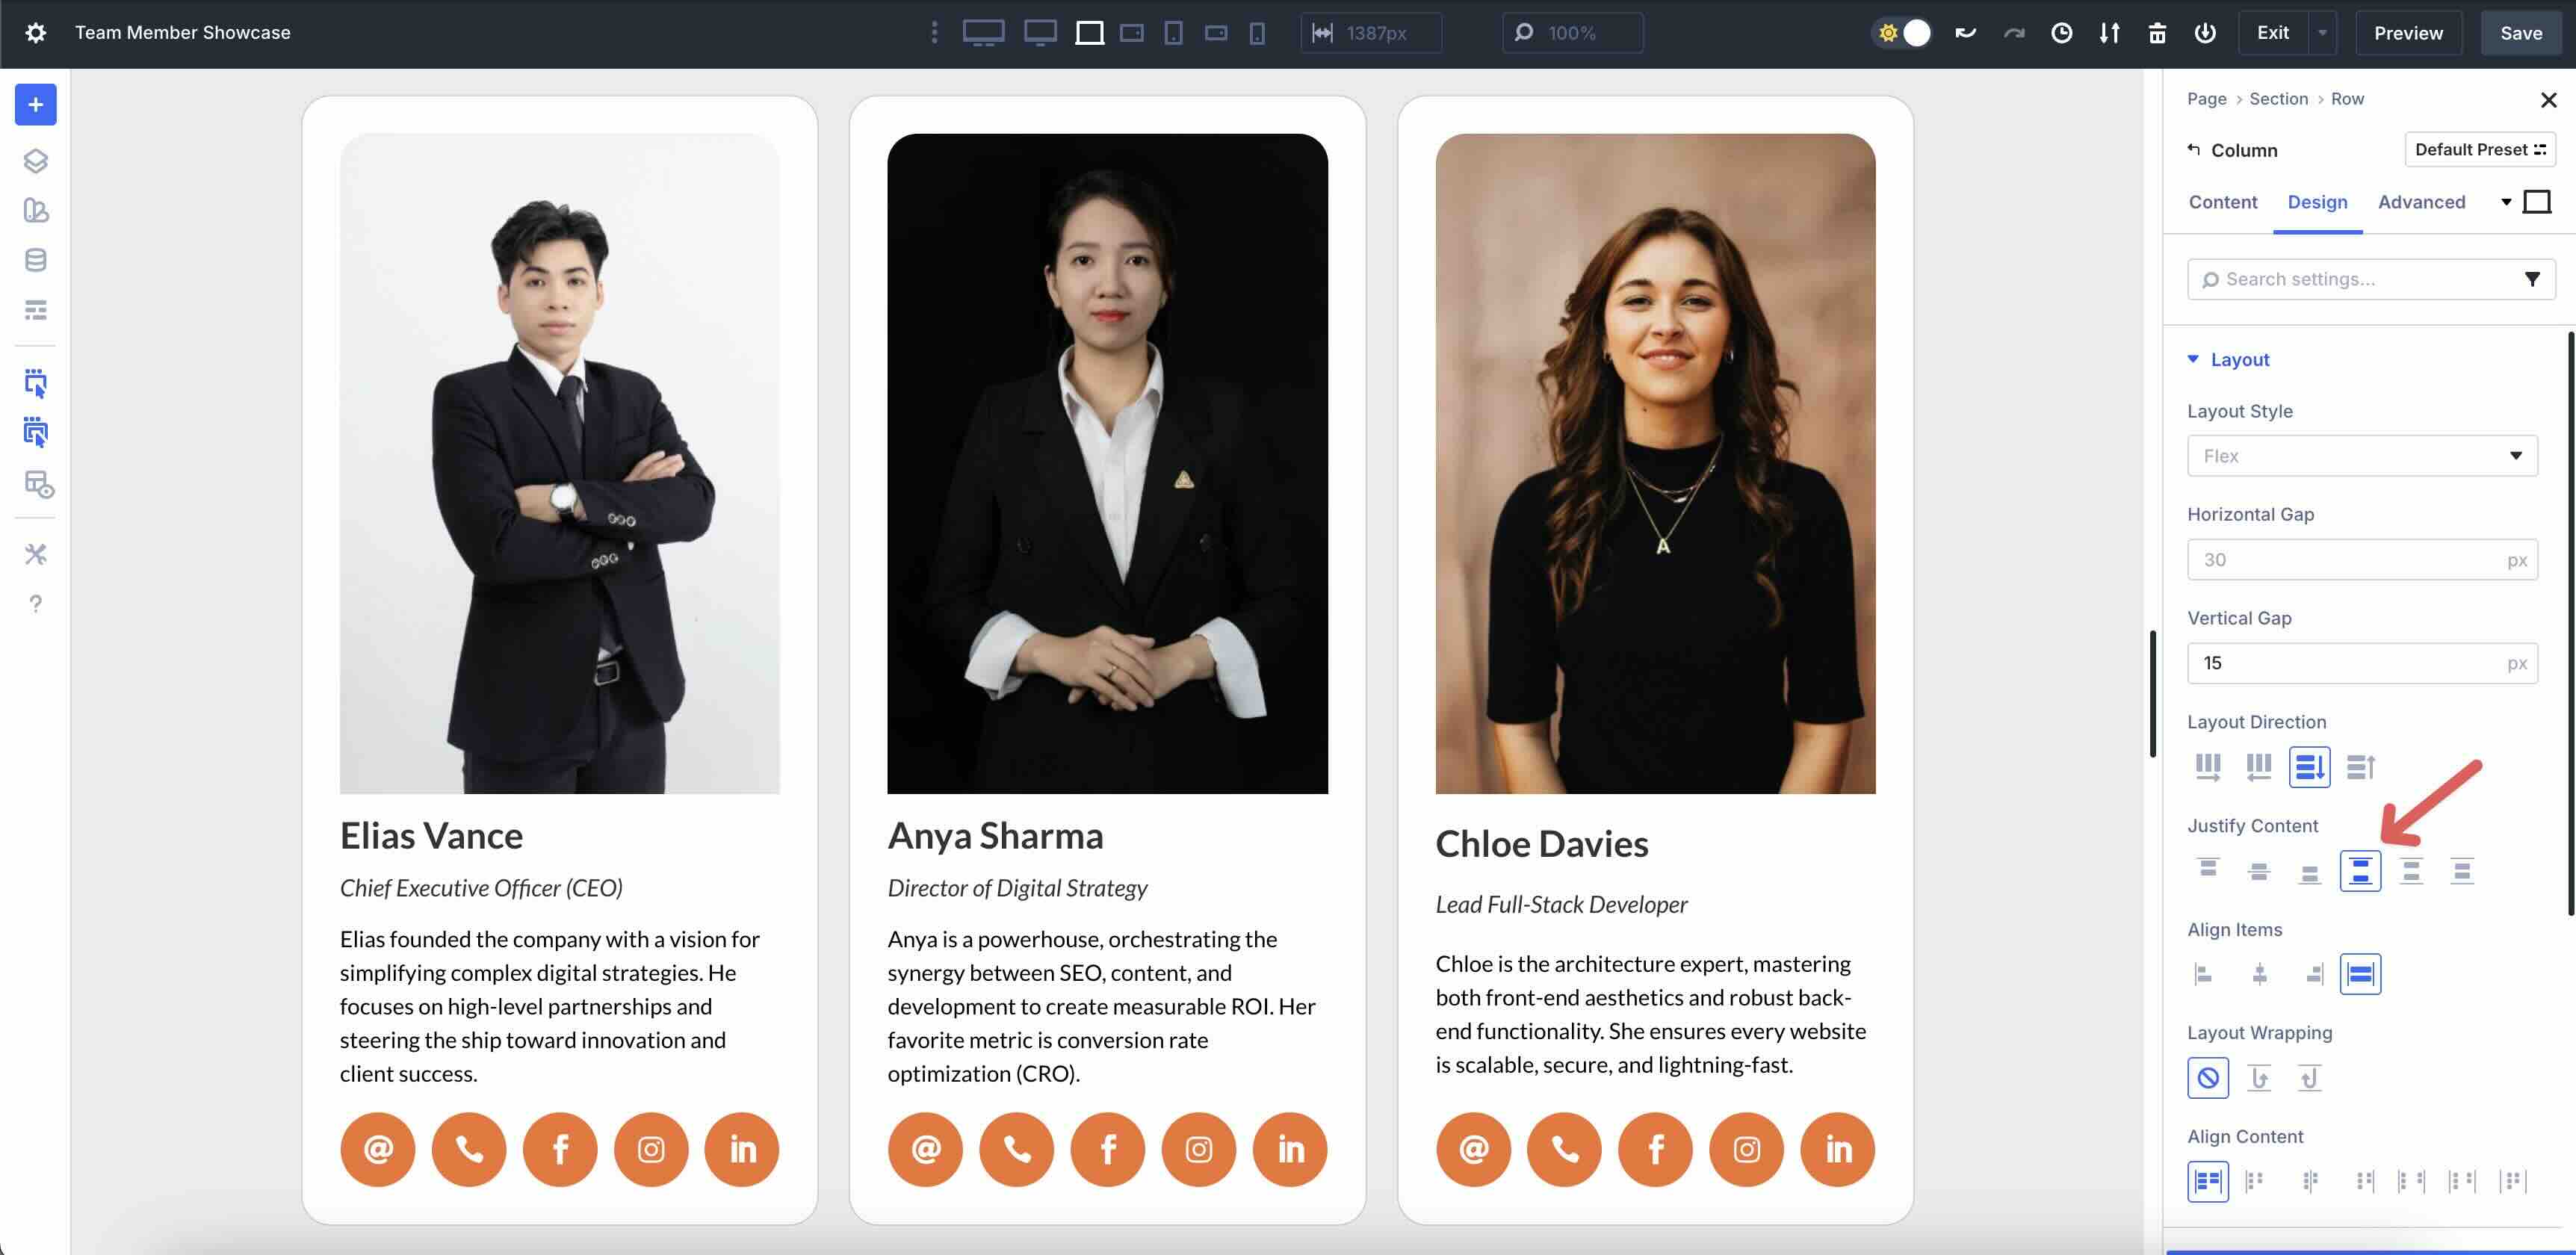
Whilst you’d love to keep watch over the vertical spacing for the Loop, exchange the Column’s Vertical Hollow in Design > Structure > Vertical Hollow.
To make sure that all your taking part in playing cards line up totally, alter the ‘Justify Content material subject matter’ field to ‘Area Between’.
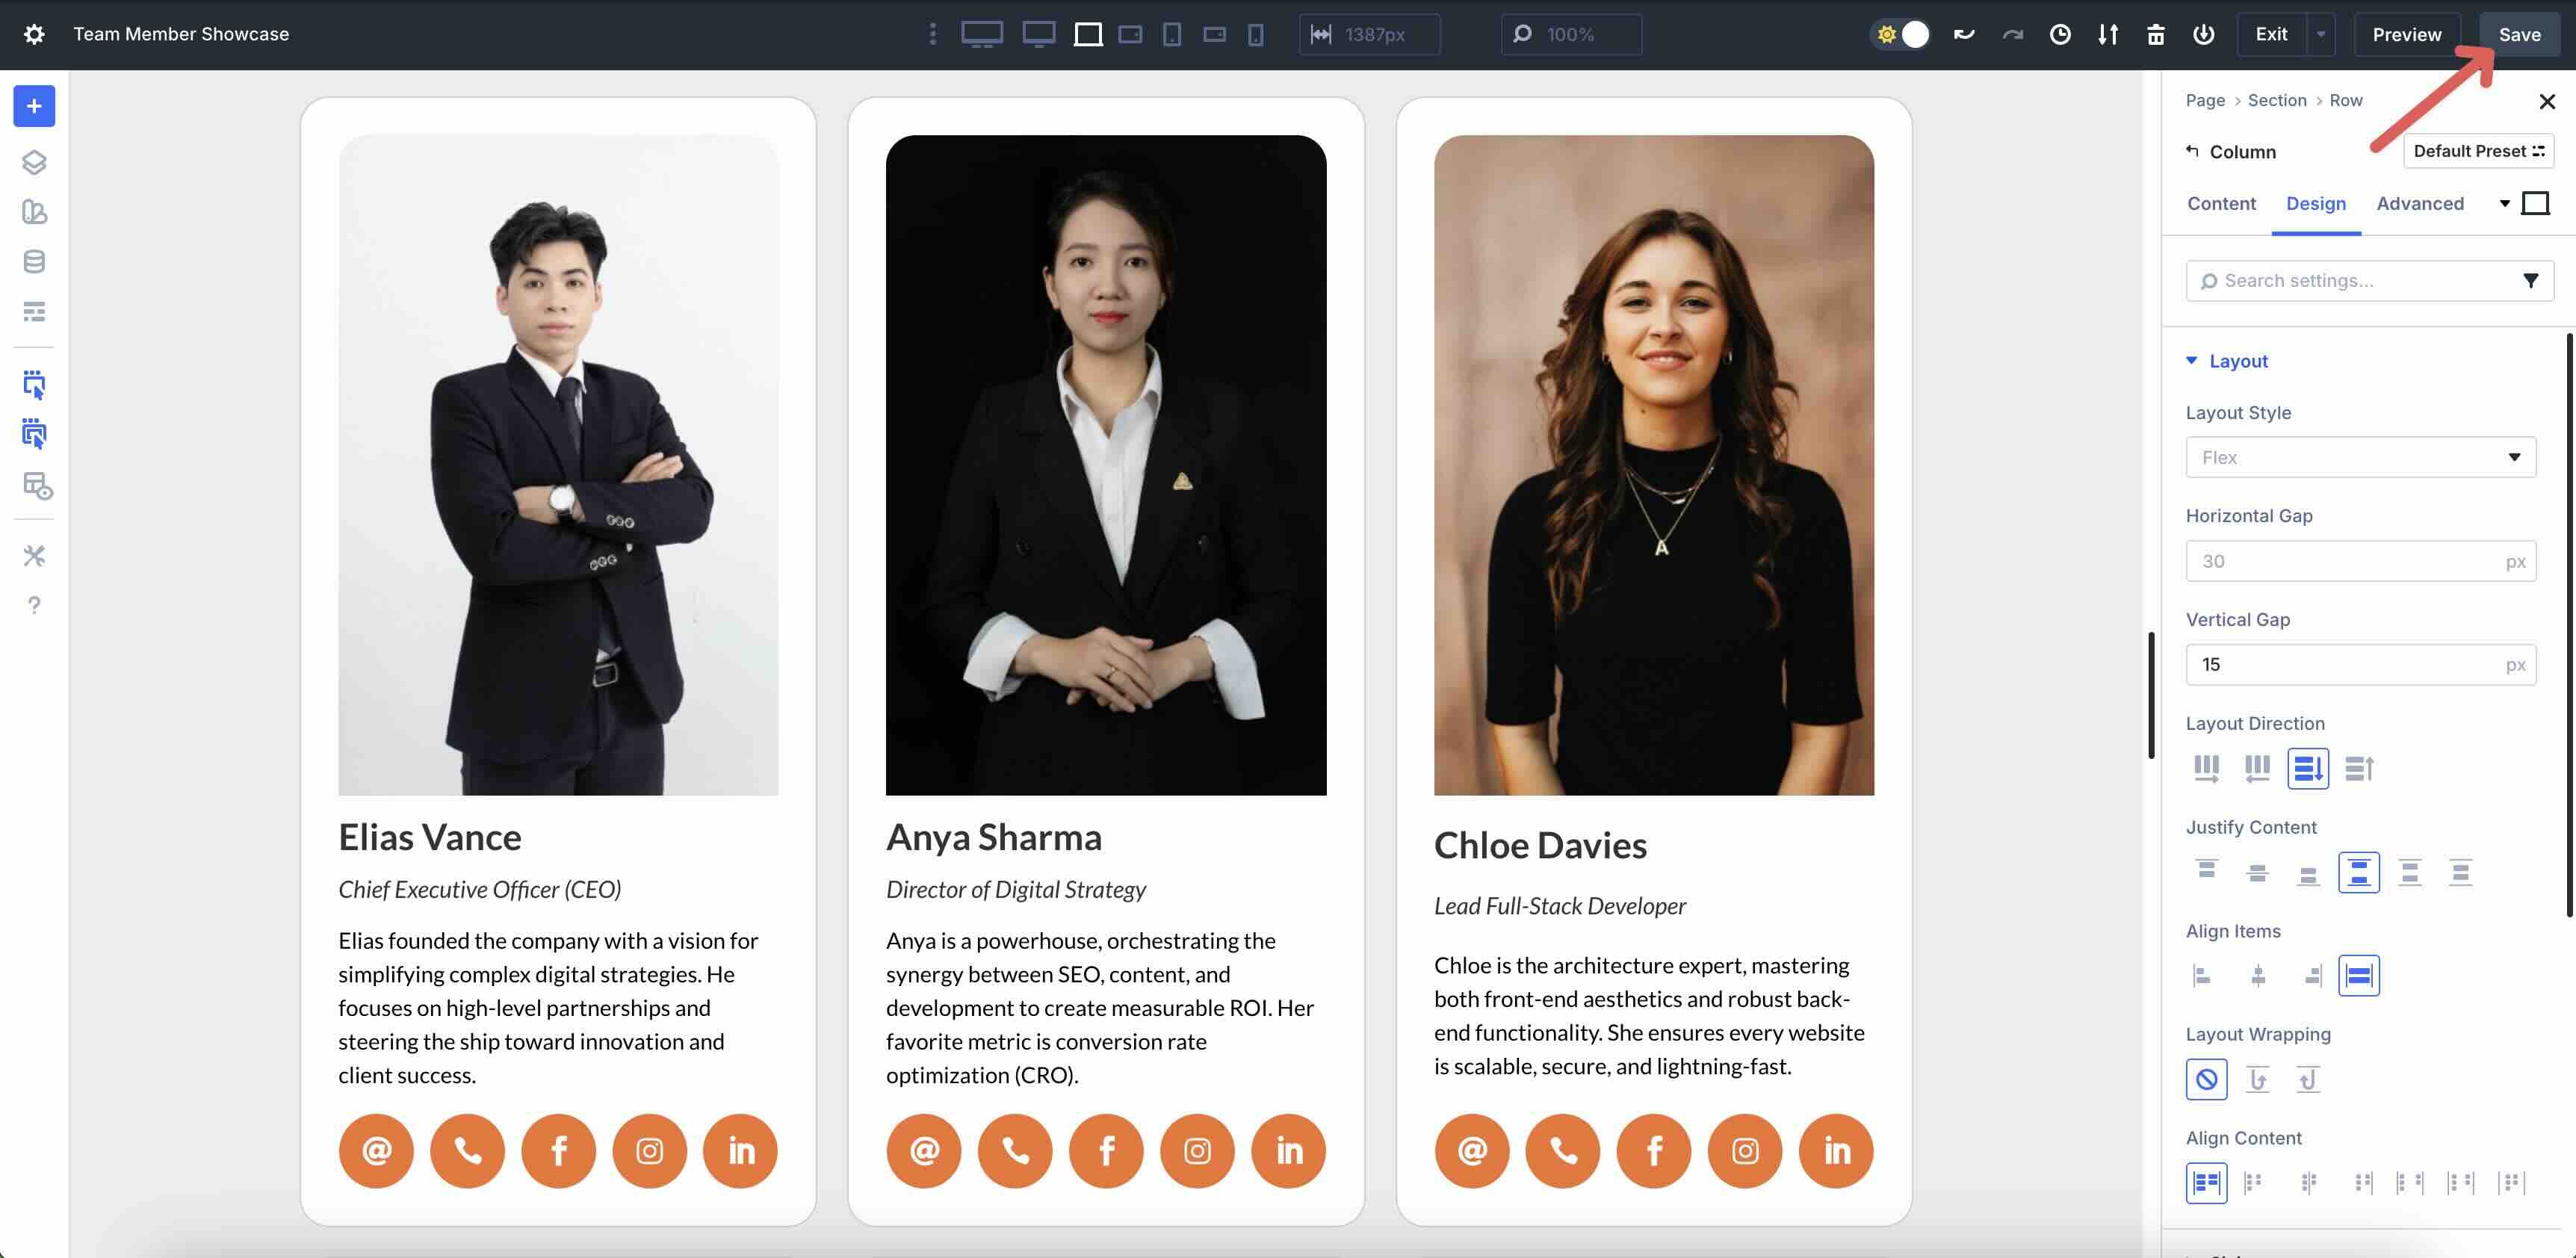
Quicker than proceeding to the next step, save the construction by the use of clicking the Save button on the most efficient right kind of the Visual Builder.
Step 5: Modify The Structure For Small Screens
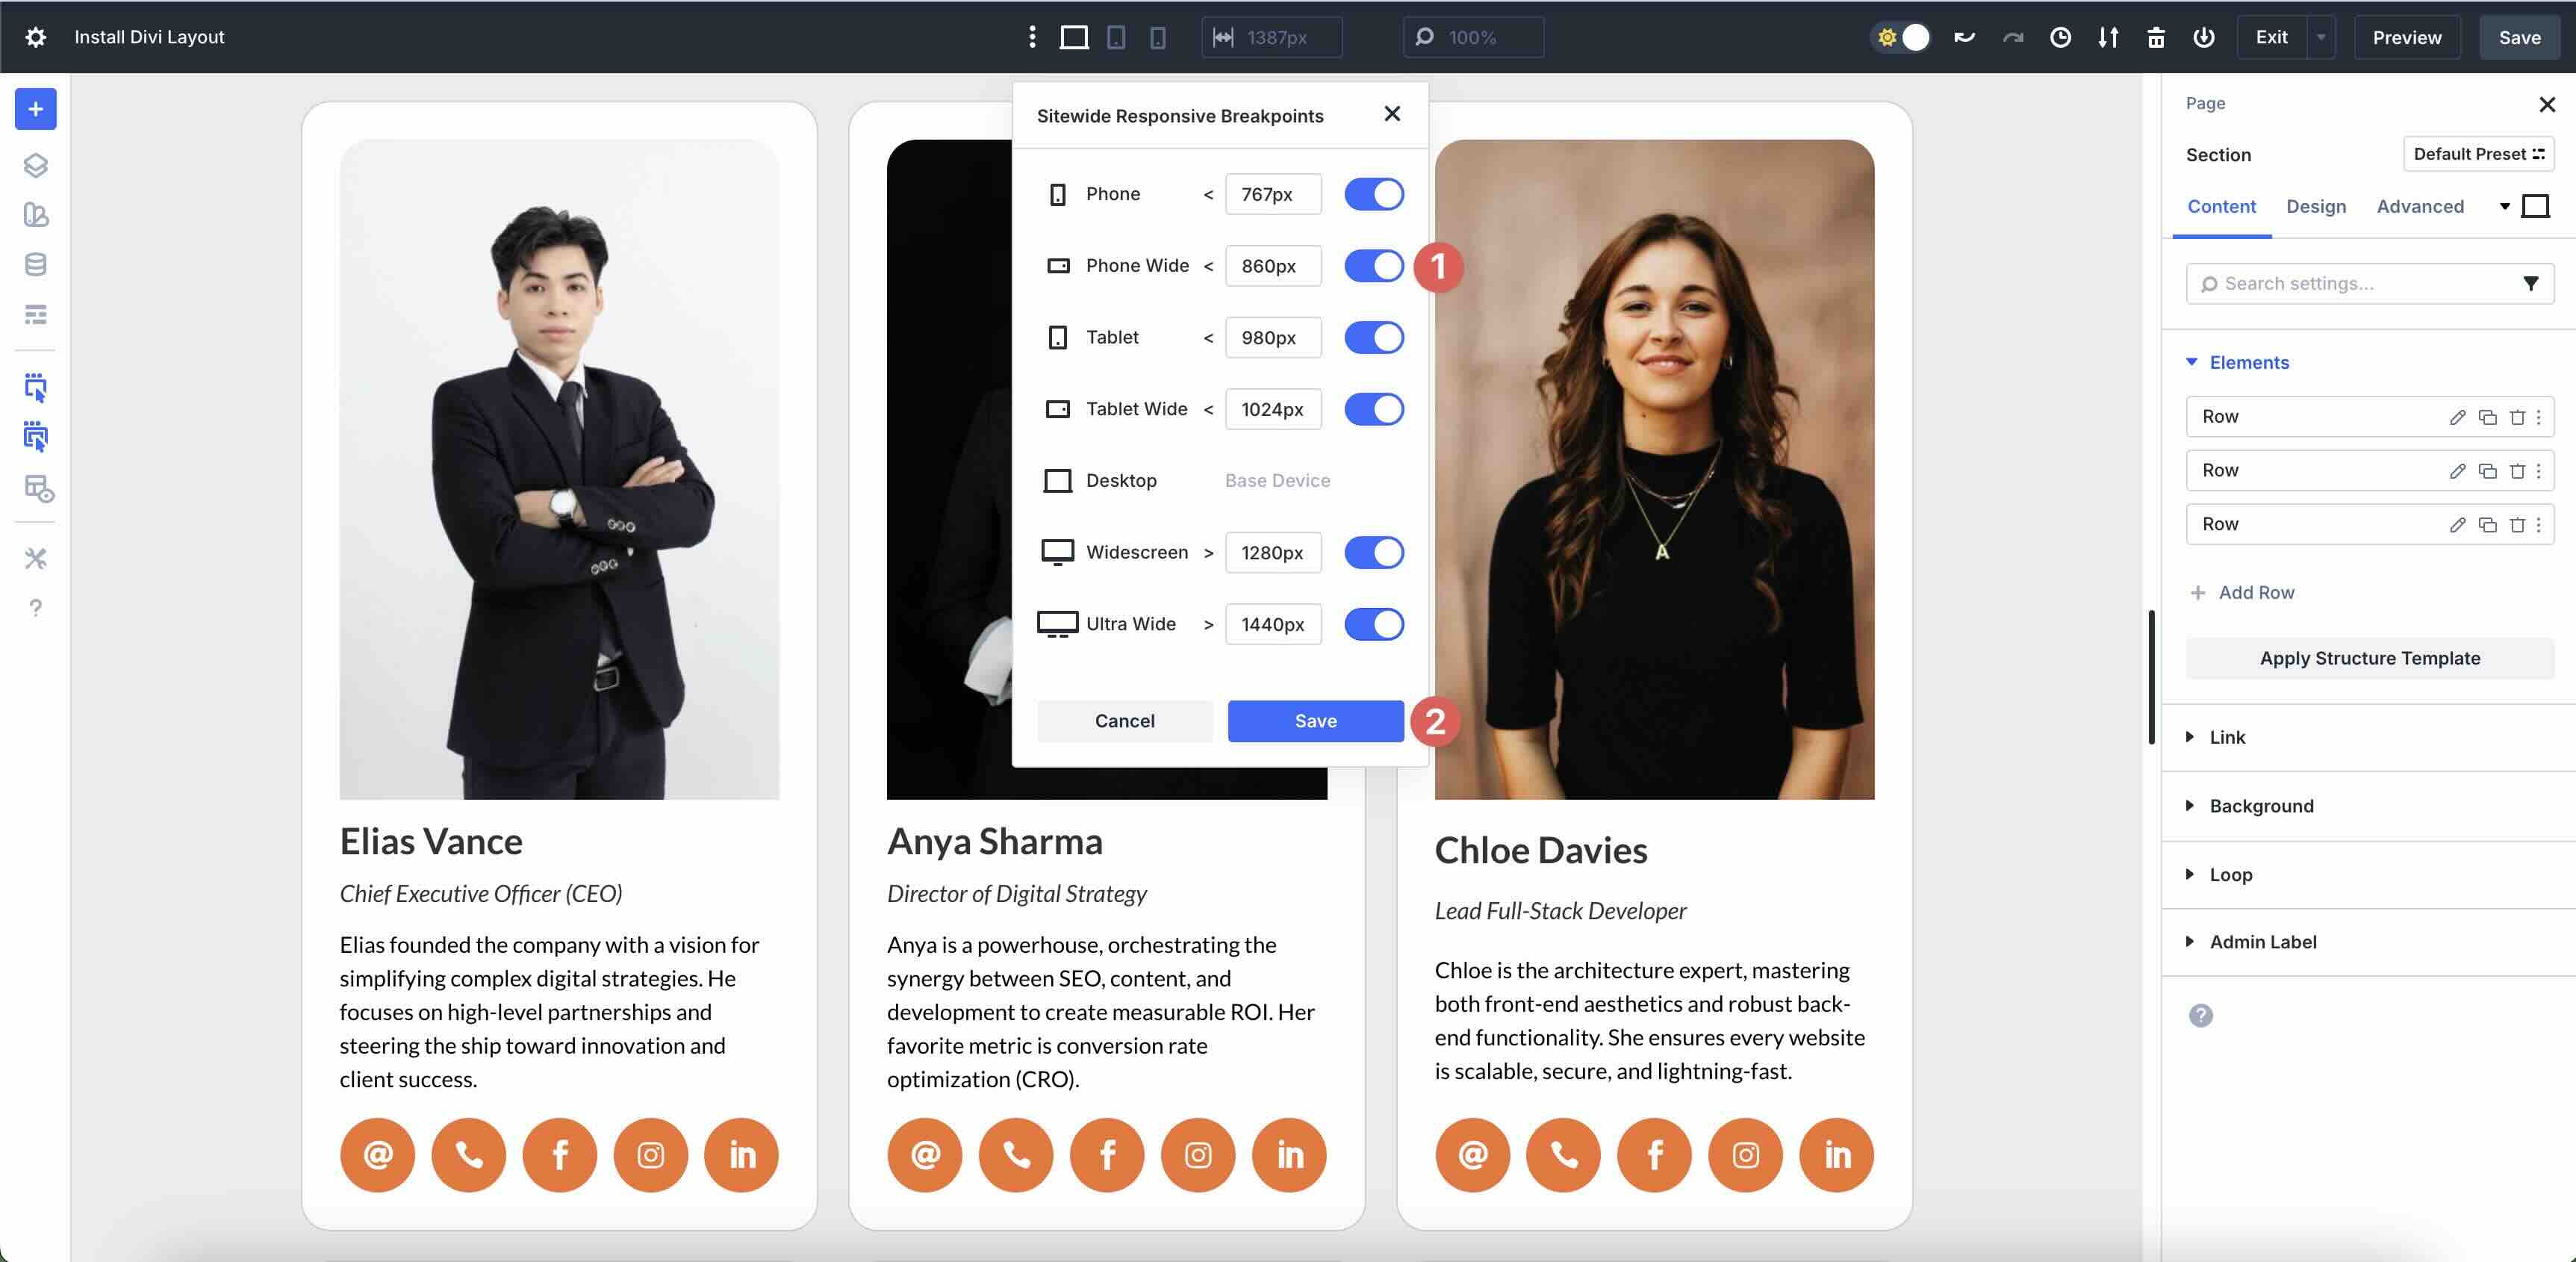
The rest step inside the process is to make responsive adjustments to the construction. Using Divi 5’s Customizable Responsive Breakpoints, you’ll be capable to fine-tune the design on up to 7 breakpoints, ensuring that the design seems to be like polished on every tool.
By way of default, 3 breakpoints are enabled. Alternatively, you’ll be capable to merely permit all 7 by the use of clicking the three-dot ellipsis menu inside of the most efficient bar inside the Visual Builder.

Permit your desired breakpoints by the use of toggling them on. Once whole, click on at the Save button to continue.
You’ll be capable to moreover use Divi 5’s Responsive Editor at the Phase, Row, Column, or Module degree to keep watch over responsive values as you assemble your construction. Click on at the Responsive icon inside the design settings of any module to activate it.
![]()
The Responsive Editor modal will appear, allowing you to make adjustments to every breakpoint on the fly.
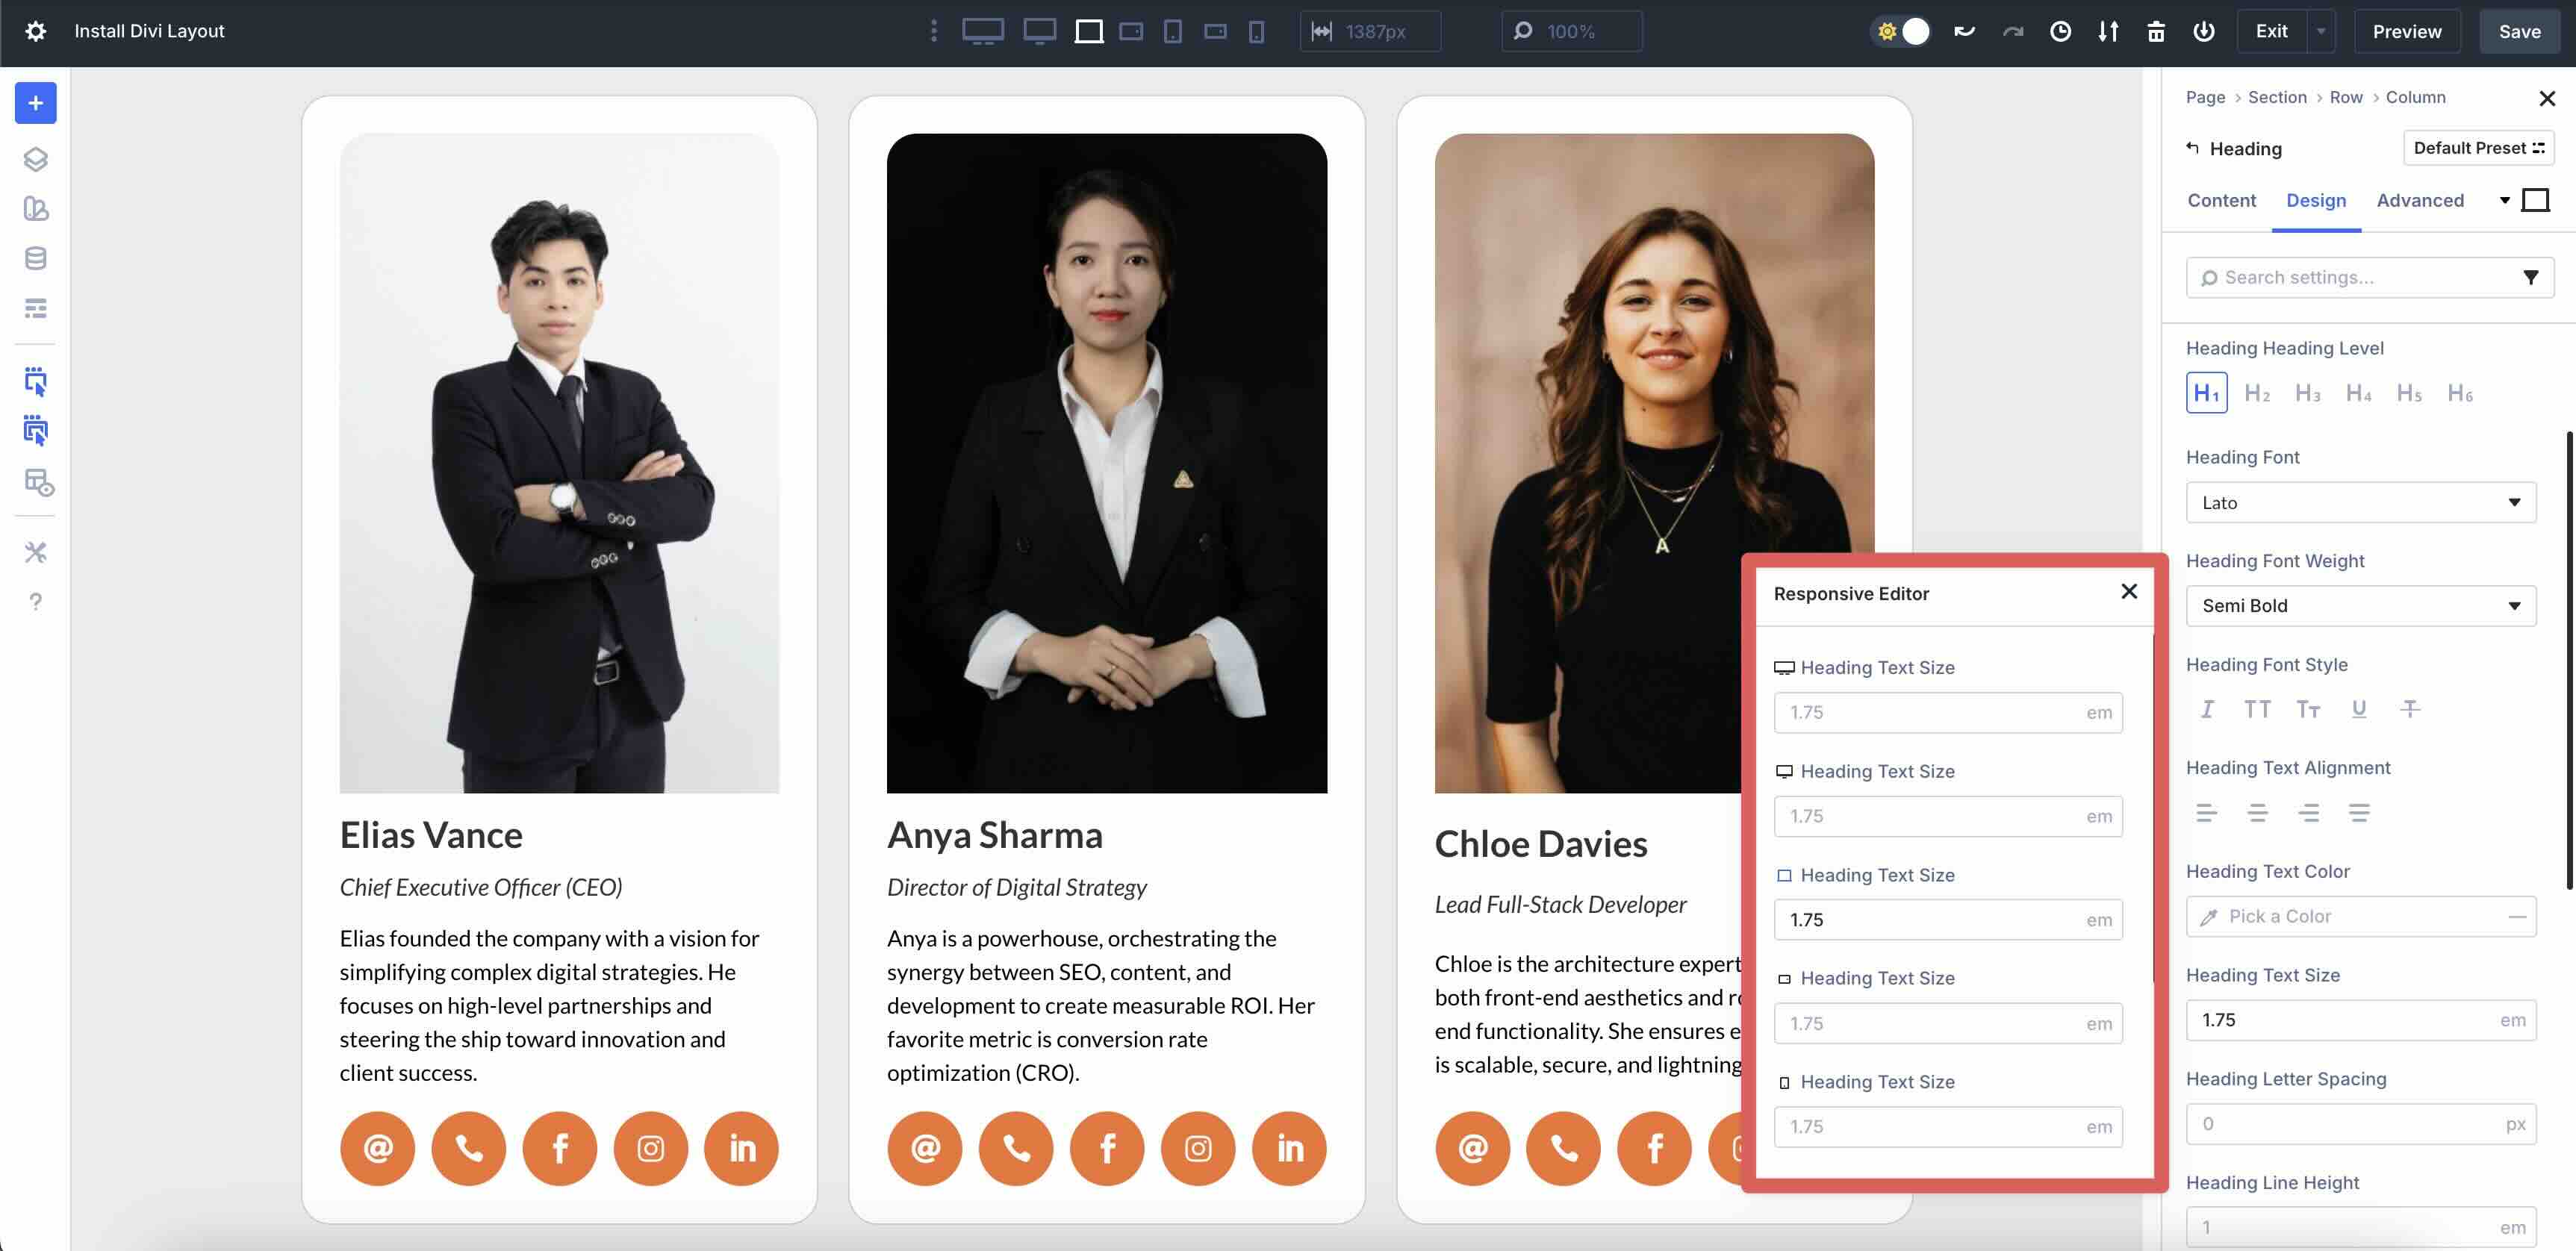
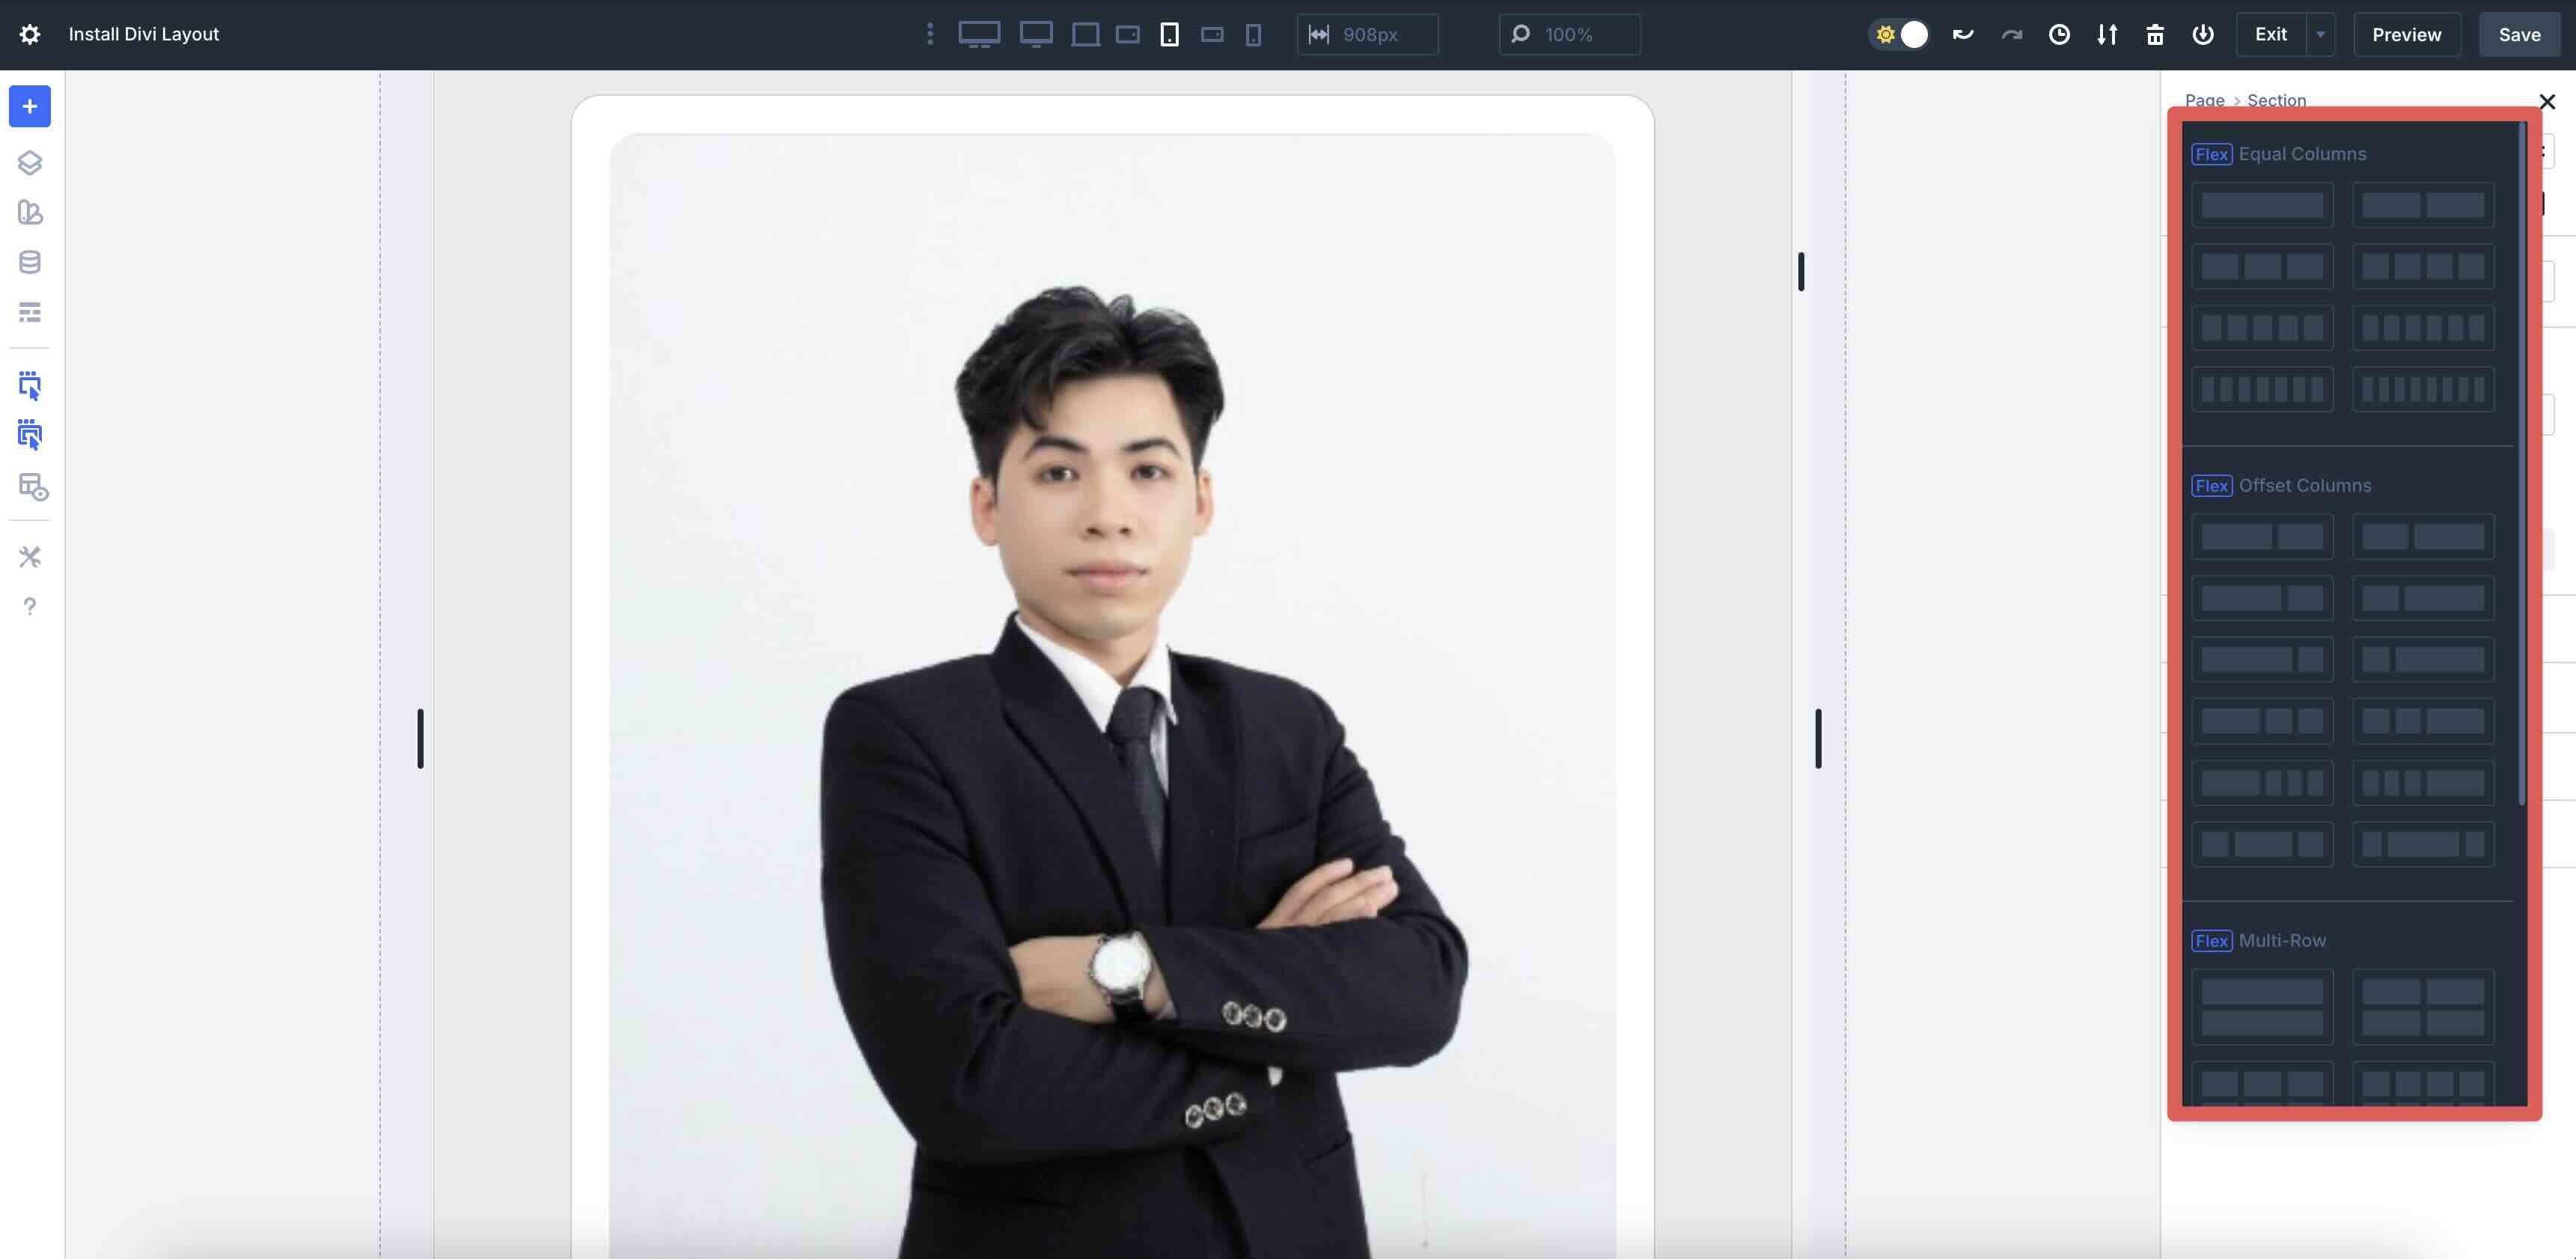
As you move via each breakpoint, you’ll be capable to alter the collection of columns by the use of clicking the Practice Development Template button situated inside the Content material subject matter tab.
When the modal turns out, you’ll be capable to exchange the Column building and follow a predefined template with the click of a button.
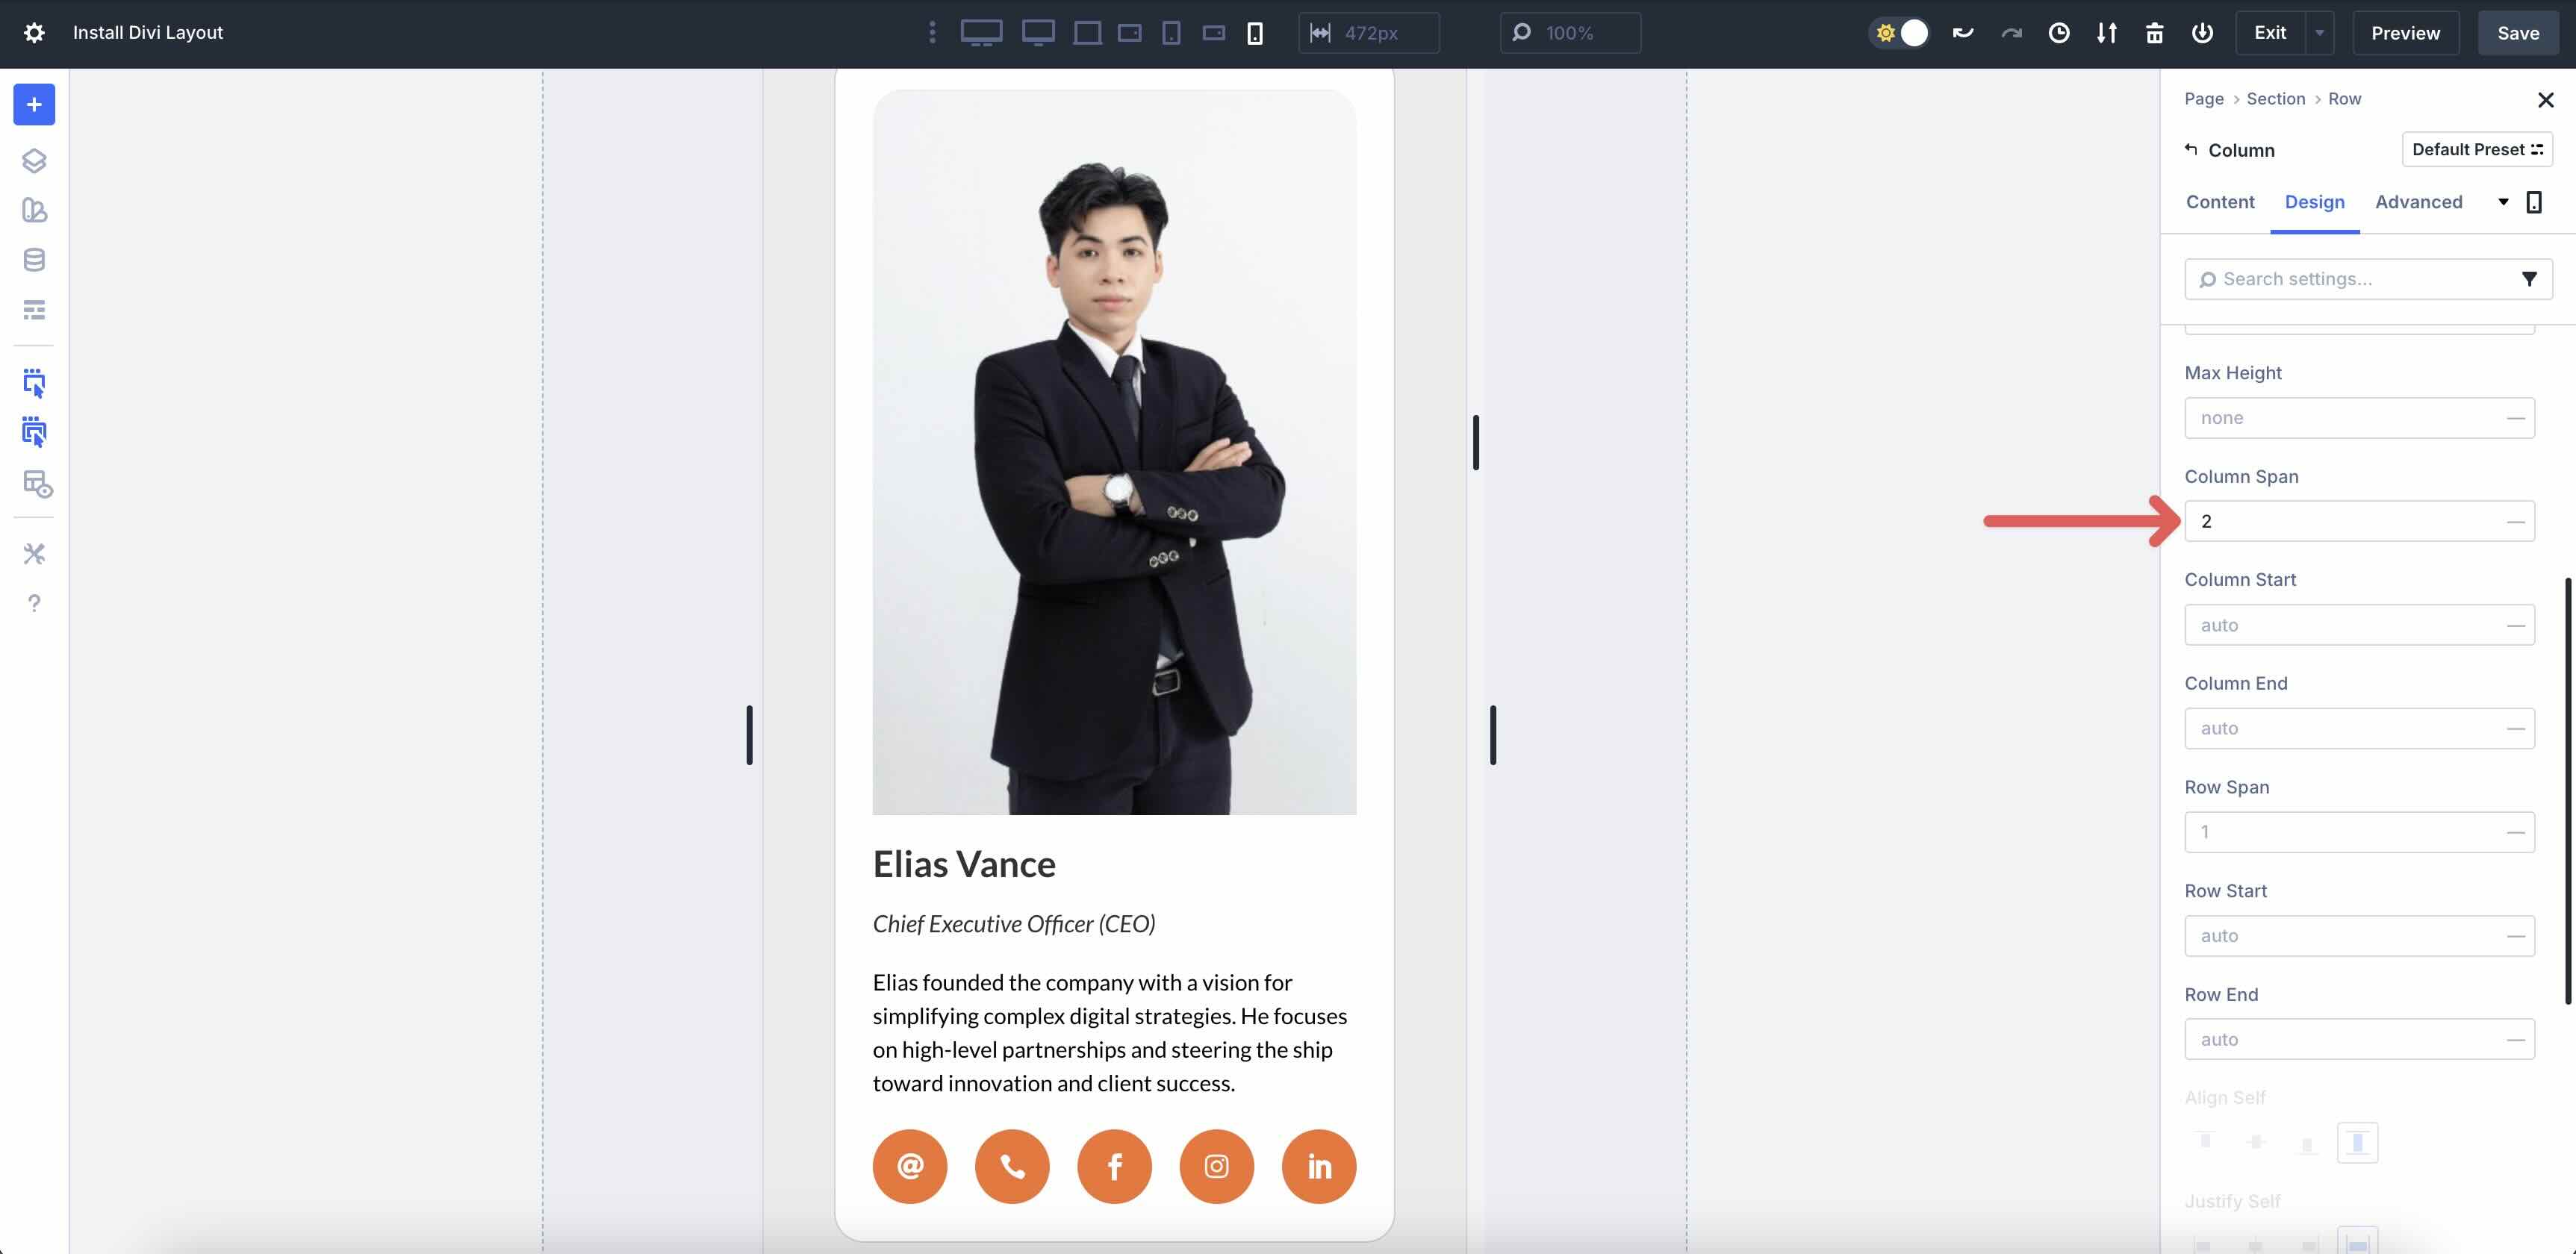
In the end, alter the collection of Columns for each breakpoint by the use of navigating to the Loop Column’s Design tab. Amplify the Sizing menu and change the Column Span for each tool.
As you’ll be capable to see, using the Loop Builder with ACF is modest, fast, and allows for never-ending creative probabilities.
Use The Divi 5 Loop Builder Nowadays!
With Loop Builder, a single setup unlocks a limiteless collection of probabilities. Transfer out submit varieties, tweak queries, or reuse layouts all through your web page for staff showcases, portfolios, testimonials, and previous. You’ve now built a certified, responsive staff list that’s easy to interchange as your staff grows.
Ready to dive in? Obtain the most recent Divi 5 Beta nowadays and get began experimenting with Loop Builder to create dynamic content material subject matter that wows.
The submit How To Construct A Workforce Listing The use of Divi 5’s Loop Builder gave the impression first on Chic Issues Weblog.
Contents
- 1 What Is Loop Builder?
- 2 How To Assemble A Personnel Checklist Using Loop Builder
- 3 Use The Divi 5 Loop Builder Nowadays!
- 4 What’s a QR Code + How Does It Paintings? The whole lot Entrepreneurs Will have to Know
- 5 WP Engine is Sponsoring Colour Code!
- 6 How you can Run a Competitor Research [Free Guide]

0 Comments