

Your logo shouldn’t be constrained by way of a static structure, so we purpose to come up with complete flexibility as Divi 5 continues to broaden. Divi 5’s new Loop Builder is a brilliant step in that path; it permits you to design an merchandise as soon as and loop it into dynamic grids or lists.
On this educational, we’ll display you how you can arrange a customized weblog publish loop. We’ll design the record, attach dynamic fields, set the question, and refine the structure for a blank grid or record. Let’s get to it!
What Is Divi 5’s Loop Builder
With Divi 5’s Loop Builder, you design a unmarried “card” structure within the Visible Builder the use of as many Divi modules as you need, then Divi loops it for every merchandise you select to show.
Subscribe To Our Youtube Channel
Permit the Loop Part on a column, set a question (posts, customized publish varieties like Tasks, phrases, or customers), and map dynamic fields akin to titles, featured pictures, classes, customized fields, and buttons. You’ll reorder components, keep watch over spacing, and let the whole thing inherit your international kinds.
The result’s a responsive, reusable record that fits your machine with out the will for additonal plugins or customized code.
How The Loop Builder Works
You’ll flip at the loop mode in any phase, row, column, or module by way of opening its Content material tab and enabling Loop.
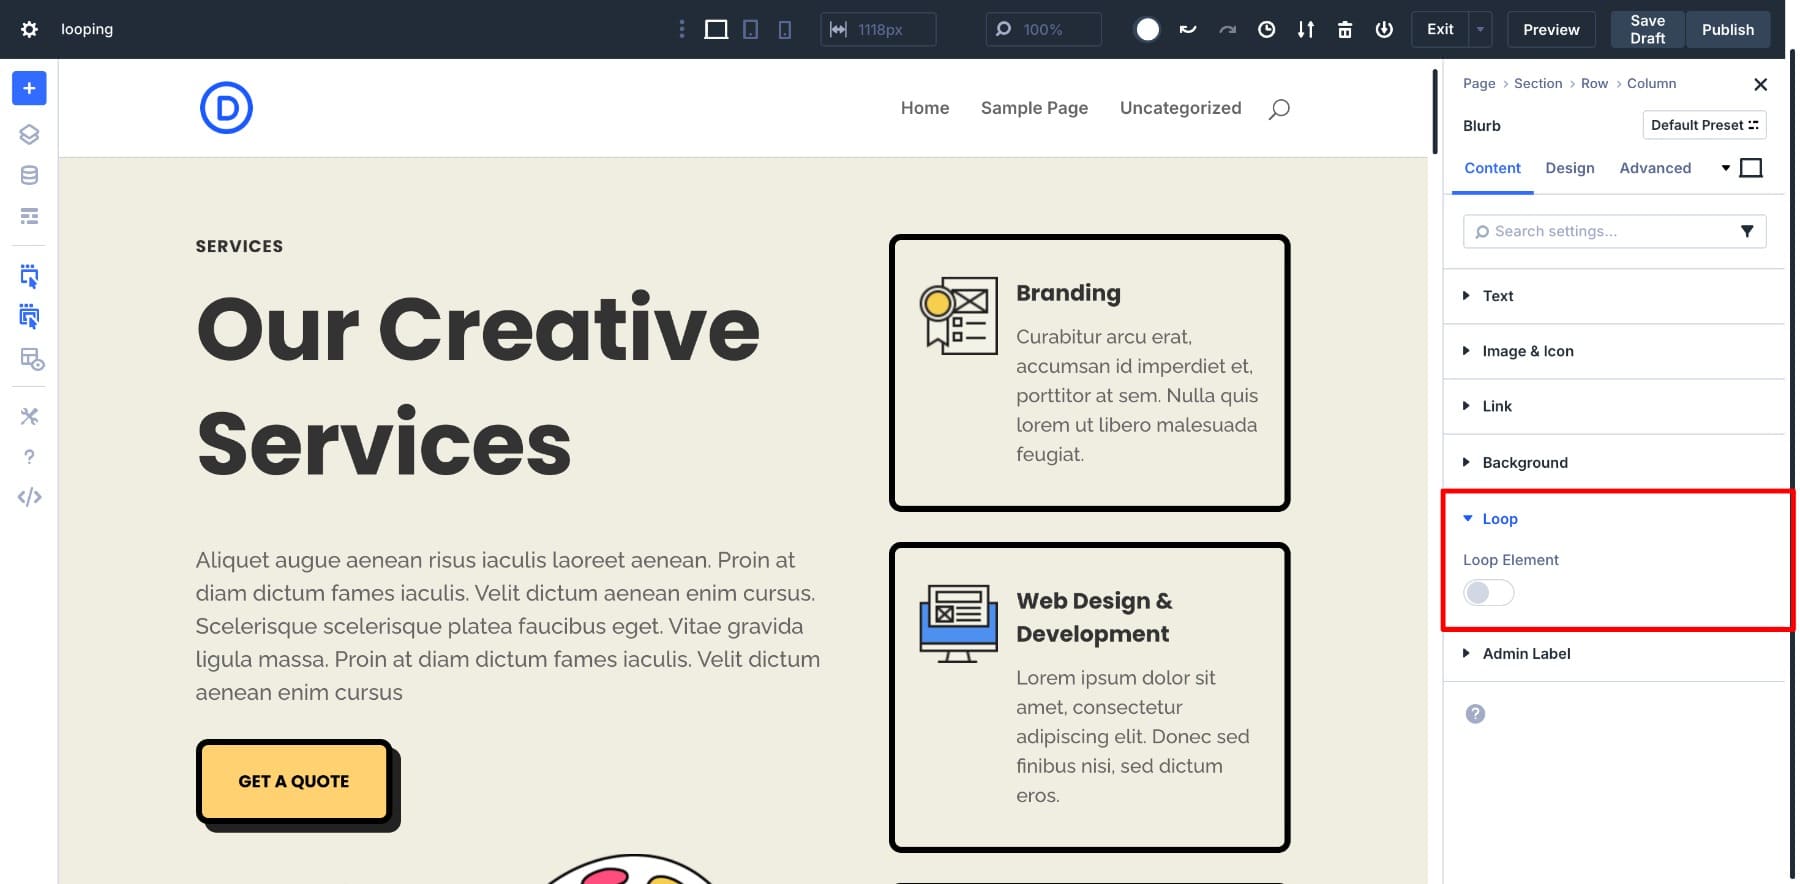
From that time, Divi routinely repeats the part for every publish that fits your settings.
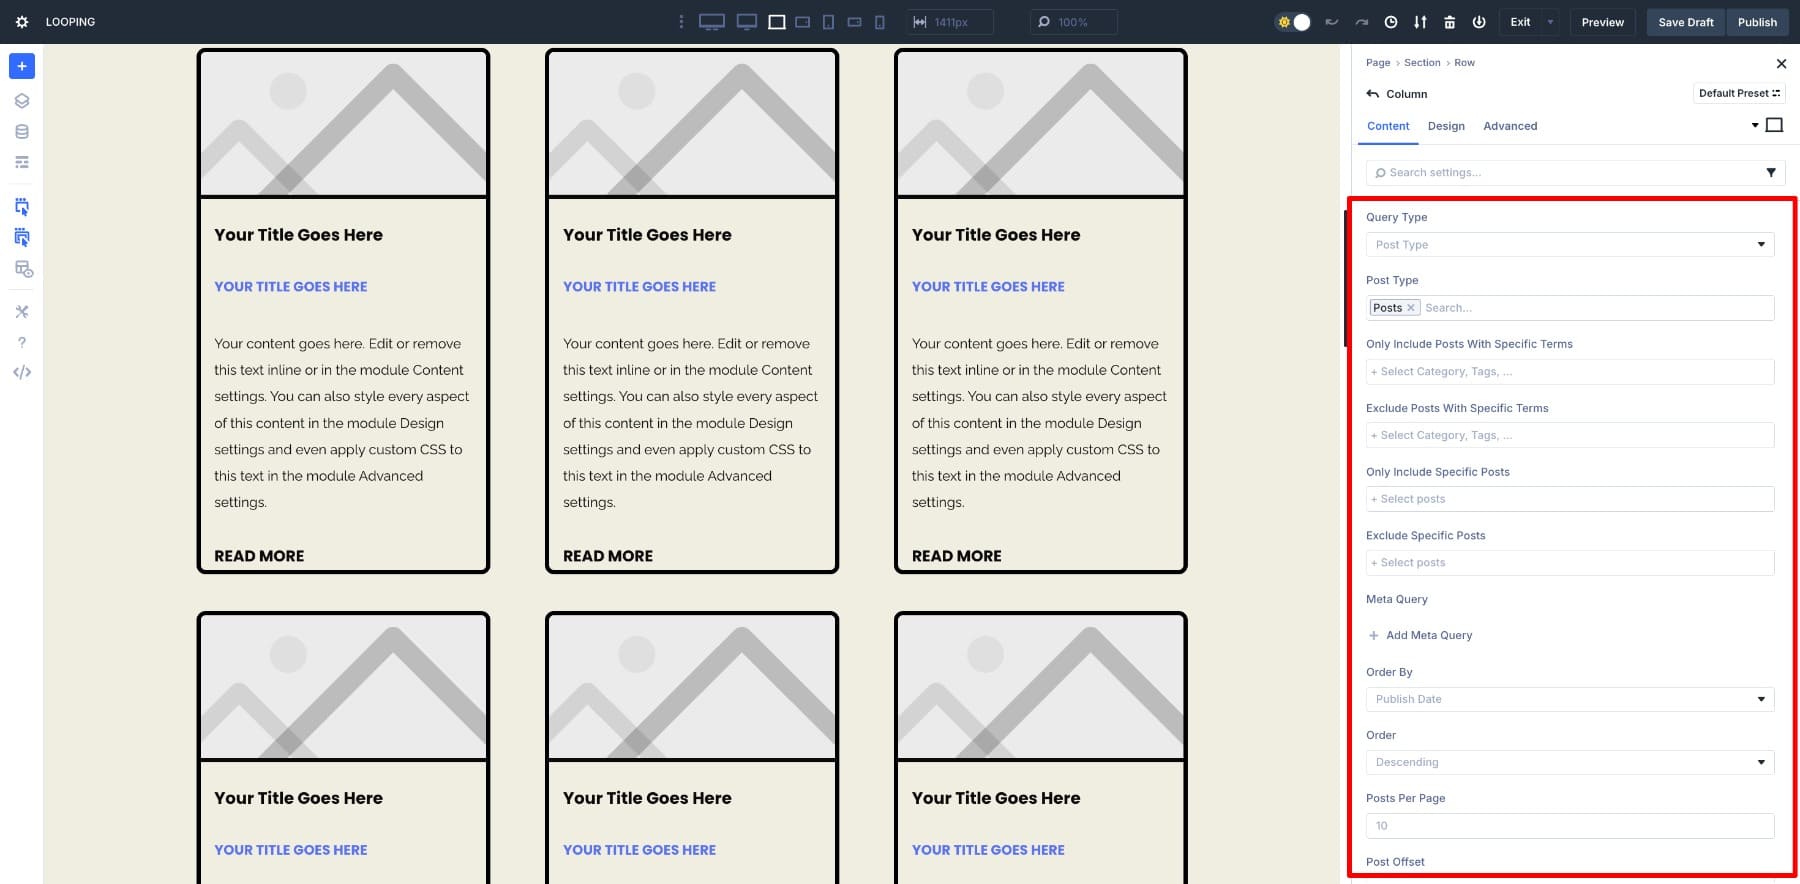
Right here’s the place the true keep watch over is available in. Within the loop settings, you’ll:
- Question Kind: Make a choice from a fundamental publish question or a meta question, filtering by way of classes, tags, customized fields, or different metadata.
- Submit Kind: Pick out the kind of content material to show, from weblog posts to merchandise to any customized publish kind.
- Simplest Come with Posts With Particular Phrases: Display best posts that fit sure classes, tags, or different taxonomy phrases.
- Exclude Posts With Particular Phrases: Take away posts that fit decided on classes, tags, or phrases.
- Simplest Come with Particular Posts: Make a selection particular person posts to incorporate.
- Exclude Particular Posts: Cover particular person posts you don’t need within the loop.
- Meta Question: Upload customized box prerequisites to keep watch over what seems.
- Order By way of: Select if effects are taken care of by way of date, name, menu order, or a customized box price.
- Order: Display leads to ascending or descending order.
- Posts Consistent with Web page: Make a decision what number of posts show earlier than pagination.
- Submit Offset: Skip a undeniable choice of posts from the beginning, at hand for keeping off duplicates with featured sections.
- Forget about Sticky Posts: Select whether or not sticky posts get precedence or are handled like commonplace posts.
While you’ve outlined your question, Divi routinely fills every publish card with the correct content material whilst maintaining the structure and styling equivalent. You focal point totally on how the cardboard appears to be like, and Divi handles the inhabitants and repetition. With the whole thing managed from a unmarried panel, a couple of settings are all it takes to stay your weblog record up to date with out handbook edits.
Learn Everything About Divi 5’s Loop Builder
Developing A Customized Weblog Submit Loop With Divi 5
Construction a customized weblog publish loop with Loop Builder has two portions. First, you design the publish card structure, opting for precisely what content material seems and the way it appears to be like. Then, you put that design within a loop so Divi repeats it routinely for each publish you need to turn.
We’ll undergo it step by step, beginning with the cardboard structure after which putting in place the loop.
Earlier than You Get started
For those who’re shifting from the Weblog Module to Loop Builder and have already got a weblog record web page, you’ll skip to creating your Loop Layout. If no longer, right here’s the short setup:
1. Upload A Weblog Web page
Out of your WordPress dashboard, move to Pages > Upload New, title it “Weblog,” and post it.
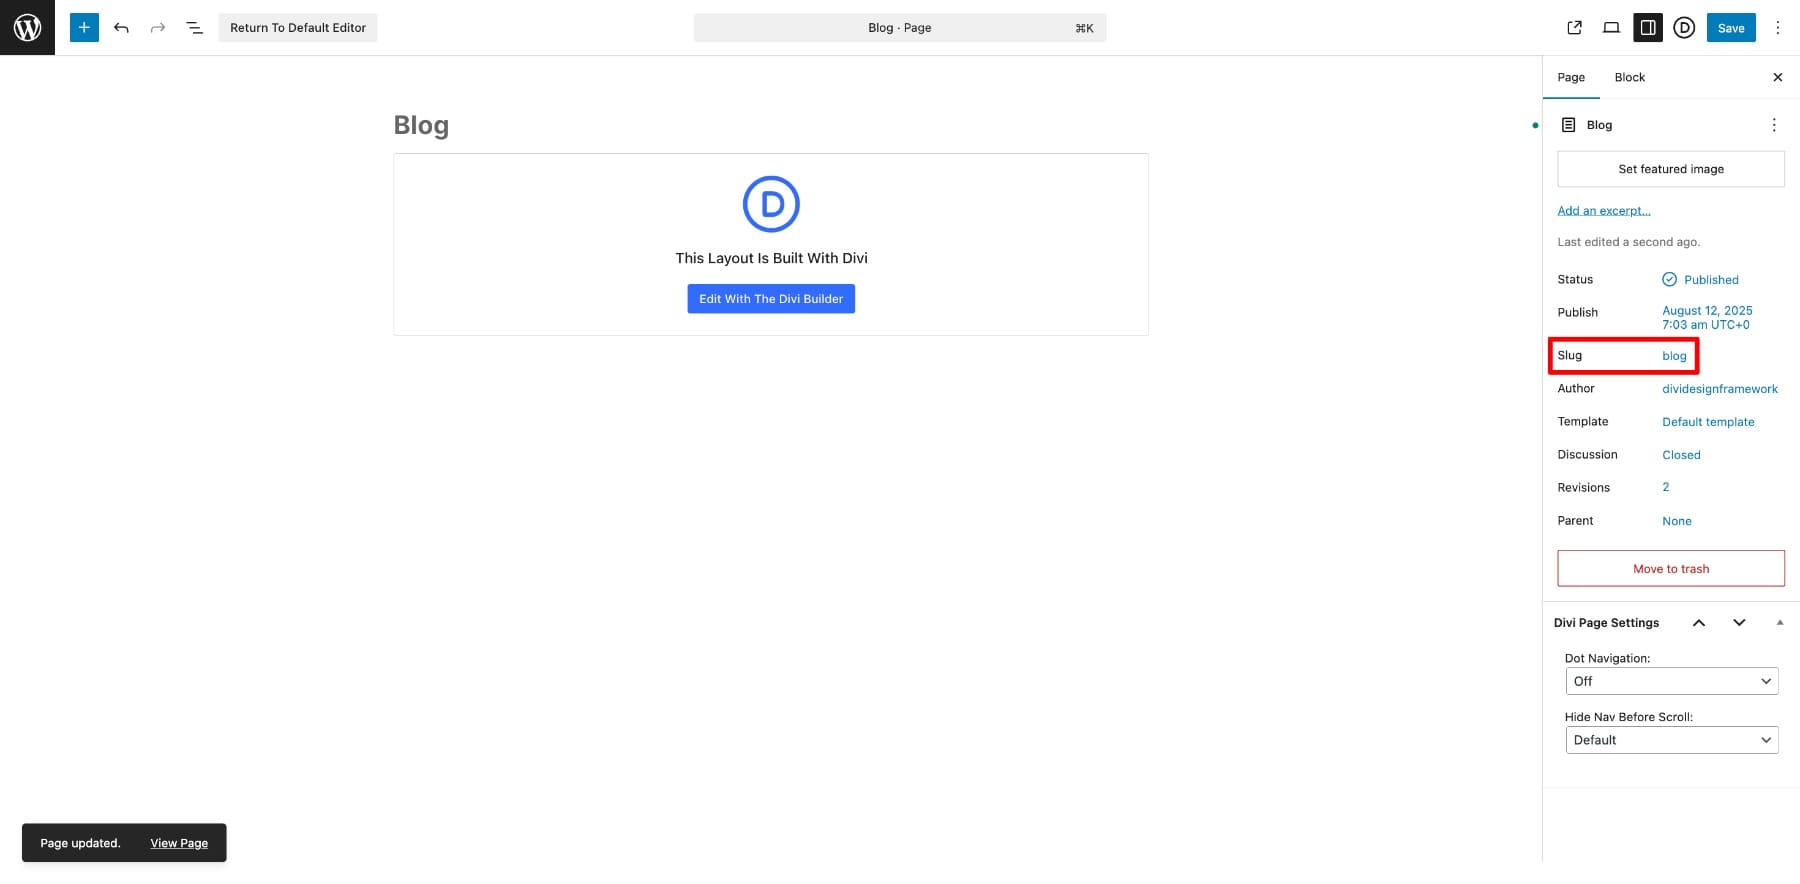
This web page would be the major hub to your posts.
2. Set Your Weblog Web page In WordPress Settings
In Settings > Studying, make a selection A static web page. Assign your Homepage to House and your new Weblog web page to Posts web page.
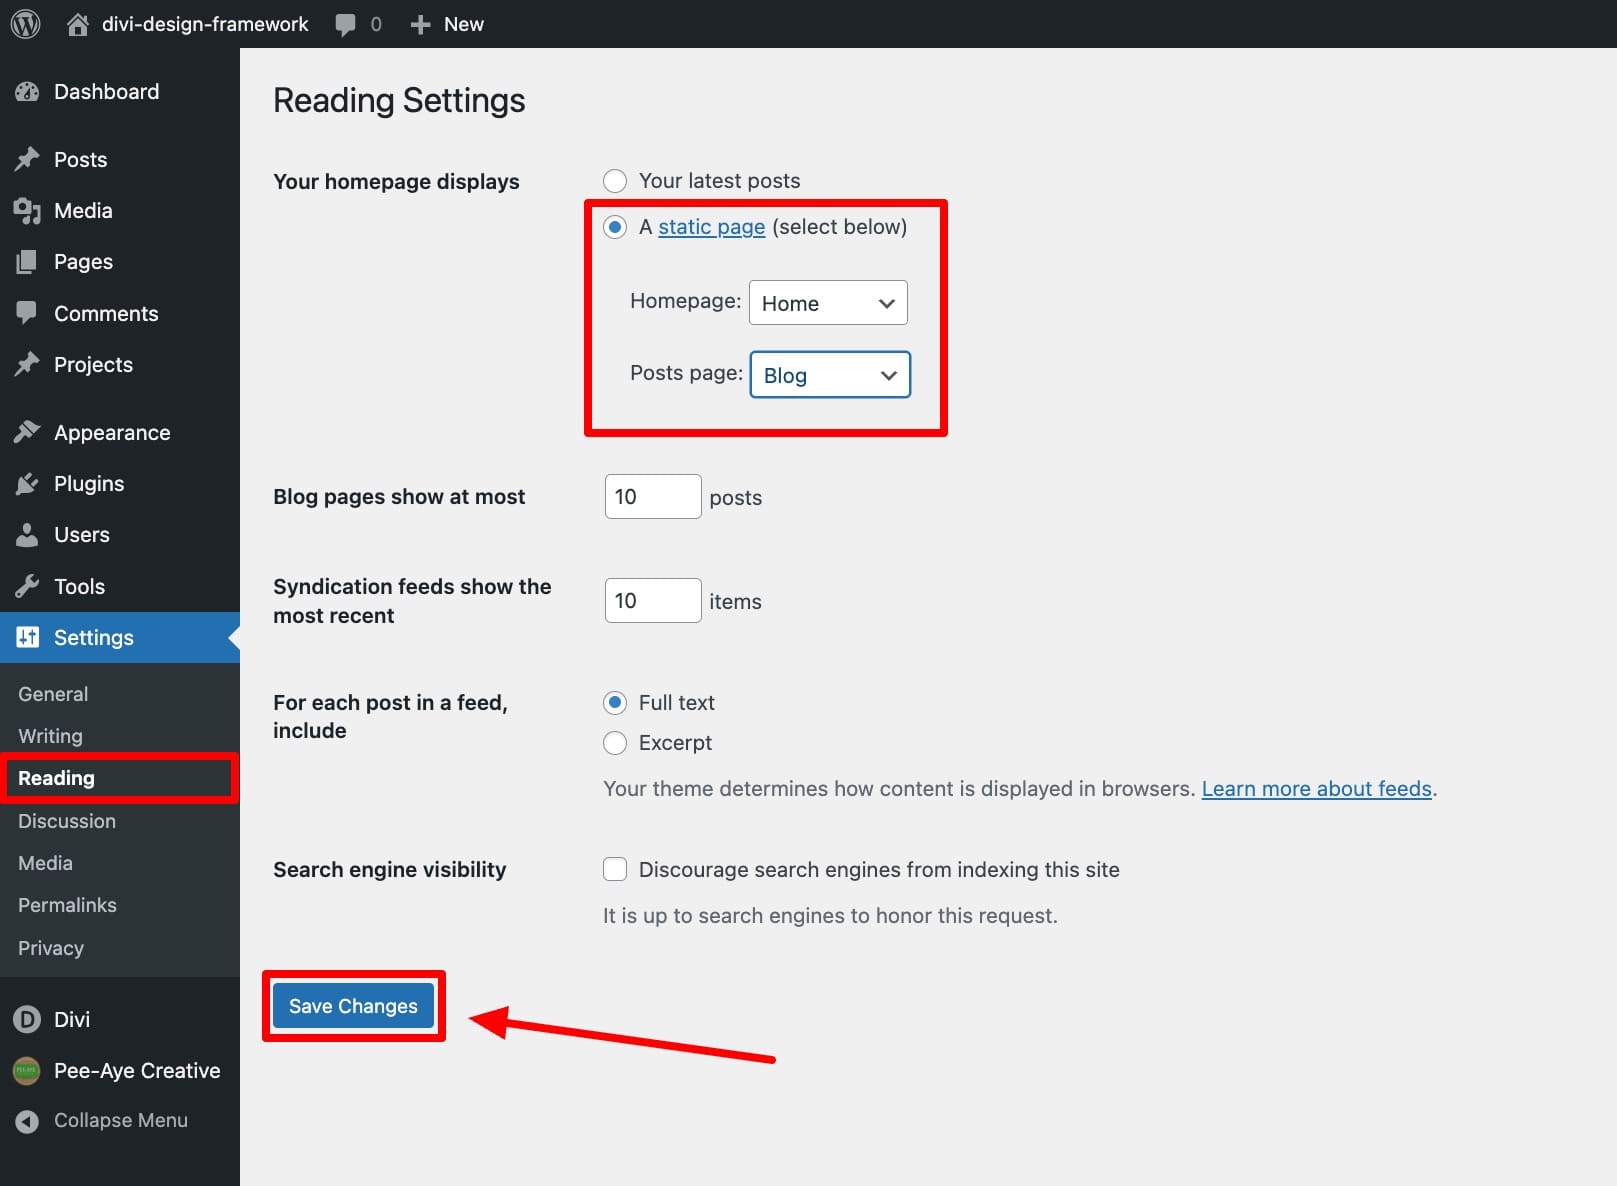
That is best wanted for those who use a separate homepage and weblog record web page.
3. Create A Theme Builder Template
Subsequent, you’ll create a brand new template to your weblog record web page. If you have already got one, you’ll customise that. Make sure to’re the use of the latest Divi 5 version to get admission to Loop Builder.
In Divi > Theme Builder, click on Upload New Template > Construct New Template.
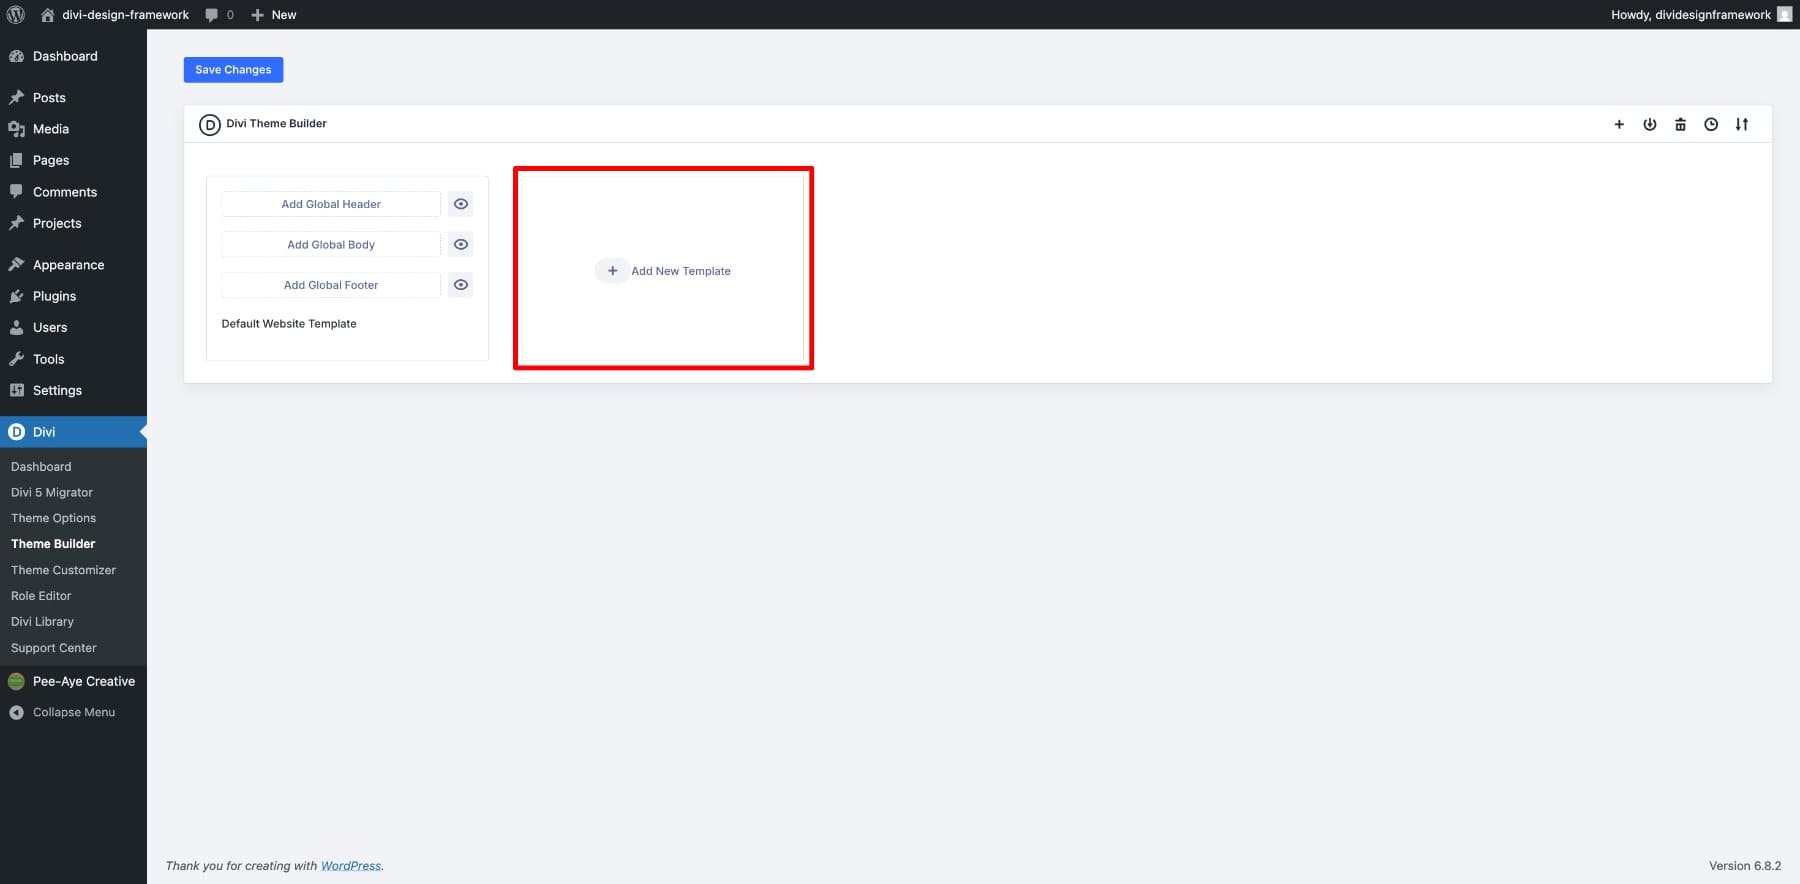
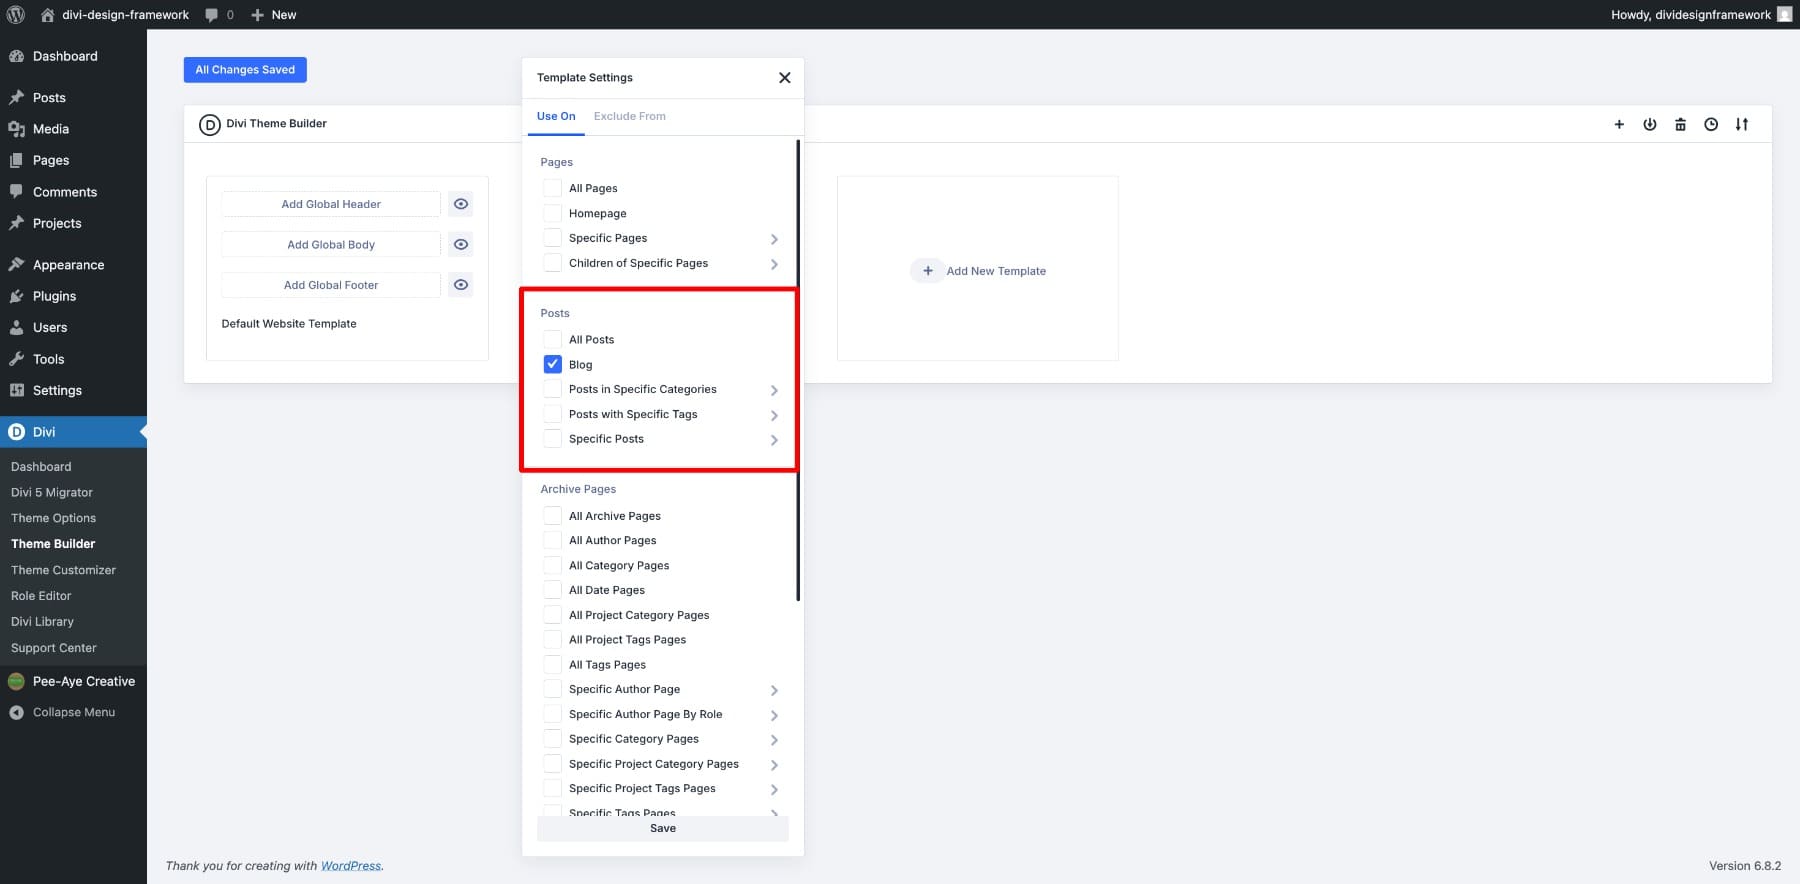
Assign it for your Weblog web page and click on Create Template.
To design your weblog publish record web page, click on Upload Customized Frame > Construct Customized Frame.
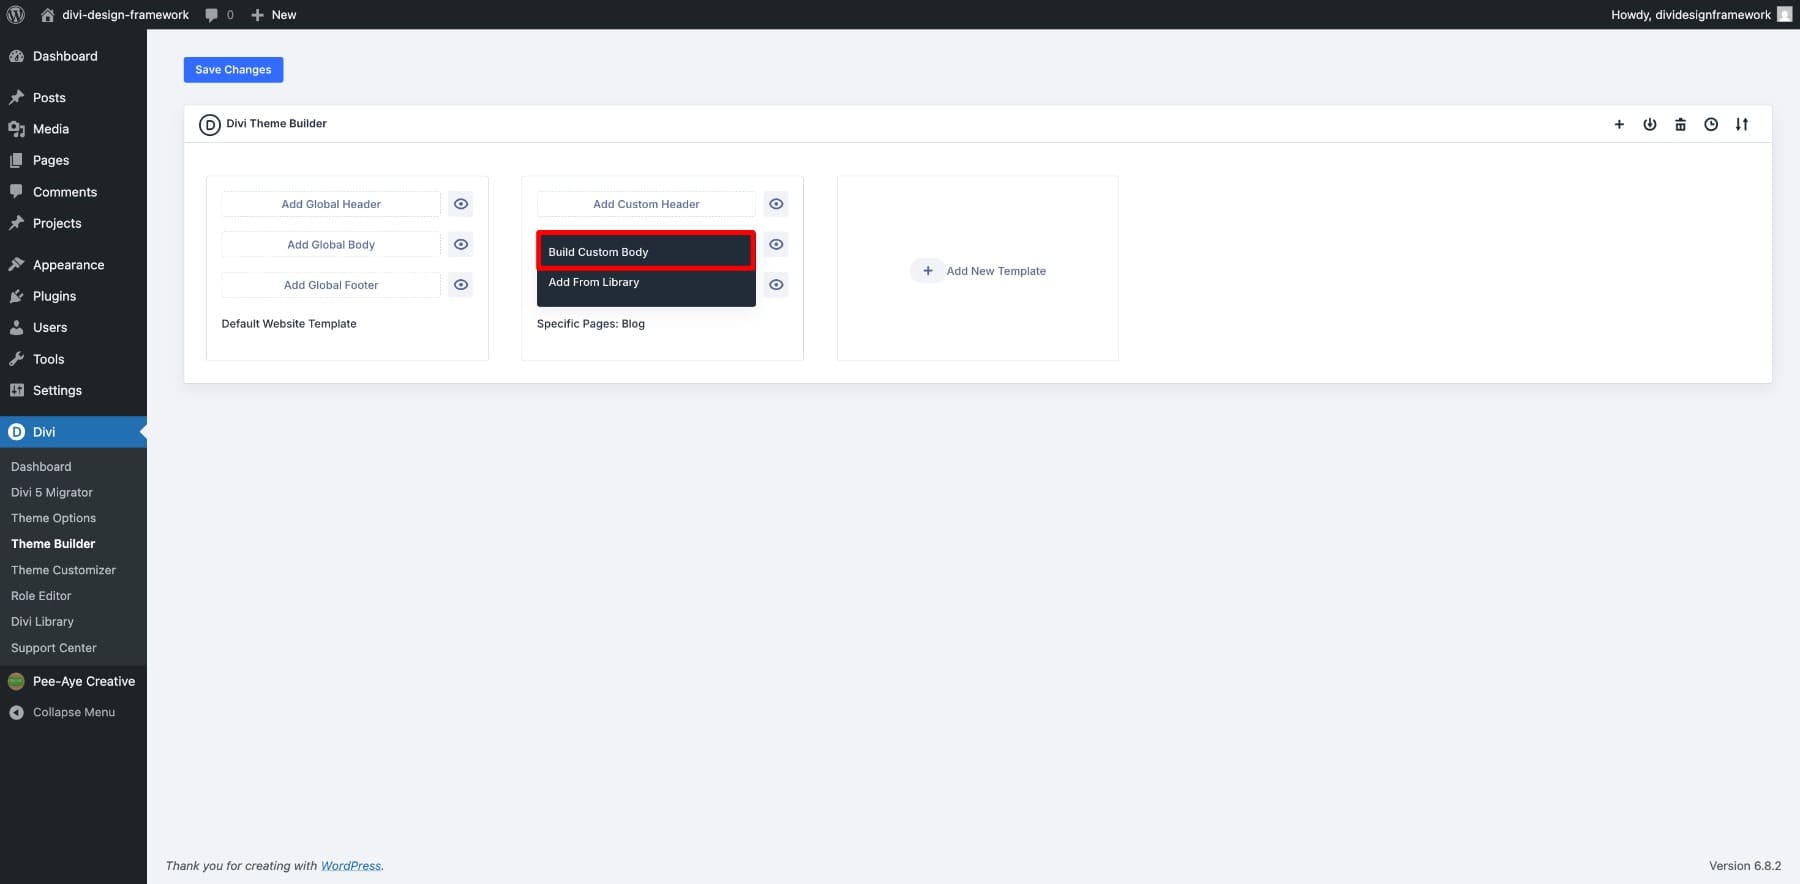
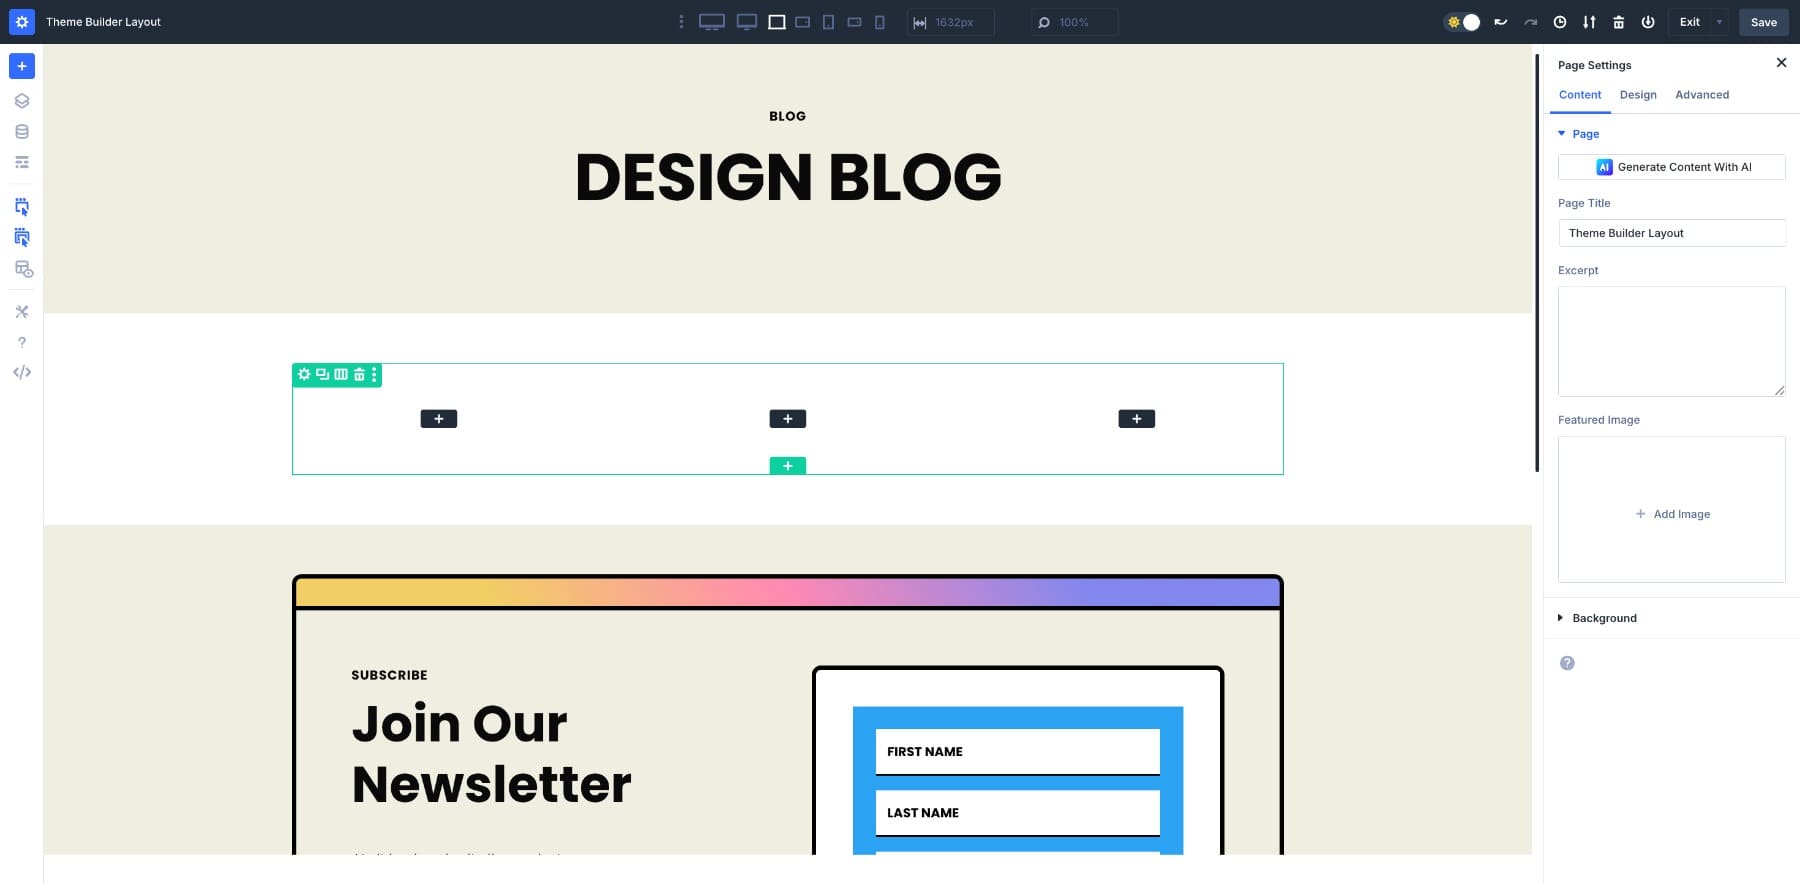
You’ll now input the Divi Builder, the place we’ll get started construction the loop structure.
1. Import A Structure
Beginning with a structure can prevent a large number of time and allow you to stay a constant design from the start. For this educational, I’m the use of the Marketing Agency Blog Page Layout for branding.
You’ll make a selection the similar or import any structure that will give you a just right base to paintings from. As soon as it’s on your template, you’ll have a ready-made construction you’ll adapt for your wishes as a substitute of establishing the whole thing from scratch.
2. Design One Weblog Submit Card
That is the place Loop Builder’s flexibility in point of fact comes via. As a substitute of being locked into the Weblog module’s mounted structure, making a decision precisely what is going in your publish card and the way it’s organized.
Upload a brand new phase for your template. You’ll select from the pre-designed constructions or create your personal the use of the one-column choice.

For this situation, let’s make a selection a three-column row construction phase.
Within the first column, we’ll create our publish card. We’ll use a Module Staff to carry the entire components.
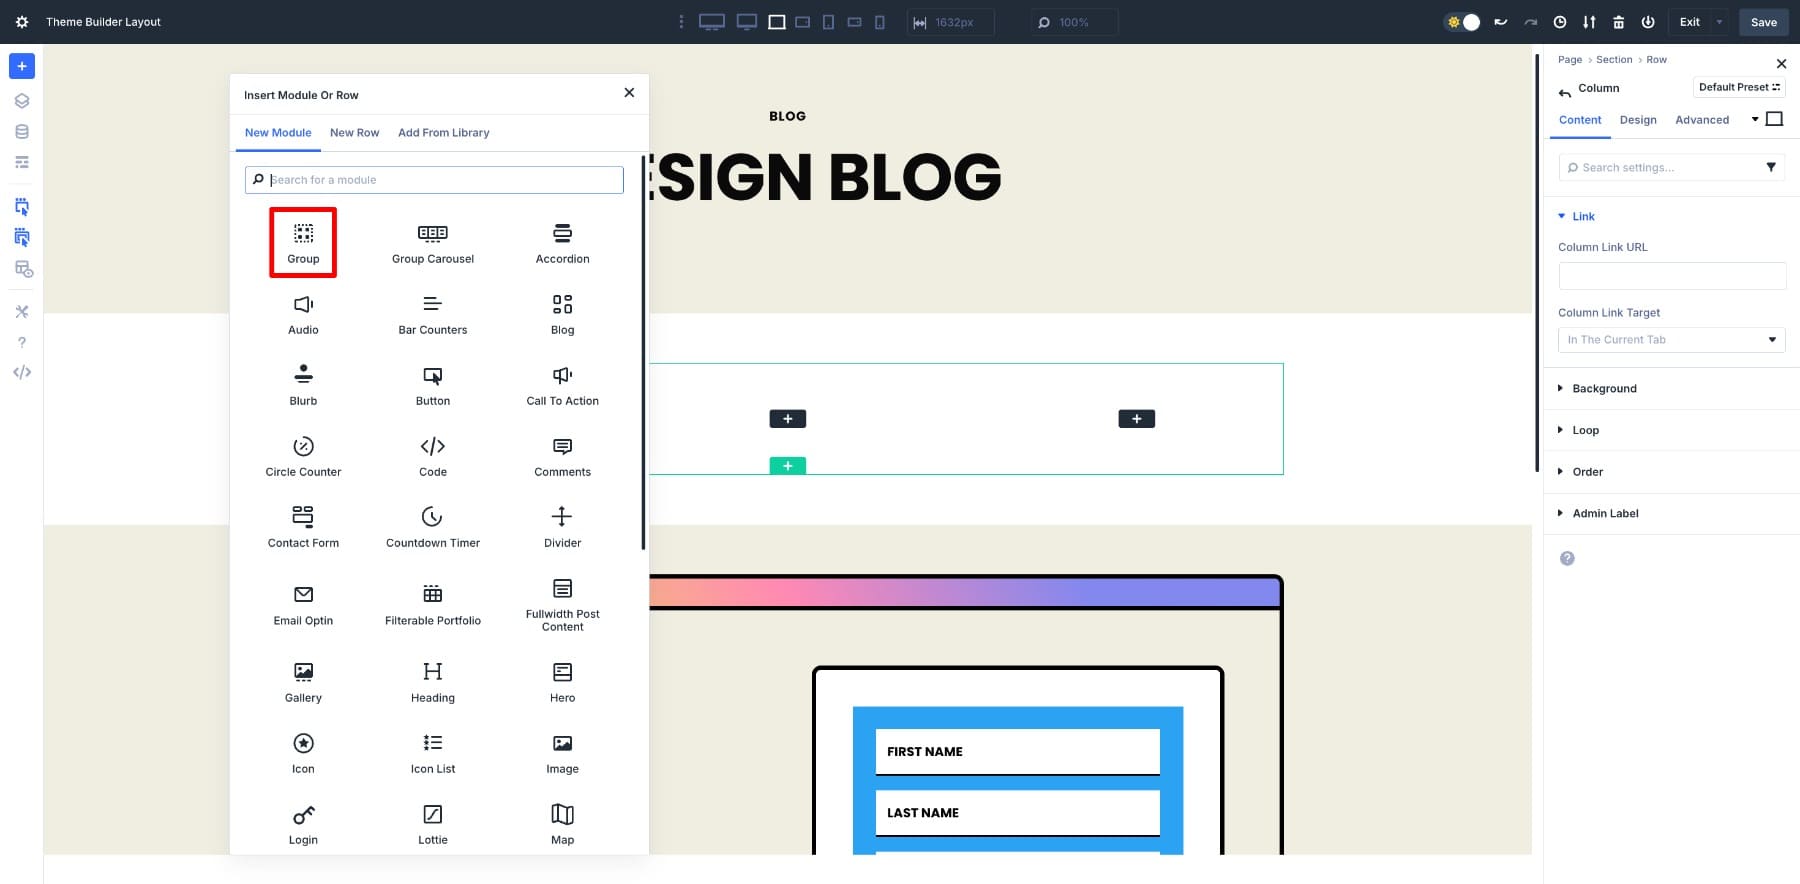
Then upload an Symbol module for the featured picture, a Heading module for the publish name, and a Textual content module for the excerpt. We’ll additionally upload meta knowledge and a Learn Extra button so guests can click on via to the whole publish.
As soon as the elemental construction is there, customise the cardboard’s design so it suits your logo. Tweak colours, fonts, spacing, and any distinctive visible main points that make it yours.
3. Permit Row Wrapping
To ensure your playing cards show well in rows throughout other display sizes, you’ll wish to permit Flex Wrapping. Make a selection the primary row and open the Design tab.
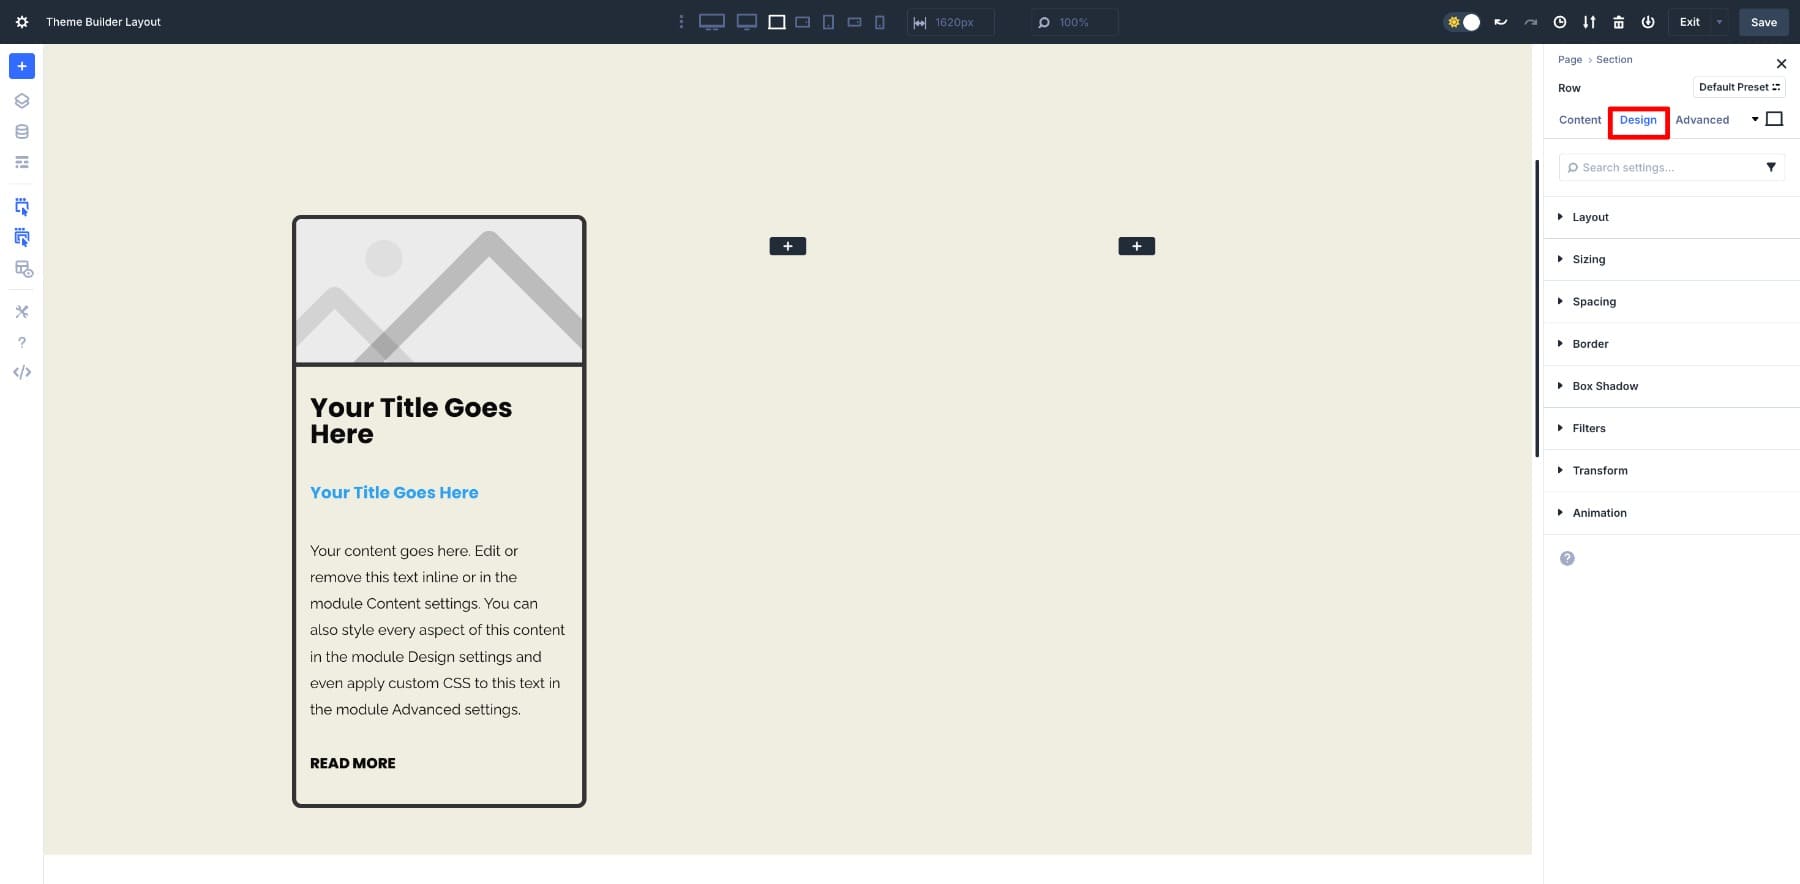
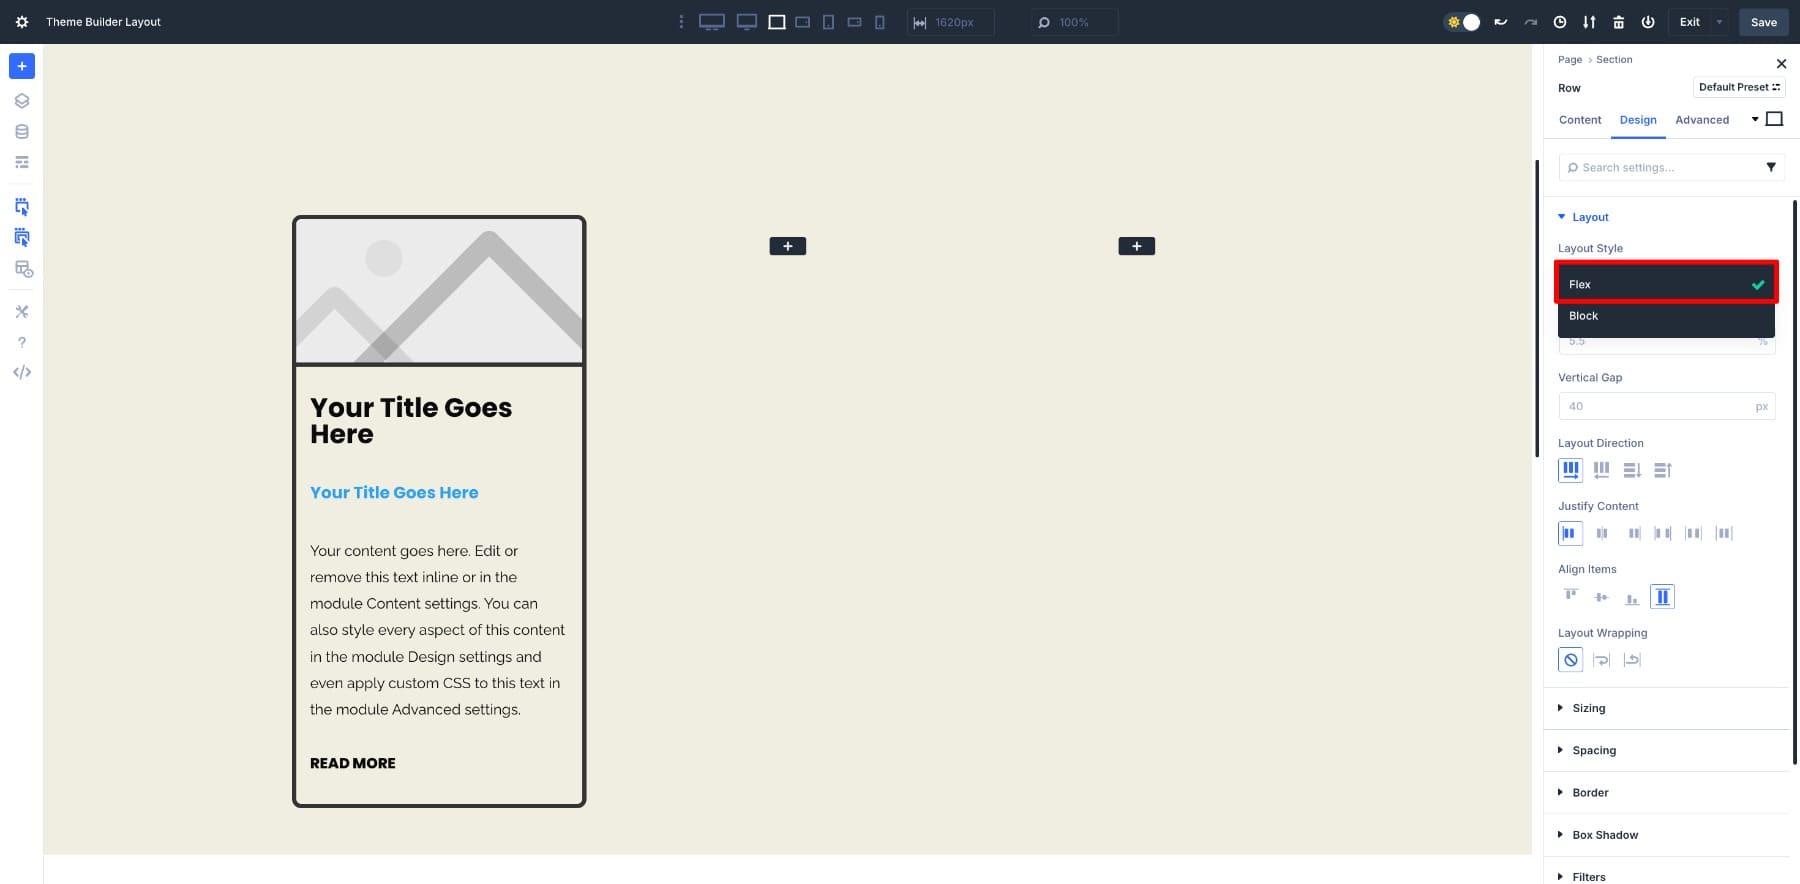
Move to Structure. Be sure the Structure Taste is about to Flex.
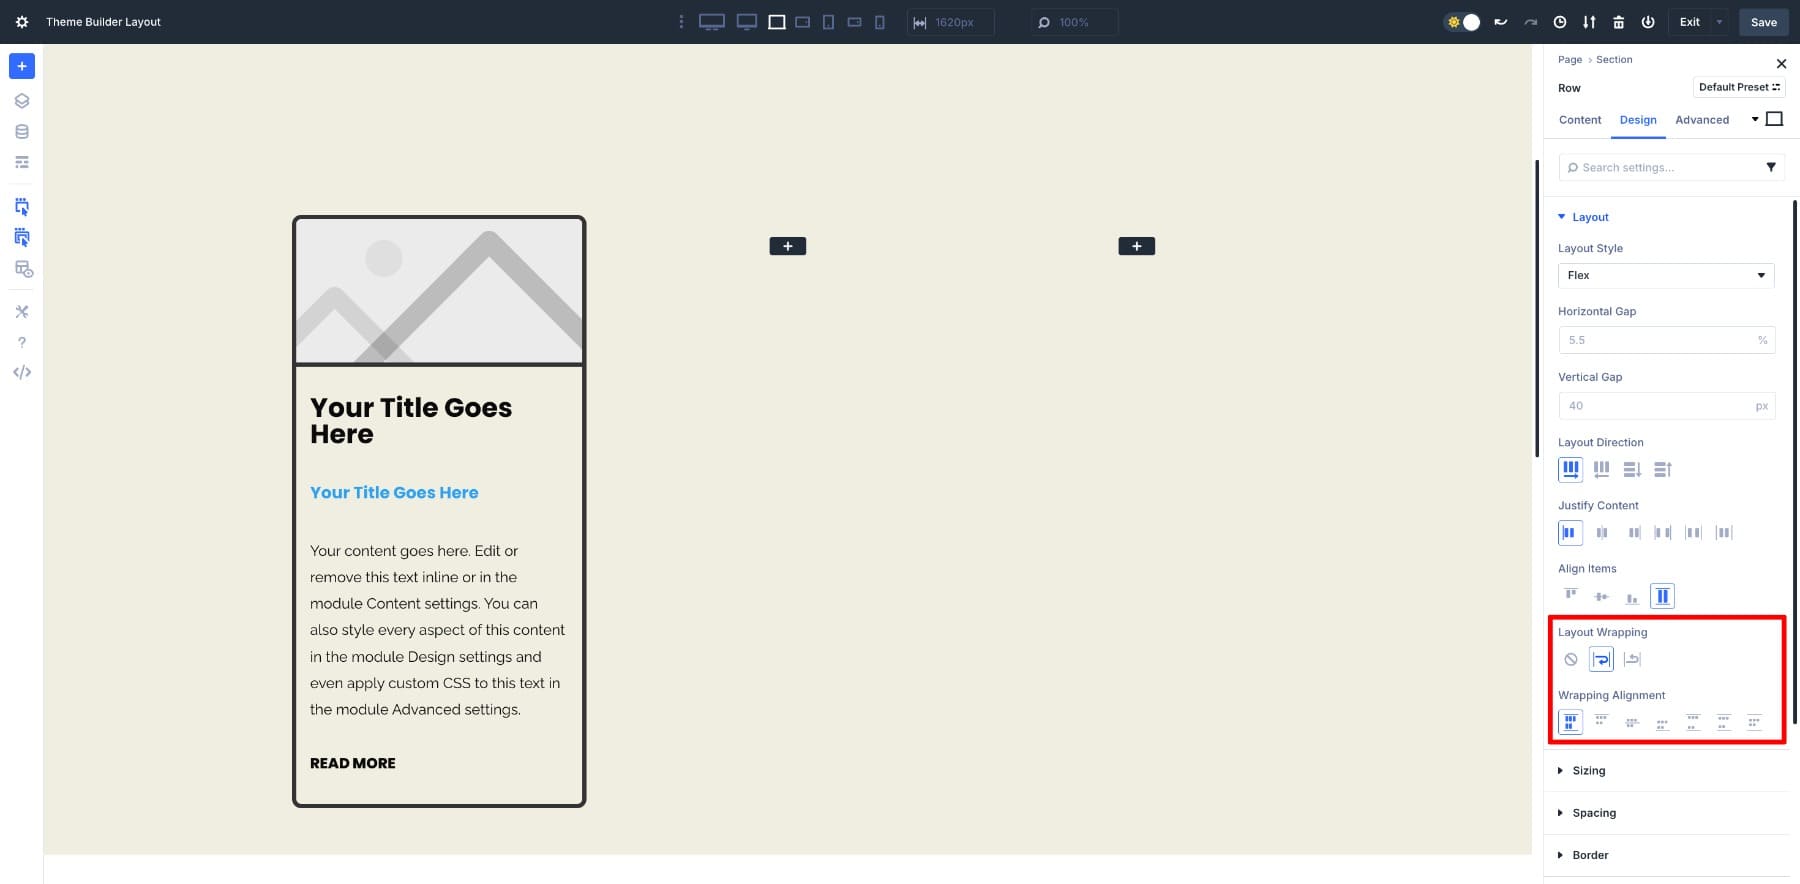
Permit Structure Wrapping so the playing cards can transfer to a brand new line when wanted, then make a selection the Wrapping Alignment that most closely fits your design.
4. Flip On Loop
Now comes the step that makes all of it automated. Make a selection the cardboard’s Column.
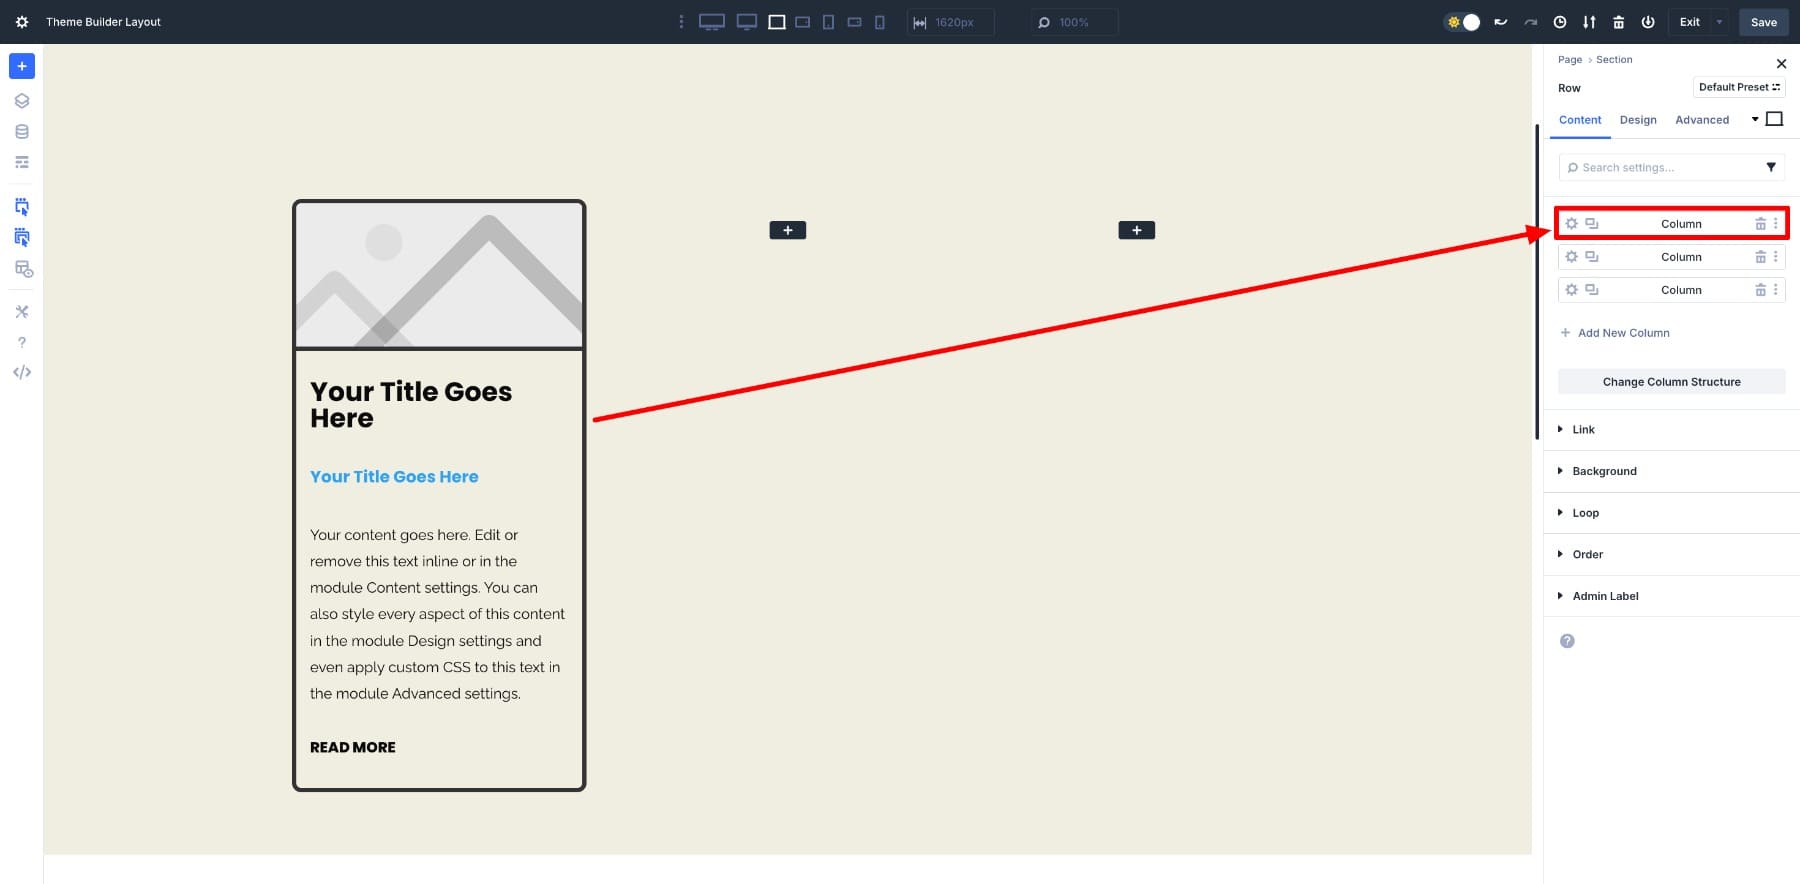
Then, flip at the Loop choice beneath the Content material tab. As soon as Loop is enabled, Divi will repeat your card design for every publish that meets your question settings.
For this structure, I’ve set:
- Submit Kind: Posts
- Posts Consistent with Web page: 10
- Order By way of: Date
- Order: Descending (latest first)
- Submit Offset: 0 (display all ranging from the most recent)
- Forget about Sticky Posts: Sure
Those small changes be certain the grid presentations precisely the posts you need, within the order you need. You’ll exchange those values anytime to evolve the structure to other wishes.
5. Upload Dynamic Content material
The general step to convey the loop to existence is to glue every module on your card to are living publish information. That is what turns a static card into an automatic, always-up-to-date record. For instance:
- Hyperlink the Symbol module to the publish’s Featured Symbol.
- Hyperlink the Heading module to the Submit Identify.
- Hyperlink the Textual content module to the Submit Excerpt.
- Attach the Learn Extra Button to the Submit URL.
When looped, Divi will change placeholder content material with the proper information for every publish within the loop.
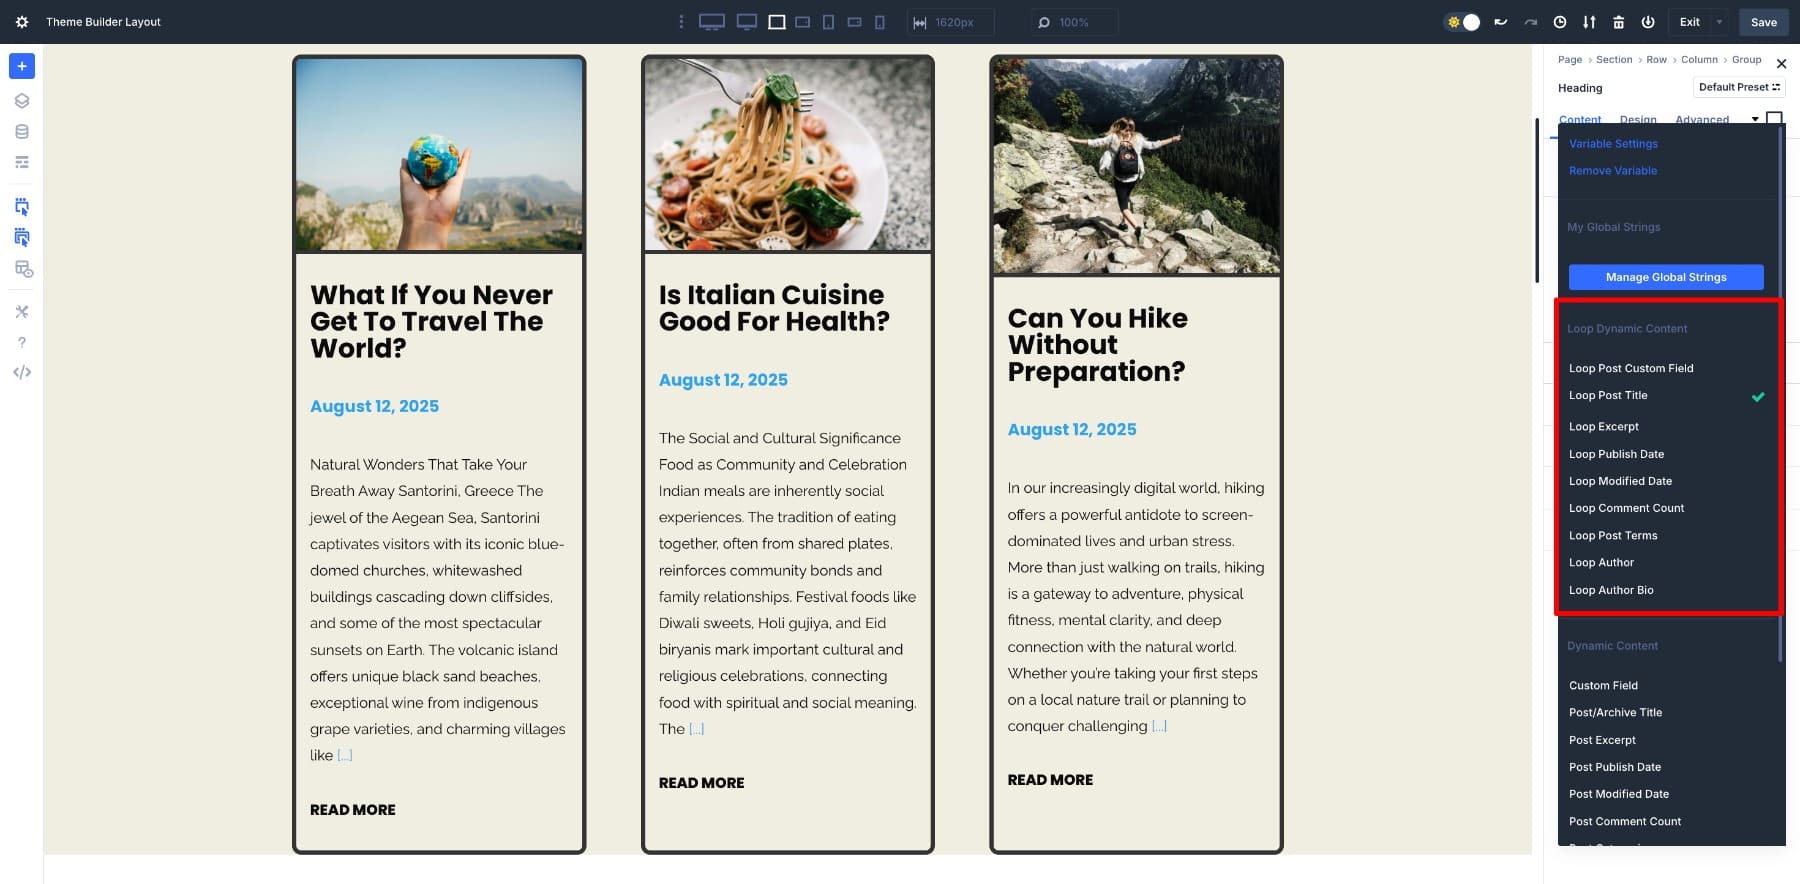
To set the featured picture, open the Symbol module, hover over the picture choice, and click on the Dynamic Content material icon. Make a selection Loop Featured Symbol and the entire related pictures will populate in an instant.
Repeat this for the publish name, revealed date, excerpt, and another fields you need to show.
Whilst you click on the Dynamic Content material icon for a module, you’ll see the whole vary of loop-specific choices. You’re no longer restricted to titles and pictures; you’ll additionally show post dates, changed dates, writer names, remark counts, classes, tags, or even customized fields.
This implies your publish card can also be as minimum or as detailed as you need. Construct a blank, image-focused grid, a content-rich structure, and even spotlight area of interest customized publish kind fields. Design it as soon as, and Divi assists in keeping it correct and constant throughout all the loop.
6. Save Your Template And Preview
As soon as the whole thing appears to be like proper, make any ultimate tweaks and Save Adjustments in each the Divi Builder and Theme Builder.
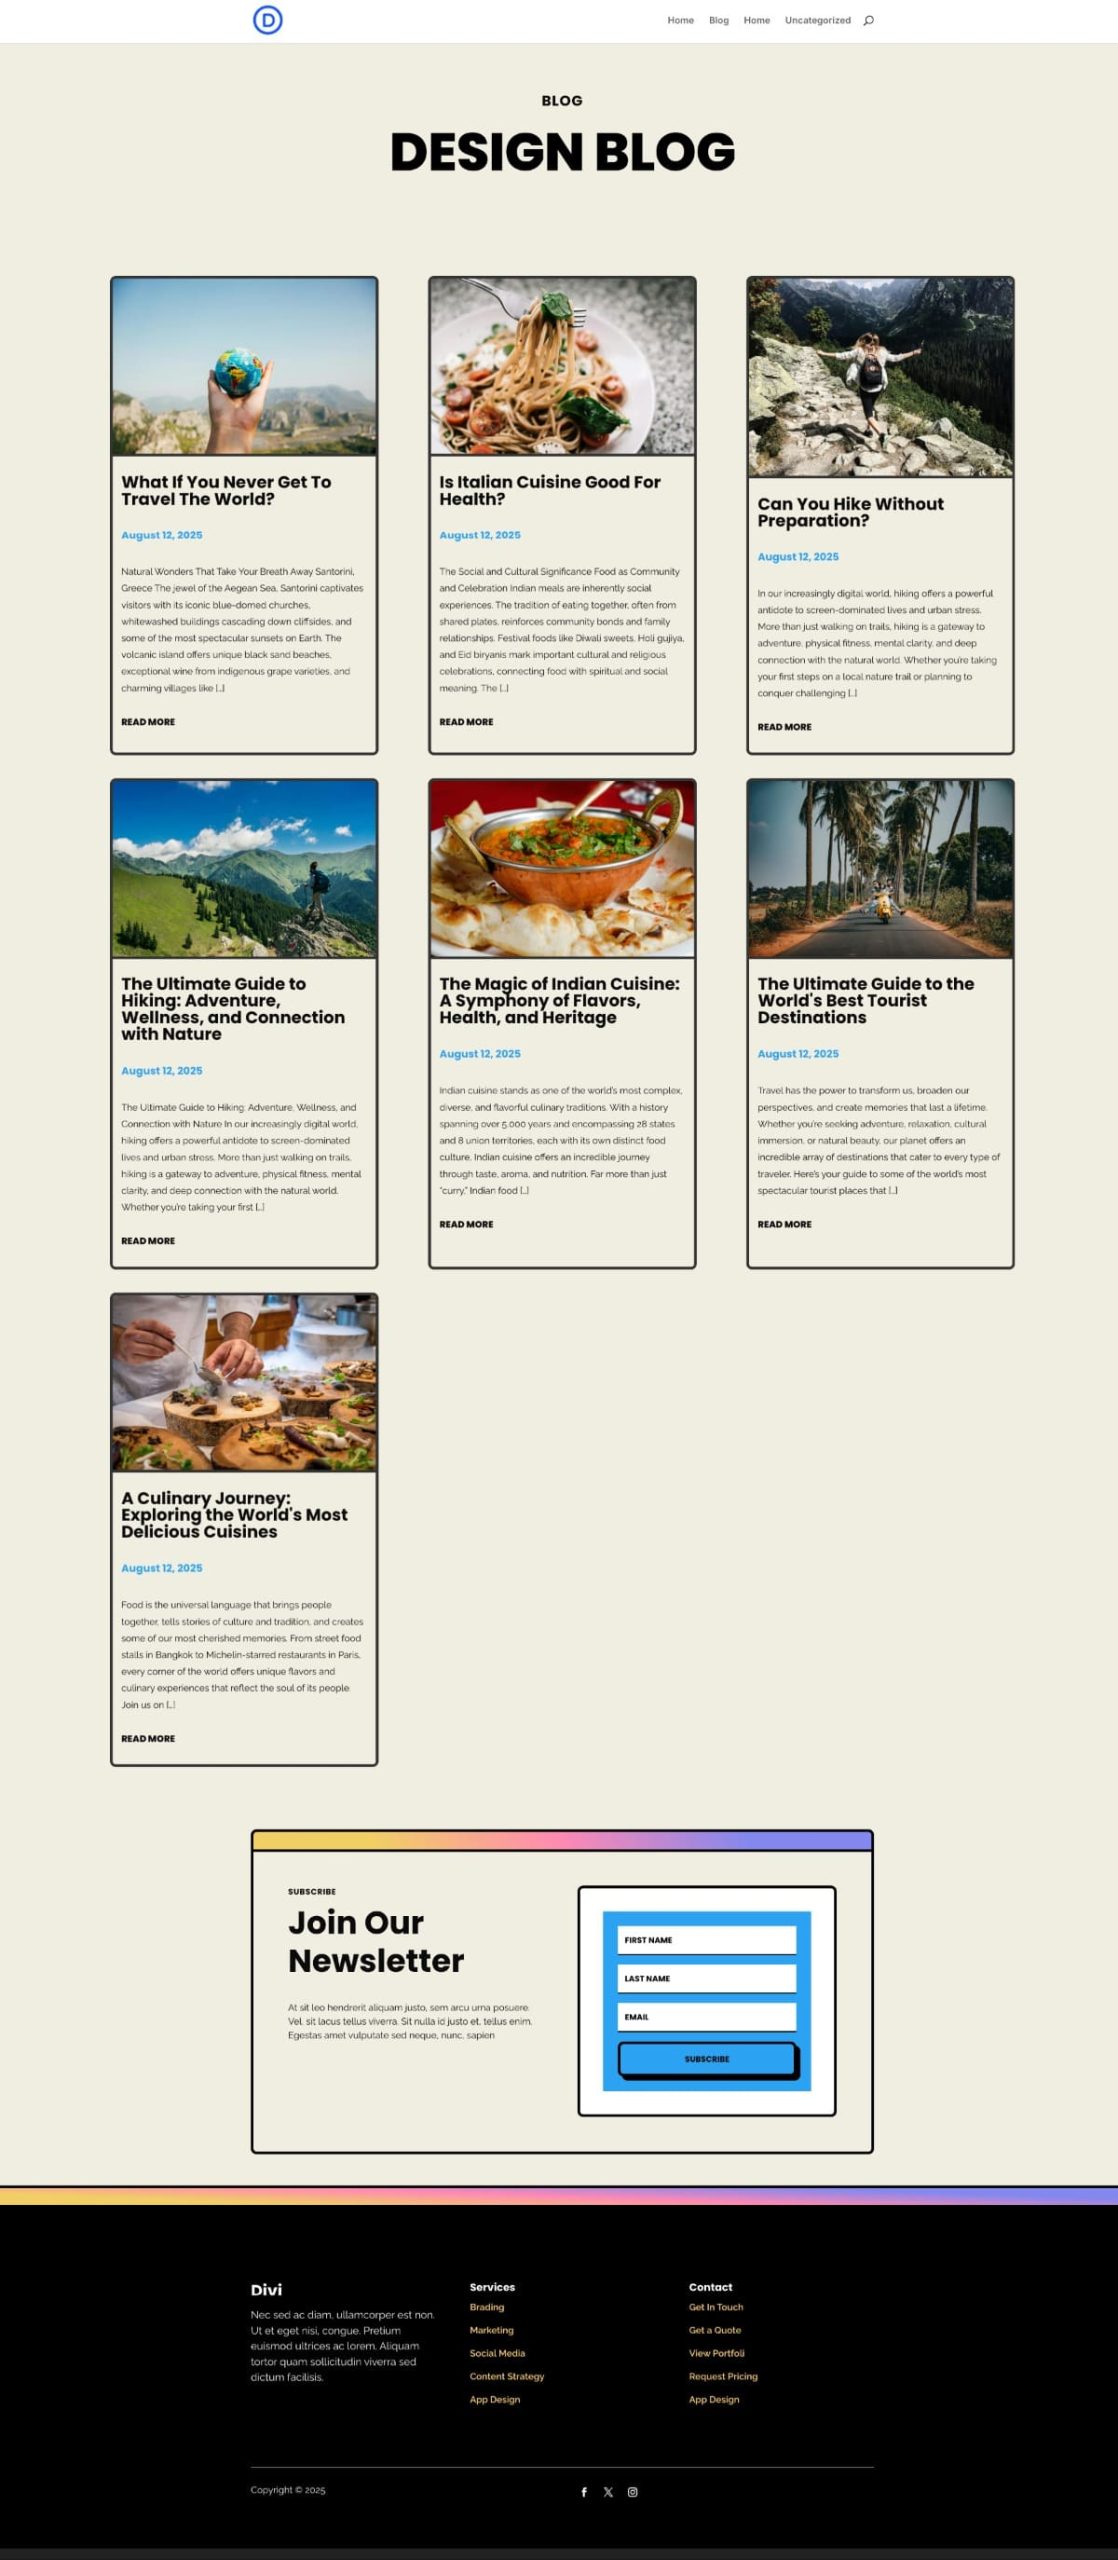
Preview your web page to look the loop in motion. Right here’s the completed weblog record web page:
The Weblog Module Had Limits, Loop Builder Doesn’t
The Weblog Module used to be operating effective, so why are we pushing for the Loop Builder? As a result of “effective” supposed mounted. The Weblog Module locked you into its template, however the Loop Builder will give you a clean canvas. You select the structure, the order, the way, and Divi loops it routinely.
That’s the true shift: you’re no longer adjusting anyone else’s template, you’re designing your personal. Let’s put that into apply as soon as once more and design a structure other from a standard Weblog Module construction.
First, upload a one-column row and phase. Modify the Sizing and ensure Flex and Flex Wrapping are enabled for the row.
This row will include your weblog playing cards. Now, upload every other nested row within the column to create your card construction, with the picture at the left and the publish’s metadata at the proper.
Design your construction precisely as you need it, no wish to practice the Weblog Module series. Go away the left column empty for now. We’ll upload the featured picture because the column’s Background picture.
Customise your weblog record card.
You’ll additionally regulate the Vertical Hole of your Module Staff in the correct column in Design > Structure > Vertical Hole choice.
Subsequent, we permit the Loop choice. Make a selection the primary column from the mother or father row.
Once more, we loop the dynamic content material. Beginning with the picture, move to the left column’s Background choice, and the remaining would be the identical.
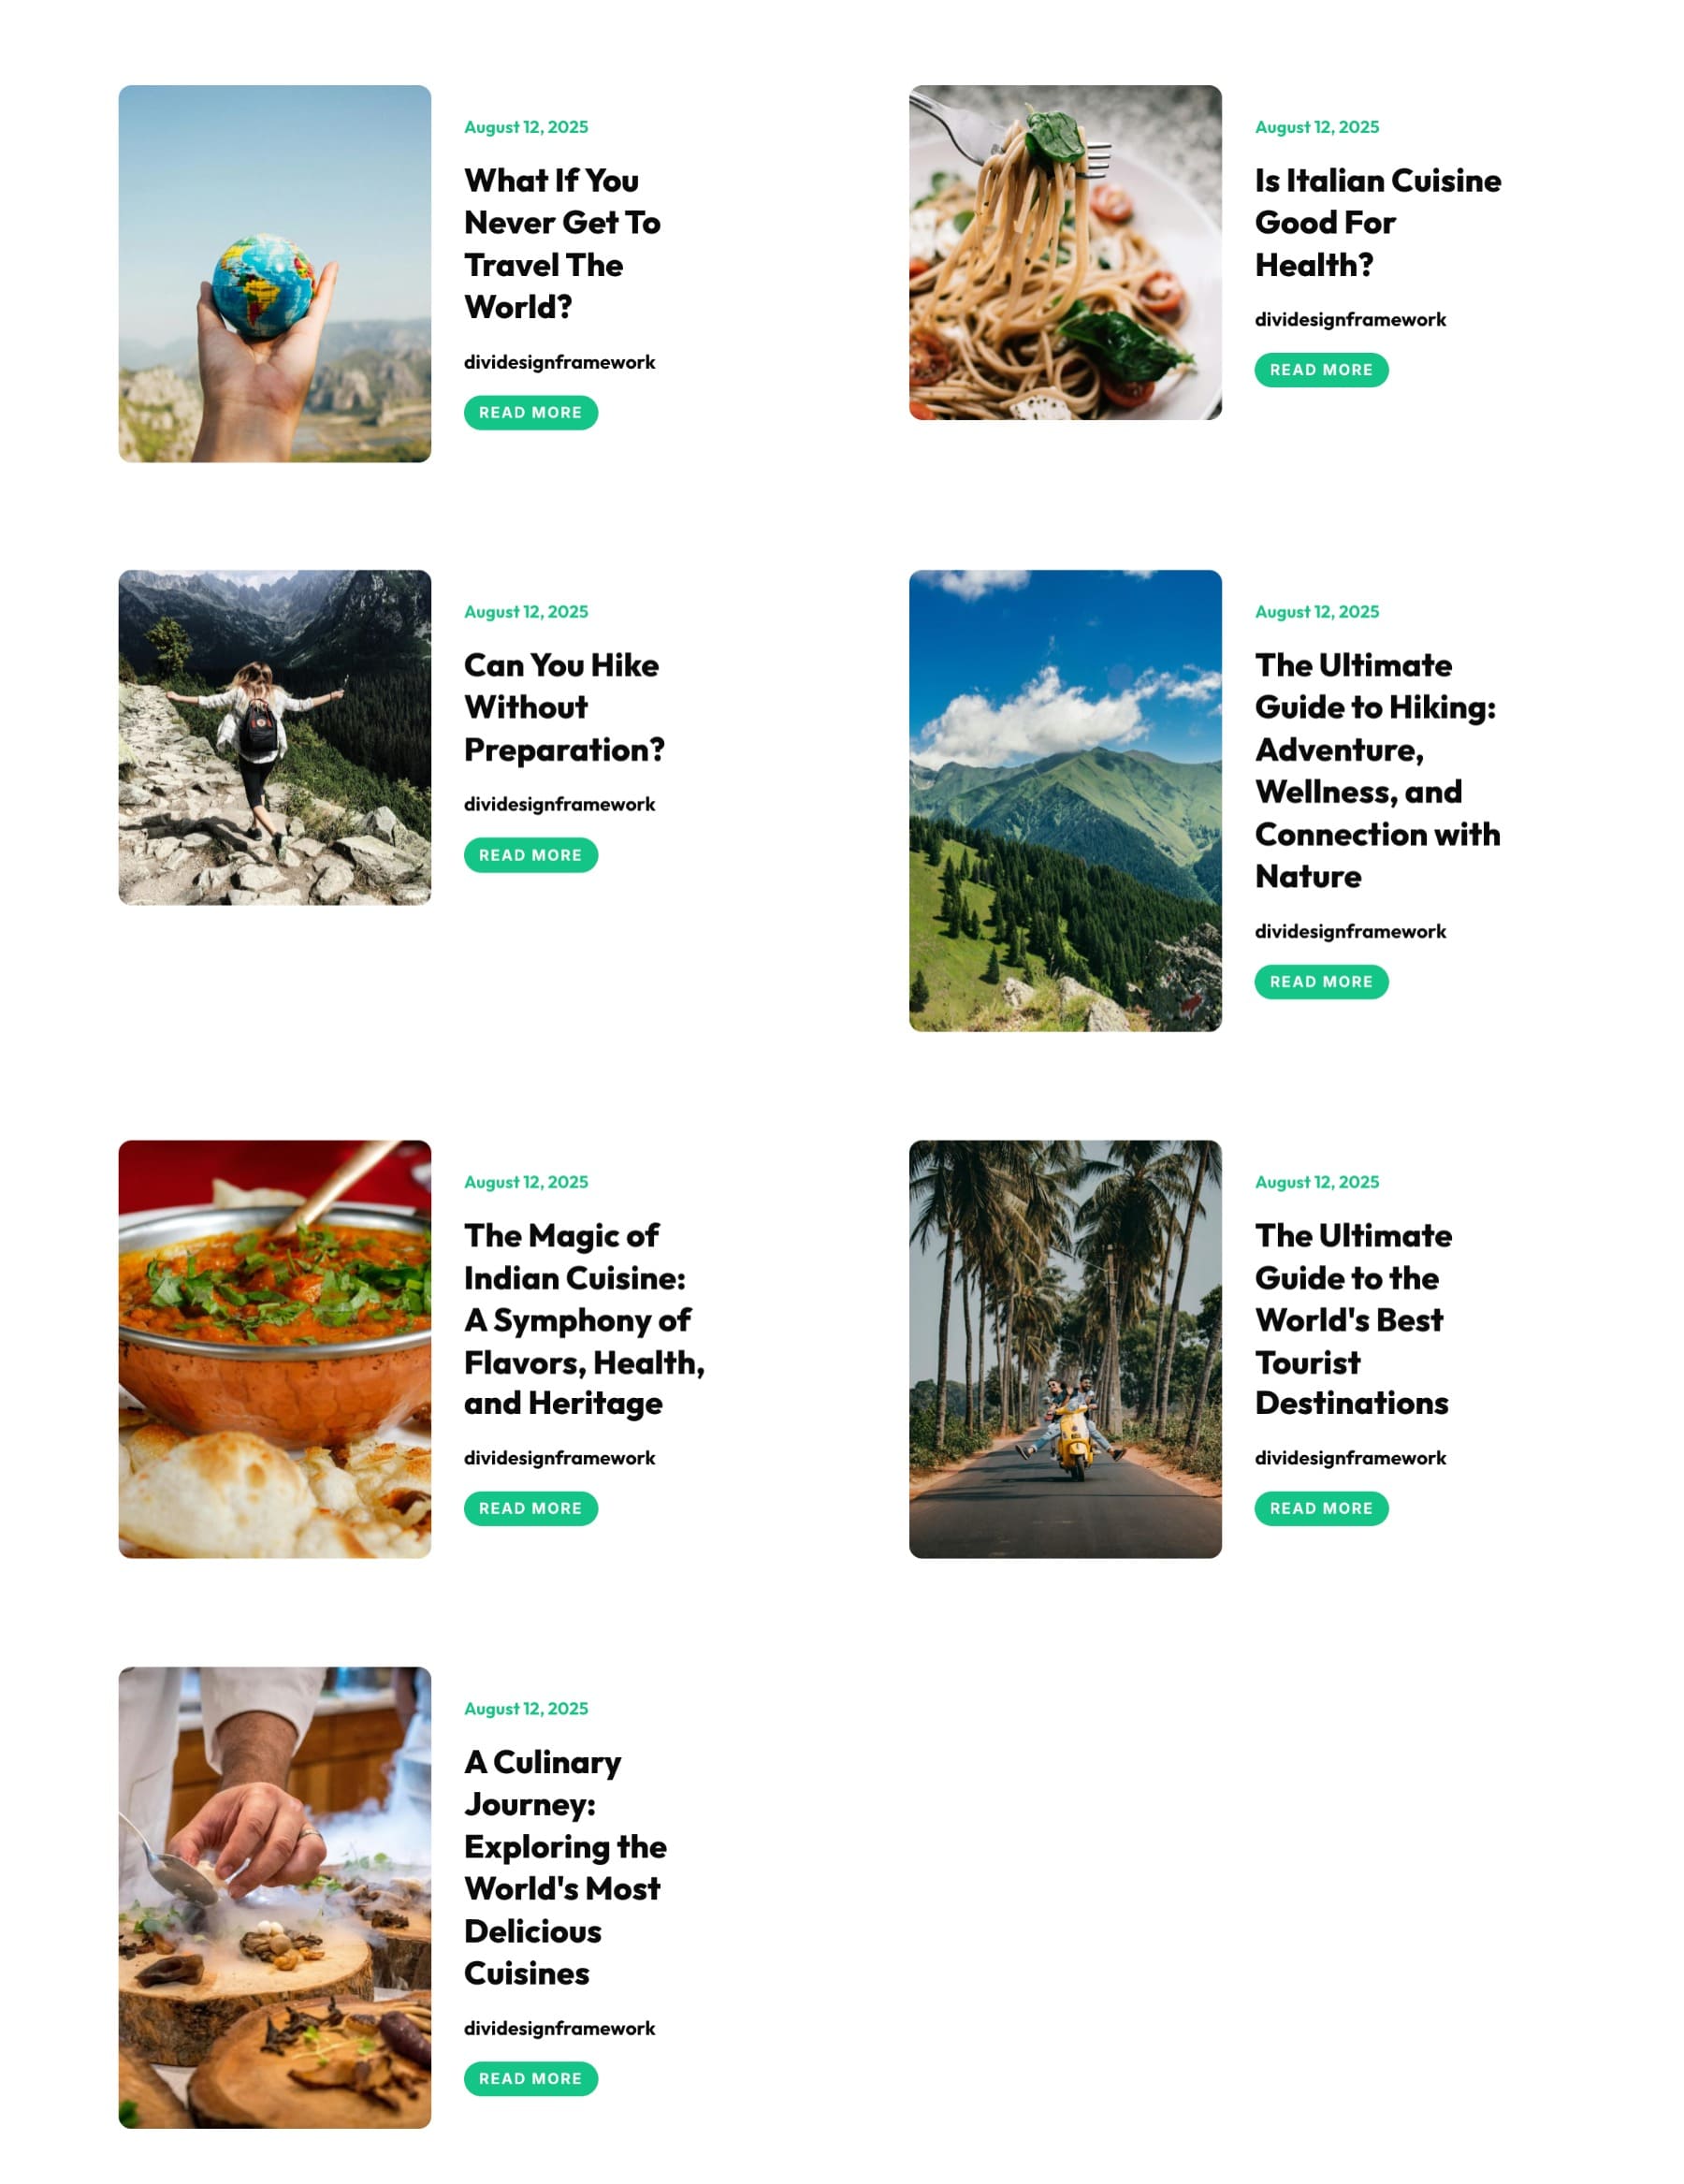
That is your list-style weblog loop. Now, if you wish to convert this right into a grid, merely exchange the column’s width. As a result of we’ve the Flex Wrapping enabled within the row, the playing cards will wrap on their very own as we modify their dimension.
If this makes your pictures method too huge, you’ll take away the excerpt, exchange the row’s column construction, or even alter the Horizontal Hole to 0.
And similar to that your grid is waiting as smartly.
This situation is just a glimpse of what Loop Builder makes conceivable. The actual takeaway is that you simply’re no longer restricted to a handful of preset layouts anymore. Each and every a part of the publish card is yours to prepare, genre, and reimagine, and Divi looks after repeating it routinely. That flexibility is what turns a easy weblog record into one thing that feels designed to your web page.
Use The Pagination Module
For those who prohibit Posts Consistent with Web page on your Loop question, you’ll most likely need a method for readers to look the remaining. Upload the Pagination module underneath your grid and set its Goal Loop to the part the place you enabled Loop. For a complete walkthrough, see How To Use Divi 5’s Loop Builder & Pagination Module In combination: read the tutorial.
Obtain The Weblog Templates
If you wish to experiment with grids within a weblog template, obtain the templates that had been used on this educational under. To import those, navigate for your Divi Theme Builder. You’ll be capable of import those the use of the import/export icon in the correct nook.
@media best display and ( max-width: 767px ) {.et_bloom .et_bloom_optin_1 .carrot_edge.et_bloom_form_right .et_bloom_form_content:earlier than { border-top-color: #ffffff !essential; border-left-color: clear !essential; }.et_bloom .et_bloom_optin_1 .carrot_edge.et_bloom_form_left .et_bloom_form_content:after { border-bottom-color: #ffffff !essential; border-left-color: clear !essential; }
}.et_bloom .et_bloom_optin_1 .et_bloom_form_content button { background-color: #f92c8b !essential; } .et_bloom .et_bloom_optin_1 .et_bloom_form_content .et_bloom_fields i { coloration: #f92c8b !essential; } .et_bloom .et_bloom_optin_1 .et_bloom_form_content .et_bloom_custom_field_radio i:earlier than { background: #f92c8b !essential; } .et_bloom .et_bloom_optin_1 .et_bloom_border_solid { border-color: #f7f9fb !essential } .et_bloom .et_bloom_optin_1 .et_bloom_form_content button { background-color: #f92c8b !essential; } .et_bloom .et_bloom_optin_1 .et_bloom_form_container h2, .et_bloom .et_bloom_optin_1 .et_bloom_form_container h2 span, .et_bloom .et_bloom_optin_1 .et_bloom_form_container h2 robust { font-family: “Open Sans”, Helvetica, Arial, Lucida, sans-serif; }.et_bloom .et_bloom_optin_1 .et_bloom_form_container p, .et_bloom .et_bloom_optin_1 .et_bloom_form_container p span, .et_bloom .et_bloom_optin_1 .et_bloom_form_container p robust, .et_bloom .et_bloom_optin_1 .et_bloom_form_container shape enter, .et_bloom .et_bloom_optin_1 .et_bloom_form_container shape button span { font-family: “Open Sans”, Helvetica, Arial, Lucida, sans-serif; } p.et_bloom_popup_input { padding-bottom: 0 !essential;}

Obtain For Loose
Sign up for the Divi Publication and we can e-mail you a replica of without equal Divi Touchdown Web page Structure Pack, plus lots of different superb and unfastened Divi assets, guidelines and tips. Apply alongside and you’re going to be a Divi grasp very quickly. If you’re already subscribed merely kind on your e-mail cope with under and click on obtain to get admission to the structure pack.
You’ve got effectively subscribed. Please take a look at your e-mail cope with to substantiate your subscription and get get admission to to unfastened weekly Divi structure packs!
Construct Your Customized Weblog Submit Loop In Divi 5 These days
Earlier than Divi 5’s Loop Builder, making a actually customized weblog publish loop ceaselessly supposed wrestling with inflexible templates or writing customized code for each small exchange. Now, it’s a visible procedure from begin to end. You design a card as soon as, hyperlink its modules to are living publish information, and let Divi deal with the remaining.
For those who’ve been operating across the Weblog Module’s limits, Loop Builder is the improve you’ve been looking forward to. Check out it on your subsequent mission and notice how a lot more uncomplicated it’s to create a weblog (or product, tournament, or record) that appears precisely how you need!
The publish How To Create A Custom Blog Post Loop With Divi 5’s Loop Builder gave the impression first on Elegant Themes Blog.
Contents
- 1 What Is Divi 5’s Loop Builder
- 2 Developing A Customized Weblog Submit Loop With Divi 5
- 3 The Weblog Module Had Limits, Loop Builder Doesn’t
- 4 Use The Pagination Module
- 5 Obtain The Weblog Templates
- 6 Obtain For Loose
- 7 You’ve got effectively subscribed. Please take a look at your e-mail cope with to substantiate your subscription and get get admission to to unfastened weekly Divi structure packs!
- 8 Construct Your Customized Weblog Submit Loop In Divi 5 These days
- 9 Empowering Engineers Thru Product-first Platforms
- 10 Manage Unlimited Websites With Divi Dash For Life (Few Days Left!)
- 11 130 Instagram Influencers You Want To Know About in 2022

0 Comments