

Presets in Divi 5 are an impressive method to stay your design constant sitewide. And with the Preset Manager and Preset Preview, you’ll refine adjustments in a centered workflow prior to you devote them throughout your pages.
Nonetheless, the most productive preset choices regularly occur in context. This is the place Divi 5’s Canvases are available in. A indifferent canvas can act as a devoted Preset Playground the place you construct life like examples, evaluate permutations aspect by means of aspect, and record what works, all whilst your reside pages keep blank and untouched. Right here’s learn how to set one up.
Divi 5’s Preset Machine: A Fast Evaluation
Divi 5’s Preset System offers you reusable kinds that paintings throughout your whole web page. Bring to mind presets as design programs you create as soon as and observe in every single place. Whilst you replace a preset, each and every component the usage of it adjustments in an instant.
Part Presets seize entire designs to your core development blocks. Those come with Sections, Rows, Columns, and Modules. Taste a Button Module with explicit colours, typography, and spacing, then reserve it as an Part Preset. Now you’ll observe that specific design to any web page with one click on.
Possibility Team Presets center of attention on explicit design settings, comparable to typography, backgrounds, spacing, or borders. Create a preset to your H1 kinds, and you’ll observe simply the ones heading settings to other modules right through your web page. They’re modular development blocks you’ll layer and mix.
Stacked Presets assist you to layer a couple of presets on a unmarried component. Follow a background gradient from one preset, alignment from every other, and spacing from a 3rd. All of them merge right into a unified design.
Whilst Nested Presets keep your Possibility Team Presets within Part Presets. Construct an Part Preset from a module that already makes use of Possibility Team Presets, and the ones connections keep intact. This assists in keeping your design machine arranged and maintainable.
The Case For A Devoted Preset Playground
Presets make consistency simple. Whilst you replace a preset, each and every component the usage of it remains completely in sync. And with Divi 5’s Preset Manager, you’ll refine adjustments in a centered workflow that features a Preset Preview, so you’ll see what you’re adjusting prior to you devote it sitewide.
A Preset Playground takes that one step additional by means of including genuine context. As a substitute of previewing a preset by itself, you’ll construct a indifferent canvas full of the precise modules and layouts you employ maximum, then check presets in life like eventualities, aspect by means of aspect. This is a sensible method to discover permutations, see how typography, spacing, and buttons really feel in combination, and record your choices.
That is particularly useful on new websites. Your genuine pages keep blank and functional, whilst your playground canvas turns into where the place you broaden the machine: experiment, evaluate, and finalize. Use the Preset Preview for fast iteration, and use the Preset Playground canvas to validate the ones alternatives in complete layouts prior to rolling them out throughout your web page.
What Are Canvases In Divi 5?
We not too long ago presented Canvases. Those are workspaces within the Visible Builder the place you drop sections, upload modules, and construct layouts. It really works precisely like development a normal web page.
Each web page you create features a Primary Canvas mechanically. This workspace holds your entire visual content material, the whole thing that displays up when any person lands to your web page. Upload a hero phase, drop in some Textual content Modules, and come with a picture gallery. All of that lives for your Primary Canvas and looks at the entrance finish.
Indifferent canvases don’t seem for your primary web page space whilst you’re development. The Visible Builder assists in keeping them in their very own remoted areas, utterly separate out of your Primary Canvas. You continue to upload sections, taste modules, and prepare complete layouts within them. They simply keep hidden till you make a decision to make use of them someplace.
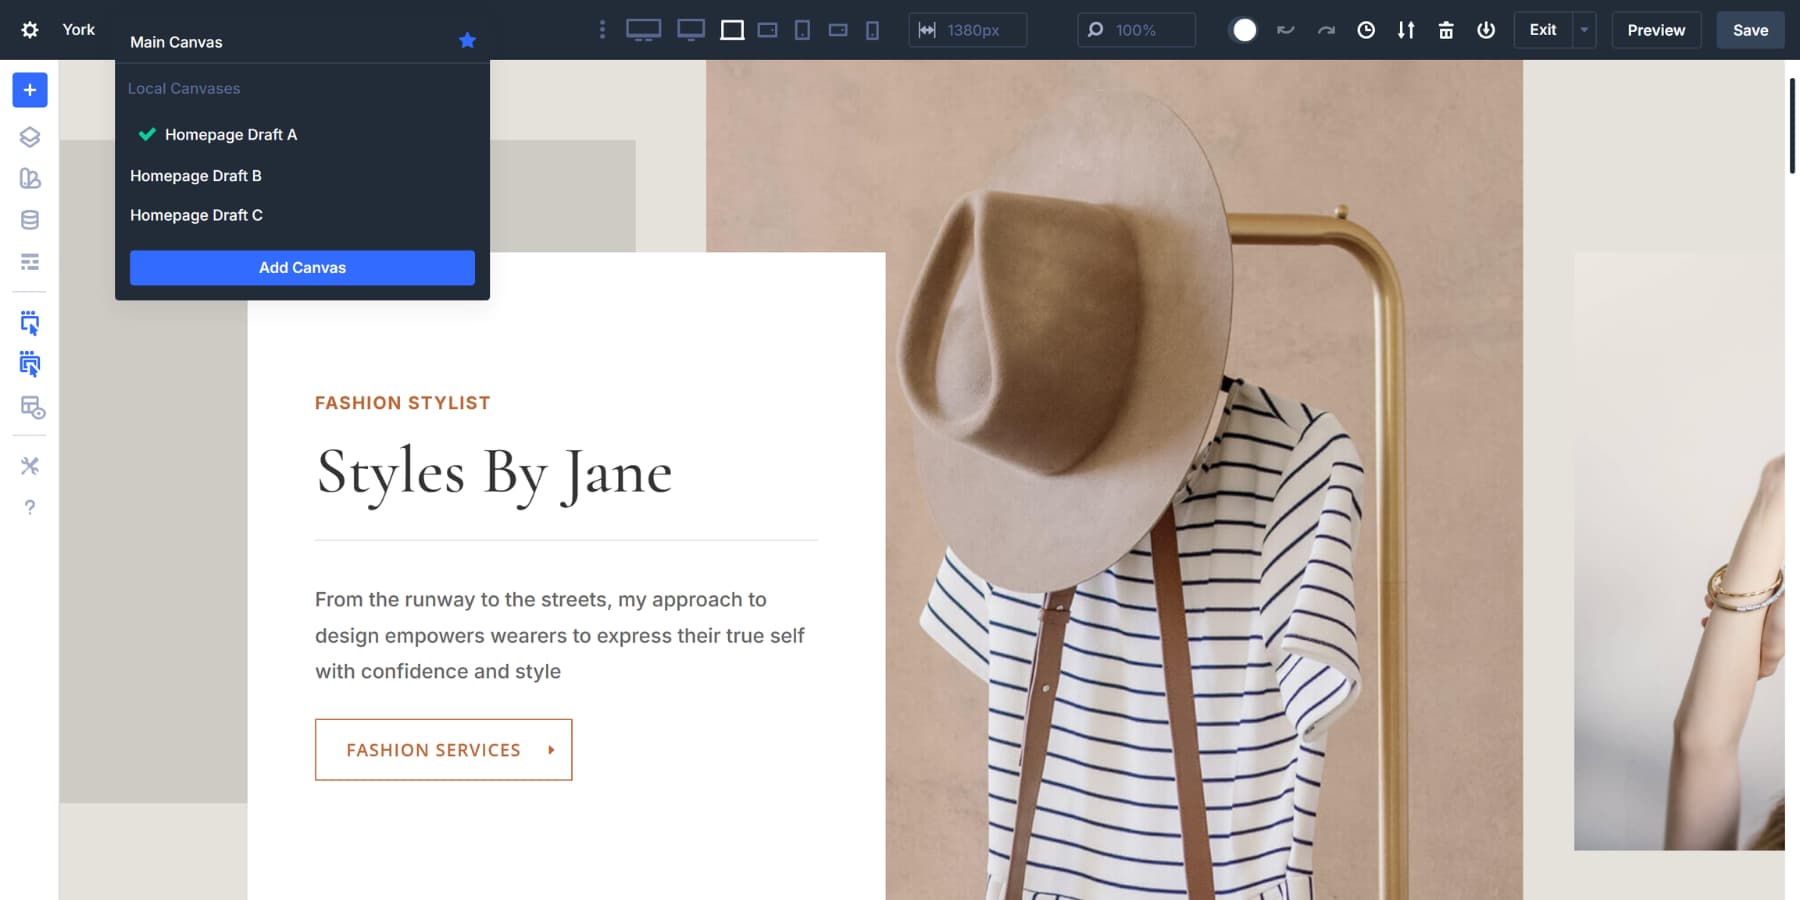
Canvases may also be native or international. Native canvases belong to a unmarried web page. International canvases change into to be had sitewide, out there from any web page you open. This works neatly for menus or popups that want to seem throughout a couple of places.
How Canvases Can Be Used For Experimenting
You’ll reproduction your Primary Canvas to create a trying out model.
![]()
Indifferent canvases supply a secure area to check concepts with out affecting your reside web page. So, you’ll make no matter adjustments you need. Take a look at a bolder font to your heading presets by means of development it in a canvas first. Take a look at other structure buildings there. The entirety you construct remains remoted till you make a decision to make use of it.
Whilst you’re happy along with your experiments, assign the canvas as the brand new Primary Canvas to make it pass reside with a unmarried click on. The outdated model doesn’t disappear. It simply reverts to a indifferent canvas you’ll reference later.
This works neatly for preset building. Create a canvas in particular for trying out new presets. Drop in instance modules, observe your preset, and notice the way it seems. Alter the colours, tweak the spacing, refine the typography. Your reside pages by no means alternate throughout this procedure, and you’ll create as many canvases as you favor.
How To Set Up Your Preset Playground
Construction your Preset Playground takes only some mins. The function here’s a unmarried workspace the place you’ll freely experiment with out affecting your reside pages. So, let’s stroll thru making a devoted canvas, including instance modules to check your presets, and putting in a machine that assists in keeping the whole thing arranged.
Create A New Canvas For Presets
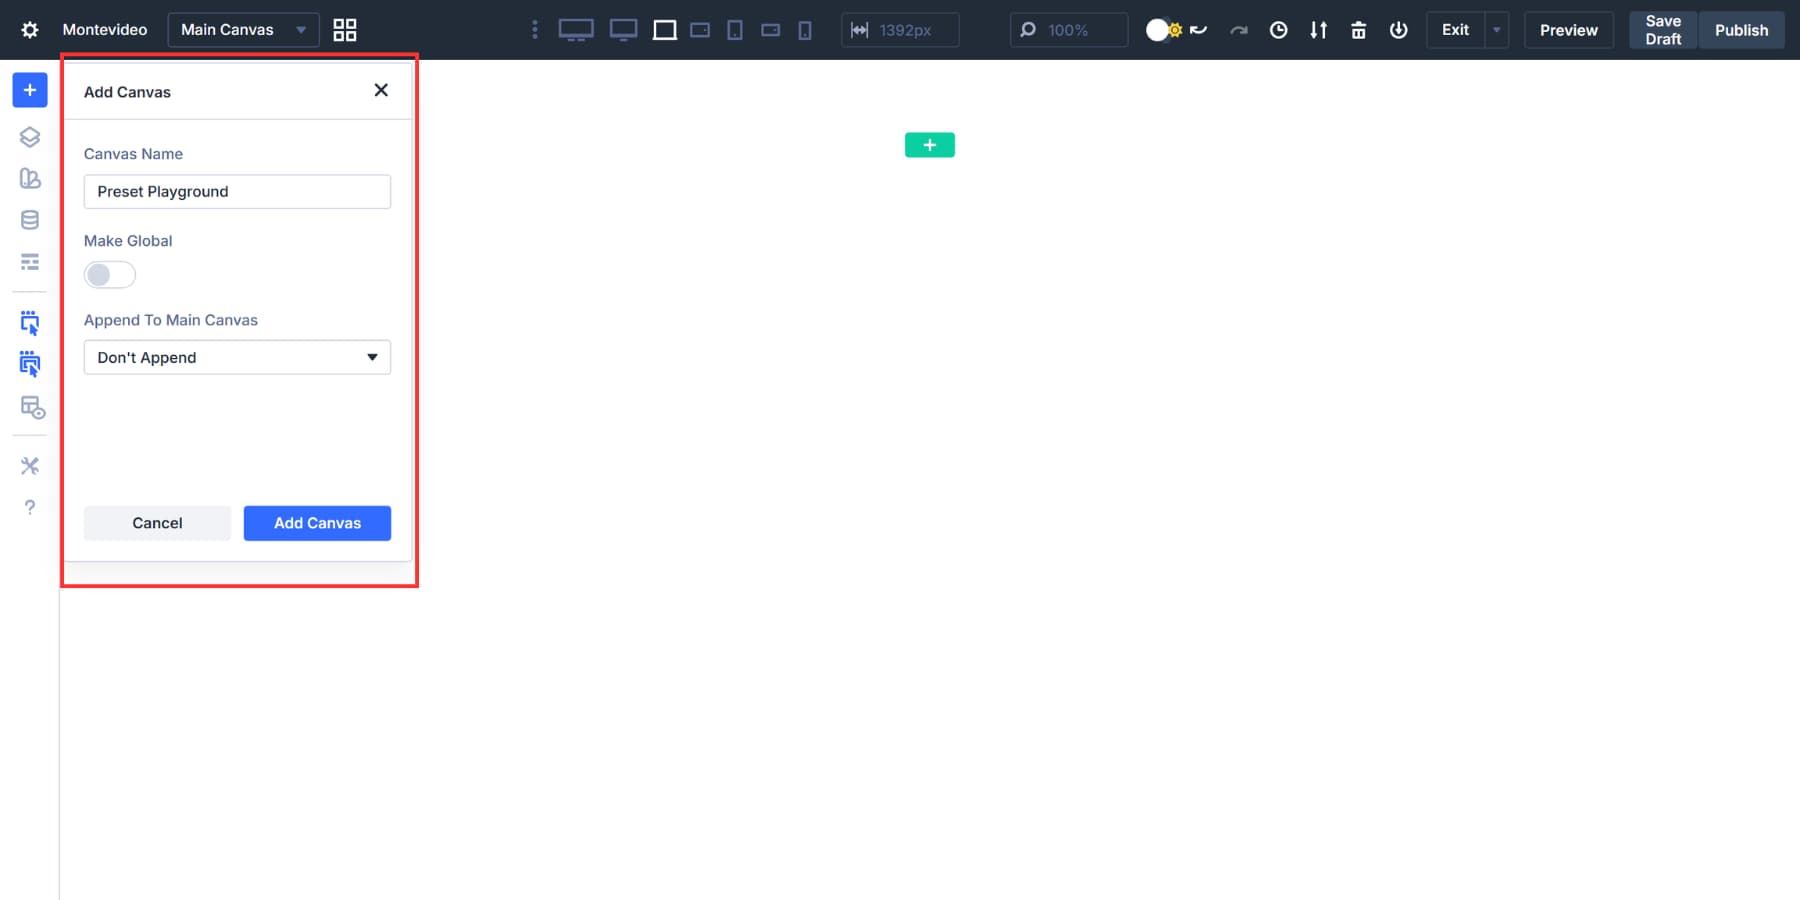
Open any web page within the Visible Builder. Take a look at the highest toolbar. You’ll see a canvas dropdown menu proper there. Click on it, then choose Upload Canvas.
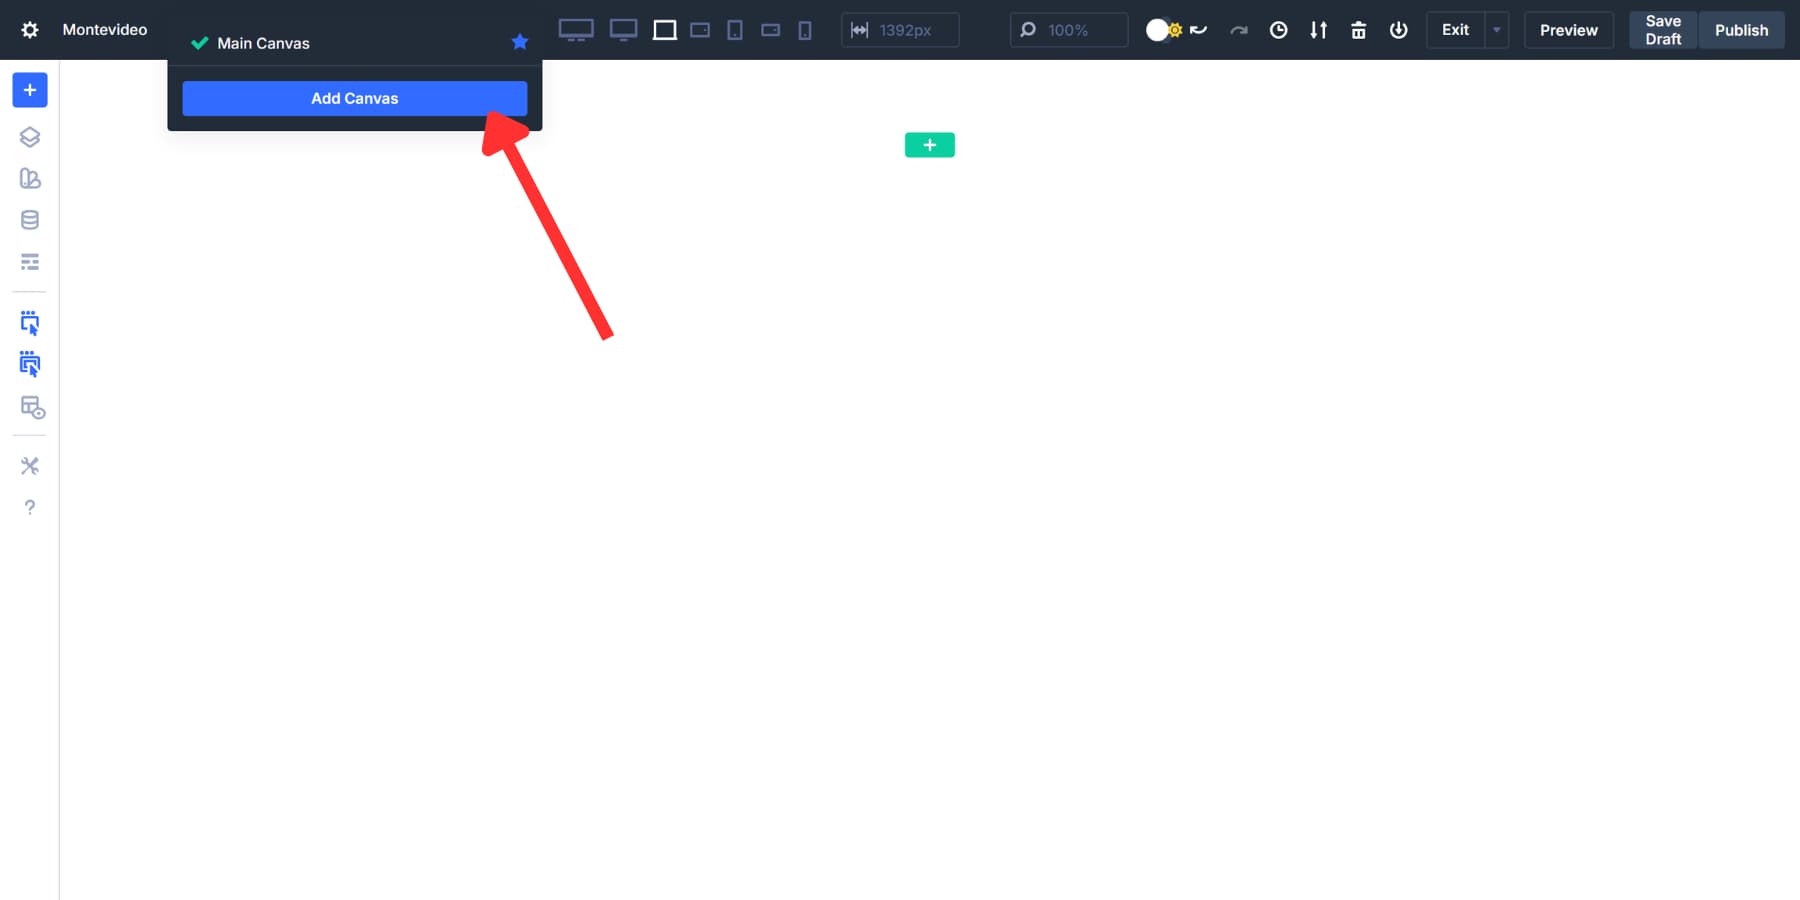
A settings panel seems the place you’ll identify your new workspace. Name it one thing transparent, like Preset Playground or Preset Checking out. This makes it simple to seek out later when you want it.
You’ll see an solution to make the canvas international or stay it native. Native works nice right here as a result of this playground serves a unmarried web page. International canvases change into out there throughout each and every web page, which isn’t wanted for a trying out area.
The ‘Append To Primary Canvas’ toggle stays off. This assists in keeping your playground hidden from view. Then click on Save. You’ll be taken to this new canvas.
Transfer between canvases anytime the usage of that very same dropdown menu. You’ll additionally click on the Canvas Grid View icon subsequent to the dropdown to look your entire canvases without delay. This visible structure makes managing a couple of workspaces easy.
Construct Your First Preset Examples
Get started development your trying out library. Upload a bit on your Preset Playground canvas, then drop within the modules you’ll use maximum regularly.
Textual content Modules with headings paintings completely right here. Button Modules, too. And Symbol Modules spherical out your trying out setup. Those 3 duvet the basis of just about each and every design you’ll construct.
Get started With Possibility Team Presets
Start with Possibility Team Presets, now not Part Presets. This issues as a result of Option Group Presets paintings throughout any component kind.
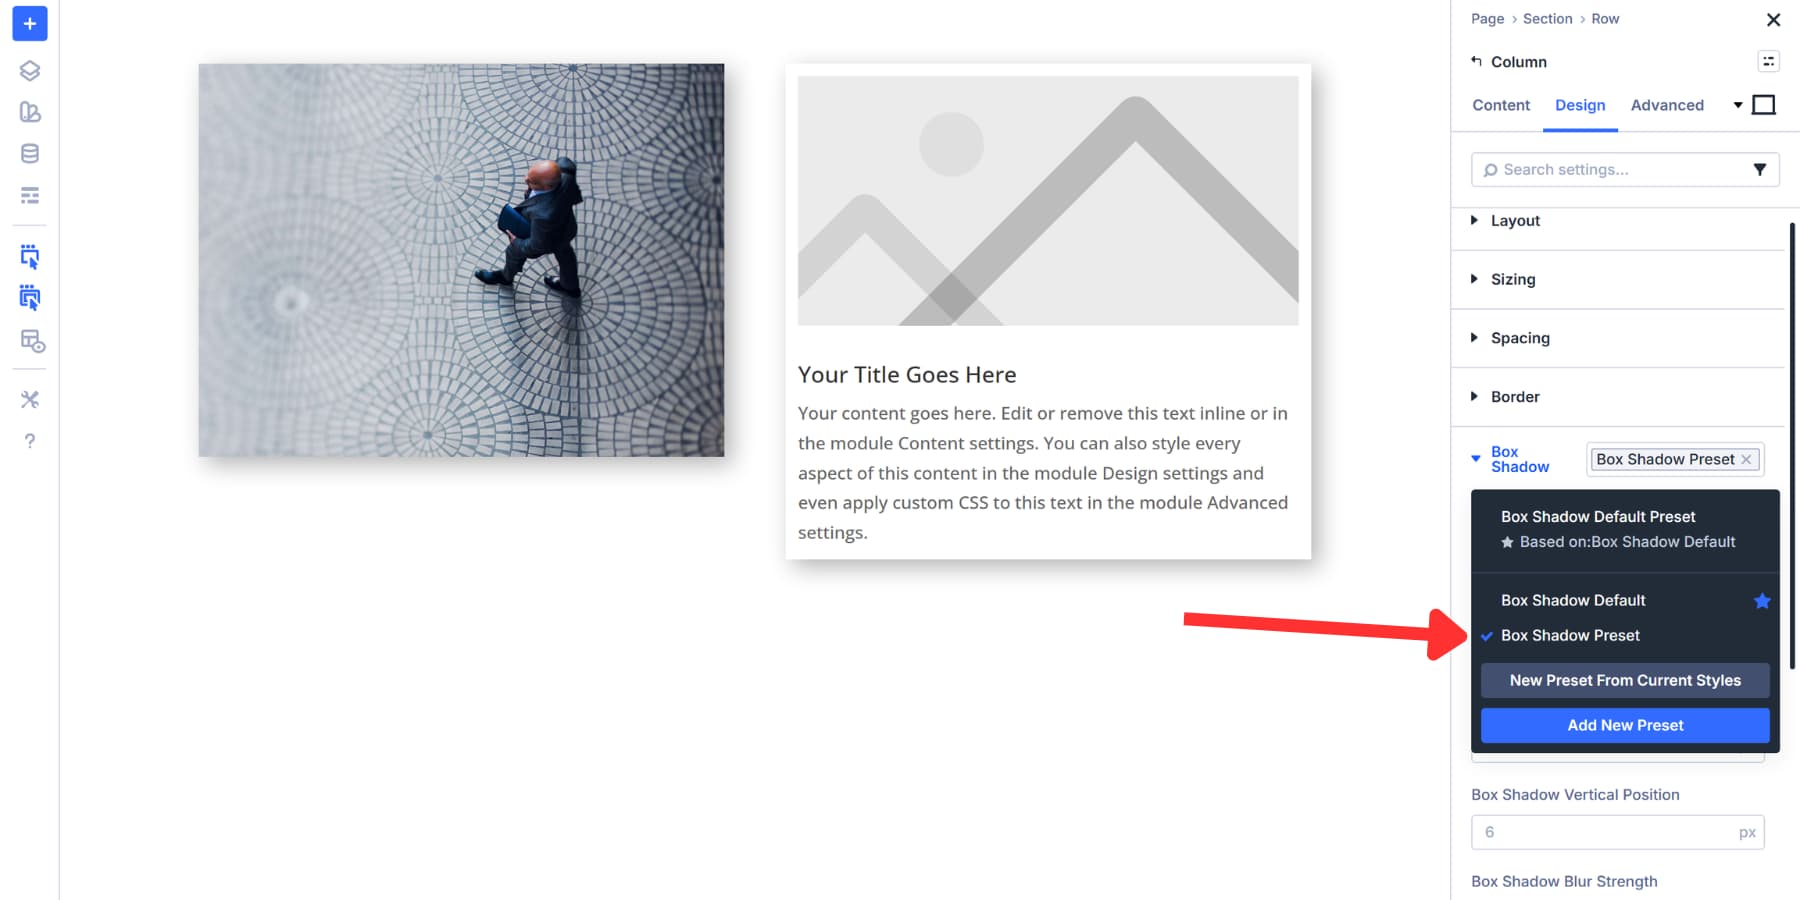
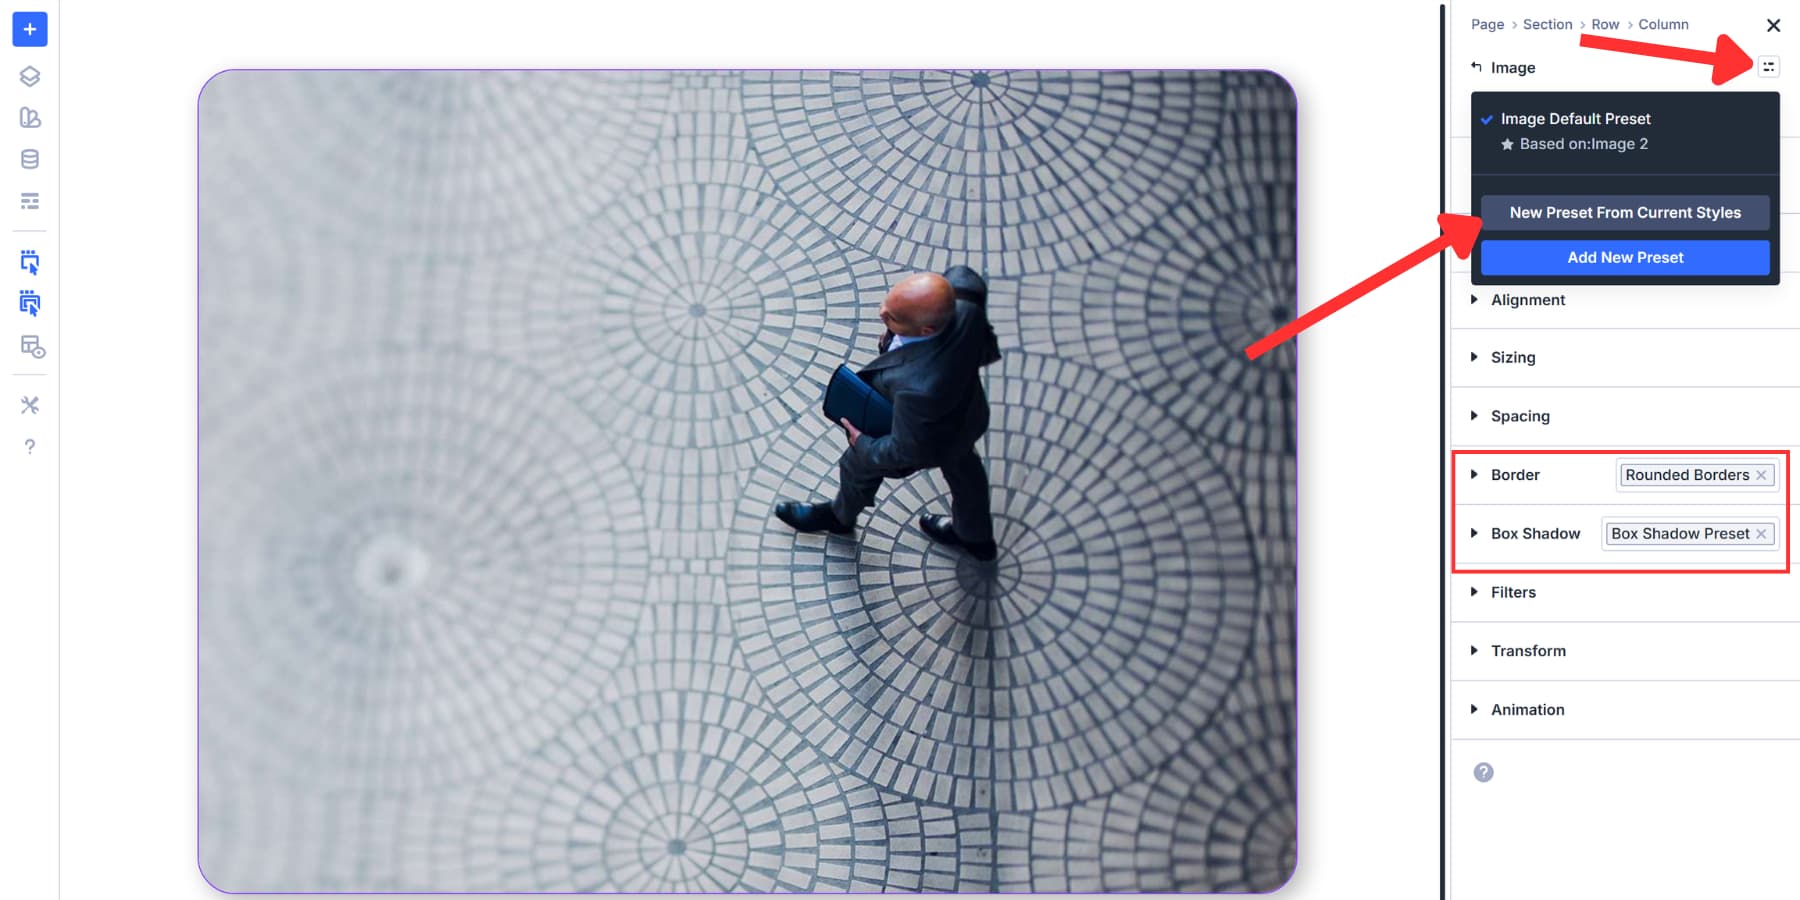
As an example, create a shadow Possibility Team Preset on a picture, then reserve it by means of clicking the presets icon.
![]()
Then, you’ll observe that specific shadow to a column later by means of going to the similar environment tab, clicking at the icon, and deciding on the Possibility Team. Similar shadow, other parts, general consistency.
It is a nice time to start out the usage of Design Variables as an alternative of hardcoded values. Open the Variable Supervisor from the sidebar. Create colour variables to your button backgrounds and textual content. Upload quantity variables for spacing and border radius. Arrange font variables to your typography. Now observe those variables on your button settings.
With that out of the best way, you don’t want to bear in mind the hex codes, the radius values, font sizes, and extra. Simply record it as soon as and reuse it on every occasion wanted. And, it is going with out pronouncing, when you replace the Design Variable, the alternate cascades to each and every environment that references it.
This method offers you development blocks. Your shadow preset works on photographs nowadays and columns the next day. Your border radius preset applies to CTAs simply as simply because it does to sections. You’re development a reusable design machine, now not simply styling particular person modules.
With that during thoughts, arrange equivalent Possibility Team Presets you assume may also be reused throughout parts: borders, animations, spacing, layouts, and extra.
Construct Part Presets From Your Choices
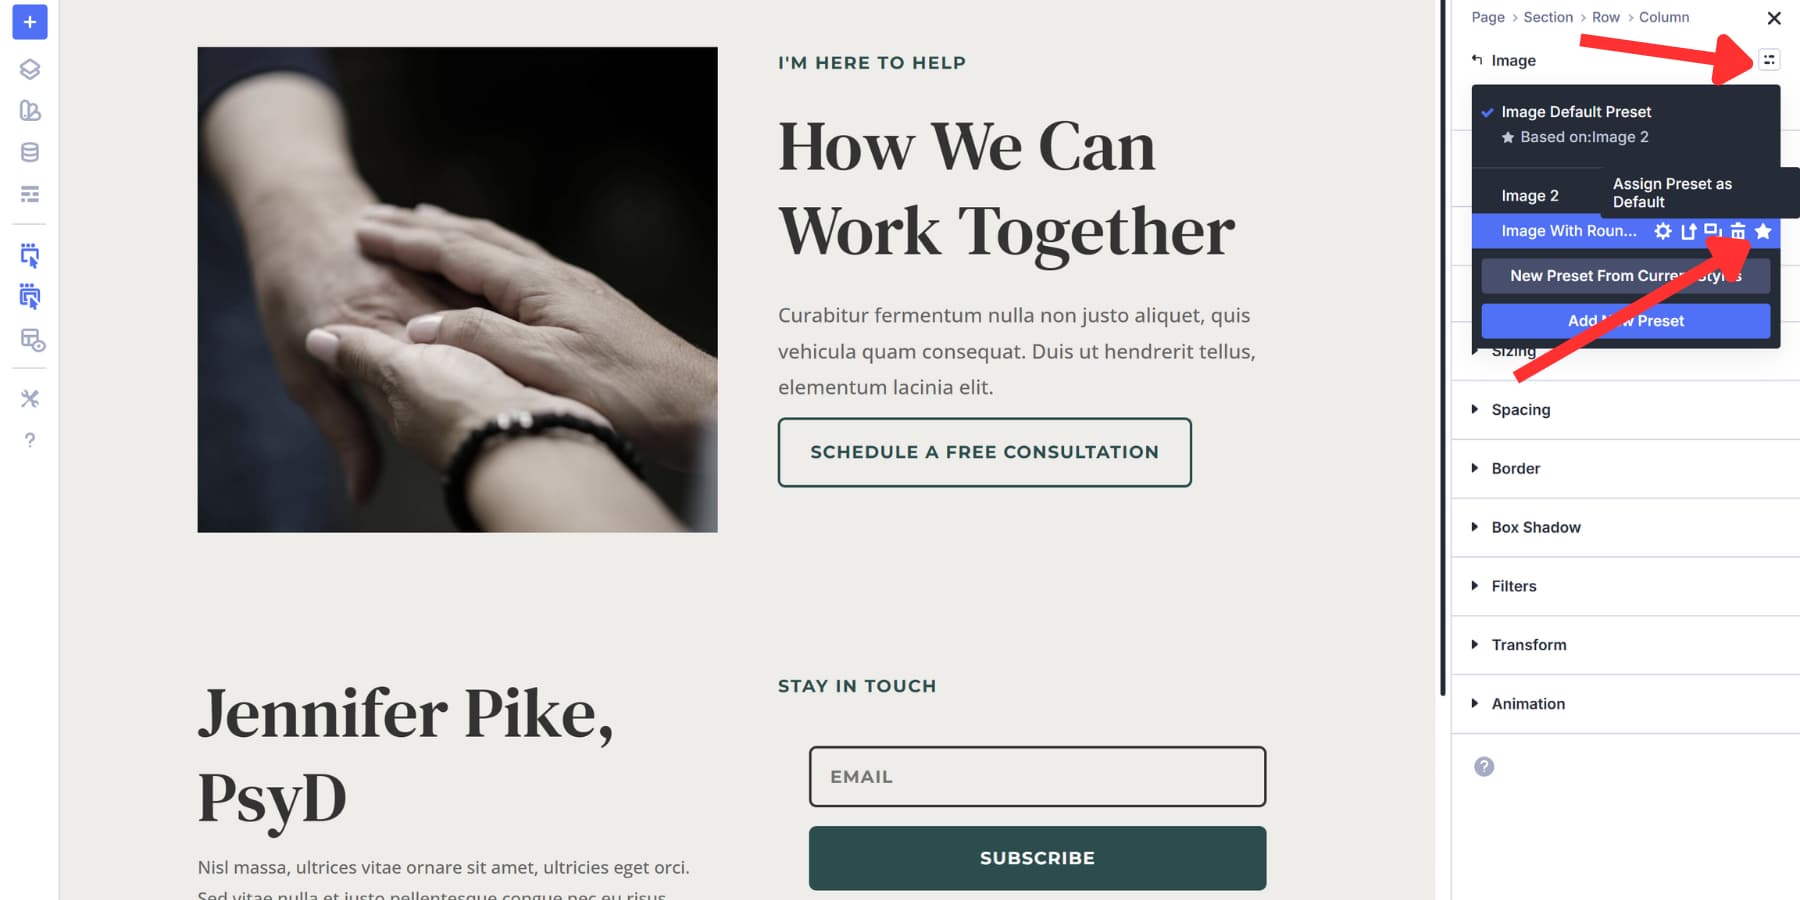
After getting created corresponding Possibility Team Presets, construct your Part Presets by means of clicking at the Part Preset icon at the most sensible proper. The ones Possibility Team Presets keep nested within, conserving the whole thing attached and maintainable.
Now, while you upload a picture on your primary canvas, choose the Part Preset from the similar possibility, and the picture inherits your preset.
To avoid wasting time, click on the Famous person icon to mark the styling as default, so that you don’t need to assign the picture preset each and every time you upload it manually.
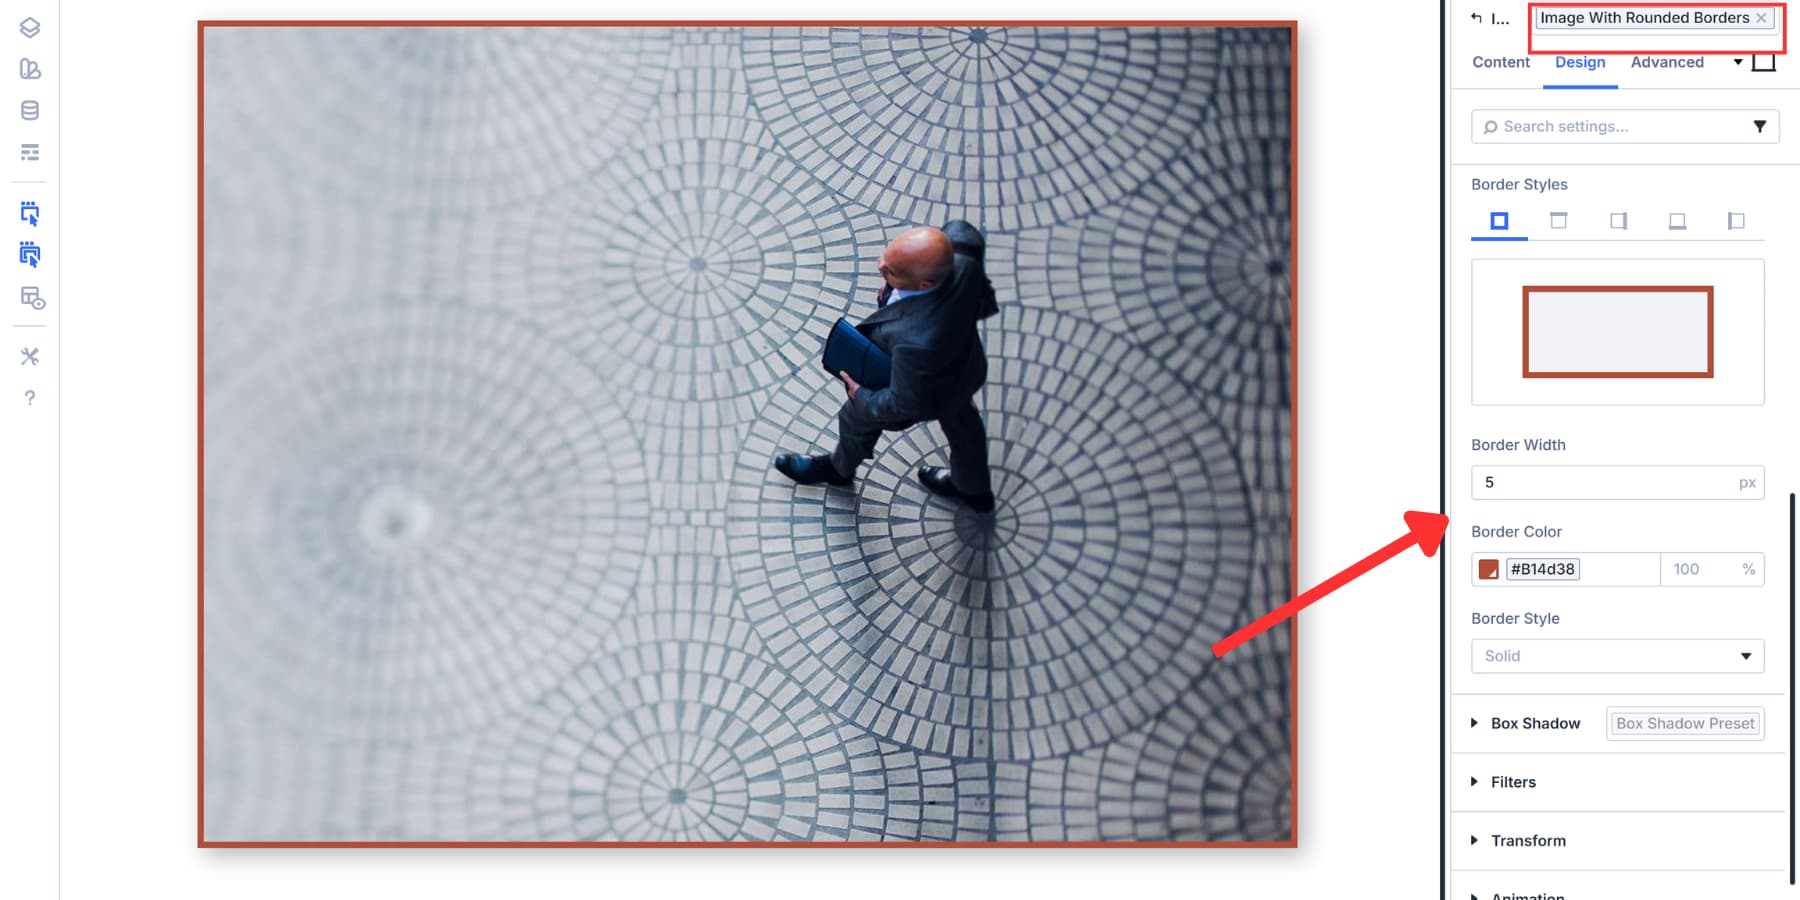
In a similar way, the hardcoded values take priority over the preset. You’ll observe a preset to a picture and regulate its radius within the settings; the changed worth will substitute the preset worth for that symbol.
You’ll use this to create permutations of the preset as neatly. Follow a preset, alter it, or create a brand new preset from the present kinds.
Repeat this procedure with the Textual content and Symbol Modules. Construct centered Possibility Team Presets first. Then mix them into entire Part Presets. Your playground turns into a trying out floor the place each and every preset may also be combined, stacked, and delicate prior to going reside.
Prepare Your Playground (Not obligatory)
That is a completely non-compulsory step, as your Preset Playground works nice with out group, however including construction would possibly prevent time ultimately.
Putting in separate sections for various preset classes makes the whole thing more straightforward to seek out. Buttons in a single phase, textual content presets in every other, photographs elsewhere. It’s worthwhile to use rows to split energetic presets from experimental permutations and archived variations.
Take this a couple of steps additional by means of labelling sections obviously with names like “Button Presets Checking out” or “Typography Diversifications” so you already know precisely what you’re having a look at while you go back months later.
Including Notes And Making The Playground International
Additionally, believe including Textual content Modules between sections to record your reasoning as you’re employed. Fast notes on why you selected explicit colours or spacing values can flip your playground into a data base relatively than only a trying out area.
This documentation is also useful when shoppers inquire about your design alternatives. As a substitute of attempting to bear in mind why you picked that individual button taste weeks in the past, you’ll stroll them throughout the idea procedure you documented in real-time. This canvas may additionally double as a reference information.
Everybody, together with your group and shopper, can use this playground from any web page they’re running on to grasp the decision-making procedure, what to make use of, the place to make use of it, and why it exists. It will considerably scale back back-and-forth.
The usage of The Preset Playground In Your Workflow
The presets you constructed for your playground are able to deploy throughout your web page. Follow them to Button Modules, Textual content Modules, and Symbol Modules to your exact pages, and so they paintings in an instant since you already examined them.
Go back on your playground canvas anytime you want new presets. Upload the module to the best phase, taste it, check permutations, and save the preset whenever you’re happy. Then use it on your reside pages.
This workflow assists in keeping the whole thing separated. Your playground canvas remains indifferent, so guests by no means see your trying out. Construct as many permutations as you want in that very same canvas, attempting other colours for buttons, adjusting textual content preset spacing, or trying out shadow mixtures on photographs. The entirety remains arranged in a single area.
Take a look at Canvases In Divi 5 As of late!
Preset Playgrounds alternate the way you method design choices in Divi 5. Construct yours nowadays, and also you’ll prevent hesitating prior to attempting new concepts.
The canvas remains separate, your experiments keep contained, and your reside web page remains untouched till you select in a different way. This workflow works similarly neatly for brand spanking new websites and current design programs.
Obtain Divi 5 and get started trying out Canvases nowadays!
The submit How To Create A Preset Playground With Divi 5’s Canvases seemed first on Elegant Themes Blog.
Contents
- 1 Divi 5’s Preset Machine: A Fast Evaluation
- 2 The Case For A Devoted Preset Playground
- 3 What Are Canvases In Divi 5?
- 4 How To Set Up Your Preset Playground
- 5 Take a look at Canvases In Divi 5 As of late!
- 6 25 Copywriting Portfolio Examples That Will Safe Your Subsequent Gig
- 7 Silent However Mighty: How Soundless Movies Are Successful Social Media [+ 2025 Data]
- 8 150+ Loose UI Kits For Designers (2022)

0 Comments