
Hugo is a popular open-source Static Website online Generator (SSG) designed to help developers assemble and arrange internet pages in brief and effectively. It can be used to create blogs, portfolios, and all forms of non-public internet pages that don’t require dynamic wisdom.
When you assemble web sites with Hugo, you’d certainly want to host them online so that you’ll be capable of percentage them with all those who need to get admission to them. That’s the position Kinsta’s Static Website online Internet internet hosting is to be had in!
Understanding Kinsta Static Website online Internet internet hosting
Kinsta Static Website online Internet internet hosting is a free service dedicated to site internet hosting static websites. It does this by means of serving pre-built HTML, CSS, and JavaScript files that don’t alternate dynamically. It truly works by means of connecting a repository hosted on a Git provider (BitBucket, GitHub, or GitLab) in your Kinsta account and deploying your static site files to the internet.
Kinsta’s Static Website online Internet internet hosting can mechanically assemble web sites from SSGs built on easiest of Node.js, while for others like Hugo, written in Transfer programming language (Golang), you’d need to devise each different way.
This newsletter explains one of the simplest ways to host your Hugo site to Kinsta for free with Kinsta’s Static Website Web hosting!
Deploy Your Hugo Website online to Kinsta Static Website online Internet internet hosting
There are three ways to deploy your Hugo site to Kinsta Static Website online Internet internet hosting:
- Assemble your internet web site the use of Stable Integration and Stable Deployment (CI/CD) and then deploy it.
- Profit from the hugo-bin developer dependency.
- Serve in the neighborhood built static files.
In this article, we go through all of them.
Should haves
To watch at the side of this instructional, we think you’ve were given:
- Enjoy with Hugo and Git.
- A Hugo site operating in the neighborhood.
Assemble Your Website online With CircleCI and Deploy to Kinsta
For the principle manner, enable us to make use of CircleCI for the reason that CI/CD tool. This method comes to creating a CircleCI workflow that builds your Hugo site into a brand spanking new division named deploy and then configuring Kinsta to deploy the static files from this division.
Advantages of Using CI/CD
With this system, you’ll be capable of avoid the need to in the neighborhood assemble your site previous to pushing it in your Git repository. Generally, Kinsta handles the site-building process for SSGs which may well be in step with Node.js, then again for various SSGs like Hugo, the use of a workflow can help deal with the site-building process mechanically.
Additionally, you’ll be capable of add other jobs in your CI/CD configuration file, for example, to lint and check out your code. You moreover make sure that your deployment is best up to the moment if the CI/CD pipeline is completed successfully.
Step 1: Create the Configuration Record
Get started by means of creating a .circleci folder to your Hugo problem’s root checklist. Within this folder, create a config.yml file to stipulate your workflow’s configuration.
Step 2: Push Your Code to a Git repository
Create a Git repository the use of your hottest Git provider and push your code to the repository.
Step 3: Create an Orphan Division
Next, create an empty orphan department known as deploy, where the static files for deployment might be pushed. Execute the following directions to your problem’s terminal:
git switch --orphan deploy
git devote --allow-empty -m "Initial devote on deploy division"
git push -u basis deploy
Don’t add any files to this division; it’ll be mechanically populated by means of the CircleCI workflow with the contents of Hugo’s generated public folder.
Step 4: Create a CircleCI Account
Consult with the CircleCI internet web site and create an account for individuals who don’t already have one. You’ll sign up the use of your hottest Git provider, which makes it easier to get admission to your repositories without further configuration.
Step 5: Configure Your Repository
After logging in, transfer in your CircleCI dashboard, click on on Tasks on the left sidebar, and make a selection the repository you wish to have to configure. CircleCI will mechanically come across your configuration file.
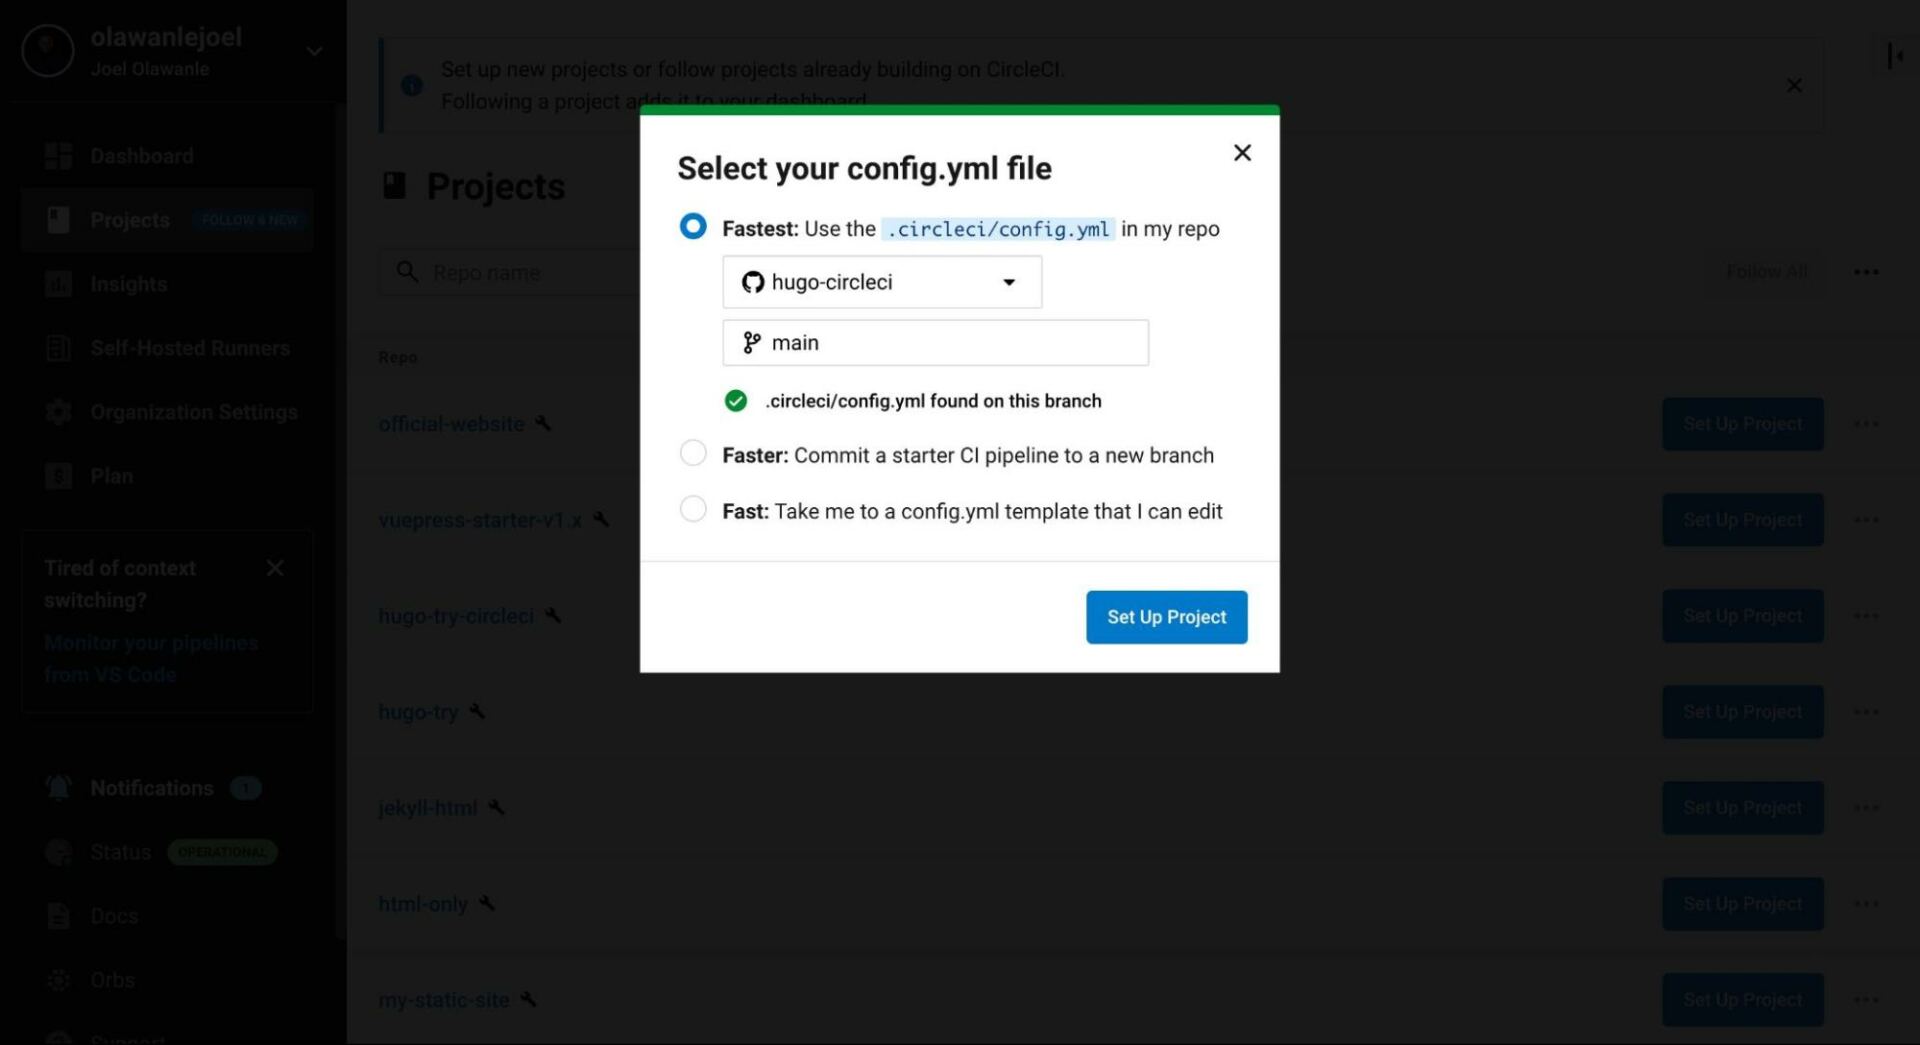
Click on at the Set Up Problem button to grant CircleCI get admission to in your codebase and execute workflows upon code changes.
Step 6: Define CircleCI Configuration
You right now have a CircleCI configuration file created. Let’s assemble its content material subject matter. You should definitely’re to your default division (now not inside the deploy division) and get began by means of defining the CircleCI fashion, which in this day and age is 2.1:
fashion: 2.1Step 7: Define Executors
Since this can be a Hugo problem, you’d need to define an executor to run the jobs. Define the hugo-executor proper right here in order that you don’t want to define it for each and every process. This executor uses a Docker image (cibuilds/hugo:latest) to create a continuing environment for setting up the Hugo site:
executors:
  hugo-executor:
    docker:
      - image: cibuilds/hugo:latest
Step 8: Define Jobs
Next, define two jobs: assemble and push assemble. The ones jobs specify the steps to be carried out in every process:
jobs:
  assemble:
    executor: hugo-executor

  push assemble:
    executor: hugo-executor
Assemble Process:
This process is answerable for setting up your Hugo site and storing the static files generated inside the workspace in brief so they are able to be in the market for later use inside the push assemble process.
assemble:
  executor: hugo-executor
  steps:
    - checkout

    - run:
        establish: Change theme
        command: git submodule exchange --init --recursive

    - run:
        establish: Assemble Hugo site
        command: hugo --destination=workspace/public

    # Persist the 'assemble' checklist to the workspace
    - persist_to_workspace:
        root: workspace
        paths:
          - public
The process above specifies that it uses the hugo-executor executor defined earlier. And then runs 4 major steps:
checkout: This step checks out your problem’s provide code from the GitHub repository.Change theme: This step initializes and updates Git submodules (if any) to make sure that your Hugo theme is up-to-date. This is useful if your Hugo site uses Gitmodules to reference the theme used instead of pushing large files of subjects already available on GitHub.Assemble Hugo site: This step builds the Hugo site and specifies the holiday spot folder as workspace/public.persist_to_workspace: This step persists the public checklist (output of the Hugo assemble) to the workspace for later use inside thepush assembleprocess.
Push Assemble Process:
The push assemble process is answerable for pushing the built site to an orphan division (deploy) to your GitHub repository. This way, your code remains on the default division, and the deploy division hosts best your site’s static files.
push assemble:
  executor: hugo-executor
  steps:
    - attach_workspace:
        at: workspace

    - run:
        establish: Push assemble folder to GitHub
        command: |
          # Configure Git identity (alternate  at the side of your exact username)
          git config --global particular person.establish ""
          git config --global particular person.electronic mail "@shoppers.noreply.github.com"

          # Clone the repository (alternate  at the side of your exact repository URL)
          git clone --branch deploy --depth 1 https://:${GITHUB_TOKEN}@github.com//.git deployment

          # Reproduction the 'public' checklist to the deployment folder
          cp -R workspace/public deployment

          # Navigate to the deployment folder
          cd deployment

          # Commit and push changes
          git add .
          git devote -m "Auto generated from ${CIRCLE_SHA1}"
          git push
The process above does the following:
attach_workspace: This step attaches the workspace where theassembleprocess endured the public checklist.Push assemble folder to GitHub: This step performs numerous Git operations:- Configures Git identity at the side of your GitHub username and electronic mail.
- Clones your GitHub repository proper right into a folder named deployment on the CircleCI runner tool.
- Copies the contents of the workspace/public checklist (the built Hugo site) into the deployment folder.
- Changes the working checklist to deployment.
- Commits the changes with a message indicating it’s an auto-generated devote from CircleCI.
- Pushes the changes to a brand spanking new division for your GitHub repository.
You’ll need to alternate and at the side of your exact GitHub username and repository establish. Moreover, make sure you create a GitHub get entry to token so that CircleCI can get admission to your GitHub account.
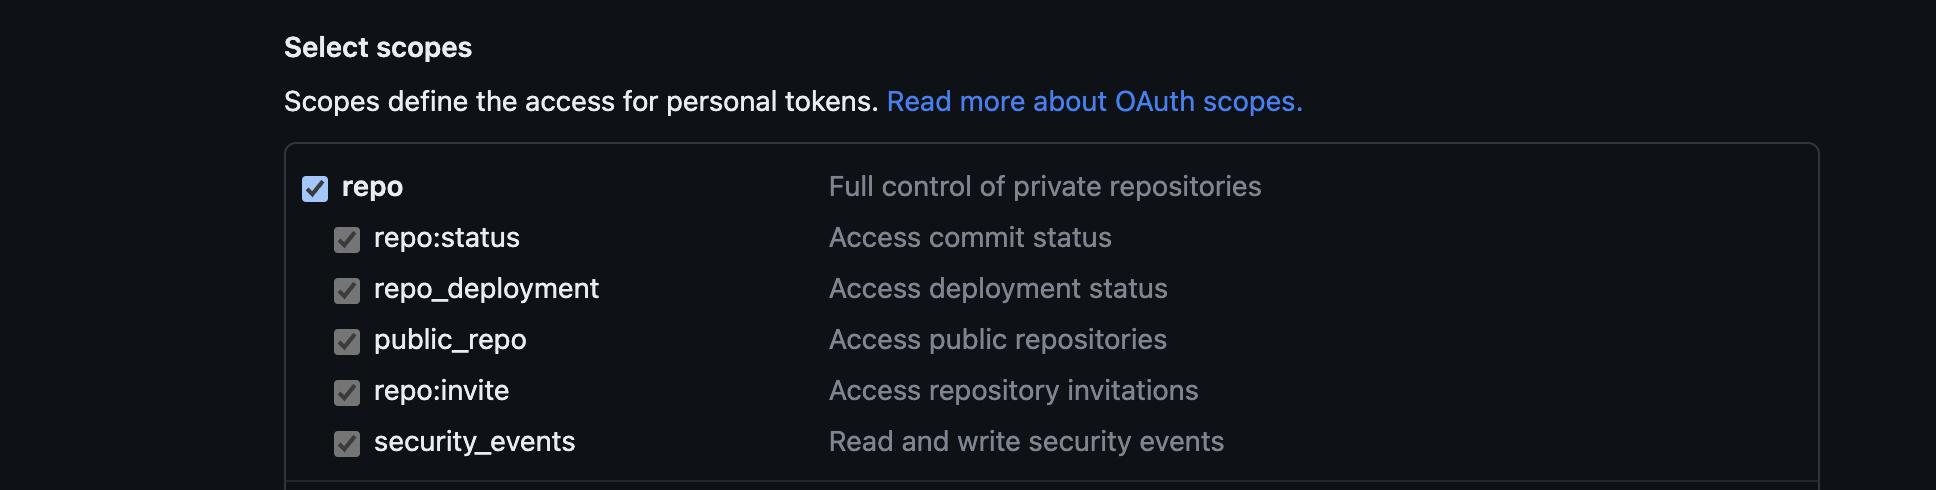
Then, add the token as an atmosphere variable named GITHUB_TOKEN to your CircleCI Problem Settings.
Step 9: Define Workflow
In conjunction with your jobs organize, the next phase involves configuring your workflow. Continuing your CircleCI configuration, create a workflow that triggers the assemble process when there are code changes on the main division and requires the assemble process to complete successfully previous to operating the push assemble process:
workflows:
  fashion: 2
  build-and-deploy:
    jobs:
      - assemble:
          filters:
            branches:
              best:
                - main
      - push assemble:
          requires:
            - assemble
Step 10: Commit and Push
Once your workflow is successfully configured, devote and push your changes in your Git repository. CircleCI mechanically detects the presence of the configuration file and triggers your defined workflows upon code changes.
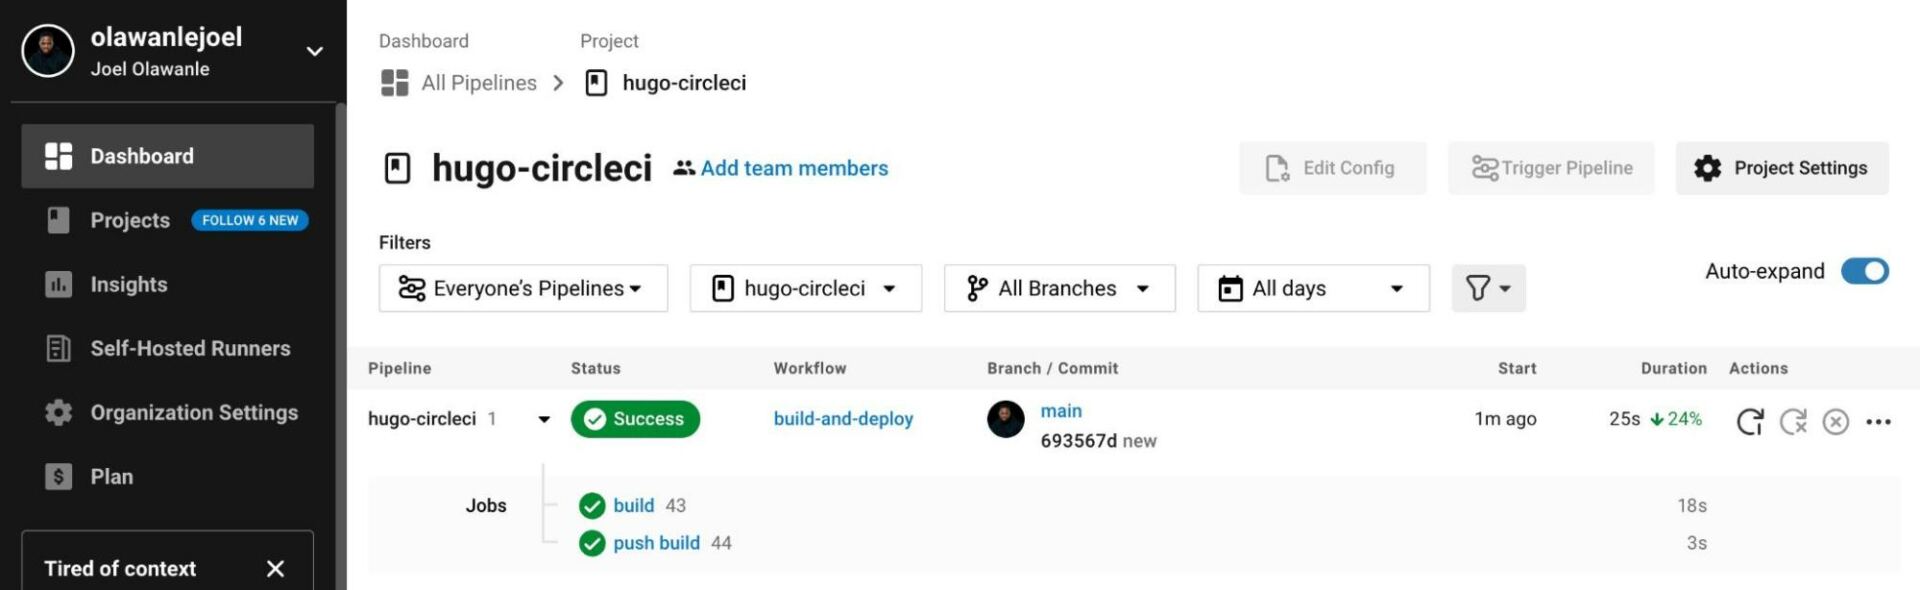
When you take a look at your GitHub repository, the deploy division already has the public folder, which contains the static files.
You’ll crosscheck the whole CircleCI configuration on this pattern repository.
Step 11: Deploy Static Information to Kinsta
Deployment to Kinsta happens in merely seconds, in particular now that the static files are already built. Follow the ones steps to deploy your Hugo site for free with Static Website Web hosting:
- Log in or create an account to view your MyKinsta dashboard.
- Authorize Kinsta at the side of your Git provider.
- Click on on Static Web sites on the left sidebar, then click on on Add site.
- Make a choice the repository and the dep. you need to deploy from (the
deploydivision). - Assign a unique establish in your site and click on on Continue.
- Move away the Assemble command and Node fashion fields empty and specify the Put up checklist as
public. - In the end, click on on Create site.
And that’s it! You right now have a deployed site within a few seconds. A link is supplied to get admission to the deployed fashion of your site. You’ll later add your customized area and SSL certificates if you need.
Using Hugo-Bin to Assemble and Deploy Your Hugo Website online to Kinsta
The Hugo-bin package deal is a binary wrapper for Hugo. It makes it imaginable so that you could assemble and serve your Hugo problem with Node.js directions. This method doesn’t want a CI/CD tool to build your site previous to deploying it to Kinsta Static Website online Internet internet hosting.
To use the Hugo-bin package deal to your Hugo problem:
- Initialize Node.js inside the root of your problem by means of operating the
npm init -ycommand. - Next, arrange Hugo-bin as a developer dependency to your problem by means of operating this command:
npm i -D hugo-bin- Add the following script directions in your package deal.json file:
"scripts": {
    "assemble": "hugo",
    "create": "hugo new",
    "serve": "hugo server"
  }
With this, Kinsta would be capable to assemble and serve your Hugo site without you needing to build your files previous to deploying.
Once all is done, push your code in your Git repository. Follow the ones steps to deploy your static site to Kinsta:
- Log in or create an account to view your MyKinsta dashboard.
- Authorize Kinsta at the side of your Git provider.
- Click on on Static Web sites on the left sidebar, then click on on Add site.
- Make a choice the repository and the dep. you need to deploy from.
- Assign a unique establish in your site.
- Add the assemble settings inside the following format:
- Assemble command: npm run assemble
- Node fashion: 18.16.0
- Put up checklist: public
- In the end, click on on Create site.
And that’s it! You right now have a deployed site within a few seconds.
Serving Your Static Information Most straightforward to Kinsta
In the end, each different manner for deploying your Hugo site to Kinsta involves setting up your site in the neighborhood and then deploying it to Kinsta. This process generates a public folder at the root of your problem. Alternatively, the main problem of the use of this system is that you simply should assemble your site in the neighborhood previous to each and every push, which can also be time-consuming and less at hand compared to other methods that automate the site-building process.
By way of default, the public folder is excluded from your Git repository as a result of its inclusion to your .gitignore file. To include it to your repository and deploy your site to Kinsta:
- Remove the public folder from your .gitignore file.
- Follow the deployment steps outlined above.
- Deploy the repository to Kinsta, ensuring that the Assemble command and Node fashion fields keep empty, as your site is already built.
- Specify the Put up checklist as
public.
On the other hand, you’ll be capable of choose to push best the static files in your GitHub repository. For this implies, there’s no need to initialize a Git repository inside the root folder of your problem. You best need to run git init throughout the public folder. This lets you keep the fashion control to your static files minimize free the rest of your problem.
In this scenario, when pushing the files one after the other without putting them within a public folder, specify the Put up checklist as . when deploying to Kinsta. This notation represents the foundation folder, and Kinsta will serve the files accordingly.
Summary
This newsletter has outlined 3 environment friendly methods for deploying your Hugo site for free on Kinsta’s Static Website online Internet internet hosting platform. That you must have the flexibility to choose the method that aligns very best at the side of your particular prerequisites. Additionally, for in-depth insights on creating a lightning-fast static site the use of Hugo, learn our complete information.
The post How To Deploy a Hugo Website to Kinsta for Unfastened With Static Website Web hosting seemed first on Kinsta®.
Contents
- 1 Understanding Kinsta Static Website online Internet internet hosting
- 2 Deploy Your Hugo Website online to Kinsta Static Website online Internet internet hosting
- 3 Assemble Your Website online With CircleCI and Deploy to Kinsta
- 3.1 Advantages of Using CI/CD
- 3.2 Step 1: Create the Configuration Record
- 3.3 Step 2: Push Your Code to a Git repository
- 3.4 Step 3: Create an Orphan Division
- 3.5 Step 4: Create a CircleCI Account
- 3.6 Step 5: Configure Your Repository
- 3.7 Step 6: Define CircleCI Configuration
- 3.8 Step 7: Define Executors
- 3.9 Step 8: Define Jobs
- 3.10 Step 9: Define Workflow
- 3.11 Step 10: Commit and Push
- 3.12 Step 11: Deploy Static Information to Kinsta
- 4 Using Hugo-Bin to Assemble and Deploy Your Hugo Website online to Kinsta
- 5 Serving Your Static Information Most straightforward to Kinsta
- 6 Summary
- 7 👋 We Discover The 46 Easiest WordPress Cyber Monday Offers! (Throughout The Ecosystem)
- 8 The Best possible Time to Ship an Electronic mail [Research]
- 9 Navigating the Long term of Search engine optimization: 5 Guidelines From HubSpot’s Senior Director ...

0 Comments