

Fullscreen headers take all the display screen, irrespective of the display screen dimension of the customer. That is nice for grabbing the eye of customers. It’s additionally nice for guiding them in your name to motion. Thankfully, it’s simple to make a fullscreen header with Divi’s Fullwidth Header Module. On this submit, we’ll display you methods to construct a fullwidth header, flip it fullscreen, and elegance it. You’ll be able to use this method to construct any fullscreen hero segment to your pages!
Let’s get began.
Previewing the Fullscreen Header
Let’s see a preview of what we’ll construct on this instructional.
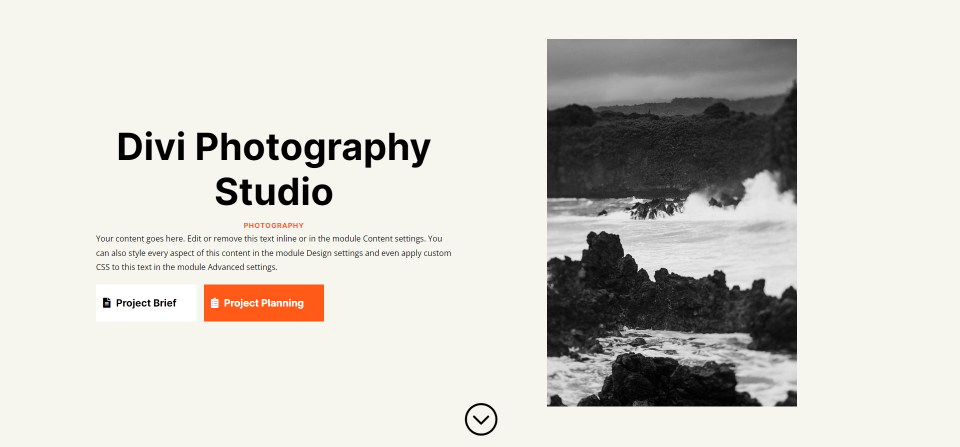
Desktop
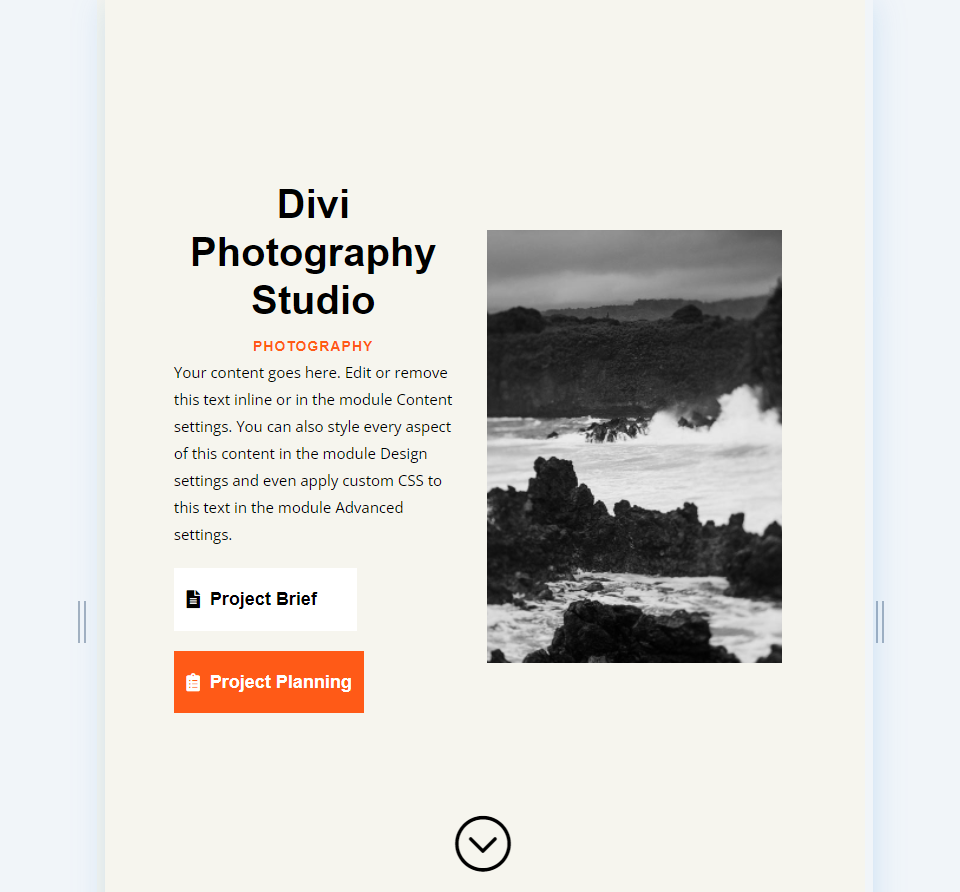
Pill
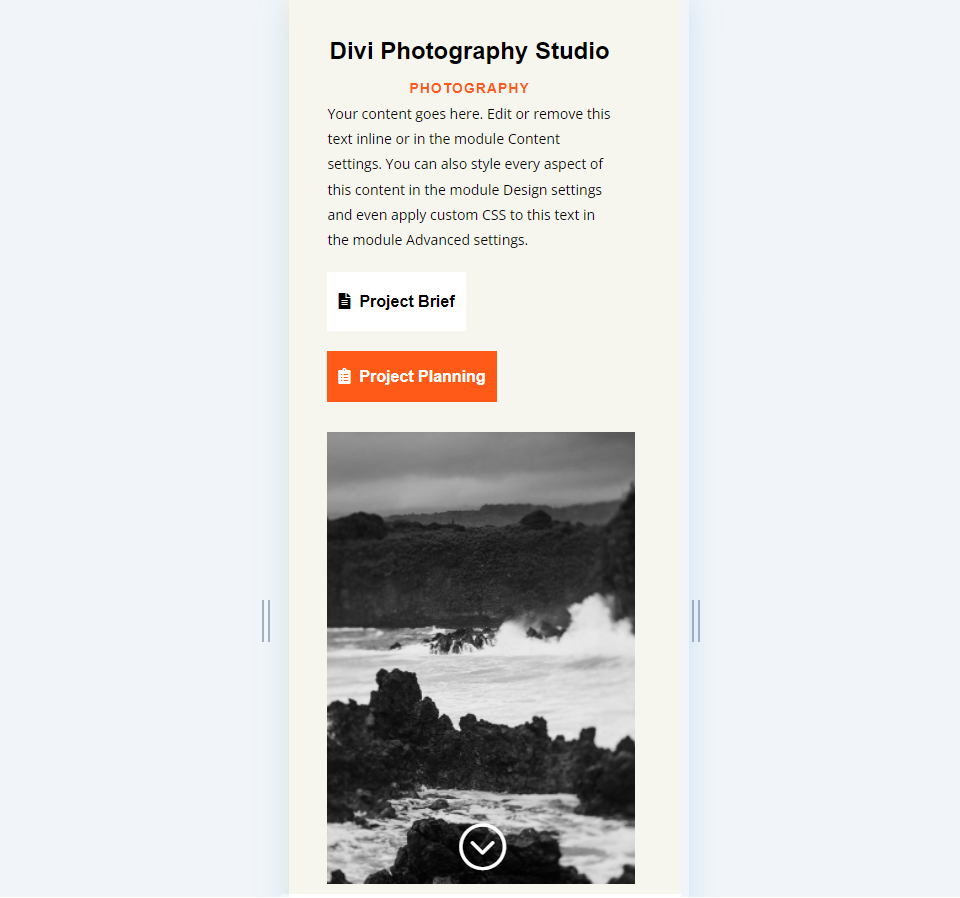
Telephone
Why Make a Fullscreen Header with Divi’s Fullwidth Header Module?
Prior to we speak about methods to make a fullscreen header, let’s speak about why Divi customers would possibly need one.
A fullscreen header items particular parts in a contained segment. This segment items those parts in a blank structure that attracts consideration and plays a number of duties.
At the start, this can be utilized to show a decision to motion that may lead your guests into your gross sales funnel. It’s an excellent spot to say a selected services or products.
Secondly, it may well provide the consumer with a captivating design that assists in keeping them at the website online. Web sites handiest have a couple of seconds to seize the eye of holiday makers.
There are some things to remember when making a fullscreen header:
- Observe not unusual design practices for colours and fonts. Be sure that they’re legible and have compatibility with the subject of your website online.
- Stay the design easy and blank. Don’t use too many photographs, hyperlinks, or buttons. Focal point on a couple of issues. Much less is extra.
- Be sure the fullscreen header is responsive. A fullscreen header will have to glance nice and paintings correctly on all display screen sizes.
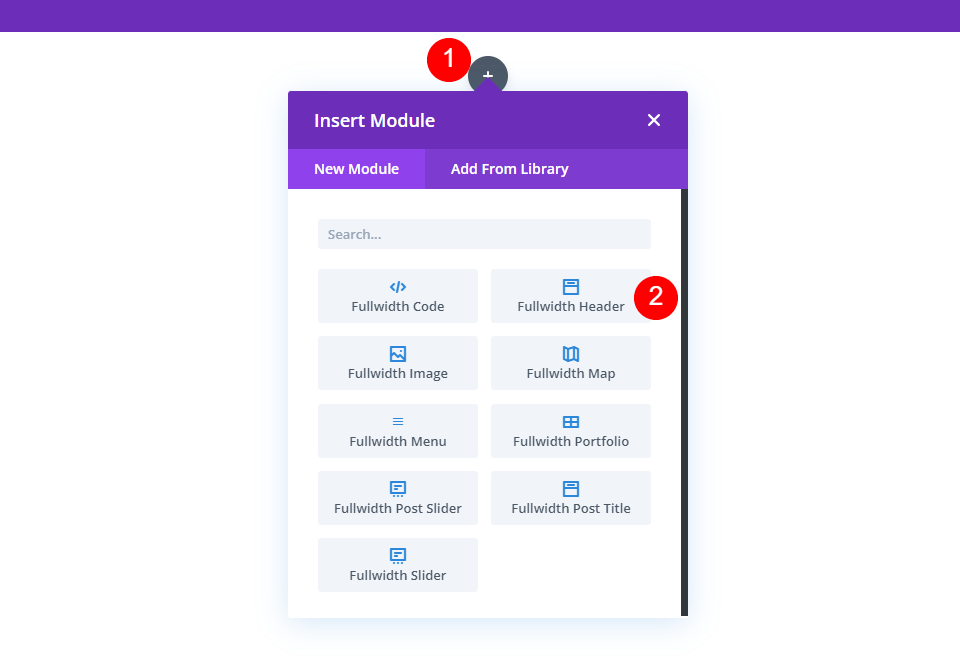
How one can Make Your Divi Fullwidth Header a Fullscreen Header
Get started through including a fullwidth segment to the web page you’re running on. Then, upload a Fullwidth Header Module to the fullwidth segment.
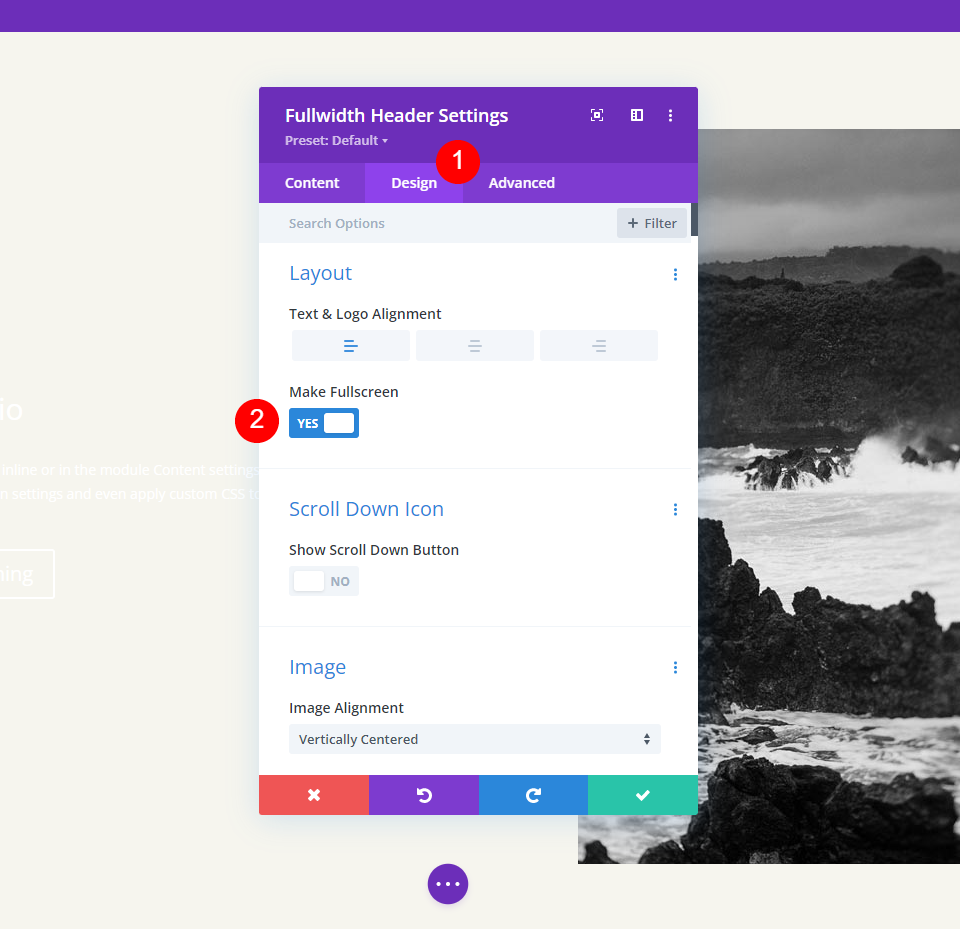
The module’s settings will open. Make a choice the Design tab. Permit the choice known as Make Fullscreen.
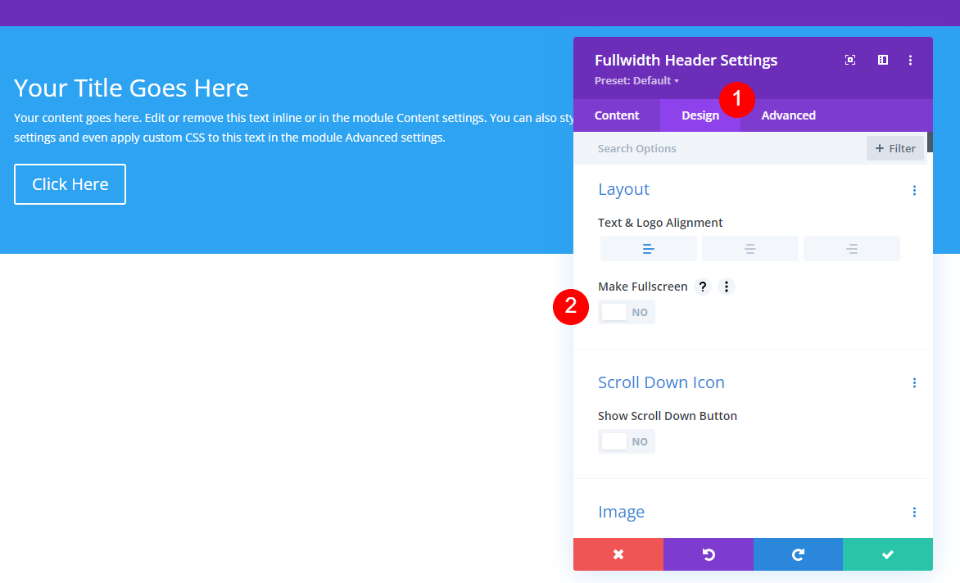
We’ve got a fullscreen header. It’s that straightforward.
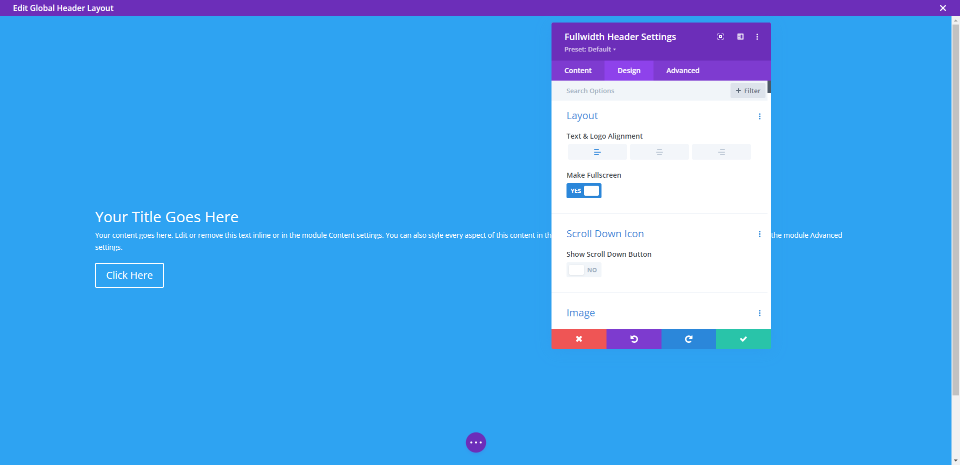
Permit the Fullscreen Header Scroll Down Icon
We will additionally upload a button that signifies for the consumer to scroll down. Alternatively, we do must allow it. This button is at all times in view within the fullscreen possibility. The fullscreen header possibility at all times suits the customer’s display screen top.
Within the module’s settings, we’ll see a piece known as Scroll Down Icon beneath the Structure choices. Click on the button to allow Display Scroll Down Button.
![]()
Divi Fullwidth Header Fullscreen Header Instance
Now that we’ve mentioned why we’d need to make a Fullwidth Header fullscreen and notice methods to accomplish the duty, let’s have a look at an instance. I’ll create a full-width header the use of the hero segment of a Divi structure.
For this situation, I’m the use of the hero segment from the homepage within the free Photography Studio Layout Pack that’s to be had inside Divi. I’ll customise this hero segment the use of the fonts and colours from the structure to create a novel full-width header.
Fullscreen Header Module Settings
Listed below are the stairs for each and every segment of settings within the Fullscreen Header Module.
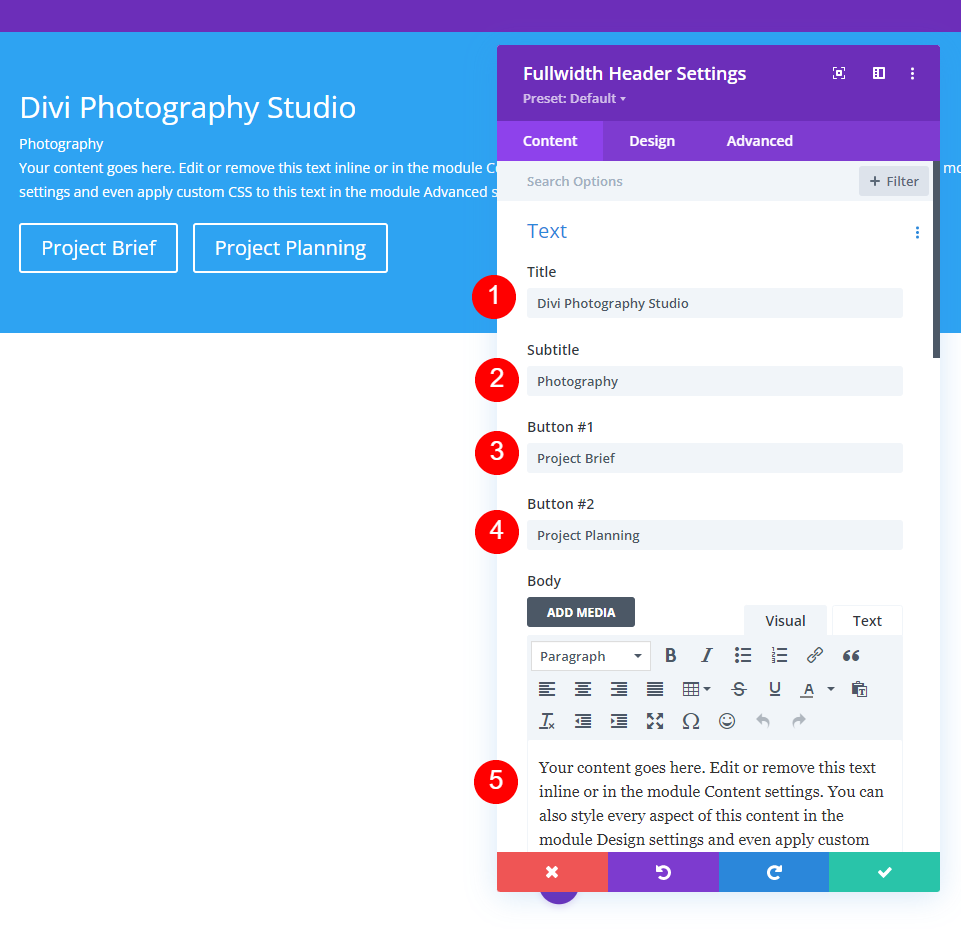
Textual content
First, upload the textual content that can be visual within the fullwidth header. This comprises the identify, sub-title, content material (I’ll use Divi’s integrated dummy textual content for this), and the button textual content.
- Name: Divi Pictures Studio
- Subtitle: Pictures
- Button 1: Mission Transient
- Button 2: Mission Making plans
- Frame: content material
Photographs
Subsequent, upload the picture. This presentations at the proper aspect of the fullwidth header, shifting the textual content to the left.
- Header Symbol: your selection

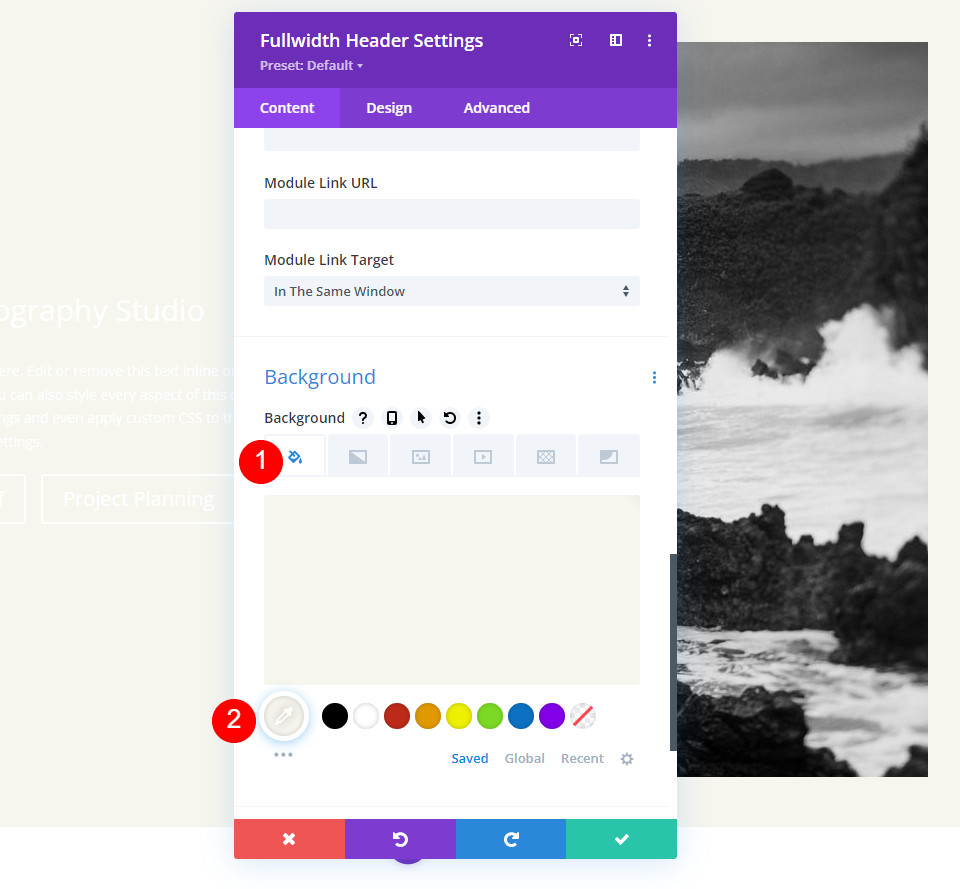
Background
Scroll right down to Background and set the Colour to #f6f5ee.
- Colour: #f6f5ee
Structure
Subsequent, move to the Design tab. Permit Make Fullscreen.
- Make Fullscreen: Sure
Scroll Down Icon
Subsequent, allow the Scroll Down Icon. Exchange the Colour to black for desktops and pills and white for telephones. With the picture I’ve decided on, the icon will seem at the symbol on the backside for telephones and this permits it to be visual with the colours of the picture. Exchange the Icon Dimension to 70px for desktops, 60px for pills, and 50px for telephones.
- Display Scroll Down Button: Sure
- Icon Colour: #000000 Desktop and Pill, #ffffff Telephone
- Dimension: 70px Desktop, 60px Pill, 50px Telephone
![]()
Name Textual content
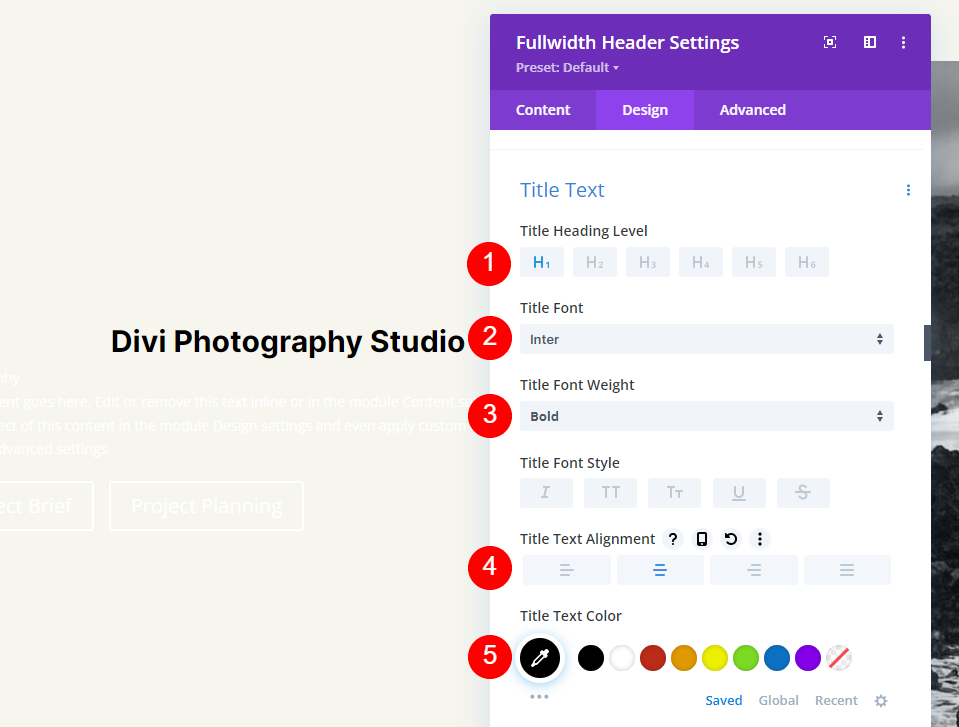
Subsequent, we’ll regulate the Name Textual content. Set the textual content to H1 and make a selection Inter for the Font. Set the Weight to daring, the Alignment to middle, and the Colour to black.
- Heading: H1
- Font: Inter
- Weight: Daring
- Alignment: Heart
- Colour: #000000
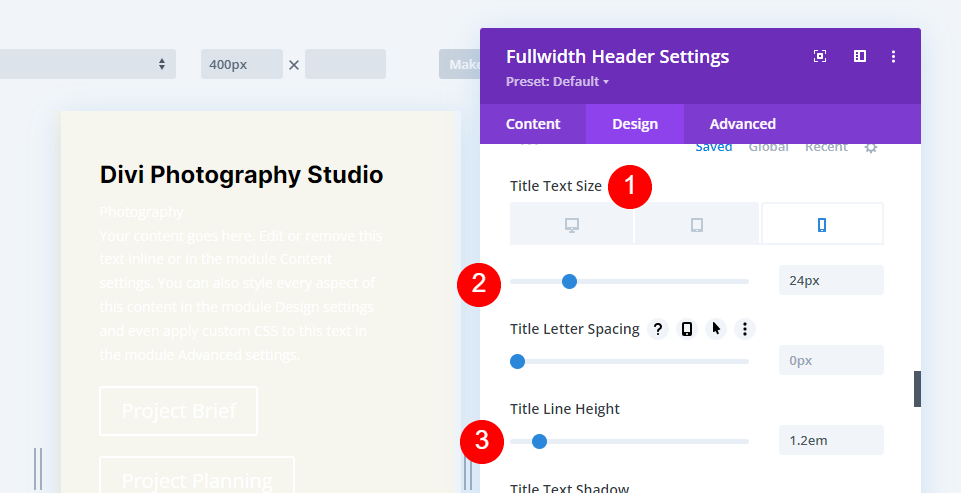
We’ll use 3 sizes for the Font Dimension: 75px for desktops, 40ps for pills, and 24px for telephones. Exchange the Line Peak to at least one.2em.
- Dimension: 75px Desktop, 40px Pill, 24px Telephone
- Line Peak: 1.2em
Frame Textual content
Subsequent, scroll right down to Frame Textual content. Make a selection Open Sans for the Font. Set the Alignment to the Left and the Colour to black.
- Font: Open Sans
- Alignment: Left
- Colour: #000000

Set the Font Dimension to 16px for desktops, 15px for pills, and 14px for telephones. Exchange the Line Peak to at least one.8em.
- Dimension: 16px Desktop, 15px Pill, 14px Telephone
- Line Peak: 1.8em

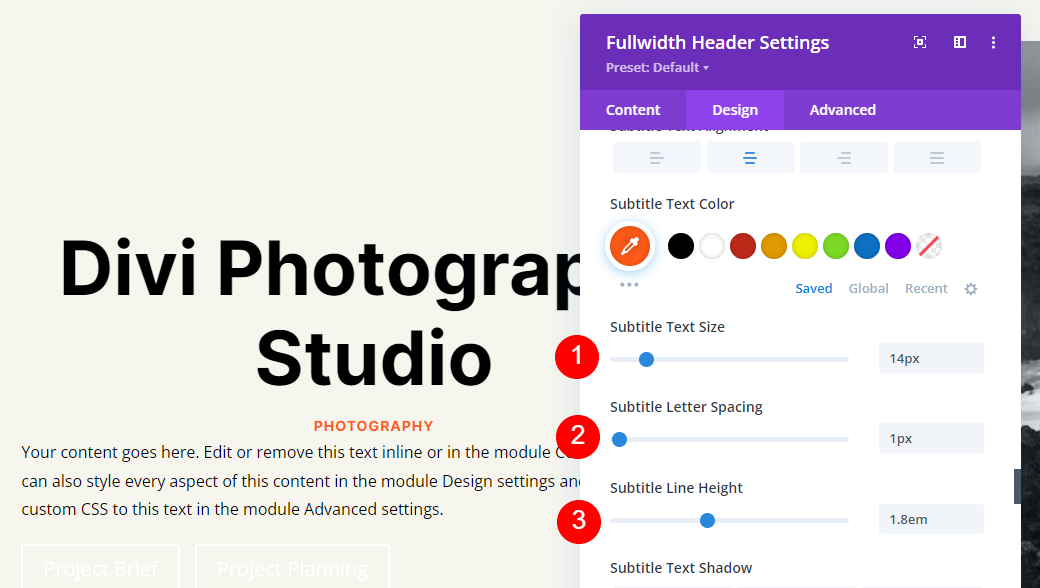
Subtitle Textual content
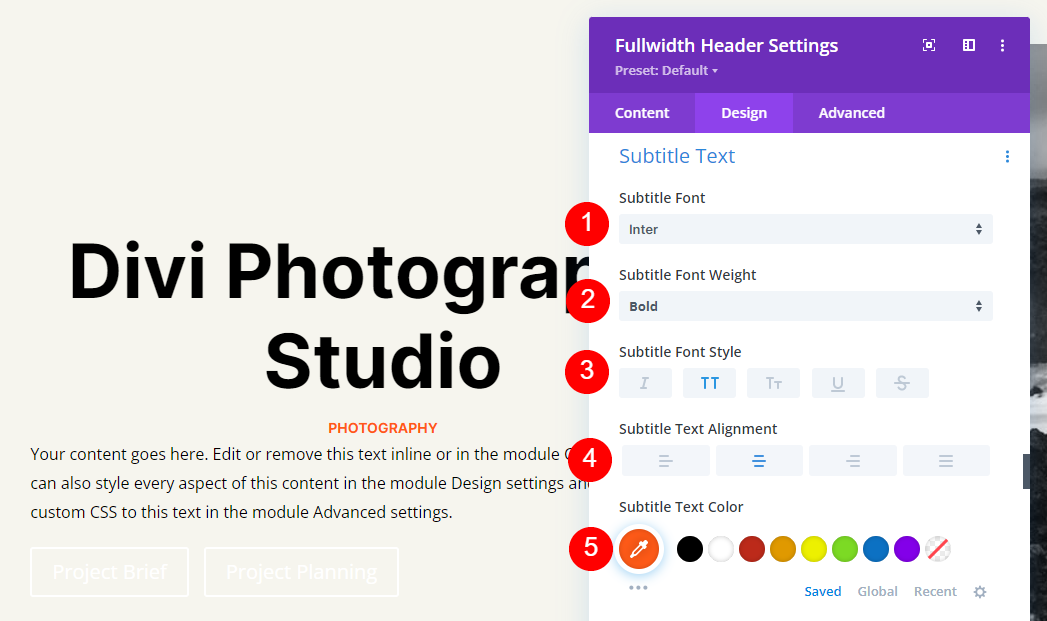
Subsequent, scroll right down to Subtitle Textual content. Exchange the Font to Inter. Set the Weight to daring, the Taste to TT, the Alignment to middle, and the Colour to #ff5a17.
- Font: Inter
- Weight: Daring
- Taste: TT
- Alignment: Heart
- Colour: #ff5a17
Exchange the Dimension to 14px for all 3 display screen sizes. Exchange the Letter Spacing to 1px and the Line Peak to at least one.4em.
- Dimension: 14px
- Letter Spacing 1px
- Line Peak: 1.8em
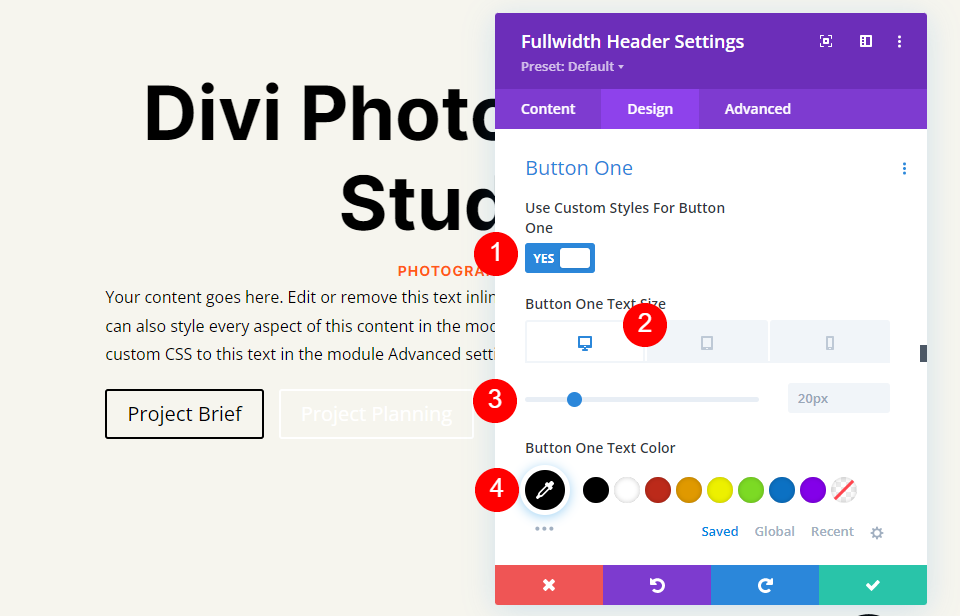
Button One
Subsequent, scroll right down to Button One and choose Use Customized Types for Button. Exchange the Textual content Colour to black.
- Use Customized Types For Button: Sure
- Dimension: 20px Desktop, 18px Pill, 16px Telephone
- Textual content Colour: #000000
Exchange the Background Colour to white and set the Border Width and Radius to 0px.
- Background Colour: #ffffff
- Button One Border Width: 0px
- Button One Border Radius: 0px

Exchange the Font to Inter and the Weight to Daring.
- Font: Inter
- Weight: Daring
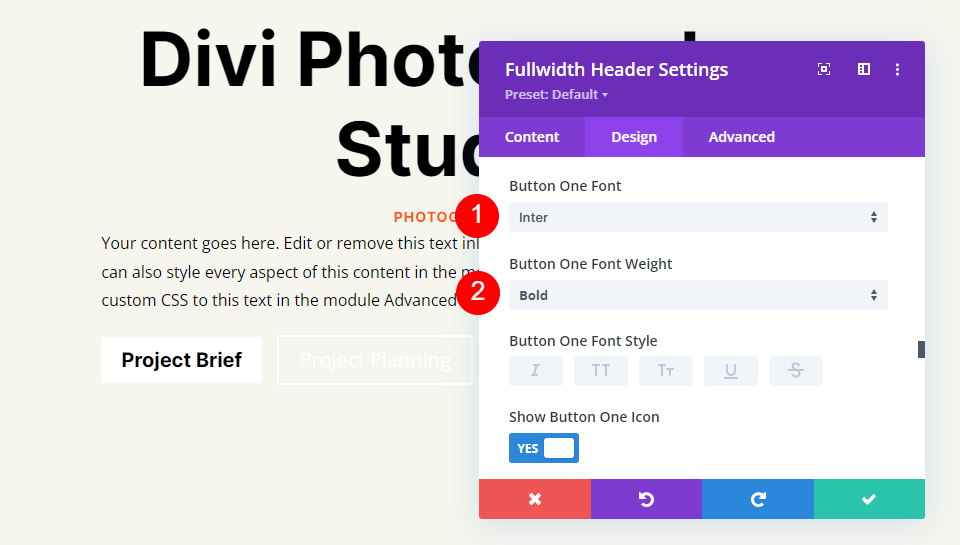
Subsequent, choose your most popular icon, alternate the Colour to black, set the Button Placement at the left, and disable Handiest Display Icon On Hover For Button One.
- Icon: your selection
- Icon Colour: #000000
- Button One Icon Placement: Left
- Handiest Display Icon On Hover For Button One: No
![]()
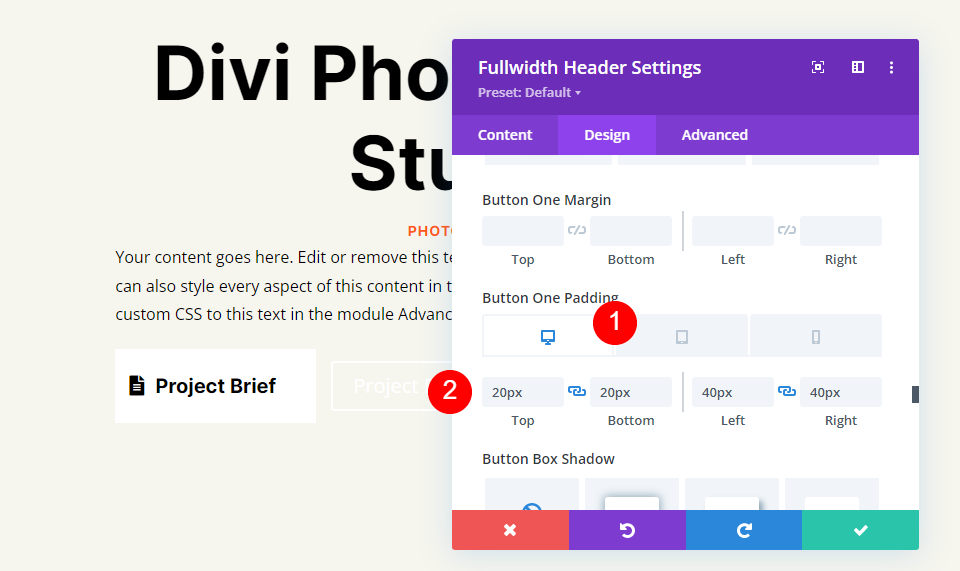
After all, scroll right down to Button One’s Padding choices. We’ll use other Padding for each and every display screen dimension. For desktops, use 20px for Most sensible and Backside, and 40px for Left and Proper. For pills, alternate the Most sensible and Backside Padding to 16px. On telephones, alternate the Most sensible and Backside Padding to 12px. Depart the Left and Proper Padding the similar for all 3.
- Desktop Padding: 20px Most sensible and Backside, 40px Left and Proper
- Pill Padding: 16px Most sensible and Backside, 40px Left and Proper
- Telephone Padding: 12px Most sensible and Backside, 40px Left and Proper
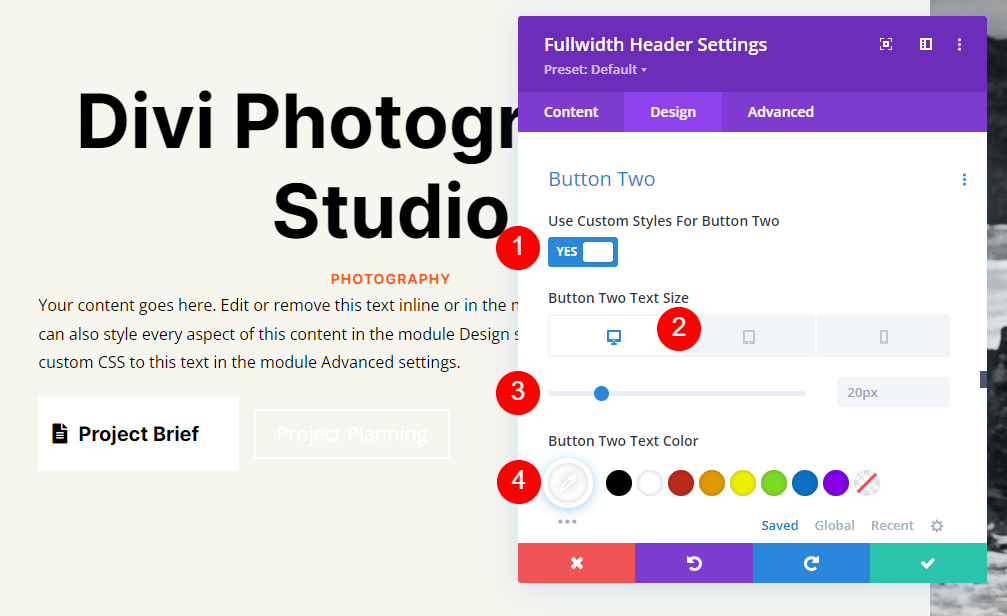
Button Two
Finally, scroll right down to Button Two. Make a choice Use Customized Types for Button. Set the Font dimension to 20px for desktops, 19ps for pills, and 16px for telephones. Exchange the Textual content Colour to white.
- Use Customized Types For Button: Sure
- Dimension: 20px Desktop, 18px Pill, 16px Telephone
- Textual content Colour: #ffffff
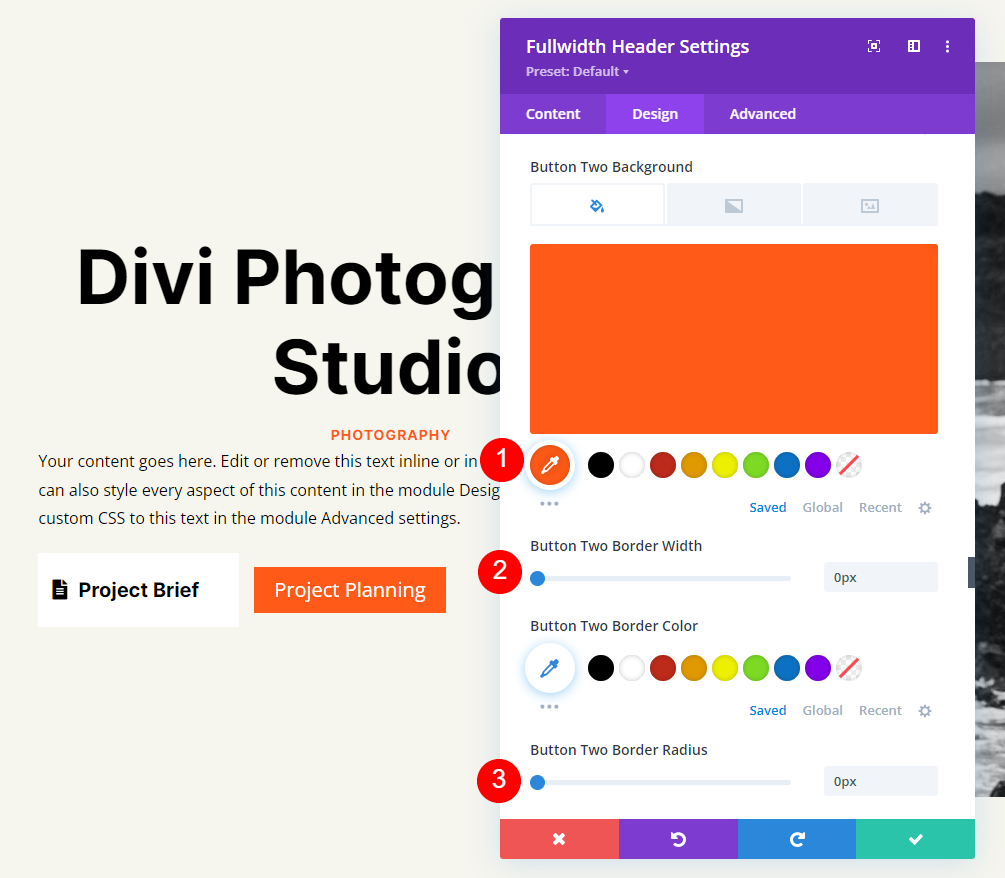
Exchange the Background Colour to #ff5a17. Set the Border Width and Radius to 0px.
- Background Colour: #ff5a17
- Button Two Border Width: 0px
- Button Two Border Radius: 0px
Subsequent, alternate the Font to Inter and the Weight to Daring.
- Font: Inter
- Weight: Daring
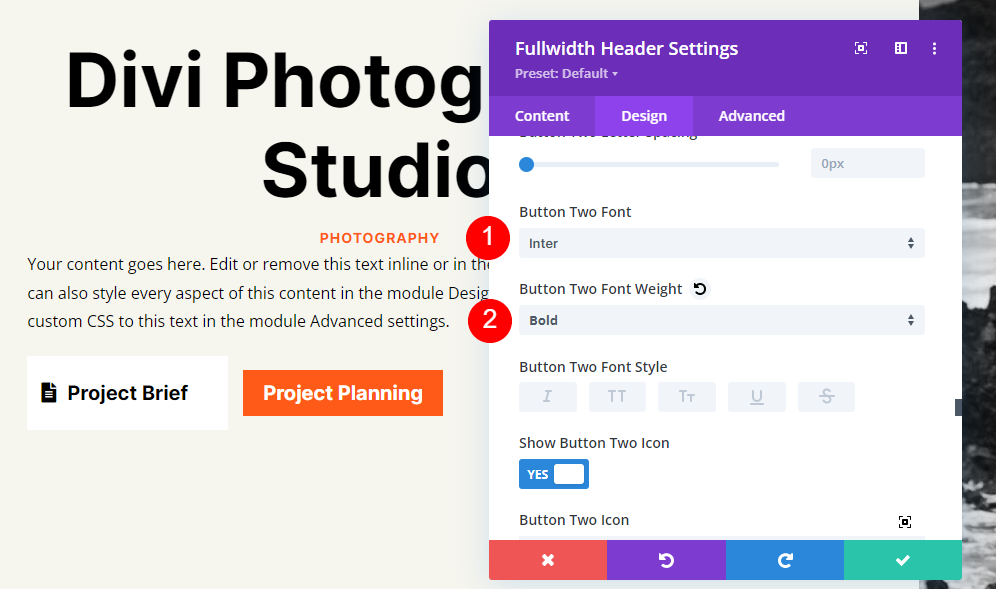
Make a selection your most popular icon. Exchange the Colour to black, set the Button Placement at the left, and disable Handiest Display Icon On Hover For Button Two.
- Icon: your selection
- Icon Colour: #000000
- Button Two Icon Placement: Left
- Handiest Display Icon On Hover For Button Two: No
![]()
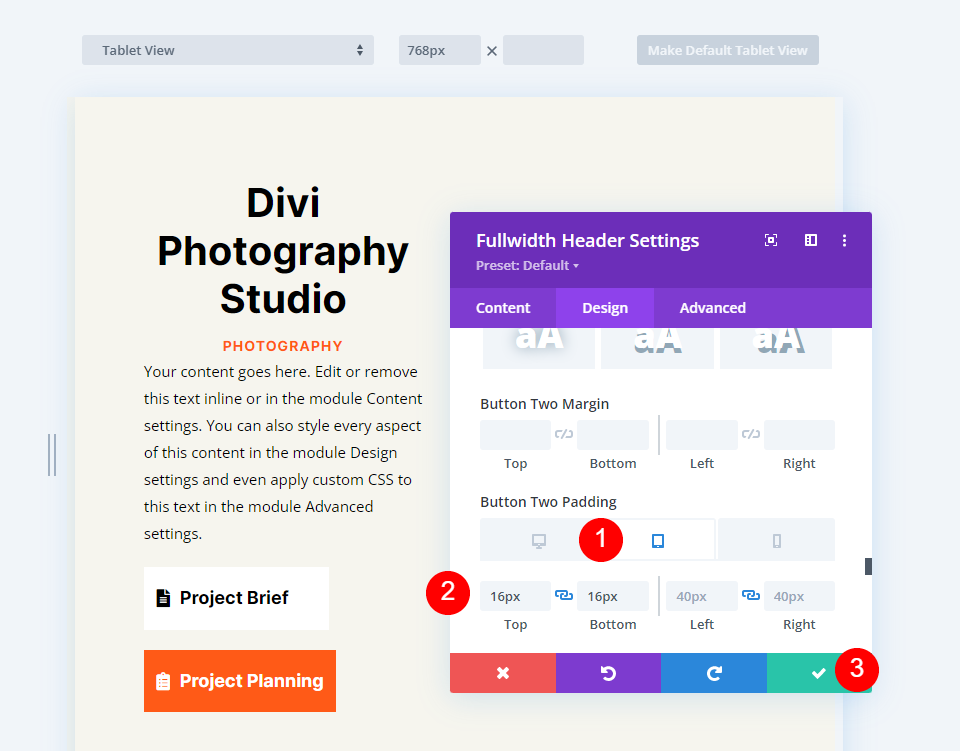
Finally, scroll right down to Button Two’s Padding choices. For desktops, use 20px for Most sensible and Backside, and 40px for Left and Proper. On pills, alternate the Most sensible and Backside Padding to 16px. For telephones, alternate the Most sensible and Backside Padding to 12px. Shut the module and save your paintings.
- Desktop Padding: 20px Most sensible and Backside, 40px Left and Proper
- Pill Padding: 16px Most sensible and Backside, 40px Left and Proper
- Telephone Padding: 12px Most sensible and Backside, 40px Left and Proper
Fullscreen Header Effects
Right here’s how our fullwidth header appears to be like on desktops, pills, and telephones.
Desktop
Pill
Telephone
Finishing Ideas on Making a Fullscreen Header with Divi’s Fullwidth Header Module
That’s our have a look at methods to make a fullscreen header along with your Divi Fullwidth Header Module. The method is inconspicuous, and it appears to be like nice on any tool. Including the Scroll Down button is a superb visible that signifies to customers they are able to scroll. Designing a fullscreen header is very similar to designing a hero segment. Following a couple of easy pointers allow you to create superb fullscreen headers with Divi’s Fullscreen Header Module.
We need to pay attention from you. Have you ever made your Divi Fullwidth Header fullscreen? Tell us about it within the feedback.
The submit How to Make Your Divi Fullwidth Header Module Fullscreen gave the impression first on Elegant Themes Blog.
Contents
- 1 Previewing the Fullscreen Header
- 2 Why Make a Fullscreen Header with Divi’s Fullwidth Header Module?
- 3 How one can Make Your Divi Fullwidth Header a Fullscreen Header
- 4 Permit the Fullscreen Header Scroll Down Icon
- 5 Divi Fullwidth Header Fullscreen Header Instance
- 6 Fullscreen Header Effects
- 7 Finishing Ideas on Making a Fullscreen Header with Divi’s Fullwidth Header Module
- 8 Easy methods to leverage the Kinsta API for predictive useful resource scaling and anomaly detection
- 9 The way to Steer clear of Paper Jams in Your Printer
- 10 9 Best possible WordPress Migration Plugins (When compared)

0 Comments