

Working an internet retailer comes with many perks, however having to determine taxes isn’t one in every of them. This process might appear somewhat daunting, particularly for those who’ve by no means completed it ahead of. Thankfully, WooCommerce supplies an easy setup procedure that will help you get the task completed briefly and successfully.
On this submit, we’ll take a more in-depth take a look at how WooCommerce taxes paintings. We’ll additionally display you learn how to set them up. Let’s get began!
What You Wish to Know About WooCommerce Taxes
While you promote merchandise or services and products on-line, you’ll wish to incorporate taxes into your product pricing and shipping costs. In case you have a WooCommerce retailer, you don’t wish to use further gear for this procedure. That’s as a result of this popular e-commerce platform comes with a number of options and settings that will help you get began.
WooCommerce allows you to calculate and arrange your taxes in keeping with the regulations and rules of the rustic the place your corporation is registered. Then again, it’s possible you’ll nonetheless need to search skilled recommendation from an accountant or prison skilled. This help you be sure that you’re the use of correct tax charges and that your retailer complies with native tax regulations.
How one can Set Up Taxes in WooCommerce (In 4 Steps)
As we’ve discussed, WooCommerce makes it really easy to arrange taxes on your retailer. Then again, you might really feel somewhat beaten by way of the other choices and settings which are to be had to you. On this educational, we’ll stroll you thru all the means of putting in place taxes in WooCommerce.
Step 1: Permit WooCommerce Taxes
To get began, you’ll wish to permit taxes on your retailer. To your WordPress dashboard, navigate to WooCommerce > Settings. Be sure that the Common tab is chosen, and search for the Permit taxes choice:

Take a look at the accompanying field, after which click on at the Save adjustments button. This may increasingly create a brand new tab for taxes to your WooCommerce settings.
Step 2: Configure Your Tax Settings
You’ll now get started configuring your tax choices by way of heading to the newly-created Tax tab within the WooCommerce settings:
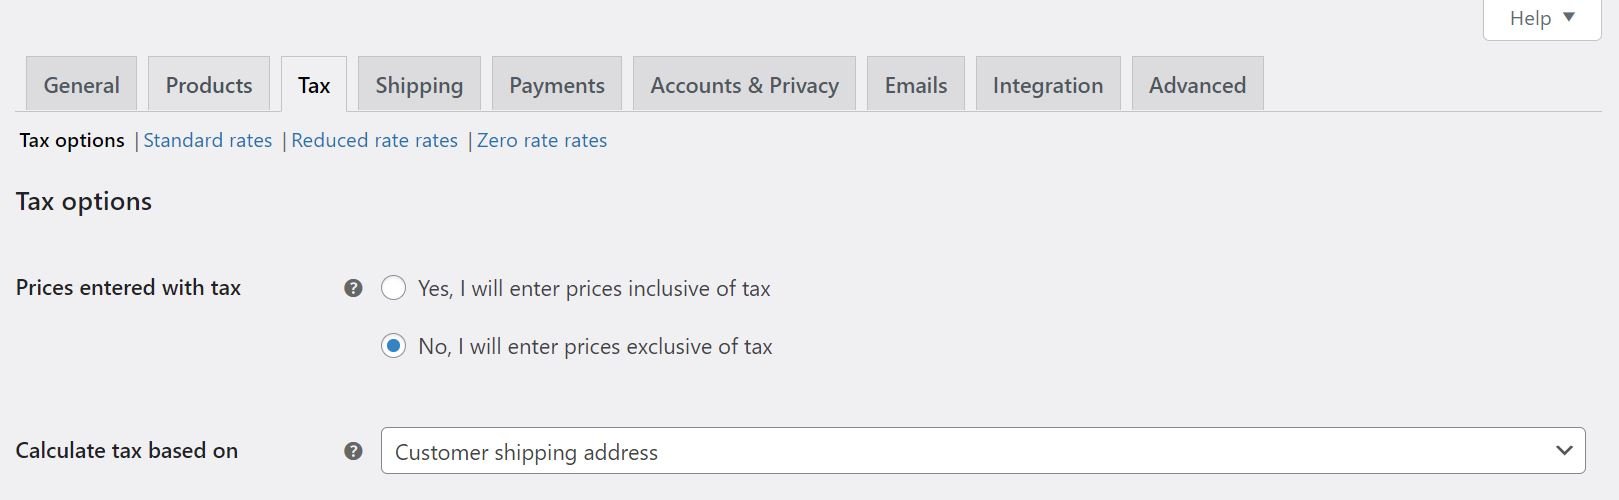
First, you’ll wish to come to a decision whether or not you need product costs to be inclusive or unique of tax. In case you go for the latter, the taxes will probably be calculated and added to every person’s invoice all the way through checkout.
Subsequent, you’ll make a selection the site that you need tax calculations to be in keeping with. Click on at the drop-down menu and choose one of the most following choices: Buyer delivery cope with, Buyer base cope with, or Store base cope with. If you select the 3rd choice, taxes will probably be in keeping with your retailer’s location.
You’ll additionally wish to set the delivery elegance. As soon as once more, you get a couple of choices to make a choice from:
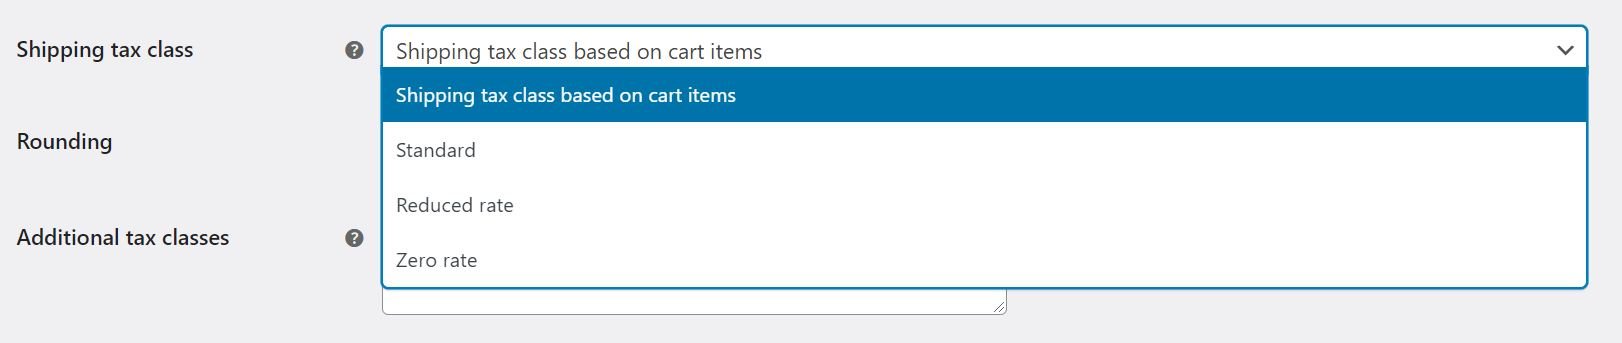
Via default, delivery tax elegance is in keeping with the pieces within the person’s cart. For example, if a person buys an merchandise that falls underneath a special tax charge, the delivery tax will probably be calculated at a equivalent charge. If this isn’t allowed to your tax jurisdiction, you’ll make a selection a special tax elegance.
You’ll additionally permit tax rounding on the sub-total degree, quite than consistent with line:
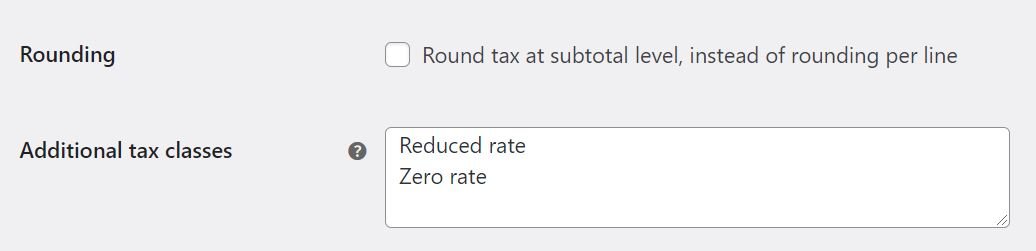
WooCommerce additionally allows you to create new tax categories. But even so the default Same old Fee, you get two further choices: Lowered Fee and 0 Fee. So as to add some other elegance, merely input the identify within the box (one elegance consistent with line). In a while, we’ll display you learn how to totally arrange further tax charges in WooCommerce.
Subsequent, you’ll make a selection whether or not the product costs displayed at the entrance finish of your retailer will probably be inclusive or unique of tax. You’ll additionally configure the similar settings for costs displayed within the cart and all the way through checkout:
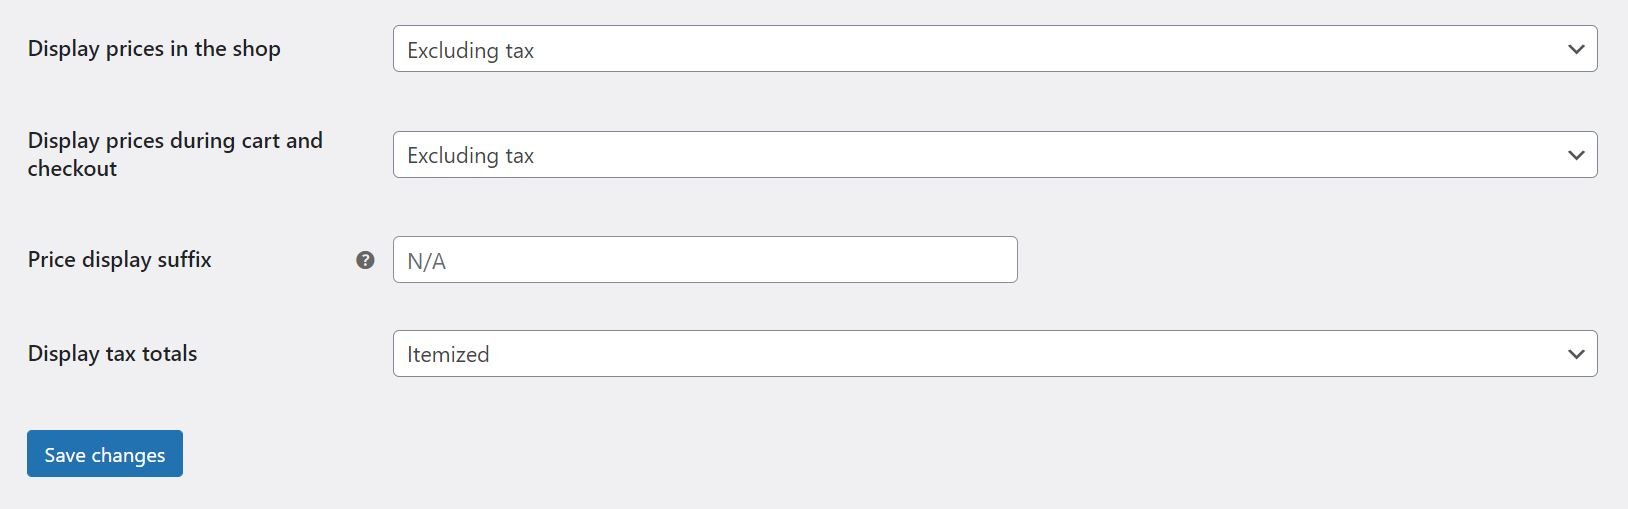
Moreover, you’ll customise the textual content that may show along your product costs. This we could customers know whether or not the cost is inclusive or unique of tax. WooCommerce supplies two placeholders for this goal: {price_including_tax} and {price_excluding_tax}.
In any case, you’ll see the Show tax totals choice. This permits you to make a selection whether or not you need a couple of taxes to be displayed as a unmarried whole all the way through checkout, or as an itemized checklist.
That’s it! We’ve coated all of the tax choices to be had with WooCommerce. While you’re satisfied along with your settings, click on at the Save adjustments button on the backside of the web page.
Step 3: Set Up Tax Charges
Previous, we discussed that WooCommerce comes with 3 forms of tax categories: usual charge, lowered charge, and 0 charge. We additionally confirmed you learn how to upload a brand new tax elegance. Now, let’s take a look at learn how to arrange tax charges on your retailer.
To your tax settings, click on at the tax elegance that you need to configure. For this educational, we’ll be running with Same old charges:
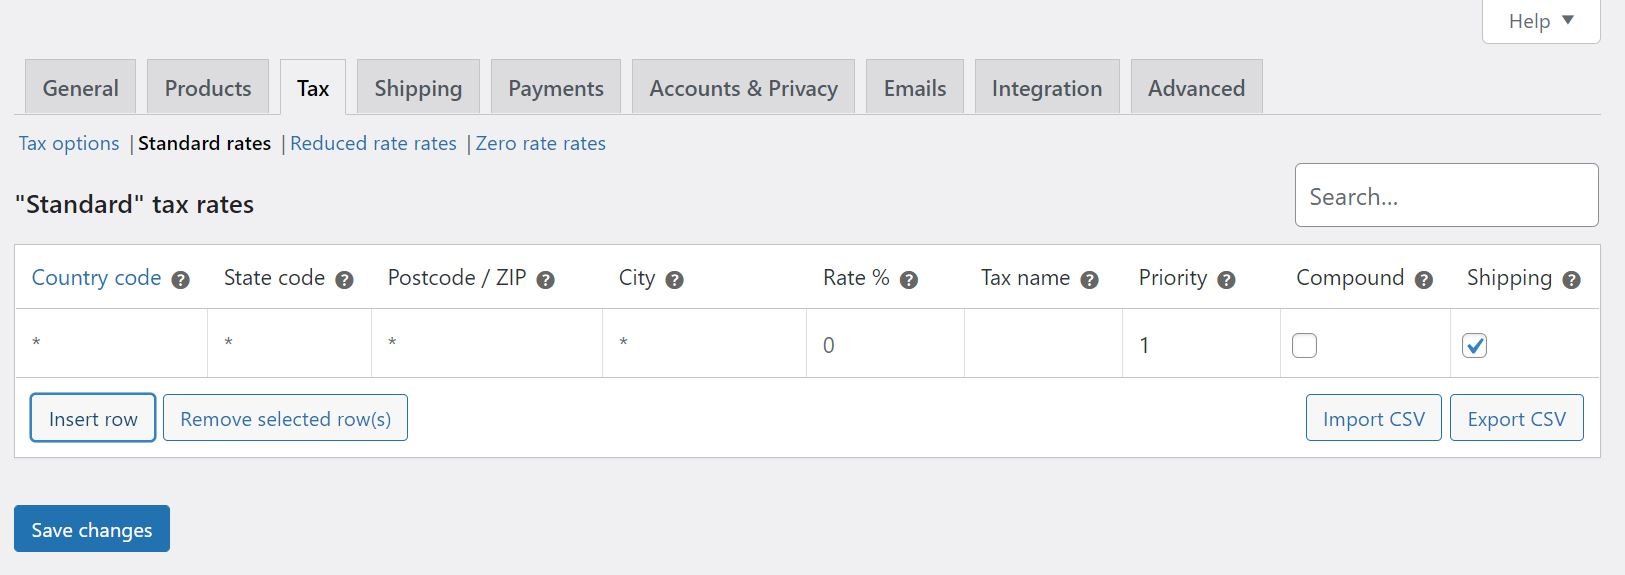
So as to add a brand new tax charge, click on at the Insert row choice. You’ll then be capable of input the related knowledge within the to be had fields. Let’s take a look at the attributes for every tax charge:
- Nation Code. Specify a 2-digit nation code for the speed. You’ll use ISO 3166-1 alpha-2 codes to seem up the legitimate codes for every nation. In case you don’t need to specify a specific nation, you’ll depart this box clean.
- State Code. Input a 2-digit state code for the speed (the place appropriate). If you wish to observe the speed to all states, you don’t wish to input a code.
- ZIP/Postcode. Input postcodes for the speed. You’ll separate every code with a semi-colon (;), and use wildcards and levels (e.g. you’ll input “50” to use the speed to all zip codes beginning with the ones two digits).
- Town. Specify town (or towns) the place this tax charge is appropriate.
- Fee. Input the tax charge, the use of 4 decimal puts. As an example, you’d input “30.000” for a tax charge of 30%.
- Tax Identify. Input a reputation on your tax charge, comparable to “Gross sales Tax” or “VAT”.
- Precedence. Make a choice a concern for this tax charge. Be aware that you’ll use one matching charge consistent with precedence. To outline a couple of tax charges for a similar space, you’ll wish to specify a special precedence for every charge.
- Compound. Take a look at this field if you need the speed to be implemented on most sensible of all different taxes.
- Delivery. Choose this feature if the speed applies to delivery fees.
While you’re able, click on on Save adjustments. Right here’s an instance of a tax setup for a WooCommerce retailer:
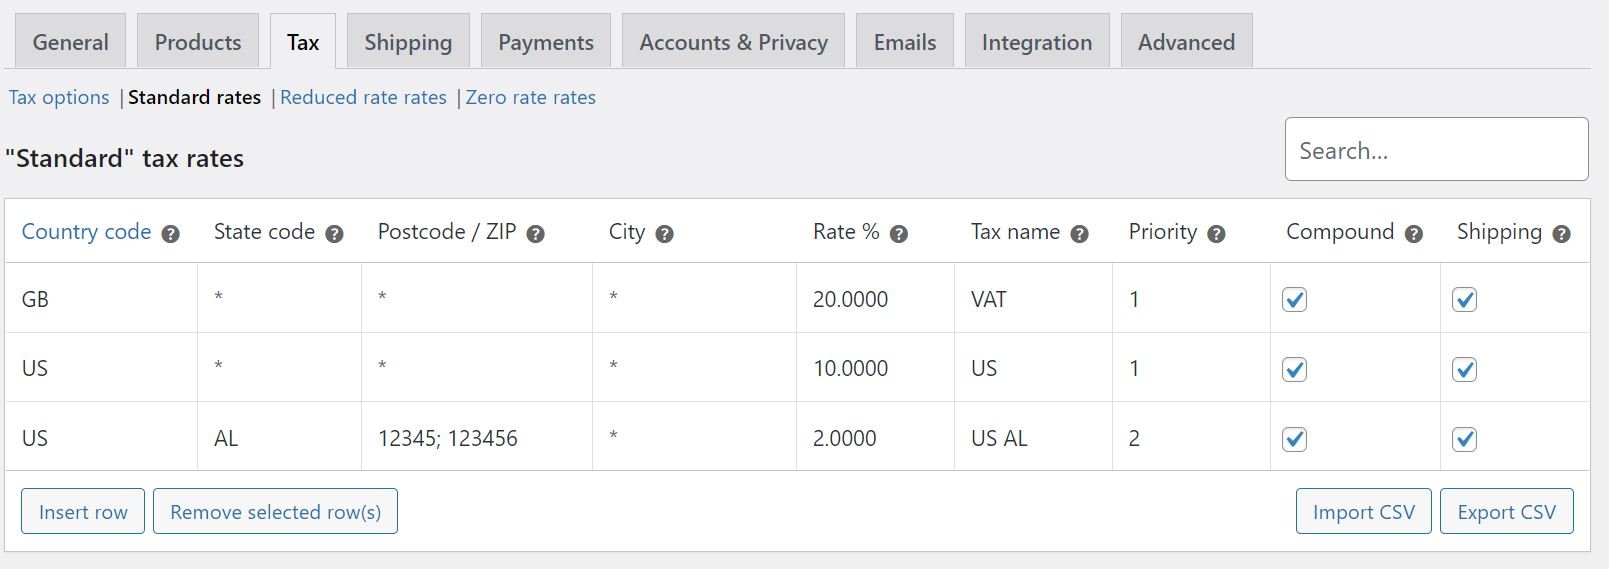
You’ll additionally import or export tax charges by way of clicking at the Import CSV or Export CSV button. If you wish to delete a tax charge, merely choose the related row and click on on Take away decided on row(s).
Understand that you’ll additionally arrange tax charges on your different tax categories: lowered charge and 0 charge. You’ll simply want to make a choice the tax elegance from the highest of the web page.
Step 4: View Your Tax Studies
When you arrange your taxes, you’ll get entry to the tax reporting function in WooCommerce. Move to WooCommerce > Studies > Taxes:
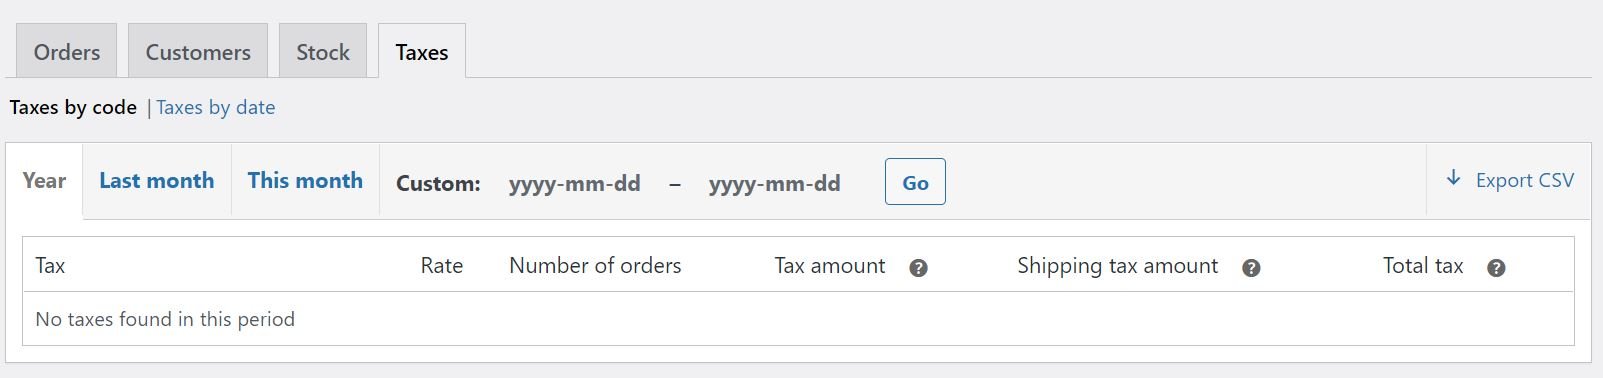
If you choose Taxes by way of date, you’ll view your tax studies in keeping with the timeline you select. In the meantime, if you choose Taxes by way of code, you’ll get get entry to to knowledge for every tax charge to your retailer.
Conclusion
Putting in place taxes on your on-line retailer is usually a quite tedious task. Thankfully, WooCommerce allows you to configure your tax charges and calculations in only some clicks.
On this submit, we confirmed you learn how to arrange taxes in WooCommerce in 4 easy steps:
- Permits tax charges and tax calculations out of your WooCommerce settings.
- Configure some fundamental settings, comparable to delivery tax categories and tax rounding.
- Arrange tax charges in keeping with other international locations and states.
- View your tax studies.
Do you will have any questions on putting in place taxes in WooCommerce? Tell us within the feedback phase beneath!
Featured Symbol by means of VectorHot / shutterstock.com
The submit How to Set Up Taxes in WooCommerce gave the impression first on Elegant Themes Blog.
Contents

0 Comments