

Symbol mask are steadily used so as to add attention-grabbing shapes to pictures. They permit the picture to peek during the form, giving the web page a novel design component. With Divi’s Gradient Builder, you don’t essentially have to make use of mask to create shapes. As a substitute, you’ll use the Gradient Stops and settings to create them! On this publish, we’ll have a look at methods to form your pictures with Divi’s Gradient Builder that can assist you upload distinctive designs on your pictures.
Let’s get began.
Preview
First, let’s check out what we’ll construct on this instructional.
First Instance – Round Symbol Form
Desktop

Pill

Telephone
2nd Instance – Linear Symbol Form
Desktop

Pill

Telephone
3rd Instance – Elliptical Symbol Form
Desktop

Pill

Telephone
Fourth Instance – Conical Symbol Form
Desktop

Pill

Telephone

Create the Format
First, let’s create the structure that we’ll use in all of the examples. This structure can be utilized as a hero phase. It’s going to come with a name and outline on one facet and the picture at the different. We’ll then use that structure and symbol for the examples.
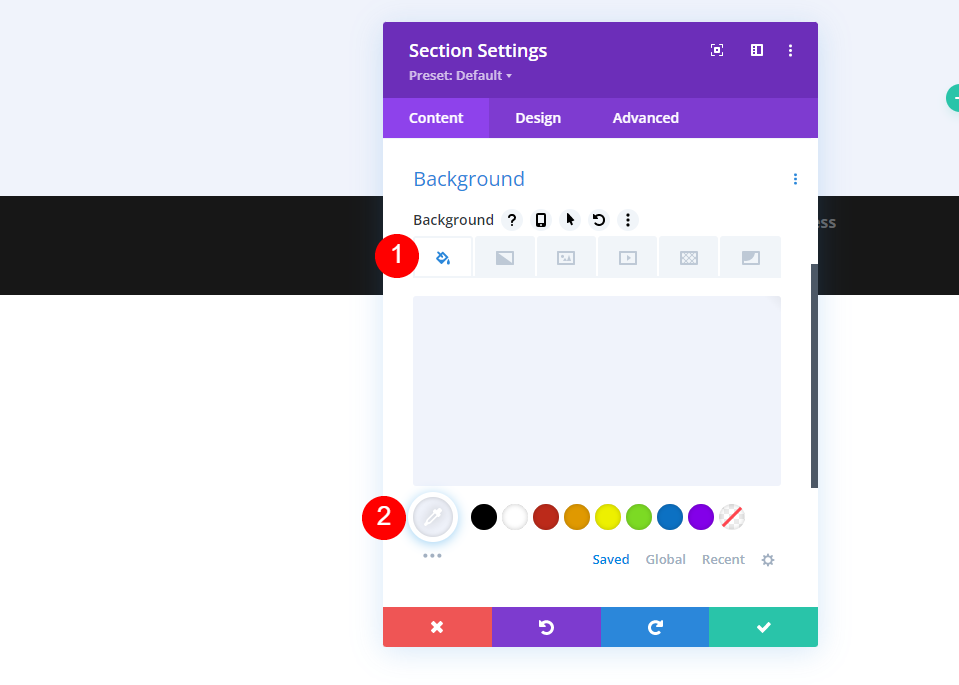
Customise the Phase
First, create a brand new Divi web page and customise the Phase. Open the phase’s settings and alter the Background Colour to #f0f3fb.
- Background Colour: #f0f3fb
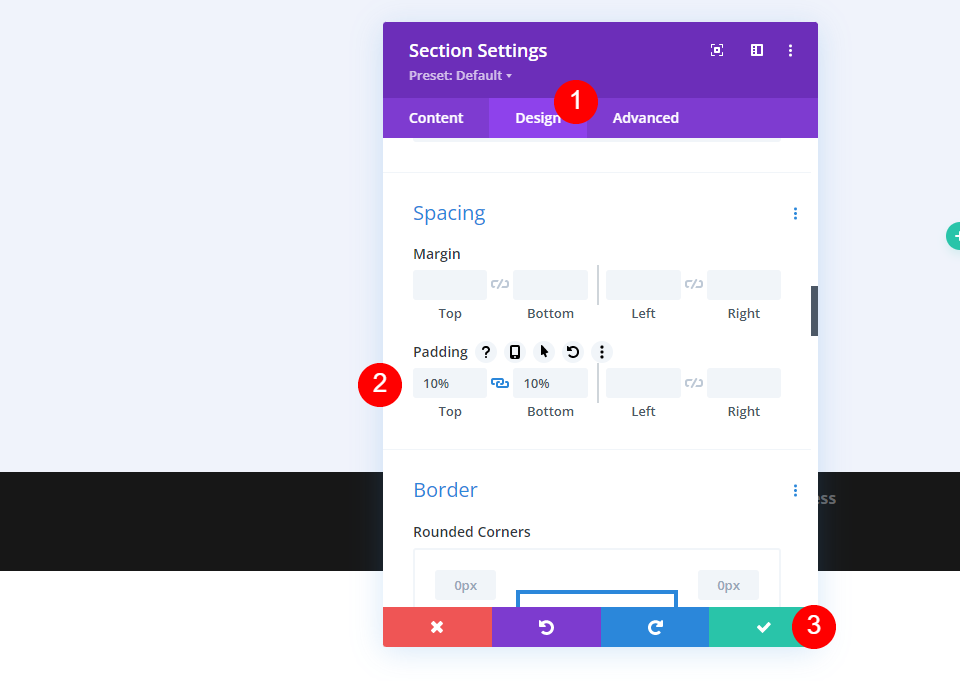
Subsequent, move to the Design tab and upload 10% Padding to the Most sensible and Backside. Shut the settings.
- Padding: 10% Most sensible, Backside
Upload a Row
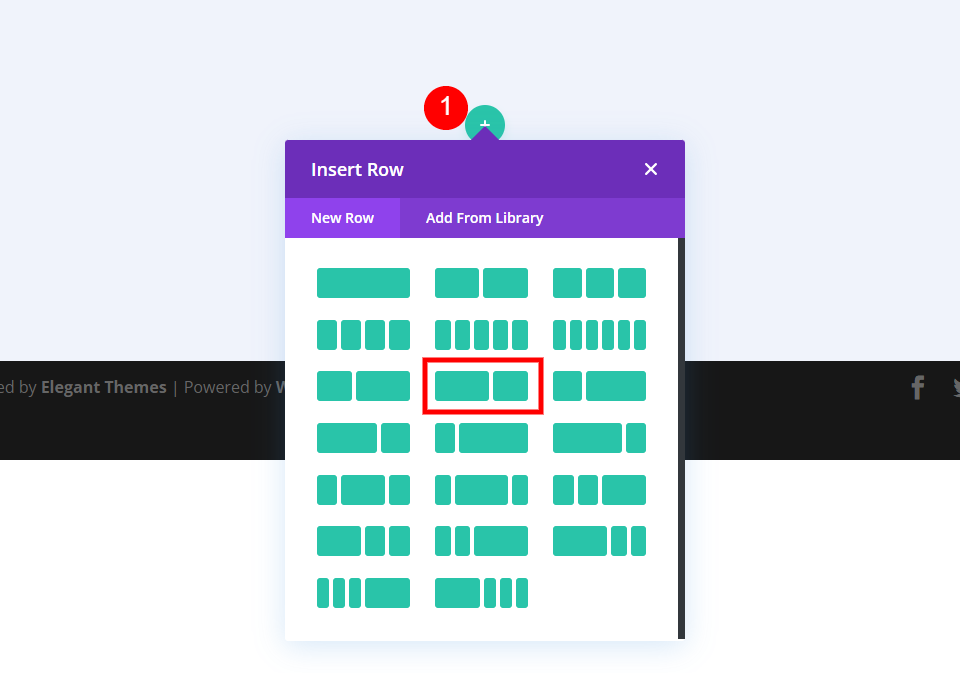
Subsequent, upload a Row with a 2/3 column and a 1/3 column.
- 2/3, 1/3 Row
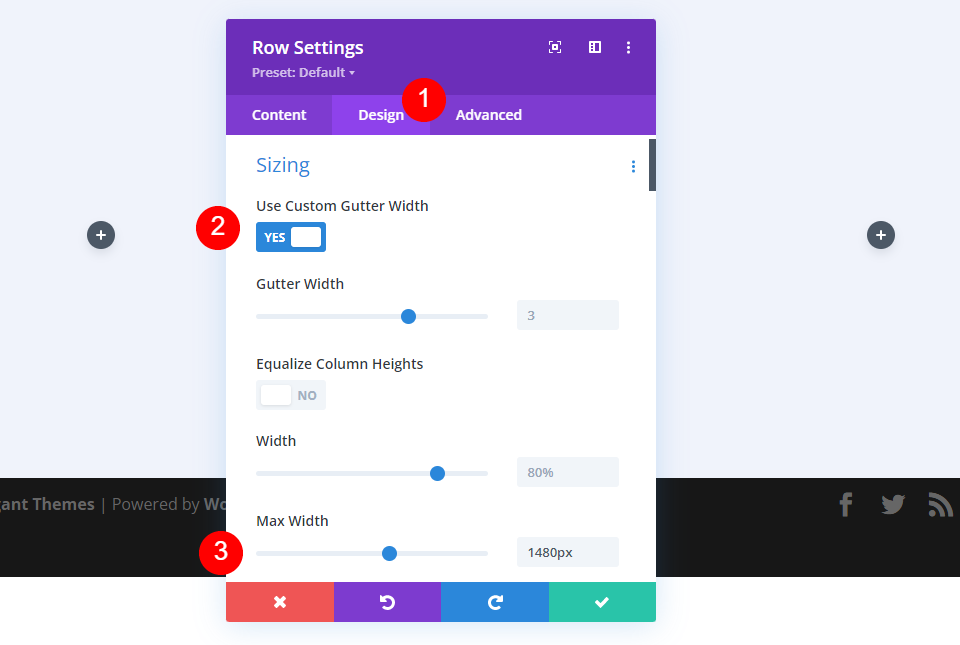
Cross to its Design tab. Allow Use Customized Gutter Width and set the Max Width to 1480px.
- Use Customized Gutter Width: Sure
- Max Width: 1480px
First Column Settings
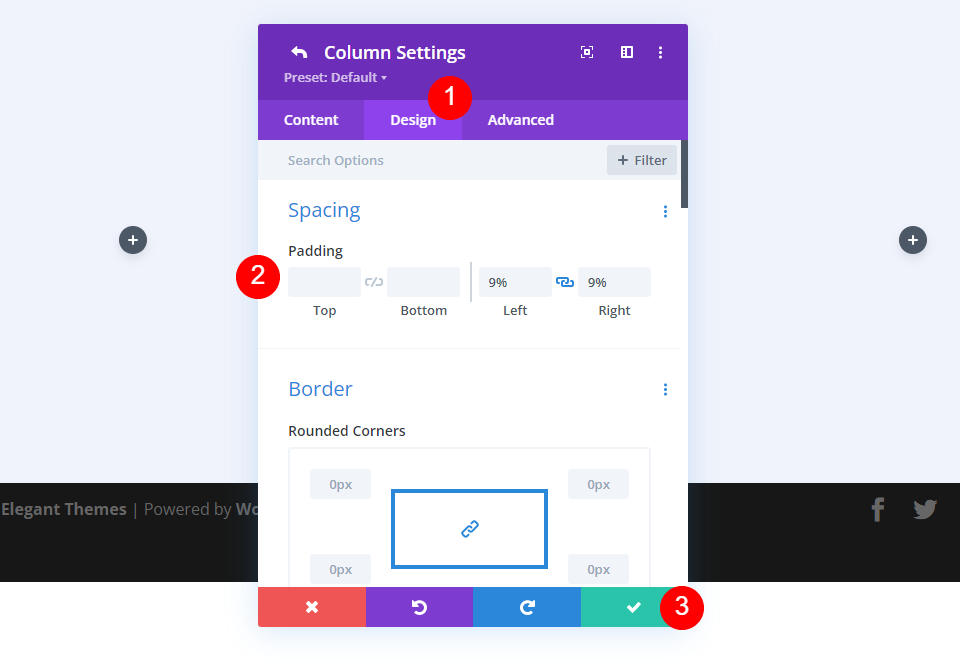
Within the Row’s Content material tab, open the settings for the Row’s first column, move to the Design tab and upload 9% Padding to the Left and Proper. Shut the Column and Row settings.
- Padding: 9% Left, Proper
First Textual content Module Settings
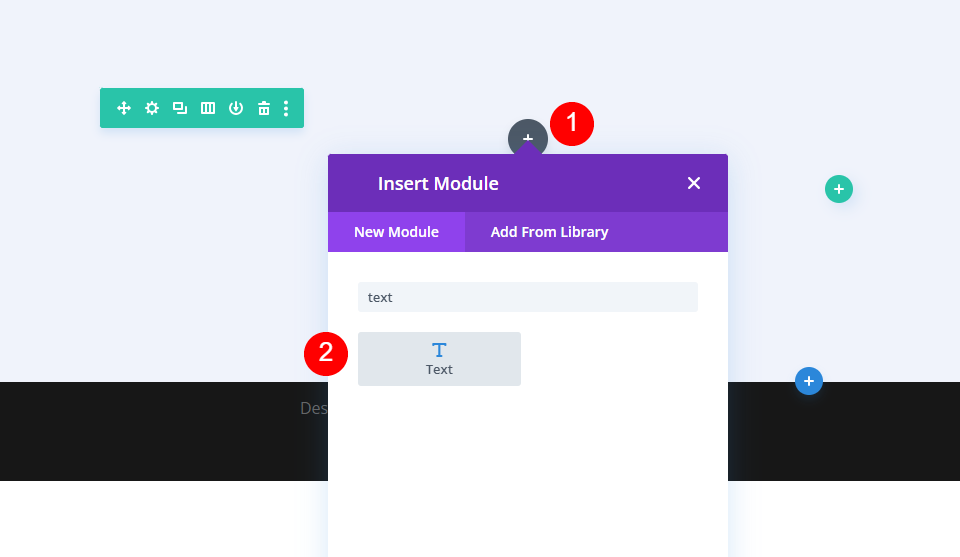
Subsequent, upload a Textual content Module to the left column.
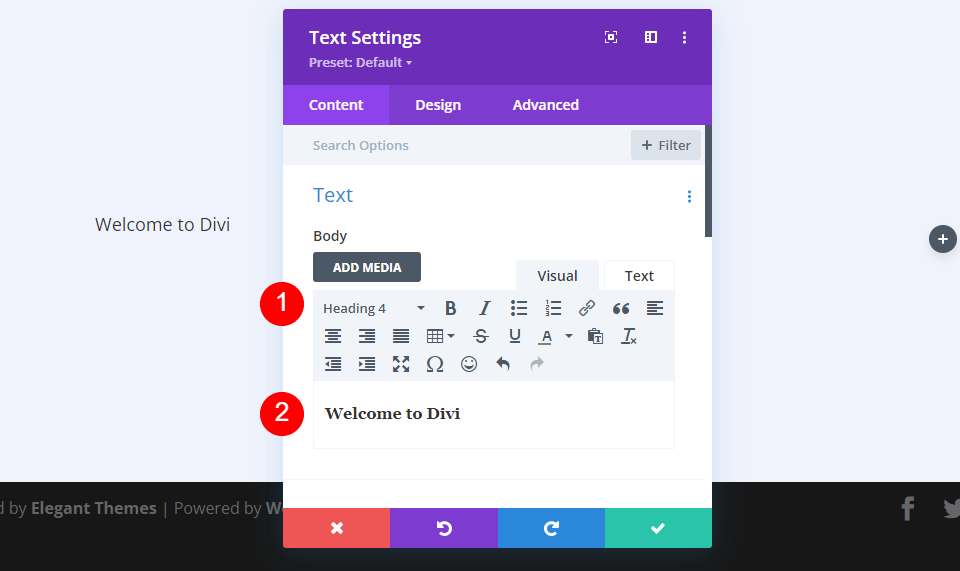
Make a choice Heading 4 for the content material textual content and upload your frame content material.
- Heading: 4
- Frame: Welcome to Divi
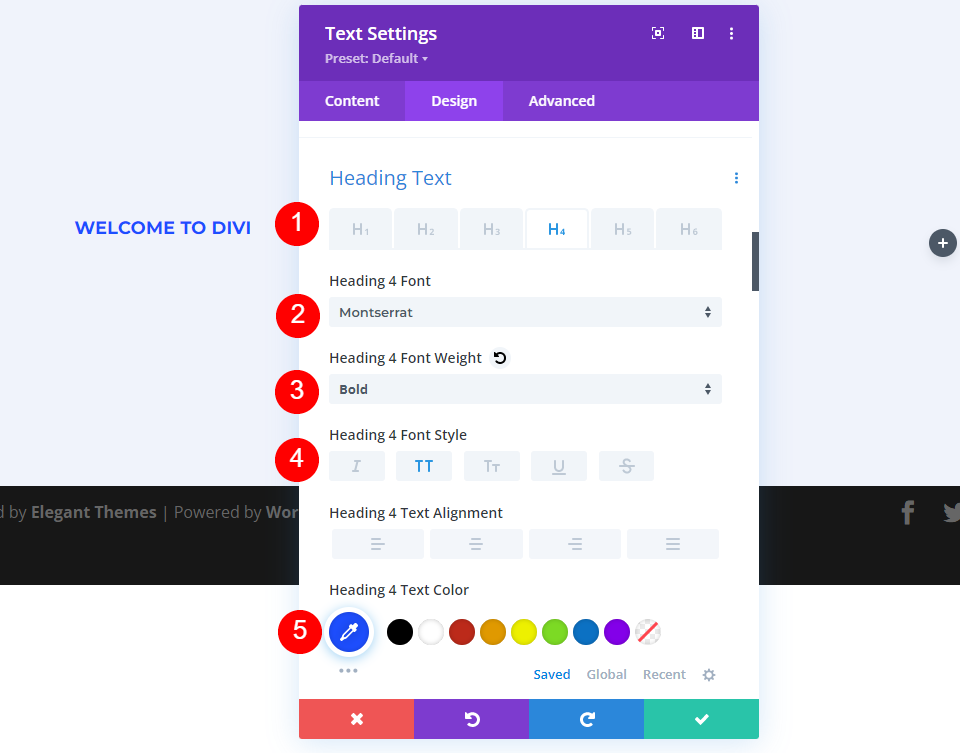
Subsequent, move to the Design tab. Set the H4 Font to Montserrat, the Weight to daring, the Taste to TT, and the Colour to #1d4eff.
- Heading 4 Font: Montserrat
- Weight: Daring
- Taste: TT
- Colour: #1d4eff
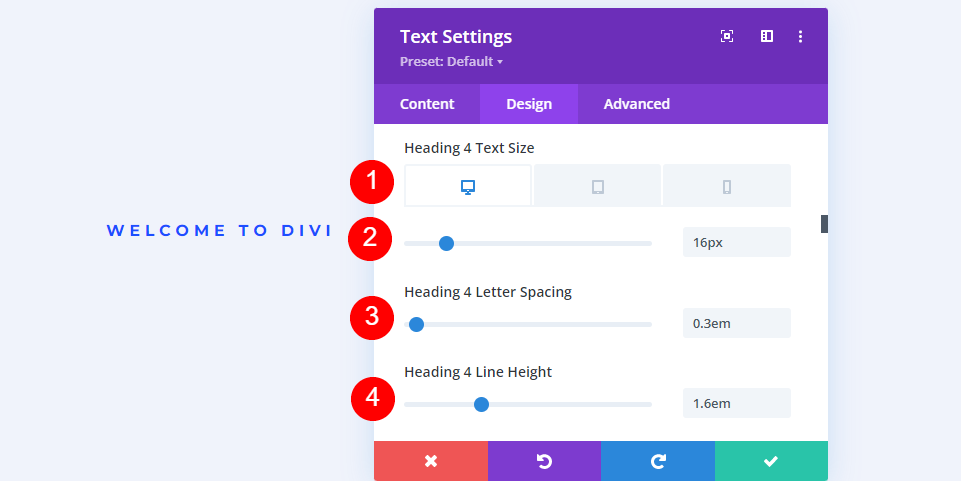
Set the desktop Font Dimension to 16px, the pill dimension to 14px, and the telephone dimension to 12px. Alternate the Letter Spacing to 0.3em and the Line Top to at least one.6em.
- Dimension: 16px Desktop, 14px Pill, 12px Telephone
- Letter Spacing: 0.3em
- Line Top: 1.6em
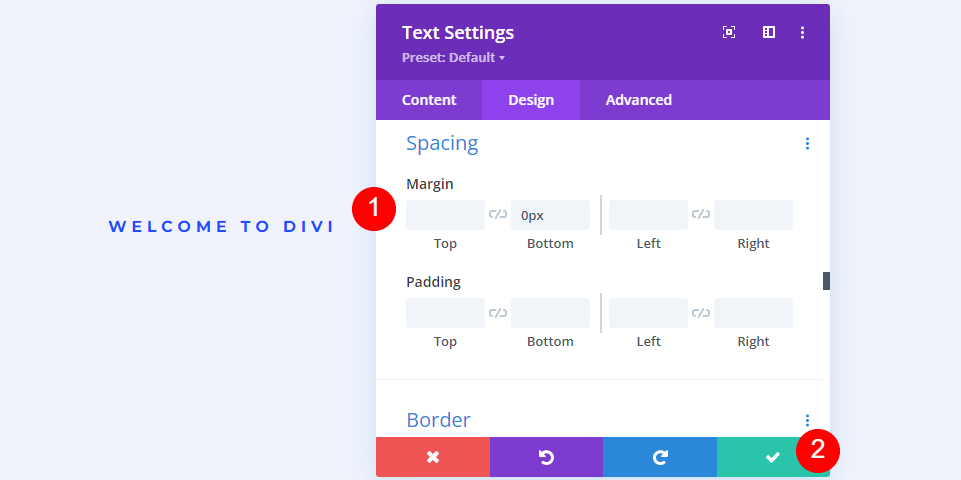
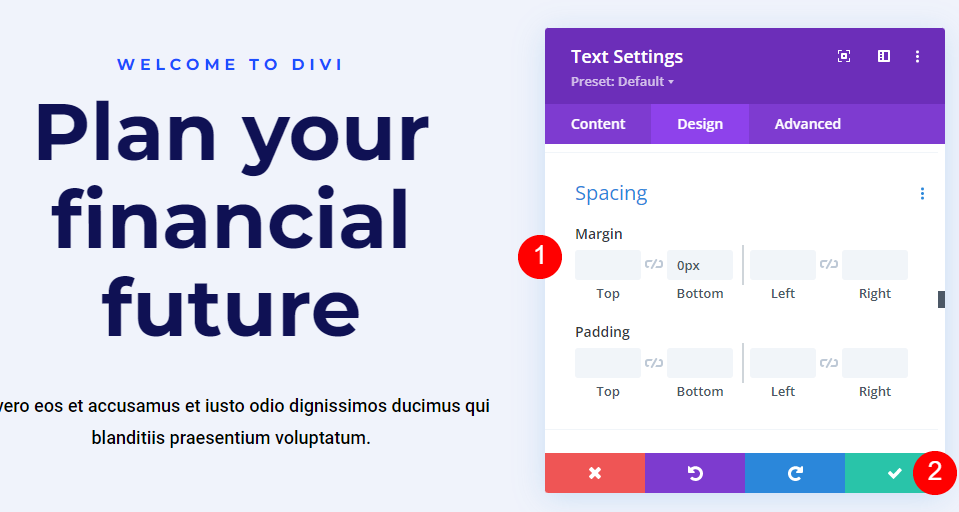
Scroll all the way down to Spacing and alter the Backside Margin to 0px. Shut the module.
- Margin: 0px Backside
2nd Textual content Module Settings
Subsequent, upload a Textual content Module beneath the primary one.
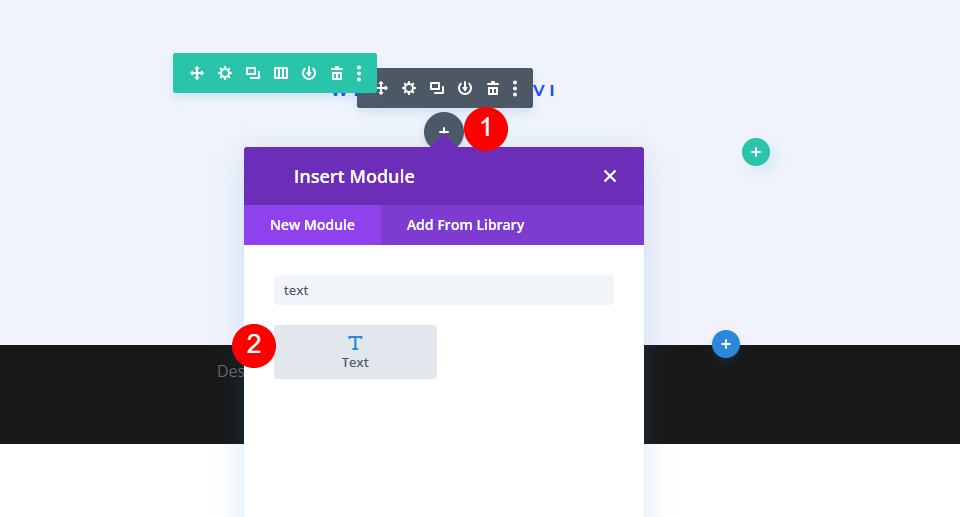
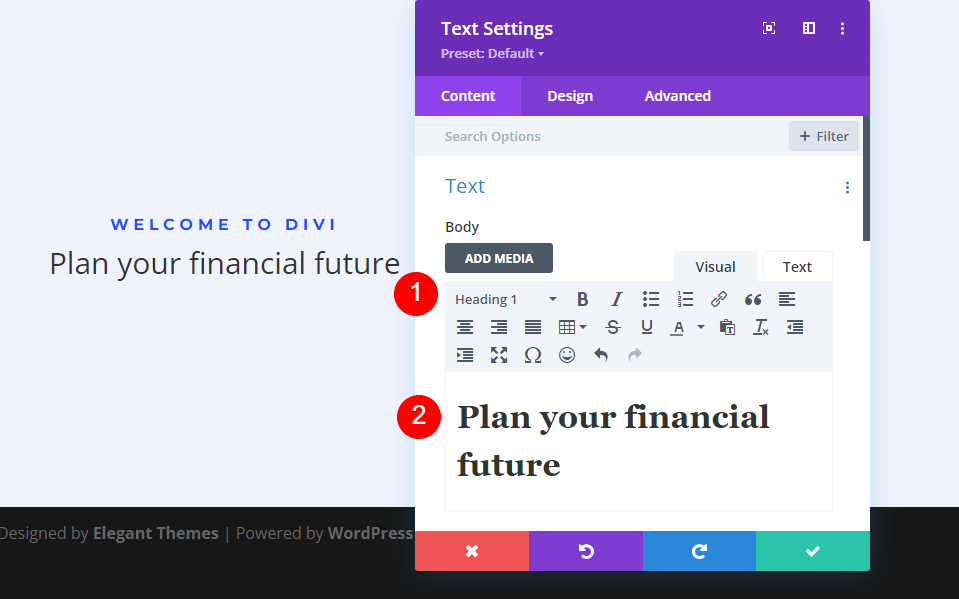
Set the textual content kind to Heading 1 and upload your frame content material.
- Heading: 1
- Frame: Plan your monetary long term
Subsequent, make a choice the Design tab. Alternate the Heading Font to Montserrat, the Weight to Daring, and the Colour to #0f1154.
- Heading 1 Font: Montserrat
- Weight: Daring
- Colour: #0f1154

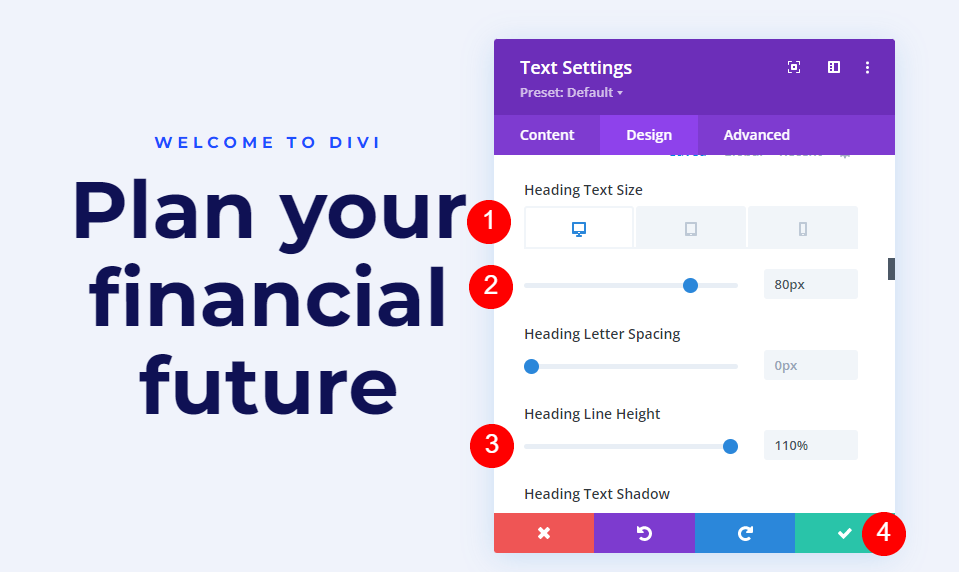
Set the Font Dimension to 80px for the desktops, 40px for drugs, and 24px for telephones. Alternate the Line Top to 110%. Shut the module.
- Dimension: 80px Desktop, 40px Pill, 24px Telephone
- Line Top: 110%
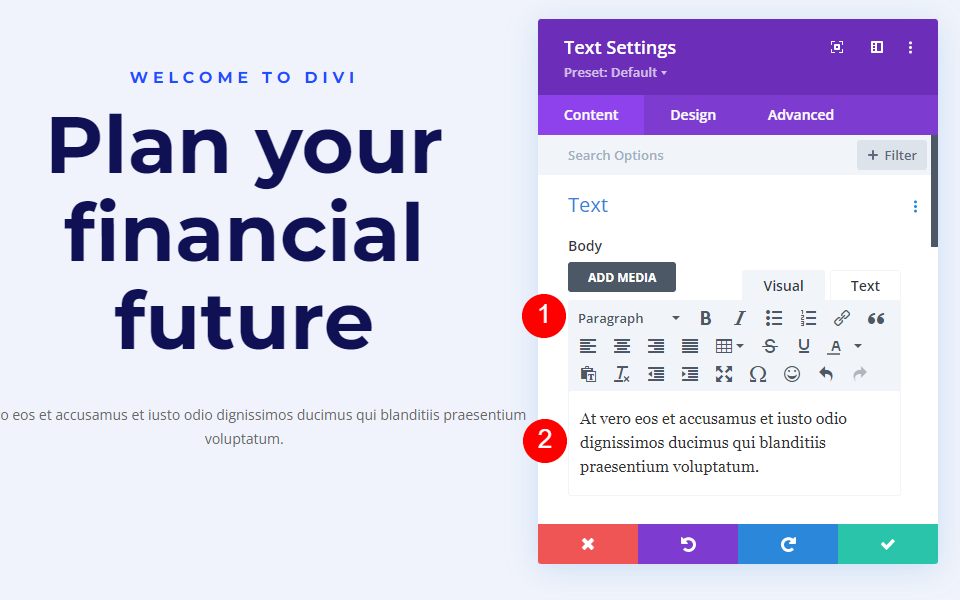
3rd Textual content Module Settings
Subsequent, upload a Textual content Module beneath the second.
Go away the textual content kind to Paragraph and upload your frame content material.
- Heading: Paragraph
- Frame: content material
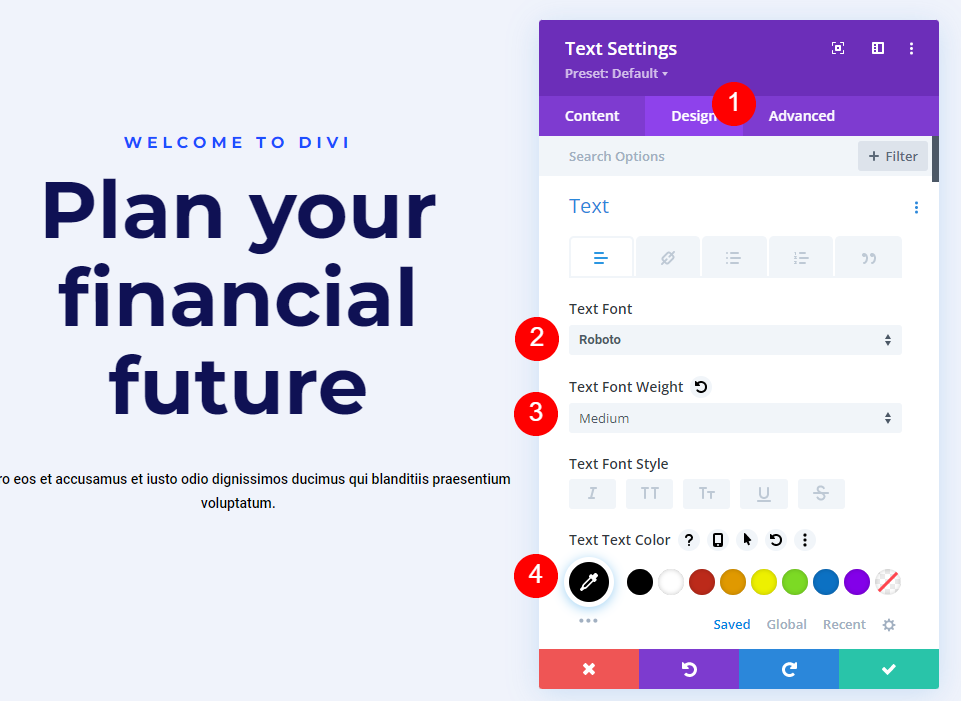
Subsequent, move to the Design tab. Alternate the Textual content Font to Roboto, set the Weight to Medium, and the Colour to black.
- Textual content Font: Roboto
- Weight: Medium
- Colour: #000000
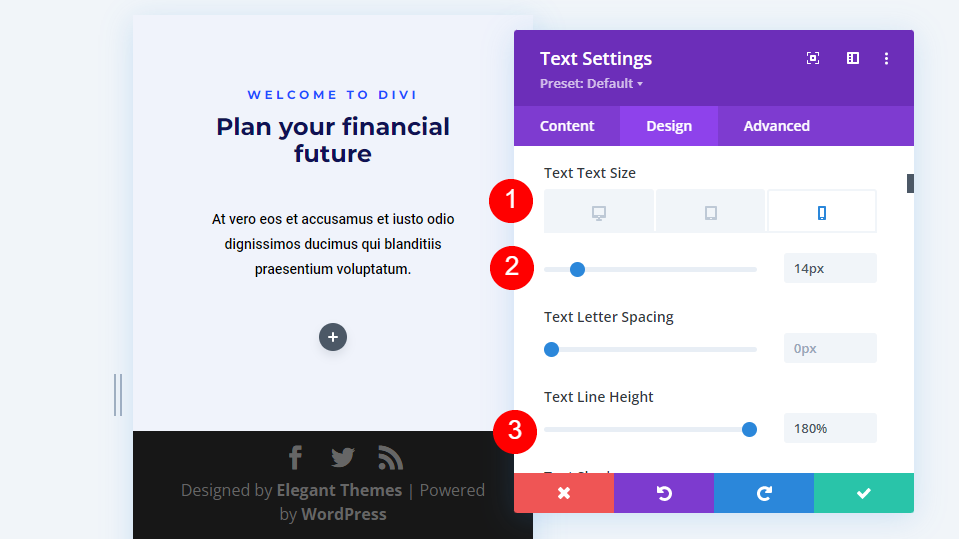
Alternate the Dimension for desktops and drugs to 18px, and telephones to 14px. Set the Line Top to 180%.
- Dimension: 18px Desktop, 18px Pill, 14px Telephone
- Line Top: 180%
In any case, scroll all the way down to Spacing and set the Backside Margin to 0%. Shut the module’s settings.
- Margin: 0px Backside
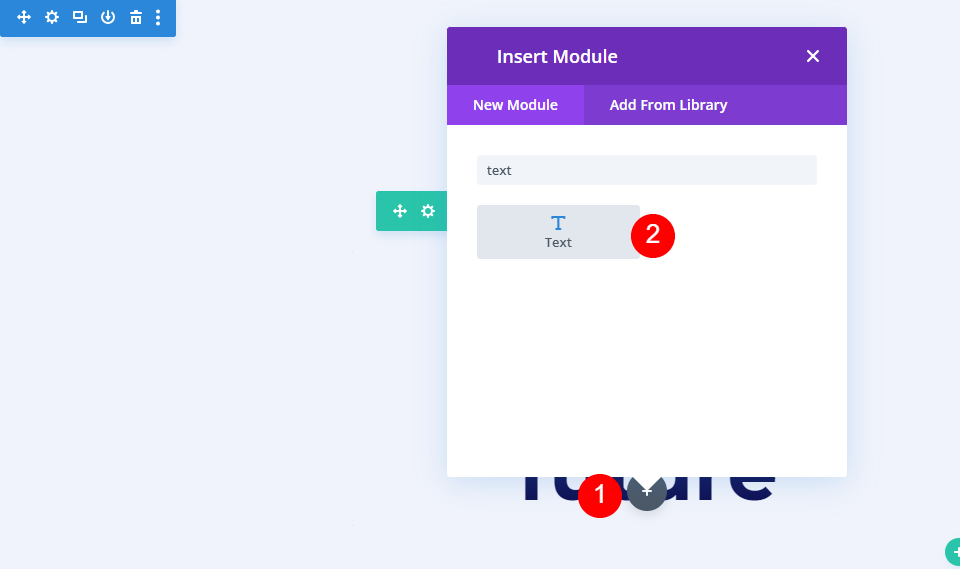
Symbol Module Settings
Now, upload an Symbol Module to the column at the proper.
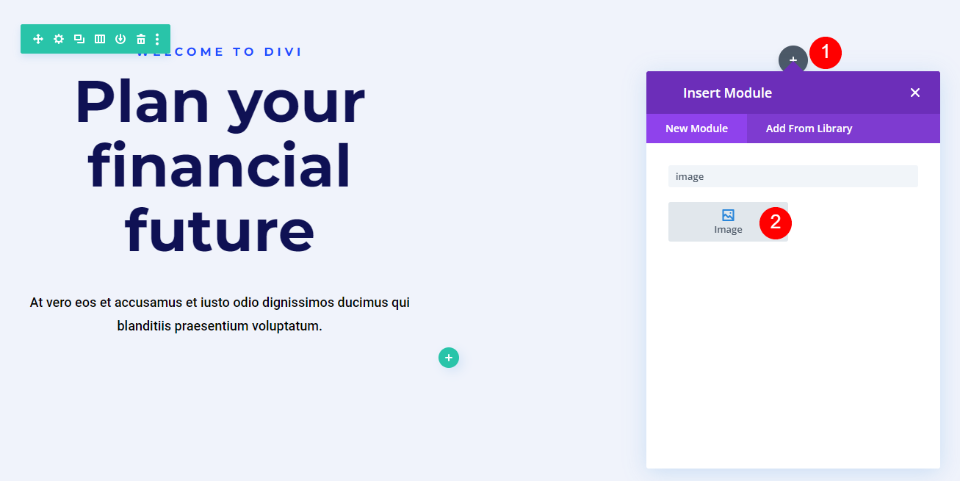
First, delete the dummy symbol by way of clicking the trash can or the reset icon above the picture.
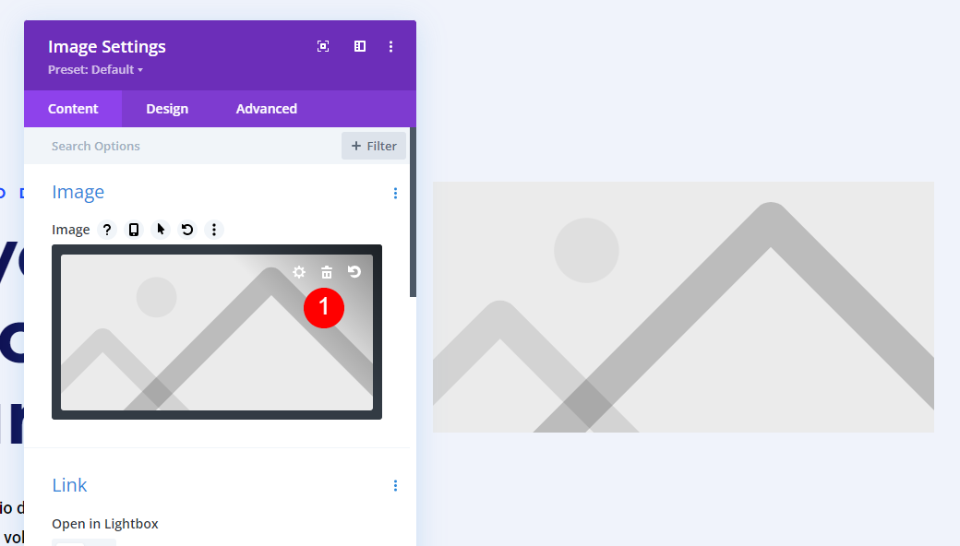
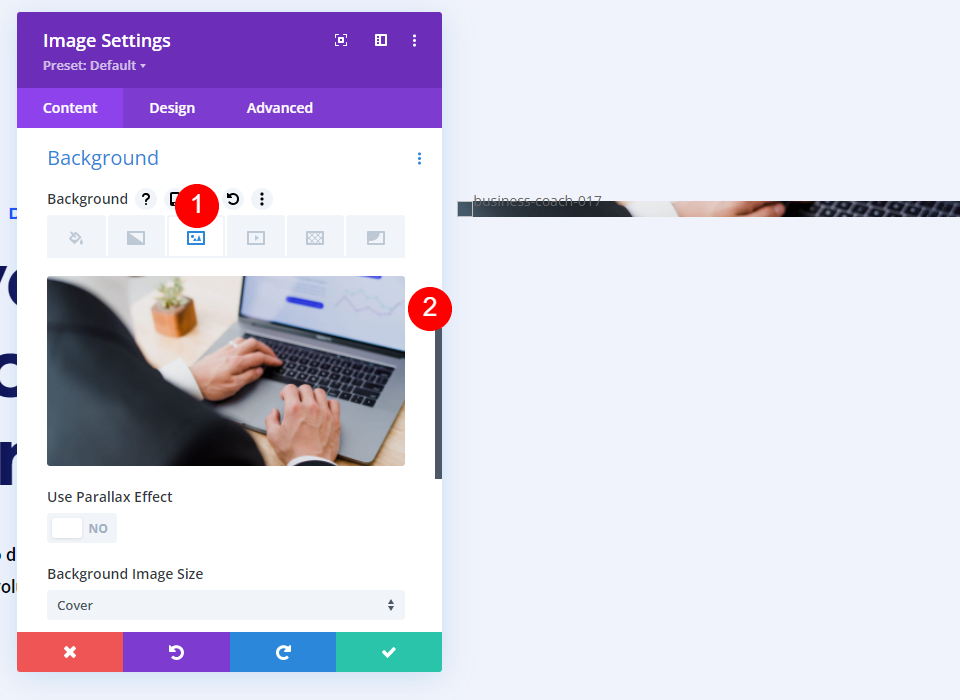
Subsequent, scroll down Background, make a choice the Symbol tab, and upload your symbol. Go away all of the symbol settings at their defaults. The picture received’t display a lot to start with. We’ll repair this as we move.
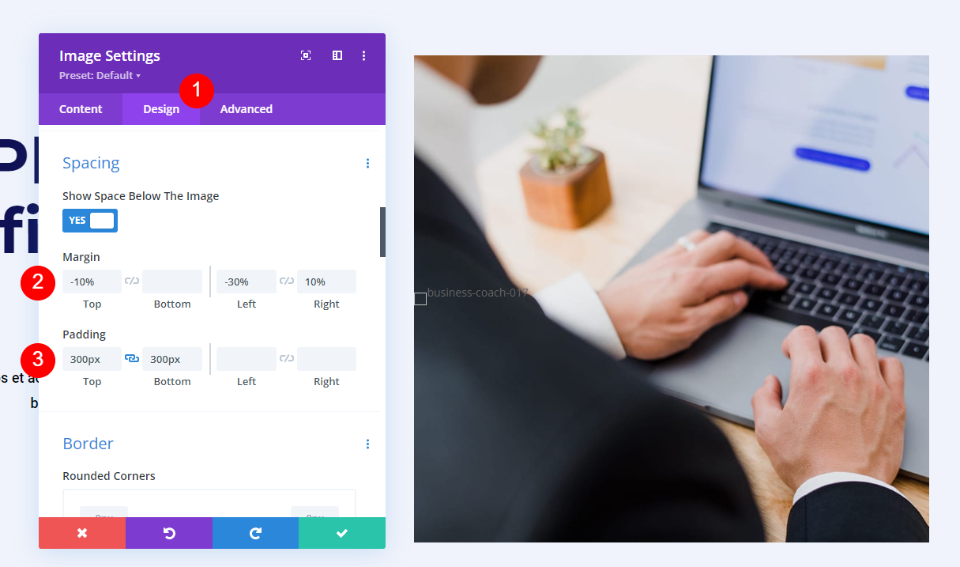
Subsequent, make a choice the Design tab and scroll all the way down to Spacing. For desktops, upload -10% Most sensible, -30% Left, 10% Proper Margin. Upload 300px Most sensible and Backside Padding. Those are the desktop settings. We’ll make changes for drugs and telephones.
- Margin (Desktop): -10% Most sensible, -30% Left, 10% Proper
- Padding: 300px Most sensible, 300px Backside
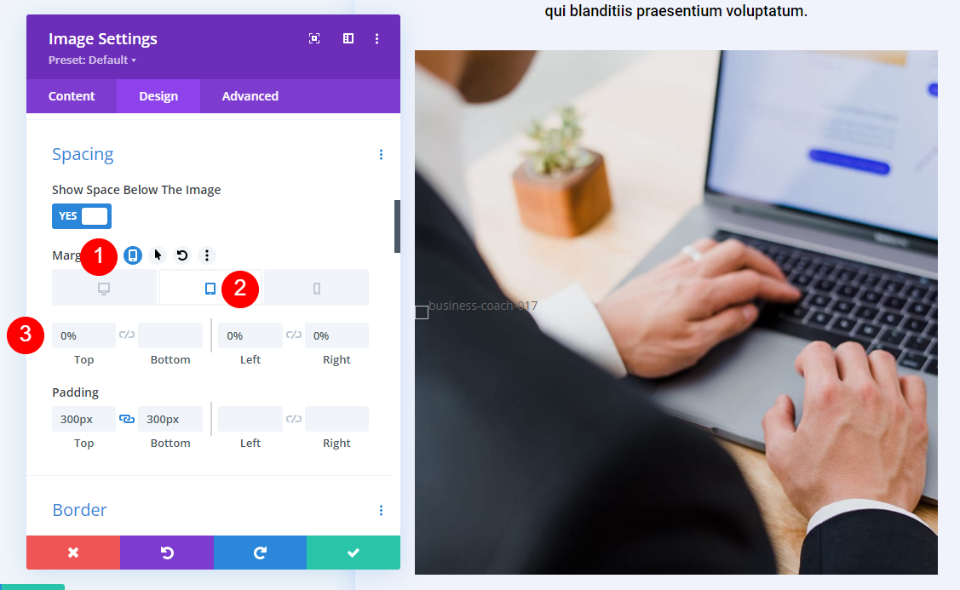
Subsequent, we need to make certain that the picture form is responsive. Make a choice the pill icon to open the settings for drugs and telephones. Hover over the Margin settings and make a choice the pill icon that looks. This opens a suite of tabs with a tab for every software kind. Select the Pill tab and alter the Margin to 0% Most sensible, 0% Left, 0% Proper Margin. The Telephone tab will practice the Pill settings, so we received’t wish to modify it for Margin.
- Margin (Pill/Telephone): 0% Most sensible, 0% Left, 0% Proper
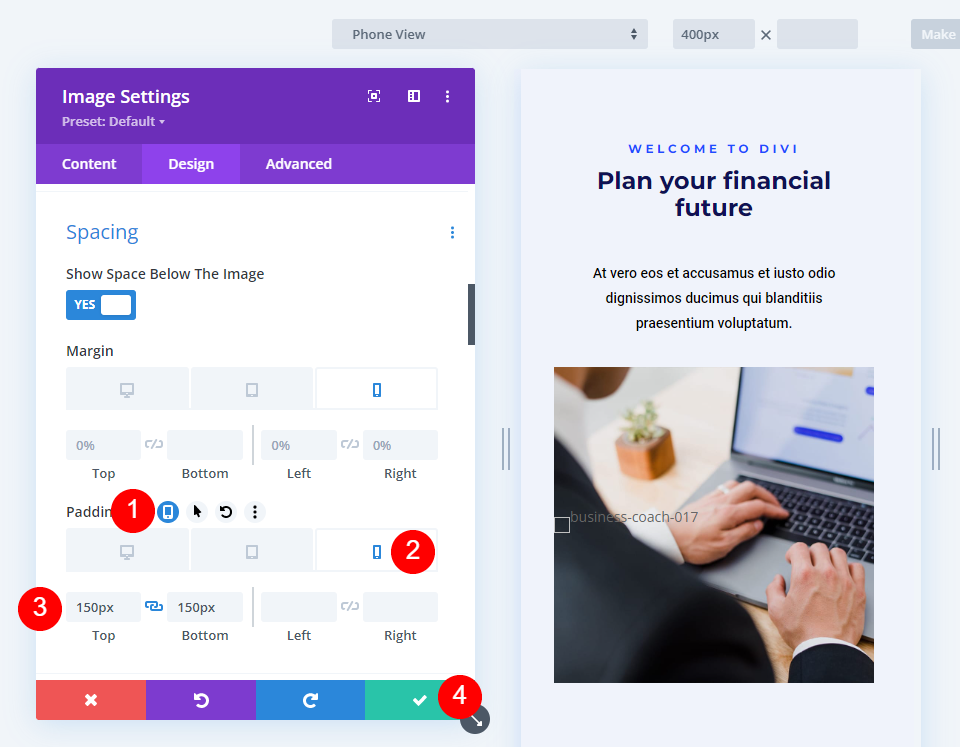
Subsequent, make a choice the pill icon that looks while you hover over the Padding settings. Select the Telephone tab and alter the Padding to 150px Most sensible and 150px Backside. The pill Padding will practice the desktop settings. Shut the module’s settings.
- Padding: 150px Most sensible, 150px Backside
Form Pictures with Divi’s Gradient Builder Examples
Subsequent, we’ll use the ones settings and form the pictures with Divi’s Gradient Builder. As we’ll see, a number of settings assist us create attention-grabbing symbol shapes with Divi’s Gradient Builder.
Some key settings to remember come with stacking Gradient Stops and environment the development to copy. You’ll want to take a look at your patterns on all display sizes to be sure to like the form.
For more info on the usage of Divi’s Gradient Builder, seek the Sublime Subject matters weblog for “Gradient Builder“. You’ll in finding a number of posts with detailed tutorials to step you during the controls and settings.
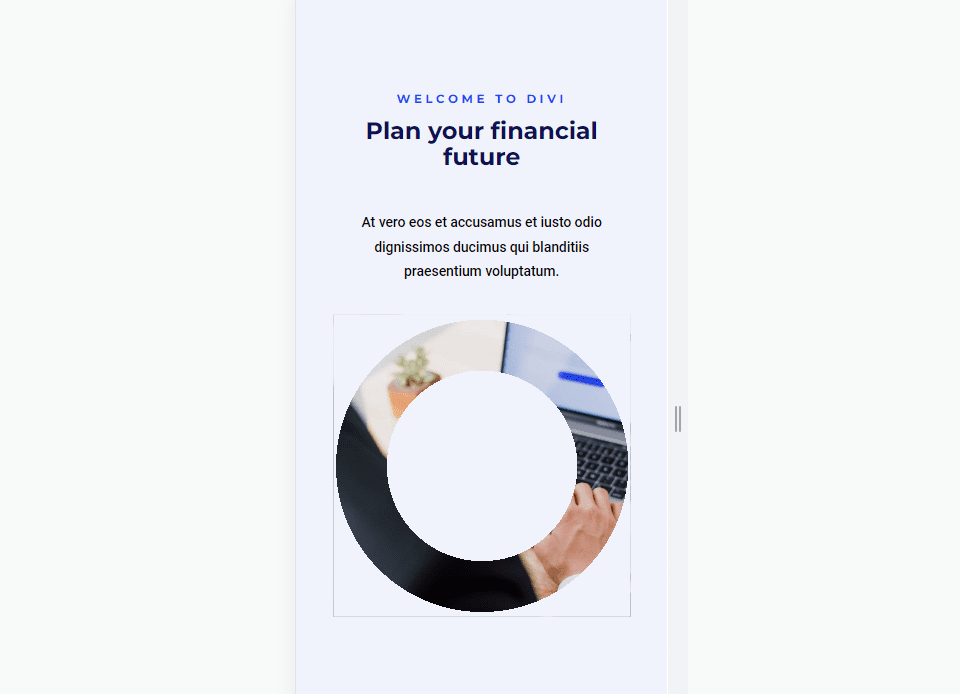
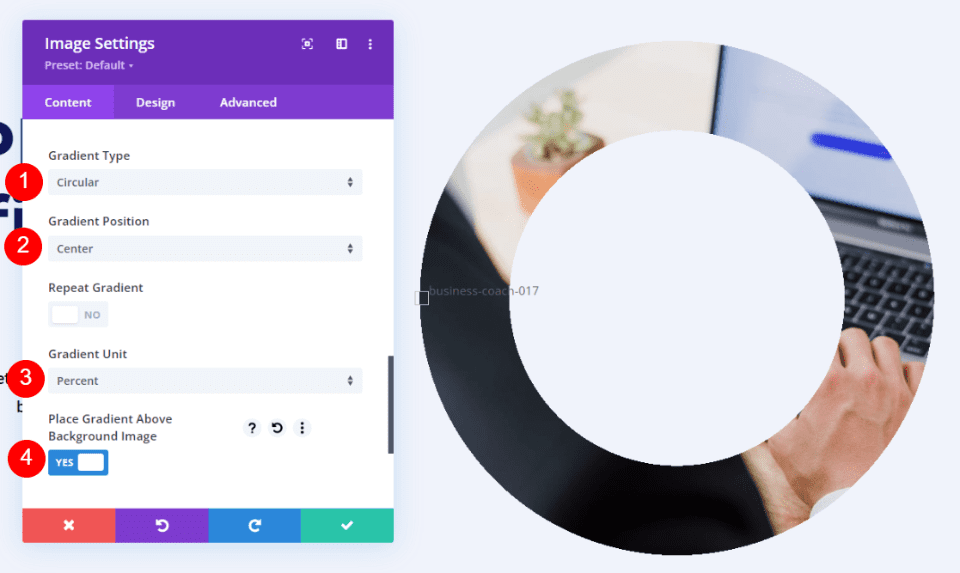
First Instance – Round Gradient Builder Symbol Form
Our first instance offers the picture a round form with a hollow within the middle.
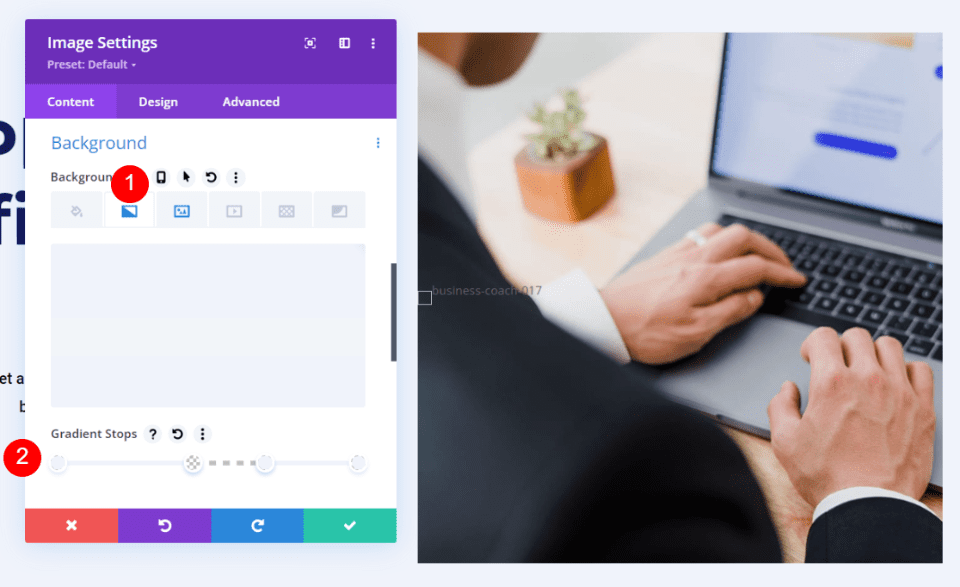
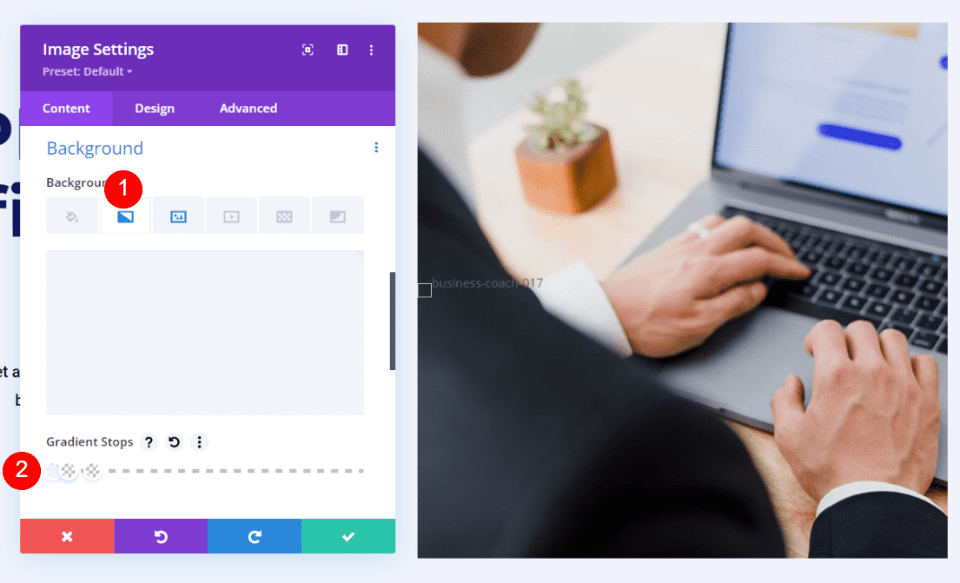
Open the Symbol Module’s settings and scroll all the way down to Background. Make a choice the Background Gradient tab and set 6 Gradient Stops:
- First Forestall: 0%, #f0f3fb
- 2nd: 45%, #f0f3fb
- 3rd (on most sensible of 2nd): 45%, rgba(41,196,169,0)
- Fourth: 69%, rgba(250,255,214,0)
- 5th (on most sensible of Fourth): 69%, #f0f3fb
- 6th: 100%, #f0f3fb
Subsequent, make a selection Round for the Gradient Kind, set the Place to Middle, use % for the Unit, and allow Position Gradient Above Background Symbol.
- Kind: Round
- Place: Middle
- Unit: %
- Position Gradient Above Background Symbol: Sure
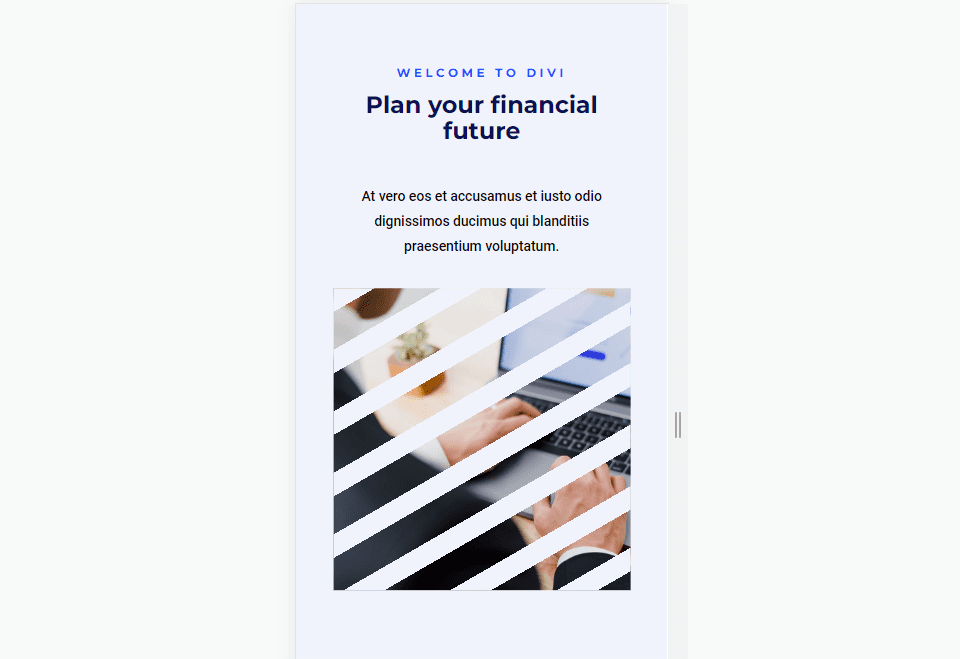
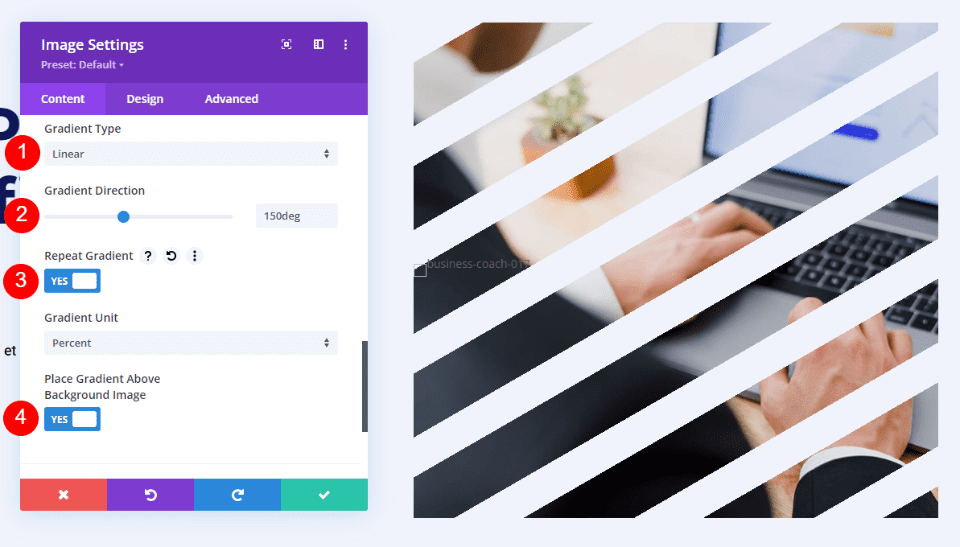
2nd Instance – Linear Gradient Builder Symbol Form
Right here’s a have a look at the second one symbol form instance. This situation puts diagonal strains around the symbol.
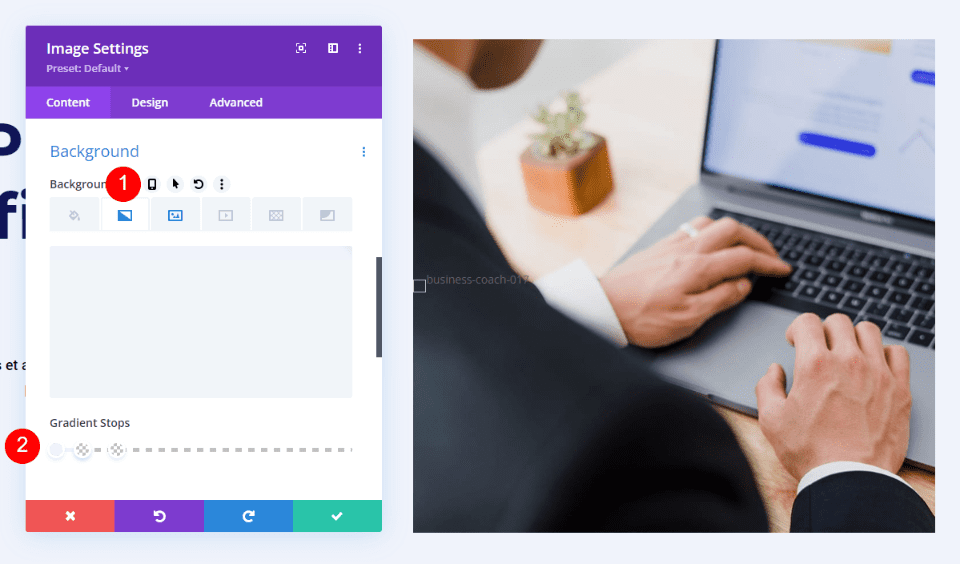
Open the settings, scroll dowl to Background, and make a choice the Background Gradient tab. Upload 4 Gradient Stops:
- First Forestall: 0%, #f0f3fb
- 2nd: 5%, #f0f3fb
- 3rd (on most sensible of 2nd): 5%, rgba(175,175,175,0)
- Fourth: 13%, rgba(41,196,169,0)
Set the Gradient Kind to Linear with a Course of 150deg. Set it to Repeat. Use % for the Unit and allow Position Gradient Above Background Symbol.
- Kind: Linear
- Course: 150deg
- Repeat: Sure
- Unit: %
- Position Gradient Above Background Symbol: Sure
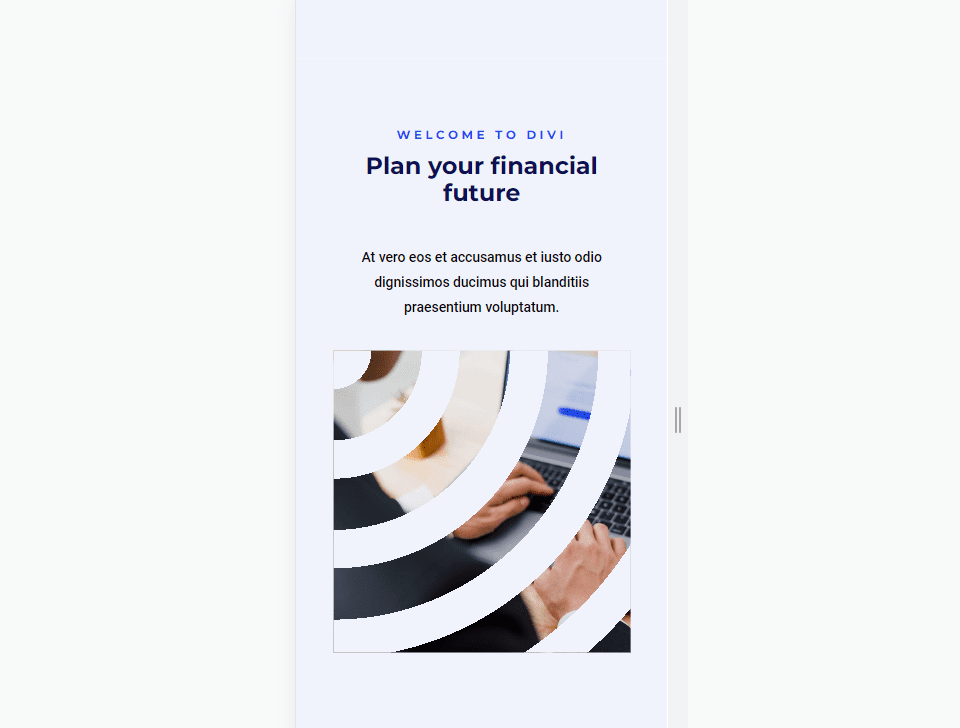
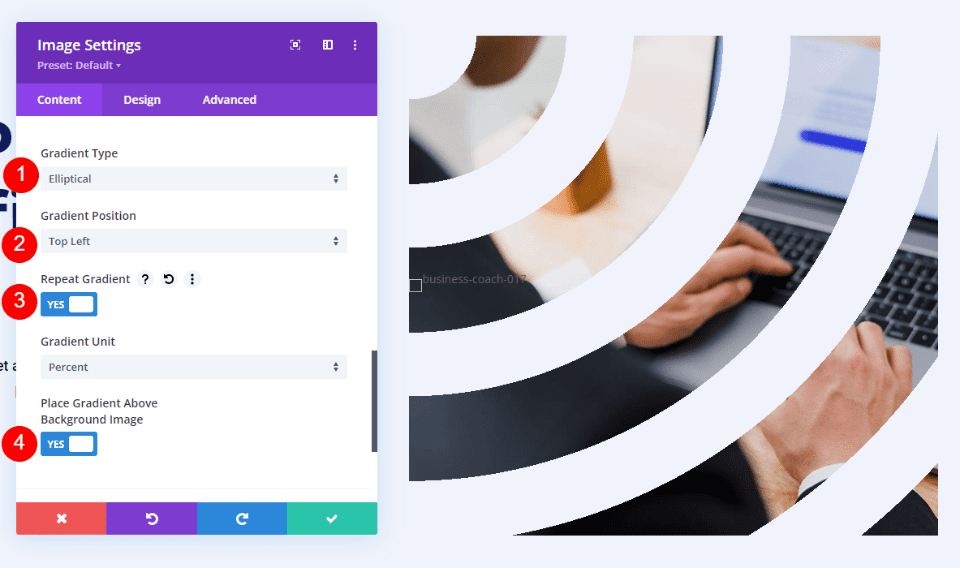
3rd Instance – Elliptical Gradient Builder Symbol Form
Right here’s our 3rd symbol form instance. This one makes use of an elliptical form.
Open the Symbol Module’s settings and scroll all the way down to Background. Make a choice the Background Gradient tab and create 4 Gradient Stops:
- First Forestall: 0%, #f0f3fb
- 2nd: 9%, #f0f3fb
- 3rd (on most sensible of 2nd): 9%, rgba(175,175,175,0)
- Fourth: 21%, rgba(41,196,169,0)
Subsequent, trade the Gradient Kind to Elliptical and set the Place to Most sensible Left. Select Repeat Gradient, use Proportion because the Unit and allow Position Gradient Above Background Symbol.
- Kind: Elliptical
- Place: Most sensible Left
- Repeat Gradient: Sure
- Unit: %
- Position Gradient Above Background Symbol: Sure
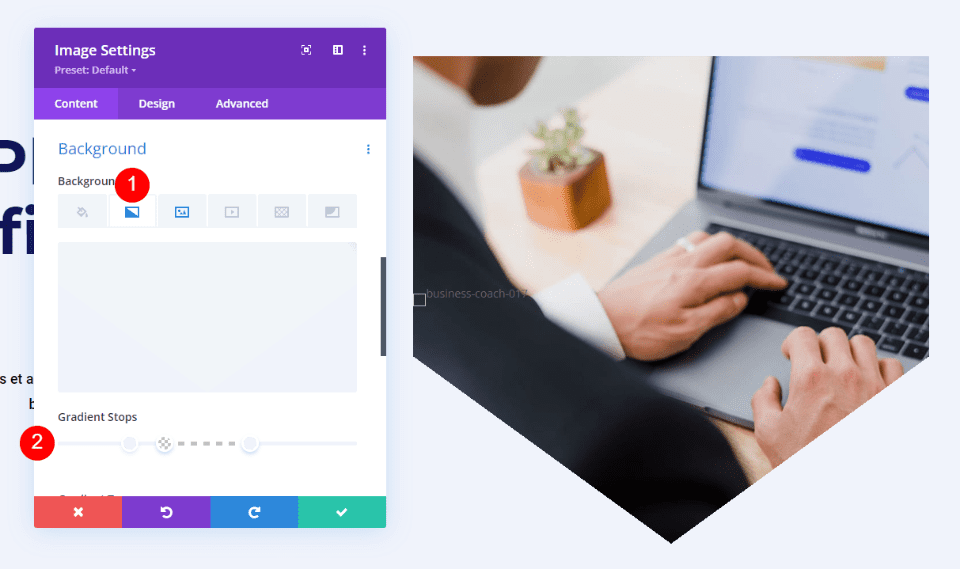
Fourth Instance – Conical Gradient Builder Symbol Form
Our fourth instance makes use of Conical to create a novel symbol form.
Open the Symbol Module’s settings, scroll all the way down to Background, and make a choice the Background Gradient tab. This one has 5 Gradient Stops:
- First Forestall: 23%, #f0f3fb
- 2nd: 35%, #f0f3fb
- 3rd (on most sensible of 2nd): 35%, rgba(41,196,169,0)
- Fourth: 65%, rgba(250,255,214,0)
- 5th (on most sensible of Fourth): 65%, #f0f3fb
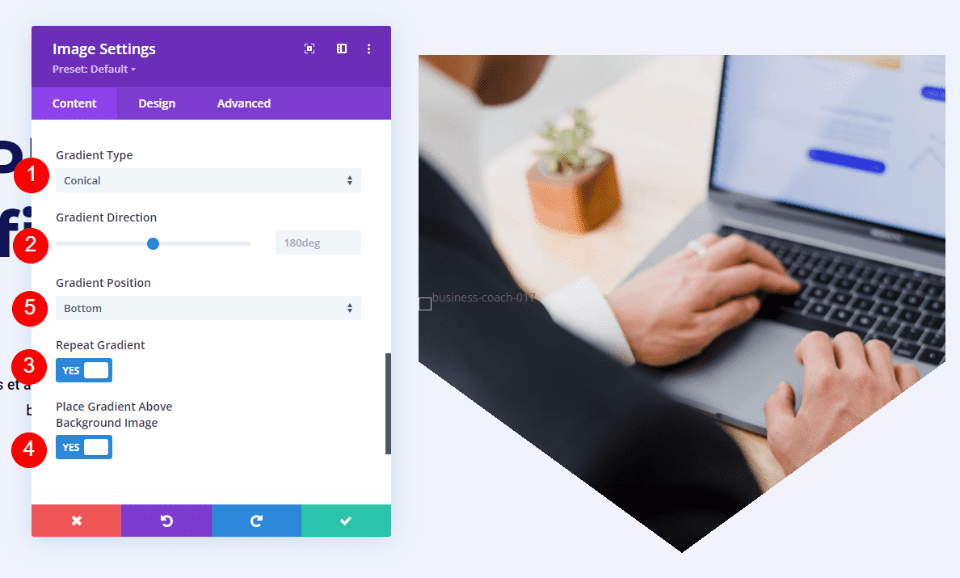
Set the Gradient Kind to Conical and depart the Course on the default environment. Set the Place to Backside, use % for the Unit, and allow Position Gradient Above Background Symbol.
- Kind: Conical
- Course: 180deg
- Place: Backside
- Unit: %
- Position Gradient Above Background Symbol: Sure
Gradient Bulder Form Effects
The entire layouts became out smartly. The picture shapes stand out and the pictures are nonetheless simple to grasp. All are responsive, so they appear nice on any software.
First Instance – Round Symbol Form
Desktop
Pill
Telephone
2nd Instance – Linear Symbol Form
Desktop
Pill
Telephone
3rd Instance – Elliptical Symbol Form
Desktop
Pill
Telephone
Fourth Instance – Conical Symbol Form
Desktop
Pill
Telephone
Finishing Ideas
That’s our have a look at methods to form your pictures with Divi’s Gradient Builder. The Gradient Builder can create some attention-grabbing symbol shapes. Taking part in round with the Gradient Stops, attempting other Gradient Varieties, and enabling Gradient Repeat are nice tactics to create new designs. You’ll want to test your designs on all display sizes and make changes if wanted.
We need to listen from you. Have you ever used Divi’s Gradient Builder to form your pictures? Tell us about your revel in within the feedback.
The publish How to Shape Your Images with Divi’s Gradient Builder seemed first on Elegant Themes Blog.
Contents
- 1 Preview
- 2 Create the Format
- 3 Form Pictures with Divi’s Gradient Builder Examples
- 4 Gradient Bulder Form Effects
- 5 Finishing Ideas
- 6 👉 How To Hack The Divi Black Friday Sale For Most Worth ($3,100+)
- 7 The right way to Restart and Get started Up Your Mac (All Strategies Defined)
- 8 Website online Site visitors Down? Easy methods to Diagnose and Repair Site visitors Drops

0 Comments