
Whilst you’re running a industry or company, sending and receiving emails with a @gmail.com doesn’t look very professional. Alternatively, if you already have a website establish, you’ll use Gmail with that very space establish. It implies that you’ll use Google’s Gmail interface to check, send and solution emails, all using the [email protected].
In this instructional, I’m going to show you ways you’ll link your space registered with NameCheap with Gmail on Google Workspace (in the past known as G Suite). Let’s take a look.
.no-js #ref-block-post-52415 .ref-block__thumbnail { background-image: url(“https://assets.hongkiat.com/uploads/thumbs/250&instances;160/pro-gmail-tips-tricks.jpg”); }
- If you already have a website establish, cross to Google Workspace, click on on Get began Free Trial to join an account. If you happen to occur to don’t however have a website, you’ll get a domain + sign up for Google Workspace all by means of NameCheap. (See here for all the process).
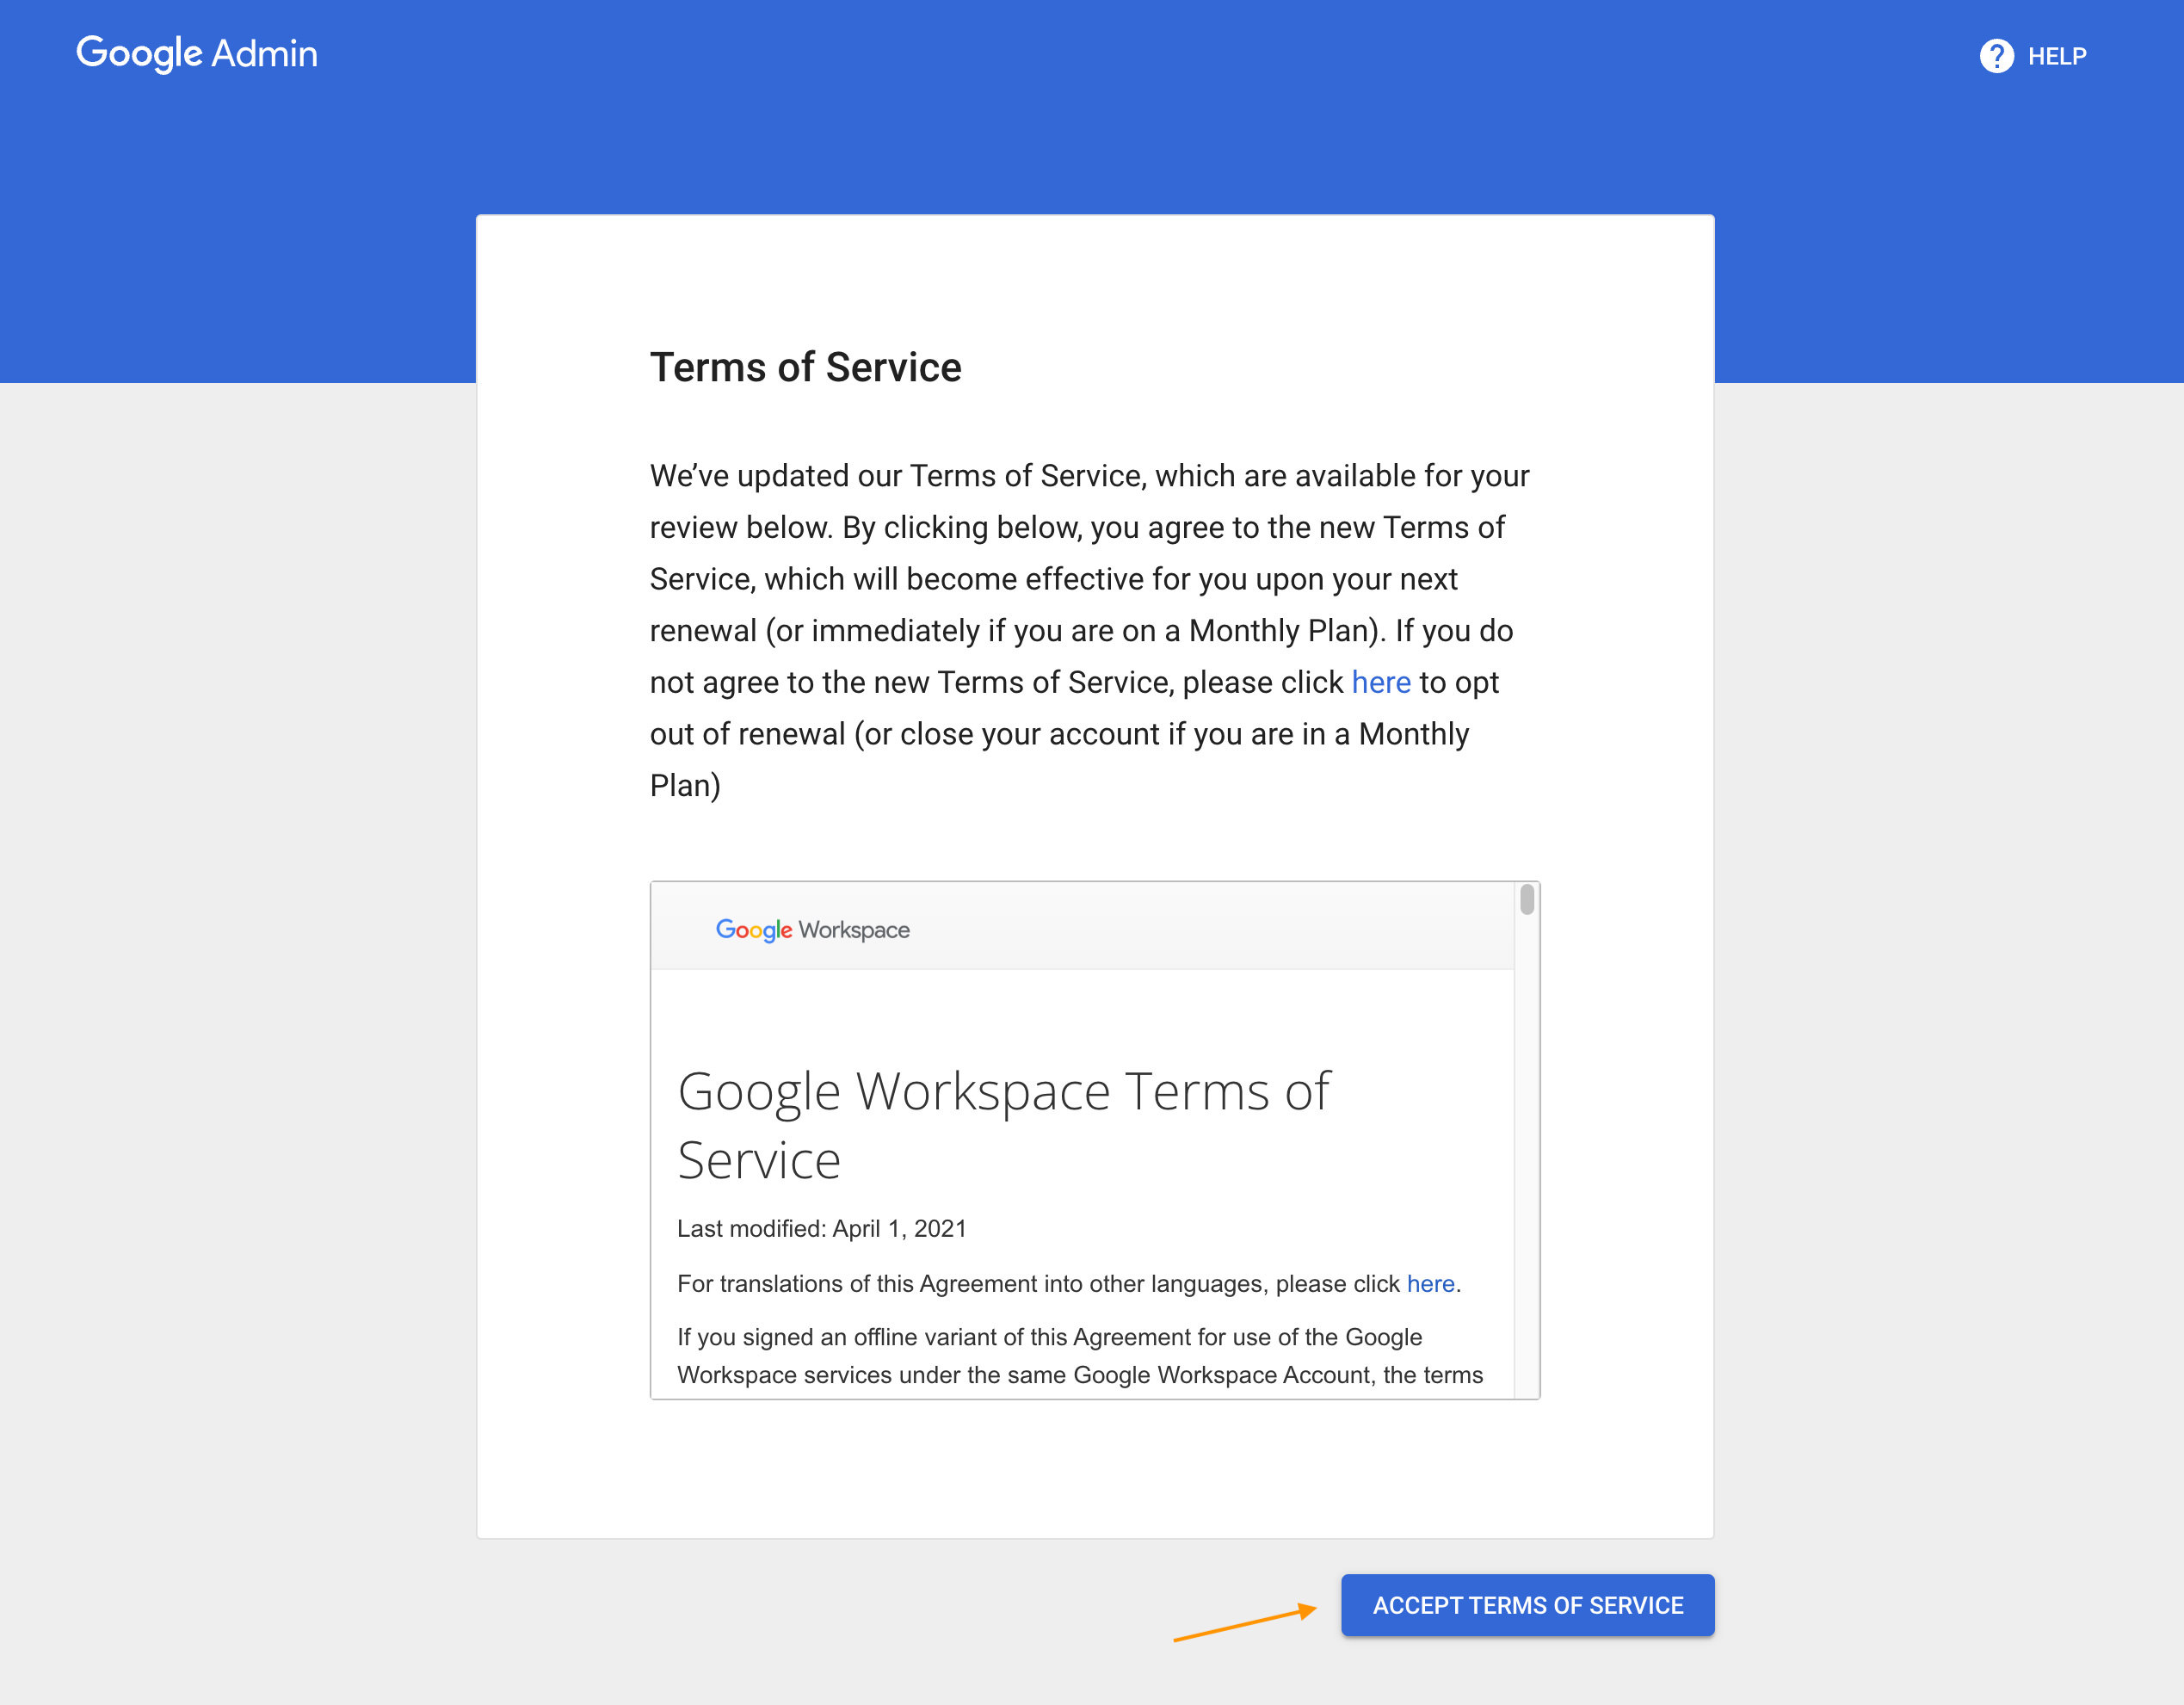
- Take a look at in to Google Admin Console. If you happen to’re doing this for the principle time, you’ll want to Accept Google Workspace Words of Service.
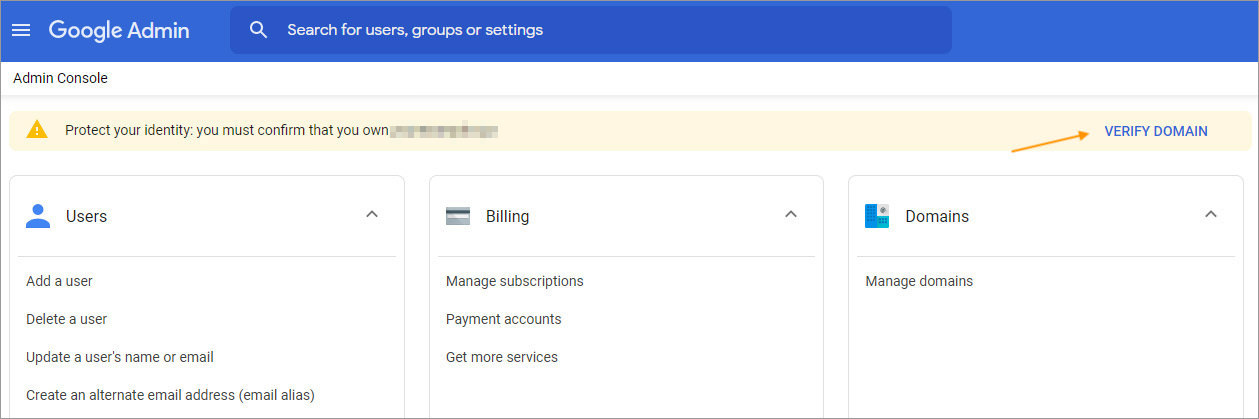
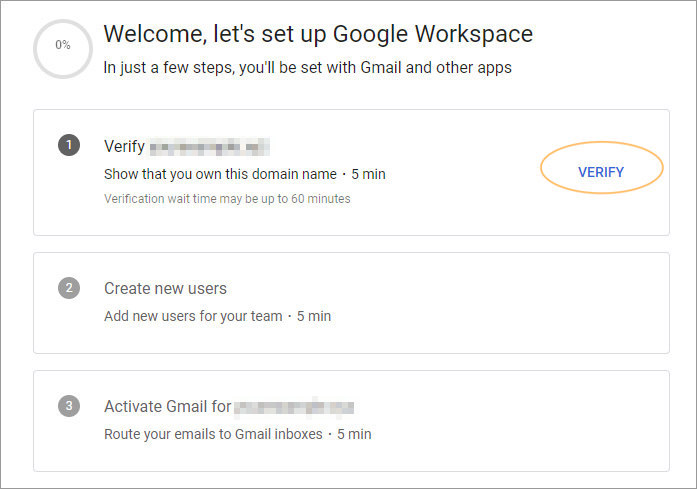
- Click on on Read about House on the top right kind corner.
- Select Read about from the decisions.
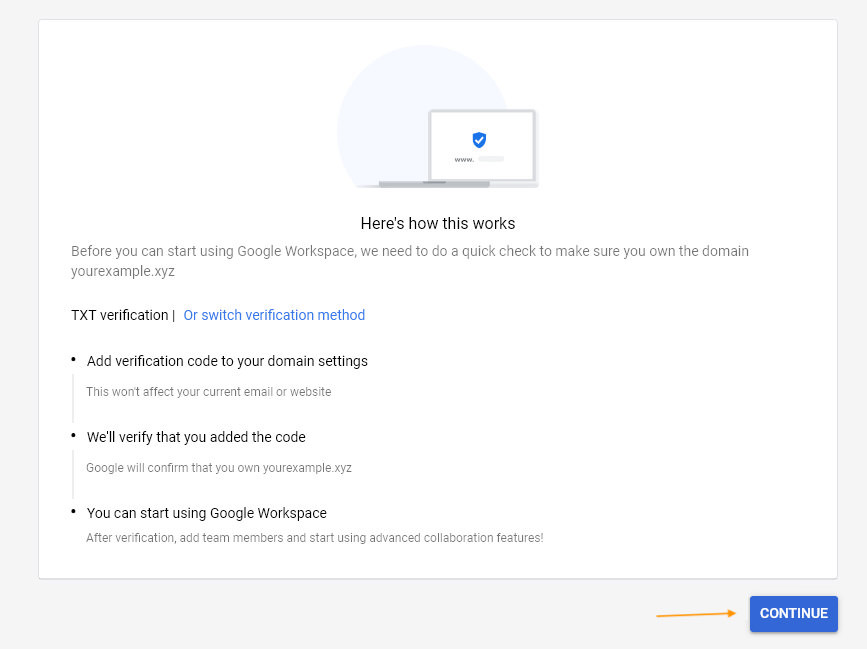
- Practice the instructions mentioned beneath Proper right here’s how it works and then click on on Continue.
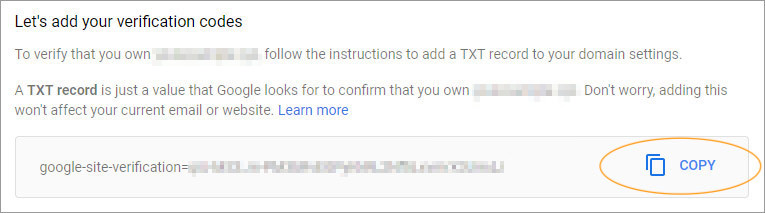
- On the next internet web page, beneath Let’s add your verification codes, click on on Replica to copy the verification codes in your clipboard.
- Now, open a brand spanking new browser window and log in in your NameCheap account.
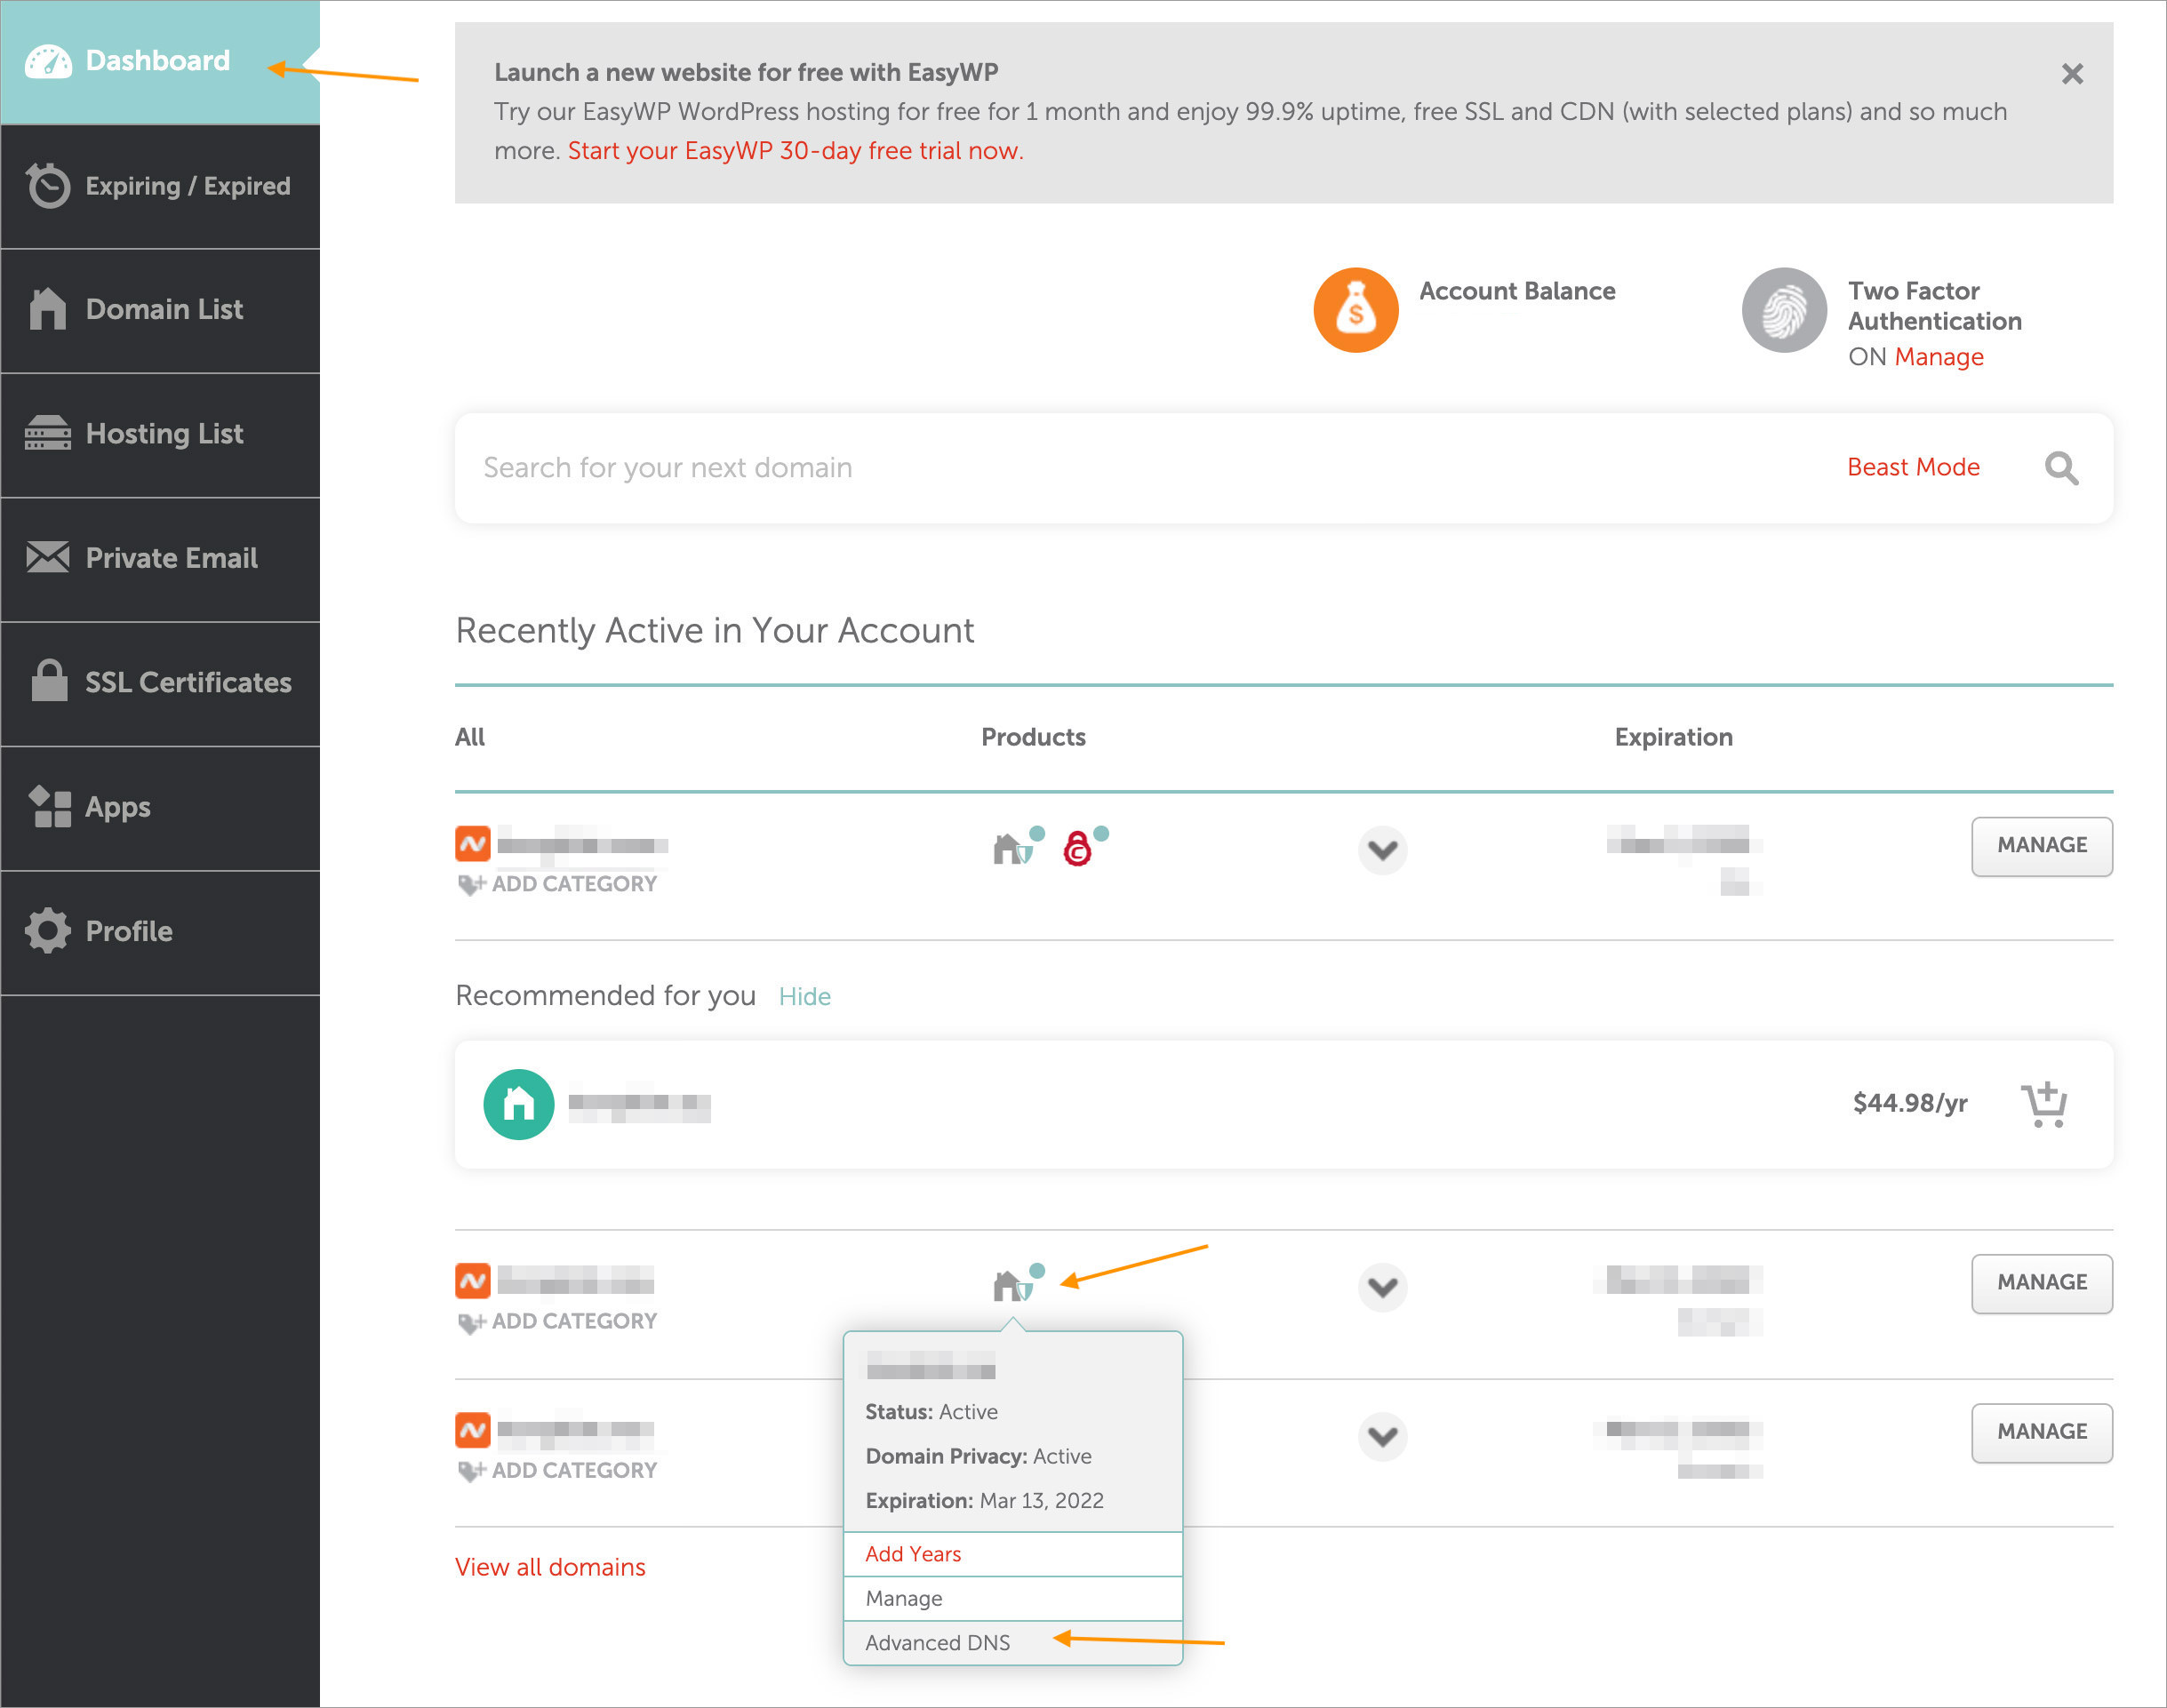
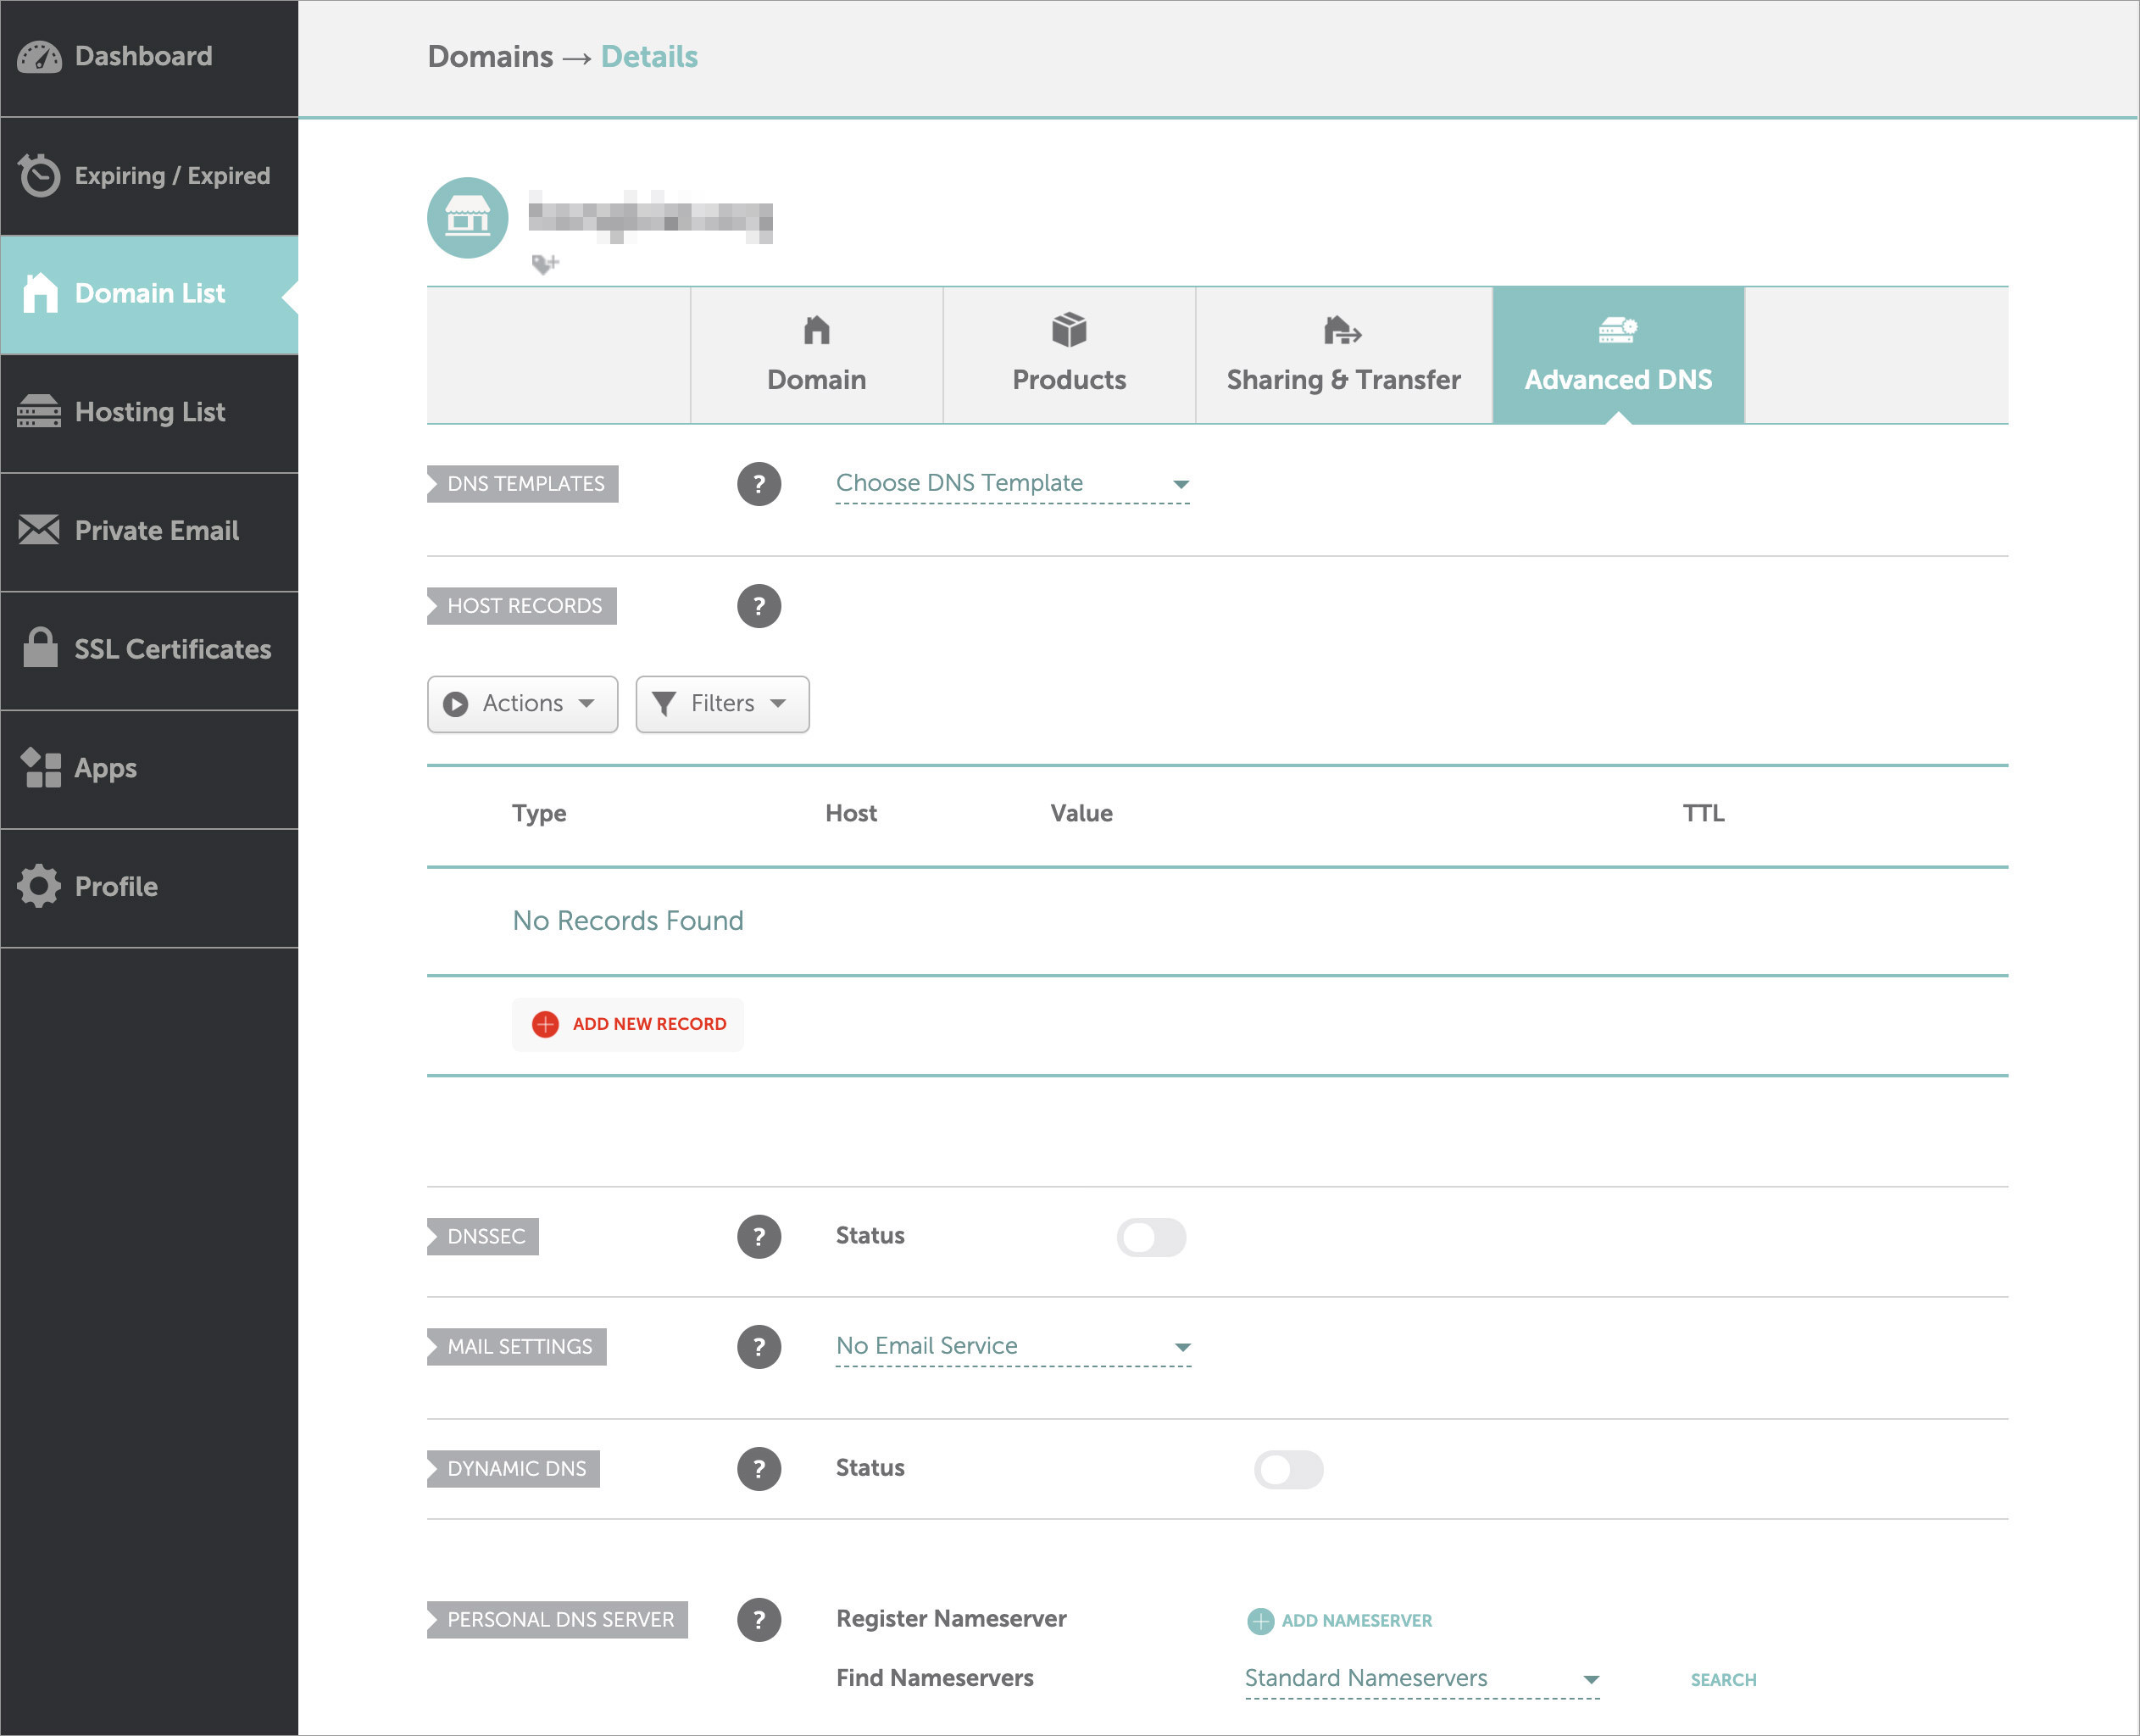
- Throughout the Dashboard tab, seek for your space. Hover over the home icon, and click on on Difficult DNS.
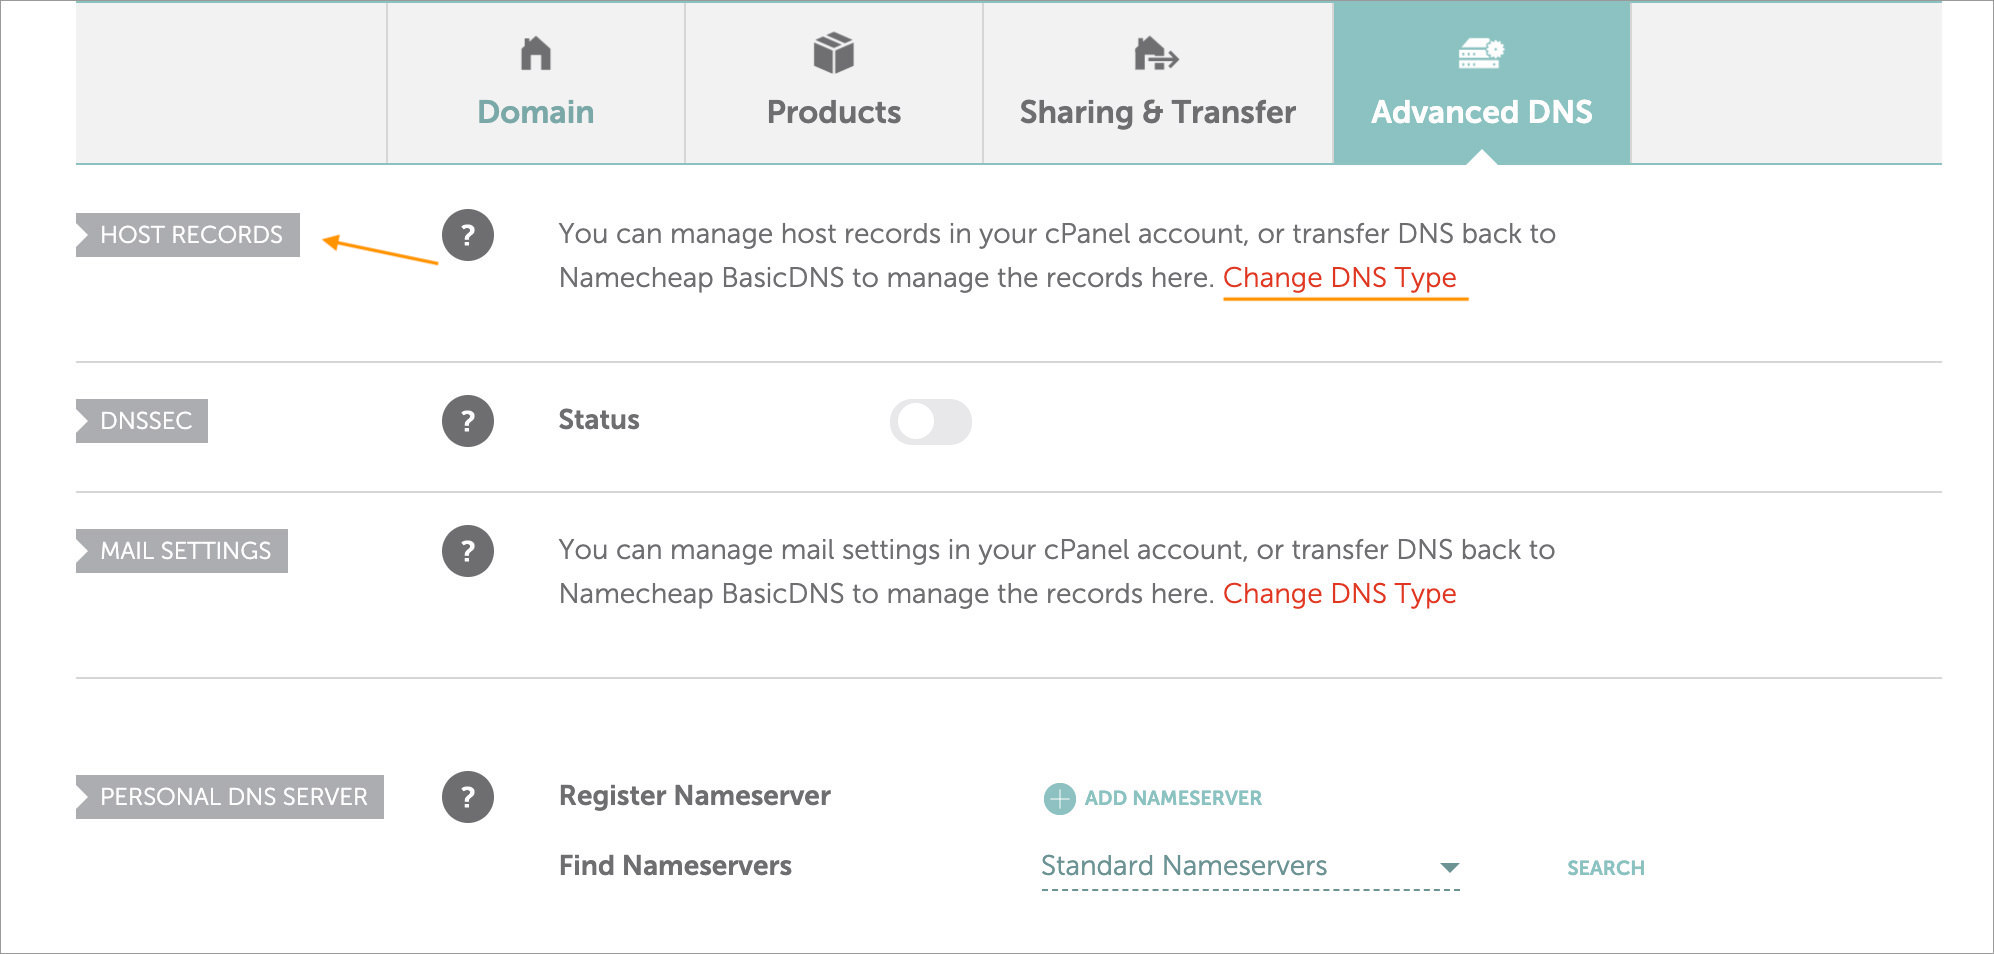
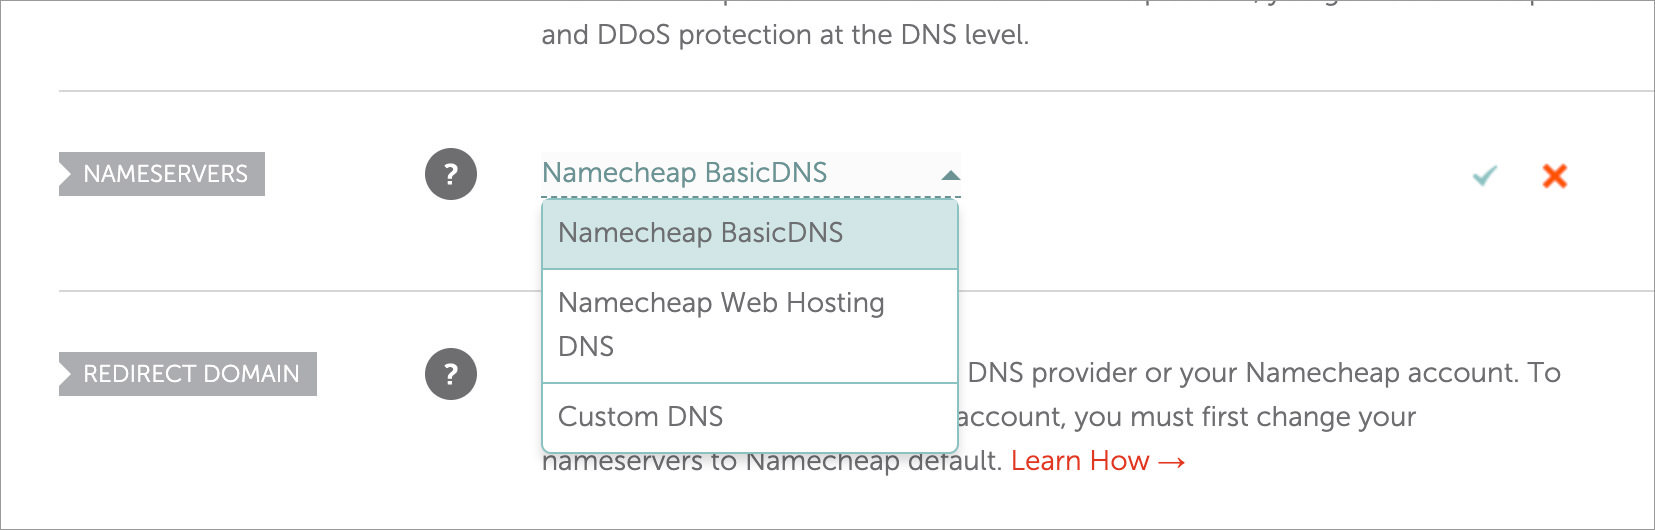
- Beside Host Information, click on on Alternate DNS Kind, then beside Nameservers, make a choice Namecheap BasicDNS, and click on at the tick icon.
- Underneath Host Information, should you see this show, then it means that you’re on the right track up to now.
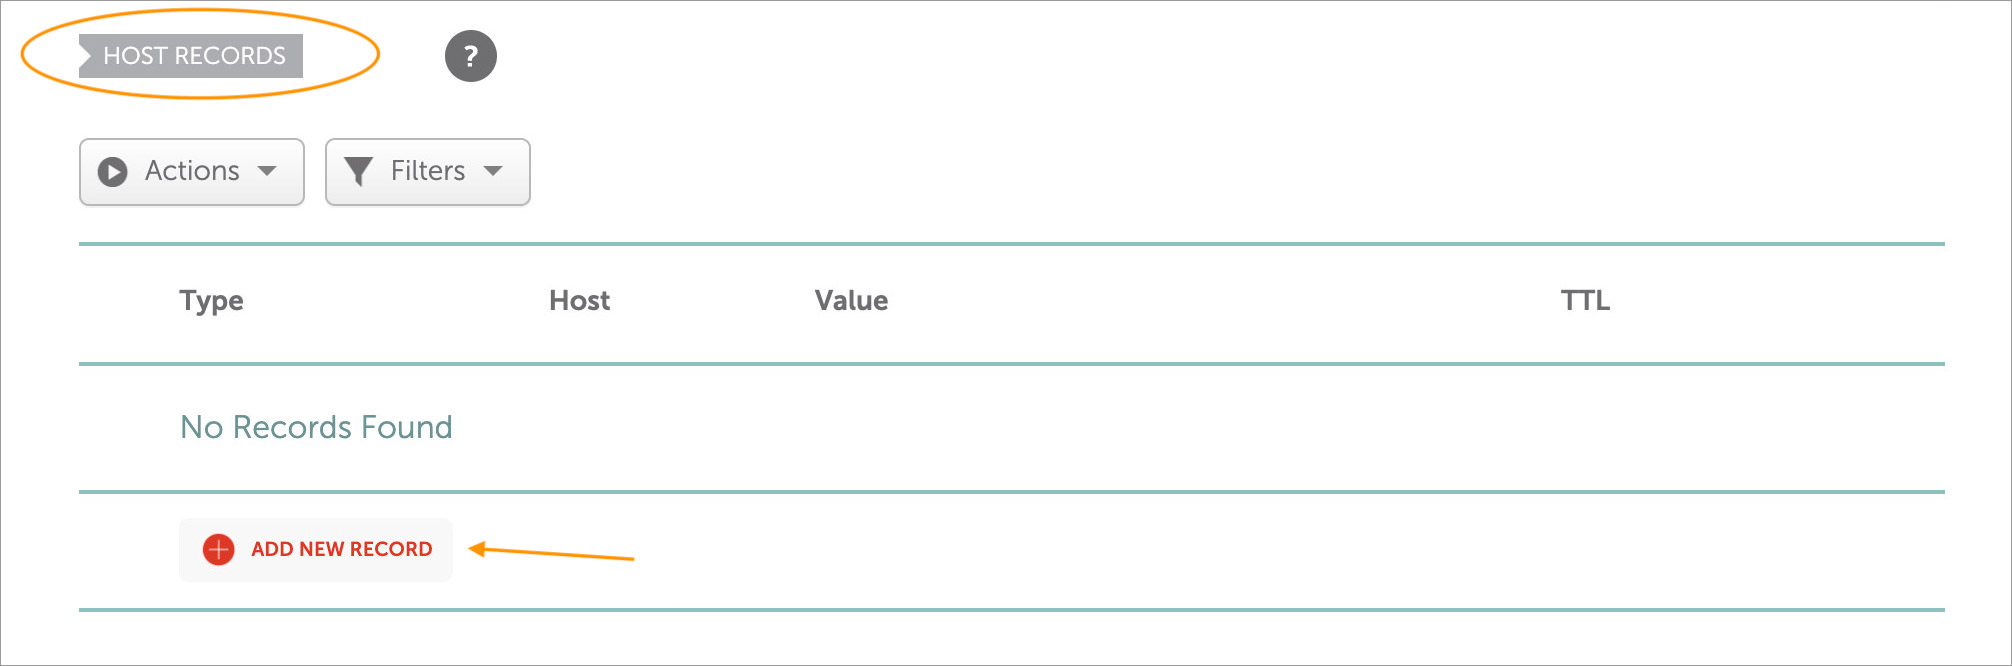
- Now, beneath Host Information, click on on Add New Information.
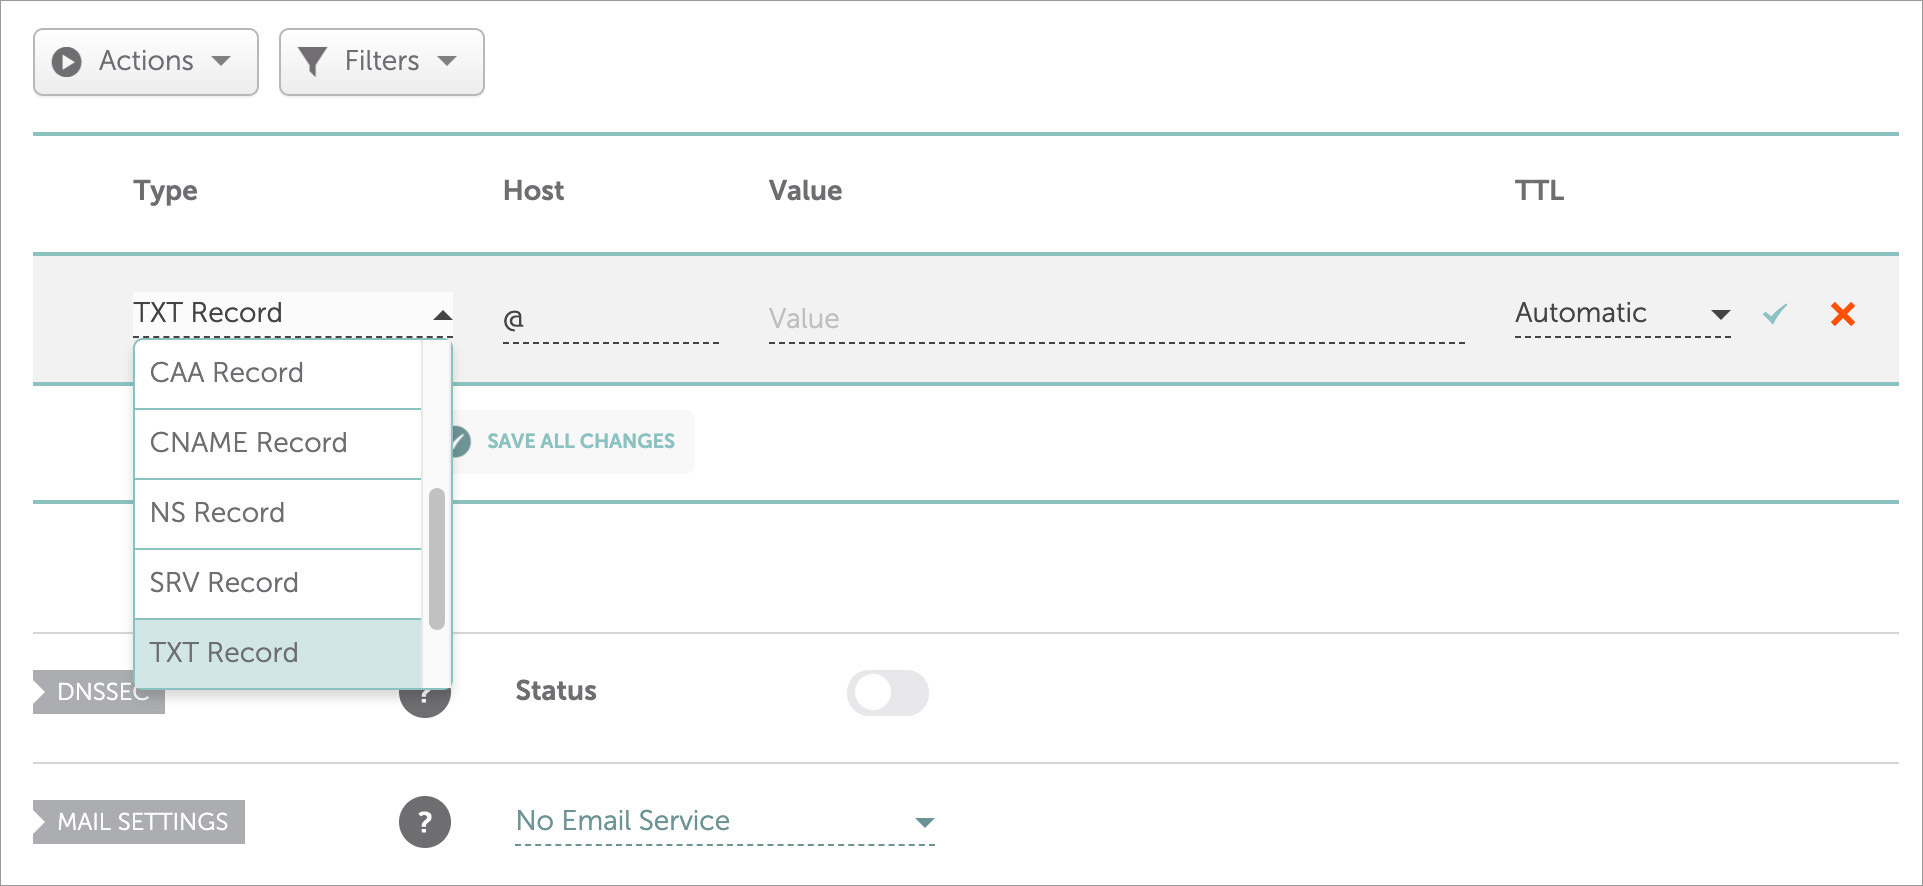
- Throughout the drop-down menu beneath Kind, make a choice TXT Record. Similarly, beneath Host, enter @, and beneath Price, paste inside the verification codes copied earlier, and then click on at the tick icon.
- Throughout the Mail Settings, make a choice Gmail from the drop-down menu, and then click on on Save Changes.
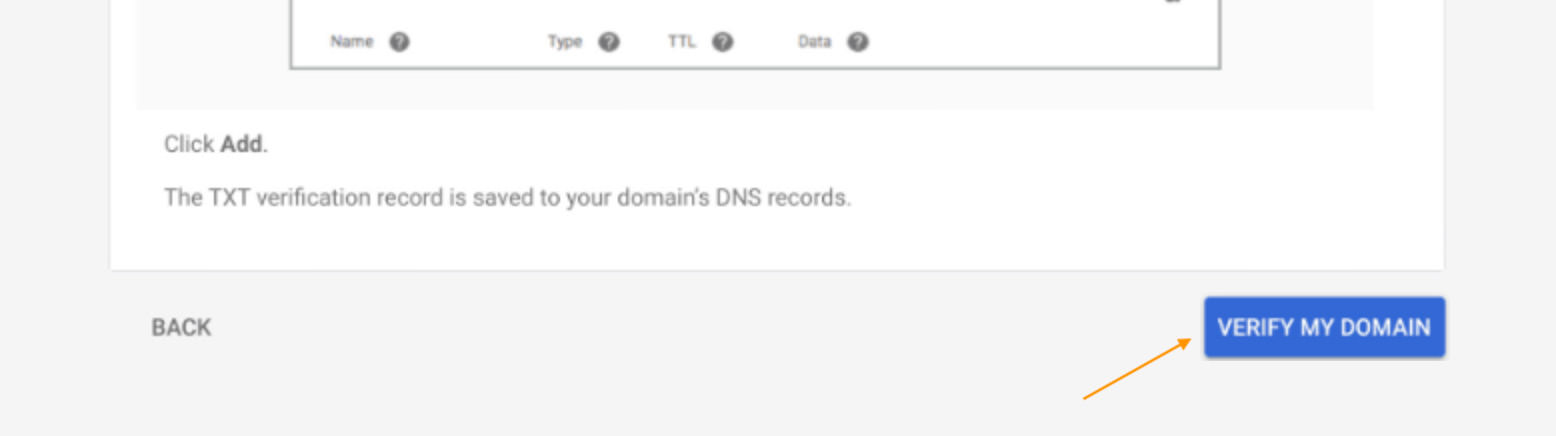
- Now, once more to the other browser of your Google Workspace, scroll to the bottom, and click on on Read about my space.
- Wait till the verification process is completed, and also you’ll see the following message.


That’s it, you’ve got your space in NameCheap verified on your Google Workspace. If you want to add a brand spanking new particular person, cross to Google Admin and do take the considered necessary steps. Each and every particular person you’ll add may have their own [email protected] electronic mail.
The put up How to Use Gmail With Your Custom Domain Name appeared first on Hongkiat.
Contents

0 Comments