
I’ve faithful a very powerful time frame to having a look to achiev of double-sided printing and reducing using a Cricut. Regardless of the abundance of online guides, constantly aligning designs utterly on either side right through reducing remained an issue. Because of this truth, I embarked on my own journey of trial and error and in the long run discovered a a good fortune approach.
Why select double-sided printing, you have to wonder?
While Cricut’s print and decrease serve as is typically unswerving, the real check out comes with duties like double-sided trade playing cards, or thank you enjoying playing cards, where precision in every design alignment and reducing is an important.
In this data, I’ll lead you throughout the stairs to create a double-sided thank you card with designs on either side. We’ll get began via growing the design, then switch immediately to importing it into Cricut Design Space, and in spite of everything, print and decrease it with as on the subject of best possible alignment as conceivable.
Atmosphere Up Your Design
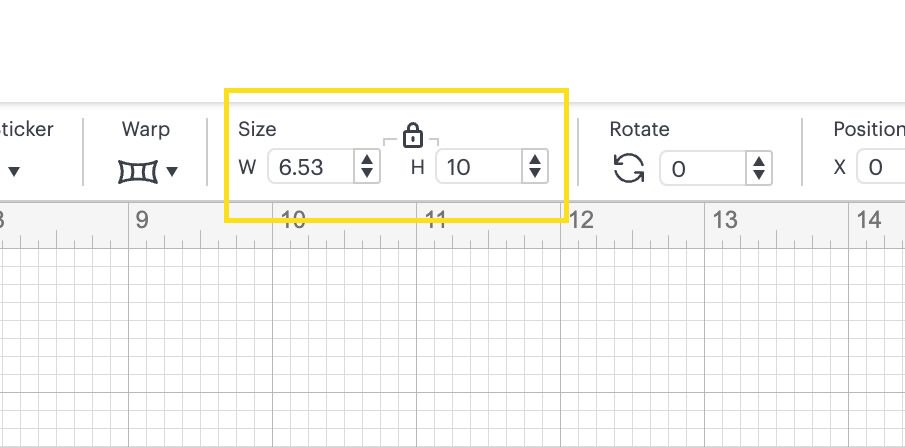
Get began via launching Cricut Design Space. Make a choice “Shapes” and insert a rectangle onto your canvas. Resize it to serve as a reference to your design’s maximum reducing dimension.
This step is an important for later precision.
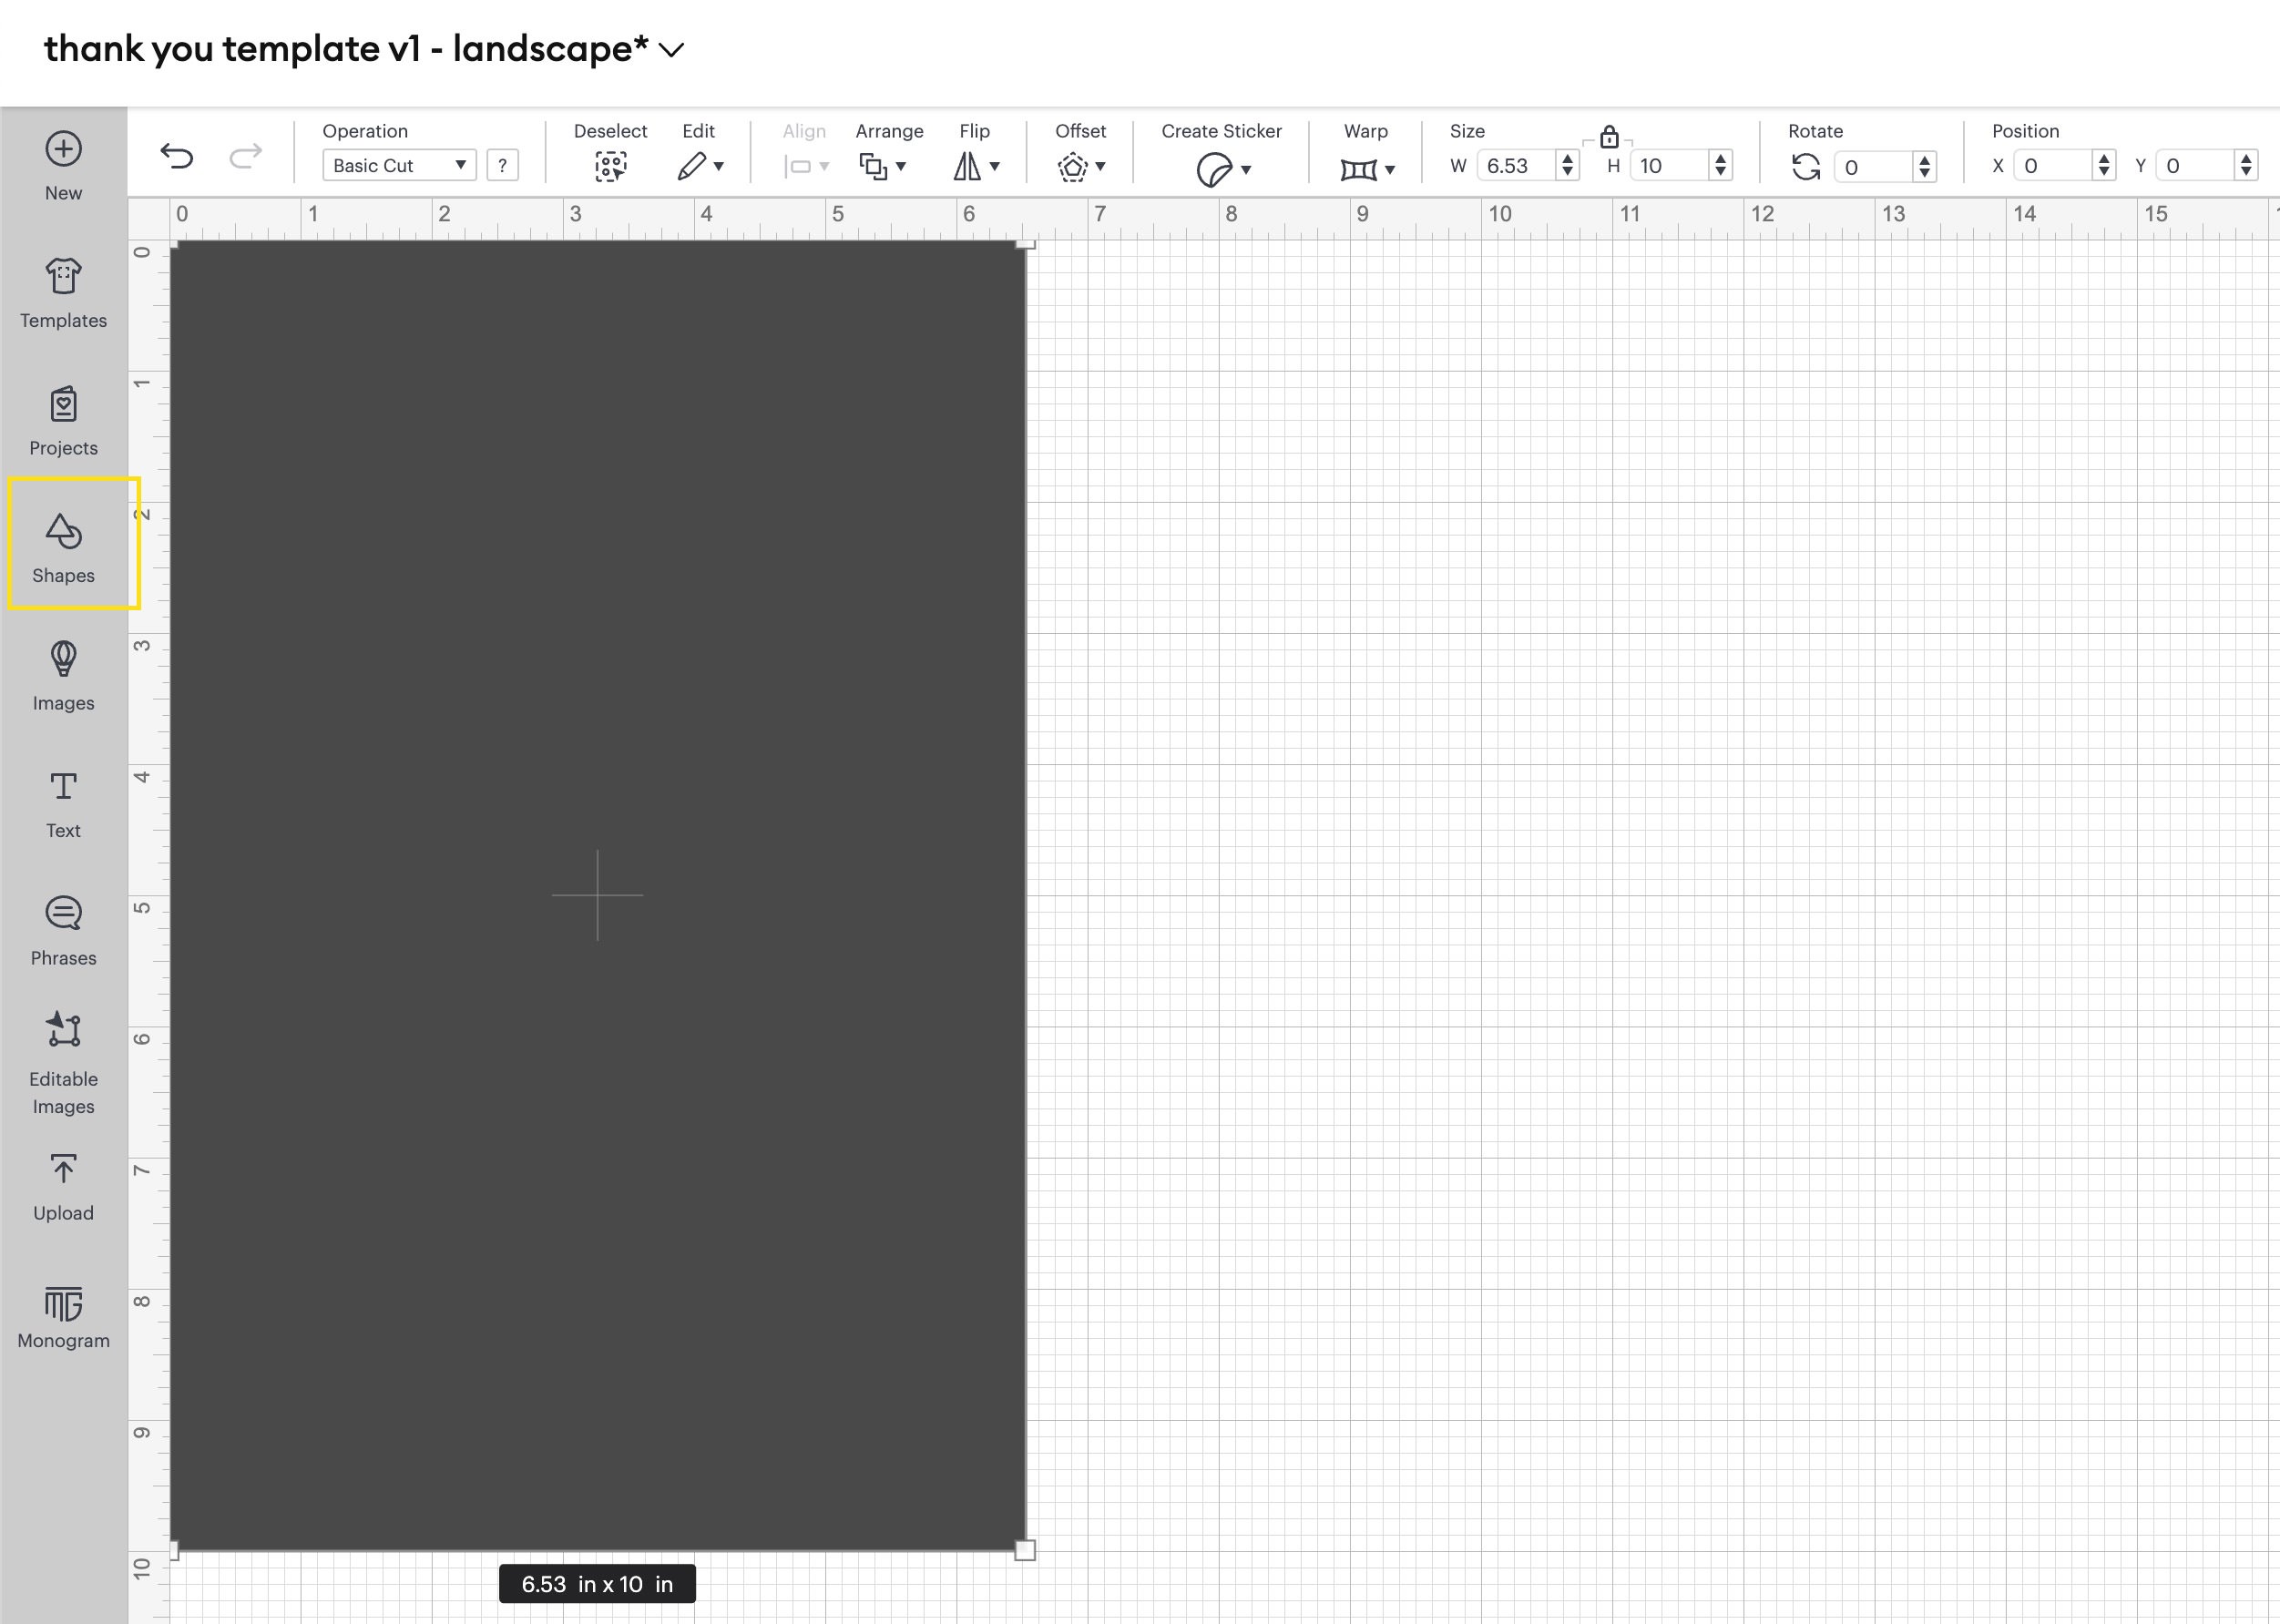
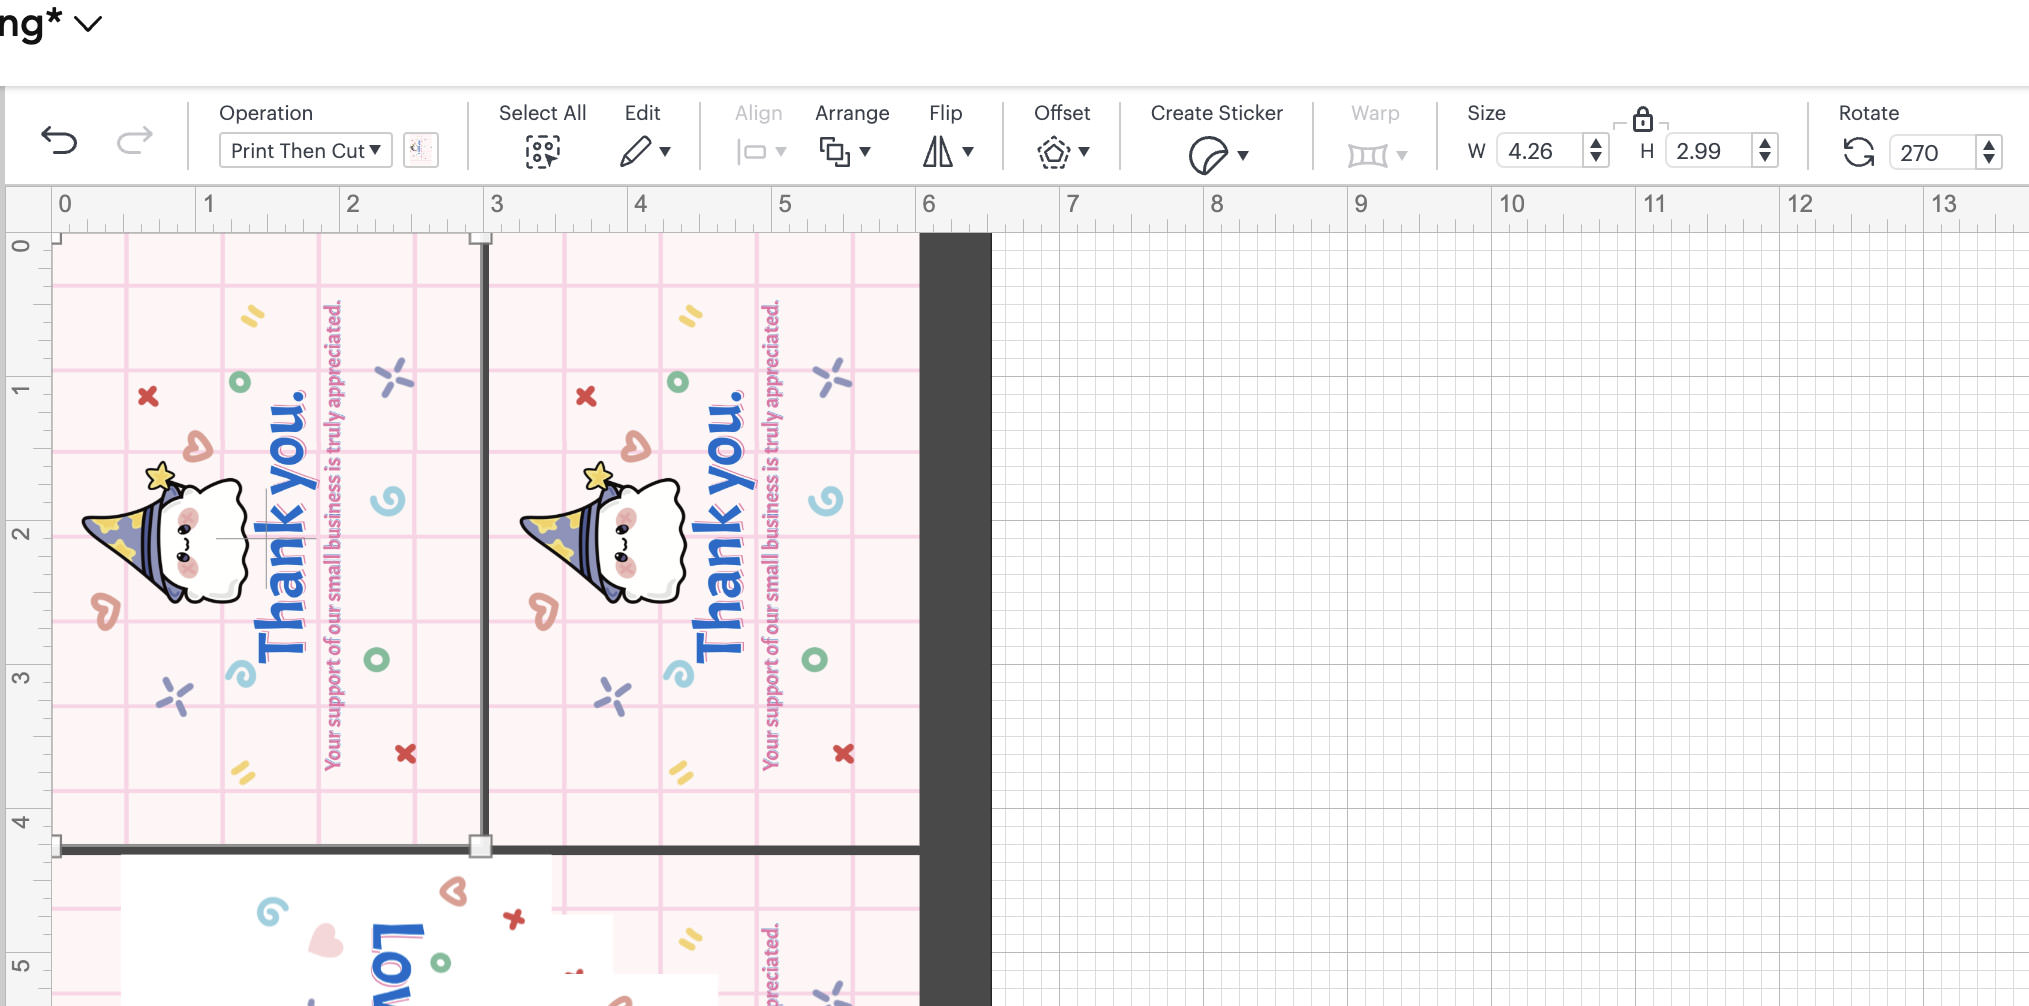
I profit from the Cricut Maker 3, so I set my rectangle’s dimension to 6.53 inches in width and 10 inches in top, which may well be very on the subject of the maximum reducing dimension.
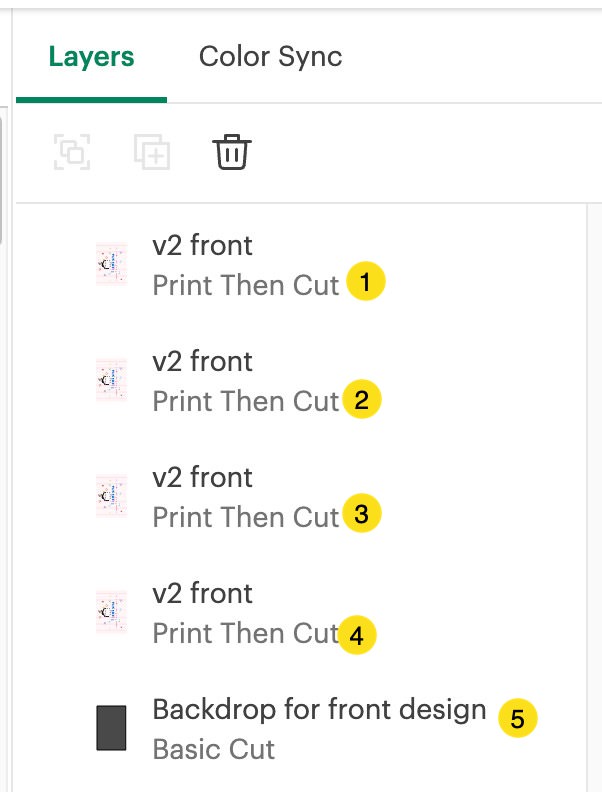
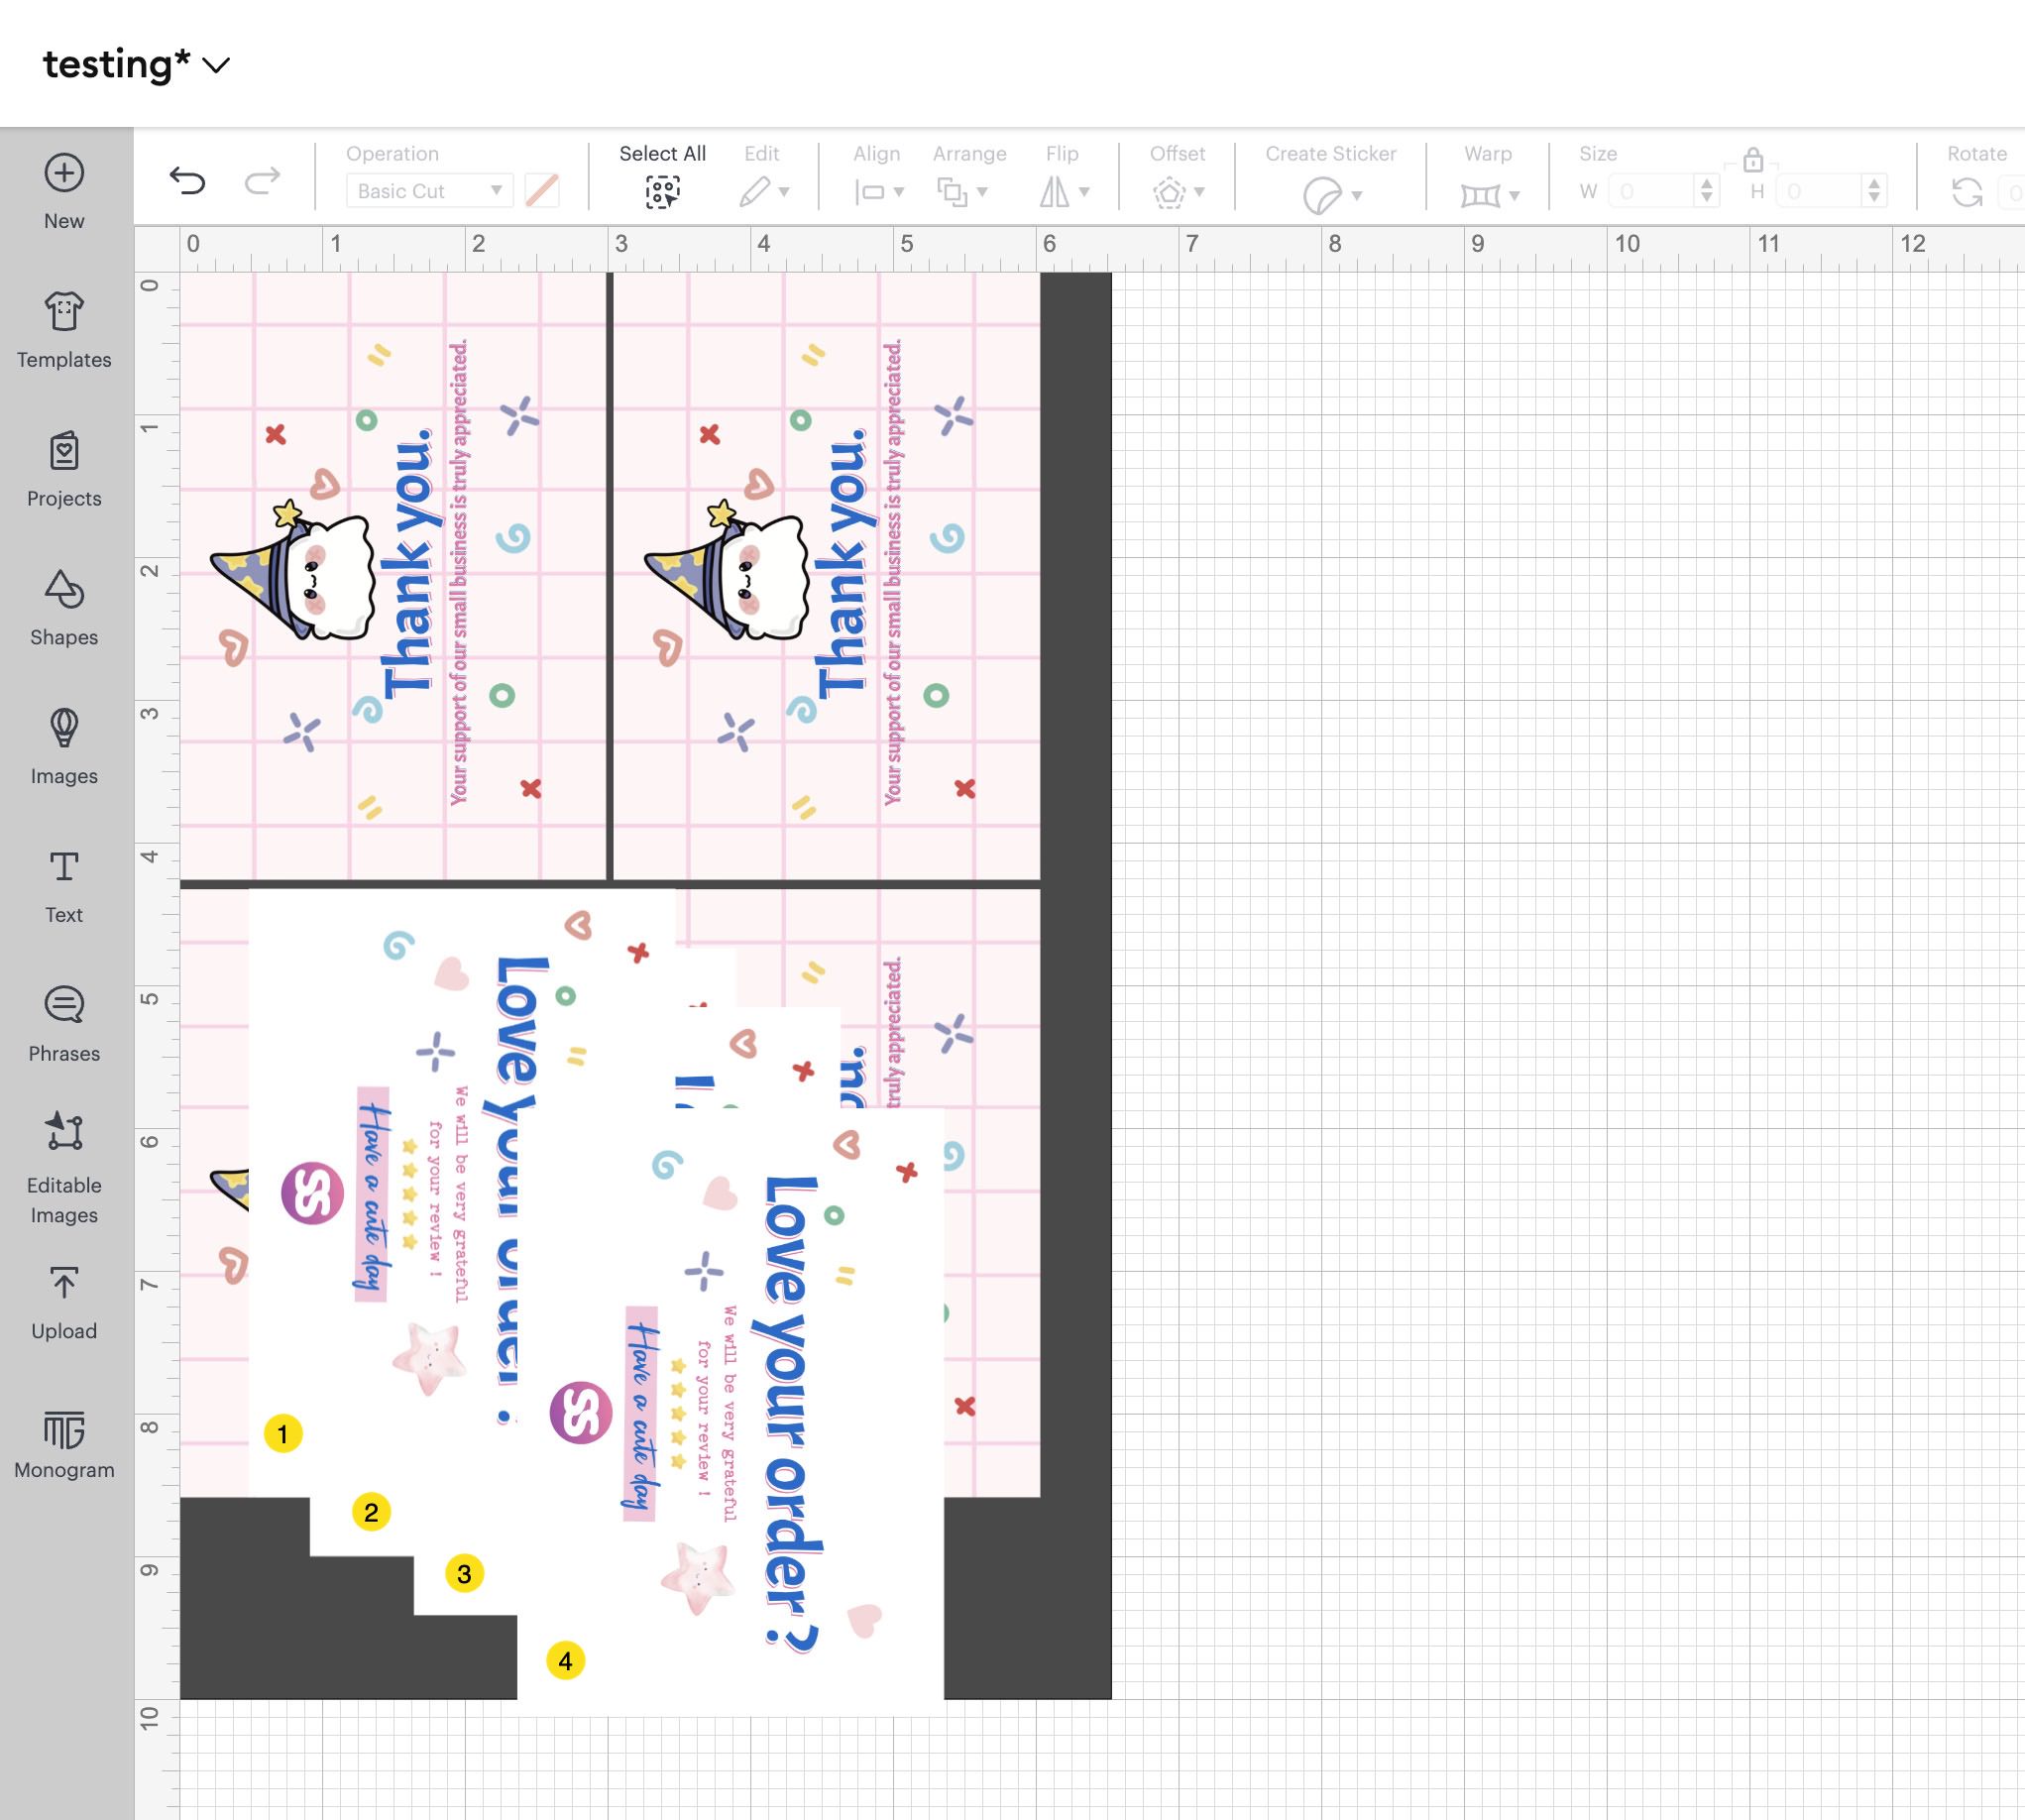
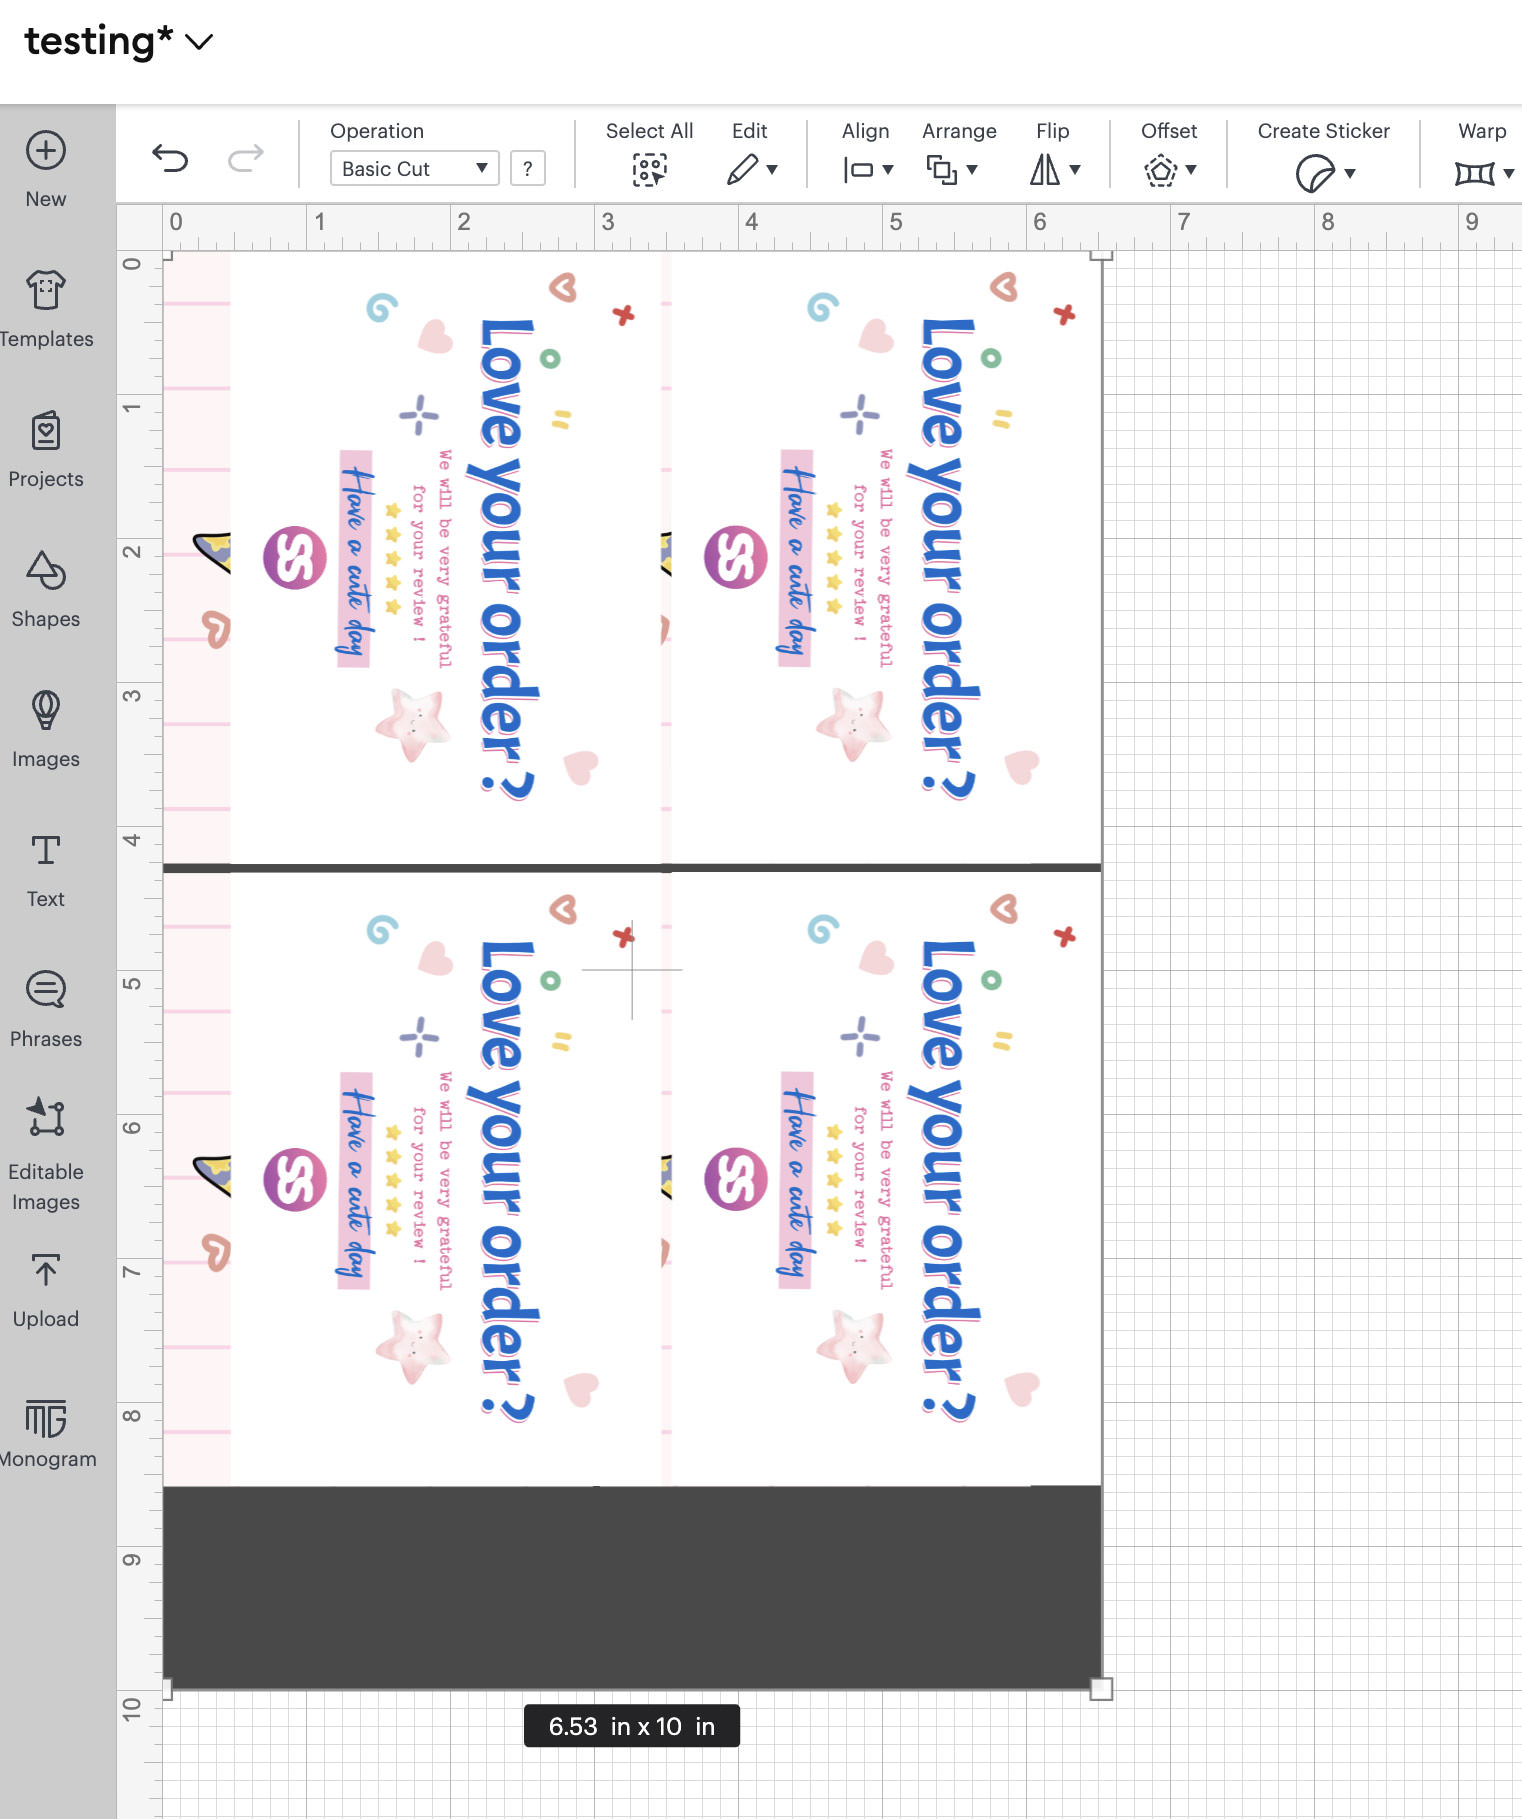
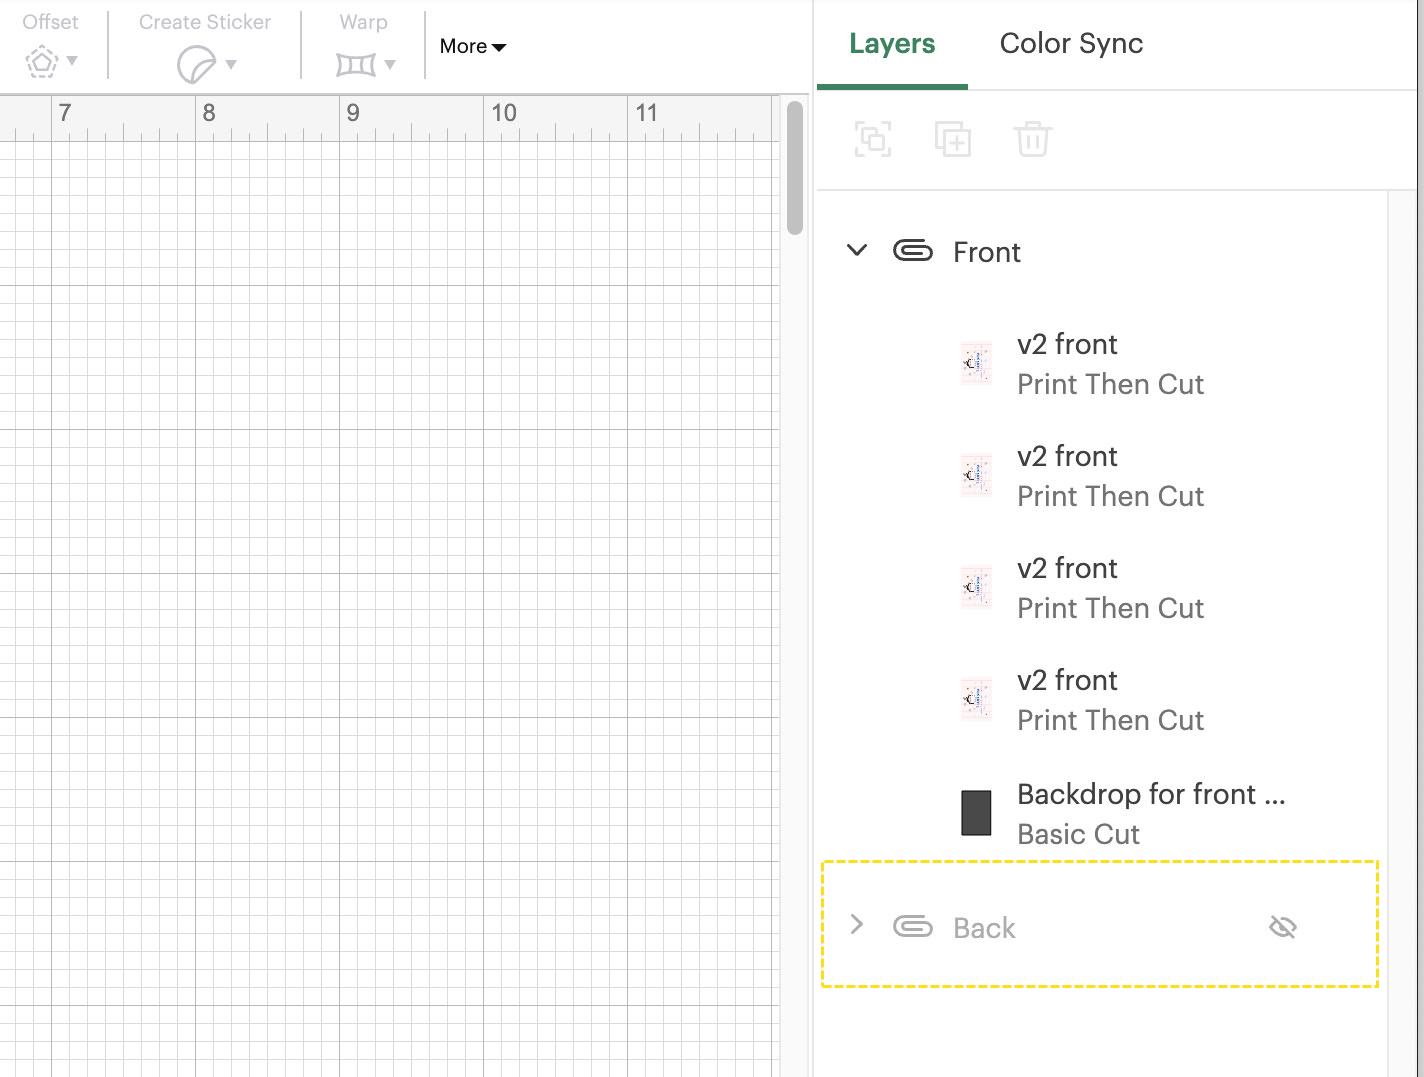
After growing every the front and back designs of the thank you card in Photoshop, I first imported the doorway design into the canvas. Then, I duplicated it thrice, main to a whole of four designs, as confirmed throughout the screenshot below.
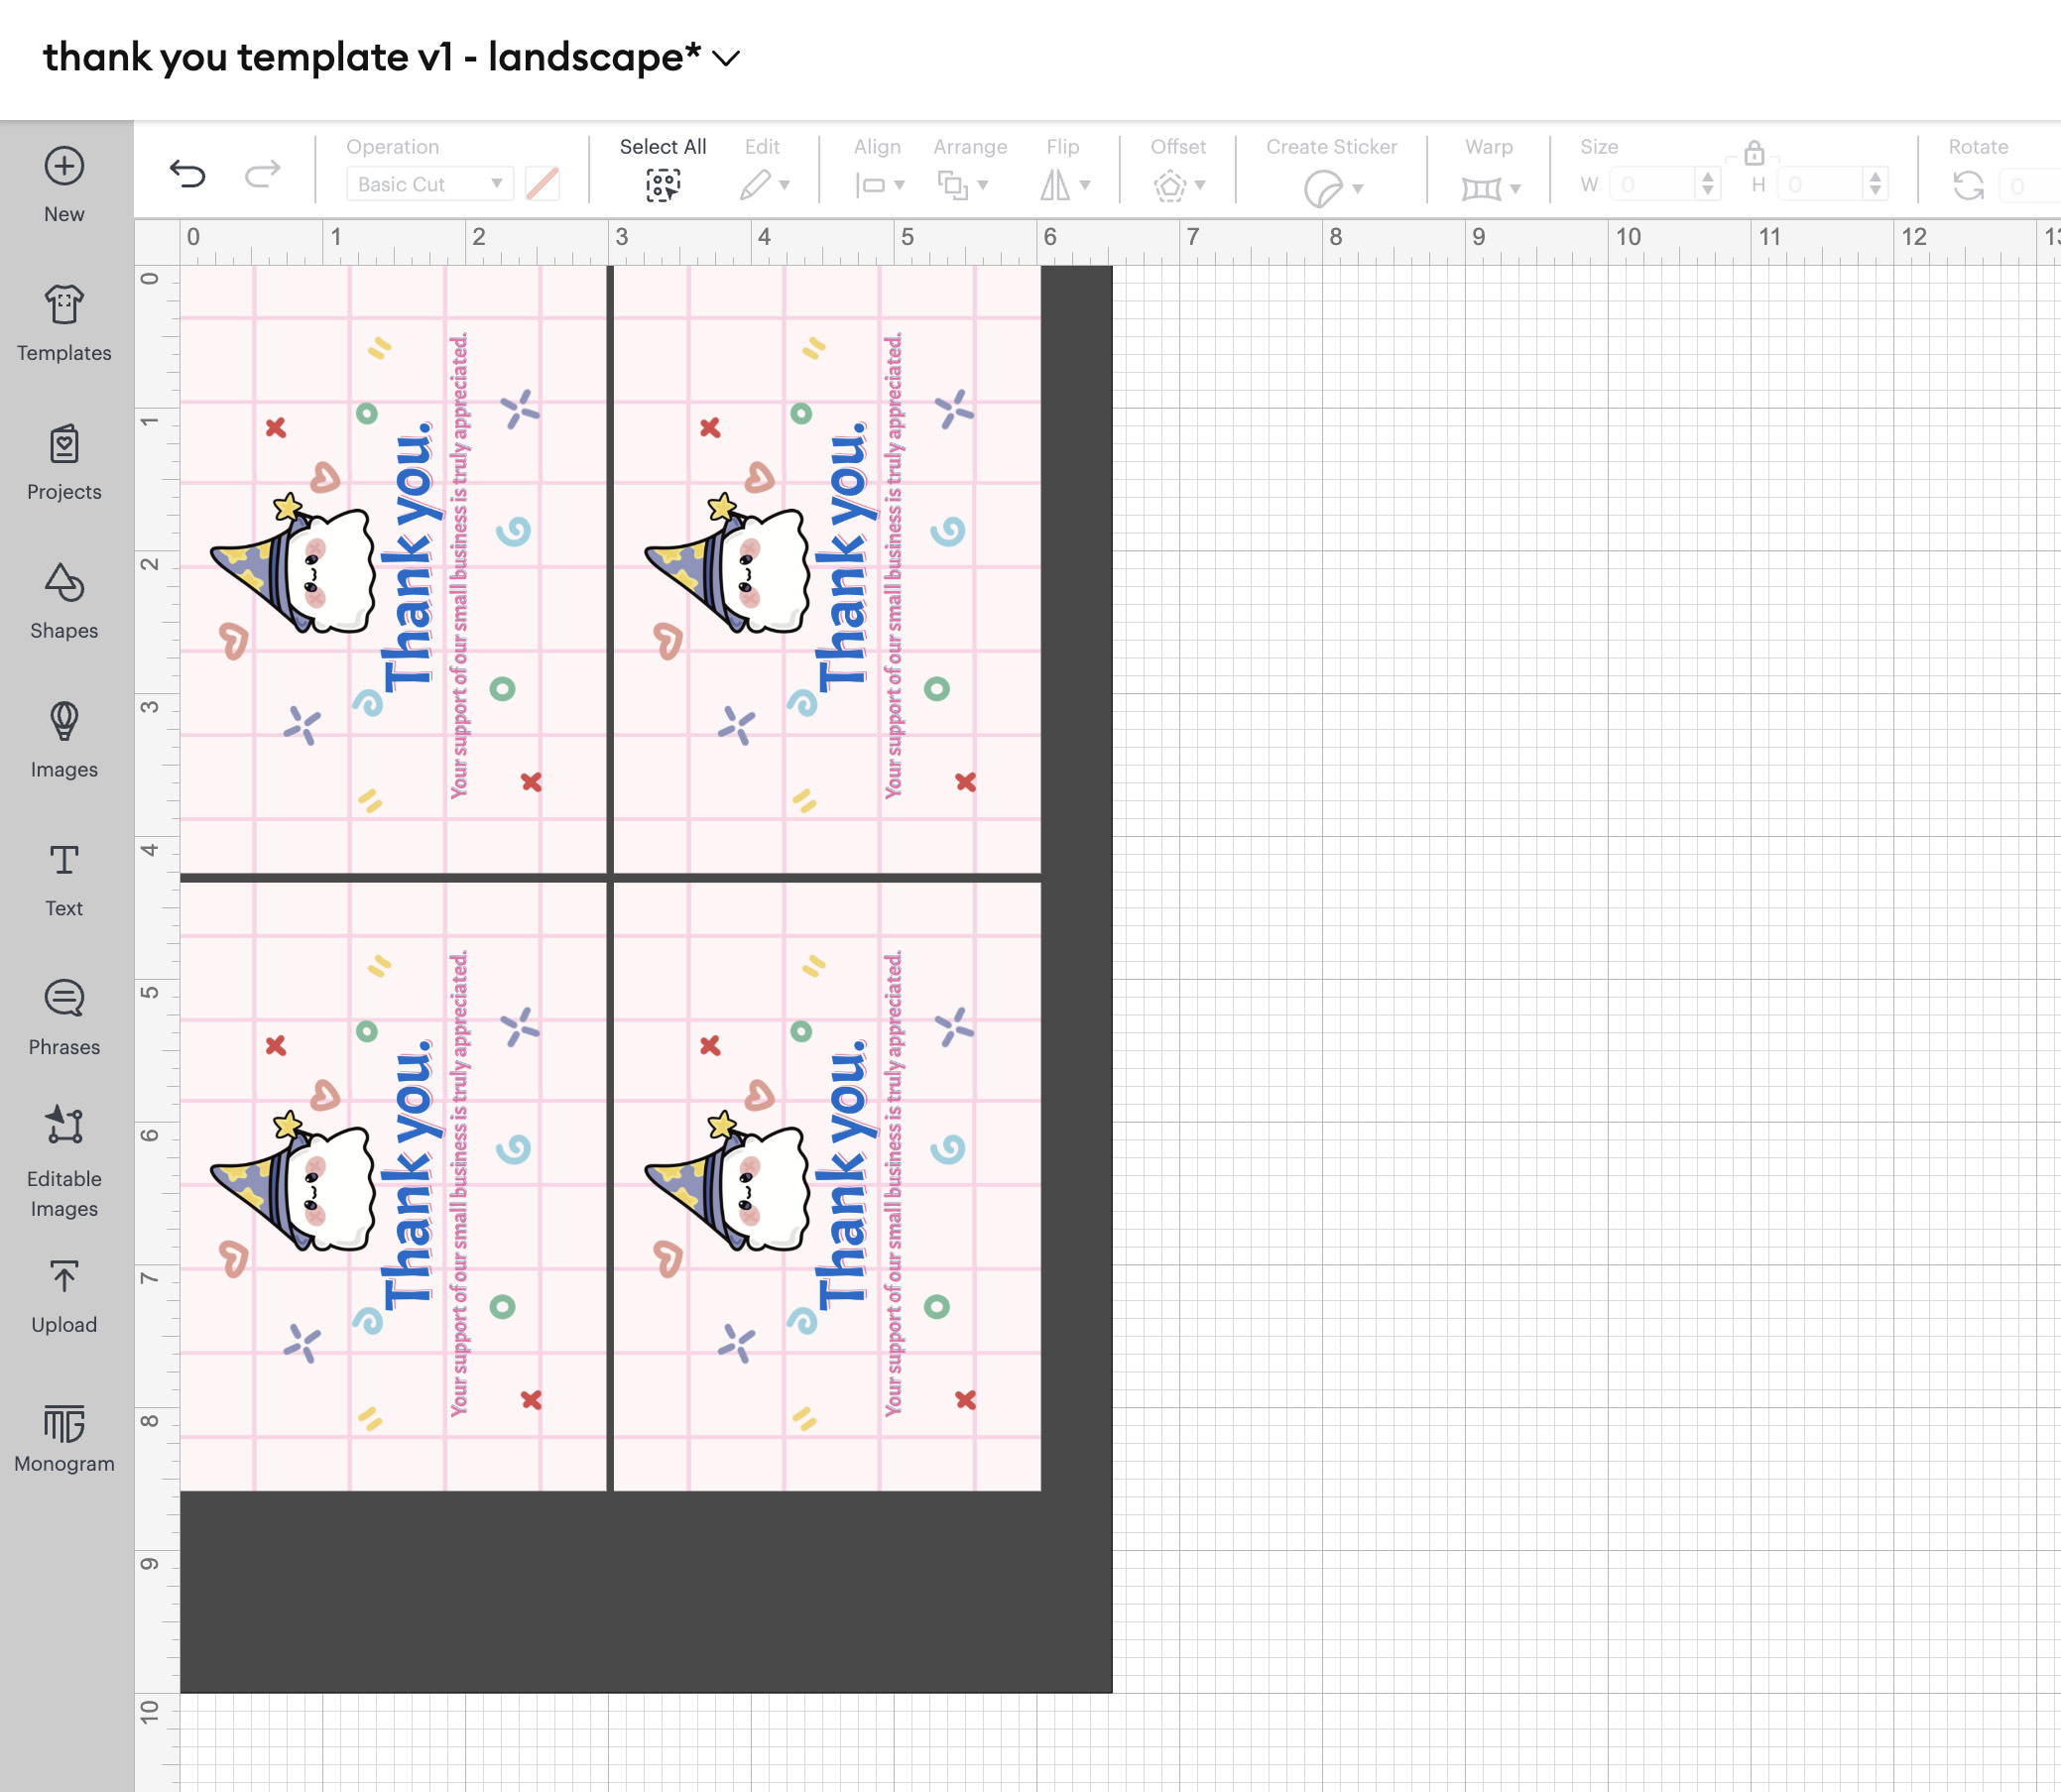
The Layers panel shows 5 items: 4 front designs and one backdrop for the doorway design.
Next, I’ll import the thank-you card’s once more design and duplicate it thrice, making a whole of four, similar to the doorway’s design earlier.
Then, every of them is located precisely over its corresponding front design. As a substitute of manually aligning them, use the X and Y coordinates from the doorway design for precise placement.
Copy some other backdrop for the once more designs. Label them distinctly to avoid confusion later.
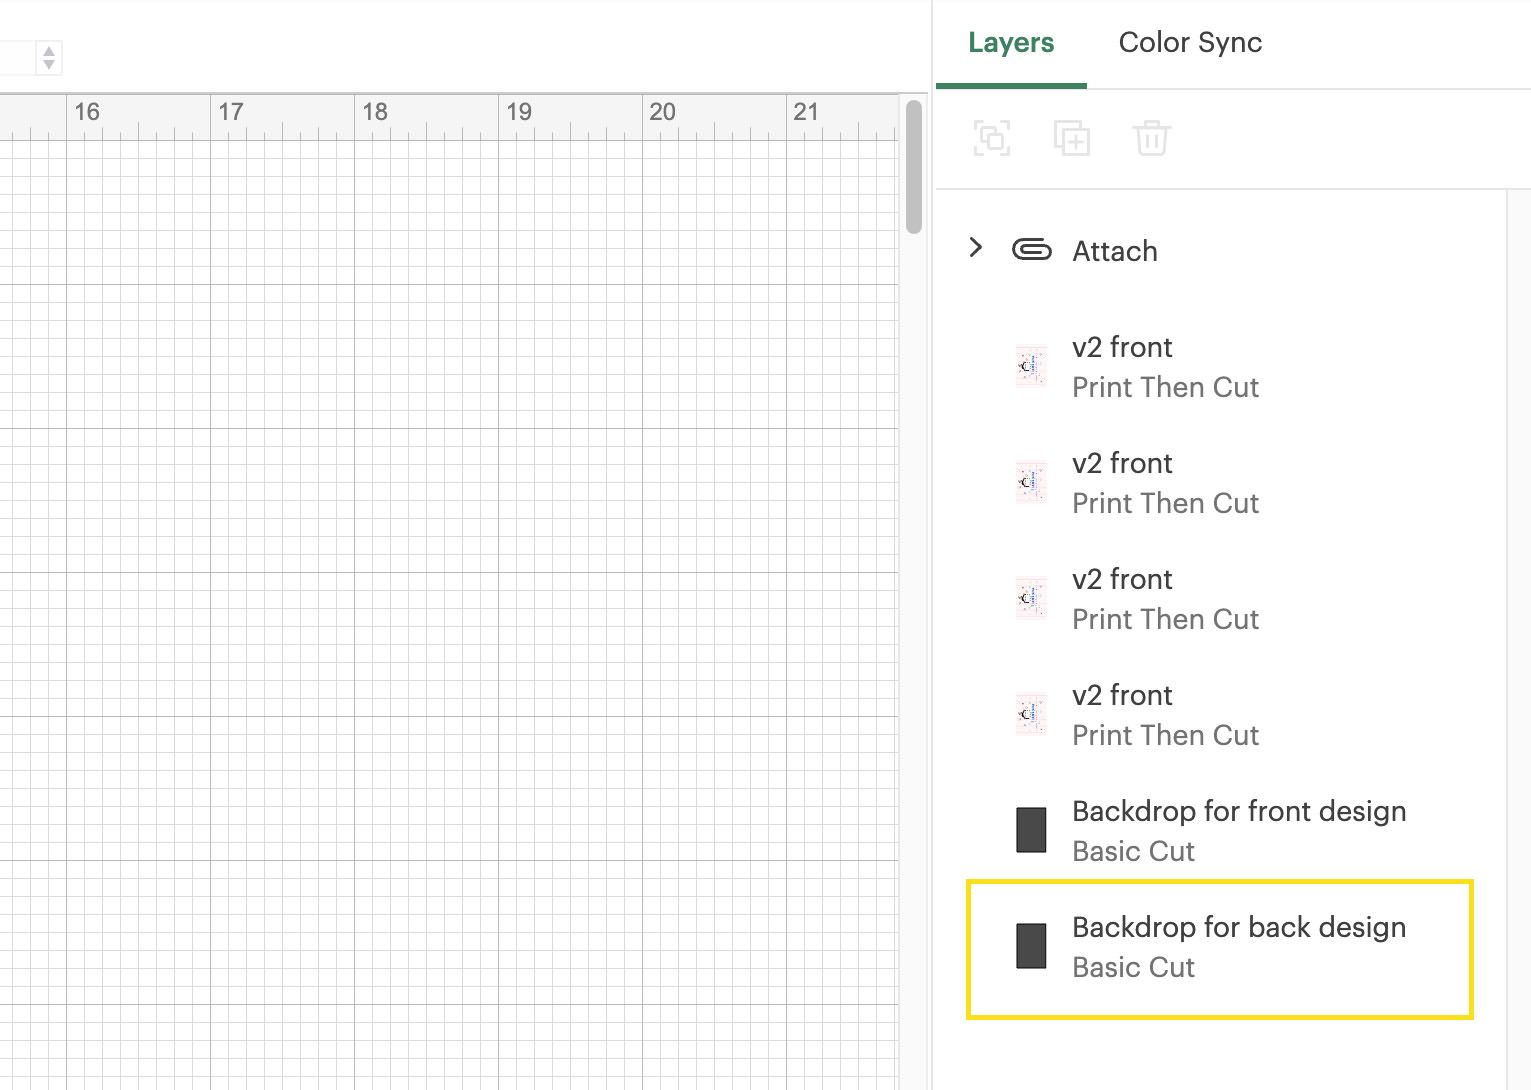
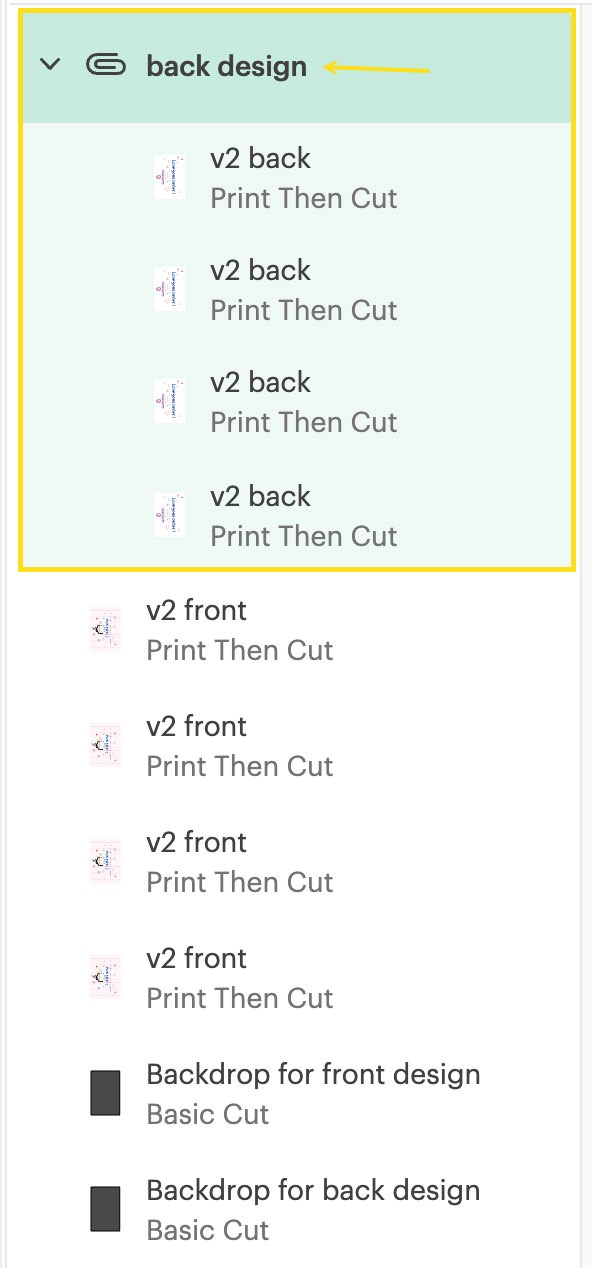
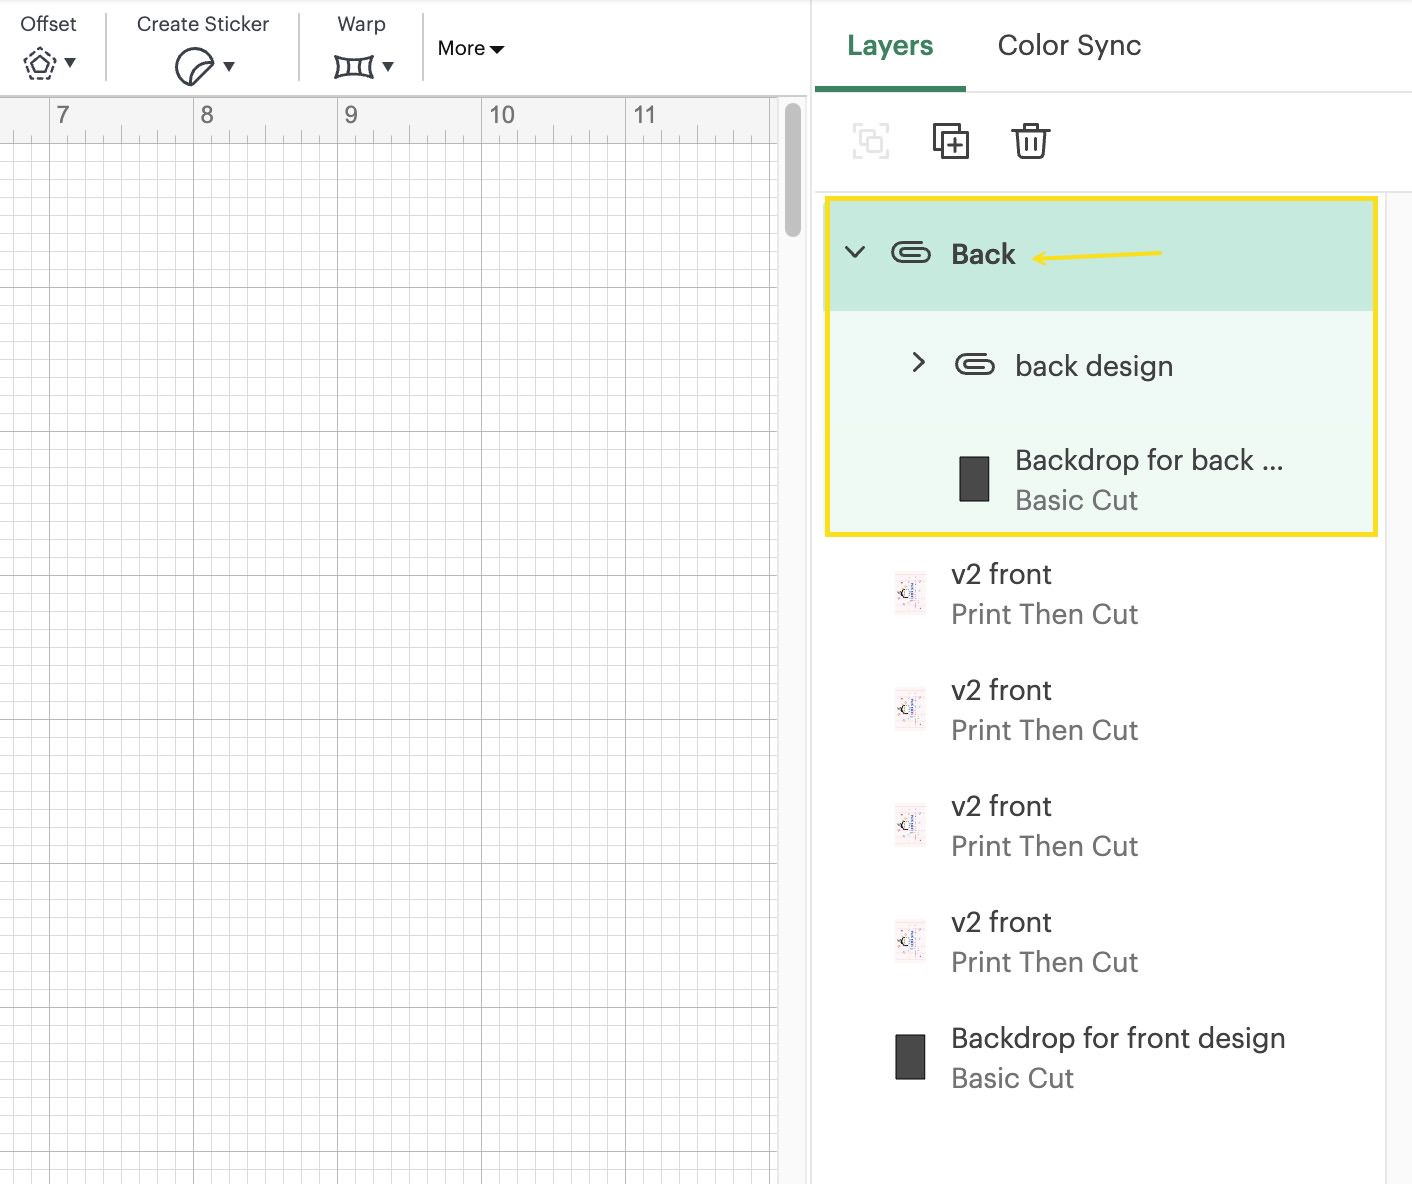
Throughout the Layers panel, attach all 4 once more designs and name the group “once more design.”
Make a choice the “once more design” crew and its backdrop, then align them to the suitable.
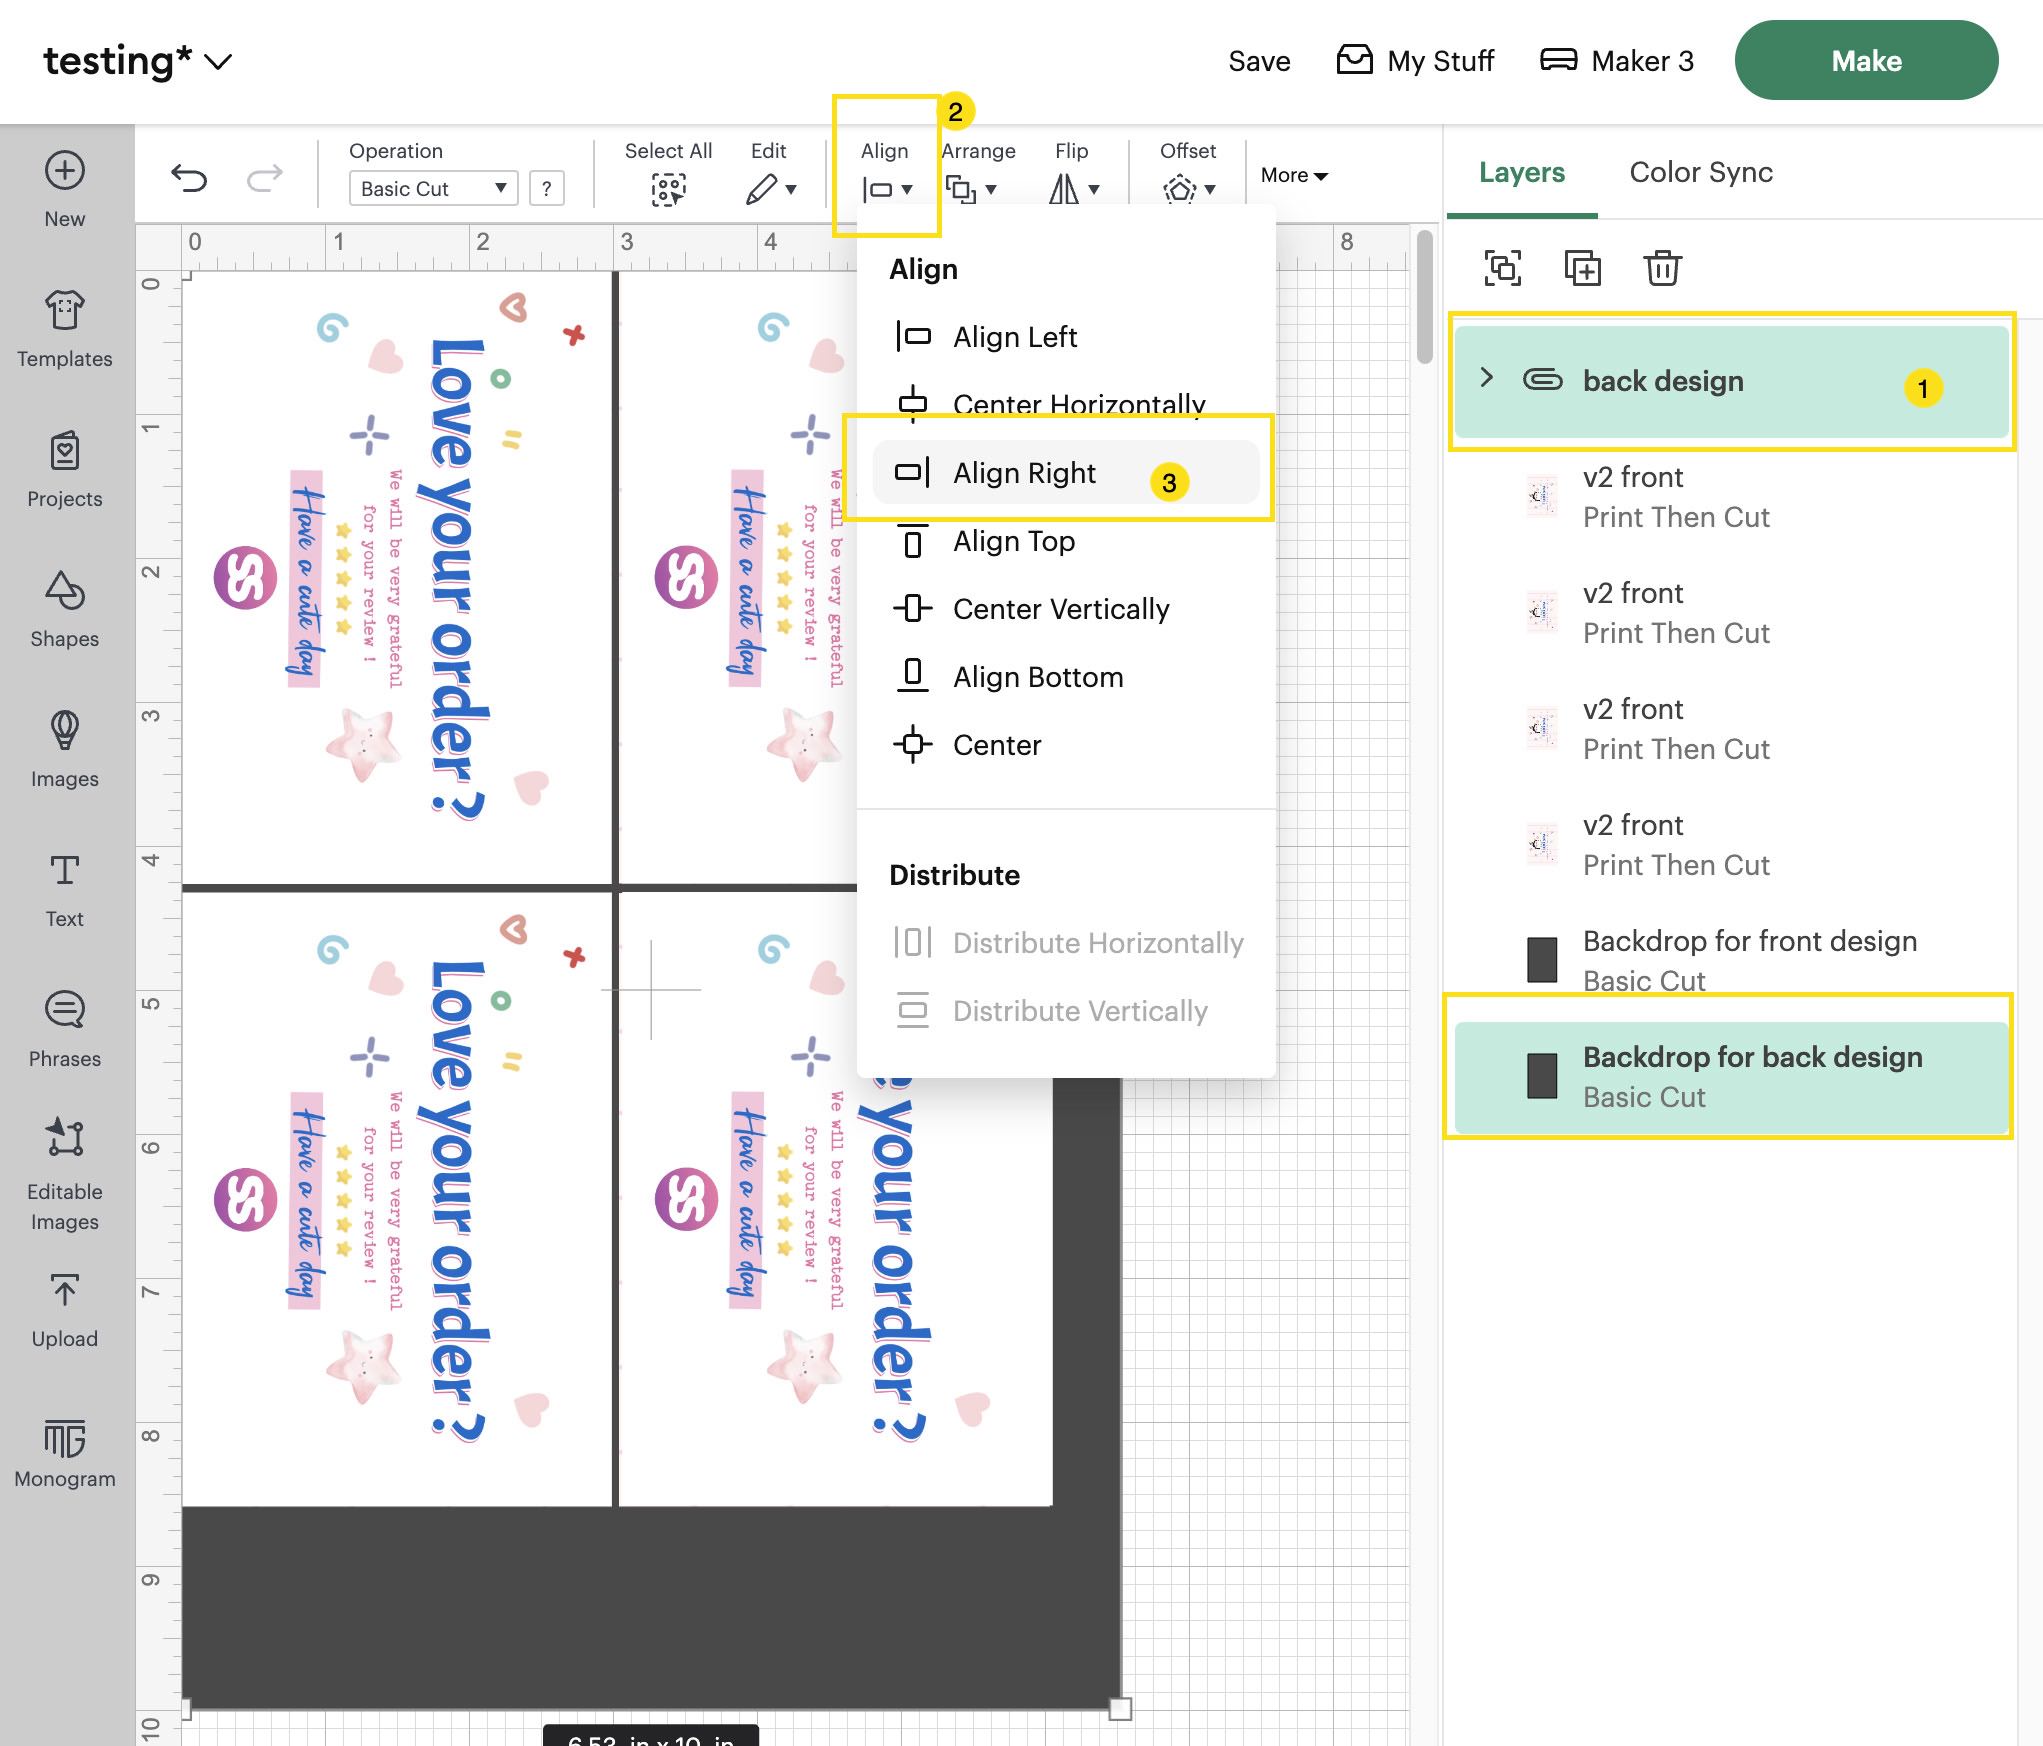
This will infrequently switch them horizontally while maintaining their vertical position, as confirmed throughout the screenshot below.
Attach the “once more design” crew and its backdrop together, naming it “Once more.”
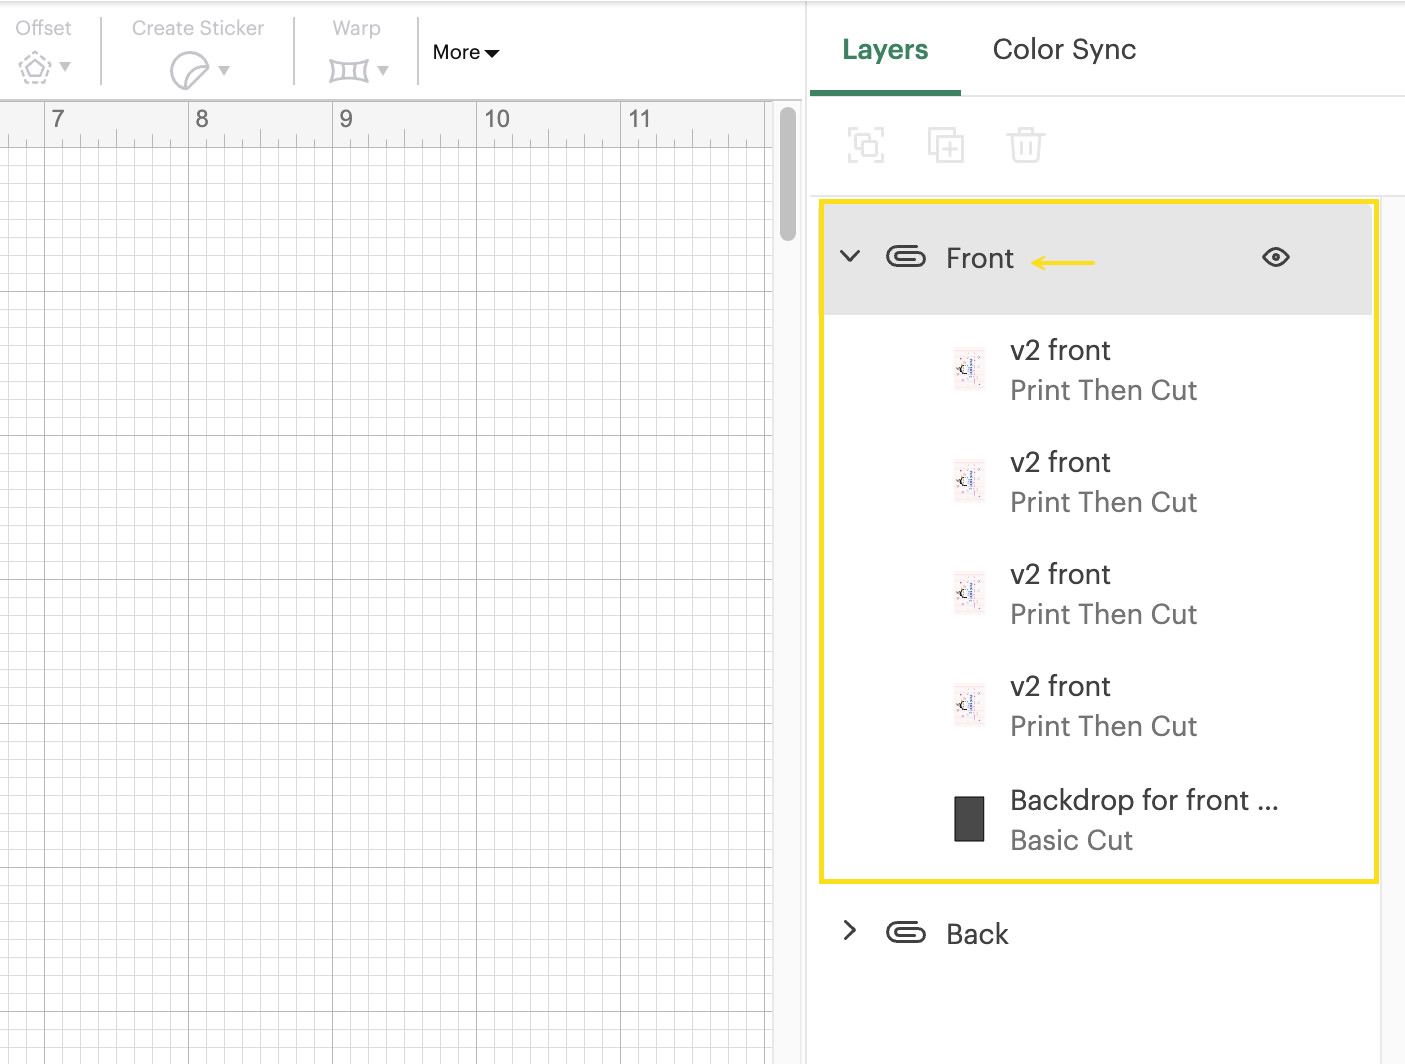
Repeat a an similar process for the doorway designs, naming the group “Front.”
The Print and Decrease Process
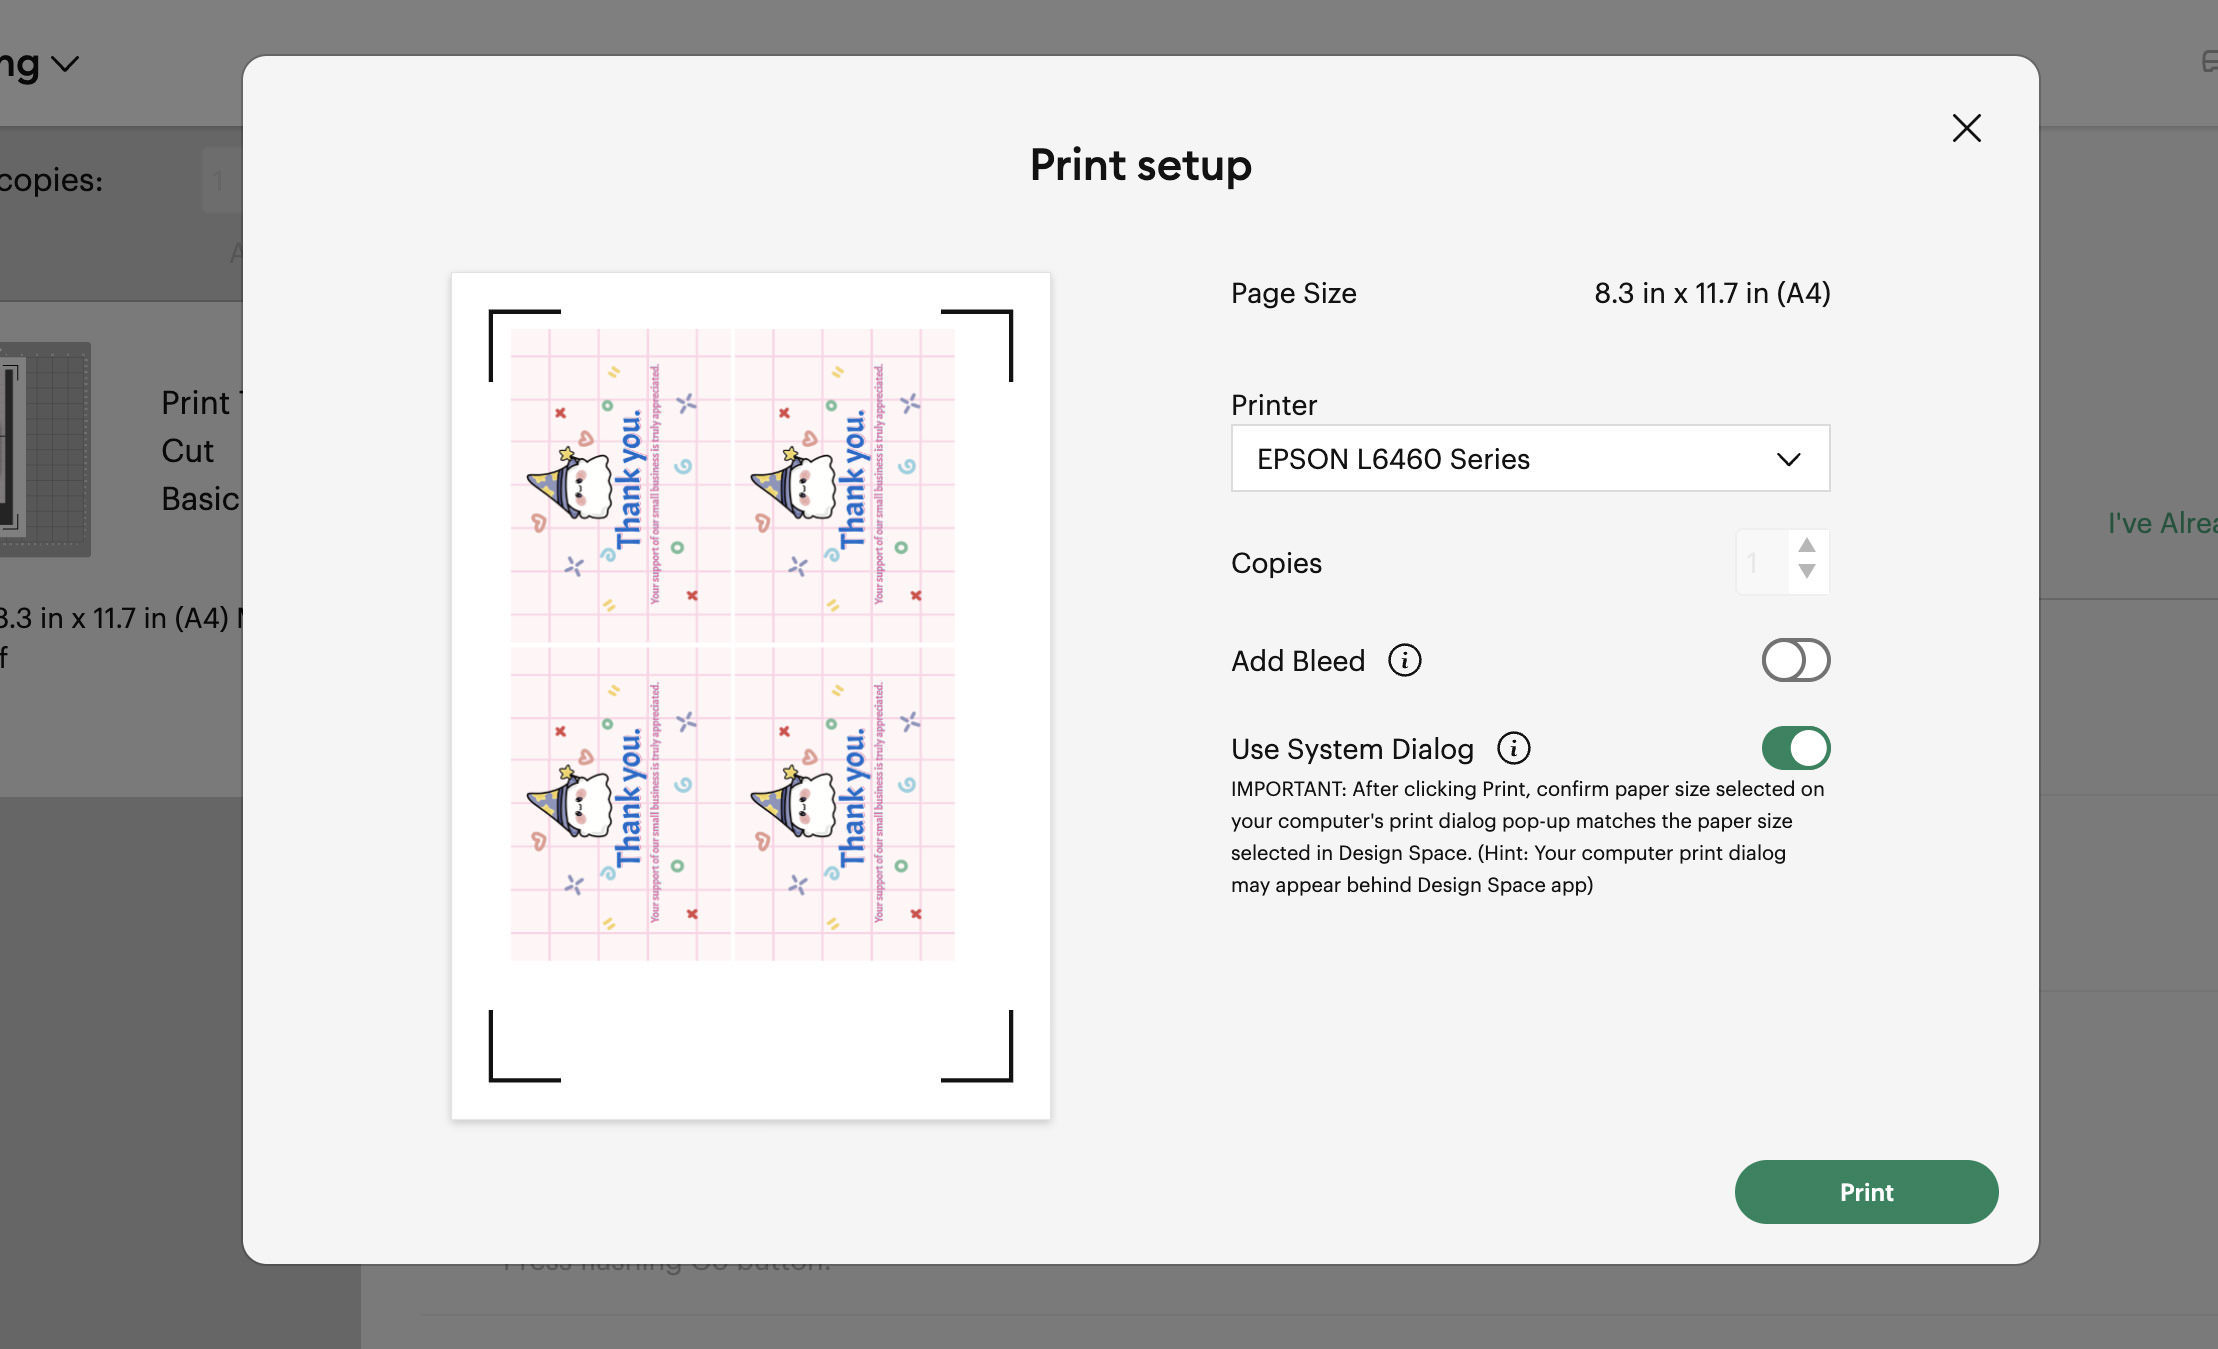
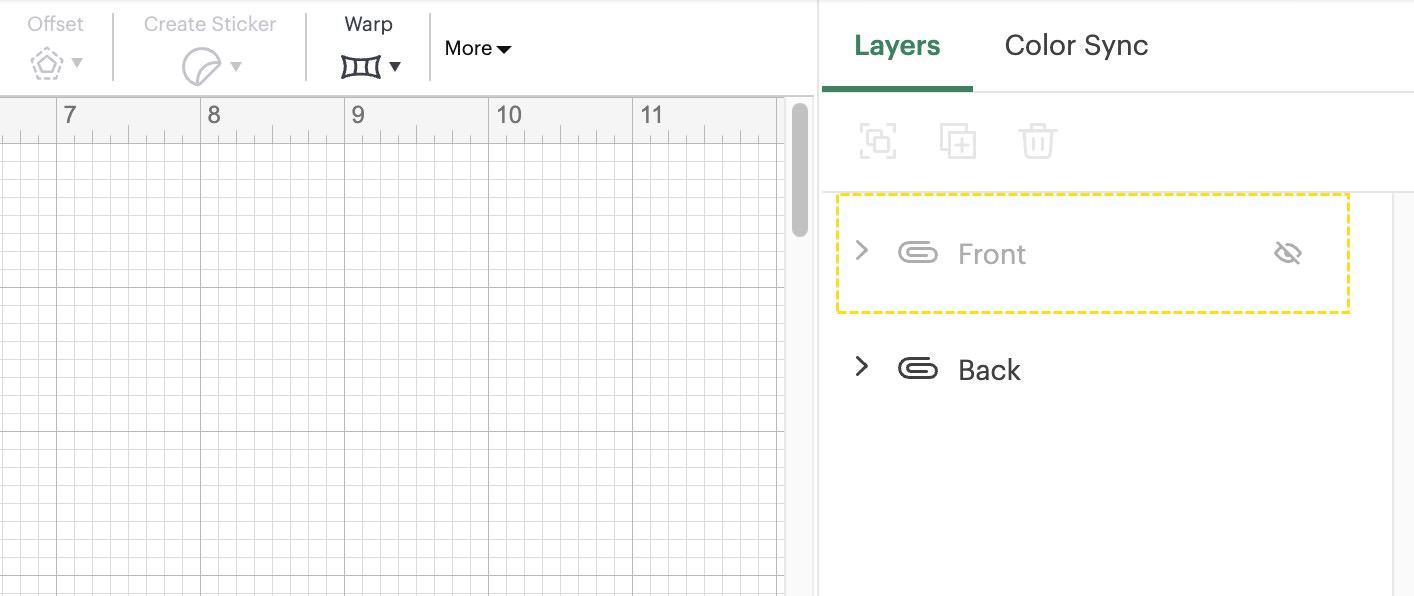
With the setup whole, it’s time to print the thank-you card. First, hide the “Once more” crew , click on on “Make” and proceed to print the doorway design.
Be sure that to blow their own horns “Add Bleed” and turn on “Use System Dialogue” throughout the printer setup.
After printing the doorway, cancel the reducing process to return to the canvas. Flip the printed sheet and reinsert it into the printer for the once more design.
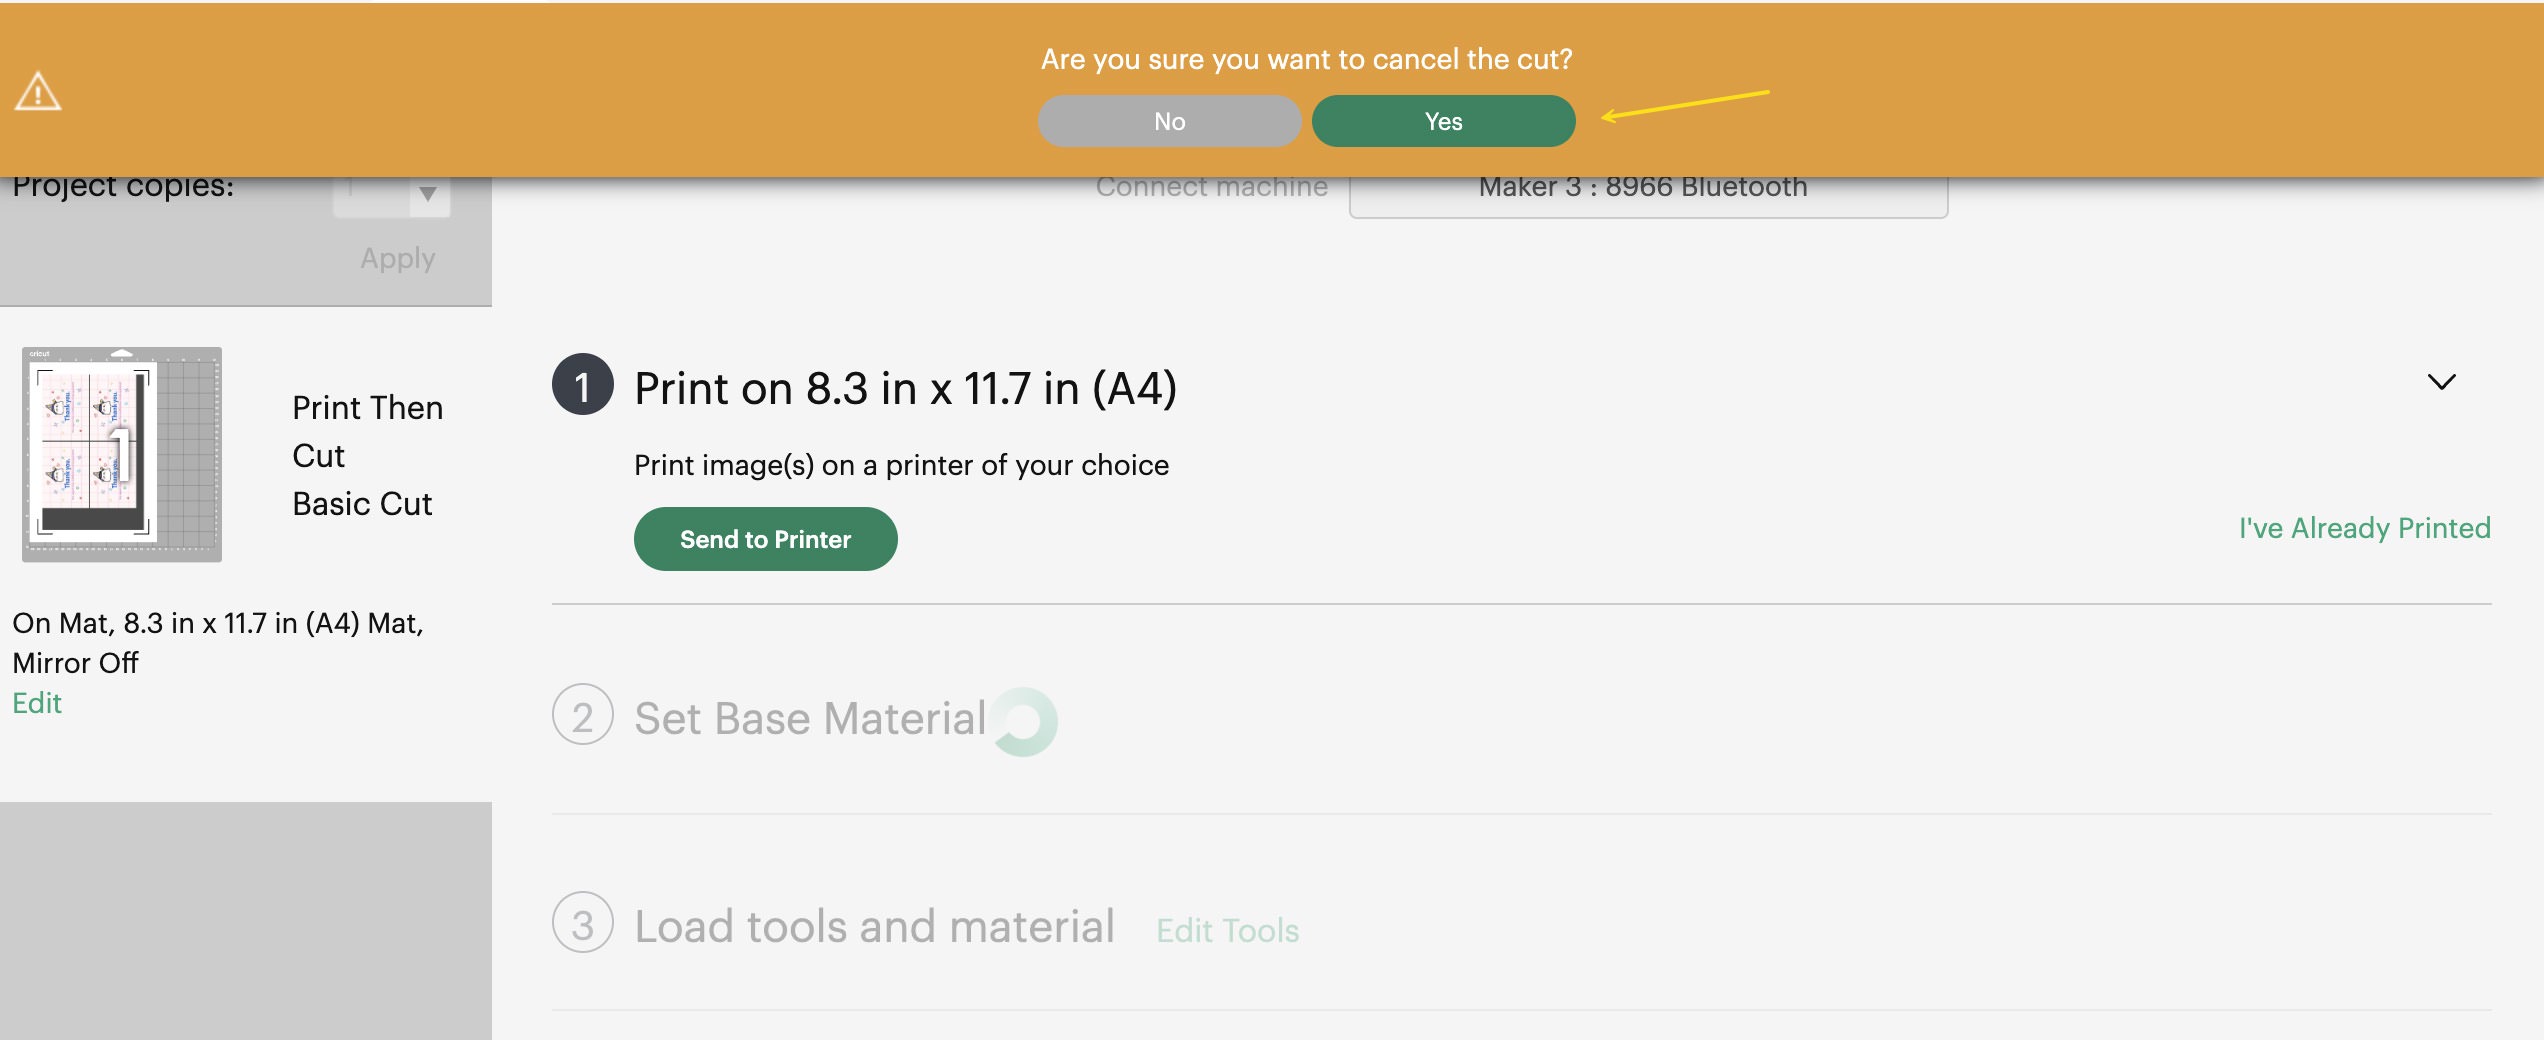
Once more in Cricut Design Space, hide the “Front” layer, make the “Once more” layer visible, and print the once more design.
Once printed, place it in your Cricut reducing mat with the once more design going via up. Then proceed to set the base subject matter and let Cricut do the reducing. You’ll have to in any case finally end up with utterly aligned front and back designs after reducing.
I hope this knowledge enhances your crafting experience. Satisfied crafting!
The put up Mastering Double-Sided Print and Lower with Cricut gave the impression first on Hongkiat.
Supply: https://www.hongkiat.com/blog/double-sided-print-and-cut-cricut/
Contents

0 Comments