
Have a website purchased from somewhere else besides WPMU DEV? It’s now easier than ever to transport them to our platform in The Hub with our house transfer-in serve as.
As you’ll see, it simplest takes 3 steps to in brief determine a website into a brand spanking new area at WPMU DEV – so that you’ll be capable to deal with the whole lot underneath one roof!
Plus, you’re in keep watch over in terms of nameservers, autorenewal, associating a website with a client, and additional.
In this article, we’ll take a look at:
- Triggering Area Transfers
- Step 1: Area Eligibility Test
- Step 2: Nameserver Settings
- Step 3: Switch Registration
- The Area Switch Procedure
After finding out this, you’ll straight away be able to put into effect transferring domains into one easy-to-manage device – affordably and effectively.
On the other hand first…
Previous than we get into the steps to transport a website, listed here are some not unusual tips to get you in very good shape:
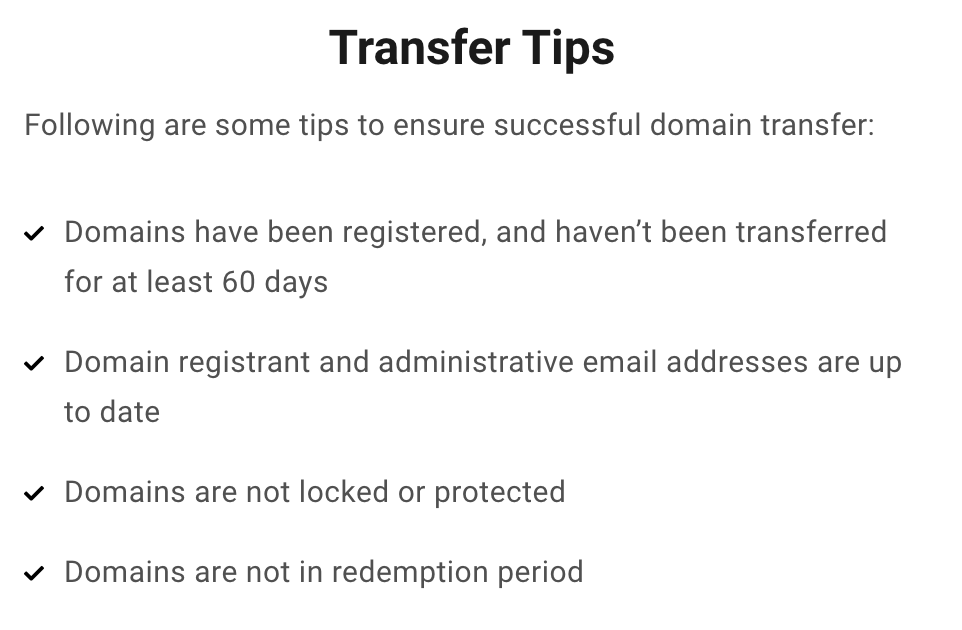
Now, must you’re ready — let’s get started!
Triggering Space Transfers
There are a selection of tactics to transport a website over. Whether or not or now not it’s an established house with us or you’re going to have a third-party house provider, it’s a breeze.
There are just a few diversifications…
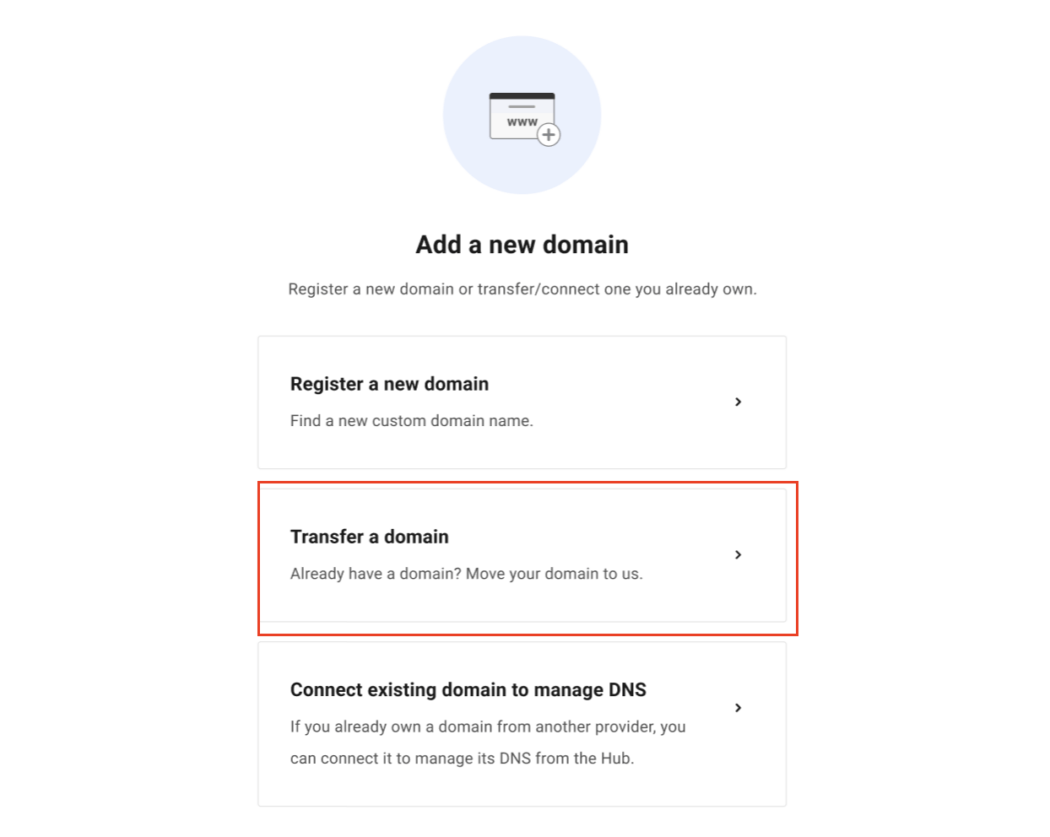
New Individual
For individuals who’re a brand spanking new shopper with no registered or attached domains, you’ll get started in The Hub by the use of clicking the Domains tab and Transfer a Space.
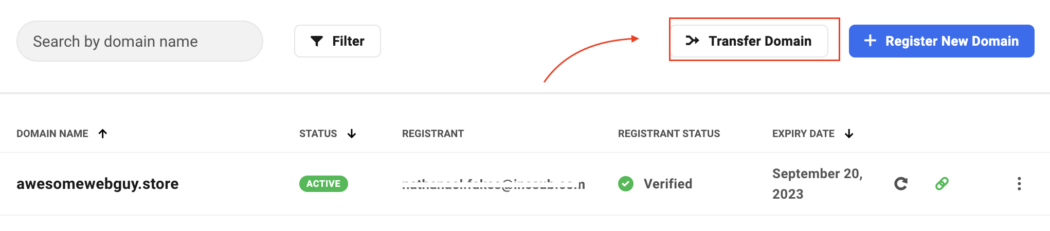
Already have domains registered or attached? Under Registered Domains, you’ll get began by the use of clicking Transfer Space.
Each and every different path is if in case you have attached any house(s), click on on on the ellipsis icon on any house’s row to show the available regulate possible choices for that house. From that, click on on on the Transfer Space to Us button.
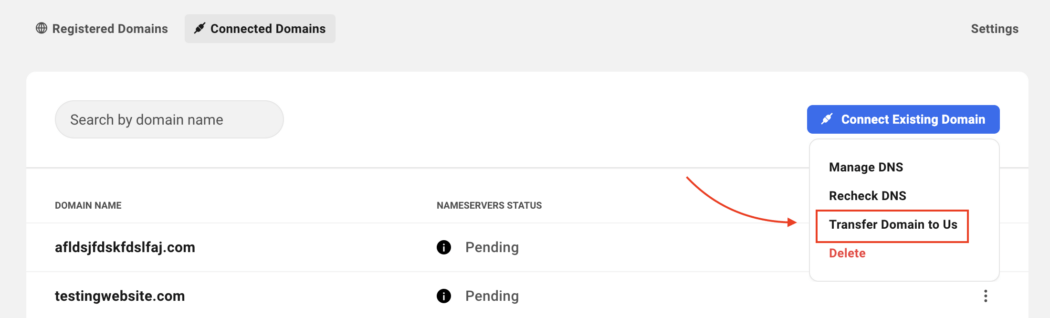
Additionally, you’ll be capable to click on on on any attached house’s row, which will open up Nameserver details for that specific house. Clicking the Transfer Space to Us button is in a different way to get the process going.
Regardless of risk you choose will lead to an area where you’ll be capable to get began the 3-step process.
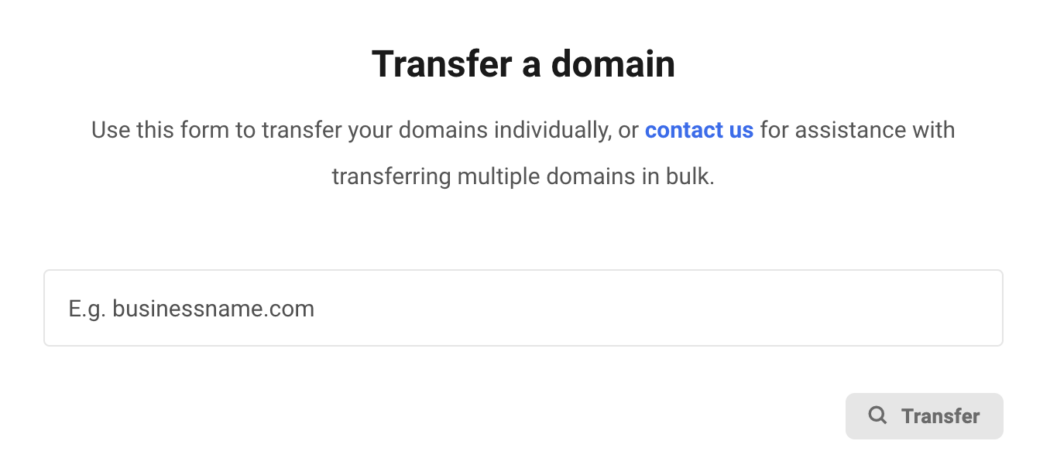
Step 1: Space Eligibility Take a look at
In this first step, we take a look at whether or not or now not the realm is transferable.
To start out, you’ll in particular enter the realm you want to transport. Enter it completely with its TLD (e.g. .com).
If a website is ineligible, you’ll get an error message. The messages will vary, depending on the issue.
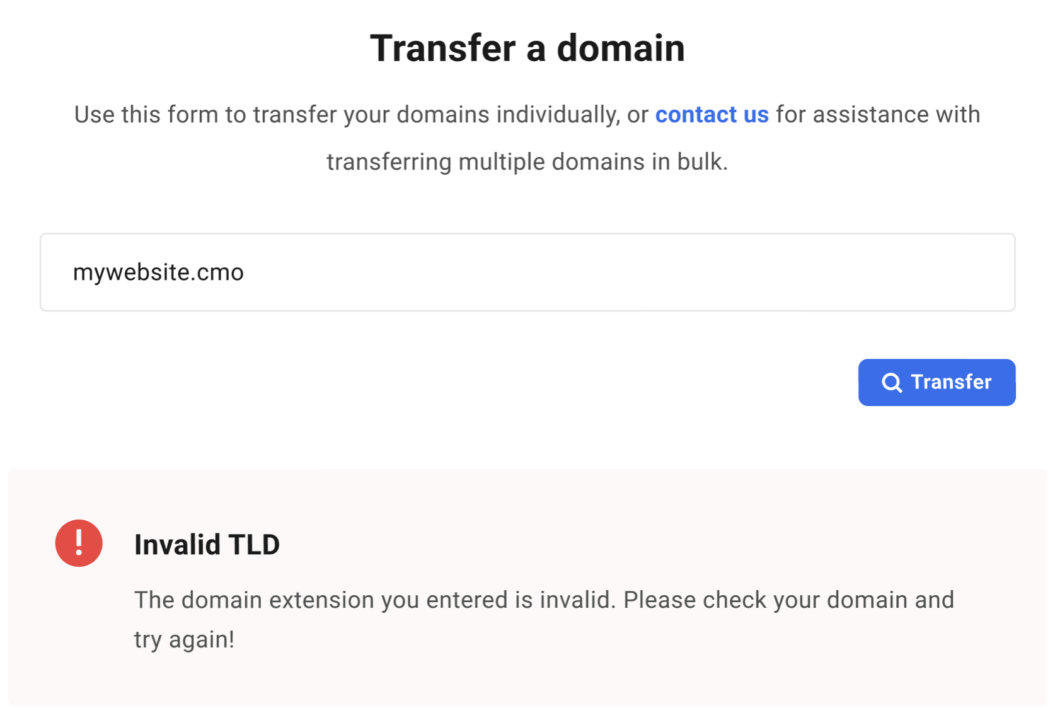
Just about any house TLD is okay to transport. We’ve were given over 260 TLDs which will also be available for use and transfers. For any questions or issues about this, please contact strengthen or see our documentation for regulations and causes a site doesn’t move.
That being discussed, if all is superb and the realm is eligible, on every occasion you hit Transfer, it’s going to take you to the nameserver step.
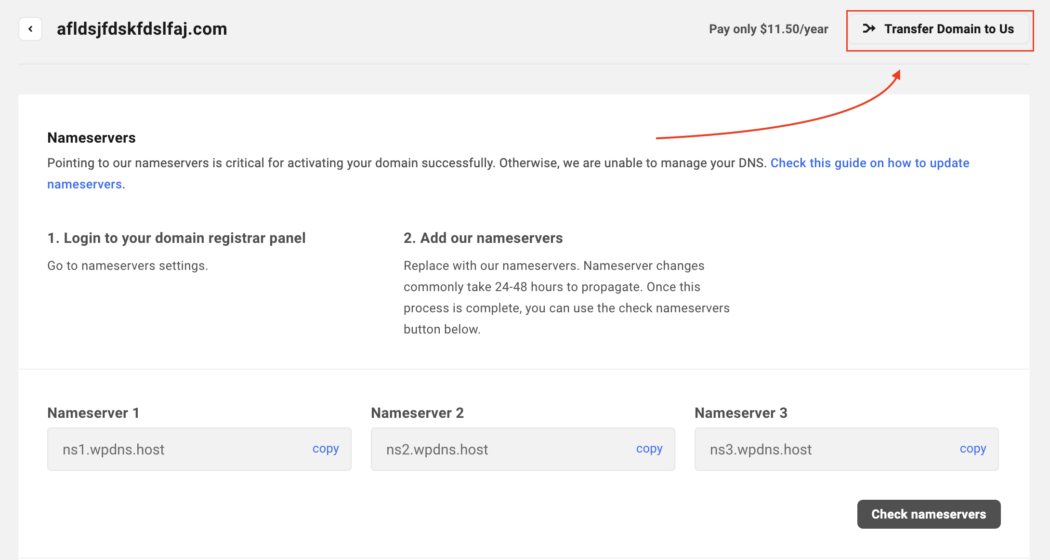
Step 2: Nameserver Settings
This step is where you’ll be in a position to choose to use our nameservers and DNS knowledge, or keep provide nameservers. If present DNS knowledge are available, they’re going to be confirmed proper right here. If no longer, it’s going to be blank and state that there are no knowledge to turn.
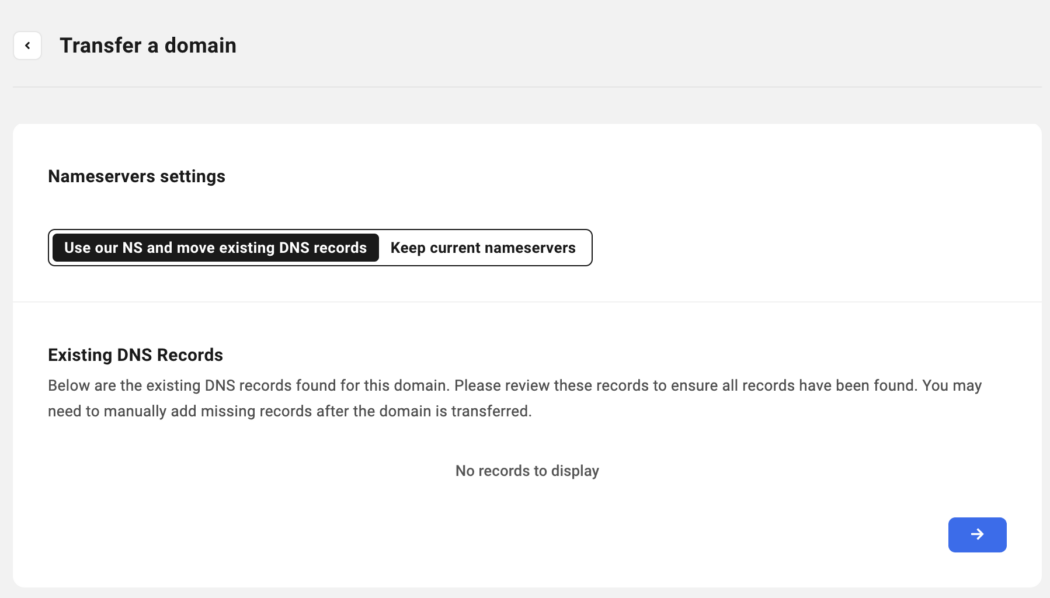
If you choose to Keep Provide Nameservers, it’s going to stick the prevailing nameserver knowledge for the realm.
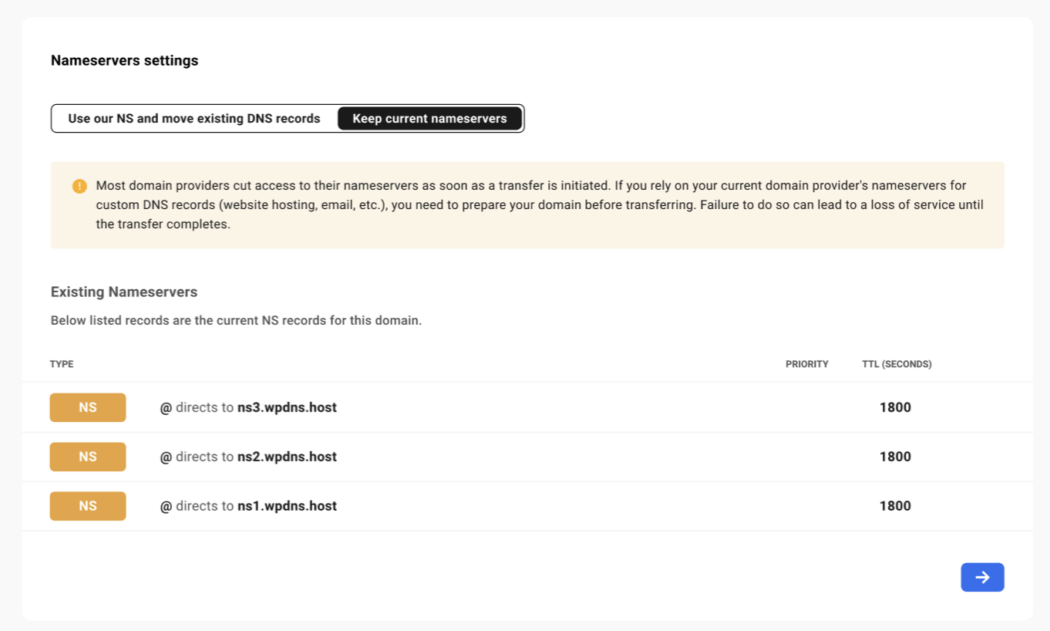
Once making a decision on what’s best for you, you’ll be capable to continue on…
And for be in agreement pointing a website to our nameservers, take a look at our whole information on how to do so.
Step 3: Transfer Registration
Registering a website is all completed in one house.
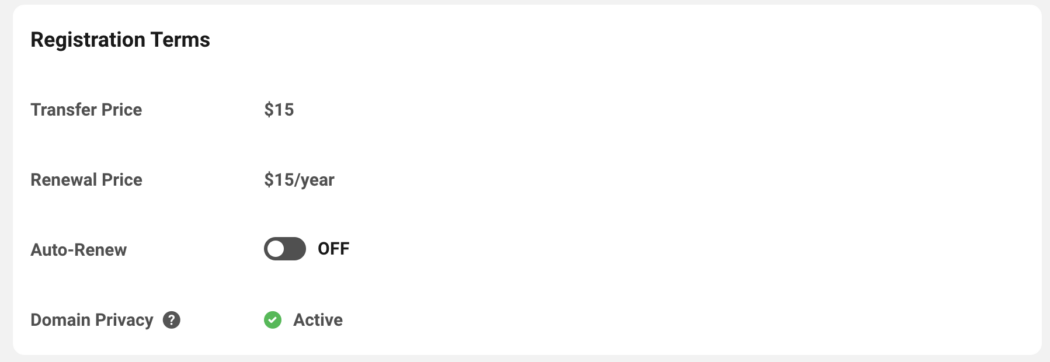
You’ll be capable to get began by the use of viewing the Registration Words. You’ll notice the transfer worth, renewal worth, auto-renew risk, and whether or not or now not house privacy is full of life or no longer.
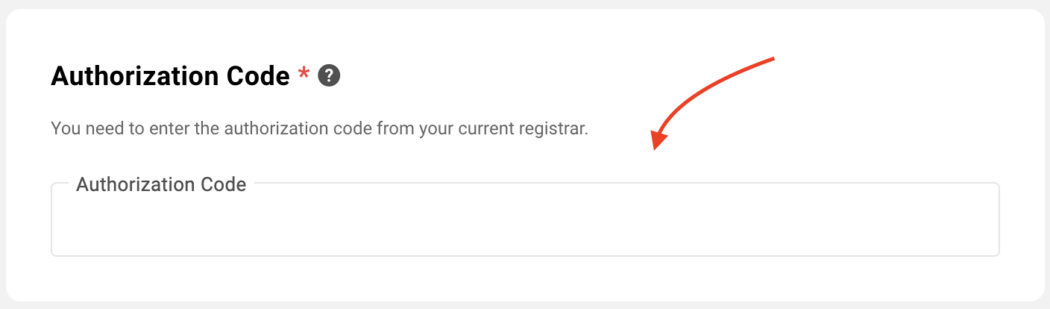
Next, the realm will need an Authorization Code from your provide registrar. This can be a common process that is not unusual amongst domains. You’ll get this from the dropping house check in you’re transferring from.
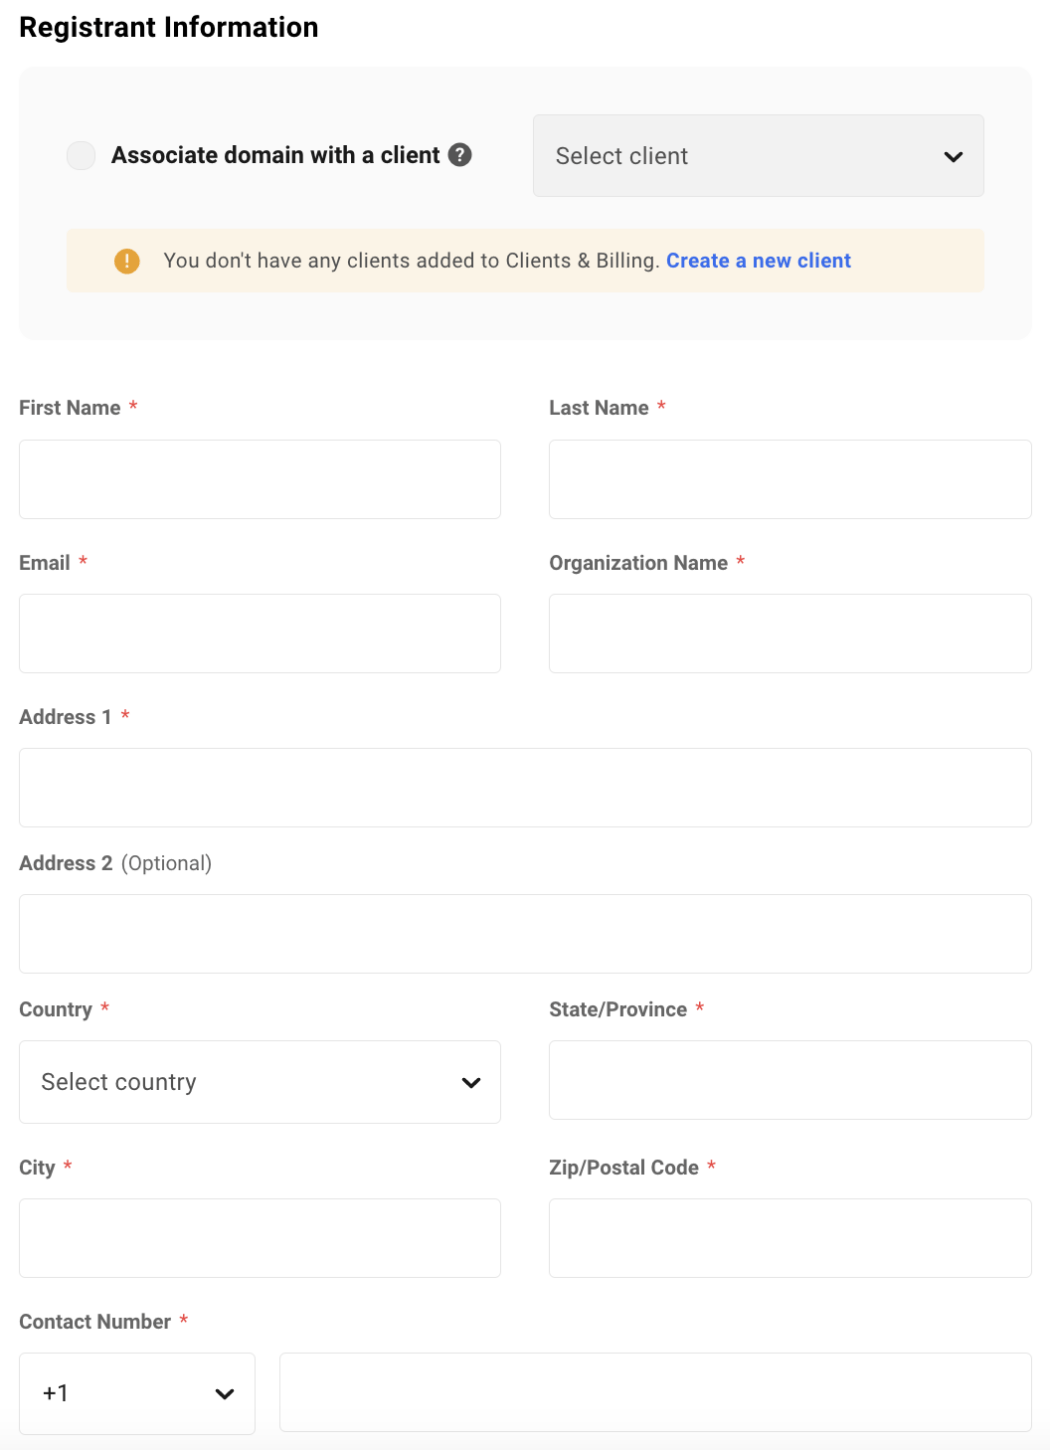
Additionally, you’ll moreover add the Registrant Information. You’ll be capable to associate the realm with a client or add personal details.
Then, checkout throughout the Summary. This has the Space Identify, Registration Period, and Value. Plus, it shows whether or not or now not Auto-Renew is activated or no longer.
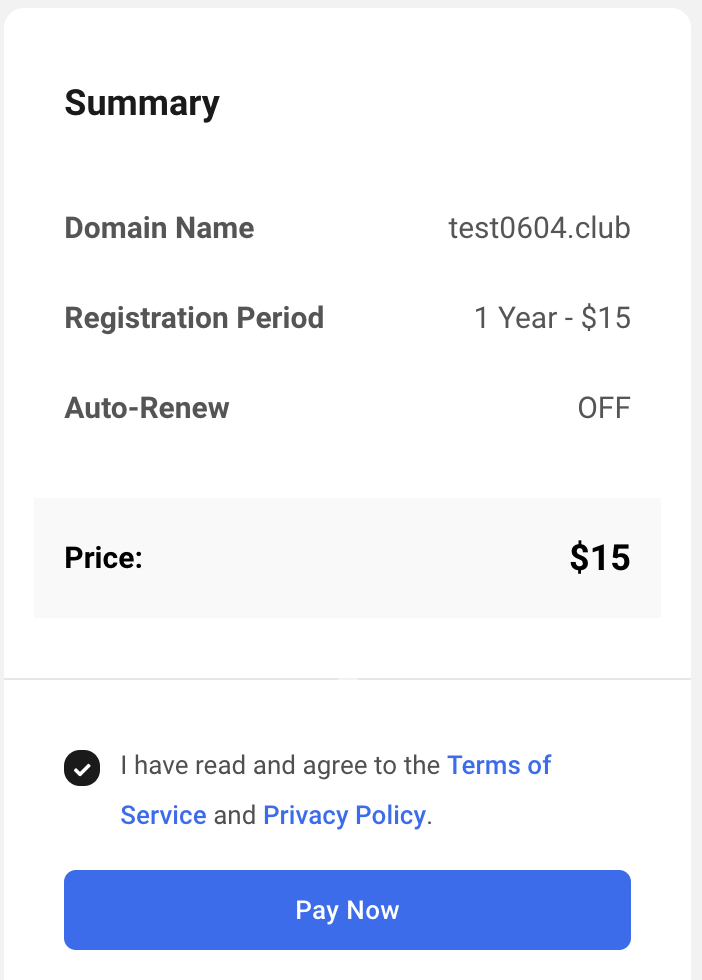
After hitting Pay Now, you’re all set!
By way of default, the Registration Period of the entire transfer-in domains is able to One year. Pay the transfer charge on our pricing web page to transport a website to WPMU DEV. Upon successful transfer, the realm’s expiration date may well be extended by the use of 300 and sixty 5 days.
It’s moreover necessary to note that if the Authorization code is invalid, the realm transfer will fail, and the transfer amount may well be refunded to your account.
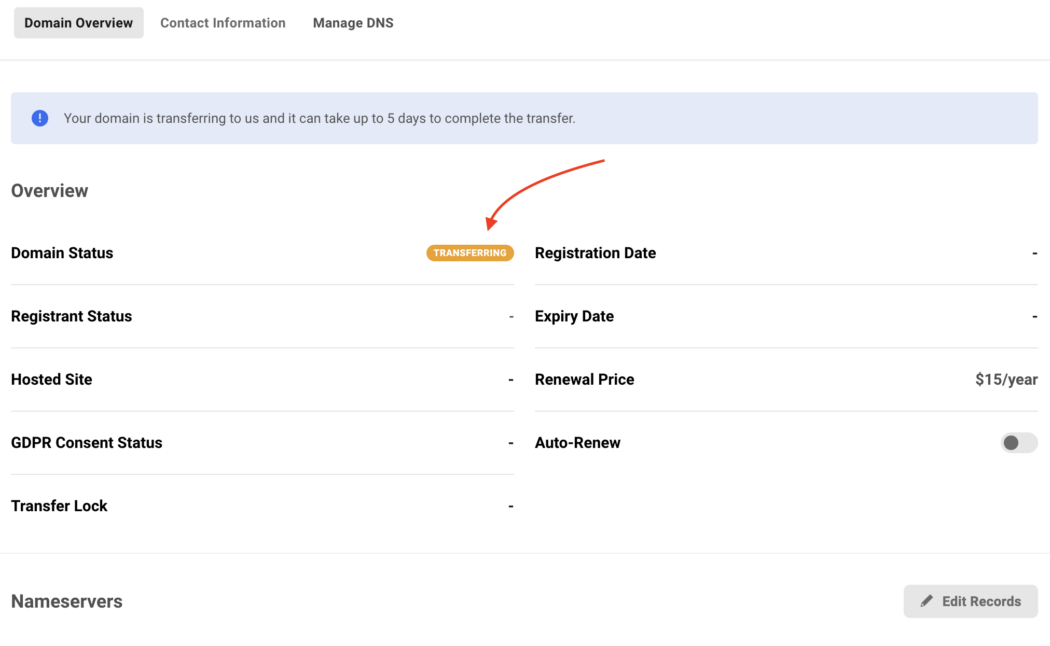
The Space Transfer Process
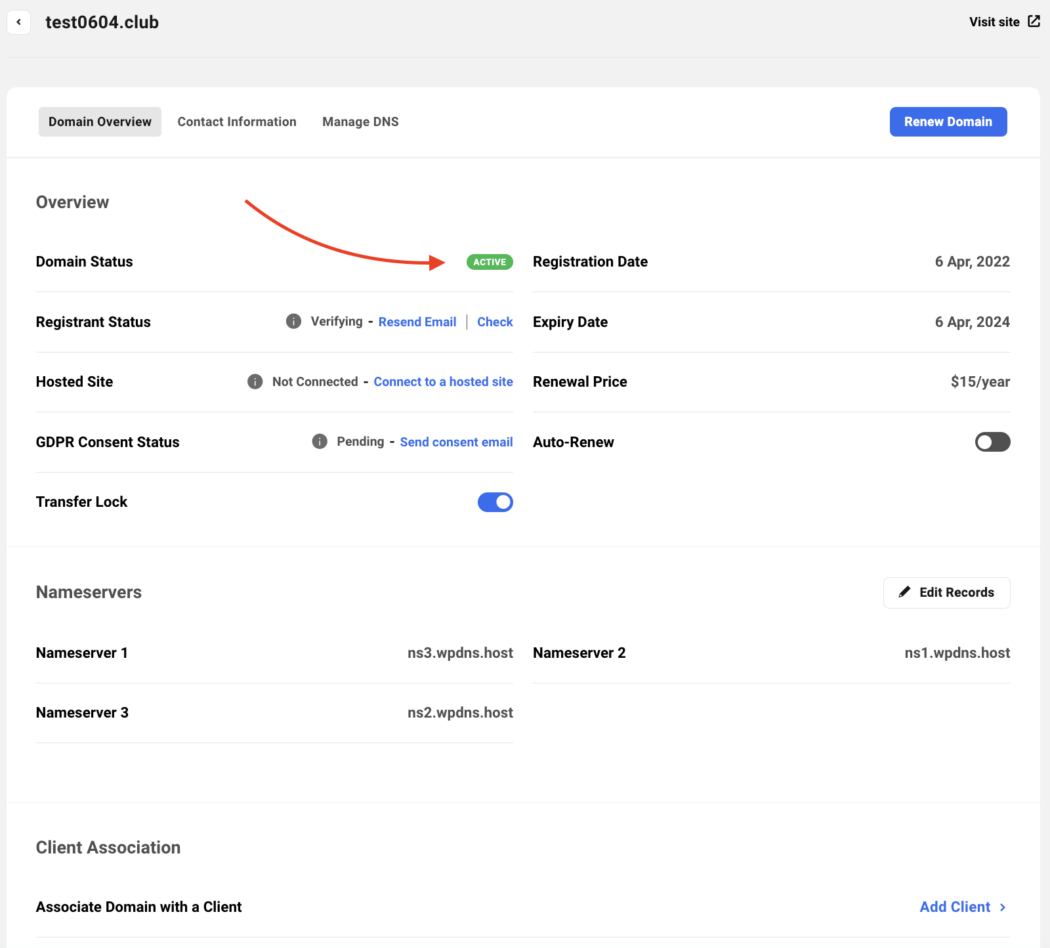
Once the new house transfer-in price is entire, the Space Registration process begins. You’ll be able to see the status underneath Space Review.
The device will take a look at 3 registrant contact data pieces: First Identify, Final Identify, and Electronic mail Deal with. For more information about registrant verification, please learn our documentation.
When entire, you’ll see that it’s Full of life OR Verifying. Moreover, additional information may well be displayed (e.g. Registration Date, Expiration date, Costs, and so forth).
Consider that the house transfer can take up to 5 days – and that’s out of our keep watch over. It’s decided via how in brief the verification can occur from the dropping check in (e.g. GoDaddy).
Once completed, your house will then be available throughout the Domains house in The Hub – at the side of any others you’re going to have.
Bulk Space Transfer
Final on the other hand no longer least, if you wish to do a Bulk Space Transfer, touch our 24/7/365 make stronger to be in agreement be in agreement with this. It’s the very best and quickest solution to get any bulk domains transferred over to our device.
The Primary Way to Prepare Your Space
As you’ll be capable to see, bringing in domains from third-party providers is rapid and easy, with simplest 3 steps. And once completed, you’ll be capable to deal with all your domains in one place with The Hub!
Together with domains to a client’s web page, setting up auto-renewal, connecting nameservers – the process couldn’t be further streamlined. So, take a look at bringing a brand spanking new house in at the moment. Superb luck, and experience!
Oh, and must you’re no longer on our Company Plan however, give it a move. Not simplest do you get house regulate like bringing in third-party domains, you’ll also have get right to use to endless web page licences, 500GB CDN, $144 web page webhosting credit score, and additional.
Contents
- 1 Triggering Space Transfers
- 2 Step 1: Space Eligibility Take a look at
- 3 Step 2: Nameserver Settings
- 4 Step 3: Transfer Registration
- 5 The Space Transfer Process
- 6 The Primary Way to Prepare Your Space
- 7 How you can Write a Tough Govt Abstract [+4 Top Examples]
- 8 30 Unfastened Sans Serif Fonts to Obtain
- 9 Highest WordPress Internet hosting Suppliers For Small Companies: Release Your Trade…

0 Comments