
Do you want to take a trip trade website in WordPress?
A adventure trade website lets you advertise your tour packages, take bookings immediately, and keep up a correspondence along side your shoppers. This may increasingly will can help you reach additional consumers, generate additional leads and product sales, and even fortify buyer enhance.
In this article, we will be able to show you find out how to take a trip trade website in WordPress, step by step.
Which Is the Very best Website Builder to Make a Move backward and forward Trade Web page?
In our an expert opinion, WordPress is the easiest web site builder to take a trip trade website. It’s used by over 43% of the websites on the web and is super unswerving, secure, easy to use, and scalable.
WordPress is used by many more than a few types of corporations to advertise their services or products, and also you’ll have the ability to merely organize a adventure company the use of a adventure booking plugin.
Alternatively, you should know that there are two types of WordPress to be had in the marketplace.
WordPress.com is a blog web web hosting platform, whilst WordPress.org is an open-source, self-hosted software. For additonal detailed knowledge, you could wish to see our comparability between WordPress.com and WordPress.org.
For a adventure company, we recommend the use of WordPress.org because of it’s completely free, will give you whole keep an eye on over your internet website online, and can merely mix with any third-party adventure plugins.
For additonal details, you could wish to see our whole WordPress evaluate.
That being said, let’s see find out how to merely take a trip trade website in WordPress, step by step. Right here’s a quick evaluation of the steps we will be able to cover:
- Step 1: Make a selection a Area Title and Internet hosting Plan
- Step 2: Create a New WordPress Site
- Step 3: Make a selection a Theme for Your Go back and forth Industry
- Step 4: Create a House Web page and Navigation Menu
- Step 5: Create Symbol Galleries for Your Go back and forth Industry
- Step 6: Set up and Set Up the WP Go back and forth Engine Plugin
- Step 7: Create a Go back and forth Bundle for Your Industry
- Step 8: Upload a Touch Shape to Your Go back and forth Industry Website
- Step 9: Upload Buyer Opinions on Your Site
- Step 10: Use AIOSEO to Strengthen Seek Engine Scores
- Bonus Gear to Spice up Conversions on Your Go back and forth Industry Website
Step 1: Select a House Identify and Web web hosting Plan
To create a WordPress website, you’ll first wish to get a web page name and web web web hosting.
A area title is the name of your internet website online on the web. That’s what consumers should type to speak about along with your website, like www.tourism.com or www.traveladventures.com.
Web web web hosting is where your internet website online lives on the web. To choose the very best web web hosting plan to your adventure trade, you could wish to see our list of the easiest WordPress internet hosting products and services.
You’ll remember that even if WordPress.org is free, the realm name and web web web hosting are where your costs will add up. The typical price for a web page name is $14.99/three hundred and sixty five days, while web web hosting costs get began from $7.99/month.
This is a bit dear if you happen to’re merely starting out and have a shoestring budget.
Thankfully, Bluehost is offering a HUGE discount to WPBeginner readers along with a free space name and an SSL certificates.
Bluehost is a WordPress-recommended web web hosting provider and one of the best throughout the trade.
To get a discount on Bluehost, merely click on on on the button beneath.
This may increasingly take you to the Bluehost web site, where you wish to have to click on at the ‘Get Started Now’ button.
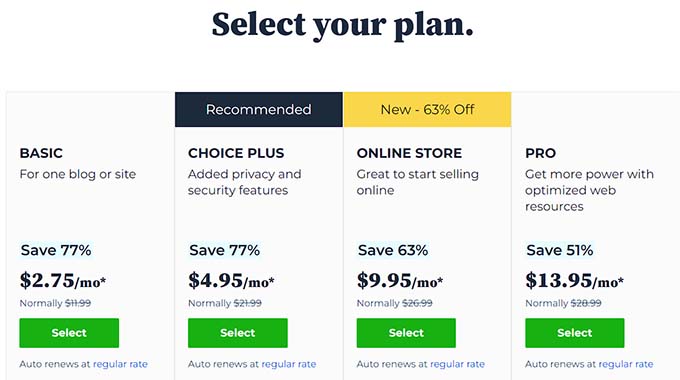
You’ll now be taken to the Bluehost Pricing internet web page, where you’ll be in a position to choose a web web hosting plan in keeping with your adventure trade website needs.
We recommend opting for the Fundamental or Variety Plus plan, as they’re the preferred web web web hosting plans among our readers.
Upon making your variety, simply click on at the ‘Select’ button underneath a plan.
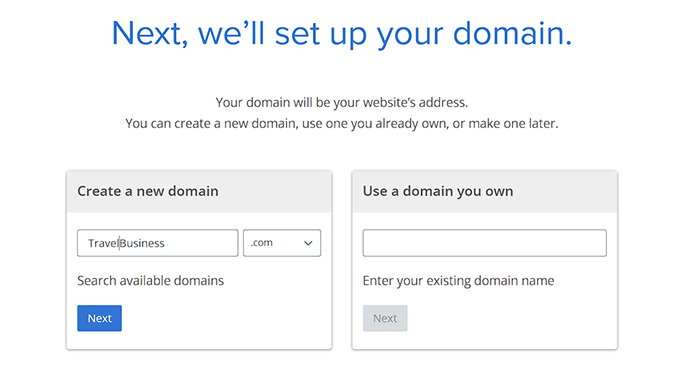
This may increasingly direct you to a brand spanking new internet web page where you wish to have to pick a web page name to your adventure trade website.
We recommend choosing a name related to what you are promoting that is easy to pronounce, spell, and take into account.
The very best chance will also be to choose the name of your provide adventure trade. Alternatively, keep in mind that this space name may already be taken by means of some other internet website online.
If this is the case, you’ll be in a position to take a look at together with some additional keywords or use your location to make your space name stand out. For additonal ideas, you could wish to see our amateur’s knowledge on how to make a choice the most productive area title.
For those who’re merely starting your adventure trade and should not have a name for it however, then you definitely’ll have the ability to moreover take a look at WPBeginner’s Unfastened Industry Title Generator to come up with a fascinating name to your company.
After choosing a name, merely click on on on the ‘Next’ button to continue.
This may increasingly take you to your next step, where you’ll be asked to supply your account knowledge, industry e-mail cope with, name, country, phone amount, and further.
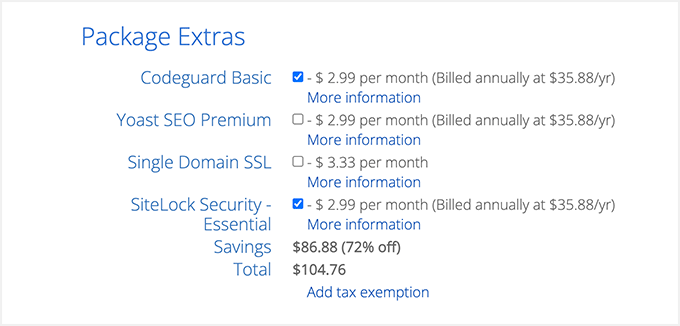
Upon getting provided those details, you’ll moreover see optional extras that you simply’ll have the ability to acquire.
We most often don’t counsel buying the ones extras instantly, as you’ll have the ability to always add them later if what you are promoting needs them.
After that, type for your value knowledge to complete the purchase.
Upon getting carried out that, you’ll download a confirmation electronic mail with details to log in to your Bluehost dashboard. This will also be your keep an eye on panel where you’ll organize your adventure trade website.
Now, it’s time so as to arrange WordPress.
Step 2: Create a New WordPress Website
Will have to you signed up for Bluehost the use of our hyperlink above, then Bluehost will robotically arrange WordPress to your space name for you.
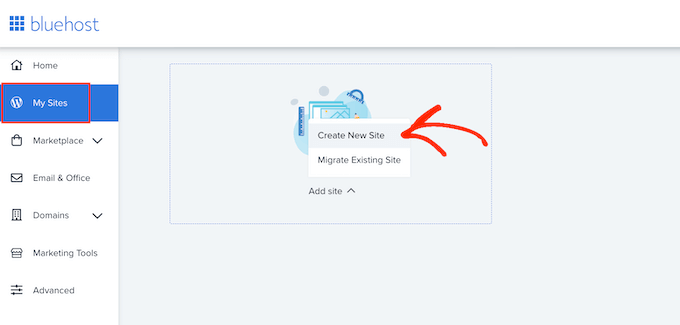
Alternatively, if you want to create a definite WordPress website to your adventure trade, then you definitely’ll have the ability to do that by means of clicking on the ‘My Internet sites’ tab throughout the Bluehost dashboard.
Upon getting carried out that, click on at the ‘Add Web page’ button and select the ‘Create New Web page’ chance.
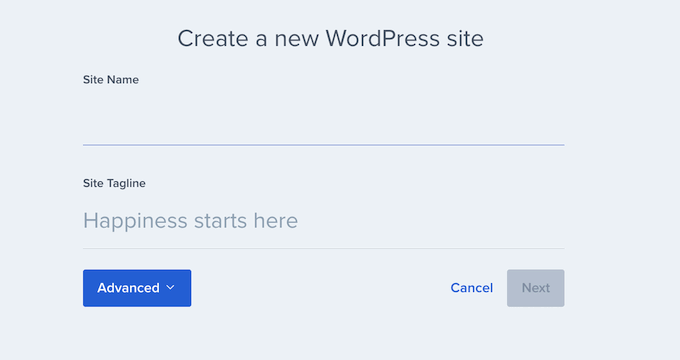
This may increasingly open the Bluehost wizard on the visual display unit, which is in a position to walk you via all of the setup process.
You’ll have the ability to get began by means of together with a reputation and an optional tagline to your internet website online. After that, merely click on at the ‘Next’ button to continue.
You’ll now be asked to choose a web page name and path to your adventure trade. If you already have a web page name, then you definitely’ll be in a position to choose it from the dropdown menu underneath the ‘House’ chance.
Alternatively, must you nevertheless haven’t purchased the realm, then you definitely’ll have the ability to do that by means of visiting the ‘Domains’ internet web page on the Bluehost dashboard.
Upon getting decided on a web page, leave the list path blank and let Bluehost fill it in for you.
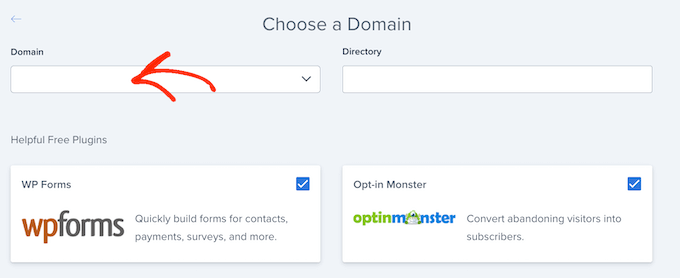
Now, the setup wizard will show you a list of optional WordPress plugins that you could wish to arrange to your internet website online, like WPForms and OptinMonster.
All these apparatus are must-have WordPress plugins that will help you fortify your normal website prime quality. To place in any of the ones plugins, merely check out the sphere next to its name.
After that, click on at the ‘Next’ button once over again to prepare your adventure trade website.
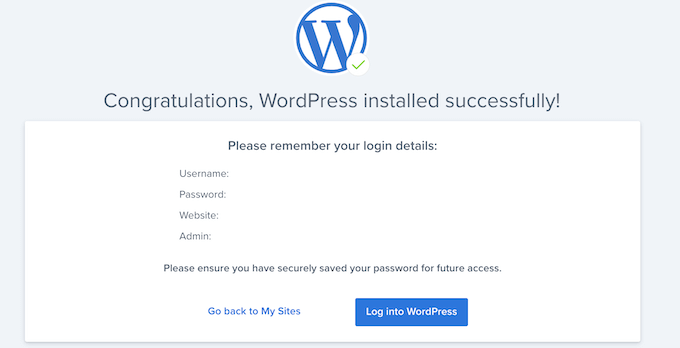
You’ll now see a ‘WordPress installed successfully’ message with information about your new internet website online on the visual display unit. From proper right here, click on at the ‘Log into WordPress’ button to get entry to your admin dashboard.
If you want to have, you’ll have the ability to moreover log in to your WordPress dashboard by means of going to yoursite.com/wp-admin/ for your web browser.
Practice: In case you have made up our minds on different web web web hosting to your adventure trade website, like WP Engine, HostGator, SiteGround, or Hostinger, then you could wish to see our entire knowledge on methods to set up WordPress for instructions.
Step 3: Select a Theme for Your Move backward and forward Trade
WordPress problems are professionally designed templates that keep an eye on how your internet website online seems on the front end.
Upon visiting your newly installed WordPress website, you’ll remember that it at the moment has the default theme activated, which is in a position to seem to be this:
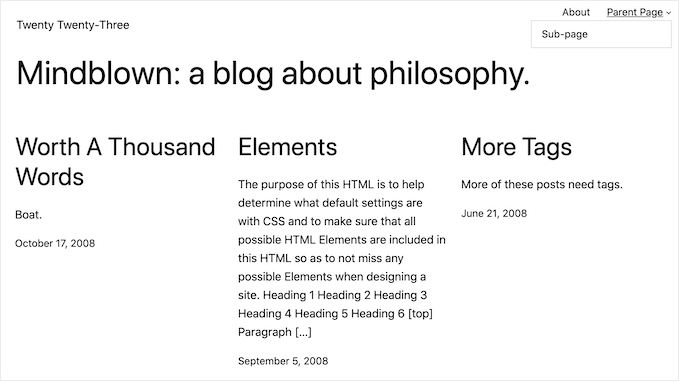
If you want to make your adventure trade successful, get additional leads, and impress your consumers, then you definitely definately should exchange the default theme with one that matches your space of pastime.
You’ll have the ability to arrange any of the widespread WordPress issues to your website and then customize them in keeping with your liking.
You’ll have the ability to moreover use problems that were specifically designed with the traveling space of pastime in ideas. For details, you could wish to see our list of the easiest WordPress issues for journey blogs.
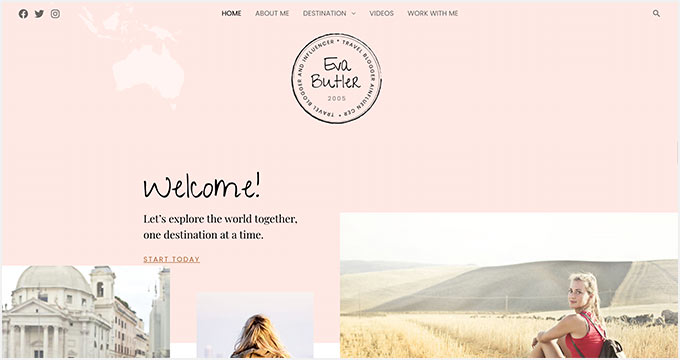
Alternatively, if you want to merely customize your adventure trade website in only a few clicks, then we recommend the use of SeedProd.
It’s the easiest WordPress web page builder to be had in the marketplace that lets you create landing pages or perhaps a whole theme without the use of any code.
It moreover comes with travel-related templates and sophisticated blocks that may assist you to organize your adventure trade website in only a few minutes.
First, you need to position in and switch at the SeedProd plugin. For detailed instructions, see our step-by-step knowledge on methods to set up a WordPress plugin.
Upon activation, consult with the SeedProd » Theme Builder internet web page from the WordPress dashboard and click on on on the ‘Theme Template Kits’ button.
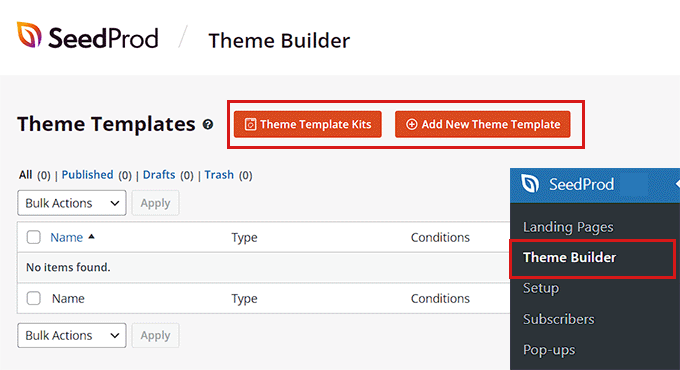
This may increasingly take you to a brand spanking new visual display unit where you’ll see a list of premade templates that you simply’ll have the ability to use to your internet website online.
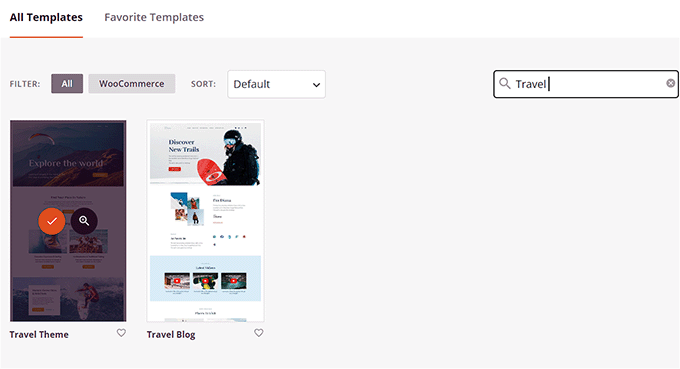
Whilst you to find the ‘Move backward and forward Theme’ or ‘Move backward and forward Blog’ template, click on on on it to free up it throughout the drag-and-drop builder.
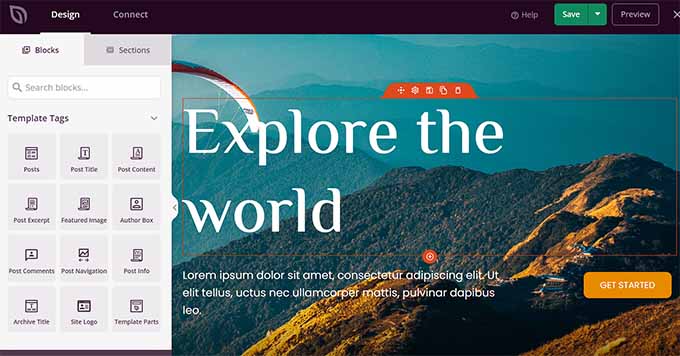
SeedProd will now create the entire internet web page templates that you’re going to need to your adventure trade and free up the home internet web page throughout the internet web page builder.
Proper right here, you’ll have the ability to drag and drop any block from the left column into the internet web page preview. For detailed instructions, see our amateur’s knowledge on methods to create a customized theme in WordPress.
Once you’re carried out, don’t forget to click on at the ‘Save’ button at the top.
If you want to use each different travel-specific theme to your internet website online, then you could wish to see our educational on methods to set up a WordPress theme.
Upon getting activated your theme, merely consult with the Glance » Customize internet web page from the WordPress admin sidebar. Proper right here, you’ll have the ability to trade the theme’s glance throughout the customizer.
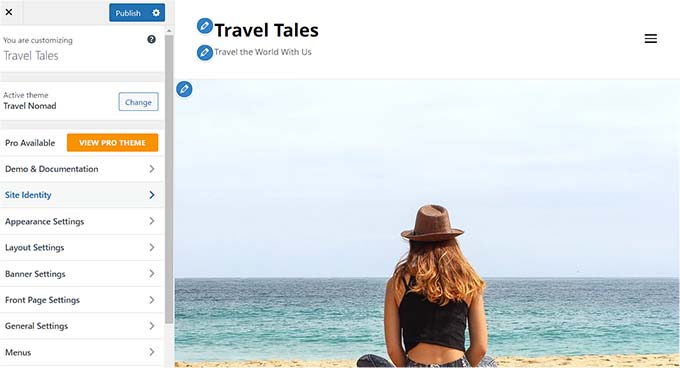
For those who’re the use of a block-based theme, then you definitely’ll have to speak about with the Glance » Editor internet web page from the WordPress dashboard.
This may increasingly open all of the website editor, where you’ll have the ability to drag and drop the blocks from the left column to customize your adventure trade website.
Once you’re carried out, don’t forget to click on at the ‘Save’ button to store your settings.
WordPress makes use of 2 content material subject material varieties by means of default, which could be posts and pages.
Pages can be used for space internet web page, a Contact Us internet web page, or an About Us internet web page. Then again, posts are used to create articles and weblog posts to your internet website online.
The ones posts are then displayed in reverse chronological order to your internet website online’s space internet web page.
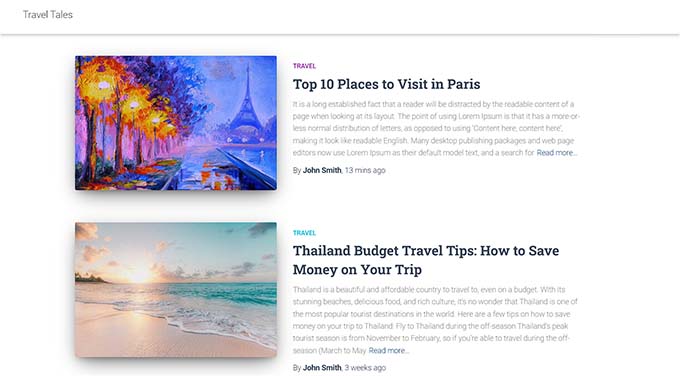
To further promote it your adventure trade, this is a good thought to start out out a adventure blog to your internet website online. This may increasingly be in agreement fortify your search engine rankings and reach additional consumers.
For detailed instructions, you’ll have the ability to see our amateur’s knowledge on methods to get started a journey weblog in WordPress.
Alternatively, even if you plan to put in writing blog posts, we recommend growing a definite internet web page to your articles and no longer appearing them on the space internet web page.
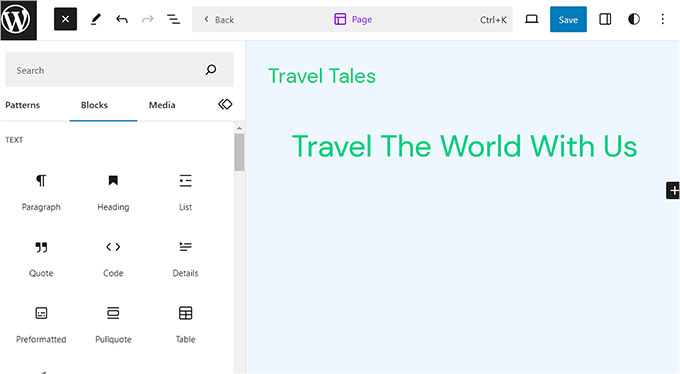
Instead, you’ll have the ability to design a custom designed space internet web page to your internet website online that represents your adventure trade in a visually delightful manner.
For details, see our educational on methods to create a customized house web page in WordPress.
Upon getting finished designing your homepage, you need to speak about with the Settings » Learning internet web page for your WordPress dashboard and select the ‘A static internet web page’ chance throughout the ‘Your homepage shows’ phase.
Next, open the ‘Homepage’ dropdown and select the internet web page you want to use.
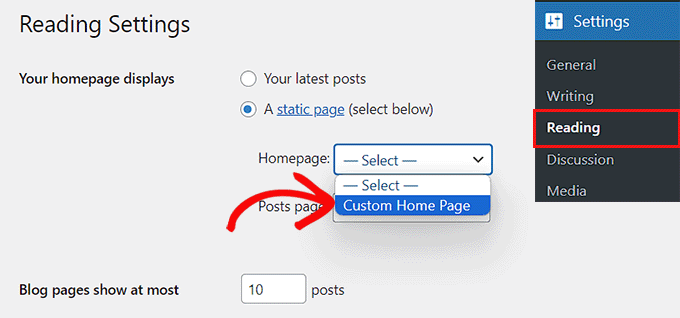
If you want to create a separate internet web page for adventure working a weblog, then you definitely’ll have the ability to see our educational on methods to create a separate weblog web page. In spite of everything, click on at the ‘Save Changes’ button to store your settings.
Upon together with different posts and pages to your adventure trade website, you’ll moreover wish to add a navigation menu at the top.
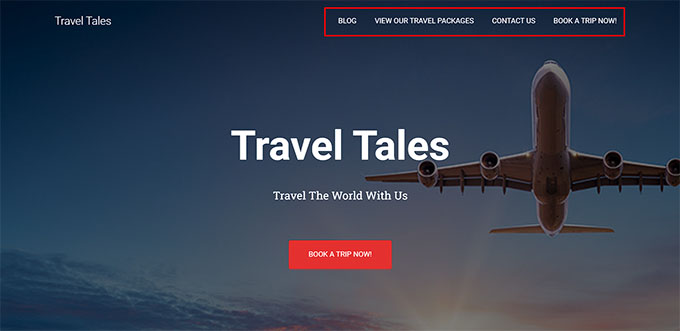
This navigation menu will show an organized building of your website and be in agreement your visitors navigate via it.
To create a navigation menu to your WordPress website, please see our step-by-step knowledge on methods to upload a navigation menu in WordPress.
Step 5: Create Image Galleries for Your Move backward and forward Trade
Showing image galleries is extremely necessary for adventure trade web sites.
This is because the ones galleries can show prime quality photos of stunning environment, exciting movements, and at ease accommodation that can be in agreement inspire potential travelers and convince them to e book a journey with you.
Plus, the ones image galleries can also be used to promote it explicit adventure packages, tell a story about your adventure adventure company, increase logo awareness, and much more.
To create image galleries in WordPress, we recommend the use of Envira Gallery. It’s the easiest WordPress gallery plugin to be had in the marketplace that contains excellent choices like lightboxes, tags, watermarks, and further.
First, you need to position in and switch at the Envira Gallery plugin. For detailed instructions, see our amateur’s knowledge on methods to set up a WordPress plugin.
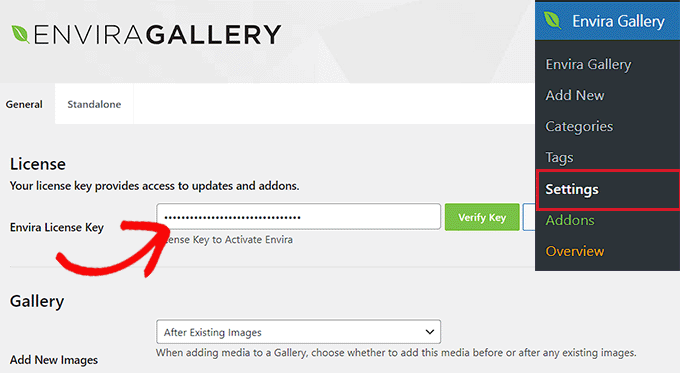
Upon activation, consult with the Envira Gallery » Settings internet web page and enter your license key. You’ll have the ability to to find this information throughout the Envira Gallery account space.
Next, head to the Envira Gallery » Add New internet web page from the WordPress dashboard. Proper right here, click on at the ‘Select Knowledge from Your Laptop’ button so as to add photos from the computer.
If you want to add photos from the media library, then click on at the ‘Select Knowledge from Other Sources’ button.

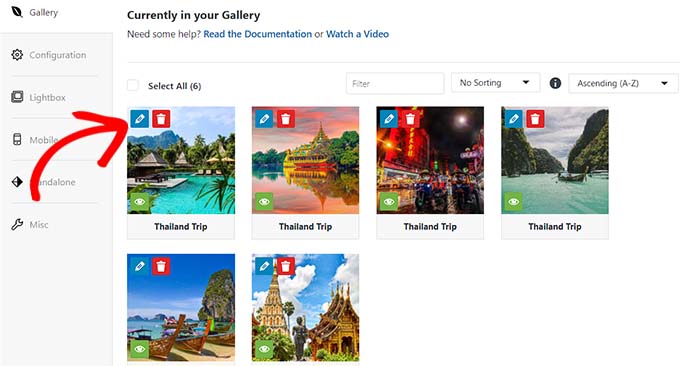
Upon getting uploaded the images to your adventure package deal, scroll the entire approach all the way down to the ‘In this day and age in Your Gallery’ phase.
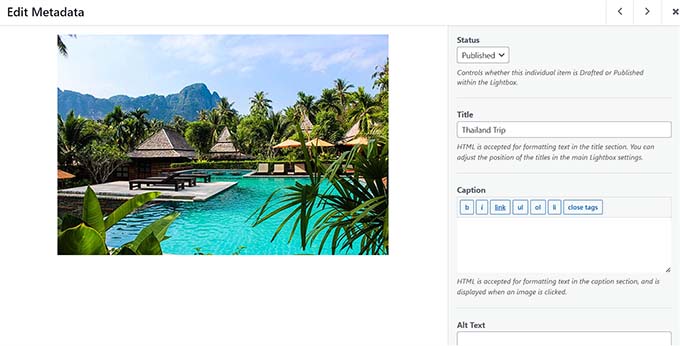
Proper right here, click on at the pencil icon on top of each image to open the ‘Edit Metadata’ instructed.
Once that instructed turns out on the visual display unit, you’ll have the ability to add titles, descriptions, tags, and alt text to your photos.
Next, click on at the ‘Save Metadata’ button to store your settings.
After that, you’ll have the ability to further configure other gallery settings in keeping with your liking. For detailed instructions, you could wish to see our amateur’s knowledge on methods to create a picture gallery in WordPress.
In spite of everything, click on at the ‘Submit’ button at the top to store your settings.
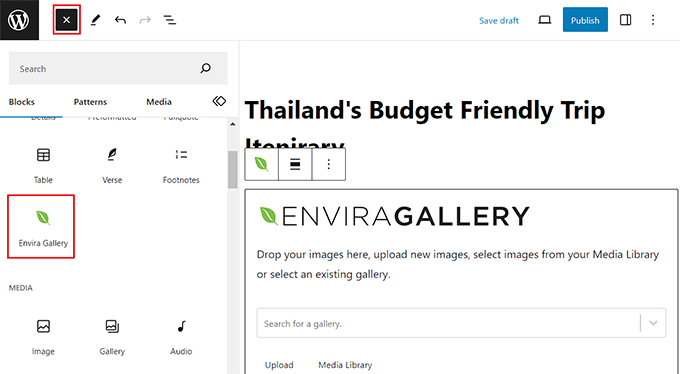
Now, consult with the WordPress internet web page/publish where you want in an effort to upload the image gallery for the adventure package deal.
Proper right here, you need to click on at the ‘Add Block’ (+) button inside essentially the most good left corner of the visual display unit to open the block menu. Next, add the Envira Gallery block to the internet web page/publish.
After that, merely select the image gallery that you just created for the adventure package deal from the dropdown menu all through the block.
In spite of everything, go ahead and click on at the ‘Submit’ or ‘Exchange’ button to store your settings.
You’ll have the ability to now go ahead and add a few image galleries to show your adventure packages, different places, and much more to your WordPress adventure trade website.
Step 6: Arrange and Set Up the WP Move backward and forward Engine Plugin
By way of default, WordPress does no longer come with any built-in capacity for adventure corporations. On account of this you’ll wish to use a third-party plugin like WP Go back and forth Engine to prepare trips and bookings to your website.
WP Move backward and forward Engine is a popular free WordPress plugin that lets you create an SEO-friendly adventure booking website in minutes.
Practice: There is also a top class model of WP Go back and forth Engine. This plugin will provide you with get entry to to an advanced itinerary builder, upsell choices, and further. Alternatively, we will be able to be the use of the free plugin for this tutorial.
First, you need to position in and switch at the WP Go back and forth Engine plugin. For detailed instructions, see our amateur’s knowledge on methods to set up a WordPress plugin.
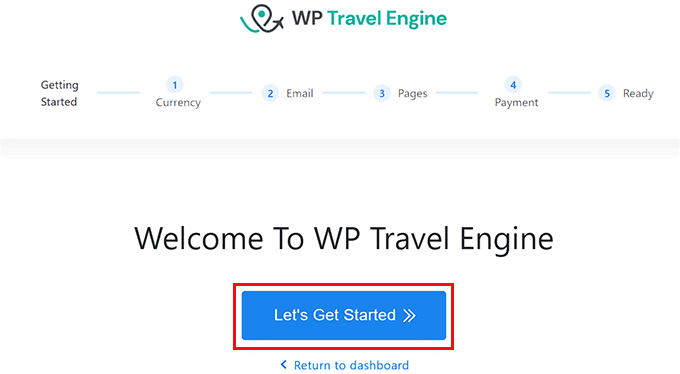
Upon activation, the plugin will free up a setup wizard to your visual display unit where you wish to have to click on at the ‘Let’s Get Started’ button.
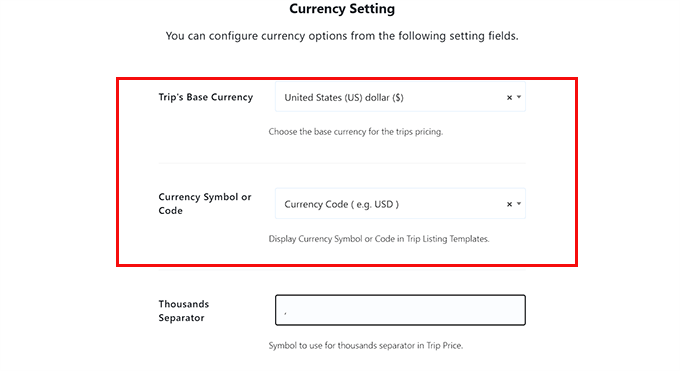
You’ll now be taken to the ‘International cash Atmosphere’ step, where you’ve to choose your internet website online’s base forex, its symbol, and 1000 separator.
After that, click on at the ‘Continue’ button to move on.
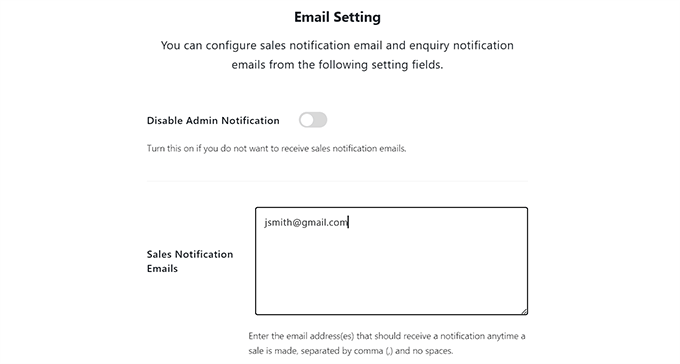
In your next step, you need to configure the email settings. Proper right here, type the email take care of where you want to acquire notifications when an individual books a journey next to the ‘Product sales Notification Emails’ chance.
Will have to you don’t wish to download any notifications, simply toggle the switch at the top.
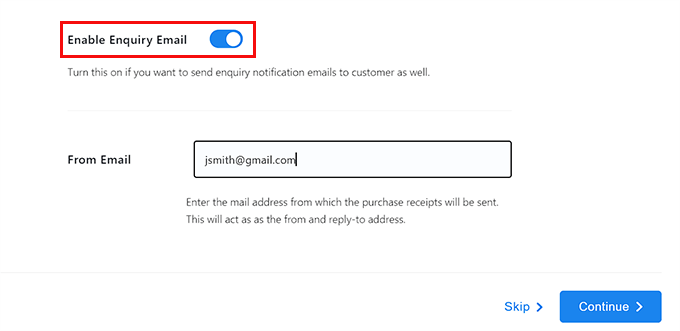
After that, toggle the ‘Allow Enquiry Piece of email’ chance if you want to have so as to send emails to consumers who e book a journey the use of your internet website online.
Next, type the email take care of that can be utilized to send emails to consumers next to the ‘From Piece of email’ chance and click on at the ‘Continue’ button.
Professional Tip: Emails sent immediately from WordPress can from time to time in spite of everything finally end up throughout the junk mail folder. That’s why we recommend the use of a provider like WP Mail SMTP to fortify electronic mail deliverability. For additonal details, you’ll have the ability to see our knowledge on methods to repair the WordPress now not sending emails factor.
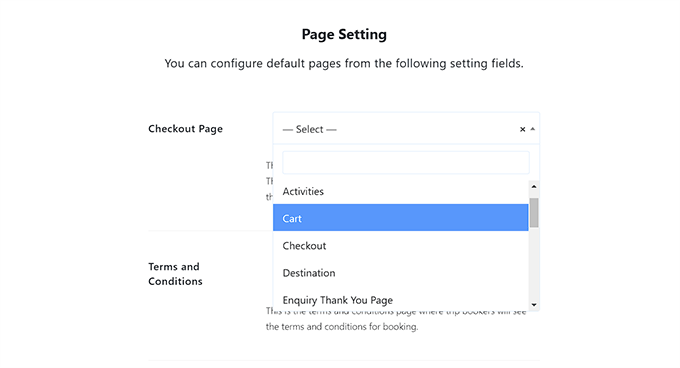
You’ll now be taken to the ‘Internet web page Settings’ step, where you’ve to choose different pages for the checkout, words and necessities, booking confirmation, and other pages.
Proper right here, you’ll be in a position to choose any of the pages that you simply’ve were given already published to your internet website online or select a internet web page created by means of the plugin.
For example, if if in case you have an provide checkout web page, then you definitely’ll be in a position to choose that internet web page from the dropdown menu. Will have to you don’t have one, then you definitely’ll have the ability to leave the surroundings because it’s, and the plugin will create a custom designed internet web page for you.
Once you’re carried out, click on at the ‘Continue’ button.
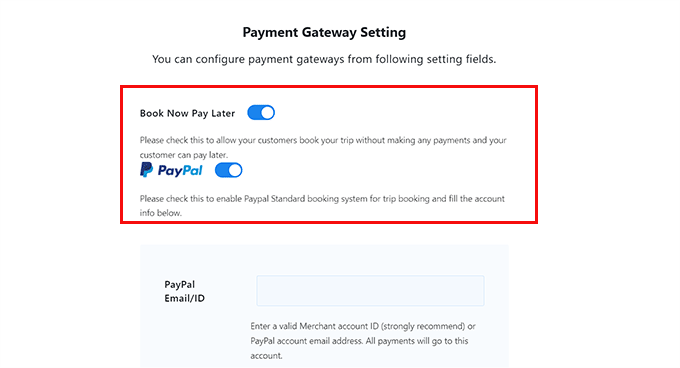
Inside the ‘Charge Gateway Atmosphere’ step, you wish to have to toggle on the switches for the ‘E guide Now Pay Later’ chance and the ‘PayPal’ chance.
After that, add your PayPal electronic mail ID into the ‘PayPal Piece of email/ID’ field.
The ones cost gateways will then be added to your adventure trade website. Next, click on at the ‘Continue’ button to move on.
You’ve now successfully configured the WP Move backward and forward Engine plugin.
Inside the remaining step, merely click on at the ‘Go to dashboard’ button to head out the setup wizard.

Step 7: Create a Move backward and forward Package for Your Trade
Upon configuring the plugin, it’s now time to create a adventure package deal to your internet website online. To try this, merely consult with the Trips » Add New internet web page from the WordPress admin dashboard.
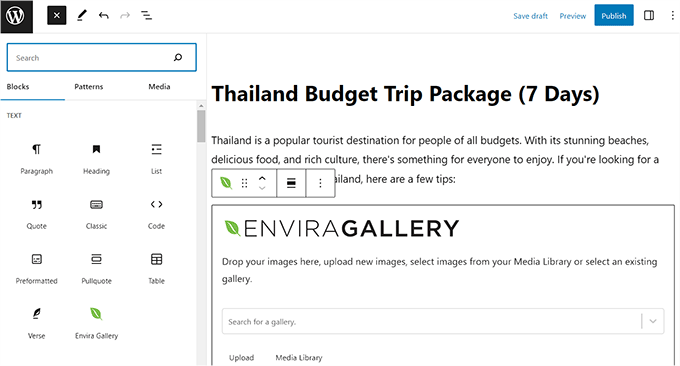
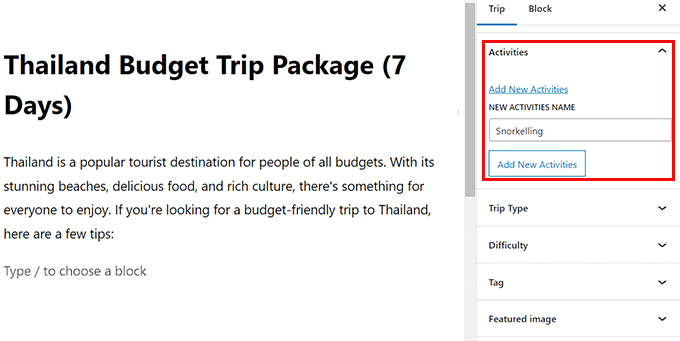
This may increasingly open the block editor, where you’ll have the ability to get began by means of together with a reputation and details to your adventure package deal. You’ll have the ability to moreover click on at the ‘Add Block’ (+) button inside essentially the most good left in an effort to upload an Image, Heading, or Quote block.
You’ll have the ability to moreover add the image gallery that you just created for the adventure package deal by means of dragging and dropping the ‘Envira Gallery’ block from the block menu.
Upon getting carried out that, lengthen the ‘Places’ tab throughout the block panel at the correct and click on at the ‘Add New Places’ link.
Proper right here, you’ll have the ability to add the name of the country or the town for the adventure package deal you’re offering. This feature will can help you organize your adventure packages by means of different places.
It’ll moreover be in agreement your shoppers must you propose to provide a few packages for the same holiday spot.
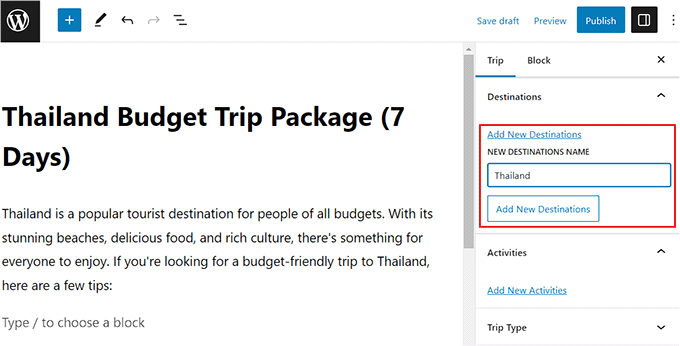
Next, lengthen the ‘Movements’ tab and click on at the ‘Add New Movements’ link. Proper right here, you’ll have the ability to add the entire movements that you’re going to offer your consumers on this journey, like snorkeling, climbing, scuba diving, visiting heritage areas, and further.
This option can also can help you further categorize your journey. For example, if an individual who does no longer have a decided on holiday spot in ideas on the other hand likes climbing varieties this keyword into the search box, they’re going to be confirmed the entire adventure packages that have climbing listed as one of the movements.
After that, you’ll have the ability to moreover add a featured symbol, journey type (adventure, leisure vacation, trade journey), and tags to your package deal from the block panel.
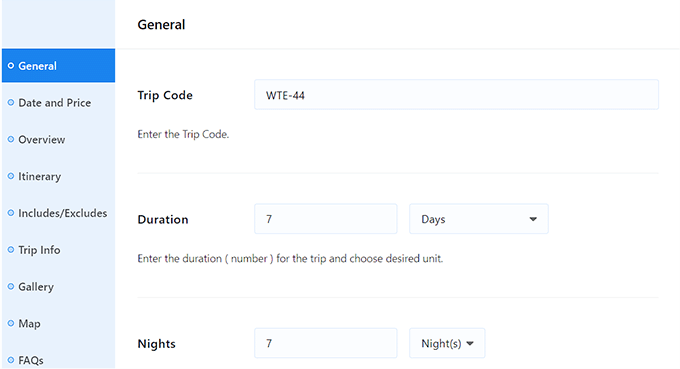
Now, it’s time so as to configure the journey settings. For this, scroll the entire approach all the way down to the ‘WP Move backward and forward Engine – Trip Settings’ phase.
Proper right here, you’ll have the ability to type throughout the journey code and the day and night time duration of the journey.
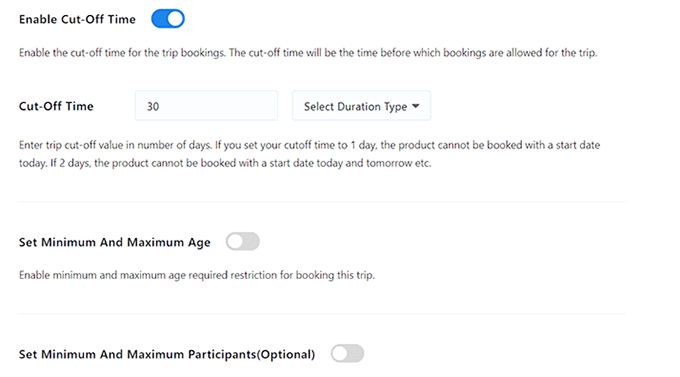
You’ll have the ability to moreover allow a decrease time for the adventure package deal. On account of this shoppers gained’t have the ability to e book this journey after a specified date.
Then, you’ll have the ability to moreover set a minimum and maximum age for the journey and the minimum or maximum number of folks for the journey.
Once you’re carried out, don’t forget to click on at the ‘Save & Continue’ button to store your settings.
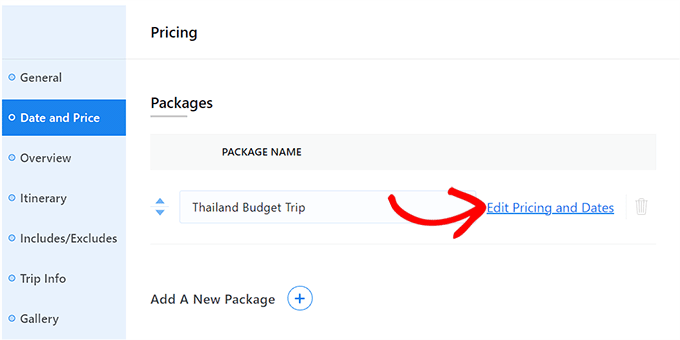
This may increasingly take you to the ‘Date and Price’ tab, where you wish to have to click on at the ‘Add A New Package’ button.
Next, you’ll need to add a package deal name and click on at the ‘Edit Pricing and Dates’ link.
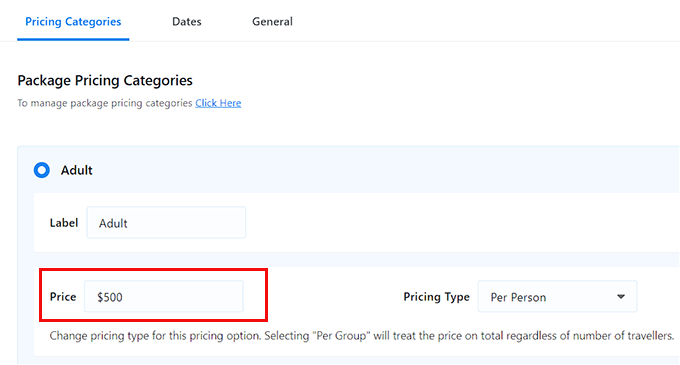
This may increasingly open a instructed on the visual display unit where you’ll have the ability to lengthen the ‘Adult’ tab and then type the cost for the journey. You’ll have the ability to set the cost for consistent with explicit individual or consistent with team.
After that, you’ll have the ability to set a price range for children and click on at the ‘Save and Close’ button once you’re carried out.
Next, click on at the ‘Continue’ button to move on.
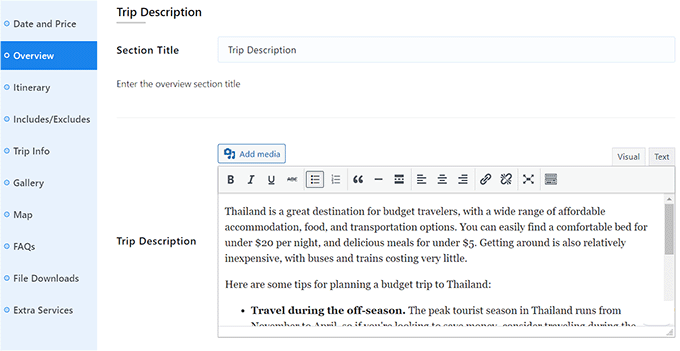
This may increasingly take you to the ‘Evaluate’ phase, where you’ll have the ability to add a reputation and description to your journey.
You’ll have the ability to even add journey highlights like a snorkeling adventure underneath the ‘Trip Highlights’ phase. After that, click on at the ‘Save & Continue’ button.
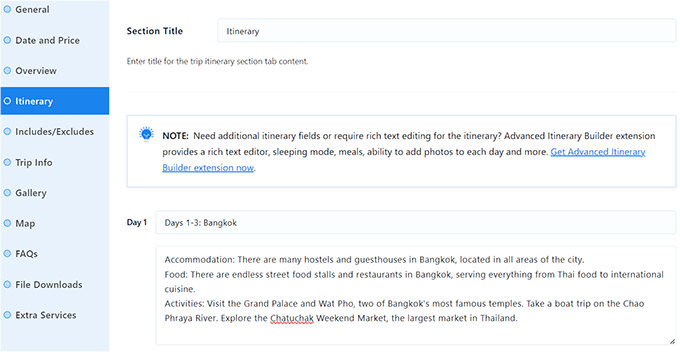
You’ll now be taken to the ‘Itinerary’ phase, where you’ll have the ability to get began by means of together with a reputation.
Next, add a reputation for the day 1 itinerary and write the entire movements that may be part of the principle day of the journey. So to upload a few days for the journey, you’ll need to click on at the ‘Add Itinerary’ button.
Once you’re carried out, click on at the ‘Save & Continue’ button.
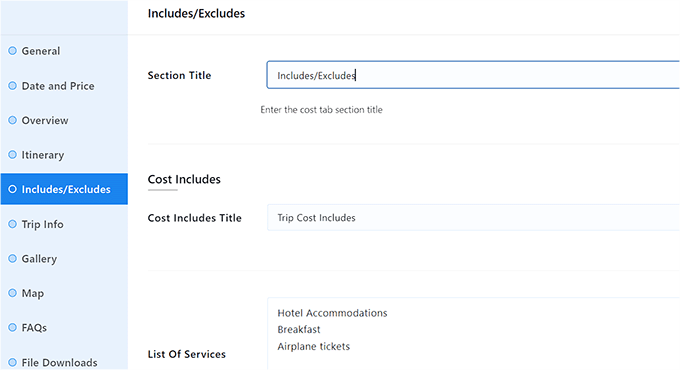
Inside the ‘Accommodates/Excludes’ phase, you’ll need to add a work for the entire problems which could be built-in throughout the journey price, similar to the hotel booking, breakfast, and further.
Similarly, you’ll also have in an effort to upload a work for the entire problems which could be excluded from the journey pricing, like snorkeling fees, dinner, and further.
Upon doing that, click on at the ‘Save & Continue’ button.
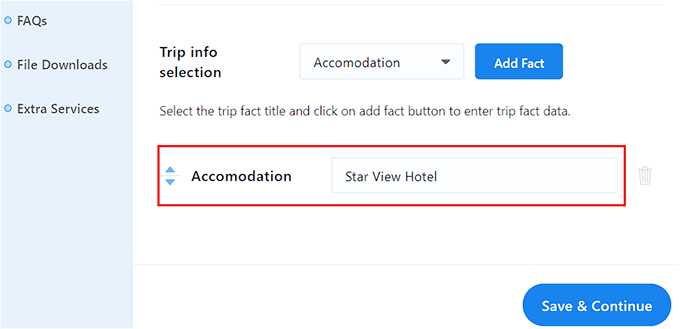
You’ll now be taken to the ‘Trip Knowledge’ phase, where you wish to have to add a reputation and then select journey main points that received’t have been added previous to from the dropdown menu.
For example, if you want to keep up a correspondence regarding the hotel that your consumers will also be staying in, then you definitely’ll be in a position to choose the ‘Accommodation’ chance and click on at the ‘Add Fact’ button.
After that, you’ll have the ability to simply add the hotel’s name and link next to the ‘Accommodation’ chance.
You’ll have the ability to moreover add other details for the journey, like admission fees, arrival the town, best season, value methods knowledge, hotel transfer, WiFi, meals, and further.
Once you’re carried out, click on at the ‘Save & Continue’ button.
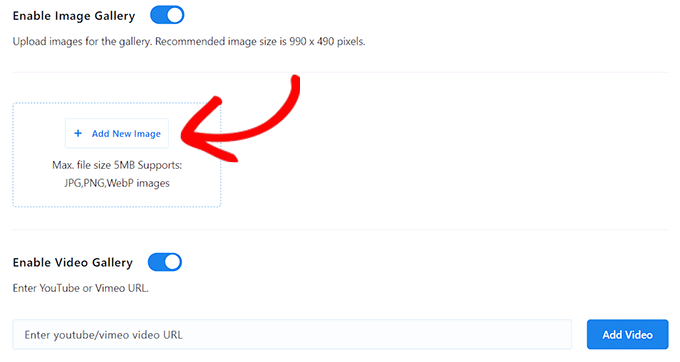
You’ll now be taken to the ‘Gallery’ phase, where you’ll have the ability to toggle the ‘Allow Image Gallery’ switch must you haven’t already added a gallery with Envira.
You’ll have the ability to then add photos, and the gallery will robotically be created for you. You’ll have the ability to even add a video gallery for the package deal by means of toggling the ‘Allow Video Gallery’ switch.
Next, you’ll have the ability to add a YouTube or Vimeo video to your package deal. Upon doing that, click on at the ‘Save & Continue’ button to move on.
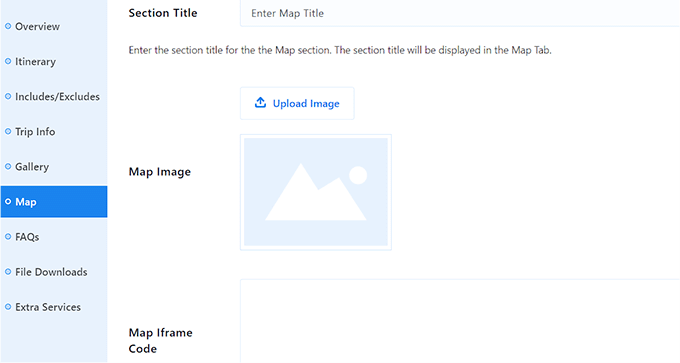
This may increasingly take you to the ‘Map’ phase, where you’ll have the ability to add a reputation, map image, and an iframe code for the hotel where your consumers will also be staying or for the entire journey location.
Then, click on at the ‘Save & Continue’ button.
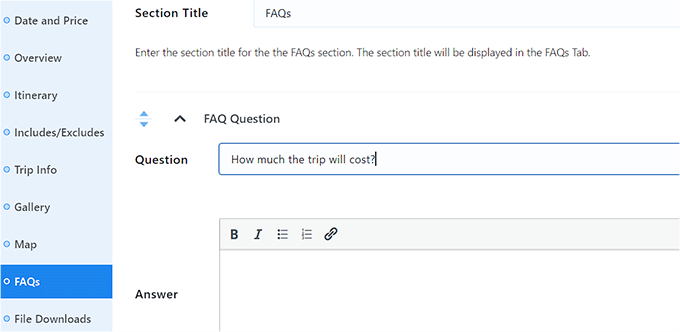
Inside the FAQs segment, you’ll have the ability to click on on on the ‘Add FAQs’ button and add questions which could be regularly asked by means of your shoppers. This may increasingly be in agreement resolution purchaser queries and even fortify your search engine rankings.
Upon together with the FAQs, simply click on at the ‘Save & Continue’ button.
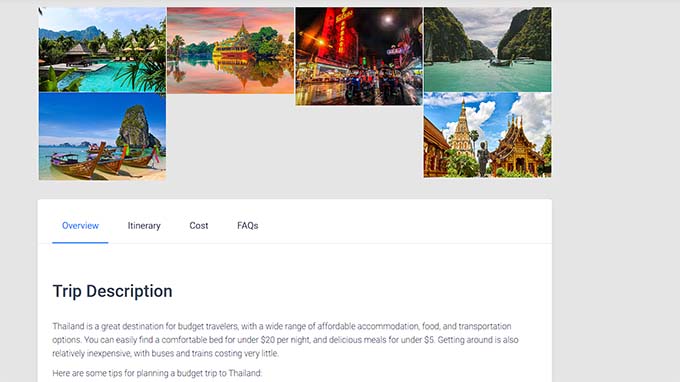
Now, scroll once more to the best possible and click on at the ‘Submit’ button to make your journey package deal live. After that, you’ll have the ability to consult with your WordPress internet website online to view the package deal in movement.
You’ll have the ability to now create additional packages to your adventure trade website by means of repeating the process.
Step 8: Add a Contact Form to Your Move backward and forward Trade Web page
Upon getting created a few adventure packages that you just plan to advertise to your internet website online, this is a good thought to moreover add a slightly form.
This kind will allow consumers to reach out to you in the event that they’ve any questions, which is in a position to be in agreement fortify purchaser excitement. Plus, it will neatly even can help you construct an e-mail listing by means of allowing you to gather purchaser knowledge.
We recommend the use of WPForms in an effort to upload a slightly form to your internet website online.
It’s the easiest WordPress touch shape plugin to be had in the marketplace that contains 1000+ premade form templates, a drag-and-drop builder, protection from junk mail entries, and further.
First, you need to position in and switch at the WPForms plugin. For detailed instructions, see our educational on methods to set up a WordPress plugin.
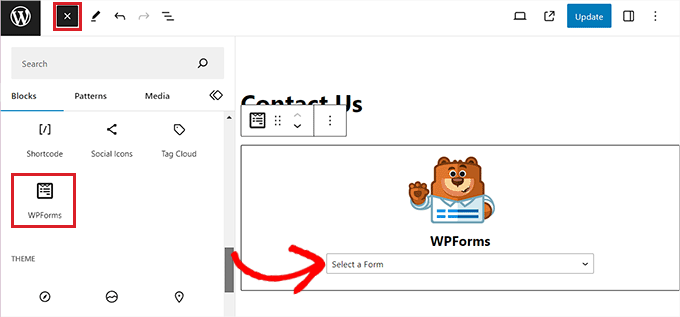
After that, all you wish to have to do is use the WPForms ‘Simple Contact Form’ template and then add it to any internet web page or publish the use of the WPForms block.
For detailed instructions, see our educational on methods to create a touch shape in WordPress.
Versus a slightly form, we moreover counsel the use of an authorized phone provider to your adventure website to make it easier for patrons to reach out to you or make bookings over the phone. This can result in additional conversions.
You’ll have the ability to merely add a phone provider to your adventure trade the use of Nextiva.
It’s the easiest industry telephone carrier for small companies that is super easy to use, provides a very simple setup, has a lot of choices, and has inexpensive pricing.
Plus, Nextiva moreover comes with other choices like on-line faxing, live chat, online surveys, CRM, identify analytics, and further.
For details, see our educational on methods to arrange an auto-attendant telephone machine in your web site.
Step 9: Add Purchaser Critiques on Your Website
Another way to build believe among potential consumers and increase conversions is in an effort to upload purchaser opinions to your adventure trade website.
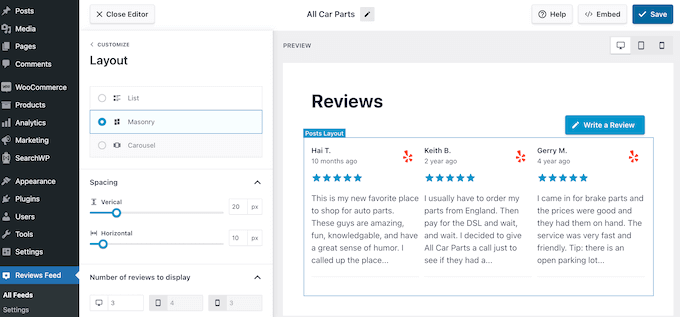
If you already have opinions to your journey packages on Yelp, Facebook, or Google, then you definitely’ll have the ability to merely add them to your internet website online the use of the Ruin Balloon Opinions Feed Professional plugin.
It’s the easiest WordPress buyer critiques plugin to be had in the marketplace that lets you add opinions to your internet website online in a visually delightful structure.
For additonal detailed instructions, see our educational on methods to display Google, Fb, and Yelp critiques in WordPress.
Step 10: Use AIOSEO to Improve Search Engine Rankings
Upon getting finished making your adventure trade website, you will need to focus on its SEO (SEO).
This may can help you rank higher and get additional website online guests to your internet website online. In turn, this can result in additional conversions and past-time for your adventure trade.
We recommend the use of All in One Search engine optimization (AIOSEO) to optimize your WordPress website.
AIOSEO comes with an excellent setup wizard that robotically helps you choose the most efficient SEO settings for what you are promoting. Plus, it provides choices like an on-page SEO checklist, XML sitemaps, a broken link checker, a schema generator, and further.
You’ll have the ability to moreover add FAQs and their schema, track explicit individual keyword results, do image SEO, use a social media assistant, and use the hyperlink assistant feature to further optimize your internet website online.
For additonal details, you could wish to see our whole WordPress Search engine optimization information.
Bonus Tools to Boost Conversions on Your Move backward and forward Trade Web page
By way of now, you’ll have an invaluable adventure trade website up and running. Listed here are some plugins that you simply’ll have the ability to set as much as fortify what you are promoting and get additional conversions:
- OptinMonster: It’s the most efficient conversion optimization and lead technology software to be had in the marketplace. It can be used to create opt-in bureaucracy that may be in agreement assemble you an electronic mail list.
- MonsterInsights: It’s the easiest analytics resolution for WordPress. This may increasingly can help you see where your visitors are coming from and optimize what you are promoting methodology in keeping with exact wisdom.
- PushEngage: It’s the easiest push notification device that lets you send custom designed web push notifications to your consumers. For example, you’ll have the ability to let shoppers know when you’ve published a brand spanking new blog publish or introduced a brand spanking new adventure package deal.
- SearchWP: It’s the most efficient search plugin to be had in the marketplace that lets you create a greater seek shape to your internet website online. This way, shoppers can to find the adventure provides they’re in search of.
We hope this article helped you learn how to take a trip trade website in WordPress. You may also wish to see our amateur’s knowledge on methods to resolve the perfect measurement of a internet server in your web site and our top picks for the must-have WordPress plugins to expand what you are promoting internet website online.
Will have to you most popular this article, then please subscribe to our YouTube Channel for WordPress video tutorials. You’ll have the ability to moreover to find us on Twitter and Fb.
The publish The best way to Make a Go back and forth Industry Website in WordPress (Step by way of Step) first gave the impression on WPBeginner.
Contents
- 0.0.1 Which Is the Very best Website Builder to Make a Move backward and forward Trade Web page?
- 0.0.2 Step 1: Select a House Identify and Web web hosting Plan
- 0.0.3 Step 2: Create a New WordPress Website
- 0.0.4 Step 3: Select a Theme for Your Move backward and forward Trade
- 0.0.5 Step 4: Create a Space Internet web page and Navigation Menu
- 0.0.6 Step 5: Create Image Galleries for Your Move backward and forward Trade
- 0.0.7 Step 6: Arrange and Set Up the WP Move backward and forward Engine Plugin
- 0.0.8 Step 7: Create a Move backward and forward Package for Your Trade
- 0.0.9 Step 8: Add a Contact Form to Your Move backward and forward Trade Web page
- 0.0.10 Step 9: Add Purchaser Critiques on Your Website
- 0.0.11 Step 10: Use AIOSEO to Improve Search Engine Rankings
- 0.0.12 Bonus Tools to Boost Conversions on Your Move backward and forward Trade Web page
- 0.1 Related posts:
- 1 The Upward push of TikTok and What It Approach for Fb
- 2 6 Perfect Buyer Critiques Plugins for WordPress When put next (2023)
- 3 How to Add a Background Image to Your Divi Header

0 Comments