
Defender had already performed Two-Factor Authentication (2FA) in WordPress for hardened protection… now we’ve added Biometrics, too!
It has grow to be increasingly more glaring that relying strictly on usernames and passwords for logins not supplies the very best levels of protection.
WPMU DEV’s option to addressing this is through the usage of the WebAuthn standard, which bypasses vulnerabilities via providing a protocol of public key cryptography as a login authentication method.
Our newest Defender liberate—every Unfastened and Professional permutations—marks the start of our odyssey into the sphere of biometric authentication; providing the ability to make sure the authenticity of an individual login by means of a device fingerprint reader or facial popularity software.
The use of this new biometric authentication is similar to the present 2FA methods already present in Defender, and can be used along side the present TOTP (Time-based One-Time Password), backup codes, and fallback email authentication methods.
In this article, we’re going to take a look at how you’ll put in force the Biometric Authentication feature, as part of our 2FA WordPress plugin choices in Defender.
Continue learning, or soar ahead the use of the ones links:
Let’s uncover all that Defender has to offer inside of the kind of login protection with the cool new 2FA Biometric feature.
The All-Encompassing Defender
Defender will give you the most efficient in WordPress plugin protection, fighting SQL injections, cross-site scripting XSS, brute power login attacks—and other vulnerabilities—with an inventory of one-click hardening tactics that can immediately add layers of protection to your internet website.
It moreover makes coverage more straightforward on and for you, making the most of the newest in biometric security features.
By means of a handy guide a rough analysis, proper right here’s how this works in Defender… the individual will input their username & password to log in, and if biometric authentication has been configured for that instrument, said individual can read about their identification through their fingerprint scanner or facial popularity software.
Because of we’re the use of the WebAuthn protocol, Defender does not at any degree download any biometric knowledge, only a confirmation or rejection from the individual’s instrument.
I want to interject proper right here with a handy guide a rough point of interest, shared via one amongst our techs, Marcel Oudejans (and paraphrased via me)…
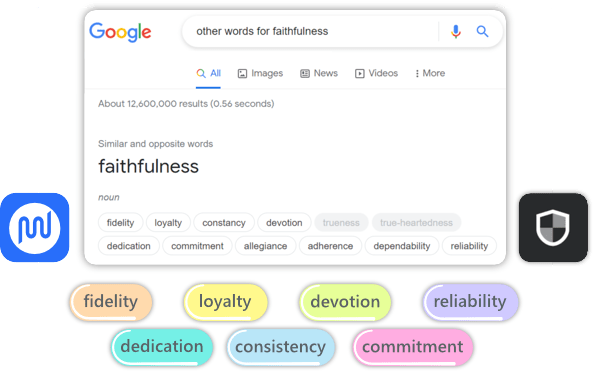
The convention of naming a dog “Fido” used to be as soon as popularized via Abraham Lincoln, even if its use as a canine pet name dates once more to the standard Romans.
“Fido” way “devoted”. FIDO stands for “Fast IDentity Online”. The new Biometric authentication feature uses WebAuthn protocol from FIDO.
So in an attractive, roundabout manner, via the use of the FIDO protocol to put in force this selection, one might say we’re infusing ‘faithfulness’ into Defender.
For additonal technical wisdom on FIDO, take a look at this newsletter.
Good enough, now let’s take an intensive take a look at this awesome new Biometric feature.
Whole Walkthrough on Biometric Authentication
First, you’ll need to have the Defender plugin installed and activated, and exchange it to the newest fashion (at the time of this writing, that’s 3.0.1). Defender permutations 3.0 and higher are completely appropriate with the simply in recent years introduced WordPress 6.0.
Two important problems to note up front:
- Configuration of approved devices is wanted on a per-user basis, since authentication is expounded to individual individual accounts.
- PHP 7.2 or above is needed, as it improves potency and protection, while moreover supporting the new biometric feature.
Allow Biometric
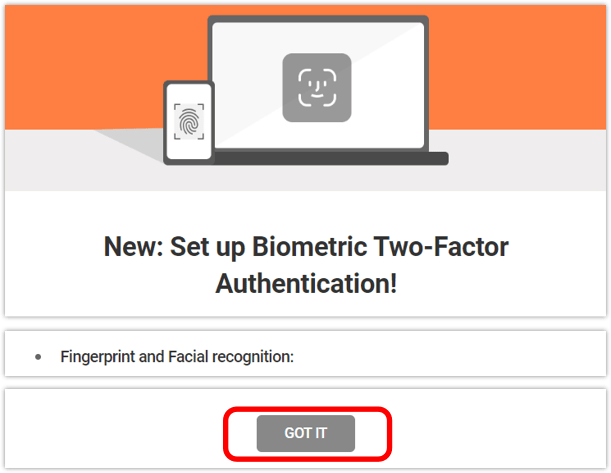
Navigate to the WordPress Dashboard > Defender. For those who’ve merely now up to the moment, you’ll get the popup modal. Give it a handy guide a rough be informed, then click on at the Got It button.
You’ll be on Defender’s primary internet web page now. From the left sidebar, click on on on the 2FA menu header.
Some other popup will appear; click on on on the Activate button.

Now you’ll see all of the section wisdom for Two-Factor Authentication, and all of the alternatives we’ve were given available proper right here.
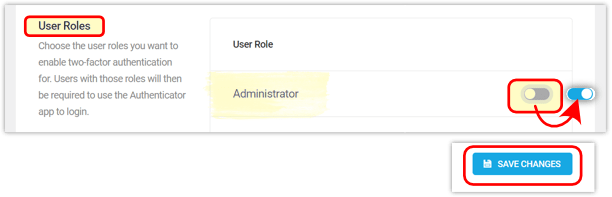
From the equivalent Defender 2FA internet web page, underneath Particular person Roles > Administrator, toggle the button On. Have in mind to scroll to the bottom and click on on on Save Changes.
From the Dashboard’s aspect menu, transfer to the Shoppers section, and click on on to your Admin Particular person profile.
Scroll proper all the way down to the Protection section, and toggle ON the button next to Biometric.
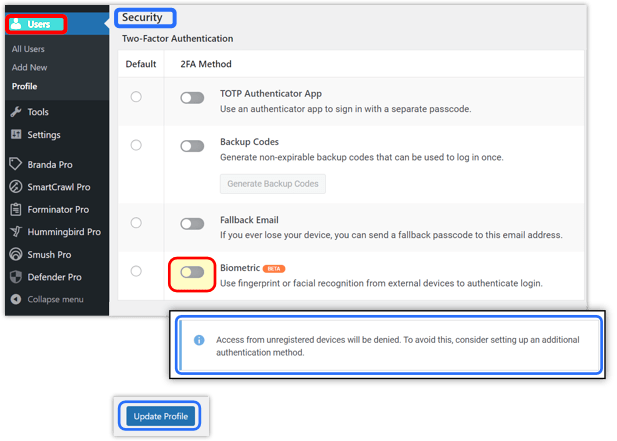
As quickly because the Biometric feature is toggled on, you’ll see an be offering to make a choice an additional authentication method from the ones alternatives: TOTP, Backup Codes, and Fallback Email.
Inside the example beneath, you’ll see I’ve determined on Fallback Email, then again you’ll be in a position to make a choice regardless of method(s) you prefer. Have in mind to click on at the Change Profile button at bottom.
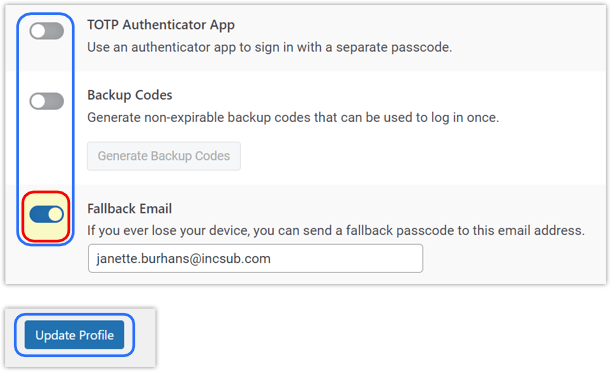
Biometric authentication does not trade your standard WordPress login (i.e., username & password), as a substitute supplies an additional protected layer, like the other authentication alternatives above.
While many browsers and dealing ways are compatible with the WebAuthn protocol used to keep an eye on the authentication process, some are in this day and age not. Check out proper right here to see WebAuthn’s browser and OS compatibility listing.
Test in Instrument
With biometric authentication enabled, the Registered Instrument table will appear, with alternatives to Test in Instrument or Authenticate Instrument.
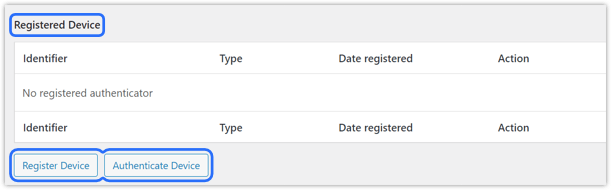
Clicking the Test in Instrument button gets began the beneficial from your browser to configure the kind of biometrics you wish to have to make use of, depending on which will also be available to your instrument.
Enter any name inside the Authenticator Identifier field, then click on at the Get began Registration button.
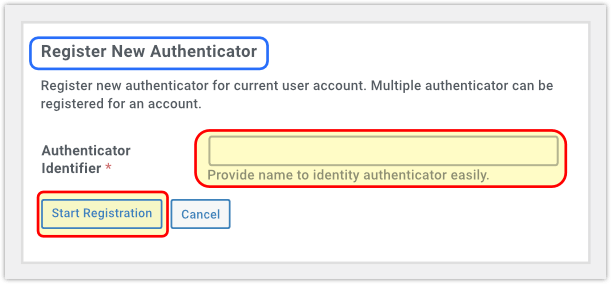
Understand that depending on the instrument you’re the use of the registration process will range.
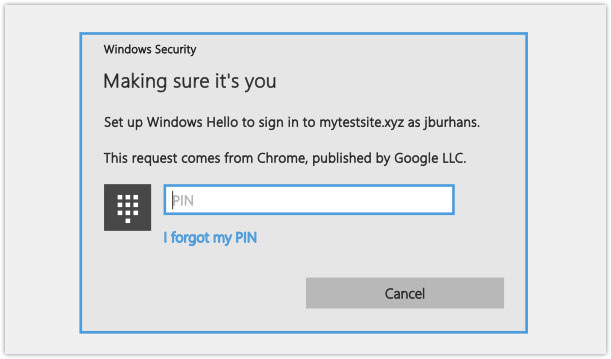
Example 1:
Registering a House home windows desktop or laptop will beneficial you to enter your House home windows Hello PIN, or regardless of other authentication method is also enabled to your instrument.
Example 2:
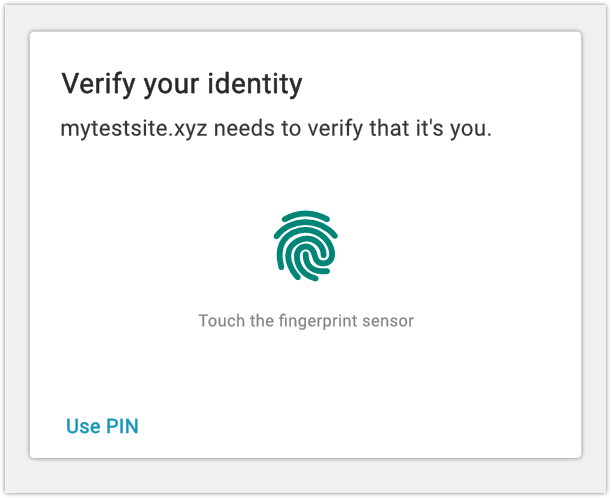
Registering a mobile instrument will beneficial you to touch the fingerprint sensor, or regardless of other authentication method is also enabled to your instrument.
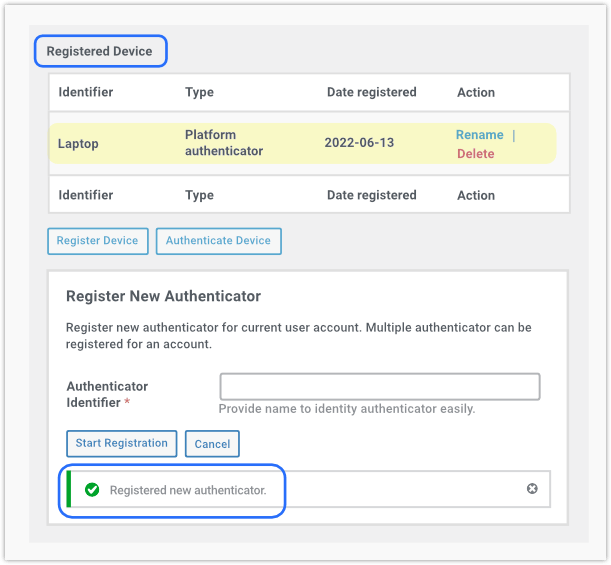
Once more to your Shoppers Profile internet web page, must you scroll to the bottom underneath Protection > Registered Instrument, you’ll see your instrument listed proper right here, at the side of a message beneath it confirming it has indisputably been registered.
The next step is to authenticate the instrument you merely registered.
Authenticate Instrument
As quickly because the instrument has been registered, click on at the Authenticate Instrument button.
The equivalent authentication method used to test within the instrument will beneficial you to ensure the movement.
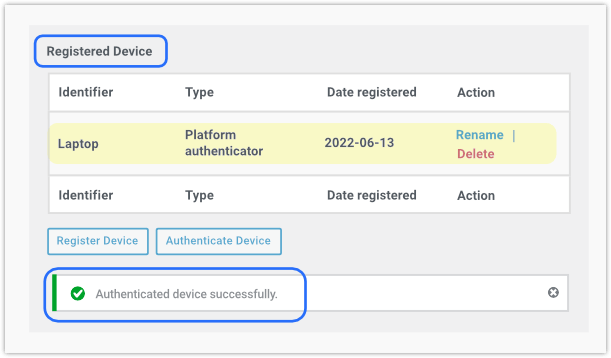
Once carried out, you’ll see a success message appear. Now you’ll be capable to use the registered biometric selection as a handy guide a rough, protected method to login to your internet website.
Rename or Delete Instrument
If desired, you’ll have the ability to rename or delete any authenticated instrument.
Navigate to the WordPress Dashboard > Shoppers, and click on on to your username.
To Rename:
From Profile > Protection > Registered instrument, click on on on the Rename text inside the Movement column. Type the new name, and click on on Save.

To Delete:
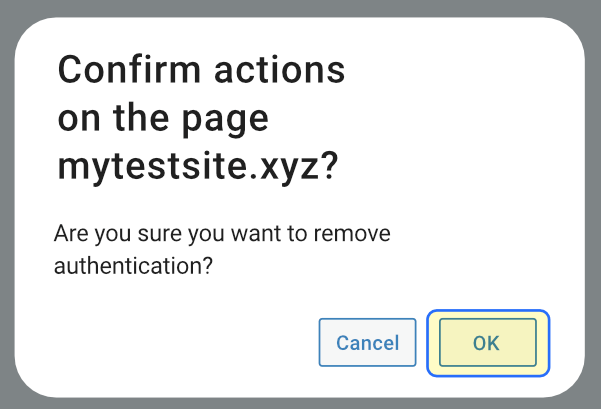
Equivalent process as above, then again click on on on the Delete text inside the Movement column, then click on on OK from the next popup.
Be instructed that the Delete movement doesn’t save settings, so if making a decision you want to use the Biometric feature from that instrument all over again, you will need to transfer all over your entire setup process.
Likewise, must you deactivate any biometric capacity to your instrument, the login will not art work, and you would need to repeat the process to your instrument to restore the feature’s capacity.
GDPR Compliance
FIDO Alliance necessities were constituted of the outset with a “privacy via design” way and are a powerful are compatible for GDPR compliance.
Because of FIDO delivers authentication with no third-party involvement or tracking between accounts and services and products and merchandise, biometric authentication with FIDO2 appropriate devices is completely GDPR compliant.
With FIDO, no personally-identifying wisdom ever leaves your instrument.
For more information, see the following article on the FIDO website: FIDO Authentication and GDPR.
Enabling A few 2FA Methods
For those who allow more than one additional authentication method on your profile, each and every will display as trade alternatives beneath the method you’ve set as your default. Inside the example beneath, TOTP Authentication is my most popular method.
You’ll have the ability to click on on on any available selection inside the checklist, and it’ll display the selected trade authentication method.

A final understand… Biometric authentication requires that the following PHP extensions be enabled to your server: mbstring, GMP, and Sodium. The ones extensions are enabled via default on all web sites hosted via WPMU DEV.
If you’re web hosting elsewhere and any of them aren’t enabled to your server, you’ll see an alert like the one beneath. Achieve out to your web hosting provider to have them allow the extensions for you so that you can use this selection.

Click on on proper right here for WPMU DEV’s entire documentation on Defender’s Biometric authentication characteristic.
The Whole Package deal
As protective measures transfer in WordPress, it’s hard to triumph over Defender.
Defender has difficult protection protocols, at the side of malware scanning, antivirus scans, IP blocking off, firewall, process log, protection log, and two-factor authentication (2FA), at the side of the newly added Biometric Authentication.
The most recent fashion of Defender moreover were given right here with an additional, useful enhancement to Defender’s WP-CLI “scan” command. Via the use of this WP-CLI command and selection, if any issues are came upon, Defender will create a table with results.
Previously, you must most efficient see the results of a malware scan from the back-end of the internet website (at WP Admin > Defender Skilled > Malware scanning), then again now you’ll be capable to see the completed scan results right kind inside the console.
Coming temporarily for Defender… we’ll amplify on our use of WebAuthn, with our devs in this day and age working on the skill to use {{hardware}} authentication devices. Plans are also underway to put in force ‘password unfastened’ logins in one of the best ways imaginable, the use of the WebAuthn protocol.
You’ll have the ability to read about upcoming choices for any of our apparatus and services and products and merchandise anytime in our product Roadmap.
If 2FA is the question, Defender is the answer. Coping with protection on your WordPress web sites may also be as simple—however complete—as activating Defender.

0 Comments