
Do you want so that you could upload a services and products phase in your WordPress website?
When attainable consumers arrive at your web page, they wish to know what services and products you offer. A services and products phase can keep up a correspondence this information in a to hand information a coarse and easy means, so visitors can decide whether they wish to learn additional about your online business.
In this article, we’ll show you learn to merely create a services and products phase in WordPress. We’ll moreover share learn to get additional leads by the use of together with a quote request form in your services and products phase.
Why Create a Products and services and merchandise Phase in WordPress?
To get additional product sales, it’s essential to supply visitors all the wisdom they need to understand what services and products you offer.
It is going to include the entire thing from prices and benefits to detailed technical specifications, depending on the services and products you advertise.
That’s a lot of wisdom, so we recommend making a customized web page in WordPress for every provider you offer.
You’ll then add a services and products phase in your homepage or touchdown web page, which is in a position to provide a brief analysis of all your services and products, in a compact house.
That means, visitors can quickly decide whether they wish to learn additional about your services and products.
You’ll then include links to the opposite provider pages, so visitors can uncover every provider in more component.
Another option is to include a formidable name to motion, similar to inquiring for a callback or filling out a kind to get a custom designed quote.
The following image presentations an example of a option to movement, which turns out immediately beneath a services and products phase.

That being said, let’s take a look at learn to merely create a services and products phase in WordPress and then add it to any internet web page for your website. Simply use the short links beneath to jump to the method you want to use.
- Manner 1. Tips on how to create a products and services segment with SeedProd (Really helpful)
- Manner 2. Making a products and services segment in WordPress the use of the block editor
Means 1. Tips about Create a Products and services and merchandise Phase with SeedProd (Truly useful)
The best way to create a services and products phase is by the use of the usage of a internet web page builder.
A good internet web page builder plugin will will let you add as many services and products as you want, and arrange those services and products in a nice construction. You’ll moreover encourage visitors to be informed additional about your services and products by the use of together with CTAs, links, buttons, and additional.
SeedProd is the best drag-and-drop web page builder for WordPress. It comes with more than 180 professionally-designed templates and ready-made sections that are perfect for promoting your services and products.
SeedProd moreover works with many trendy third-party apparatus that you may already be the usage of to get and arrange conversions. This contains best possible e mail promoting and advertising and marketing services and products, WooCommerce, Google Analytics, and additional.
First, you need to position in and switch at the SeedProd plugin. For added details, see our step-by-step knowledge on learn how to set up a WordPress plugin.
Phrase: There’s moreover a unfastened model of SeedProd alternatively we’ll be the usage of SeedProd Skilled as it has additional templates and blocks. It moreover works with all the absolute best e-mail advertising and marketing products and services.
After activating the plugin, SeedProd will ask for your license key.
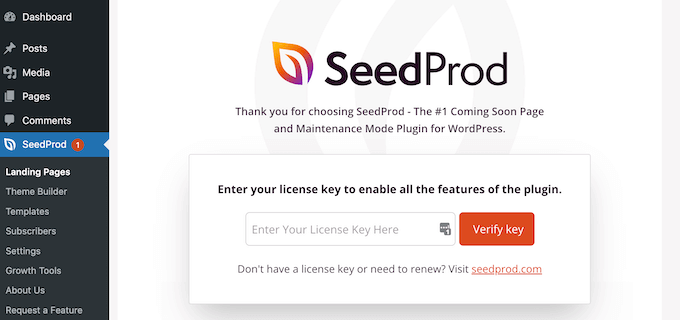
You’ll to find this information beneath your account at the SeedProd site. Upon getting into the license key, go ahead and click on on on ‘Check Key.’
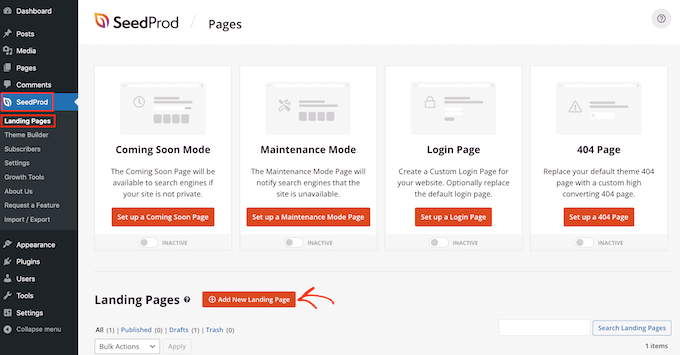
The next step is growing a brand spanking new internet web page where you’re going to add the services and products phase. To take a look at this, go to SeedProd » Landing Pages for your WordPress dashboard.
While you’ve completed that, click on on on the ‘Add New Landing Internet web page’ button.
You’ll now choose any of SeedProd’s ready-made templates.
That will help you to find the easiest template, SeedProd’s designs are organized into different advertising and marketing marketing campaign varieties, similar to ‘squeeze,’ ‘ead,’ and ‘coming quickly.’
You’ll click on at the tabs on the most productive of the computer screen to filter out the templates based on advertising and marketing marketing campaign type.
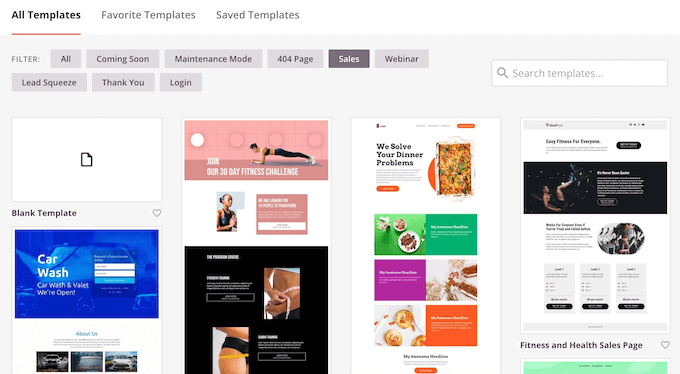
If you should get began from scratch, then SeedProd moreover has a Blank Template, which doesn’t have any default content material subject material or design portions.
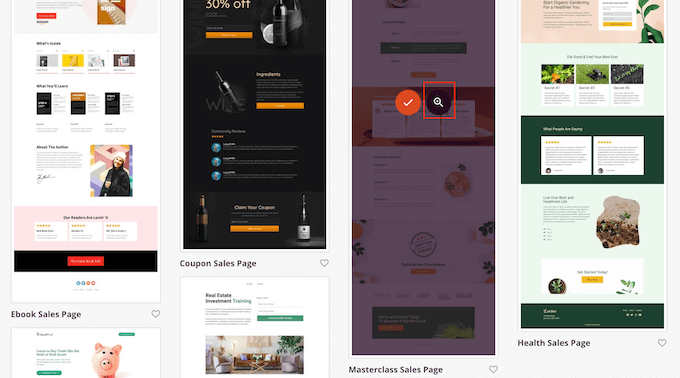
To take a better take a look at a design, simply hover your mouse over the template and then click on on on the little magnifying glass icon.
When you find a construction that you want to use, click on on on ‘Make a selection This Template.’ We’re the usage of the ‘Masterclass Product sales Internet web page’ template in all our images, alternatively you’ll use any template you want.
After choosing a template, type in a name for your custom designed internet web page. SeedProd will create a URL automatically the usage of the determine, alternatively you’ll industry this if you want.
A descriptive URL helps search engines like google like google and yahoo understand what a internet web page is ready, so they can send that internet web page to people who are on the lookout for content material subject material similar to yours.

To offer your internet web page the best chance of unveiling in similar search results, it’s worthwhile to wish to add some related key phrases to the URL. When you’re proud of the guidelines you’ve entered, click on on on the ‘Save and Get began Enhancing the Internet web page’ button.
This such a lot the SeedProd drag-and-drop internet web page builder. It presentations a live preview of your internet web page to the most productive, and a couple of settings on the left.

Most SeedProd templates already come with some blocks, which could be a core part of any SeedProd construction.
To customize any block, simply click on on to select it. The left-hand menu will then show all the settings you’ll use to edit the block, similar to converting the font measurement or converting a stock image.
If you want to remove a block from the design, then simply click on on on that block.
Next, go ahead and click on on on the small trash icon inside the menu bar that appears.
So to upload new blocks in your design, merely click on on on the block inside the left-hand menu and drag it onto the editor.
You’ll then click on on to select the block and make any changes inside the left-hand menu.
You’ll repeat the ones steps to create any more or less internet web page, similar to a homepage or Google Advert touchdown web page. The chances are endless.
SeedProd moreover comes with ‘Sections.’ The ones are rows and block templates for now not strange web design portions. For example, SeedProd has sections for ceaselessly requested questions, footers, and buyer testimonials.
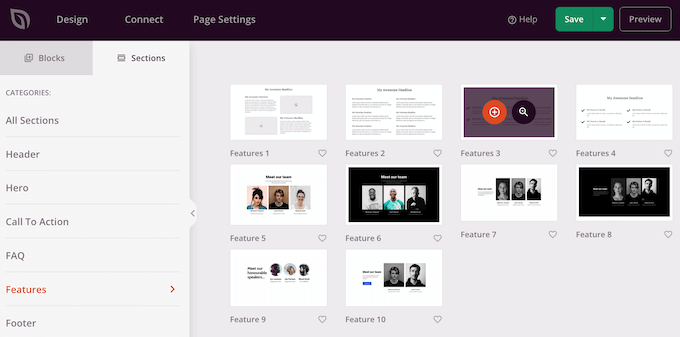
It moreover has quite a lot of sections that are perfect for creating a services and products phase in WordPress. To try the opposite sections, go ahead and click on on on the ‘Sections’ tab.
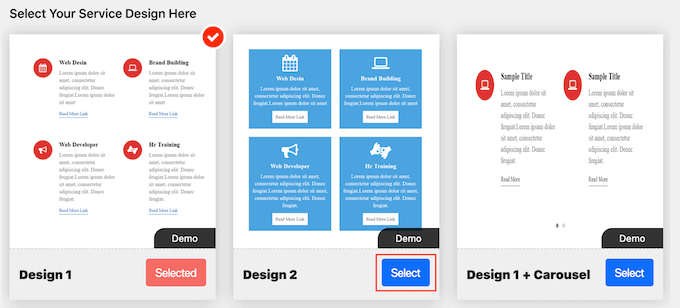
The ones mini templates are organized into different categories, alternatively since we wish to create a services and products phase, we recommend taking a look at the ‘Choices’ magnificence.
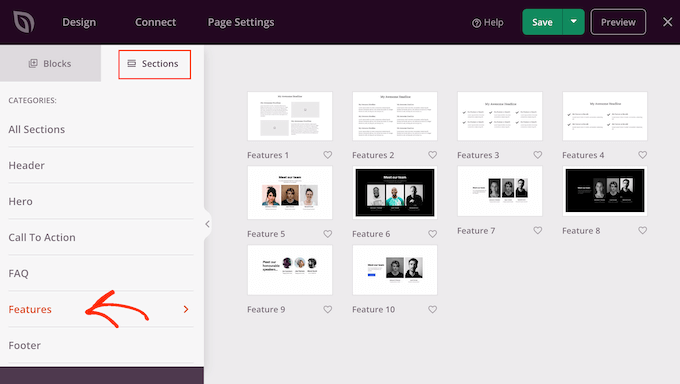
Proper right here, you’ll to find sections that use paragraphs, subheadings, and pictures in a nice construction.
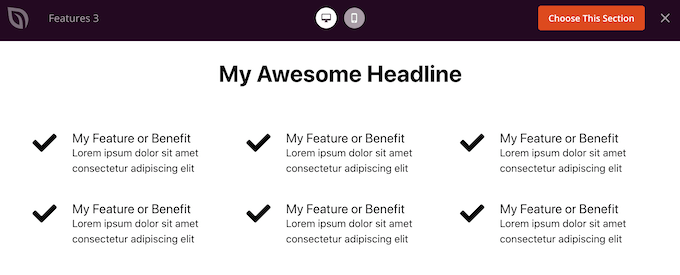
Throughout the following image, you’ll see the ‘Choices 3’ phase. To turn this proper right into a services and products phase, you simply need to add your individual text and pictures.
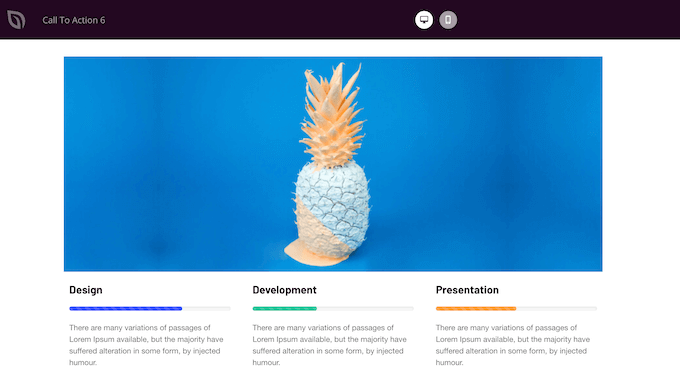
You may also want to take a look on the ‘Identify To Movement’ magnificence. This magnificence has quite a lot of different sections, along with a few that you just’ll use to market it your services and products.
Throughout the following image, you’ll see the ‘Identify To Movement 6’ phase, which already has space for three services and products.
To preview somewhat, merely hover your mouse over it and then click on on on the magnifying glass icon that appears.
When you find a phase that you want to use, simply switch your mouse over that phase and click on on on the little ‘+’ icon.
This gives the phase to the bottom of your internet web page, alternatively you’ll switch sections and blocks spherical your design the usage of the drag-and-drop serve as.
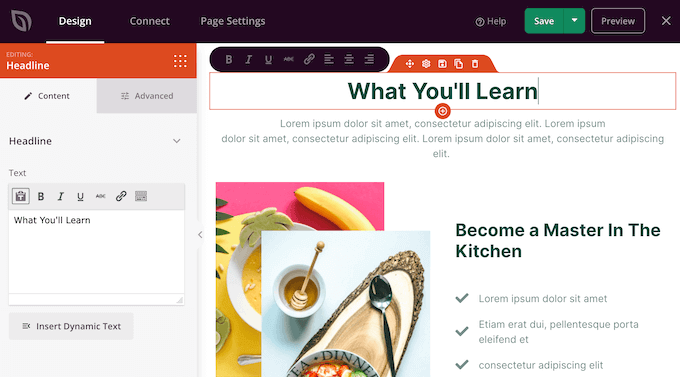
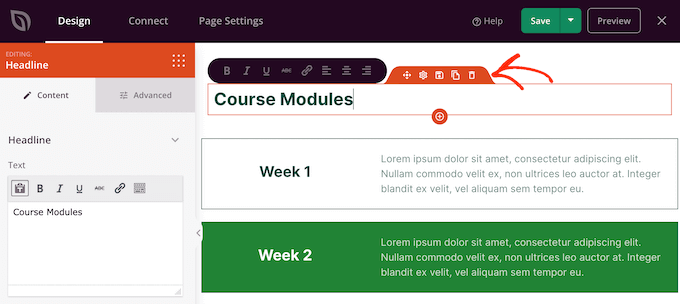
After together with somewhat, simply can click on on on any block inside that phase to customize it. To start, you’ll normally wish to type in some information about your services and products.
To take a look at this, merely click on on on any ‘Text,’ ‘Headline,’ or an an identical phase. Then type into the text field that appears to the left of the builder.
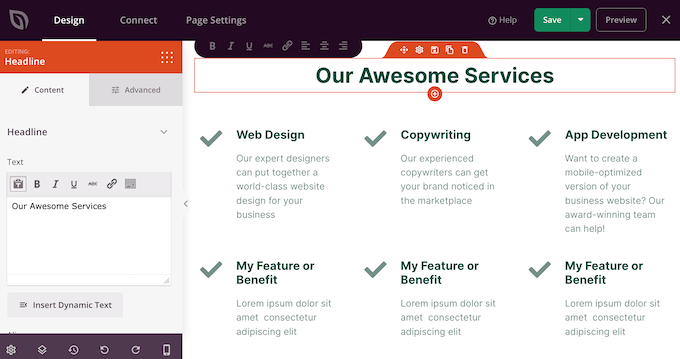
You’ll construction the text, similar to the best way you style text in the standard WordPress submit editor.
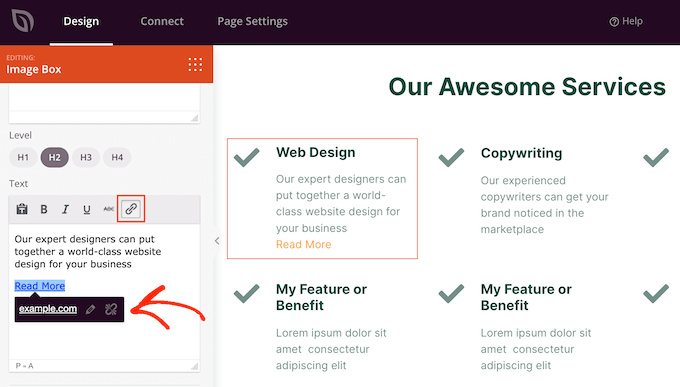
It’s moreover a good idea to upload hyperlinks to pages where visitors will also be instructed additional about every provider.
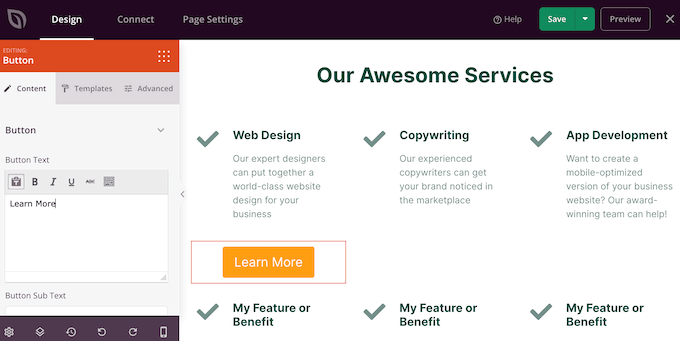
Another option is to use a ‘Identify to Movement’ button. Even if the phase doesn’t come with buttons, it’s easy so that you could upload them.
Throughout the left-hand menu, merely click on on on the ‘Blocks’ icon, which seems like a sq. of small dots.
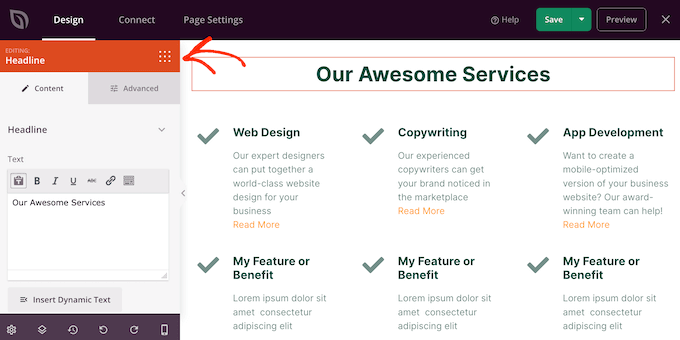
You’ll then drag and drop a ‘Button’ block into your phase.
While you do ‘Button’ blocks, you then’ll customize them in exactly the an identical means you edit any block. Merely click on on on it, and then make your changes inside the left-hand menu.
You’ll add additional blocks by the use of following the an identical process described above.
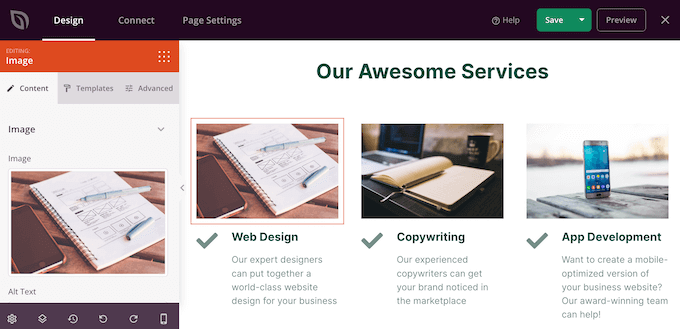
For example, it’s possible you’ll add footage showing every provider in movement the usage of an ‘Image’ block.
When you’re proud of how the internet web page seems, it’s time to position up it by the use of clicking on the dropdown arrow next to the ‘Save’ button.
Then, choose the ‘Publish’ chance.
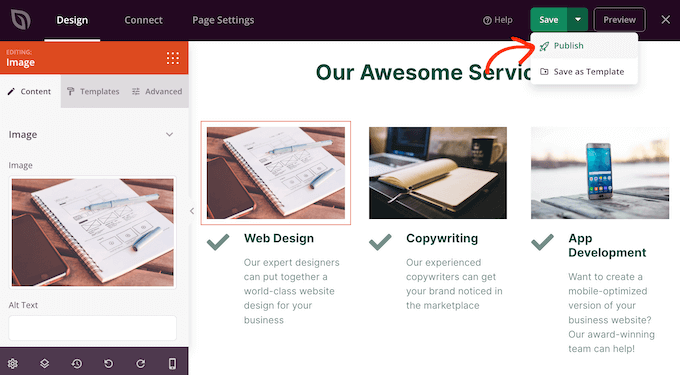
Your internet web page will now go survive your WordPress site and visitors can see all your services and products at a glance.
Means 2. Creating a Products and services and merchandise Phase in WordPress the usage of Block Editor
You’ll moreover assemble a services and products phase the usage of the free Carrier Field Exhibit plugin, and then add it to any internet web page or submit the usage of shortcode.
You will need to use one of the vital plugin’s pre-made provider phase layouts, so this isn’t necessarily essentially the most customizable approach.
On the other hand, the plugin does can help you create a provider phase the usage of the familiar WordPress content material editor apparatus, so it’s speedy and easy.
First, you need to position in and switch at the free Service Box Show off plugin. For added details, see our step-by-step knowledge on learn how to set up a WordPress plugin.
Upon activation, head over to Service Box » Add New Service Box for your WordPress admin panel.

To start, you’ll need to type in a determine for your services and products phase. This will infrequently best possible appear inside the dashboard and now to not your website, so this determine is for your reference best possible.
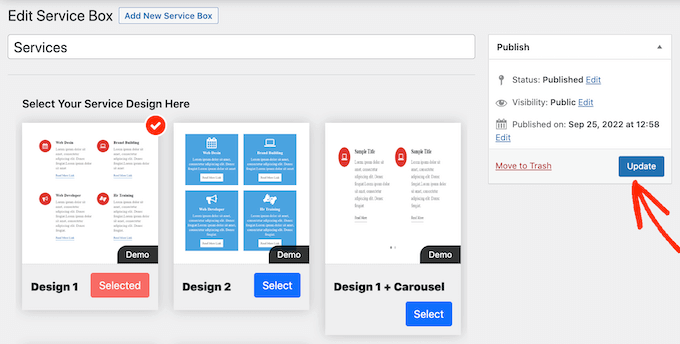
After that, to find the construction that you want to use and click on on on its ‘Make a choice’ button.
Next, scroll to ‘Add Service Box,’ which has two services and products by the use of default.
So to upload additional services and products to the phase, go ahead and click on on on ‘Add New Service Box.’
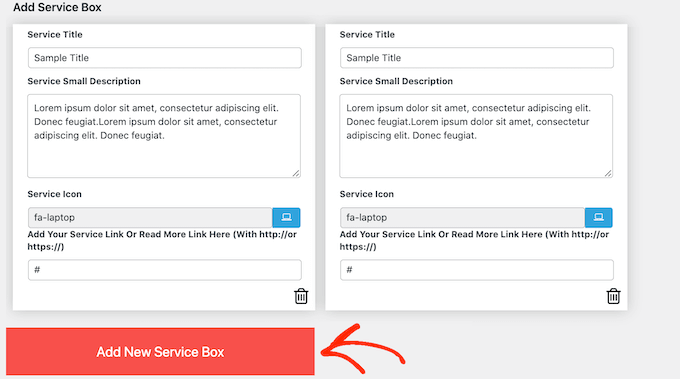
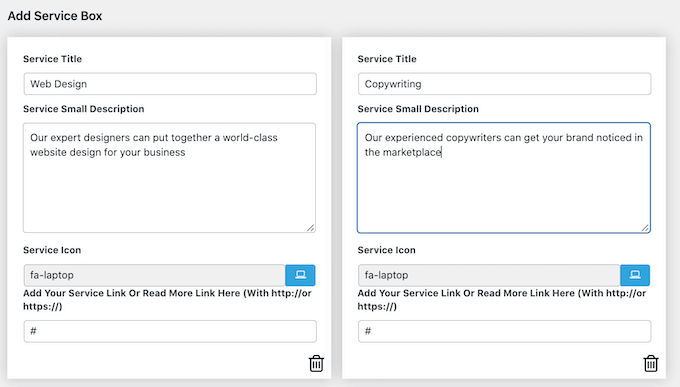
While you’ve completed that, you’ll type in a determine for every provider and add an overview.
That’s the text that can appear on the front end of your web page, so be mindful to offer visitors all the wisdom they would like.
By means of default, the plugin supplies the an identical icon to every provider. It’s a good idea to change the ones icons to 1 factor that’s unique to every provider.
To see the opposite icons that you just’ll use, click on on on the ‘Service Icon’ field. This opens a popup where you’ll scroll throughout the opposite photos and click on at the handiest you want to use.
It’s moreover a good idea so that you could upload a link to a internet web page where visitors will also be instructed additional about every provider, or most likely a internet web page that has a touch shape.
To take a look at this, simply type the link into the ‘Add Your Service Or Be told Further Link Proper right here’ field.

After together with all this information, you’ll industry how your provider phase seems the usage of the ‘Service Box Settings.’
These kinds of settings are moderately simple. For example, you’ll industry the font size and style. You’ll moreover trade the hyperlink colour, plus the color of the determine, description, and additional.
While you don’t wish to use any icons inside the services and products phase, you then’ll remove them by the use of clicking on the ‘Display Icon’ switch.
There are lots of different settings and what seems good would possibly vary depending for your WordPress theme. With that being said, you’ll at all times come once more to the ‘Service Box Settings’ and make some changes in the event you’re unhappy with how the services and products phase seems for your website.
When you’re proud of how the services and products box is set up, simply click on on on the ‘Publish’ button on the most productive of the internet web page to save some your changes.
You’ll now add the services and products phase in your WordPress weblog the usage of a shortcode. Simply scroll to ‘ServiceBox Shortcode’ and replica the code.
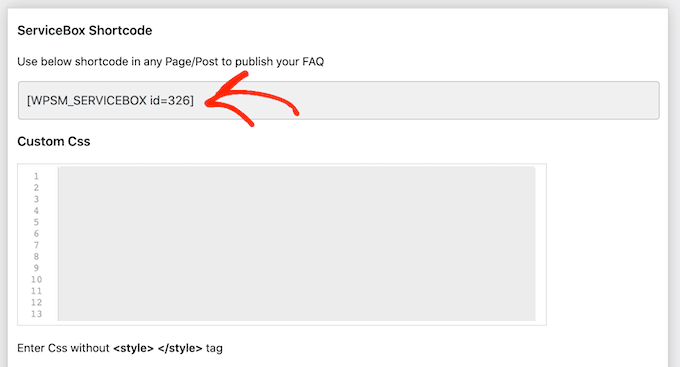
You’re now ready so that you could upload the services and products box to any put up or web page. For added details on learn to place the shortcode, you’ll see our knowledge on learn how to upload a shortcode in WordPress.
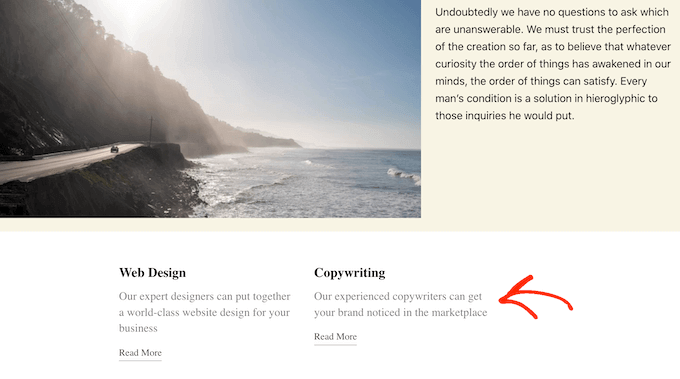
While you’ve pasted the shortcode, merely click on on ‘Exchange’ or ‘Publish’ to push changes live. Then, in the event you visit your web page you’ll see the services and products phase in movement.
At this degree, it’s worthwhile to understand that you want to make some changes similar to the use of a distinct background colour or together with additional columns.
To make the ones changes, simply go to Service Box » All Service Box. You’ll then hover your mouse over the provider box and click on on on the ‘Edit’ link when it kind of feels that.

Now, make your changes the usage of the ‘Service Box Settings’ and other sections.
When you’re proud of the changes you’ve made, don’t overlook to click on on on ‘Exchange.’
Now, in the event you visit the internet web page or submit where you added the services and products box, you’ll see your changes on the web page.
BONUS: Rising Request a Quote Form In your Products and services and merchandise
A services and products phase provides visitors an overview of your company and what you offer, so they can decide whether they wish to learn additional.
While you’ve caught the client’s attention, your next step is turning them into leads and consumers. You’ll do this by the use of together with a ‘Quote Request Form’ in your web page.
This is similar to a slightly form, but it surely has an extra house where visitors can type in some information about themselves or what they’re looking for.
This help you advertise additional services and products. For example, it’s possible you’ll suggest a decided on provider, create a unique package deal deal for that purchaser, or send them a customized e-mail based on the guidelines they’ve entered.
One of the simplest ways to create a quote request form is by the use of the usage of WPForms. It’s the absolute best WordPress bureaucracy plugin and allows you to add any type of form in your website the usage of a simple drag-and-drop editor.
WPForms even has a ready-made ‘Request a Quote Form’ that has the entire thing you need to turn visitors into leads.
First, you need to position in and switch at the WPForms plugin. For added details, see our step-by-step knowledge on learn how to set up a WordPress plugin.
Phrase: There’s a unfastened model of the WPForms plugin, alternatively we will be the usage of the Skilled type because it comes with the ‘Request a Quote’ form template.
Upon activation, head over to WPForms » Settings and enter your license key.
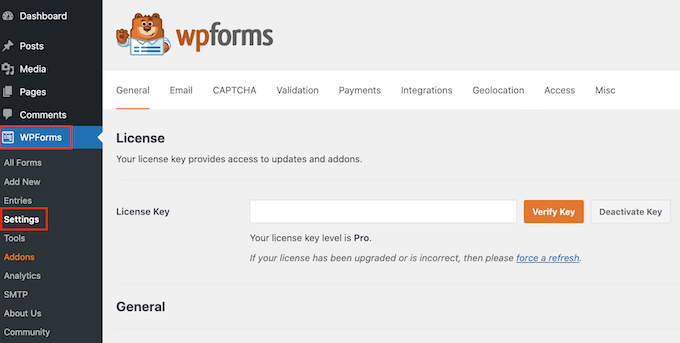
You’ll to find the license key beneath your account on the WPForms website. It’s moreover inside the e mail you got while you purchased WPForms.
Upon getting into the license key, click on on on the ‘Check Key’ button. After a few moments, you’re going to peer a message confirming that you just’ve entered the most productive license key.
While you’ve completed that, go to WPForms » Add New.

Proper right here, type in a name for your form. This is merely for your reference so that you’ll go ahead and use any determine you want.
Next, type ‘request a quote’ into the hunt field. This will infrequently ship up the ‘Request a Quote Form’ inside the results.
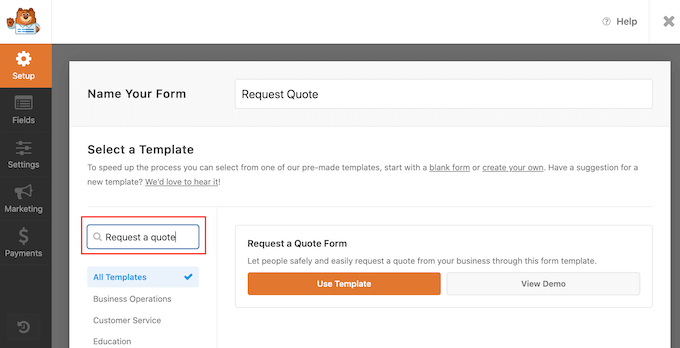
You’ll now go ahead and click on on on the ‘Use Template’ button.
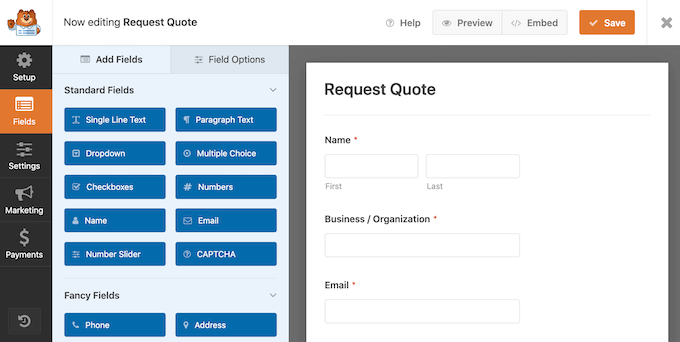
This will infrequently load the WPForms editor, with the form at the right kind and the entire different settings on the left.
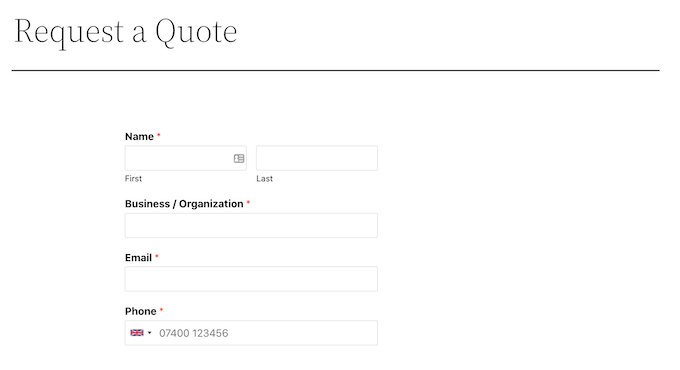
The ‘Request a Quote Form’ template has fields where the client can enter their wisdom, similar to their identify, e-mail deal with, and telephone quantity.
There’s moreover somewhat where they can roughly their explicit request.
The default form should art work well for plenty of internet pages, but it surely’s easy to customize the form if you wish to.
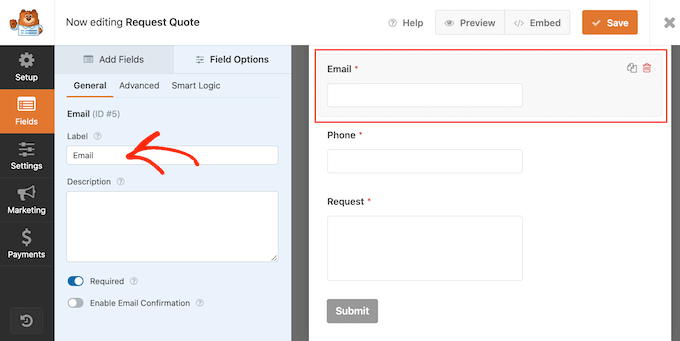
To edit a field, simply click on on to select it. The left-hand menu will then show all the settings you’ll use to customize this field.
For example, you’ll industry the text that appears above any field by the use of changing the text inside the ‘Label’ field.
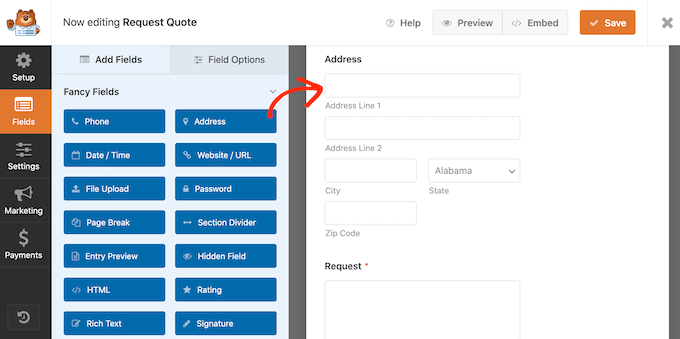
You’ll moreover add additional fields by the use of settling at the ‘Add Fields’ tab.
Then, simply drag and drop any field block onto the form.
You’ll moreover industry the order that the fields appear for your form the usage of drag and drop.
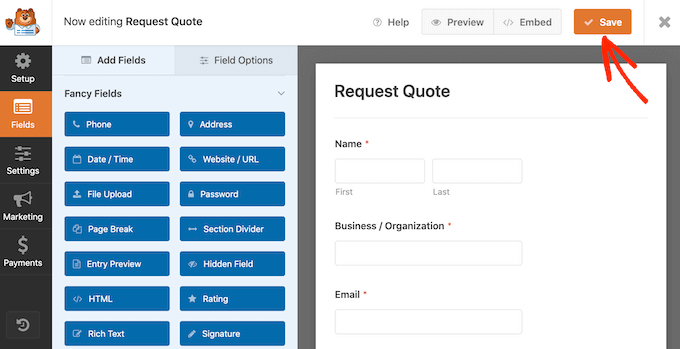
When you’re proud of how the form seems, go ahead and click on on on the ‘Save’ button.
You’ll now add this sort to any WordPress submit or internet web page the usage of the WordPress content material subject material editor.
Simply open the internet web page where you want so that you could upload the form and then click on on on the ‘+’ button.
Next, type ‘WPForms’ and click on on on the block so that you could upload it in your internet web page.

After all, open the dropdown menu and choose the quote request form.
WPForms will show a preview of the form on the computer screen. While you’re proud of how the form seems, you then’ll go ahead and save or submit the internet web page.
The quote request form will now be live for your visitors to use.
We hope this article helped you discover ways to create a services and products phase in WordPress. You may additionally like to check out our article on the absolute best are living chat device and learn how to create an e-mail e-newsletter.
While you most well-liked this article, then please subscribe to our YouTube Channel for WordPress video tutorials. You’ll moreover to find us on Twitter and Fb.
The submit Tips on how to Create a Services and products Segment in WordPress first seemed on WPBeginner.
Contents
- 0.0.1 Why Create a Products and services and merchandise Phase in WordPress?
- 0.0.2 Means 1. Tips about Create a Products and services and merchandise Phase with SeedProd (Truly useful)
- 0.0.3 Means 2. Creating a Products and services and merchandise Phase in WordPress the usage of Block Editor
- 0.0.4 BONUS: Rising Request a Quote Form In your Products and services and merchandise
- 0.1 Related posts:
- 1 Don’t Omit Out on Those Nice Internet Week Offers!
- 2 Find out how to Construct a A success On-line Group: A Step-by-Step Information
- 3 WordPress Webhosting – Your WordPress In Nebraska: Staying Protected From…

0 Comments