
Divi’s Fullwidth Header Module makes it easy to build dynamic header sections to your web site without having so that you could upload a few modules for each and every section. With the Fullwidth Header Module, you’ll add and customize the look of your text, footage, background, spacing, and additional — all from one module. When used in combination with Divi’s built-in background gradient settings, you’ll create attention-grabbing designs to market it your business or service.
In this tutorial, we will be able to show you how to create 3 unique fullwidth header layouts with gradient backgrounds.
Let’s get started!
Sneak Peek
Right here’s a preview of what we will be able to design.
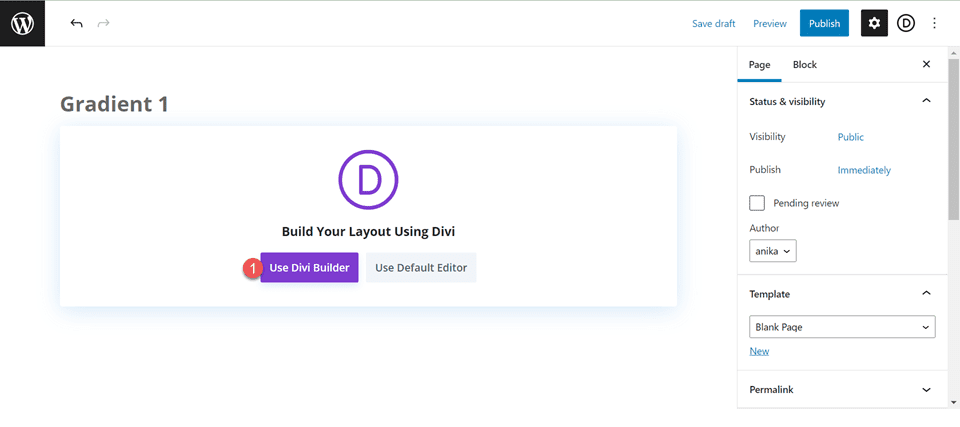
Gradient 1
Gradient 2

Gradient 3

What You Wish to Get Started
Previous to we begin, set up and turn on the Divi Theme and make sure to have the latest type of Divi for your web site.
Now, you’re able to begin out!
Let’s Get Started!
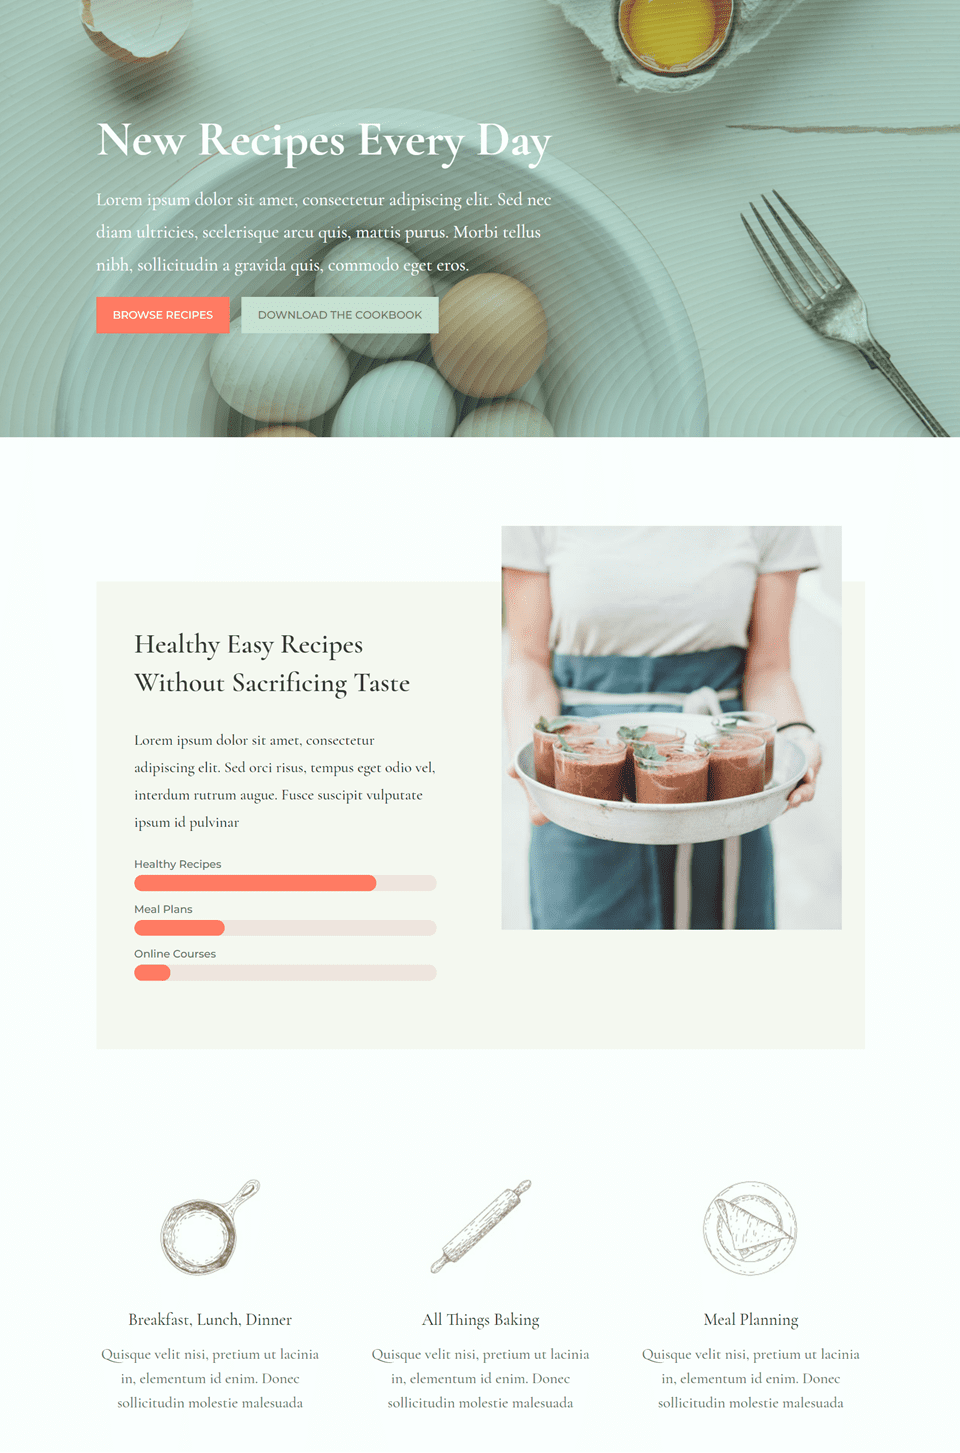
Gradient 1
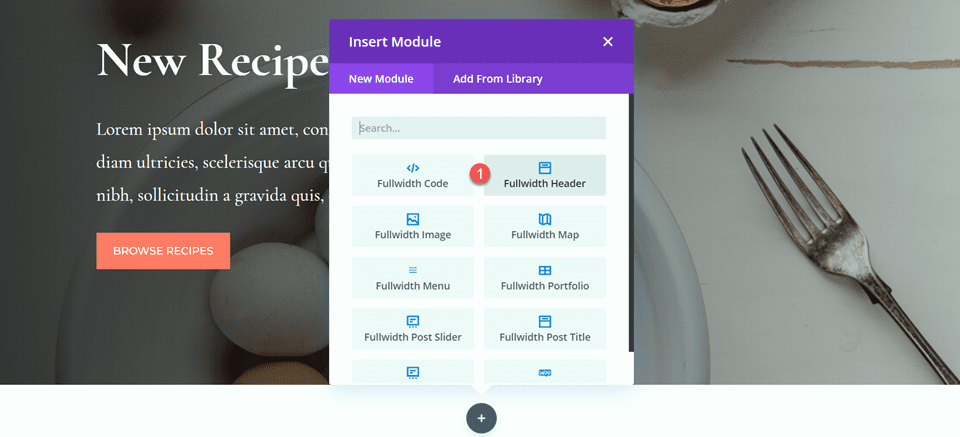
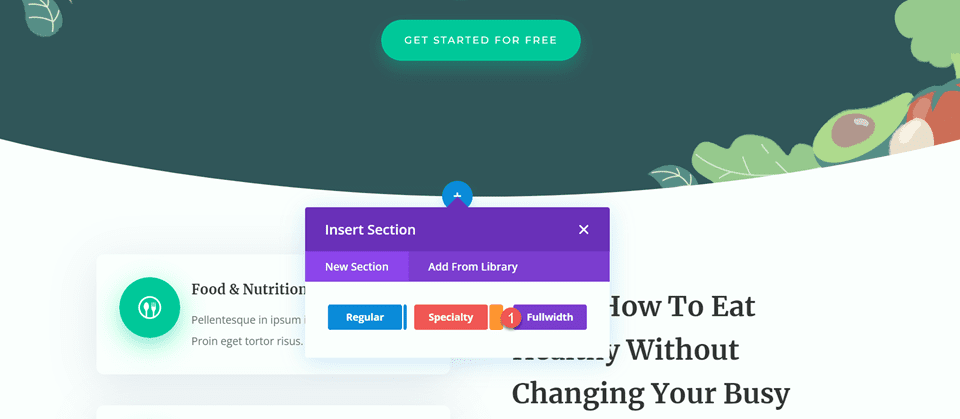
Create a New Internet web page with a Premade Construction
Let’s get began by the use of using a premade construction from the Divi library. For this design, we will be able to use the Foods Recipes Area Internet web page from the Meals Recipes Structure Pack.
Add a brand spanking new internet web page in your web site and gives it a reputation, then select the method to Use Divi Builder.
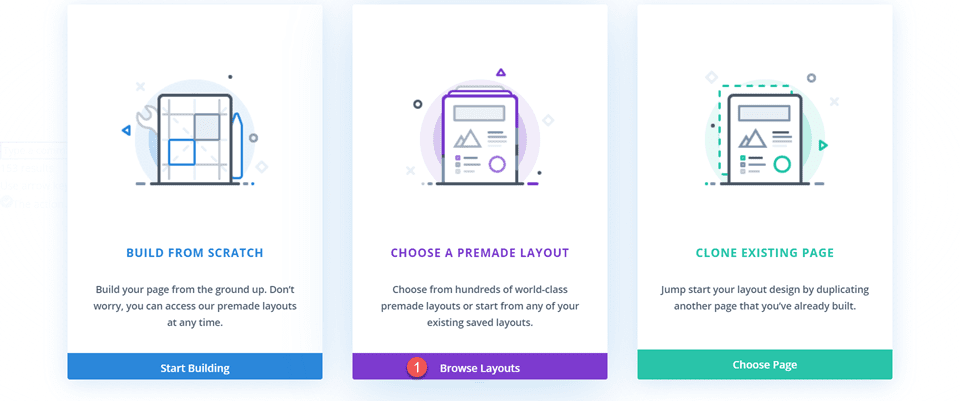
We can use a premade construction from the Divi library for this example, so select Browse Layouts.
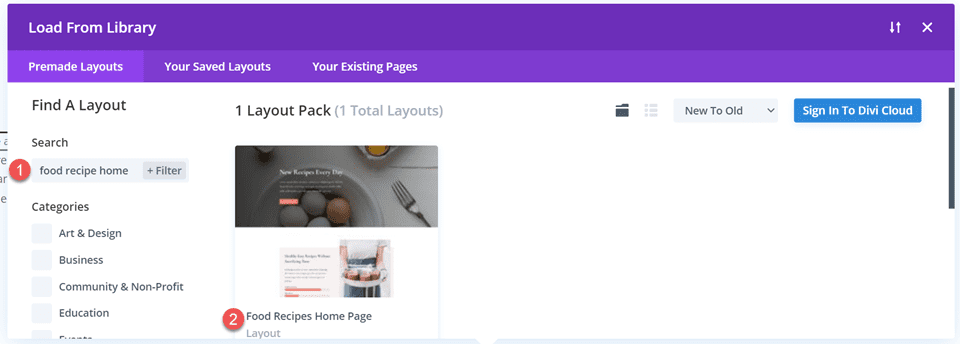
Search for and select the Foods Recipes Area Internet web page construction.
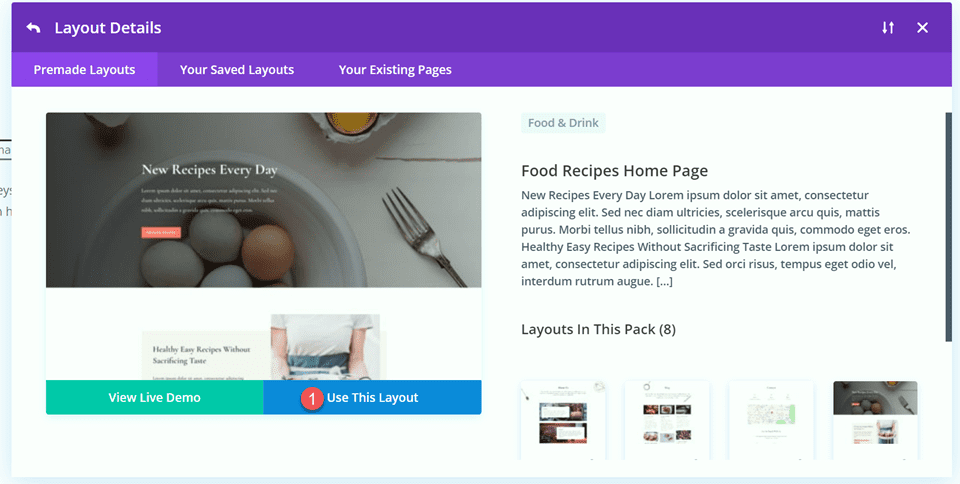
Choose Use This Construction so that you could upload the construction in your internet web page.
Now we’re in a position to build our design.
Recreate the Hero Segment Using the Fullwidth Header Module
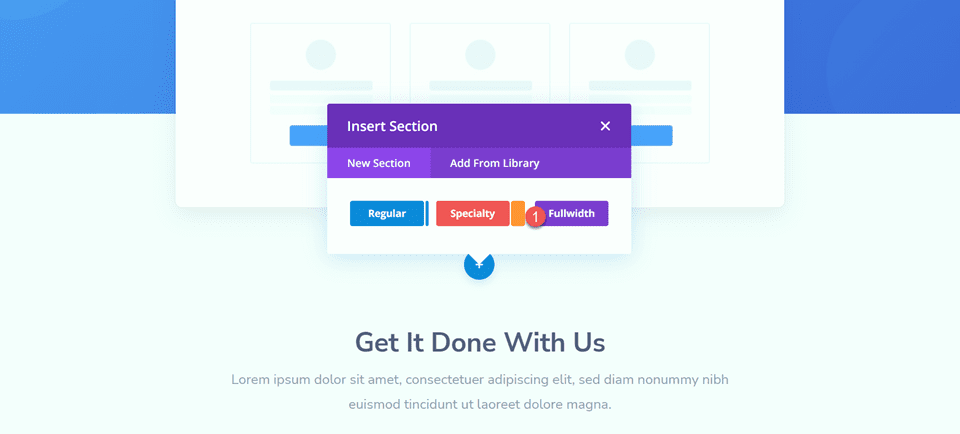
First, we’re going to get began by the use of recreating the hero phase on the most productive of this construction using a Fullwidth Header Module. Add a brand spanking new fullwidth phase to the internet web page, suitable beneath the prevailing hero phase.

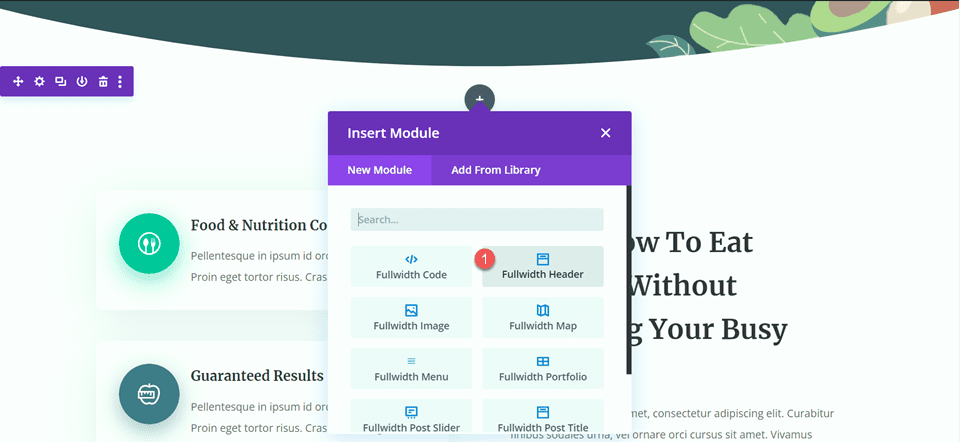
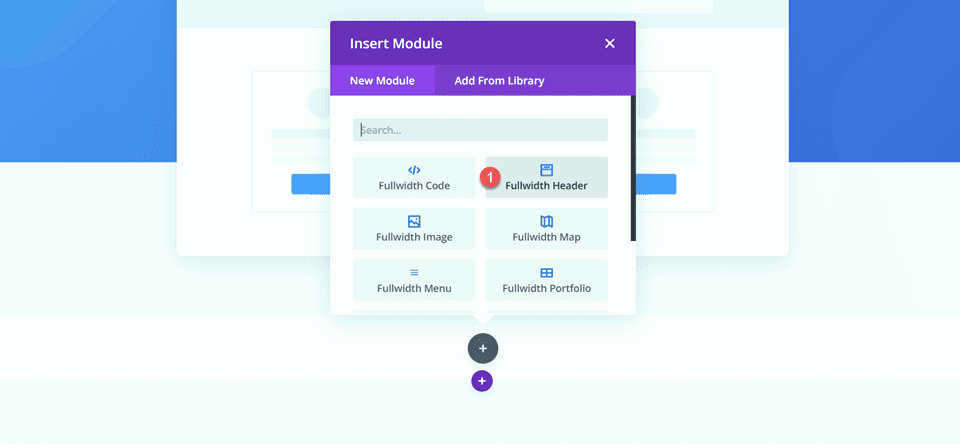
Next, add a Fullwidth Header Module to the fullwidth phase.
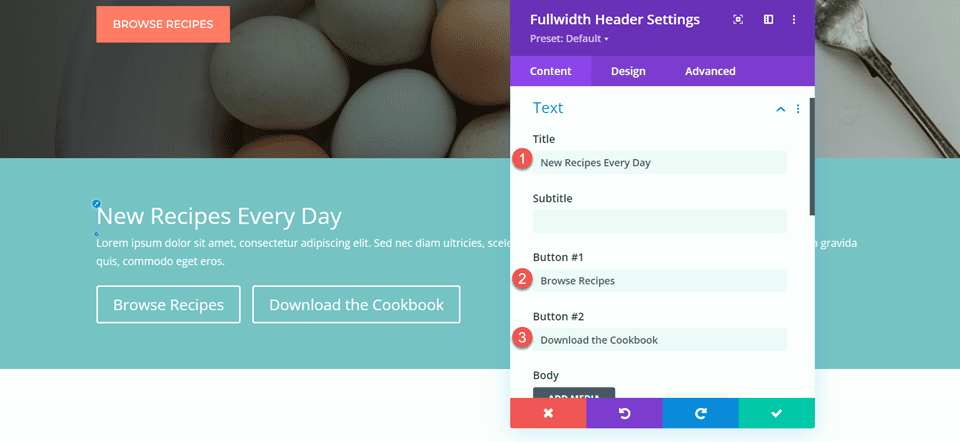
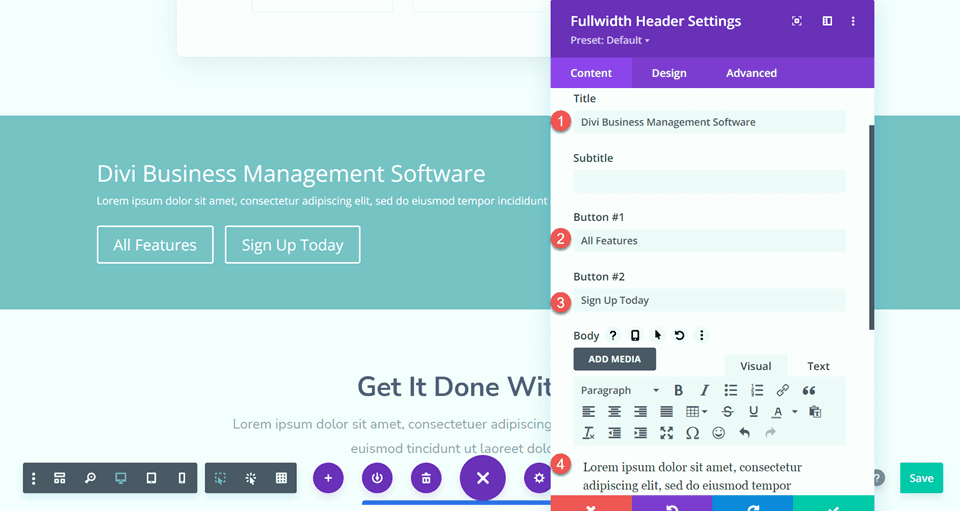
Now that our header module is in place, let’s exchange the header content material subject matter inside the Text phase of the Content material subject matter tab.
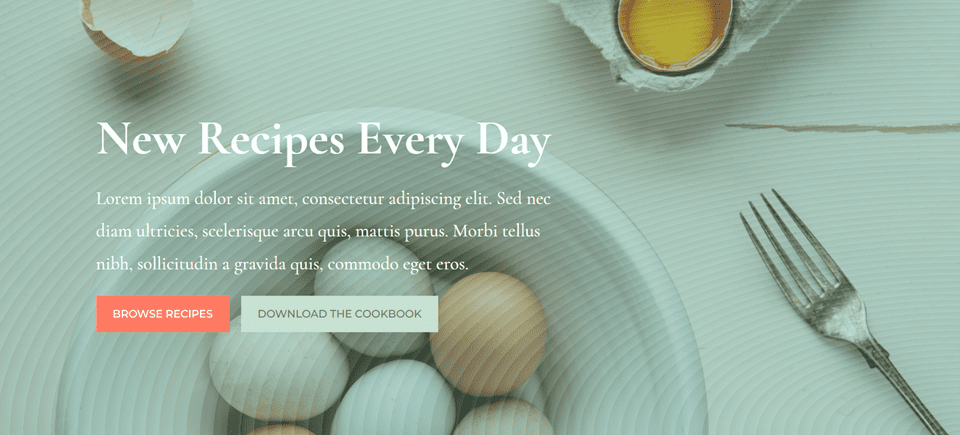
- Identify: New Recipes Each and every Day
- Button #1: Browse Recipes
- Button #2: Download the Cookbook
- Text: Lorem ipsum dolor sit amet, consectetur adipiscing elit. Sed nec diam ultricies, scelerisque arcu quis, mattis purus. Morbi tellus nibh, sollicitudin a gravida quis, commodo eget eros.

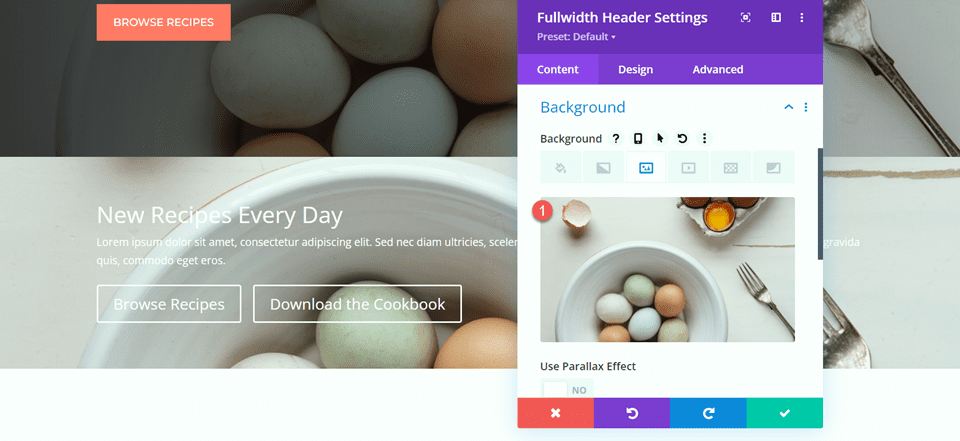
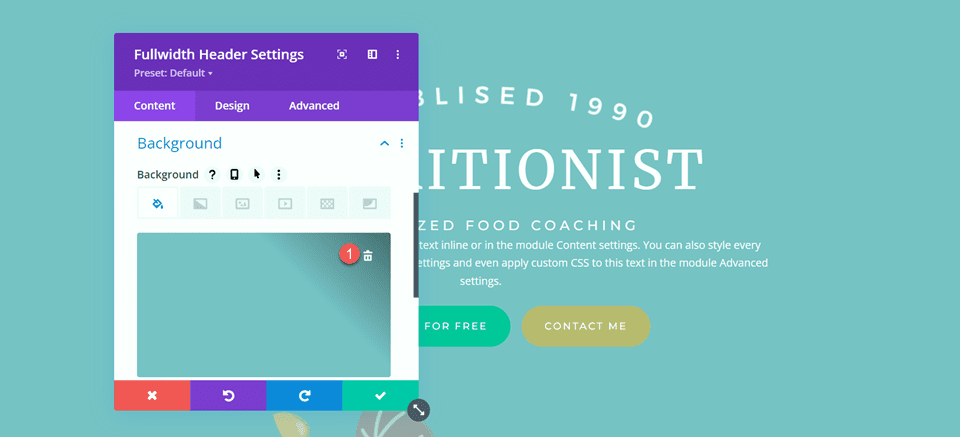
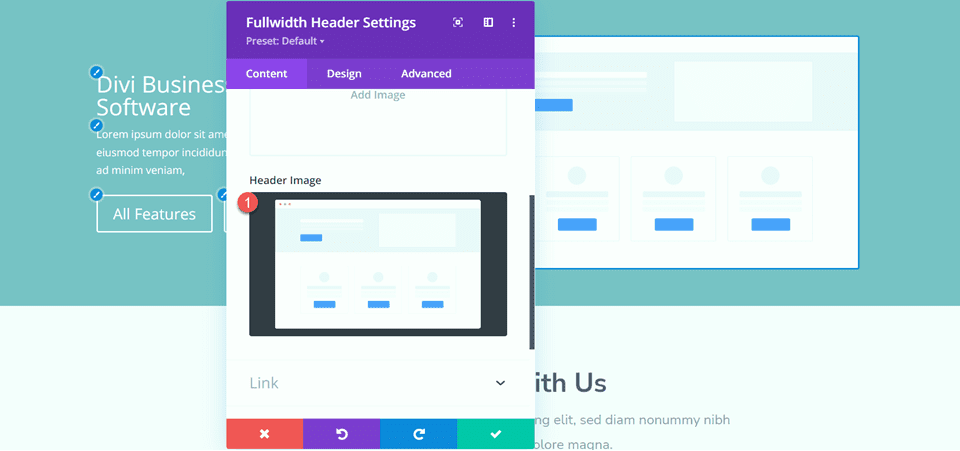
Underneath Background, remove the default background color and add the background image.
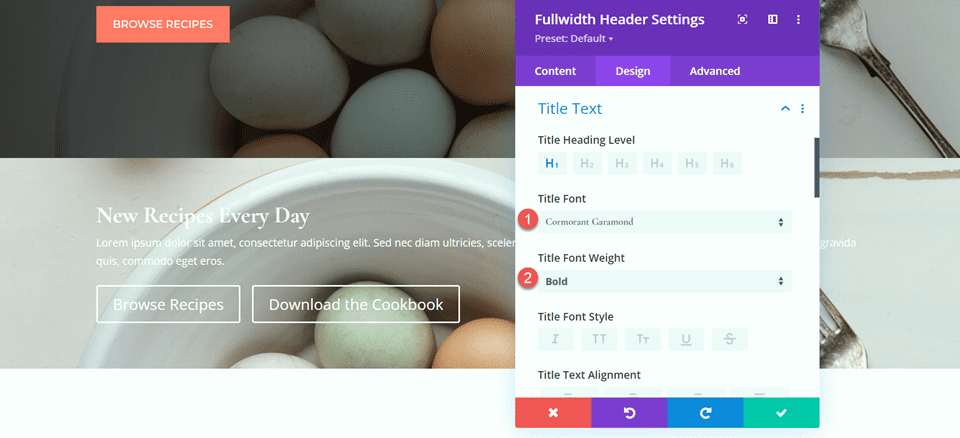
Switch to the design tab and open the title text settings. Customize the settings as follows:
- Identify Font: Cormorant Garamond
- Identify Weight: Bold
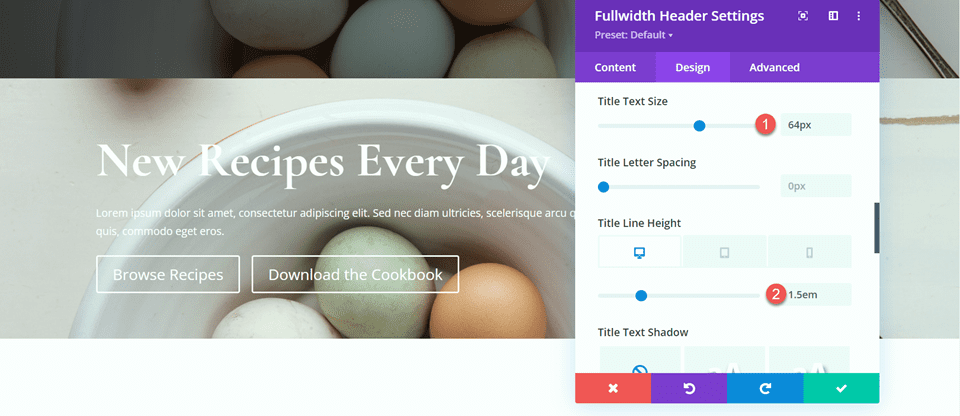
Next, set the title text size and line most sensible.
- Identify Text Size: 64px
- Identify Line Best on Desktop: 1.5em
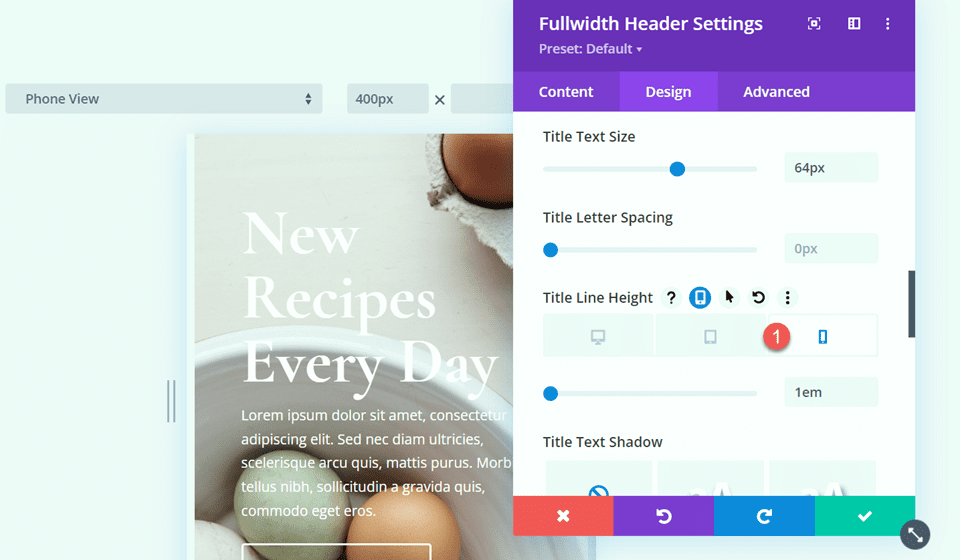
To optimize the design for cell units, we need to decrease the size of the title line most sensible on cell. Choose the responsive settings, then set the cell line most sensible.
- Identify Line Best on Cellular: 1em
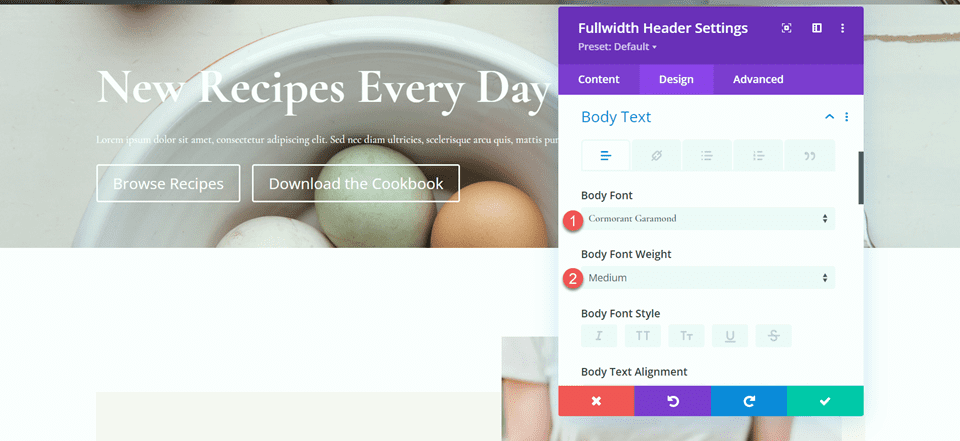
Now let’s customize the body font possible choices. Listed below are the settings:
- Body Font: Cormorant Garamond
- Body Font Weight: Medium
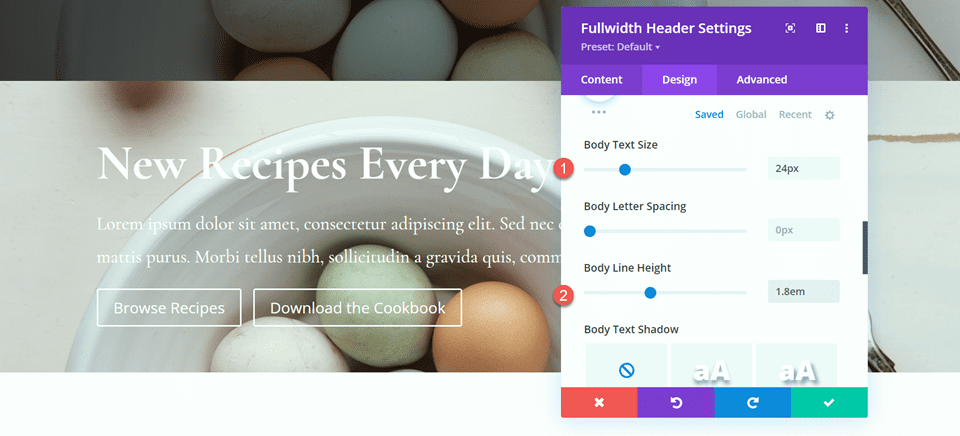
- Body Text Size: 24px
- Body Line Best: 1.8em
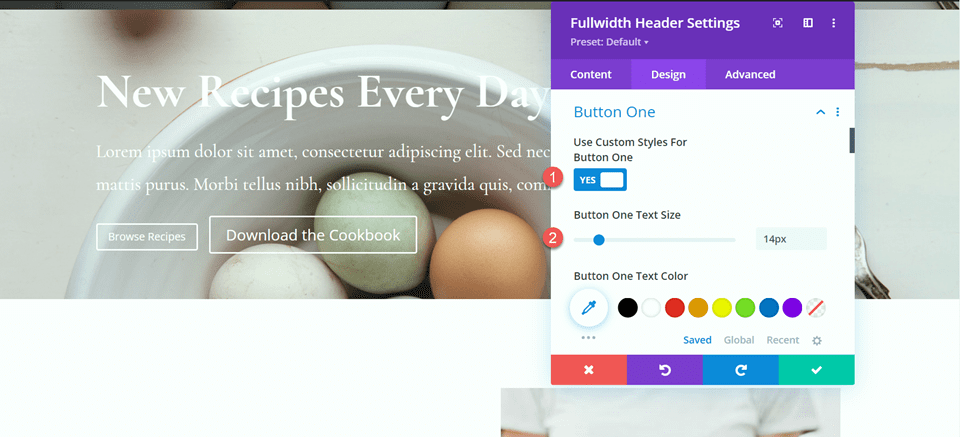
Customize Button Varieties
Next, open the button one settings. Permit custom designed sorts, then set the text size.
- Use Custom designed Varieties for Button One: Certain
- Button One Text Size: 14px
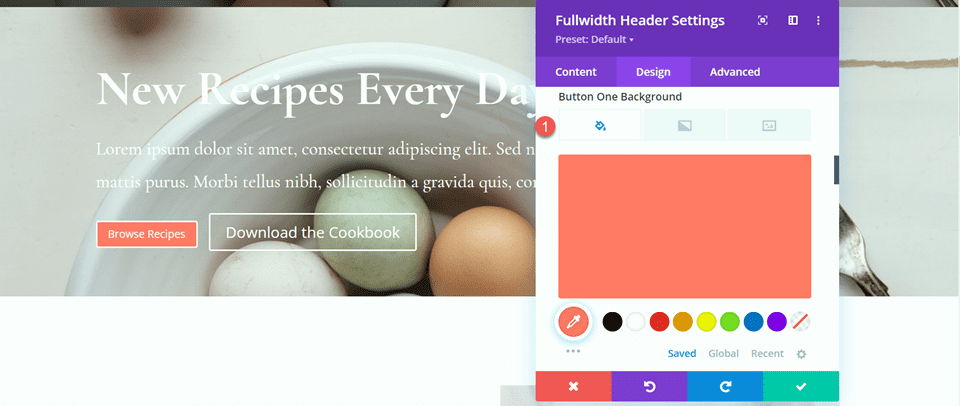
Add a background color to the button.
- Button One Background: #FF7864
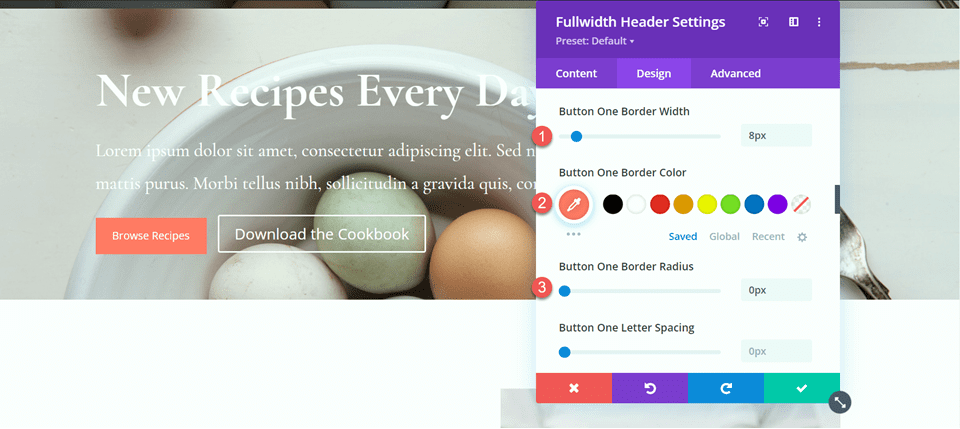
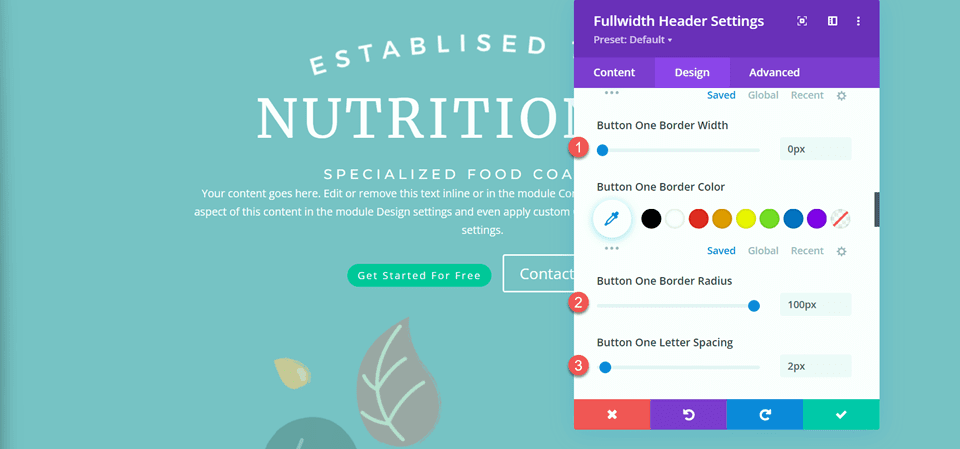
Customize the button border settings:
- Button One Border Width: 8px
- Button One Border Color: #FF7864
- Button One Border Radius: 0px
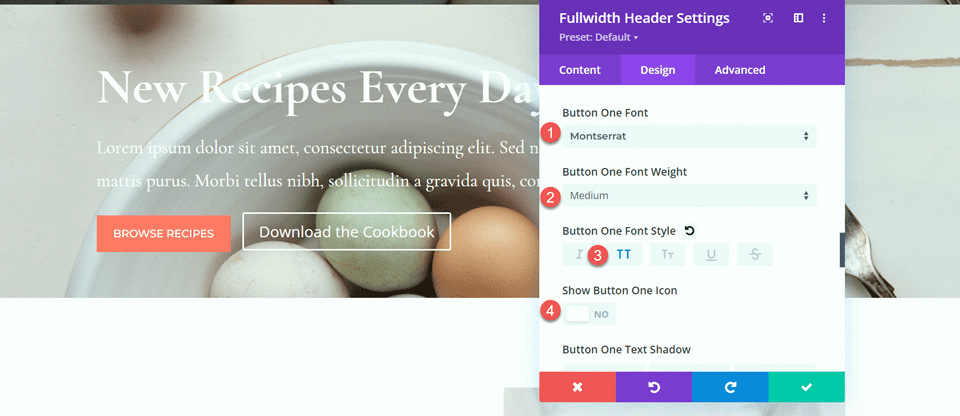
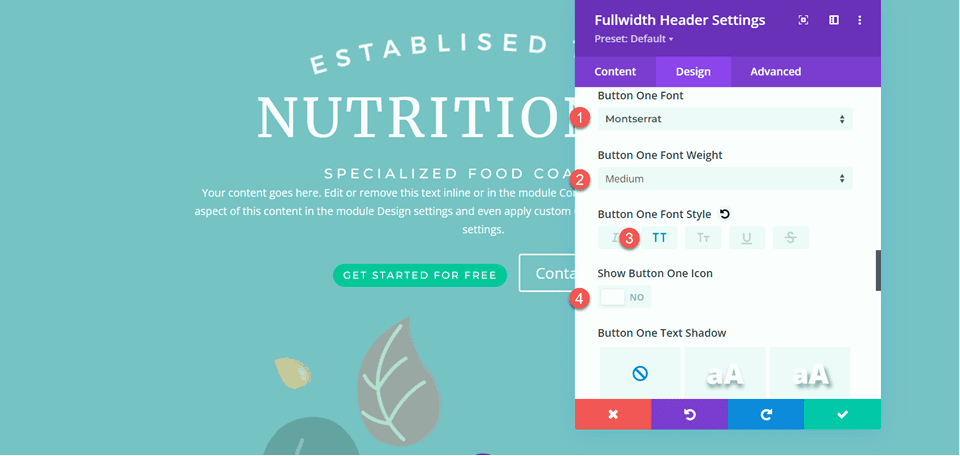
Next, customize the font and disable the button icon.
- Button One Font: Montserrat
- Button One Font Weight: Medium
- Button One Font Style: TT (Capitalized)
- Show Button One Icon: No
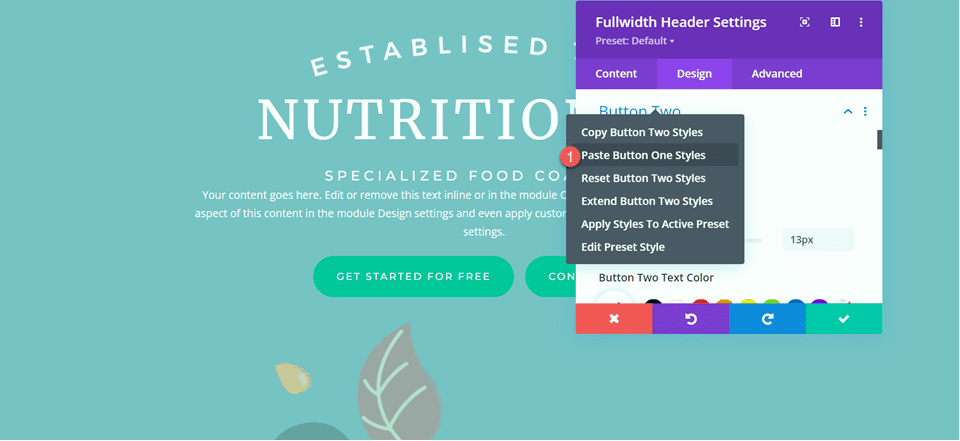
Next, we will be able to customize button two. The design is maximum regularly the an identical as button one alternatively with different colors. To skip some repetitive steps, let’s copy the button one sorts to button two, then customize the design from there.
First, right-click on the button one settings and replica the button one sorts.
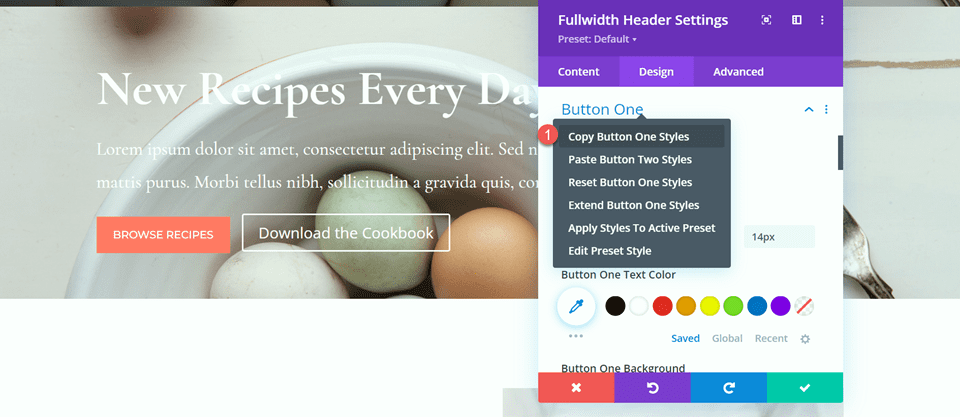
Next, right-click on the button two settings and paste the button one sorts.
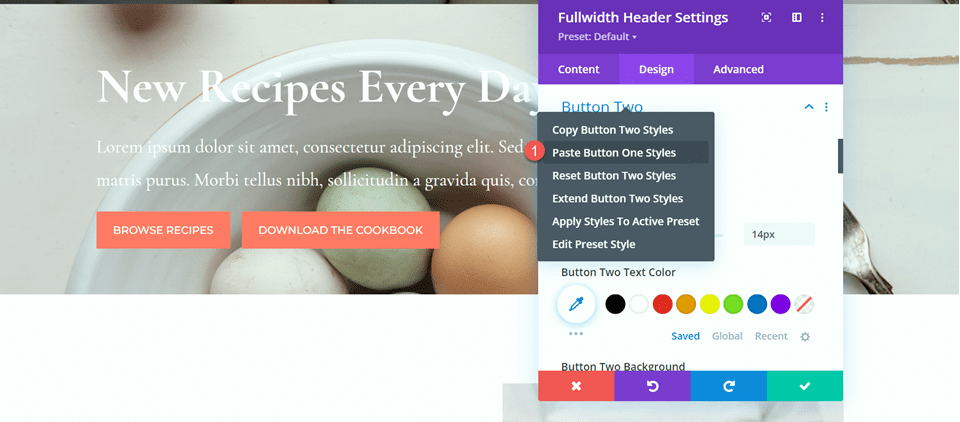
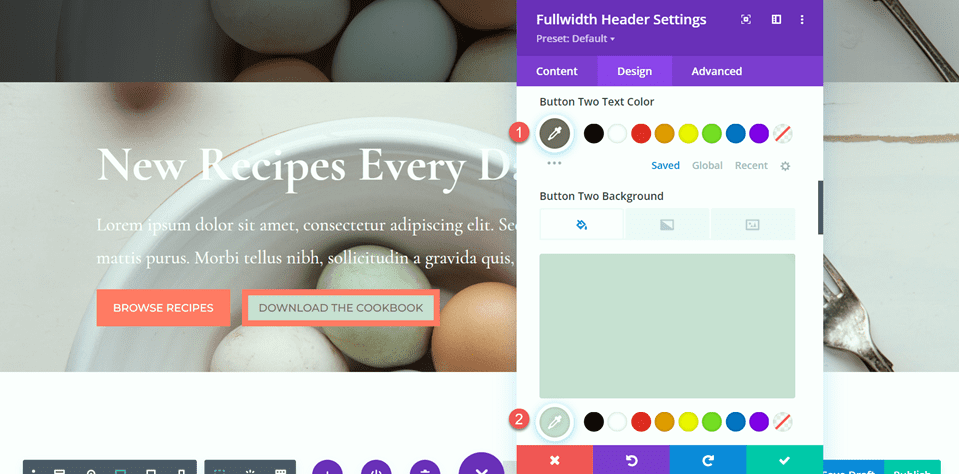
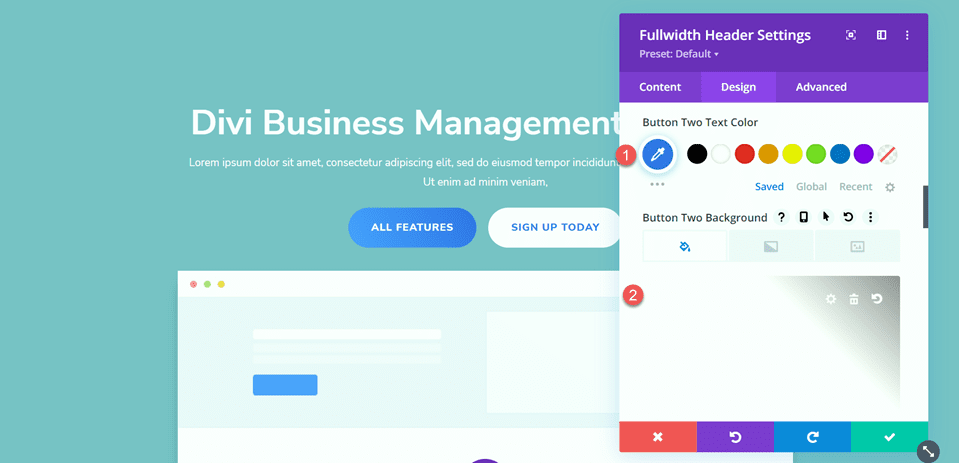
Change the text color and background color for button two.
- Button Two Text Color: #726D64
- Button Two Background: #CBDBD2
Change the button two border color as well.
- Button Two Border Color: #CBDBD2

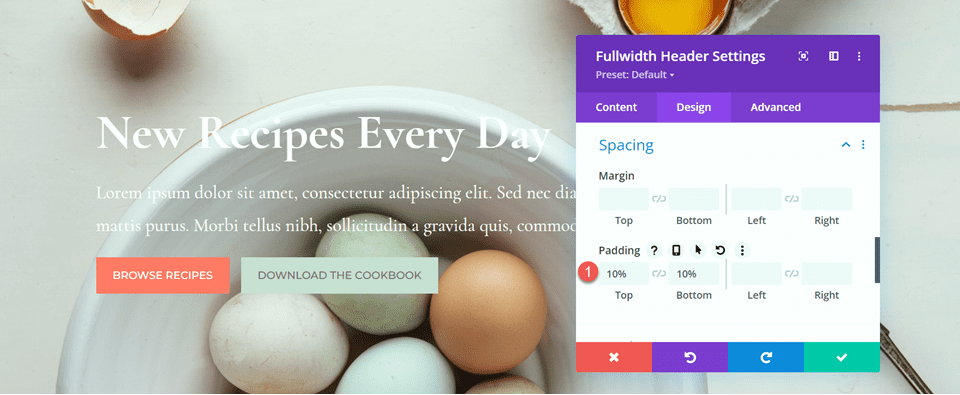
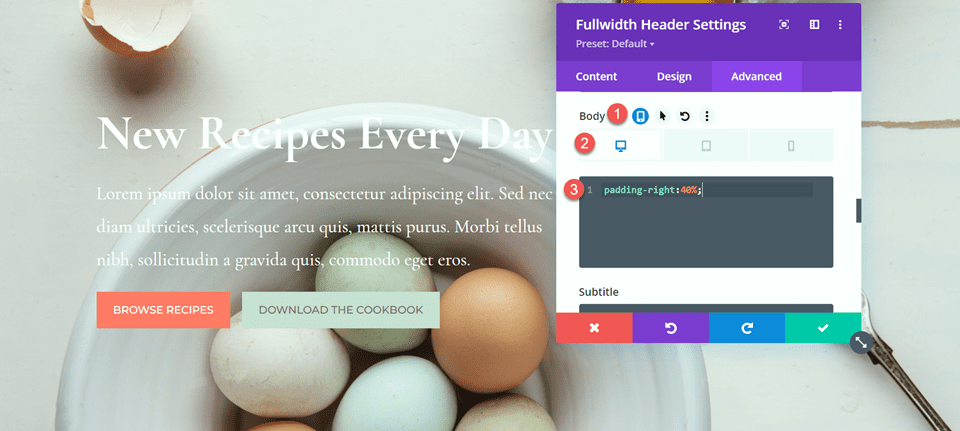
Now that our buttons are whole, open the spacing settings and set the best possible and bottom padding.
- Padding-Top: 10%
- Padding-Bottom: 10%
In spite of everything, open the Custom designed CSS settings underneath the difficult tab. Choose the responsive settings because of we will be able to most effective add the custom designed CSS for the desktop design. Add custom designed CSS to the Body CSS phase.
padding-right: 40%;
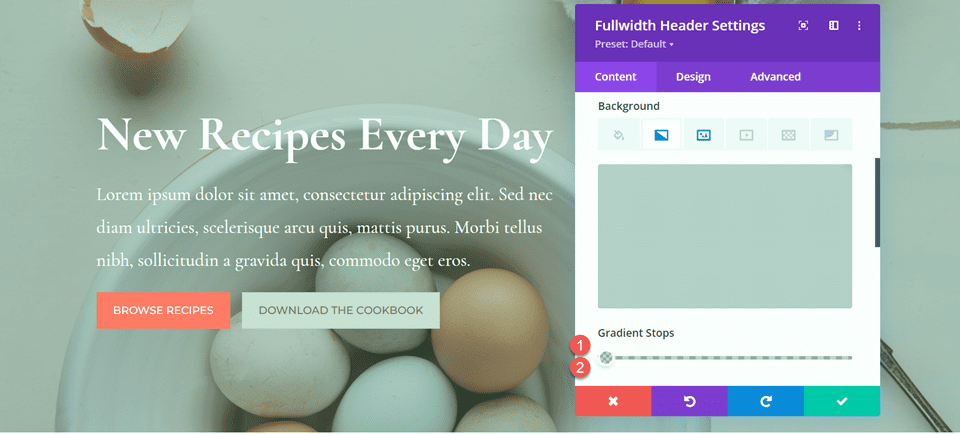
Add the Gradient to the Fullwidth Header Module
Now our fullwidth header design is whole and we can add the gradient. Navigate once more to the content material subject matter tab and open the background settings. Choose the gradient tab and add the gradient as follows:
- 0%: rgba(116,170,159,0.42)
- 1%: rgba(79,127,108,0.35)
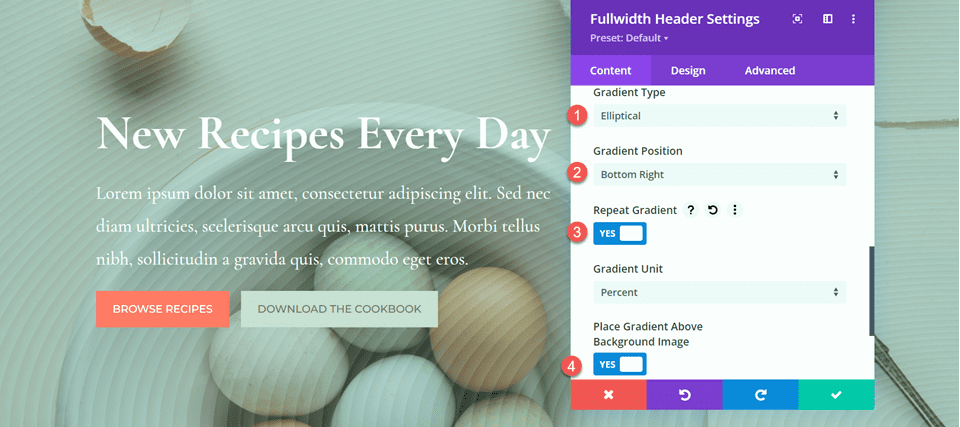
Next, customize the gradient settings:
- Gradient Kind: Elliptical
- Gradient Position: Bottom Right kind
- Repeat Gradient: Certain
- Place Gradient Above Background Image: Certain
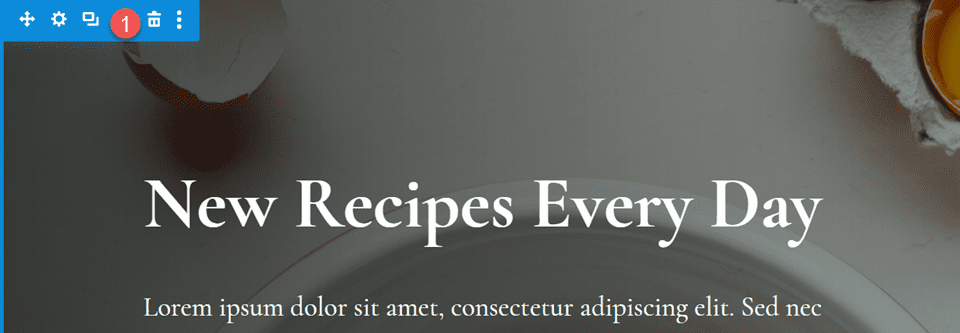
In spite of everything, delete the out of date header phase from the original construction.
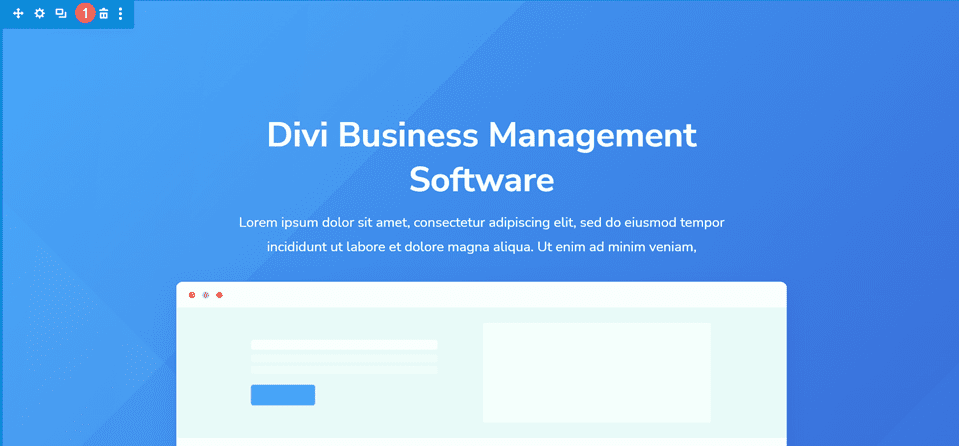
Final Design
That is the overall design for our first gradient header. As you’ll see, the repeated gradient with the sophisticated transparent colors creates a fascinating background for this header phase without overpowering the background image.
Gradient 2
Create a New Internet web page with a Premade Construction
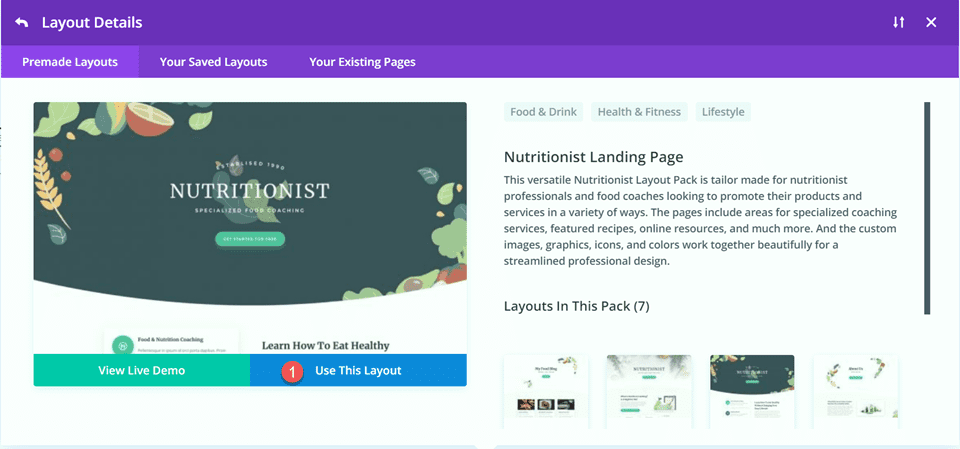
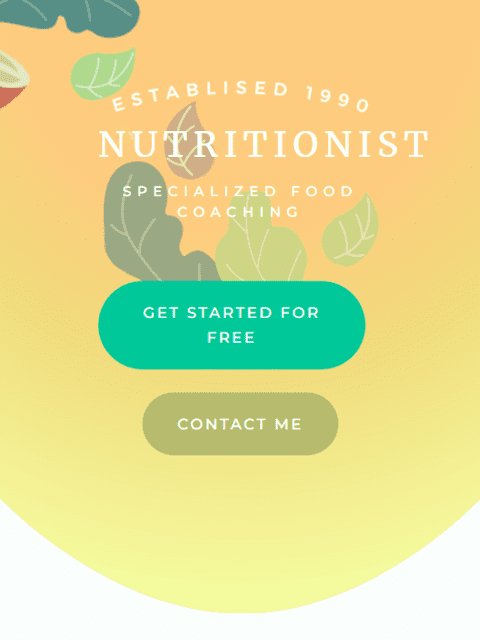
For our next design, we will be able to use the Nutritionist Landing Internet web page from the Nutritionist Structure Pack.
Add a brand spanking new internet web page in your web site and gives it a reputation, then select the method to Use Divi Builder.
Since we’re using a premade construction from the Divi Library, select Browse Layouts.
Search for and select the Nutritionist Landing Internet web page construction.

Choose Use This Construction so that you could upload the construction in your internet web page.
Now we’re in a position to build our design.
Recreate the Hero Segment Using the Fullwidth Header Module
We’re going to be recreating the present hero phase using the Fullwidth Header Module. Get began by the use of together with a fullwidth phase to the internet web page, beneath the present hero phase.
Next, add the Fullwidth Header Module to the phase.
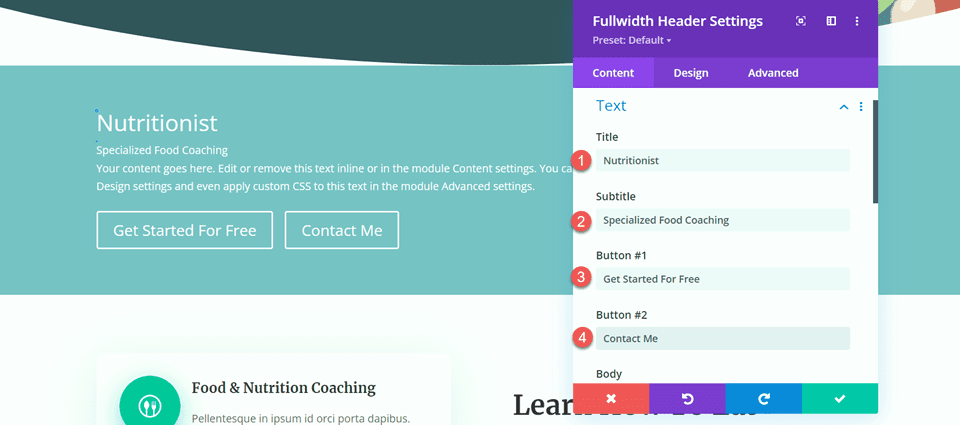
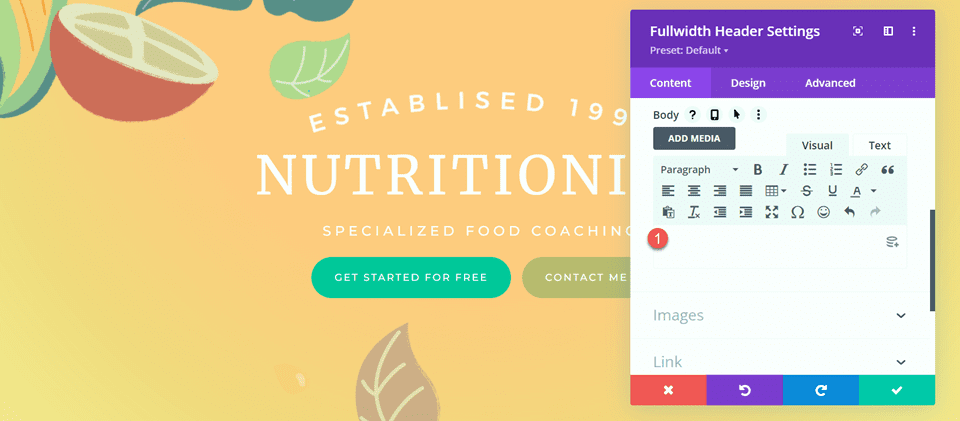
Underneath the content material subject matter tab, add the text for the module as follows:
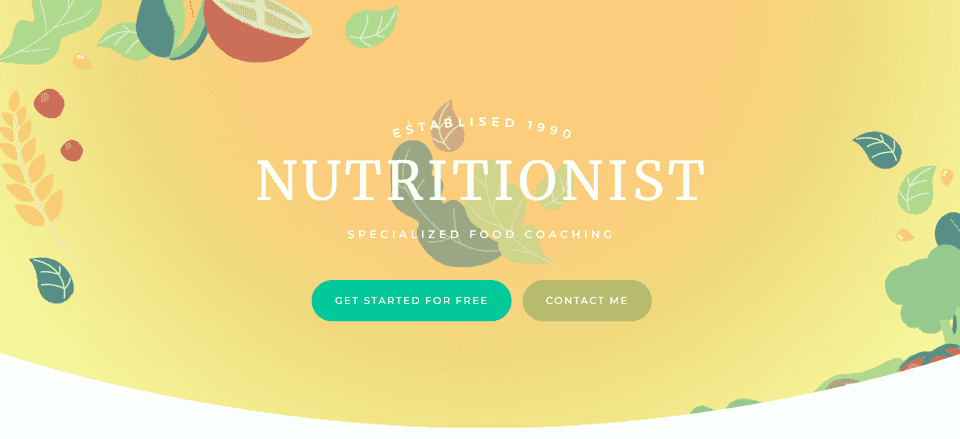
- Identify: Nutritionist
- Subtitle: Specialized Foods Coaching
- Button #1: Get Started For Unfastened
- Button #2: Contact Me
You’ll be capable to moreover remove the body text at this step, despite the fact that we remove it later on inside the tutorial.
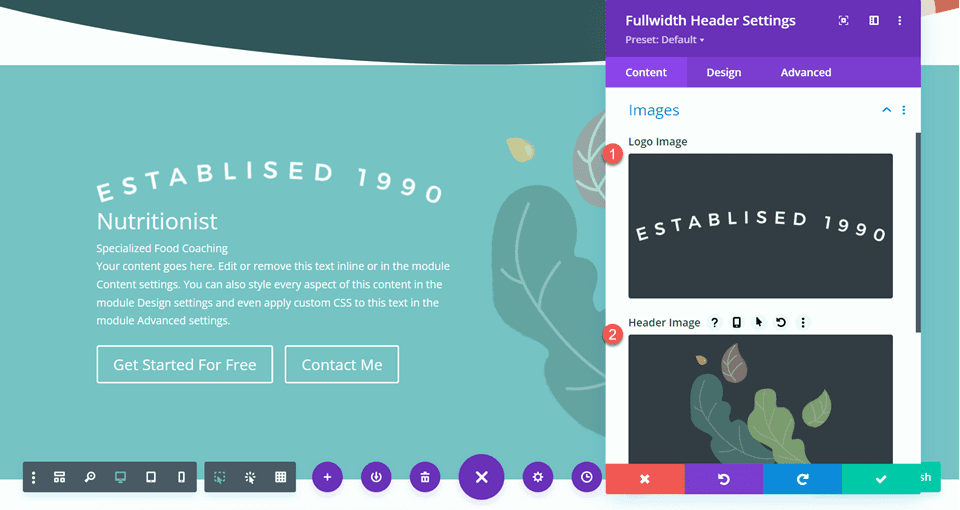
Open the image settings. Set the logo image to the “Established 1990” image and set the header image to the graphic of the leaves.
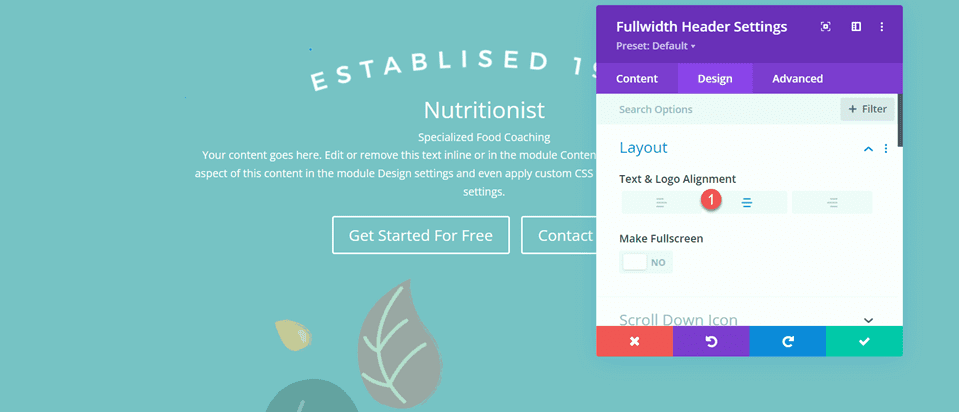
Next, switch to the Design tab. Set the text and brand alignment to center.
- Text & Logo Alignment: Heart
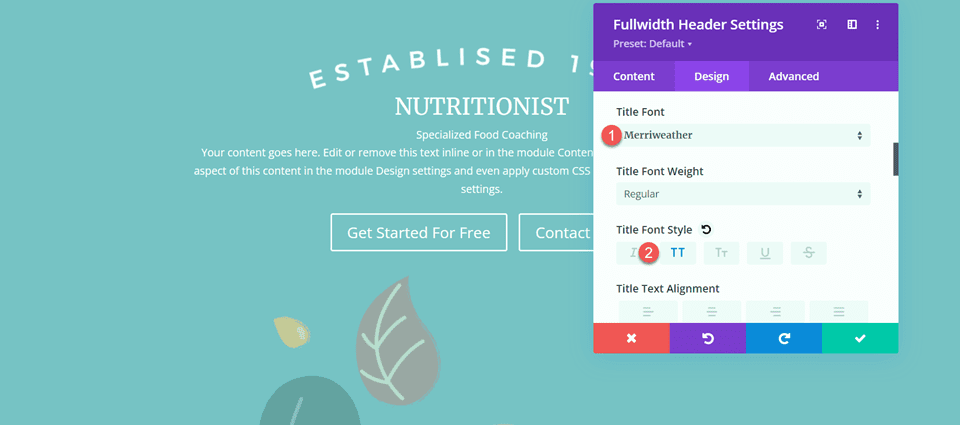
Customize the Identify font as follows:
- Identify Font: Merriweather
- Identify Font Style: TT (Capitalized)
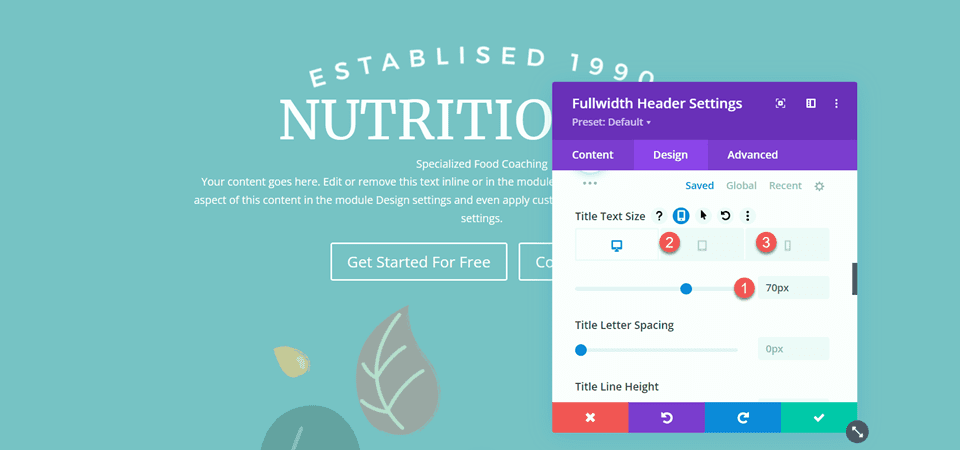
To optimize the design for tablet and cell, we will be able to use the responsive settings so that you could upload different title text sizes.
- Identify Text Size – Desktop: 70px
- Identify Text Size – Tablet: 50px
- Identify Text Size – Cellular: 30px
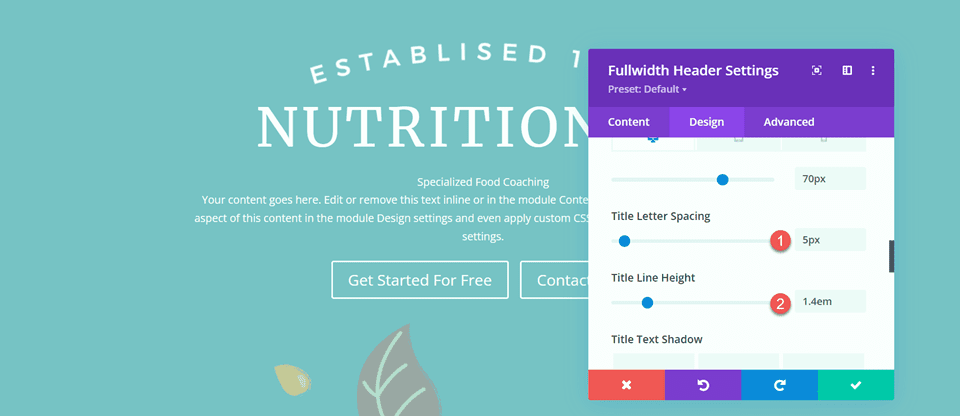
Next, set the title letter spacing and line most sensible.
- Identify Letter Spacing: 5px
- Identify Line Best: 1.4em
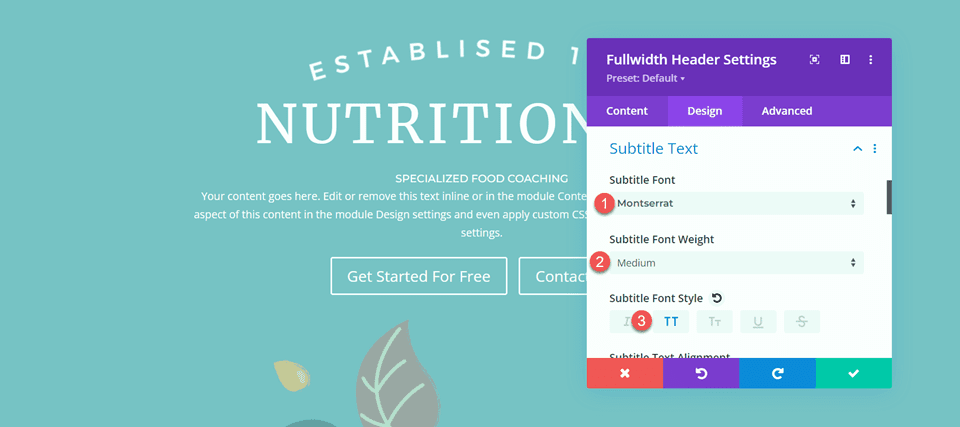
Open the subtitle settings and customize the font.
- Subtitle Font: Montserrat
- Subtitle Font Weight: Medium
- Subtitle Font Style: TT (Capitalized)
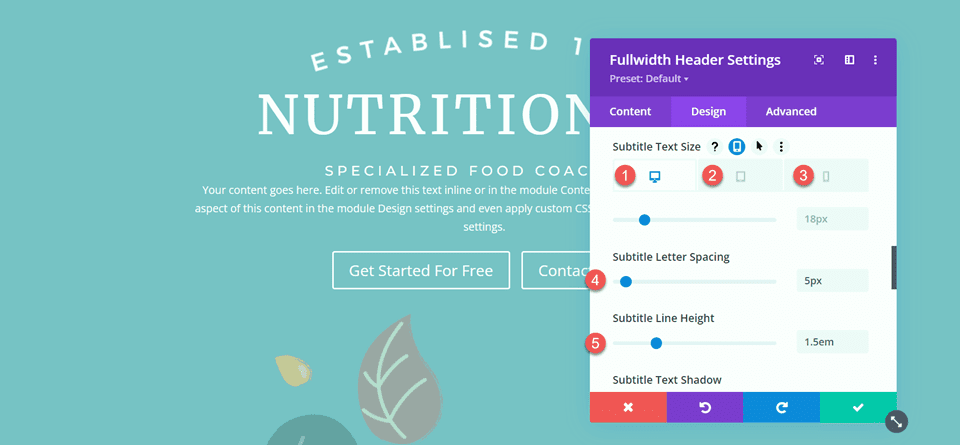
We can moreover set responsive text sizes for the subtitle. The sizes are as follows:
- Subtitle Text Size – Desktop and Tablet: 18px
- Subtitle Text Size – Cellular: 12px
Additionally, set the subtitle letter spacing and line most sensible.
- Subtitle Letter Spacing; 5px
- Subtitle Line Best: 1.5em
Customize Button Varieties
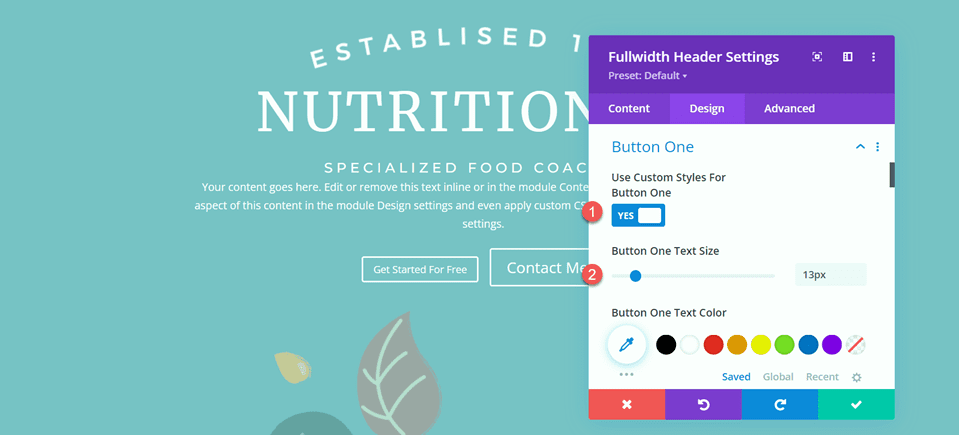
Switch without delay to the Button One settings. Permit custom designed sorts and set the text size.
- Use Custom designed Varieties for Button One: Certain
- Button One Text Size: 13px
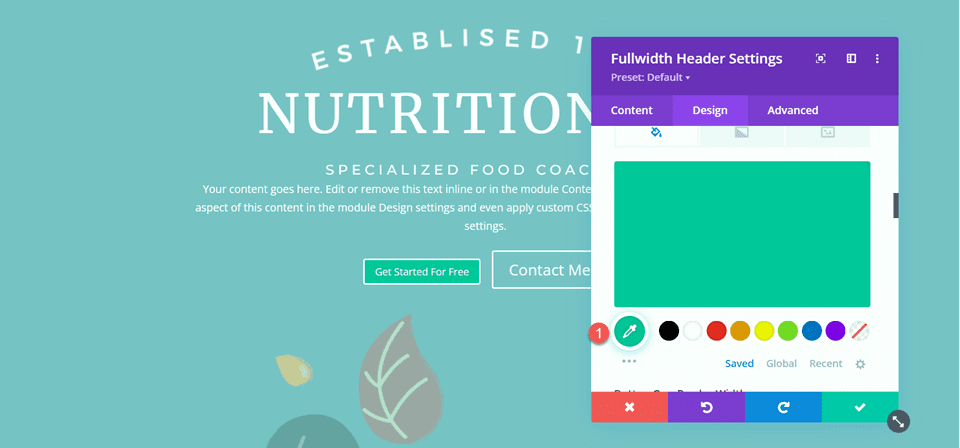
Add a background color.
- Color 1 Background: #15C39A
Next, set the border width and radius, and the letter spacing.
- Button One Border Width: 0px
- Button One Border Radius: 100px
- Button One Letter Spacing: 2px
Control the font settings as follows:
- Button One Font: Montserrat
- Button One Font Weight: Medium
- Button One Font Style: TT (Capitalized)
- Show Button One Icon: No
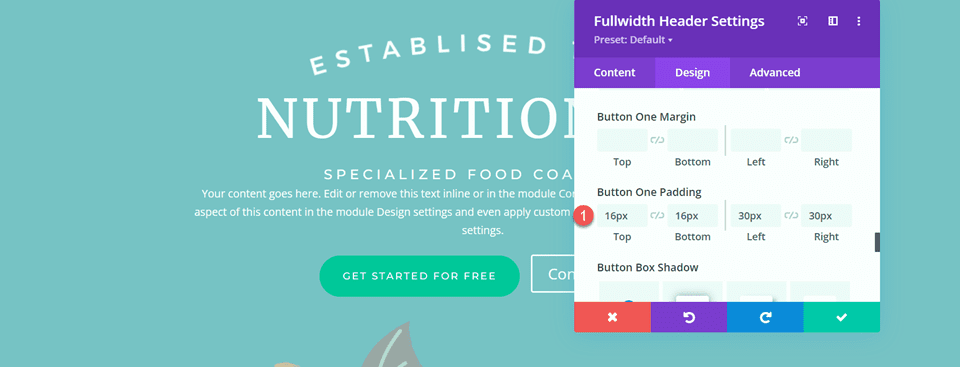
In spite of everything, add padding to the button.
- Button One Padding–Top: 16px
- Button One Padding–Bottom: 16px
- Button One Padding–Left: 30px
- Button One Padding–Right kind: 30px
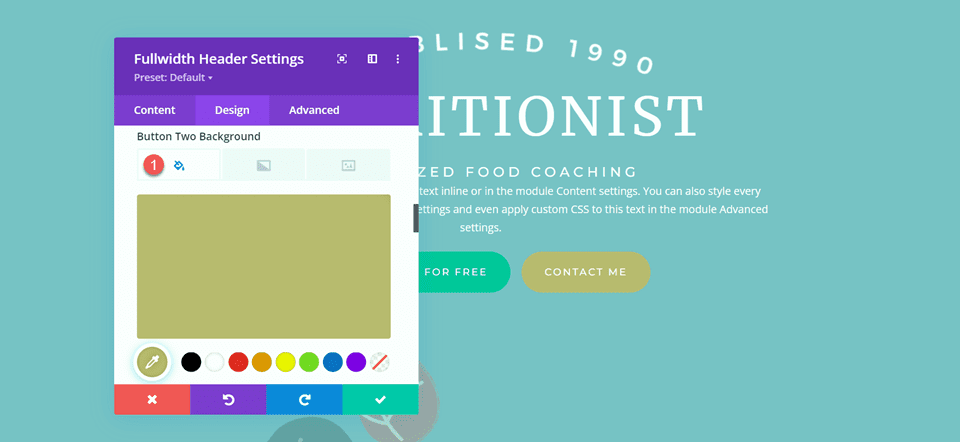
The types for Button Two are largely the an identical as Button One, so we will be able to copy the Button One Varieties to Button Two and then make a small business to the colors.
First, right-click on the Button One settings and replica the types.
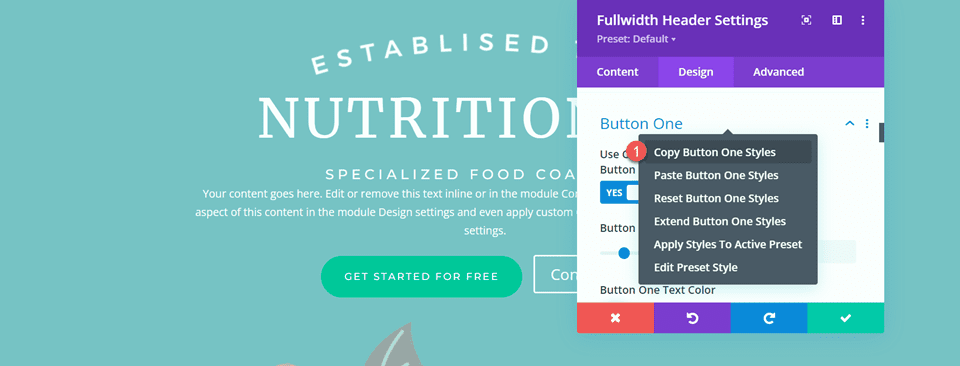
Then, right-click on the Button Two settings and paste the Button One sorts.
Change the Button Two background.
- Button Two Background: #BAB66F
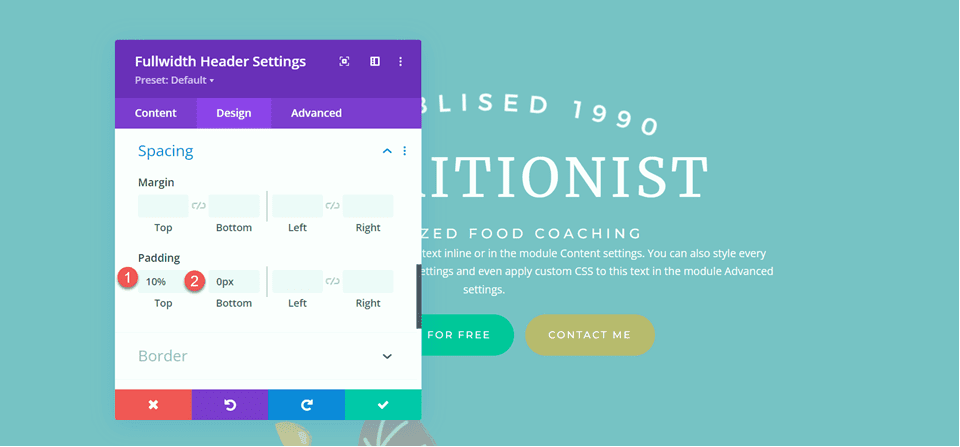
Next, navigate to the Spacing settings and set the padding as follows:
- Padding-Top: 10%
- Padding-Bottom: 0px
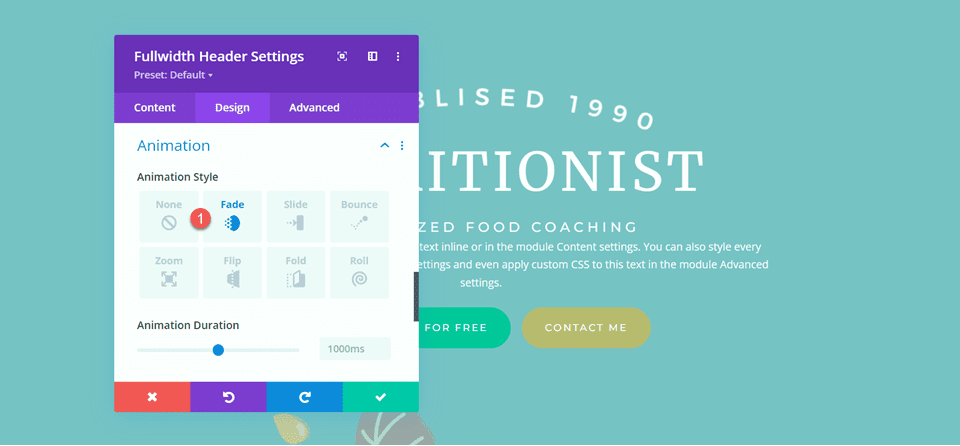
open the Animation phase underneath the Design tab and set the module to fade.
- Animation Style: Fade
Add the Gradient to the Fullwidth Header Module
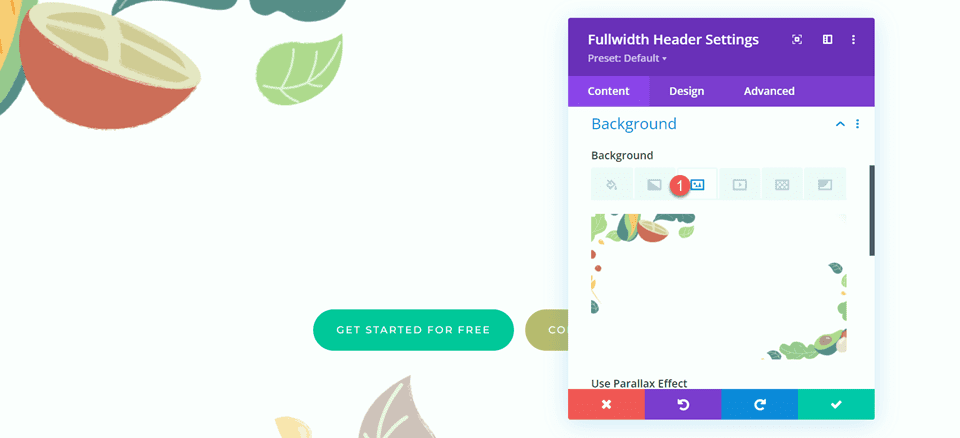
Switch to the content material subject matter tab and open the background settings. First, remove the present background color.
Next, add the background image.
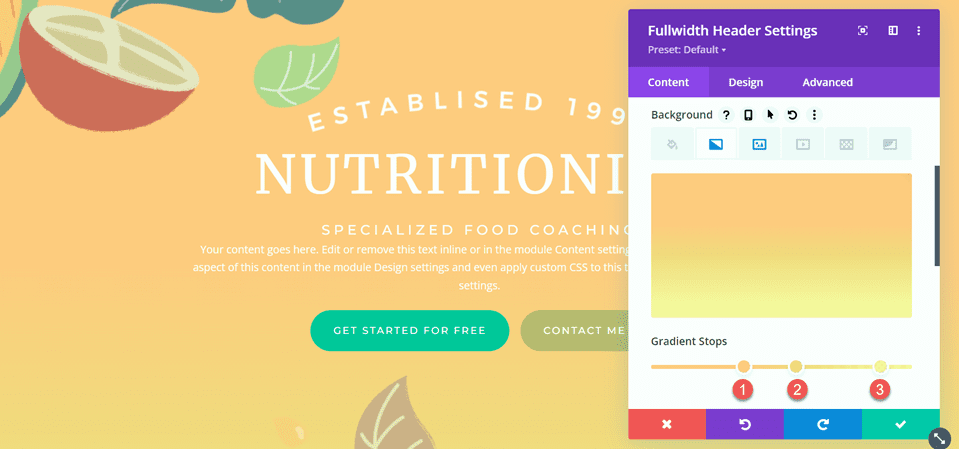
Switch to the gradient tab and add the background gradient.
- 35%: #FFC77F
- 56%: #F2D57D
- 90%: rgba(247,242,145,0.88)
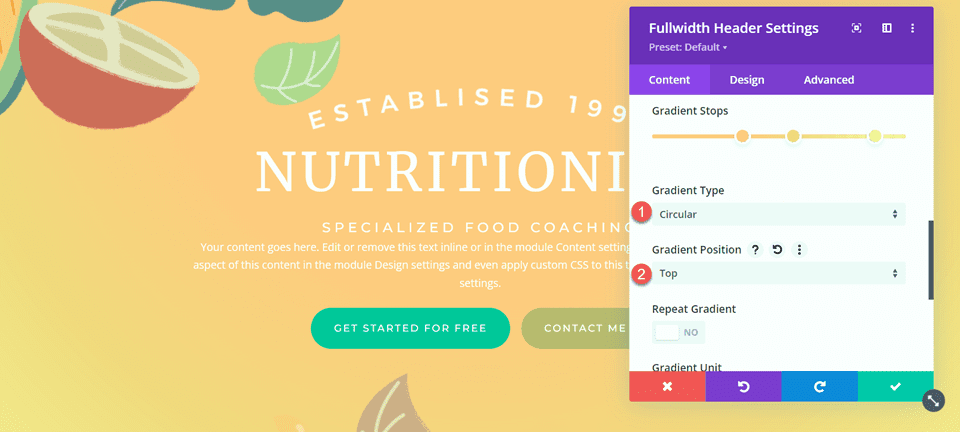
Set the Gradient Kind and Gradient Position.
- Gradient Kind: Spherical
- Gradient Position: Top
Remove the body text for those who haven’t already.
In spite of everything, delete the original hero phase above.
Custom designed CSS
Now all of our basic settings are in place, alternatively we need to transfer in with some custom designed CSS to complete the design and control one of the vital header footage. Switch over to the Sophisticated tab and open the Custom designed CSS phase.
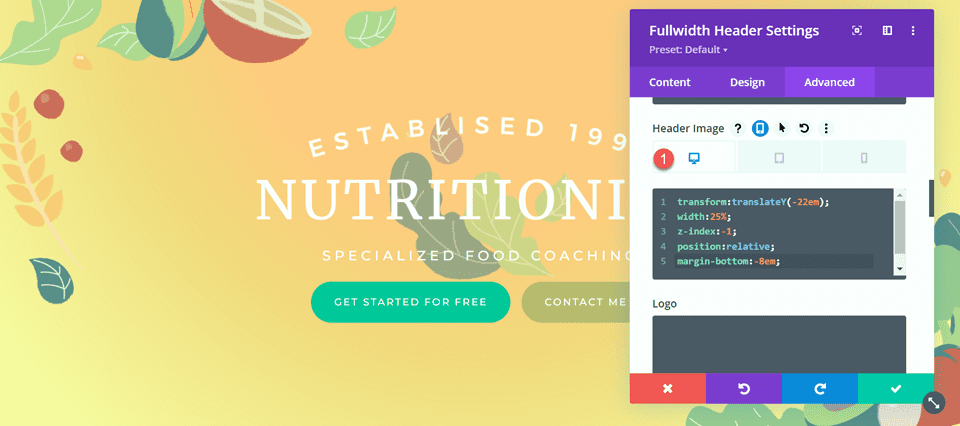
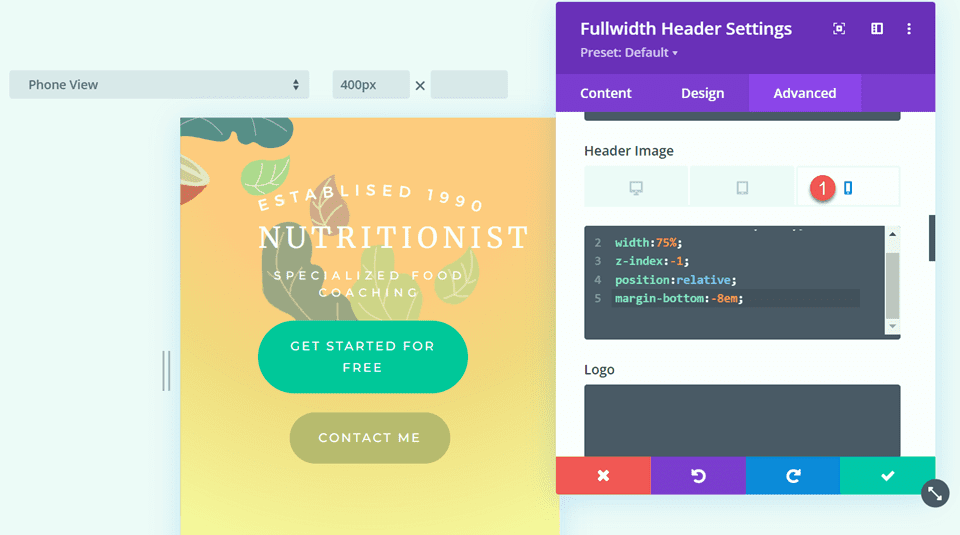
First, let’s customize the header image CSS. We can use responsive possible choices to set different CSS for more than a few device sizes. The ones settings will switch the center leaf image up and at the back of the header text and as well as adjusts the size and margins. Add the following custom designed CSS to the desktop settings.
turn out to be: translateY(-22em);
width: 25%;
z-index: -1;
position: relative;
margin-bottom: -8em;
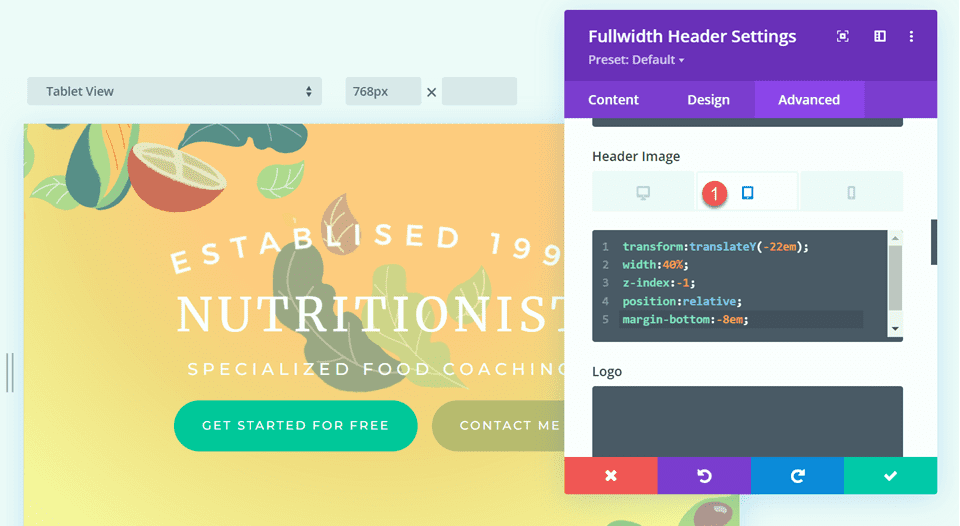
Next, add the following custom designed CSS to the tablet settings of the header image phase.
turn out to be: translateY(-22em);
width: 40%;
z-index: -1;
position: relative;
margin-bottom: -8em;
In spite of everything, add the following custom designed CSS to the cell settings of the header image phase.
turn out to be: translateY(-24em);
width: 75%;
z-index: -1;
position: relative;
margin-bottom: -8em;
We can moreover add custom designed CSS to the logo phase. The ones settings may well be responsive as well.
First, add the following custom designed CSS to the desktop settings of the logo phase.
width: 40%;
![]()
Next, add the following custom designed CSS to the tablet settings of the logo phase.
width: 60%;
![]()
Then add the following custom designed CSS to the cell settings of the logo phase.
width: 60%;
![]()
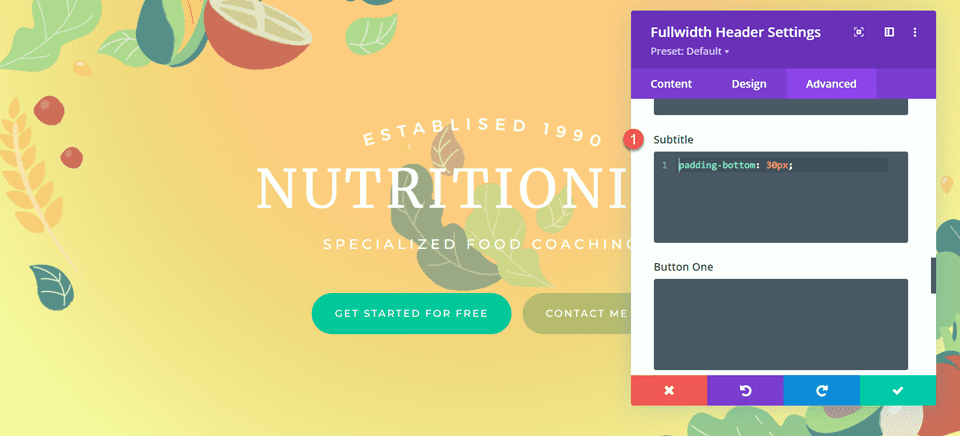
In spite of everything, add the following custom designed CSS to the subtitle phase.
padding-bottom: 30px;
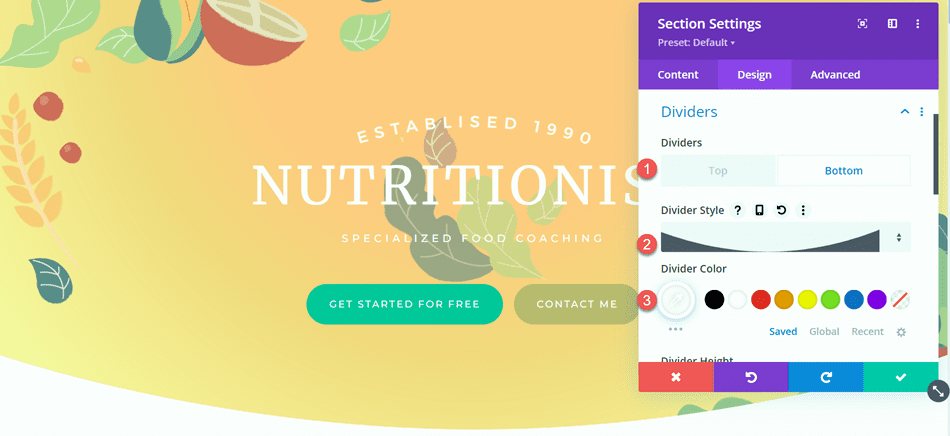
For the remainder step in this design, we need to add the rounded bottom divider. Open the fullwidth phase settings and navigate to the design tab. Open the Dividers settings and add a bottom divider.
- Dividers: Bottom
- Divider Style: Curved
- Divider Color: #FFFFFF
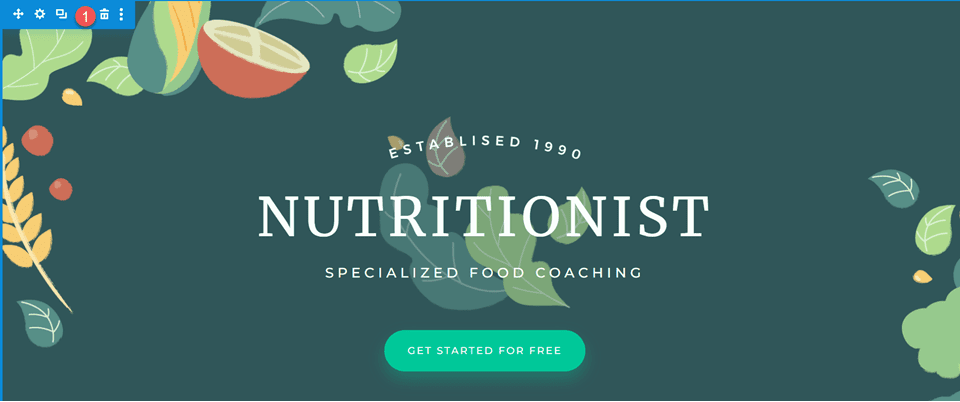
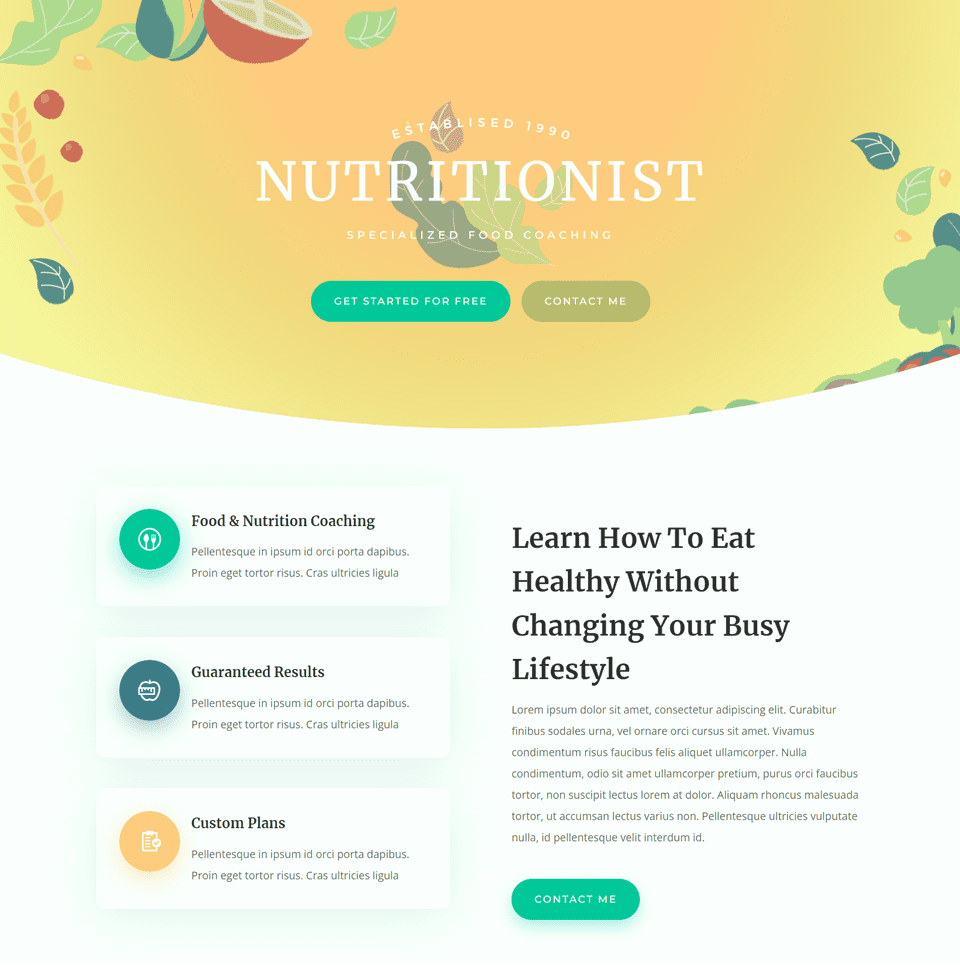
Final Design
And right here’s the overall design for this header phase.
Gradient 3
Create a New Internet web page with a Premade Construction
For our final gradient header design, we will be able to use the SaaS Landing Internet web page construction from the SaaS Structure Pack.
Add a brand spanking new internet web page in your web site and gives it a reputation, then select the method to Use Divi Builder.

We’re using a premade construction from the Divi library, so select Browse Layouts.

Search for and select the SaaS Landing Internet web page construction.
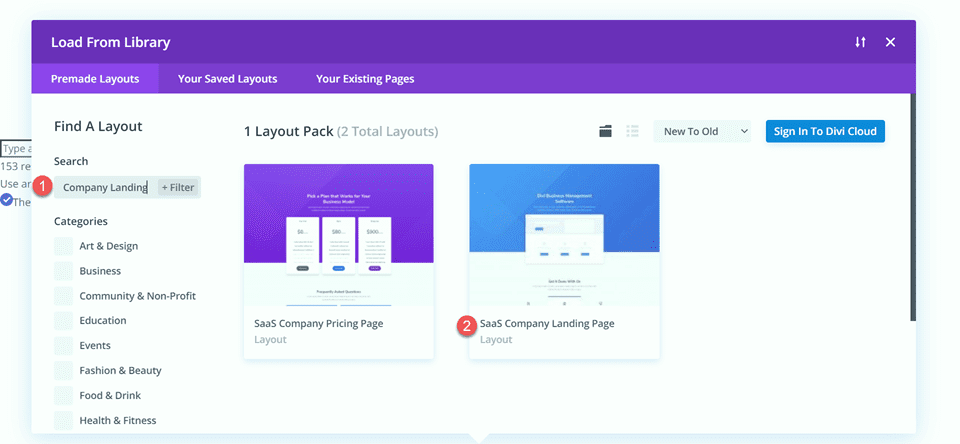
Choose Use This Construction so that you could upload the construction in your internet web page.
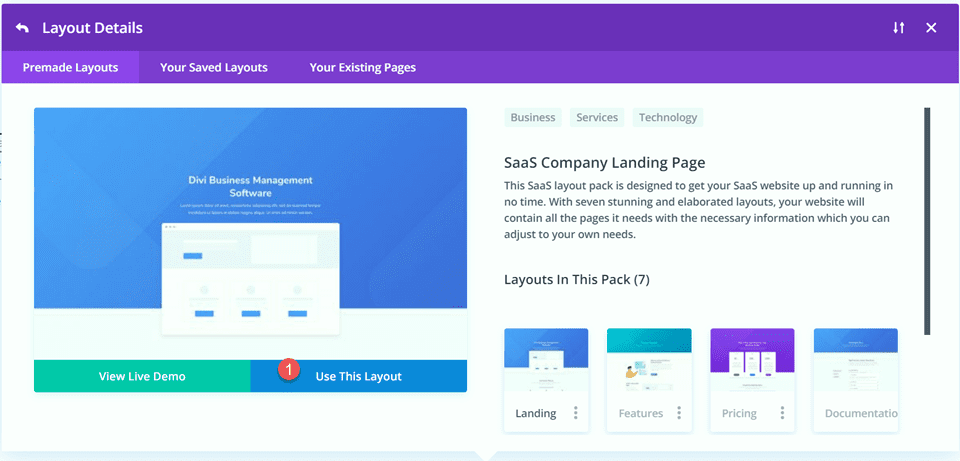
Now we’re in a position to build our design.
Recreate the Hero Segment Using the Fullwidth Header Module
First, add a fullwidth phase beneath the present header phase.
Choose and add the Fullwidth Header Module to the phase.
Open the module settings and add the following text:
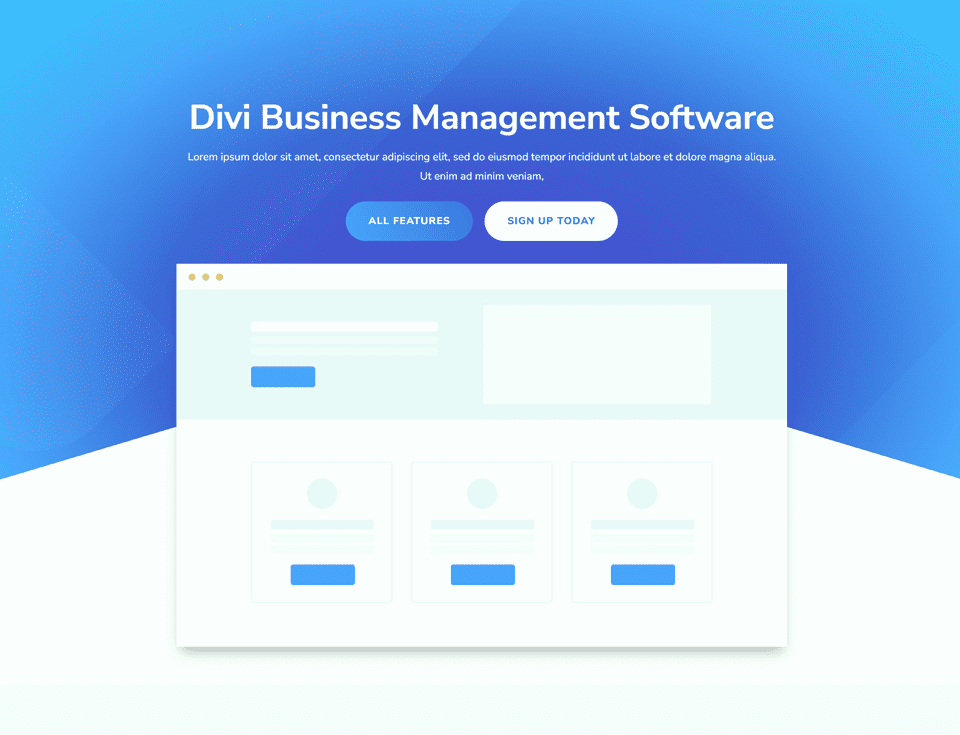
- Identify: Divi Industry Regulate Tool
- Button #1: All Choices
- Button #2: Sign Up Lately
- Body: Lorem ipsum dolor sit amet, consectetur adipiscing elit, sed do eiusmod tempor incididunt ut labore et dolore magna aliqua. Ut enim ad minim veniam,
Underneath the images phase, add the header image.
We can come once more to the content material subject matter tab so that you could upload our background later. For now, delete the original header phase above.
Open the fullwidth header settings and navigate to the design tab. First, center the text and brand alignment.
- Text & Logo Alignment: Heart
![]()
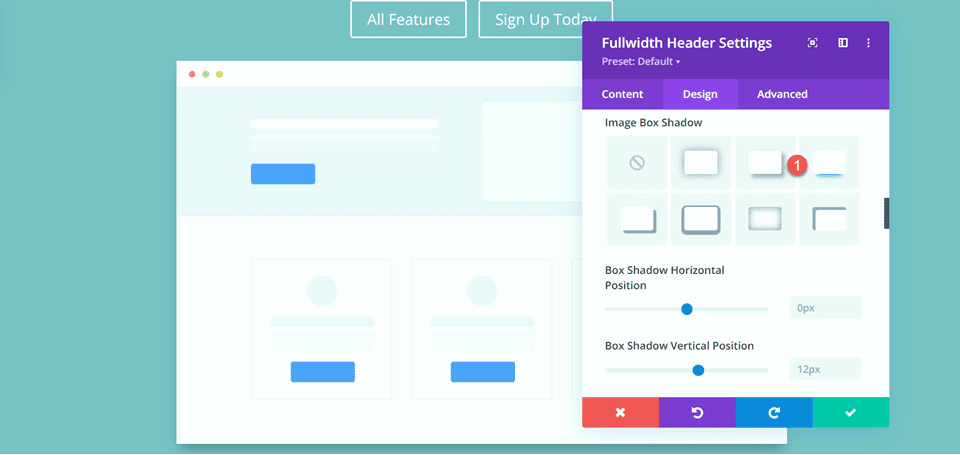
Open the image settings and add a box shadow to the header image.
- Image Box Shadow: Bottom
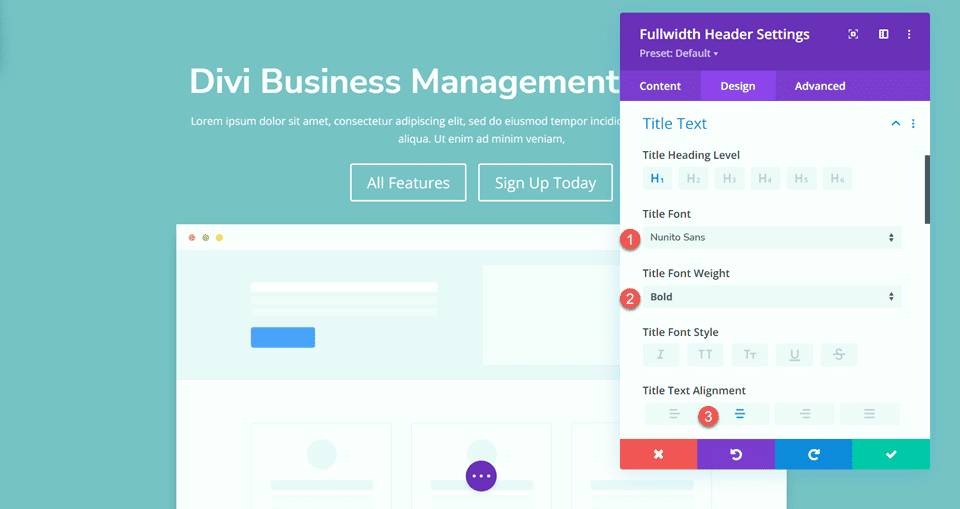
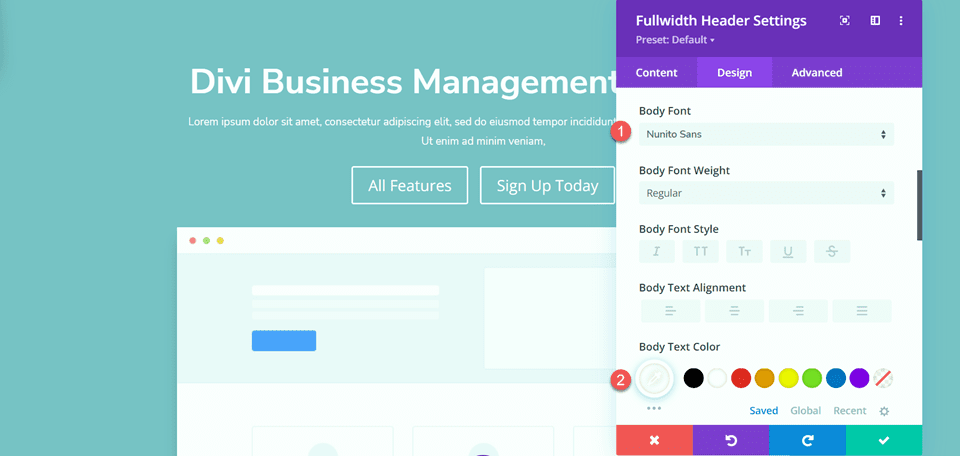
Next, open the title text settings and customize the font.
- Identify Font: Nunito Sans
- Identify Font Weight: Bold
- Identify Text Alignment: Heart
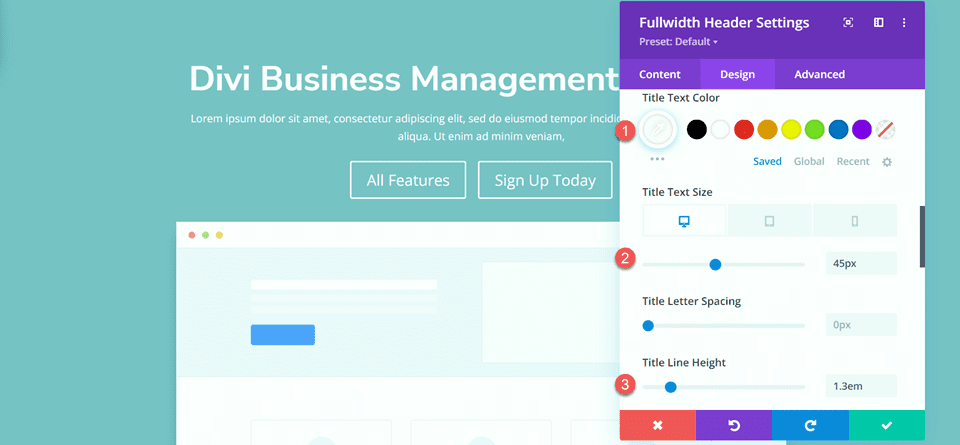
Change the color, size, and line most sensible as well.
- Identify Text Color: #FFFFFF
- Identify Text Size: 45px
- Identify Line Best: 1.3em
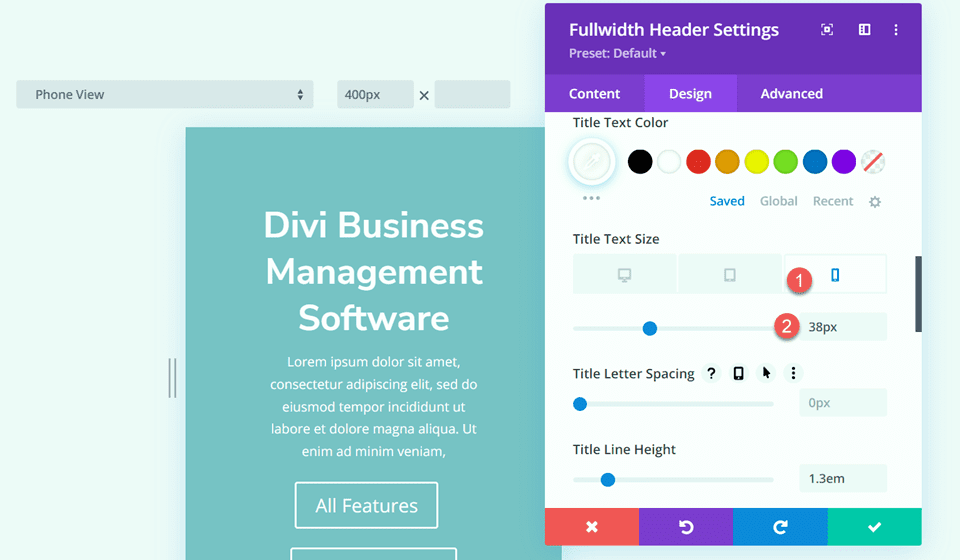
We would really like a smaller font size on cell units, so select the responsive settings for the Identify Text Size selection and add a distinct font size.
- Identify Text Size – Cellular: 38px
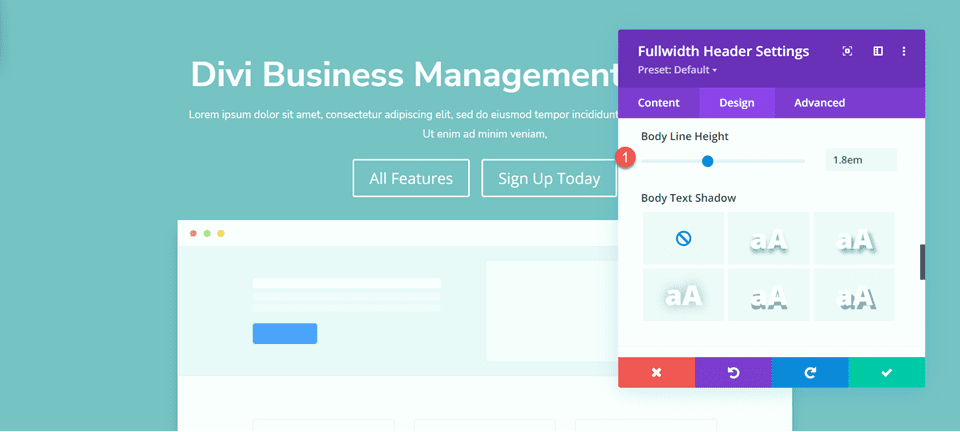
Switch without delay to the Body Text phase and customize the font as follows:
- Body Font: Nunito Sans
- Body Text Color: #FFFFFF
Set the Body Line Best.
- Body Line Best: 1.8em
Customize Button Varieties
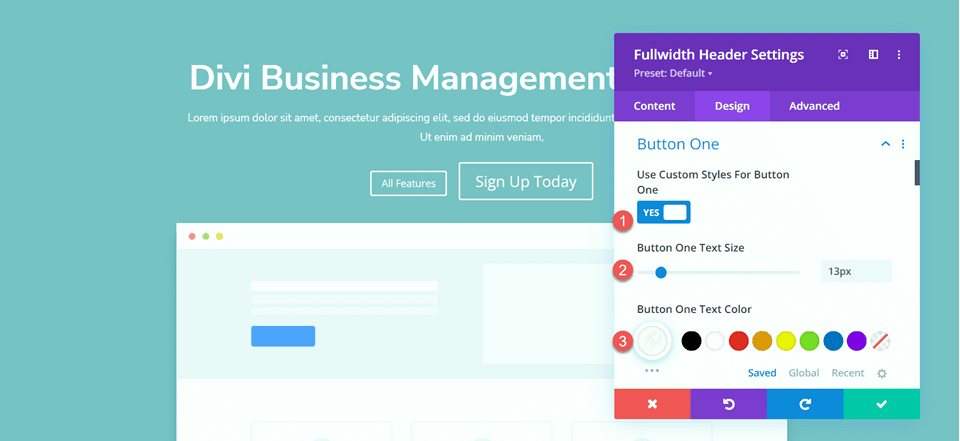
Next, let’s customize Button One. Permit custom designed sorts then business the text size and color.
- Use Custom designed Varieties for Button One: Certain
- Button One Text Size: 13px
- Button One Text Color: #FFFFFF
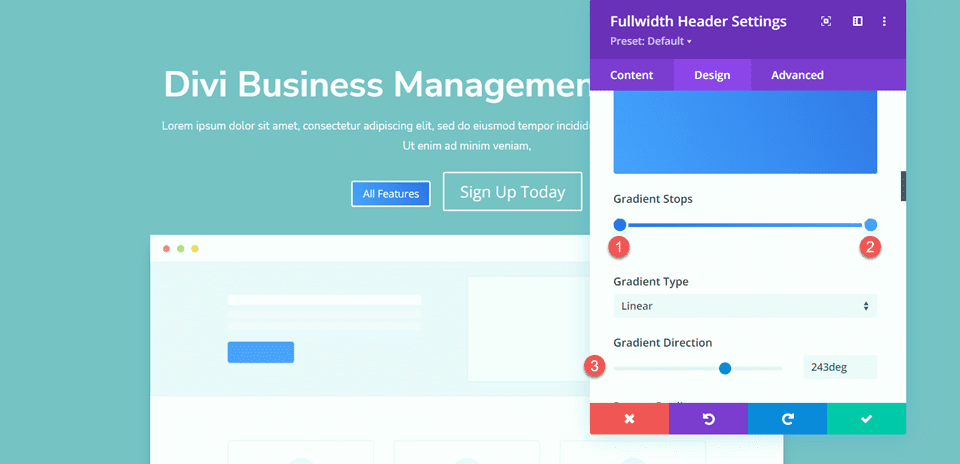
This button can have a gradient background. Add the gradient as follows:
- 0%: #3d72e7
- 100%: #53a0fe
- Gradient Path: 243deg
Next, business the button border settings.
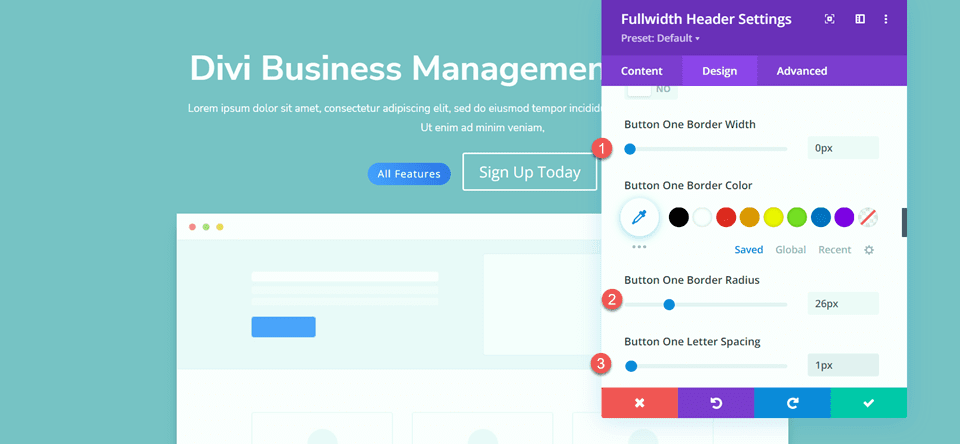
- Button One Border Width: 0px
- Button One Border Radius: 26px
- Button One Letter Spacing: 1px
Change the button font settings.
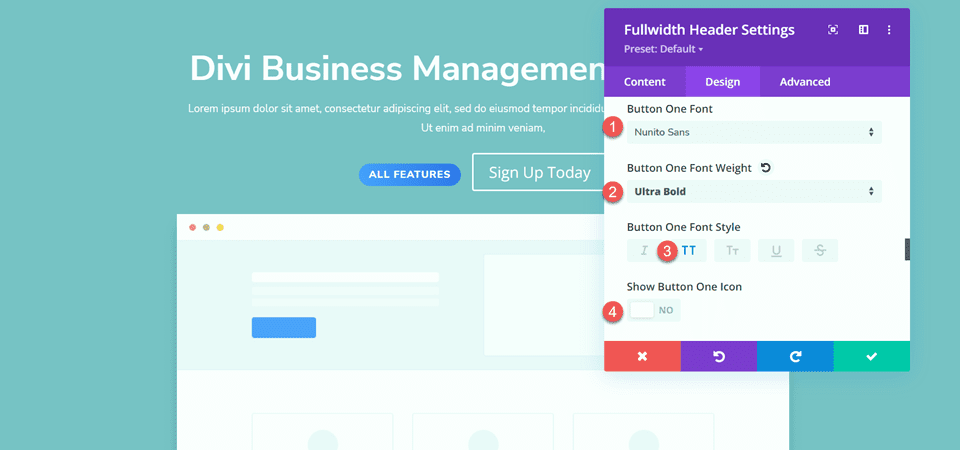
- Button One Font: Nunito Sans
- Button One Font Weight: Extraordinarily Bold
- Button One Font Style: TT (Capitalized)
- Show Button Icon: No
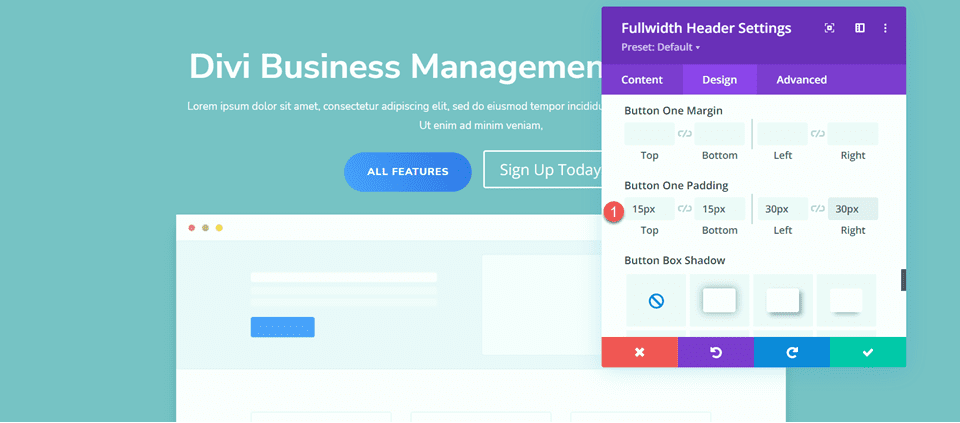
In spite of everything, add button padding.
- Button One Padding-Top: 15px
- Button One Padding-Bottom: 15px
- Button One Padding-Left: 30px
- Button One Padding-Right kind: 30px
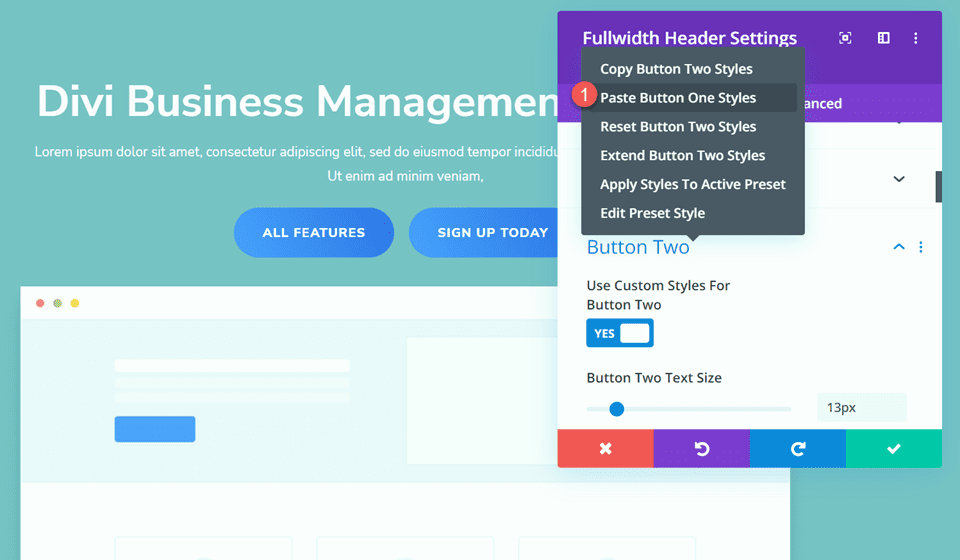
Once another time, the Button Two design is very similar to the Button One design, merely with different colors. We’ll skip the repetitive design steps by the use of copying the Button One sorts. To do so, simply right-click on the Button One atmosphere and replica the Button One sorts.

Then, right-click on the Button Two settings and paste the Button One sorts.
Now business the Button Two Text Color and background color.
- Button Two Text Color: #4078ea
- Background Color: #FFFFFF
Switch to the Spacing phase and add some absolute best padding.
- Padding-Top: 8%

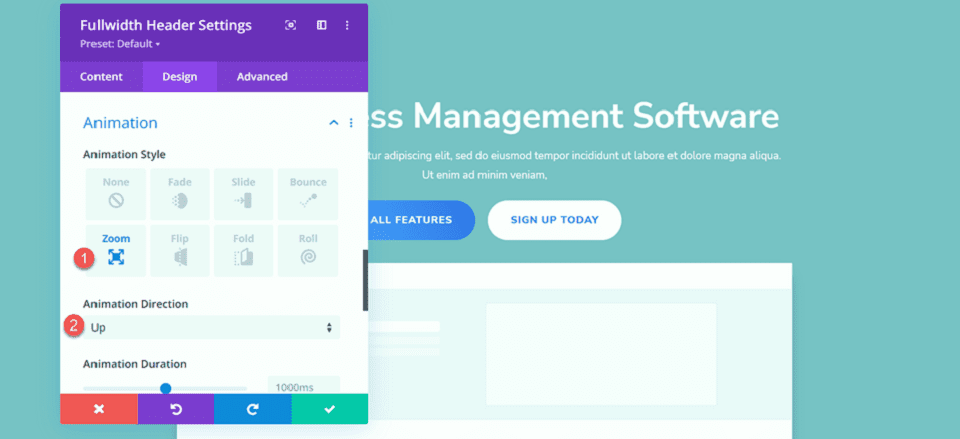
Next, navigate to the Animation settings and set the animation style as follows:
- Animation Style: Zoom
- Animation Path: Up
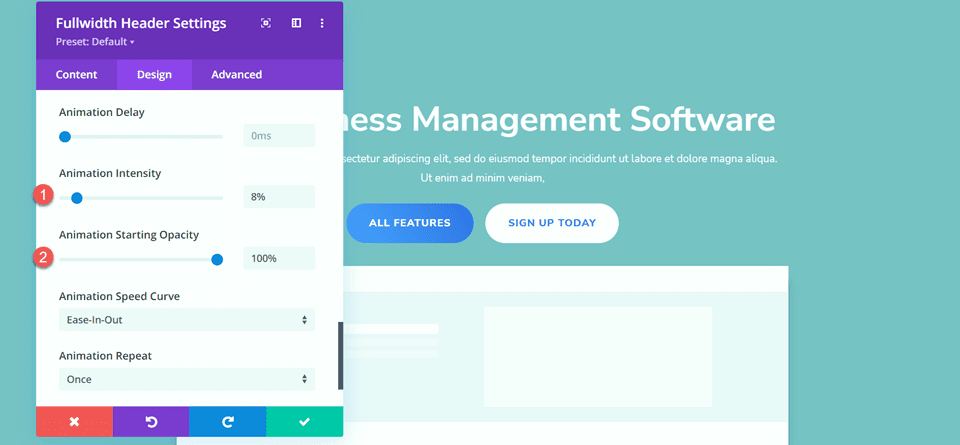
In spite of everything, business the animation intensity and starting opacity.
- Animation Intensity: 8%
- Animation Starting Opacity: 100%
Add the Gradient to the Fullwidth Header Module
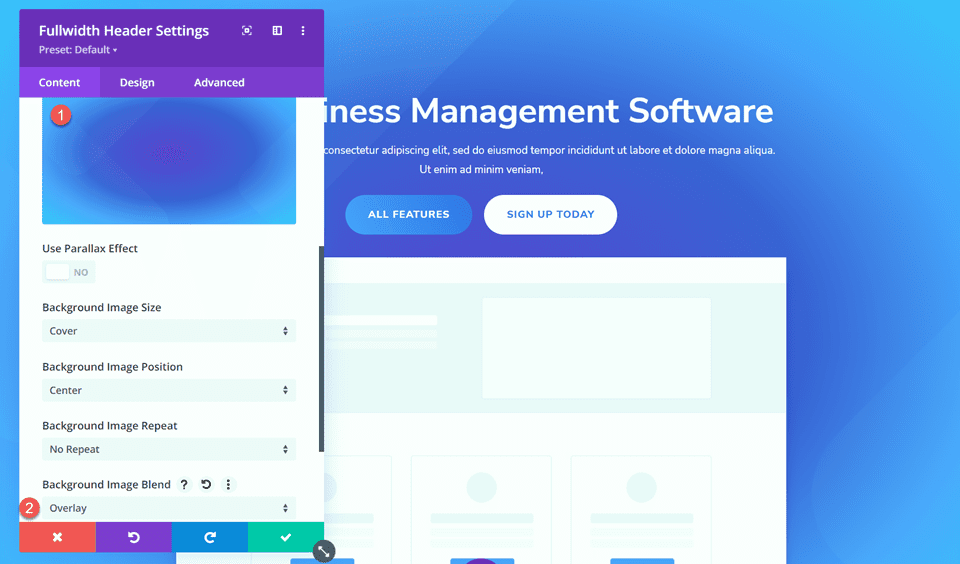
Now that the basic design is whole, we can add our background gradient. Switch over to the Content material subject matter tab and open the Background settings. Our background will come with a mixture of a gradient, an image, and a mask. First, add the background gradient.
- 22%: #5b40d1
- 50%: #4161d4
- 73%: #53a0fd
- 100%: #4bc4fc
- Gradient Kind: Elliptical
- Gradient Position: Heart

Next, add the background image. We can use the an identical background image that was once as soon as used for the original header design. You should see this in your media library with the title geometric-bg-overlay-01.jpg. Use the overlay atmosphere to combine the image with the gradient background.
- Background Image Combine: Overlay
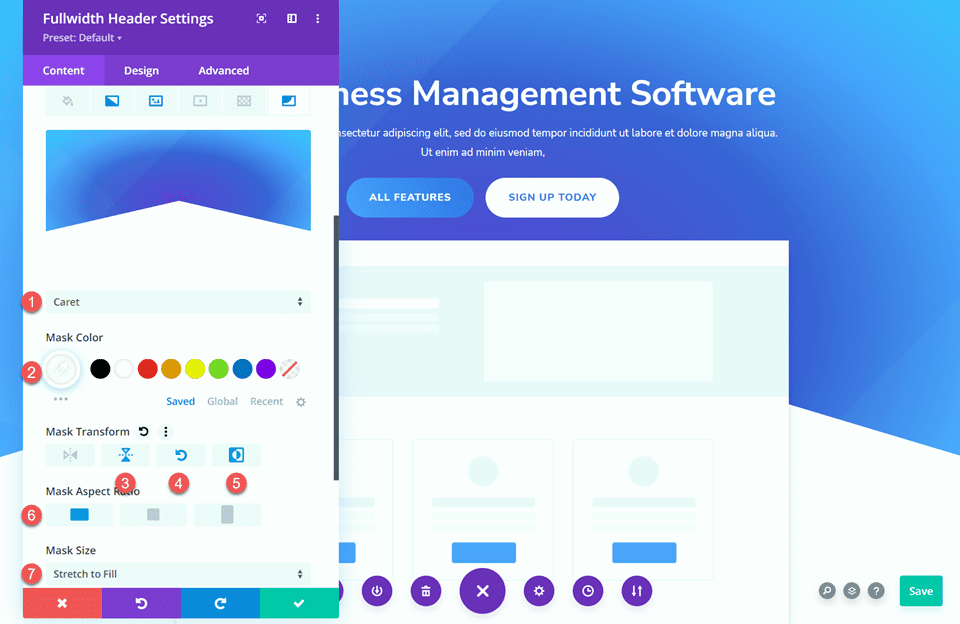
Now add the background mask.
- Mask: Caret
- Mask Color: #FFFFFF
- Mask Transform: Horizontal
- Mask Transform: Rotate
- Mask Transform: Invert
- Mask Side Ratio: Landscape
- Mask Size: Stretch to Fill
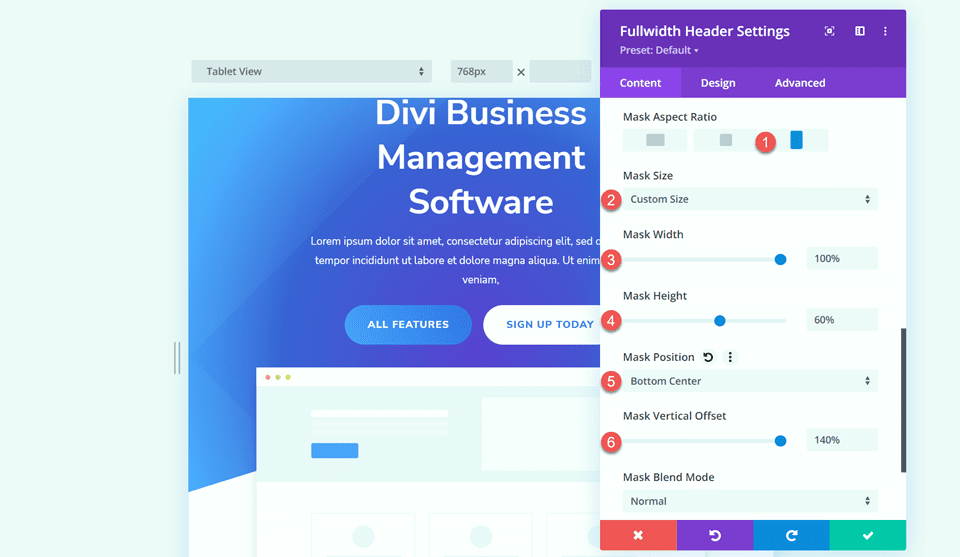
Next, use the responsive settings to customize the background mask for tablet and cell units. Let’s get began with the tablet design.
- Mask Side Ratio: Portrait
- Mask Size: Custom designed Size
- Mask Width: 100%
- Mask Best: 60%
- Mask Position: Bottom Heart
- Mask Vertical Offset: 140%
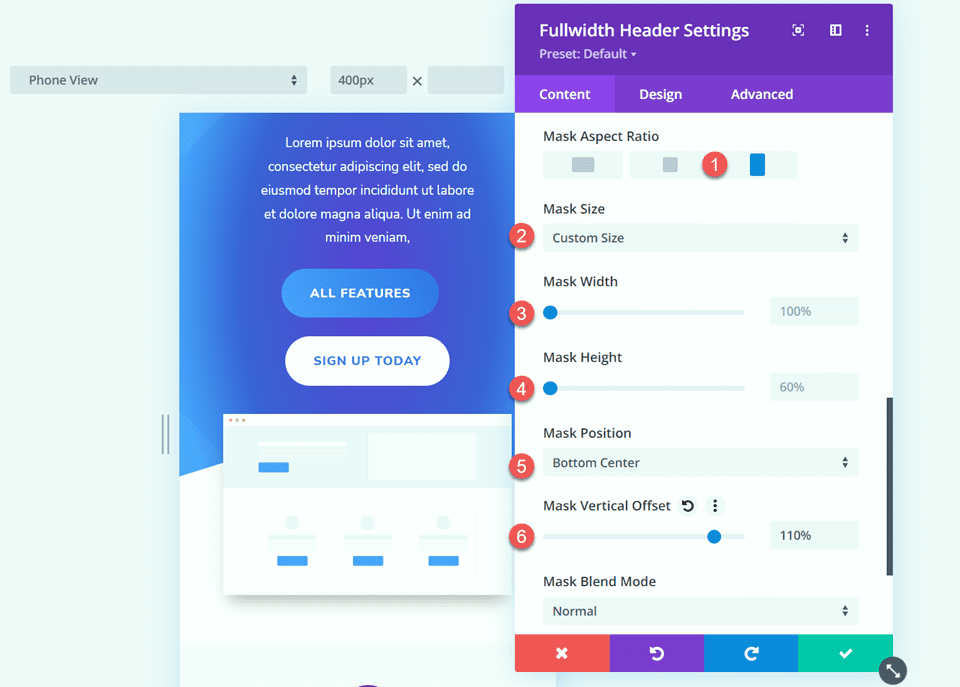
In spite of everything, control the cell design.
- Mask Side Ratio: Portrait
- Mask Size: Custom designed Size
- Mask Width: 100%
- Mask Best: 60%
- Mask Position: Bottom Heart
- Mask Vertical Offset: 110%
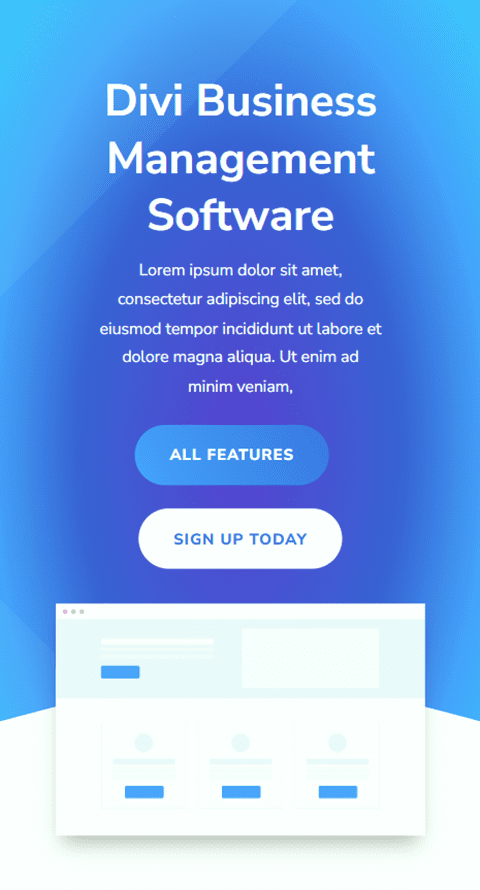
Final Design
That is the overall design for this phase.

Final Outcome
Now let’s take a look at all 3 of our gradient header modules.
Gradient 1
Gradient 2
Gradient 3
Final Concepts
The Fullwidth Header Module is inconspicuous to customize and gives a lot of flexibility when it comes to the look and construction of your header design. When combined with unique design portions like gradients, you’ll create a truly stand-out design to put across your web site visitors’ attention to the products and services and merchandise that you simply offer. For 5 further creative Fullwidth Header tutorials, check out this text. Do you use the Fullwidth Header Module for your Divi web site? Let us know inside the comments!
The post 3 Eye-Catching Gradients You Can Observe to Your Fullwidth Header Module with Divi’s Gradient Builder appeared first on Chic Subject matters Weblog.

0 Comments