
Building a hero section is a superb way to title attention to important content material subject material to your internet web page. It’s a super-sized piece of content material subject material that you simply’ll use to tell your story, proportion information about your art work, or highlight a product or service. With Divi’s Fullwidth Header module, you’ll add a reputation, a subtitle, two buttons, body text, an emblem image and a header image. In truth, you’ll moreover benefit from the background possible choices in an effort to upload and blend photos, gradients, colors, patterns, and masks. You’ll edit all of the ones settings within the one fullwidth header module’s settings instead of having to toggle between multiple image, text, and button modules.
In this educational, we will show you one of the simplest ways to build an enchanting and crowd pleasing hero section using Divi’s fullwidth header module.
Let’s get started!
Sneak Peek
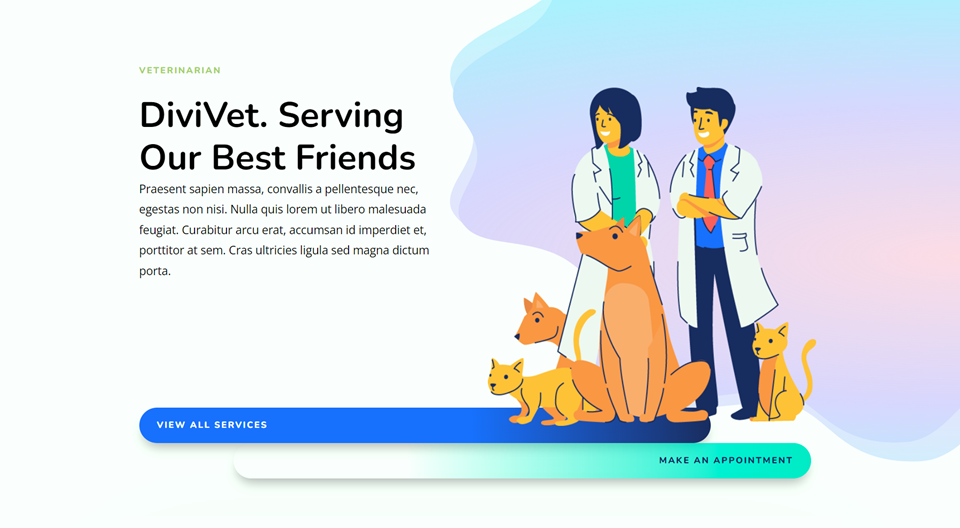
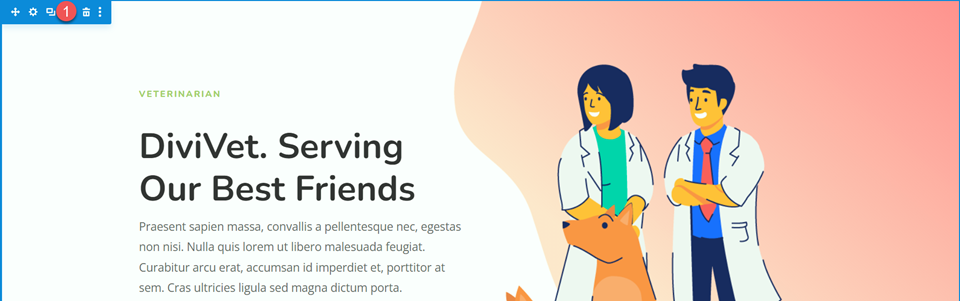
Right here’s a preview of what we will design.
What You Need to Get Started
Faster than we begin, and you’ll want to have the latest type of Divi to your internet web page.
Now, you are ready to begin out!
How you can Assemble a Hero Segment with Divi’s Fullwidth Header Module
Create a New Internet web page with a Premade Construction
Let’s get began by the use of using a premade structure from the Divi library. For this design, we will use the Veterinarian Landing Internet web page from the Veterinarian Structure Pack.
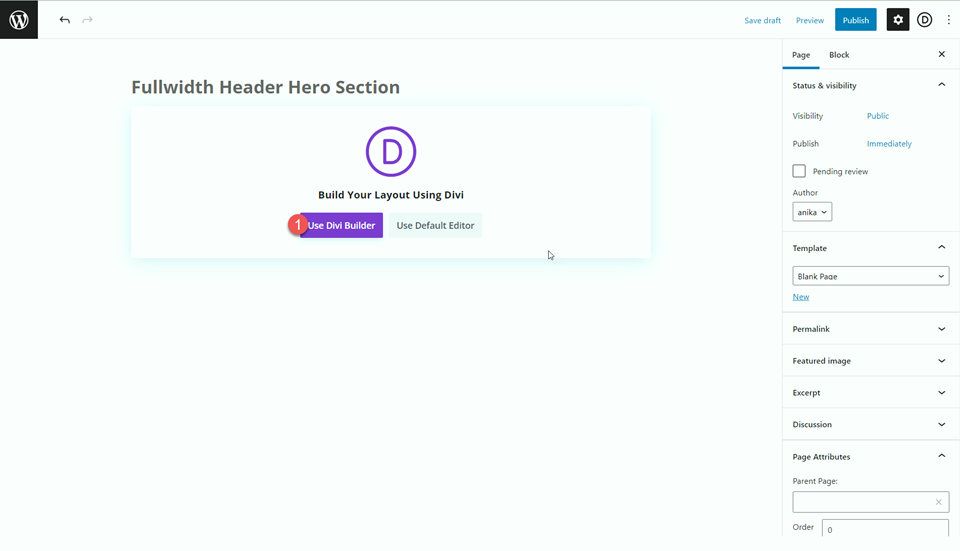
Add a brand spanking new internet web page for your internet web page and gives it a reputation, then choose the method to Use Divi Builder.
We can use a premade structure from the Divi library for this example, so choose Browse Layouts.
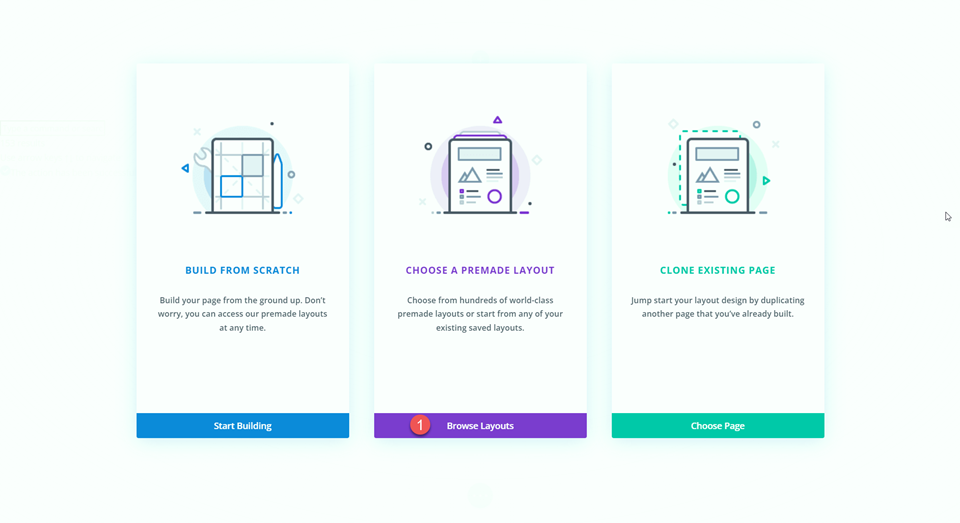
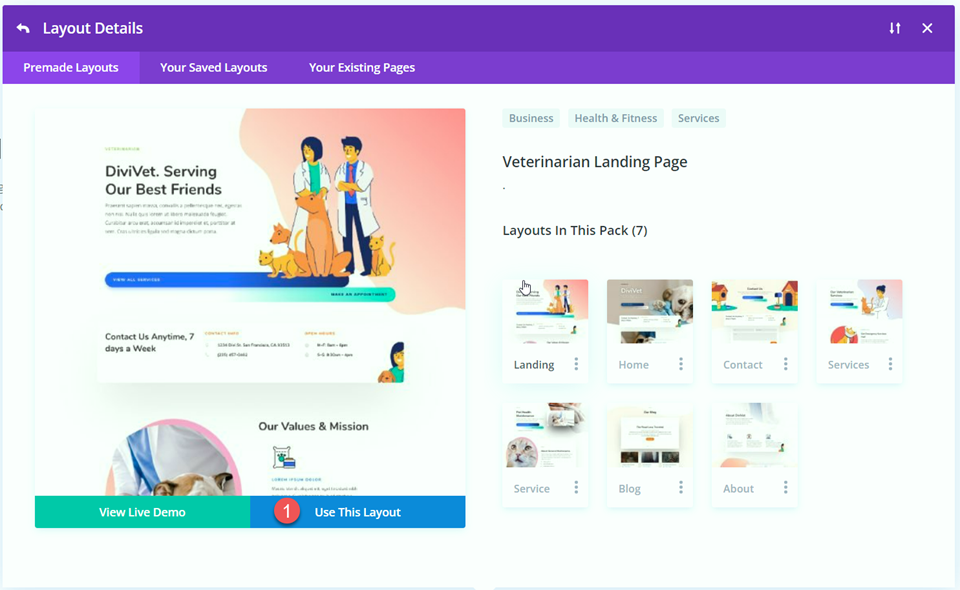
Search for and choose the Veterinarian Landing Internet web page structure.
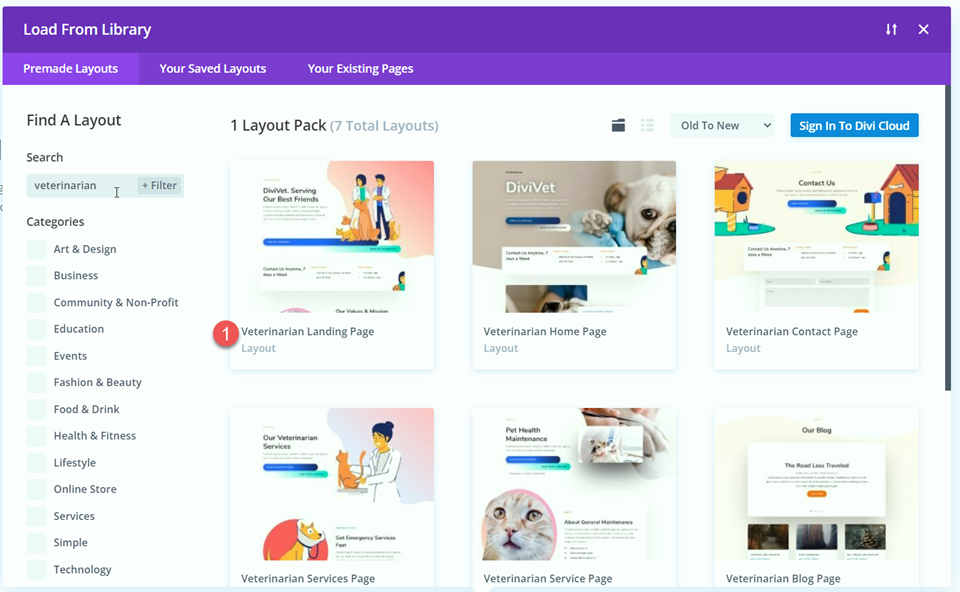
Select Use This Construction in an effort to upload the structure for your internet web page.
Now we’re ready to build our design.
Add the Fullwidth Header Module
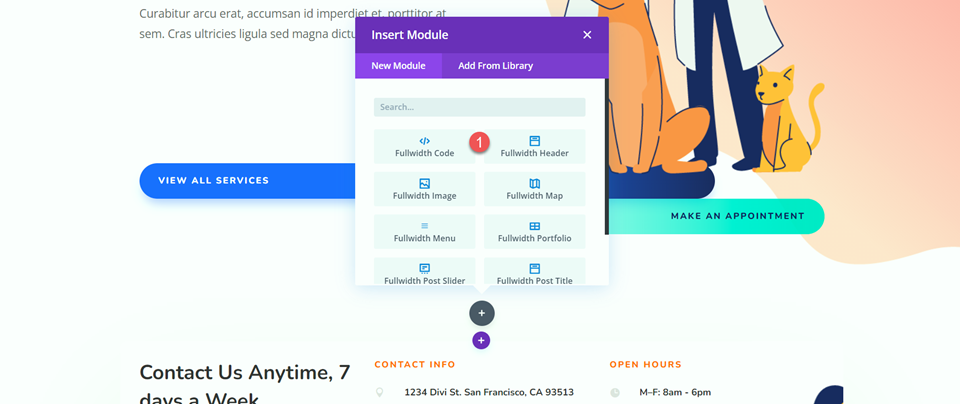
We’re going to be recreating the hero section using the fullwidth header module. Add a brand spanking new fullwidth section to the internet web page, underneath the existing header.
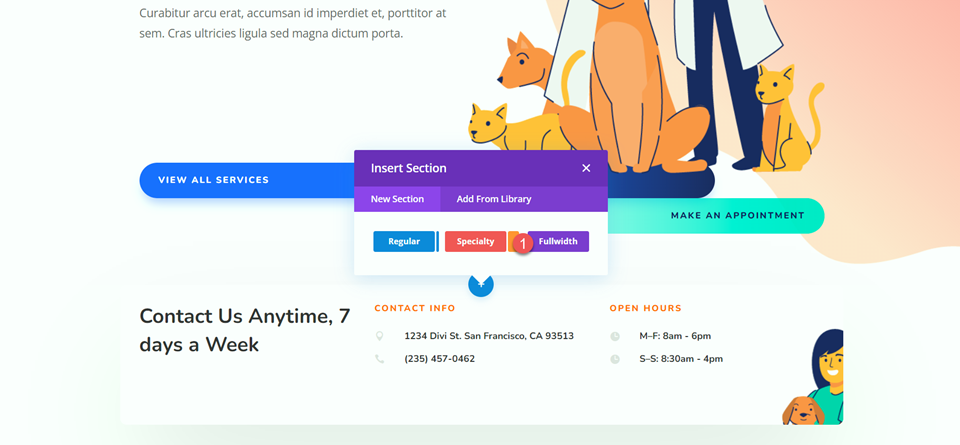
Add a fullwidth header module to the section.
Then, delete the original header section.
Customize the Fullwidth Header Module
Add Content material subject material
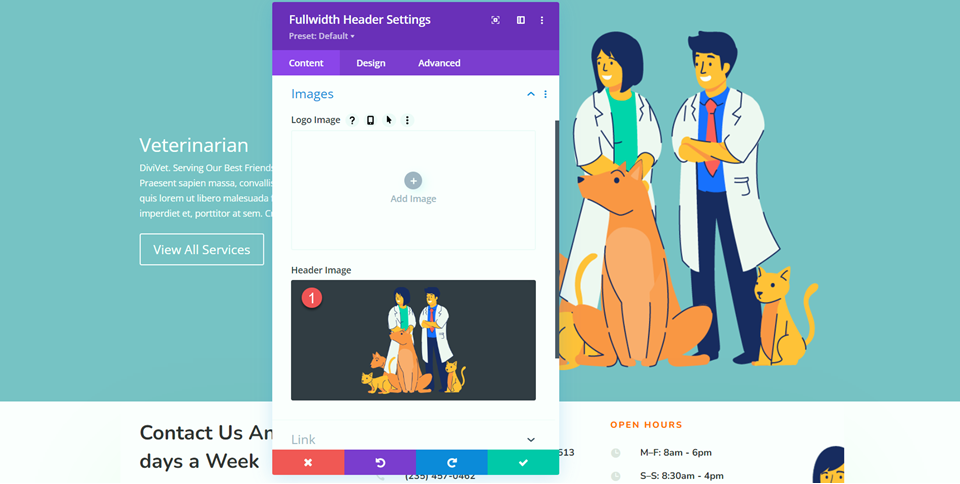
Open the fullwidth header module settings and add the following content material subject material to the module:
- Identify: Veterinarian
- Subtitle: DiviVet. Serving Our Perfect Buddies
- Button #1: View All Services and products
- Button #2: Make An Appointment
- Body: Praesent sapien massa, convallis a pellentesque nec, egestas non nisi. Nulla quis lorem ut libero malesuada feugiat. Curabitur arcu erat, accumsan id imperdiet et, porttitor at sem. Cras ultricies ligula sed magna dictum porta.

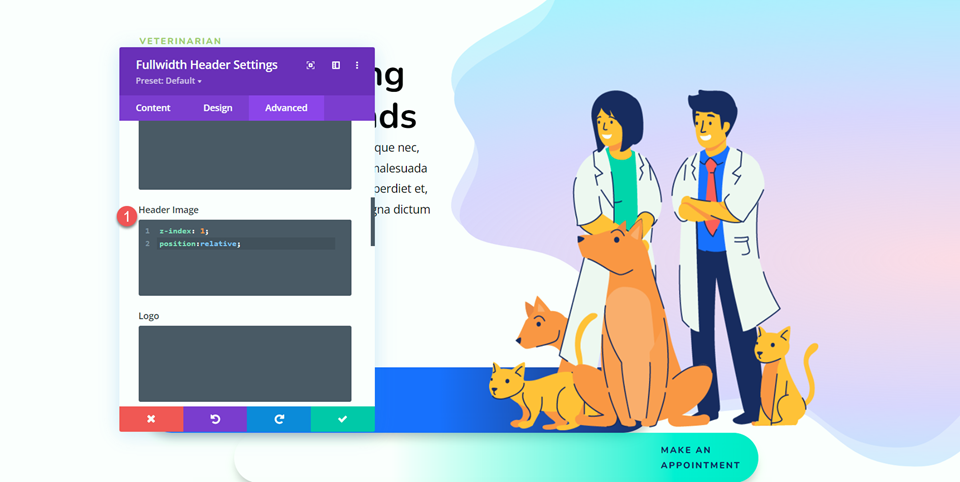
Next, add the Header Image of the veterinarians with the animals.
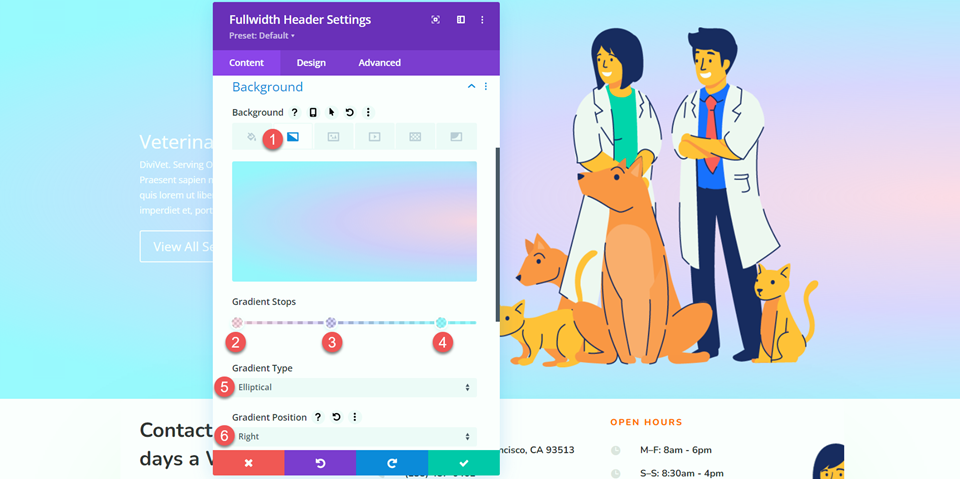
Gradient Background Settings
Switch to the background settings. Delete the original background color, then add a background gradient.
- 0%: rgba(255,170,205,0.48)
- 40%: rgba(110,66,255,0.24)
- 87%: rgba(124,239,255,0.71)
- Gradient Type: Elliptical
- Gradient Position: Correct
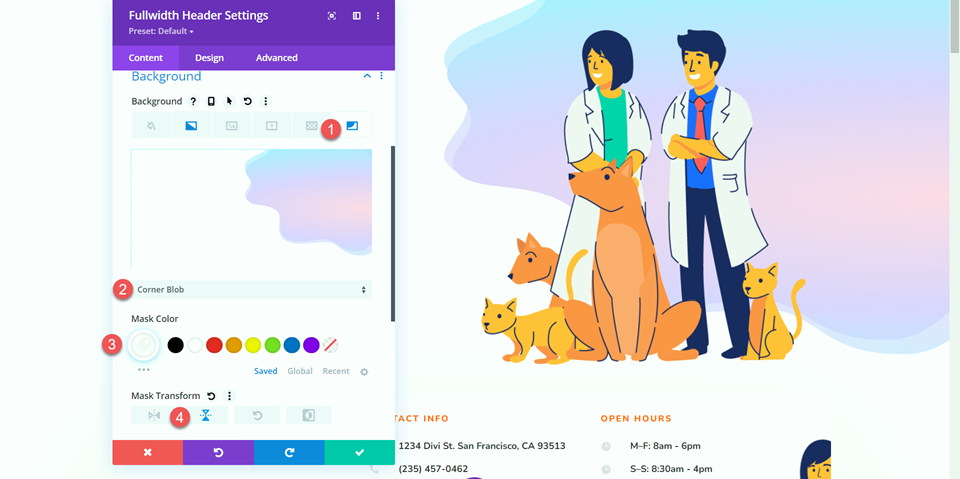
Next, choose the Background Mask tab and add a background mask to the background.
- Background Mask: Corner Blob
- Mask Color: #FFFFFF
- Mask Grow to be: Vertical
Customize Text Sorts
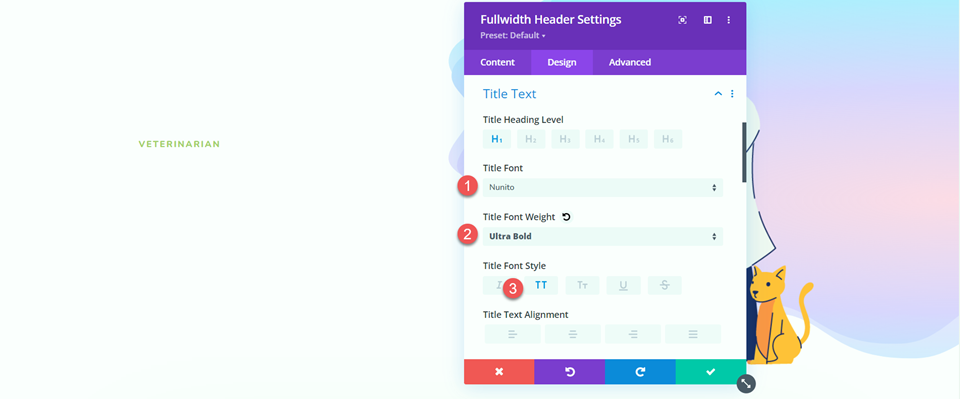
With our header content material subject material and background in place, let’s switch over to the design tab to customize the text sorts. First, open the title settings and customize the text as follows:
- Identify Font: Nunito
- Identify Font Weight: Extraordinarily Bold
- Identify Font Style: TT (Capitalized)
Keep an eye on the title text color, size, and spacing.
- Identify Text Color: #a9cb6b
- Identify Text Measurement: 14px
- Identify Letter Spacing: 2px

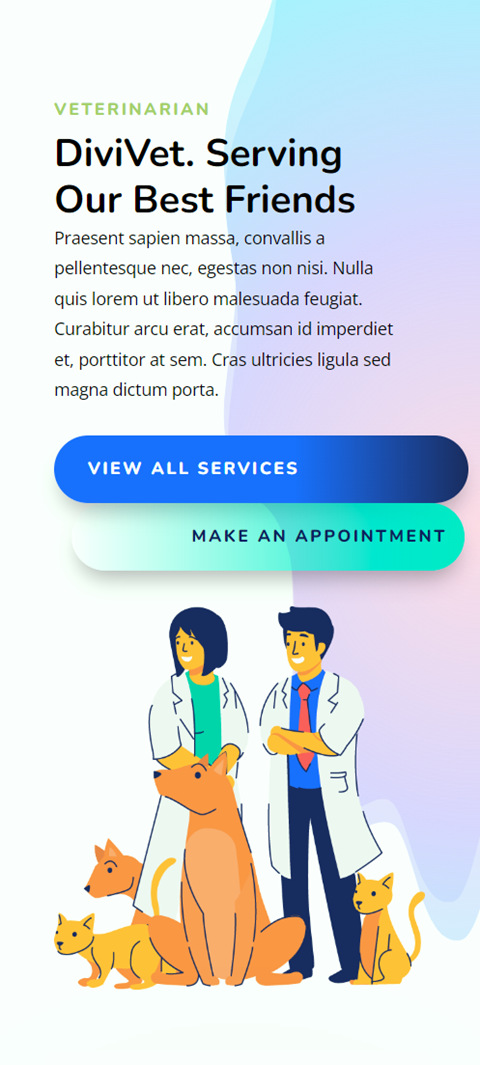
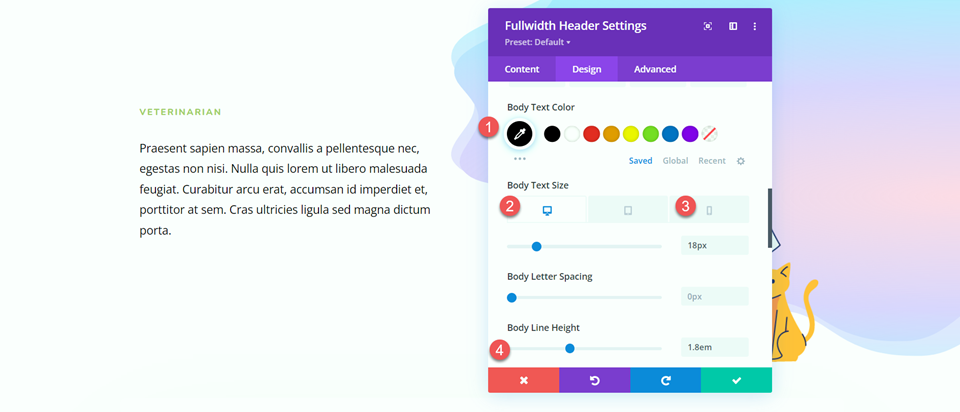
Switch to the body text section and customize the font. Use Divi’s responsive settings in an effort to upload a smaller text size for mobile gadgets.
- Body Text Color: #000000
- Body Text Measurement-Desktop: 18px
- Body Text Measurement: Mobile: 14px
- Body Line Top: 1.8em
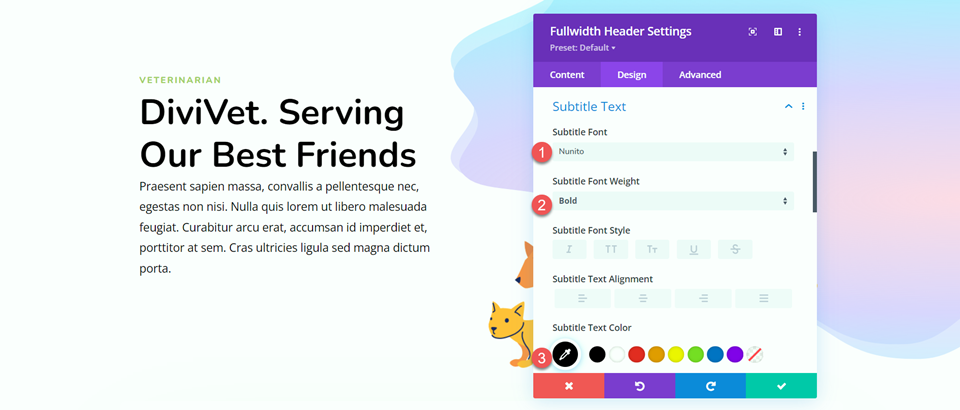
Next, open the subtitle settings and customize the font.
- Subtitle Font: Nunito
- Subtitle Font Weight: Bold
- Subtitle Text Color: #000000
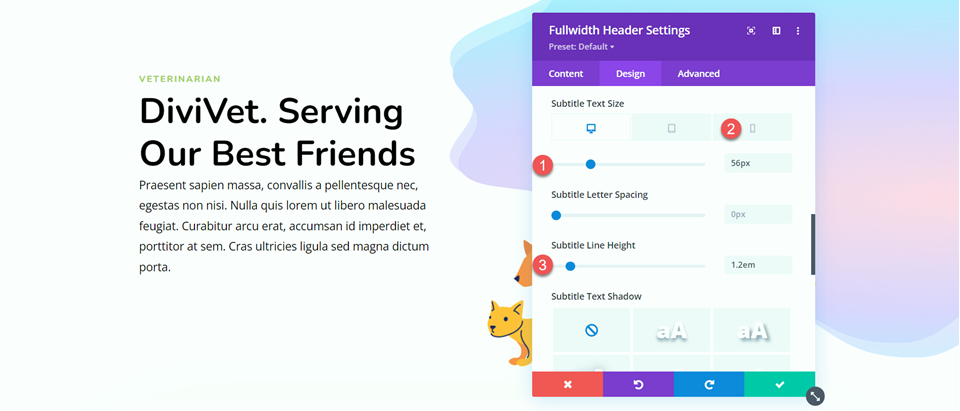
After all, industry the text size for desktop and mobile (once over again, use the responsive settings in an effort to upload a smaller text size on mobile) and keep watch over the street peak.
- Subtitle Text Measurement–Desktop: 56px
- Subtitle Text Measurement-Mobile: 32px
- Subtitle Line Top: 1.2em
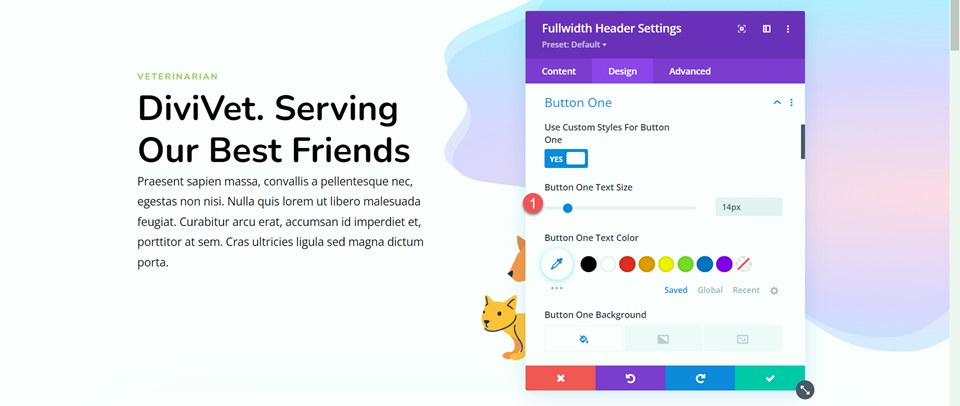
Customize Button One Sorts
Next, we will customize the button sorts. Get began by the use of enabling custom designed sorts for Button One, then keep watch over the text size.
- Use Custom designed Sorts for Button One: Certain
- Button One Text Measurement: 14px
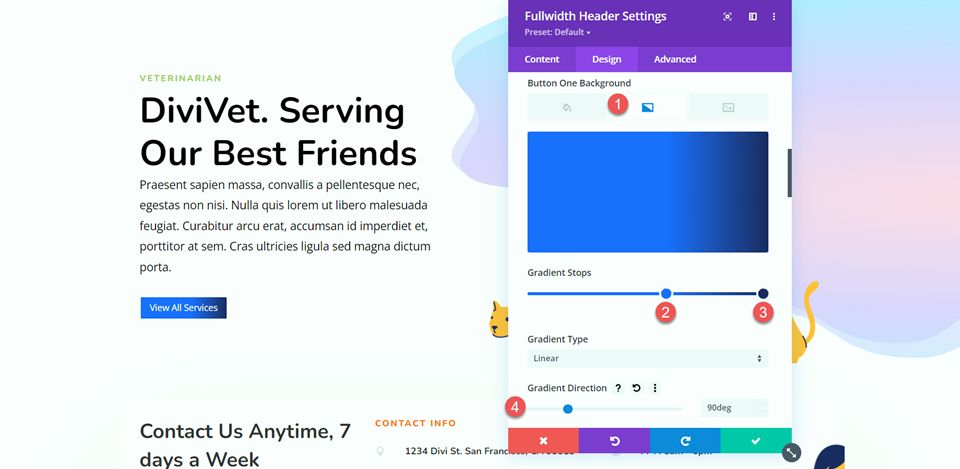
Add a background gradient to the button. Gradient values are as follows:
- 58%: #316EFF
- 100%: #1D2B60
- Gradient Trail: 90deg
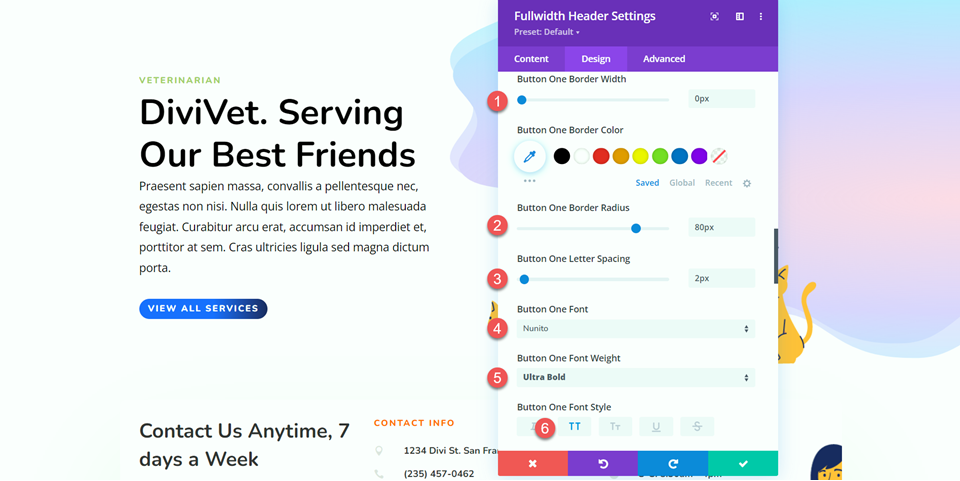
Next, customize the border settings and font settings.
- Button One Border Width: 0px
- Button One Border Radius: 80px
- Button One Letter Spacing: 2px
- Button One Font: Nunito
- Button One Font Weight: Extraordinarily Bold
- Button One Font Style: TT (Capitalized)
Disable the Button One Icon.
- Show Button One Icon: No
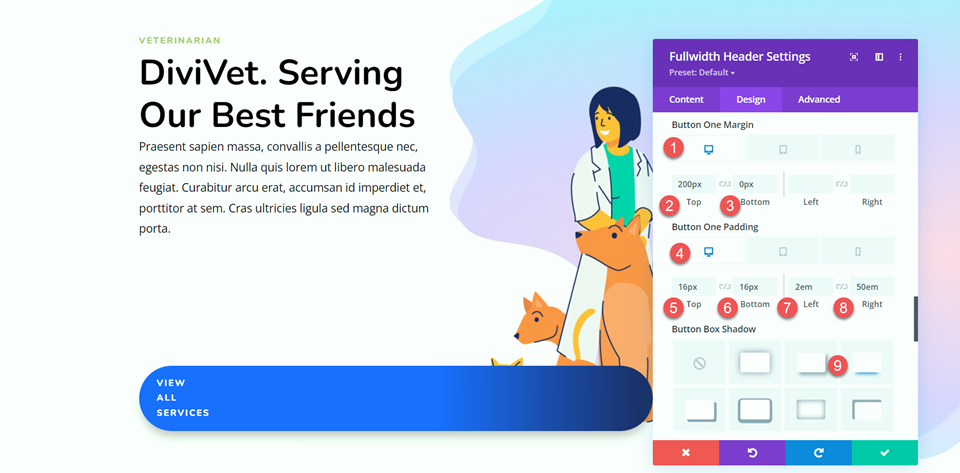
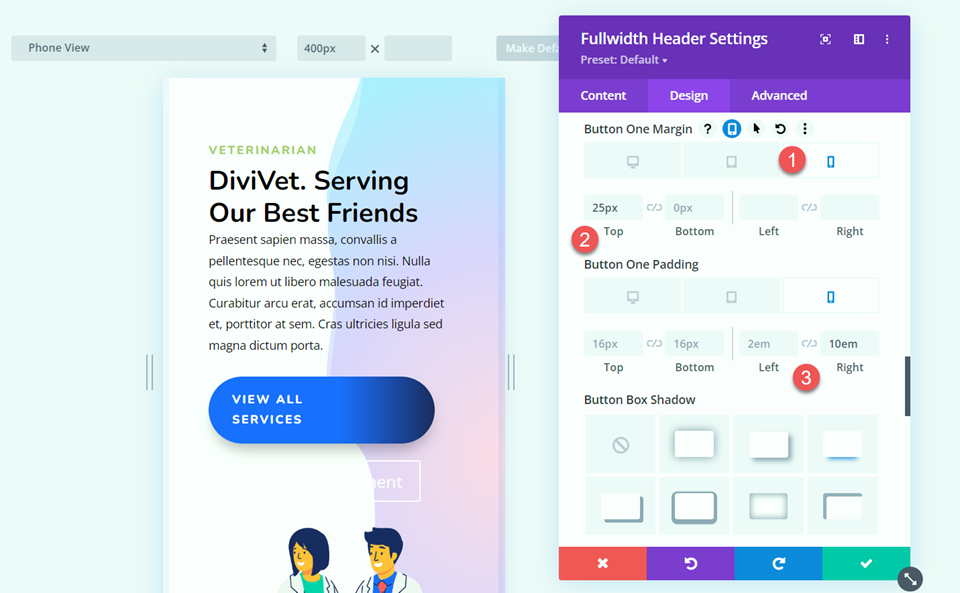
Next, customize the margin and padding settings for the desktop design and add a box shadow.
- Button One Margin-Best-Desktop: 200px
- Button One Margin-Bottom-Desktop: 0px
- Button One Padding-Best-Desktop: 16px
- Button One Padding-Bottom-Desktop: 16px
- Button One Padding-Left-Desktop: 2em
- Button One Padding-Correct-Desktop: 50em
- Button Box Shadow: Bottom
Use the responsive settings to set different margin and padding values on mobile gadgets.
- Button One Margin-Best-Mobile: 25px
- Button One Padding-Correct-Mobile: 10em
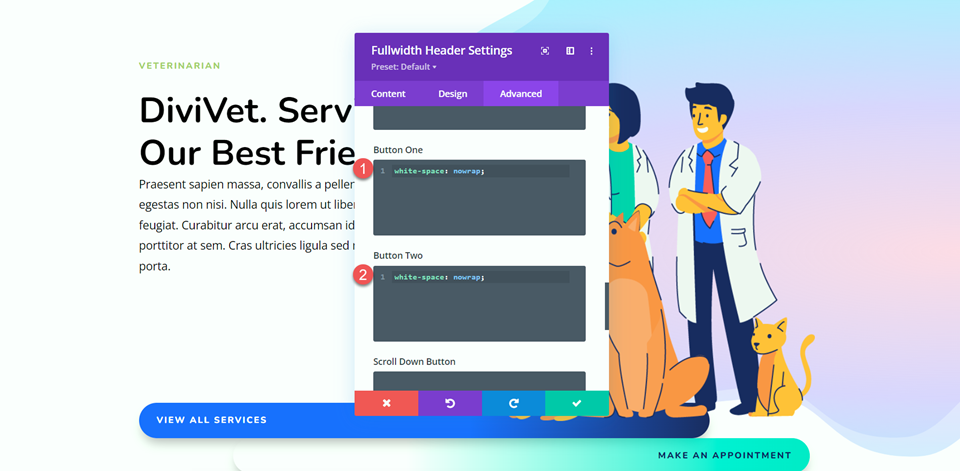
There are some text wrap issues of our button that we will restore with some custom designed CSS later.
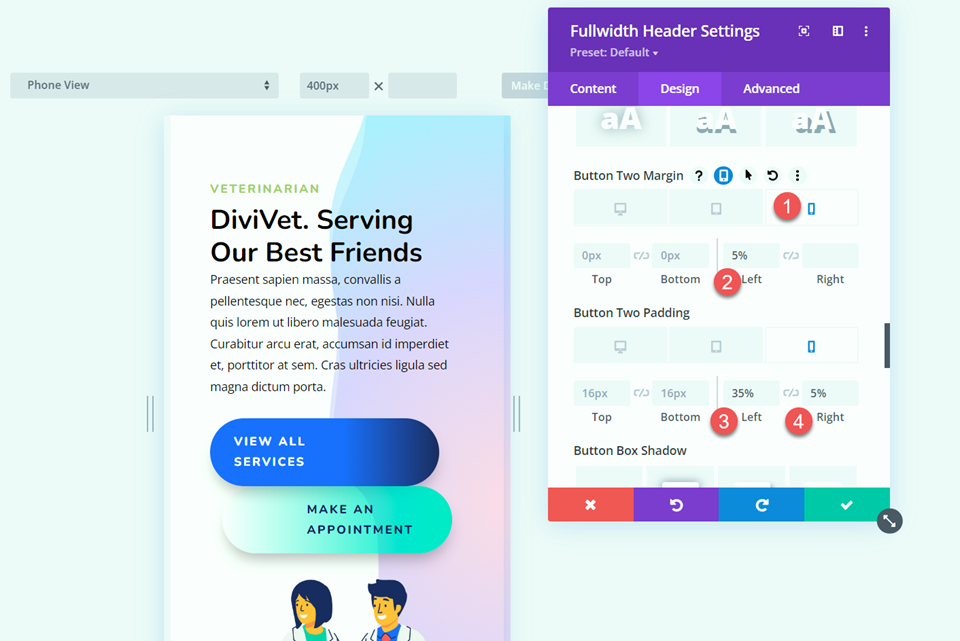
Customize Button Two Sorts
Button two has any other colors and spacing then again is gorgeous similar to button one. To save some repetitive design steps, let’s replica the button one module sorts to the button two module, then customize what we want to industry.
First, right-click on the button one section and copy the button one sorts.

Then right-click on the button two section and paste the button one sorts.

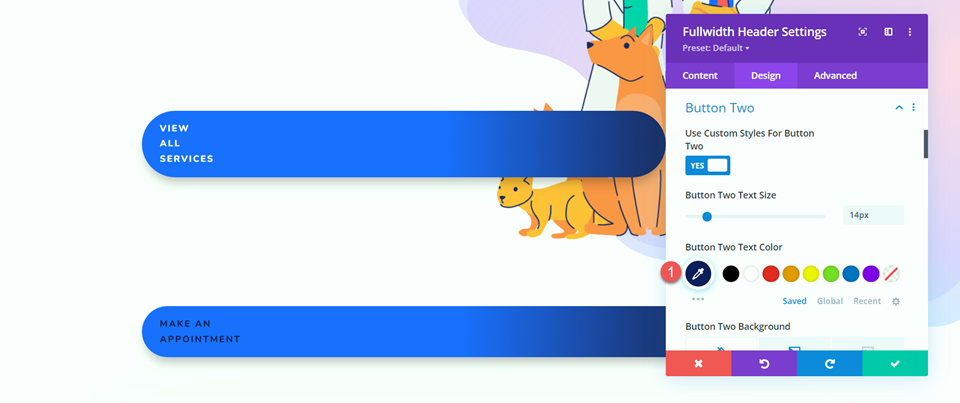
Now we will customize the button two sorts. Business the text color.
- Button Two Text Color: #121F60
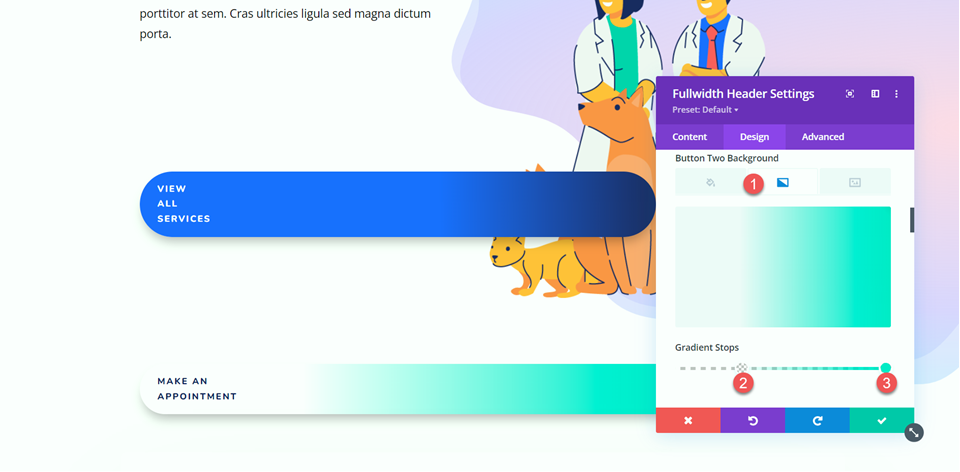
Customize the background gradient for button two.
- 30%: rgba(0,229,198,0)
- 100%: #00e5c6
Use the responsive settings to keep watch over the background gradient for mobile gadgets.
- 0%: rgba(0,229,198,0)
- 100%: #00e5c6

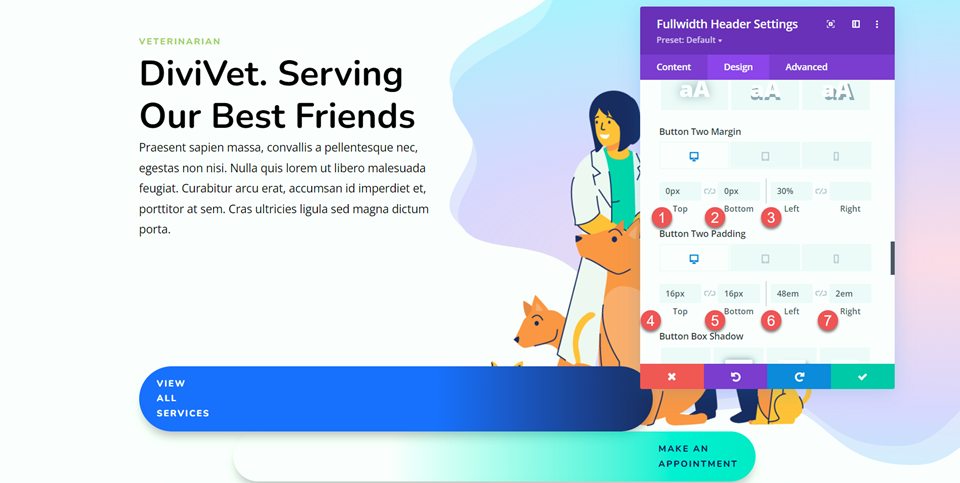
Next, keep watch over the margin and padding for the desktop design.
- Button Two Margin-Best-Desktop: 0px
- Button Two Margin-Bottom-Desktop: 0px
- Button Two Margin-Left-Desktop: 30%
- Button Two Padding-Best-Desktop: 16px
- Button Two Padding-Bottom-Desktop: 16px
- Button Two Padding-Left-Desktop: 48em
- Button Two Padding-Correct-Desktop: 2em
Use the responsive settings to set different margin and padding values for the mobile design.
- Button Two Margin-Left-Mobile: 5%
- Button Two Padding-Left-Mobile: 35%
- Button Two Padding-Correct-Mobile: 5%
Custom designed CSS
After all, nearly all of the design art work is completed. Now we want to add some custom designed CSS to complete the design. Switch over to the Complicated tab and open the Custom designed CSS section.
First, let’s get began with the Header Image CSS. This CSS shall we within the header image to turn above the button.
z-index: 1;
position:relative;
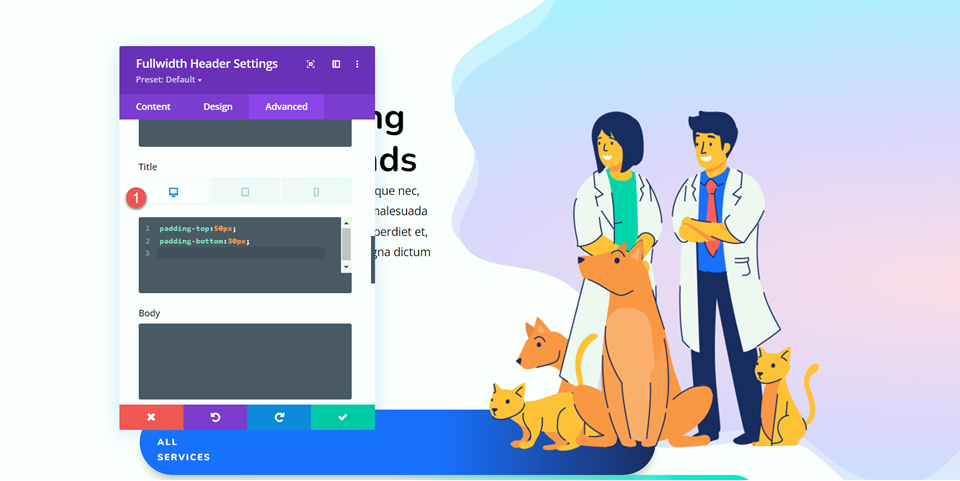
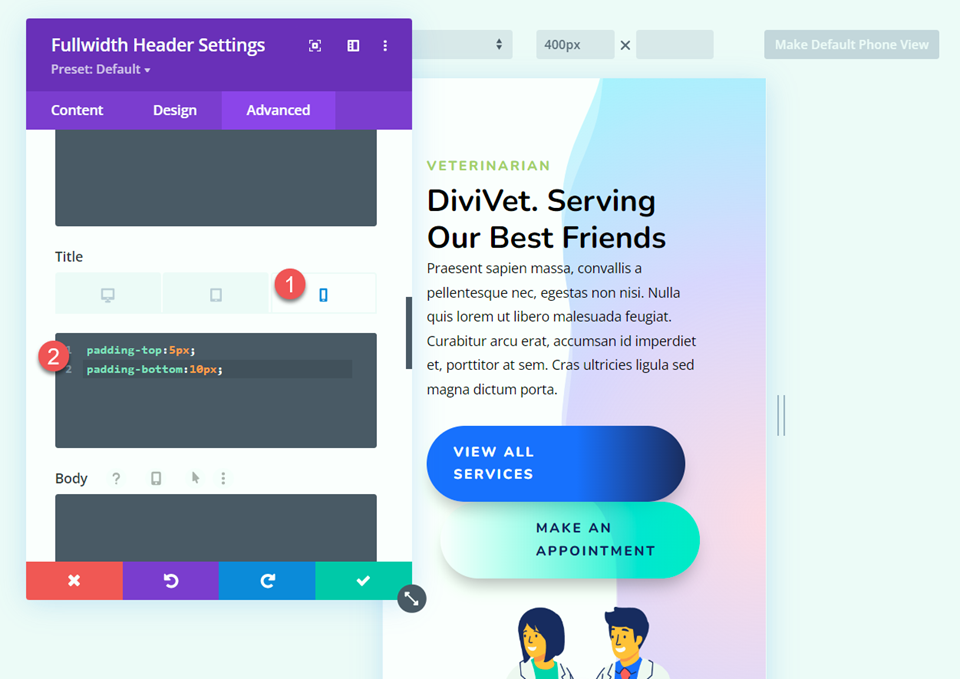
Next, Custom designed CSS to the Identify. We’ll set different values for the desktop and mobile views using the responsive settings.
For desktop:
padding-top:50px;
padding-bottom:30px;
For mobile:
padding-top:5px;
padding-bottom:10px;
After all, add the following CSS to Button One and Button Two.
white-space: nowrap;
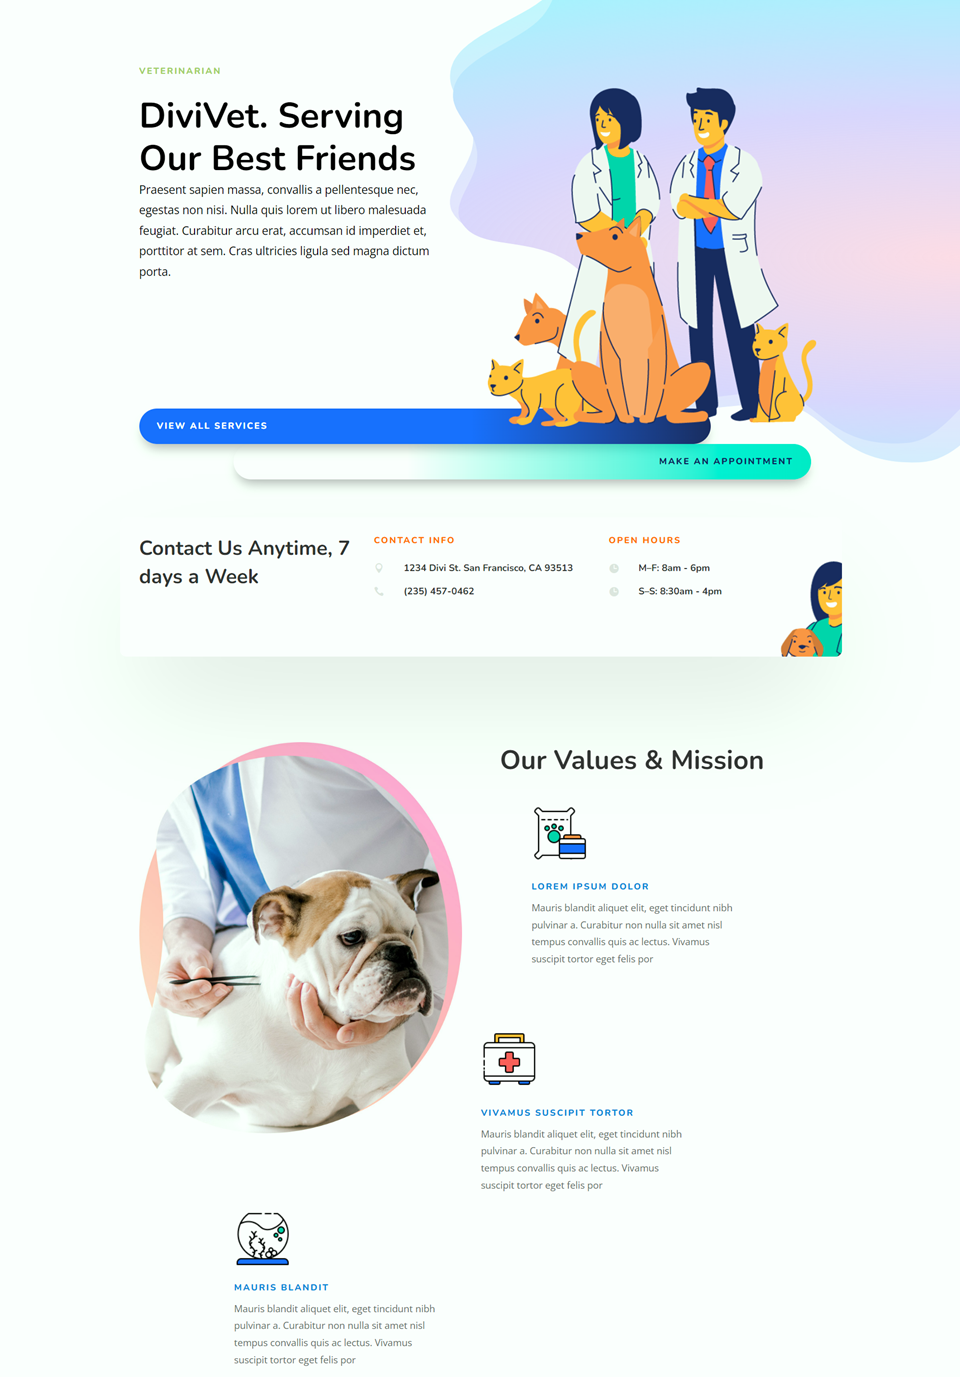
Final Finish outcome
That is the overall design for our fullwidth header hero section.
Final Concepts
The fullwidth header module implies that you’ll be able to merely create a fantastic hero section to advertise your services and tell your visitors what your internet web page is able. The built-in settings make it easy to customize the design of every aspect of the header, and the entire thing is in one place, so no want to toggle between multiple modules to build your hero section. For added unique hero section designs, check out this educational: How one can Use Divi’s Background Mask and Patterns for a Hero Phase. Do you utilize the fullwidth header module to build your hero sections? We might in reality like to hear from you throughout the comments!
The put up How one can Construct a Hero Phase with Divi’s Fullwidth Header Module gave the impression first on Sublime Subject matters Weblog.
Contents
- 1 Sneak Peek
- 2 What You Need to Get Started
- 3 How you can Assemble a Hero Segment with Divi’s Fullwidth Header Module
- 4 Final Finish outcome
- 5 Final Concepts
- 6 What is Omnichannel Marketing? A Complete Guide to Getting Started
- 7 10 Best YouTube Plugins for WordPress in 2023
- 8 Methods to Display Customized Content material to Other Customers in WordPress

0 Comments