
Mac’s built-in screenshot tool has two number one issues:
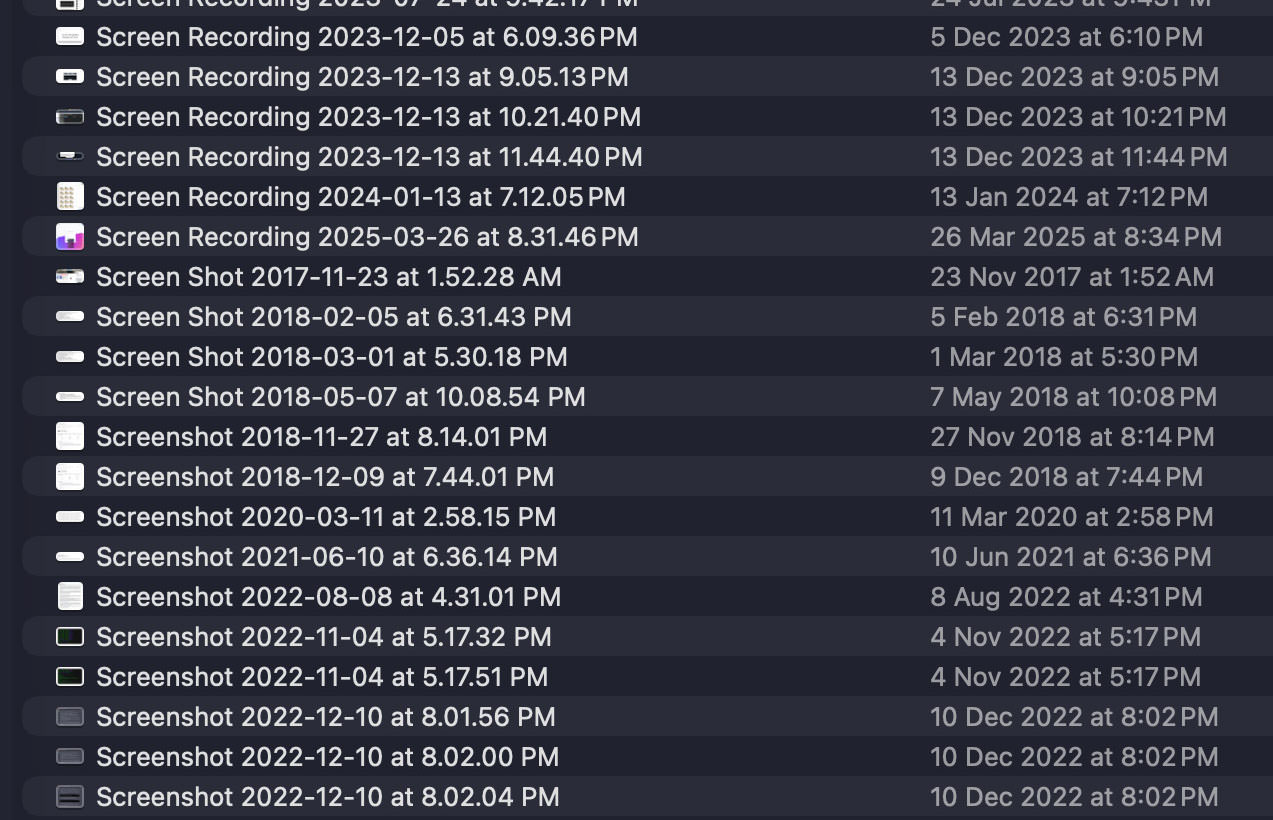
- Screenshots save to your Desktop by the use of default, growing litter
- Filenames are in keeping with timestamps (e.g., “
Visual display unit Shot 2026-01-09 at 2.30.00 PM.png“), which aren’t descriptive
This post will show you discover ways to treatment every problems by the use of automatically saving screenshots to a custom designed folder with vital, descriptive filenames.
Why does this matter?
Through the years, you’ll collect lots of screenshots with unhelpful filenames. Finding the fitting one becomes difficult. It’s imaginable you’ll tell yourself you’ll get ready and rename them later, then again let’s be honest – that barely happens.
In the long run, the litter becomes overwhelming and likewise you delete them in bulk, ceaselessly dropping screenshots you actually need.
What we’re building
Proper right here’s what we’ll do the use of Mac’s native choices (no additional apps required): Every time you’re taking a screenshot, your Mac will automatically save it to a custom designed folder, analyze the content material subject matter, and gives it a temporary, descriptive filename.
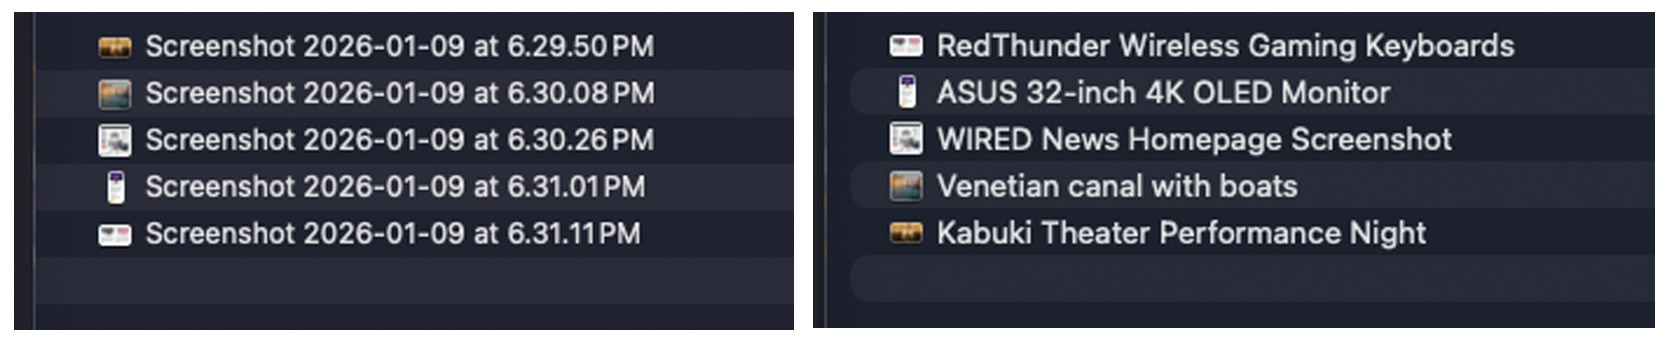
Principally, you’ll turn messy screenshot data like the ones (left) into organized, descriptive ones like the ones (proper).
Getting started
This setup takes about 5-10 minutes and requires Mac’s Terminal and Shortcuts apps.
Software prerequisites:
- Apple silicon Mac (M1, M2, or later)
- Latest macOS fashion
- Apple Intelligence enabled
Now, let’s get started.
1. Specify a folder for screenshots
First, let’s configure macOS to automatically save all screenshots to a decided on folder.
Steps:
- Create a folder named “Screenshots” (or any name you prefer)
- Open the Terminal app
- Sort the following command followed by the use of a space (don’t press Enter however):
defaults write com.apple.screencapture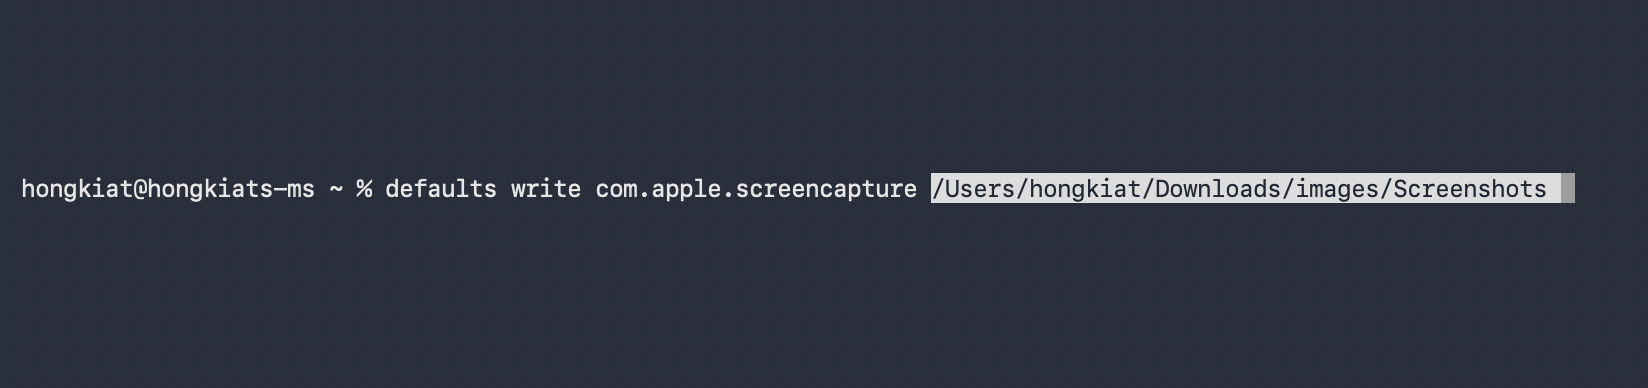
- Drag and drop your folder from Finder into the Terminal window – this automatically fills inside the folder path

- Press Enter
- Apply the changes by the use of running:
killall SystemUIServer
That’s it! Cross out the Terminal app and take a few take a look at screenshots. They will have to now save automatically to your designated folder.
2. Building the automation
Proper right here’s what we’re building: on each instance a screenshot is saved to your folder, it’ll be automatically analyzed and renamed with a vital, descriptive filename.
Steps:
- Unlock the Shortcuts app
- Create a brand spanking new Automation: Move to File > New Automation, select Folder, then click on on Next
- Inside the next show:
- Click on on Make a selection Folder, navigate to your screenshot folder, and click on on Make a selection
- Beneath “When Any Items Is”, check Added
- Check Run Immediately
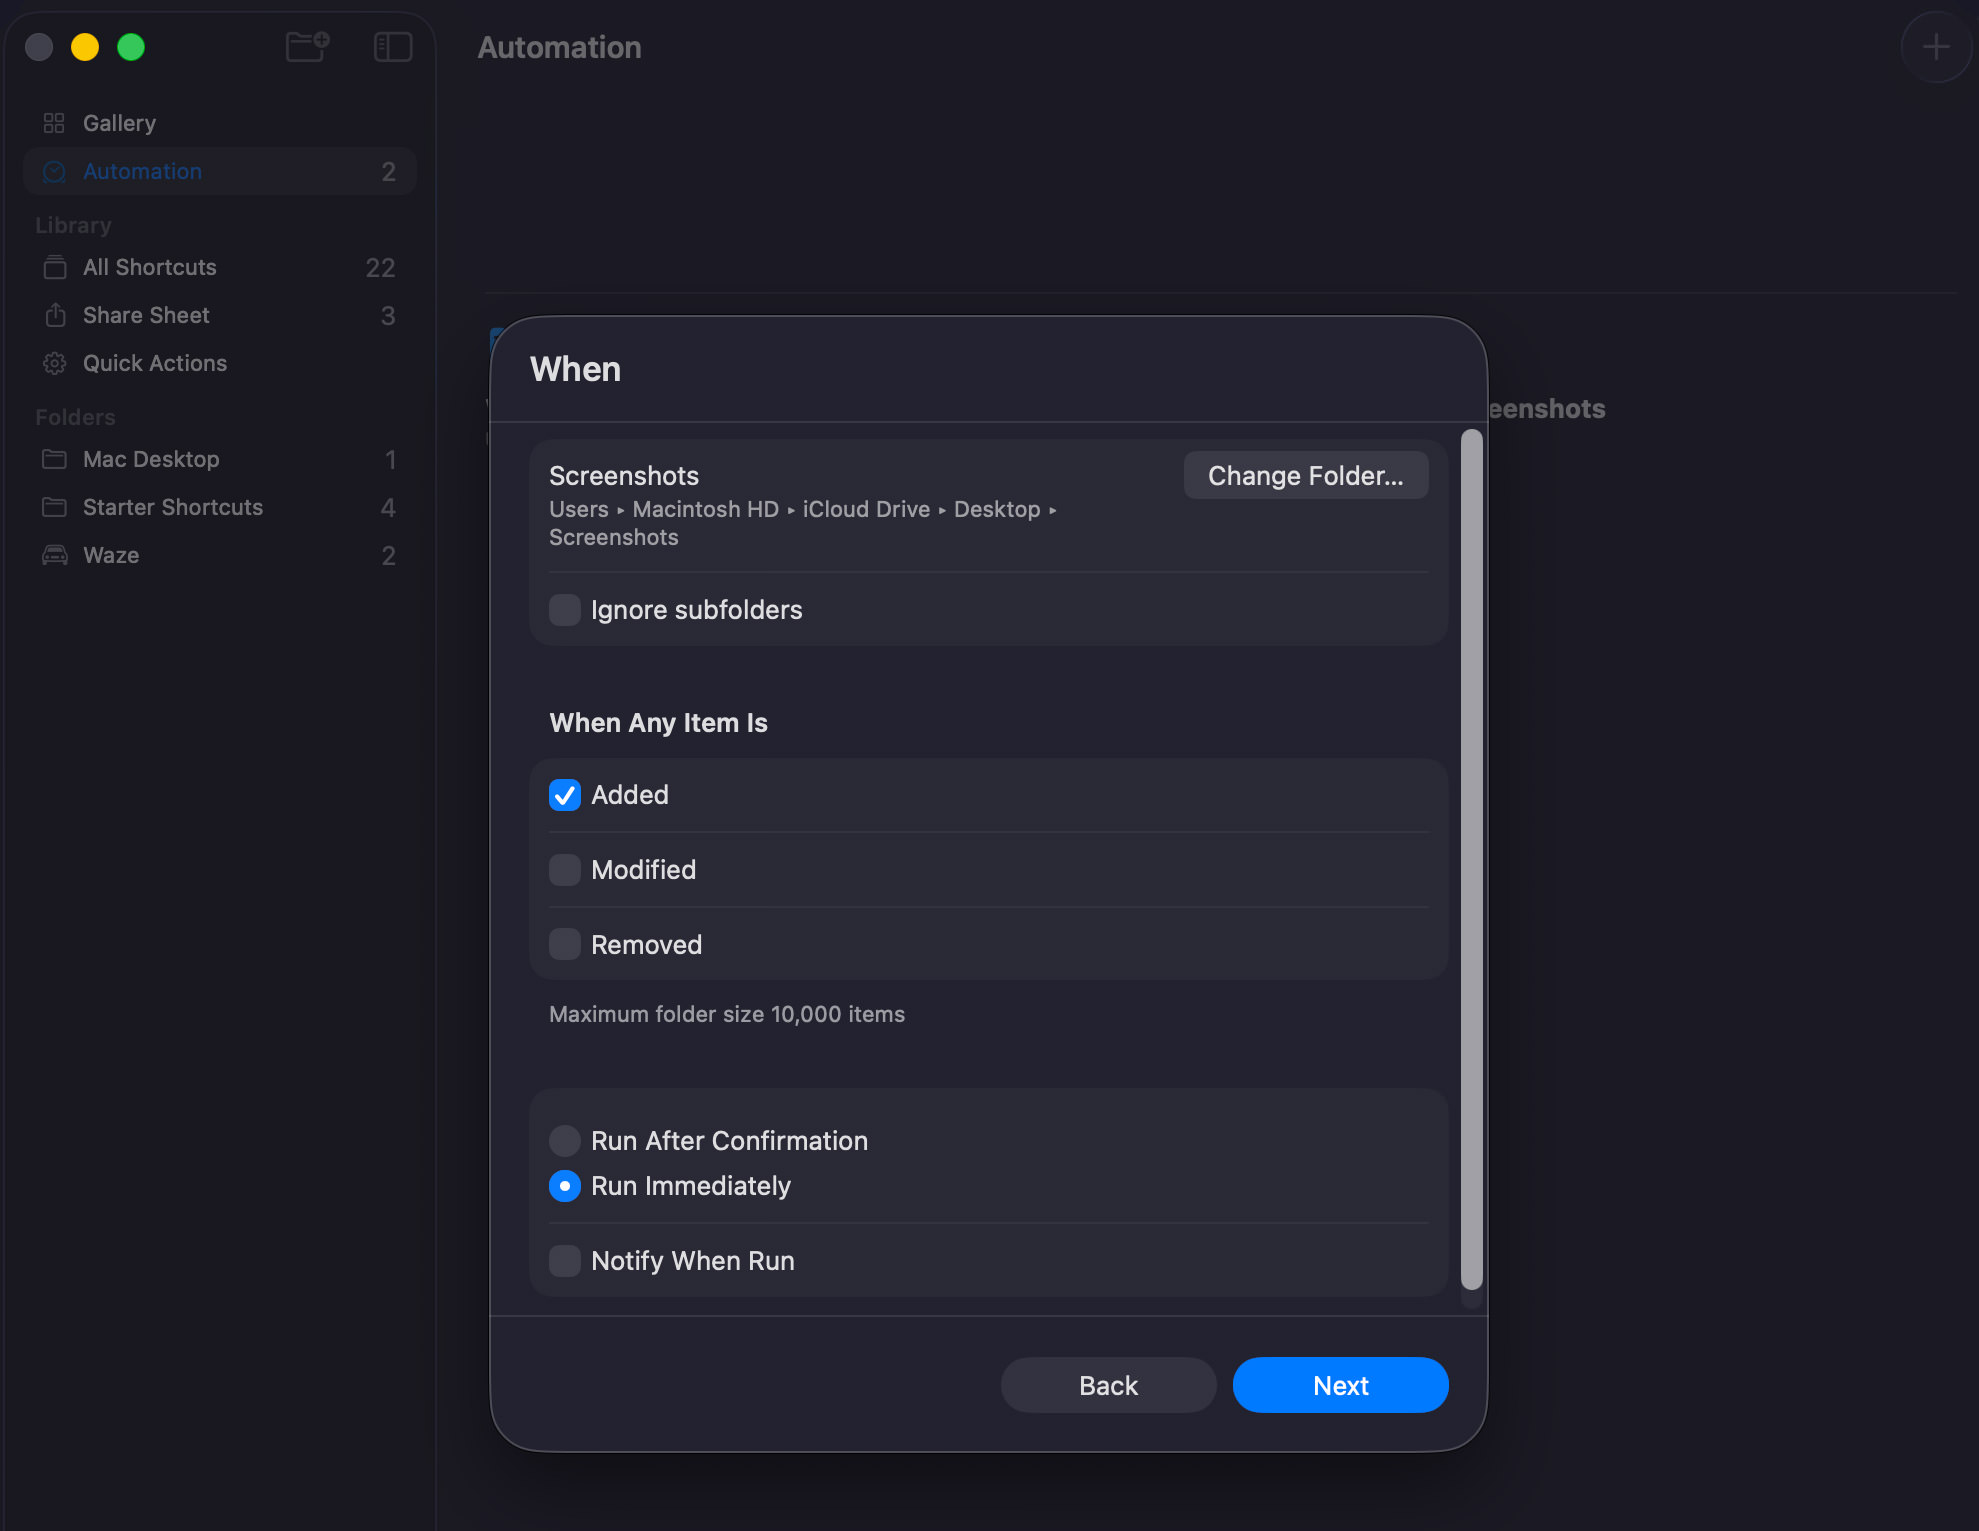
- Take a look at the entire thing is correct (see screenshot underneath), then click on on Next
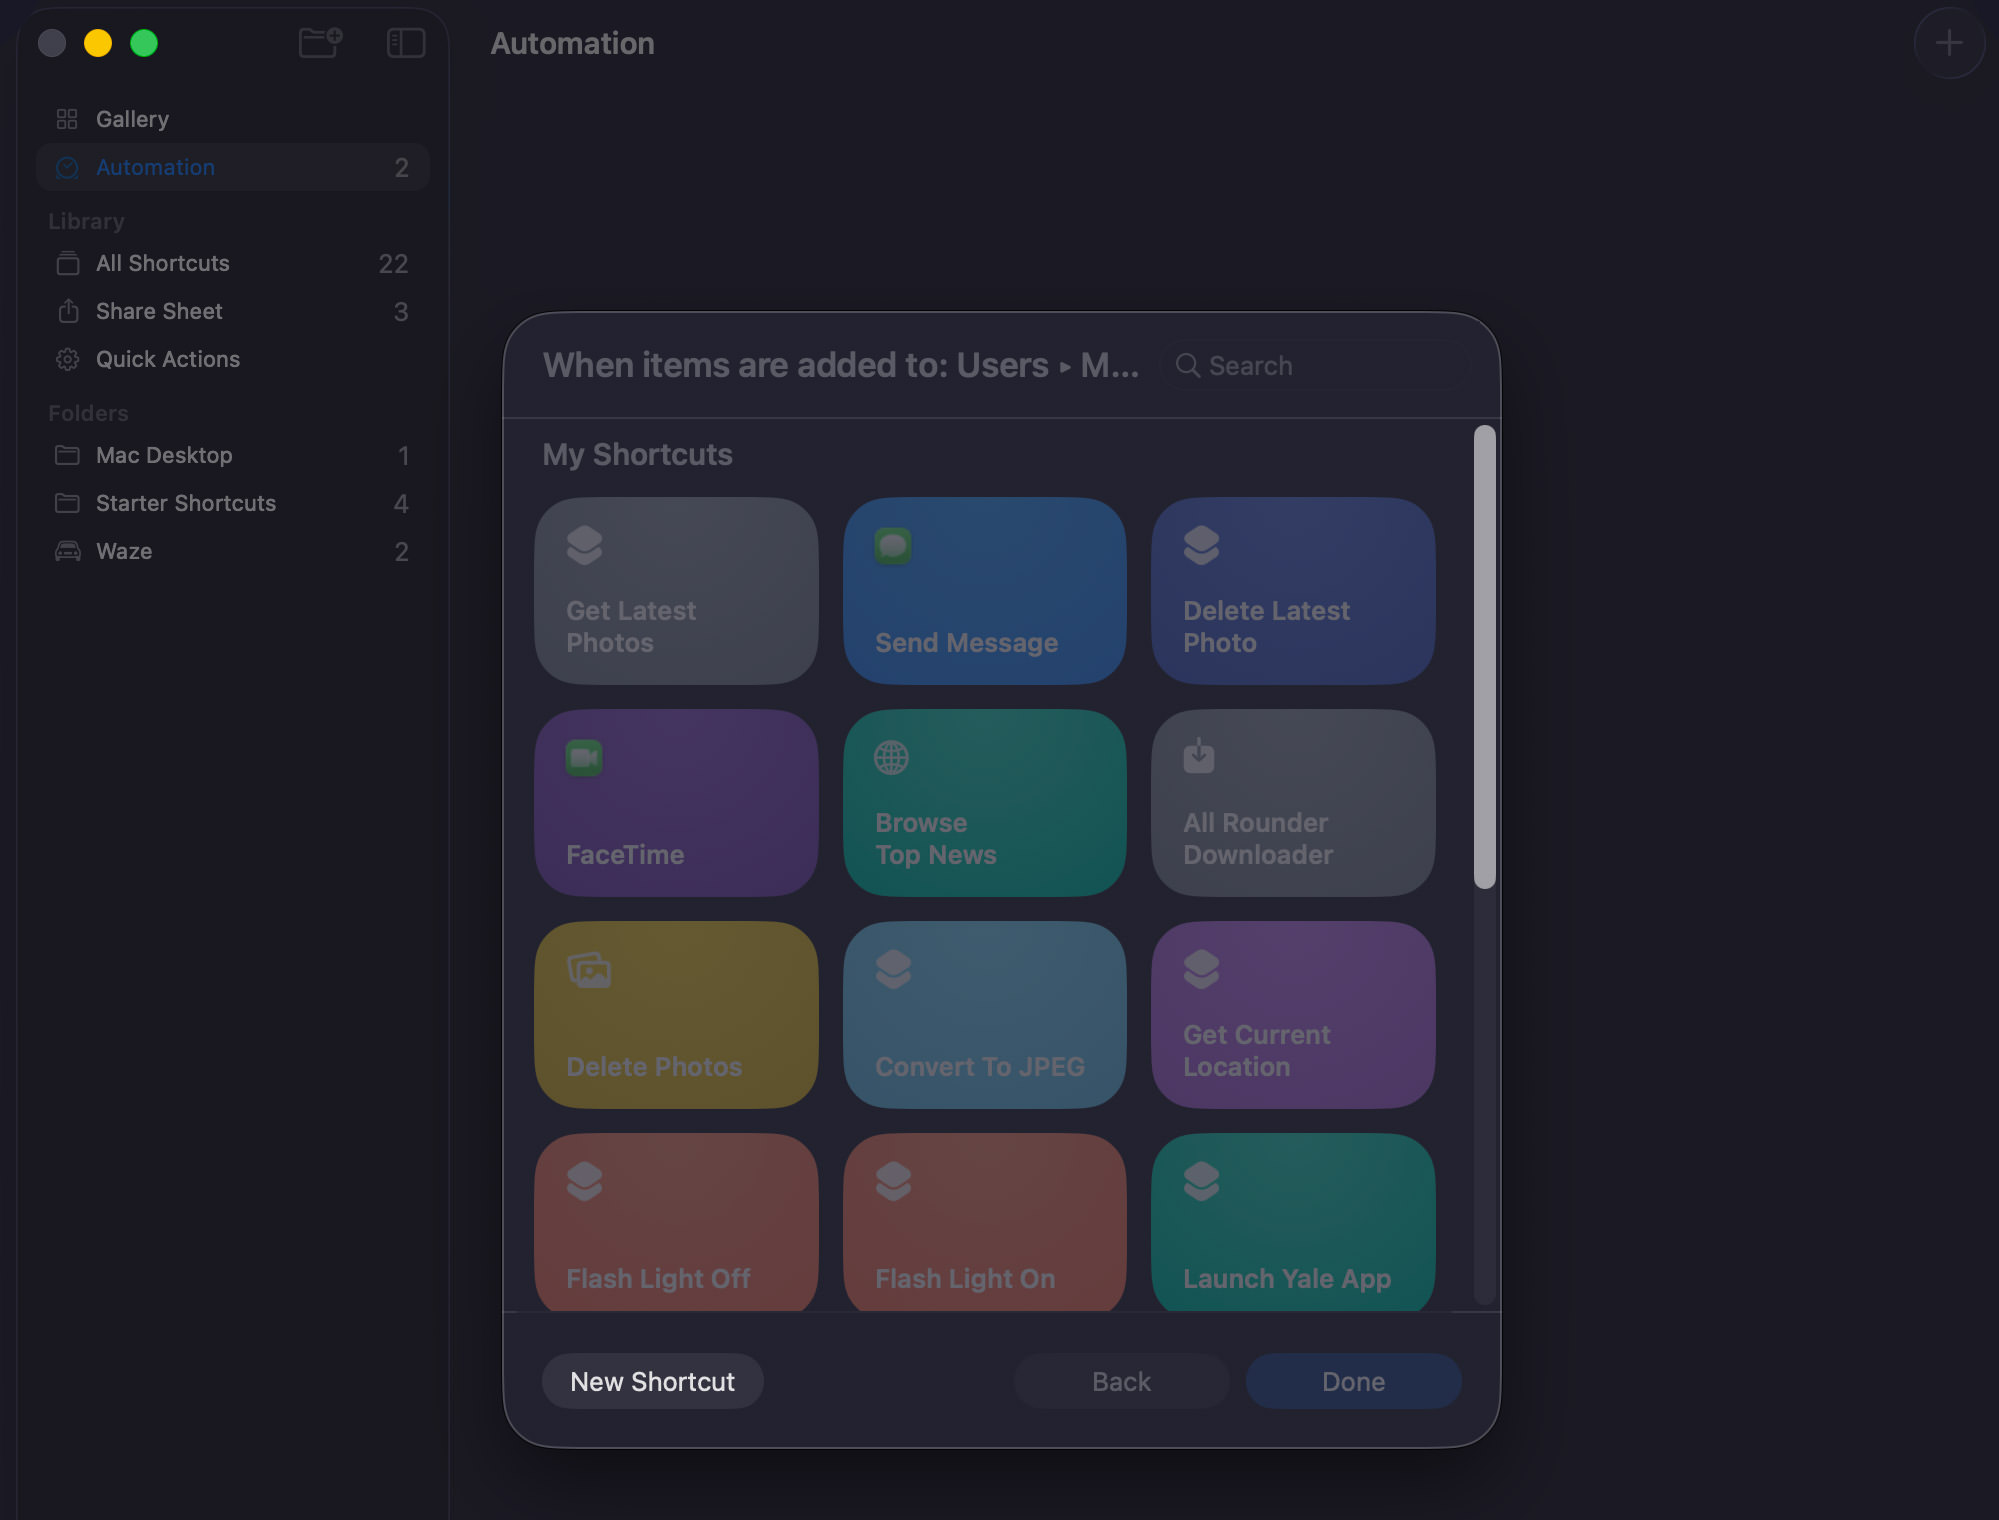
On the next show, click on on “New Shortcut” to continue, and then you definitely indisputably’ll be directed to the shortcut’s interface.
Observe the ones underneath steps moderately to build the shortcut:
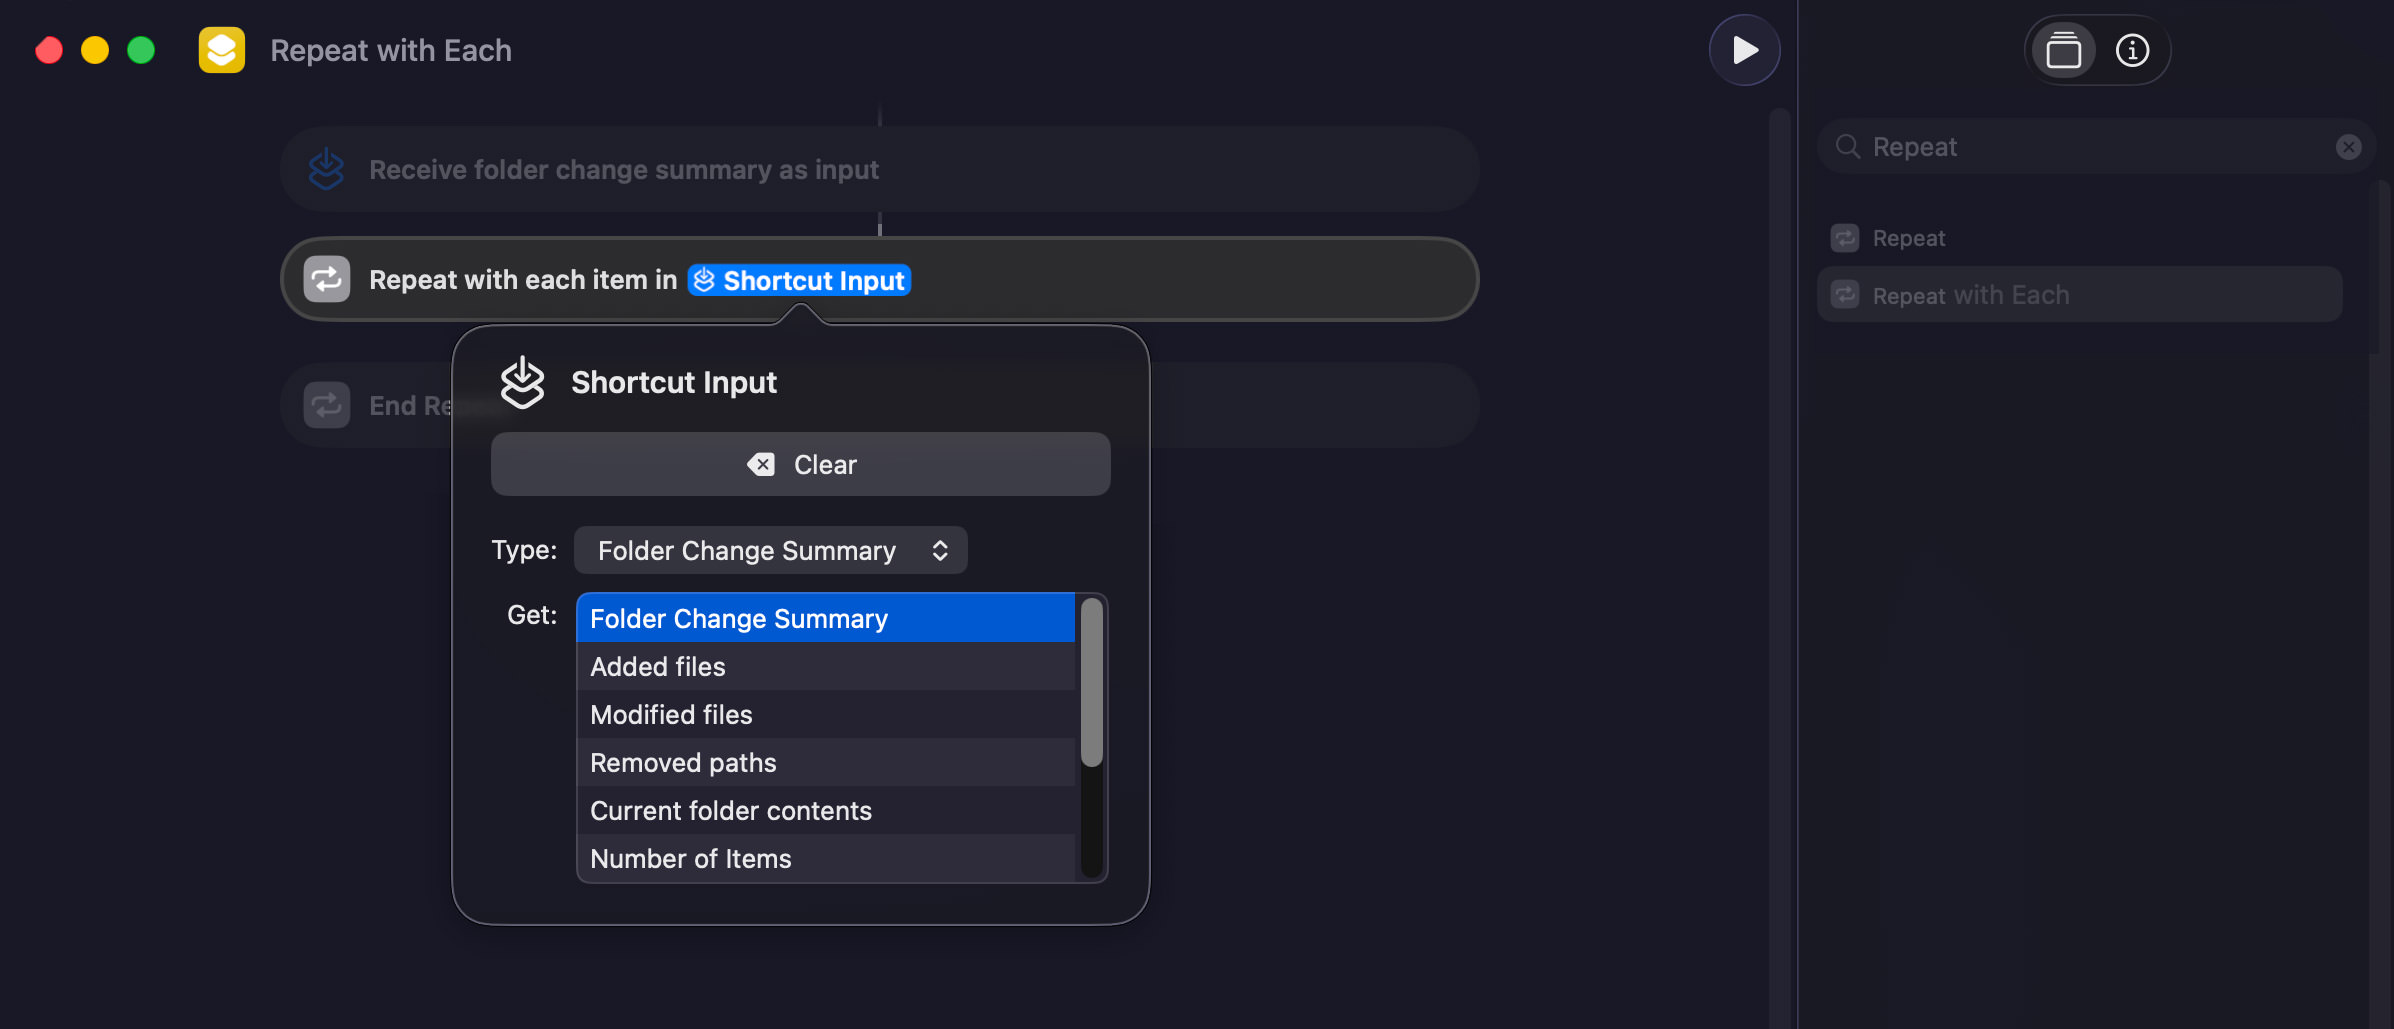
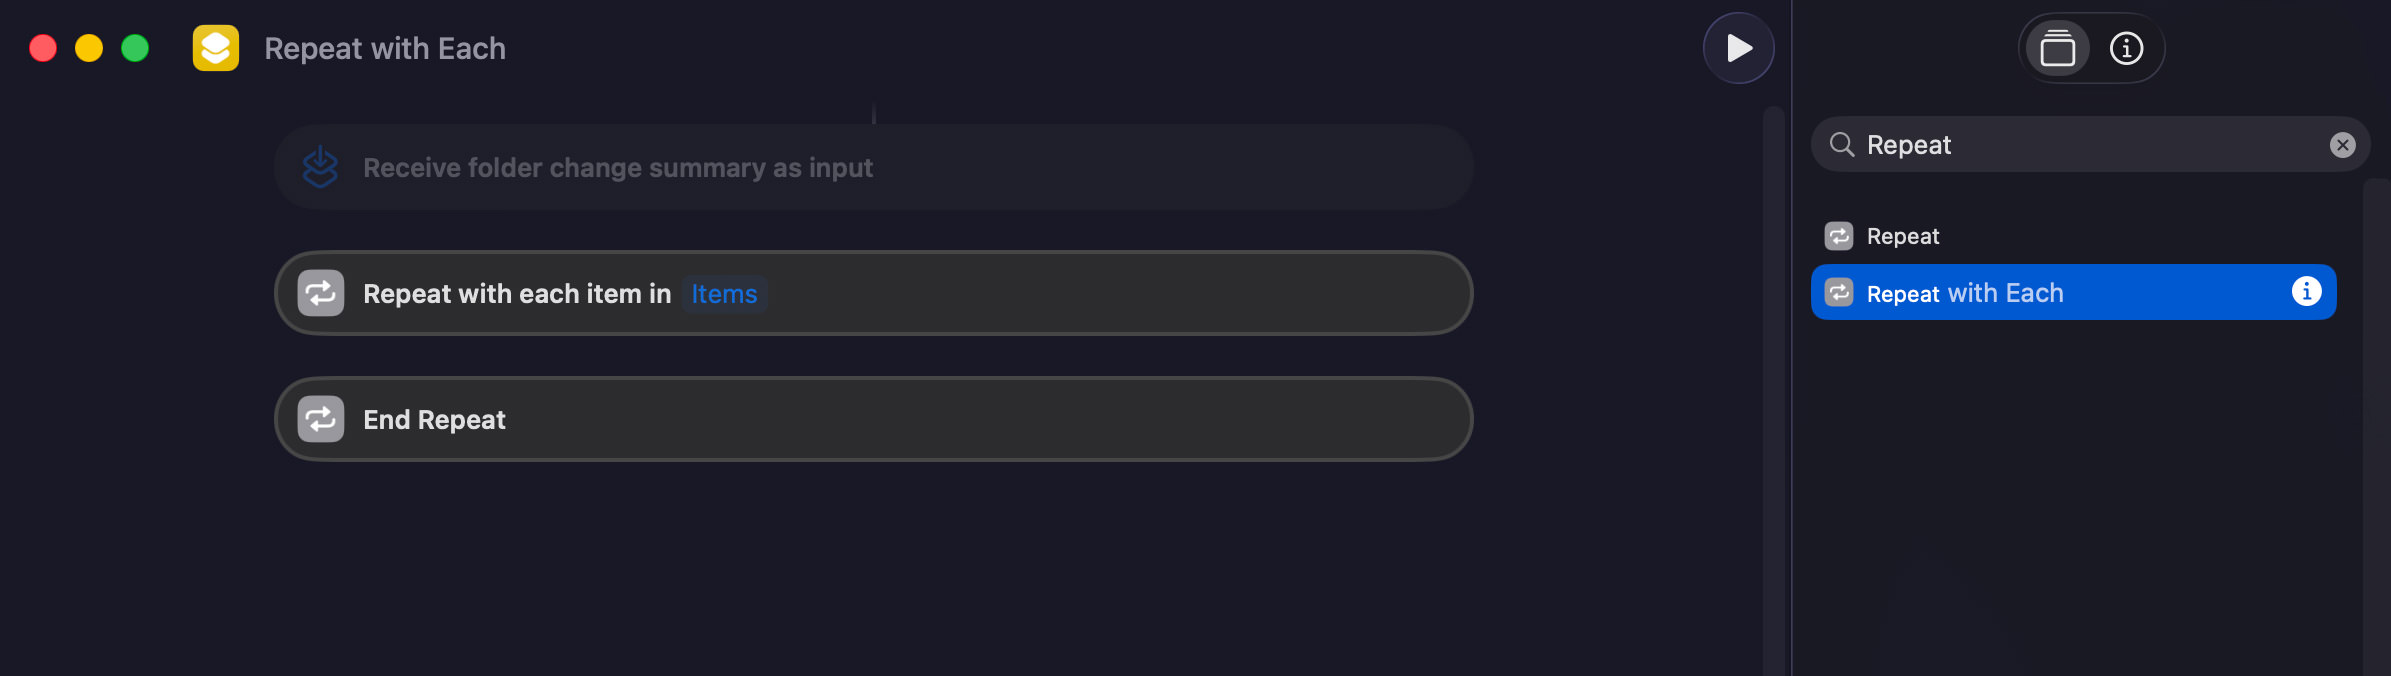
1. Add “Repeat with Every” movement:
- In “Search Actions” (best proper), search for “Repeat with Every” and double-click as a way to upload it
- Click on at the blue “Items”, select “Shortcut Input” from the dropdown
- Click on on “Shortcut Input” another time, then select “Added data”
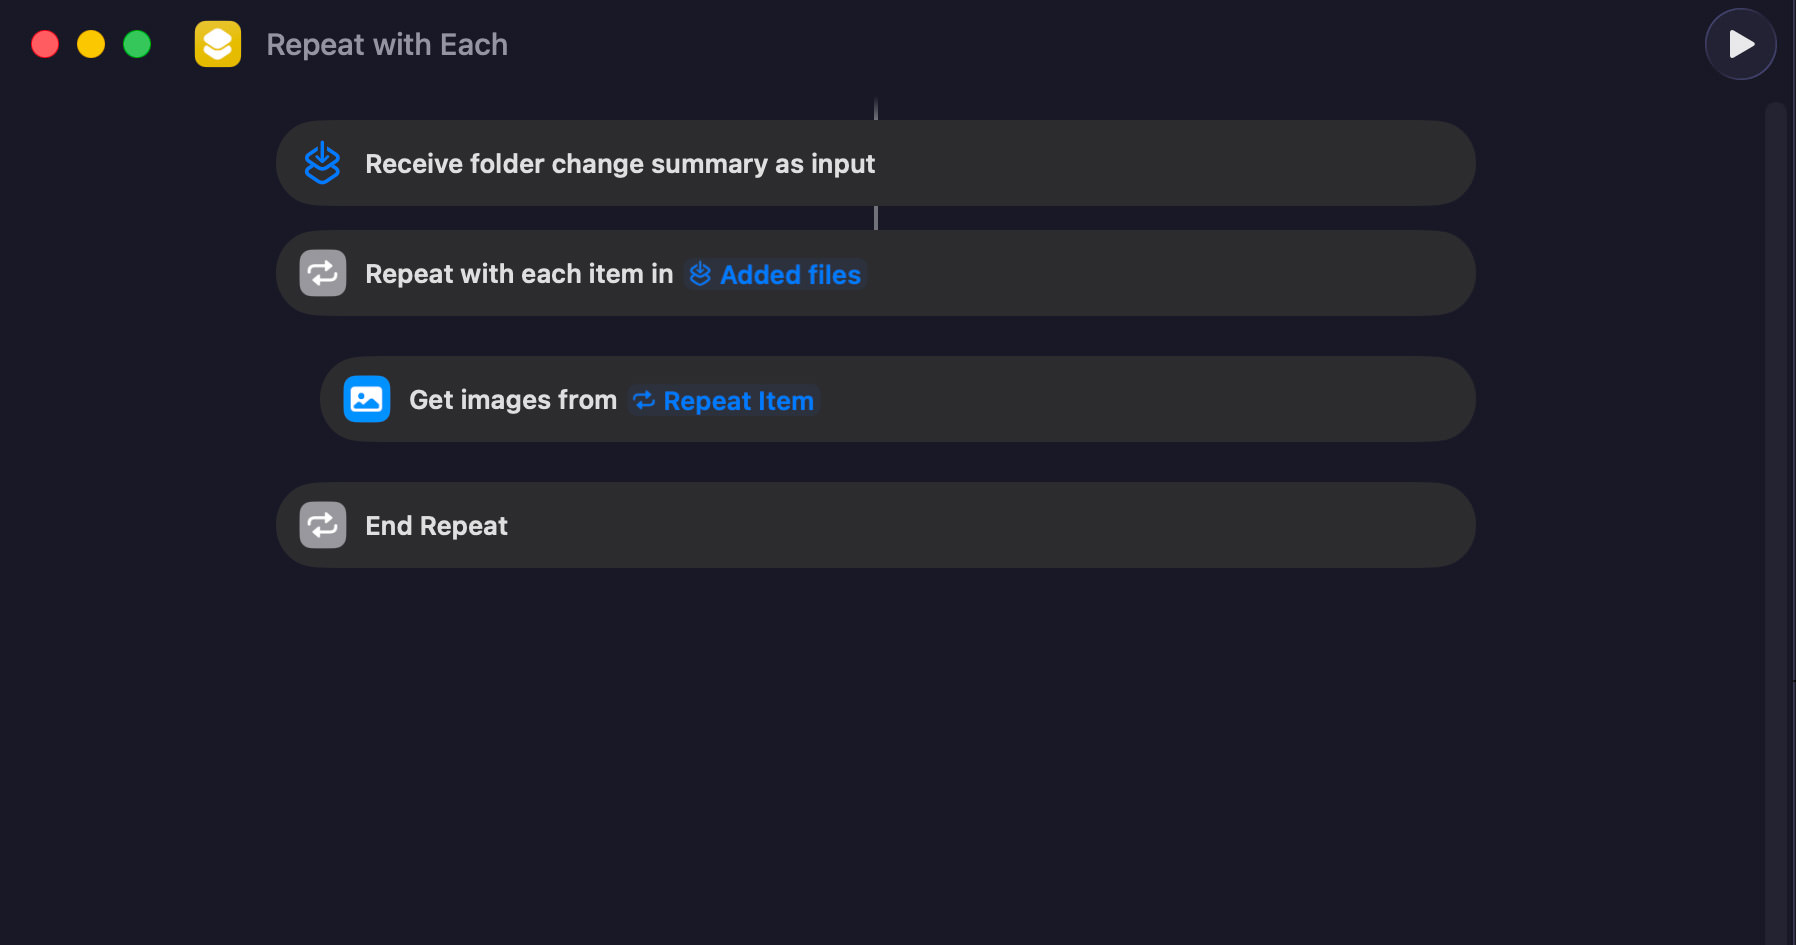
2. Add “Get Photos from Input” movement:
- Search for “Get Photos from Input” and double-click as a way to upload it
- Drag it between “Repeat with…” and “End Repeat”
Check your shortcut in opposition to the screenshot underneath to verify it’s correct.
3. Add “Use Taste” movement:
- Search for “Use Taste” and add it to the panel
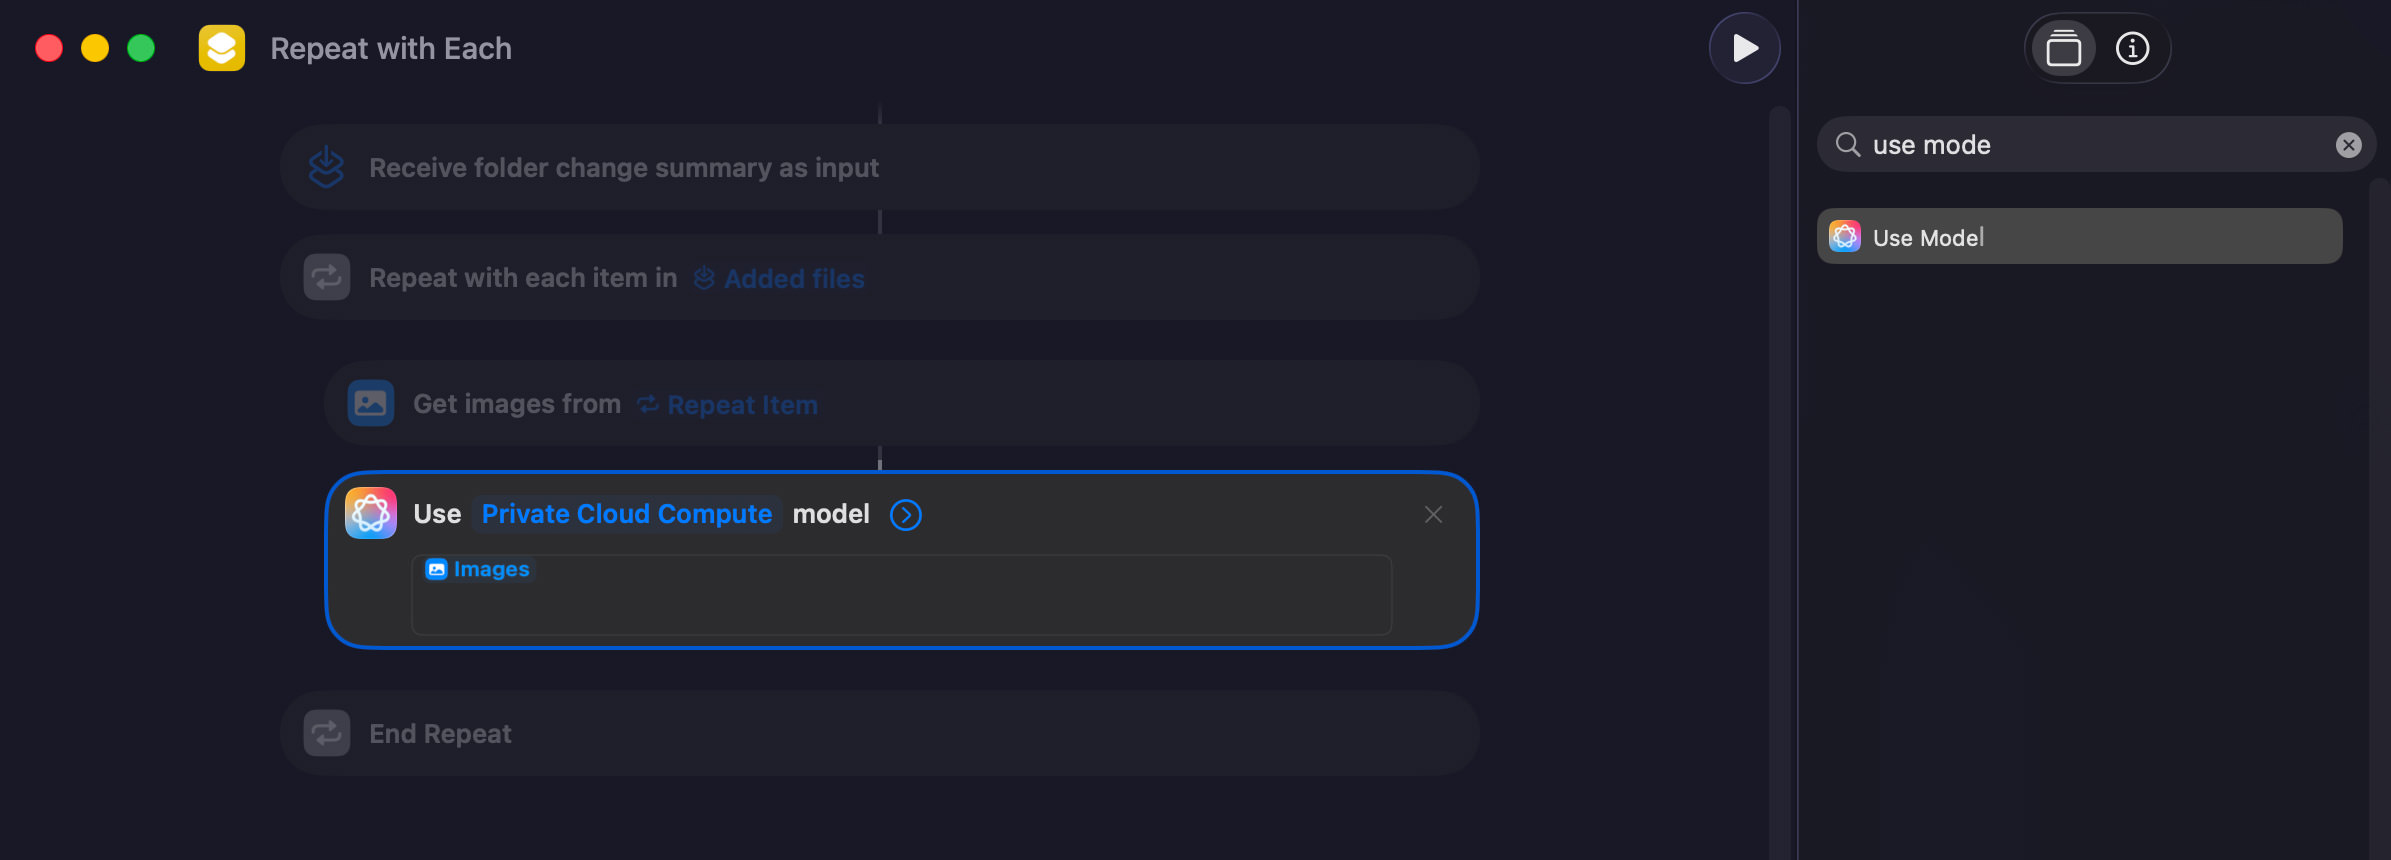
- Click on at the textbox containing “Photos”, clear it, and paste this advised:
Analyze the image and provide a temporary, simple descriptive name in keeping with the ones rules:
* "Period:" Use between 3 to 5 words.
* "Format:" Do not end the description with a period (.).
* "Style:" Keep it clear, concise, and descriptive of the main subject.
- At the end of the textbox, right-click and select “Insert Variable > Photos”
4. Add “Rename File” movement:
- Search for “Rename File” and add it above “End Repeat”
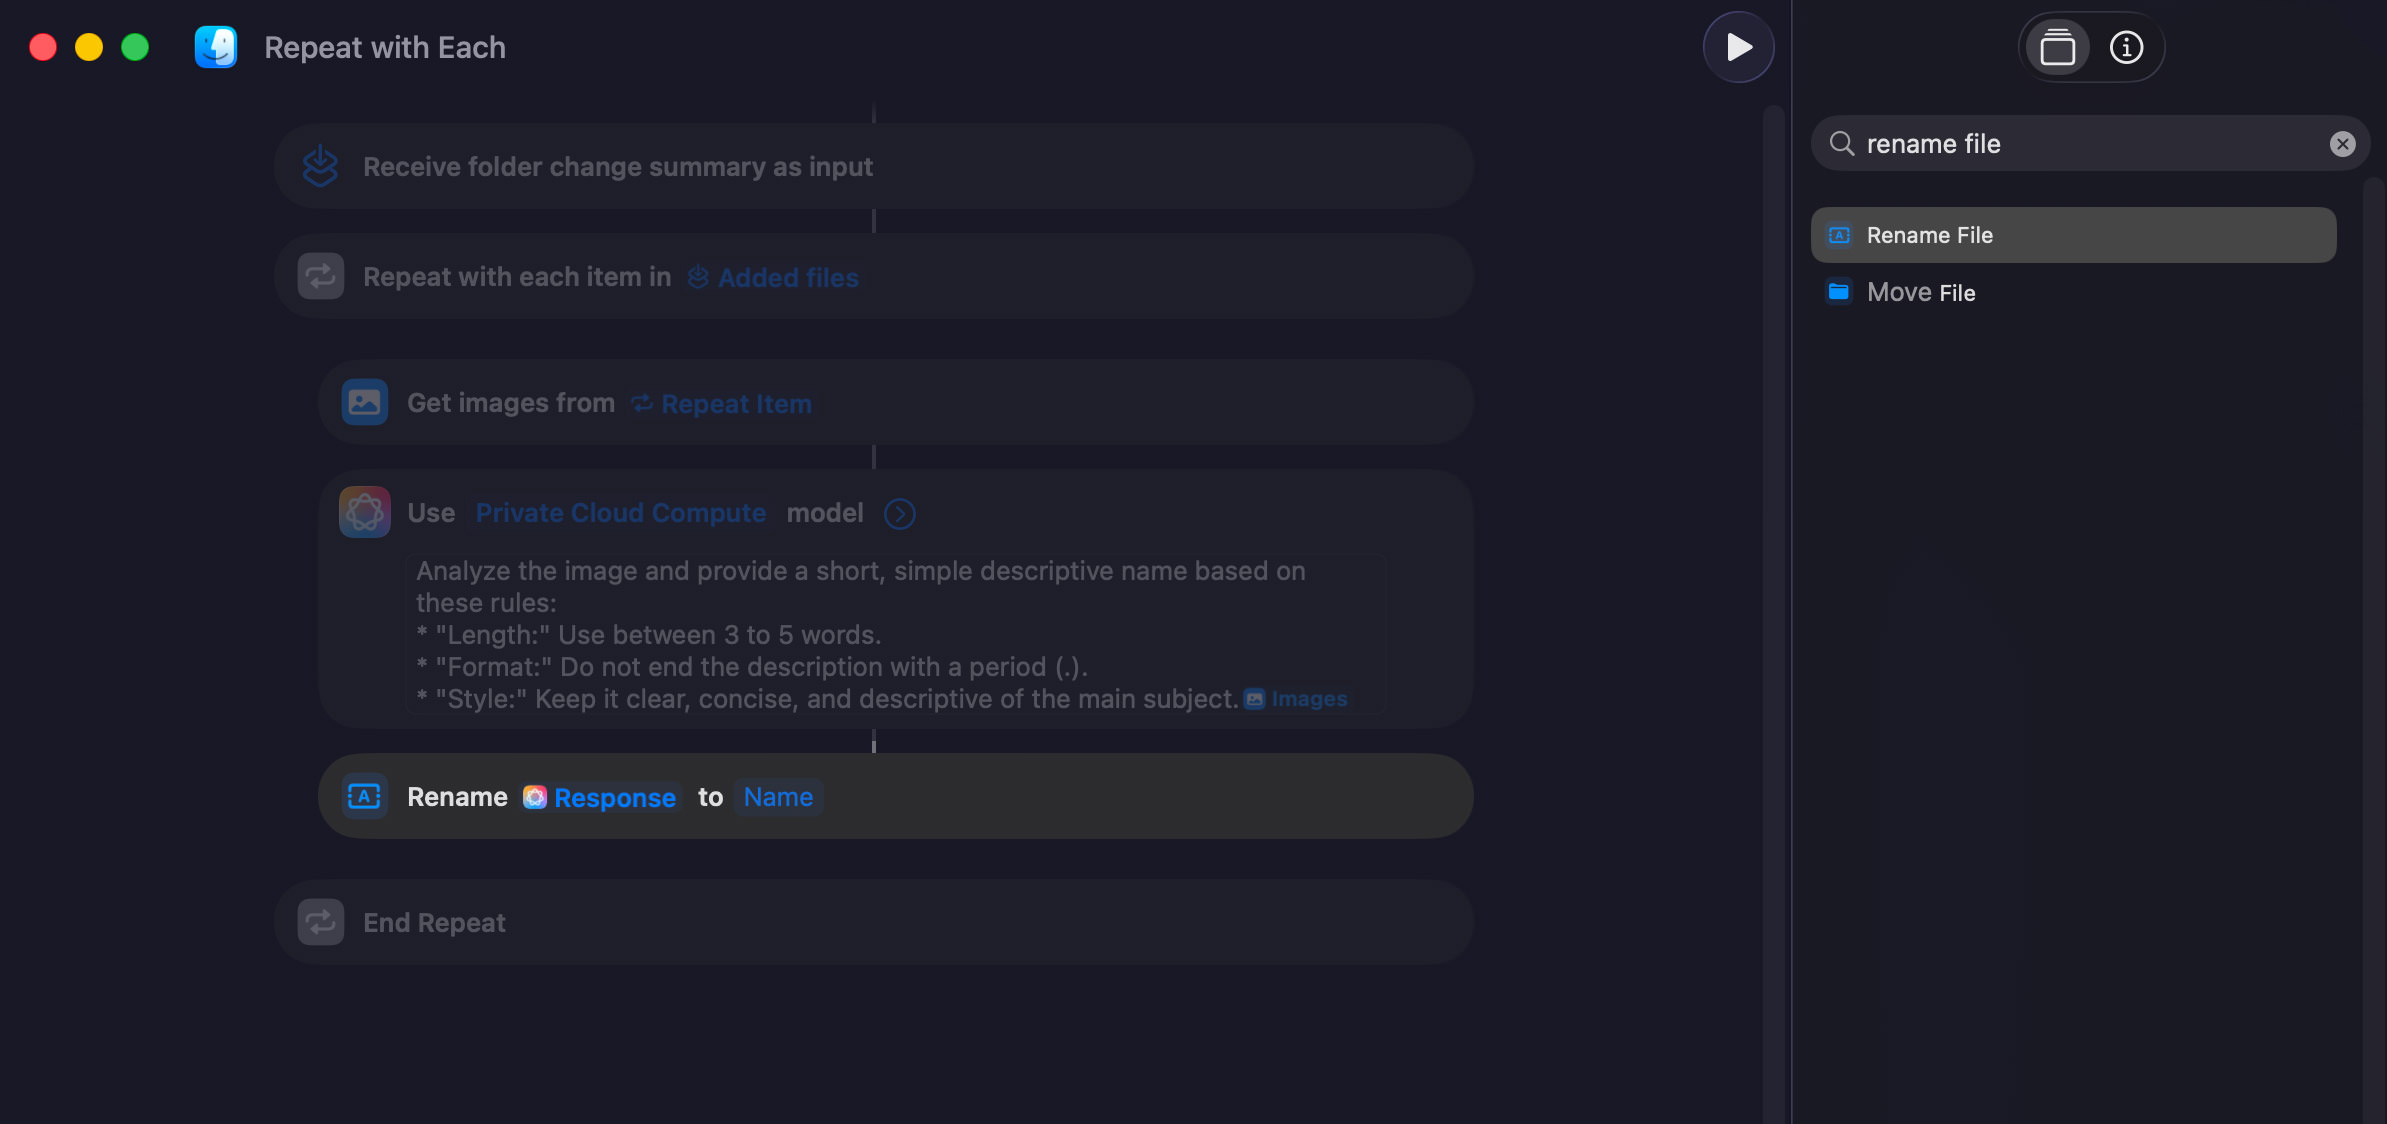
- Right kind-click “Response” and change it to “Repeat Products”
- Right kind-click “Determine” and change it to “Response”
That’s it! Take a take a look at screenshot. The main time, you’ll see a permission advised – click on on Okay to allow get admission to to your screenshot folder.
Take a few additional screenshots and watch them automatically get renamed with descriptive filenames in your designated folder.
Final concepts
If the renamed screenshots aren’t exactly what you need, feel free to edit the advised. With this automation quietly operating inside the background, your screenshots will probably be upper organized, easier to search around by means of Spotlight, and easier to identify at a glance.
The post Auto-Arrange Mac Screenshots into Folder and Rename with AI seemed first on Hongkiat.
Supply: https://www.hongkiat.com/blog/organize-mac-screenshots-ai-rename/
Contents
- 1 Why does this matter?
- 2 What we’re building
- 3 Getting started
- 4 1. Specify a folder for screenshots
- 5 2. Building the automation
- 6 Final concepts
- 7 Tips on how to Backup the WooCommerce Database to Safe Your Retailer’s Information
- 8 The Final Internet Developer Toolkit
- 9 30 Cool Computer Sleeves and Luggage to Purchase

0 Comments