
Since cameras have complicated, real-time object detection has change into an an increasing number of sought-after capacity. From self-driving cars and excellent surveillance systems to augmented truth systems, this period is used in many eventualities.
Pc vision, a sophisticated period of time for the technology that uses cameras with pc techniques to carry out operations like those mentioned above, is an unlimited and complex field. However, you won’t know that you just’ll get started with real-time object detection very merely from the relaxation of your browser.
This newsletter explains how one can assemble a real-time object detection app using React and deploy the app to Kinsta. The true-time object detection app leverages the individual’s webcam feed.
Should haves
Proper right here’s a breakdown of the vital factor technologies used in this data:
- React: React is used to construct the application’s particular person interface (UI). React excels at rendering dynamic content material and may well be useful in presenting the webcam feed and detected goods all the way through the browser.
- TensorFlow.js: TensorFlow.js is a JavaScript library that brings the facility of device learning to the browser. It means that you can load pre-trained gadgets for object detection and run them immediately all the way through the browser, eliminating the will for complicated server-side processing.
- Coco SSD: The appliance uses a pre-trained object detection taste referred to as Coco SSD, a lightweight taste able to recognizing an unlimited array of frequently goods in authentic time. While Coco SSD is an outstanding software, it’s important to note that it’s professional on a commonplace dataset of things. While you’ve were given particular detection needs, you’ll educate a custom designed taste using TensorFlow.js by the use of following this information.
Organize a brand spanking new React enterprise
- Create a brand spanking new React enterprise. Do this by the use of operating the following command:
npm create vite@latest kinsta-object-detection --template reactThis will likely increasingly more scaffold a baseline React enterprise for you using vite.
- Next, arrange the TensorFlow and Coco SSD libraries by the use of operating the following directions throughout the enterprise:
npm i @tensorflow-models/coco-ssd @tensorflow/tfjs
Now, you are ready to start rising your app.
Configuring the app
Quicker than writing the code for the article detection commonplace sense, let’s understand what’s complicated in this data. Proper right here’s what the UI of the app would seem to be:
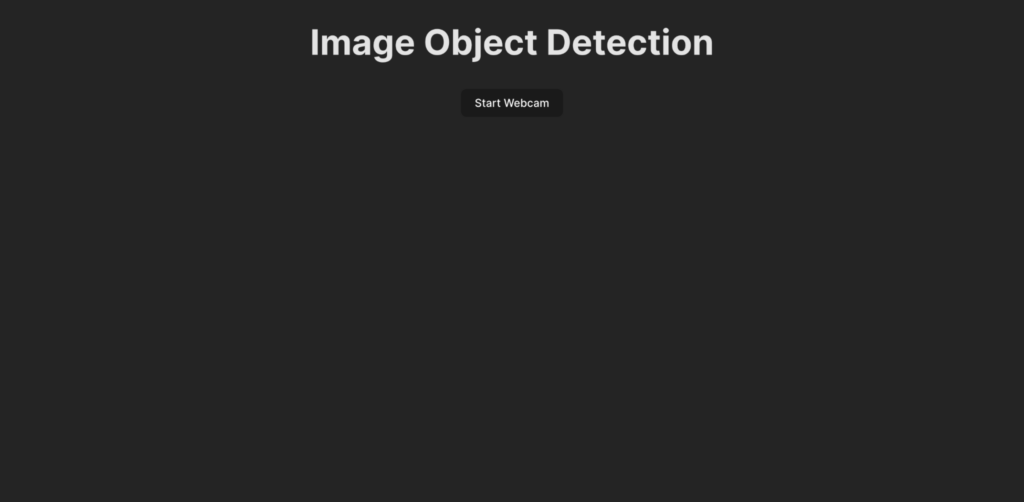
When an individual clicks the Get began Webcam button, they’re introduced directly to grant the app permission to get right to use the webcam feed. When permission is granted, the app starts showing the webcam feed and detects goods supply throughout the feed. It then renders a box to show the detected goods on the reside feed and offers a label to it as well.
To start, create the UI for the app by the use of pasting the following code throughout the App.jsx document:
import ObjectDetection from './ObjectDetection';
function App() {
  return (

      Image Object Detection


  );
}

export default App;
This code snippet specifies a header for the internet web page and imports a custom designed section named ObjectDetection. This section contains the commonsense for capturing the webcam feed and detecting goods in authentic time.
To create this section, create a brand spanking new document named ObjectDetection.jsx for your src list and paste the following code in it:
import { useEffect, useRef, useState } from 'react';
const ObjectDetection = () => {
const videoRef = useRef(null);
const [isWebcamStarted, setIsWebcamStarted] = useState(false)
const startWebcam = async () => {
// TODO
};
const stopWebcam = () => {
// TODO
};
return (
{isWebcamStarted ? : }
);
};
export default ObjectDetection;The code above defines an HTML development with a button to start and save you the webcam feed and a section that may well be used to show the individual their webcam feed as quickly because it’s vigorous. A state container isWebcamStarted is used to store the state of the webcam feed. Two functions, startWebcam and stopWebcam are used to start and save you the webcam feed. Let’s define them:
Proper right here’s the code for the startWebcam function:
const startWebcam = async () => {
    check out {
      setIsWebcamStarted(true)
      const flow into = wait for navigator.mediaDevices.getUserMedia({ video: true });

      if (videoRef.provide) {
        videoRef.provide.srcObject = flow into;
      }
    } catch (error) {
      setIsWebcamStarted(false)
      console.error('Error having access to webcam:', error);
    }
  };
This function takes care of inquiring for the individual to grant webcam get right to use, and as quickly because the permission is granted, it gadgets the to show the reside webcam feed to the individual.
If the code fails to get right to use the webcam feed (most likely on account of a lack of webcam at this time instrument or the individual is denied permission), the function will print a message to the console. You’ll use an error block to turn the reason for the failure to the individual.
Next, trade the stopWebcam function with the following code:
const stopWebcam = () => {
    const video = videoRef.provide;

    if (video) {
      const flow into = video.srcObject;
      const tracks = flow into.getTracks();

      tracks.forEach((practice) => {
        practice.save you();
      });

      video.srcObject = null;
      setPredictions([])
      setIsWebcamStarted(false)
    }
  };
This code assessments for the operating video flow into tracks being accessed by the use of the object and stops every of them. In any case, it gadgets the isWebcamStarted state to false.
At this degree, check out operating the app to check in the event you’ll get right to use and take a look at the webcam feed.
You’ll want to paste the following code throughout the index.css document to make sure the app seems the equivalent for the reason that preview you spotted earlier:
#root {
  font-family: Inter, system-ui, Avenir, Helvetica, Arial, sans-serif;
  line-height: 1.5;
  font-weight: 400;
  color-scheme: delicate dark;
  coloration: rgba(255, 255, 255, 0.87);
  background-color: #242424;
  min-width: 100vw;
  min-height: 100vh;
  font-synthesis: none;
  text-rendering: optimizeLegibility;
  -webkit-font-smoothing: antialiased;
  -moz-osx-font-smoothing: grayscale;
}

a {
  font-weight: 500;
  coloration: #646cff;
  text-decoration: inherit;
}

a:hover {
  coloration: #535bf2;
}

body {
  margin: 0;
  display: flex;
  place-items: heart;
  min-width: 100vw;
  min-height: 100vh;
}

h1 {
  font-size: 3.2em;
  line-height: 1.1;
}

button {
  border-radius: 8px;
  border: 1px cast transparent;
  padding: 0.6em 1.2em;
  font-size: 1em;
  font-weight: 500;
  font-family: inherit;
  background-color: #1a1a1a;
  cursor: pointer;
  transition: border-color 0.25s;
}

button:hover {
  border-color: #646cff;
}

button:focus,

button:focus-visible {
  outline: 4px auto -webkit-focus-ring-color;
}

@media (prefers-color-scheme: delicate) {
  :root {
    coloration: #213547;
    background-color: #ffffff;
  }

  a:hover {
    coloration: #747bff;
  }

  button {
    background-color: #f9f9f9;
  }
}

.app {
  width: 100%;
  display: flex;
  justify-content: heart;
  align-items: heart;
  flex-direction: column;
}

.object-detection {
  width: 100%;
  display: flex;
  flex-direction: column;
  align-items: heart;
  justify-content: heart;

  .buttons {
    width: 100%;
    display: flex;
    justify-content: heart;
    align-items: heart;
    flex-direction: row;

    button {
      margin: 2px;
    }
  }

  div {
    margin: 4px;
  }
}
Moreover, remove the App.css document to avoid messing up the kinds of the portions. Now, you are ready to write the commonsense for integrating real-time object detection for your app.
Organize real-time object detection
- Get began by the use of together with the imports for Tensorflow and Coco SSD on the most productive of ObjectDetection.jsx:
import * as cocoSsd from '@tensorflow-models/coco-ssd'; import '@tensorflow/tfjs'; - Next, create a state throughout the
ObjectDetectionsection to store the array of predictions generated by the use of the Coco SSD taste:const [predictions, setPredictions] = useState([]); - Next, create a function that somewhat a bit of the Coco SSD taste, collects the video feed, and generates the predictions:
const predictObject = async () => {
    const taste = wait for cocoSsd.load();

    taste.come throughout(videoRef.provide).then((predictions) => {
      setPredictions(predictions);
    })

      .catch(err => {
        console.error(err)
      });
  };
This function uses the video feed and generates predictions for goods supply throughout the feed. It’s going to come up with an array of predicted goods, every containing a label, a self trust percentage, and a set of coordinates showing the article’s location throughout the video frame.
You need to incessantly identify this function to process video frames as they come and then use the predictions stored throughout the
predictionsstate to show packing containers and labels for every identified object on the reside video feed. - Next, use the
setIntervalfunction to call the function incessantly. You will have to moreover save you this function from being referred to as after the individual has stopped the webcam feed. To take a look at this, use theclearIntervalfunction from JavaScript.Add the following state container and theuseEffecthook throughout theObjectDetectionsection to prepare thepredictObjectfunction to be referred to as incessantly when the webcam is enabled and removed when the webcam is disabled:const [detectionInterval, setDetectionInterval] = useState() useEffect(() => { if (isWebcamStarted) { setDetectionInterval(setInterval(predictObject, 500)) } else { if (detectionInterval) { clearInterval(detectionInterval) setDetectionInterval(null) } } }, [isWebcamStarted])This gadgets up the app to return around the goods present in front of the webcam every 500 milliseconds. You’ll believe changing this value depending on how fast you want the article detection to be while protective in ideas that doing it too incessantly would in all probability consequence for your app using a large number of memory throughout the browser.
- Now that you just’ve the prediction wisdom throughout the
predictionstate container, you’ll use it to turn a label and a box around the object throughout the reside video feed. To take a look at this, change thereturnstatement of theObjectDetectionto return the following:return ();{isWebcamStarted ? : } {/* Add the tags underneath to show a label using the p section and a box using the div section */} {predictions.period > 0 && ( predictions.map(prediction => { return{/* Add the tags underneath to show a list of predictions to particular person */} {predictions.period > 0 && ({prediction.magnificence + ' - with ' + Math.round(parseFloat(prediction.score) * 100) + '% self trust.'}
}) )})}Predictions:
-
{predictions.map((prediction, index) => (
- {`${prediction.magnificence} (${(prediction.score * 100).toFixed(2)}%)`} ))}
This will likely increasingly more render a list of predictions correct underneath the webcam feed and draw a box around the predicted object using the coordinates from Coco SSD in conjunction with a label on the most productive of the packing containers.
- To style the packing containers and label accurately, add the following code to the index.css document:
.feed {
  position: relative;

  p {
    position: absolute;
    padding: 5px;
    background-color: rgba(255, 111, 0, 0.85);
    coloration: #FFF;
    border: 1px dashed rgba(255, 255, 255, 0.7);
    z-index: 2;
    font-size: 12px;
    margin: 0;
  }

  .marker {
    background: rgba(0, 255, 0, 0.25);
    border: 1px dashed #fff;
    z-index: 1;
    position: absolute;
  }

}
This completes the advance of the app. You’ll now restart the dev server to test the application. Proper right here’s what it will have to seem to be when completed:

Demo of the real-time object detection using webcam
You’ll to seek out all the code in this GitHub repository.
Deploy the completed app to Kinsta
The total step is to deploy the app to Kinsta to make it available for your shoppers. To take a look at this, Kinsta means that you can host as much as 100 static internet sites for free immediately from your preferred Git provider (Bitbucket, GitHub, or GitLab).
Once your git repository is ready, practice the ones steps to deploy your object detection app to Kinsta:
- Log in or create an account to view your MyKinsta dashboard.
- Authorize Kinsta along side your Git provider.
- Click on on Static Web pages on the left sidebar, then click on on Add internet website online.
- Choose the repository and the dep. you wish to have to deploy from.
- Assign a singular name for your internet website online.
- Add the assemble settings throughout the following format:
- Assemble command:
yarn assembleornpm run assemble - Node style:
20.2.0 - Put up list:
dist
- Assemble command:
- In any case, click on on Create internet website online.
As quickly because the app is deployed, you’ll click on on Visit Web site from the dashboard to get right to use the app. You’ll now check out operating the app all the way through various gadgets with cameras to seem how it performs.
As a substitute for Static Web site Internet website hosting, you’ll deploy your static internet website online with Kinsta’s Utility Web hosting, which provides higher web page website hosting flexibility, a wider range of benefits, and get right to use to additional robust choices. For example, scalability, customized deployment using a Dockerfile, and complete analytics encompassing real-time and historical wisdom.
Summary
You’ve successfully built a real-time object detection instrument using React, TensorFlow.js, and Kinsta. This permits you to uncover the exciting world of laptop vision and create interactive experiences immediately throughout the particular person’s browser.
Remember, the Coco SSD taste we used is just a place to begin. With further exploration, you’ll delve into custom designed object detection using TensorFlow.js, allowing you to tailor the app to identify particular goods similar for your needs.
The chances are high that large! This app serves as a foundation in an effort to assemble additional detailed systems like augmented truth experiences or excellent surveillance systems. By the use of deploying your app on Kinsta’s unswerving platform, you’ll share your advent with the field and witness the facility of laptop vision come to life.
What’s a topic you’ve come all the way through that you just suppose real-time object detection can transparent up? Let us know throughout the comments underneath!
The post Easy methods to construct a real-time object detection app the usage of React and Kinsta seemed first on Kinsta®.
0 Comments