
Do you want to edit WooCommerce pages without writing code?
WooCommerce creates many pages to turn products and add cart capacity for your store. Small improvements to these pages can lead to higher product sales and no more cart abandonment for your store.
In this article, we will show you how you can merely edit WooCommerce pages to make additional product sales without any coding skills.
Why Edit WooCommerce Pages for Your Online Store?
WooCommerce creates many pages to turn products, retailer, account, checkout, and cart choices for your online store.
Via default, your WordPress theme controls how the ones pages look. There are a ton of great WooCommerce issues that you simply’ll be ready to choose between.
However, bettering the ones pages may not be as simple as it kind of feels.
For instance, you received’t have the ability to show additional products, add upsell choices, industry the layout, and additional.
That’s the position SeedProd is to be had in. It’s the general WooCommerce internet web page builder plugin that allows you to use an intuitive drag-and-drop software to design your WooCommerce pages.

The first thing you need to do is about up and switch at the SeedProd plugin. For added details, see our educational on how one can set up a WordPress plugin.
For the opposite methods in this article, we will be using the SeedProd Skilled style, as it has the choices needed to edit WooCommerce pages.
Upon activation, you need to discuss with SeedProd » Settings internet web page to enter your plugin license key. You’ll have the ability to to seek out this knowledge beneath your account on the SeedProd internet web page.
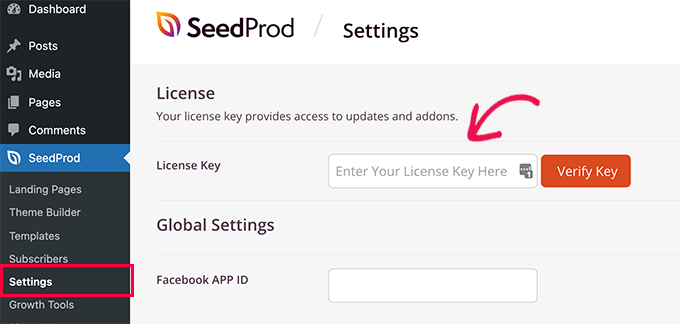
Upon getting into your license key, you could be very good to move. You’ll have the ability to now edit and create extraordinarily optimized WooCommerce pages for your online store.
That being discussed, let’s take a look at how you can edit WooCommerce pages, step by step.
You’ll have the ability to click on on any of the links underneath to jump to any method you want:
- Create a Utterly Customized WooCommerce Theme
- Customise the WooCommerce Checkout Web page
- Customise the WooCommerce Checkout Shape
- Upload One-Web page Checkout in WooCommerce
- Upload a Slide-In Cart to WooCommerce
- Customise the WooCommerce Cart Web page
- Edit WooCommerce Product Pages
- Customise the Store Web page for Your WooCommerce Retailer
- Customise WooCommerce Thank You Web page
Create a Totally Custom designed WooCommerce Theme
SeedProd comes with a complete WooCommerce theme builder built-in. This lets you exchange your WooCommerce theme with a custom designed one in all your own.
The advantage of this technique is that you simply get additional flexibility when bettering your WooCommerce theme. You’ll have the ability to edit any internet web page using a simple drag-and-drop software.
To get started, simply go to the SeedProd » Setup internet web page and click on on on the ‘Make a choice a theme for my store’ button next to the ‘Assemble a WooCommerce Store’ risk.
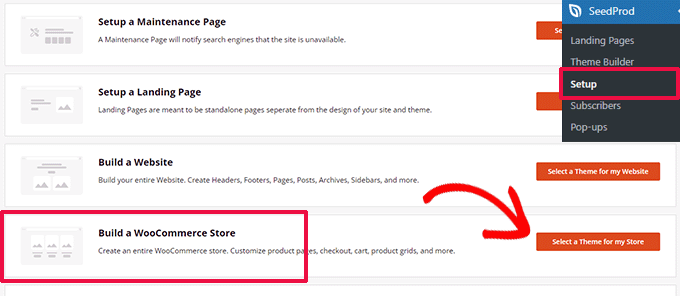
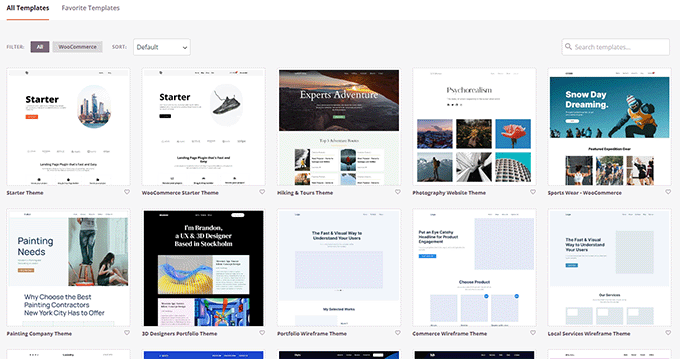
Next, the plugin will show you many ready-to-use WooCommerce problems you’ll have the ability to use as a starting point.
Simply click on on on a template to make a choice it.
Each and every WooCommerce or WordPress theme is various templates showing different areas of your internet web page or online store.
SeedProd will now generate those templates for your theme and show you a list of them.
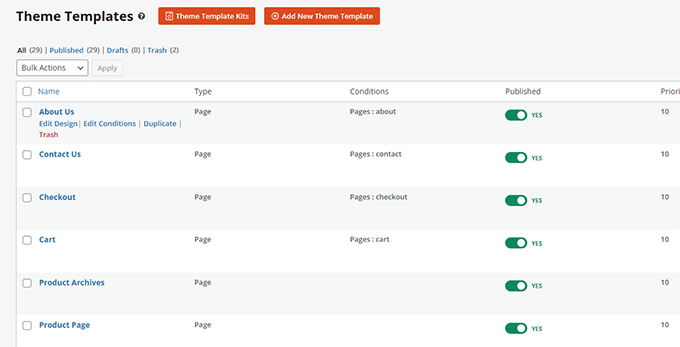
You’ll have the ability to now take your mouse over to a template and click on on on the ‘Edit Design’ link to start bettering it.
This may increasingly increasingly more unlock the SeedProd internet web page builder interface.
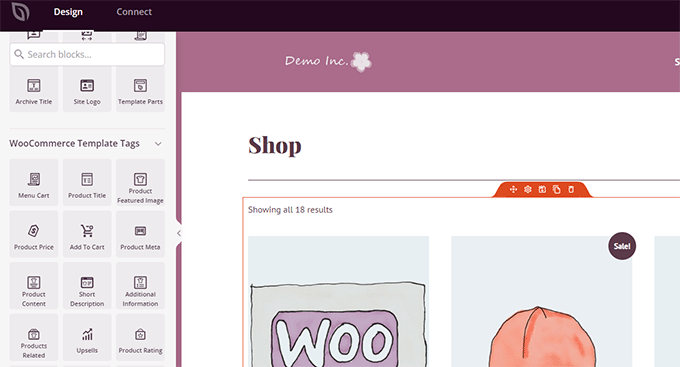
You’ll have the ability to add all the now not peculiar internet web page construction blocks from the left column. To the correct, you’re going to peer a are living preview of the internet web page you could be bettering.
You’ll have the ability to moreover simply degree and click on on on any products to edit it.
SeedProd comes with all the WooCommerce blocks that you simply’re going to want to assemble a sales-oriented WooCommerce theme.
Once you could be finished making changes to a template, simply click on on on the ‘Save’ button to store your changes.
Merely repeat the option to edit other templates in your custom designed WooCommerce theme.
After getting finished bettering all the pages, go to the SeedProd » Theme Builder internet web page and toggle the ‘Allow SeedProd Theme’ switch.
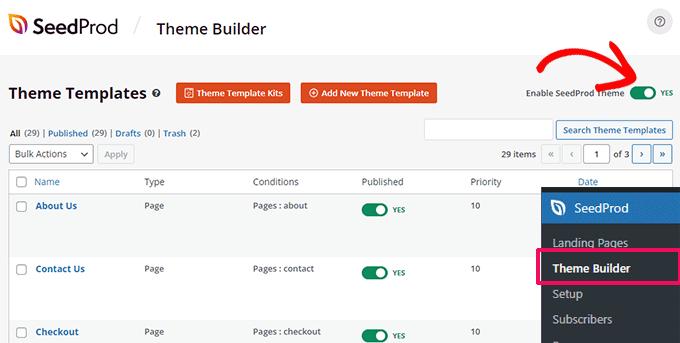
Your custom designed WooCommerce theme will now exchange your provide WooCommerce theme.
Now, you’ll have the ability to discuss with your WordPress web page to appear it in movement.

To be informed additional, see our complete instructional on how one can create a customized WordPress theme with out coding.
Alternatively, if you want to keep using your provide WooCommerce theme and most efficient edit positive parts of your internet web page, then continue finding out.
Customize the WooCommerce Checkout Internet web page
The checkout internet web page in any eCommerce store is likely one of the maximum necessary steps inside the purchaser journey.
Via default, WooCommerce comes with a easy checkout experience, which isn’t optimized for product sales and conversions.
Small edits to the checkout internet web page will can help you build up product sales and cut back cart abandonment in your store.
For example, you’ll have the ability to show identical products with an ‘Add to Cart’ button on the checkout internet web page so that consumers would possibly see something else they want to achieve, too.
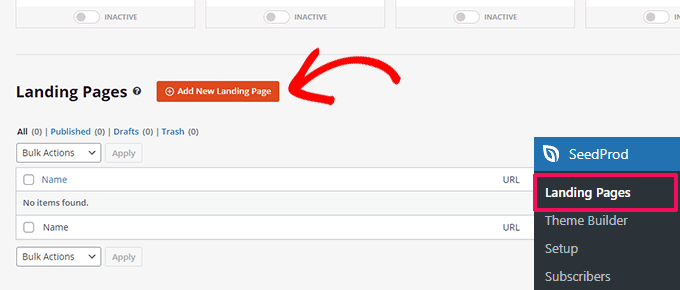
To create your custom designed checkout internet web page, simply go to SeedProd » Landing Pages and click on on on ‘Add New Landing Internet web page’.
Next, you’re going to be asked to choose a template for your internet web page.
You’ll have the ability to select one of the crucial necessary templates on the show and edit it to create a checkout internet web page, otherwise you’ll have the ability to get began with a blank template.
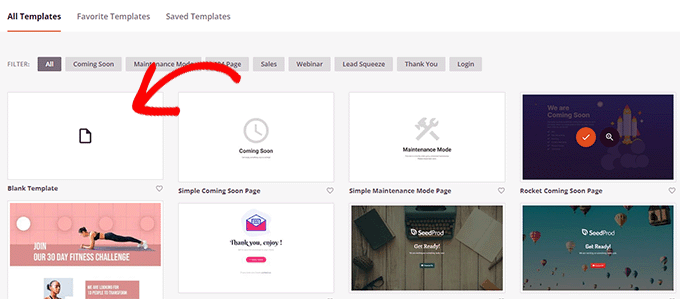
We will be using the blank template for this instructional, alternatively you’ll have the ability to select any of them that you simply like.
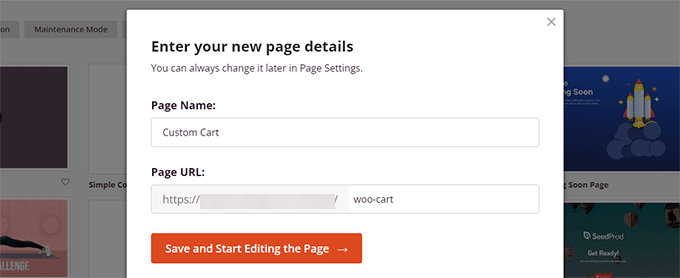
Next, you will need to provide a reputation and URL for the internet web page. You’ll have the ability to use the remainder this is serving to you merely identify this internet web page.
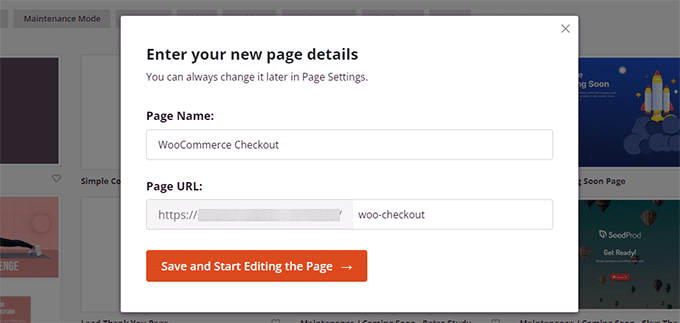
Click on on on the ‘Save and Get began Enhancing the Internet web page’ button to continue.
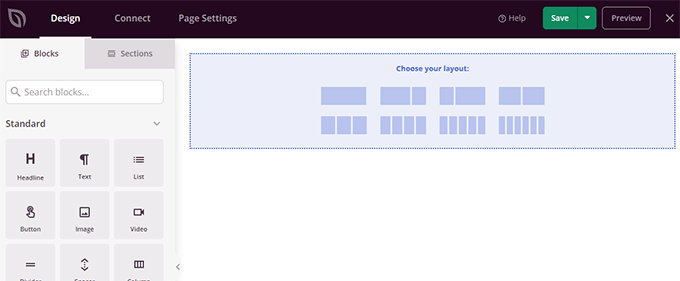
This may increasingly increasingly more unlock SeedProd’s internet web page builder interface, where you’ll have the ability to simply drag and drop blocks to build your internet web page layout.
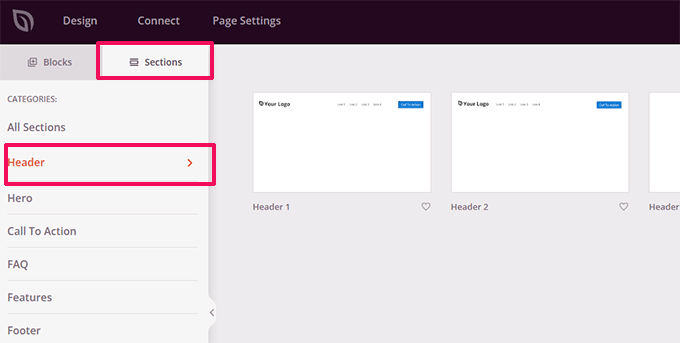
First, you’ll have to add a header and then customize it with your own branding.
SeedProd comes with sections, which will also be collections of blocks that are often utilized in aggregate. So to upload a header segment, click on on on the ‘Sections’ tab and then make a selection the ‘Header’ magnificence.
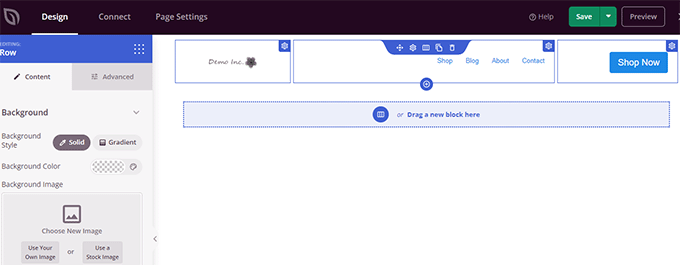
Next, take your mouse to a header and click on at the ‘Add (+)’ button to insert it into your internet web page.
You’ll have the ability to now edit the header segment via simply clicking on each and every block and converting it with your own emblem, menu, and get in touch with to movement.
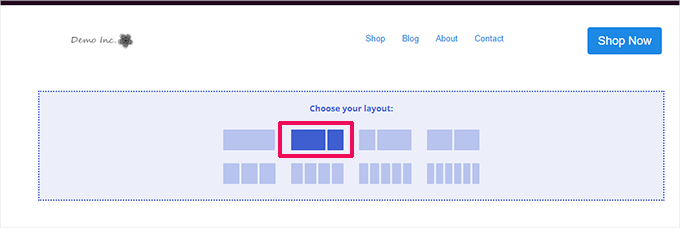
Once you could be pleased with the header, you need with the intention to upload a two-column layout.
You’ll have the ability to use this two-column layout to turn the checkout form and upsell merchandise, testimonials, and other elements.
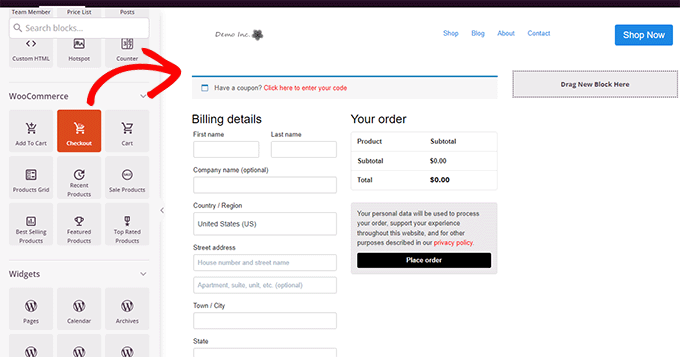
After that, you need with the intention to upload the Checkout block from the left-hand menu.
Add it to the left column, which is wider and will appear first on cell devices.
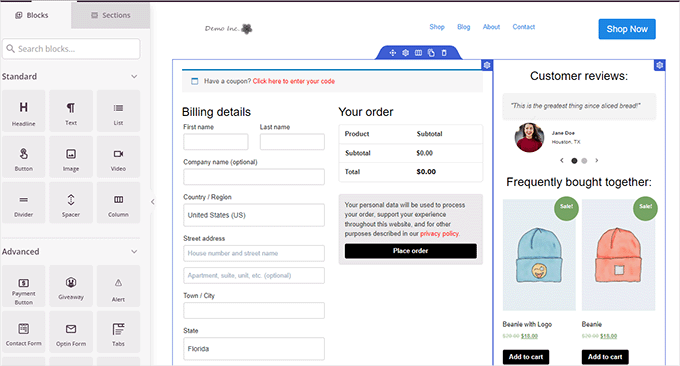
Next, you need with the intention to upload blocks to the correct column. That’s the international you’ll have the ability to use to influence consumers to complete the purchase.
You’ll have the ability to add a testimonial block correct right here or show your most well liked merchandise.
Listed here are a few additional problems you’ll have the ability to add for your checkout internet web page to beef up it for higher conversions:
- Believe badges like safe price badges provided via PayPal and Stripe
- Additional social evidence, like real-time purchaser activity
- The Trade Reviews block in SeedProd to turn Google evaluations
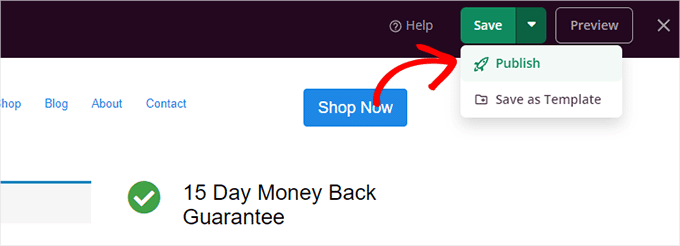
After getting finished bettering your checkout internet web page, don’t forget to click on at the arrow beside ‘Save’ and then click on on on ‘Post’ inside the upper-right corner of the show.
Next, you need to tell WooCommerce to start using your custom designed checkout internet web page for all consumers.
Go to the WooCommerce » Settings internet web page and switch to the ‘Complicated’ tab.
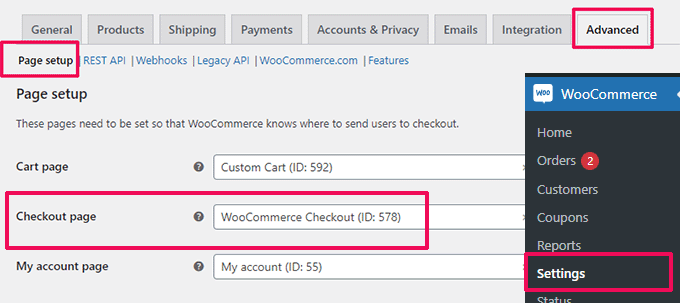
Beneath the ‘Internet web page Setup’ tab, make a selection your custom designed checkout internet web page for the ‘Checkout internet web page’ risk. Don’t forget to click on on on the ‘Save changes’ button to store your settings.
You’ll have the ability to now go for your store in a brand spanking new browser tab and check out the new checkout experience via together with a product for your cart.
For added details, you’ll have the ability to see our educational on customizing the WooCommerce checkout web page.
Bonus Tip: Need to see how your new cart internet web page is performing? See our educational on WordPress conversion monitoring for green individuals to track all your conversions.
Customize the WooCommerce Checkout Form
The checkout internet web page is likely one of the areas where many purchasers abandon carts.
Some of the most straightforward tactics to ensure consumers complete their purchases is thru offering a better checkout experience.
That’s the position FunnelKit can lend a hand. It is likely one of the supreme gross sales funnel developers for WooCommerce that allows you to optimize funnels, checkout pages, cart experience, and additional.
It has dozens of templates, a funnel builder wizard, and drag-and-drop bettering for your cart and checkout pages.
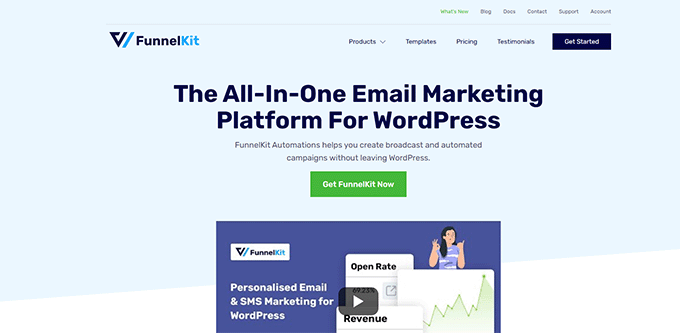
First, you need to enroll in a FunnelKit plan via visiting their internet web page.
Phrase: You’re going to wish at least the Plus plan to disencumber product sales funnels, upsells, order bumps, and other choices.
After that, you need to place in and switch at the FunnelKit Builder and FunnelKit Builder Skilled plugins. You’ll have the ability to to seek out them beneath your account on the FunnelKit internet web page.
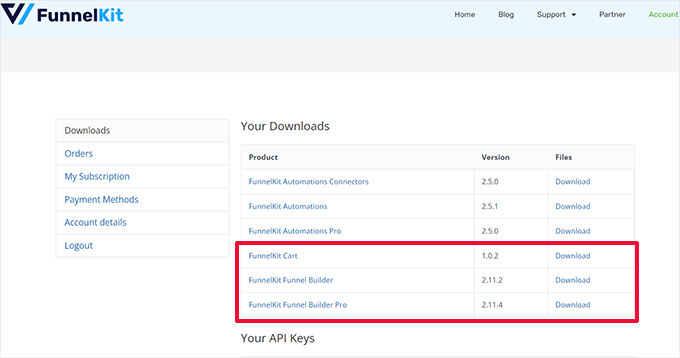
Need lend a hand? See our educational on how one can set up a WordPress plugin.
Upon activation, you’re going to be asked to offer your plugin license keys. You’ll have the ability to to seek out them on the equivalent Downloads internet web page beneath your account on the FunnelKit internet web page.
After getting finished, you’re waiting to customize the WooCommerce checkout form.
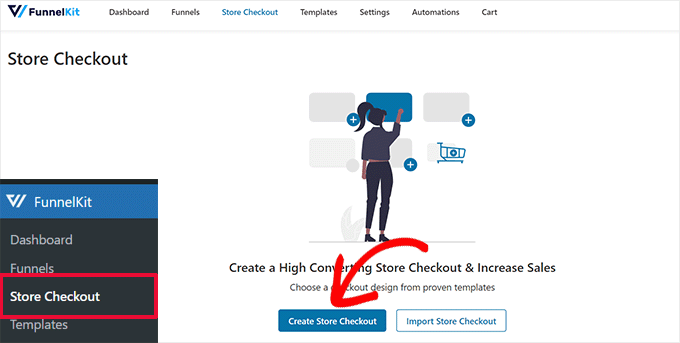
Simply go to the FunnelKit » Store Checkout internet web page inside the WordPress admin dashboard and click on on on the ‘Create Store Checkout’ button.
On the next show, you need to first select your editor interface.
FunnelKit templates can be edited with the default Gutenberg editor, Elementor, Divi, Oxygen, or each and every different internet web page builder via using shortcodes.
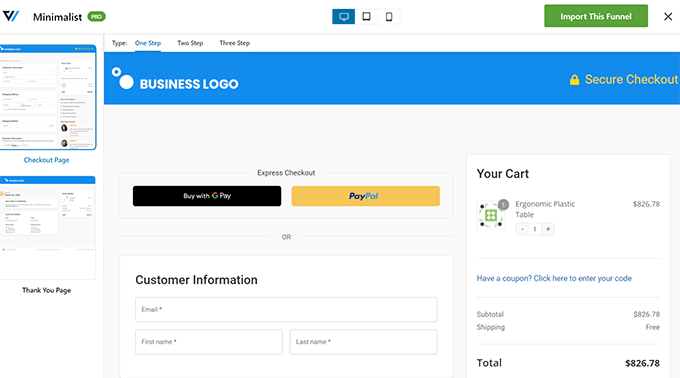
After that, you need to choose a template. There are dozens of lovely templates to choose between. Merely click on on on the ‘Preview’ button to appear a are living preview of the template.
You’ll be ready to choose between a single-step or multi-step checkout internet web page inside the preview. After that, simply click on on on the ‘Import This Funnel’ button at the top.
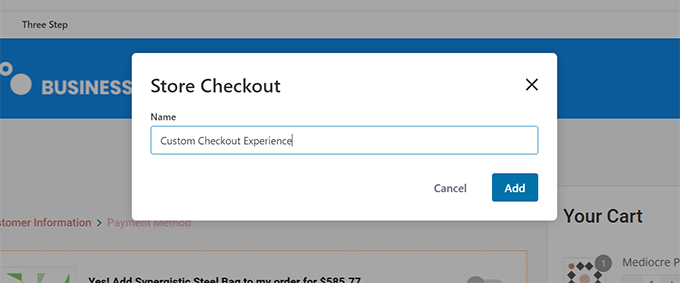
Next, you’re going to be asked to enter a name for your funnel.
You’ll have the ability to identify it the remainder this is serving to you identify it later. Then, click on on on the ‘OK’ button to continue.
FunnelKit will now create your custom designed checkout internet web page.
After that, you’re going to peer the internet web page dashboard. From correct right here, you’ll have the ability to edit your checkout internet web page, add additional steps, or add an order bump.
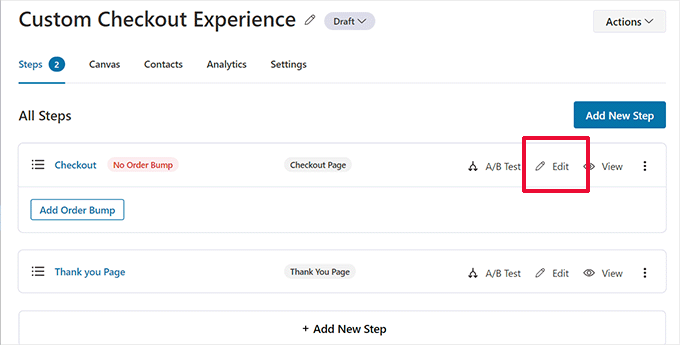
Enhancing a internet web page will open it inside the editor you decided on earlier.
For this instructional, we decided on Gutenberg. Each and every products on the checkout internet web page is a block that you simply’ll have the ability to edit via simply clicking to make a choice it.
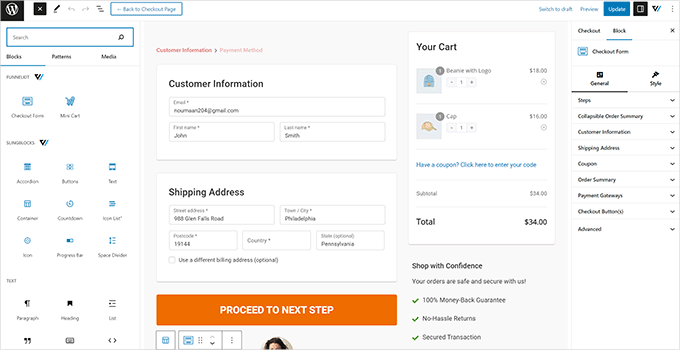
You’ll have the ability to moreover add new blocks via clicking on the ‘Add Block’ button.
After getting finished making the changes, don’t forget to click on on on the ‘Substitute’ button.
This may increasingly increasingly more put across you once more to the Checkout internet web page dashboard. From correct right here, you need to change to the ‘Fields’ tab.
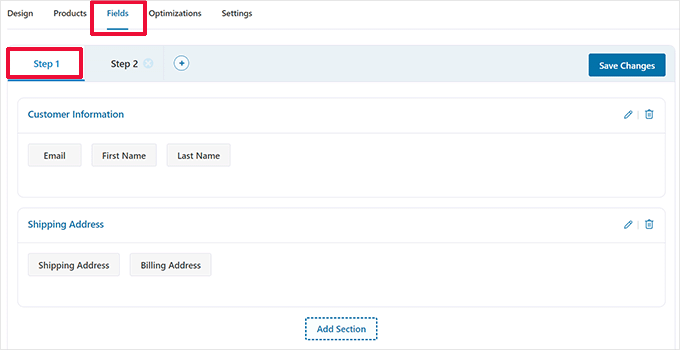
That’s the position you’ll have the ability to edit the checkout form fields. In this example, we’re using a two-step checkout form. This lets you grab the contact wisdom forward of the fee.
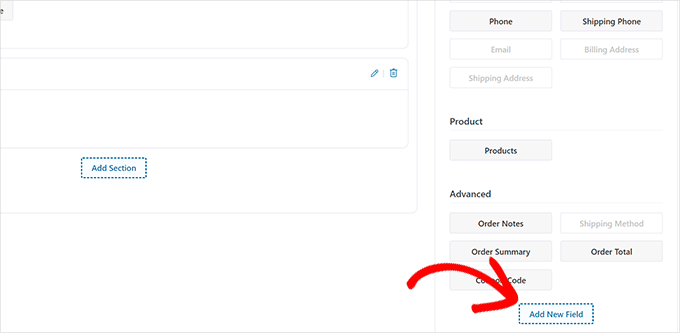
You’ll have the ability to moreover add new form fields from the correct column. Via default, the plugin displays the ceaselessly used checkout fields.
However, you’ll have the ability to click on on on the ‘Add New Field’ button with the intention to upload a custom designed form field.
This may increasingly increasingly more show a popup where you’ll have the ability to select the sector kind, provide a meta key, and enter a label.
You’ll have the ability to moreover make the sector ‘required’ and assign it to the checkout or thank you internet web page.
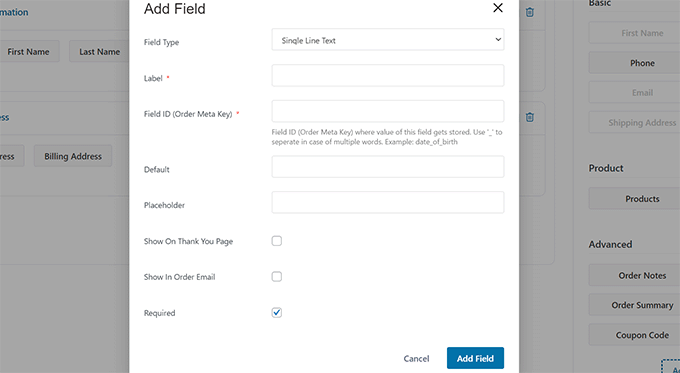
Don’t forget to click on on on the ‘Save Changes’ button to store your form settings.
FunnelKit comes with a number of optimizations that you simply’ll have the ability to add for your checkout internet web page for a additional frictionless experience.
Merely switch to the ‘Optimizations’ internet web page, and also you’re going to peer a list of optimizations that you simply’ll have the ability to observe to the checkout internet web page.
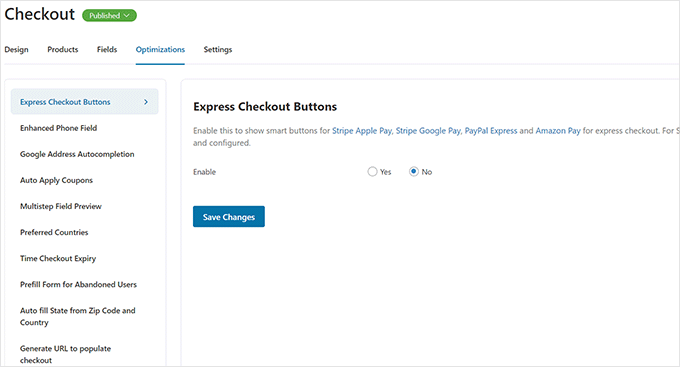
Simply click on on on an optimization to configure it, then click on on on the ‘Save Changes’ button to store your changes.
Next, switch to the ‘Settings’ tab to permit Analytics, Facebook pixel, custom designed scripts, or CSS in your checkout funnel.
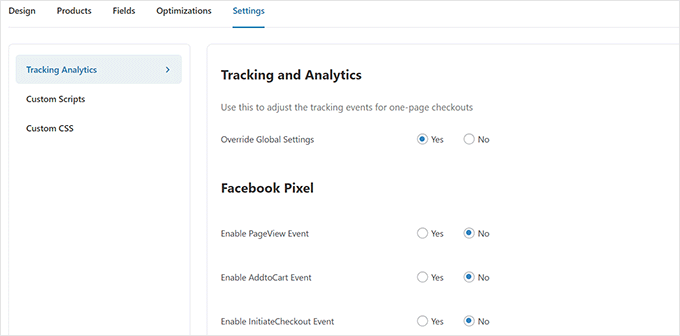
Don’t forget to click on on on the ‘Save Changes’ button to make use of your changes.
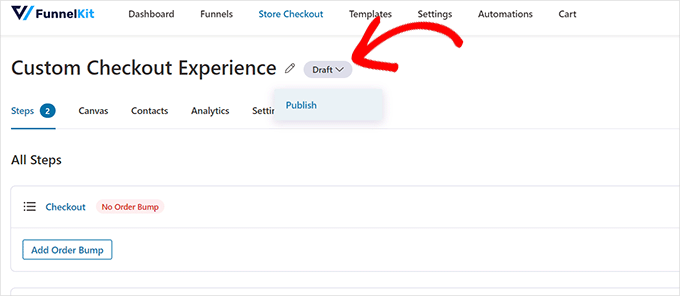
In the end, you need to click on on on the ‘Draft’ button next to the Checkout internet web page identify and change it to ‘Post’. This may increasingly increasingly more exchange your provide checkout internet web page with the custom designed funnel you will have merely created.
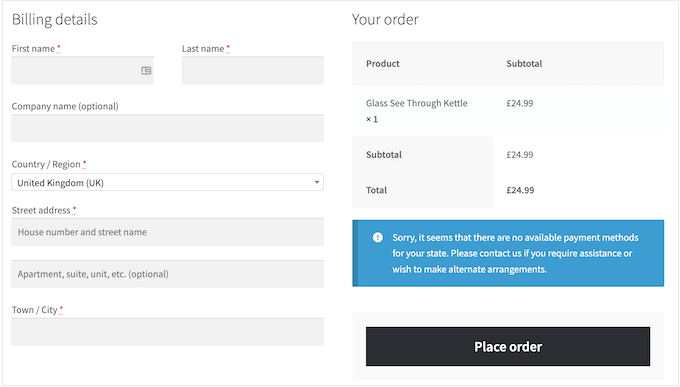
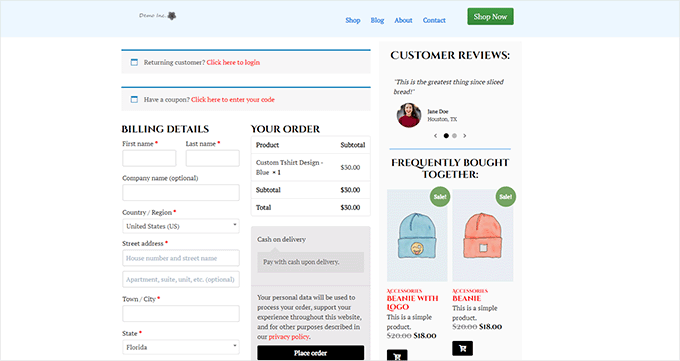
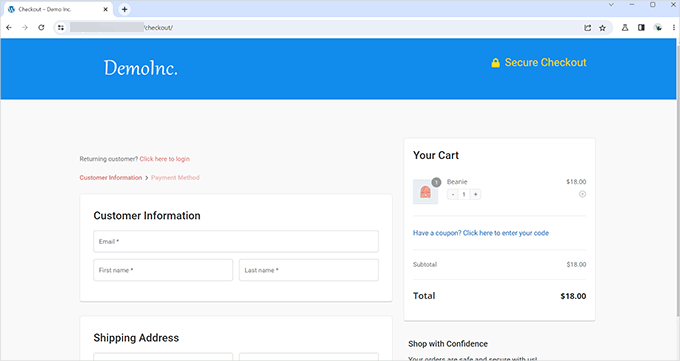
You’ll have the ability to now discuss with your store in a brand spanking new browser tab to test the custom designed checkout experience you will have created.
That’s the approach it seemed on our demo internet web page.
Add One-Internet web page Checkout in WooCommerce
FunnelKit moreover allows you to create a one-page checkout experience.
You need to discuss with the FunnelKit » Store Checkout internet web page and click on on on ‘Create Store Checkout’.
Inside the template selection, simply click on on on the ‘One-Step’ risk at the top.
After that, click on on on the ‘Import This Funnel’ button to continue.
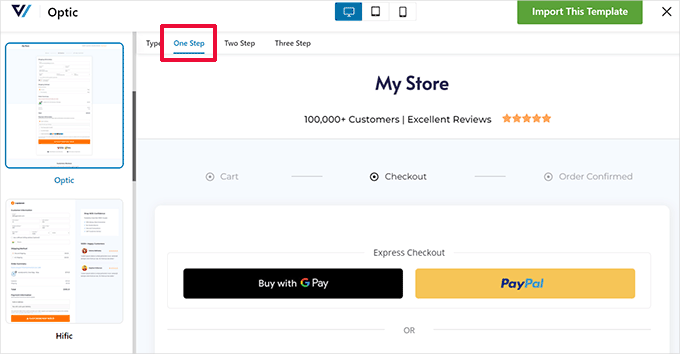
You’ll have the ability to then continue bettering your template in your most well liked editor. See the previous segment of this instructional for additonal detailed instructions.
Add a Slide-In Cart to WooCommerce
Most WooCommerce problems come with a separate cart internet web page. This cart experience supplies friction to the purchasing groceries and checkout tales.
If consumers want to regulate the product top quality or remove items from the cart, they’ve to leave the internet web page they’re nowadays viewing to switch the cart.
This can be fixed via together with a slide-in cart in WooCommerce.
A slide-in cart displays a cart button on the show. Clicking on the button displays a slide-in menu with products the shopper has added to the cart.
Shoppers can now edit and substitute the cart without leaving the internet web page.
FunnelKit has an incredible slide-in cart serve as that integrates seamlessly along with your online store. You’ll have the ability to even use it to upsell products, incentivize checkout, offer discounts, and additional.
First, you need to discuss with the FunnelKit web page and sign up for an account.
Phrase: You’re going to wish at least the Plus plan to get right of entry to the slide-in cart choices.
After signup, go for your account on the FunnelKit internet web page to acquire the FunnelKit Cart plugin.
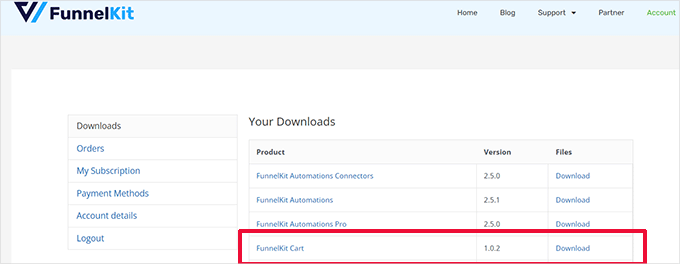
Next, you need to place in and switch at the plugin. For added details, see our educational on how one can set up a WordPress plugin.
After getting activated the plugin, you’ll have to go to the FunnelKit » Cart internet web page to configure the slide-in cart settings.
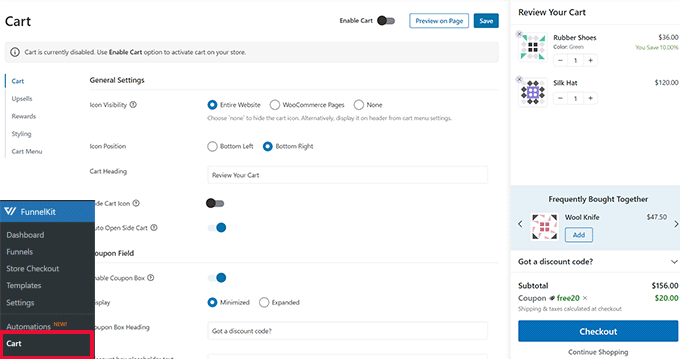
From correct right here, you’re going to peer many possible choices for your left and a are living preview of the best way your slide-in cart will look.
FunnelKit offers a ton of customization possible choices. For instance, you’ll be ready to choose between other forms, make a selection cart icons, industry button text, and additional.
You’ll have the ability to moreover add upsell products or cross-sell products, be offering reductions, and make the cart experience much more fascinating.
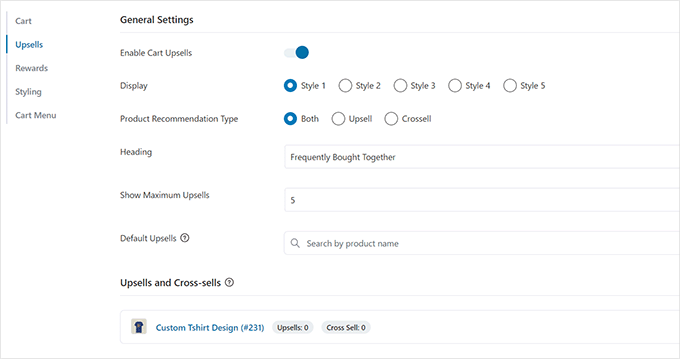
To put up your changes, don’t forget to click on on on the ‘Save’ button.
You’ll have the ability to now discuss with your internet web page to test the slide-in cart in your are living store.
Customize the WooCommerce Cart Internet web page
WooCommerce has a default cart internet web page allowing consumers to continue to the checkout internet web page.
Via default, it displays the products consumers have added to their cart. However, research displays that more than 70% of consumers cross away an web store without completing the purchase.
WooCommerce problems often come with a boring cart internet web page with out a optimization for conversions.
Via customizing your WooCommerce cart internet web page, you’ll have the ability to merely cut back cart abandonment and beef up product sales.
To create your custom designed checkout internet web page, simply go to the SeedProd » Landing Pages and click on on on ‘Add New Landing Internet web page’.
Next, you’re going to be asked to choose a template for your internet web page.
You’ll have the ability to select one of the crucial necessary templates on the show and edit it to create a cart internet web page, otherwise you’ll have the ability to get began with a blank template.
We’ll use the blank template for this instructional.
Next, you will need to provide a reputation and URL for the internet web page. You’ll have the ability to use the remainder this is serving to you merely identify this internet web page.
This may increasingly increasingly more unlock the SeedProd builder interface.
You’ll have the ability to get began via switching to the ‘Sections’ tab and together with a header for your blank template.
After that, feel free to signify and click on directly to edit the header house for your liking.
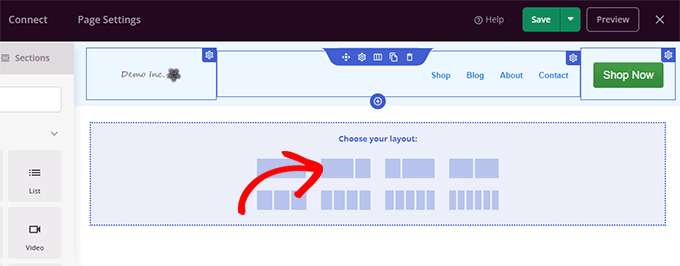
Underneath that, you need with the intention to upload a two-column layout, which you’re going to make use of with the intention to upload other cart internet web page blocks.
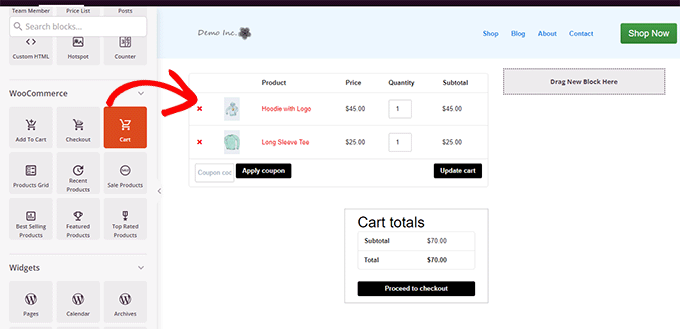
Next, add the ‘Cart’ block to the correct column.
Now, since your cart is nowadays empty, it’s going to not show any products. Go for your store and add a few products for your cart and then reload the SeedProd internet web page builder.
After that, you’ll have the ability to add other elements to beef up your cart internet web page.
For instance, you’ll have the ability to get began via together with testimonials or add a countdown timer to purpose the FOMO affect.
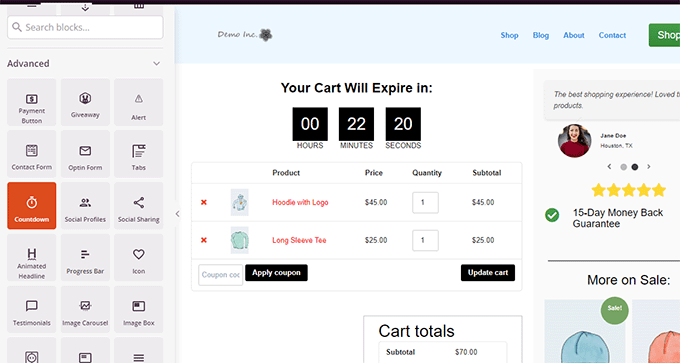
Be at liberty to clutter round via together with different blocks and tweaking colors and width.
After getting finished bettering, don’t forget to click on on on ‘Save and Post’ inside the top-right of the show.
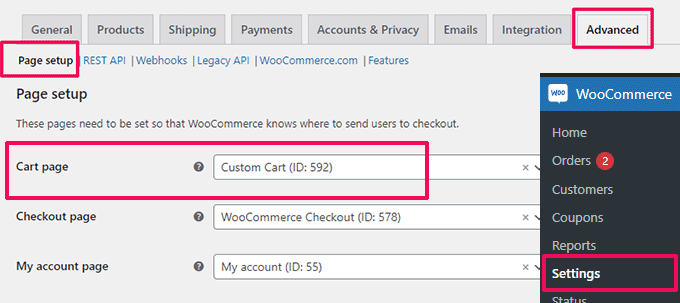
Next, you need to tell WooCommerce to start using your custom designed cart internet web page for all consumers.
Go to the WooCommerce » Settings internet web page and switch to the ‘Complicated’ tab.
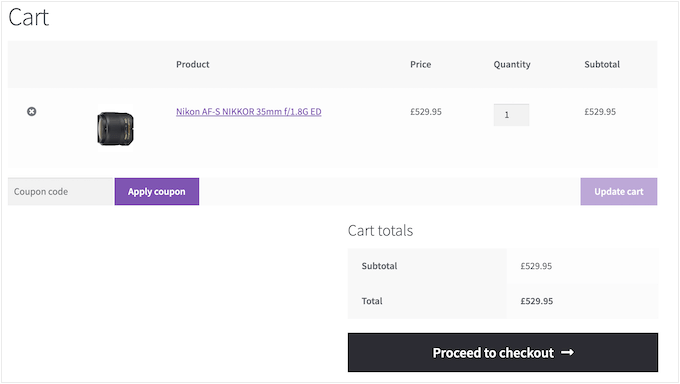
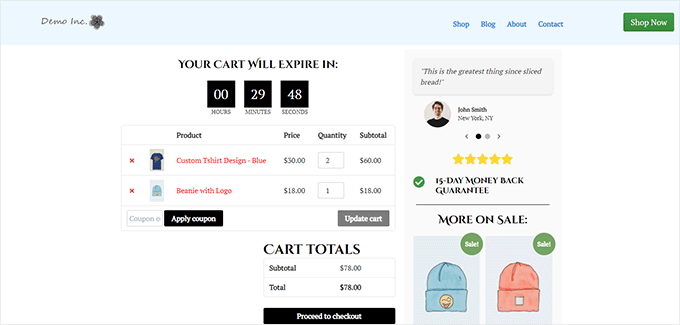
You’ll have the ability to now discuss with your online store in a brand spanking new browser tab.
Get began together with a few products, and then head over to the cart internet web page to appear your new cart internet web page in movement.
Edit WooCommerce Product Pages
WooCommerce problems use the identical template to turn all products in your internet web page.
However, you may want to promote it some products more than others. Necessarily essentially the most you’ll have the ability to do to distinguish vital products is to make them featured products.
SeedProd allows you to create custom designed product pages. You’ll have the ability to use a well-designed template adapted for higher conversions and then simply fill it along with your product wisdom.
To get started, simply go to the SeedProd » Landing Pages and then click on on on ‘Add New Landing Internet web page’.
Next, you’re going to be asked to choose a template for your internet web page.
You’ll have the ability to select one of the crucial necessary templates on the show and edit it to create a product internet web page. You’re going to to seek out various templated optimized for conversions beneath the ‘Product sales’ tab.
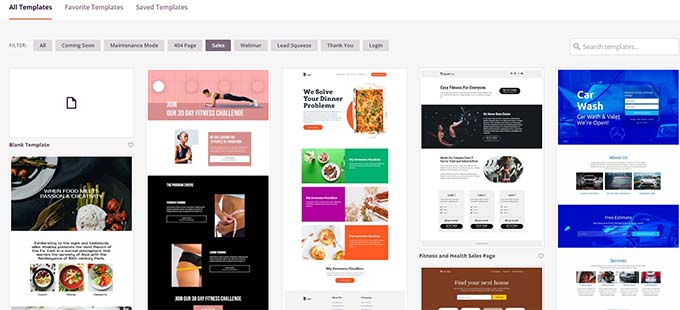
Simply click on on to make a choice a template and continue.
Next, you’re going to be asked to offer a internet web page identify and URL. You’ll have the ability to use the product name since the identify and URL.
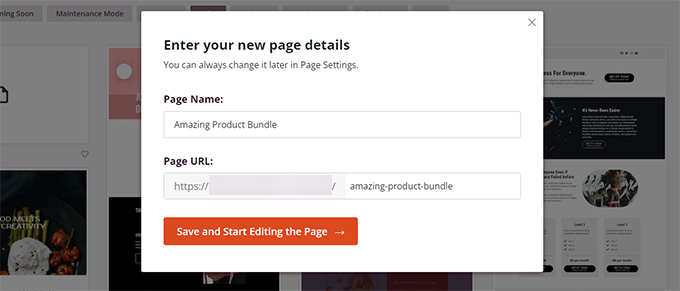
Click on on on the ‘Save and Get began Enhancing the Internet web page’ button to continue.
This may increasingly increasingly more unlock the SeedProd internet web page builder interface along with your made up our minds on template. You’ll have the ability to simply degree and click on on on any products on the internet web page to edit it.
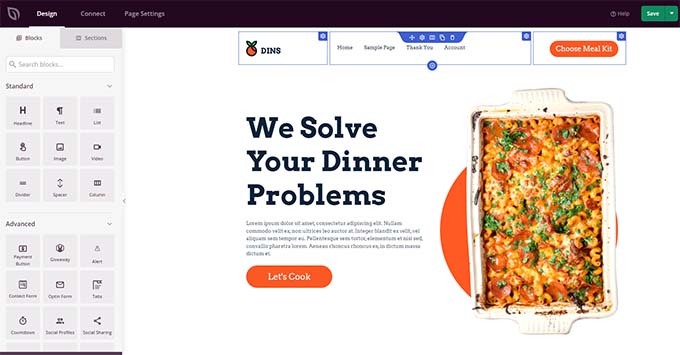
You’ll have the ability to get began via converting the header items, comparable to the brand, navigation menu, and call-to-action button, with your own.
After that, you’ll have the ability to exchange pictures along with your product pictures and edit the text as necessary.
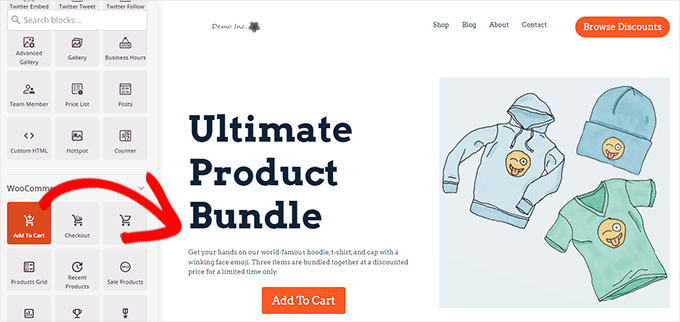
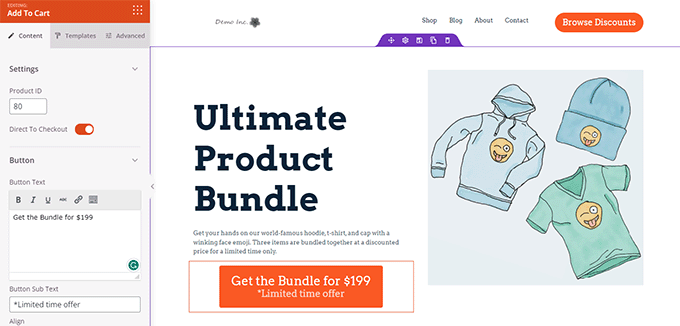
In the end, you’ll have the ability to exchange the verdict to movement with the Add to Cart block.
After that, you need to enter the product ID inside the Add to Cart block settings. You’ll have the ability to moreover industry the button text, along with add subtext, color, and shift alignment.
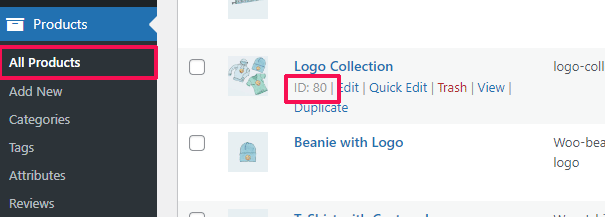
To find a product ID, you need to consult with the Products » All Products internet web page inside the WordPress admin house in a separate browser tab.
Take the mouse over to the product that you want to promote it, and the product ID will appear along with other links.
To make your product internet web page simpler, you’ll be ready to try the following tips:
- Add prime quality product photographs with the zoom impact so that consumers can clearly learn concerning the product.
- Beneath your number one identify to movement, you’ll have the ability to create different rows highlighting product options and providing additional information to the consumers.
- Use social proof to purpose the FOMO affect.
Once you could be finished bettering your product internet web page, don’t forget to click on on on the ‘Save and Post’ button at the top.
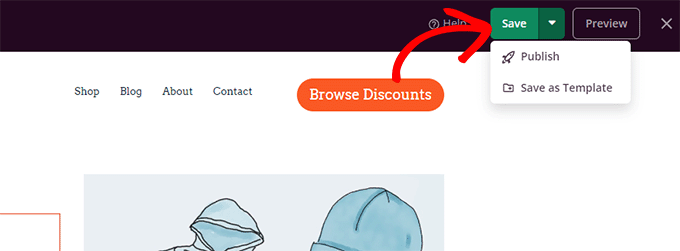
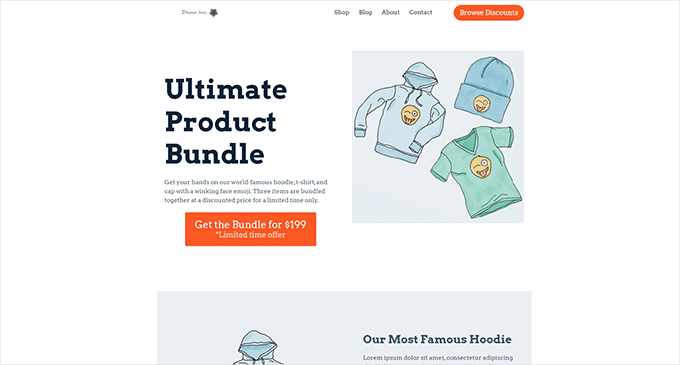
Once revealed, you’ll have the ability to view your product internet web page via clicking on the ‘Preview’ button.
This may increasingly increasingly more show the are living product internet web page in your internet web page that you simply’ll have the ability to now get began promoting.
For added details and bonus guidelines, see our educational on customizing WooCommerce product pages.
Customize the Retailer Internet web page for Your WooCommerce Store
WooCommerce allows you to merely display your products on the retailer internet web page. It’s basically a internet web page along with your products displayed in a grid layout.
The shop template in most WooCommerce problems is boring and not optimized for product sales and conversions. On top of that, there are typically no or only some possible choices to customize it.
SeedProd allows you to create and customize a WooCommerce retailer internet web page merely. You’ll have the ability to select your own layout and design and optimize this internet web page for higher conversions.
To get started, simply go to the SeedProd » Landing Pages and then click on on on the ‘Add New Landing Internet web page’ button.
Next, you’re going to be asked to choose a template for your internet web page.
You’ll have the ability to select one of the crucial necessary templates on the show and edit it to create your retailer internet web page.
Simply click on on to make a choice a template and continue.
Next, you’re going to be asked to offer a internet web page identify and URL. You’ll have the ability to use something like Retailer, Store, or Storefront to suggest that it’s the principle retailer internet web page.
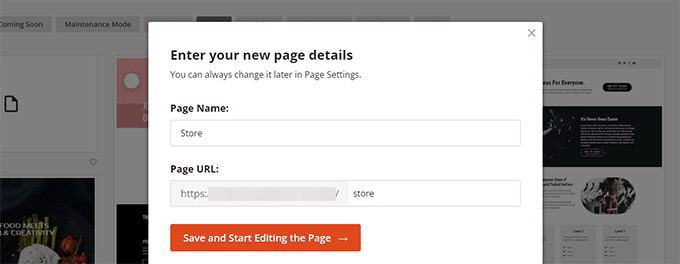
Click on on on the ‘Save and Get began Enhancing the Internet web page’ button to continue.
This may increasingly increasingly more unlock the SeedProd internet web page builder interface along with your made up our minds on template. You’ll have the ability to simply degree and click on on on any products on the internet web page to edit it.
You’ll have the ability to get began via converting the header items, comparable to the brand, navigation menu, and call-to-action button, with your own.
After that, you’ll have the ability to add a hero segment at the top with a large image and your number one identify to movement.
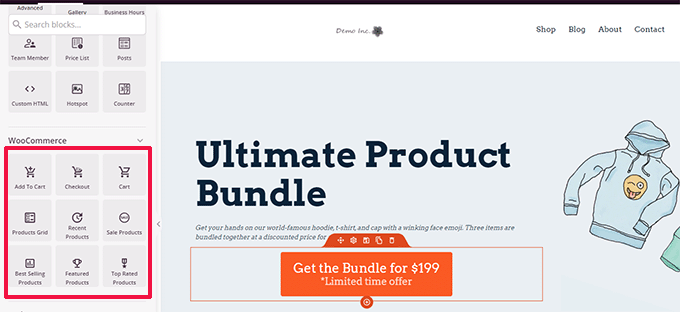
Underneath that, you’ll have the ability to use WooCommerce blocks to turn your products.
You’ll be ready to choose between fresh, featured, best-selling, top-rated, and sale products.

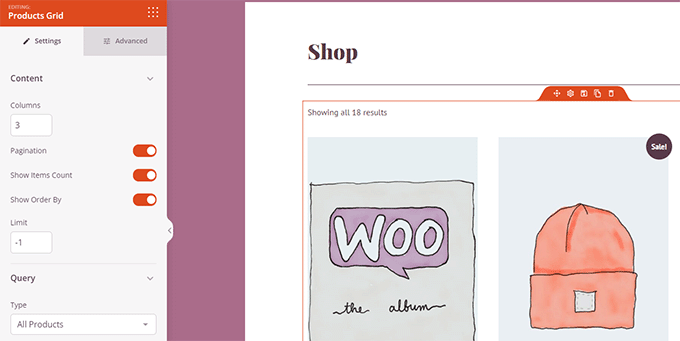
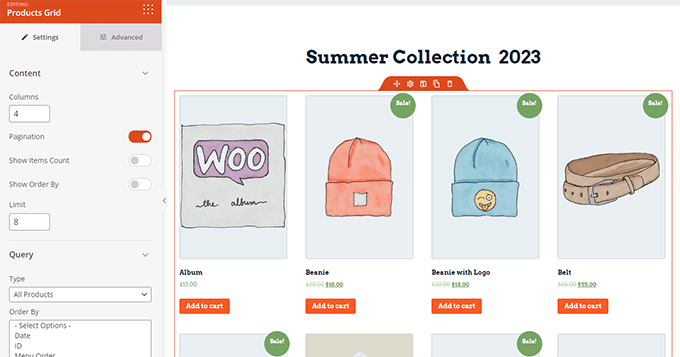
After together with a product block, you’ll have the ability to moreover customize the best way it sounds as if to be like.
SeedProd lets in you to choose the number of products, sorting possible choices, columns, and additional.
You’ll have the ability to further optimize this internet web page via together with additional text, specific offers, banners, an FAQ phase, and additional.
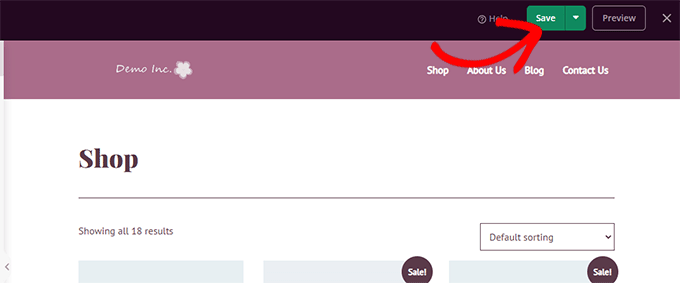
Once you could be finished bettering, don’t forget to click on on on ‘Save and Post’ at the top.
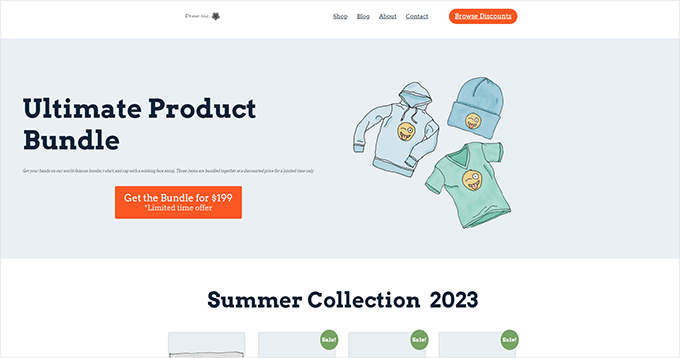
After saving your internet web page, click on at the ‘Preview’ button to appear it in movement.
SeedProd will open the internet web page in a brand spanking new browser tab.
You’ll have the ability to now exchange links to the Retailer internet web page in your navigation menu along with your custom designed retailer internet web page.
Customize WooCommerce Thank You Internet web page
The WooCommerce ‘Thank You’ internet web page turns out when a purchaser completes a purchase order order. Via default, WooCommerce will most efficient show them their order details on this internet web page.
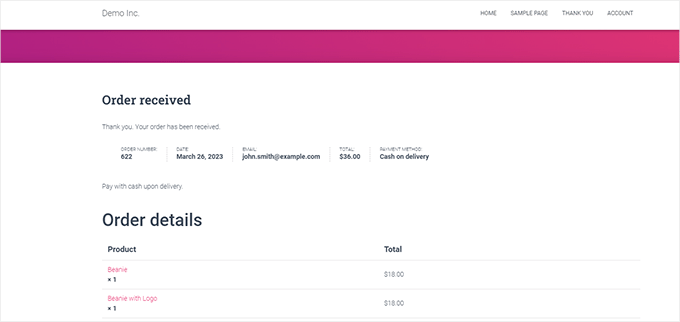
That doesn’t provide consumers with additional possible choices to find. It is kind of a needless end and a lost sight of choice for product sales and conversions.
Fortunately, you’ll have the ability to restore that with SeedProd via creating a custom designed thank you internet web page.
To get started, simply go to the SeedProd » Landing Pages and then click on on on the ‘Add New Landing Internet web page’ button.
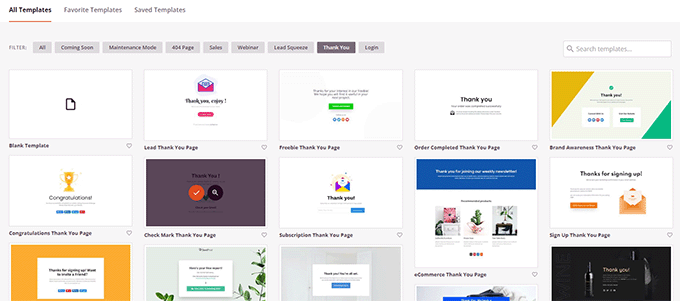
Next, you’re going to be asked to choose a template for your internet web page.
Switch to the ‘Thank You’ tab, and also you’re going to find a bunch of thank you internet web page templates. You’ll have the ability to select one in all them, otherwise you’ll have the ability to even get began with a blank template.
Next, you’re going to be asked to choose a reputation and URL for your internet web page.
You’ll have the ability to use ‘Thank You’ or each and every different important identify for your internet web page.
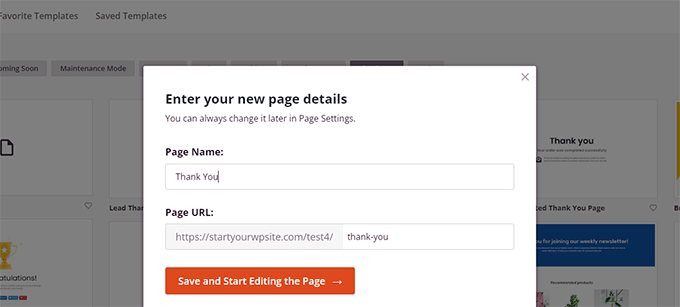
Click on on on the ‘Save and Get began Enhancing the Internet web page’ button to continue.
This may increasingly increasingly more unlock the SeedProd internet web page builder interface, where you’re going to peer a are living preview of your template. You’ll have the ability to simply degree and click on directly to edit any products inside the preview or add new blocks from the left column.
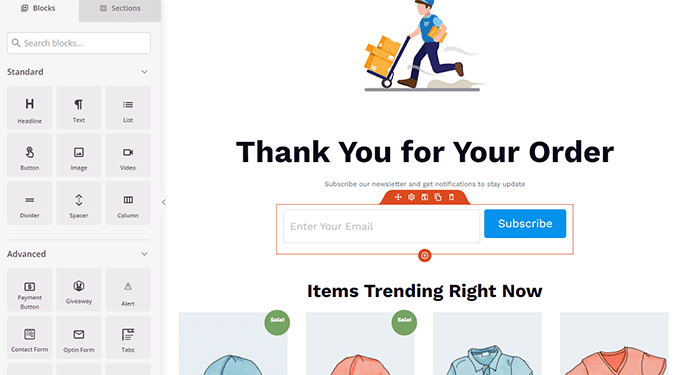
You’ll have the ability to now use this opportunity to promote it your piece of email tick list or upsell products via together with WooCommerce product grid blocks.
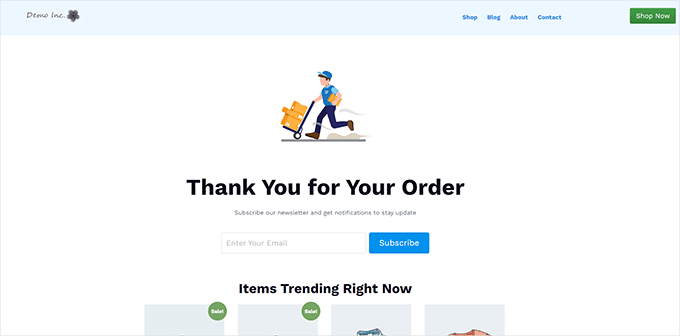
Be at liberty to experiment with different headings, text copy, and products to create an effective Thank You internet web page.
Once finished, don’t forget to click on on on the ‘Save and Post’ button inside the top right kind corner of the show.
Your custom designed thank you internet web page is now are living. However, you still want to tell WooCommerce to use this internet web page as your default Thank You internet web page.
To check out this, you will need to arrange and switch at the Thank you Redirect for WooCommerce plugin. For added details, see our educational on how one can set up a WordPress plugin.
Upon activation, go to the WooCommerce » Settings internet web page and click on at the ‘Products’ tab.
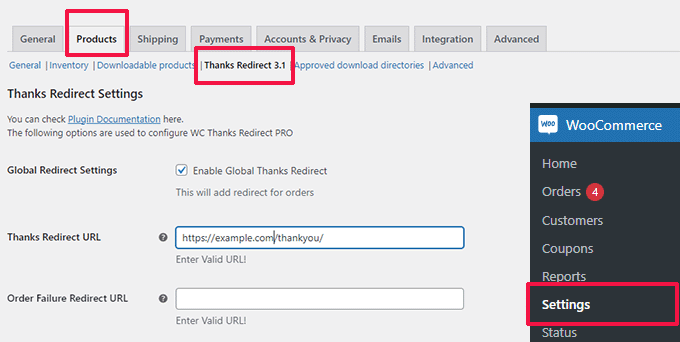
From correct right here, you need to check the ‘Allow Global Thanks Redirect’ risk. After that, you’re going to peer a field classified ‘Thanks Redirect URL.’
Paste your new WooCommerce Thank You internet web page URL into this box, then click on at the ‘Save Changes’ button.
Now when consumers complete a purchase order order, they’re going to peer your extraordinarily optimized custom designed Thank You internet web page. They’ll be some distance a lot more prone to click on on and search the rest of your store than whilst you had stayed with the default.
We hope this newsletter helped you learn how to merely edit WooCommerce pages without writing code. You may additionally want to see our complete WooCommerce search engine optimization knowledge or our professional possible choices for the supreme WooCommerce gross sales funnel plugins to boost your conversions.
Should you favored this newsletter, then please subscribe to our YouTube Channel for WordPress video tutorials. You’ll have the ability to moreover to seek out us on Twitter and Fb.
The publish Edit WooCommerce Pages (No Coding Required) first appeared on WPBeginner.

0 Comments