
Are you looking to learn how to create a one-click checkout in WordPress?
Optimizing checkout for a smoother experience for customers is one of the highest priorities when working an eCommerce site. Specifically, together with a one-click checkout in WordPress helps consumers entire transactions faster, which makes them a lot more most probably to return.
In this article, you’ll learn how to create a one-click checkout in WordPress to boost conversions and increase product sales.

Why Do You Need to Create a One-Click on on Checkout in WordPress?
Long checkout pages can energy away visitors who can also be fascinated by making a purchase order order. Having to click on on by the use of a listing of checkout fields and fill out a lot of pointless or repetitive wisdom makes the buying process drag on and on.
The longer the checkout process is, the higher the chance that customers will drop off at some point.
The reasonable cart abandonment fee is 70.19%, and 22% of shoppers cited {{that a}} too-long or too-complicated checkout process was once the reason for their abandonment.
That’s where the one-click checkout process is to be had in. It’s as simple as including a buy-now button, so returning shoppers get to revel in a streamlined checkout process.
A one-click checkout is a straightforward for customers to buy items online with just a click on on of a button and not using a want to cross into their shipping, billing, and value details each and every time they make a purchase order order.
It’s similar to the auto-complete function, excluding consumers don’t even want to fill out the fields since your site will robotically process the transaction without even going to the checkout internet web page.
With just a single click on on, visitors can entire their achieve rapid, which results in higher conversion fees and lowered cart abandonment charges. Whether or not or no longer you’ve an online store, a service business, a membership site, or another type of site, it’s a simple and easy method to increase product sales.
That said, we’ll duvet the 5 methods for together with a one-click checkout in WordPress:
- Create a One-Click on Checkout The use of WPForms (Simple + Loose Choice)
- Create a One-Click on Checkout The use of WP Easy Pay (A couple of Cost Strategies)
- Create a One-Click on Checkout The use of Simple Virtual Downloads (Virtual Merchandise)
- Create a One-Click on Checkout The use of FunnelKit (eCommerce Retail outlets)
- Create a One-Click on Checkout The use of WooCommerce (Loose)
Way 1: Create a One-Click on on Checkout in WordPress The usage of WPForms (Easy + Unfastened Selection)
The usage of WPForms, you’ll be capable of merely create a one-click checkout process for customers. WPForms is a type builder that permits you to merely assemble all forms of forms without any code.

The drag-and-drop builder signifies that you’ll merely achieve expenses with Stripe value capacity so that you can create cost paperwork, individual registration forms, expense approval forms, and further. Moreover, with 1,700+ templates to make a choice from, you’ll be capable of nearly to seek out any form kind, that suggests you not at all have to begin out from scratch.
Realize: The good news is that you simply’ll be capable of use WPForms Lite for this instructional since we’ll most effective be the usage of the Stripe integration, which is free. On the other hand, if you want additional complicated choices, then you definitely definately’ll want to arrange the Professional model.
To begin out, download and switch at the WPForms plugin. For additonal details, check out our knowledge on how one can set up a WordPress plugin.
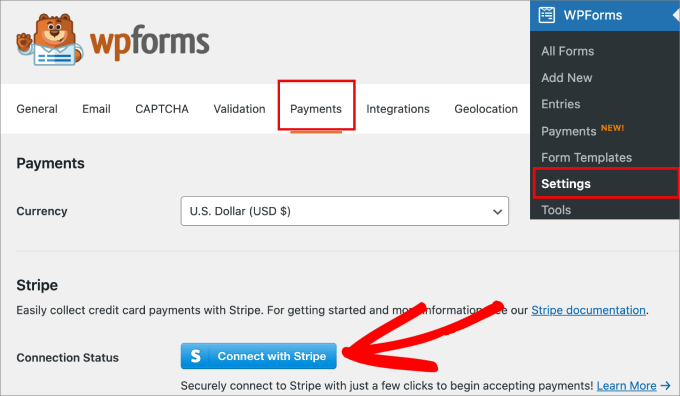
Upon activation, head over to the WPForms » Settings internet web page from your WordPress admin dashboard. Then move to the Expenses tab.
Under Stripe, you’ll wish to hit the ‘Connect with Stripe’ button.
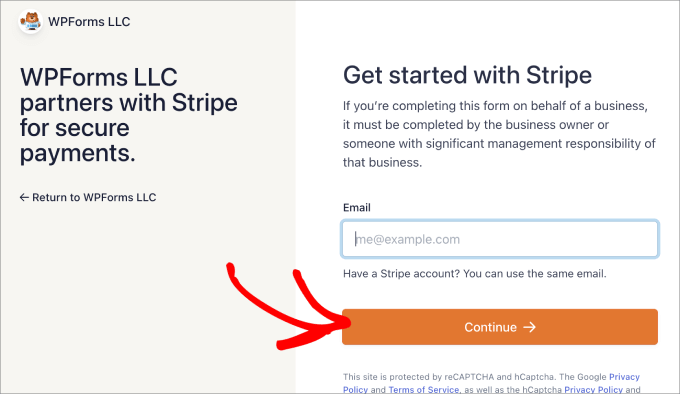
This redirects you to the Stripe connection wizard, where you’ll have the ability to connect in your present account or create a brand spanking new account.
Apply the steps inside the Stripe connection wizard.
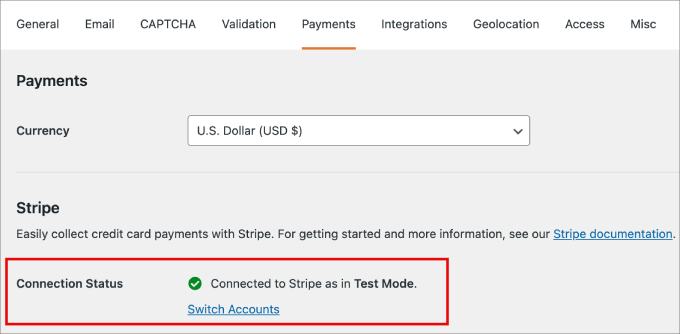
After completing the steps, you’ll be taken once more to the WordPress dashboard.
You will have to see a green checkmark indicating that your Stripe account is now hooked as much as WPForms.
Now, you’ll be capable of get began accepting expenses for your site and these days are able to create your checkout form.
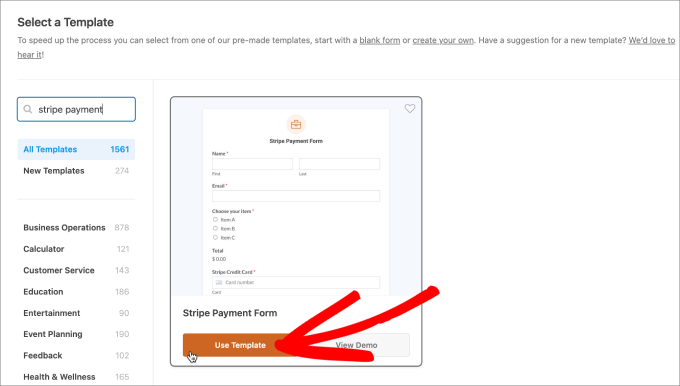
Go to WPForms » Add New. From proper right here, you’ll be capable of establish your form, which can be helpful for reference later.
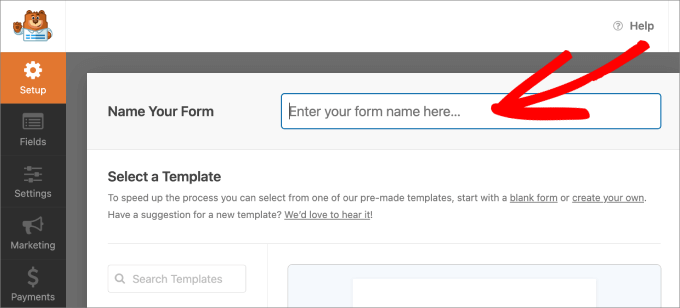
Then, pick a value form template that matches your needs.
For the sake of this instructional, we’ll be working off of the Stripe Value Form template. Under the template, click on on on ‘Use Template.’
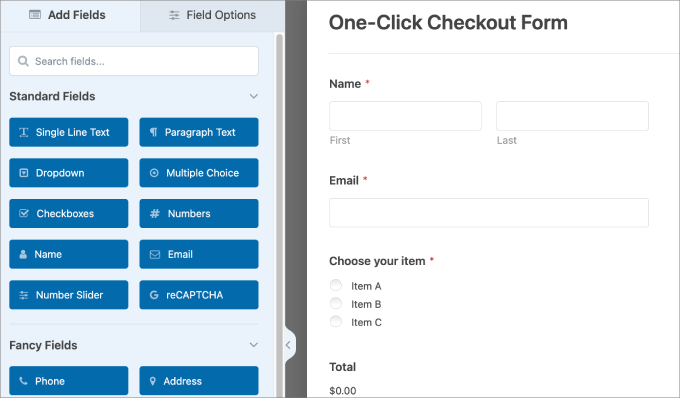
You’ll be taken inside the drag-and-drop form editor, where you’ll be capable of merely customize the form in your needs.
Any time you want to be able to upload a field, merely drag and drop it from the ‘Add Fields’ panel on the left to the appropriate side. To edit the fields, click on on on the section, and you’ll be capable of make adjustments underneath ‘Field Alternatives.’
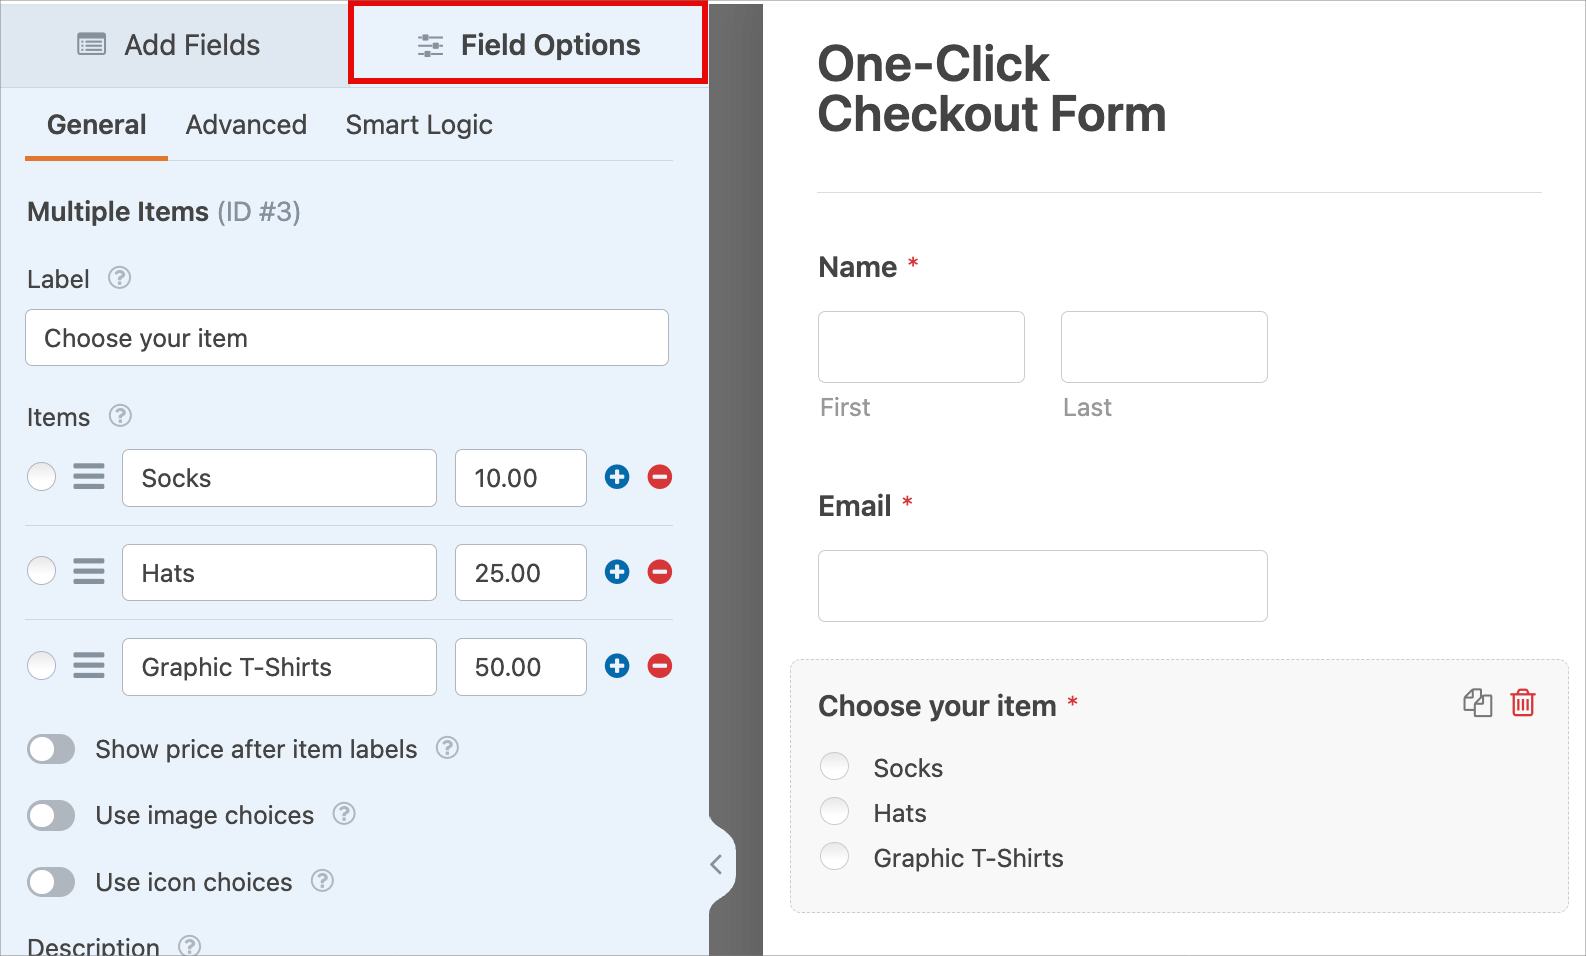
For instance, in case you have been to create a wholesale shape, you’ll be capable of edit the multiple-choice field with radio buttons.
Then click on on on the section, and underneath ‘Field Alternatives,’ you’ll be capable of add the opposite products.
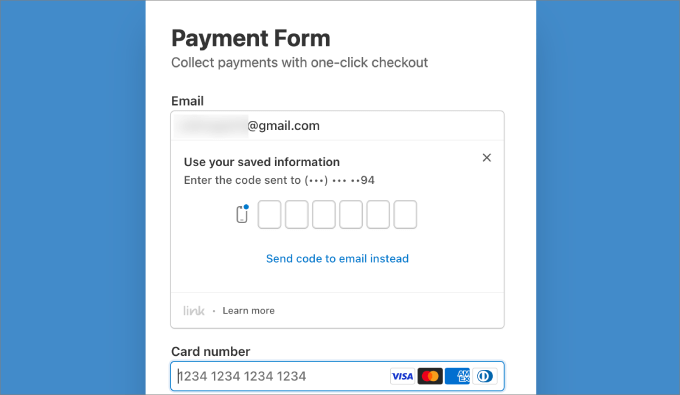
You’ll wish to activate Stripe Link, a one-click checkout answer that securely retail outlets all the purchaser details and lets in consumers to reuse them for your site. They use Level 1 PCI-compliant servers, on account of this that your shoppers’ wisdom is encrypted and secure.
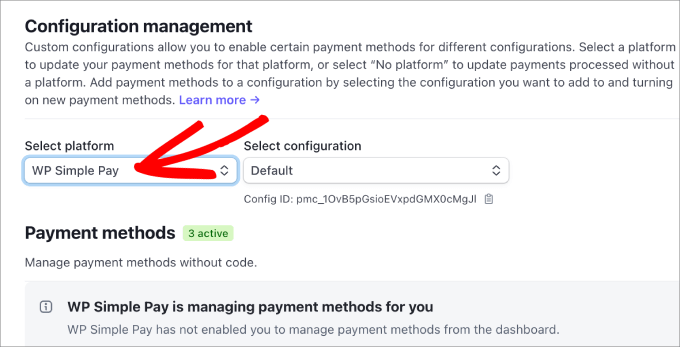
To show at the Stripe Link checkout preference, head over to the Settings » Expenses internet web page in Stripe. Then, move to the Value Methods tab.
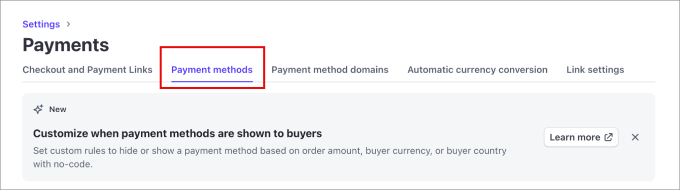
From proper right here, you’ll select the ‘WPForms LLC’ menu for Choose Platform.
This connects all available value methods from your Stripe account to WPForms.
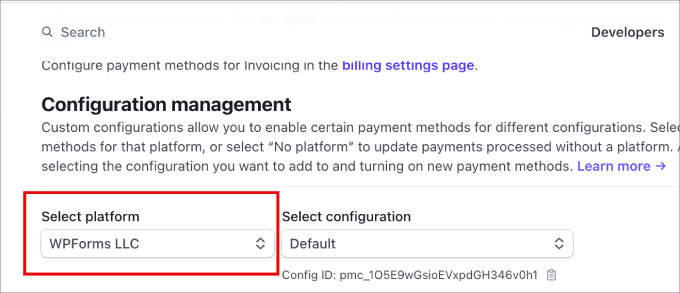
Scroll down the internet web page, and also you’ll see the opposite value methods and settings for WPForms.
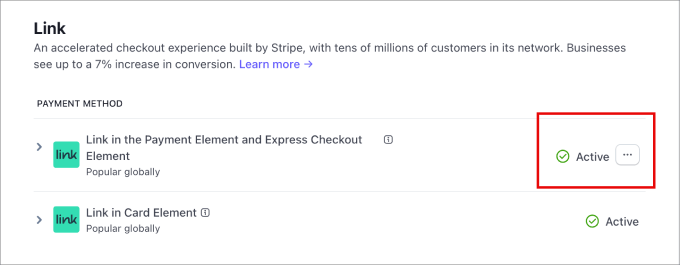
Ensure that the Link preference for explicit checkout is Lively.
After that, go back to WordPress to finish rising your checkout form. Go to the Expenses » Stripe tab.
Then turn on the ‘Permit one-time expenses’ preference so that Stripe is activated for your form.
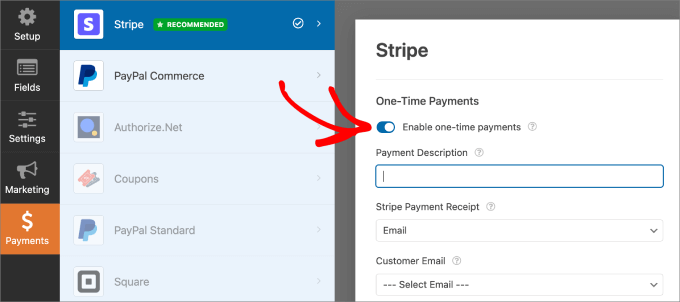
When you’re performed with that, hit the ‘Save’ button.
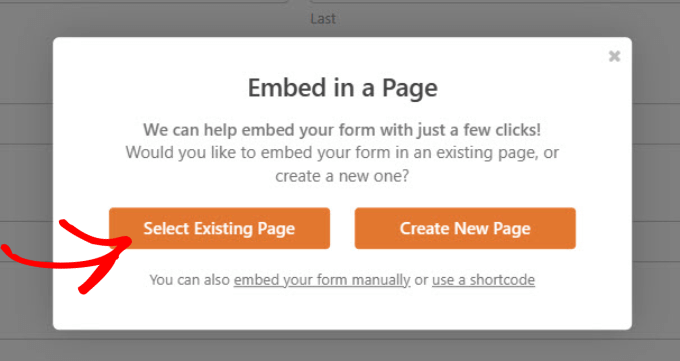
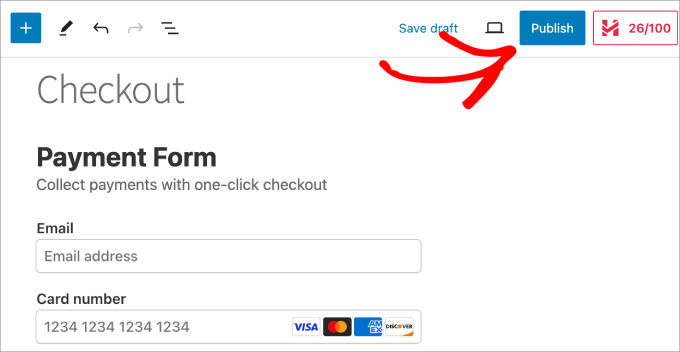
Then click on on on ‘Embed.’
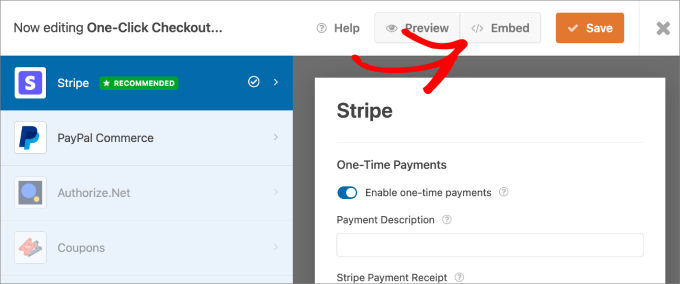
You will have to see a popup message appear. Proper right here, you’ll be ready to choose to embed this type into an present internet web page or create a brand spanking new internet web page.
Assuming you already have a checkout internet web page, we’ll hit the ‘Choose Provide Internet web page’ button.
The form will have to robotically be embedded into the internet web page you choose.
From there, merely hit the ‘Publish’ or ‘Change’ button up top.
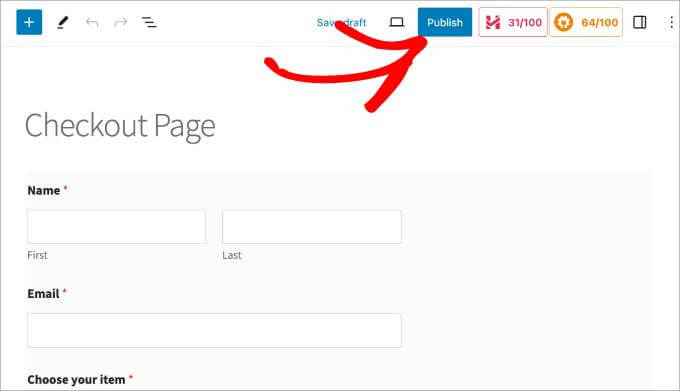
You will have to indisputably preview the checkout form and spot if the expenses are going by the use of in your Stripe account.
Once activated, it’ll pre-fill their credit card details which can be saved on Stripe.
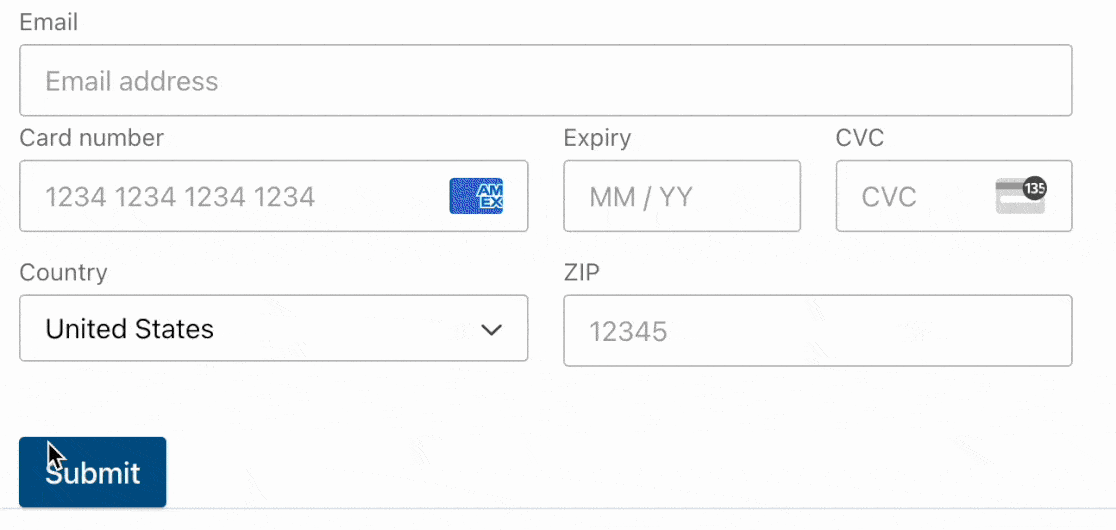
Take into account that shoppers with Stripe accounts can be precipitated to enter a one-time passcode authentication to use Link.
Way 2: Create a One-Click on on Checkout in WordPress The usage of WP Simple Pay (A few Value Methods)
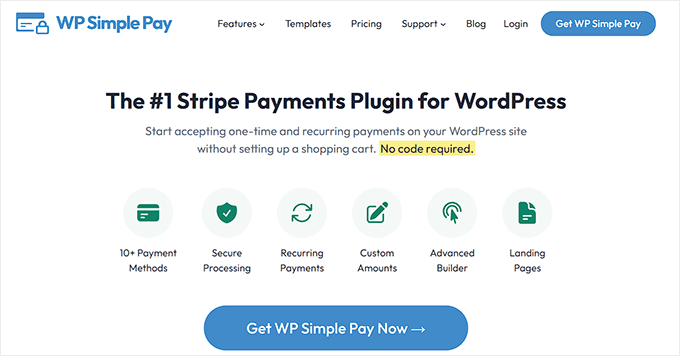
WP Easy Pay is another great preference for accepting one-time and regimen expenses on WordPress. That’s the more effective want if you want to offer a lot of value methods for your one-click checkout process.
WP Simple Pay supplies 13+ value methods, at the side of debit and credit score ranking expenses, ACH debit, Google Pay, Apple Pay, Venmo, and further. Moreover, you’ll be capable of even provide shoppers with methods to ‘Purchase Now Pay Later‘ with Klarna.
To get started, arrange and switch at the WP Simple Pay plugin. Upon activation, you’ll be taken to the setup wizard, which will knowledge you on how you can get began accepting expenses for your site.
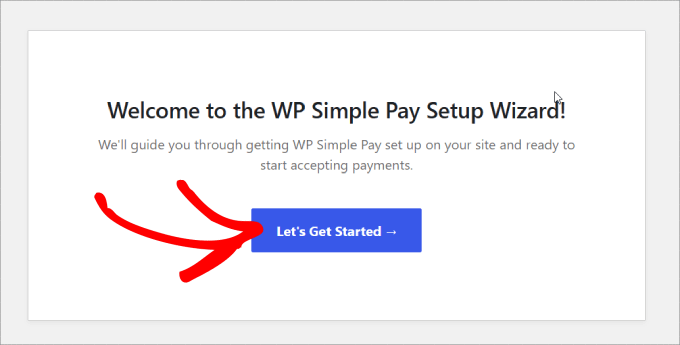
You will have to indisputably practice the steps in all places.
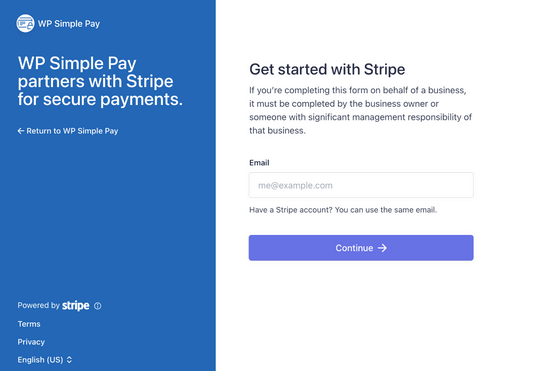
You will have to be asked to glue your Stripe account as well. For those who don’t have a Stripe account, you’ll be capable of create one.
After you’ve completed the setup wizard, you’ll be confirmed a good fortune internet web page that confirms that the setup is finished.
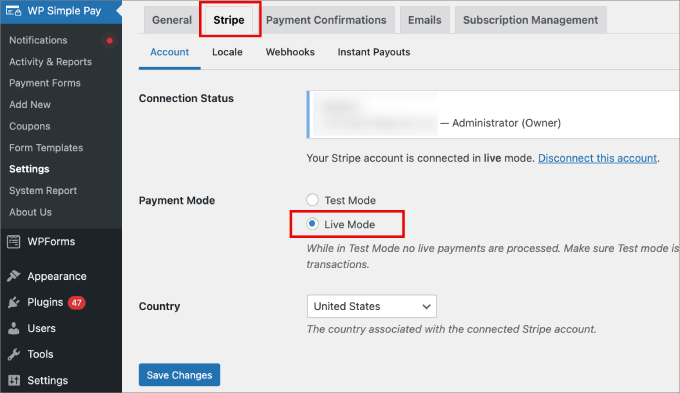
Next, move to the WP Simple Pay » Settings internet web page. Under the Stripe Tab, make sure that the Stripe account is connected and that you just’re in ‘Are living Mode.’
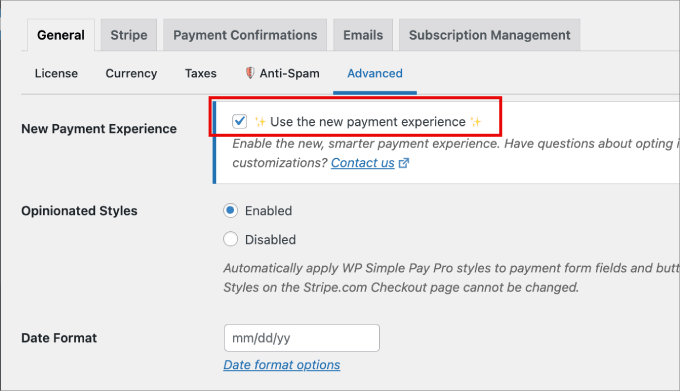
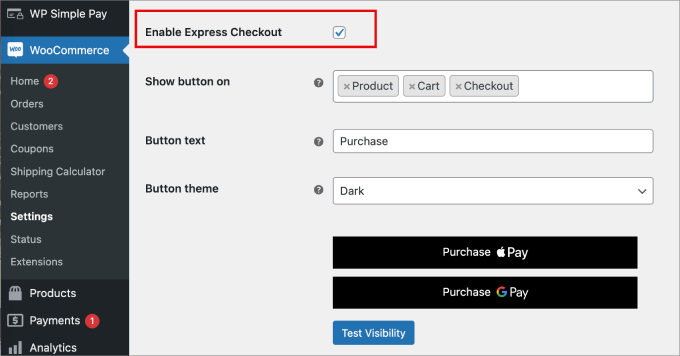
Forward of you move into rising your value form, you moreover wish to ensure that Stripe Link is enabled.
To take a look at this, move to the Settings » Commonplace tab. Then, underneath the Difficult tab, take a look at the ‘New Value Experience’ box.
From proper right here, you’re able to begin out customizing your checkout form.
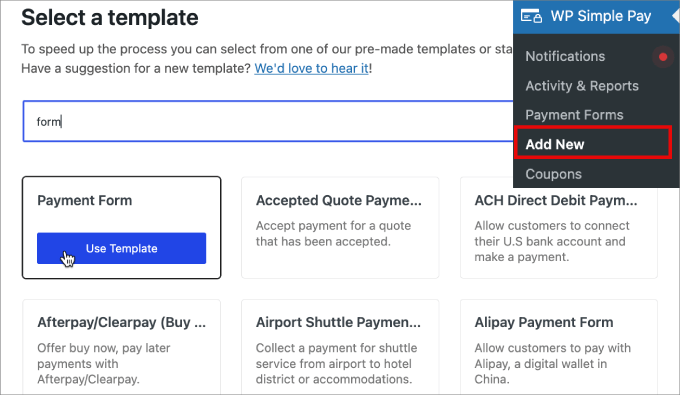
Head over to WP Simple Pay » Add New, and likewise you’ll be taken to a library of available templates.
You’ll choose any template that fits your needs, on the other hand we’ll be the usage of the Value Form template for this instructional. Under the template establish, select ‘Use Template.’
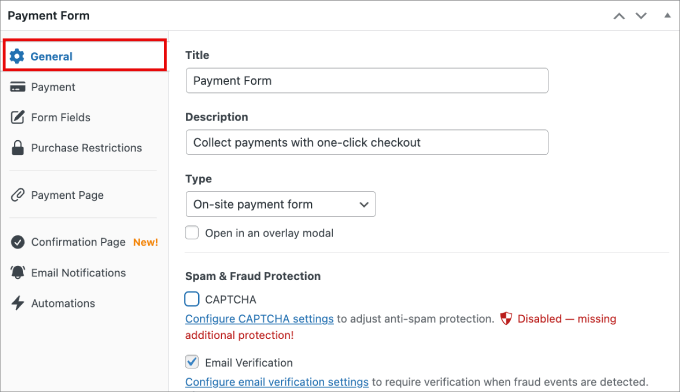
Next, you’ll be taken to a type builder. Inside the Commonplace tab, you’ll be capable of fill out the necessary wisdom.
Give the form a Title and Description. You’ll moreover take a look at the CAPTCHA and electronic message verification possible choices to save you junk mail submissions.
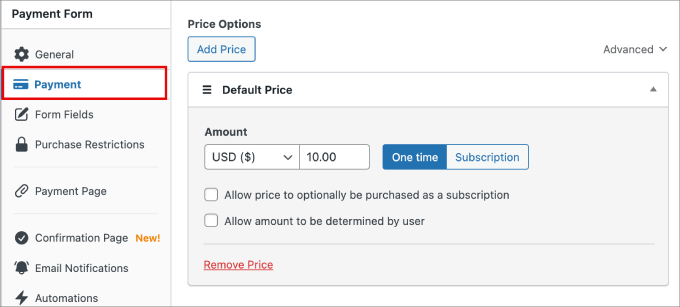
From there, navigate to the Value tab so that you’ll be capable of get began adjusting the pricing and foreign exchange possible choices.
You’ll moreover set the pricing to a one-time or subscription preference.
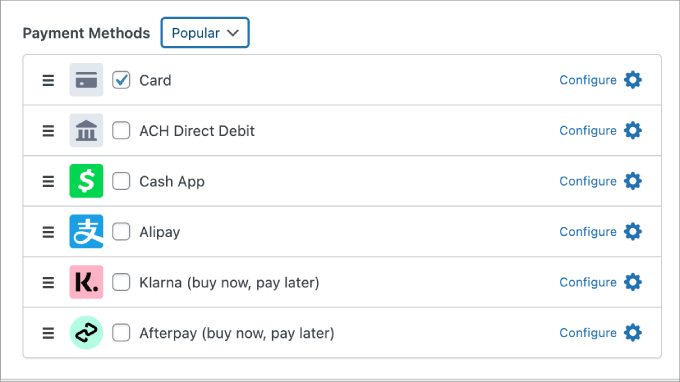
Underneath that, you’ll be capable of have rather numerous value methods to make a choice from.
Click on at the checkboxes of the decisions you want to accept.
Inside the Form Fields tab, you’ll be capable of add any fields you want by the use of deciding on them from the dropdown menu and clicking on ‘Add Field.’ You’ll moreover edit your present fields.
To permit Stripe Link, enlarge the E mail Take care of dropdown menu. Then, you’ll want to click on on on the checkbox underneath ‘Offer Saved Value Methods.’
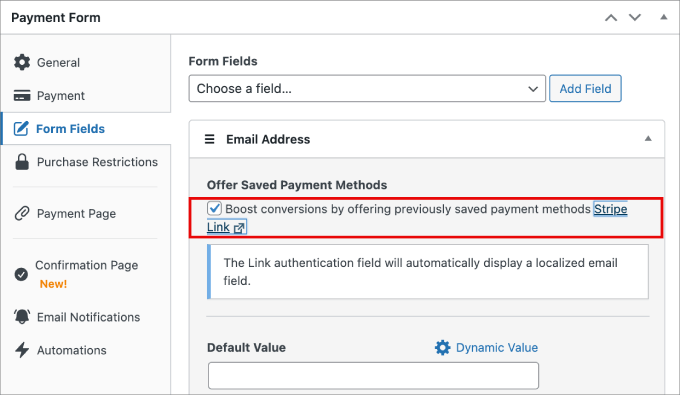
Then, head over in your Stripe account. Go to the Settings » Expenses internet web page.
Under the Value Methods tab, make certain that to choose ‘WP Simple Pay’ from the ‘Choose platform’ dropdown menu.
Then, go back to WordPress and finish customizing your value form.
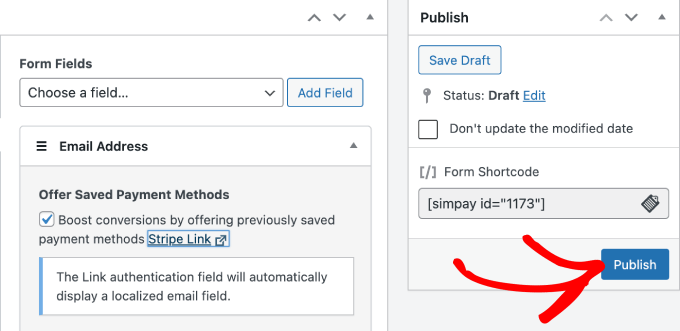
Once completed, move ahead and hit ‘Publish.’
Now, you’ll be capable of move to any internet web page you want and add the newly created form.
Hit the ‘+’ icon and then add the WP Simple Pay block.
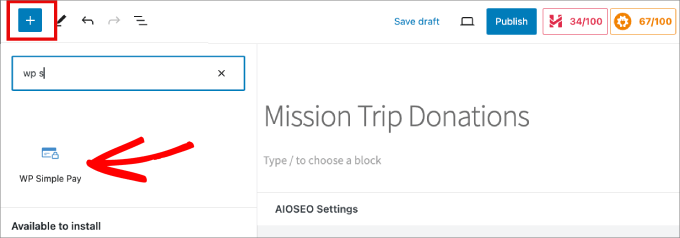
Then, choose the fee form you’ve merely created, and it will have to appear on the internet web page.
Click on on on the ‘Publish’ or ‘Change’ button at the top.’
Now, you’ve successfully created a one-click checkout experience with WP Simple Pay.
You will have to indisputably preview the form to ensure it actually works.
Way 3: Create a One-Click on on Checkout in WordPress The usage of Easy Digital Downloads (Digital Products)
For those who advertise digital products, there’s no upper plugin for creating a one-click checkout in WordPress than Simple Virtual Downloads.
With over 50,000+ consumers, this plugin signifies that you’ll merely arrange and advertise digital products like eBooks, PDFs, audio, on-line lessons, templates, and further.
To get started, you’ll wish to arrange and activate Easy Digital Downloads. Upon activation, the plugin robotically creates a checkout and cart internet web page for you.
That said, we will add a one-click checkout process by the use of together with a purchase order now button with EDD. The acquisition now button robotically bypasses the add to cart and checkout process, sending the buyer without delay to price.
For the sake of this instructional, we’ll assume you already have a digital product created on EDD. On the other hand in case you haven’t, you’ll want to be informed our amateur’s information on how one can promote virtual downloads on WordPress.
First, move to the Downloads » Settings internet web page inside the WordPress admin panel.
Under the Expenses » Stripe tab, you’ll want to click on on on ‘Connect with Stripe.’
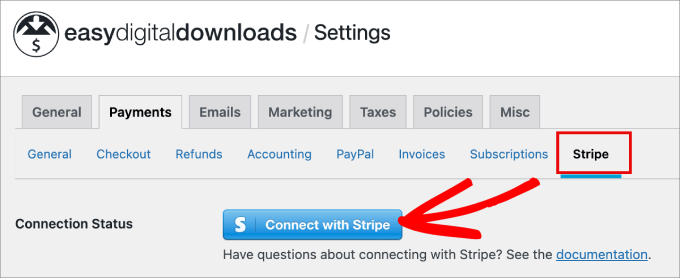
You’ll be taken to the Stripe Connect Wizard.
Simply connect your present Stripe account or create a brand spanking new one.
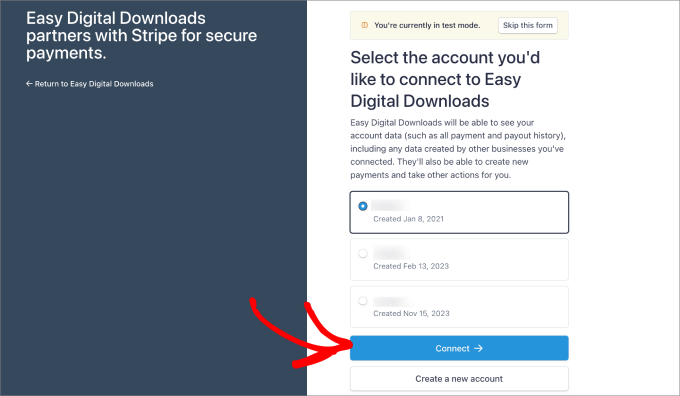
Once connected, you’ll be directed once more to WordPress.
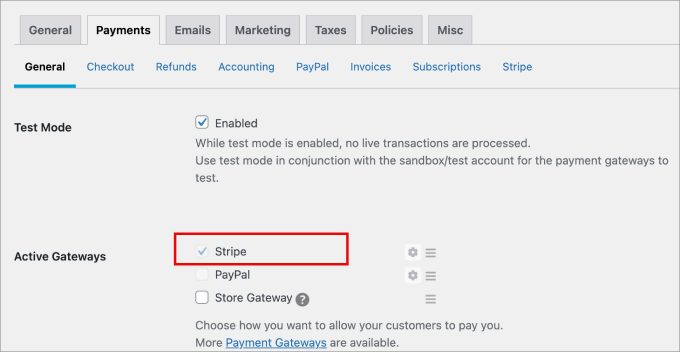
You will have to see that Stripe is one of the value possible choices checked off inside the Commonplace tab.
In addition to, you’ll wish to move in your Stripe account. Then head over to the Settings » Expenses internet web page.
Under the Value Methods tab, make certain that to choose the ‘Easy Digital Downloads’ preference from the ‘Choose platform’ dropdown menu.
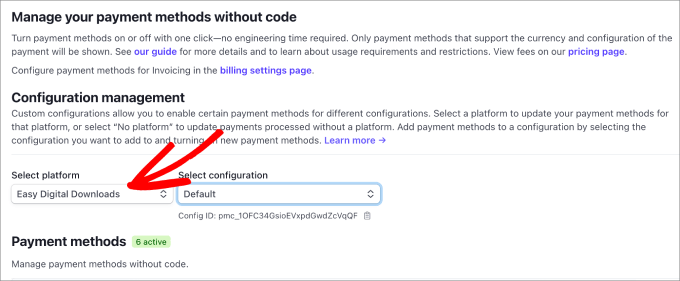
By way of doing so, each and every time any individual purchases your digital products, Stripe Link can be activated, and their credit card wisdom can be auto-completed into the fields.
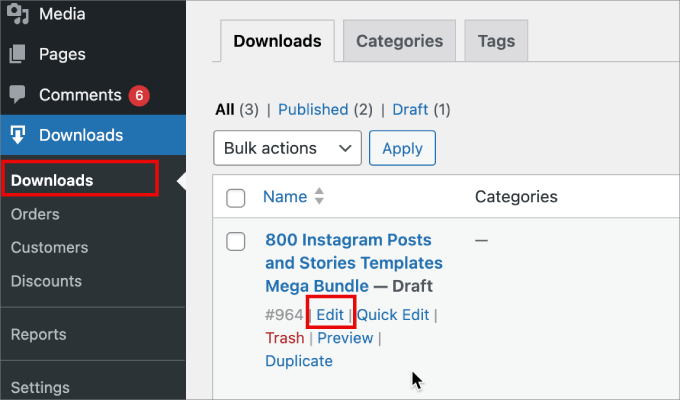
Next, move to the Downloads » Downloads internet web page. Then, find a digital product to which you want to be able to upload the acquisition now button and click on on ‘Edit.’
When you’re inside the block editor, click on on on the black side panel widget at the top.
Scroll down inside the panel until you reach Button Alternatives. From there, select ‘Acquire Now’ from the dropdown menu.

Then you definately indisputably’ll hit the ‘Publish’ or ‘Change’ button.
From proper right here, you’ll be capable of preview your internet web page, and likewise you will have to see a ‘Checkout’ button at the bottom of your product internet web page, which takes you at once to the checkout web page. Then, you’ll be capable of enter your electronic message, and Stripe will autofill your billing and value details.

Way 4: Create a One-Click on on Checkout in WordPress The usage of FunnelKit (eCommerce Shops)
If when you have an eCommerce store, FunnelKit Funnel Builder is your best choice for setting up your explicit checkout process.

This popular product sales funnel builder signifies that you’ll merely create a high-converting gross sales funnel to boost your affordable order worth, reduce cart abandonment fees, and take hold of additional leads.
You’ll do everything from rising lead take hold of pages and order bumps to creating checkout forms and slide-in carts. Perfect conceivable of all, you gained’t wish to write any code.
For the program, you’ll already wish to have your product pages prepare for WooCommerce. If when you have no longer prepare your store however, check out our entire step-by-step WooCommerce educational.
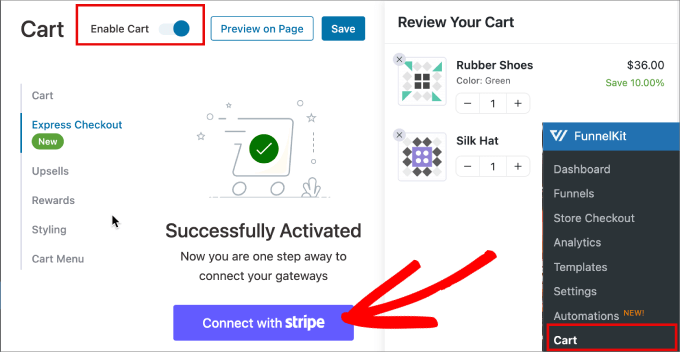
To get started, arrange and switch at the FunnelKit Automation plugin. Upon activation, head over to FunnelKit » Cart. You’ll want to turn on the ‘Permit Cart’ preference. Under the ‘Express Checkout’ tab, click on on on ‘Connect with Stripe.’
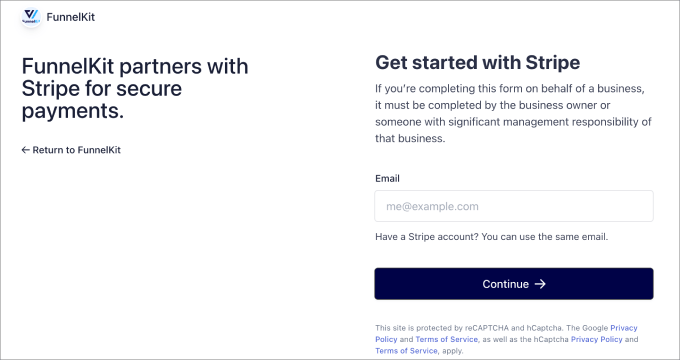
After that, you’ll be taken to the Stripe Connect Wizard.
Simply practice the steps to glue your Stripe account to FunnelKit or create a brand spanking new account.
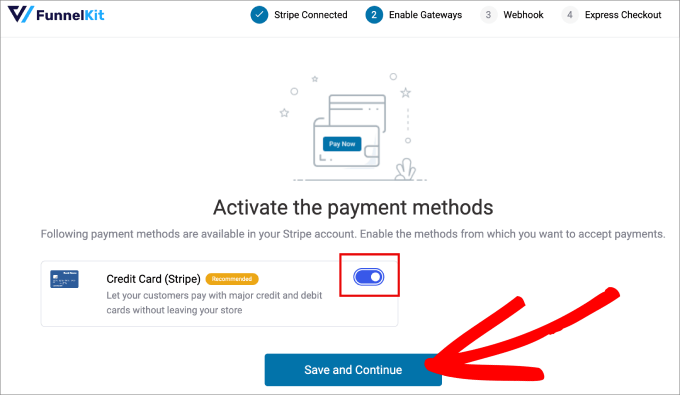
Once your Stripe account is connected to FunnelKit, you’ll be taken once more to WordPress.
You’ll want to flip at the ‘Credit score ranking Card (Stripe)’ preference and then hit ‘Save and Continue.’
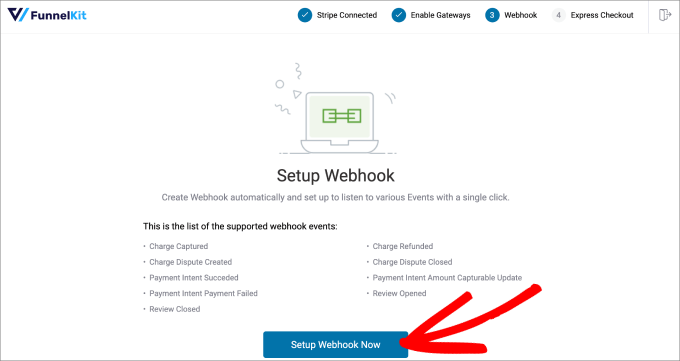
Next, you’ll be asked to prepare a webhook so that you’re able to robotically process expenses with a single click on on.
Click on on on ‘Setup Webhook Now.’
From proper right here, you wish to have to permit the express checkout preference for Google Pay and Apple Pay.
Then, hit the ‘Examine’ button.
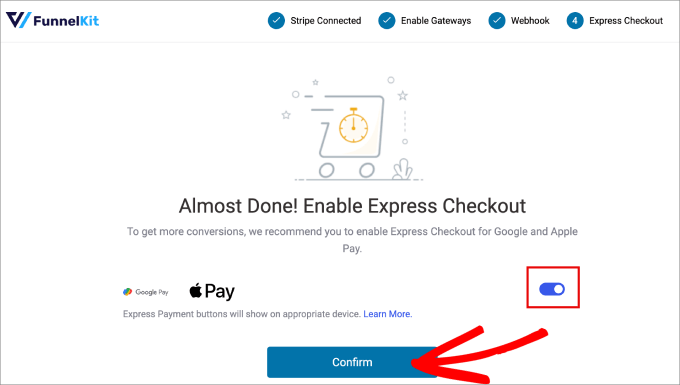
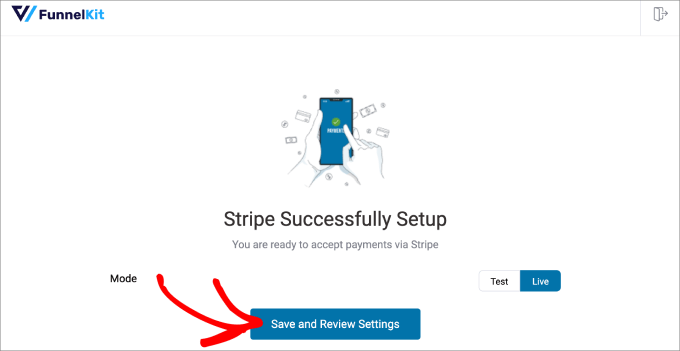
You will have to see a confirmation message that says that the Stripe setup is a success.
Feel free to select the ‘Are living’ mode in case you’re able to begin out accepting expenses. In a different way, you’ll be ready to choose the ‘Test’ preference for now. Then click on on on ‘Save and Overview Settings.’
Next, you’ll want to head once more to FunnelKit » Cart. Then, underneath the Express Checkout tab, simply turn on the ‘Permit Express Checkout on Cart’ preference.
Then, hit the ‘Save’ button to avoid wasting numerous changes.
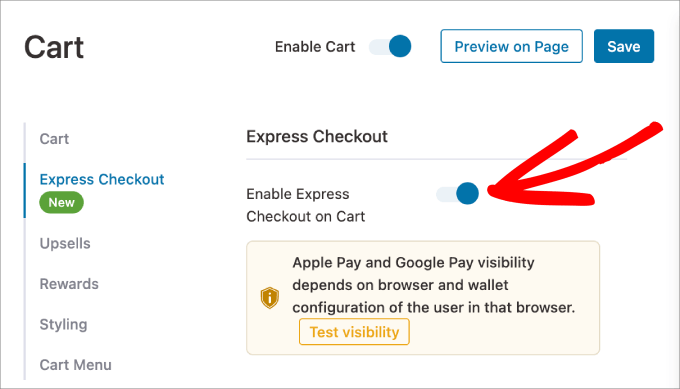
Once that is enabled, you’re good to transport.
Merely move to a live product internet web page to appear it in movement.
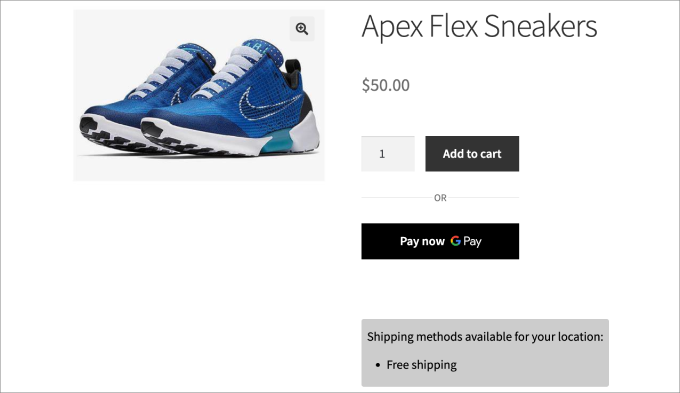
When a purchaser chooses the ‘Pay Now’ preference, a window will pop up.
All the value details saved to their Google and Apple Pay accounts will robotically appear.

Way 5: Create a One-Click on on Checkout in WordPress The usage of WooCommerce (Unfastened)
If you want a free way to be able to upload the one-click checkout in your WooCommerce store, then you definitely’ll be capable of download the Direct Checkout for WooCommerce plugin.
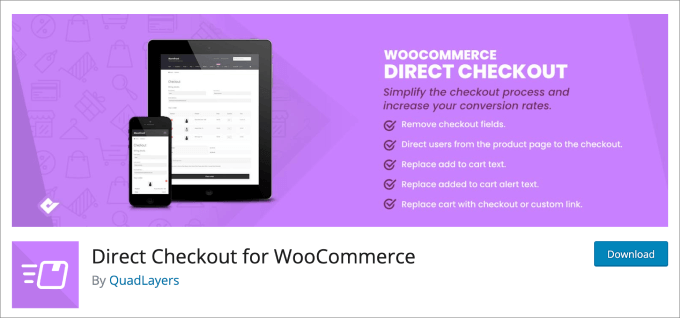
It’s a free plugin that gives a one-click acquire button in your store.
Upon activation, move to the WooCommerce » Settings internet web page. Then, navigate to Expenses » Express Checkout.
From proper right here, click on at the checkbox that says ‘Permit Express Checkout.’
The plugin supplies rather numerous customizations. You’ll customize where you want the one-click checkout button to look, along with the color of the button and the text confirmed.
Now you’re all set.
Simply move to a product internet web page or your storefront to appear the one-click checkout button.

We hope this article helped you learn how to create a one-click checkout in WordPress. You may also want to see our checklist of the easiest WooCommerce plugins in your retailer and our ultimate knowledge on how one can create an electronic mail e-newsletter the suitable approach.
For those who preferred this article, then please subscribe to our YouTube Channel for WordPress video tutorials. You’ll moreover to seek out us on Twitter and Fb.
The post The best way to Create a One-Click on Checkout in WordPress (5 Techniques) first seemed on WPBeginner.
0 Comments