
Together with scroll animation to Divi’s background masks and patterns is a useful design trick that can put across new life in your web site’s background designs. We’ve already confirmed you learn the way to combine Divi’s background alternatives in ingenious ways, along side learn the way to create two layers of background designs. On the other hand, at the present time, we’re together with scroll animation to Divi’s background alternatives.
In this tutorial, we’re going to show you learn the way to create and animate background masks and patterns the use of Divi’s scroll alternatives (no custom designed code sought after). To try this, we’ll create a floating background layer the use of a Divi row (similar to what we did proper right here) that we will use to animate the background masks and patterns when an individual scrolls by the use of slightly of content material subject material. We expect you’re going to love the result.
Let’s get started!
Sneak Peek
Right here’s a quick illustration of what the background scroll animation will appear to be from this tutorial.
The Concept
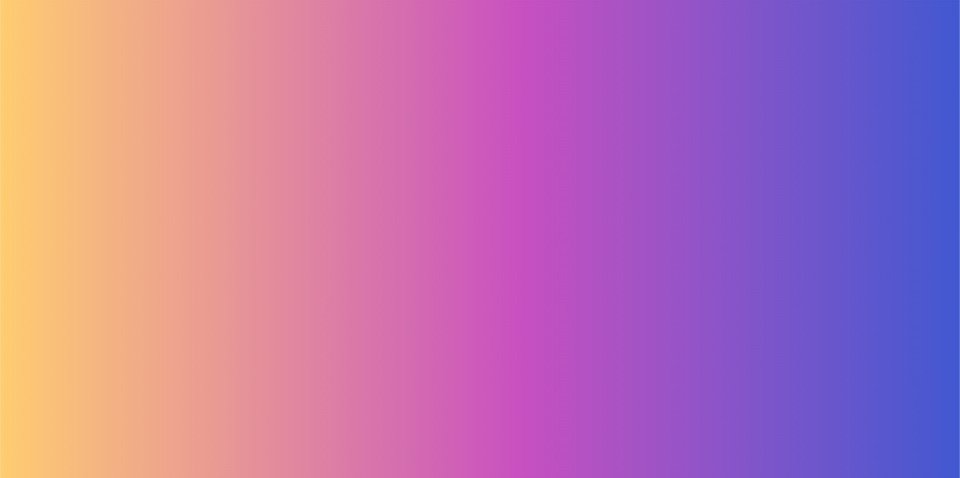
The concept for this design shouldn’t be too hard to grab. We start with slightly that has a gradient background.
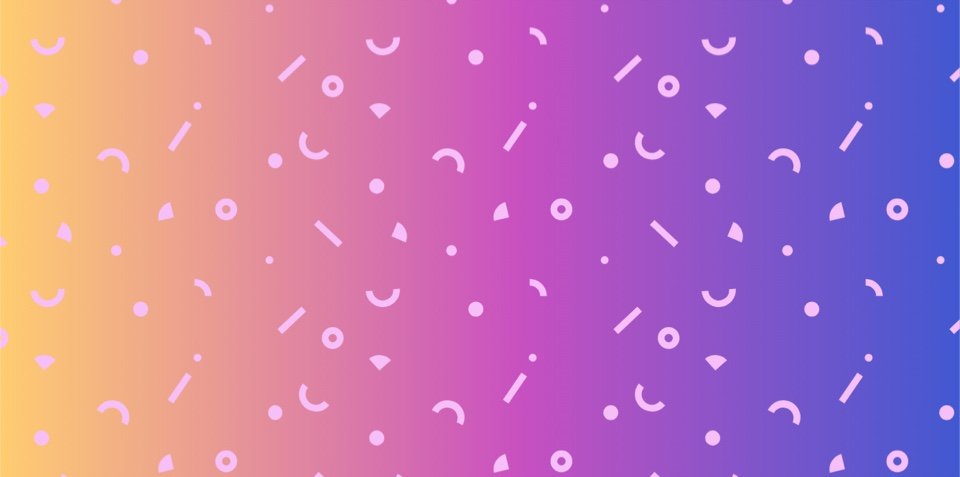
Then we create a row that is positioned (absolute) so that it totally covers the segment (like an overlay). We will be able to add a background pattern to the row.
Then we can add a background mask to the column.

Then we add scroll effects to the row and column (like scale and rotation) which is in a position to animate the fashion and mask one by one within the segment background.
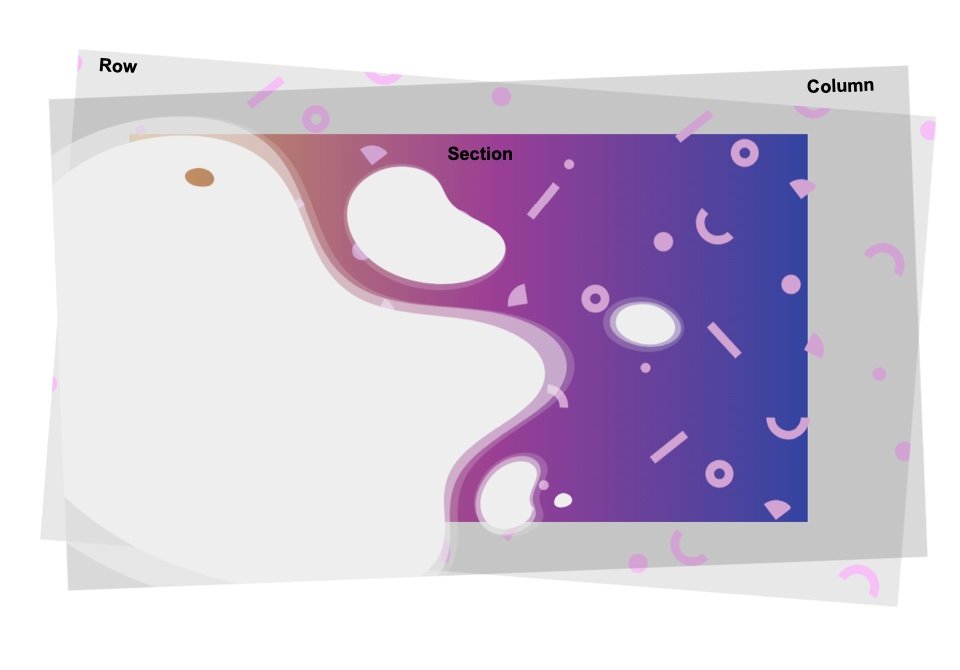
When we conceal the overflow of the segment, all we see is the animation contained within the segment.
Download the Layout for FREE
To position your palms on the structure design from this tutorial, you’ll first want to download it the use of the button below. To reach get admission to to the download you will need to subscribe to our Divi Daily email report via the use of the form below. As a brand spanking new subscriber, you’ll download a lot more Divi goodness and a free Divi Layout pack every Monday! For those who occur to’re already on the report, simply enter your email deal with below and click on on download. You’ll no longer be “resubscribed” or download additional emails.
@media highest computer screen and ( max-width: 767px ) {.et_bloom .et_bloom_optin_1 .carrot_edge.et_bloom_form_right .et_bloom_form_content:previous than { border-top-color: #ffffff !essential; border-left-color: transparent !essential; }.et_bloom .et_bloom_optin_1 .carrot_edge.et_bloom_form_left .et_bloom_form_content:after { border-bottom-color: #ffffff !essential; border-left-color: transparent !essential; }
}.et_bloom .et_bloom_optin_1 .et_bloom_form_content button { background-color: #f92c8b !essential; } .et_bloom .et_bloom_optin_1 .et_bloom_form_content .et_bloom_fields i { colour: #f92c8b !essential; } .et_bloom .et_bloom_optin_1 .et_bloom_form_content .et_bloom_custom_field_radio i:previous than { background: #f92c8b !essential; } .et_bloom .et_bloom_optin_1 .et_bloom_border_solid { border-color: #f7f9fb !essential } .et_bloom .et_bloom_optin_1 .et_bloom_form_content button { background-color: #f92c8b !essential; } .et_bloom .et_bloom_optin_1 .et_bloom_form_container h2, .et_bloom .et_bloom_optin_1 .et_bloom_form_container h2 span, .et_bloom .et_bloom_optin_1 .et_bloom_form_container h2 powerful { font-family: “Open Sans”, Helvetica, Arial, Lucida, sans-serif; }.et_bloom .et_bloom_optin_1 .et_bloom_form_container p, .et_bloom .et_bloom_optin_1 .et_bloom_form_container p span, .et_bloom .et_bloom_optin_1 .et_bloom_form_container p powerful, .et_bloom .et_bloom_optin_1 .et_bloom_form_container form input, .et_bloom .et_bloom_optin_1 .et_bloom_form_container form button span { font-family: “Open Sans”, Helvetica, Arial, Lucida, sans-serif; } p.et_bloom_popup_input { padding-bottom: 0 !essential;}

Download For Unfastened
Join the Divi E-newsletter and we will email you a reproduction of the ultimate Divi Landing Internet web page Layout Pack, plus lots of other superb and free Divi resources, tips and strategies. Follow along and also you’ll be a Divi clutch in no time. For those who’re already subscribed simply sort on your email deal with below and click on on download to get admission to the structure pack.
It’s worthwhile to have successfully subscribed. Please check out your email deal with to ensure your subscription and get get admission to to free weekly Divi structure packs!
To import the segment structure in your Divi Library, do the following:
- Navigate to the Divi Library.
- Click on at the Import button at the top of the internet web page.
- Throughout the portability popup, make a selection the import tab
- Choose the download file from your computer (you’ll need to unzip the file first and use the JSON file).
- Then click on at the import button.

Once completed, the segment structure will probably be available inside the Divi Builder.
Let’s get to the training, we could?
What You Need to Get Started
To get started, you will need to do the following:
- For those who occur to haven’t however, set up and turn on the Divi Theme.
- Create a brand spanking new internet web page in WordPress and use the Divi Builder to edit the internet web page on the front end (visual builder).
- Choose the selection “Assemble From Scratch”.
- Now have a blank canvas to start out designing in Divi!

The right way to Animate Background Masks and Patterns on Scroll with Divi
Designing the Segment Background
First, we’re going to avoid creating a row and jump right kind into bettering the prevailing default segment inside the builder. To make certain that our background design to fill the browser, we want to add some vertical height to the segment. An easy manner to check out that is with the intention to upload a min-height to the segment.
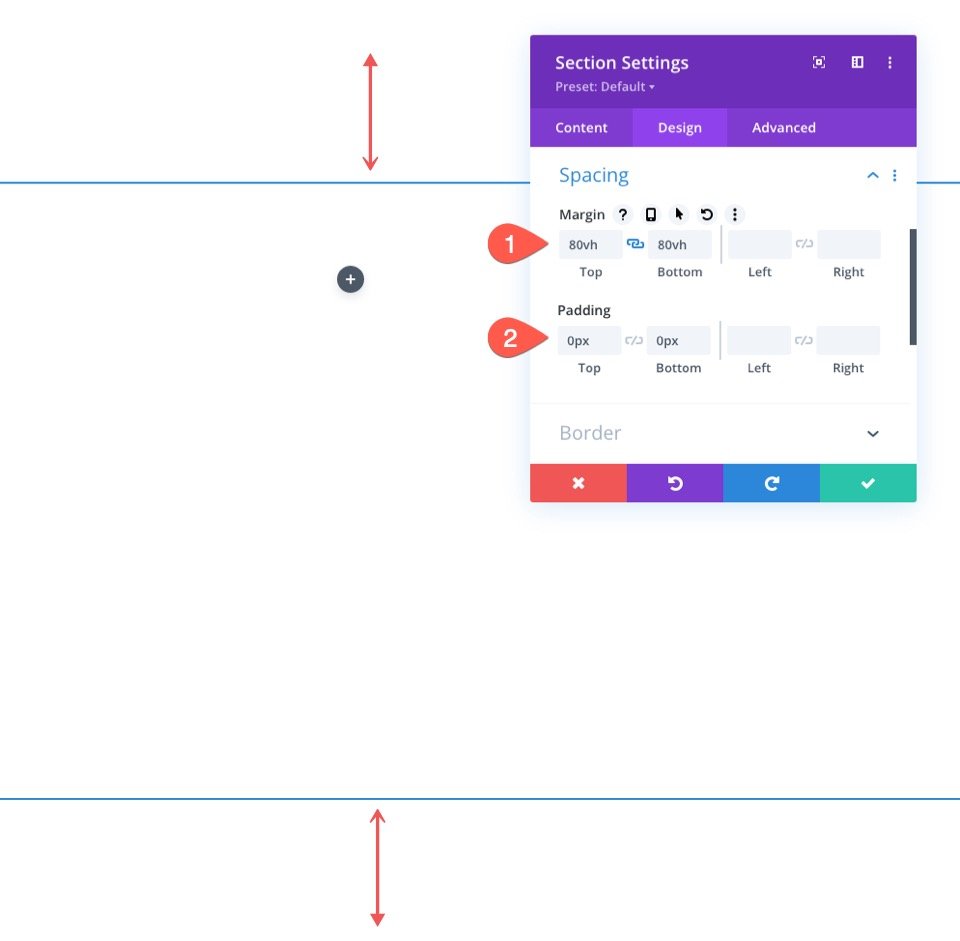
Open the settings for the segment. Beneath the design tab, change the min-height and take out the padding as follows:
- Min Top: 50vw
- Padding: 0px top, 0px bottom
Design a Background Gradient for the Segment
Now we can add a custom designed background gradient to the segment. For this gradient, we’re going to add 3 gradient colour stops which can be spaced out pretty frivolously. We’re going to stick it simple so that we can take note of rising our animated backgrounds on the row.
With the intention to upload the principle gradient stops, you must surely have the segment settings open underneath the content material subject material tab. Then make a selection the gradient tab and click on on with the intention to upload a brand spanking new gradient. This may occasionally sometimes add two default gradient colors. Add the following gradient stops with a color and a spot as follows:
- Gradient Stop #1: #4158d0 (at 0%)
- Gradient Stop #2: #c850c0 (at 50%)
- Gradient Stop #3: #ffcc70 (at 100%)
Then trade the linear gradient direction:
- Gradient Trail: 270deg

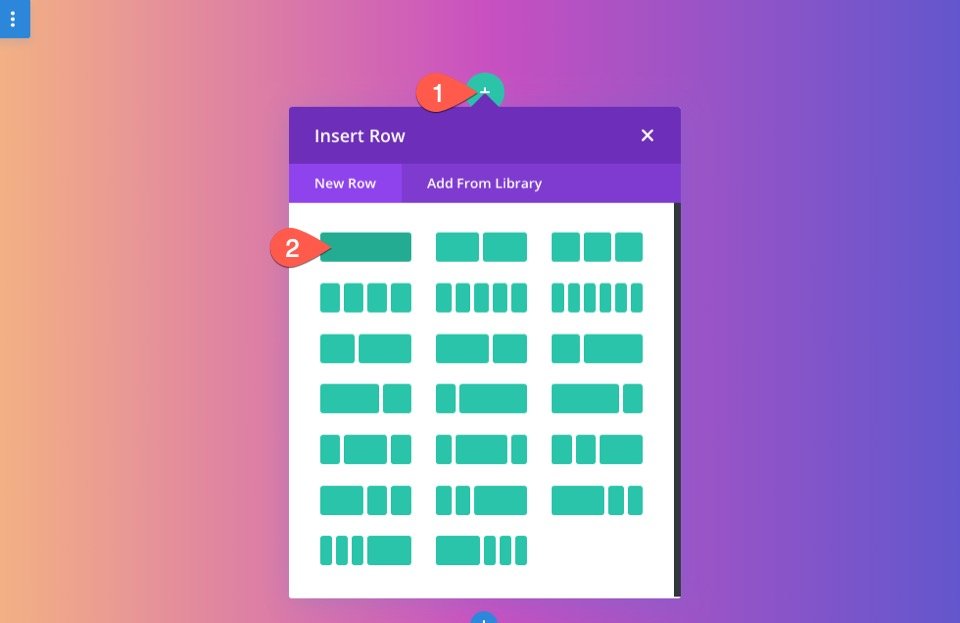
Add Rows to the Segment
Now that our Segment is in place, add a one-column row to the segment. This row will probably be used for our background mask and pattern scroll animation.
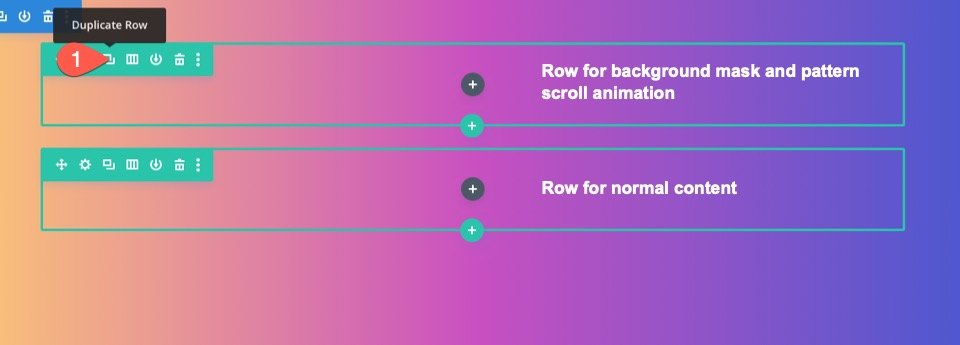
Next, copy the row you merely created. This 2nd (copy) row will probably be used for our content material subject material similar to you might want to generally. Now you’ll have one top row for the background scroll animation and one row for standard content material subject material.
Customize the Row
Now that our segment background gradient is in a position, we can turn our attention to the row we’re going to make use of for our background scroll animation. Open the settings for the row. Beneath the Difficult tab, change the following:
- Position: Absolute

This may occasionally sometimes allow the row to sit down above (or overlay) the segment without taking up any exact area inside the report. Now, all we want to do is change the height and width so that it spans the entire width and height of the segment. This may occasionally sometimes create the overlay we’d like and our 2nd layer of background design.
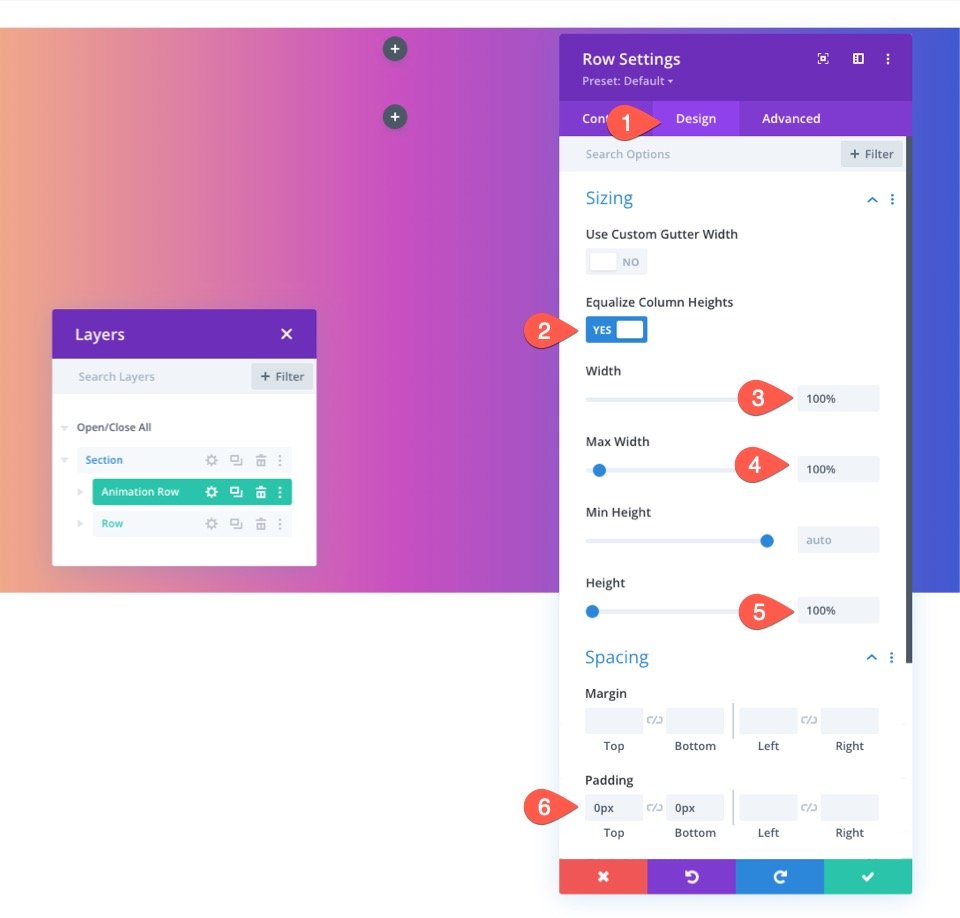
Beneath the design tab, change the sizing alternatives as follows:
- Equalize Column Heights: YES
- Width: 100%
- Max Width: 100%
- Top: 100%
- Padding: 0px top, 0px bottom
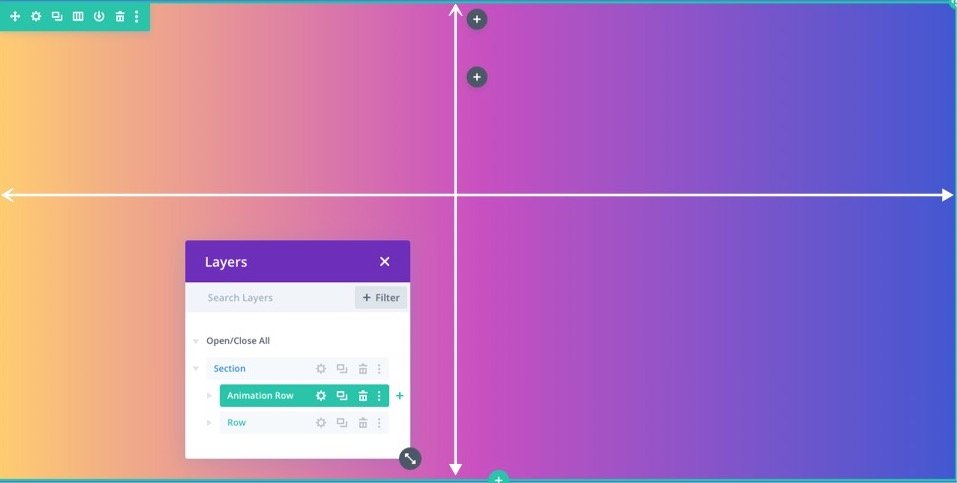
Now you may not be capable of see the row, then again it’s now totally protective all the segment background.
Create a Background Pattern for the Row
In this example, we’re going to add the Confetti pattern for the reason that row background.
Open the settings for the row. Beneath background risk, make a selection the patterns tab and change the following:
- Background Pattern: Confetti
- Pattern Color: #f6bef7
- Pattern Dimension: Custom designed Dimension
- Pattern Width: 35vw
- Pattern Repeate Beginning position: Middle
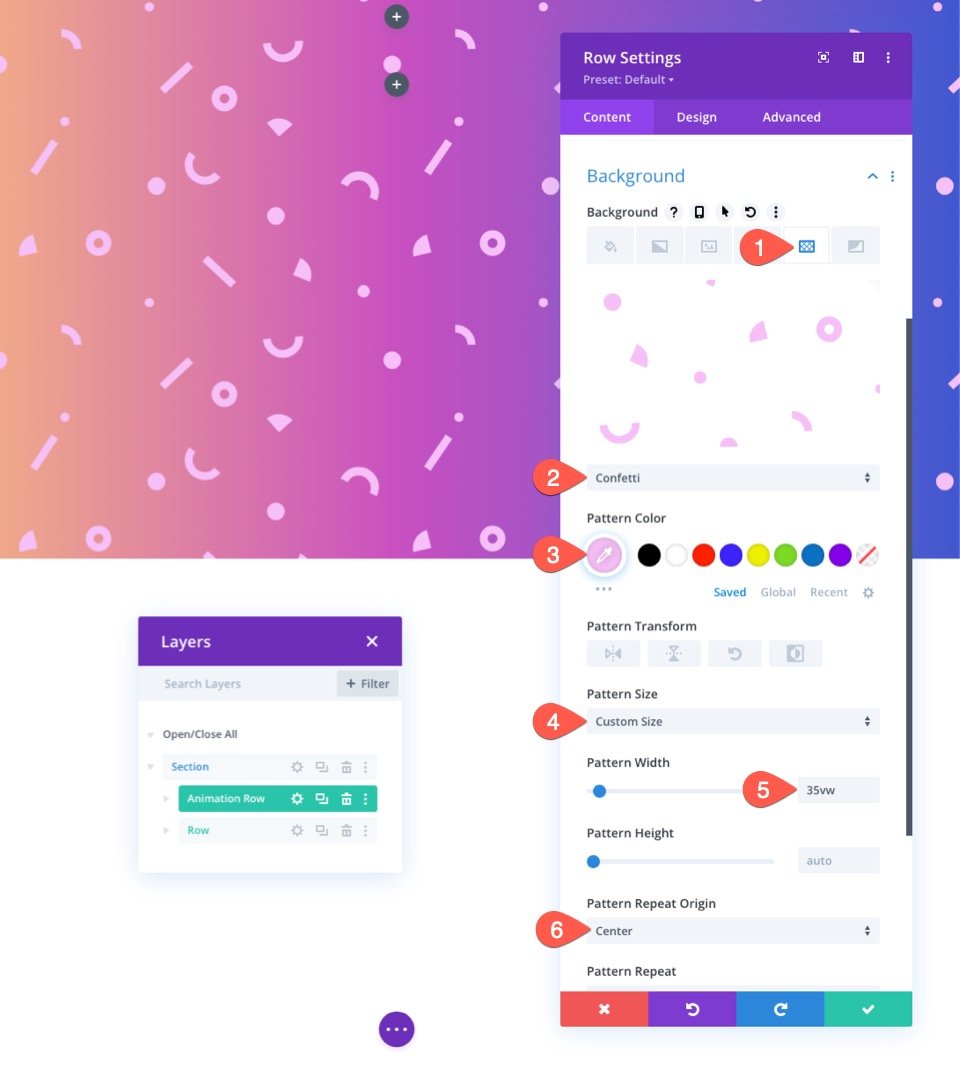
NOTE: The usage of the VW duration unit might be sure the fashion will scale with the browser, keeping the design consistent and responsive.
Add Scroll Effects to the Row
Now that our background pattern is in place, we can add scroll effects to the row.
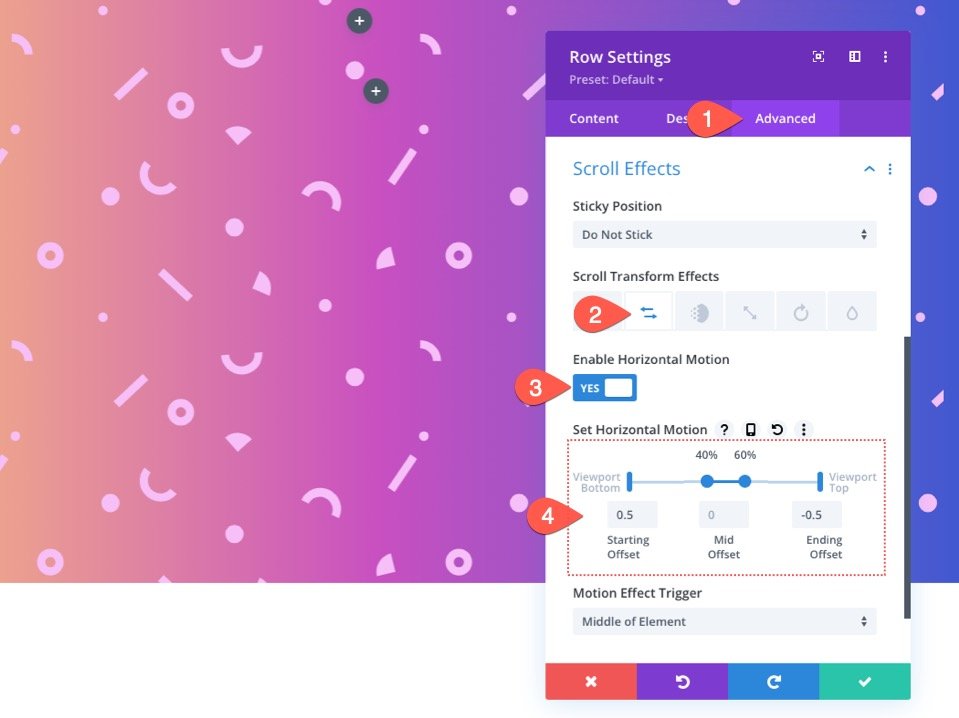
Move to the Difficult tab. Beneath the scroll effects alternatives, change the following:
Select the Horizontal Motion tab and change the following:
- Allow Horizontal Motion: YES
- Starting Offset: 0.5 (at 0%)
- Mid Offset: 0 (from 40% to 60%)
- Completing Offset: -0.5 (at 100%)
This may occasionally sometimes switch the row background pattern starting from 50px to the left and completing at 50px to the fitting.
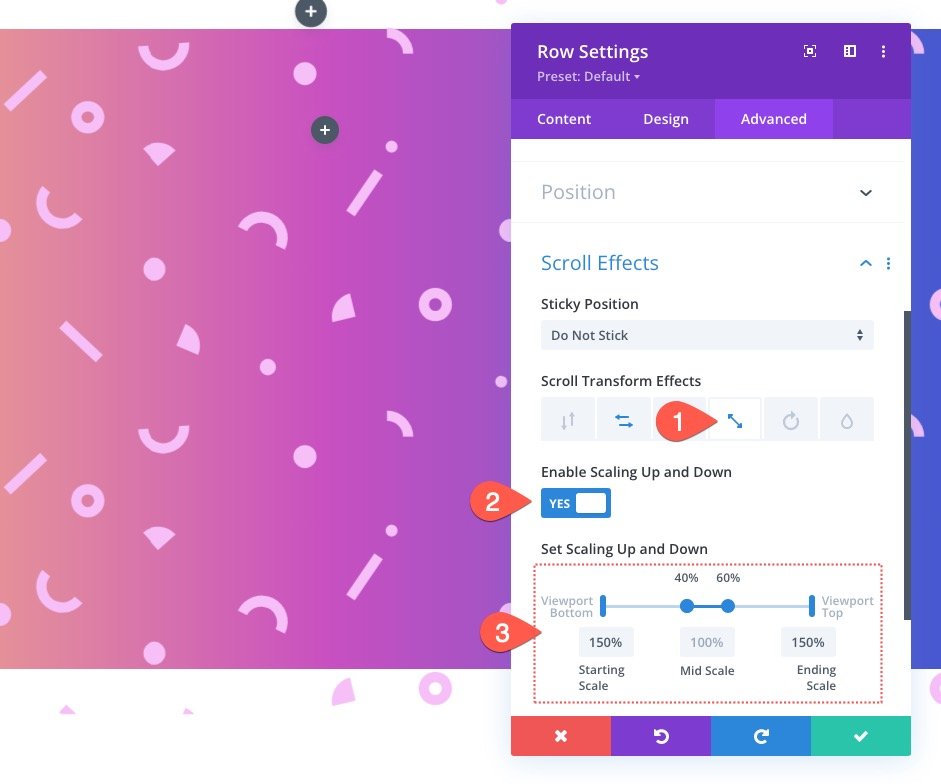
Select the Scale Up and Down tab and change the following:
- Allow Scaling Up and Down: YES
- Starting Scale: 150% (at 0%)
- Mid Scalel: 100% (from 40% to 60%)
- Completing Scale: 150% (at 100%)
This may occasionally sometimes scale the row background pattern from 150% to 100% to 150% on scroll.
Select the Rotating tab and change the following:
- Allow Rotating: YES
- Starting Rotation: 10 deg (at 0%)
- Mid Rotation: 0 deg (from 40% to 60%)
- Completing Rotation: -10 deg (at 100%)
KEY TIP: You will want to keep the rotation to a minimum differently you likelihood showing gaps where the row doesn’t extend previous the segment. A very good rule of thumb is to increase the size if you happen to’re going to increase the rotation. This may occasionally sometimes allow the row to rotate above the segment without exposing any edges.
Add a Background Mask with Scoll Effects to the Column
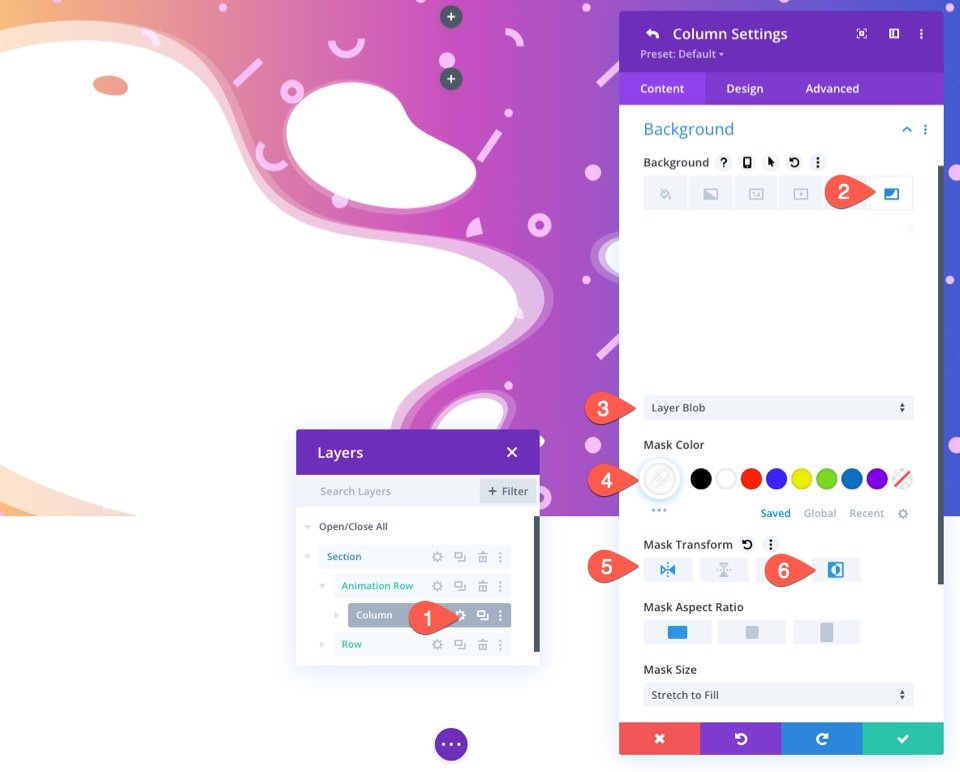
With our row finished, we’re in a position with the intention to upload a background mask with scroll effects to the column inside the equivalent row. To start out, let’s add a background mask.
To try this, open the surroundings for the column. Beneath the masks tab, change the following:
- Mask: Layer Blog
- Mask Color: #ffffff
- Mask Become: Horizontal Flip, Invert
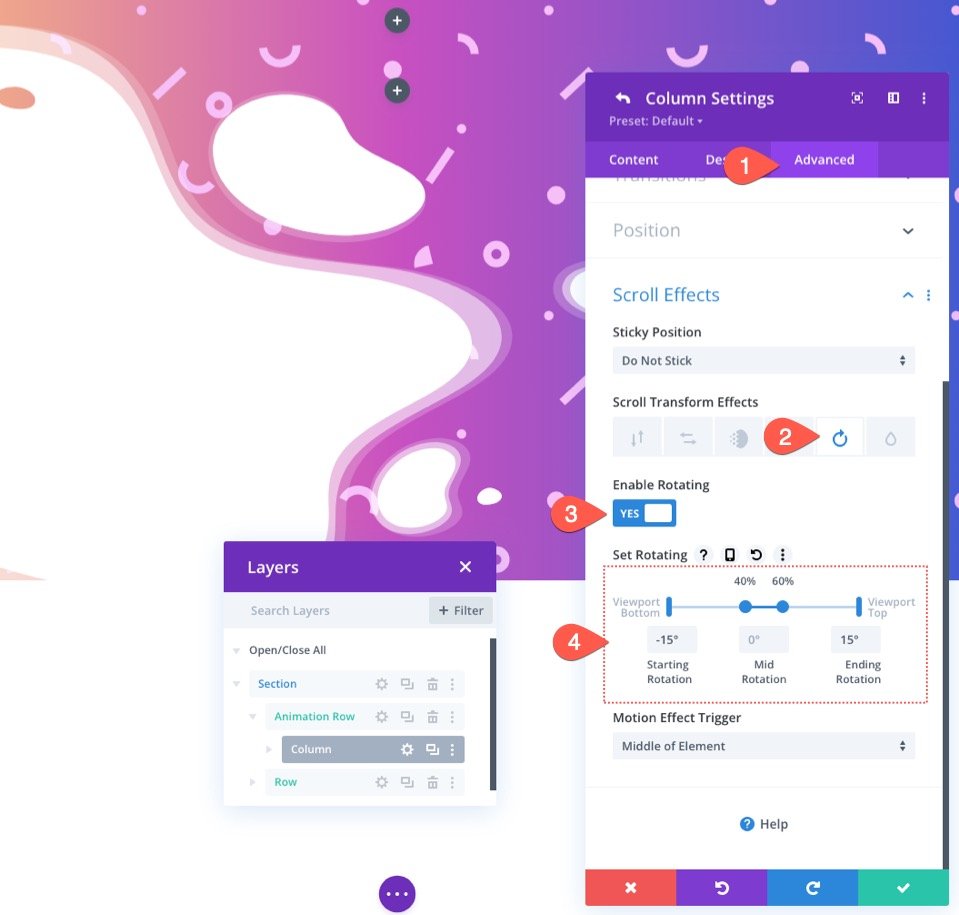
Add Scroll Effects to the Column
Now that our background mask is in place, we can add scroll effects to the column. Remember that the column already has scroll effects inherited from the mummy or father row. All we’re going to do is rotate the column in the opposite direction of the row to get further of a separation of mask and pattern at the duration of the scroll animation.
Move to the Difficult tab. Beneath the scroll effects alternatives, make a selection the Rotating tab and change the following:
- Allow Rotating: YES
- Starting Rotation: -15 deg (at 0%)
- Mid Rotation: 0 deg (from 40% to 60%)
- Completing Rotation: 15 deg (at 100%)
Cover the Overflow of the Segment
At the moment, the row will keep visible on each instance the scroll animation causes it to extend previous the segment.
To wash this up, we want to conceal the overflow of the segment. To try this, open the settings of the segment. Beneath the Difficult tab, change the visibility alternatives as follows:
- Horizontal Overflow: Hidden
- Vertical Overflow: Hidden
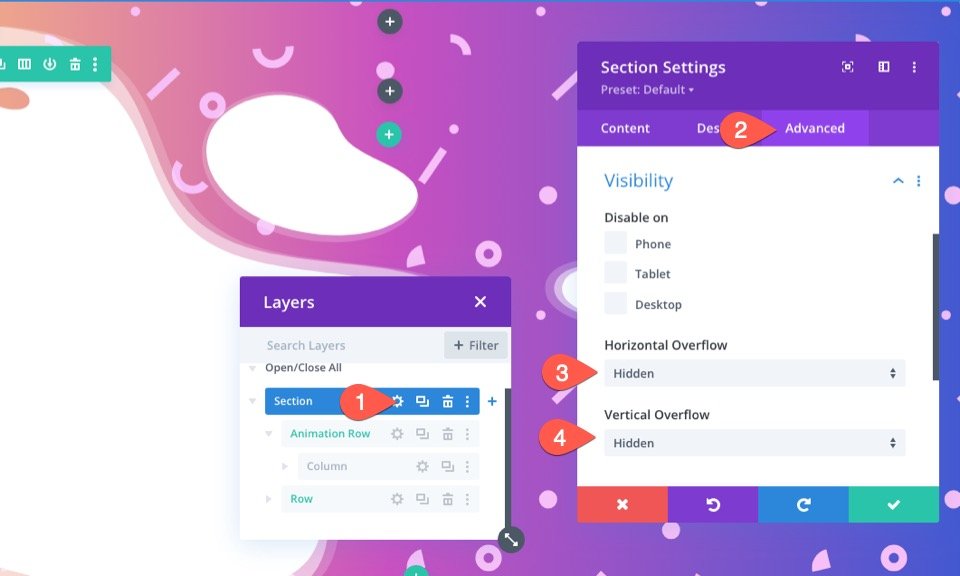
Now that looks upper.
Together with Content material subject material to the Content material subject material Row
At this stage, the background mask and pattern scroll animation is complete. All we want to do is add any content material subject material we want to the row we created earlier for content material subject material.
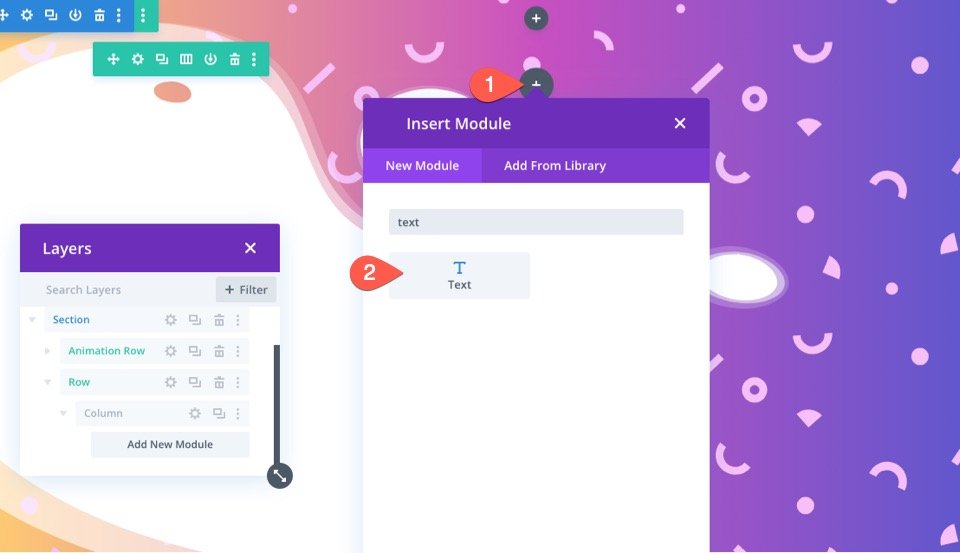
For this situation, I’ve added a mock headline so we can see what the background animation will appear to be with some static text.
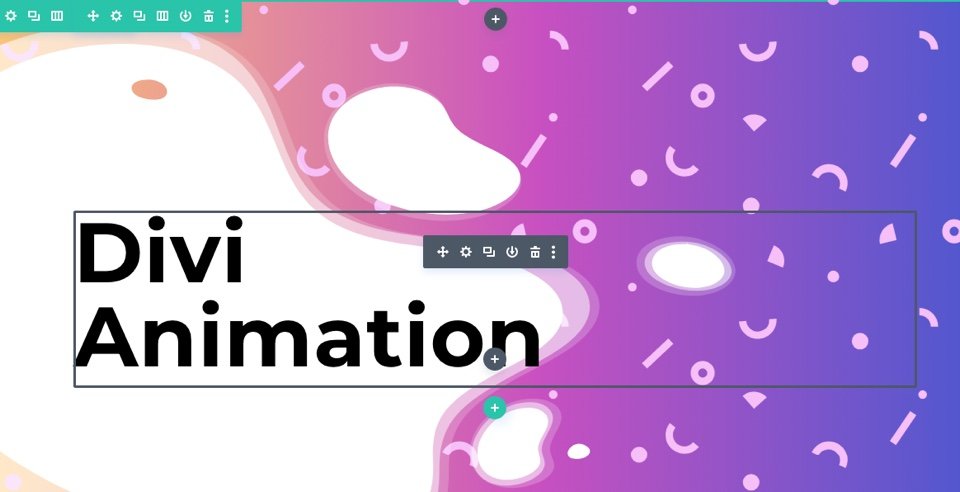
You’ll be capable of download the structure from the training above if you want to have to check out the settings used for the row and text module.
Final End result
Let’s take a look at the entire result of our design.
Business it Up!
For a definite look, you’ll be in a position to try different masks and patterns on each layer. If you want to have further inspiration for learn the way to make use of background mask and patterns, check out the ones 12 background masks and trend designs loose for obtain.
The Gradient Builder can merely create some superb gradient backgrounds for the segment as smartly. You’ll be in a position to check out our reside demos of additional background gradient design probabilities.
Final Concepts
It’s superb how easy it’s to create such surprising background designs with Divi’s background alternatives. And, together with scroll animation with Divi’s scroll effects brings new life to those designs.
For additonal, you’ll be in a position to check out our an identical tutorial on find out how to upload two layers of background designs.
Moreover, check out our function liberate posts on the gradient builder and background mask and patterns.
You might also find it helpful to clutch find out how to use mask and patterns to design a hero phase.
I sit up for being attentive to from you inside the comments.
Cheers!
.inline-code{padding: 0px 4px; colour: pink; font-family: Monaco,consolas,bitstream vera sans mono,courier new,Courier,monospace!essential} video.with-border {border-radius: 8px;box-shadow: 0 8px 60px 0 rgba(103,151,255,.11), 0 12px 90px 0 rgba(103,151,255,.11);display:block;margin: 0 auto;}
The submit The way to Animate Background Mask and Patterns on Scroll with Divi appeared first on Chic Issues Weblog.

0 Comments