
Docker is a popular open-source platform for rising, shipping, and working techniques. It encapsulates techniques and their dependencies in packing containers to put it up for sale consistency all over different environments. This consistency helps prevent issues related to dependency conflicts and “it actually works on my machine” discrepancies.
With Docker, you’ll define the necessary dependencies and extensions using Dockerfiles. This means your techniques have all the required libraries and tool in a reproducible, isolated environment.
Kinsta Utility Webhosting supplies dynamic toughen for custom designed Dockerfiles, which helps you to have better control of your application’s environment. With a Dockerfile, you’ll use just about any language—you’re no longer restricted to the languages supported by way of Nixpacks or Buildpacks.
This hands-on article walks you via how you can arrange and use PHP dependencies and extensions in Docker.
Why use Docker for setting up dependencies?
Using Docker to place in dependencies has an a variety of benefits:
- Surroundings consistency — Docker allows you to package deal deal your application, its dependencies, and its configurations proper right into a container. This implies promises that the environment through which your application runs remains consistent all over different configurations and strategies, in conjunction with development, checking out, and production environments.
- Ease of setup and dependency answer — Docker allows you to prepare your app’s environment on any machine that is helping it by way of specifying all its required dependencies and configurations. Because of this, you steer clear of compatibility issues and the difficulty of manually setting up dependencies.
- Type control and isolation — Docker packing containers encapsulate all dependencies, in conjunction with their specific permutations throughout the container. This means you’ll style control your application and its dependencies, promoting reproducibility and eliminating conflicts between different dependency permutations.
Additionally, Docker packing containers provide isolation, which helps do away with conflicts between dependencies of more than a few techniques working on the an identical device.
Organize your application on Kinsta
Setting up your application on Kinsta is modest. Consult with MyKinsta and observe the sign-up procedure. Once registered, you’ll get admission to an outstanding web site website hosting dashboard and a collection of choices designed to optimize potency and protection.
Kinsta’s Software Internet hosting helps a variety of programming languages, in conjunction with PHP, Python, Node.js, and Ruby. This intensive language toughen promises compatibility with a large number of techniques, empowering you to choose the language that best suits your challenge must haves.
For example, when you’re rising a dynamic web application with PHP, Kinsta’s optimized web site website hosting environment promises high potency and reliability to your PHP-based duties. Or, when you’re advancement a RESTful API with Node.js or a data-driven web application with Python, Kinsta provides the infrastructure and toughen necessary to your application.
To enjoy how you can deploy an application using a Dockerfile on Kinsta, use this application, a basic PHP-based authentication device that uses MariaDB to store data. This application moreover leverages a few composer techniques, in conjunction with recognize/validation for input validation and ircmaxell/password-compat for password hashing.
Get able your Docker environment
A Dockerfile is a text report containing all the directions, arranged inside the necessary order, that you want to build the required image. A basic Dockerfile for a PHP application would look like this:
FROM php:8.3-cli
COPY . /usr/src/myapp
WORKDIR /usr/src/myapp
CMD [ "php", "./your-script.php" ]
This Dockerfile creates a container environment for working a PHP script from a command-line interface (CLI). It starts by way of using the dependable PHP image with the CLI variant, ensuring that most effective the PHP runtime is included inside the container.
It then copies the contents of the local checklist — which incorporates the Dockerfile — into the /usr/src/myapp checklist throughout the container. After atmosphere the working checklist to /usr/src/myapp, it specifies the PHP script to execute, your-script.php, using the php command.
The image incorporates many pre-compiled PHP extensions. So, get began by way of checking if the extension you want is installed by way of working the php -m command.
If your required extension isn’t in the market inside the base image, Docker provides the following helper scripts to help you arrange additional extensions additional merely:
docker-php-ext-configuredocker-php-ext-installdocker-php-ext-enable
For example, the demo application for this instructional uses the MySQLi extension to engage with the MariaDB database. This extension isn’t compiled into the image by way of default, so arrange it using the following command on your Dockerfile:
RUN docker-php-ext-install mysqliTo put in writing a Dockerfile for the demo application, create a brand spanking new report named Dockerfile inside the challenge root folder. Paste the following code inside the report:
FROM php:8.3-apache

# Arrange MySQL client, server, and other dependencies
RUN apt-get exchange &&
	apt-get arrange -y
	default-mysql-client
	default-mysql-server
	git
	&& apt-get clean
	&& rm -rf /var/lib/apt/lists/*

# Arrange mysqli PHP extension for MySQL toughen
RUN docker-php-ext-install mysqli
This code specifies the reliable PHP symbol — particularly style 8.3 — with Apache installed as the ground image for the container. This image provides a preconfigured environment for working PHP techniques with Apache since the web server.
It then installs the additional dependencies the demo application requires, in conjunction with default-mysql-client and default-mysql-server, which create and engage with the MariaDB database.
In any case, the snippet above installs the mysqli PHP extension using docker-php-ext-install, which allows the demo application to determine a connection and perform operations on the MariaDB database.
Arrange dependencies with Docker
Managing PHP dependencies with Docker involves using Composer, a popular dependency manager for PHP. By means of setting up Composer in a Docker container, you’ll streamline the process of setting up, updating, and managing PHP dependencies — all while facilitating consistency and reproducibility all over different environments.
Apply the steps beneath to use Composer for dependency keep watch over throughout the demo application. Add the code in each of the steps to your Dockerfile.
- Arrange Composer inside the Docker image using the command beneath:
# Arrange Composer
COPY --from=composer/composer:latest-bin /composer /usr/bin/composer
This command copies a pre-built Composer binary report from the Docker Hub repository into your image.
--from=composer/composer:latest-binspecifies the provision image from which to copy knowledge.The
/composerpath inside the provide image incorporates the ideas to copy, while your Docker image’s/usr/bin/composerpath is the holiday spot for the ones knowledge. - Next, set the working checklist by way of working the following:
# Set working checklist WORKDIR /var/www/html - Copy the composer.json and composer.lock knowledge to the image.
# Copy composer.json and composer.lock COPY composer.json composer.lock ./ - Arrange the Composer dependencies listed in composer.json.
# Arrange Composer dependencies RUN composer arrange --no-dev --optimize-autoloader--no-devinstructs Composer to skip the development-specific dependencies.--optimize-autoloaderinstructs Composer to optimize the autoloader for upper potency.
You’ll exchange and arrange dependencies through the years by way of bettering the composer.json report as sought after, together with new dependencies, updating style constraints, and putting off dependencies which don’t seem to be required.
After making the necessary changes, you run composer arrange or composer exchange throughout the Docker container to place in or exchange dependencies accordingly.
Practice final configurations
Forward of the applying works with Docker, you’ll have to create the database and database individual, set environment variables, and replica the challenge knowledge into the Docker image.
To check out this, observe the steps beneath and replica each code snippet to your Dockerfile.
- Set the environment variables the PHP application will use to connect with the MariaDB database. You’ll alternate the
DB_USER,DB_PASSWORD, andDB_NAMEin conjunction with your preferred credentials.# Set environment variables ENV DB_HOST=localhost DB_USER=kinsta_user DB_PASSWORD=your_password_here DB_NAME=kinsta_docker_auth # Path to the Unix socket report used for connecting to the MariaDB server. DB_SOCKET=/var/run/mysqld/mysqld.sock - Copy the PHP application knowledge to the Docker image:
# Copy PHP application knowledge into the image COPY . . - Copy the startup script into the image:
# Copy the startup script
COPY scripts/get began.sh /usr/local/bin/get began.sh
This script runs when the container starts and is in command of starting the database server, creating a database, table, and individual, and starting the Apache server. You’ll create this script later.
- Make the script executable using the
chmodcommand:# Make the script executable RUN chmod +x /usr/local/bin/get began.sh - In any case, execute the script using the command beneath:
# Execute the startup script
CMD ["/usr/local/bin/start.sh"]
Now that the Dockerfile is entire, you create the startup script discussed earlier.
Create a brand spanking new report named scripts/get began.sh inside the challenge root folder and add the following code. Make sure to use the database credentials that you simply defined inside the Dockerfile.
#!/bin/bash

# Get began MariaDB server
provider mariadb get began

# Stay up for MariaDB to be completely initialized (retry up to 30 events, able 1  second between each attempt)
attempt=0
while [ $attempt -lt 30 ]; do
		if mysqladmin ping &>/dev/null; then
    		echo "MariaDB is up and working."
    		break
		else
    		echo "MariaDB is not however in the market. Retrying..."
    		attempt=$((attempt+1))
    		sleep 1
		Fi
performed

# If MariaDB failed to start out throughout the specified makes an strive, cross out with an error
if [ $attempt -eq 30 ]; then
		echo "Error: MariaDB failed to start out throughout the specified time."
		cross out 1
fi

# Set the database identify, username, and password
dbname="kinsta_docker_auth"
dbuser="kinsta_user"
dbpassword="your_password_here"

# Create the database if it does no longer exist
mysql -u root -e "CREATE DATABASE IF NOT EXISTS $dbname;"

# Create a database individual and assign privileges to the database
mysql -u root -e "CREATE USER '$dbuser'@'localhost' IDENTIFIED BY '$dbpassword';"
mysql -u root -e "GRANT ALL PRIVILEGES ON $dbname.* TO '$dbuser'@'localhost';"
mysql -u root -e "FLUSH PRIVILEGES;"

# Create shoppers table if it does no longer exist
mysql -u root -e "USE $dbname; CREATE TABLE IF NOT EXISTS shoppers (
		identity INT AUTO_INCREMENT PRIMARY KEY,
		username VARCHAR(20) UNIQUE NOT NULL,
		password_hash VARCHAR(255) NOT NULL
);"

# Get began Apache server
apache2ctl -D FOREGROUND
This Bash script starts the MariaDB server. Then, when the server is completely initialized, it creates a database, an individual with appropriate privileges, and a table throughout the database. In any case, it starts the Apache server.
Deploy on Kinsta
Forward of deploying your application to Kinsta, you’ll have to configure a few configurations for the Apache server. Kinsta’s Utility Webhosting provider has ports 80 and 443 open, on the other hand we recommend using port 8080 if your application exposes any ports.
By means of default, the Apache server listens for connections on port 80, so that you’re going to need to configure it to listen to connections on port 8080. To do so, observe the ones steps:
- Create a folder named apache-conf inside the challenge’s root folder.
- Throughout the newly created folder, create a report named apache-config.conf. Add the code beneath to configure Apache to listen to connections on port 8080:
ServerAdmin webmaster@localhost DocumentRoot /var/www/html ErrorLog ${APACHE_LOG_DIR}/error.log CustomLog ${APACHE_LOG_DIR}/get admission to.log blended - Throughout the apache-conf folder, create a brand spanking new report named apache-ports.conf and add the code beneath.
# Industry the Concentrate directive to concentrate on port 8080
Concentrate 8080

# Keep the existing configuration for port 443

	Concentrate 443


	Concentrate 443
The
Concentrate 8080directive instructs Apache to concentrate for incoming connections on port 8080. - Now, you want to change the Dockerfile to make use of this configuration to the Apache server. Throughout the Dockerfile, add the ones directions merely after the command for atmosphere the working checklist (
WORKDIR /var/www/html). The ones are in command of copying the custom designed configuration knowledge into the proper directories.# Organize Apache virtual host COPY apache-conf/apache-config.conf /and plenty of others/apache2/sites-available/000-default.conf # Organize Apache ports COPY apache-conf/apache-ports.conf /and plenty of others/apache2/ports.conf - In any case, create a .dockerignore report inside the challenge root folder. This report holds a list of folders and knowledge that are meant to no longer be copied into the Docker image. Add
providerto exclude the provider folder.
With all the configurations performed, you’ll deploy to Kinsta. Upload your challenge knowledge to your preferred Git provider (Bitbucket, GitHub, or GitLab), then observe the steps beneath.
- On your MyKinsta dashboard, choose Applications on the sidebar and click on at the Add application button.
- On the Add application internet web page, choose your Git repository and division, provide an application identify, make a choice an information middle location, and click on on Continue.
- On the Assemble environment internet web page, choose Use Dockerfile to organize container image. Provide “Dockerfile” since the Dockerfile path and a duration (“.”) since the Context. Click on on Continue.

Assemble environment segment of the Add application form. - Cross away the whole thing on the Organize your processes internet web page and click on on Continue.Realize: The database will lose data when you restart or redeploy the applying. If you want to need to care for this issue, check out Kinsta’s continual garage and practice it on this internet web page. This data gained’t overview setting up power storage.
- Check the price details on the Summary internet web page and click on on Deploy now.
- As quickly because the deployment is entire, open your application’s house to view the are living internet website online.
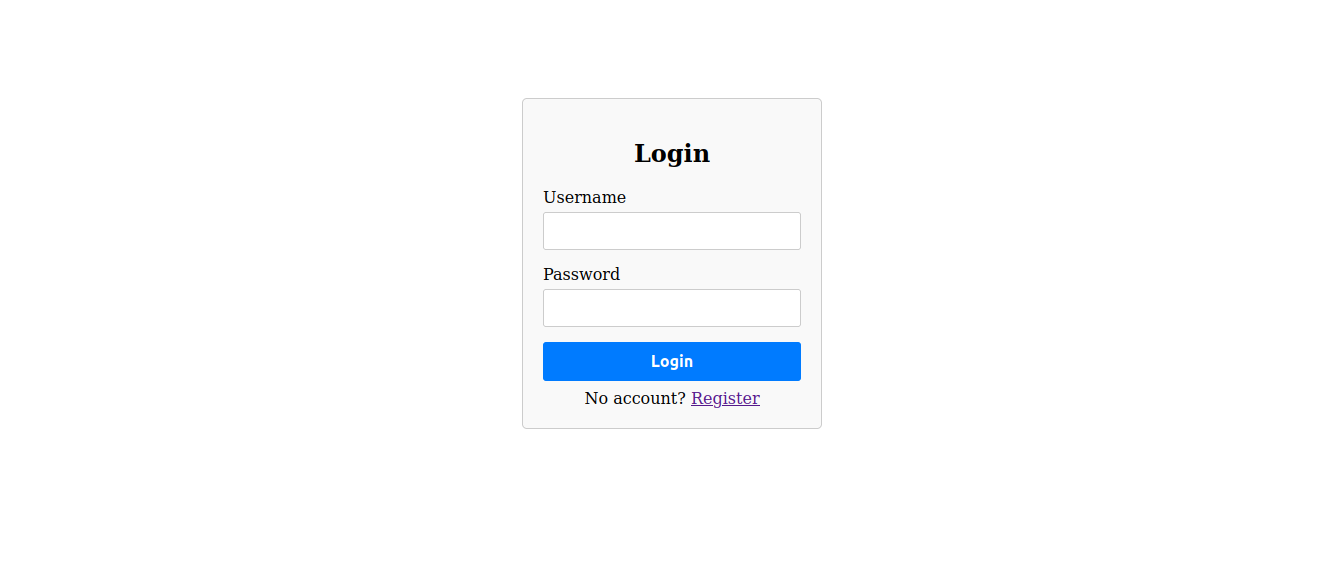
Login internet web page on the are living website online. Check in for an account, log in using your details, and try that you simply’ll get admission to the protected internet web page and that the whole thing works as expected.

The applying’s homepage once logged in.
Observe and optimize your application
Once your application is up and working on Kinsta, monitoring and optimizing its potency is essential. It promises your application can carry out simply and use assets effectively.
Optimizing your application’s potency is crucial for turning in a snappy and responsive individual enjoy.
Kinsta is always working on ways to optimize your utility’s efficiency. We offer entire monitoring equipment to help you apply somewhat numerous potency metrics, in conjunction with bandwidth, basic assemble time, CPU usage, memory consumption, group guests, and response events. You’ll view all this information by way of navigating to your app’s Analytics segment on the Kinsta dashboard.
Should you occur to bump into a topic or sudden application behavior, you’ll navigate to your Logs segment on the Kinsta dashboard. Its detailed evaluation of your application’s potency and behavior incorporates error and get admission to logs.
By means of meticulously reviewing the ones logs, you’ll achieve valuable insights into what might be causing the issue, paying homage to error messages, stack strains, or patterns of unusual behavior. This data mean you can diagnose the basis explanation why for the problem and take appropriate actions to resolve it.
Additionally, you’ll leverage potency optimization tactics within your Docker environment, paying homage to optimizing Docker photos and implementing perfect practices for application construction and code optimization.
Summary
Docker’s lightweight and portable packing containers make it easy to package deal deal and deploy techniques with all the required dependencies, regardless of the underlying infrastructure. By means of containerizing your application and its dependencies, you put it up for sale consistency all over different environments, streamline setup processes, and obtain upper versioning control.
Leveraging Docker with Kinsta enhances your application’s deployment process. Its toughen for custom designed Dockerfiles and numerous programming languages, in conjunction with PHP, promises compatibility and flexibility to your duties.
With Utility Webhosting’s infrastructure and Docker’s containerization technology, you’ll achieve streamlined deployment, scalability, and reliability to your techniques.
Have you ever ever used Docker to your challenge previous to? Do you’ve got enjoy or insights on Docker? Proportion them inside the comments beneath!
The put up Tips on how to set up PHP dependencies and extensions with Docker gave the impression first on Kinsta®.
0 Comments