
Are you in search of a way to supply Klarna expenses on your internet web site or eCommerce store?
Klarna means that you can add financing and installment plans on your internet web site. You’ll be capable of use it to supply a ‘Acquire Now, Pay Later’ risk and encourage customers to shop for products.
In this article, we’ll show you add Klarna expenses to WordPress.

What’s Klarna & Why Add It to WordPress?
Klarna is a Swedish fintech company offering online charge methods for internet web site and on-line retailer householders.
Together with Klarna on your online store can lend a hand boost conversions and average order worth. It makes it at hand for customers to shop for a dear product or sumptuous items they would really like and pay over time.
Klarna supplies 4 ways customers can purchase now and pay later for a product:
- get a divorce the purchase amount into 4 interest-free expenses
- use a debit or bank card to pay the entire amount
- gain a product now and pay in 30 days
- get financing for your gain and pay installments over 6 to 24 months.
Then again, an important issue to bear in mind is that Klarna’s charge alternatives depend on your purchaser’s location. For example, in the USA, customers can get installment and financing alternatives, then again now not the facility to pay in 30 days or completely pay using a credit card.
That discussed, let’s see the way you’ll add Klarna expenses in WordPress. We’ll show you 2 methods, along side WP Simple Pay and WooCommerce. You’ll be capable of click on at the links beneath to jump ahead on your most well liked segment.
Method 1: Add Klarna Expenses The use of WP Simple Pay
One of the most best possible techniques of together with Klarna expenses in WordPress is thru using WP Easy Pay. It’s the most efficient Stripe fee plugin for WordPress and allows you to merely acquire online expenses using Klarna, with no want to prepare a purchasing groceries cart.
For this instructional, we’ll use the WP Simple Pay Skilled plan because it accommodates the Klarna charge bureaucracy and ‘Acquire Now, Pay Later’ risk. There could also be a loose model of WP Easy Pay you’ll use.
The first thing you need to do is ready up and switch at the WP Simple Pay plugin. If you want to have lend a hand, then please see our knowledge on set up a WordPress plugin.
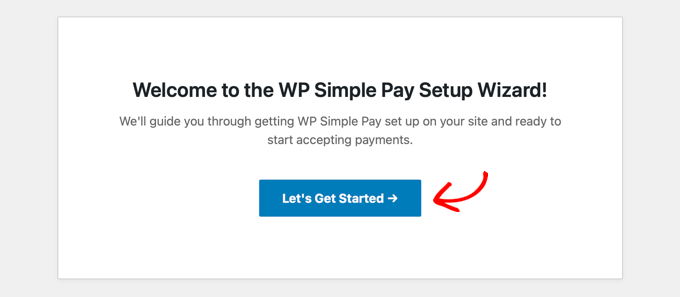
Upon activation, the plugin will liberate the setup wizard. You’ll be capable of simply click on at the ‘Let’s Get Started’ button to continue.
On the next computer screen, you’ll want to enter the license key. You’ll be capable of to search out the license key in your WP Simple Pay account area.
After that, move ahead and click on on on the ‘Activate and Continue’ button.

Next, the plugin will ask you to attach your Stripe account. Stripe is a fee gateway that allows you to accept online expenses very simply.
Simply click on at the ‘Connect with Stripe’ button.
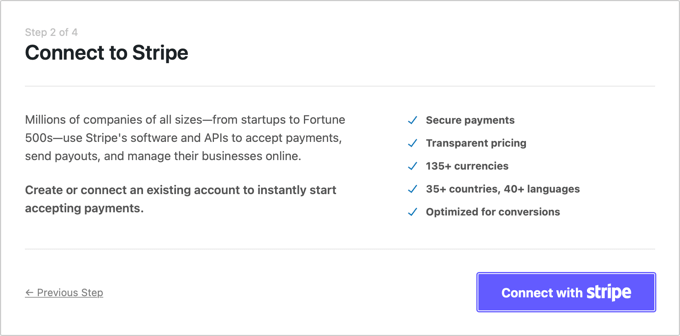
You’ll be capable of now log in on your Stripe account and follow the onscreen instructions to attach the fee gateway with WP Simple Pay.
Should you occur to don’t have a Stripe account, then you definitely’ll create one. Any individual with a legitimate trade can prepare a Stripe account. In addition to, you’ll want to have SSL encryption on your internet web page. For additonal details, please see our knowledge on get loose SSL certification for a WordPress web site.
When you’ve connected Stripe with WP Simple Pay, you’ll be redirected to the setup wizard.
In your next step, the plugin will ask you to configure emails. For example, you’ll allow alternatives to send charge receipts to customers, notify them about upcoming invoices, and get charge notifications.
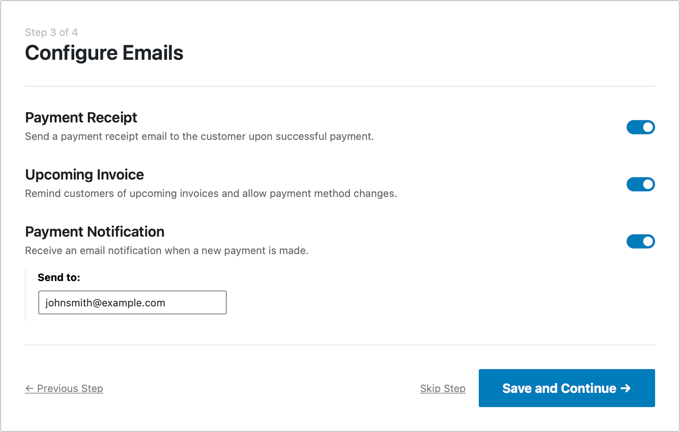
Transfer ahead and enter your electronic mail take care of throughout the ‘Send to’ field and then click on at the ‘Save and Continue’ button.
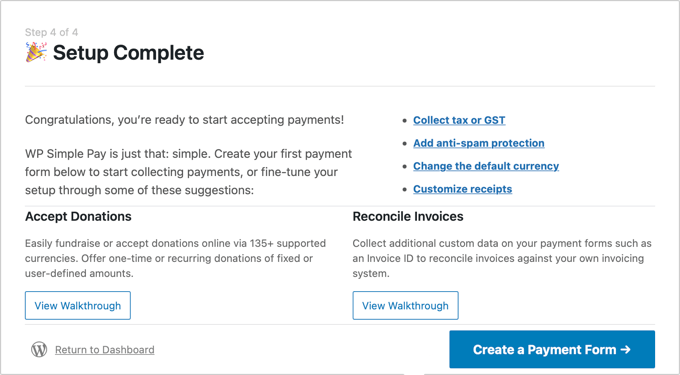
After that, you’ll see without equal step throughout the setup wizard. Transfer ahead and click on at the ‘Create a Rate Form’ button.
Create a Klarna Rate Form in WP Simple Pay
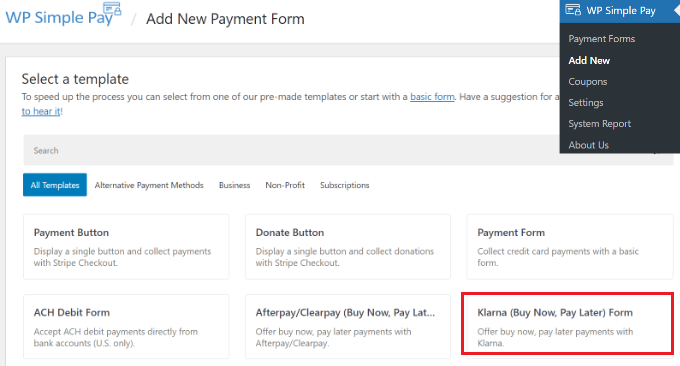
You’ll be capable of moreover create new charge bureaucracy thru going to WP Simple Pay » Add New from your WordPress dashboard.
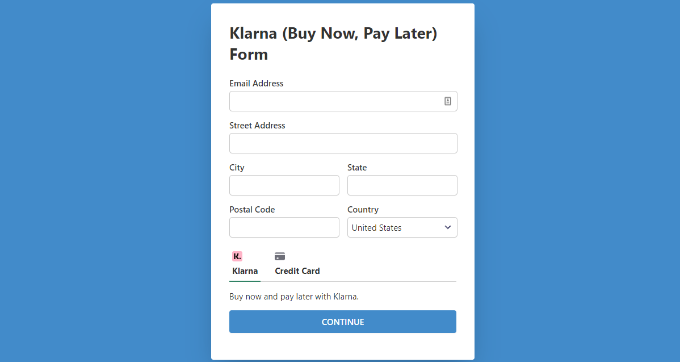
The plugin supplies a few pre-built form templates. So that you could upload Klarna, move ahead and make a choice the ‘Klarna (Acquire Now, Pay Later) Form’ template.
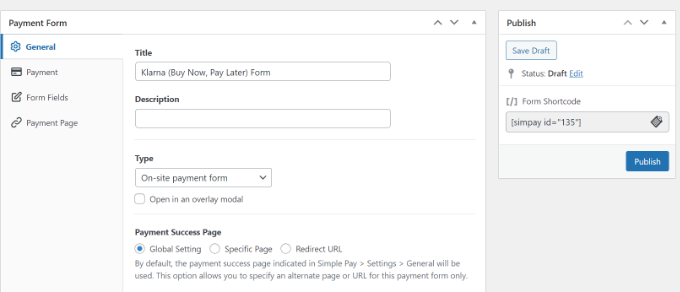
Next, you’ll customize your charge form.
For instance, beneath the ‘Elementary’ tab, you get alternatives to rename the form, add an summary, and make a choice a type kind.
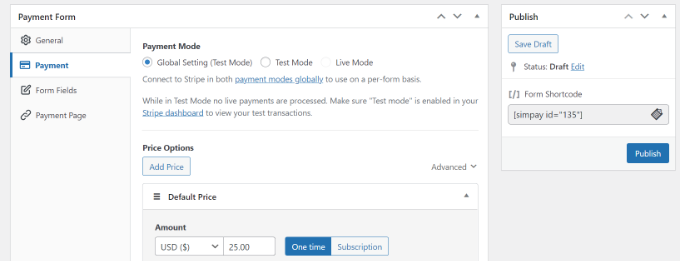
After that, you’ll switch to the ‘Rate’ tab.
Proper right here, you’ll to search out charge mode settings and price alternatives. The plugin signifies that you’ll be able to add a few prices, the cost of the product, the foreign exchange that may appear throughout the form, and whether or not or now not you’d want a one-time charge or a regimen subscription.
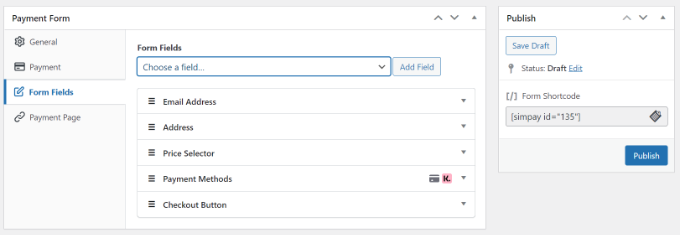
Next, you’ll scroll down and choose different fee strategies.
Ensure that the ‘Klarna’ risk is selected. You’ll be capable of moreover add further alternatives like credit card and ACH Direct Debit.

From proper right here, switch to the ‘Form Fields’ tab and choose which fields so that you could upload.
You’ll be capable of moreover alternate the order of present fields thru simply dragging and shedding them. Plus, there are further form fields so that you could upload from the dropdown menu at the top.
After improving the form fields, head to the ‘Rate Internet web page’ tab. WP Simple Pay means that you can create a loyal charge internet web page for your Klarna form.
Merely have in mind to click on at the ‘Allow a loyal charge internet web page’ checkbox.
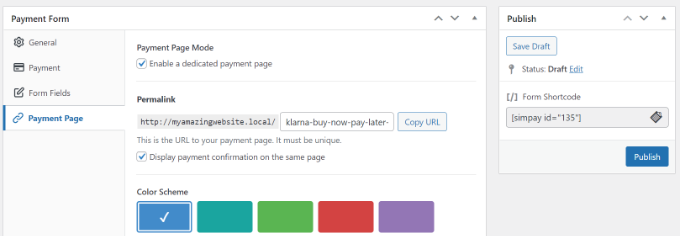
You’ll be capable of alternate the permalink for the internet web page, make a choice a color scheme, add the form title and description, add a symbol, and change the text throughout the footer.
When you’ve made the changes, move ahead and put up your Klarna form. Now, consult with the trustworthy internet web page to look the Klarna form in movement.
On the other hand, you’ll embed the cost anyplace on your internet web site using the WP Simple Pay block.
Simply edit a internet web page or add a brand spanking new one. When you’re throughout the content material editor, click on at the ‘+’ button, and then add the ‘WP Simple Pay’ block. Next, you merely make a choice your form from the dropdown menu.

After that, move ahead and put up your internet web page.
You’ll be capable of now consult with your WordPress web site to look the Klarna charge form in movement.

Method 2: Add Klarna Expenses in WooCommerce
You’ll be capable of moreover add Klarna expenses in WordPress using the WooCommerce plugin. WooCommerce is the most popular eCommerce platform on the planet, and it’s built on top of WordPress.
It has built-in charge alternatives, then again you’ll add a free Klarna Expenses extension for your online store.
Forward of you’ll use Klarna in WooCommerce, first you need to make sure that you have setup a web based retailer using WooCommerce.
After that, you’ll want to arrange and activate Klarna Bills for WooCommerce. For additonal details, please see our knowledge on set up a WordPress plugin.
Upon activation, you’ll move to WooCommerce » Settings from your WordPress dashboard and click on on on the ‘Expenses’ tab.

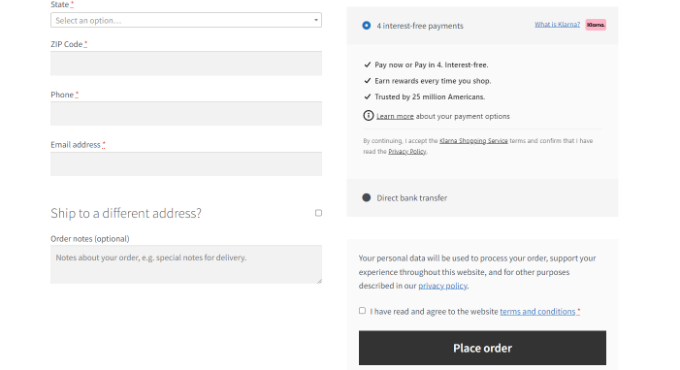
Proper right here, you’ll produce other charge alternatives presented thru WooCommerce, along side Klarna Expenses. Simply click on at the ‘Prepare’ button in front of Klarna Expenses.
Next, you’ll check out the ‘Allow Klarna Expenses’ to show at the charge supplier in WooCommerce.
Besides that, there are also alternatives for changing the title, enabling take a look at mode, showing your customers a link to what’s Klarna, and further.

When you’re completed, don’t put out of your mind to save some your changes.
Next, you’ll move on your WooCommerce store and consult with the checkout internet web page to look Klarna as a charge risk.
It’s important to note that Klarna Expenses artwork with provider supplier accounts and is best available in Australia, Austria, Belgium, Canada, Denmark, Germany, Finland, France, Italy, Netherlands, Norway, New Zealand, Sweden, Spain, Switzerland, United Kingdom, and the USA.
We hope this article helped you learn how to add Klarna expenses to WordPress. You may also wish to see our final information to WordPress search engine marketing and our novice’s knowledge on get started an e mail publication.
Should you occur to favored this article, then please subscribe to our YouTube Channel for WordPress video tutorials. You’ll be capable of moreover to search out us on Twitter and Fb.
The publish Tips on how to Upload Klarna Bills to WordPress (2 Simple Tactics) first gave the impression on WPBeginner.

0 Comments