
Kinsta is a cloud platform designed to help companies and dev teams ship and organize their web duties faster and additional effectively.
Kinsta provides builders and consumers with an API to control their WordPress websites, programs, and databases programmatically.
The Kinsta API can be used to automate tasks, retrieve data, and mix Kinsta with other systems without gaining access to MyKinsta. To get entry to the API, you want an API key. This text explains the process of creating and the usage of a Kinsta API key.
How To Create an API Key
To use Kinsta’s API, you’ll have an account with at least one WordPress site, instrument, or database in MyKinsta. You’ll moreover want to generate an API key to authenticate and get entry to your account during the API. To generate an API key:
- Transfer to your MyKinsta dashboard.
- Navigate to the API Keys internet web page (Your identify > Company settings > API Keys).
- Click on on Create API Key.
- Make a choice an expiration or set a custom designed get began date and choice of hours for the necessary factor to expire.
- Give the necessary factor a unique identify.
- Click on on Generate.

When you create an API key, copy it and store it somewhere safe, as that’s the one time you’ll be capable of see it. You’ll be capable of generate multiple API keys—they’ll be listed on the API Keys internet web page. If you want to must revoke an API key, click on on Revoke next to the one you wish to have to revoke.
How To Use Kinsta API With Your API Key
After getting the API key, you’ll be capable of engage with all Kinsta’s services and products and merchandise (WordPress web pages, Programs, and Databases) by way of the Kinsta API, paying homage to getting a checklist of databases by means of corporate ID, corporate websites, creating a WordPress site, and additional.
For example, to get a listing of company web pages for your MyKinsta, the endpoint is /web pages. The API key will serve as your authorization header; you’re going to moreover add the company ID (required parameter). Proper right here’s learn to make this API request the usage of cURL:
curl -i -X GET
  'https://api.kinsta.com/v2/web pages?company='
  -H 'Authorization: Bearer '
Exchange YOUR_API_KEY_HERE with the actual API key you generated and
COMPANY_ID_HERE at the side of your unique company ID. This will likely most likely return a JSON response of all the company web pages for your DevKinsta dashboard:
{
    "company": {
        "web pages": [
            {
                "id": "YOUR_SITE_ID",
                "name": "my-test-site",
                "display_name": "Test site",
                "status": "live",
                "site_labels": []
            }
        ]
    }
}
Another example, think you wish to have to fetch a specific site by way of ID (GET request). You’ll be capable of use the /web pages/{site_id} endpoint. {site_id} may well be modified with the unique ID of the right site you wish to have to fetch. Proper right here’s learn to make this API request the usage of NodeJS:
import fetch from 'node-fetch';

async function fetchSite() {
  const siteId = 'YOUR_SITE_ID';
  const response = look ahead to fetch(
    `https://api.kinsta.com/v2/web pages/${siteId}`,
    {
      way: 'GET',
      headers: {
        Authorization: 'Bearer
      }
    }
  );

  const data = look ahead to response.json();
  console.log(data);
}

fetchSite();There’s additional to what you’ll be capable of do with the Kinsta API. For whole details on available API endpoints and the parameters sought after, to acquire our OpenAPI specification, and to try out endpoints, see our API Reference.
Permissions
API get entry to permissions for Kinsta depend on the consumer’s position during the company, as company householders, administrators, and developers can create API keys.
For example, an API key generated by way of a developer isn’t going to have the equivalent level of get entry to as a key generated by way of a company owner or administrator. The specific permissions associated with each client place ensure that appropriate get entry to keep an eye on and protection for the Kinsta API.
How To Use Kinsta API To Assemble a Status Checker
When you create an instrument, site, or database on MyKinsta, it’s going by the use of different levels. A approach to decide the ones levels is through their fame. For example, an instrument deployed to Kinsta will have a status for when it’s deploying, successfully deployed, or failed.
The Kinsta API provides endpoints that permit you to retrieve fame information about your duties on MyKinsta. For this enterprise, you’re going to engage with 3 endpoints i.e. the /programs, /websites, and /databases, to fetch an array of all systems, web pages, and databases the usage of the JavaScript Fetch API.
After getting retrieved the tick list, you’ll be capable of use the to search out() way in JavaScript to search for a specific enterprise identify entered into the shopper interface (UI). This returns the identify and status of the enterprise if it exists.
Prerequisite
To use along side this enterprise, it’s possible you’ll need to have a fundamental working out of HTML, CSS, and JavaScript and some familiarity with React. The primary focus of this enterprise is to show the use of the Kinsta API, so the article isn’t going to delve into the details of UI creation or styling.
You’ll be capable of create a Git repository the usage of this template on GitHub. Make a choice Use this template > Create a brand spanking new repository to copy the starter code into a brand spanking new repository within your individual GitHub account, and be sure you test the sector to include all branches. When you pull to your local laptop, be sure you switch to the status-checker-ui division to use the starter data the usage of the command beneath:
git checkout status-checker-uiArrange the necessary dependencies by way of executing the npm arrange command. As quickly because the arrange is entire, you’ll be capable of free up the enterprise to your local laptop the usage of the npm run get began command. This will likely most likely open the enterprise at http://localhost:3000/.
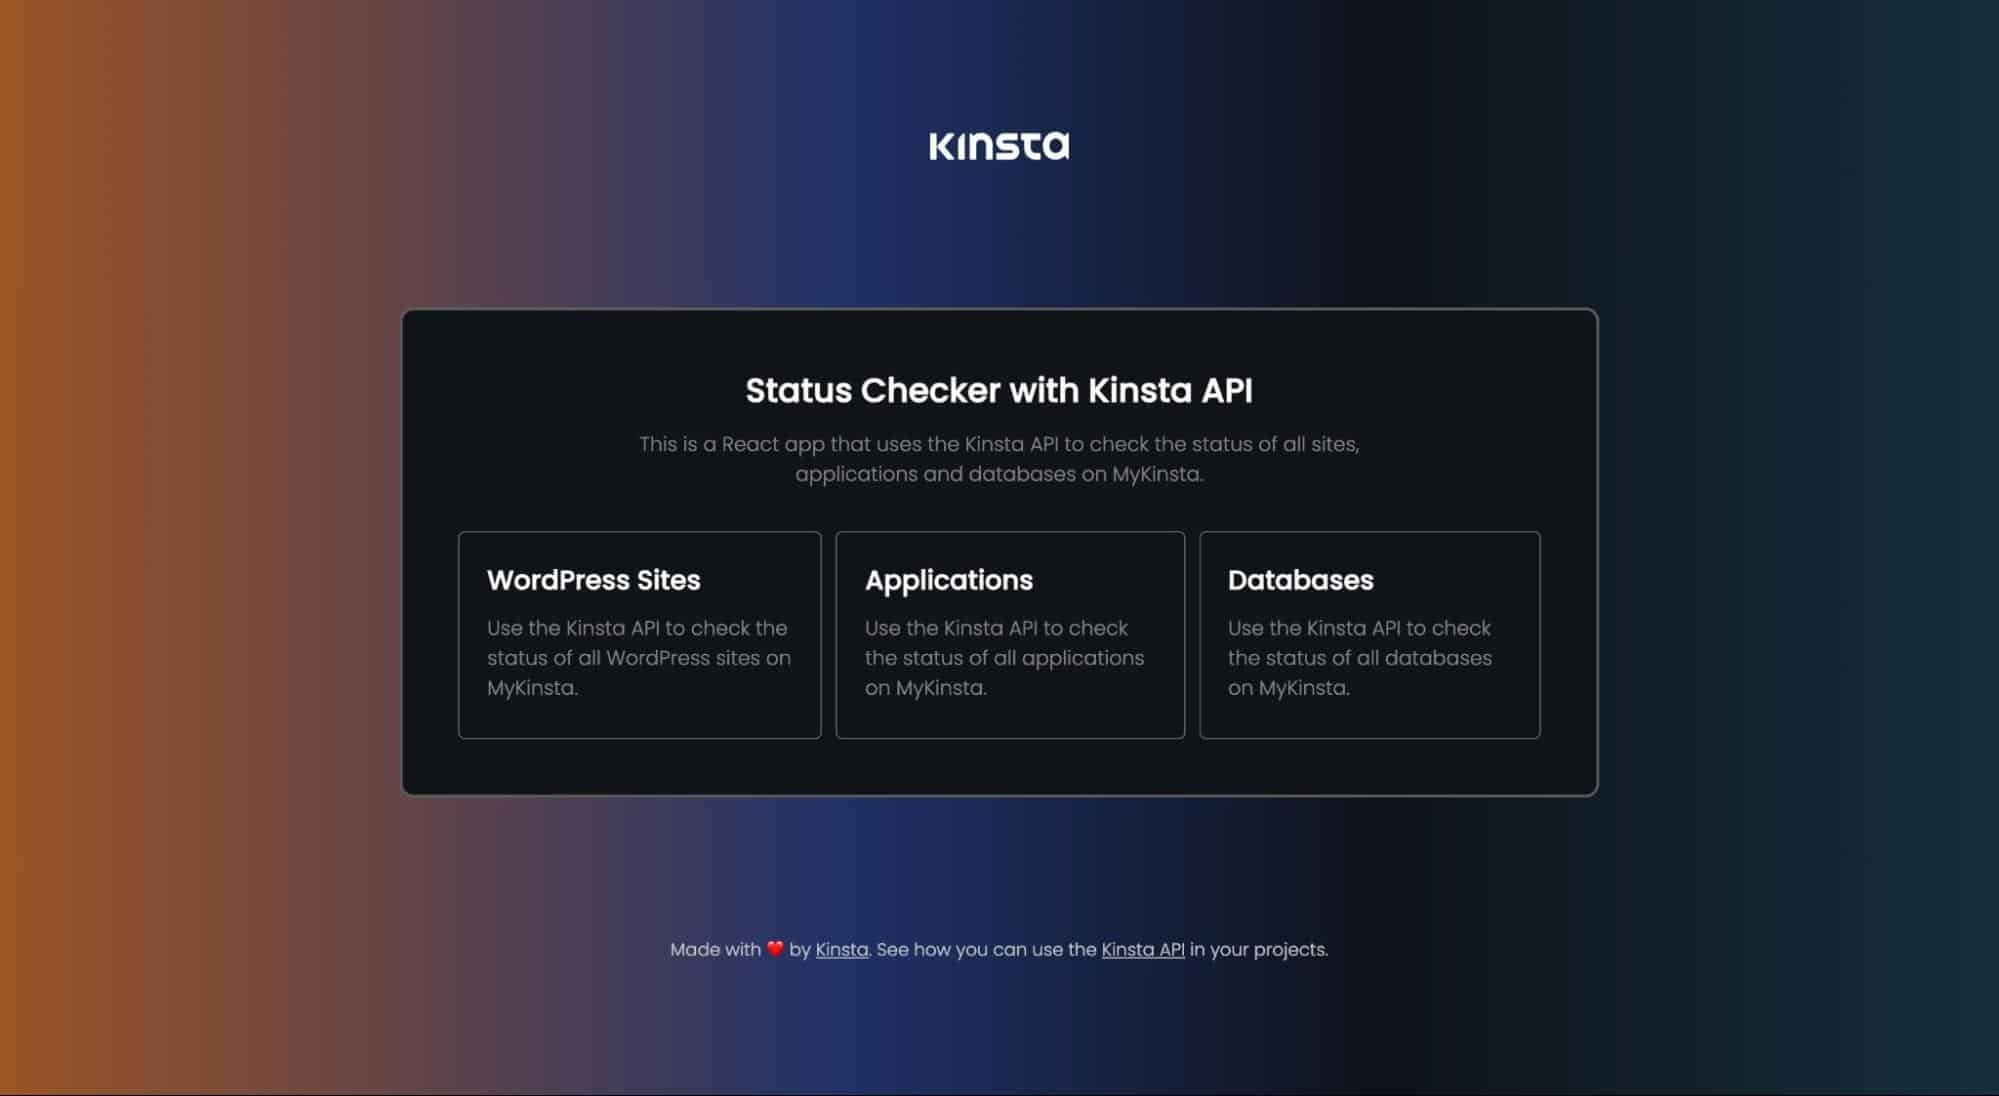
This enterprise has two number one pages: the Area and Provider pages. The Area internet web page displays a listing of services and products and merchandise provided by way of Kinsta (WordPress, instrument, and database site internet hosting). When you click on on on any of the services and products and merchandise, you’re taken to the Provider internet web page, which is designed to provide specific knowledge related to the selected provider.
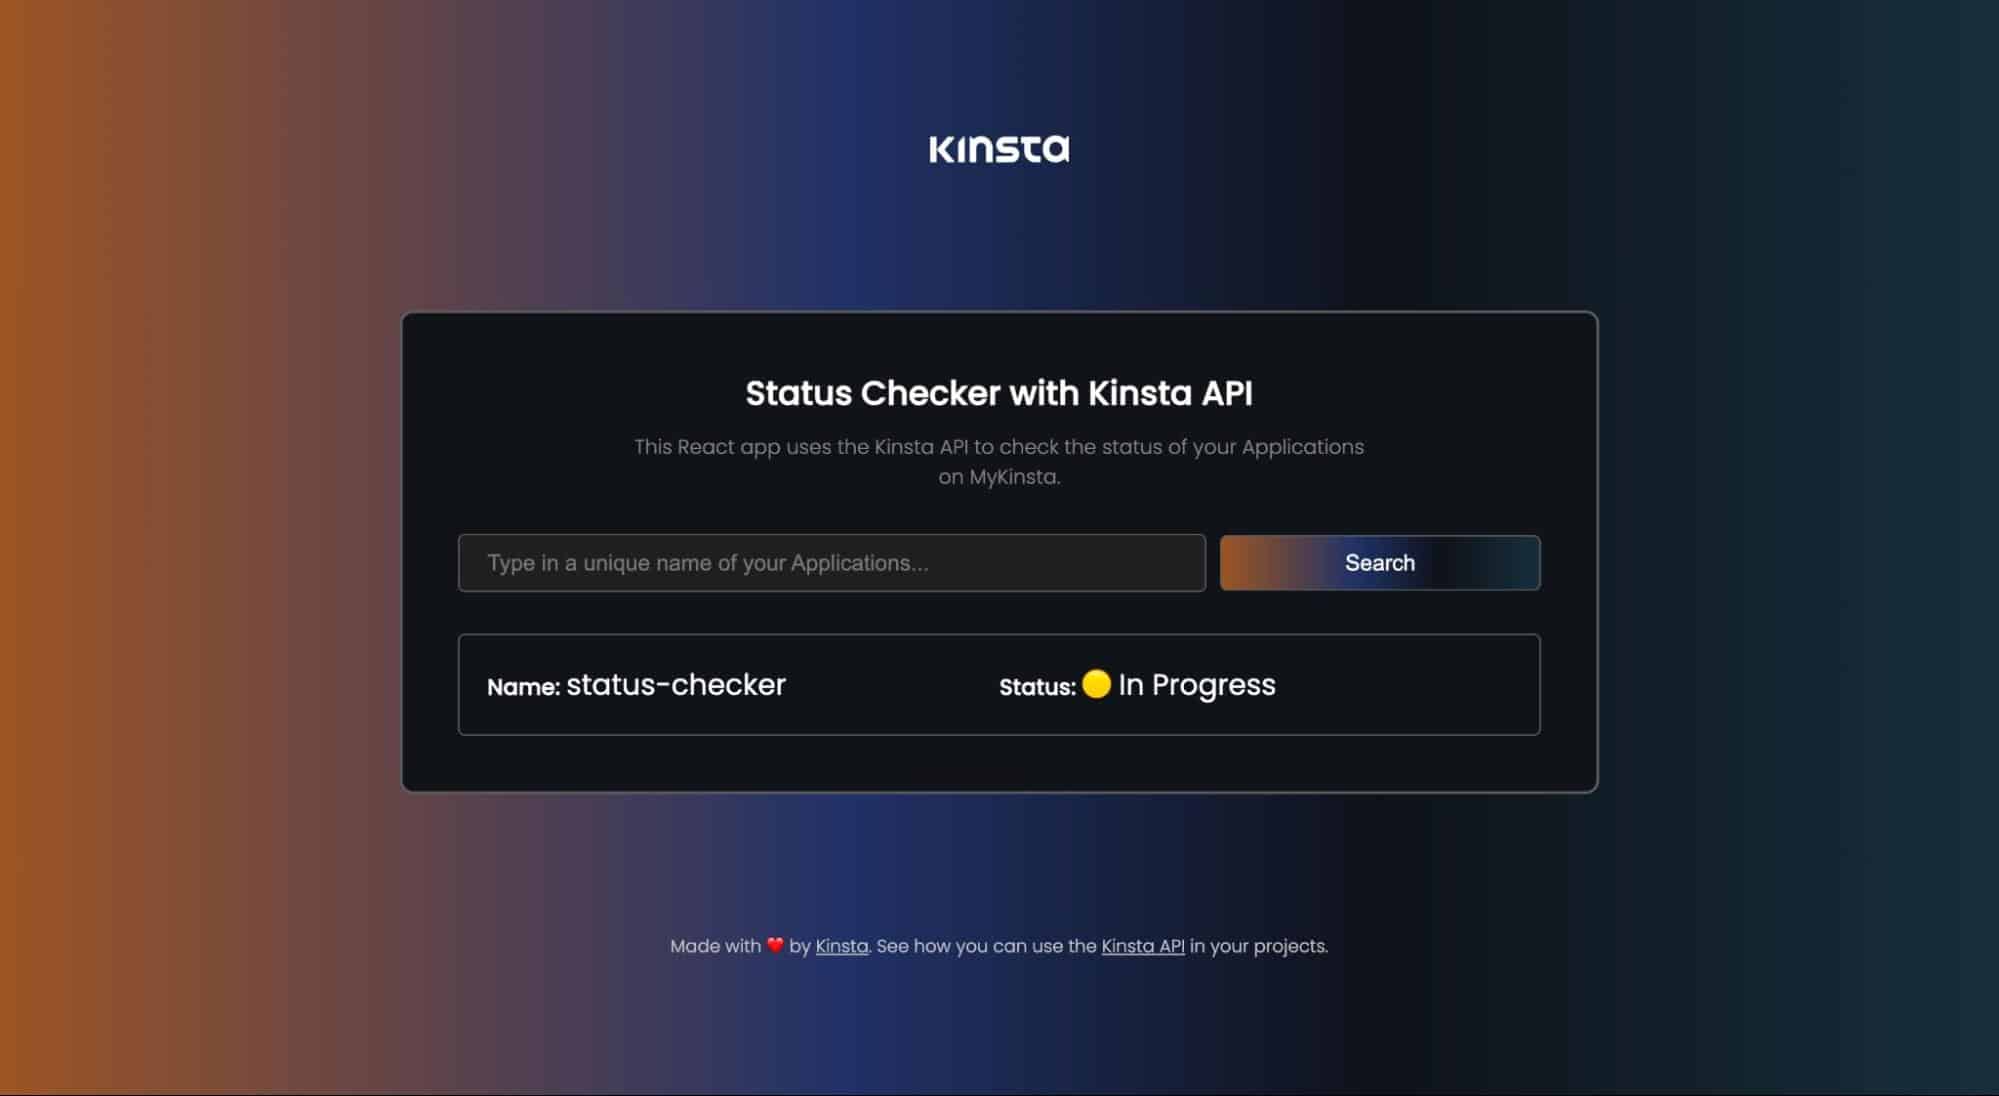
For instance, clicking the “Programs” segment will redirect you to the Provider internet web page dedicated to systems. You’ll be capable of search for any instrument within your MyKinsta account on this internet web page, so it retrieves the application fame the usage of each its unique identify or display identify.
Interacting With the Kinsta API
To implement the hunt function for this enterprise, chances are you’ll create 3 functions to take care of fetch requests for each provider (systems, web pages, and databases). Then, you’ll implement a search capacity that scans all of the array of data to check if a given search value exists.
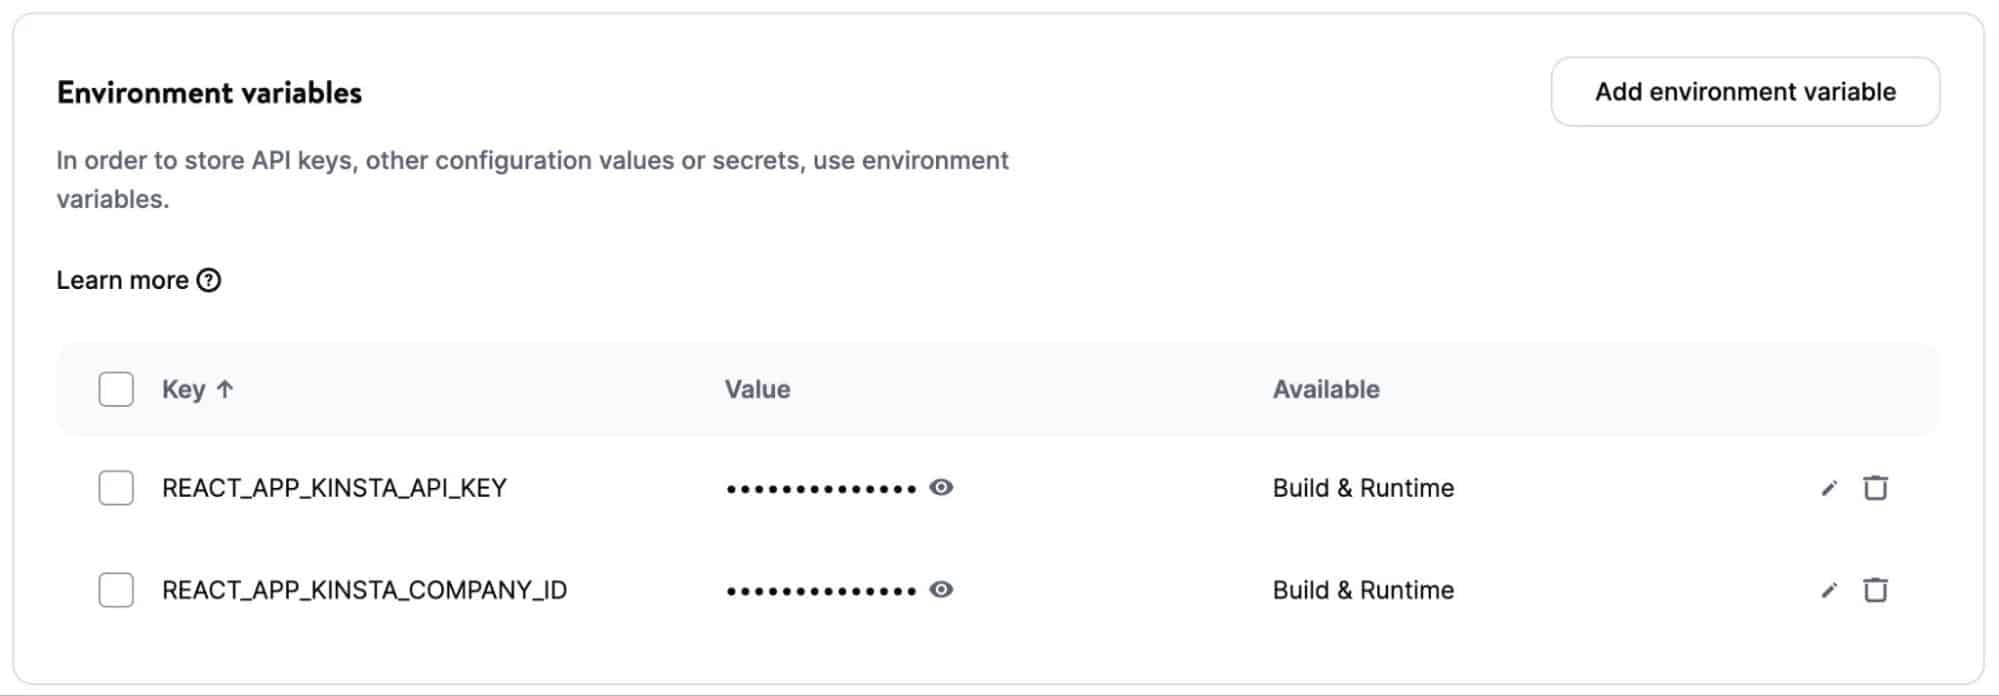
You want your company ID and API key to interact with the Kinsta API so that you’ll be capable of fetch a listing of databases, systems, and internet sites available for your MyKinsta account. After getting them, store them as atmosphere variables for your React instrument by way of creating a .env file throughout the root folder of your enterprise.
REACT_APP_KINSTA_COMPANY_ID = 'YOUR_COMPANY_ID'
REACT_APP_KINSTA_API_KEY = 'YOUR_API_KEY'
You’ll be capable of now get entry to the ones values anywhere for your enterprise the usage of process.env.THE_VARIABLE. For example, to get entry to REACT_APP_KINSTA_COMPANY_ID, you employ process.env.REACT_APP_KINSTA_COMPANY_ID.
Previous than the usage of the API, create 3 states throughout the Provider.jsx internet web page to store the fame and identify of the output generated when you search for a site, instrument, or database. The third state is to store error knowledge.
let [status, setStatus] = useState('');
let [name, setName] = useState('');
let [error, setError] = useState('');
Moreover, create a variable to store the Kinsta API URL:
const KinstaAPIUrl = 'https://api.kinsta.com/v2';When completed, attach an onClick fit with a CheckQuery() function to the form’s publish button on the Provider.jsx internet web page, so it triggers a function in keeping with the slug. That implies if the slug indicates databases, then the CheckDatabases() function may well be introduced on:
const CheckQuery = async (identify) => {
  if (slug === 'wp-site') {
      look ahead to CheckSites(identify);
  } else if (slug === 'instrument') {
      look ahead to CheckApplications(identify);
  } else if (slug === 'database') {
      look ahead to CheckDatabases(identify);
  }
}
Fetch Tick list of Internet sites With Kinsta API
To fetch a listing of internet websites available to your MyKista company account with Kinsta API, you’re going to create a function, go in a query with the company ID as its parameter, then authorize the request at the side of your API key. This request will use the /web pages endpoint of Kinsta API:
const CheckSites = async (identify) => {
  const query = new URLSearchParams({
      company: `${process.env.REACT_APP_KINSTA_COMPANY_ID}`,
  }).toString();
  const resp = look ahead to fetch(
      `${KinstaAPIUrl}/web pages?${query}`,
      {
          way: 'GET',
          headers: {
              Authorization: `Bearer ${process.env.REACT_APP_KINSTA_API_KEY}`
          }
      }
  );
}
This code above will fetch all the web pages available for your MyKinsta account, you’ll be capable of now use the to search out() approach to search if the hunt query suits any identify or display identify:
const data = look ahead to resp.json();
  let sitesData = data.company.web pages;
  let site = sitesData.to search out(site => site.identify === identify || site.display_name === identify);
With this, you’ll be capable of then create some must haves to check if it returns any value, then set the states else change the error state with a message to inform the shopper that such site does not exist:
if (site) {
    setName(site.display_name);
    if (site.fame === 'live') {
        setStatus('🟢 Running');
    } else if (site.fame === 'staging') {
        setStatus('🟡 Staging');
    } else {
        setStatus('🟡 Unknown');
    }
    setUniqueName('');
} else {
    setError('No such site found out for your account');
    setUniqueName('');
}
When you put all these together, that’s what your code to check for a particular site’s fame will appear to be:
const CheckSites = async (identify) => {
  setName('');
  setStatus('');
  setError('');
  const query = new URLSearchParams({
      company: `${process.env.REACT_APP_KINSTA_COMPANY_ID}`,
  }).toString();
  const resp = look ahead to fetch(
      `${KinstaAPIUrl}/web pages?${query}`,
      {
          way: 'GET',
          headers: {
              Authorization: `Bearer ${process.env.REACT_APP_KINSTA_API_KEY}`
          }
      }
  );
  const data = look ahead to resp.json();
  let sitesData = data.company.web pages;
  let site = sitesData.to search out(site => site.identify === identify || site.display_name === identify);
  if (site) {
      setName(site.display_name);
      if (site.fame === 'live') {
          setStatus('🟢 Running');
      } else if (site.fame === 'staging') {
          setStatus('🟡 Staging');
      } else {
          setStatus('🟡 Unknown');
      }
      setUniqueName('');
  } else {
      setError('No such site found out for your account');
      setUniqueName('');
  }
}
Phrase: All 3 states are initialized as empty strings each and every time the CheckSites() function is introduced on. This is necessary to make sure that all previous search data is wiped.
Fetch Tick list of Programs With Kinsta API
Very similar to you almost certainly did for web pages, you’ll use the /systems endpoint, go a query that incorporates the company ID, and as well as use the to search out() approach to search during the returned array:
const CheckApplications = async (identify) => {
  setName('');
  setStatus('');
  setError('');
  const query = new URLSearchParams({
      company: `${process.env.REACT_APP_KINSTA_COMPANY_ID}`,
  }).toString();
  const resp = look ahead to fetch(
      `${KinstaAPIUrl}/systems?${query}`,
      {
          way: 'GET',
          headers: {
              Authorization: `Bearer ${process.env.REACT_APP_KINSTA_API_KEY}`
          }
      }
  );
  const data = look ahead to resp.json();
  let appsData = data.company.apps.items;
  let app = appsData.to search out(app => app.unique_name === identify || app.identify === identify || app.display_name === identify);
  if (app) {
      setName(app.display_name);
      if (app.fame === 'deploymentSuccess') {
          setStatus('🟢 Running');
      } else if (app.fame === 'deploymentFailed') {
          setStatus('🔴 Failed');
      } else if (app.fame === 'deploymentPending') {
          setStatus('🟡 Pending');
      } else if (app.fame === 'deploymentInProgress') {
          setStatus('🟡 In Enlargement');
      } else {
          setStatus('🟡 Unknown');
      }
      setUniqueName('');
  } else {
      setError('No such app found out for your account');
      setUniqueName('');
  }
}
Fetch Tick list of Databases With Kinsta API
To fetch a listing of databases, you’re going to use the /databases endpoint of the Kinsta API:
const CheckDatabases = async (identify) => {
  setName('');
  setStatus('');
  setError('');
  const query = new URLSearchParams({
      company: `${process.env.REACT_APP_KINSTA_COMPANY_ID}`,
  }).toString();
  const resp = look ahead to fetch(
      `${KinstaAPIUrl}/databases?${query}`,
      {
          way: 'GET',
          headers: {
              Authorization: `Bearer ${process.env.REACT_APP_KINSTA_API_KEY}`
          }
      }
  );
  const data = look ahead to resp.json();
  let databasesData = data.company.databases.items;
  let database = databasesData.to search out(database => database.identify === identify || database.display_name === identify);
  if (database) {
      setName(database.display_name);
      if (database.fame === 'in a position') {
          setStatus('🟢 Running');
      } else if (database.fame === 'growing') {
          setStatus('🟡 Growing');
      } else {
          setStatus('🟡 Unknown');
      }
      setUniqueName('');
  } else {
      setError('No such database found out for your account');
      setUniqueName('');
  }
}
Once this is completed. You’ve gotten successfully used the Kinsta API for your React enterprise. To verify your app works properly, add the data that is returned from the ones functions, which has been set to the states we created earlier to your markup code:
{fame !== '' && (


               className="tag">Identify:
               className="value">{identify}


               className="tag">Status:
               className="value"> {fame}


)}
Moreover, add a state of affairs that may well be introduced on when there’s an error. For example, when a client searches for a enterprise that doesn’t exist in MyKinsta, the error is introduced on.
{error !== '' && (


          {error}


)}
At this degree, your enterprise will art work properly, and also you’ll be capable of test the fame of each systems, web pages, or databases available to your MyKinsta dashboard. You’ll be capable of cross-check your code with this GitHub repository.
How To Deploy Your Status Checker To Kinsta
To deploy your React enterprise to Kinsta, you want to push the enterprise to your most popular Git supplier. When your enterprise is hosted on each GitHub, GitLab, or Bitbucket, you’ll be capable of proceed to deploy to Kinsta.
To deploy your repository to Kinsta, observe the ones steps:
- Log in to or create your Kinsta account on the MyKinsta dashboard.
- On the left sidebar, click on on “Programs” and then click on on “Add provider”.
- Make a choice “Device” From the dropdown menu to deploy a React instrument to Kinsta.
- Throughout the modal that appears, choose the repository you wish to have to deploy. If you have multiple branches, you’ll be in a position to make a choice the desired division and gives a name to your instrument.
- Make a choice one of the vital available data center puts from the tick list of 25 alternatives. Kinsta will robotically stumble on the start command for your instrument.
In spite of everything, it’s not safe to push out API keys to public hosts like your Git provider. When site internet hosting, you’ll be capable of add them as atmosphere variables the usage of the equivalent variable identify and value specified throughout the .env file.
If you happen to get started up the deployment of your instrument, it’ll get started the process and most often entire within a few minutes. You’ll download a link to get entry to your instrument’s deployed type when the deployment is a luck. For example, in this case, the link is https://status-checker-1t256.kinsta.app/.
Summary
The Kinsta API key permits you to merely automate tasks, retrieve data, and mix Kinsta with other systems. Be mindful to stick your get entry to key safe.
Now you’ll be capable of leverage the power of the Kinsta API to make some reportings, time table duties, create WordPress websites, and automate various movements.
What endpoint would you’re excited by to appear added to the Kinsta API next? Let us know throughout the comments.
The publish How To Create and Use Kinsta API Get admission to Key appeared first on Kinsta®.
0 Comments