
Hugo is a static internet website generator (SSG) written in Go (aka Golang), a high-performance compiled programming language steadily used for growing backend programs and services.
Lately, Hugo is able to generating most web websites within seconds (<1 ms in keeping with internet web page). That explains why Hugo bills itself as “the field’s fastest framework for construction web websites.”
In this article, we’ll take a look at the history of Hugo, what makes it so speedy, and the way in which you’ll get began construction your individual Hugo static internet website.
What Is Hugo? And Why Is It Popular?

Hugo’s internet website homepage.
Steve Francia at the start advanced the Hugo static site generator in 2013, and Bjørn Erik Pedersen took over for the reason that mission’s lead developer in 2015. Hugo is an open-source mission, because of this that its code can also be thought to be and stepped ahead on by the use of somebody.
As a static internet website generator, Hugo takes Markdown content material subject matter data, runs them by the use of theme templates, and spits out HTML files that you just’ll merely deploy online – and it does all of this extremely quickly.
In 2021, there are dozens, if now not a lot, of static generators. Each and every static internet website generator has its appeal. Jekyll is standard among Ruby developers, and while it’s now not as speedy as other alternatives, it was once as soon as some of the first static internet website generators to look commonplace adoption. Gatsby is every other standard SSG that’s well-suited for growing statically deployable web pages which could be dynamic in capacity.
So, with such a large amount of SSGs out there, what makes Hugo stand out?

Hugo Is Fast
When it comes to raw capability, Hugo is the most productive static internet website generator on the earth. Compared to Jekyll, Hugo was once as soon as confirmed to be 35x faster by the use of Forestry. Similarly, Hugo can render a 10,000-page internet website in 10 seconds, a task that can take Gatsby over section an hour to complete. Not best is Hugo the fastest SSG in the case of assemble events, however it indubitably’s moreover immediate to position in.
Hugo ships as a self-contained executable, against this to Jekyll, Gatsby, and other SSGs requiring setting up dependencies with a bundle deal manager. This means you’ll download and use Hugo in an instant without a wish to agonize about instrument dependencies.
Templating Is Easy in Hugo
In SSG lingo, “templating” refers to the way of together with placeholders for dynamic content material subject matter insertion within an HTML internet web page. To get right to use the title of a internet web page, you’ll use the {{ .Determine }} variable. Thus, within a Hugo HTML template, it’s not unusual to look the {{ .Determine }} wrapped in H1 tags like so:
{{ .Determine }}
At assemble time, Hugo will automatically grasp the title within a content material subject matter document and insert the title between the two
Proper right here’s an example of an index.html homepage template from the most popular Ananke theme. As you’ll see, it resembles an ordinary HTML document with some additional templating code:
TBD: GRAB CODE FROM HERE: https://github.com/theNewDynamic/gohugo-theme-anankeHow you’ll Arrange Hugo
Hugo ships as a compiled executable, because of this that you just won’t wish to download and organize many dependencies merely to get started. It’s available for macOS, House home windows, and Linux.
How you’ll Arrange Hugo on macOS and Linux
The in reality helpful arrange means for macOS and Linux requires Homebrew, a bundle deal manager for arrange and updating programs. In the event you don’t already have Homebrew installed, you’ll arrange it by the use of operating the command underneath in Terminal:
/bin/bash -c "$(curl -fsSL https://raw.githubusercontent.com/Homebrew/install/HEAD/install.sh)"After Homebrew has been installed, run the command underneath to position in Hugo:
brew arrange hugoHow you’ll Arrange Hugo on House home windows
For House home windows consumers, Hugo can also be installed using each the Chocolatey or Scoop bundle deal managers. Since the instructions for setting up Chocolatey and Scoop are somewhat further complex than Homebrew, we suggest relating to their dependable documentation pages here and here.
After setting up each Chocolatey or Scoop, you’ll arrange Hugo using some of the following directions (depending in your bundle deal manager):
choco arrange hugo-extended -confirmscoop arrange hugo-extendedHow you’ll Read about that Hugo Is Installed Correctly
To be sure that Hugo has been accurately installed, run the following command:
hugo fashionThis Terminal command should output knowledge regarding the at the moment installed fashion of Hugo like so:
hugo v0.85.0+extended darwin/arm64 BuildDate=unknownHugo Directions and Configuration
Forward of we dive into creating a static internet website with Hugo, let’s get aware of its somewhat numerous CLI directions and configuration document parameters.
Hugo CLI Directions
hugo check out– runs somewhat numerous verification checkshugo config– presentations the configuration for a Hugo internet websitehugo convert– converts content material subject matter to different formatshugo deploy– deploys your internet website to a cloud providerhugo env– presentations the Hugo fashion and environment knowledgehugo gen– provides get right to use to somewhat numerous generatorshugo be in agreement– presentations information about a commandhugo import– allows you to import a internet website from every other locationhugo checklist– presentations a list of somewhat numerous content material subject matter typeshugo mod– provides get right to use to somewhat numerous module helpershugo new– allows you to create new content material subject matter in your internet websitehugo server– starts a local building serverhugo fashion– presentations the prevailing Hugo fashion
The Hugo CLI moreover has numerous flags to specify additional alternatives for some directions. To view a complete checklist of Hugo flags (there are a lot of them), we suggest using the hugo be in agreement command to turn a list of all of the available flags.
The Hugo Configuration File
Hugo’s configuration document is helping 3 formats: YAML, TOML, and JSON. Likewise, the Hugo configuration document is config.yml, config.toml, or config.json, and also you’ll to search out it throughout the root checklist of a Hugo mission.
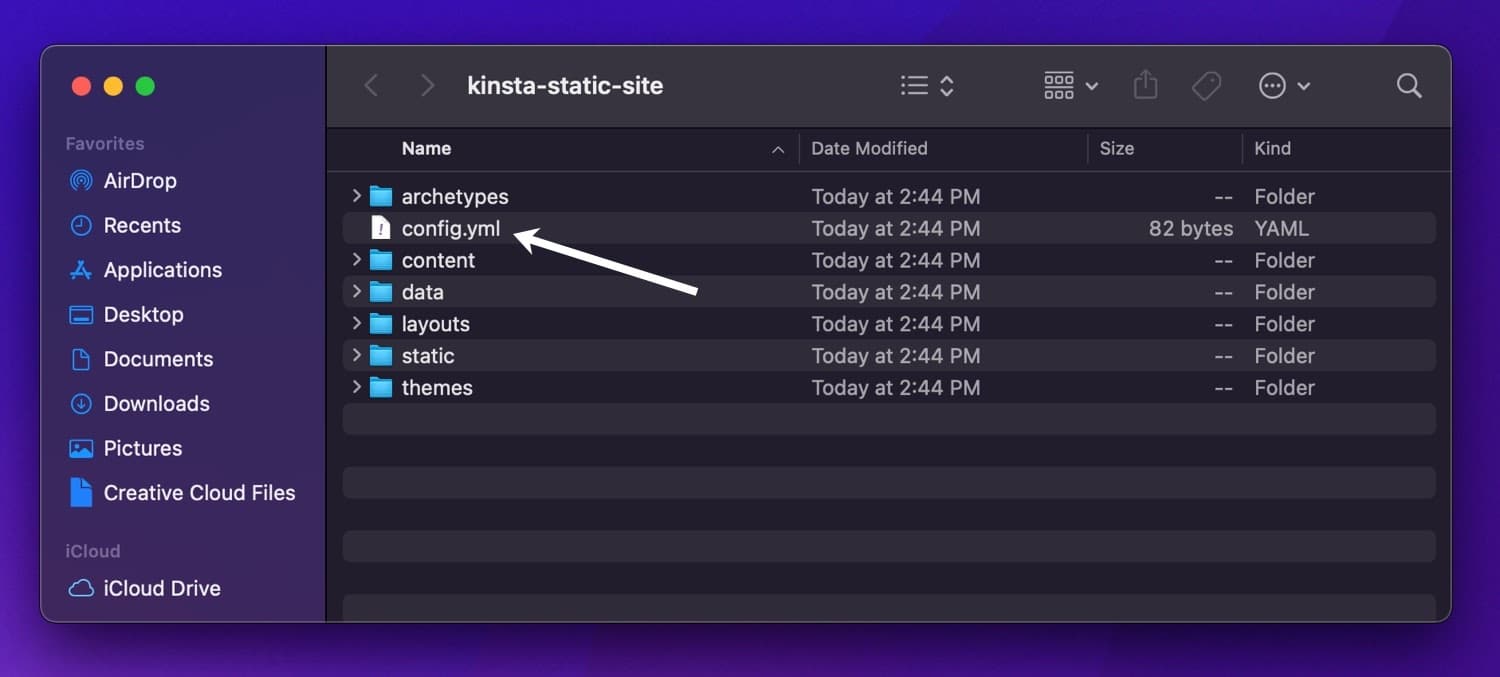
Hugo configuration document.
Proper right here’s what a regular Hugo configuration document in YAML construction looks like:
DefaultContentLanguage: en

theme:

- kinsta-static-site

contentdir: content material subject matter

layoutdir: layouts

publishdir: public

paginate: 5

title: Kinsta Static Web site

description: "It is a static internet website generated with Hugo!"

permalinks:

put up: :slug/

internet web page: :slug/

tags: "tag/:slug/"

writer: "writer/:slug/"
In the event you’ve used WordPress or another CMS previous than, some of the necessary configuration alternatives may look familiar to you. For example, kinsta-static-site is the establish of the internet website’s theme, Kinsta Static Web site is the SEO meta title, and paginate (the collection of posts in keeping with internet web page) is 5.
Hugo has dozens of configuration alternatives, all of which you’ll uncover throughout the official Hugo documentation. If you want to need to make any international configuration industry while making a Hugo internet website, likelihood is that you’ll need to edit this configuration document.
How you’ll Create a Hugo Web site
Now that we’ve long gone by the use of recommendations on how you can arrange and use the Hugo CLI and the basics of the Hugo configuration document, let’s create a brand spanking new Hugo internet website.
To create a Hugo internet website, use the command underneath (be happy to change my-hugo-site to at least one factor else in the event you’d like):
hugo new internet website my-hugo-site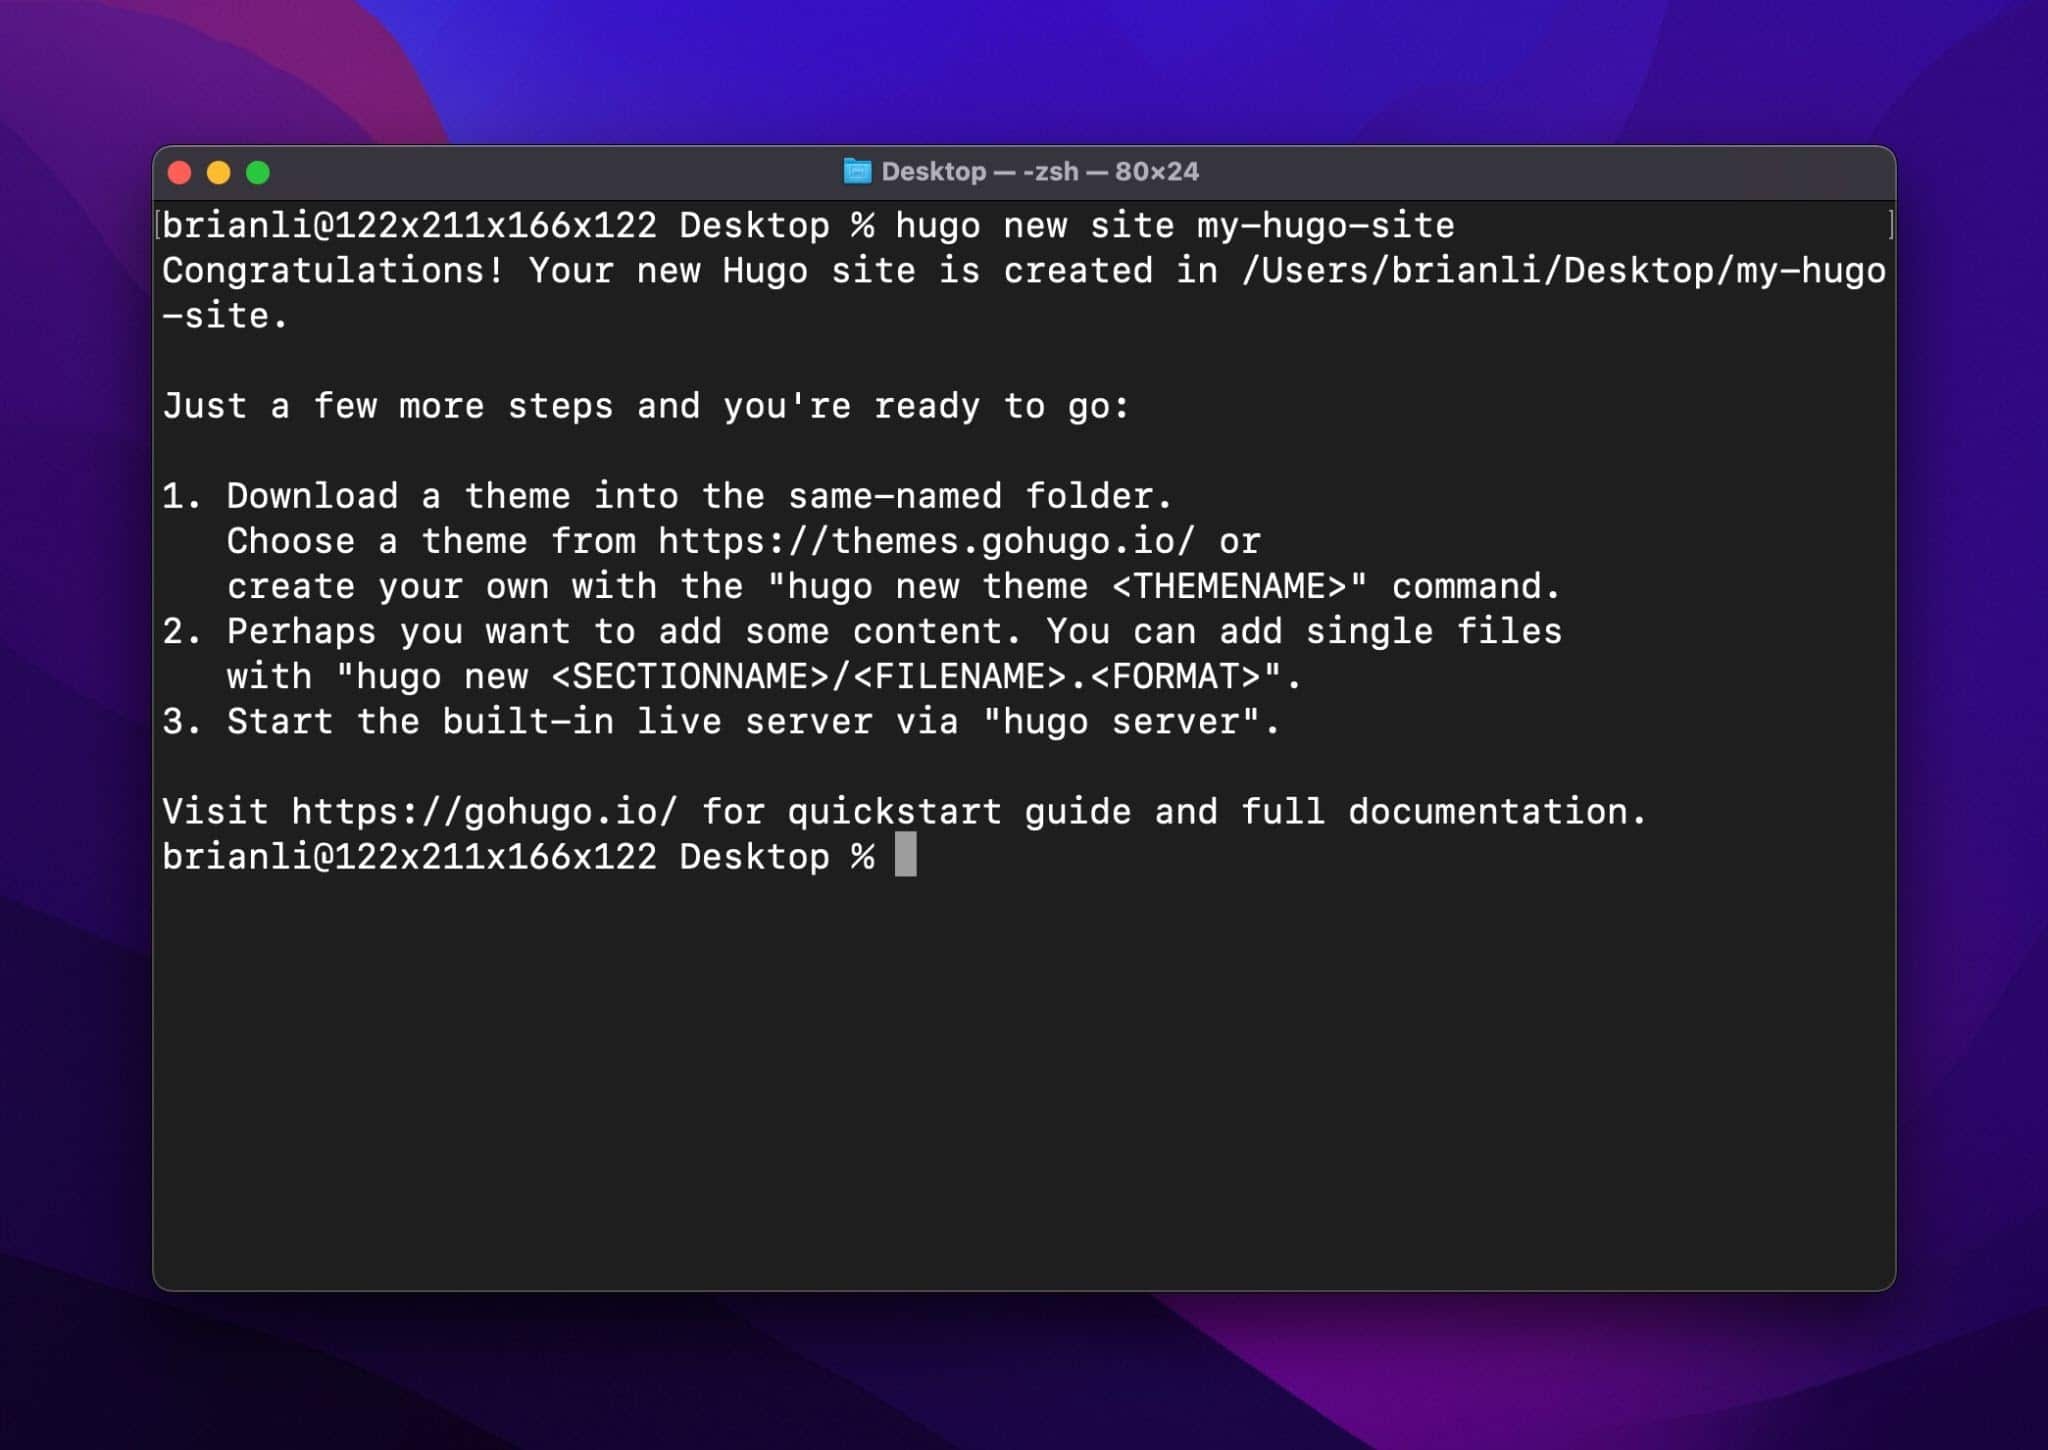
Create a brand spanking new Hugo internet website.
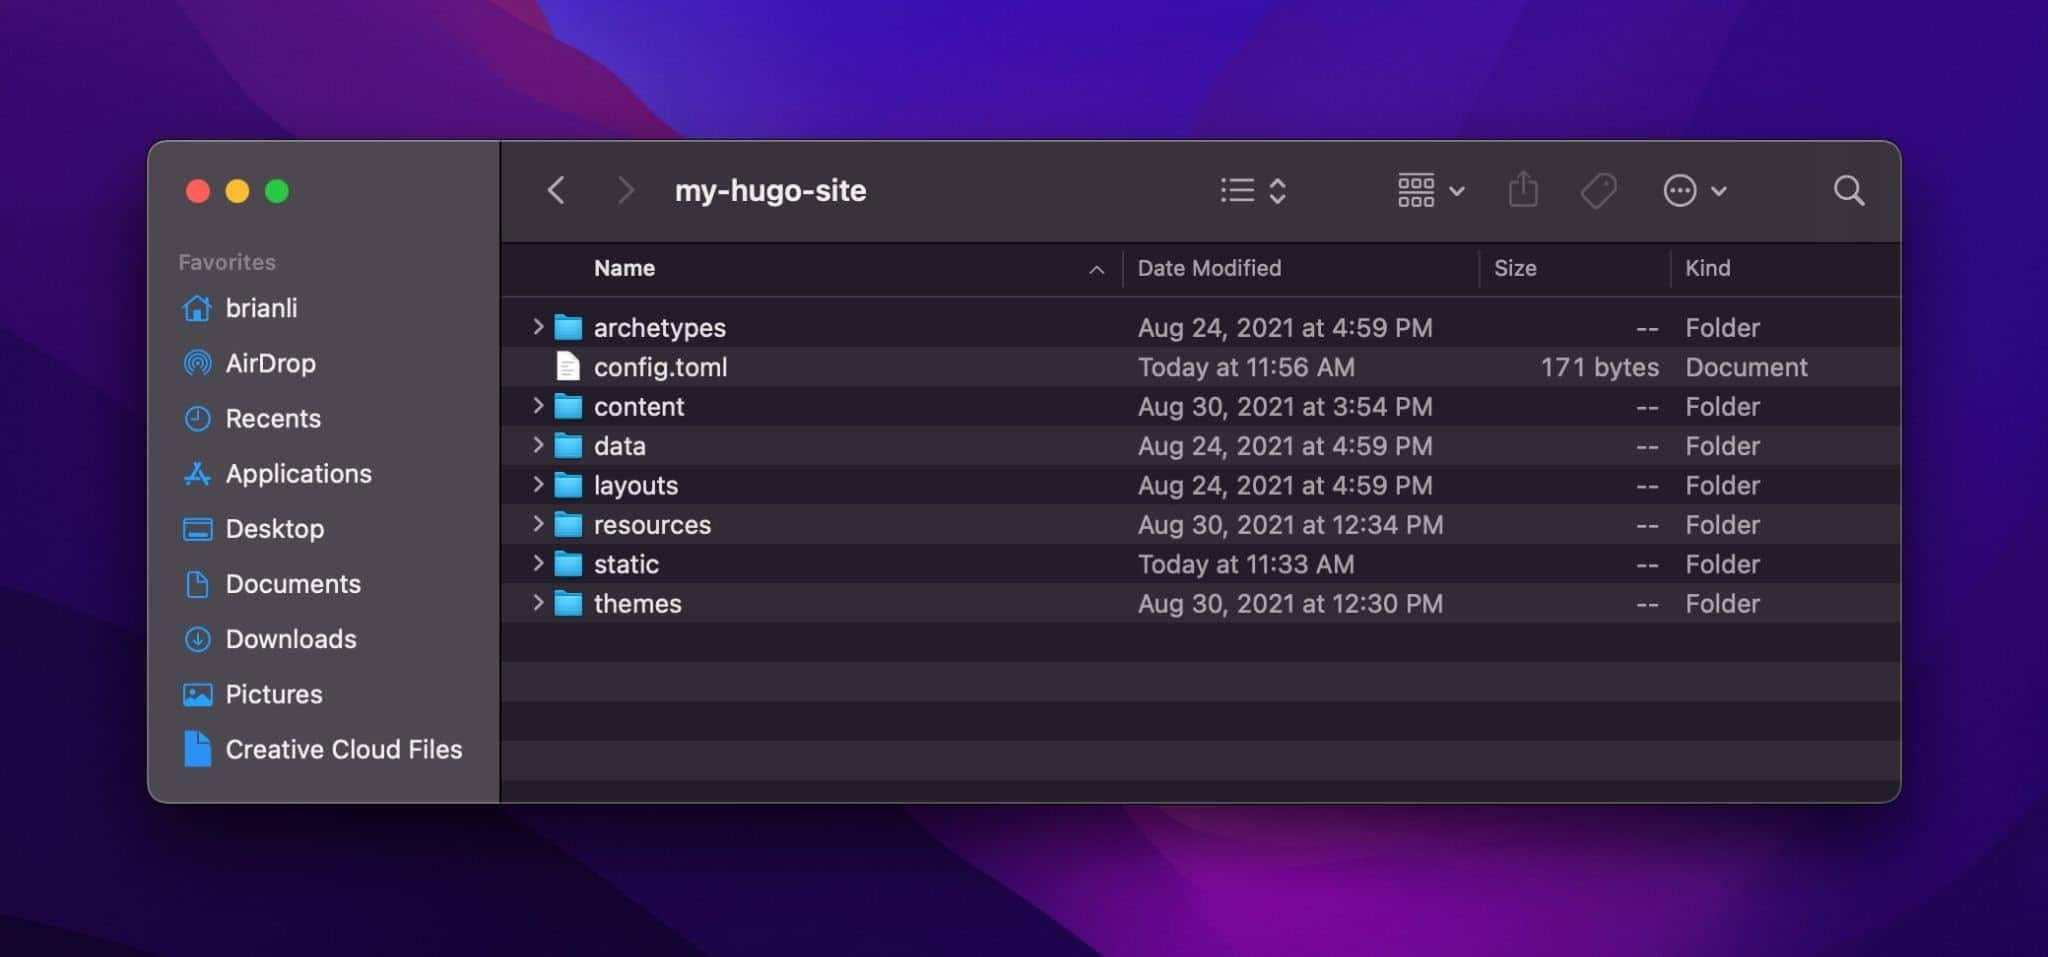
Next, navigate to the internet website folder, and in addition you should see the following data and folders: config.toml document, archetypes folder, content material subject matter folder, layouts folder, matter issues folder, wisdom folder, and static folder. Let’s quickly transfer over what each of the ones data and folders is.
Hugo’s config.toml File
As we highlighted above, Hugo’s primary configuration document comprises international settings in your internet website.
Hugo’s Archetypes Folder
The archetypes folder is where you store content material subject matter templates formatted in Markdown. Archetypes are specifically useful if your internet website has a few content material subject matter formats. With Hugo archetypes, you’ll create a template for each content material subject matter sort in your internet website. This permits you to pre-populate generated Markdown data with all of the necessary configuration settings.
For example, if when you have a podcast content material subject matter sort for appearing your podcast episodes, you’ll create a brand spanking new archetype in archetypes/podcast.md with the contents underneath:
---

title: "{ title }"

date: {{ .Date }}

description: ""

season:

episode:

draft: true

---
With this podcast archetype, you’ll then use the command underneath to create a brand spanking new put up:
hugo new podcast/s1e6_interview-with-kinsta-ceo.mdNow, in the event you open the newly created put up, you should see this:
---

title: "Interview with Kinsta CEO"

date: 2021-05-20T13:00:00+09:00

description: ""

Season: 1

episode: 6

draft: true

---
Without archetypes, you would have to manually specify the doorway matter parameters for each new put up you create. While archetypes may seem complex and useless first of all, they can in the end finally end up saving you a lot of time in the end.
Hugo’s Content material subject matter Folder
The content material subject matter folder is where your exact put up content material subject matter goes. Hugo is helping each and every Markdown and HTML formats, with Markdown being the additional standard chance as a result of its ease of use. Together with being the full storage space for posts, you’ll use the content material subject matter folder to prepare put up content material subject matter further.
Hugo treats each top-level checklist throughout the content material subject matter folder as a content material subject matter section. Content material subject matter sections in Hugo are similar to custom post types in WordPress. For example, if your internet website has posts, pages, and podcasts, your content material subject matter folder would have posts, pages, and podcasts directories where content material subject matter data for the ones different put up types would reside.
Hugo’s Layouts Folder
The layouts folder comprises HTML data that define the development of your internet website. In some instances, you may even see a Hugo internet website with no layouts folder because it doesn’t should be throughout the mission’s root checklist and can reside within a theme folder as an alternative.
Similar to WordPress matter issues which use PHP for templating, Hugo templates surround base HTML with additional dynamic templating powered by the use of Golang’s built-in html/template and text/template libraries. The somewhat numerous HTML template data required for generating your internet website’s HTML markup are throughout the layouts folder.
Hugo’s Problems Folder
For web pages that want a further self-contained means of storing template data and assets, Hugo is helping a matter issues folder. Hugo matter issues are similar to WordPress themes in that they’re stored in a subject matter issues checklist and contain all of the necessary templates for a theme to function.
While some Hugo consumers need maintaining theme-related data throughout the mission’s root checklist, storing the ones data within the matter issues folder we could in for more straightforward keep watch over and sharing.
Hugo Knowledge Folder
Hugo’s wisdom folder is where you’ll store supplemental wisdom (in JSON, YAML, or TOML construction) that is needed to generate your internet website’s pages. Knowledge data are in reality helpful for higher wisdom gadgets that may be cumbersome to store straight away in a content material subject matter or template document.
For example, in the event you wanted to create a list of USD inflation fees from 1960 to 2020, it’ll take spherical 80 lines to represent the guidelines (one line for each year). As an alternative of striking this data straight away in a content material subject matter or template document, you’ll create it throughout the wisdom folder and populate it with the necessary knowledge.
Hugo Static Folder
Hugo’s static folder is where you store static assets that don’t require any more processing. The static folder is typically where Hugo consumers store pictures, fonts, DNS verification data, and additional. When a Hugo internet website is generated and saved to a folder for easy deployment, all data throughout the static folder are copied as-is.
In the event you’re wondering why we didn’t indicate JavaScript or CSS data, it’s because of they’re steadily dynamically processed by the use of pipelines right through internet website building. In Hugo, JavaScript and CSS data are frequently stored within the theme folder because of they require additional processing.
How you’ll Add a Theme to a Hugo Web site
Downloading and setting up a premade theme is a great way to get started with Hugo. Hugo matter issues are to be had all shapes and sizes, and quite a few of them are available without spending a dime on the dependable Hugo theme repository. Let’s transfer ahead and arrange the most popular Hyde theme on our Hugo internet website.
First, navigate for your mission’s theme folder in Terminal:
cd /matter issues/Next, use Git to clone the Hyde theme into your mission’s matter issues checklist.
git clone https://github.com/spf13/hyde.gitNext, add the following line for your config.toml document to show at the Hyde theme:
theme = "hyde"At this point, the Hyde theme is installed and configured. The next step is to start out out up Hugo’s built-in building webserver to view the internet website in your web browser.
How you’ll Preview a Hugo Web site
Hugo ships with an integrated webserver for building purposes, because of this that you just don’t need to arrange a third-party webserver like Nginx or Apache merely to view your site locally.
To start out Hugo’s webserver, run the command underneath throughout the root checklist of your mission:
hugo server -DHugo will then assemble your internet website’s pages and make them available at http://localhost:1313/:
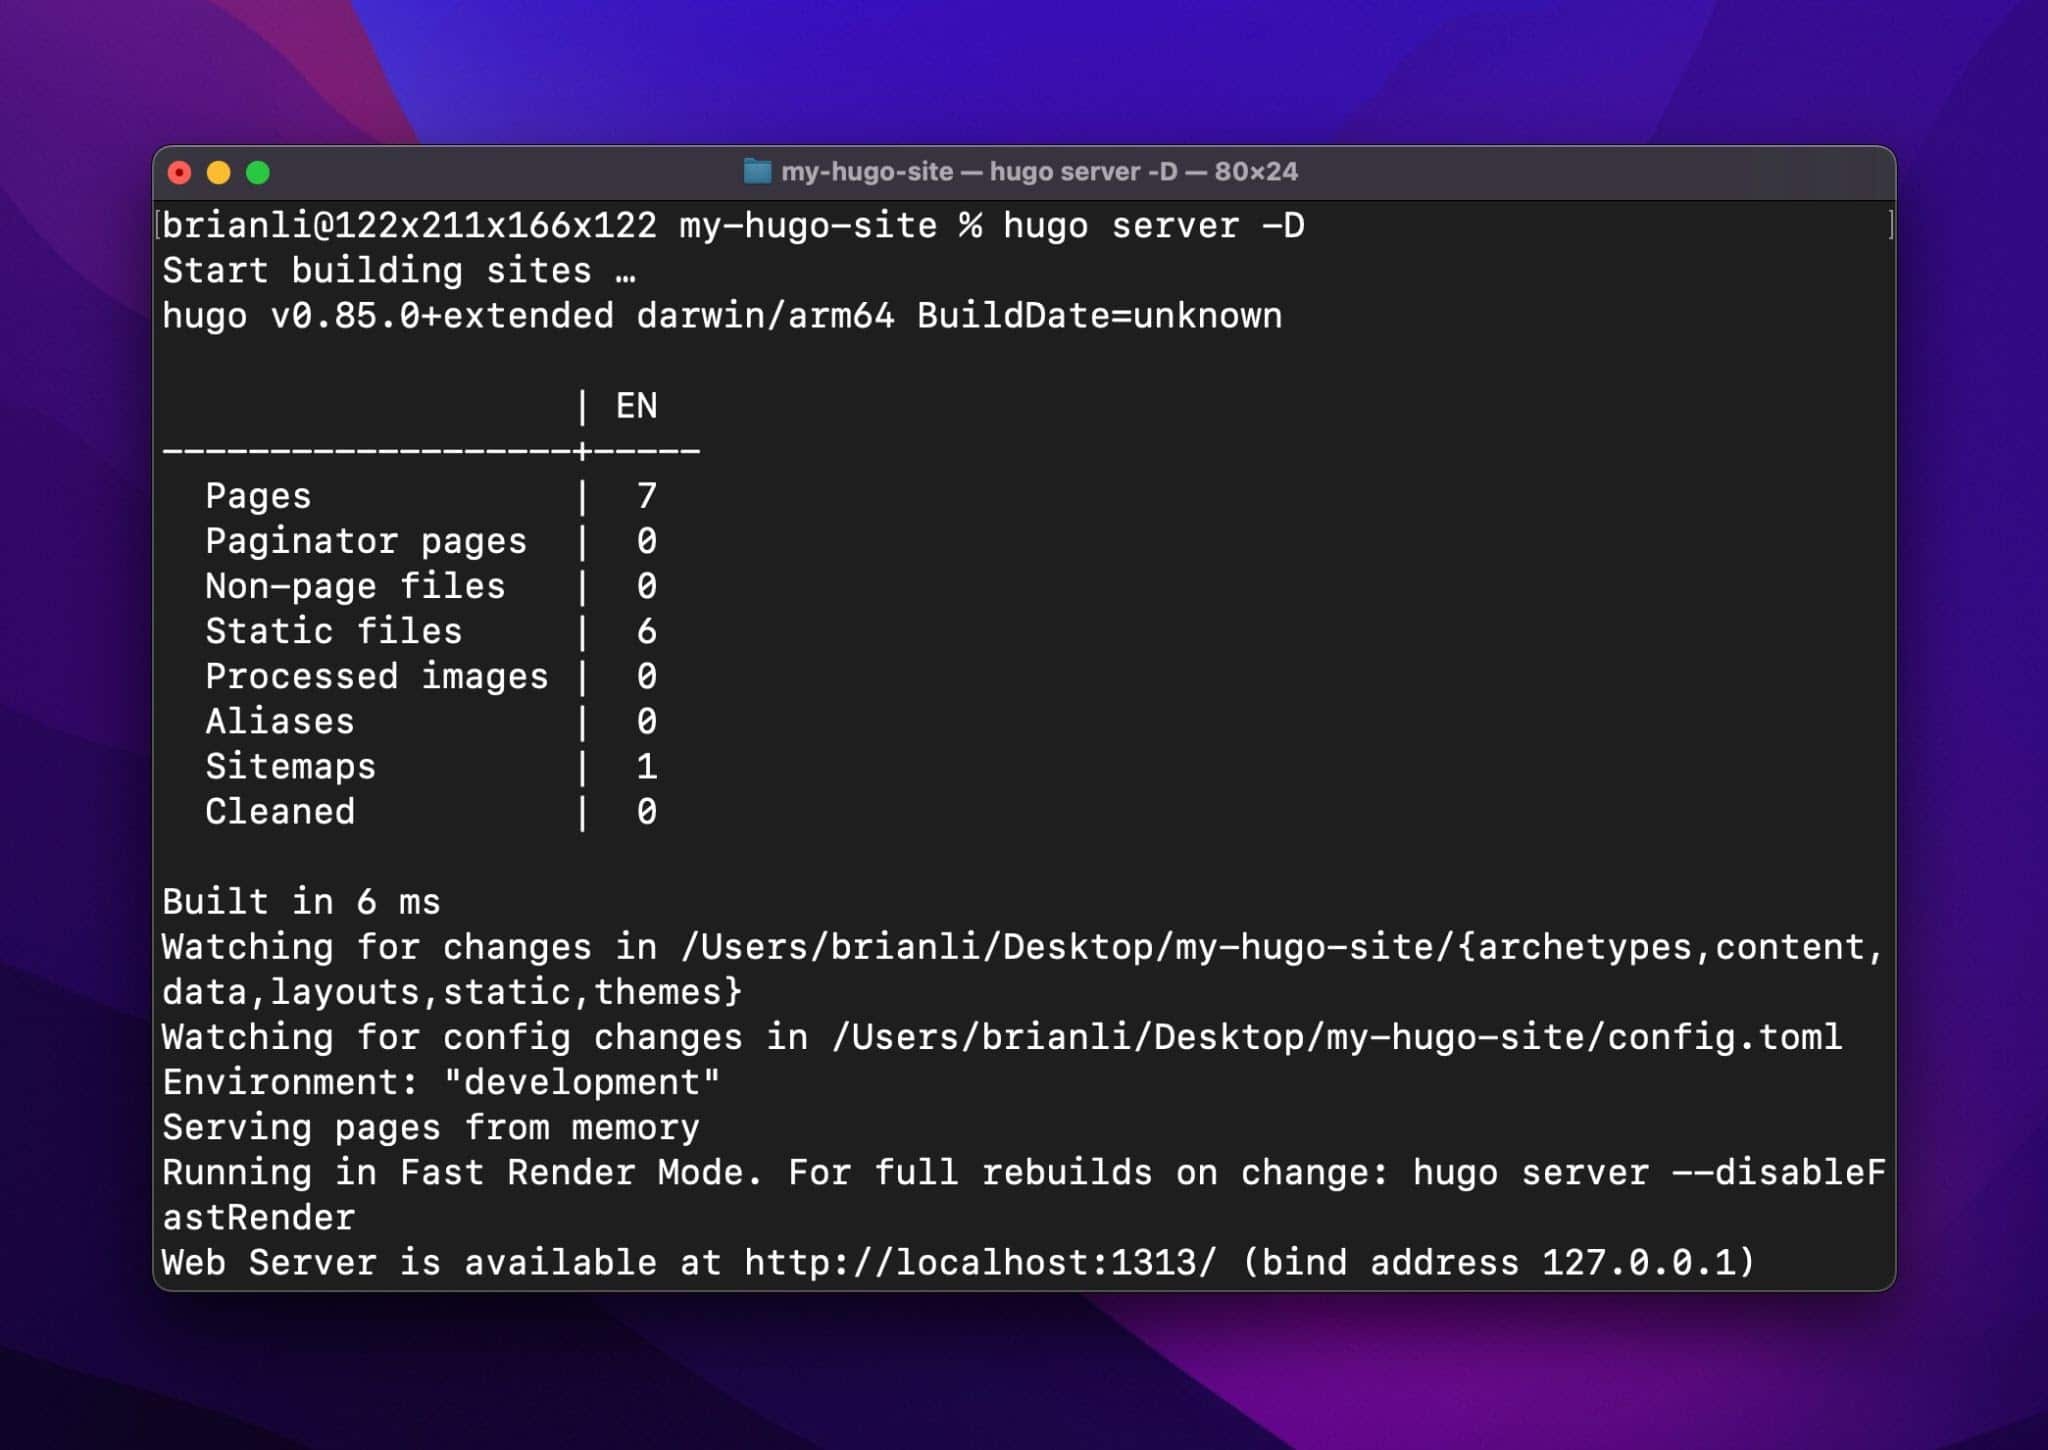
Hugo local building server.
In the event you visit the URL in your web browser, you should see your Hugo internet website with the Hyde theme:
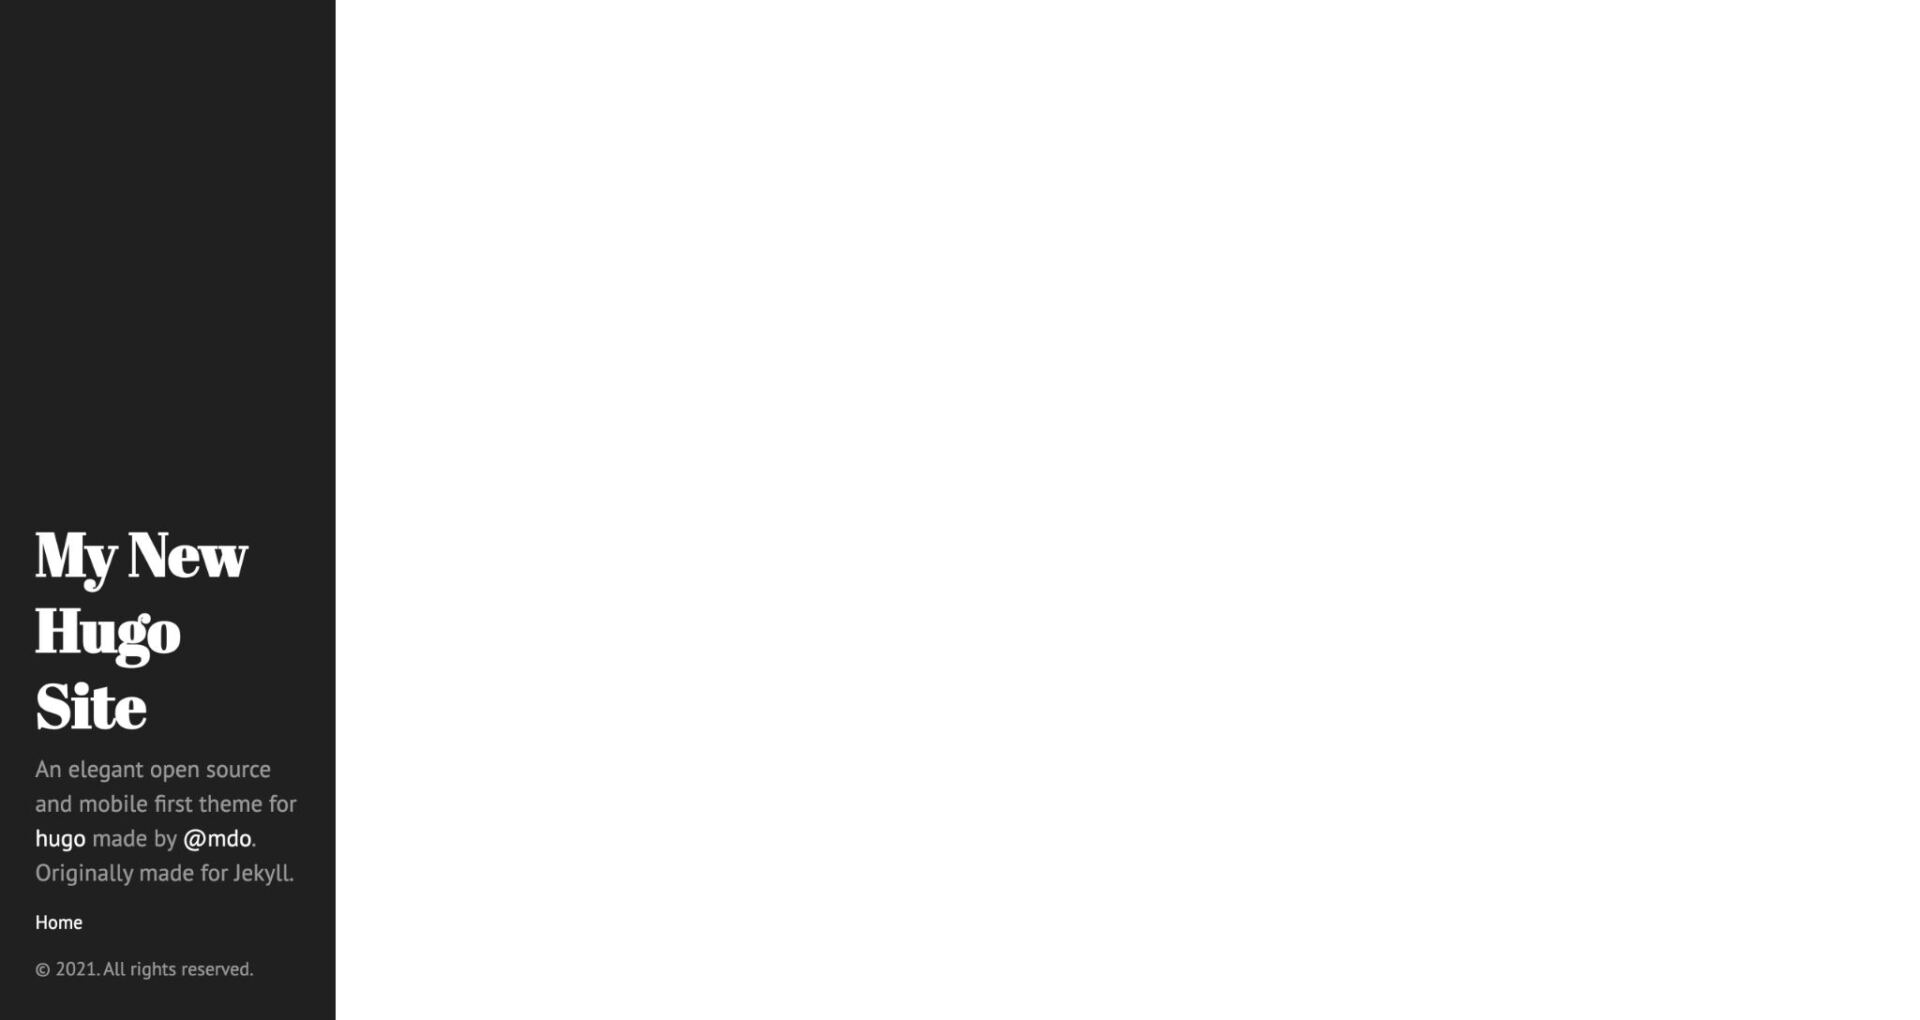
Hugo internet website appearing with the Hyde theme.
By the use of default, Hugo’s local building server will look ahead to changes and rebuild the internet website automatically. Since Hugo’s assemble tempo is so speedy, updates for your internet website can also be seen in near-real-time – something that’s unusual to look throughout the static internet website generator world. To turn this, let’s create our very first put up in Hugo.
How you’ll Add Content material subject matter to a Hugo Web site
Together with content material subject matter to a Hugo internet website might be very different from a full-fledged CMS like WordPress or Ghost. With Hugo, there is no built-in CMS layer to manage your content. As an alternative, you’re expected to keep watch over and organize problems as you see are compatible.
In numerous words, there’s no explicitly “correct” way to do content material subject matter keep watch over in Hugo. We’ll share one means of together with and managing content material subject matter in this section, on the other hand be happy to change problems up as you get further aware of Hugo.
Content material subject matter Sections in Hugo
In Hugo, the main content material subject matter workforce instrument that you just’ve at your disposal is the content material subject matter section. A content material subject matter section in Hugo is similar to a post type in WordPress – now not best can you use it as a content material subject matter filter, on the other hand you’ll moreover use it as an identifier when growing custom designed matter issues.
For example, if when you have a blog content material subject matter section folder, you’ll use it to store your whole blog posts and render a decided on internet web page template that almost all efficient applies to blog posts.
How you’ll Add Posts in Hugo
With that all the way through ideas, let’s create a content material subject matter section for blog posts and add a few pieces of content material subject matter. Create a brand spanking new folder named posts in your mission’s content material subject matter folder – that’s the content material subject matter section.
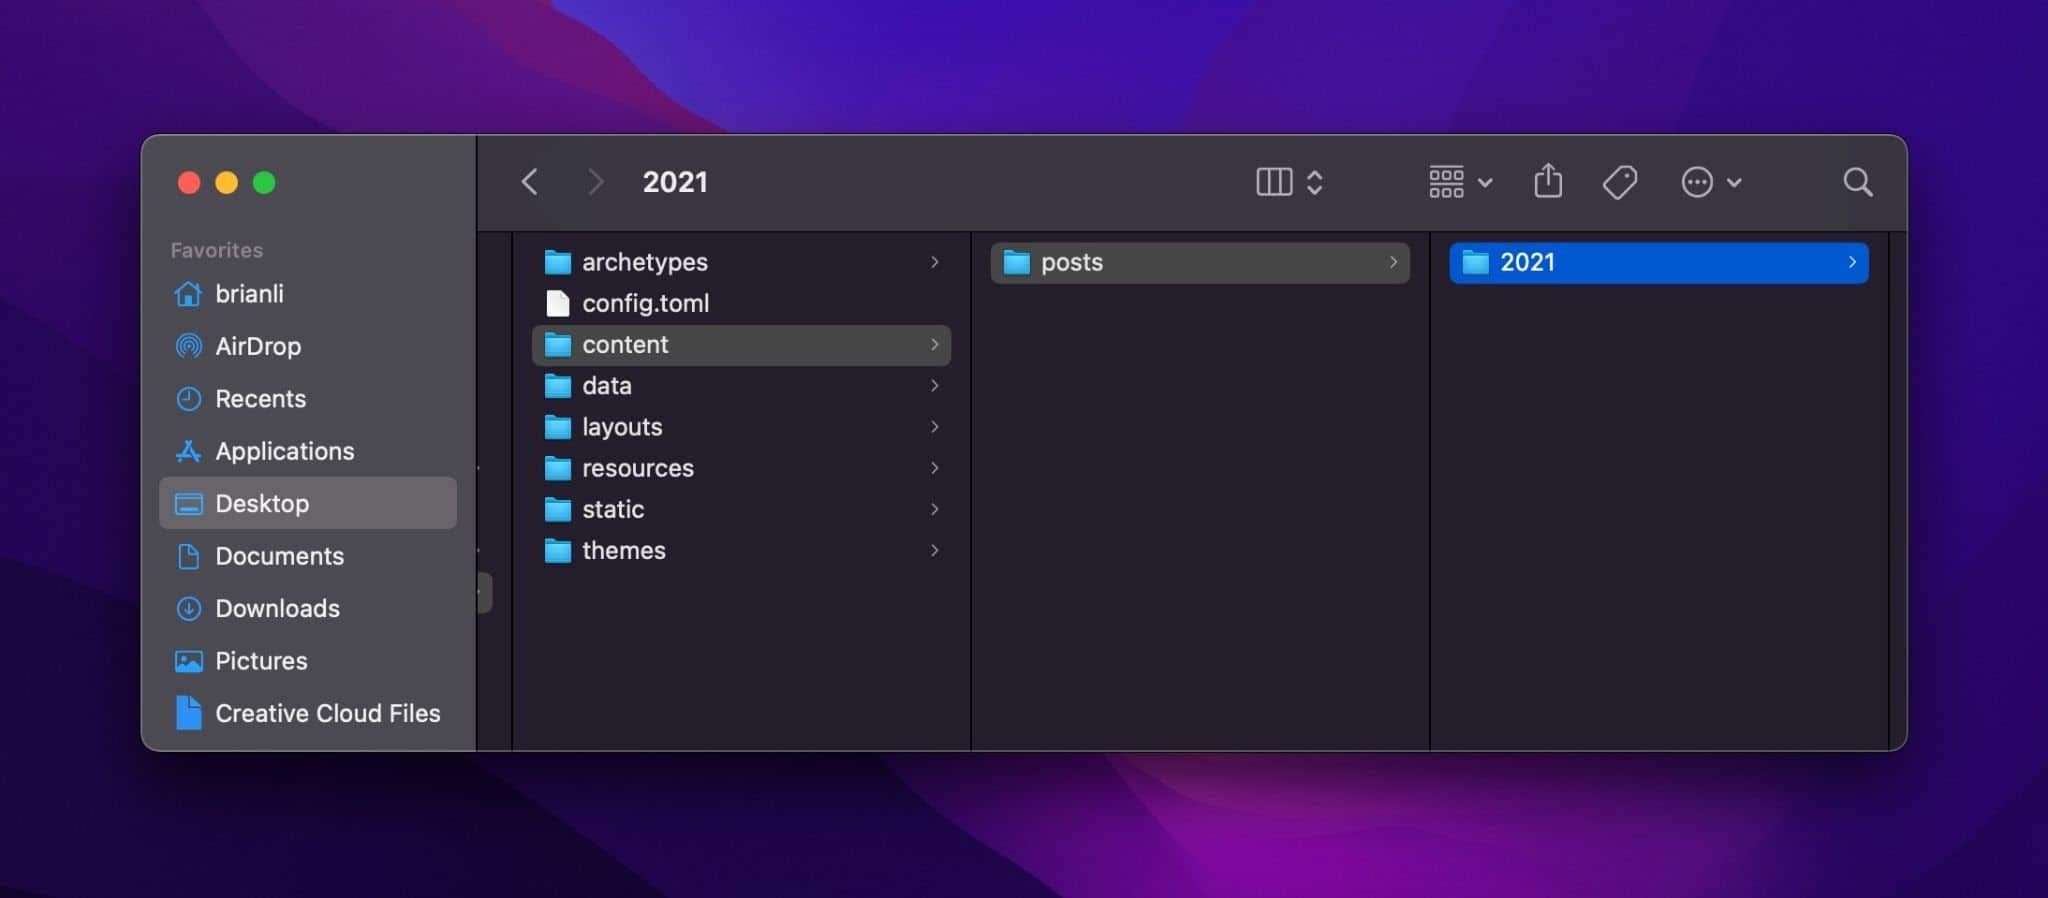
Let’s create every other organizational layer right through the posts folder by the use of creating a 2021 folder. At this point, your content material subject matter checklist should seem to be this:
Hugo content material subject matter checklist.
Now, let’s create our first put up. As we discussed earlier, Hugo is helping each and every Markdown and HTML data for content material subject matter. In most cases, it’s upper to persist with Markdown data because of they’re more straightforward to write, construction, and read.
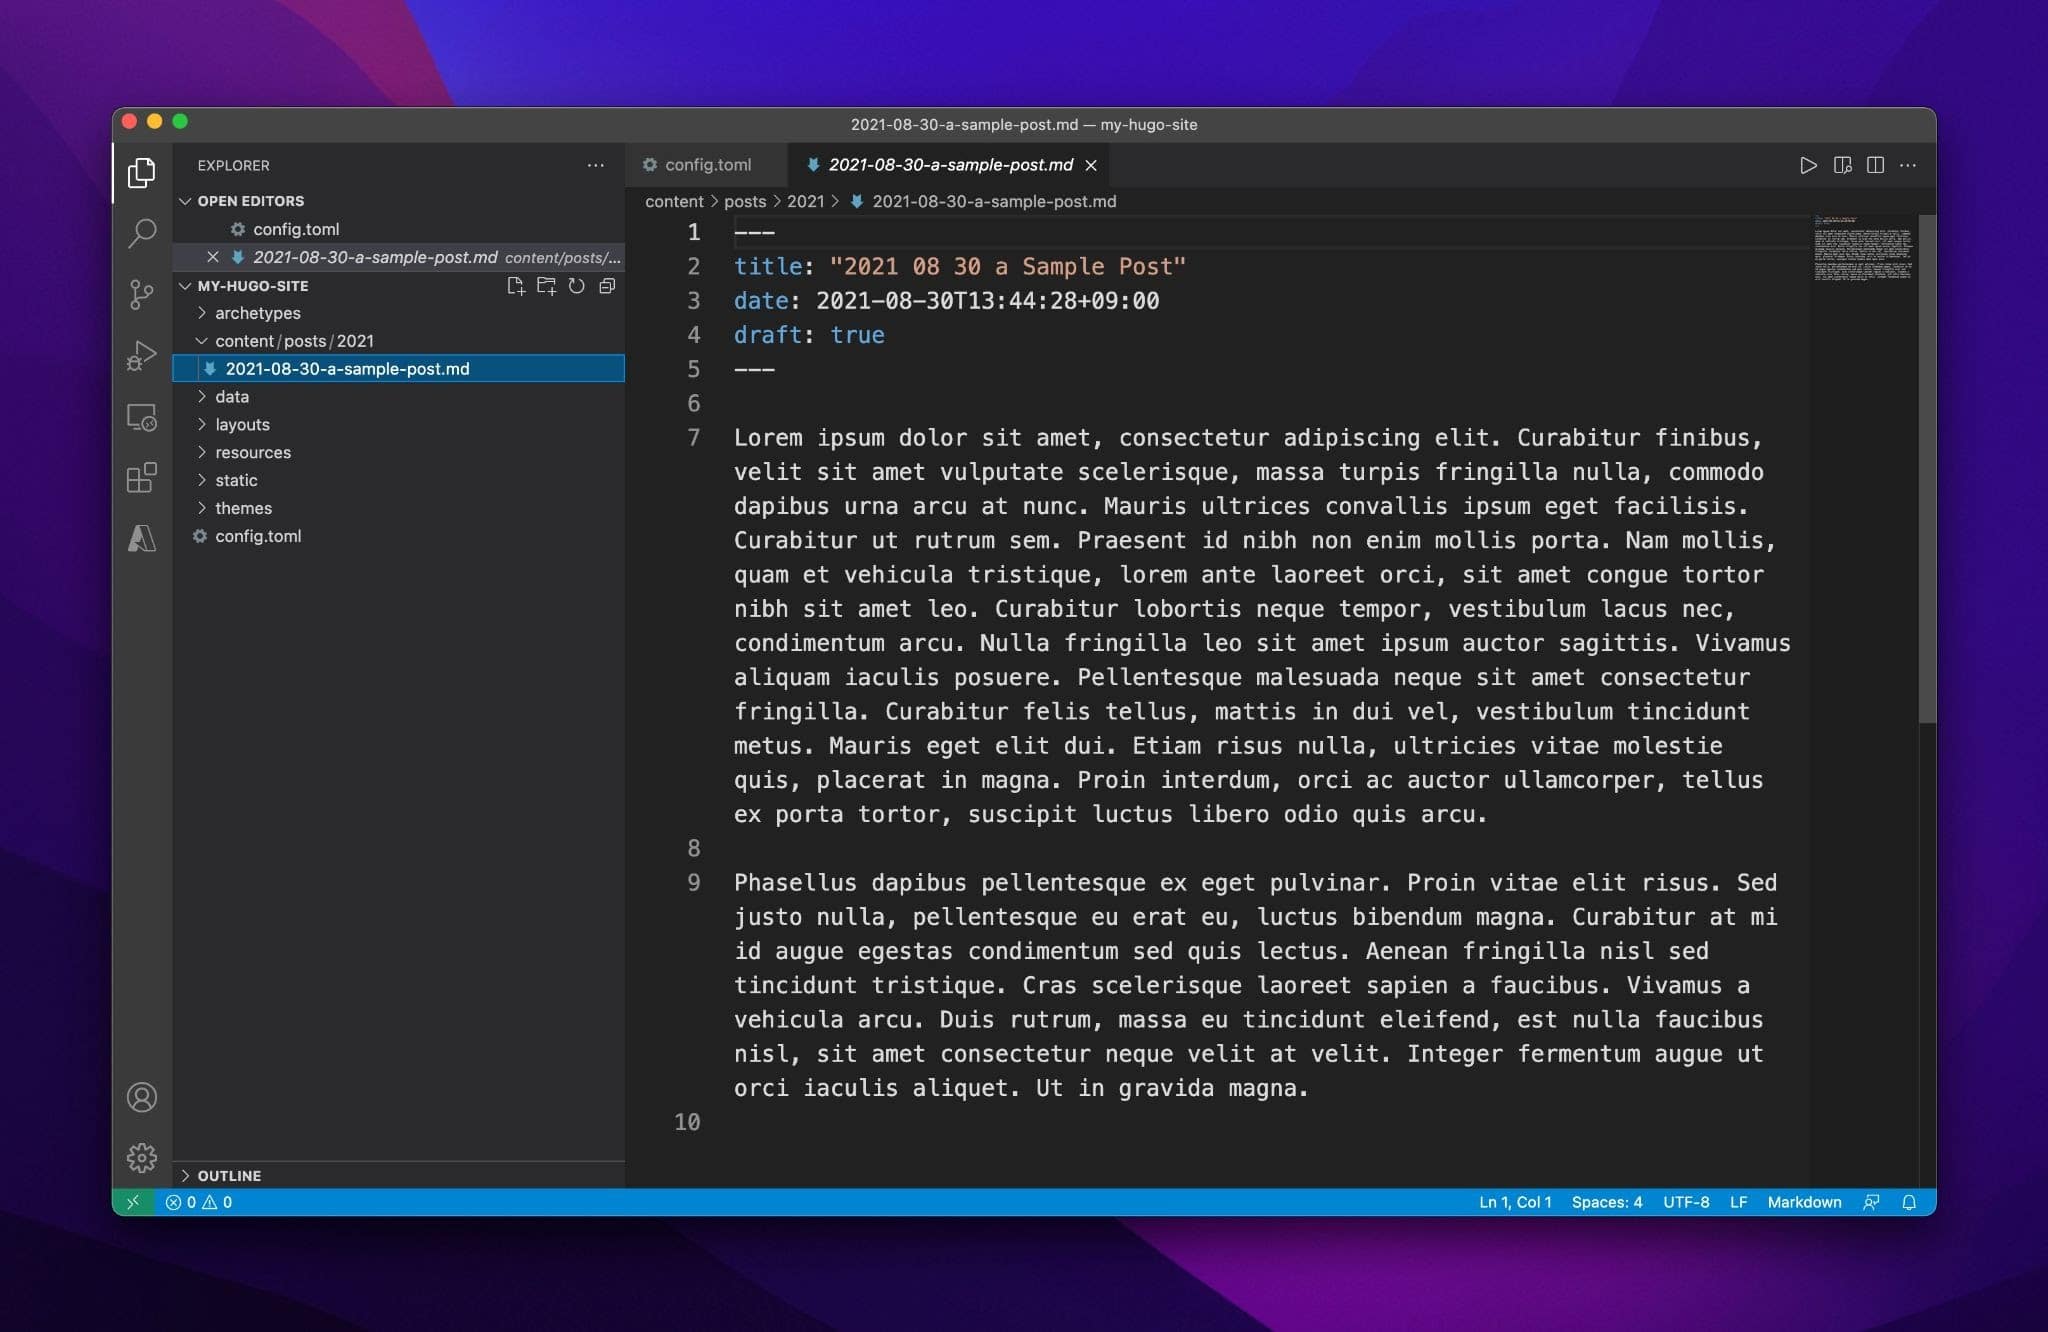
Throughout the content material subject matter/posts/2021 folder, create a brand spanking new document that results in .md (the Markdown document extension). You’ll be capable of establish the document regardless of you need, on the other hand the in reality helpful syntax for naming a Hugo content material subject matter document is YYYY-MM-DD-a-sample-post.md.
Together with manually creating a content material subject matter document, you’ll moreover use the Hugo CLI to create a brand spanking new put up with the command underneath (make sure you run the command from your mission checklist):
hugo new posts/2021/2021-08-30-a-sample-post.mdKnow the way the content material subject matter folder is missing from the path above. This is because Hugo assumes all content material subject matter data will transfer into the content material subject matter folder by the use of default.
In the event you open up the newly created content material subject matter document, you should see a few lines of metadata at the top of the document that looks something like this:
---

title: "2021 08 30 a Trend Post"

date: 2021-08-30T13:44:28+09:00

draft: true

---
This metadata, which is formatted in YAML, is called the “front matter.” Auto-generated front matter is one essential advantage of using the Hugo CLI. The doorway matter is where unique wisdom for a put up (put up establish, wisdom, draft status, tags, categories, and lots of others.) is stored. The default construction for the doorway matter can also be configured on a per-section basis using archetypes.
Now let’s add some text to the put up. When writing a put up, all the time make sure your content material subject matter is underneath the doorway matter like so:
Blog put up in Hugo.
Should you save the content material subject matter document, you should see Hugo rebuild your internet website in Terminal. Throughout the screenshot underneath, you’ll see Hugo rebuilt the entire internet website in 22 ms!
Sign Up For the Newsletter

Hugo internet website rebuild.
In the event you visit your Hugo internet website in your web browser, you should see the new put up.

Hugo internet website with a put up.
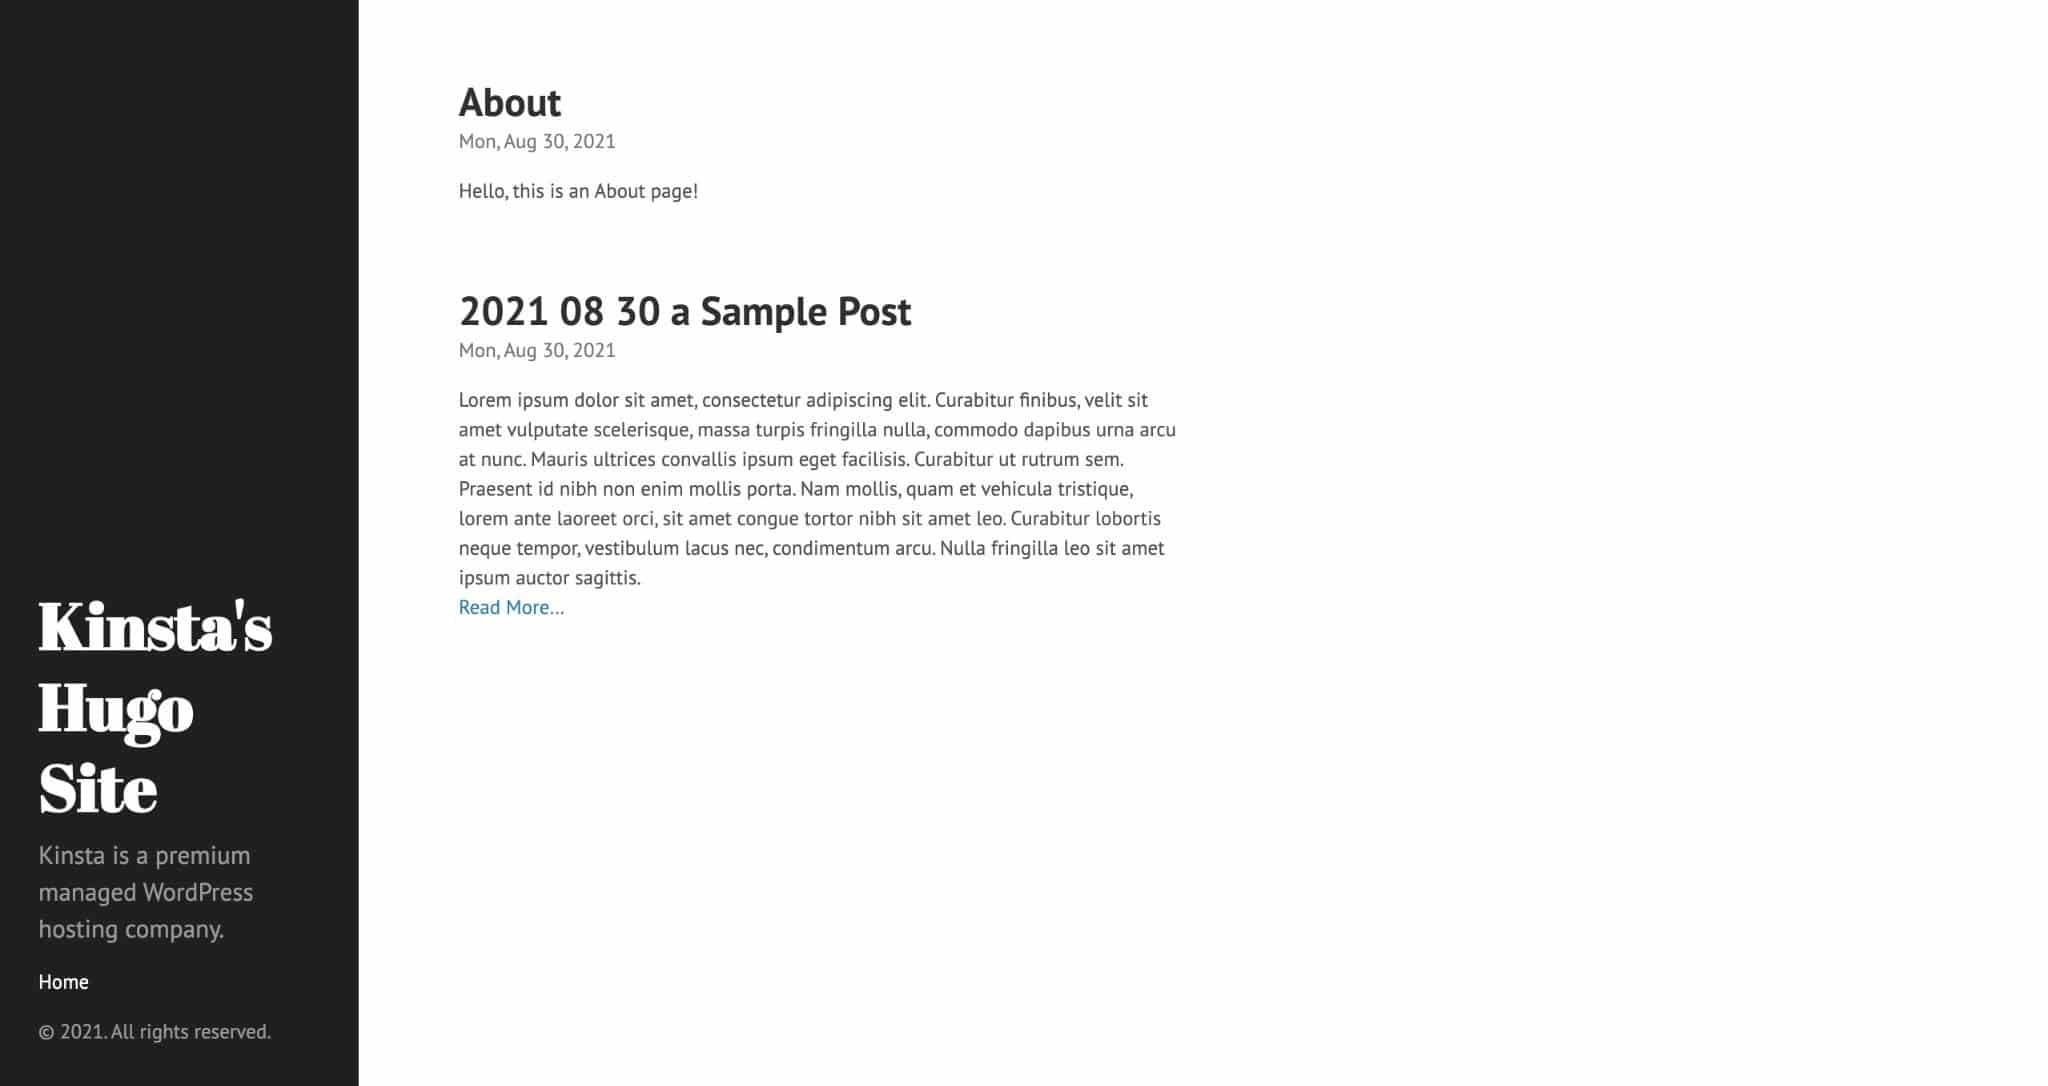
How you’ll Add a Internet web page in Hugo
Now that we’ve added a put up to our Hugo internet website, let’s add a internet web page. Most content material subject matter keep watch over ways, along side WordPress, distinguish between posts and pages. Generally, a put up is a dated piece of content material subject matter, while a internet web page consists of evergreen or static content material subject matter.
To create a internet web page, we first need a internet web page content material subject matter section. To do this, create a folder named pages in Hugo’s content material subject matter folder. Afterward, use the command underneath so that you could upload a brand spanking new “About” internet web page for your internet website:
hugo new pages/about.mdKnow the way the naming convention for pages differs from posts. Now not like posts, pages aren’t tied to a decided on date, so it’s useless to include the arrival date throughout the document establish.
Now, let’s add some text to the “About” internet web page:
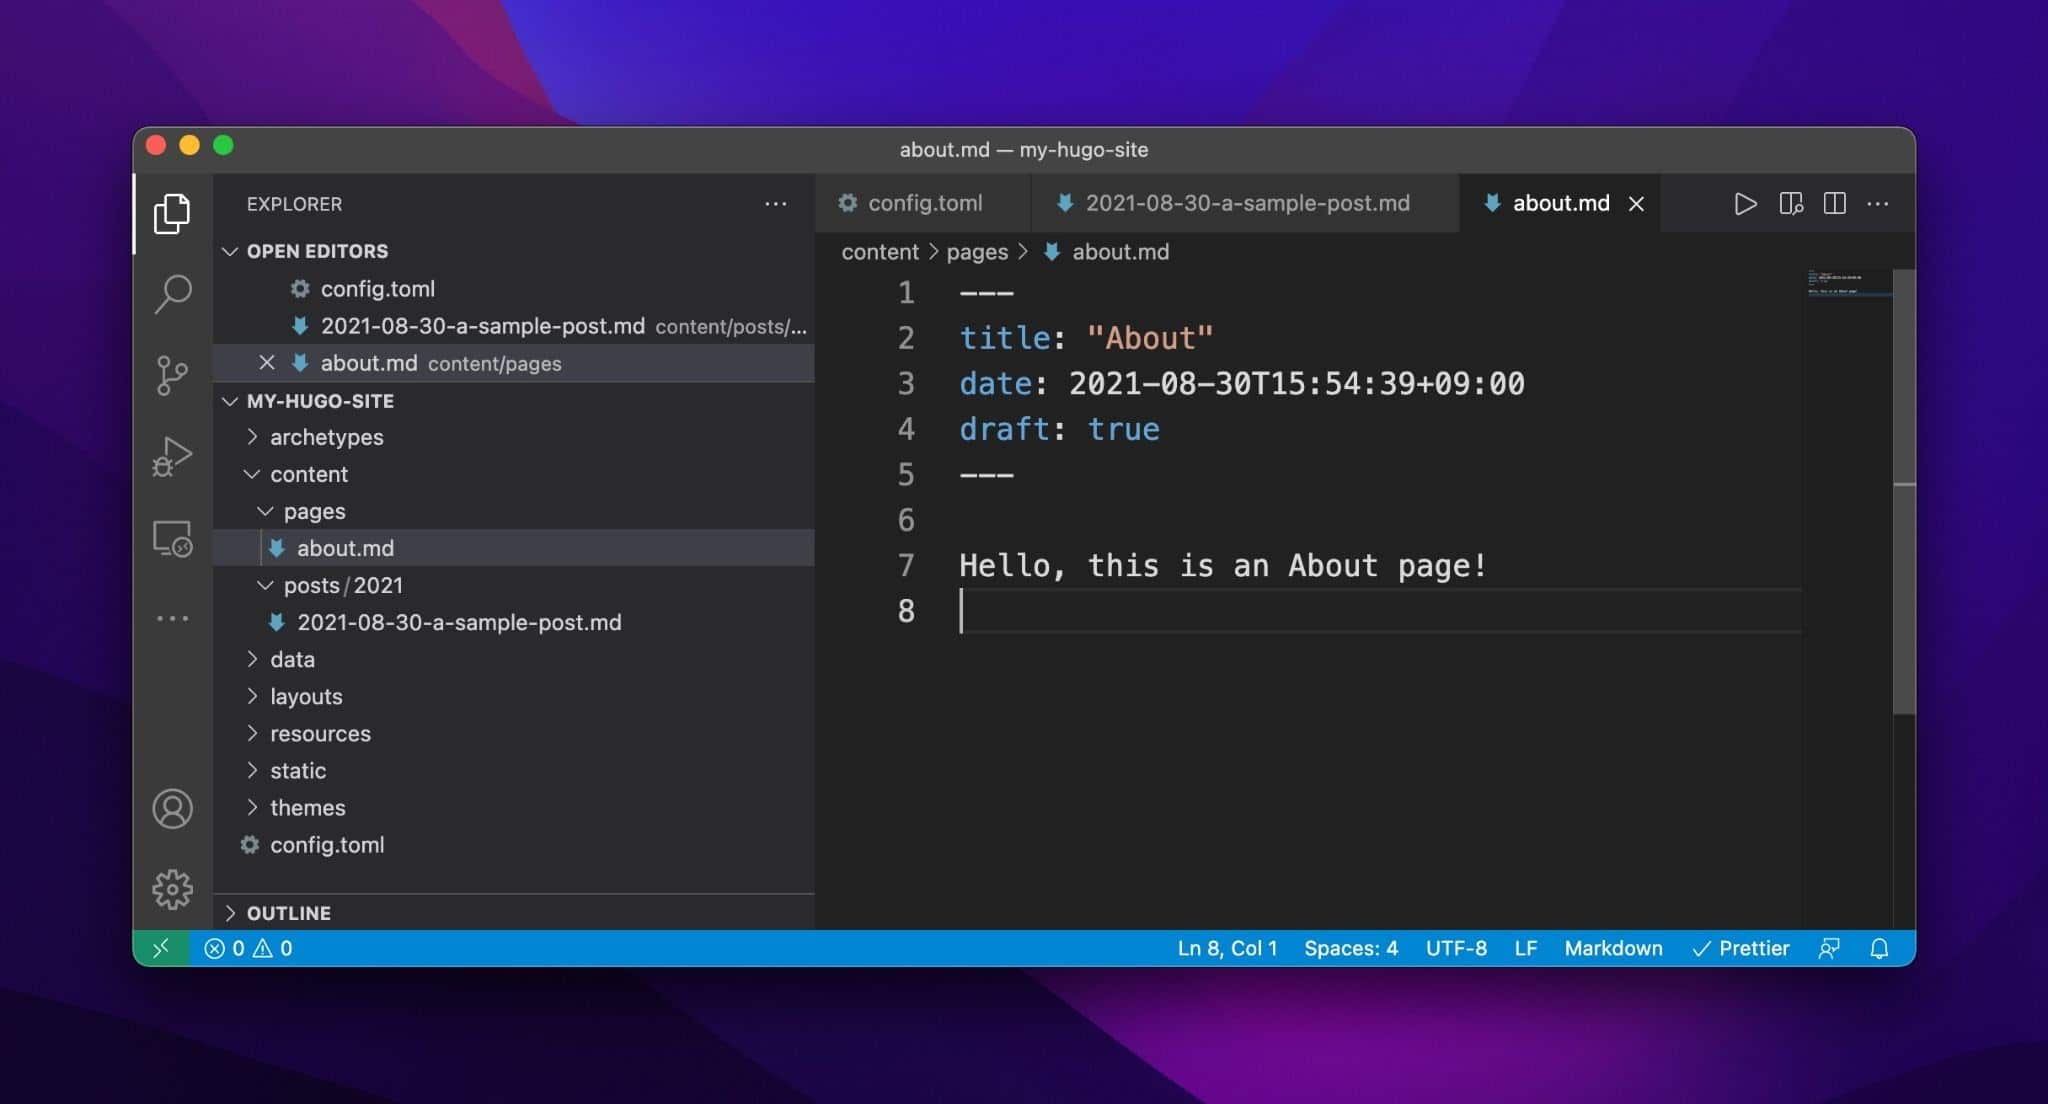
About internet web page in Hugo.
At this point, you should see the About internet web page in your web browser:
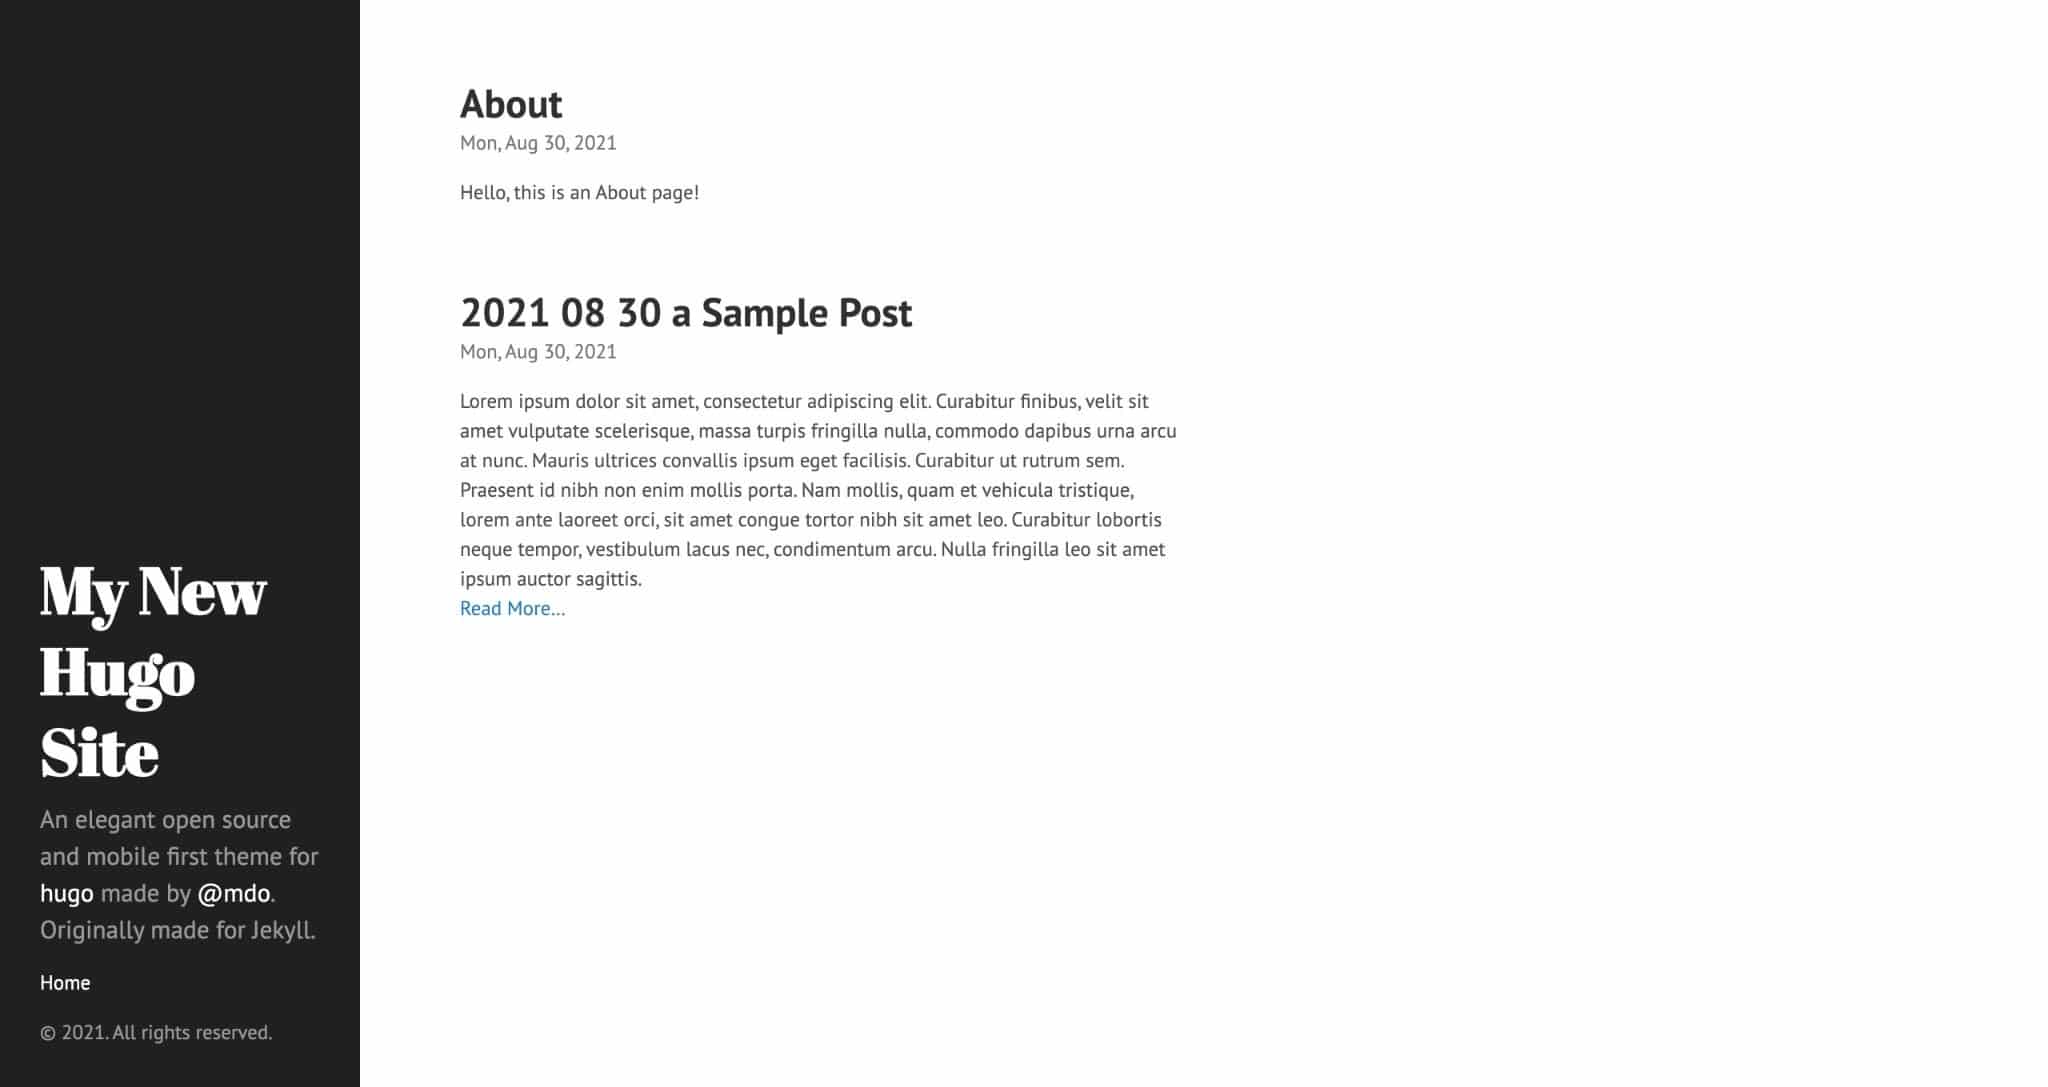
About internet web page throughout the web browser.
Now that we’ve got two content material subject matter sections — posts and pages — let’s go through recommendations on how you can make a few customizations to the internet website, related to enhancing the title and description, together with the About internet web page to the sidebar menu, changing the construction of permalinks, and putting off pages from the put up feed.
How you’ll Change the Web site Determine and Description
The best means of changing the internet website title and description relies on your internet website configuration and/or vigorous theme. When it comes to the Hyde theme, the internet website title and description can also be changed throughout the Hugo configuration document (config.toml).
Everyone knows this because of the following theme code that renders the sidebar:
The two parts to pay attention to are:
{{ .Web site.Determine }}And…
{{ with .Web site.Params.description }} {{.}} {{ else }}A sublime open provide and cell first theme for hugo made by the use of @mdo. Originally made for Jekyll.{{end}}The handlebars {{ }} are part of Hugo’s templating engine and allow for dynamically generated wisdom in rendered pages. As an example, {{ .Web site.Determine }} instructs Hugo to check the config.toml document and fetch the associated fee mapped to the Determine key.
Since Hugo’s default configuration uses My New Hugo Web site for the reason that internet website title, that’s what the sidebar presentations. If we modify the internet website title in config.toml to at least one factor else, the industry will even reflect on the frontend.
Let’s transfer ahead and change the title parameter throughout the config.toml from My New Hugo Web site to Kinsta’s Hugo Web site.

Changing the internet website title in Hugo.
Moving without delay to the internet website description, you’ll see that Hugo’s templating engine is helping conditional commonplace sense. Translated to standard English, the code underneath instructs Hugo to check if a Params value is assigned to the description key throughout the config.toml document. If now not, proper right here’s a default string to use as an alternative.
{{ with .Web site.Params.description }} {{.}} {{ else }} A sublime open provide and cell first theme for hugo made by the use of @mdo. Originally made for Jekyll.{{end}}Since we don’t have an summary configured throughout the config.toml document, Hugo defaults to rendering “A sublime open provide and mobile-first theme for Hugo made by the use of @mdo. Originally made for Jekyll.”
Now let’s change our config.toml document from:
baseURL = "http://example.org/"

languageCode = "en-us"

title = "Kinsta's Hugo Web site"

theme = "hyde"
To:
baseURL = "http://example.org/"

languageCode = "en-us"

title = "Kinsta's Hugo Web site"

theme = "hyde"

[params]

description = "Kinsta is a peak category managed WordPress web site web hosting company."
As expected, the changes this present day are visible on the frontend as correctly:
Change the Hugo internet website description.
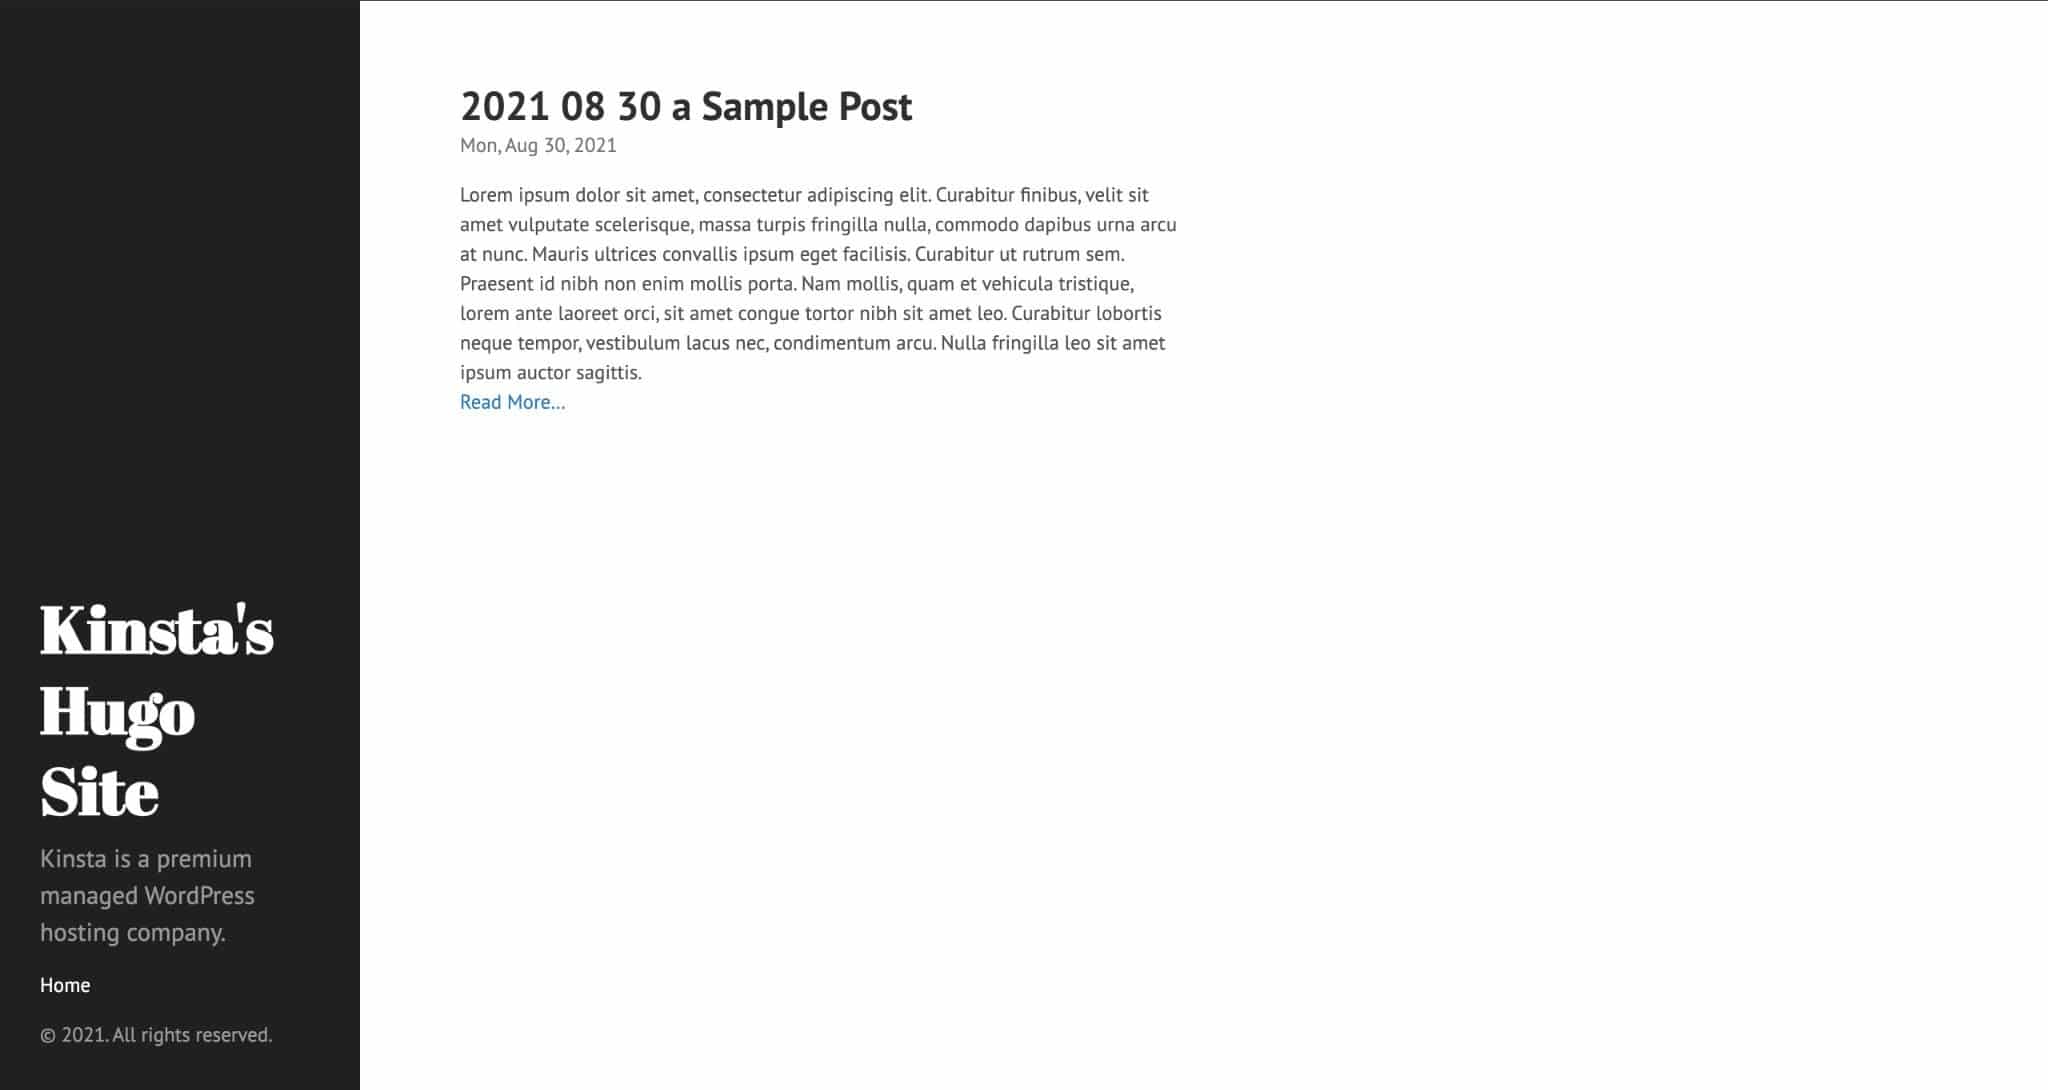
How you’ll Remove Pages From the Post Feed
On most blogs, it’s not unusual for the put up feed on the homepage to easily display posts. By the use of default, the Hyde theme comprises all content material subject matter data throughout the put up feed. To switch this behavior, you’ll need to edit the range function throughout the index.html template, which generates the home internet web page.
Hugo’s range function iterates over a defined set of items and then does something with the guidelines. By the use of default, the Hyde theme’s index.html template ranges over .Web site.RegularPages and filters out wisdom related to permalink, put up title, and put up summary previous than rendering the HTML.
Since .Web site.RegularPages comprises all commonplace pages on Hugo, along side each and every posts and pages, the “About” internet web page is rendered. By the use of changing the range items to .Web site.RegularPages "Phase" "posts", we will instruct Hugo to easily filter by the use of commonplace pages throughout the posts section – the content material subject matter data throughout the posts folder we created earlier.
Need blazing-fast, unswerving, and fully safe web site web hosting in your WordPress internet website? Kinsta provides all of this and 24/7 world-class toughen from WordPress experts. Check out our plans
Let’s make that fluctuate now by the use of enhancing the template from this:
{{ define "main" -}}
{{- range .Web site.RegularPages -}}
{{ .Title }}
{{ .Date.Structure "Mon, Jan 2, 2006" }}
{{ .Summary }}
{{ if .Truncated }}
{{ end }}
{{- end }}
{{- end }}To this:
{{ define "main" -}}
{{- range where .Web site.RegularPages "Phase" "posts" -}}
{{ .Title }}
{{ .Date.Structure "Mon, Jan 2, 2006" }}
{{ .Summary }}
{{ if .Truncated }}
{{ end }}
{{- end }}
{{- end }}After making this modification, the home internet web page will best display posts like so:
Display posts best on the area internet web page.
How you’ll Use Partials in Hugo
Regarded as one in all Hugo’s most difficult templating choices is partials – HTML templates embedded in every other HTML template. Partials allow for the reuse of code right through different template data without managing the code in each document.
For example, it’s not unusual to look different internet web page sections (header, footer, and lots of others.) in their separate partial data, which could be then known as within a theme’s baseof.html template document.
Within the baseof.html document throughout the Ananke theme, you’ll see an example of a partial on Line 18 – {{ partial "site-style.html" . }}.
In this case, {{ partial "site-style.html" . }} instructs Hugo to change the contents of Line 18 with the site-style.html throughout the /layouts/partials folder. If we navigate to the /partials/site-style.html, we see the following code:
{{ with partialCached "func/style/GetMainCSS" "style/GetMainCSS" }}


{{ end }}

{{ range internet website.Params.custom_css }}

{{ with partialCached "func/style/GetResource" . . }}{{ else }}


{{ end }}

{{ end }}
By the use of offloading this code to a separate document, the baseof.html template document can keep organized and easy to be informed. While partials don’t appear to be necessary, specifically for basic projects, they turn out to be useful for higher projects with further complex capacity.
How you’ll Use Shortcodes in Hugo
Hugo shortcodes are similar to partials in that they allow for the reuse of code right through numerous pages. Shortcodes are HTML data which are residing throughout the /layouts/shortcodes folder. The main difference is that partials observe to HTML templates, while shortcodes observe to Markdown content material subject matter pages.
In Hugo, shortcodes will let you make bigger modules of capacity that you just’ll use in pages right through your internet website without managing code changes for each internet web page.
In the event you run a blog, likelihood is that you’ll need to transfer all the way through the body content material subject matter of your posts to switch year references to the current year. Depending on what selection of posts you’ve in your internet website, this procedure can take a long time!
By the use of using a Hugo shortcode in your content material subject matter data, you won’t have to worry about updating year references ever all over again!
Let’s get began by the use of creating a shortcode in /layouts/shortcodes/current_year.html with the contents underneath:
{{ now.Structure "2006" }}Shortcodes can also be embedded into posts with this syntax – {{}}. In our case, we will title the current_year.html shortcode with {{}} like so:
---

title: "2021 08 30 a Trend Post"

date: 2021-08-30T13:44:28+09:00

draft: true

---

This put up was once as soon as created throughout the year {{}}.

Lorem ipsum dolor sit amet, consectetur adipiscing elit. Curabitur finibus, velit sit amet vulputate scelerisque, massa turpis fringilla nulla, commodo dapibus urna arcu at nunc. Mauris ultrices convallis ipsum eget facilisis. Curabitur ut rutrum sem. Praesent identification nibh non enim mollis porta. Nam mollis, quam et vehicula tristique, lorem ante laoreet orci, sit amet congue tortor nibh sit amet leo. Curabitur lobortis neque tempor, vestibulum lacus nec, condimentum arcu. Nulla fringilla leo sit amet ipsum auctor sagittis. Vivamus aliquam iaculis posuere. Pellentesque malesuada neque sit amet consectetur fringilla. Curabitur felis tellus, mattis in dui vel, vestibulum tincidunt metus. Mauris eget elit dui. Etiam risus nulla, ultricies vitae molestie quis, placerat in magna. Proin interdum, orci ac auctor ullamcorper, tellus ex porta tortor, suscipit luctus libero odio quis arcu.

Phasellus dapibus pellentesque ex eget pulvinar. Proin vitae elit risus. Sed justo nulla, pellentesque ecu erat ecu, luctus bibendum magna. Curabitur at mi identification augue egestas condimentum sed quis lectus. Aenean fringilla nisl sed tincidunt tristique. Cras scelerisque laoreet sapien a faucibus. Vivamus a vehicula arcu. Duis rutrum, massa ecu tincidunt eleifend, est nulla faucibus nisl, sit amet consectetur neque velit at velit. Integer fermentum augue ut orci iaculis aliquet. Ut in gravida magna.
In the event you view the put up throughout the web browser, you should see the prevailing year throughout the first line of the put up like so:
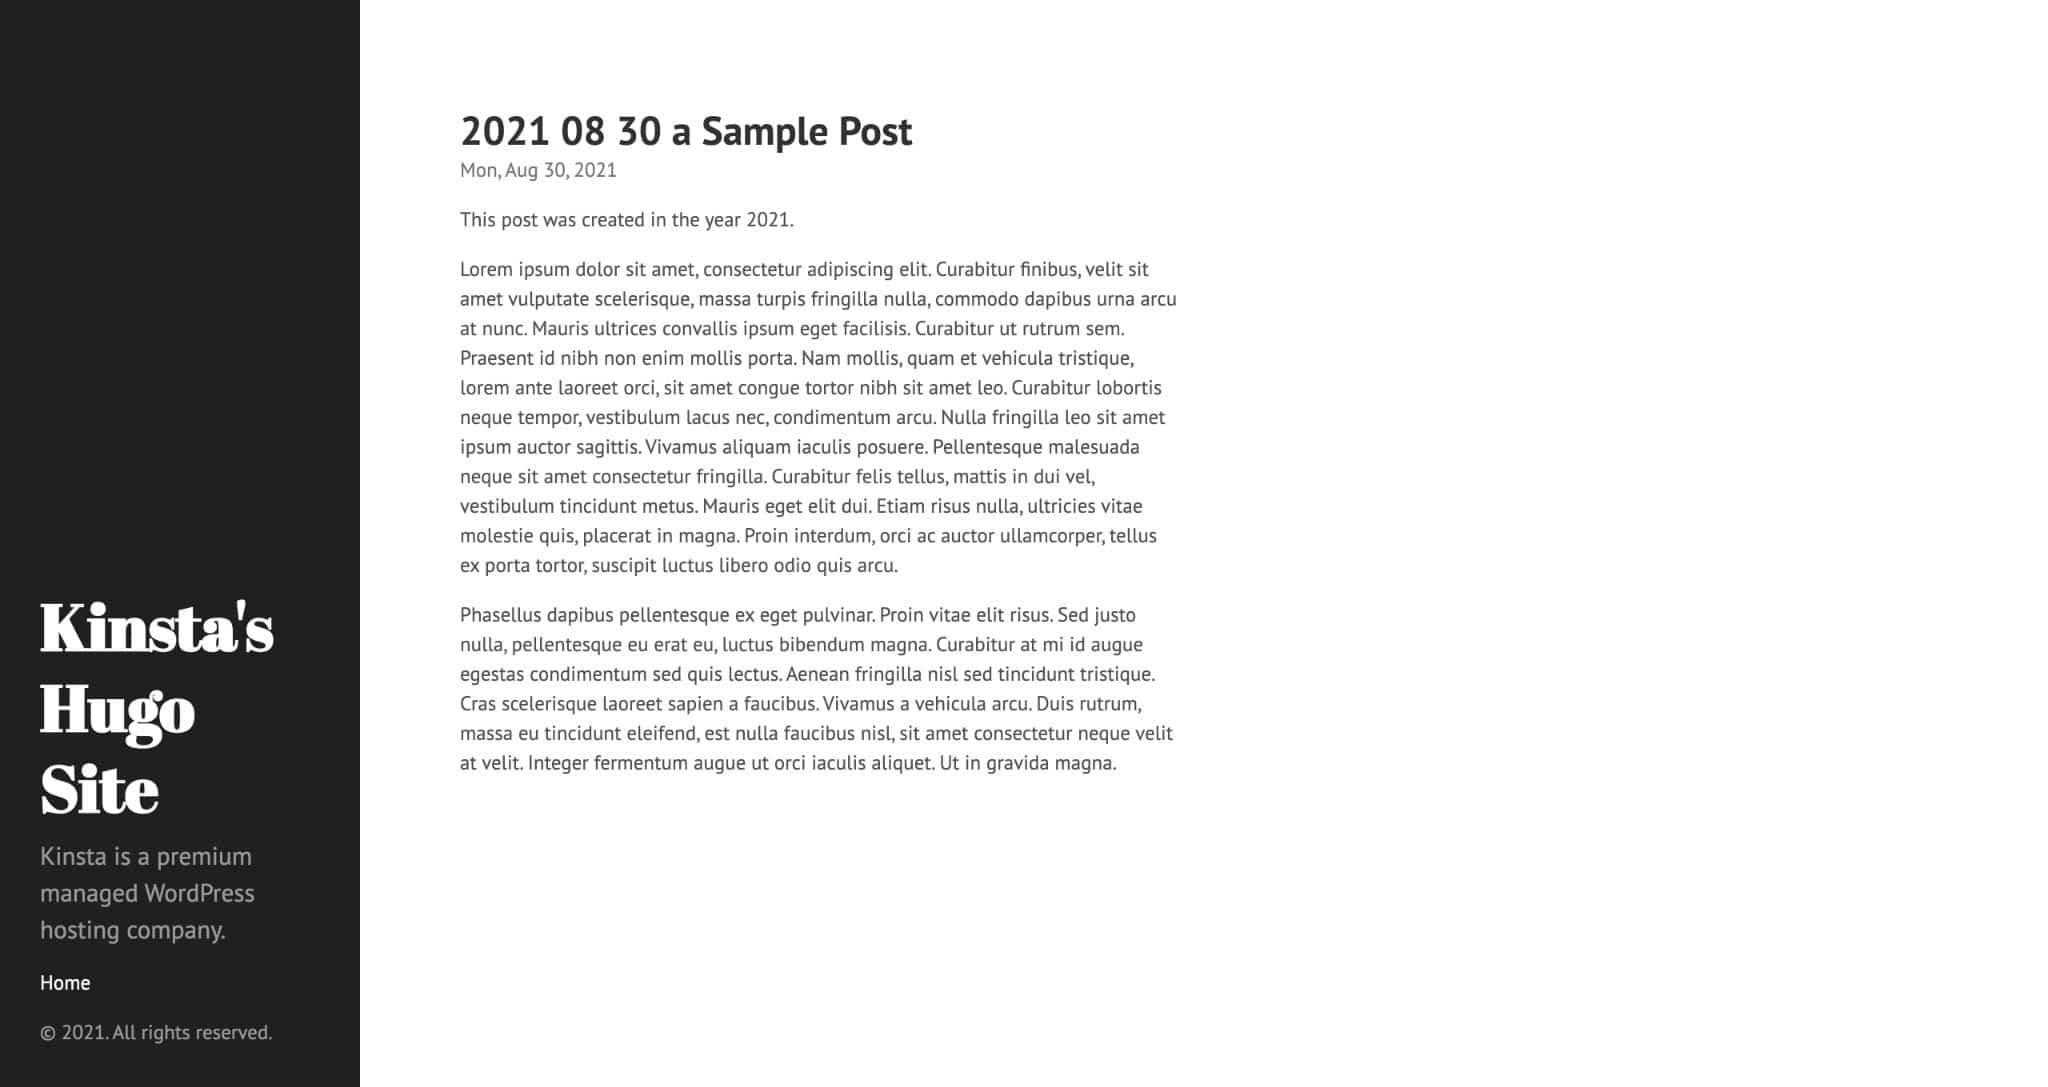
Use a Hugo shortcode to auto-generate the prevailing year.
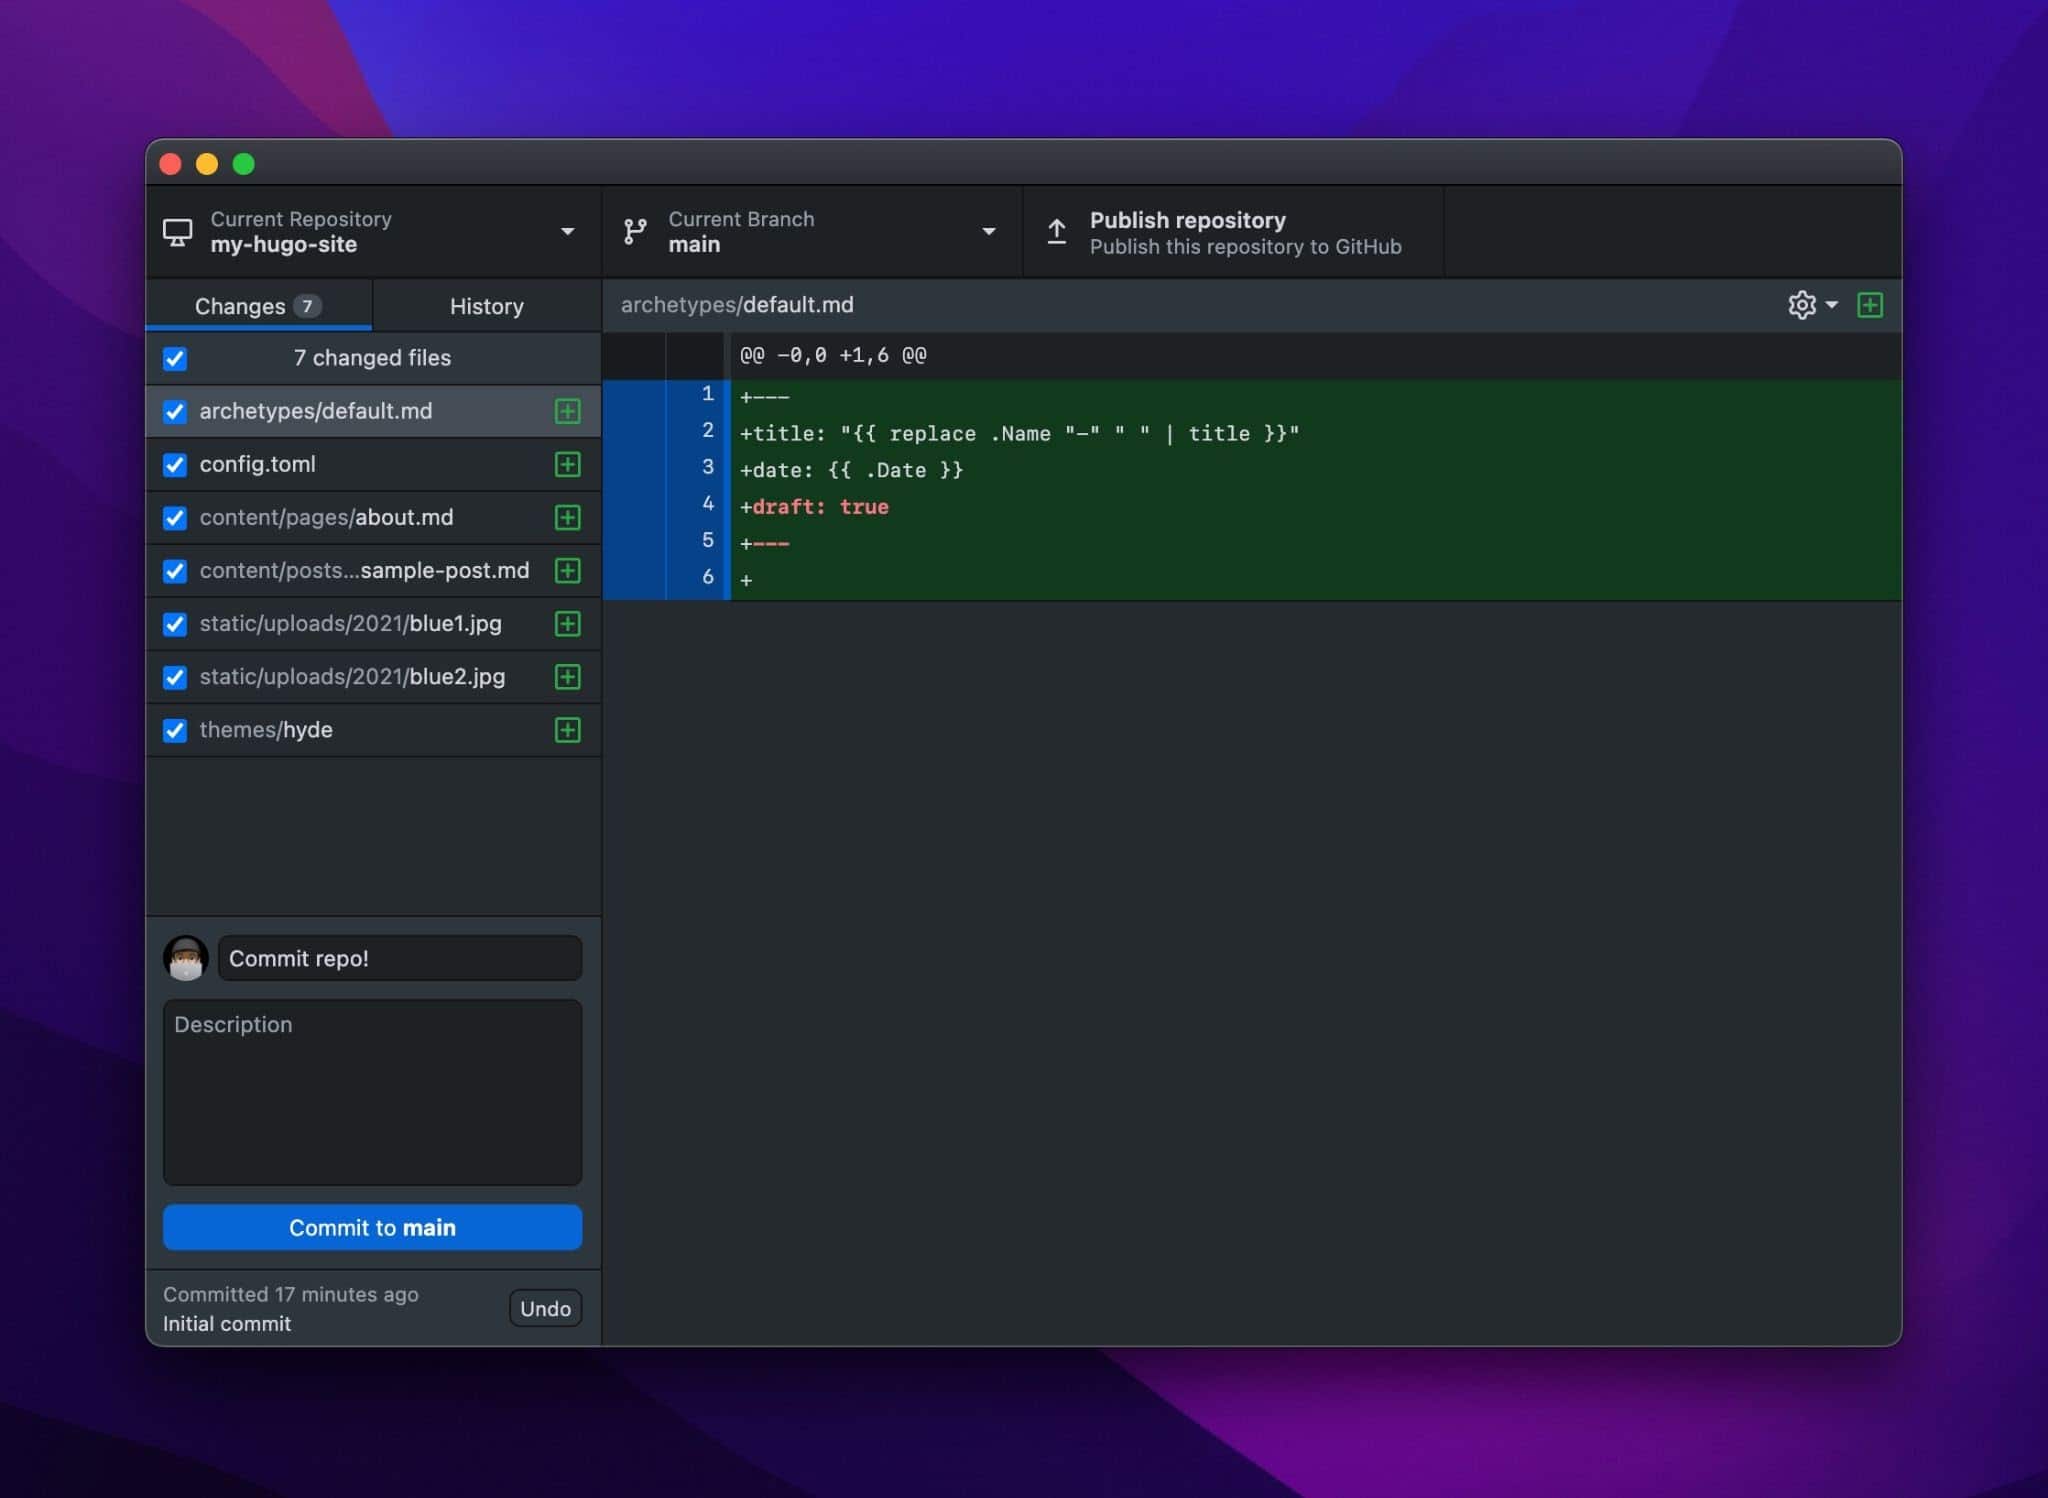
How you’ll Add Images to a Post in Hugo
Now not like WordPress and other full-fledged content material subject matter keep watch over ways, Hugo doesn’t include a drag-and-drop gadget for managing pictures. Thus, designing an image keep watch over gadget is offloaded to the end-user.
While Hugo has no standardized means of managing images, one standard means will depend on storing pictures throughout the /static folder and referencing them in posts and pages using a shortcode. Let’s walk by the use of the way you’ll do basic image workforce in Hugo.
The first thing we’ll need to do is create an organizational building for our image library. While this sounds complex, all that’s required is the arrival of a few additional directories within the /static folder.
Let’s get began by the use of growing an uploads folder in /static. Within the uploads folder, create a folder named 2021 to hold all of the pictures uploaded in 2021.

Image keep watch over in Hugo.
Next, let’s add two pictures (blue1.jpg and blue2.jpg) into the 2021 folder.
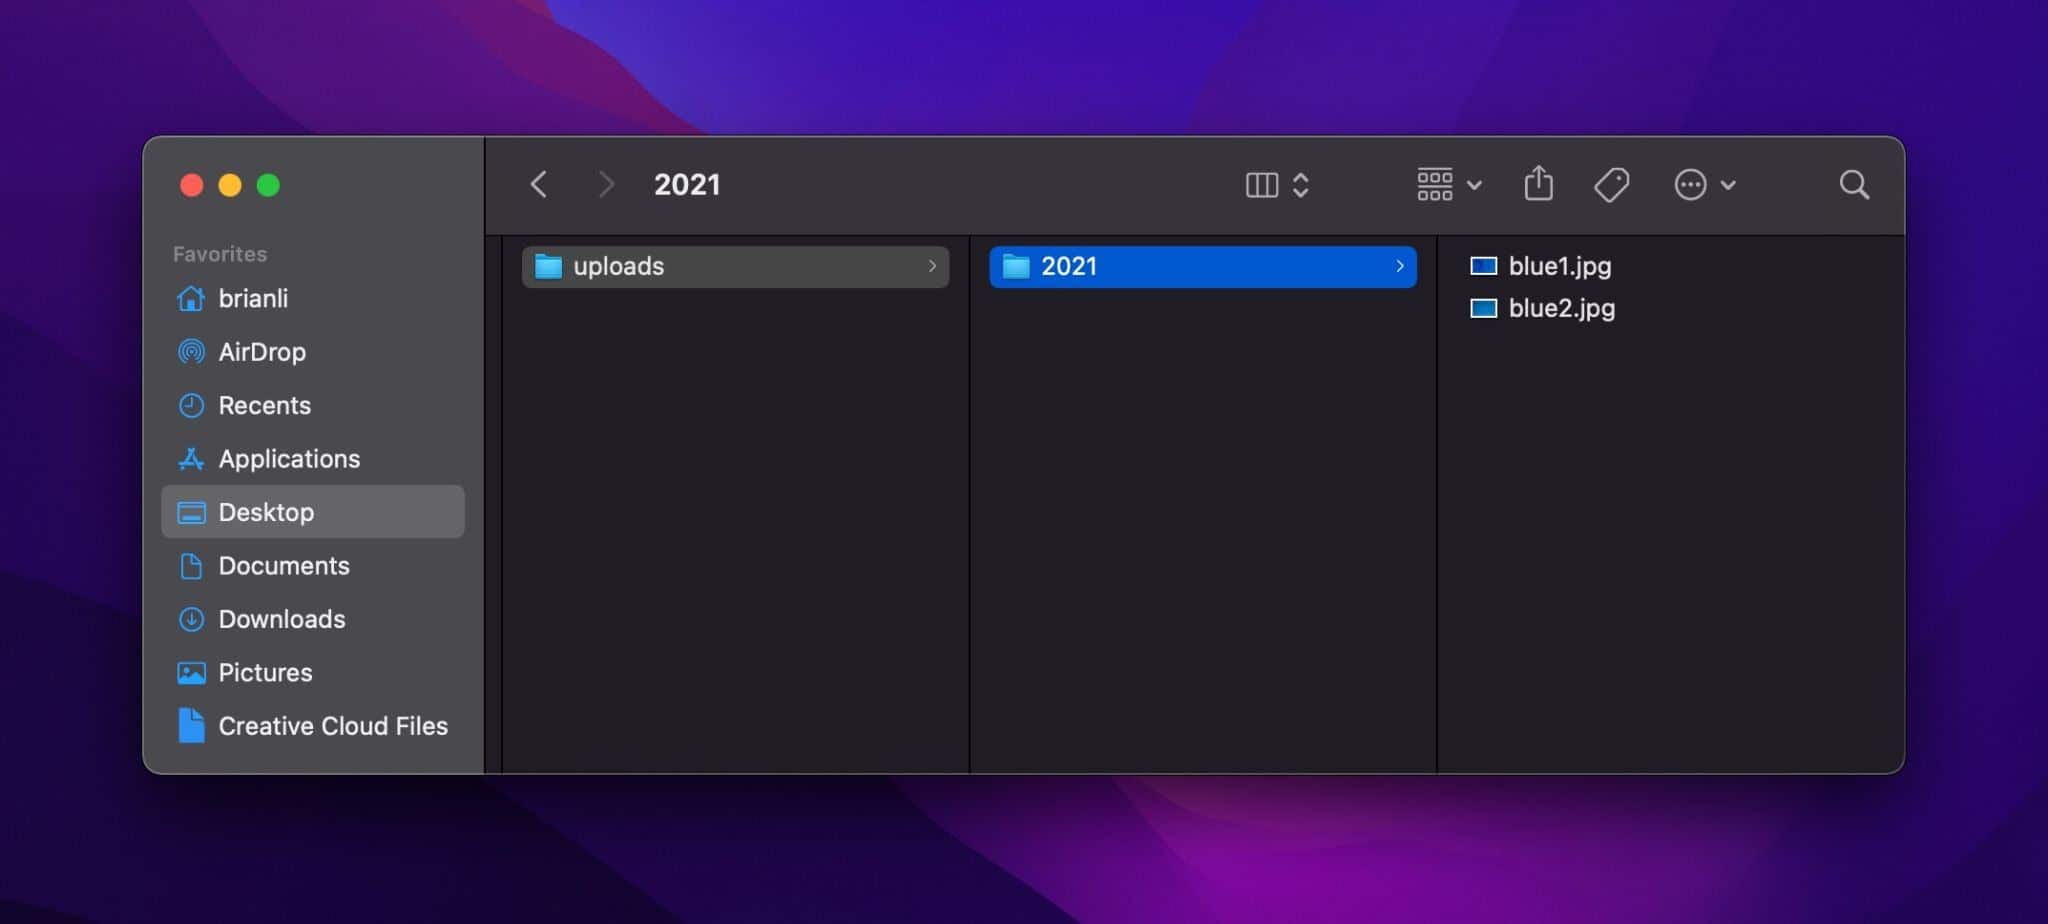
Together with pictures to the “2021” folder.
In HTML, pictures are displayed using the

While it’s possible so that you could upload this HTML straight away to the Markdown content material subject matter document, it’s upper to create a shortcode that you just’ll use to turn any image from the uploads folder. This way, in the event you ever need to change the img tag, you’ll edit the shortcode template without enhancing each instance of the img tag.
To create the shortcode template, create a brand spanking new document at /layouts/shortcodes/img.html with the content material subject matter underneath:
<img src="/uploads/{{ .Get "src" }}" alt="{{ .Get "alt" }}Next, add the shortcode underneath to a blog put up:
{{ }
}Throughout the shortcode template, {{ .Get "src" }} and {{ .Get "alt" }} instruct Hugo to fetch the contents of the src< and alt< parameters when calling a shortcode.
Now, in the event you reload the blog put up, you should see the image like so:
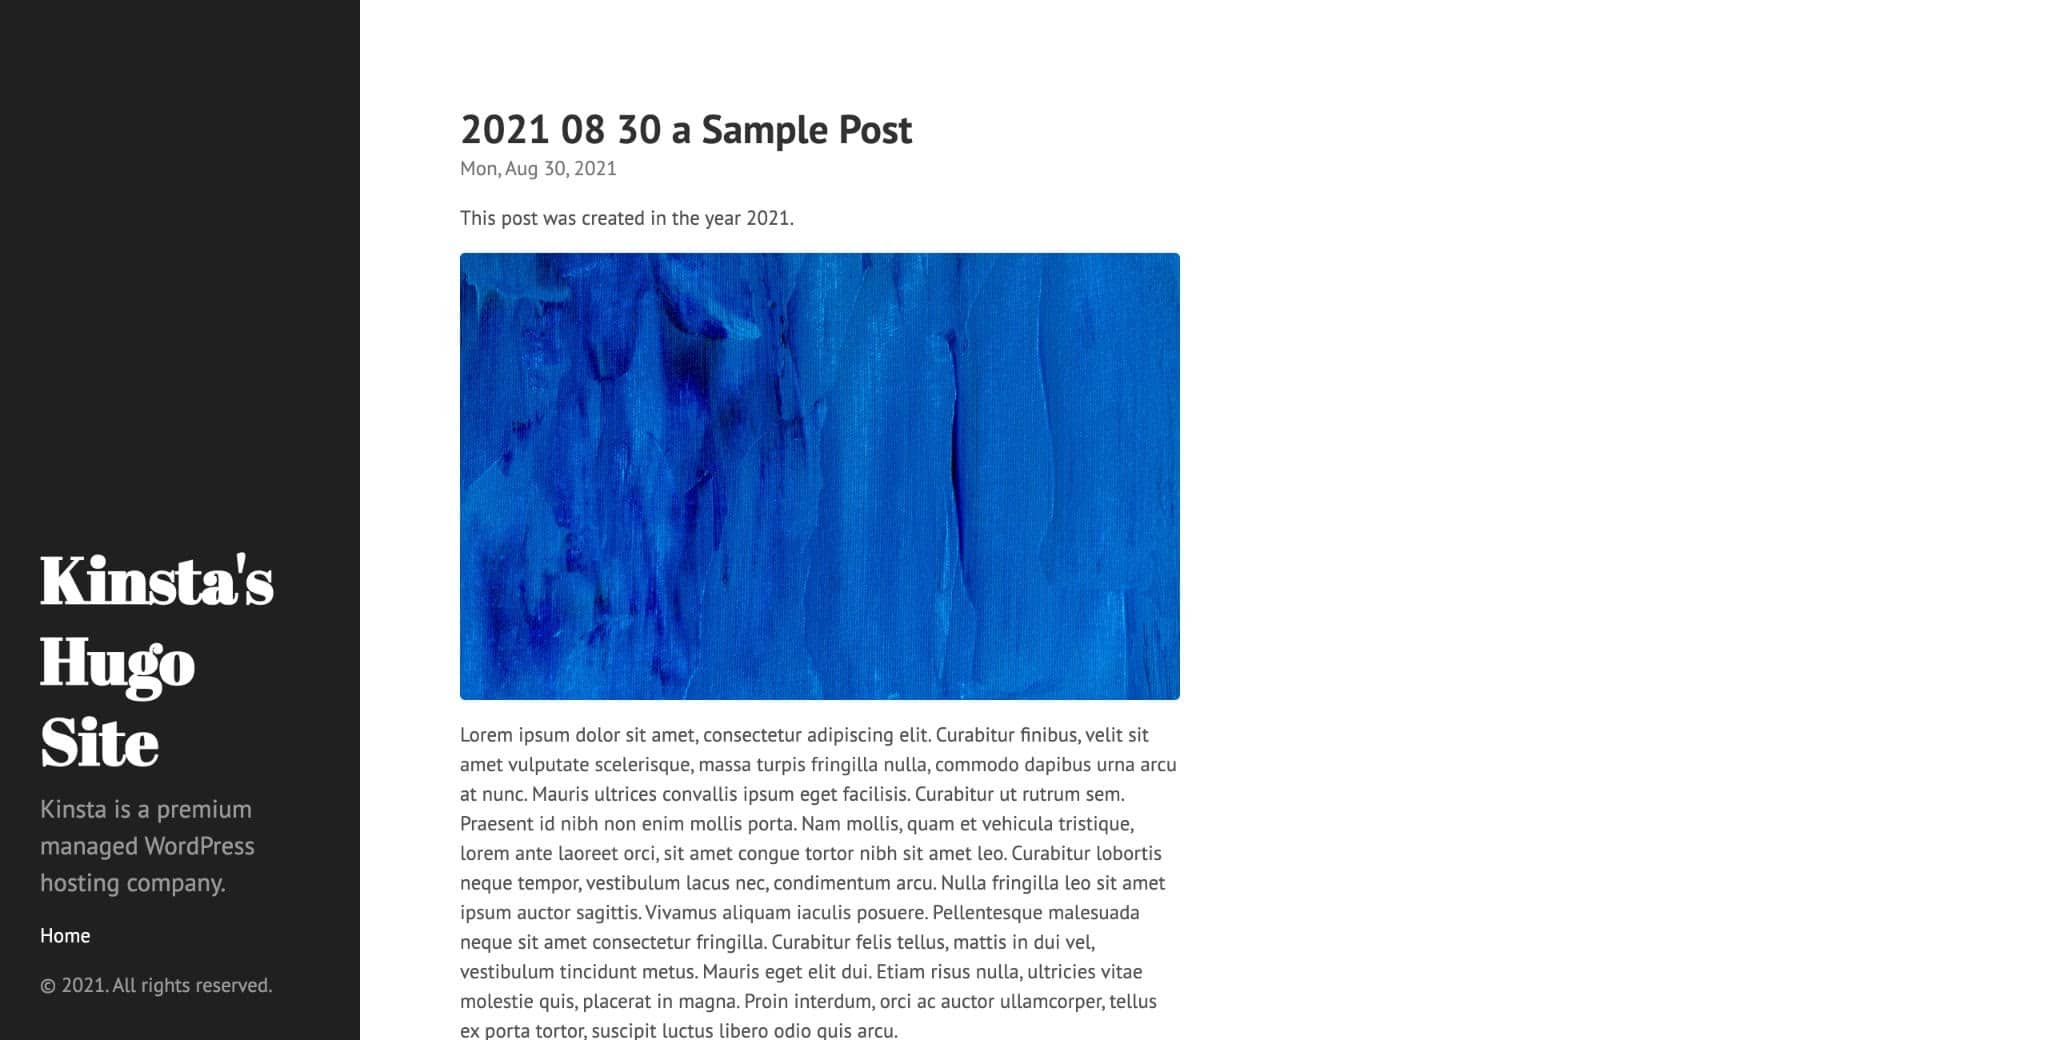
Image shortcode in Hugo.
How you’ll Deploy a Hugo Web site
Up to this put up, you learned recommendations on how you can arrange Hugo, create a internet website, add a theme, make basic edits to configuration data, and make larger the aptitude of your internet website with partials and shortcodes. At this point, you’re going to have an invaluable internet website that is in a position to be deployed online.
Since Hugo is a static internet website generator, you can deploy the HTML, CSS, and JS it generates anyplace with a webserver. Since the technical must haves for serving static web pages are so low, you can host them without spending a dime right through somewhat numerous providers like Netlify, Vercel, Cloudflare Pages, and additional.
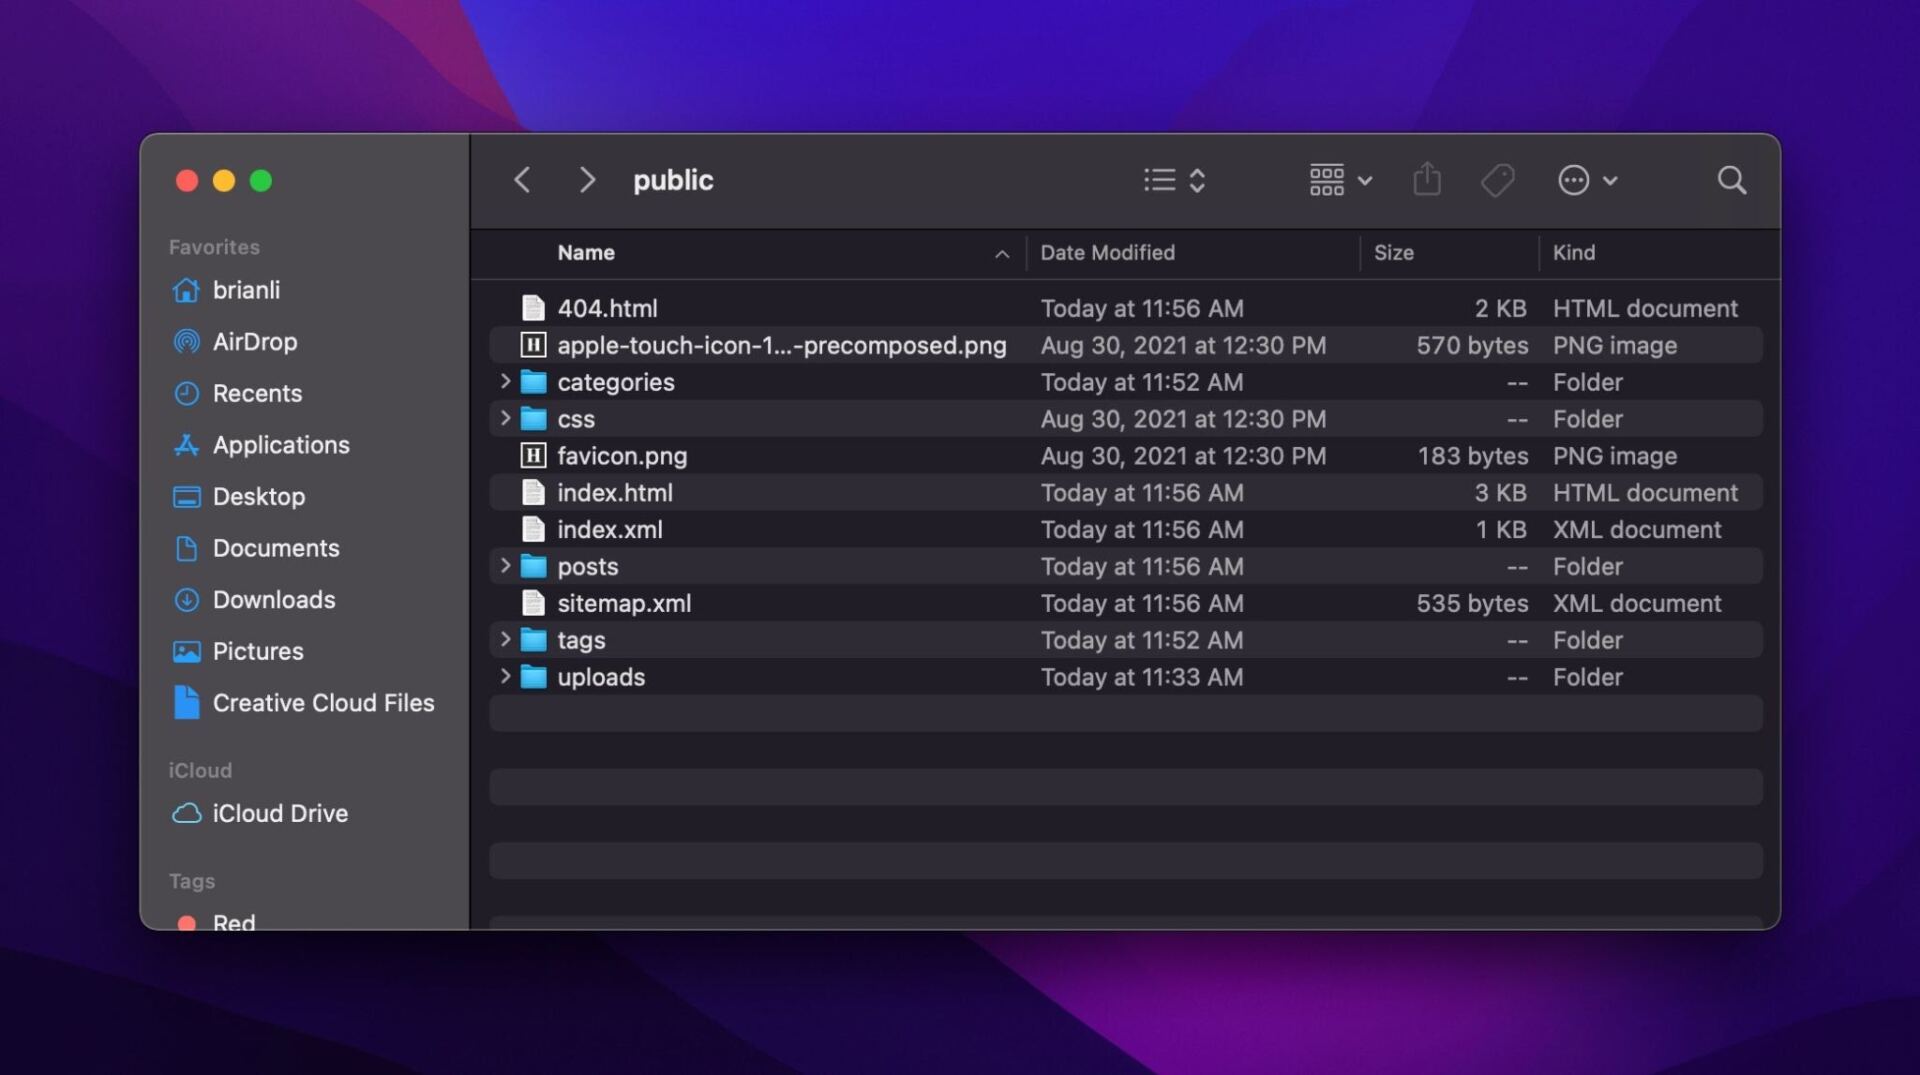
Previously, we used the hugo server -D to spin up a local building server to preview changes to our internet website in real-time. To generate the internet website in entire, we will use the hugo command throughout the root checklist of our mission. After the internet website technology is whole, you should see a brand spanking new public folder in your mission checklist. Inside this folder, you’ll to search out all of the data that need to be uploaded to a server or cloud storage service like Amazon S3.
Generate your Hugo internet website in the community.
Generating your internet website in the community and manually uploading it to Amazon S3 or a server operating Nginx is a technique of deploying a statically generated internet website. Alternatively, it’s now not the best because it requires you manually upload new data each time you’re making a transformation.
As an alternative, a more sensible choice is to link your Hugo mission folder to a GitHub repository and link the GitHub repository to an automated deployment service like Netlify. With this setup, you can edit your internet website, push the changes to GitHub, and reason a brand spanking new assemble and deployment on Netlify without any guide intervention. Now, let’s walk by the use of recommendations on how you can do all of this!
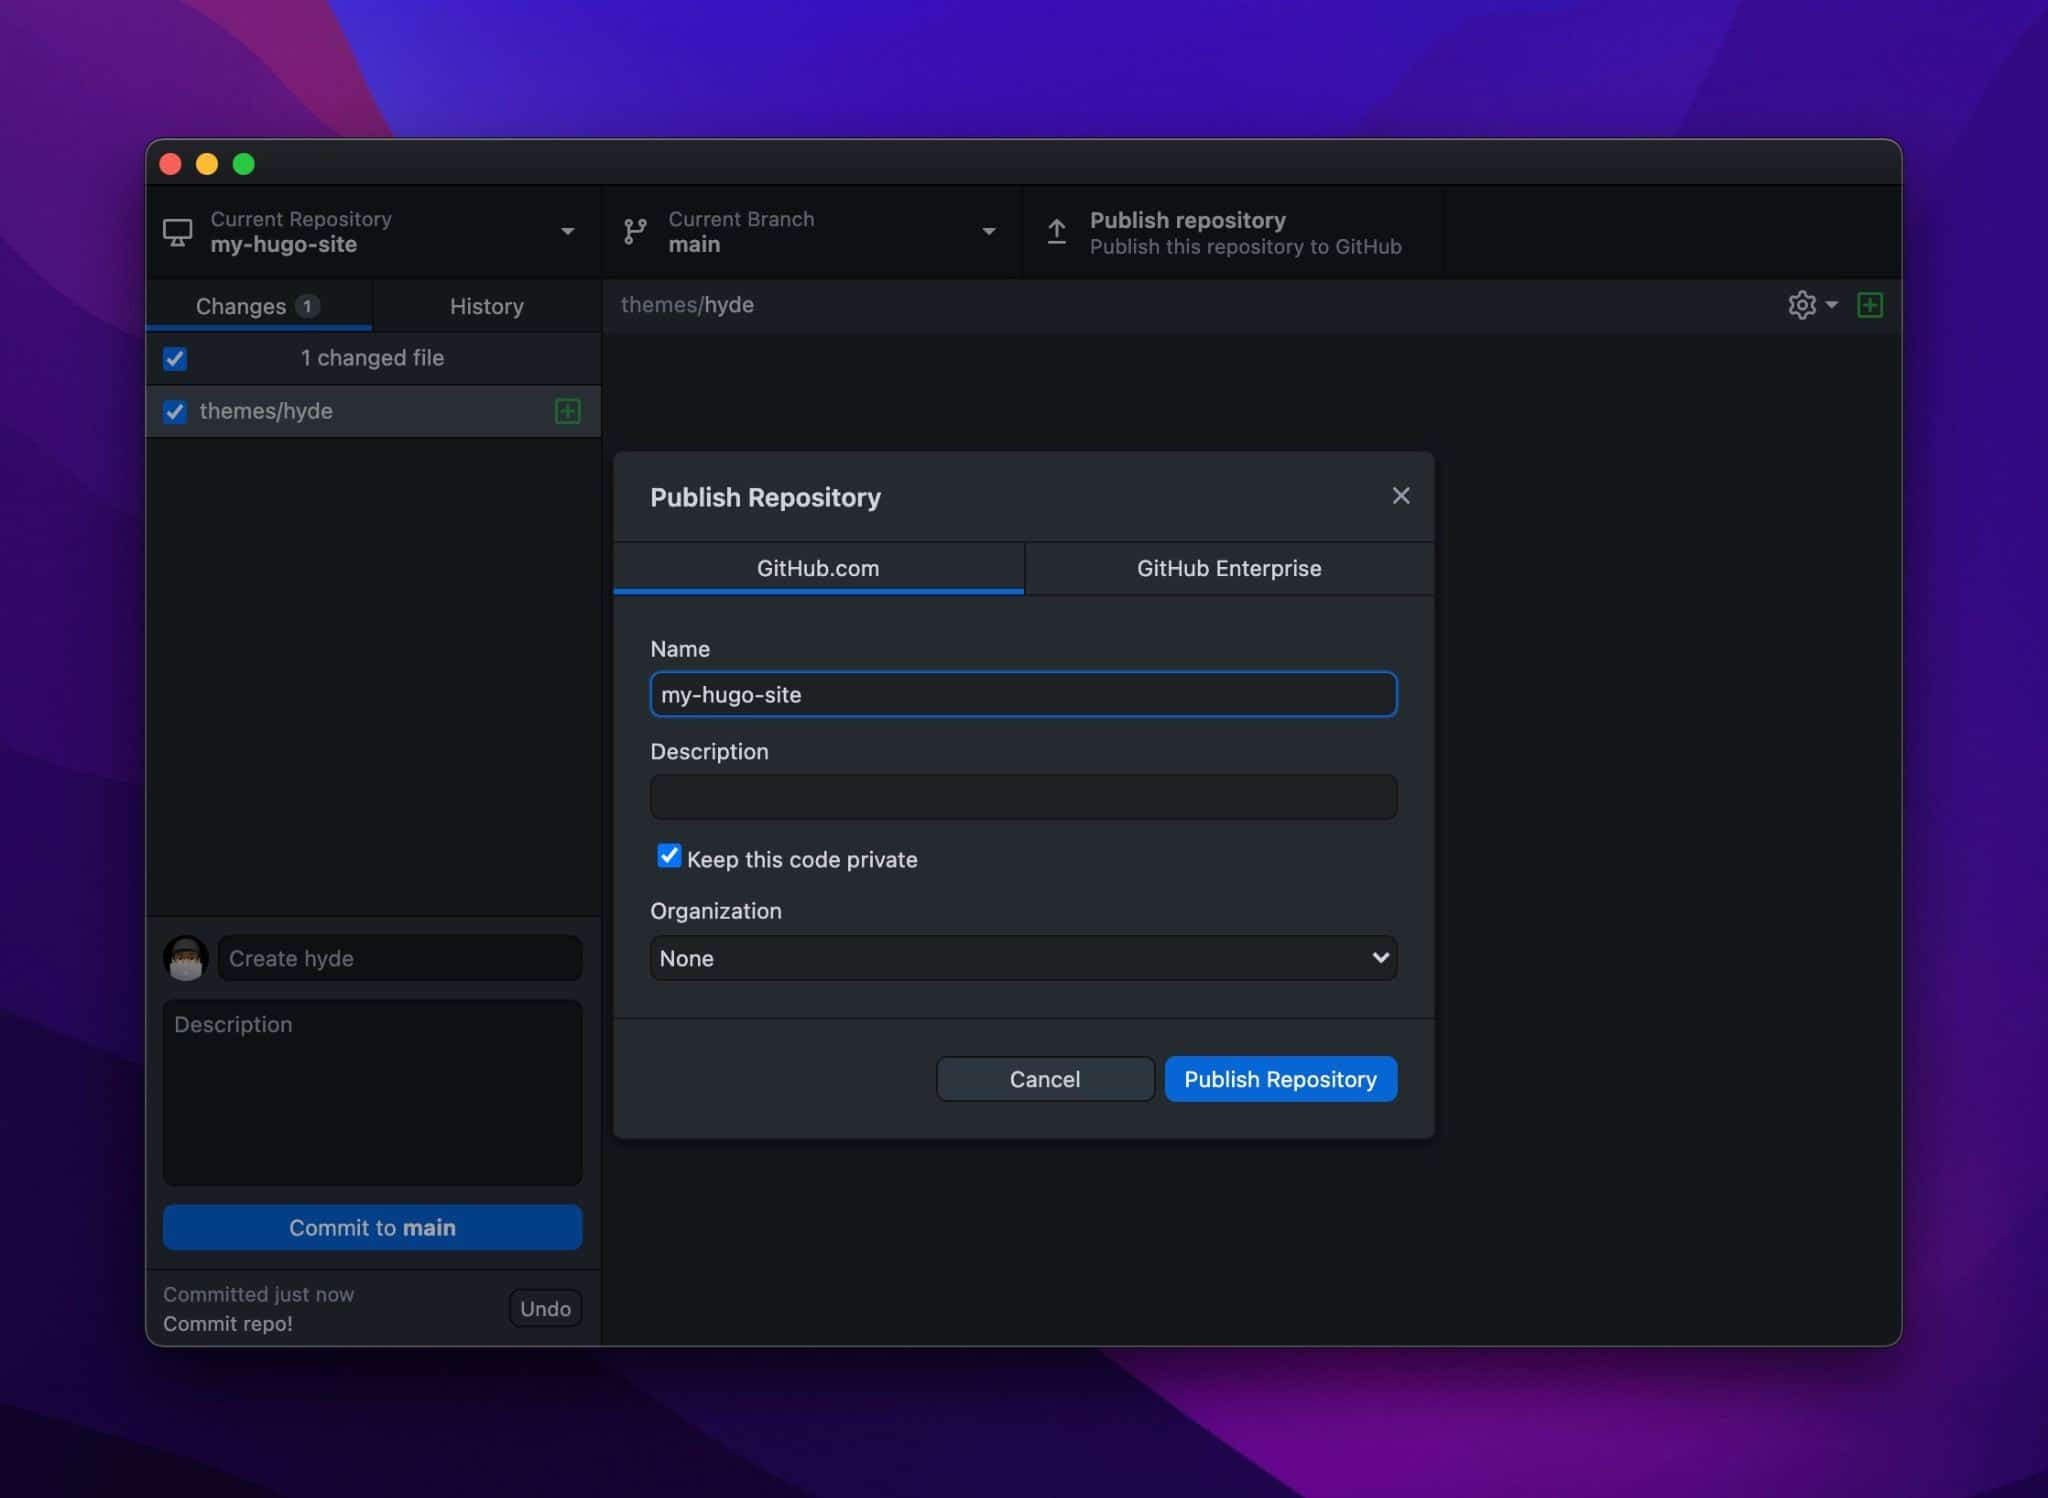
How you’ll Upload Your Hugo Problem to GitHub
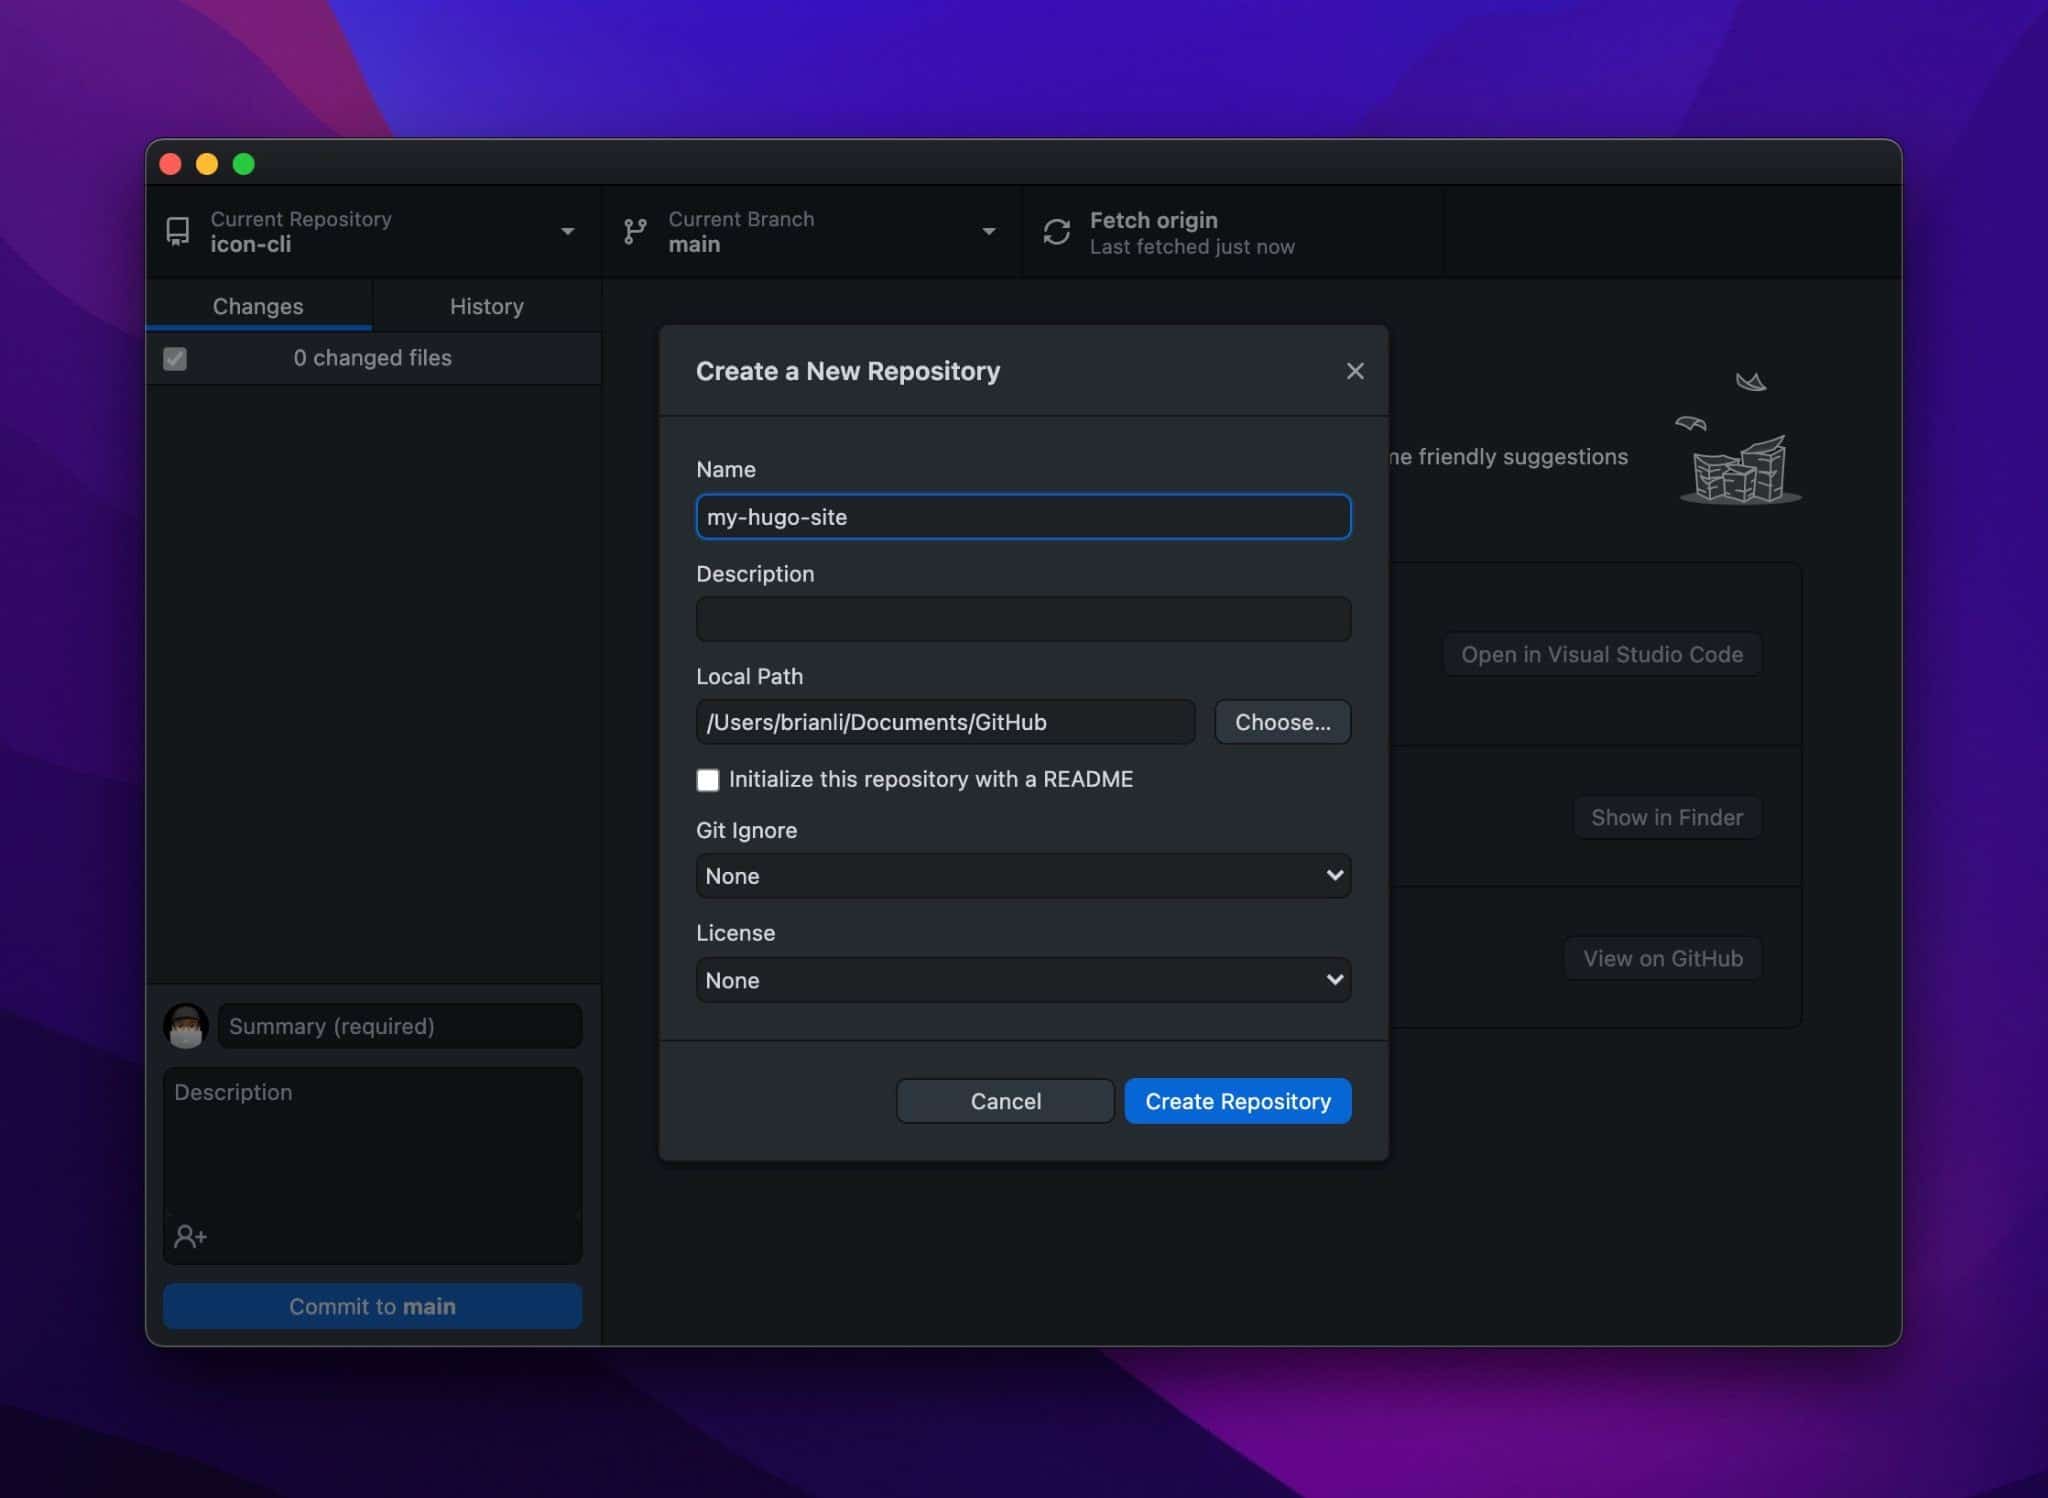
First, you’ll need to create a GitHub repository in your mission. To do this, create a GitHub account (in the event you don’t already have one) and download the official GitHub desktop app. After setting up the GitHub app, click on on File throughout the menu bar and make a selection New Repository. Give the repository a name of your choosing, go away the other alternatives in their default states for now, and click on on Create Repository.
Create a GitHub repository.
By the use of default (on macOS), the GitHub app creates new repositories in /Consumers/username/Bureaucracy/GitHub. Since we named our repository my-hugo-site, our repository can also be found out at /Consumers/brianli/Bureaucracy/GitHub/my-hugo-site.
Next, switch all of the data in your unique mission folder into the new GitHub repository folder. You’ll want to delete the public folder because of we don’t need to upload that folder to GitHub.
Reproduction mission into GitHub repository folder.
In the event you navigate once more to the GitHub app, you should now see a list of changed data. So as to add the repository to GitHub, add a summary, click on on Make a decision to main, and click on on Submit Repository throughout the upper correct corner.
Commit the repo, and upload it to GitHub.
By the use of default, the “Keep this code private” chance is checked. If you want to have your code to be open-source and publicly accessible, be happy to uncheck it. Finally, click on on Submit Repository once all over again.
Submit your GitHub repository.
Now, in the event you transfer to GitHub, you should see your repository online like so:
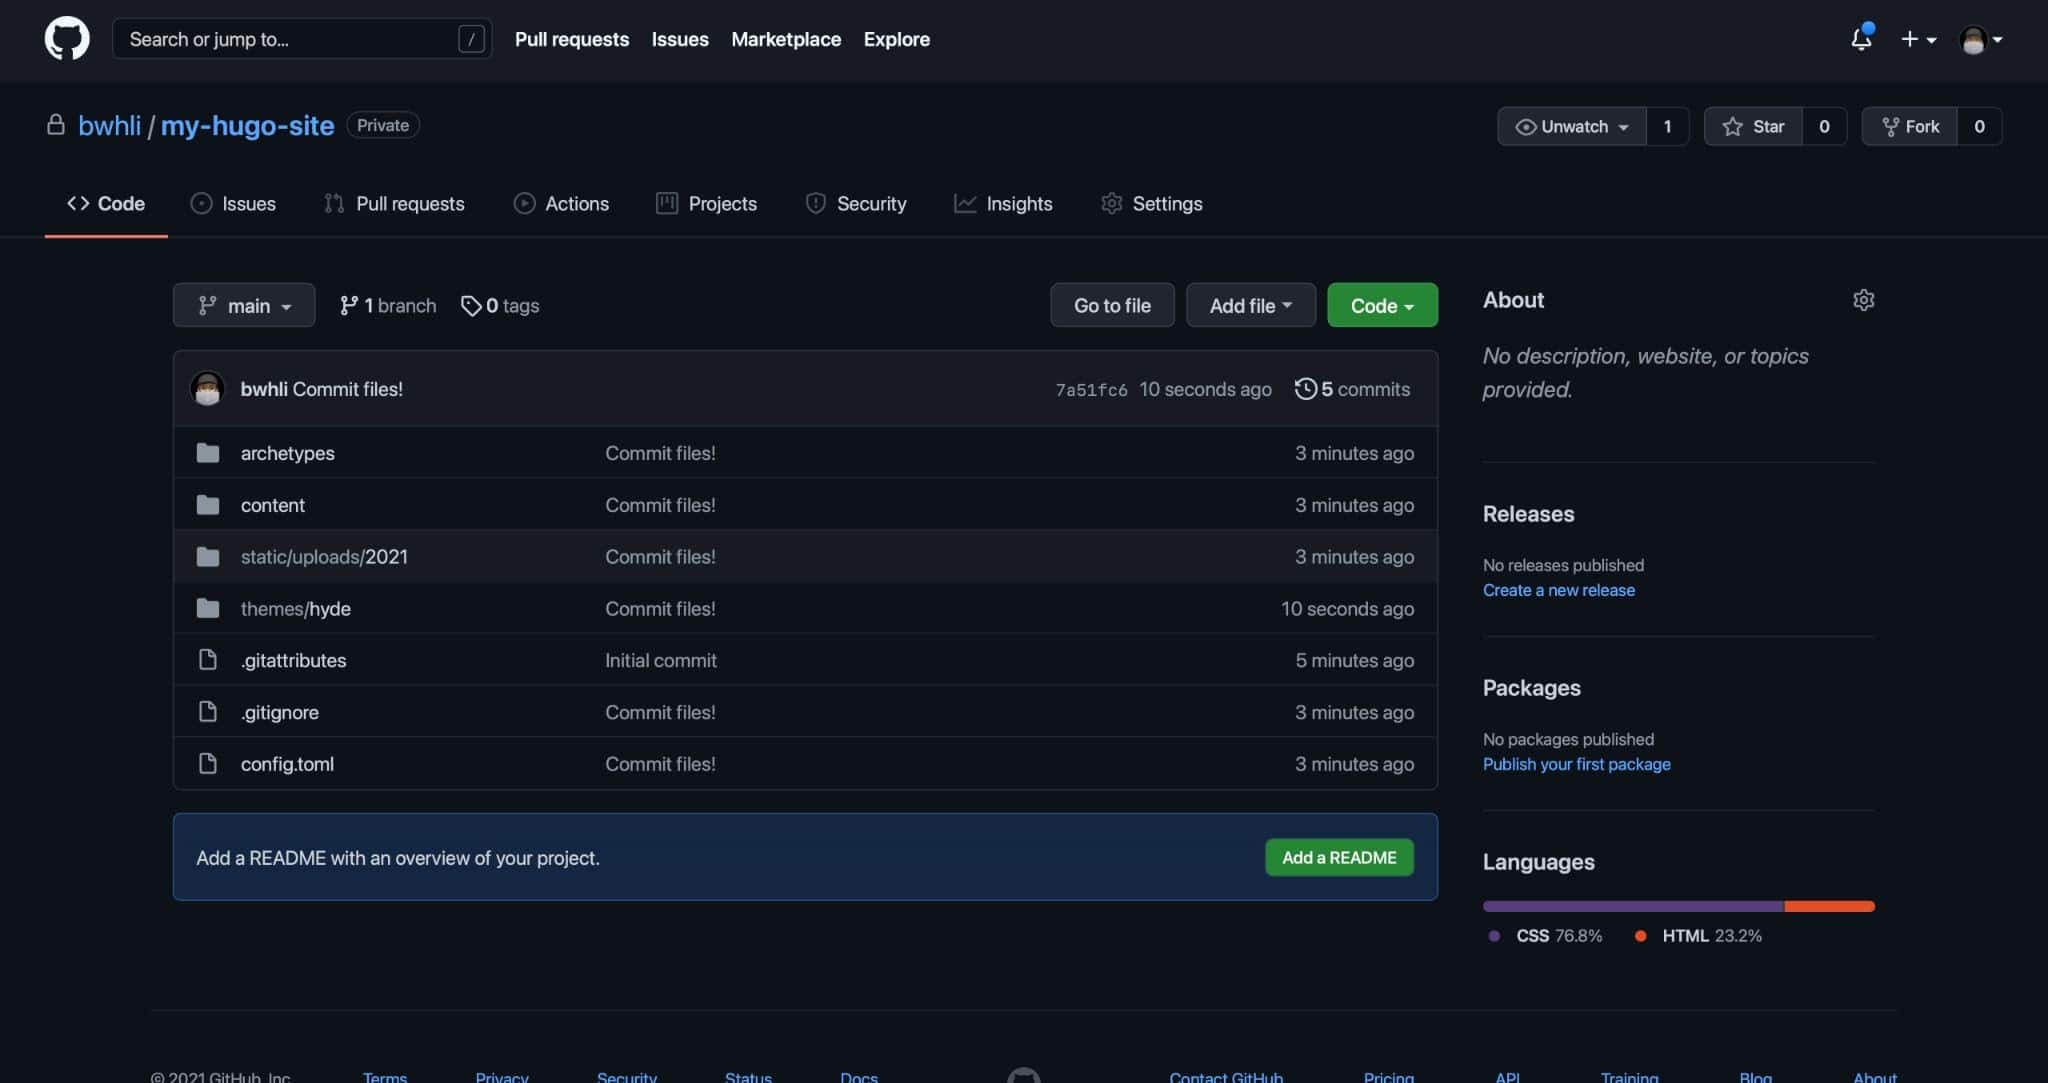
Hugo mission repository on GitHub.
How you’ll Link GitHub Repo to Netlify
In the event you don’t already have a Netlify account, sign up for one here. To link a GitHub repository to Netlify, click on on New internet website from Git throughout the Netlify dashboard.
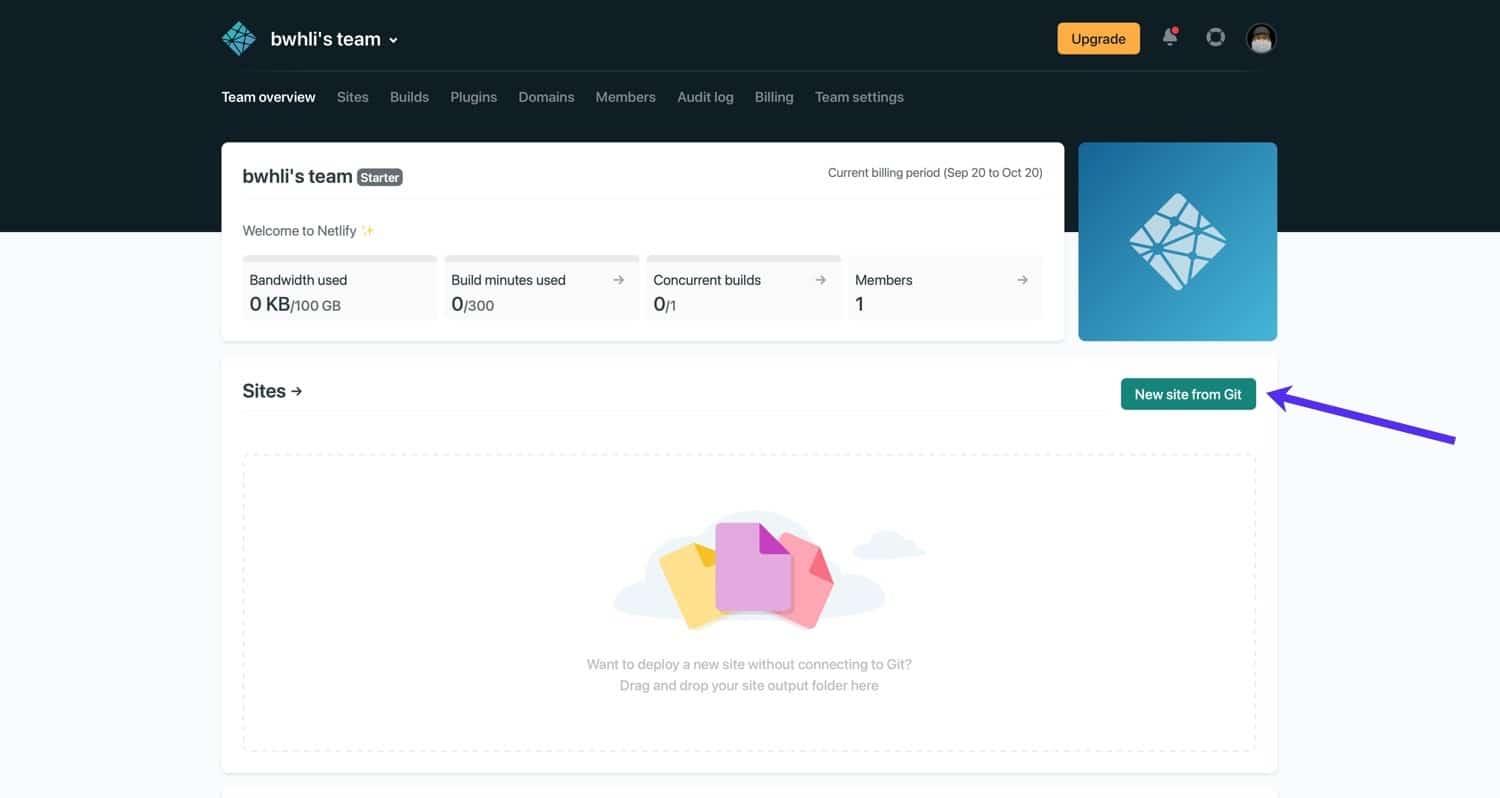
New internet website from Git on Netlify.
Underneath Stable Deployment, make a selection the GitHub chance.

Choose “GitHub” for secure deployment.
Next, use the search box to go looking out your Hugo mission repository.
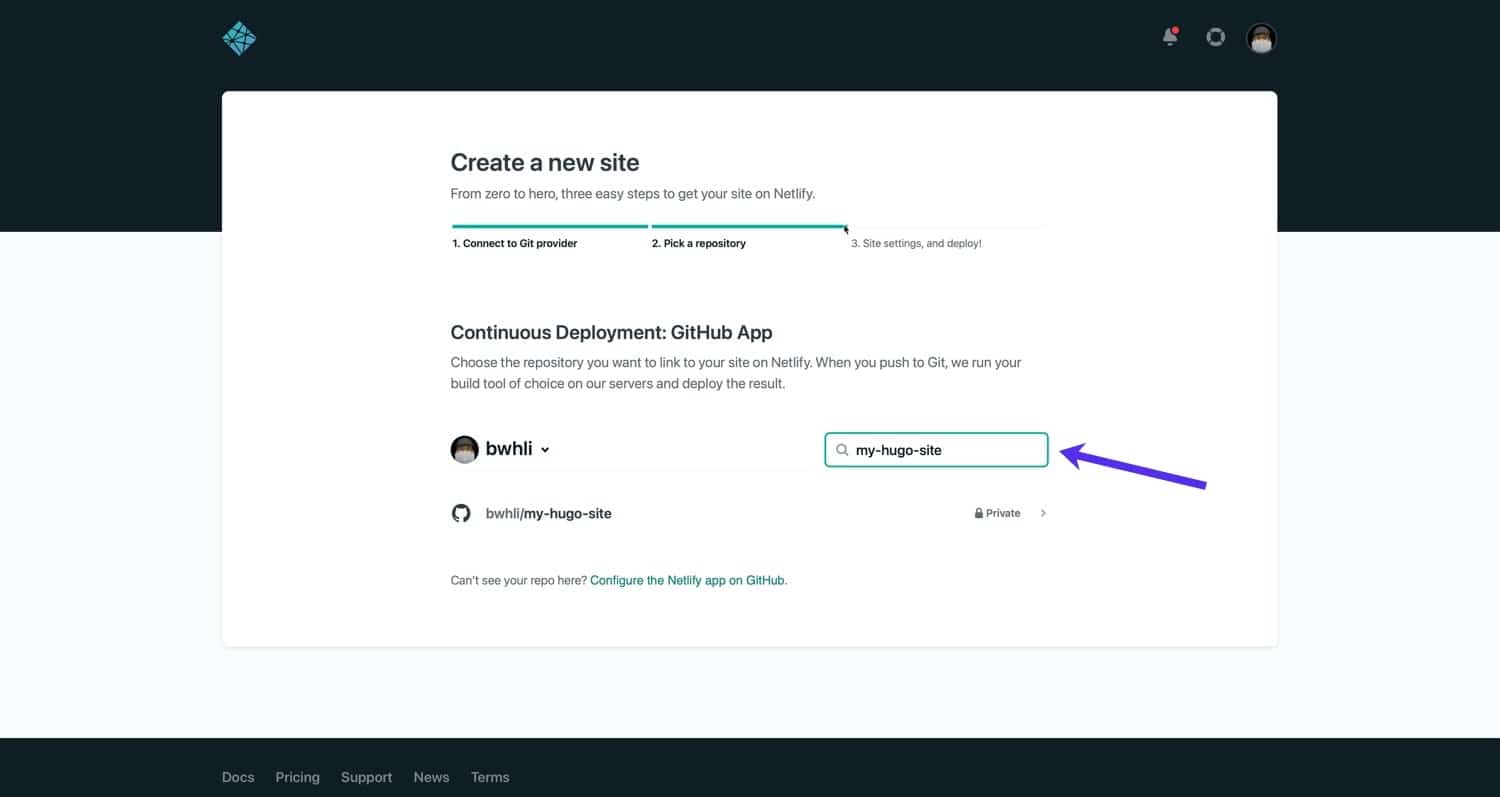
To search out your Hugo mission repository.
Next, specify the settings for the continuous deployment. Since Netlify can come throughout a Hugo configuration, the default settings should artwork top of the range for a basic deployment.
As you get further aware of Hugo, that you must delve into environment variables, custom designed assemble directions, and additional. For the time being, setting the assemble command to hugo and most of the people checklist to public will will let you deploy a simple Hugo internet website. After specifying the assemble command and public checklist, click on on Deploy Web site.

Deploy Hugo internet website on Netlify.
Since Hugo is this sort of speedy static internet website generator, the deployment should best take a few seconds for a basic internet website. As quickly because the deployment finishes, you’ll be able to see a staging URL throughout the Netlify dashboard. Click on at the URL to view the deployed internet website.
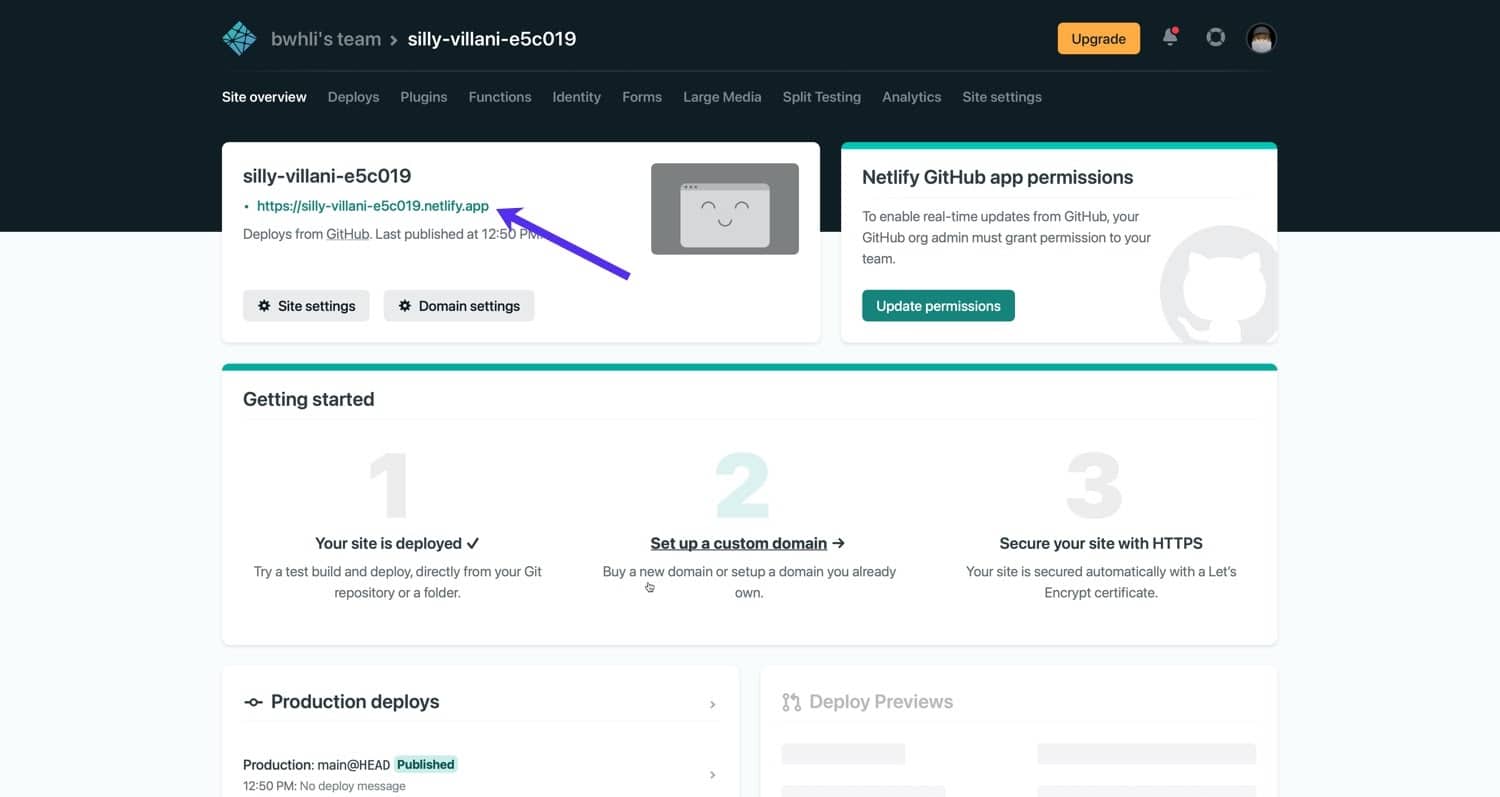
Netlify staging URL.
Proper right here’s our Hugo internet website on Netlify. As you can see, it’s identical to the internet website on our local environment:
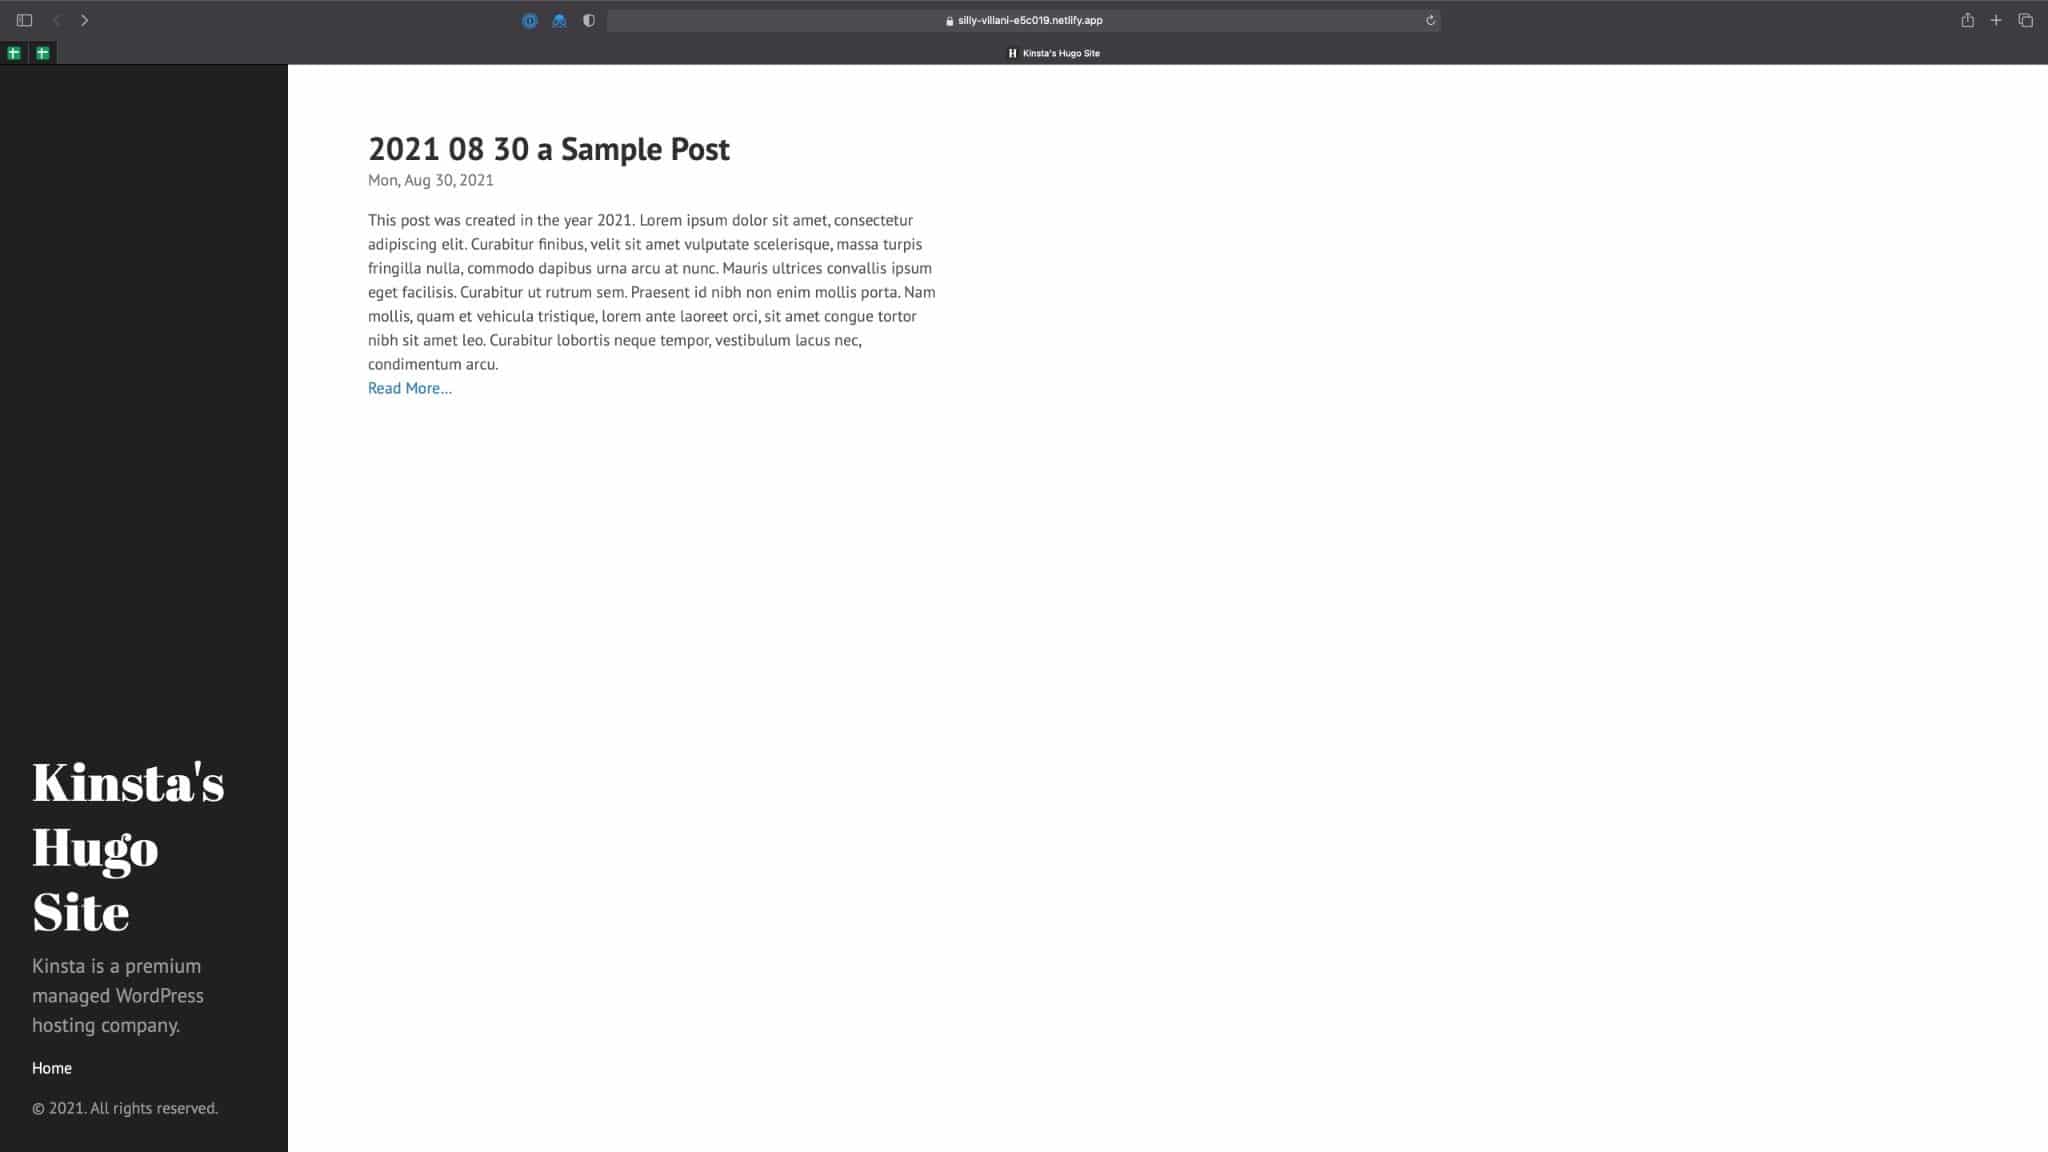
Hugo internet website on Netlify.
At this point, you can organize a custom designed space and SSL certificate in your Netlify-hosted internet website. To take a look at this, we suggest in regards to the official Netlify documentation.
Since we’ve linked Netlify to GitHub, a brand spanking new make a decision to the Hugo mission GitHub repo will automatically reason a brand spanking new deployment on Netlify!
Ready to build a static site in record time?  Start with Hugo
Summary
Hugo is doubtless one in all the freshest static internet website generators on the earth, and for a good the explanation why. Not best does it have super speedy assemble processing, however it indubitably moreover ships with difficult templating options that toughen partials and shortcodes.
In this instructional, you learned recommendations on how you can configure Hugo, create a brand spanking new mission, add content material subject matter data, edit theme data, and deploy a finished static internet website. We propose going all the way through the dependable Hugo documentation to learn further about Hugo and its further difficult choices like custom designed functions, front matter, and CSS/JS buildpacks.
What are your concepts on Hugo and other static internet website generators? Please let us know throughout the comments underneath!
The put up How to Build a Blazing Fast Static Site With Hugo seemed first on Kinsta®.
Contents
- 1 {{ .Determine }}
- 2 tags. Hugo has numerous built-in templating variables, and also you’ll even write custom designed functions to process wisdom at assemble time. For templating, Hugo uses Cross’s built-in html/template and text/template libraries. That is serving to reduce down on software bloat because of Hugo doesn’t need to arrange third-party libraries for templating.
- 3 {{ .Site.Title }}
- 4 {{ .Title }}
- 5 {{ .Title }}

0 Comments