

As a clothier or inventive, it’s all the time a good suggestion to have a portfolio to turn your paintings on-line. Within the virtual generation that we’re residing in, construction a non-public logo is an effective way to set your self except for the contest. Bearing this in thoughts, using Divi to create your portfolio website is a smart thought. Divi has two local modules that permit you to construct your portfolio. Now we have the Portfolio Module, in addition to the Filterable Portfolio Module. Each mean you can exhibit your portfolio in two tactics. Whilst the Portfolio Module is a great way to turn your paintings, the Filterable Portfolio Module lets you exhibit extra of your paintings and is derived with a clear out that can assist you higher provide your paintings in a extra arranged method. Through default, our portfolio modules exhibit your paintings in both one or 4 columns, relying at the format you select. On the other hand, on this educational, we’ll be the use of CSS to modify columns in Divi’s portfolio module.
On this educational, we’ll be the use of Divi’s Filterable Portfolio Module throughout the FREE Print Designer Layout Pack. Particularly, we’ll be the use of the Print Designer Gallery Page Template from the format pack. There are two format kinds inside of Divi’s portfolio Modules. The Grid Format comes with 4 columns. The Complete Width Format is available in one column. We’ll be the use of the Grid Format and CSS to modify columns in Divi’s portfolio module. With CSS, we’ll alternate the columns throughout the module to two, 3, 5, and six columns. The module may also be cell responsive for each pill and cell gadgets.
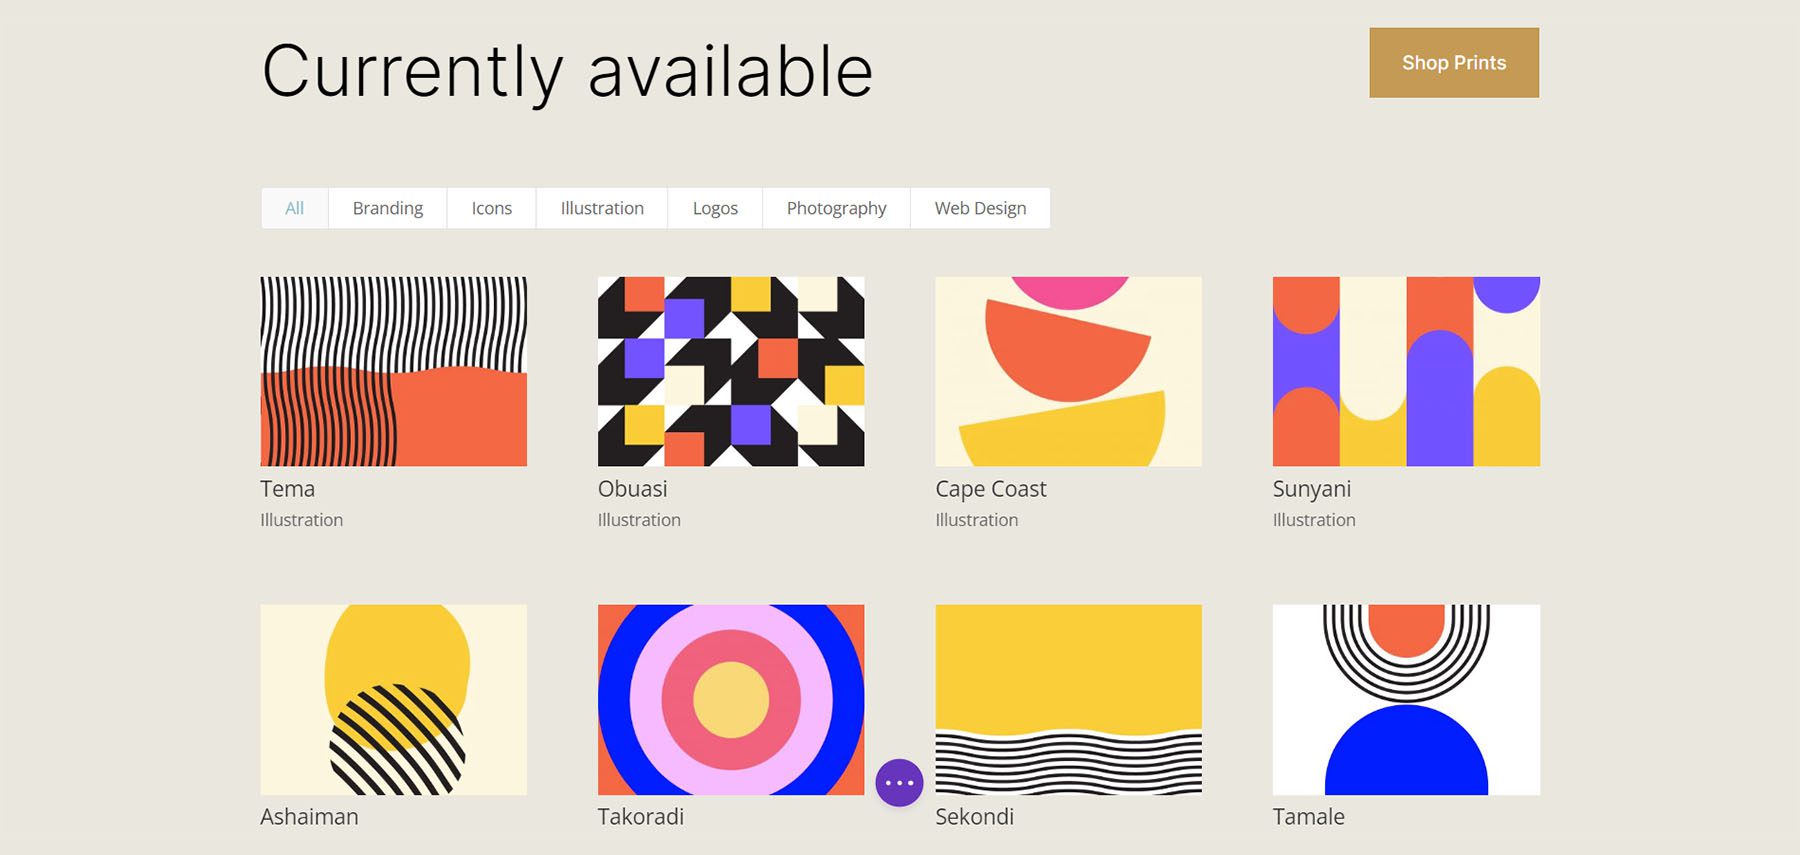
Examples of Other Columns within the Filterable Portfolio Module
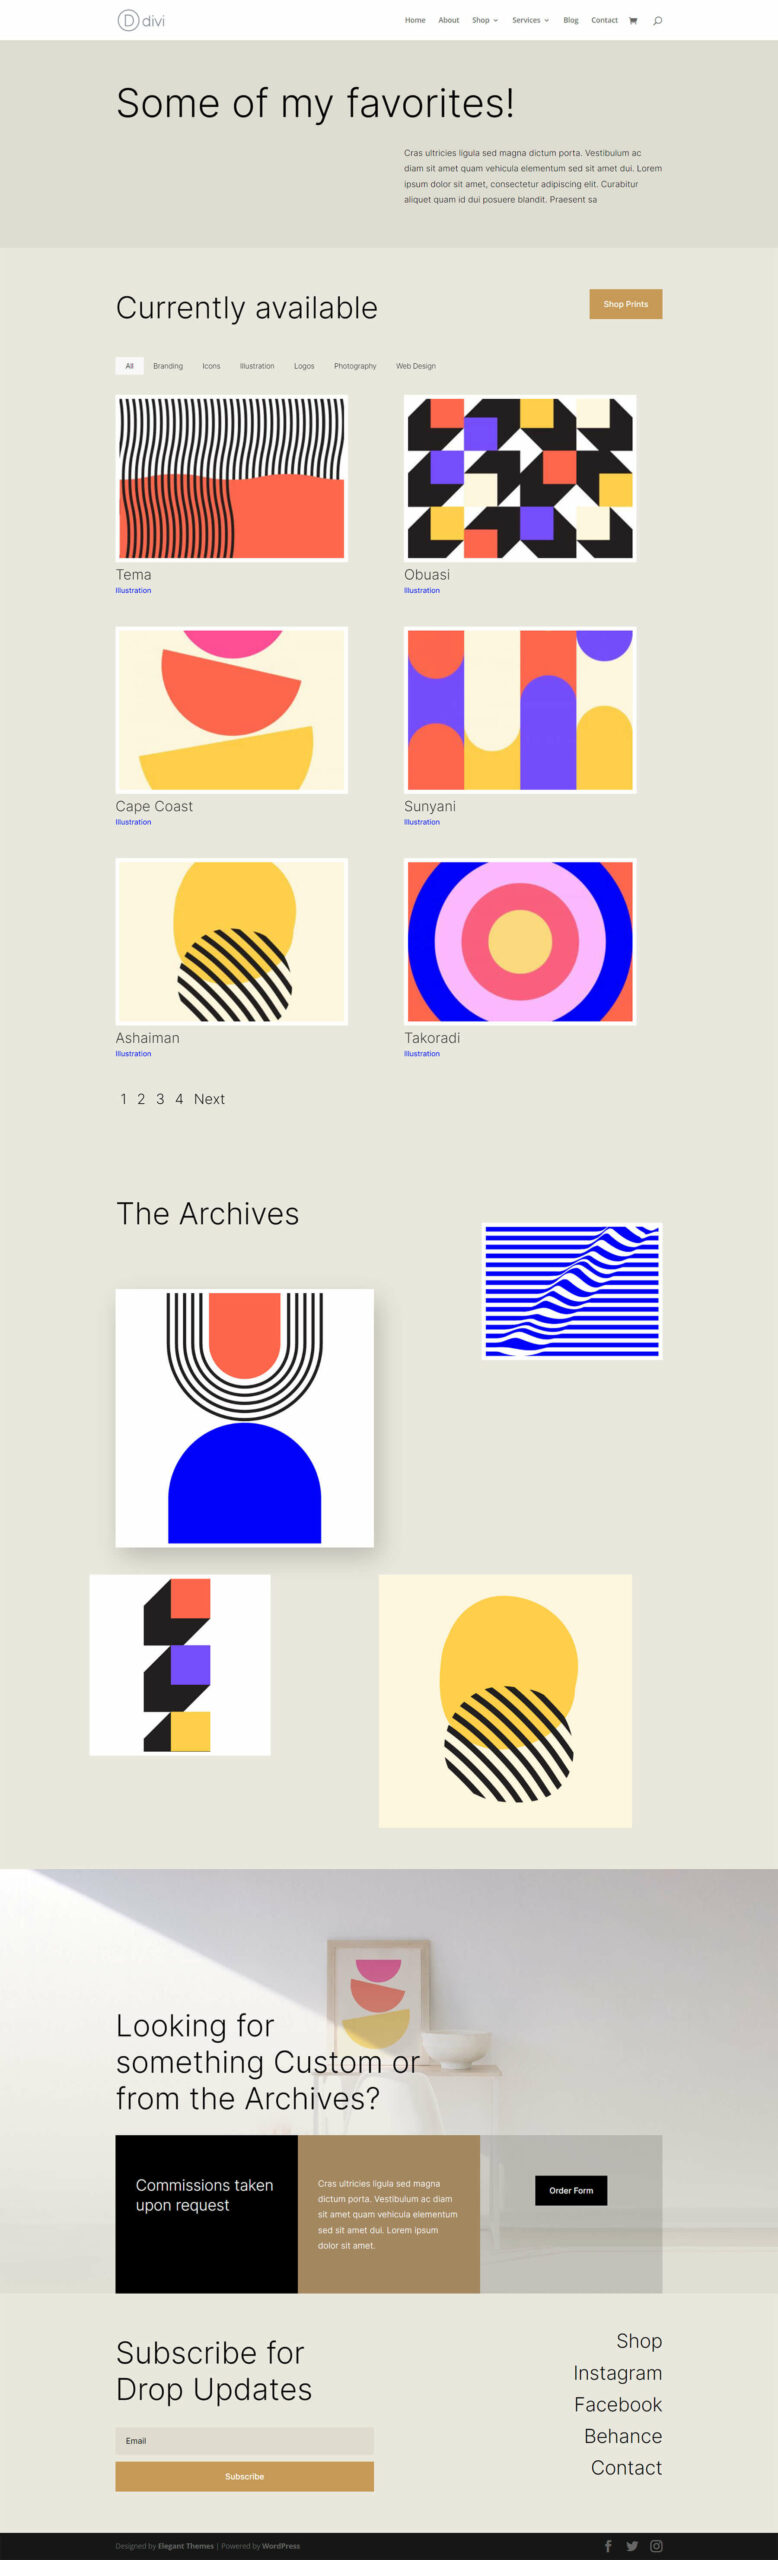
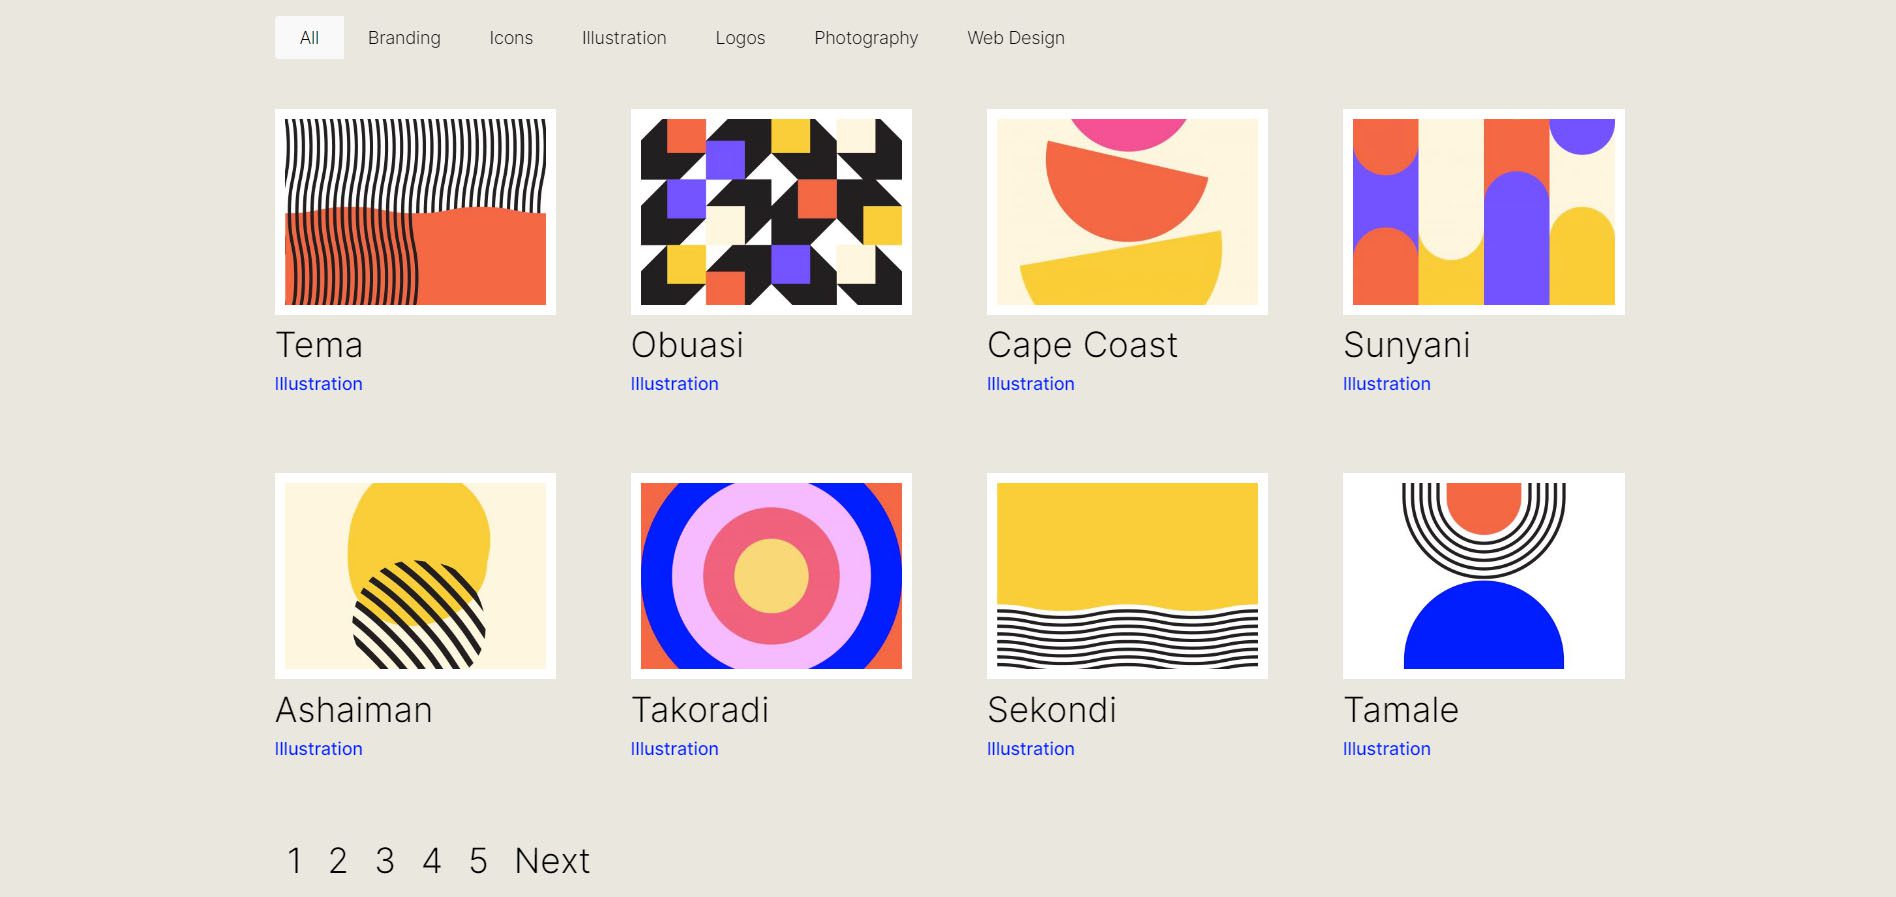
Right here’s the outcome of the paintings that we’ll be doing on this educational:
Alternate Divi’s Filterable Portfolio Module to two Columns
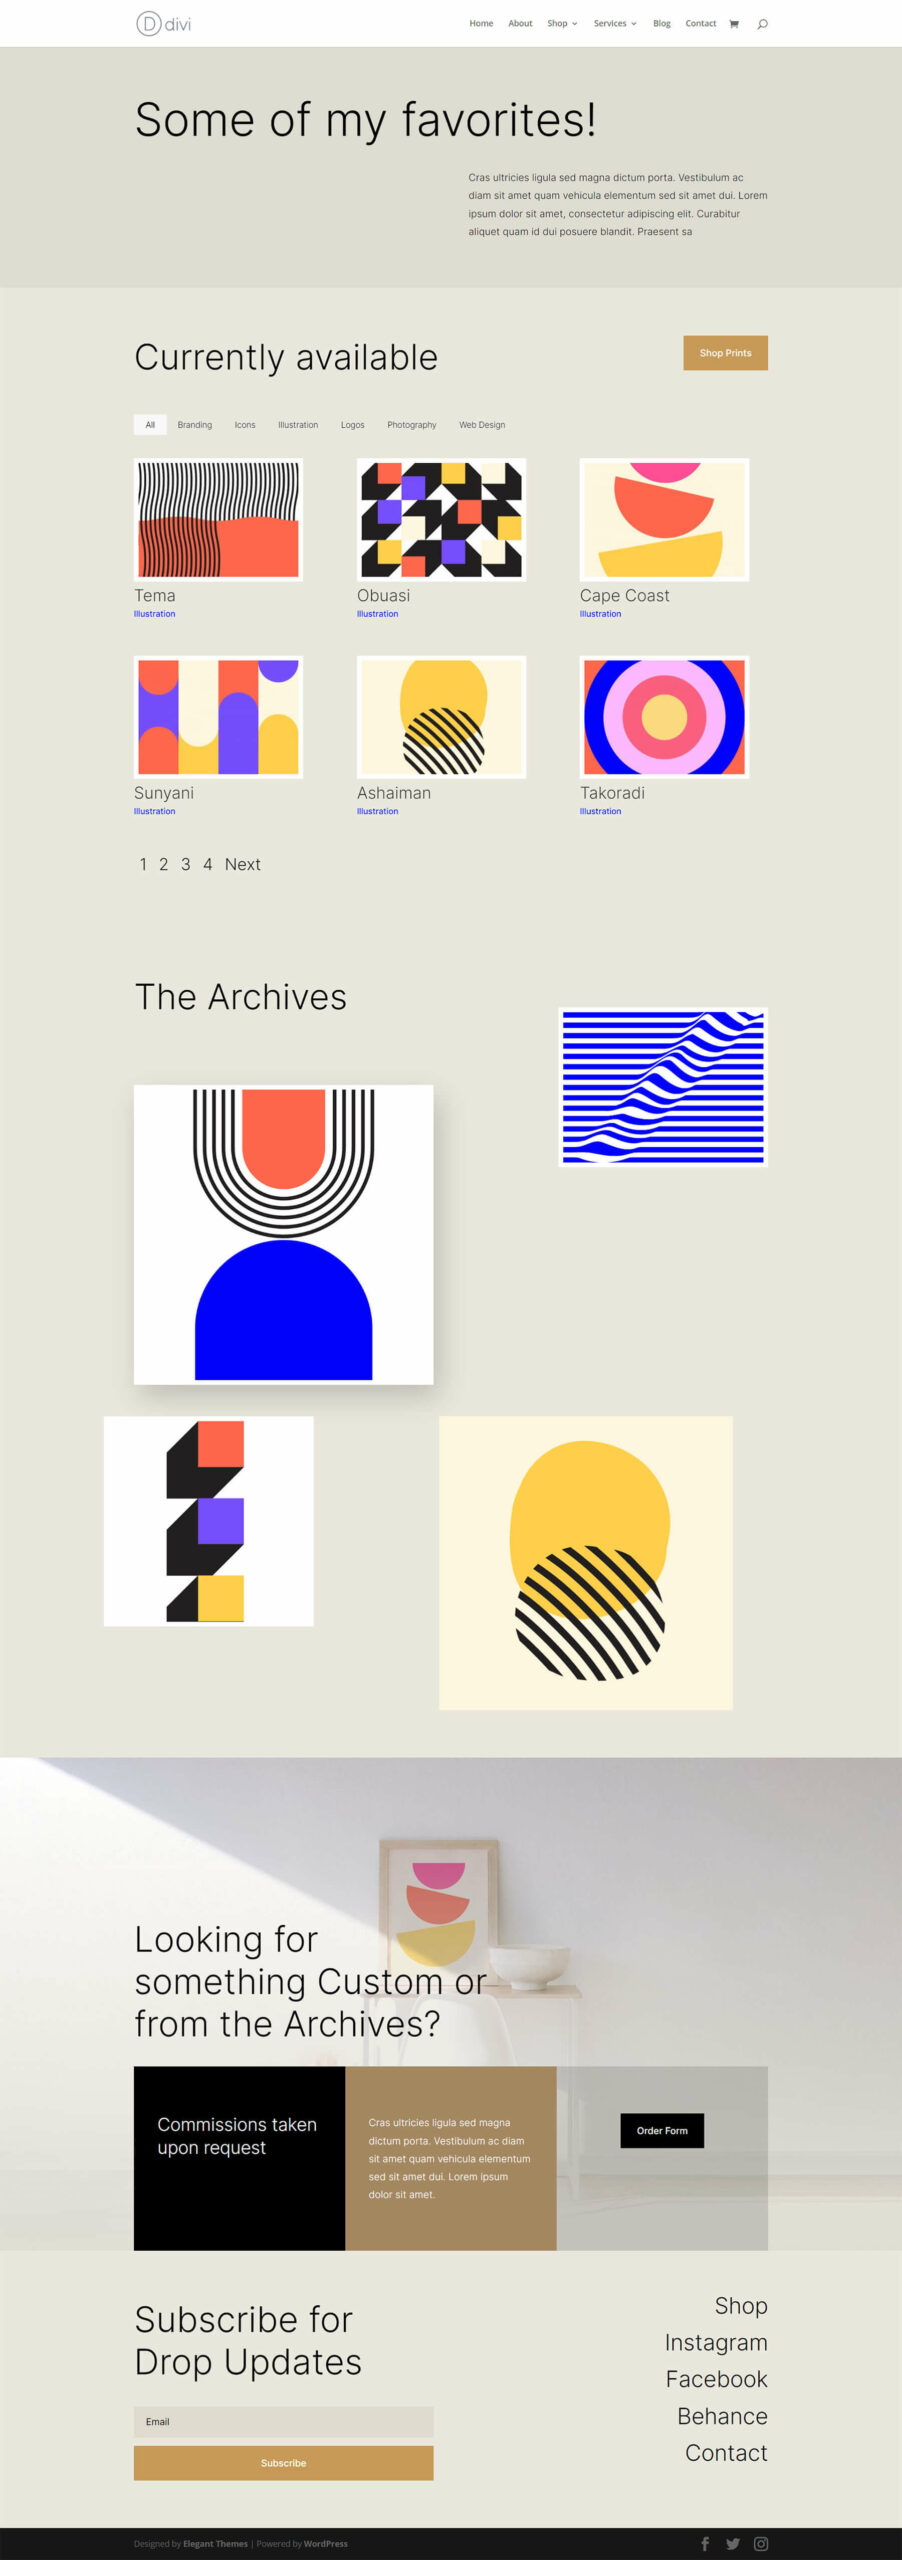
Regulate Divi’s Filterable Portfolio Module to a few Columns
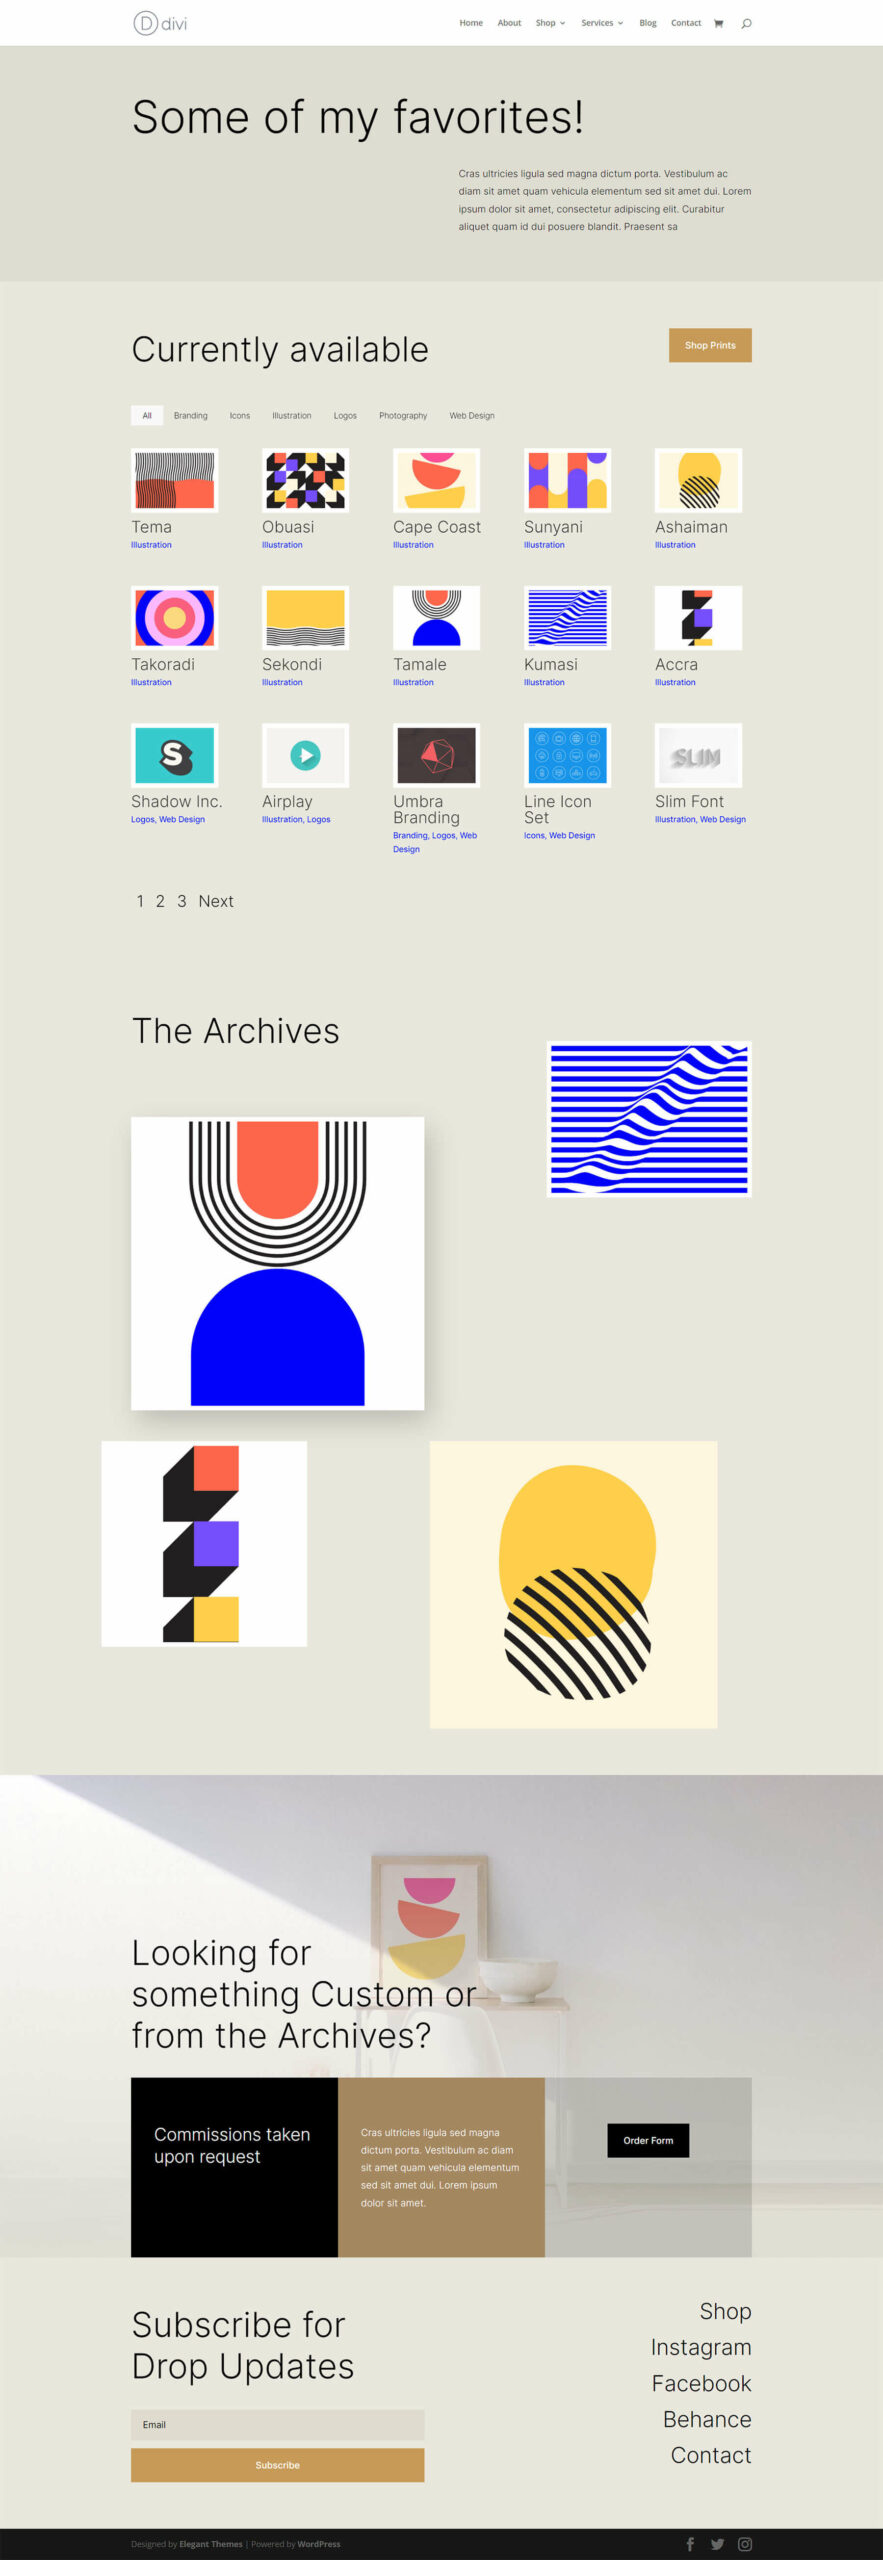
Replace Divi’s Filterable Portfolio Module to five Columns
Edit Divi’s Filterable Portfolio Module to six Columns

Styling the Filterable Portfolio Module
Sooner than we practice CSS to modify the collection of columns inside of our Filterable Portfolio Module, we will have to first taste it to compare our template.
Converting the Format
To begin, we will have to alternate our module format. To do that, we click on at the equipment icon to go into the module settings for our Filterable Portfolio Module.
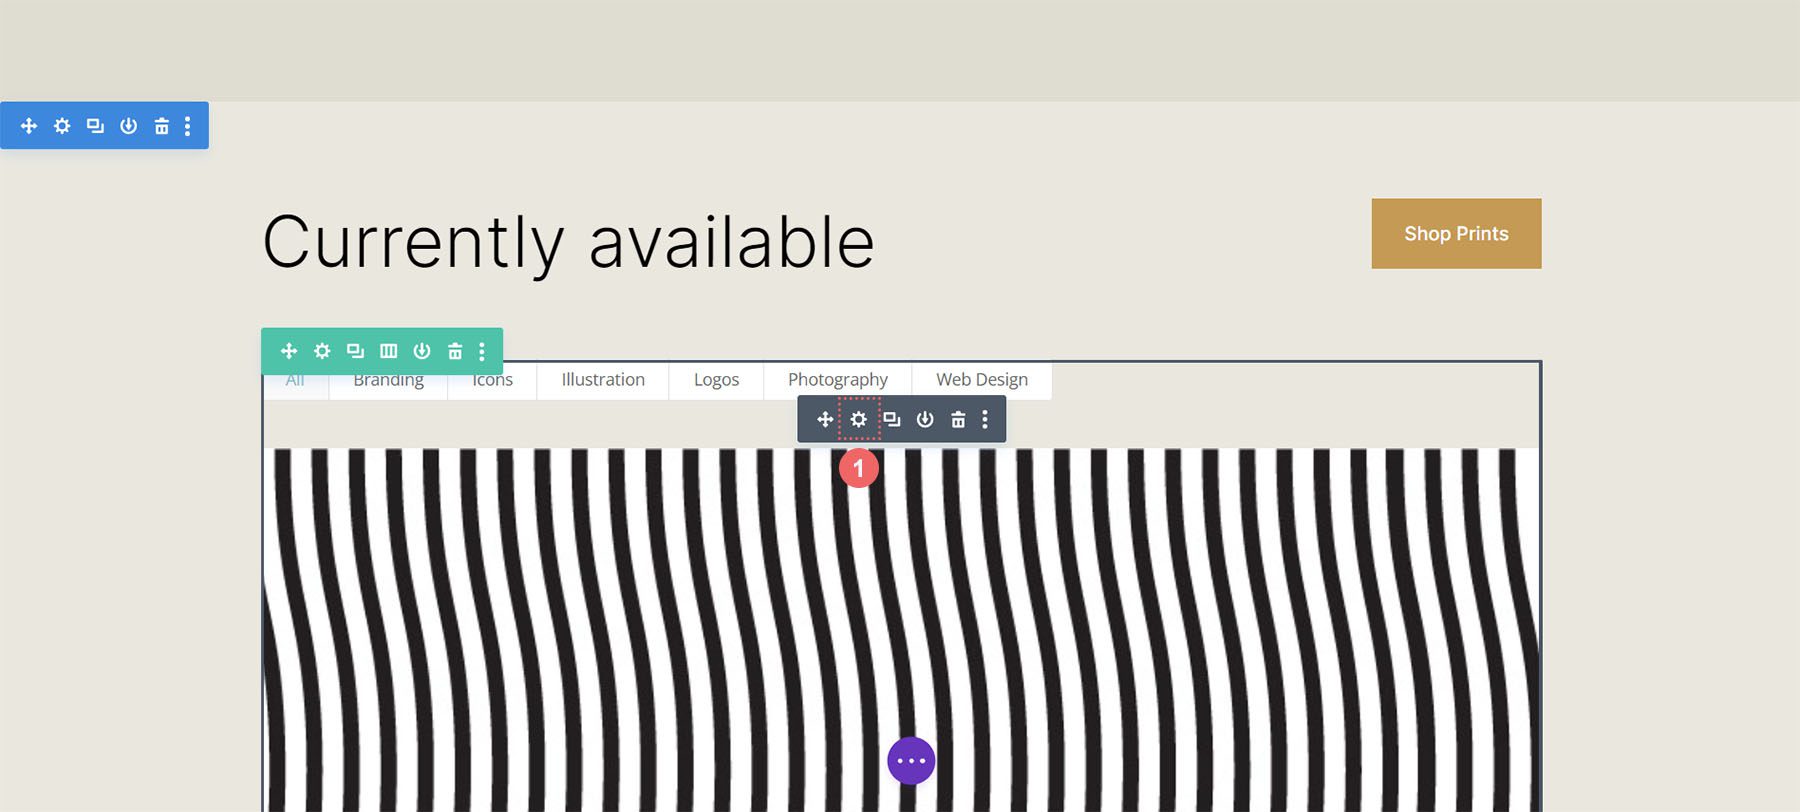
Subsequent, we click on at the Design tab. Once we input this tab, we will be able to now click on at the Format tab. Then, we will be able to alternate the format of the module from Fullwidth to Grid.

Right here, we will see the default Grid Format accommodates 4 columns.
Taste Portfolio Symbol Thumbnail
Now that we have got our Grid Format in position, let’s taste the portfolio symbol.
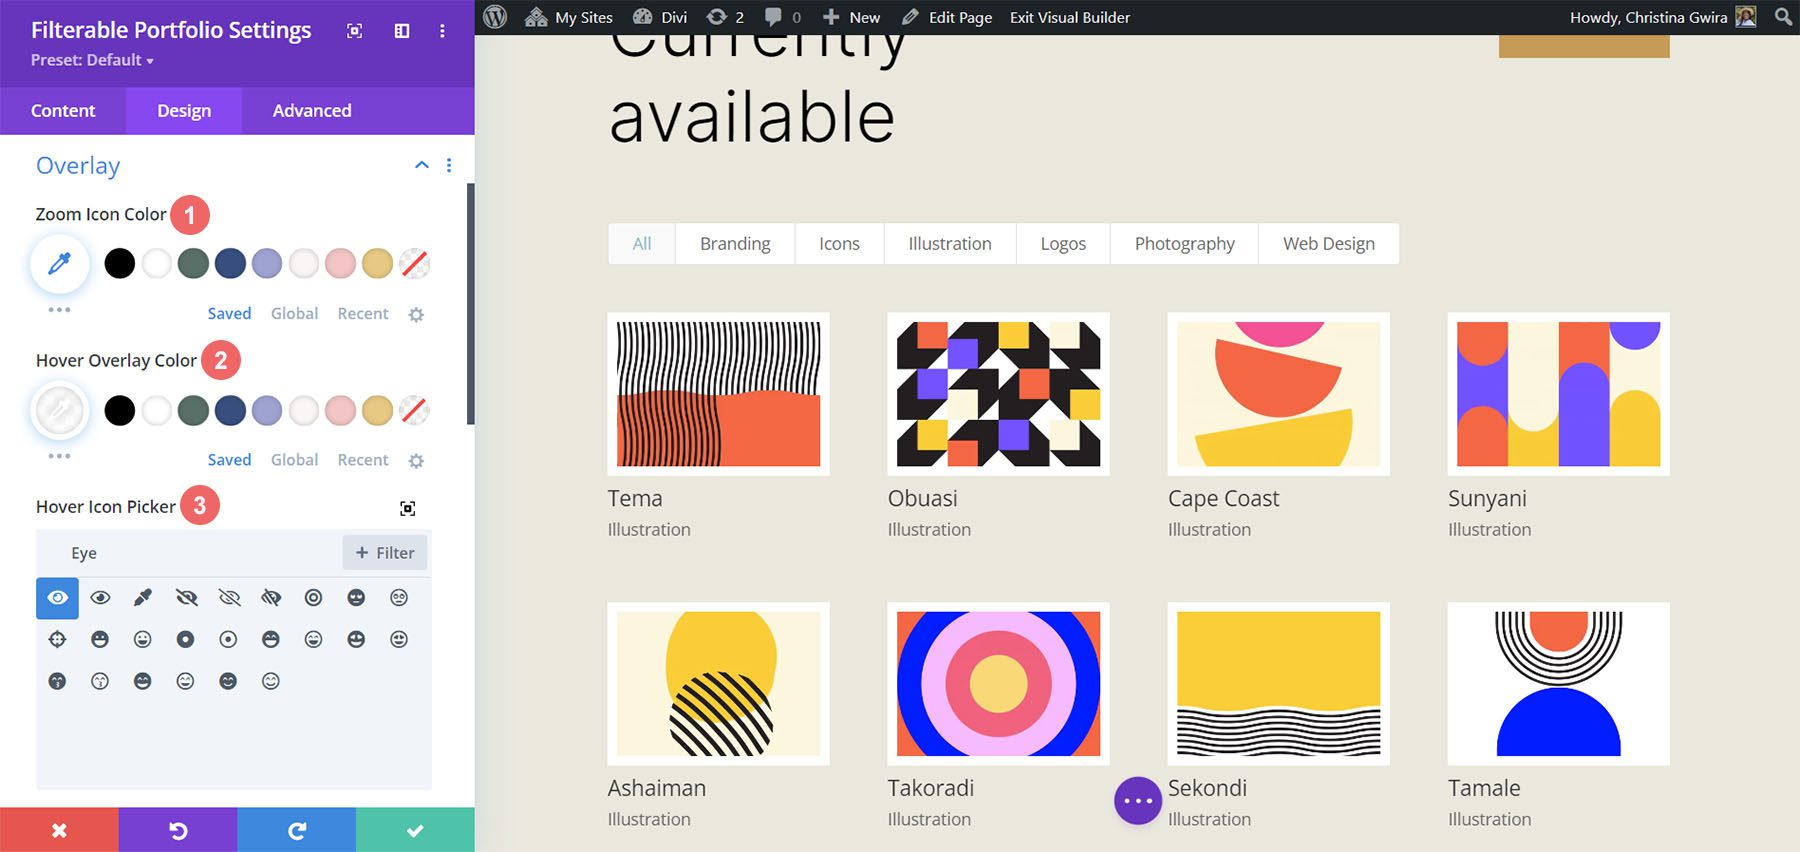
Styling the Symbol Overlay
First, we commence by means of styling the Overlay. Scroll down and click on at the Overlay tab. Use the next settings so as to add a white, translucent overlay to the Symbol:
Overlay Settings:
- Zoom Icon Colour: #000000
- Hover Overlay Colour: RGB(255,255,255,0.9)
- Hover Icon Picker: Check with the screenshot underneath
Including Symbol Border
After styling the Overlay, we will be able to upload a border. To do that, scroll right down to the Symbol tab. Use the next settings to taste the border:
Symbol Settings:
- Symbol Border Width: 8px
- Symbol Border Colour: #ffffff
- Symbol Border Taste: Cast

Styling Name Textual content
Subsequent, we will be able to taste the Name Textual content throughout the module. Let’s scroll right down to the Name Textual content tab. Subsequent, we’ll use the next settings to taste the identify:
Name Textual content Settings:
- Name Font: Inter
- Name Font Weight: Mild
- Name Textual content Colour: #000000
- Name Textual content Dimension: 28px
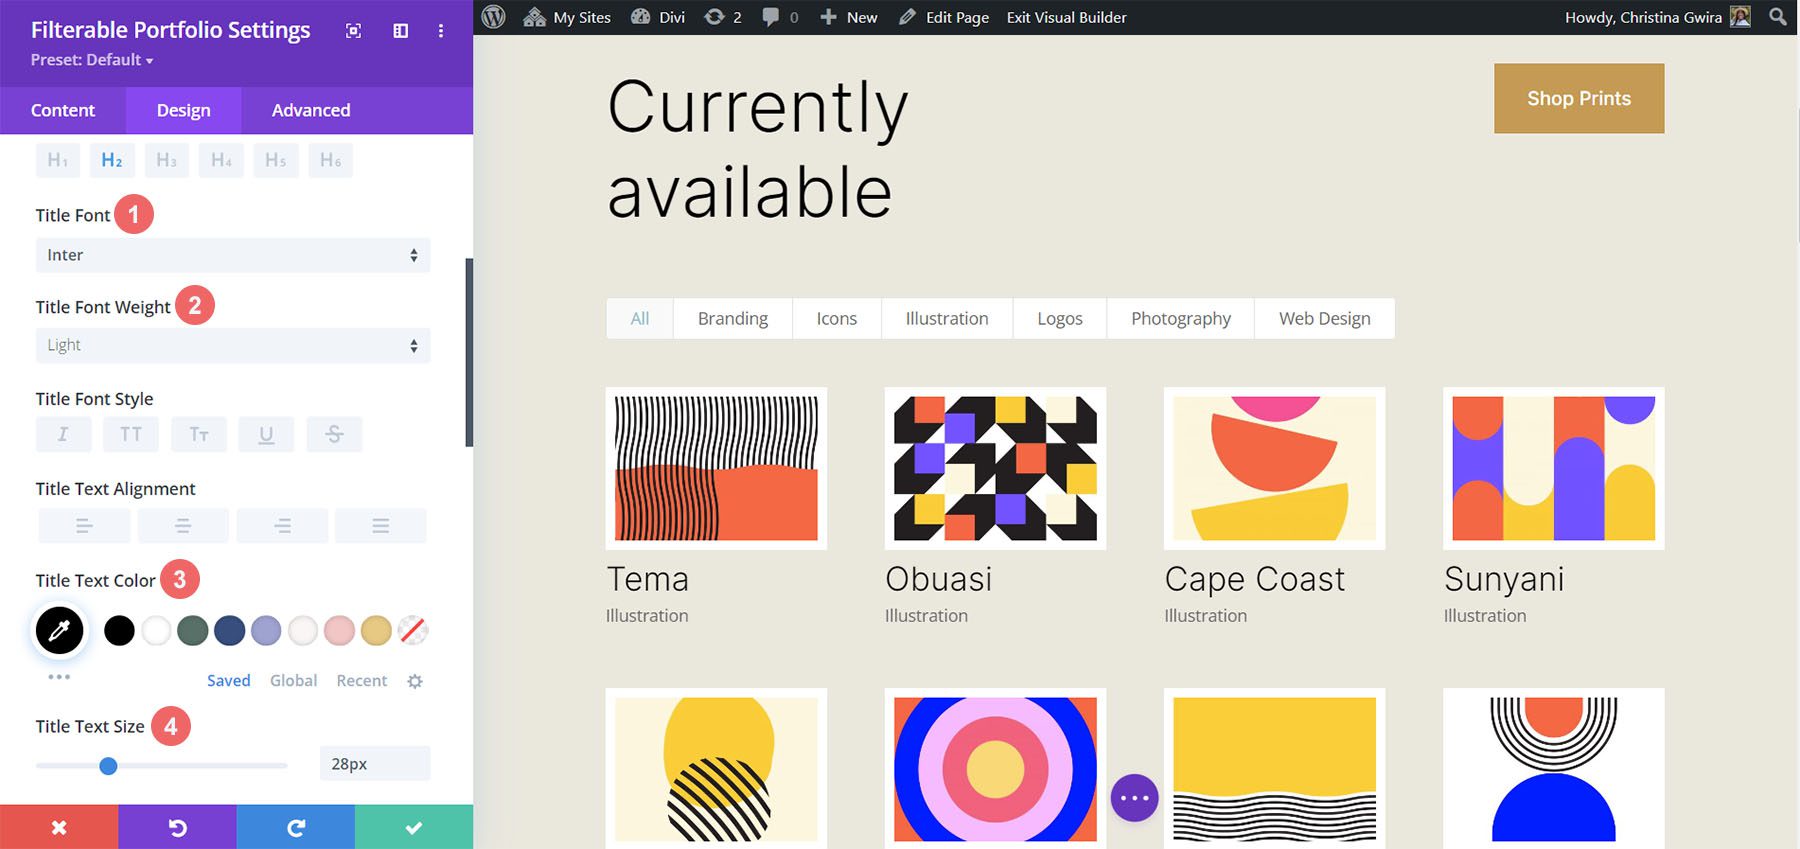
Understand that we’re the use of the similar font this is used in the course of the Print Clothier Format Pack.
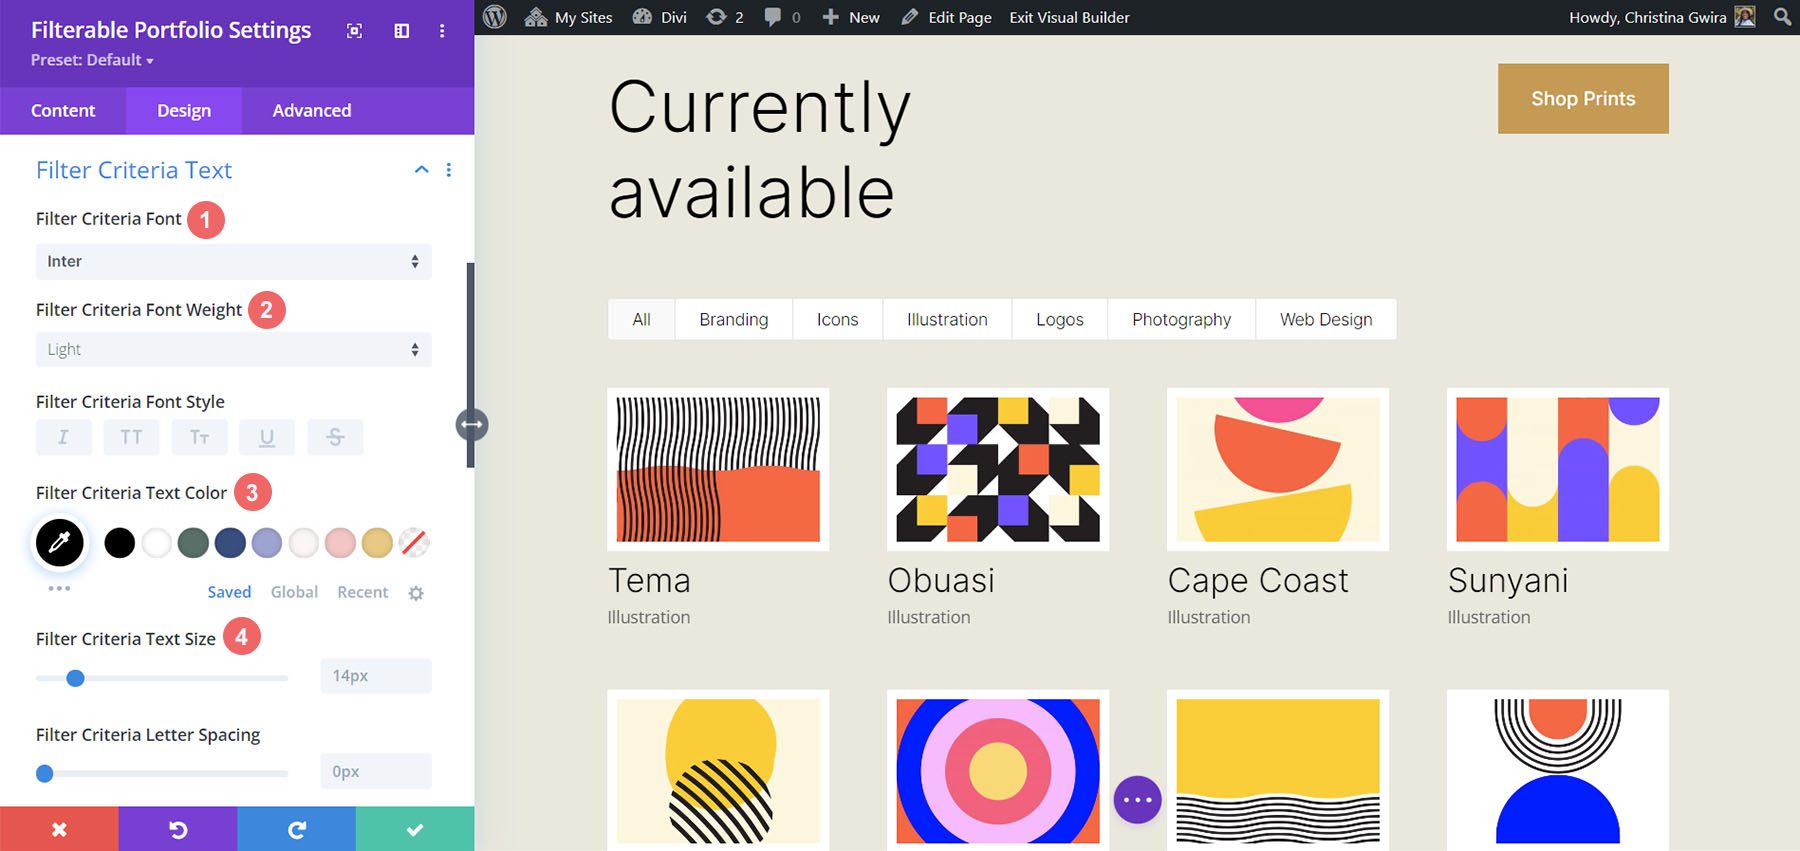
Styling and Including CSS for the Filter out Standards Textual content
For the Filter out Standards Textual content, we’ll be the use of a couple of traces of customized CSS throughout the Complicated tab of the module settings. Sooner than we upload the CSS, let’s taste the environment. First, we’ll practice the similar font circle of relatives and colour to the Filter out Standards Textual content.
Filter out Standards Textual content Settings:
- Filter out Standards Font: Inter
- Filter out Standards Font Weight: Mild
- Filter out Standards Font Dimension: 14px
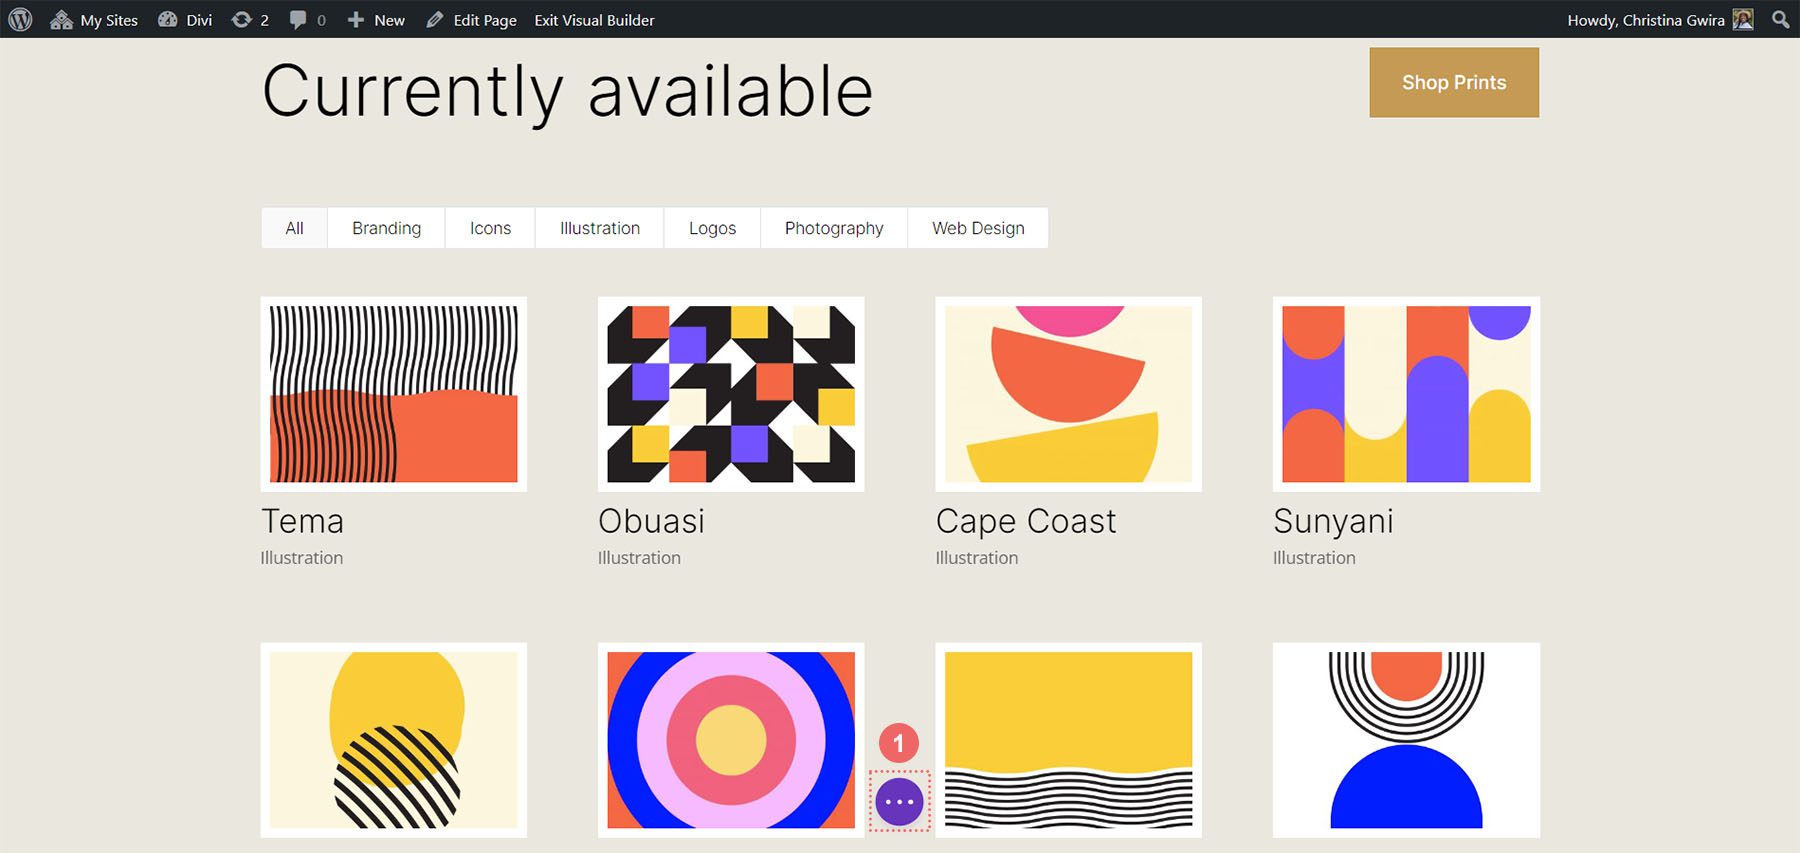
For now, we’re going to avoid wasting our adjustments by means of clicking at the inexperienced checkmark of the Filterable Portfolio Module’s modal field. On the other hand, we’re now not completed with the Filter out Standards Textual content simply but. We’re going to navigate to the Web page Settings to begin construction the customized CSS for our venture. To do that, we click on at the red circle with the meatball menu within the heart of our display.
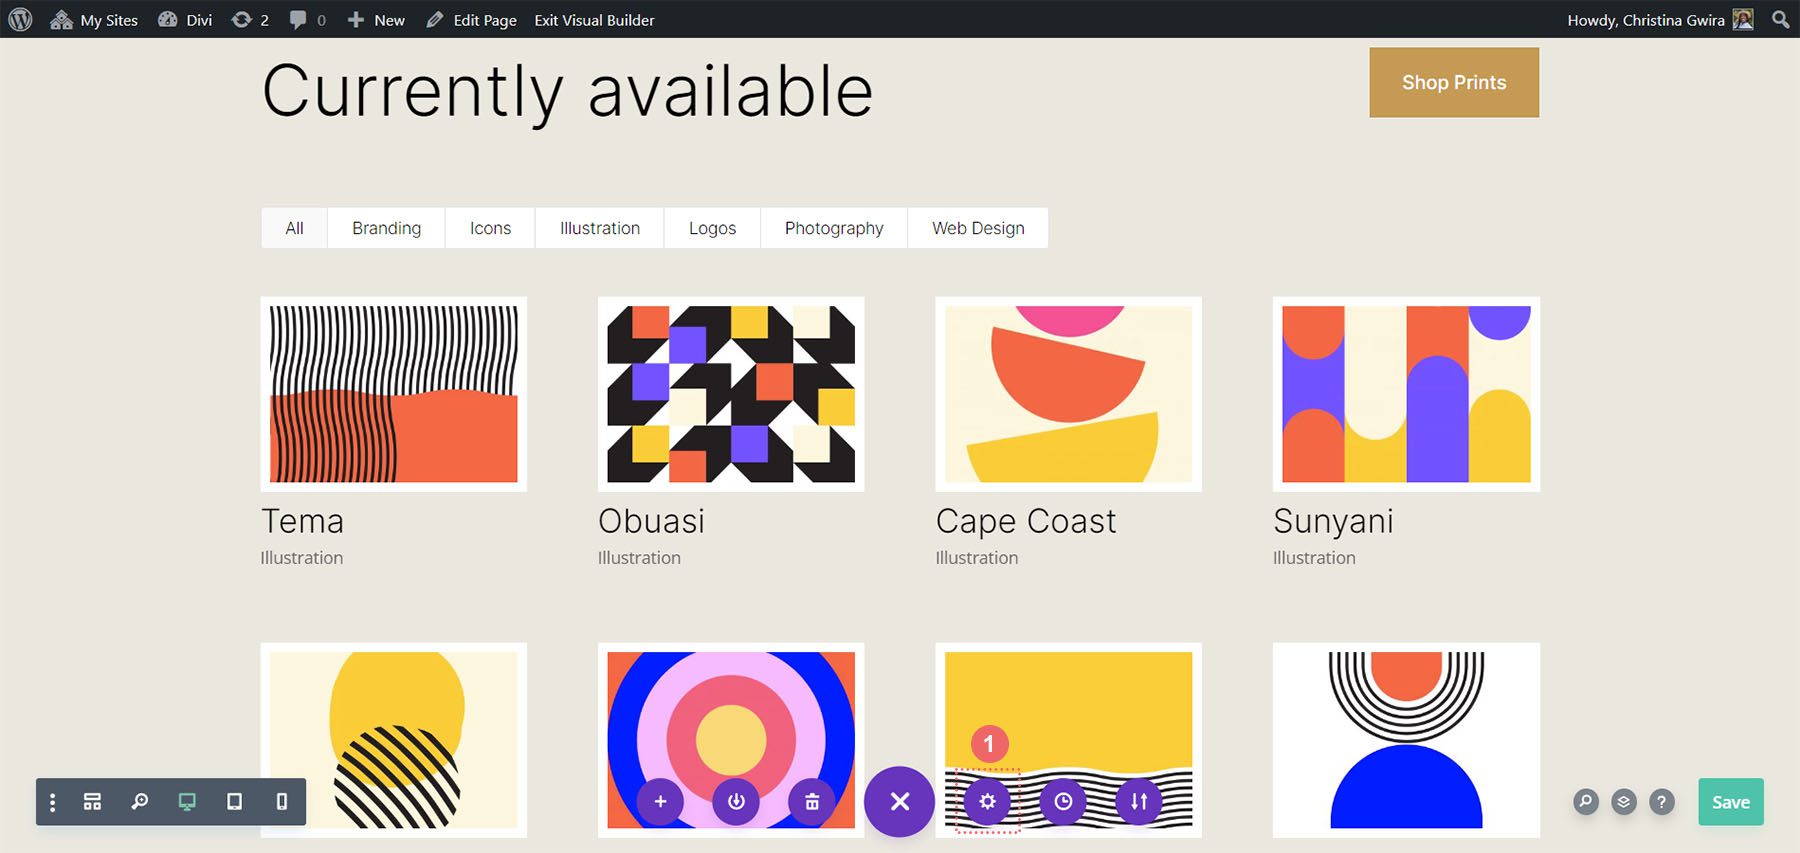
As soon as we have now clicked this button, we’ll be capable of click on at the equipment icon. The equipment icon will take us into the Web page Settings modal field.
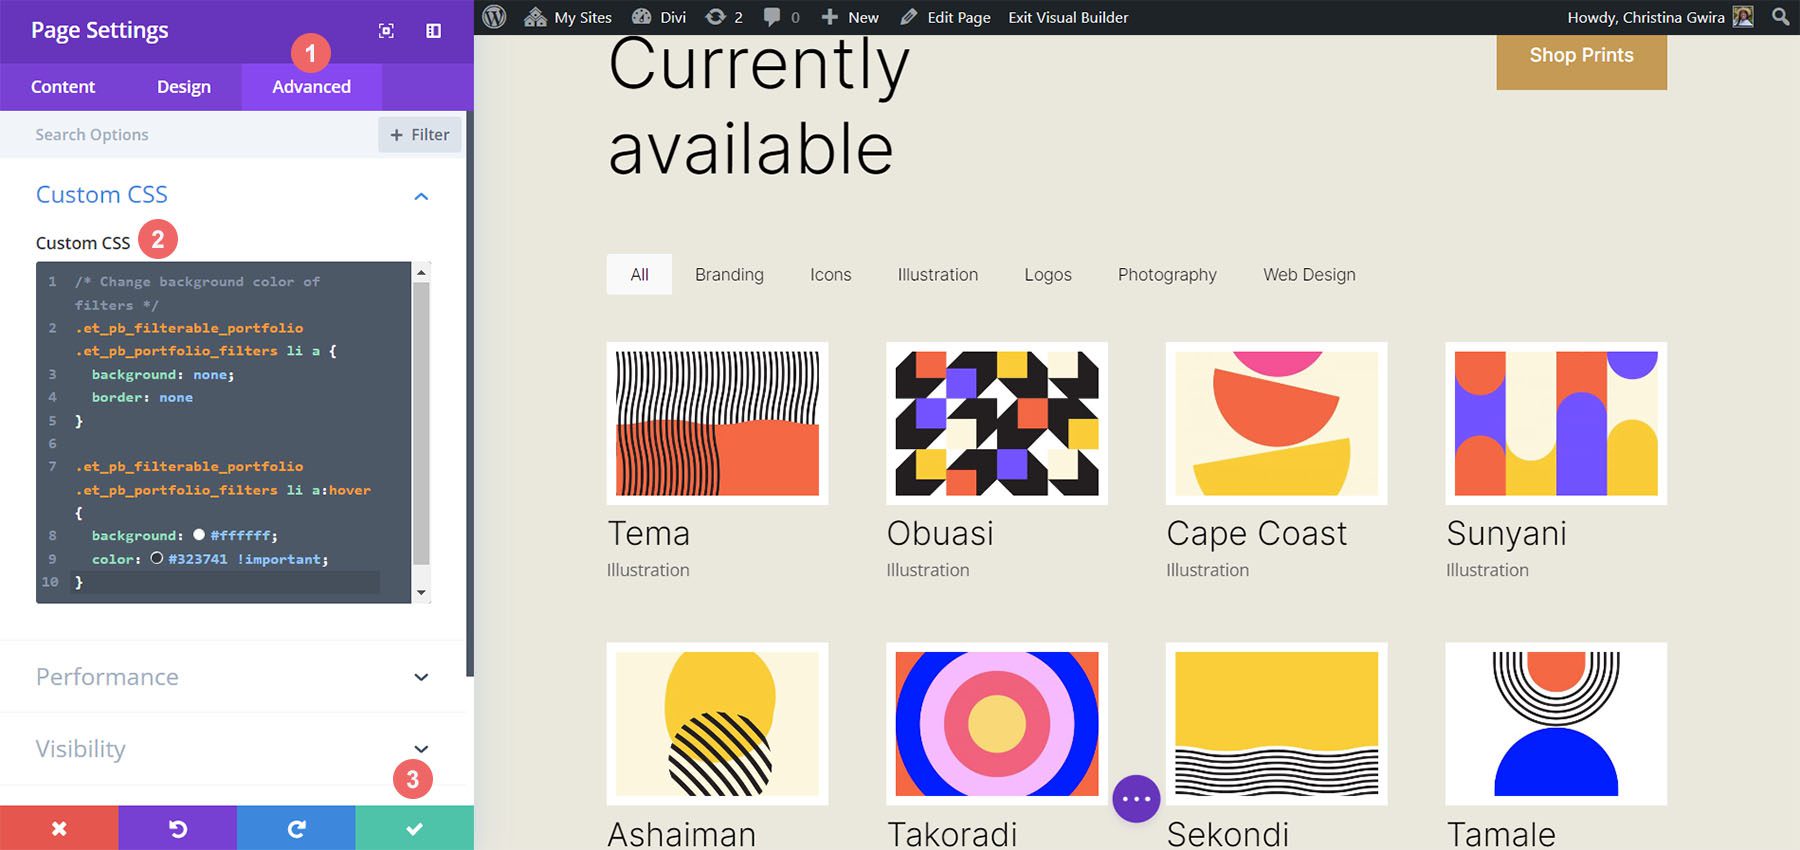
As soon as within the Web page Settings modal, click on at the Complicated tab. Subsequent, paste the next CSS into the Customized CSS field:
/* Alternate background colour of filters */
.et_pb_filterable_portfolio .et_pb_portfolio_filters li a {
background: none;
border: none
}

.et_pb_filterable_portfolio .et_pb_portfolio_filters li a:hover {
background: #ffffff;
colour: #323741 !essential;
}
Understand that we’re commenting our CSS! Don’t overlook to take action as we’ll be coming again so as to add to our CSS as we development thru this educational. Save your adjustments by means of clicking at the inexperienced tick button on the backside of the modal field. Now, let’s transfer again into enhancing the Filterable Portfolio Module.
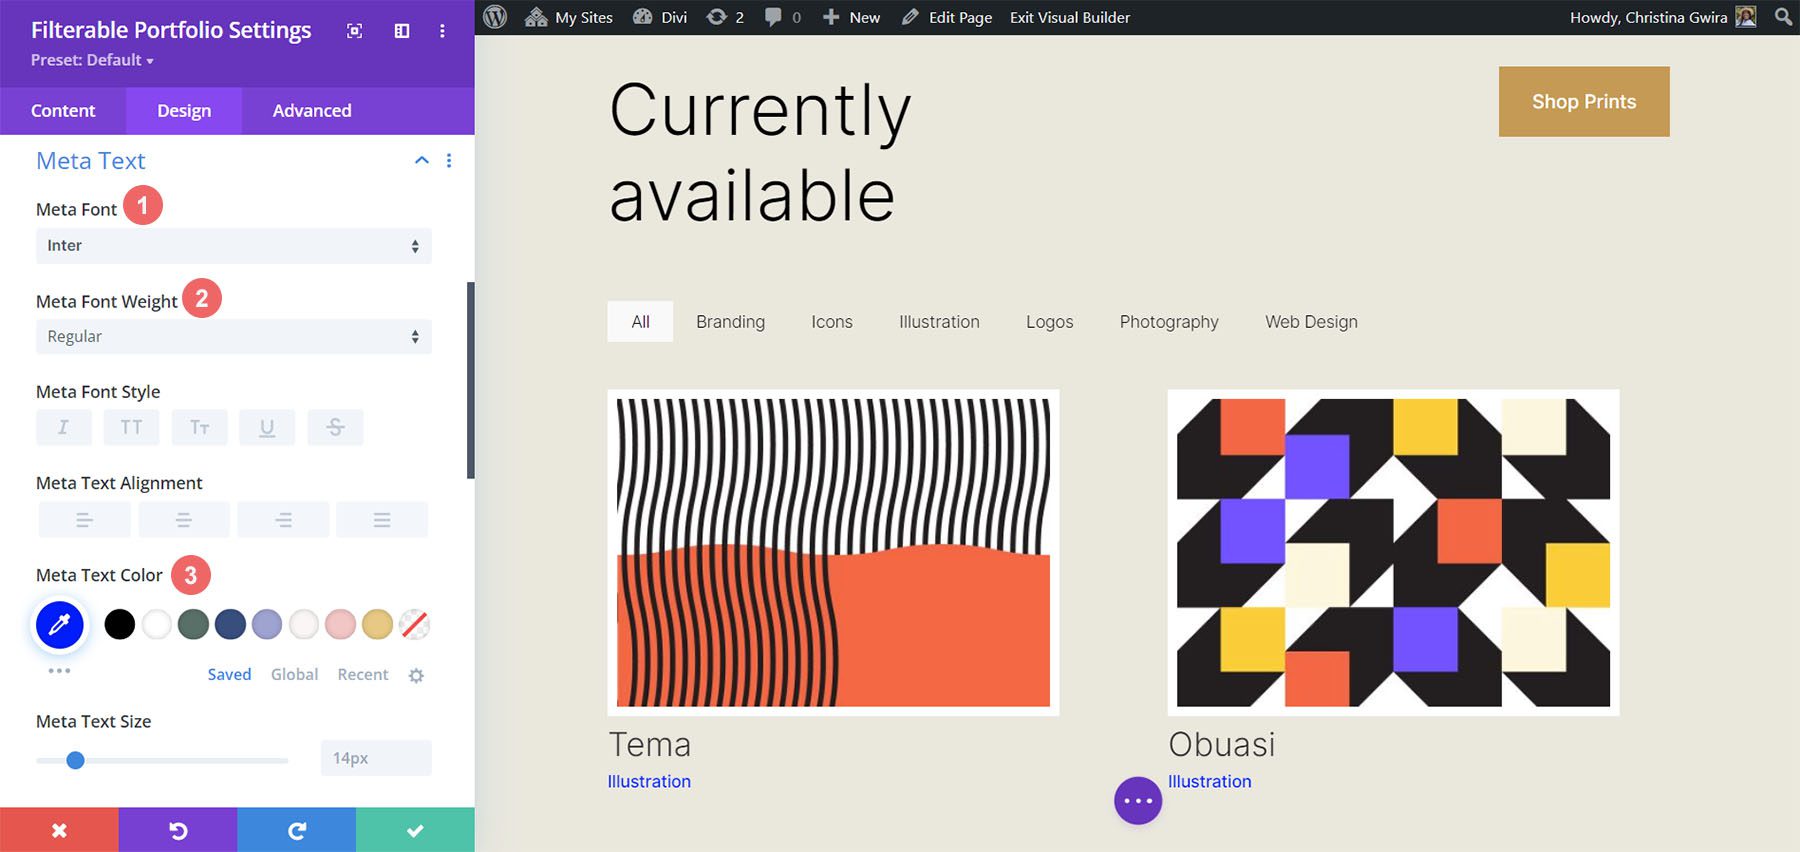
Styling Meta Textual content
We’ll now be styling the meta textual content that looks underneath the portfolio merchandise’s identify. We wish to make it stand out a bit of extra from the identify. To do that, we’ll navigate to the Design tab of the Filterable Portfolio module and scroll right down to the Meta Textual content tab. As with the opposite textual content parts of our module, we’ll be the use of the font circle of relatives Inter. We’ll practice this up with the supporting design alternatives indexed underneath:
Meta Textual content Surroundings:
- Meta Font: Inter
- Meta Font Weight: Common
- Meta Font Colour: #0102fa
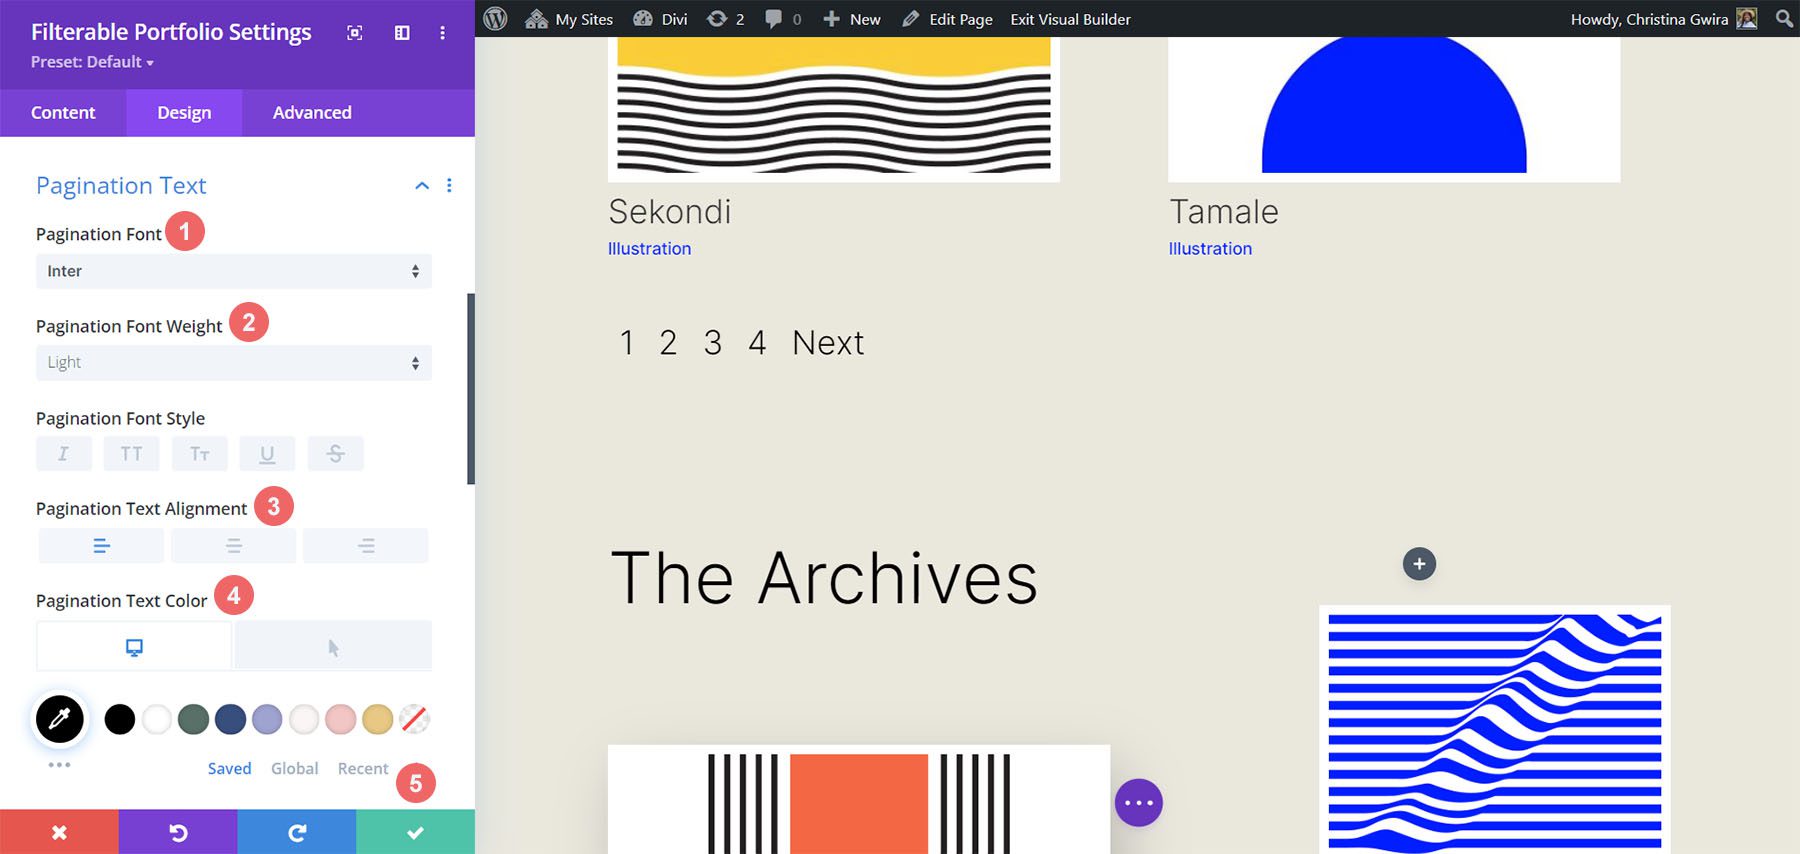
Taste Pagination Textual content
Subsequent at the styling block would be the Pagination Textual content of our module. We’re going to name again our Printer Clothier Format Pack by means of the use of the similar font. On the other hand, we’re going so as to add a touch of our blue to the hover of this side of the module. Additionally, we’re going to create some passion by means of making the pagination textual content considerably better than its present dimension.
To do that, at first, we’re going to scroll right down to the Pagination Textual content tab and click on on it. Subsequent, we’re going to make use of the next styling settings:
Pagination Textual content Settings:
- Pagination Font: Inter
- Pagination Font Weight: Mild
- Pagination Textual content Alignment: Proper
- Pagination Textual content Colour: #000000
- Pagination Textual content Colour (Hover): #0102fa
- Pagination Textual content Dimension: 28px
We’re going to move a step additional with our Pagination Textual content. We wish to take away the default border that looks on most sensible of the Pagination Textual content. To do this, we’re going to click on at the Complicated tab inside of our modal field. Then, we’re going so as to add the next line of CSS:
Portfolio Pagiation CSS:
border: none;
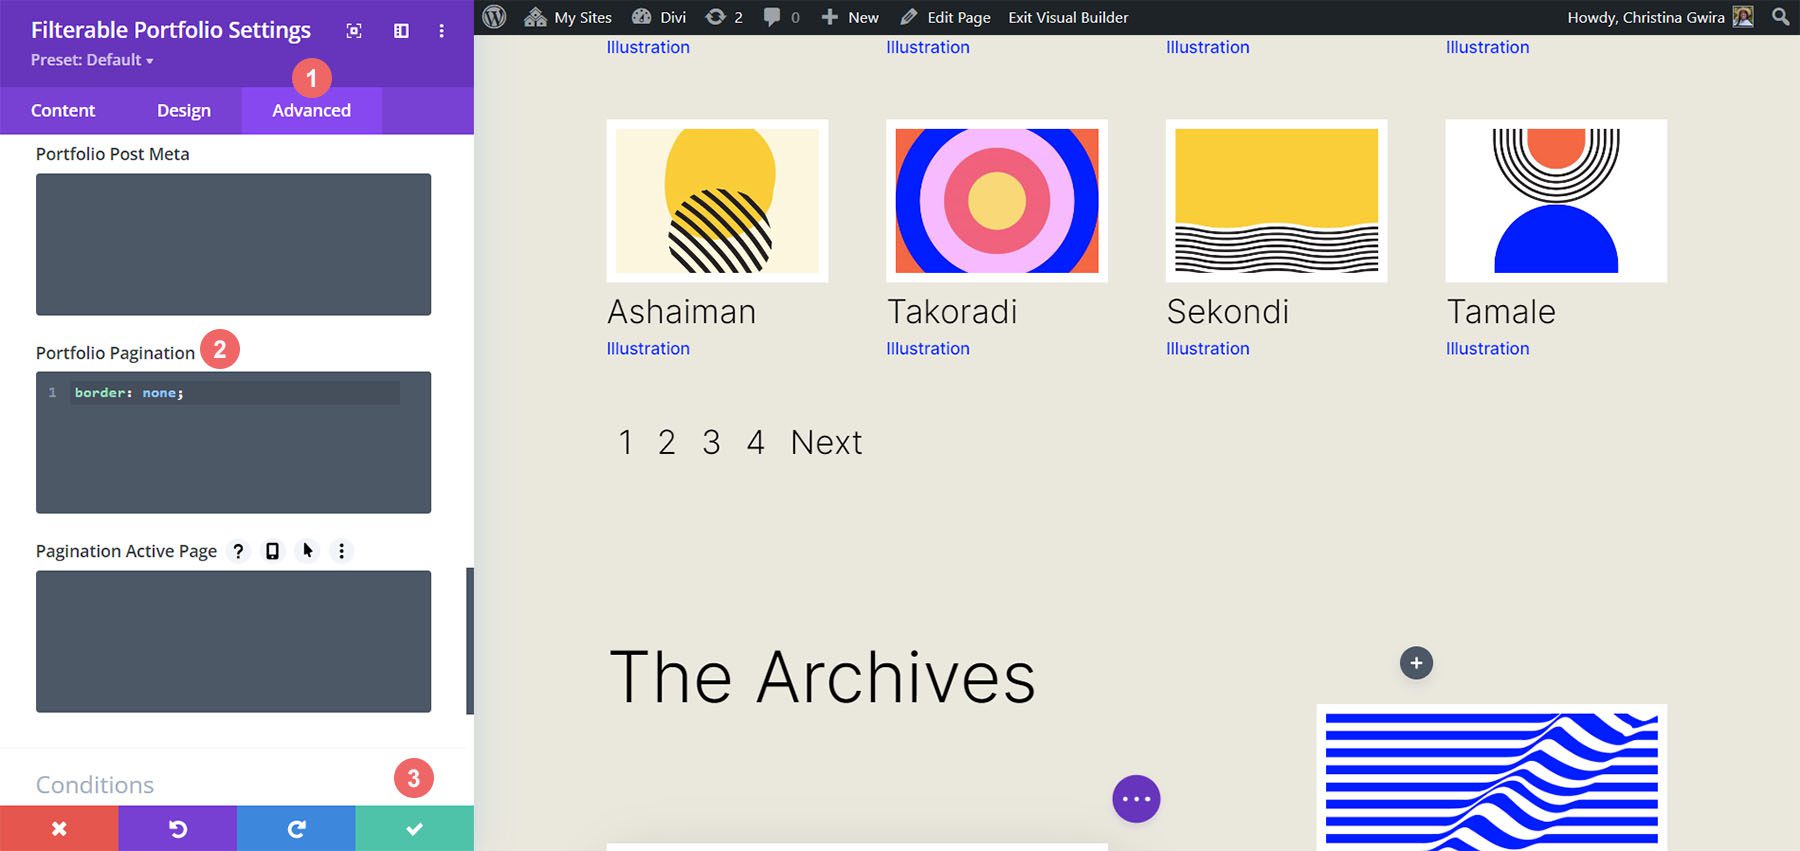
Whenever you’ve executed this, we will now transfer directly to including some customized CSS so as to add the completing touches to our module. Click on at the inexperienced checkmark button to avoid wasting your adjustments. You’ll pass forward and in addition save the web page as neatly, simply if you weren’t saving your paintings at the side of the academic (don’t overlook to take action!).
Customizing the Filterable Portfolio Module with CSS
Now that we’ve completed designing our Filterable Portfolio Module in Divi, we’ll now be the use of CSS to modify the collection of columns that we’ll have in our module. However first, we’re going to make one minor tweak. We’re going to make use of CSS to take away the preliminary transition that comes default with the module.
To do that, we’re going to transfer into the Web page Settings to get entry to the Customized CSS tab.

Then, we’re going so as to add the next CSS to our Customized CSS:
/* Take away transition */
.et_pb_filterable_portfolio .et_pb_portfolio_item.lively {
transition: none;
}

.et_pb_portfolio_item {
animation: none!essential;
transition: none !essential;
}
We upload this beneath the former CSS that we added for the styling of the filters. That is what our Filterable Portfolio now seems like, with all our styling edits.
Now, let’s alternate the column quantity from 4 to two.
CSS Design Adjustments for Our Filterable Portfolio Module
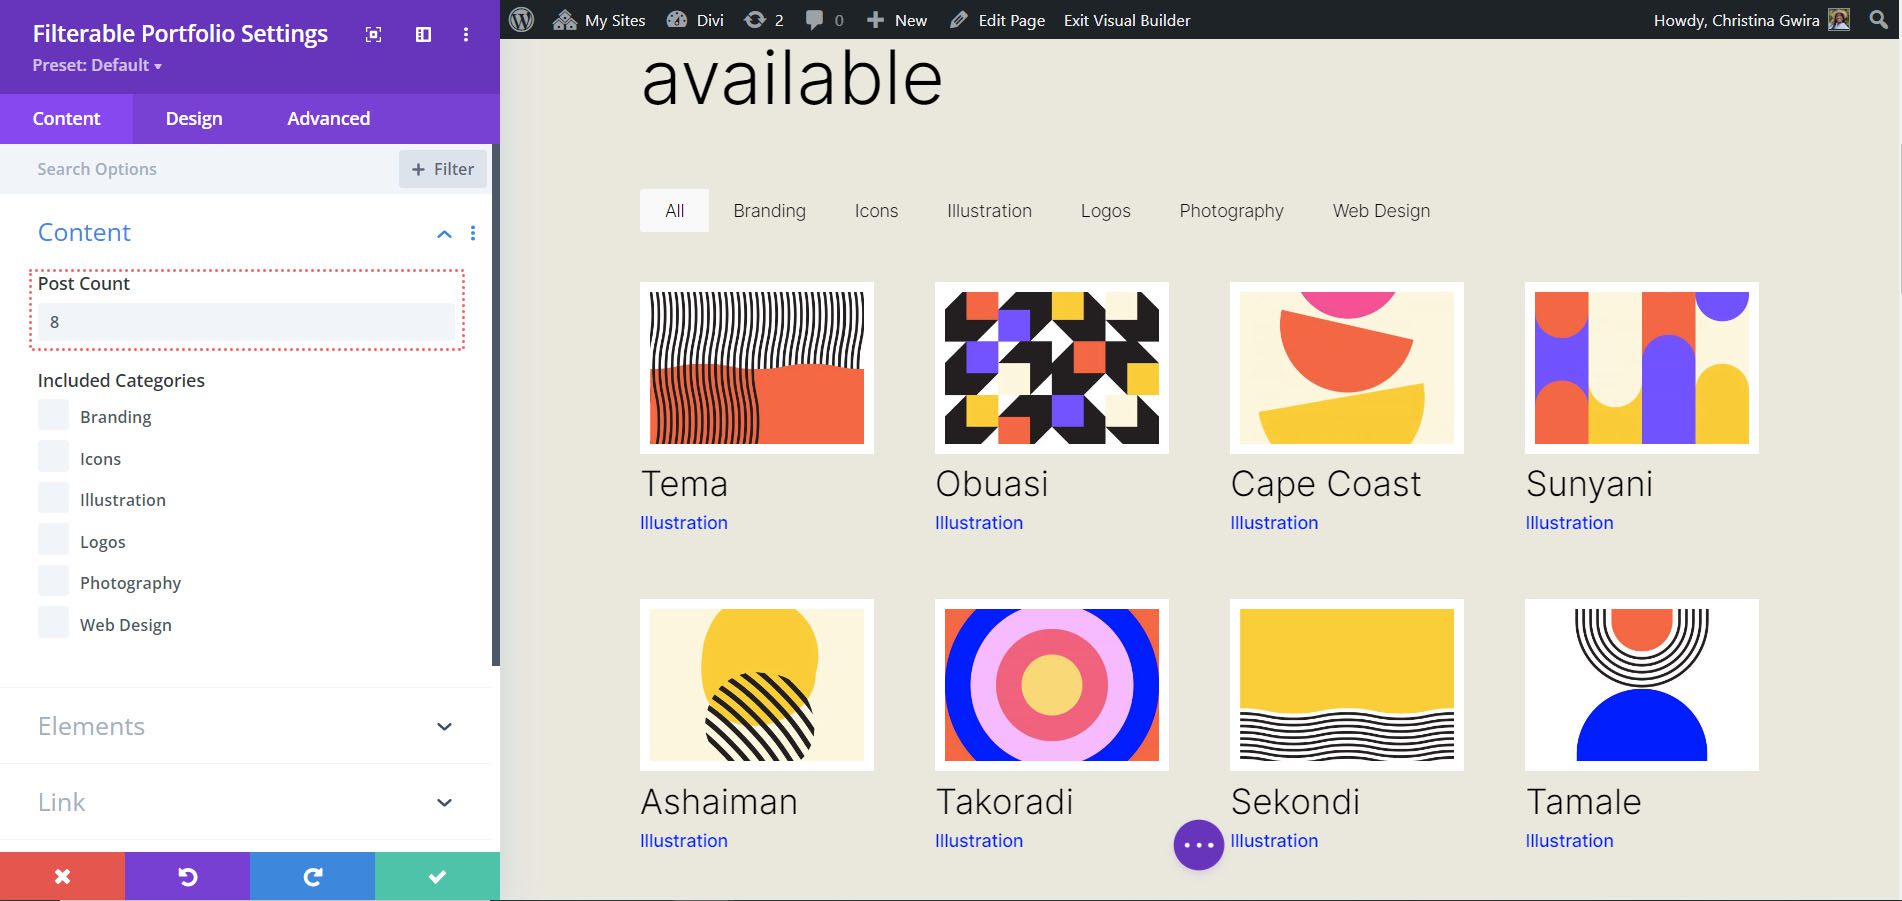
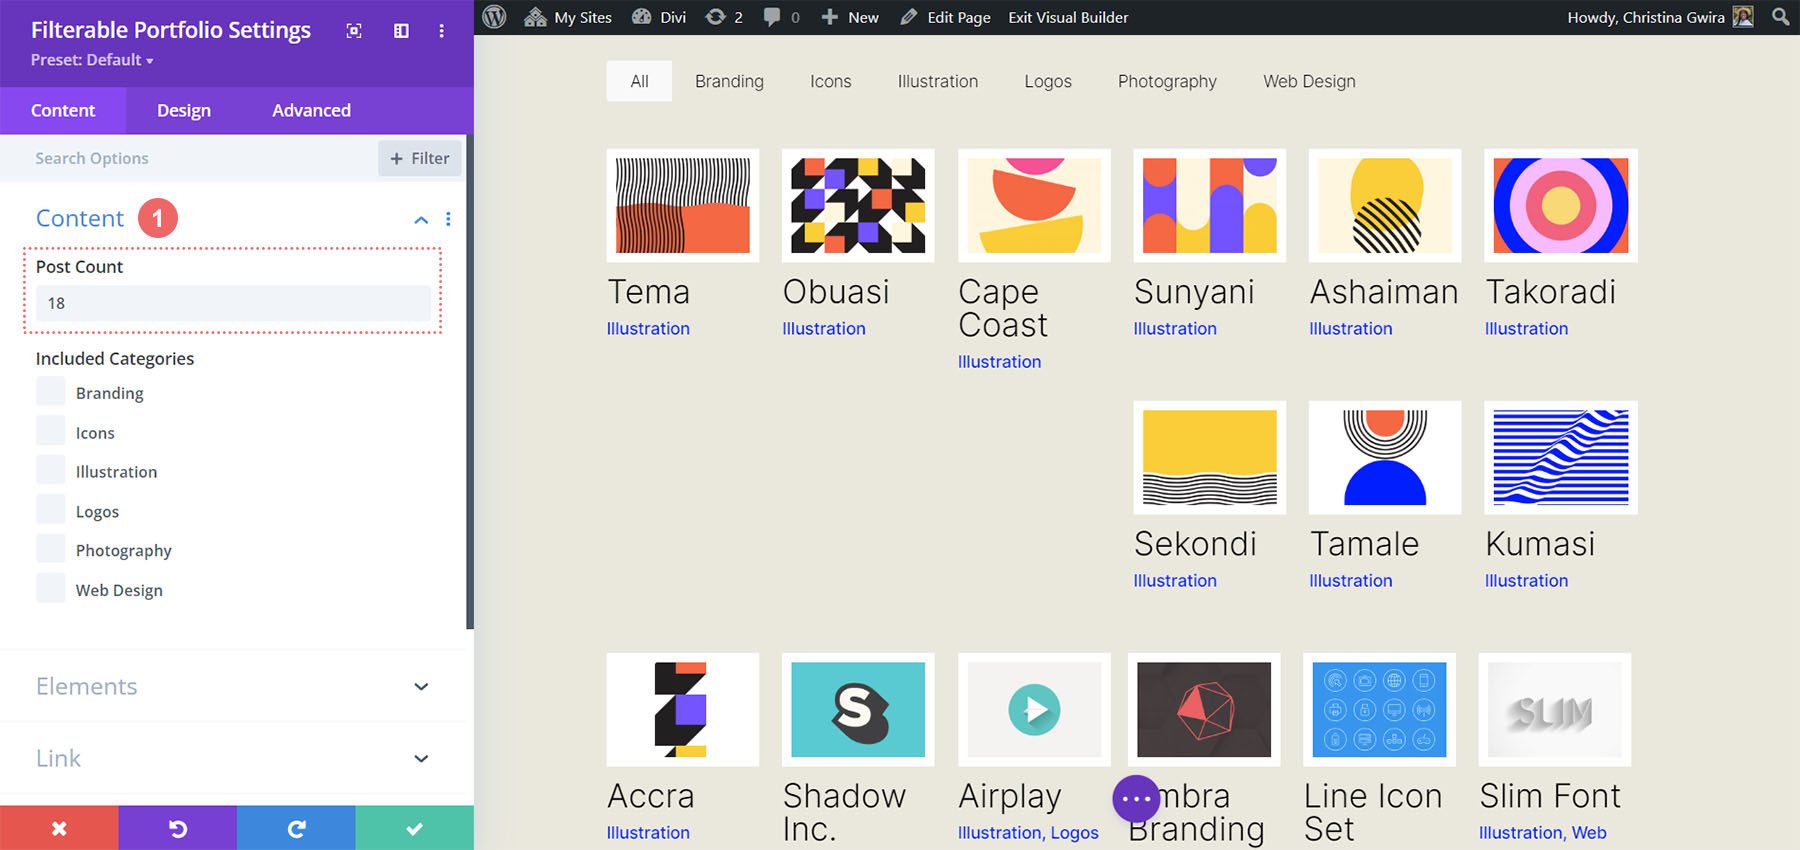
At first, one essential reality to keep in mind when the use of this module, is to have in mind of the collection of posts that you wish to have to exhibit on every web page. For our CSS to paintings appropriately, take note to exhibit quite a few posts this is divisible by means of the collection of columns that you’ve got. For instance, if you wish to display your portfolio in 6 columns, you will want to display at least 6 posts for your put up rely. If you need to turn extra posts, you will want to do 12, 18, 24, and so forth. posts throughout the module.
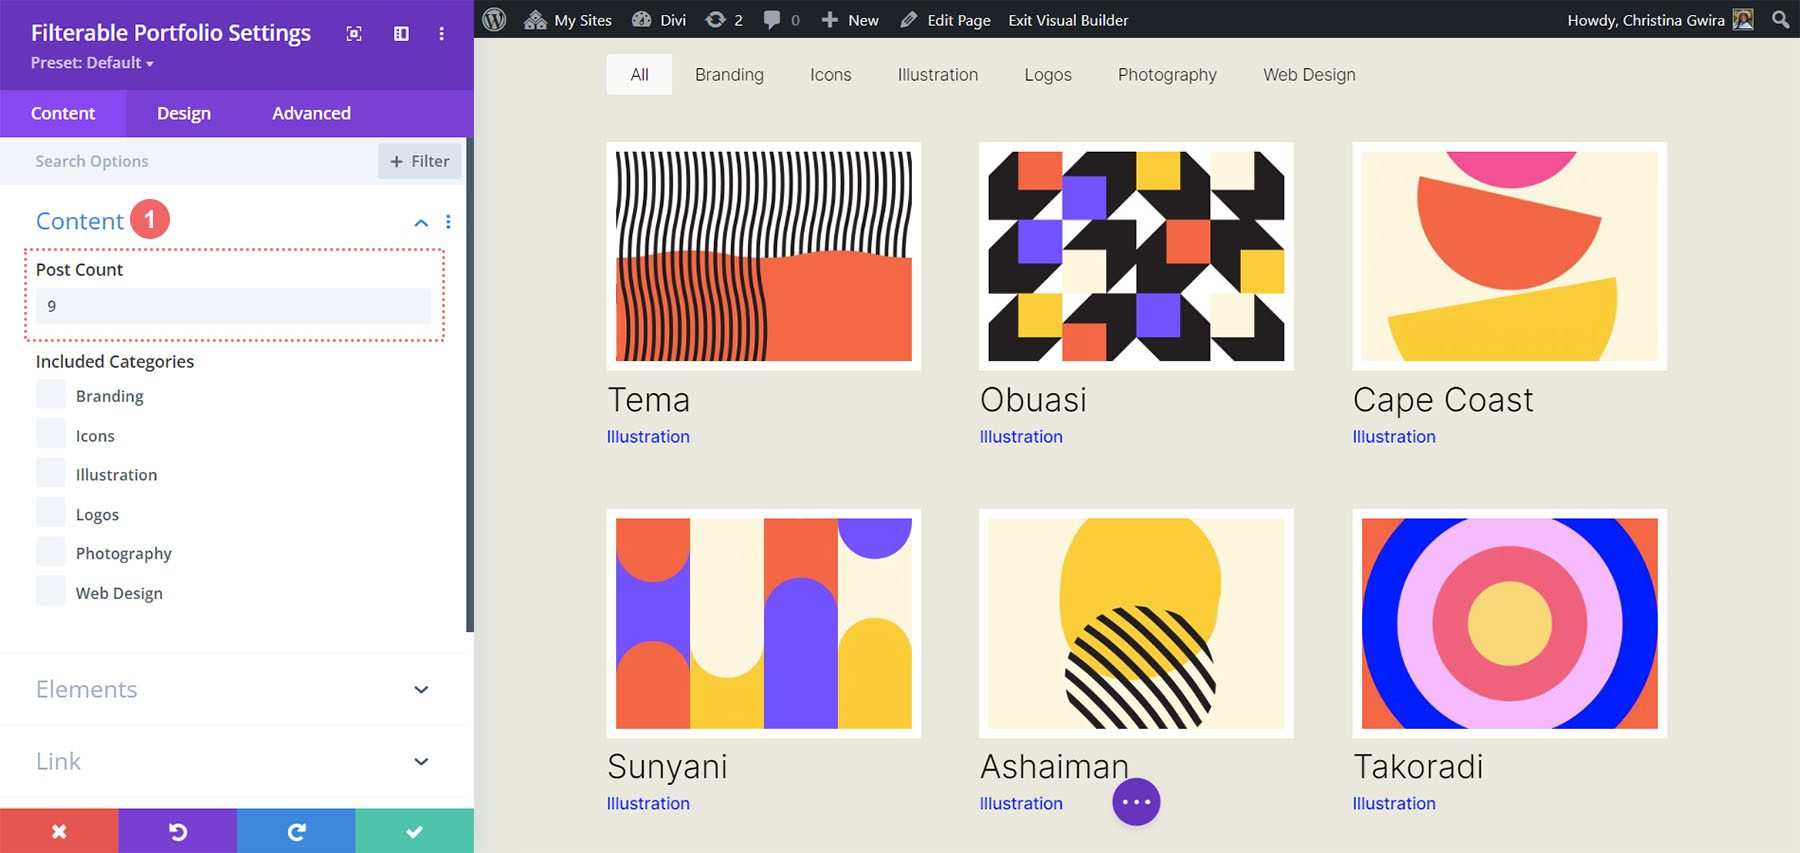
You’ll in finding the put up rely throughout the Content material tab of the Filterable Portfolio and Portfolio Modules.
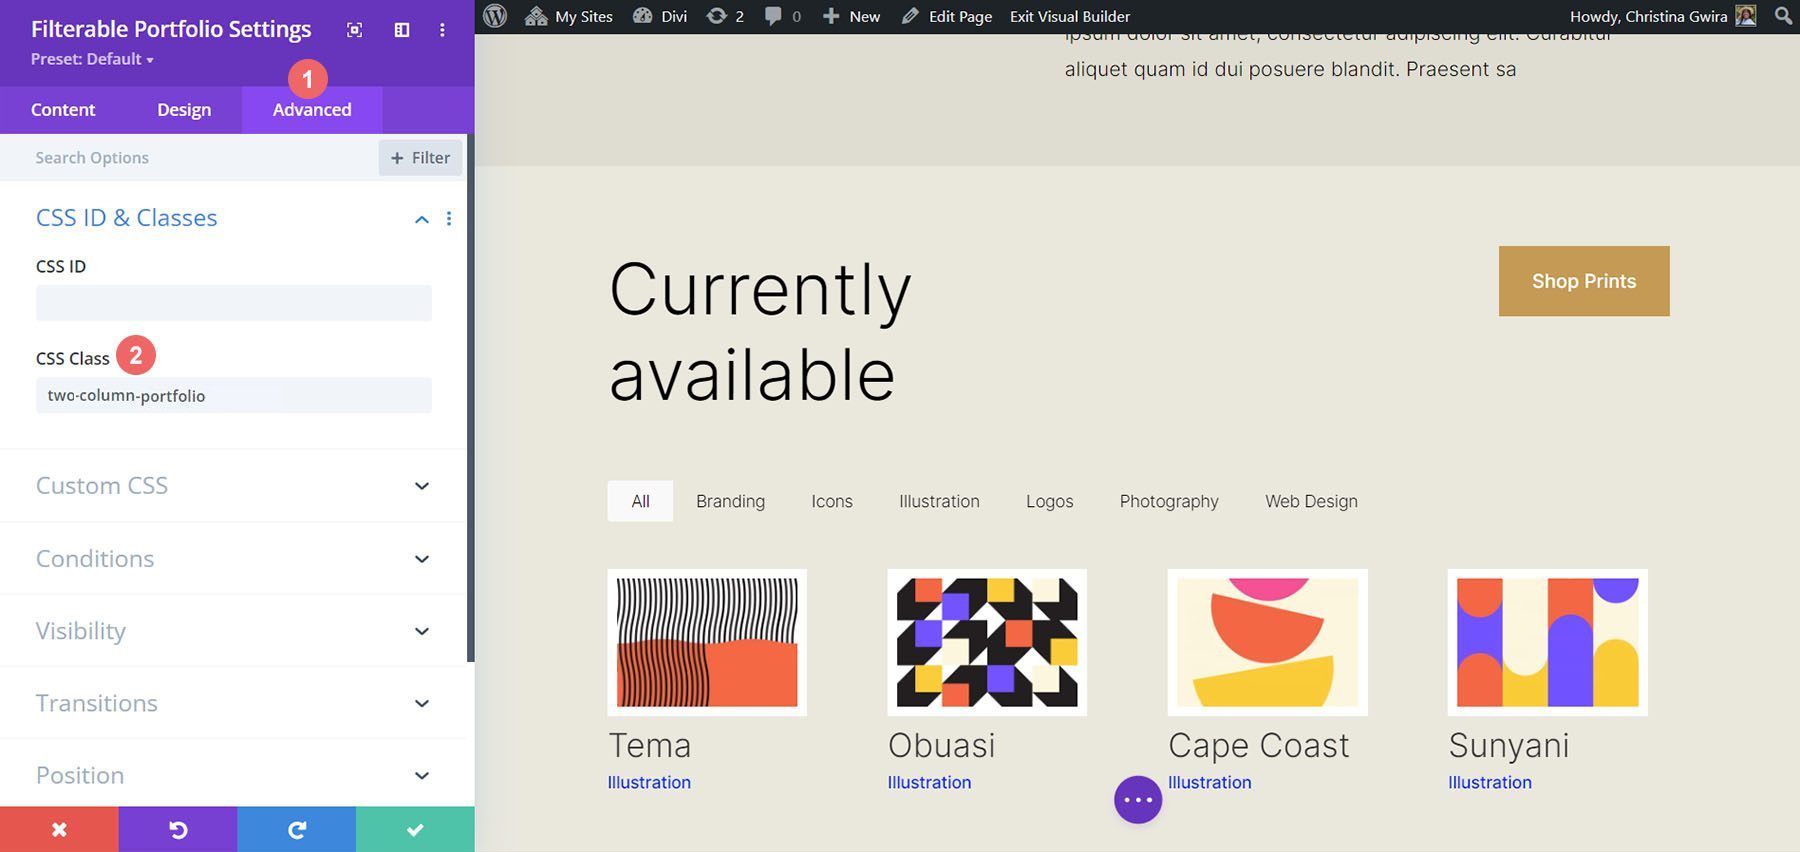
Sooner than we upload our CSS, we wish to connect a CSS magnificence to our module. To do that, we’ll re-enter the module settings, click on at the Complicated tab and upload our CSS magnificence to our module. We’ll use the category column-portfolio. In order that we don’t get puzzled as we transfer thru this educational, we’ll prefix this magnificence with the collection of columns that we’ll be developing.
Converting the Filterable Portfolio Module to Two Columns
To switch the collection of columns in our module from 4 columns to two columns, we’ll as soon as once more, pass to the Web page Settings. Then, we’ll upload the next CSS:
Customized CSS for a Two Column Filterable Portfolio:
/* 2 Column Portfolio */
@media (min-width: 981px) {
.two-column-portfolio .et_pb_grid_item {
width: 47.25%!essential;
margin-right: 5.5%!essential;
}

.two-column-portfolio .et_pb_grid_item:nth-child(3n) {
margin-right: 5.5%!essential;
}

.two-column-portfolio .et_pb_grid_item:nth-child(2n) {
margin-right: 0!essential;
}

.two-column-portfolio .et_pb_grid_item.et_pb_portfolio_item:nth-child(4n+1) {
transparent: none!essential;
}

.two-column-portfolio .et_pb_grid_item.first_in_row {
transparent: unset;
}
}
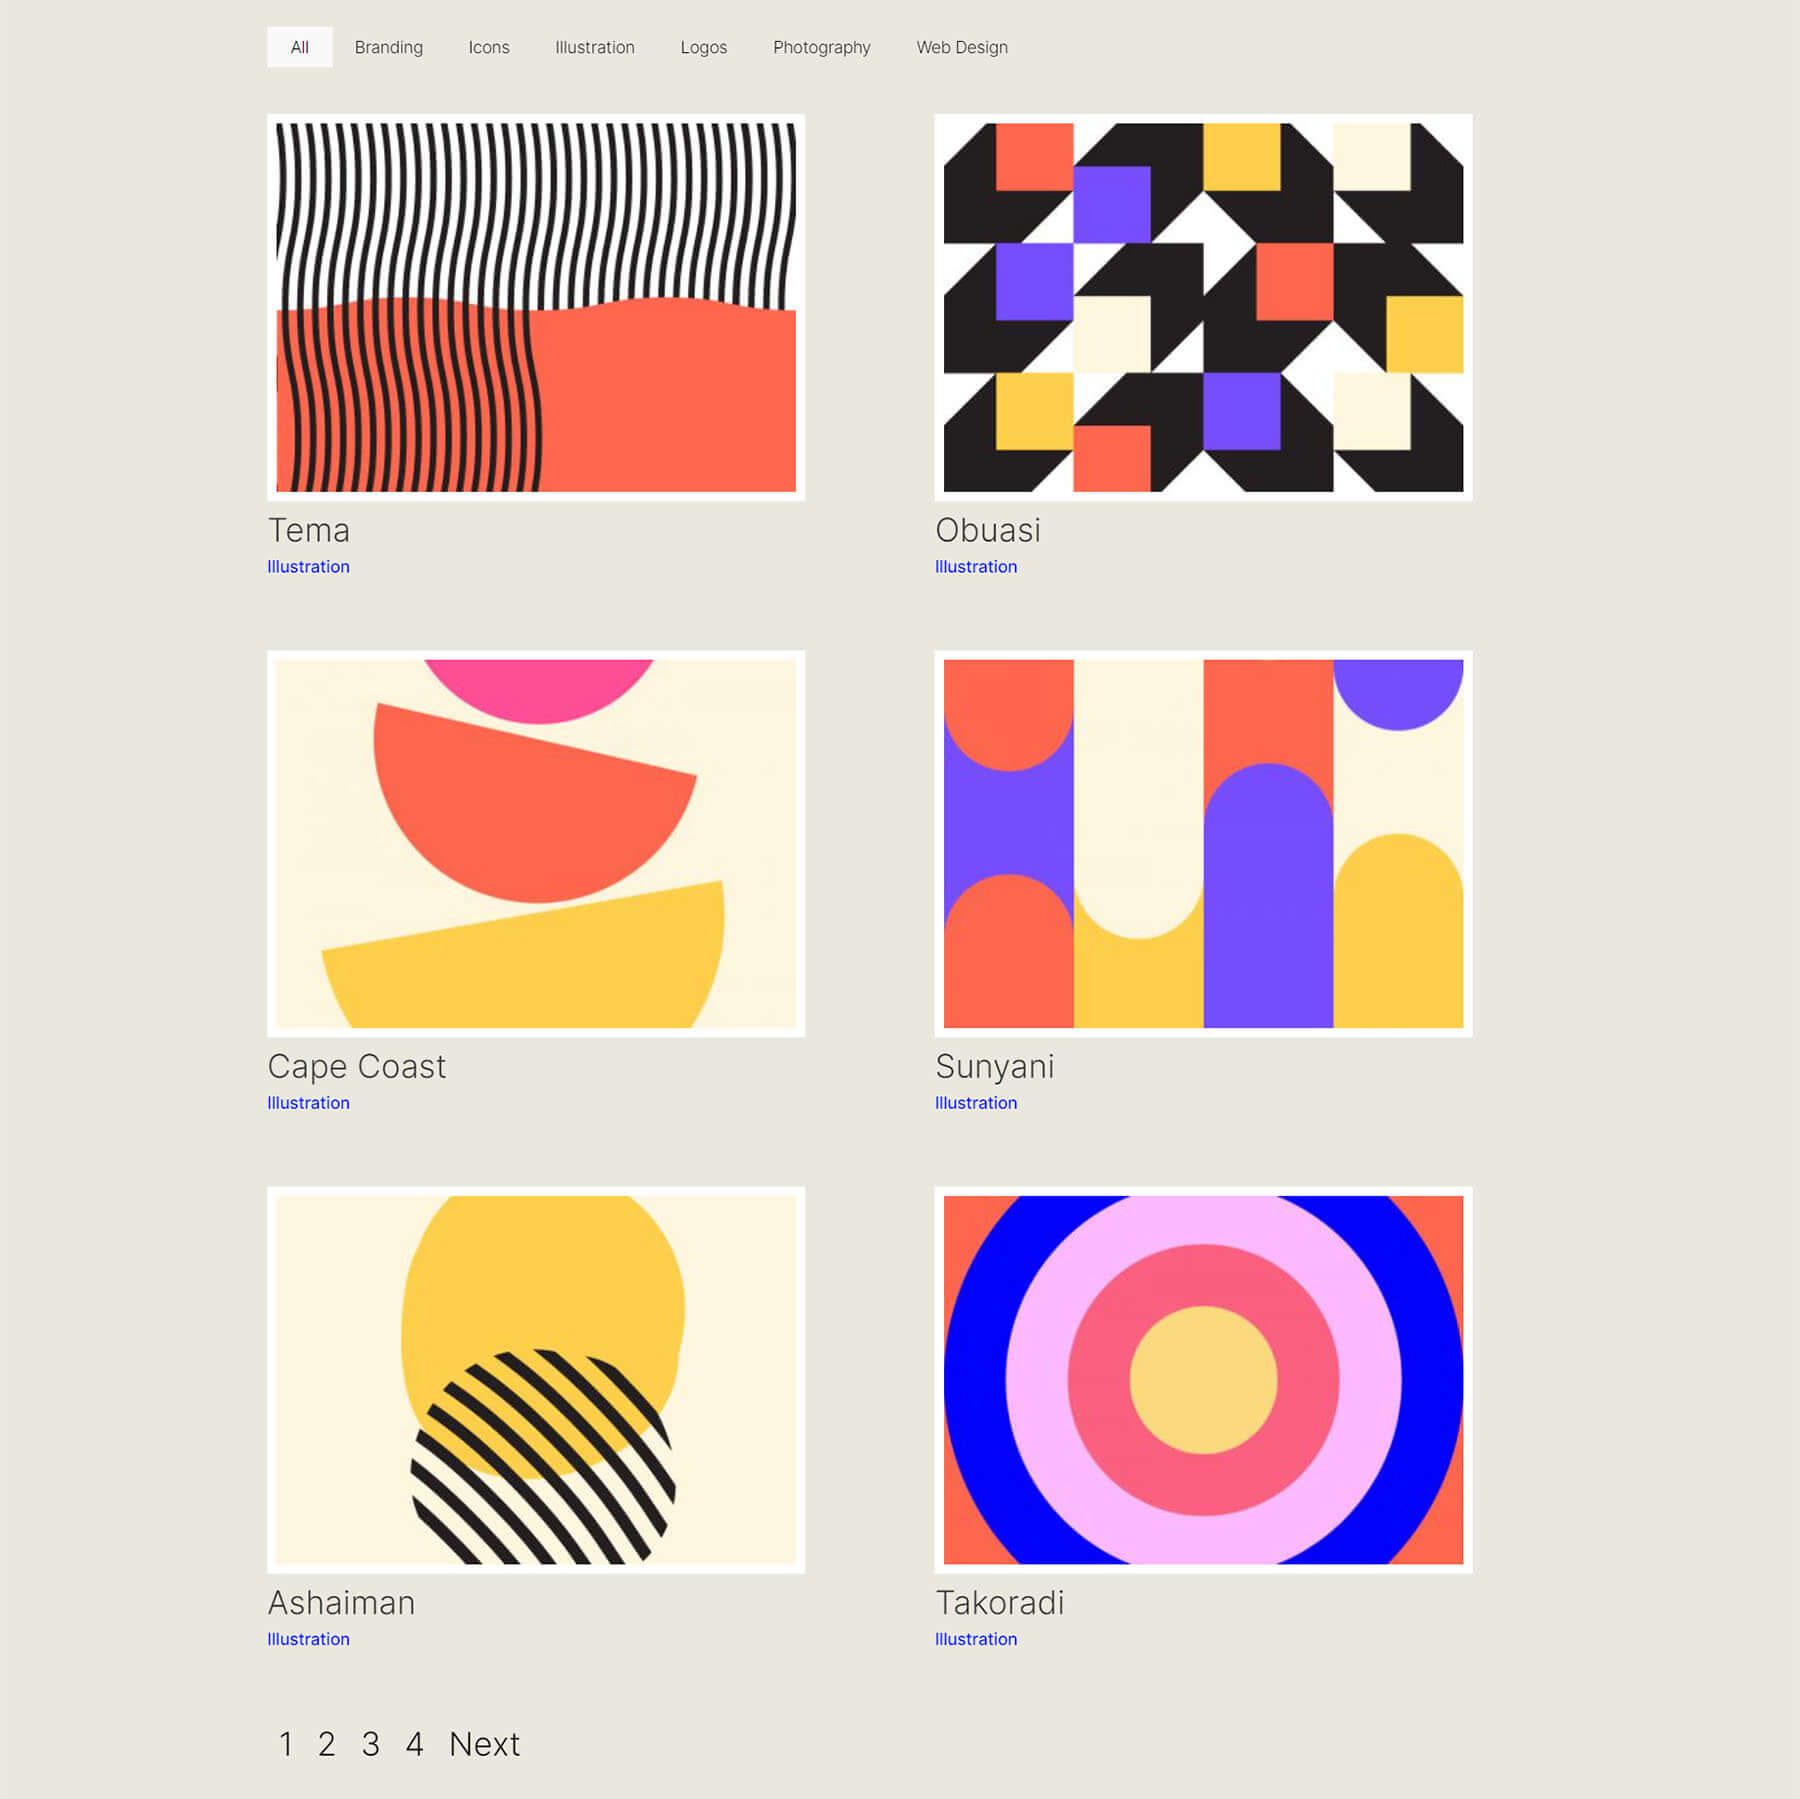
The width of our first selector (.two-column-portfolio .et_pb_grid_item) determines the width of the column. The margin-right belongings that we use right through this CSS snippet provides some padding (or gutter) round our portfolio pieces. Right here’s what our new, two-column module seems like.
The usage of CSS to Alternate the Filterable Portfolio Module to 3 Columns
Now, we’re going to modify our module from 2 columns to a few columns. Right here’s a brand new CSS snippet to do that:
/* 3 Column Portfolio */
@media (min-width: 981px) {
    .three-column-portfolio .et_pb_grid_item {
        width: 29.66%!essential;
        margin-right: 5.5%!essential;
    }

    .three-column-portfolio .et_pb_grid_item:nth-child(3n) {
        margin-right: 0!essential;
    }

    .three-column-portfolio.et_pb_grid_item:nth-child(4n) {
        margin-right: 5.5%!essential;
    }

    .three-column-portfolio .et_pb_grid_item.et_pb_portfolio_item:nth-child(4n+1) {
        transparent: none!essential;
    }
    .three-column-portfolio .et_pb_grid_item.first_in_row {
        transparent: unset;
    }
}
Take into accout, after including this CSS, we’re going to have to modify the put up rely to a host this is divisible by means of 3. Let’s pass with 9.
Alternate the Collection of Columns throughout the Filterable Portfolio Module to 5 Columns
Here’s the snippet for making our module have 5 columns.
/* 5 Column Portfolio */
@media (min-width: 981px) {
    .five-column-portfolio .et_pb_grid_item {
        width: 15.6%!essential;
        margin-right: 5.5%!essential;
    }

    .five-column-portfolio .et_pb_grid_item:nth-child(3n) {
        margin-right: 5.5%!essential;
    }

    .five-column-portfolio .et_pb_grid_item:nth-child(5n) {
        margin-right: 0!essential;
    }

    .five-column-portfolio .et_pb_grid_item.et_pb_portfolio_item:nth-child(4n+1) {
        transparent: none!essential;
    }

    .five-column-portfolio .et_pb_grid_item.first_in_row {
        transparent: unset;
    }
}
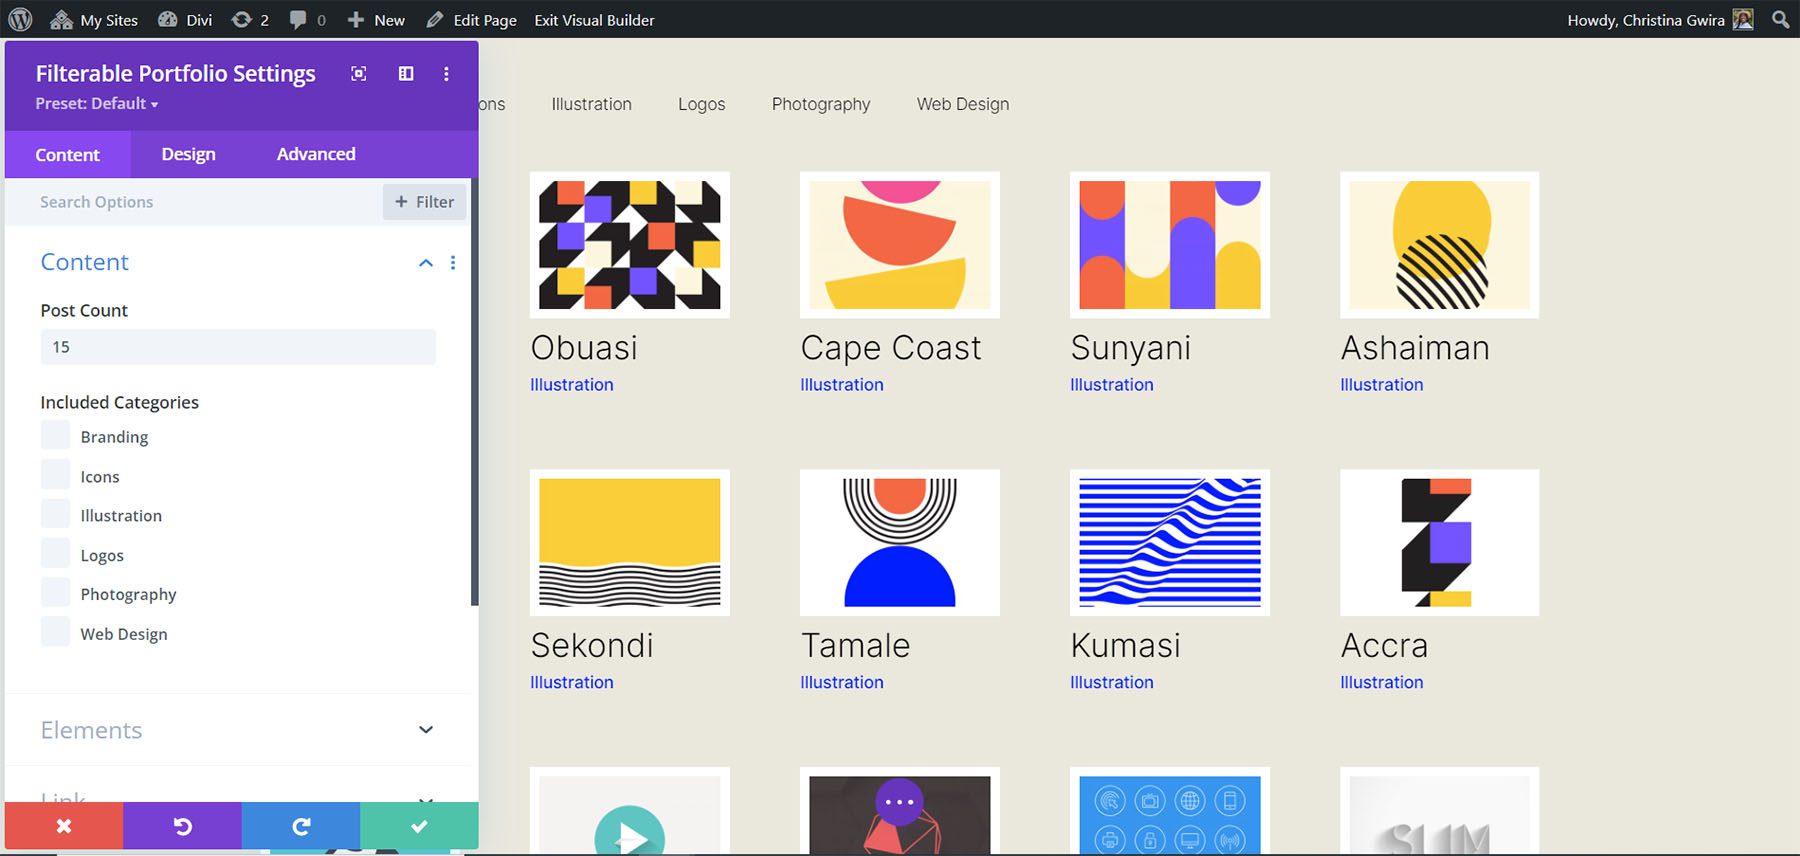
Once more, take note to modify the put up rely! We’re going to move with a better quantity right here… we’re going all of the method as much as 15!
Edit the Collection of Columns within the Filterable Portfolio Module to Six Columns
In the end, we’re going to modify our portfolio to 6 columns. On the other hand, we wish to make a small tweak when the use of the next CSS snippet. We’re going to enter the module settings one ultimate time and upload a line of CSS. This CSS will alternate the dimensions of the Portfolio Symbol. The rationale we do that is to make sure that we will are compatible in our padding (gutter) and border throughout the six column format.
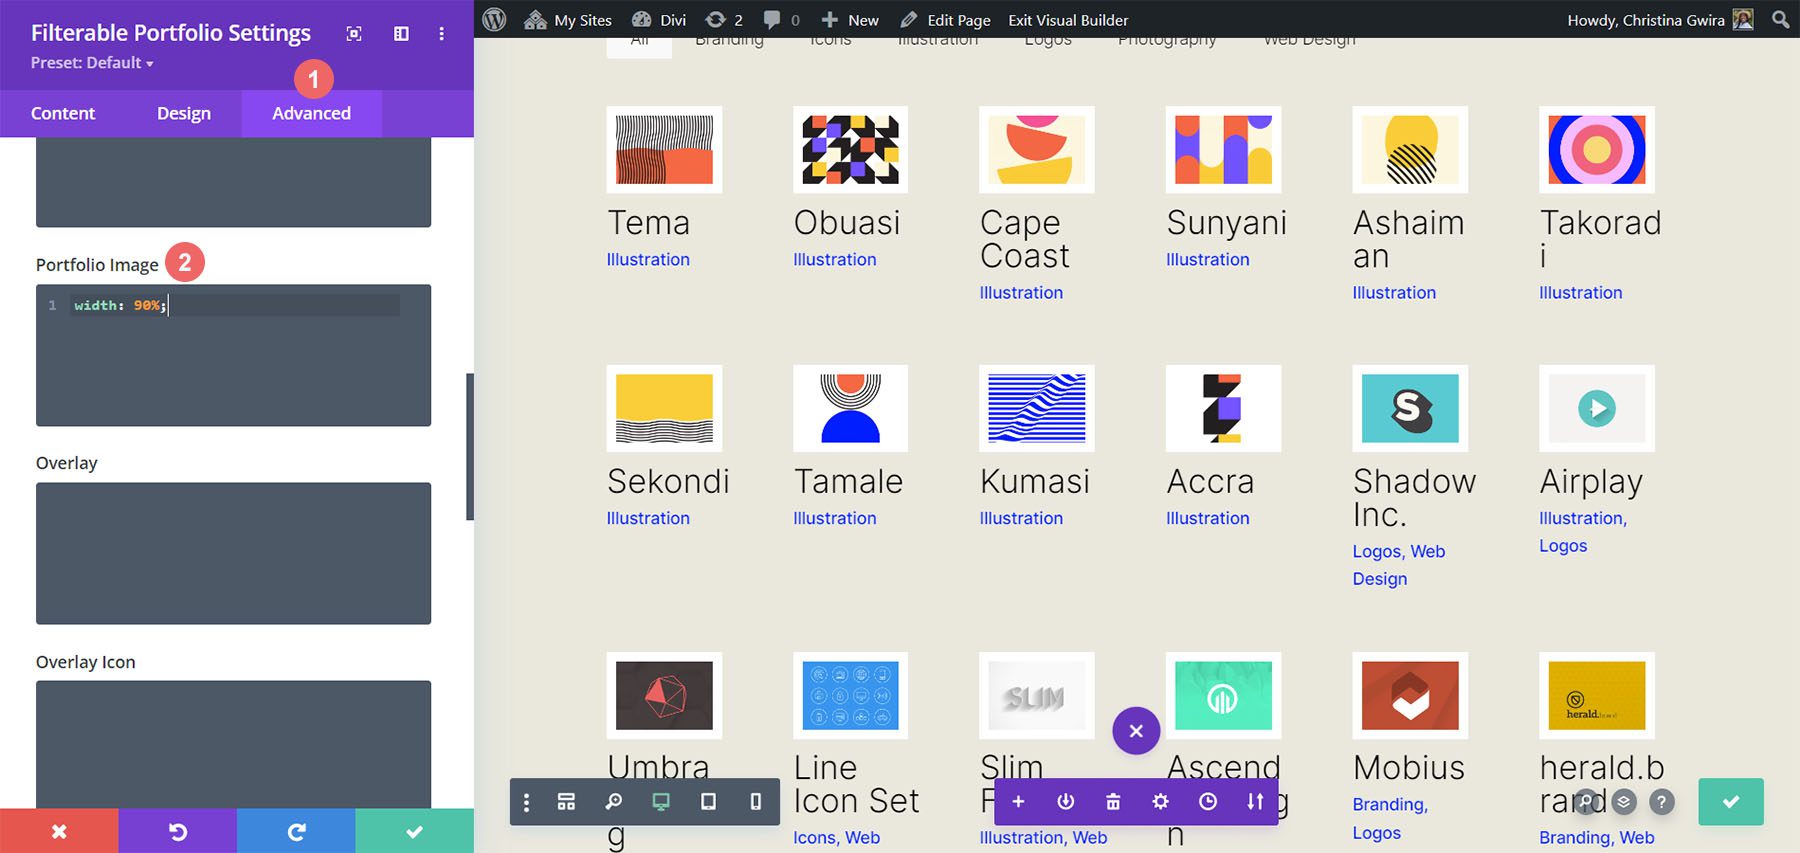
To do that, we’re going to navigate to the Complicated tab of our Filterable Portfolio module, and upload the next line of CSS to the Portfolio Symbol choice:
Portfolio Symbol Customized CSS:
- Portfolio Symbol CSS: width: 90%;
Now that we have got this CSS in position, we will return to the Web page Settings and upload this CSS snippet to make the module have six columns:
/* 6 Column Portfolio */
@media (min-width: 981px) {
    .six-column-portfolio .et_pb_grid_item {
        width:16%!essential;
        margin-right: 5px!essential;
    }

    .six-column-portfolio .et_pb_grid_item:nth-child(3n) {
        margin-right: 5px!essential;
    }

    .six-column-portfolio .et_pb_grid_item:nth-child(6n) {
        margin-right: 0!essential;
    }

    .six-column-portfolio .et_pb_grid_item.et_pb_portfolio_item:nth-child(4n+1) {
        transparent: none!essential;
    }

    .six-column-portfolio .et_pb_grid_item.first_in_row {
        transparent: unset;
    }
}
For this snippet, you’ll understand that we’ve modified the size of our appropriate margin. The rationale we do that is in order that we will nonetheless deal with the thick white borders that we applied within the design section of this educational. So, we lowered our margin to 5px. We extensively utilized 18 posts inside of our put up rely.
Let’s Wrap it All Up!
As we have now come to the tip of your educational, I am hoping that you’ve got been ready to peer how we will customise the default modules that include Divi by means of the use of CSS. As we live in an ever-growing virtual age, it’s all the time a good suggestion to take a position time in construction a web based presence. That would seem like including your paintings on-line within the type of a virtual portfolio! We are hoping this educational will mean you can make your portfolio distinctive.
The put up How to Change the Column Count in Divi’s Filterable Portfolio Module seemed first on Elegant Themes Blog.
0 Comments